


ENGLISH
Important
R-8730
MICROWAVE OVEN WITH TOP & BOTTOM
GRILLS AND CONVECTION
OPERATION MANUAL
900 W (IEC 60705)
R-8730 ENGLISH 12/07/2001 12:20 PM Page A

R-8730 ENGLISH 12/07/2001 12:20 PM Page B

ENGLISH
1
CONTENTS
OVEN AND ACCESSORIES . . . . . . . . . . . . . . . . . . . . . . . . . . . . . . . . . . . . . . . . . . . . . . . . . . . .2
CONTROL PANEL . . . . . . . . . . . . . . . . . . . . . . . . . . . . . . . . . . . . . . . . . . . . . . . . . . . . . . . . . . . .3
IMPORTANT SAFETY INSTRUCTIONS . . . . . . . . . . . . . . . . . . . . . . . . . . . . . . . . . . . . . . . . . . .4 - 6
INSTALLATION . . . . . . . . . . . . . . . . . . . . . . . . . . . . . . . . . . . . . . . . . . . . . . . . . . . . . . . . . . . . . .6
BEFORE OPERATION . . . . . . . . . . . . . . . . . . . . . . . . . . . . . . . . . . . . . . . . . . . . . . . . . . . . . . . . .7
COOKING WITH PRE-PROGRAMMED MEMORIES . . . . . . . . . . . . . . . . . . . . . . . . . . . . . . . . . .7 - 8
PRE-SET MEMORY CHART . . . . . . . . . . . . . . . . . . . . . . . . . . . . . . . . . . . . . . . . . . . . . . . . . . . . . .8
TIME REDUCE COOKING . . . . . . . . . . . . . . . . . . . . . . . . . . . . . . . . . . . . . . . . . . . . . . . . . . . . . .9
MANUAL COOKING . . . . . . . . . . . . . . . . . . . . . . . . . . . . . . . . . . . . . . . . . . . . . . . . . . . . . . . . .9
MICROWAVE POWER LEVELS . . . . . . . . . . . . . . . . . . . . . . . . . . . . . . . . . . . . . . . . . . . . . . . . . . .9
MICROWAVE COOKING . . . . . . . . . . . . . . . . . . . . . . . . . . . . . . . . . . . . . . . . . . . . . . . . . . . . .10
CONVECTION COOKING . . . . . . . . . . . . . . . . . . . . . . . . . . . . . . . . . . . . . . . . . . . . . . . . . . . .11
PRE-HEATING THE OVEN . . . . . . . . . . . . . . . . . . . . . . . . . . . . . . . . . . . . . . . . . . . . . . . . . . . . .12
GRILL COOKING . . . . . . . . . . . . . . . . . . . . . . . . . . . . . . . . . . . . . . . . . . . . . . . . . . . . . . . . . . .13
DUAL COOKING . . . . . . . . . . . . . . . . . . . . . . . . . . . . . . . . . . . . . . . . . . . . . . . . . . . . . . . . . . .14
OTHER CONVENIENT FUNCTIONS . . . . . . . . . . . . . . . . . . . . . . . . . . . . . . . . . . . . . . . . . .15 - 18
CARE AND CLEANING . . . . . . . . . . . . . . . . . . . . . . . . . . . . . . . . . . . . . . . . . . . . . . . . . . . . . .19
SERVICE CALL CHECK . . . . . . . . . . . . . . . . . . . . . . . . . . . . . . . . . . . . . . . . . . . . . . . . . . . . . . .20
COOKBOOK . . . . . . . . . . . . . . . . . . . . . . . . . . . . . . . . . . . . . . . . . . . . . . . . . . . . . . . . . .21 - 31
SPECIFICATIONS . . . . . . . . . . . . . . . . . . . . . . . . . . . . . . . . . . . . . . . . . . . . . . . . . . . . . . . . . . .32
SERVICE ADDRESSES . . . . . . . . . . . . . . . . . . . . . . . . . . . . . . . . . . . . . . . . . . . . . . . . . . . . .33 - 38
OPERATION MANUAL
This operation manual contains important information which you should read carefully before
using your microwave oven.
IMPORTANT: There may be a serious risk to health if this operation manual is not followed or
if the oven is modified so that it operates with the door open.
R-8730 ENGLISH 12/07/2001 12:20 PM Page 1

2
OVEN AND ACCESSORIES
1 Control panel
2 Oven lamp
3 Grill heating element (top grill)
4 Door opening button
5 Waveguide cover
6 Oven cavity
7 Turntable motor shaft
8 Grill heating element (bottom grill)
9 Ventilation openings
10 Door seals and sealing surfaces
11 Power cord
12 Outer cabinet
ACCESSORIES:
Check to make sure the following accessories are
provided:
13 Turntable 14 Handle (x1, only one handle will be
supplied and will be marked either L or R). When the
turntable is hot, use the provided handle to remove the
turntable from the oven. 15 Rack.
Place the turntable on to the turntable motor shaft so
that it locates firmly.
Before first using the turntable, clean with mild soapy
water. Do not cut or scratch the turntable.
WARNING:
The accessories (e.g. turntable) will become
very hot during operation (except Defrost)
modes. Always use thick oven gloves when
removing the food or turntable from the
oven to prevent burns.
1
2
3
4
13
10 9 8 7 6 5
15
9
11
12
NOTE: When you order accessories, please mention
the following two items: part name and model name
to your dealer or SHARP authorised service agent.
Bottom grill
Turntable motor shaft
14
R-8730 ENGLISH 17/07/2001 12:44 PM Page 2

CONTROL PANEL
3
1. DIGITAL DISPLAY
2. INDICATORS:
These indicators will light corresponding
with below symbols
: Time reduce
: Memory
: Manual
: Percentage (for microwave
power level)
: Lock (showing oven lock is set)
: Cook (showing oven in operation)
3. COOKING MODE indicator lights.
These indicator lights will light during
each cooking mode.
OPERATION KEYS:
4. NUMBER keys for time and memory
programming
5. START key
6. DOOR OPENING button
7. STOP key
8. TIME REDUCE key
9. MEMORY key
10. +1min key
11. BOTTOM GRILL key
12. TOP GRILL key
13. CONVECTION key
To change the convection temperature
14. MICROWAVE key
To change the microwave power setting
15. MANUAL key
2
4
1
15
14
13
12
11
10
9
7
5
6
3
8
R-8730 ENGLISH 12/07/2001 12:20 PM Page 3

To avoid the danger of fire
The microwave oven should not be left
unattended during operation. Power
levels that are too high or cooking times
that are too long may overheat foods
resulting in a fire.
This oven is not designed to be built into a kitchen
unit.
The electrical outlet must be readily accessible so that
the unit can be unplugged easily in an emergency.
The AC power supply must be 230 V, 50 Hz, with
a minimum 16 A distribution line fuse, or a
minimum 16 A distribution circuit breaker.
It is recommended that a separate circuit serving
only this appliance be provided.
Do not place the oven in areas where heat is
generated. For example, close to a conventional oven.
Do not install the oven in an area of high humidity
or where moisture may collect.
Do not store or use the oven outdoors.
If food being heated begins to smoke,
DO NOT OPEN THE DOOR. Turn off and
unplug the oven and wait until the food
has stopped smoking. Opening the door
while food is smoking may cause a fire.
Use only microwave-safe containers and
utensils. See Page 22 - 23.
Do not leave the oven unattended when
using disposable plastic, paper or other
combustible food containers.
Clean the waveguide cover, the oven
cavity and the turntable after use. These
must be dry and free from grease. Builtup grease may overheat and begin to
smoke or catch fire.
Do not place flammable materials near the oven or
ventilation openings. Do not block the ventilation
openings.
Remove all metallic seals, wire twists, etc., from
food and food packages. Arcing on metallic
surfaces may cause a fire.
Do not use the microwave oven to heat oil for deep
frying. The temperature cannot be controlled and
the oil may catch fire.
To make popcorn, use only special microwave
popcorn makers.
Do not store food or any other items inside the oven.
Check the settings after you start the oven to ensure
the oven is operating as desired.
See the corresponding hints in the cookery book section.
4
IMPORTANT SAFETY INSTRUCTIONS
To avoid the possibility of injury
WARNING:
Do not operate the oven if it is damaged or
malfunctioning. Check the following before use:
a)The door; make sure the door closes properly and
ensure it is not misaligned or warped.
b)The hinges and safety door latches; check to make sure
they are not broken or loose.
c) The door seals and sealing surfaces; ensure that they
have not been damaged.
d)Inside the oven cavity or on the door; make sure there
are no dents.
e) The power supply cord and plug; ensure that they are
not damaged.
Never adjust , repair or modify the oven
yourself. It is hazardous for anyone
other than a competent person to carry
out any service or repair operation
which involves the removal of a cover
which gives protection against exposure
to microwave energy.
Do not operate the oven with the door open or
alter the door safety latches in any way.
Do not operate the oven if there is an object
between the door seals and sealing surfaces.
Do not allow grease or dirt to build up
on the door seals and adjacent parts.
Follow instructions for “Care and
Cleaning”, Page 19.
Individuals with PACEMAKERS should check with
their doctor or the manufacturer of the pacemaker
for precautions regarding microwave ovens.
To avoid the possibility of electric shock
Under no circumstances should you remove the
outer cabinet.
Never spill or insert any objects into the door lock
openings or ventilation openings. In the event of a
spill, turn off and unplug the oven immediately, and
call an authorised SHARP service agent.
Do not immerse the power supply cord or plug in
water or any other liquid.
Do not let the power supply cord hang over the
edge of a table or work surface.
Keep the power supply cord away from heated
surfaces, including the rear of the oven.
Do not attempt to replace the oven lamp yourself or
allow anyone who is not an electrician authorised
by SHARP to do so. If the oven lamp fails, please consult
your dealer or an authorised SHARP service agent.
IMPORTANT SAFETY INSTRUCTIONS: READ CAREFULLY AND KEEP FOR FUTURE REFERENCE
R-8730 ENGLISH 12/07/2001 12:20 PM Page 4

Temperature of the container is not a true indication
of the temperature of the food or drink; always
check the food temperature.
Always stand back from the oven door when opening,
to avoid burns from escaping steam and heat.
Slice stuffed baked foods after heating to release
steam and avoid burns.
Keep children away from the door to prevent them
burning themselves.
Do not touch the oven door, outer cabinet, rear
cabinet, oven cavity, ventilation openings,
accessories and dishes during GRILL,
CONVECTION, DUAL and MEMORY
OPERATION modes as they will become hot.
Before cleaning make sure they are not hot.
To avoid misuse by children
WARNING: Only allow children to use the
oven without supervision when adequate
instructions have been given so that the child
is able to use the oven in a safe way and
understands the hazards of improper use.
Do not lean or swing on the oven door. Do not
play with the oven or use it as a toy.
Children should be taught all important safety
instructions: use of pot holders, careful removal of
food coverings; paying special attention to
packaging (e.g. self-heating materials) designed to
make food crisp, as they may be extra hot.
Other warnings
Never modify the oven in any way.
Do not move the oven while it is in operation.
This oven is for home food preparation only and
may only be used for cooking food. It is not
suitable for commercial or laboratory use.
To promote trouble-free use of your oven
and avoid damage.
Never operate the oven when it is empty except
where recommended in the operation manual, see
Page 13. Doing so may damage the oven.
When using a browning dish or self-heating
material, always place a heat-resistant insulator
such as a porcelain plate under it to prevent
damage to the turntable due to heat stress. The
preheating time specified in the dish’s instructions
must not be exceeded.
Do not use metal utensils, which reflect microwaves
and may cause electrical arcing. Do not put cans
in the oven.
5
IMPORTANT SAFETY INSTRUCTIONS
If the power supply cord of this appliance is
damaged, it must be replaced with a special cord.
The exchange must be made by an authorised
SHARP service agent.
To avoid the possibility of explosion and
sudden boiling:
WARNING: Liquids and other foods must
not be heated in sealed containers since
they are liable to explode.
Never use sealed containers. Remove seals and
lids before use. Sealed containers can explode due
to a build up of pressure even after the oven has
been turned off.
Take care when microwaving liquids. Use a widemouthed container to allow bubbles to escape.
Never heat liquids in narrow necked
containers such as baby bottles, as this may
result in the contents erupting from the
container when heated and cause burns.
To prevent sudden eruption of boiling liquid and
possible scalding:
1. Stir liquid prior to heating/reheating.
2. It is advisable to insert a glass rod or similar utensil
into the liquid whilst reheating.
3. Let liquid stand in the oven at the end of cooking
time to prevent delayed eruptive boiling.
Do not cook eggs in their shells, and whole
hard boiled eggs should not be heated in
microwave ovens since they may explode
even after microwave cooking has ended.
To cook or reheat eggs which have not
been scrambled or mixed, pierce the yolks
and the whites, or the eggs may explode.
Shell and slice hard boiled eggs before
reheating them in the microwave oven.
Pierce the skin of such foods as potatoes, sausages
and fruit before cooking, or they may explode.
To avoid the possibility of burns
Use pot holders or oven gloves when removing food
from the oven to prevent burns.
Always open containers, popcorn makers, oven
cooking bags, etc., away from the face and hands to
avoid steam burns.
To avoid burns, always test food
temperature and stir before serving and
pay special attention to the temperature
of food and drink given to babies,
children or the elderly.
R-8730 ENGLISH 12/07/2001 12:20 PM Page 5
1. Remove all packing materials from the inside of the
oven cavity. Discard the loose polythene sheet from
between the door and cavity. Remove the feature
sticker, if attached, from the outside of the door.
2. Check the oven carefully for any signs of damage.
3. Place the oven on a flat, level surface strong
enough to support the oven’s weight plus the
heaviest item likely to be cooked.
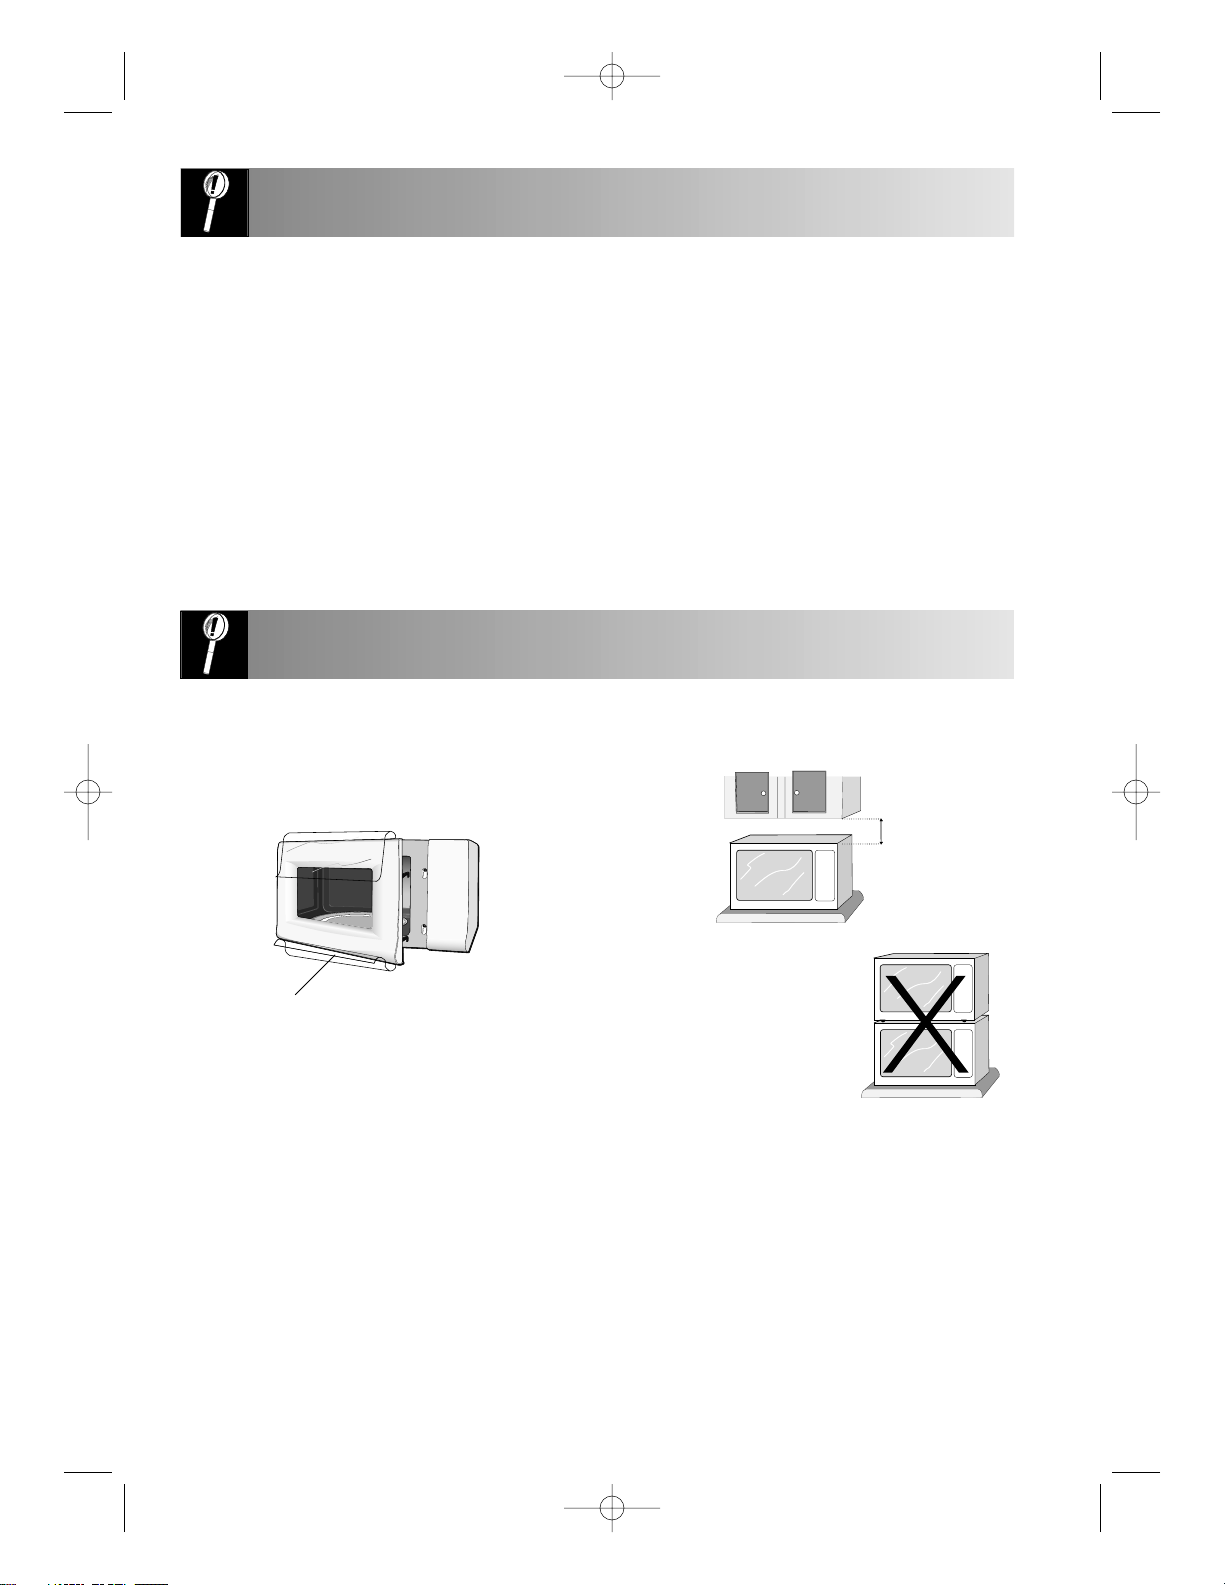
4. The oven door may become hot during
cooking. Place or mount the oven so
that the bottom of the oven is 85 cm or
more above the floor. Keep children
away from the door to prevent them
burning themselves.
5. Do not allow the power supply cord to
run over any hot or sharp surfaces,
such as the hot air vent area at the top
rear of the oven.
Remove this film
6. Ensure there is a minium of free space above
the oven of 19 cm.
7. Do not stack this oven.
8. Securely connect the plug of the oven to a
standard earthed (grounded) household
electrical outlet.
6
IMPORTANT SAFETY INSTRUCTIONS
INSTALLATION
NOTE:
If you are unsure how to connect your oven, please
consult an authorised, qualified electrician.
Neither the manufacturer nor the dealer can accept
any liability for damage to the oven or personal
injury resulting from failure to observe the correct
electrical connection procedure.
Water vapour or drops may occasionally form on
the oven walls or around the door seals and
sealing surfaces. This is a normal occurrence and is
not an indication of microwave leakage or a
malfunction.
Use only the turntable designed for this oven.
Do not use the oven without the turntable.
Do not place anything on the outer cabinet during
operation.
Do not use plastic containers for microwaving if the
oven is still hot from using the GRILL,
CONVECTION, DUAL and MEMORY
OPERATION modes because they may melt.
Plastic containers must not be used during above
modes unless the container manufacturer says they
are suitable.
R-8730 ENGLISH 17/07/2001 12:44 PM Page 6
19 cm
BEFORE OPERATION
7
COOKING WITH PRE-PROGRAMMED MEMORIES
LOCK FUNCTION
• Your oven has a lock function and is locked when
you first connect to an electrical socket. At that time
the digital display will show:
• The lock will be set when the oven is plugged in,
you can use all functions except for the
MEMORY key.
• To release the lock function, press the
MANUAL key and hold for 2 seconds until the
audible sound is heard. LOCK indicator will
disappear and you can use the MEMORY key.
To lock the oven press the MANUAL key and
hold for 2 seconds.
• Your oven is already installed with 30 cooking
programmes for apetito products in each number
key. The first 20 programmes cannot be changed.
• The input is cancelled when any keys are not
pressed for more than 3 minutes.
• Heat the oven using the top and bottom grills
without food for 20 minutes. (For operation see
notes in GRILL COOKING, on page 13).
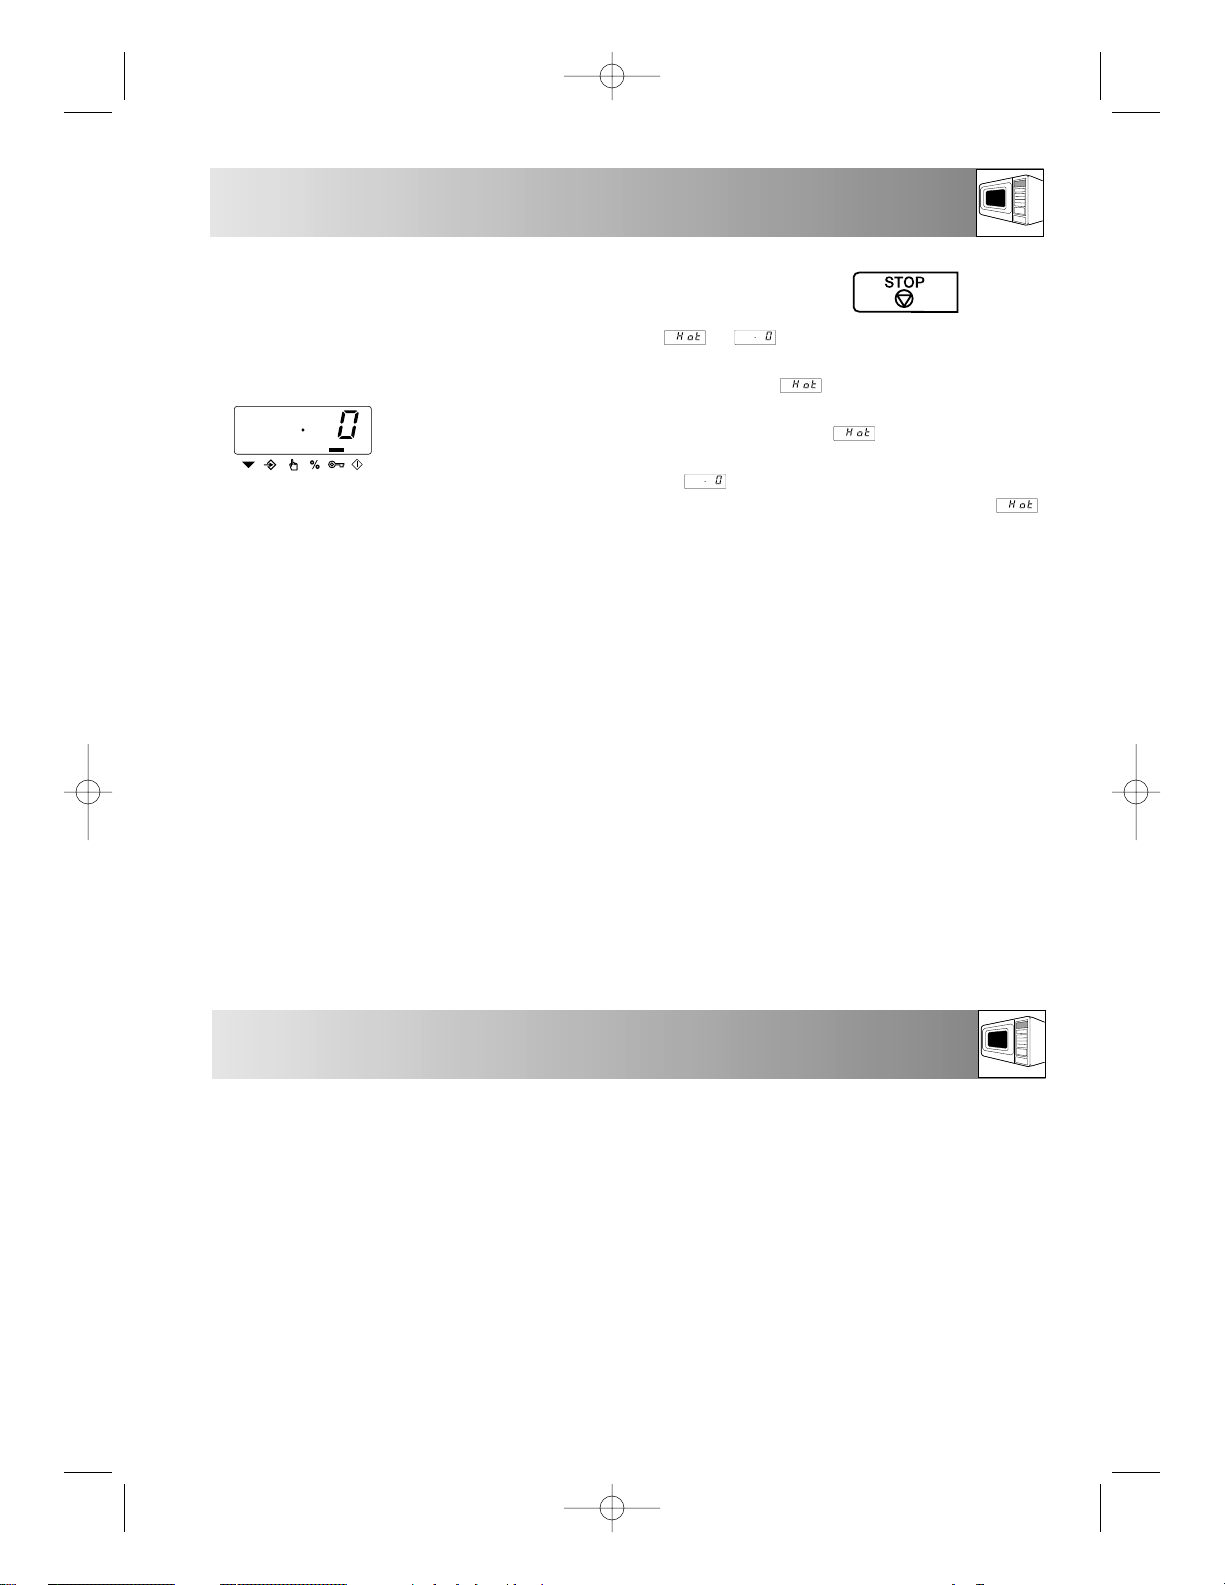
STOPPING THE OVEN
• or will appear on the display after
the time reaches zero (e.g. at the end of the
cooking time). will disappear when the
STOP key is pressed. If you press the STOP key
twice during cooking appears. If you
press the stop key again the display will return
to
.
LET THE OVEN COOL DOWN WHILE
IS DISPLAYED TO PREVENT OVER
COOKING.
• If you wish to stop the oven during cooking:
Press the STOP key once or open the door.
To start the oven again, close the door and press
the START key within 1 minute.
• If you wish to cancel a programme during cooking,
press the STOP key twice.
• If you wish to erase a mistake during
programming, press STOP key once.
• The oven has 30 memory banks (1 - 30), the
programme numbers of Memory are made
especially for deep frozen menus of apetito.
• The total cooking times for each memory bank are
shown in the table on page 8. The memory banks
21 - 30 can be changed individually if required
(see page 16).
• In addition for all memory banks a reduce factor is
stored. It is useful if you use the same memory in
the memory banks continuously.
The reduce factor is separately made for each
programme.
The stored reduce factor for 21 - 30 can also be
changed individually if required (see page 17).
• Information in these memory banks is not lost
during power interruptions. If the power goes off,
the oven does not need to be re-programmed.
Batteries are not necessary for this type of memory.
• To check the stored programmes or reduce factors
refer to “memory check” on page 18.
R-8730 ENGLISH 12/07/2001 12:20 PM Page 7
PRE-SET MEMORY CHART
8
Memory No. 1234567890
Total Cooking 15’00” 17’00” 14’50” 16’00” 16’00” 13’00” 13’50” 14’00” 14’00” 14’50”
Time
Reduce Factor 0.96 0.96 0.97 0.97 0.96 0.96 0.96 0.96 0.96 0.96
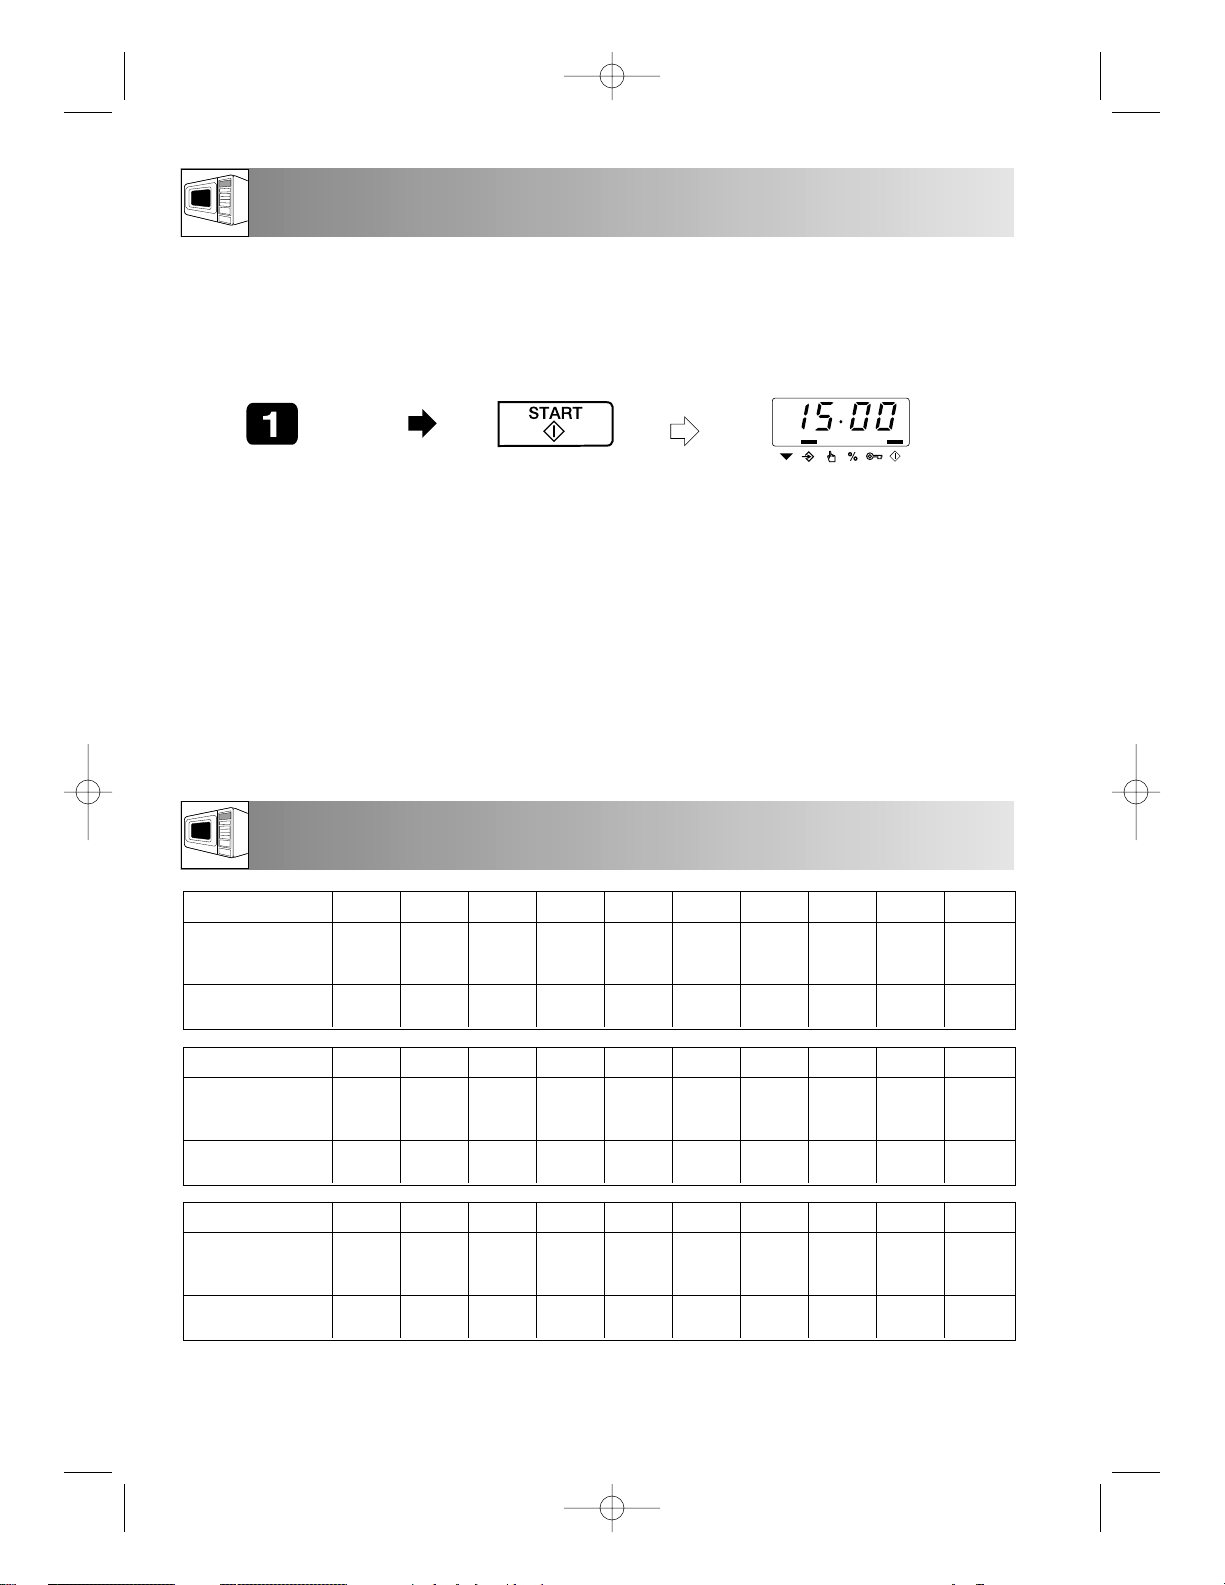
Example: Suppose you want to reheat frozen apetito menu by using MEMORY 1.
Follow instructions on the apetito Guide.
COOKING WITH PRE-PROGRAMMED MEMORIES
1. Press the NUMBER key 1. Display will count down
through the cooking time.
2. Press the START key.
Memory No. 11 12 13 14 15 16 17 18 19 20
Total Cooking 14’50” 15’00” 17’00” 18’00” 15’30” 14’30” 12’50” 19’00” 14’00” 16’30”
Time
Reduce Factor 0.96 0.96 0.96 0.96 0.97 0.96 0.96 0.96 0.96 0.85
Memory No. 21 22 23 24 25 26 27 28 29 30
Total Cooking 15’00” 5’50” 8’00” 1’15” 5’30” 6’00” 4’50” 5’20” 7’30” 12’30”
Time
Reduce Factor 0.96 0.85 0.92 0.90 0.93 0.85 0.91 0.91 0.91 0.91
Note: The correct Memory number for each menu is mentioned on the cover of each apetito-menu.
Note:
When you reheat with the memory key:
1. Place the upturned Pyrex dish onto the turntable. The Pyrex dish is supplied from apetito separately.
2. Place the frozen menus of apetito on top of the Pyrex dish. For details, please refer to apetito guide.
3. Do not remove the Pyrex dish just after cooking as it will be very hot.
4. The programmes 26 - 30 are baking menus. Remove outer package and container before reheating.
Place the food on the rack. Remove the Pyrex dish here.
WARNING:
The oven cavity, turntable, rack, dishes and especially the bottom grill will become very hot, always use
the handle or thick oven gloves at all times when removing food or turntable from the oven to prevent
burns.
x1 x1
R-8730 ENGLISH 12/07/2001 12:20 PM Page 8
TIME REDUCE COOKING
9
ENGLISH
When you use the same NUMBER key within a short time one after another, the food may be
overcooked. It is recommended to use the time reduce function to get the best results. This function will
shorten the total cooking time depending on the reduced factor for each memory;
Reduced cooking time = total cooking time x reduce factor.
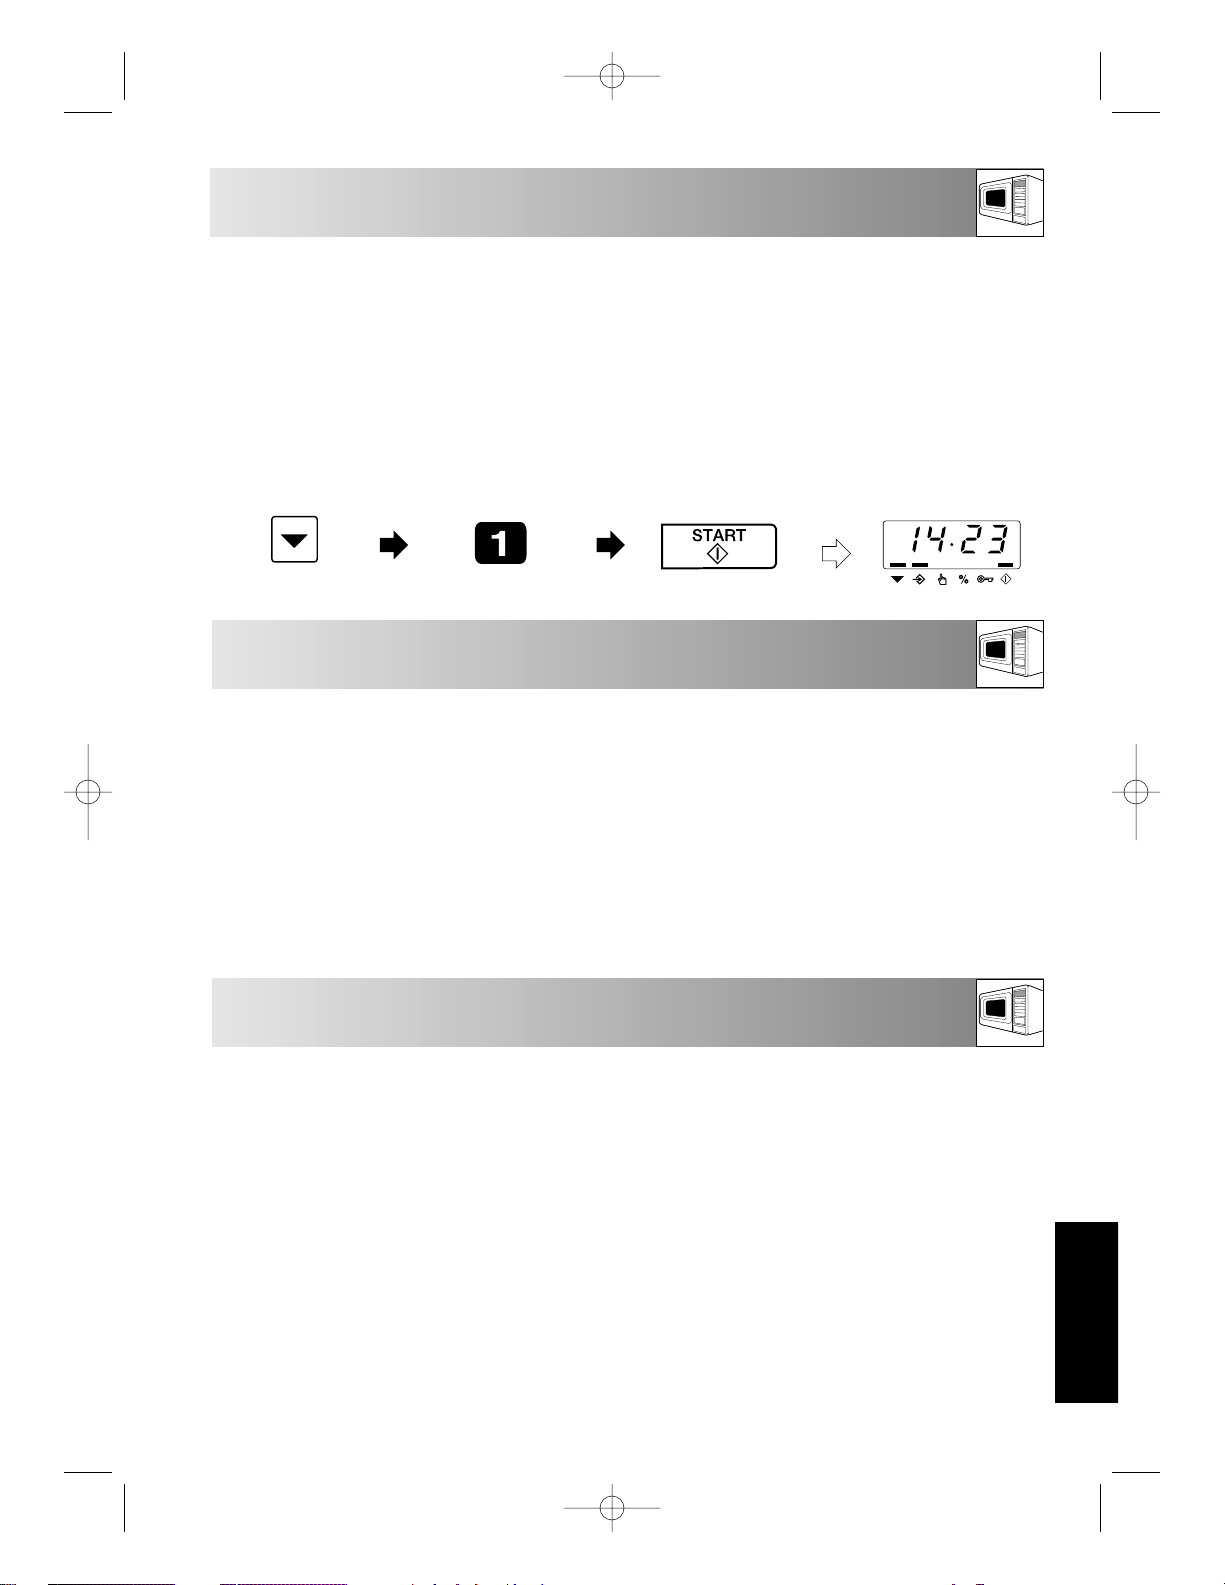
Example: Suppose you want to reheat frozen Apetito menu by using MEMORY 1 with the time reduce setting.
• Your oven can be programmed for up to 3 cooking sequences. You can enter cooking time up to 99
minutes 99 seconds for each stage. (See page 15 for details.)
• To input manual cooking:
1. Press the MANUAL key.
2. Enter cooking time. (for preheating, you can omit this step).
3. Select desired cooking mode.
4. Press the START key.
• During cooking mode, the oven stops when the door is opened, and the programme is cancelled if the
START key is not pressed within 1 minute after the door is closed.
• Before cooking check the suitable utensils on pages 22 - 23.
1. Press the TIME
REDUCE key.
MANUAL COOKING
2. Press the NUMBER
key 1.
3. Press the START key.
Display will count down
through the cooking time.
MICROWAVE POWER LEVELS
Your oven has 6 power levels. To choose the
power level for cooking, follow the advice given in
the recipe section. Generally the following
recommendations apply:
100 % - (900 W) used for fast cooking or
reheating e.g. soup, casseroles, canned food, hot
beverages, vegetables, fish, etc.
70 % - (630 W) used for longer cooking of dense
foods such as roast joints, meat loaf and plated
meals, also for sensitive dishes such as cheese
sauce and sponge cakes. At this reduced setting,
the sauce will not boil over and food will cook
evenly without over cooking at the sides.
50 % - (450 W) for dense foods which require a
long cooking time when cooked conventionally,
eg. beef dishes, it is advisable to use this power
setting to ensure the meat will be tender.
30 % - (270 W Defrost setting) to defrost, select
this power setting, to ensure that the dish defrosts
evenly. This setting is also ideal for simmering rice,
pasta, dumplings and cooking egg custard.
10 % - (90 W) for gentle defrosting, eg. cream
gateaux or pastry.
0 % - (0 W) for setting standing time.
(No microwave power.)
x1
x1
x1
R-8730 ENGLISH 12/07/2001 12:20 PM Page 9
Your oven has 6 preset power levels.
Press MICROWAVE key x1 x2 x3 x4 x5 x6
Microwave power level 100 % 70 % 50 % 30 % 10 % 0 %
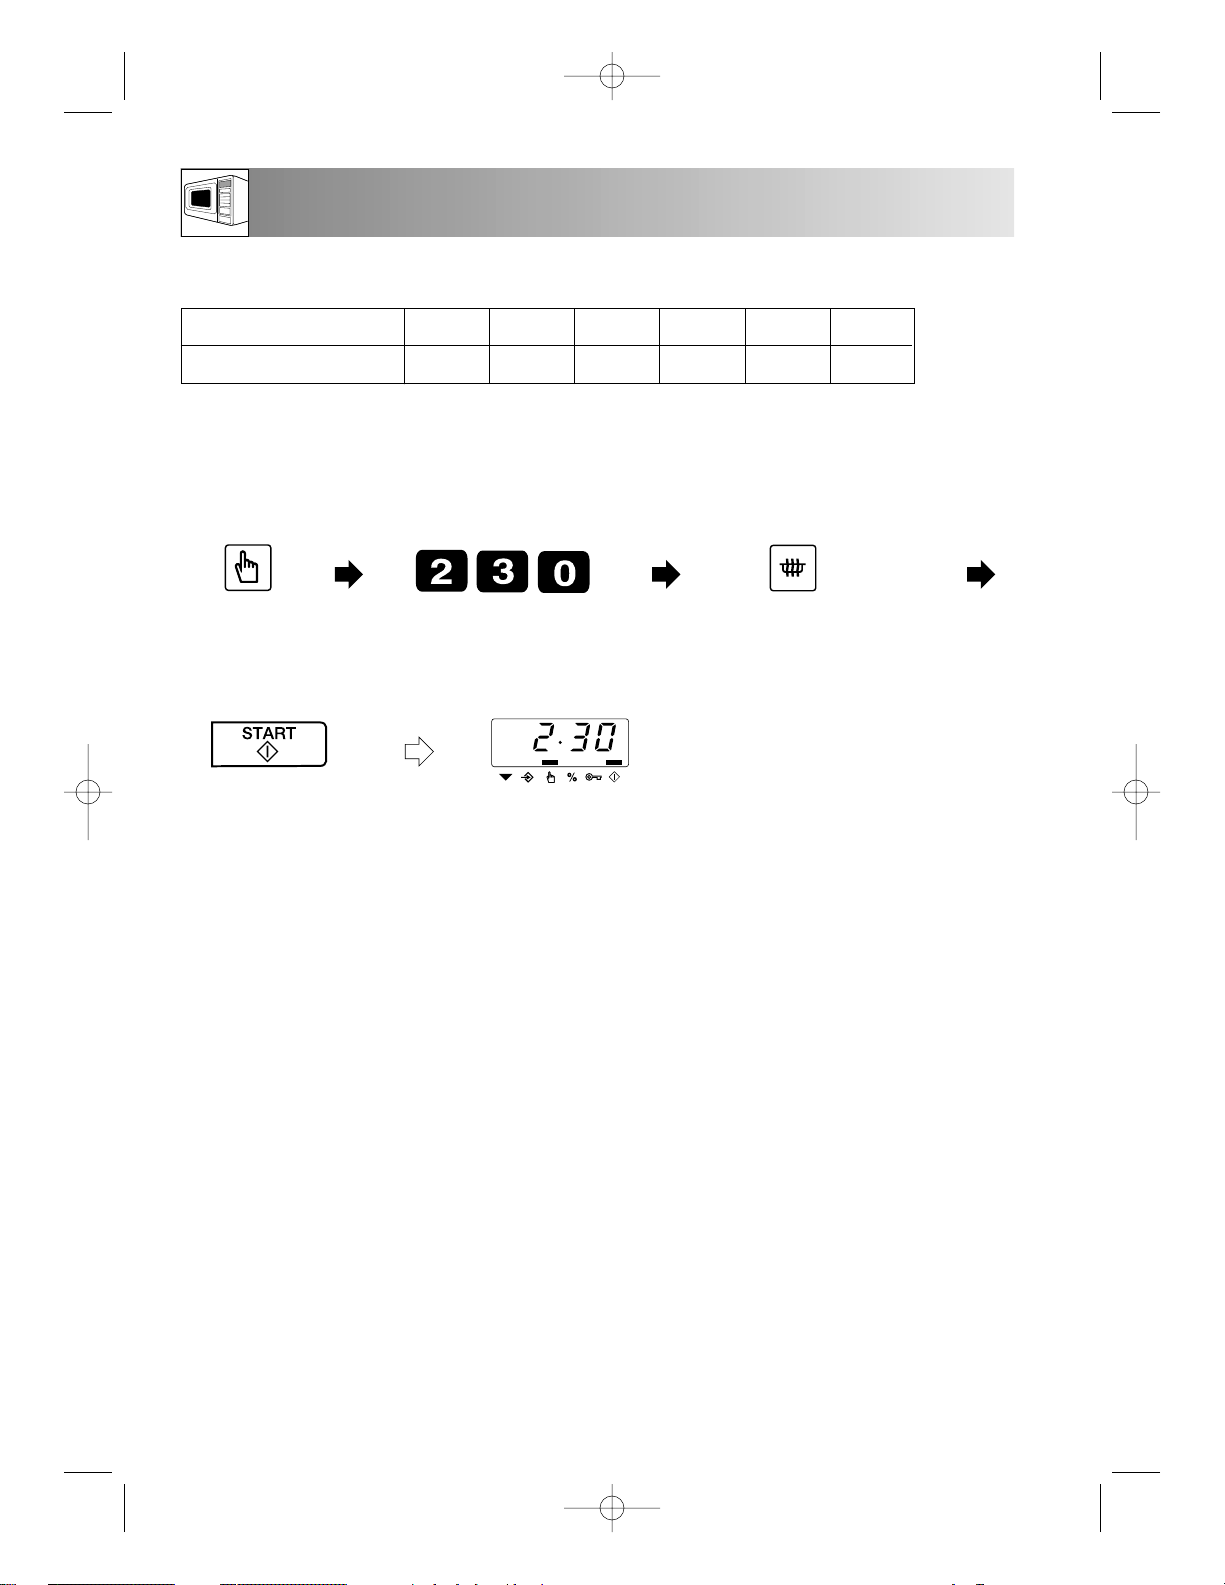
Example: Suppose you want to cook for 2 minutes 30 seconds on 50 %.
Notes:
• Once the oven has started you can find out the power level you have programmed by pressing the
MICROWAVE key. The power level will appear on the display. This will not affect the programme or
the cooking time.
• If the power level is not selected, 100 % power is automatically set.
1. Press the
MANUAL key.
2. Enter desired cooking time.
All indicatior lights will flash
on and off.
3. Enter the desired power level 50% by
pressing the MICROWAVE key 3 times,
MICRO indicator light will remain on.
10
MICROWAVE COOKING
x3
4. Press the START key.
Display will count down
through the cooking time.
x1
x1
x1
x1
x1
R-8730 ENGLISH 12/07/2001 12:20 PM Page 10

Your oven can be programmed to cook with ten different temperatures by combining the top and bottom grills with
the convection fan.
Notes:
• Once the oven has started you can find out the temperatures you have programmed by pressing the
CONVECTION key. The temperature will appear on the display. This will not affect the programme or
cooking time.
• After cooking is complete the cooling fan will continue working for a short time to lower the
temperature of the electrical and mechanical components.
WARNING:
The oven cavity, turntable, rack, dishes and especially the bottom grill will become very hot, always use
the handle or thick oven gloves at all times when removing food or turntable from the oven to prevent
burns.
11
CONVECTION COOKING
ENGLISH
x1
250
Press CONVECTION key
Oven Temp (° C)
x2
230x3220
x4
200x5180
x6
160
x7
130x8100x970
x10
40
Example: Suppose you want to cook for 20 minutes at 200˚ C.
1. Press the
MANUAL key.
2. Enter desired cooking time.
All indicatior lights will flash
on and off.
3. Enter the desired temperature 200˚ C by
pressing the CONVECTION key 4 times.
CONVEC indicator light will remain on.
x4
4. Press the START key.
Display will count down
through the cooking time.
x1 x1 x1 x1 x1
x1
Note:
Temperature measurements taken whilst the oven is in convection mode will differ from the displayed level.
This is due to the grill elements turning on and off in order to regulate the oven temperature. This will not
affect the cooking results as long as the operation manual and cookbook are followed correctly.
R-8730 ENGLISH 12/07/2001 12:20 PM Page 11

12
PREHEATING THE OVEN
Your oven can be preheated to a desired temperature prior to oven cooking.
Example: Suppose you want to preheat the oven to 200˚ C.
When the oven reaches 200˚C, the audible signal will
sound and the oven will display 200˚C. Place food in
the oven, enter the desired cooking time and
temperature before pressing the START key.
Notes:
• The preheated temperature will be maintained for approximately 30 minutes before automatically
turning itself off.
If you open and close the oven door during the 30 minutes will appear and the oven will stop
keeping the preheated temperature.
• Once the oven has started you can find out the actual temperature by pressing the
CONVECTION key. The temperature will appear on the display. This will not affect the programme or
the cooking time.
WARNING:
The oven cavity, turntable, rack, dishes and especially the bottom grill will become very hot, always use
the handle or thick oven gloves at all times when removing food or turntable from the oven to prevent
burns.
1. Press the
MANUAL key.
2. Enter the desired temperature 200˚ C by
pressing the CONVECTION key 4 times.
CONVEC indicator light will come on.
x4
3. Press the START key.
x1 x1
R-8730 ENGLISH 12/07/2001 12:20 PM Page 12

13
GRILL COOKING
ENGLISH
Your oven has 2 grill heating elements, and a combination of 3 grill cooking modes. Select the desired
grill mode by pressing the TOP GRILL or/and BOTTOM GRILL key.
Example: Suppose you want to cook for 5 minutes using the top and bottom grills.
Notes:
You may detect smoke or a burning smell when using the grill for the first time. This is normal and not a
sign that the oven is out of order. To avoid this problem, when first using the oven, operate the oven using
the top and bottom grills without food for 20 minutes.
Important: • During grill operation, to allow smoke or smells to disperse open a window or switch the
kitchen ventilation on.
• The oven door, outer cabinet & oven cavity will become hot. Take care to avoid burns
after using the oven.
WARNING:
The oven cavity, turntable, rack, dishes and especially the bottom grill will become very hot, always use
the handle or thick oven gloves at all times when removing food or turntable from the oven to prevent
burns.
1. Press the
MANUAL key.
2. Enter desired cooking time.
All indicatior lights will flash
on and off.
3. Press the TOP GRILL and BOTTOM
GRILL keys. TOP and BOTTOM
GRILL indicator lights will remain on.
x1
4. Press the START key.
Display will count down
through the cooking time.
x1x1
x1
x1 x1 x1
R-8730 ENGLISH 12/07/2001 12:20 PM Page 13

14
DUAL COOKING
Your oven has 3 DUAL cooking modes to combine the microwave with convection or the grills. To select
the DUAL cooking mode, press the MICROWAVE key and one of the CONVECTION, TOP GRILL or
BOTTOM GRILL keys. Generally, dual cooking time shortens the total cooking time.
Programmed Dual Cooking modes.
WARNING:
The oven cavity, turntable, rack, dishes and especially the bottom grill will become very hot, always use
the handle or thick oven gloves at all times when removing food or turntable from the oven to prevent
burns.
Example: Suppose you want to cook for 11 minutes on Dual 1, combining 50 % Microwave power with
the 200˚ C Convection.
Cooking method
MICRO 30 %
CONV 250° C
MICRO 30 %
TOP GRILL
MICRO 30 %
BOTTOM GRILL
Microwave Power Range
10 % - 50 %
10 % - 100 %
10 % - 100 %
DUAL 1
DUAL 2
DUAL 3
Notes:
• To adjust the microwave power, press the MICROWAVE key.
• To adjust the convection temperature, press the CONVECTION key until the desired temperature
appears on the display.
• For DUAL 1 the oven temperature can be changed from 40° C to 250° C in ten levels.
1. Press the
MANUAL key.
2. Enter desired cooking time.
All indicatior lights will flash
on and off.
3. Enter the desired temperature 200˚ C by
pressing the CONVECTION key 4 times.
CONVEC indicator light will remain on.
x4
5. Press the START key.
Display will count down
through the cooking time.
4. Enter desired power level 50 % by
pressing the MICROWAVE key 3 times.
MICRO indicator will come on.
x3
x1
x1
x1
x1
x1
x1
R-8730 ENGLISH 12/07/2001 12:20 PM Page 14

15
OTHER CONVENIENT FUNCTIONS
ENGLISH
1. MULTIPLE SEQUENCE COOKING
This facility enables continued operation of up to three different sequences.
Example:
Suppose you want to cook: 2 minutes 30 seconds on 70% microwave power (Stage 1)
5 minutes on Top grill (Stage 2)
Notes:
• You can programme a pause when you programme 2 cooking sequences (Stage 1 ➝ Pause ➝ Stage 2).
To set the pause, press the NUMBER KEY ‘0’ and MICROWAVE key once, after setting stage 1. The
oven will keep the programme during the pause. After pause, you must press the START key to resume
cooking.
• If you set the preheat in the sequence programming, the oven will keep the programme after preheat is over.
1. Press the
MANUAL key.
STAGE 1
2. Enter desired cooking time.
All indicatior lights will flash
on and off.
3. Enter desired power level 70 % by
pressing the MICROWAVE key twice.
MICRO indicator will remain on.
x2
6. Press the START
key.
Display will count
down through the
cooking time.
STAGE 2
4. Enter desired cooking time.
All indicatior lights will flash
on and off.
5. Press the TOP GRILL
key. TOP GRILL
indicator light will
remain on.
2. MINUTE PLUS FUNCTION
The +1min key allows you to operate the two following functions:
a. Microwave 100 % cooking.
You can cook for 1 minute on 100 % easily.
Example: Suppose you want to cook for 2 minutes on 100 % microwave power.
b. Extend the cooking time.
You can extend the cooking time for multiples of 1 minute if the key is pressed while the oven is in
operation.
NOTE: You cannot use this function during cooking with the pre-programmed memories of apetito products.
1. Press the
MANUAL key.
Display will count down
through the cooking time.
2. Press the +1min
key twice.
x2
x1
x1 x1
x1
x1 x1 x1
x1
x1
x1
R-8730 ENGLISH 17/07/2001 12:44 PM Page 15

OTHER CONVENIENT FUNCTIONS
3. MEMORY PROGRAMME ENTRY
You can change, if you need, the memory programmes for 10 memory banks (21 - 30).
You can programme for up to 3 cooking sequences using microwave, convection, grill, dual
cooking and you can enter cooking time up to 99 min 99 sec. for each stage.
For details of each cooking mode, see the following pages:
Microwave Cooking: page 10 Grill Cooking: page 13
Convection Cooking: page 11 Dual Cooking: page 14
Before you change the memory programme ensure that the oven is not in the lock function.
If you personnally have the wish to change the programmes, please consider that after changing
the programme, the best preparation time for apetito menus is no longer guaranteed.
3a. TO OVERWRITE TIME AND POWER LEVEL OF MEMORY
Example: Suppose you want to change the programme for Memory 23 as follows:
4 minutes on 50 % microwave power (Stage 1)
2 minutes on Dual 2 (10 % microwave power and bottom grill) (Stage 2)
16
1. Press the MEMORY
key and hold for 5
seconds until the
singal sounds twice.
MEMORY indicator
light will come on.
2. Select the memory
number. To programme
23 simply press the
NUMBER 3 key to
change the flashing
number 1.
STAGE 1
4. Enter desired
cooking time.
All indicator lights
will flash on and off.
x1 for 5
seconds
x3
STAGE 2
6. Enter desired
cooking time.
All indicator lights
will flash on and off.
7. Press the TOP GRILL
key. TOP GRILL
indicator light will
remain on.
5. Press the
MICROWAVE key 3
times for 50 % power,
MICRO indicator light
will remain on.
3. Press the
MANUAL
key.
x2
8. Press the
MICROWAVE key
twice for 10 % power,
MICRO indicator light
will come on.
x1
x1
x1
x1 x1
x1
x1 x1
x1
R-8730 ENGLISH 12/07/2001 12:20 PM Page 16

Notes:
• To select memory number 30, press the NUMBER keys 3 and 0, or simply press the NUMBER key 0.
• If you wish to change other preset memory programmes continually, press desired memory number key
prior to setting the STOP key. After selecting the memory number, follow the above example.
• The preset reduce factors of the memory banks are suitable for each cooking programme. It is
recommended to change it corresponding with new programmes you set.
9. Press the MEMORY key.
10. Press the STOP key to release the memory setting mode.
17
OTHER CONVENIENT FUNCTIONS
ENGLISH
Notes:
• To select memory number 30, press the NUMBER keys 3 and 0, or simply press the NUMBER key 0.
• The reduce factor can be set from 0.00 to 0.99
• If you wish to change the reduce factor in other memories continually, press desired memory number key
prior to pressing the STOP key. After selecting the memory number, follow the above example.
3b. TO CHANGE THE REDUCE FACTORS
The reduce factor is preset for each memory programme separately, but you can alter the factor to suit
your needs.
For preset reduce factor, see page 8.
Example: Suppose you want to reduce the factor in memory 23 (0.92) to 0.8.
1. Press the MEMORY key and hold for
5 seconds until the singal sounds twice.
MEMORY indicator light will come on.
2. Press the TIME
REDUCE key.
x1 for 5 seconds
3. Select the MEMORY number. Press
the NUMBER 3 key to change the
flashing number 1.
5. Press the
MEMORY key.
6. Press the STOP key to release
the memory setting mode.
4. Set the reduce factor.
x1
x1
x1
x1
x1
x1
x1 x1
R-8730 ENGLISH 12/07/2001 12:20 PM Page 17

18
OTHER CONVENIENT FUNCTIONS
3c. MEMORY CHECK
You can check the information programmed into the memory, for example time and power level.
Before you check the memory programme ensure the oven has released from the lock function.
NOTE:
• To cancel MEMORY CHECK, press the STOP key.
• If you wish to check other memory programmes continually repeat steps 2 and 3 prior to pressing the
STOP key.
• To check the reduce factor, press the TIME REDUCE key before pressing memory number key.
CHECKING TIME AND POWER LEVEL
Example: Suppose you want to know the information programmed into memory 27, programmed for
2 minutes on Dual 2 (100% microwave/top grill) for the first sequence and 2 minutes 50
seconds on top and bottom grills for the second sequence.
1. Press the
MEMORY key.
2. Select the memory
number.
STAGE 1
4. The programme will appear. MICRO and
TOP GRILL indicator lights will come on.
x1
x1
3. Press the MEMORY
key again.
x1
x1
STAGE 2
5. TOP and BOTTOM GRILL
indicator lights will come
on.
R-8730 ENGLISH 12/07/2001 12:20 PM Page 18

19
CARE AND CLEANING
ENGLISH
CAUTION! DO NOT USE COMMERCIAL
OVEN CLEANERS, ABRASIVE, HARSH
CLEANERS OR SCOURING PADS ON ANY
PART OF YOUR MICROWAVE OVEN.
WARNING!
After GRILL, DUAL, CONVECTION and MEMORY
OPERATION modes, the oven cavity, door, oven
cabinet and accessories will become very hot. Before
cleaning, make sure they are completely cool.
Oven exterior
The outside of your oven can be cleaned easily with
mild soap and water. Make sure the soap is wiped off
with a moist cloth, and dry the exterior with a soft towel.
Oven controls
Open the door before cleaning to de-activate the oven
controls. Care should be taken when cleaning the
oven control. Using a cloth dampened with water
only, gently wipe the panel until it becomes clean.
Avoid using excessive amounts of water. Do not use
any sort of chemical or abrasive cleaner.
Oven Interior
1. For cleaning, wipe any splatters or spills with a soft
damp cloth or sponge after each use while the
oven is still warm. For heavier spills, use a mild
soap and wipe several times with a damp cloth
until all residues are removed.
Do not remove the waveguide cover.
2. Make sure that mild soap or water does not
penetrate the small vents in the walls which may
cause damage to the oven.
3. Do not use spray type cleaners on the oven interior.
4. Heat up your oven regularly by using both heating
elements, refer to “Notes of GRILL COOKING” on
page 13. Remaining food or fat splashed can
cause smoke or bad smell.
Turntable
Remove the turntable from the oven. Wash the
turntable in mild soapy water. Dry with a soft cloth.
The turntable is dishwasher safe.
Rack and Pyrex Dish
Wash the rack and the Pyrex dish in mild soapy water
and dry with a soft cloth.
Both utensils are dishwasher safe.
Door
To remove all trace of dirt, regularly clean both sides
of the door, the door seals and adjacent parts with a
soft, damp cloth.
R-8730 ENGLISH 12/07/2001 12:20 PM Page 19

PLEASE CHECK THE FOLLOWING BEFORE CALLING FOR SERVICE.
1. Power Supply
Check the power plug is properly connected to a suitable wall outlet.
Check the line fuse/circuit breaker is functioning properly.
2. When the door is opened, does the oven lamp light? YES NO
3. Place a cup of water (approx. 150 ml) in the oven and close the door securely.
Set the cooking mode to microwave cooking mode.
Programme the oven for one minute on 100 % power and start the oven.
Does the oven lamp light? YES NO
Does the turntable rotate? YES NO
NOTE: The turntable turns in either direction.
Does the ventilation work? YES NO
(Place your hand over the ventilation openings and check for air flow.)
After 1 minute does the signal sound? YES NO
Does cooking in progress indicator go off? YES NO
Is the water warm after the above operation? YES NO
4. Take the cup out of the oven and close the door.
Set the GRILL cooking mode using the top and bottom grill for 3 minutes.
After 3 minutes do both grill heating elements become red? YES NO
If you answer “NO” to any of the above questions, call a Service Technician appointed by SHARP and report the
results of your check. See inside back cover for details of address.
NOTES:
1. If you cook the food over the standard time with only the same cooking mode, the power of the
oven will lower automatically to avoid overheating. (The microwave power level will be reduced and the grill
heating elements will begin to light on and off.)
2. After cooking the cooling fan may run and “HOT” may appear on the display. Also, when you press the
STOP button and open the door during these cooking modes, the cooling fan may run; you may, therefore,
feel air blowing from the ventilation openings.
20
SERVICE CALL CHECK
Cooking mode
Microwave 100 % cooking
Grill cooking
TOP GRILL
BOTTOM GRILL
TOP and BOTTOM GRILL
Dual 2 Microwave 100 % cooking
Microwave 10 - 70 % cooking
Dual 3 Microwave 100 % cooking
Microwave 10 - 70 % cooking
Standard time
20 min.
30 min.
45 min.
Top grill - 15 min.
Bottom grill - 15 min.
Micro - 20 min.
Top grill - 15 min.
Top grill - 30 min.
Micro - 20 min.
Bottom grill - 15 min.
Bottom grill - 45 min.
R-8730 ENGLISH 12/07/2001 12:20 PM Page 20

Durch den Einsatz des Kombibetriebs können Sie
gleichzeitig garen und bräunen.
Der Vorteil liegt darin, daß die Heißluft oder die
Hitze des Grills die Poren der Gargutrandschichten
schnell versiegelt. Die Mikrowellen sorgen für eine
kurze schonende Garzeit. Das Lebensmittel bleibt
innen saftig und wird außen knusprig.
HEISSLUFTBETRIEB
Sie können die Heißluft auch ohne
Mikrowellenbetrieb einsetzen.
GRILLBETRIEB
Ihr Gerät ist mit einem Quarzgrill an der
Garraumdecke ausgestattet. Er kann wie jeder
konventionelle Grill ohne Mikrowellenbetrieb
benutzt werden. Sie können Gerichte schnell
überbacken oder grillen.
Zusätzlich verfügt Ihr Gerät über einen zweiten
Grill unter dem Drehteller. Diese Betriebsart kann
eingesetzt werden um Lebensmittel von unten zu
bräunen.
Mikrowellen sind wie Radio- und Fernsehwellen,
elektromagnetische Wellen.
Mikrowellen werden im Mikrowellengerät vom
Magnetron erzeugt und versetzen die Wassermoleküle im Lebensmittel in Schwingungen. Durch die
verursachte Reibung entsteht Wärme, die dafür sorgt,
daß die Speisen aufgetaut, erhitzt oder gegart
werden.
Das Geheimnis der kurzen Garzeiten liegt darin, daß
die Mikrowellen von allen Seiten direkt in das Gargut
eindringen. Die Energie wird optimal ausgenutzt. Im
Vergleich dazu gelangt die Energie beim Kochen mit
dem Elektroherd über Umwege von der Herdplatte an
den Kochtopf und dann erst zum Lebensmittel. Auf
diesem Umweg geht viel Energie verloren.
EIGENSCHAFTEN DER MIKROWELLEN
Mikrowellen durchdringen alle nichtmetallischen
Gegenstände aus Glas, Porzellan, Keramik,
Kunststoff, Holz und Papier. Das ist der Grund dafür,
warum diese Materialien in der Mikrowelle nicht
erhitzt werden. Das Geschirr wird nur indirekt über
die Speise erwärmt.
Speisen nehmen Mikrowellen auf (absorbieren) und
werden dadurch erhitzt.
Materialien aus Metall werden von der Mikrowelle
nicht durchdrungen, die Mikrowellen werden
zurückgeworfen (reflektiert). Deshalb sind
Gegenstände aus Metall für die Mikrowelle in der
Regel nicht geeignet. Es gibt jedoch Ausnahmen, wo
Sie genau diese Eigenschaften ausnutzen können. So
werden Speisen an bestimmten Stellen während des
Auftauens oder Garens mit etwas Aluminiumfolie
abgedeckt. Dadurch vermeiden Sie zu warme oder
zu heiße bzw. übergarte Bereiche bei
unregelmäßigen Teilen. Beachten Sie hierzu die
folgenden Hinweise.
MIKROWELLENBETRIEB
Sie können in lhrem neuen Kombi-Mikrowellengerät durch Einsatz des Mikrowellenbetriebes zum
Beispiel Tellergerichte oder Getränke schnell
erhitzen oder in kürzester Zeit Butter oder
Schokolade schmelzen.
Für das Auftauen von Lebensmitteln ist die
Mikrowelle ebenfalls hervorragend geeignet.
In vielen Fällen ist es jedoch vorteilhaft, Mikrowelle
mit Heißluft oder Grill zu kombinieren
(Kombibetrieb). Dann können Sie sowohl in
kürzester Zeit garen als auch gleichzeitig bräunen.
Im Vergleich zum konventionellen Braten ist die
Garzeit in der Regel erheblich kürzer.
KOMBIBETRIEB
(MIKROWELLENBETRIEB MIT
HEISSLUFT ODER GRILL)
Durch die Kombination zweier Betriebsarten
werden die Vorteile Ihres Gerätes sinnvoll
miteinander kombiniert.
Sie haben die Möglichkeit zu wählen zwischen
● Mikrowelle + Heißluft (ideal für Braten,
Geflügel, Aufläufe) und
● Mikrowelle + Grill (ideal für Pizzen, Snacks,
Kurzgebratenes, Käsetoasts und zum Gratinieren).
21
WAS SIND MIKROWELLEN?
ENGLISH
DAS KANN IHR NEUES KOMBI-MIKROWELLENGERÄT
R-8730 ENGLISH 12/07/2001 12:21 PM Page 21

MIKROWELLENFOLIE
oder hitzebeständige Folie ist zum Abdecken oder
Umwickeln gut geeignet. Beachten Sie bitte die
Angaben des Herstellers.
BRATBEUTEL
können im Mikrowellengerät
verwendet werden. Metallclipse
sind jedoch zum Verschließen
ungeeignet, da die Bratbeutel-
folie schmelzen kann. Nehmen
Sie Bindfaden zum Verschließen und stechen Sie
den Bratbeutel mehrmals mit einer Gabel ein.
Nicht hitzebeständige Folie, wie z.B.
Frischhaltefolie, ist für die Benutzung im
Mikrowellengerät nicht empfehlenswert.
METALL
sollte in der Regel nicht verwendet
werden, da Mikrowellen Metall
nicht durchdringen und so nicht
an die Speisen gelangen können.
Es gibt jedoch Ausnahmen:
Schmale Streifen aus Aluminiumfolie können zum
Abdecken von Teilen verwendet werden, damit diese
nicht zu schnell auftauen oder garen (z.B. die Flügel
beim Hähnchen).
Kleine Metallspieße und
Aluminiumschalen (z.B. bei
Fertiggerichten) können benutzt
werden. Sie müssen aber im
Verhältnis zur Speise klein sein,
z.B. müssen Aluminiumschalen mindestens
2
/
3
bis
3
/
4
mit Speise gefüllt sein. Empfehlenswert ist, die
Speise in mikrowellengeeignetes Geschirr
umzufüllen.
Bei Verwendung von Aluminiumschalen oder
anderem Metallgeschirr muß ein Mindestabstand
von ca. 2,0 cm zu den Garraumwänden
eingehalten werden, da diese sonst durch
mögliche Funkenbildung beschädigt werden
können.
KEIN GESCHIRR MIT METALLAUFLAGE,
Metallteilen oder Metalleinschlüssen, wie z.B. mit
Schrauben,Bändern oder Griffen verwenden.
KUNSTSTOFF
Hitzebeständiges, mikrowellengeeignetes Kunststoffgeschirr ist
zum Auftauen, Erhitzen und Garen
geeignet. Beachten Sie bitte die
Angaben des Herstellers.
PAPIER-GESCHIRR
Hitzebeständiges, mikrowellengeeignetes
Papiergeschirr ist ebenfalls geeignet. Beachten Sie
bitte die Angaben des Herstellers.
KÜCHENPAPIER
kann benutzt werden, um
entstehende Feuchtigkeit bei
kurzen Erhitzungsvorgängen
aufzunehmen, z.B. von Brot oder
Paniertem. Das Papier zwischen
die Speise und den Drehteller legen. So bleibt die
Oberfläche der Speise knusprig und trocken. Durch
Abdecken von fettigen Speisen mit Küchenpapier
werden Spritzer aufgefangen.
GLAS UND GLAS-KERAMIK
Hitzebeständiges Glasgeschirr ist
sehr gut geeignet. Der Garvor-
gang kann von allen Seiten
beobachtet werden. Es darf
jedoch nicht metallhaltig (z.B.
Bleikristall) oder mit einer
Metallauflage versehen sein (z.B.
Goldrand, Kobaltblau).
KERAMIK
ist im allgemeinen gut geeignet.
Keramik muß glasiert sein, da bei unglasierter
Keramik Feuchtigkeit in das Geschirr eindringen
kann. Feuchtigkeit erhitzt das Material und kann es
zum Zerspringen bringen. Falls Sie nicht sicher sind,
ob Ihr Geschirr für die Mikrowelle geeignet ist,
führen Sie den Geschirr-Eignungstest durch.
Siehe Seite 23.
PORZELLAN
ist sehr gut geeignet. Achten Sie darauf, daß das
Porzellan keine Gold- oder Silberauflage hat bzw.
nicht metallhaltig ist.
DAS GEEIGNETE GESCHIRR FÜR DEN MIKROWELLENBETRIEB
22
DAS GEEIGNETE GESCHIRR
R-8730 ENGLISH 12/07/2001 12:21 PM Page 22

TIPS UND TECHNIKEN
23
DAS GEEIGNETE GESCHIRR
ENGLISH
GESCHIRR-EIGNUNGSTEST
Wenn Sie nicht sicher sind, ob
Ihr Geschirr mikrowellengeeignet
ist, führen Sie folgenden Test
durch: Das Geschirr in das Gerät
stellen. Ein Glasgefäß mit 150 ml
Wasser gefüllt auf oder neben das Geschirr
stellen. Das Gerät 1 bis 2 Minuten bei 100 %
Leistung betreiben. Wenn das Geschirr kühl oder
handwarm bleibt, ist es geeignet. Diesen Test nicht
für Kunststoffgeschirr durchführen. Es könnte
schmelzen.
DAS GEEIGNETE GESCHIRR FÜR DEN
KOMBIBETRIEB
Im allgemeinen ist hitzebeständiges
Mikrowellengeschirr z.B. aus Porzellan, Keramik
oder Glas auch für den Kombibetrieb (Mikrowelle und
Heißluft, Mikrowelle und Grill) geeignet. Beachten Sie
jedoch, daß das Geschirr durch Heißluft oder Grill
sehr heiß wird. Kunststoffgeschirr und -folie sind für
den Kombibetrieb nicht geeignet.
Verwenden Sie kein Küchen- oder Backpapier. Es
könnte überhitzen und sich entzünden.
METALL
sollte in der Regel nicht verwendet werden.
Außnahmen sind beschichtete Backformen, durch die
auch die Randschichten der Speisen, wie z.B. Brot,
Kuchen und pikante Kuchen gut gebräunt
werden. Beachten Sie die Hinweise für das
geeignete Geschirr im Mikrowellenbetrieb.
DAS GEEIGNETE GESCHIRR FÜR DEN
HEISSLUFT-UND GRILLBETRIEB
Für das Garen mit Heißluft oder Grill ohne
Mikrowellenbetrieb können Sie das Geschirr
benutzen, das auch für jeden konventionellen
Backofen oder Grill geeignet ist.
werden normale Lagertemperaturen vorausgesetzt
(Kühlschranktemperatur ca. 5o C, Raumtemperatur
ca. 20o C). Für das Auftauen von Lebensmitteln
wird von -18o C Tiefkühltemperatur ausgegangen.
Popcorn nur in speziellen mikrowellengeeigneten
Popcorn-Behältern zubereiten. Richten Sie sich genau
nach den Angaben des Herstellers. Keine normalen
Papierbehälter oder Glasgeschirr verwenden.
Eier nicht in der Schale kochen.
In der Schale baut sich Druck
auf, der zum Explodieren des
Eies führen könnte. Das Eigelb
vor dem Garen anstechen.
Kein Öl oder Fett zum Fritieren
im Mikrowellengerät erhitzen. Die
Temperatur des Öls kann nicht
kontrolliert werden. Das Öl könnte
plötzlich aus dem Gefäß spritzen.
Keine geschlossenen Gefäße, wie Gläser
oder Dosen, erhitzen. Durch den entstehenden
Druck könnten die Gefäße zerspringen.
(Ausnahme: Einkochen).
BEVOR SIE BEGINNEN …
Um Ihnen den Umgang mit der Mikrowelle so
einfach wie möglich zu machen, haben wir für Sie
die wichtigsten Hinweise und Tips nachfolgend
zusammengestellt: Starten Sie Ihr Gerät nur dann,
wenn sich Lebensmittel im Garraum befinden.
EINSTELLUNG DER ZEITEN
Die Auftau-, Erhitzungs- und Garzeiten sind im
allgemeinen erheblich kürzer als in einem
konventionellen Herd oder Backofen. Halten Sie
sich deshalb an die in den Tabellen empfohlenen
Zeiten. Stellen Sie die Zeiten eher kürzer als
länger ein. Machen Sie nach dem Garen eine
Garprobe. Lieber kurz nachgaren als etwas
übergaren lassen.
AUSGANGSTEMPERATUR
Die Auftau-, Erhitzungs- und Garzeiten sind von der
Ausgangstemperatur der Lebensmittel abhängig.
Tiefgefrorene und kühlschranktemperierte Lebensmittel
benötigen beispielsweise länger als raumtemperierte.
Für das Erhitzen und Garen von Lebensmitteln
R-8730 ENGLISH 12/07/2001 12:21 PM Page 23

24
TIPS UND TECHNIKEN
WASSERZUGABE
Gemüse und andere sehr wasserhaltige Lebensmittel
können im eigenen Saft oder mit wenig Wasserzugabe gegart werden. Dadurch bleiben viele
Vitamine und Mineralstoffe im Lebensmittel erhalten.
LEBENSMITTEL MIT HAUT ODER SCHALE
wie Würstchen, Hähnchen, Hähnchenschenkel,
Pellkartoffeln, Tomaten, Äpfel, Eigelb oder
ähnliches, mit einer Gabel oder einem
Holzstäbchen einstechen. Dadurch kann der sich
bildende Dampf entweichen, ohne daß die Haut
oder Schale platzt.
FETTE SPEISEN
Mit Fett durchwachsenes Fleisch und Fettschichten
garen schneller als magere Teile. Decken Sie
deshalb diese Teile beim Garen mit etwas
Aluminiumfolie ab oder legen Sie die Lebensmittel
mit der fetten Seite nach unten.
BLANCHIEREN VON GEMÜSE
Gemüse sollte vor dem Einfrieren blanchiert
werden. So bleiben die Qualität und die
Aromastoffe am besten erhalten.
Verfahren: Das Gemüse waschen und zerkleinern.
Getränke erhitzen
(Kaffee,Wasser,Tee,etc )
Milch erhitzen
Suppen erhitzen
Eintöpfe erhitzen
Geflügel
Lammfleisch
Rosa gebraten
Durchgebraten
Roastbeef
Leicht angebraten
(rare)
Halb durchgebraten
(medium)
Gut durchgebraten
(welldone)
Schweine-, Kalbfleisch
Getränk/Speise Innentemperatur Innentemperatur
am Ende de nach 10 bis 15
Garzeit Minuten Standzeit
65-75o C
75-80o C
75-80o C
75-80o C
80-85o C
70o C
75-80o C
50-55o C
60-65o C
75-80o C
80-85o C
85-90o C
70-75o C
80-85o C
55-60o C
65-70o C
80-85o C
80-85o C
TABELLE: GARZEITBESTIMMUNG MIT
DEM SPEISENTHERMOMETER
GARZEITBESTIMMUNG MIT DEM
SPEISENTHERMOMETER
Jedes Getränk und jede Speise hat nach Ende des
Garvorgangs eine bestimmte Innentemperatur, bei
der der Garvorgang abgeschlossen werden kann
und das Ergebnis gut ist. Die Innentemperatur
können Sie mit einem Speisenthermometer
feststellen. In der Temperaturtabelle sind die
wichtigsten Temperaturen angegeben.
ALLE ANGEGEBENEN ZEITEN...
in den folgenden Tabellen sind Richtwerte,
die je nach Ausgangstemperatur, Gewicht
und Beschaffenheit (Wasser-,Fettgehalt
etc.) der Lebensmittel variieren können.
SALZ, GEWÜRZE UND KRÄUTER
In der Mikrowelle gegarte Speisen erhalten ihren
Eigengeschmack besser als bei konventionellen
Zubereitungsarten. Verwenden Sie deshalb Salz
sehr sparsam und salzen Sie in der Regel erst nach
dem Garen. Salz bindet Flüssigkeit und trocknet
die Oberfläche aus. Gewürze und Kräuter können
wie gewohnt verwendet werden.
GARPROBEN:
Der Garzustand von Speisen kann wie bei
konventioneller Zubereitung getestet werden:
● Speisenthermometer: Jede Speise hat bei
Abschluß des Erhitzungs- oder Garvorgangs
eine bestimmte Innentemperatur. Mit einem
Speisenthermometer können Sie feststellen, ob
die Speise heiß genug bzw. gegart ist.
● Gabel: Fisch können Sie mit einer Gabel prüfen.
Wenn das Fischfleisch nicht mehr glasig ist und
sich leicht von den Gräten löst, ist es gar. Ist es
übergart, wird es zäh und trocken.
● Holzstäbchen: Kuchen und Brot können durch
Einstechen eines Holzstäbchens getestet
werden. Wenn das Stäbchen nach dem
Herausziehen sauber und trocken bleibt, ist die
Speise gar.
R-8730 ENGLISH 12/07/2001 12:21 PM Page 24

25
TIPS UND TECHNIKEN
ENGLISH
ABDECKEN
Durch Abdecken bleibt die
Feuchtigkeit im Lebensmittel
erhalten und die Garzeit verkürzt
sich. Zum Abdecken einen
Deckel, Mikrowellenfolie oder
eine Abdeckhaube verwenden. Speisen, die eine
Kruste erhalten sollen, z.B. Braten oder Hähnchen,
nicht abdecken. Es gilt die Regel, was im
konventionellen Herd abgedeckt wird, sollte auch
im Mikrowellengerät abgedeckt werden. Was im
Herd offen gegart wird, kann auch im
Mikrowellengerät offen gegart werden.
250g Gemüse mit 275 ml Wasser in eine Schüssel
geben und abgedeckt 3-5 Minuten erhitzen.
Nach dem Blanchieren sofort in Eiswasser
tauchen, um ein Weiterkochen zu verhindern, und
danach abtropfen lassen. Das blanchierte
Gemüse luftdicht verpacken und einfrieren.
KLEINE UND GROSSE MENGEN
Die Mikrowellenzeiten sind direkt abhängig von
der Menge des Lebensmittels, das Sie auftauen,
erhitzen oder garen möchten. Das bedeutet, kleine
Portionen garen schneller als große.
Als Faustregel gilt:
DOPPELTE MENGE=FAST DOPPELTE ZEIT
HALBE MENGE=HALBE ZEIT
HOHE UND FLACHE GEFÄSSE
Beide Gefäße haben das gleiche
Fassungsvermögen, aber in der
hohen Form ist die Garzeit länger
als in der flachen. Bevorzugen Sie
deshalb möglichst flache Gefäße
mit großer Oberfläche. Hohe Gefäße nur für
Gerichte verwenden, bei denen die Gefahr des
Überkochens besteht, z.B. für Nudeln, Reis, Milch etc.
RUNDE UND OVALE GEFÄSSE
In runden und ovalen Formen garen Speisen
gleichmäßiger als in eckigen, da sich in Ecken
Mikrowellenenergie konzentriert und die Speise an
diesen Stellen übergaren könnte.
STANDZEIT
Die Einhaltung der Standzeit ist
eine der wichtigsten MikrowellenRegeln. Fast alle Speisen, die in
der Mikrowelle aufgetaut, erhitzt
oder gegart werden, benötigen
eine kurze oder längere Standzeit, in der ein
Temperaturausgleich stattfindet und sich die
Flüssigkeit in der Speise gleichmäßig verteilen kann.
ANORDNUNG
Mehrere Einzelportionen, z.B. Puddingförmchen,
Tassen oder Pellkartoffeln, ringförmig auf dem
Drehteller anordnen. Zwischen den Portionen Platz
lassen, so daß die Mikrowellenenergie von allen
Seiten eindringen kann.
WENDEN
Mittelgroße Teile, wie Hamburger und Steaks,
während des Garvorgangs einmal wenden, um
die Garzeit zu verkürzen. Große Teile, wie Braten
und Hähnchen, müssen gewendet werden, da die
nach oben gerichtete Seite mehr Mikrowellenenergie erhält und austrocken könnte, falls nicht
gewendet wird.
UNREGELMÄSSIGE TEILE
mit der dickeren bzw. kompakten
Seite nach außen plazieren.
Gemüse (z.B. Broccoli) mit den
Stielen nach außen legen.
Dickere Teile benötigen eine
längere Garzeit und erhalten an den Außenseiten
mehr Mikrowellenenergie, so daß die Lebensmittel
gleichmäßig garen.
UMRÜHREN
Das Umrühren der Speisen ist
notwendig, da die Mikrowellen
zuerst die äußeren Bereiche
erhitzen. Dadurch wird die
Temperatur ausgeglichen und die
Speise gleichmäßig erhitzt.
R-8730 ENGLISH 12/07/2001 12:21 PM Page 25

26
ERHITZEN
Die Mikrowelle ist ideal zum Auftauen von
Lebensmitteln. Die Auftauzeiten sind in der Regel erheblich kürzer als beim Auftauen auf herkömmliche Weise.
Nachfolgend einige Tips.
Nehmen Sie das Gefriergut aus der Verpackung und
legen Sie es zum Auftauen auf einen Teller.
VERPACKUNGEN UND BEHÄLTER
Gut geeignet zum Auftauen und Erhitzen von Speisen
sind mikrowellengeeignete Verpackungen und Behälter,
die sowohl tiefkühlgeeignet (bis ca. -40o C) als auch
hitzebeständig (bis ca. 220o C) sind. So können Sie im
gleichen Geschirr auftauen, erhitzen und sogar garen,
ohne die Speise zwischendurch umfüllen zu müssen.
ABDECKEN
Dünnere Teile vor dem Auftauen mit
kleinen Aluminiumstreifen abdekken. Angetaute oder warme Teile
während des Auftauens ebenfalls
mit Aluminiumstreifen abdecken.
Dies verhindert, daß dünnere Teile bereits zu heiß
werden, während dickere Teile noch gefroren sind.
DIE MIKROWELLENLEISTUNG...
eher niedriger als zu hoch wählen. So erzielen Sie ein
gleichmäßiges Auftauergebnis. Ist die Mikrowellenleistung zu hoch, gart die Speisenoberfläche bereits an,
während das Innere noch gefroren ist.
WENDEN/UMRÜHREN
Fast alle Lebensmittel müssen zwischendurch einmal
gewendet oder umgerührt werden.
Teile, die aneinanderhaften, so bald
wie möglich voneinander trennen
und umordnen.
KLEINERE MENGEN...
tauen gleichmäßiger und schneller auf als große. Wir
empfehlen deshalb, möglichst kleine Portionen
einzufrieren. So können Sie sich schnell und einfach
ganze Menüs zusammenstellen.
EMPFINDLICHE LEBENSMITTEL,
wie Torte, Sahne, Käse und Brot, nicht vollständig
auftauen, sondern nur antauen und bei
Raumtemperatur fertig auftauen. Dadurch wird
vermieden, daß die äußeren Bereiche bereits zu heiß
werden, während die inneren noch gefroren sind.
DIE STANDZEIT...
nach dem Auftauen von Lebensmitteln ist besonders
wichtig, da der Auftauvorgang während dieser Zeit
forgesetzt wird. In der Auftautabelle finden Sie die
Standzeiten für verschiedene Lebensmittel. Dicke,
kompakte Lebensmittel benötigen eine längere
Standzeit als flache oder Lebensmittel mit poröser
Struktur. Sollte das Lebensmittel nicht ausreichend
aufgetaut sein, können Sie es weiter im Mikrowellengerät auftauen oder die Standzeit entsprechend
verlängern. Die Lebensmittel nach der Standzeit
möglichst sofort weiterverarbeiten und nicht wieder
einfrieren.
● Fertiggerichte in Aluminiumbehältern sollten
herausgenommen und auf einem Teller oder in einer
Schüssel erhitzt werden.
● Speisen mit Mikrowellenfolie, Teller oder
Abdeckhaube (im Handel erhältlich) abdecken, damit
die Oberfläche nicht austrocknet. Getränke müssen
nicht abgedeckt werden.
● Bei fest verschlossenen Gefäßen die Deckel entfernen.
● Beim Kochen von Flüssigkeiten wie Wasser, Kaffee,
Tee oder Milch, einen Glasstab in das Gefäß stellen.
● Größere Mengen, wenn möglich, zwischendurch
umrühren, so daß sich die Temperatur gleichmäßig
verteilt.
● Die Zeiten sind für Lebensmittel bei einer
Zimmertemperatur von 20o C angegeben. Bei
kühlschranktemperierten Lebensmitteln erhöht sich die
Erhitzungszeit geringfügig.
● Lassen Sie die Speisen nach dem Erhitzen 1-2
Minuten stehen, so daß sich die Temperatur
gleichmäßig innerhalb der Speise verteilt (Standzeit).
● Die angegebenen Zeiten sind Richtwerte, die je nach
Ausgangstemperatur, Gewicht, Wassergehalt,
Fettgehalt und gewünschtem Endzustand etc.
variieren können.
AUFTAUEN
R-8730 ENGLISH 12/07/2001 12:21 PM Page 26

SYMBOL ERKLÄRUNG
Grill oben
Vielseitig einzusetzen zum überbacken und Grillen von Fleisch, Geflügel und Fisch.
Grill unten
Diese Betriebsart kann eingesetzt werden um Lebensmittel von unten zu bräunen.
Heißluftbetrieb
Sie können bei dieser Betriebsart zwischen 10 Heißluftstufen (40° C
-
250° C) wählen.
Grillbetrieb oben und unten
Gleichzeitiger Betrieb von dem Grill oben und unten. Besonders gut eignet sich diese
Kombination z.B. für überbackene Toasts, Quiches und Frikadellen.
Kombibetrieb: Mikrowelle und Heißluft
In dieser Betriebsart können Sie verschiedene Mikrowellen-Leistungsstufen mit einer gewünschten
Heißlufttemperatur (40° C - 250° C) kombinieren.
Die Mikrowellenleistung ist im Kombibetrieb auf 50 % begrenzt.
Kombibetrieb: Mikrowelle und Grill oben
Kombibetrieb: Mikrowelle und Grill unten
In diesen Betriebsarten können verschiedene Mikrowellen-Leistungsstufen mit dem Grill oben oder
mit dem Grill unten kombiniert werden.
ZEICHENERKLÄRUNG
MIKROWELLENLEISTUNG
Ihr Mikrowellengerät hat 900 W und 6 Leistungsstufen.
27
AUFTAUEN UND GAREN
ENGLISH
Tiefkühl-Gerichte können in der Mikrowelle in
einem Arbeitsgang aufgetaut und gleichzeitig
gegart werden. In den Tabellen finden Sie hierzu
einige Beispiele. Für die Zubereitung von
handelsüblichen Tiefkühl-Fertiggerichten richten
Sie sich bitte nach den Herstellerangaben auf
der Verpackung. In der Regel werden genaue
Garzeiten und Hinweise für die Zubereitung im
Mikrowellengerät gegeben.
Für den Kombibetrieb die gewünschte
Tastenkombination drücken.
Möglichkeiten:
Mikrowelle und Heißluft
Mikrowelle und Grill oben
Mikrowelle und Grill unten
Grill oben und Grill unten
MIKROWELLE
ZUR AUSWAHL DER LEISTUNGSSTUFE
X1 100 %
X2 70 %
X3 50 %
X4 30 %
X5 10 %
X6 0 %
X7 100 %
° C HEISSLUFT
ZUR AUSWAHL DER TEMPERATUR
X1 250° C X6 160° C
X2 230° C X7 130° C
X3 220° C X8 100° C
X4 200° C X9 70° C
X5 180° C X10 40° C
GRILL OBEN
GRILL UNTEN
AUSWAHL DER BETRIEBSART
+
+
+
+
R-8730 ENGLISH 12/07/2001 12:21 PM Page 27

Bratenfleisch
Steaks,
Schnitzel, Koteletts
Gulasch
Aufschnitt
Würstchen
Ente / Pute
Hähnchen
Hähnchenschenkel
Fisch im Stück
Fischfilet
Krabben
Brötchen, 2
Stück
Brot in Scheiben
Brot, ganz
Kuchen, 1 Stück
Torte, ganz Ø
24cm
Butter
Sahne
Käse in Scheiben
Obst wie
Erdbeeren,
Himbeeren,
Kirschen,
Pflaumen
1500
1000
500
200
500
200
300
1500
1200
200
700
400
300
80
250
1000
150
250
200
200
250
10
10
10
30
30
30
30
10
30
30
30
30
30
30
30
30
30
30
30
30
30
30
54 - 58
38 - 42
19 - 22
ca. 4
8 - 9
2 - 4
3 - 5
44 - 48
19 - 22
5 - 6
9 - 11
5 - 7
6 - 8
1 - 1
1
/
2
2 - 3
8 - 10
2 - 3
8 - 10
2 - 3
2 + 2
1 - 2
2 - 4
auf einen umgedrehten Teller legen,
nach der halben Auftauzeit wenden
auf einen Teller legen, nach der halben
Auftauzeit wenden
auf einen Teller legen, nach der halben
Auftauzeit trennen und wenden
auf einen Teller legen, nach je 1 Min.
die äußeren Scheiben abnehmen und
wenden
auf einen Teller, nebeneinander legen,
nach der halben Auftauzeit wenden
auf einen umgedrehten Teller legen,
nach der halben Auftauzeit wenden
auf einen umgedrehten Teller legen,
nach der halben Auftauzeit wenden
auf einen Teller legen, nach der halben
Auftauzeit wenden
auf einen Teller legen, nach der halben
Auftauzeit wenden
auf einen Teller legen, nach der halben
Auftauzeit wenden
auf einen Teller legen, nach der halben
Auftauzeit wenden und aufgetaute
Teile abnehmen
auf einen Teller legen, nur antauen
auf einen Teller legen, Scheiben
nebeneinander plazieren, nur antauen
auf einen Teller legen, nach der halben
Auftauzeit wenden
auf einen Teller legen
auf einen Tortenteller stellen
auf einen Teller legen, nur antauen
den Deckel entfernen; nach 2 Minuten
Auftauzeit in eine Schüssel geben und
weiter auftauen lassen
auf einen Teller legen, nur antauen
auf einen Teller gleichmäßig
nebeneinander legen, nach der halben
Auftauzeit wenden
30-90
30-90
30-60
10-15
10-15
5
5-10
30-90
30-90
10-15
30-60
5-10
5
-
5
15
10
60-90
15
5-10
10
5
28
TABELLEN
TABELLE : AUFTAUEN MIT MIKROWELLE
Lebensmittel Menge Leistungs- Ein- Auftauzeit Verfahrenshinweise Standzeit
-g- stufe stellung -Min- -Min-
-%-
R-8730 ENGLISH 12/07/2001 12:21 PM Page 28

1 - 2
1 - 2
2
-
-
-
-
-
3 - 4
-
-
-
-
-
29
TABELLEN
ENGLISH
Fischfilet
Forelle, 1 Stück
Gemüse
Pizza, dünn
Pizza, dünn
Pizza, dick
Baguette mit
Pizzabelag
Ciabatta mit
Pizzabelag
2 Stück
Kräuterbrot
Cheeseburger
Pommes frites
(dünne sorte
empfohlen für
Backöfen)
Kartoffelpuffer
(empfohlen für
Backöfen)
Bratkartoffeln
(empfohlen für
Backöfen)
KartoffelKroketten
(empfohlen für
Backöfen)
TABELLE : AUFTAUEN UND GAREN
Lebensmittel Menge Leistungs- Ein- Zeit Verfahrenshinweise Standzeit
-g- stufe stellung -Min- -Min-
-%-
400
250
300
450
300
350
450
250
185
350
145
300
400
450
400
100
100
100
100
100
-
-
100
-
-
70
-
-
100
-
-
100
-
-
70
-
50
-
100
-
100
-
-
100
-
-
100
-
-
10 - 12
6 - 8
7 - 9
9 - 11
2
1
/
2
- 3
1
/
2
2
3 - 3
1
/
2
1
/
2
2
4
1
2
2
1
/
2
- 1
3
1
/
2
- 4
1
1
/
2
- 2
2
1
/
2
- 3
1
3
3
3
2
3
1
/
2
- 4
6 - 7
5
5
2
5
6
1
1
/
2
6
4
1
/
2
1
auf einen Teller legen mit
Mikrowellenfolie abdecken
auf einen Teller legen mit
Mikrowellenfolie abdecken
in eine Schüssel mit Deckel,
Wasserzugabe laut Herstellerangaben,
nach der halben Zeit umrühren
aus der Packung nehmen, direkt auf
den Drehteller legen
aus der Packung nehmen, direkt auf
den Drehteller legen
aus der Packung nehmen, direkt auf
den Drehteller legen
aus der Packung nehmen, direkt auf
den Drehteller legen
aus der Packung nehmen, direkt auf
den Drehteller legen
aus der Packung nehmen, direkt auf
den Drehteller legen
aus der Packung nehmen, direkt auf
den Drehteller legen
direkt auf den Drehteller legen
direkt auf den Drehteller legen
direkt auf den Drehteller legen
direkt auf den Drehteller legen
R-8730 ENGLISH 12/07/2001 12:21 PM Page 29

nicht abdecken
Sauce mit Wasser beträufeln,
abdecken, zwischendurch umrühren
abdecken, nach dem Erhitzen
umrühren
mit etwas Wasser beträufeln,
abdecken, zwischendurch umrühren
mit etwas Sauce beträufeln
auf einen Teller legen, die Haut
mehrmals einstechen
Deckel entfernen, nach dem Eritzen gut
umrühren und die Temperatur prüfen
in einer Suppentasse schmelzen
in einer Suppentasse schmelzen
direkt auf den Drehteller stellen
-
-
5
5
30
TABELLEN
Laugengebäck
Apfelstrudel
Lasagne
BackCamembert
Fischfilet à la
Bordelaise
TABELLE : AUFTAUEN UND GAREN
Lebensmittel Menge Leistungs- Ein- Zeit Verfahrenshinweise Standzeit
-g- stufe / stellung -Min- -Min-
Heissluft-
temperatur
300
600
400
150
400
10 %
10 %/200˚ C
10 %/230˚ C
100 %
50 %
30 %
30 %
100 %
50 %
30 %
3
12
25
4
1/
2
6
6
5
2
4
1/
2
6
9
nach Herstellerangaben die Teiglinge
auf das mitgelieferte Backpapier und
dann direkt auf den Drehteller legen
auf einen Tortenteller legen
aus der Verpackung nehmen und in
eine hitzebeständige Auflaufform
umfüllen, mit etwas Wasser beträufeln
direkt auf den Drehteller
in der Aluminiumform ohne Deckel auf
den Drehteller stellen
Getränke,
1 Tasse
Tellergericht
Eintopf, Suppe
Beilagen
Fleisch,
1 Scheibe
Bockwürste
Babynahrung,
1 Glas
Margarine,
Butter schmelzen
Schokolade
schmelzen
Hot Dog
TABELLE : ERHITZEN VON GETRÄNKEN UND SPEISEN
Lebensmittel Menge Leistungs- Ein- Zeit Verfahrenshinweise
-g- stufe stellung -Min-
-%-
150
400
500
200
400
200
500
200
250
190
50
100
200
100
100
100
100
100
100
100
100
30
50
100
50
100
ca. 1
3 - 5
4 - 6
1
1
/
2
- 3
4 - 5
ca. 2
3 - 5
3 - 4
3
1
/
2
- 4
1
/
2
- 1
1
/
2
- 1
ca. 3
ca. 1
1
/
2
R-8730 ENGLISH 12/07/2001 12:21 PM Page 30

direkt auf den Drehteller legen, nach
(*) wenden
direkt auf den Drehteller stellen
direkt auf den Drehteller legen
direkt auf den Drehteller legen, nach
(*) wenden
direkt auf den Drehteller legen
31
TABELLEN / REZEPTE
ENGLISH
Käsetoast
Gesamtgarzeit: ca. 5 Minuten
Zubereitung: Toastbrot toasten, mit Butter bestreichen, mit einer Scheibe gekochten Schinken, einer Scheibe
Ananas und einer Scheibe Schmelzkäse belegen auf den Drehteller legen und garen.
1.
1
/2- 1 Min. 50%
2. 5 - 7 Min.
Grillwürst
5 Stck.
Gratinieren von
Aufläufen
Cheeseburger
Frikadellen
Pizza
TABELLE : GAREN UND GRILLEN VON GEKÜHLTEN LEBENSMITTELN
Lebensmittel Menge Leistungs- Ein- Zeit Verfahrenshinweise
-g- stufe stellung
-Min-
-%-
400
300
500
300
9 - 11 (*)
6 - 7
10 - 15
1
1
/
2
2 (*)
2
1 - 1
1
/
2
1 - 1
1
/
2
3 - 3
1
/
2
-
-
-
100
100
100
100
Deutschland
Rührei mit Zwiebeln und Speck
Gesamtgarzeit: 3
1
/
2
- 4
1
/
2
Minuten
Zutaten
5 - 10g Margarine
25 g Zwiebeln, fein gehackt
40 g Speck
3 Eier
3 EL Milch
Salz, Pfeffer
Zubereitung
1. Das Fett, die Zwiebeln und den Speck auf dem
Drehteller verteilen und andünsten.
2 - 3 Min. 50 % +
2. Die Eier mit der Milch und den Gewürzen
verschlagen.
Die Eiermilch über die Zwiebeln und den Speck
geben und stocken lassen.
1
1
/
2
Min. 100 % +
Das Rührei zwischendurch einmal umrühren.
Frankreich
Croque Monsieur
Gesamtgarzeit: ca. 5 Minuten
Zutaten
2 Scheiben Toast
20 g Butter
1 - 2 Scheiben Scheiblettenkäse
(je nach Größe des Toasts)
1 Scheibe gek. Schinken
1 EL Crème fraîche
ca. 30 g geriebener Käse
Zubereitung
1. Die Toastscheiben mit der Butter bestreichen.
2. Den Käse und anschließend den Schinken auf eine
Toastscheibe legen. Mit Crème fraîche
bestreichen.
3. Mit der zweiten Toastscheibe belegen und mit
dem geriebenen Käse bestreuen.
Den Croque auf den Drehteller legen und garen.
1. 1 Min. 30 % +
2. 4 Min.
R-8730 ENGLISH 12/07/2001 12:21 PM Page 31

32
SPECIFICATIONS
AC Line Voltage
Distribution line fuse/circuit breaker
AC Power required: Microwave
Bottom Grill
Grill
Bottom Grill/Microwave
Top Grill/Microwave
Top and Bottom Grills
Convection
Triple Function
Output power: Microwave
Top Grill
Bottom Grill
Convection
Microwave Frequency
Outside Dimensions
Cavity Dimensions
Oven Capacity
Turntable
Weight
Oven lamp
: 230V, 50 Hz, single phase
: Minimum 16 A
: 1,45 kW
: 550 W
: 1000 W
: 1,95 kW
: 2,4 kW
: 1500 W
: 1525 W
: 2,9 kW
: 900 W (IEC 60705)
: 1000 kW
: 500 kW
: 1500 kW
: 2450 MHz
: 520 mm (W) x 309 mm (H) x 488 mm (D)
: 349 mm (W) x 207 mm (H) x 357 mm (D)
: 26 litres
: ø325 mm, metal
: 19 kg
: 25 W/240 - 250 V
This oven complies with the requirements of Directives 89/336/EEC and 73/23/EEC as amended by
93/68/EEC.
SPECIFICATIONS ARE SUBJECT TO CHANGE WITHOUT NOTICE AS PART OF
CONTINUOUS IMPROVEMENT
R-8730 ENGLISH 12/07/2001 12:21 PM Page 32

33
ÖSTERREICH
Bei einer Reklamation Ihrer SHARP Mikrowelle wenden Sie sich bitte an Ihren Fachhändler oder an
eine der nachfolgend aufgeführten SHARP SERVICE Niederlassungen.
Manfred Mayer GmbH, Stipcakgasse 6, 1234 Wien, Phone: 01-6093120, Fax: 01-6993629 / MCL-Service
‘GmbH, Deutschstr. 19, 1232 Wien, Phone: 01-6168800, Fax: 01-6168800-15 / Karl Rother, Simmeringer
Hauptstr. 11, 1110 Wien, Phone: 01-7498432, Fax: 01-7498432-12 / Roland Göschl, Bayerhamerstr. 12c, 5020
Salzburg, Phone: 662-882307, Fax: 662-881926 / Franz Schuhmann, Gablonzerweg 18, 4030 Linz, Phone: 732382280, Fax: 732-382280-8 / Arnold Moser, An der Heufurt 28, 6900 Bregenz, Phone: 5574-75777, Fax: 557475777 / Anton Reitmeir, Leopoldstr. 57, 6020 Innsbruck, Phone: 512-562277, Fax: 512-562277 /
Scheuermann, Rennsteinerstr. 8, 9500 Villach, Phone: 4242-21174, Fax: 4242-21174 / Pichler, Am Wagrain
342, 8055 Graz, Phone: 316-291292, Fax: 316-291292 / Audio Video Service, Sonnengasse 13, 9020
Klagenfurt, Phone: 463-43114, Fax: 463-43113
BELGIUM
En cas d´une réclamation concernant une four a micro-onde SHARP, nous vous prions de vous
adresser à votre spècialiste ou à une adresse des SHARP Services suivantes.
Indien uw magnetron problemen geeft kunt u zich wenden tot uw dealer of een van de
onderstaande Sharp service centra.
AVTC, Kleine Winkellaan 54,1853 Strombeek-Bever, Phone:02/2674019, Fax:2679670,
ETS HENROTTE,Rue Du Campinaire 154,6240 Farciennes, Phone: 071/396290, Fax:391237
Nouvelle Central Radio (N.G.R) Rue des Joncs 15 L-1818 HOWALD Phone: 00352404078, Fax. 2402085
NEDERLAND
Indien uw magnetron problemen geeft kunt u zich wenden tot uw dealer of naar onderstaand
Sharp Service Centrum.
SHARP ELECTRONICS BENELUX BV,- Helpdesk -,Postbus 900,3990 DW Houten, Telefoon: 09-007427728, Fax:
030-6359621
DEUTSCHLAND
Bei einer Reklamation Ihrer SHARP Mikrowelle wenden Sie sich bitte an Ihren Fachhändler oder an
eine der nachfolgend aufgeführten SHARP SERVICE Niederlassungen.
03048 Groß Garglow, Cottbuser Str.129, Bernd Mindach, Tel:, 0355-539987, Fax:, 0355-5265685 / 04159
Leipzig, Max-Liebermann-Straße 4 a, Rudi Franz, Tel: 0341-9112525, Fax: 0341-9112526 / 04600 Altenburg,
Gabelentzstraße 15 A, Mechanik Altenburg E.G., Tel: 03447-311102, Fax: 03447-315253 / 06217 Merseburg,
Gotthardstraße 30, Looke & May GmbH, Tel: 03461-214121, Fax: 03461-216891 / 06295 Eisleben, Hallesche
Straße 36, Hausger. Kundend. Eisleben, Tel: 03475-603079, Fax: 03475-747262 / 06618 Naumburg,
Wenzelstraße 15, Hausgeräte & Service GmbH, Tel: 03445-202016, Fax: 03445-202016 / 06844 Dessau,
Albrechtstraße 116-118, Dessau-Electric GmbH, Tel: 0340-261270, Fax: 0340-213332 / 07407 Rudolstadt, Emil
Hartmann Straße 2, Elektro Ernst Granowski, Tel: 03672-352123, Fax: 03672-357097 / 07545 Gera, Amthorstraße
12, Ess Hardware Service GmbH, Tel: 0365-8820115, Fax: 0365-8820116 / 07973 Greiz, Reichenbacher Straße
44 d, Elektro Riederer Haushaltgeräte, Tel: 03661-3148, Fax: 03661-430142 / 08280 Aue, Bahnhofstraße 21, EHS
Elektro-Hausgeräte SVC GmbH, Tel: 03771-552222, Fax: 03771-552255 / 08523 Plauen, Weststraße 63,
Elektrotechnik Plauen GmbH, Tel: 03741-2120, Fax: 03741-212259 / 09221 Neukirchen, Hauptstraße 74,
Walther Elektro, Tel: 0371-217096, Fax: 0371-217090 / 09246 Pleißa, Zeppelinstraße 8 a, Hans Krempl
Haustechnik GmbH, Tel: 03722-73780, Fax: 03722-737822 / 09328 Lunzenau, Schulstraße 6, Peter Welsch
GmbH, Tel: 037383-6434, Fax: 037383-6448 / 09376 Oelsnitz, Bahnhofstraße 43, Elektrotechnik Oelsnitz-GmbH,
Tel: 037298-2677, Fax: 037298-2678 / 12157 Berlin, Cranachstraße 2, Michael Kittler, Tel: 030-8551335, Fax:
030-8554835 / 18055 Rostock, Timmermannstrat 5, Hetec, Tel: 0381-36231, Fax: 0381-36231 / 18435
Stralsund, Kedingshäger Straße 78, RDS Haushaltsgeräte GmbH, Tel: 03831-391426, Fax: 03831-390121 /
20357 Hamburg, Schulterblatt 132, Dieter Möller, Tel: 040-435332, Fax: 040-4302120 / 20537 Hamburg,
Eiffestraße 398, Deubel+Höfermann Elektronic GmbH, Tel: 040-257227, Fax: 040-2500192 / 22459, Hamburg,
Seesrein 35, Dieter A. Volbrecht VDI Klima und Kälte Service, Tel: 040 - 5517331, Fax: 040 - 5519996 / 23562
Lübeck, Helmholtzstraße 12, Lutz H. Boenisch, Tel: 0451-51929, Fax: 0451-56787 / 24116 Kiel, Eckernförder
Straße 93, Jürgen Skop GmbH, Tel: 0431-13038, Fax: 0431-13811 / 24357 Fleckeby, Südring 14, Kaack ElektroHaushaltgeräte Service GmbH, Tel: 04354-700, Fax: 04354-1311 / 24975 Husby, Flensburger Straße 41, Günter
Josten, Tel: 04634-422, Fax: 04634-723 / 25770 Hemmingstedt, Koesliner Straße 18, Dirk Stübner Dithmarscher
Hausgeräte Service, Tel: 0481-64943, Fax: 0481-64764 / 26655 Westerstede, Südring 37, Gerhard Ahrenholtz
GmbH, Tel: 04488-84770, Fax: 04488-847711 / 27404 Heeslingen, Kirchstraße 9-11, Helmut Willenbrock
Elektro-Kälte-Radio, Tel: 04281-1031, Fax: 04281-6467 / 27478 Cuxhaven, Am Kanal 5, Oskar Wieandt & Sohn
OHG, Tel: 04724-81300, Fax: 04724-813050 / 28207 Bremen, Neidenburger Straße 20, Hansa Haushaltsgeräte
Service GmbH, Tel: 0421-492526, Fax: 0421-440932 / 29439 Lüchow, Güldenboden 25, Elektro-Kittler, Tel:
05841-3322, Fax: 05841-3322 / 30926 Seelze, Lange-Feld-Straße 122, Strickling Werkskundendienst, Tel: 0511400399-9, Fax: 0511-40039920 / 34123 Kassel, Heinrich-Hertz-Straße 9, Kältedienst v. Rappard, Tel: 0561-
.
SERVICE NIEDERLASSUNGEN . ADDRESSES D’ENTRETIEN. ONDERHOUDSADRESSEN . DIRECCIONES DE SERVICIO . INDIRIZZI DI SERVIZIO
.
R-8730 ENGLISH 12/07/2001 12:21 PM Page 33

34
5809545, Fax: 0561-5809570 / 34128 Kassel, Ahnatalstraße 84, Elektro Mohrhenne, Tel:, 0561-61727, Fax:,
0561-65470 / 35037 Marburg, Wilhelmstraße 16, Hans-Georg Fuchs, Tel:, 06421-22424, Fax:, 06421-27549 /
35415 Pohlheim, Ludwigstraße 13-15, Jung KDZ, Tel: 06403-61131, Fax:, 06403-62151 / 36088 Hünfeld,
Hauptstr. 22, Elektro Vogt, Tel: 06652-2215, Fax: 06652-5782 / 37671 Höxter, Krämerstraße 8, Elektro Nonn, Tel:
05271-7959, Fax: 05271-35053 / 38444 Wolfsburg, Brandgehaege 5 C, Gärtner Elektro-Haustechnik, Tel:
05308-4070, Fax: 05308-40740 / 39106 Magdeburg, Ankerstr. 9, Industrie-Elektronik Magdeburg GmbH, Tel:
0391-5430402, Fax: 0391-5433520 / 40476 Düsseldorf, Rather Straße 21, Horst Leven, Tel: 0211-486025, Fax:
0211-443399 / 41065 Mönchengladbach, Gutenbergstraße 28, Horst Hommers Kundendienst-Center, Tel: 02161603256u.57, Fax: 02161-651951 / 42781 Haan, Talstraße 8 b, Horst Kerkühn Elektro-Haustechnik, Tel: 021294466+53550, Fax: 02129-34037 / 44357 Dortmund, Freigrafenweg 23-29, Gehado Elektronik Service GmbH,
Tel: 0231-9370000, Fax: 0231-93700078+44 / 44869 Bochum, Ruhrstraße 181, ML Werks-Service GmbH, Tel:
02327-77899, Fax: 02327-74692 / 45219 Essen, Corneliusstraße 39, R. Drengenburg, Tel: 02054-84114, Fax:
02054-15238 / 46045 Oberhausen, Feldmannstraße 76, Dieter Kroppen, Tel: 0208-871711, Fax: 0208-876652
/ 48165 Münster-Hiltrup, Rohrkampstraße 23, Günter Pfeifer Großküchentechnik, Tel: 02501-3033, Fax: 0250124277 / 49324 Melle, Plettenberger Straße 50, H. U. Borgards GmbH, Tel: 05422-949740, Fax: 05422-9497-92 /
51598 Friesenhagen, Mühlenhof 6, Hans Krempl Haustechnik GmbH, Tel: 02734-7377, Fax: 02734-40618 /
52146 Würselen, De Gasperistraße 6+10, Hubert Hamacher, Tel: 02405-9600+9609, Fax: 02405-2704 /
53757 Sankt Augustin, Kölnstraße 4, HDL Elektro-Kundendienst GmbH, Tel: 02241-920330, Fax: 02241-920334
/ 55130 Mainz, Nur telefonische Annahmestelle, Norbert Schwamb GmbH, Tel: 06131-881070 / 55543 Bad
Kreuznach, Industriestraße, Hans Krempl Haustechnik GmbH, Tel: 0671-794331, Fax: 0671-794369 / 56070
Koblenz, August-Horch-Straße 14, Hans Krempl Haustechnik GmbH, Tel: 0261-8909173, Fax: 0261-8909199 /
57080 Siegen, Gosenbacher Hütte 44, Hans Krempl Haustechnik GmbH, Tel: 0271-354114, Fax: 0271-351408 /
58239 Schwerte, Holzener Weg 79, HHKT Electronica 2000 Josef Schlütz GmbH, Tel: 02304-982100, Fax: 02304-
86360 / 61381 Friedrichsdorf, Bahnstraße 17 a, O. Hollmann, Tel: 06172-778276, Fax: 06172-75883 /
63739 Aschaffenburg, Maximilianstraße 8, Radio-Fernseh Reis, Tel: 06021-15177, Fax: 06021-15199 / 65239
Hochheim, Eltviller Straße 14, Norbert Schwamb GmbH, Tel: 06146-4085, Fax: 06146-4088 / 65627 Elbtal-
Hangenmeilingen, Am Ohlenrod 10, Rudi Wagner, Tel: 06436-3444, Fax: 06436-3444 / 65931 Frankfurt,
Nur telef.Annahmestelle, Norbert Schwamb GmbH, Tel: 069-371525 / 66117 Saarbrücken, Zinzinger Straße 13,
Hans Krempl Haustechnik GmbH, Tel: 0681-5008522, Fax: 0681-5008533 / 67434 Neustadt, Saarlandstraße 55,
Hans Krempl Haustechnik GmbH, Tel: 06321-83077, Fax: 06321-83077 / 68309 Mannheim, Heppenheimerstraße
23, Hans Krempl Haustechnik GmbH, Tel: 0621-7184621, Fax: 0621-7184628 / 68526 Ladenburg, Brauergasse
2, Salinger Elektro Service, Tel: 06203-3341, Fax: 06203-16919 / 70186 Stuttgart, Klippeneck Straße 1, Elektro
Herterich Techn. Kundendienst, Tel: 0711-4687023, Fax: 0711-4687024 / 75236 Kämpfelbach, Goethestraße
19, Horst Frei, Tel: 07232-1518, Fax: 07232-5238 / 76185 Karlsruhe, Lotzbeckstraße 9, Electronic Service
Franke, Tel: 0721-5700720-23, Fax: 0721-5700736 / 76872 Winden, Hauptstraße 103, Hans Krempl Haustechnik
GmbH, Tel: 06349-8571, Fax: 06349-3390 / 78462 Konstanz, Nur telef. Annahmestelle, Elektro Herterich, Tel:
07531-27923 / 78737 Fluorn-Winzeln, Schafbaumstraße 9, Edmund Schneider, Tel: 07402-482, Fax: 074028014 / 79650 Schopfheim, Feldbergstraße 21, R. Grossmann, Tel: 07622-7673, Fax: 07622-61900 / 80339
München, Schwanthalerstraße 110, Kesel & Schnitt, Tel: 089-505802, Fax: 089-5021596 / 85095 Denkendorf-
Zandt, Michlstraße 3, Elektro Pfeiffer, Tel: 08466-1319, Fax: 08466-1319 / 85413 Hörgertshausen,
Schlosstraße 7, Elektro Radlmaier, Tel: 08764-9306-0, Fax: 08764-9306-30 / 86157 Augsburg, Stadtberger Straße
67, J. Haslinger Elektro-Geräte Kundendienst, Tel: 0821-523125, Fax: 0821-526664 / 87439 Kempten,
Heiligkreuzer Straße 17, Radio Hartmann, Tel: 0831-594646, Fax: 0831-91319 / 89231 Neu-Ulm, Gartenstraße
4, Elektrotechnik Schneider, Tel: 0731-85897, Fax: 0731-74681 / 91522 Ansbach, Am Ring 17, Elektro Merk
GmbH, Tel: 0981-89574, Fax: 0981-86715 / 93102 Pfatter, Regensburger Straße 60, Franz Bernhard, Tel: 0948190060, Fax: 09481-90061 / 94130 Obernzell, Hameter Straße 31, Elektro Service Schurig, Tel: 08591-2400, Fax:
08591-1285 / 96052 Bamberg, Aronstraße 2 a, Bernhard Jackl, Tel: 0951-9370245, Fax: 0951-9370247 /
97070 Würzburg, Untere Johannitergasse 16, Radio Wels City Service GmbH, Tel: 0931-3557119, Fax: 093114151 / 97318 Kitzingen, Herrnstraße 4-6, Hoffritz GmbH, Tel: 09321-4221/32021, Fax: 09321-32185 /
98724 Neuhaus, Eisfelder Straße 32, DLC Haustechnik GmbH, Tel: 03679-79060, Fax: 03679-790620 / 99096
Erfurt, Goethestraße 14, Ernst Grüsser, Tel: 0361-3465719, Fax: 0361-3465719 / 99734 Nordhausen,
Töpferstraße 10, Südharzer Dienstleistungs-Gesellschaft GmbH, Tel: 03631-983651, Fax: 03631-983654 / 99817
Eisenach, Bahnhofstraße 17, Blitz Elektro-Elektronik GmbH, Tel: 03691-292930, Fax: 03691-292915
FRANCE
En cas de réclamation pour les fours micro-ondes SHARP, nous vous prions de vous adresser à
votre spécialiste ou à l’une des stations techniques agréées SHARP suivantes :
A.A.V.I.: 1, Rue du Mont de Terre, 59818 Lesquin Cédex. Tél : 03 20 62 18 98 - Fax : 03 20 86 20 60.
Départements desservis : 02, 08, 59, 62, 80 / ASYSTEC : P.A. Charles de Gaulle, 4 rue des Artisans, 95190
Goussainville. Tél : 01 39 88 80 00 - Fax : 01 34 38 91 20. Départements desservis . 60, 77, 93, 95 / ATELIER
ROUSSEL : 12, Bld Flandre Dunkerque, 56100 Lorient. Tél : 02 97 83 07 41 - Fax: 02 97 87 02 36. Départements
desservis : 22,29,35,44,56 / C.E.A.T. : 9, Rue de Venise , 21000 Dijon. Tél : 03 80 66 15 57 - Fax: 03 80 67 12
36. Départements desservis : 10,21,25,39,52,58,71,89 / C.M.T.S. : 38, Rue des Ormeaux , 75020 Paris. Tél : 01
.
SERVICE NIEDERLASSUNGEN . ADDRESSES D’ENTRETIEN. ONDERHOUDSADRESSEN . DIRECCIONES DE SERVICIO . INDIRIZZI DI SERVIZIO
.
R-8730 ENGLISH 12/07/2001 12:21 PM Page 34

35
43 70 20 00 - Fax: 01 43 70 36 46. Départements desservis : 75,77,78,91,92,93,94,95 / C.T.E. : Zone Tilly - 116
rte de Thionville, 57140 Woippy. Tél : 03 87 30 14 14 - Fax: 03 87 30 85 07. Départements desservis :
51,54,55,57,88 / ELECMA : 6 Bld Gueidon , 13013 Marseille. Tél : 04 91 06 22 56 - Fax : 04 91 06 22 90.
Départements desservis : 13,26,30,34,43,48,83,84 / ELECTRO SERVICE : 21 rue de Mulhouse, BP 122, 68313
ILLZACH. Tél : 03 89 62 50 00 - Fax : 03 89 50 80 14. Départements desservis : 67,68,70,90 / M.E.C. :118 Bld
Tonnellé, 37020 Tours. Tél : 02 47 77 90 90 - Fax : 02 47 77 90 91. Départements desservis.
18,36,37,41,45,44,49,79,85,86 / M.R.T. : 74, Rue Albert Einstein , 72021 Le Mans Cedex. Tél : 02 43 28 52 20 -
Fax: 02 43 24 93 81. Départements desservis : 28,53,61,72 / ROSSIGNOL : ZL du Brezet Est, 6 rue P.
Boulanger,63100 Clermont Ferrand. Tél : 73 91 93 09, Fax:73 92 28 79. Départements desservis : 3, 15, 19, 23,
43, 63 / SETELEC : 23, Rue du Chatelet,76420 Bihorel les Rouen. Tél : 35 60 64 39 - Fax:35 59 93. 48.
Départements desservis : 14,27,50,76 / S.T.E. : 3, Chemin de l’Industrie,06110 Le Cannet Rocheville. Tél : 93 46 05
00 - Fax: 93 46 51 18. Départements desservis : 04,06 / S.T.V.S. : 18, Rue Benoit Malon,42000 Saint Etienne. Tél :
77 32 74 57,Fax: 77 37 45 29. Départements desservis : 03,07,42,43,63 / S.T.V.S. : 10, Chemin Saint-Gobain
,69190 Saint Fons. Tél : 78 70 03 32 - Fax: 78 70 86 61. Départements desservis : 01,38,69,71,73,74 / TECH
SERVICE : Batiment G-Impasse Boudeville ,31100 Toulouse. Tél : 61 44 98 45 - Fax: 62 14 16 13. Départements
desservis : 09,11,31,32,33,40,47,64,65,66,81,82 / TIMO VIDEO : 29 rue Elisabeth,91330 Yerres. Tél : 69 48 04
80 - Fax: 69 83 36 10. Départements desservis :28, 45, 77, 89, 912, 94 / U.N.T.D. : 1, Rue des Lourdines, 76000
Rouen. Tél : 35 72 28 04 - Fax: 35 73 18 32. Départements desservis :14,27,50,76
ITALIA
NEL CASO SI VERIFICASSERO PROBLEMI ALLA VOSTRA APPARECCHIATURA POTRETE RIVOLGERVI
PRESSO UN NOSTRO CENTRO DI ASSISTENZA AUTORIZZATO SHARP
Microcentro, Via Falloppio 11, 20100 Milano, Phone: 02-26827306 / Rota G., Via Martinella 65, 24020 Torre
Boldone (BG), Phone: 035-344492 / ServiceTVA, Via Vergnano 59, 25127 Brescia, Phone: 011-2296000, Fax.
011253921 / Tre Esse, Via M. Coppino 96/e, 10147 Torino, Phone: 011-2296000, Fax: 011-253921 / Video
Service s.n.c., Via Giordano 52/54, 16100 Genova , Phone: 010-6043580 / Tecnoservice s.n.c., Via San
Vigilio 64/b-c-d, 39100 Bolzano, Phone: 0471-289062 / Campi, Via Noalese 87, 31100 Treviso, Phone: 0422436245, Fax: 0422-435996 / Video Service, Via Vitruvio 11, 37100 Verona, Phone: 045-566299, Fax: 045573865 / Video Hi-fi, Via Longhi 16 a/b, 40128 Bologna, Phone: 051-360986, Fax: 051-366863 / Aerre Digit,
Via Marbellini 10/12, 50127 Firenze, Phone: 055-410874, Fax: 055-411490 / Saec di Coppa, Via Rinchiostra
Nord 34, 54100 Massa, Phone: 0585-251724, Fax: 0585-791177 / Tecnoconsult, Via Mad. Alta 185,
06100Perugia, Phone: 075-5003089 / Digitecnica s.n.c., Via Zuccarini 1- Zona Baraccola, 60131 Candia (AN)
Phone :071-2866067 / S.A.R.E. s.r.l., Via Barbana 35/37, 00142 Roma, Phone 06-5406796 / Tecno Labs, Via
Naz. Delle Puglie 294, 80026 Casoria (NA), Phone: 081-5845923 / Marcantonio, Via G.M.Giovene 45, 70124
Bari, Phone: 080-5618029 / Audio Video, Via A. de Gasperi 44, 88018 Vibo Valentia , Phone: 0963-45571/2 /
A.V.S., Via Sassari2/c, 95100 Catania, Phone: 095-446696, Fax: 095-434337 / AS. TEC., Via R. Villasanta 227,
09100 Cagliari, Phone: 070-524153, Fax: 070-504109
ESPANA
En caso de una reclamación con vuestra SHARP Microwave, preguntan por favor la casa dónde han
comprado su máquina o infórmanse en una de las SHARP Service casas siguientes.
MERINO NICOLAS JOSE A., - 945/ 25.18.92 - AV JUDIZMENDI 24, 01003 VITORIA-GASTEIZ, ALAVA / TELE-
COLOR - 96/585.24.60, CL DEL VENT 9, 03500 BENIDORM, ALICANTE / TELECOM ELECTRONICA -
96/539.50.21, CL HERNAN CORTES 8, 03600 ELDA, ALICANTE / EUROSAT, S.L. - 96/525.80.40, CL
MONTERO RIOS 33 03013 ALICANTE, ALICANTE / ELECTRONICA GOMEZ - 96/ 546.75.81, CL BALTASAR
TRISTANY 100, 03201 ELCHE, ALICANTE / ANGEL AVELLAN PUIG - 965/ 21.32.55, CL POETA QUINTANA 13,
03004 ALICANTE, ALICANTE / ELECTRONICA ELER - 965/ 25.63.32, CL PINOSO 8, 03012 ALICANTE,
ALICANTE / INSAT, CB - 971/ 36.53.18, CL PINTOR CALBO 30, 07703 MAHON, BALEARES (MENORCA) /
REPARACIONES ORTEGA - 971/ 39.01.55, CL VIA PUNICA 33, 07800 IBIZA, BALEARES (IBIZA). / AUDIO
IMAGEN - 971/ 31.46.59, CL JOSE RIQUER LLOBET 8, 07800 IBIZA, BALEARES (IBIZA) / IRTESA ELECTRONICA -
971/ 20.47.02, CL JAUME FERRAN 72 BJOS, 07004 PALMA DE MALLORCA, BALEARES (MALLORCA) /
INSTALACIONES MAES, S.L - 971/ 27.49.47, CL SON NADAL 63, 07008 PALMA DE MALLORCA, BALEARES
(MALLORCA) / ELECTRON. PONS GOMILA SA - 971/ 37.22.76, CR NUEVA 162, 07730 ALAYOR, BALEARES
(MENORCA) / JOSE MARQUES ANGLADA,S.L. - 971/ 38.54.54, CL LEPANTO 19, 07760 CIUDADELA,
BALEARES (MENORCA) / ANOIA ELECTROVISIO - 93/ 805.11.90, AV BALMES 12, 08700 IGUALADA,
BARCELONA / AUDIO VISION - 385.78.08, CL MARE DEU MONTSERRAT 22, 08922 STA.COLOMA, BARCELONA
/ SAC-2, S.C.P. - 331.77.54, CL RIERA BLANCA 113, 08028 BARCELONA, BARCELONA / FERMO - 465.22.00,
AV MORERA 5, 08915 BADALONA, BARCELONA / ELEC.SAFONT - 821.30.03, CL GRAL. MANSO SOLA 31,
08600 BERGA, BARCELONA / SERVINTERS, S.C.C.L. - 389.44.60 - PZ CASAGEMES 20, 08911 BADALONA,
BARCELONA / TECNIK’S, S.C.P. - 630.11.20, CL JOAN BARDINA 32, 08830 SANT BOI DE LL, BARCELONA / CE.
VA. SAT, S.C. - 785.51.11, CR MATADEPERA 87, 08225 TERRASSA, BARCELONA / LAUREA S.A.T. - 889.02.48,
CL GUILLERIES BIS 20, 08500 VIC, BARCELONA / CE. VA. SAT, S.C. - 710.76.13, PS RUBIO I ORS 105, 08203
SABADELL, BARCELONA / VILLARET POLO RAMON - 798.02.48, CL MOLI DE VENT 21, 08303 MATARO,
.
SERVICE NIEDERLASSUNGEN . ADDRESSES D’ENTRETIEN. ONDERHOUDSADRESSEN . DIRECCIONES DE SERVICIO . INDIRIZZI DI SERVIZIO
.
R-8730 ENGLISH 12/07/2001 12:21 PM Page 35

36
BARCELONA / ESTARLICH PRADAS VICENTE - 766.22.33, CL INDUSTRIA 131, 08370 CALELLA, BARCELONA /
VIDEOCOLOR - 93/ 454.99.08, CL VILLARROEL 44, 08011 BARCELONA, BARCELONA / ELDE - 872.85.42, CL
BRUCH 55, 08240 MANRESA, BARCELONA / PULGAR I EDO S.L. - 93/ 436.44.11, CL CASTILLEJOS 333, 08025
BARCELONA, BARCELONA / ELECTRONICA MATEOS - 849.28.77, CR DE CALDAS (BAJOS) 76, 08400
GRANOLLERS, BARCELONA / ANTONIO ROBLES SANCHEZ - 872.55.41, CL SANT BARTOMEU 42, 08240
MANRESA, BARCELONA / TOP ELECTRONICA, 890.35.91, CL MISSER RUFET 4 bjos, 08720 VILAFRANCA
PENEDES, BARCELONA / LA CLINICA DEL ELECTROD., 93/ 236.44.11, CL BALMES 160, 08008 BARCELONA,
BARCELONA / FIX SERVICIO TECNICO, 675.59.02, CL SANT RAMON 3 L-2, 08190 SANT CUGAT VALLES,
BARCELONA / SONITEV ELECTRONICA, C.B., 815.74.44, CL AIGUA 143, 08800 VILANOVA I GELTRU,
BARCELONA / TOTVISIO ELECTRONICA S.L., 873.88.81, PJ FERRER 14, 08240 MANRESA, BARCELONA / 4 EN
1 REPARACIONES, 430.97.2, CL TAQUIGRAFO MARTI 19, 08028 BARCELONA, BARCELONA / MOVILFRIT
S.A., 93/ 630.14.53, CL OSCA 11-C POL.SALINAS, 08830 SANT BOI DE LL., BARCELONA / TELE-SERVEI BRUC
S.L., 93/ 207.08.08, CL ROSSELLO 289, 08037 BARCELONA, BARCELONA / SABE ELECTRONICA, 964/
21.52.65, CL JOAQUIN COSTA 46, 12004 CASTELLON, CASTELLON / F.CARCELLER-F.CERVERA,C.B, 964/
45.44.65, CL CARRERO 29, 12500 VINAROS, CASTELLON / ASISTE, S.L., 964/ 21.57.69, AV DE VALENCIA
NAVE 19, 12006 CASTELLON, CASTELLON / TECHNOTRONIC, 971/ 32.27.62, CL IBIZA 12, 07860 SAN FCO.
JAVIER, FORMENTERA / REPARACIONES PILSA S.C., 972/ 20.66.96, CL J. PASCUAL I PRATS 8, 17004
GERONA, GERONA / SATEL, 972/ 26.55.19, PS DE BARCELONA 12, 17800 OLOT, GIRONA / SALLERAS PUIG
JUAN, 972/ 50.67.54, CL POU ARTESIA 4, 17600 FIGUERES, GIRONA / RIERA DAVIU, 972/ 50.32.64, CL
TORRAS Y BAGES 19, 17600 FIGUERES, GIRONA / LAVISON, C.B., 972/ 23.01.22, CL MONTSENY 35, 17005
GIRONA, GIRONA / MONJE URE#A MANUEL, 972/ 70.25.52, CL SANT QUINTI 33, 17534 RIBES DE FRESER,
GIRONA / ESTUDIOS 3, C.B., 943/ 45.37.97, PZ DE LOS ESTUDIOS 3, 20011 SAN SEBASTIAN, GUIPUZCOA /
NOMBRE1, TLFNO, CALLE, CIUDAD, PROVINCIA / TEKNIBAT ELECTRONICA, 943/ 70.24.37, CL
ZEZENBIDE 4, 20600 EIBAR, GUIPUZCOA / REPARACIONES URRUTI S.L., 943/ 45.84.10, PS AINTZIETA 32,
20014 SAN SEBASTIAN, GUIPUZCOA / TELESERVIC, 974/ 31.34.44, CL ESTADILLA 6, 22300 BARBASTRO,
HUESCA / SERVIELECTRO, 974/ 21.00.14, CL BALTASAR GRACIAN 5, 22002 HUESCA, HUESCA / TELESONIC,
974/ 36.32.97, CL TERUEL 6, 22700 JACA, HUESCA / TELESERVICIO, 974/ 22.01.39, CL TENERIAS 20, 22001
HUESCA, HUESCA / SATEF, 973/ 50.08.48, AV RAVAL DEL CARME 12, 25300 TARREGA, LERIDA / IELSA, C.B.,
973/ 24.71.27, CL TARRAGONA 40, 25005 LLEIDA, LLEIDA / CRISTEL, 973/ 27.08.26, CL VALLCALENT 32,
25006 LLEIDA, LLEIDA / UNITEC, 948/ 82.74.34, CL FUENTE CANONIGOS 5, 31500 TUDELA, NAVARRA /
TELSAN, C.B., 948/ 24.19.50, CL GAYARRE 1 BJOS., 31005 PAMPLONA, NAVARRA / EURO TECNICS
ELECTRONICA, 977/ 32.24.89, CL LEPANTO 16-18, 43202 REUS, TARRAGONA / ELECTRO SERVEI C.B., 977/
51.04.42, PS MOREIRA 10, 43500 TORTOSA, TARRAGONA / A.B.R. ELECTRONICA S.L., 977/ 50.21.20, CL
CALDERON LA BARCA 3, 43520 ROQUETAS, TARRAGONA / CURTO GAMUNDI S.R.C., 977/ 44.13.14, CL
RIEROL CAPUTXINS 6, 43500 TORTOSA, TARRAGONA / SELECCO S.L., 977/ 70.00.12, CL CALDERON DE LA
BARCA 11, 43870 AMPOSTA, TARRAGONA / ELECTRONICA S. TORRES, 977/ 21.21.48, CL JOAN MIRO 4
ESC.D 1-2, 43005 TARRAGONA, TARRAGONA / BUIRA TECNIC’S, 977/ 66.04.37, CL SAN JAVIER 55, 43700
EL VENDRELL, TARRAGONA / TECNO SERVEIS MORA, 977/ 40.08.83, CL PAU PICASSO 1, 43740 MORA
D’EBRE, TARRAGONA / SERTECS, S.C., 977/ 22.18.51, CL CAPUTXINS (BAJOS) 22, 43001 TARRAGONA,
TARRAGONA / ELECTRONICA JOSEP, 977/ 88.04.41, CTRA. IGUALADA 29 BJOS, 43420 STA. COLOMA
QUERALT, TARRAGONA / MARTORELL ALTES , 977/ 75.32.41, CL ROSETA MAURI 10, 43205 REUS,
TARRAGONA / TELESERVICIO S.C., 978/ 87.08.10, CL ROMUALDO SOLER 4, 44600 ALCAÑIZ, TERUEL /
ELECTRONICA ALCAÑIZ S.L., 979/ 87.07.94, CL CARMEN 21, 44600 ALCAÑIZ, TERUEL / SONOVISION,
C.B., 978/ 60.11.74, CL ABADIA 5, 44001 TERUEL, TERUEL / ELECTRONICA MONCHO, 96/287.23.29, CL PARE
PASCUAL CAT. 5, 46700 GANDIA, VALENCIA / ENVISA ELECTRONIC, S.L., 96/241.24.87, CL GENERAL
ESPARTERO 9, 46600 ALZIRA, VALENCIA / ANTONIO MONLEON, S.L., 96/334.55.87, AV DE LA PLATA 91,
46006 VALENCIA, VALENCIA / TECNO HOGAR, 96/286.53.35, CL DOS DE MAYO 41, 46700 GANDIA,
VALENCIA / SERVICIOS ELECTRONICOS,, 96/340.20.34, CL DOCTOR OLORIZ 3, 46009 VALENCIA, VALENCIA
/ ELECTRONICA LAS HERAS, 96/ 238.11.14, CL JOSE IRANZO 6, 46870 ONTINYENT, VALENCIA / NEGREDO
MARTIN DANIEL, 94/411.22.82, CL PADRE PERNET 8, 48004 BILBAO, VIZCAYA / COLLANTES MARTIN
ONOFRE, 94/ 483.21.22, CL ORTUÑO DE ALANGO 7, 48920 PORTUGALETE, VIZCAYA / ARGI GILTZ, 94/
443.77.93, CL AUTONOMIA 15, 48012 BILBAO, VIZCAYA / SERVITELE, 94/444.89.02, CL AUTONOMIA 24
Galerias, 48012 BILBAO, VIZCAYA / CINCA MONTERDE ANTONIO, 976/ 31.69.65, CL VIA UNIVERSITAS 52,
50010 ZARAGOZA, ZARAGOZA / ARAGON TELEVIDEO, S.C., 976/ 32.97.12, CL BATALLA CLAVIJO 18, 50010
ZARAGOZA, ZARAGOZA / TV VIDEO JIMENEZ, S.L., 967/ 34.04.43, CL JUAN XXIII 38, 02640 ALMANSA,
ALBACETE / JUMAN, 967/ 22.40.78, CL EJERCITO 1, 02002 ALBACETE, ALBACETE / TELEVIDEO, 950/
40.18.63, CL VELAZQUEZ 7 LOCAL-A, 04770 ADRA, ALMERIA / SERVICIO TECNICO PONCE, 950/ 45.67.53,
UB MONTE ALMAGRO 10, 04610 CUEVAS DE ALMANZORA, ALMERIA / SONIVITEL S.L., 950/ 22.97.55, CL
POETA PACO AQUINO 51, 04005 ALMERIA, ALMERIA / ELECTRONICA EDIMAR, S.A, 98/535.34.51, CL
CANGAS DE ONIS 4, 33207 GIJON, ASTURIAS / CAÑEDO S.T., 98/522.29.68, CL OTERO, S/N C. CIAL, 33008
OVIEDO, ASTURIAS / ALVAREZ OLIVAR CASILDA, 98/522.37.39, CL SAN JOSE 12, 33003 OVIEDO, ASTURIAS
/ SANTIAGO VALDERREY, 98/ 563.18.61, CL DR. VENANCIO MTEZ. 7, 33710 NAVIA, ASTURIAS / ASTUSETEL
S.L., 98/539.10.11, CL CEA BERMUDEZ 9, 33208 GIJON, ASTURIAS / ASTURSERVICE, 98/556.83.87, CL
.
SERVICE NIEDERLASSUNGEN . ADDRESSES D’ENTRETIEN. ONDERHOUDSADRESSEN . DIRECCIONES DE SERVICIO . INDIRIZZI DI SERVIZIO
.
R-8730 ENGLISH 12/07/2001 12:21 PM Page 36

37
.
SERVICE NIEDERLASSUNGEN . ADDRESSES D’ENTRETIEN. ONDERHOUDSADRESSEN . DIRECCIONES DE SERVICIO . INDIRIZZI DI SERVIZIO
.
SANCHEZ CALVO 6 bjos., 33401 AVILES, ASTURIAS / JUAN MORILLON DEL CORRO, 98/567.40.24, AV DE
GIJON 19, 33930 LA FELGUERA/LANGREO, ASTURIAS / S.A.T. JUAN-MANUEL, 98/ 581.22.48, CL URIA 60,
33800 CANGAS DE NARCEA, ASTURIAS / DANIEL SERRAN0 LABRADO, 920/ 37.15.16, CL JOSE GOCHICOA
16, 05400 ARENAS DE S.PEDRO, AVILA / ELECTRONICA GREDOS, 920/ 22.48.39, CL EDUARDO MARQUINA
24, 05001 AVILA, AVILA / JIMENEZ ALMOHALLA , 920/ 25.08.76, CL JACINTO BENAVENTE 1, 05001 AVILA,
AVILA / ELECTRONICA BOTE, 924/ 22.17.40, PZ PORTUGAL 2, 06001 BADAJOZ, BADAJOZ / MARCIAL
LAGOA GONZALEZ, 924/ 49.03.33, CL RAMON Y CAJAL 7, 06100 OLIVENZA, BADAJOZ / C.E.
VILANOVENSE C.B., 924/ 84.59.92, CL CAMINO MAGACELA 4 LOCAL-5, 06700 VILLANUEVA SERENA,
BADAJOZ / ELECTRONICA CENTENO S.L., 924/ 57.53.08, AV DEL ZAFRA 1, 06310 PUEBLA SANCHO PEREZ,
BADAJOZ / INDALECIO AMAYA SANCHEZ, 924/ 66.47.01, CL CARRERAS 11, 06200 ALMENDRALEJO,
BADAJOZ / PATRICIO ELECTRONICA, 924/ 33.04.13, CL REYES HUERTAS 7, 06800 MERIDA, BADAJOZ /
ELECTRONICA MAS, 947/ 31.49.94, CL ALFONSO VI 6, 09200 MIRANDA DE EBRO, BURGOS / SERVITEC
BURGOS S.L., 947/ 22.41.68, CL LAVADEROS 7-9, 09007 BURGOS, BURGOS / RUIZ GARCIA JOSE, 927/
22.48.86, CL ECUADOR 5-B, 10005 CACERES, CACERES / ARSENIO SANCHEZ, C.B., 927/ 41.11.21, CL
TORNAVACAS 9, 10600 PLASENCIA, CACERES / ZABALA VAZQUEZ JOSE, 927/ 57.06.13, CL DEL AGUA 39,
10460 LOSAR DE LA VERA, CACERES / RADIO SANCHEZ C.B., 927/ 32.06.88, AV DE MIAJADAS S/N, 10200
TRUJILLO, CACERES / ELECTRONICA JEDA, , CL PAGADOR 31, 11500 PTO. STA. MARIA, CADIZ / SERVICIO
TECNICO, 956/ 87.07.05, CL DIVINA PASTORA E-1 L-4, 11402 JEREZ LA FRONTERA, CADIZ / JOSE BORJA Y
JOSE ARANA, 956/ 66.60.53, CL SAN ANTONIO 31, 11201 ALGECIRAS, CADIZ / VHIFITEL, 956/ 46.25.01,
CL FCO.FDEZ.ORDO|EZ 5, 11600 UBRIQUE, CADIZ / GALAN SAT S.L., 956/ 20.14.17, CL CRUZ ROJA
ESPAÑOLA 11, 11009 CADIZ, CADIZ / GALAN SAT S.L., 956/ 83.35.35, CL FACTORIA MATAGORDA 52,
11500 PUERTO REAL, CADIZ / ELECTRONICA SEYMA, 942/ 23.69.19, CL DEL MONTE 69 C bjos, 39006
SANTANDER, CANTABRIA / TELE-NUEVA, 926/ 50.59.96, CL CAMPO 56, 13700 TOMELLOSO, CIUDAD REAL /
ELECTRONICA ARELLANO, 926/ 54.78.95, CL LORENZO RIVAS 14, 13600 ALCAZAR DE SAN JUAN, CIUDAD
REAL / ELECTRONICA LARA, 926/ 21.17.87, CL DE LA JARA 1, 13002 CIUDAD REAL, CIUDAD REAL / MANUEL
VAZQUEZ , 926/ 42.09.93, CL ADUANA 3, 13500 PUERTOLLANO, CIUDAD REAL / ELECTRODIAZ S.L., 926/
32.23.24, CL BUENSUCESO 10, 13300 VALDEPE|AS, CIUDAD REAL / DUE|AS CA|AS TEODORO, 957/
26.35.06, CL HERMANO JUAN FDEZ 15, 14014 CORDOBA, CORDOBA / ELECTRONICA SALES, 957/
66.09.04, CL ANDALUCIA 11, 14920 AGUILAR FRONTERA, CORDOBA / LAVISON ELECTRONICA S.L., 957/
75.01.75, CM DE LA BARCA 3, 14010 CORDOBA, CORDOBA / ANTONIO GONZALEZ , 957/ 57.10.50, CL
GRAL PRIMO RIVERA 61, 14200 PEÑARROYA, CORDOBA / ELECTRONICA GARCIA, 969/ 22.24.83, CL RAMON
Y CAJAL 17, 16004 CUENCA, CUENCA / GALLARDO ALONSO MIGUEL, 958/ 67.64.81, CL CARMEN 104,
18510 BENALUA DE GUADIX, GRANADA / VILCHEZ VILCHEZ RAFAEL, 958/ 60.06.50, CL AMADEO VIVES 9,
18600 MOTRIL, GRANADA / ELECTRONICA WENCESLAO, 958/ 81.16.16, CL FONTIVEROS 42, 18008
GRANADA, GRANADA / DIGIMAT ELECTRONICA, 958/ 70-04-52, CL CASICAS 7, 18800 BAZA, GRANADA /
MEGATECNICA EXTREMERA, 958/ 26.06.01, C/.MOZART L-2 Ed.Granate, 18004 GRANADA, GRANADA /
TECNICAS MARVI S.L., 949/ 23.27.63, PZ CAPITAN BOIXAREU 51, 19001 GUADALAJARA, GUADALAJARA /
ABRIL SANCHEZ VALENTIN, 959/ 10.60.41, CL CADIZ 2, 21270 CALA, HUELVA / TELESONID HUELVA,
S.C.A., 959/ 24.38.60, CL FCO.VAZQUEZ LIMON 4, 21002 HUELVA, HUELVA / ELECTRONICA SUR, 959/
47.11.51, CL M. LERDO DE TEJADA 9, 21400 AYAMONTE, HUELVA / ELECTRO HIMEGA, S.A., 953/ 24.22.56,
CL ADARVES BAJOS 4-C, 23001 JAEN, JAEN / ELECTRONICA JUMAR, 953/ 26.17.08, CL GOYA (LAS FLORES)
1, 23006 JAEN, JAEN / ELECTRONICA GONZALEZ, 953/ 50.33.82, CORREDERA SAN BARTOLOME 11, 23740
ANDUJAR, JAEN / UNISERVIC ELECTRONICA, 953/ 75.14.19, CL GOYA 1 BJOS, 23400 UBEDA, JAEN /
NOMBRE1, TLFNO, CALLE, CIUDAD, PROVINCIA / ANUMA, 953/ 69.70.41, CL PAREDON 24, 23700
LINARES, JAEN / TALLERES INSTALUZ, 981/ 26.80.26, CL JUAN FLOREZ 110, 15005 LA CORU|A, LA CORU|A /
GARCIA QUINTELA ARTURO, 981/ 70.21.07, CL XOANE, 15100 CARBALLO, LA CORU|A / MANUEL MATO
SEÑARIS, 981/ 53.71.14, CL SILVOUTA-PEDRA DA, 15896 SANTIAGO COMPOSTELA, LA CORU|A / ZENER
ELECTRONICA, 981/ 22.07.00, CL RONDA DE MONTE ALTO 15, 15002 LA CORU|A, LA CORU|A / S.T.
MENDEZ, 981/ 27.52.52, CL GIL VICENTE 13, 15011 LA CORU|A, LA CORU|A / ELECTRONICA CASTILLA,
981/ 32.14.09, CR CASTILLA 377-bis bjos, 15404 FERROL, LA CORU|A / BANDIN AUDIO, 981/ 86.60.23, CL
RUA ARCOS MOLDES 2 B-3, 15920 RIANXO, LA CORUÑA / ELECTRONICA TORRES, S.C., 941/ 24.76.15, AV
NAVARRA 14, 26001 LOGRO#O, LA RIOJA / TOP SERVICE, 941/ 13.50.35, CL ACHUTEGUI DE BLAS 17, 26500
CALAHORRA, LA RIOJA / AGUADO GIL ROBERTO, 941/ 25.25.53, AV VIANA 10, 26001 LOGRO#O, LA RIOJA
/ TELSON, 987/ 21.25.18, CL BATALLA CLAVIJO 2, 24006 LEON, LEON / SALVADOR RODRIGUEZ, C.B., 987/
40.36.02, CL ORTEGA Y GASSET 24, 24400 PONFERRADA, LEON / PROSAT, 987/ 20.34.10, PZ DOCE
MARTIRES 5, 24004 LEON, LEON / ELECTRONICA FOUCES, 982/ 40.24.38, CL BENITO VICETTO 34, 27400
MONFORTE DE LEMOS, LUGO / TELEVEXO S.L., 982/58.18.57, CL NOSA SRA. do CARMEN 82, 27880 BURELA,
LUGO / ELECTRONICA PENELO, 982/ 21.47.43, CL SERRA GA#IDOIRA 63, 27004 LUGO, LUGO /
GOMESCAN, 91/305.48.90, PZ DEL JUBILADO 8, 28042 BARAJAS-MADRID, MADRID / ELECTRONICA
GARMAN, C.B., 91/368.01.79, CL MANDARINA 15, 28027 MADRID, MADRID / ELECTRONICA ANSAR, 91/
460.47.45, CL TOMASA RUIZ 4, 28019 MADRID, MADRID / TEC-NORTE, 91/851.63.47, CL SANTIAGO
APOSTOL 12, 28400 COLLADO VILLALBA, MADRID / VARIOSAT, S.L., 91/662.04.68, CL ISLA DE CORCEGA 24,
28100 ALCOBENDAS, MADRID / ELBESERVI, S.A., 91/386.27.11, CL DR.R. CASTROVIEJO 19, 28029 MADRID,
R-8730 ENGLISH 12/07/2001 12:21 PM Page 37

38
.
SERVICE NIEDERLASSUNGEN . ADDRESSES D’ENTRETIEN. ONDERHOUDSADRESSEN . DIRECCIONES DE SERVICIO . INDIRIZZI DI SERVIZIO
.
MADRID / ALCALA SERVITEC C.B., 91/889.00.32, CL SANTA URSULA 5, 28801 ALCALA DE HENARES, MADRID /
GARMAN C.B., , CL CARLOS SOLE 38 local, 28038 MADRID, MADRID / AVILES SANCHEZ ANTONIO, 952/
36.16.02, CL CIUDAD DE ANDUJAR 2, 29006 MALAGA, MALAGA / VIDEO TALLER, S.C., 952/ 54.23.95, EDIF.
LA NORIA B BJOS-5, 29740 TORRE DEL MAR, MALAGA / SERVISUEL, EDIF. LA UNION, 952/ 46.90.28, CM DE
LAS CA#ADAS LC 2, 29640 FUENGIROLA, MALAGA / BISER, S.L., 952/ 25.55.53, CL LOZANO DE TORRES 8,
29013 MALAGA, MALAGA / ELECTRO RONDA, 952/ 87.59.99, CL SANTA CECILIA 11, 29400 RONDA,
MALAGA / DIEGO LOPEZ JODAR, 95/ 280.12.23, PZ DEL RELOJ 13, 29680 ESTEPONA, MALAGA / CARO
PORLAN RAIMUNDO, 968/ 46.18.11, CL JOSE MOULIAA 45, 30800 LORCA, MURCIA / REG., C.B., 968/
51.00.06, CL ANTONIO OLIVER 17, 30204 CARTAGENA, MURCIA / ELECTROSERVICIOS SEBA,C.B, 968/
29.85.93, CL ISAAC ALBENIZ 4 BJOS, 30009 MURCIA, MURCIA / VISATEL, 968/24.16.47, CL TORRE ALVAREZ
S/N, 30007 MURCIA, MURCIA / ELECTRO SERVICIOS PLAZA,, 968/ 28.45.67, CL GOMEZ CORTINA 10,
30005 MURCIA, MURCIA / RAFAEL GOMEZ YELO, 968/ 26.14.67, PS CORBERA 17, 30002 MURCIA, MURCIA /
FERNANDEZ GONZALEZ JOSE, 988/ 23.48.53, AV BUENOS AIRES 75 BJOS, 32004 ORENSE, ORENSE /
ELECTRONICA JAVIER, 979/ 75.03.74, CL RAMIREZ 5, 34005 PALENCIA, PALENCIA / CENTRAL DE
SERVICIOS, 986/ 37.47.45, CL ASTURIAS (BAJO) 10, 36206 VIGO, PONTEVEDRA / MONTAJES SERVICIOS
TECN., 986/ 84.16.36, CL LOUREIRO CRESPO 43, 36004 PONTEVEDRA, PONTEVEDRA / SIAL-ALVIMO S.L.,
986/ 29.93.01, C/ C.TORRECEDEIRA 92 bjos, 36202 VIGO, PONTEVEDRA / ELECTRONICA CAMBADOS, 986/
50.83.27, CL CAMILO JOSE CELA 13, 36600 VILAGARCIA AROUSA, PONTEVEDRA / ALMAT ELECTRONICA,
923/ 22.45.08, CL GALILEO 21, 37004 SALAMANCA, SALAMANCA / GUIJO S.T., 921/ 42.94.18, CL RAMON
Y CAJAL 1, 40002 SEGOVIA, SEGOVIA / AVITELSAT, S.A., 954/ 66.21.52, CL ESPINOSA Y CARCEL 31, 41005
SEVILLA, SEVILLA / VANHCOLOR, S.L., 95/433.83.03, CL SAN JACINTO 96, 41010 SEVILLA, SEVILLA / TELEPAL,
95/464.95.80, CL JULIO VERNE 49, 41006 SEVILLA, SEVILLA / AUVITEL, S.L., 95/427.57.07, CL VIRGEN DE
AFRICA 20, 41011 SEVILLA, SEVILLA / AUDIO COLOR, 95/457.94.47, CL GOLGOTA 3 LOCAL-IZDA., 41003
SEVILLA, SEVILLA / ELECTRO 93 S.L., 95/ 472.37.16, CL MELLIZA 1, 41700 DOS HERMANAS, SEVILLA / TECO,
975/ 22.61.25, CL ANTOLIN DE SORIA 10, 42003 SORIA, SORIA / ELECTRONICA RIVAS, 925/ 80.55.46, CL
BARRIO SAN JUAN 1, 45600 TALAVERA LA REINA, TOLEDO / ELECTRONICA FE-CAR, S.L., 925/ 21.21.45, AV
SANTA BARBARA 30, 45006 TOLEDO, TOLEDO / ELECTRONICA JOPAL S.L., 925/ 25.04.42, AV SANTA
BARBARA S/N, 45006 TOLEDO, TOLEDO / ELECTRO ANAYA, 925/ 48.09.81, CL VERTEDERA ALTA 14, 45700
CONSUEGRA, TOLEDO / TELESERVICIOS, 983/ 30.92.61, CL ESGUEVA 6, 47003 VALLADOLID, VALLADOLID /
ASIST. TECNICA MARCOS, 983/ 29.78.66, CL PIO DEL RIO HORTEGA 2-4, 47014 VALLADOLID, VALLADOLID /
ELECTRONICA VITELSON, 983/ 80.43.56, PZ DEL MERCADO 9, 47400 MEDINA DEL CAMPO, VALLADOLID /
R.T.V. BLANCO, 980/ 51.14.41, CL EDUARDO JULIAN PEREZ 9, 49018 ZAMORA, ZAMORA
SWITZERLAND
FALCOMAT AG, Allmendstrasse 134, 4058 BASEL. Tel. 061601-1919. Fax. 061601-5755
SWEDEN
Vid förfrågningar angående din mikrovågsugn var vänlig kontakta din återförsäljare eller nägon
av Sharps representanter Centralservice Umeå, Formvägen 8, 90621 Umeå , Phone: 090-125001, Fax: 090-
131135 / MN Elektronikservice AB, Flygplatsinfarten 10A, 161 11 Bromma, Phone: 08-6275900, Fax:086275160 / Jönköpings Antenn & TV Service, Fridhemsvägen 20, 553 02 Jönköping, Phone: 036-161690, Fax:
036-160211 / Ratronik Radio & TV Service, Nordlandergatan 15, 931 32 Skellefteå, Phone: 0910-17305, Fax:
0910-16844 / Tomi Elektronik AB, Bäckvägen 90, 126 47 Hägersten , Phone: 08-186170 , Fax: 08-186175 /
Tretronik, Östermovägen 33, 854 62 Sundsvall, Phone: 060-155925, Fax: 060-173690 / TV-Trim Service AB, S:T
Pauligatan 37, 416 60 Göteborg, Phone: 031-847200, Fax: 031-847500
NORWAY
Finn Clausen AS, Postbox 274 , No-0511 Oslo , Phone: 47-22635000 , Fax: 47-22646655
Norsk Elektronik senter, Postbox 13 , No-2007 Kjeller , Phone: +47-63804500 , Fax: +47-63804501
ICELAND
Braedurnir Ormsson Ltd, PO box 8790 , IS-128 Reykjavik , Phone: +354-5332800 , Fax: +354-5332810
Hjolmtaekni Ehf, Skeifar , IS-108 Reykjavik , Phone: +354-5332150 , Fax: +354-5332151
DENMARK
Sö Höyem AS, Büllowsvej 3 , DK-1870 Fredriksberg C , Phone: 45-31224434 , Fax: 45-31224127
Almstock Radio & Tv service, Sallingsvej 61 , DK-2720 Vanlöse , Phone: 45-38740021 , Fax:45-38740031
SUOMI
Oy Perkko, PL 40 Rälssintie 6 , SF-00721 Helsinki , Phone: +35-8947805000 , Fax: +35-8947805480
Theho Video, Kuoataankatu 7 , SF-00520 Helsinki , Phone: +35-891451500 , Fax: +35-891461767
R-8730 ENGLISH 12/07/2001 12:21 PM Page 38

R-8730 ENGLISH 12/07/2001 12:21 PM Page 39

Gedruckt in Grossbritannien
Imprimé au Royaume-Uni
Gedrukt in Groot-Brittannie
Stampato in Gran Bretagna
Impreso en el Reino Unido
SHARP ELECTRONICS (EUROPE) GMBH.
Sonninstrasse 3, 20097 Hamburg
Germany
TINS-A243URR0
Der Zellstoff zur
Herstellung dieses
Papiers kommt zu
100 % aus nachhaltig
bewirtschafteten
Wäldern
Ce papier est
entièrement fabriqué
à partir de pâte à
papier provenant
de forêts durables
De pulp die gebruik is
voor de vervaardiging
van dit papier is voor
100 % afkomstig uit
bossen die doorlopend
opnieuw aangepland
worden
Il 100 % della pasta
utilizzata per
produrre questa carta
proviene da foreste
sostenibili
El 100 % de la
pasta utilizada en
la fabricación de
este papel procede
de bosques
sostenibles
R-8730 ENGLISH 12/07/2001 12:21 PM Page 40
 Loading...