

Page 1
TINS-A206URR0
R-743M
QUICK START GUIDE
SETTING THE CLOCK
Read SAFETY WARNINGS in the manual before operating
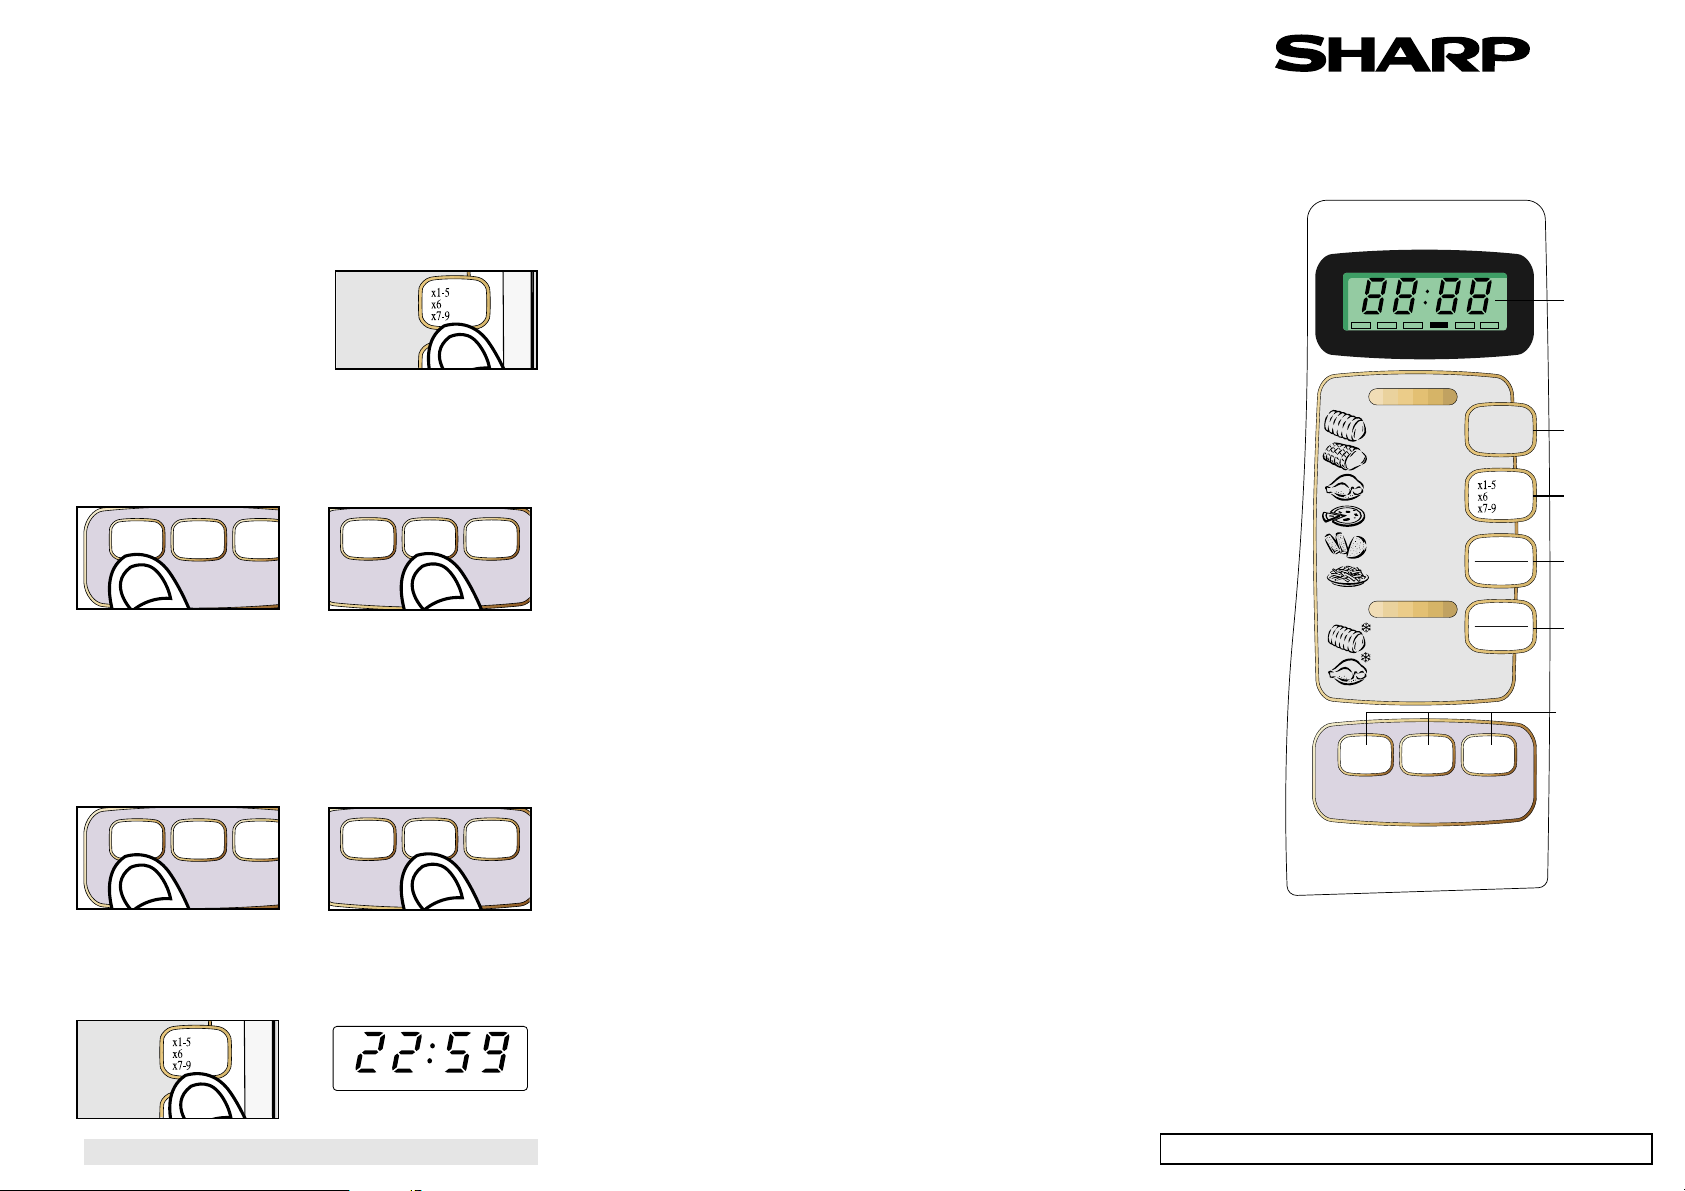
1. DIGITAL DISPLAY
2. AUTO COOK / DEFROST key
3. MICRO/GRILL/DUAL key
4. STOP/CLEAR key
5. START/AUTO MINUTE key
6. TIME keys
R-743
Poultry
Meat Joint
8
7
1
Roast Beef / Lamb
2
Roast Pork
3
Roast Poultry
4
Oven Ready Pizza
5
Crispy Crumb Foods
6
Oven Chips
KG/%TURNSTIR GRILL
MICRO COOK
Auto Cook
Auto Defrost
STOP
CLEAR
START
AUTO MINUTE
AUTO COOK/
DEFROST
GRILL
DUAL
MICRO
10min. 1min. 10sec.
1.0KG 0.1KG PCS
1
6
2
3
4
5
Set hours (This example is for the 24 hour clock).
Enter the hours, by pressing the 10 min key twice,
and the 1 min key twice.
Press the MICRO/GRILL/DUAL key once.
Your oven is fitted with a 12 and 24 hour clock.
Press the STOP/CLEAR key to clear the display.
To set the time of day, follow the guidelines given below:
Example: to set the time of day to 22:59:
If you make a mistake, press the STOP key and repeat from step 1
Set Minutes
Enter the minutes, by pressing the 10 min key five
times, and the 1 min key nine times.
Press the MICRO/GRILL/DUAL key once.
The display will show:
Roast Poultry
Oven Ready Pizza
Crispy Crumb Foods
STOP
GRILL
DUAL
MICRO
Roast Poultry
Oven Ready Pizza
Crispy Crumb Foods
STOP
GRILL
DUAL
MICRO
KG/%TURNSTIR GRILL
MICRO COOK
To select the 12 Hour clock
press and hold the MICRO/
GRILL/DUAL key for 3
seconds.
Press the same key again to
select the 24 Hour clock.
4.
5.
1.
2.
3.
10min. 1min. 10sec
1.0KG 0.1KG PCS
10min. 1min. 10sec.
1.0KG 0.1KG PCS
10min. 1min. 10sec
1.0KG 0.1KG PCS
10min. 1min. 10sec.
1.0KG 0.1KG PCS
Page 2
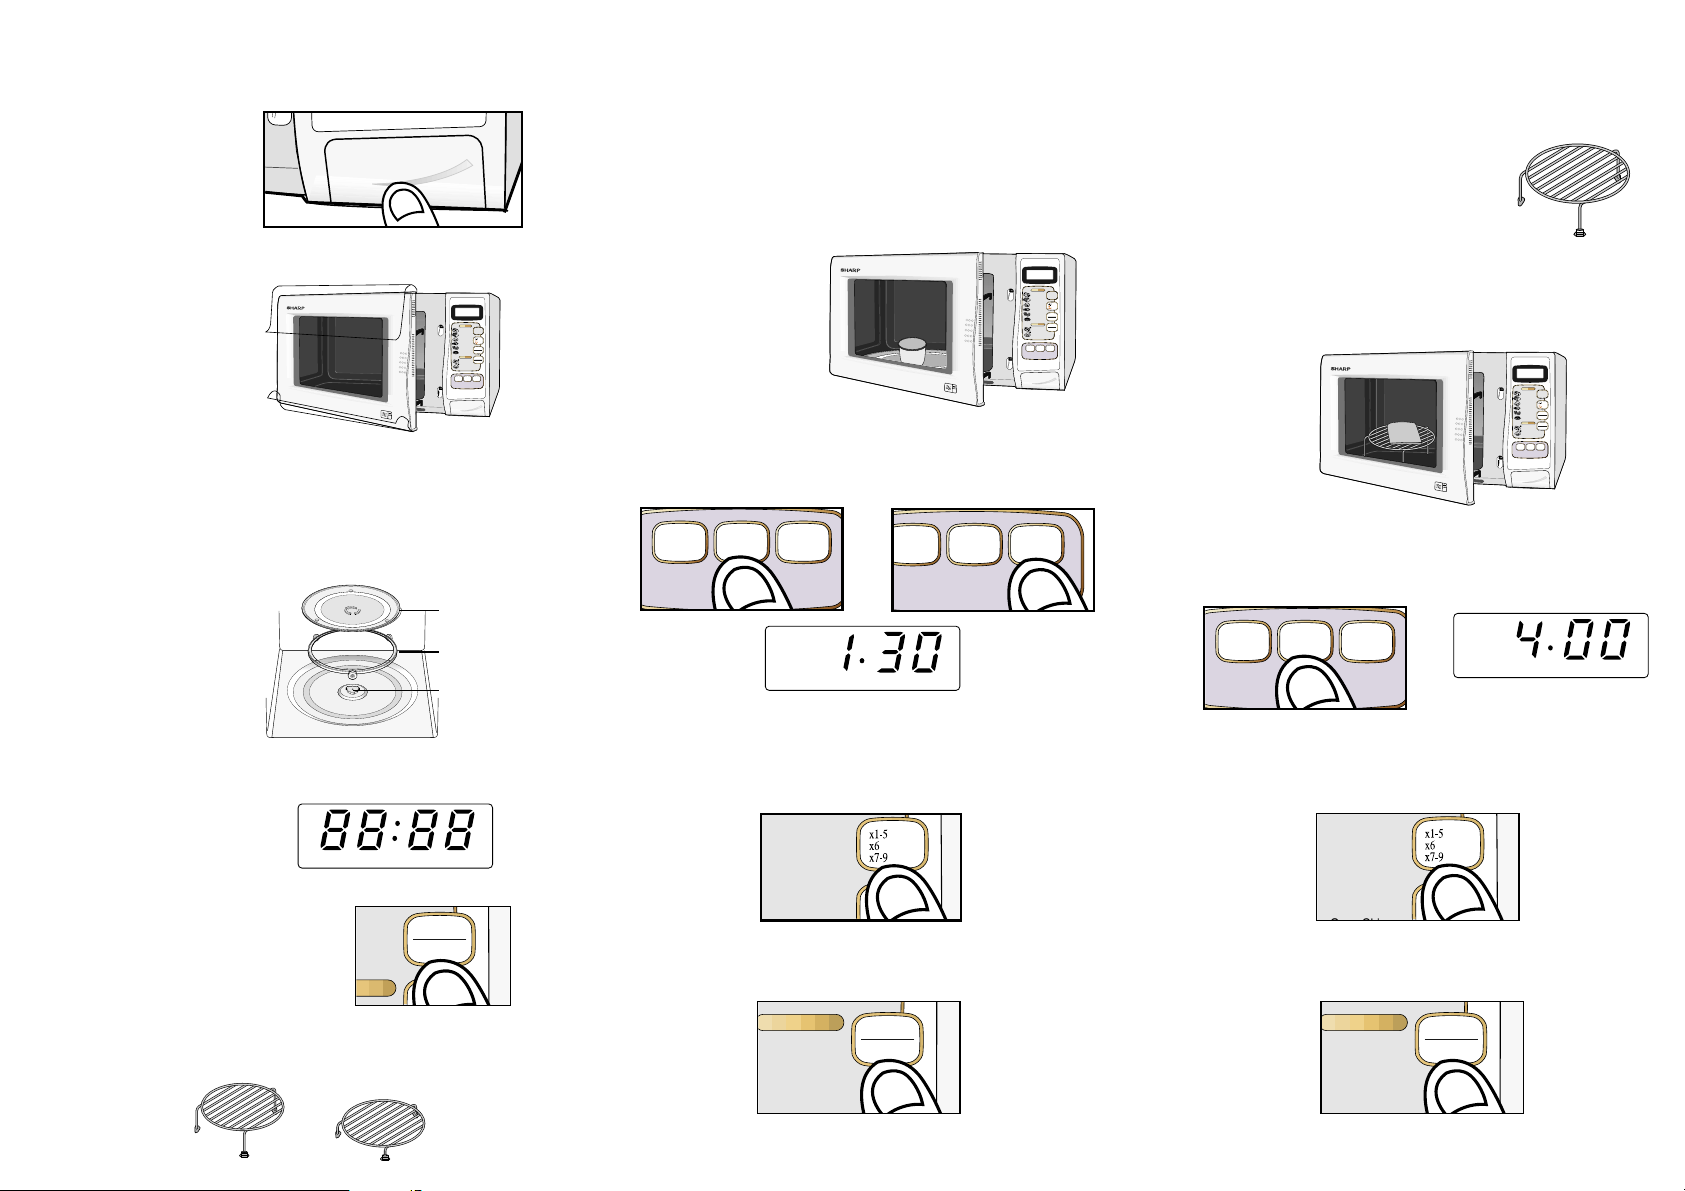
Other Accessories
Low and high rack - use for grilling / dual grilling
food.
Press the door
opening button to
open the door.
Remove all packaging and accessories from the
oven, including the feature sticker fixed to the
outside of the door
and the wrapping,
shown in the
diagram.
NOTE:
Do not remove the plastic
film from the inside of the window.
INSTALLATION MICROWAVING
Turntable Assembly
Place the turntable support into the centre of the
oven floor so that it can freely rotate around the
coupling.
Place the turntable
onto the support so
that it locates firmly
into the coupling.
Example of basic microwaving:
To heat a cup of water on 50P (MEDIUM) power
for 1 minute 30 seconds.
Place the cup of water in the centre of the turntable
and close the door.
To enter the heating time press the 1 min key once
and the 10 sec key three times.
Press the MICRO/GRILL/DUAL key three times
for 50P (MEDIUM) power.
Press the START/AUTO MINUTE key.
The display will count down.
10min. 1min. 10sec.
1.0KG 0.1KG PCS
R-743
10min. 1min. 10sec.
1.0KG 0.1KG PCS
3
Roast Poultry
4
Oven Ready Pizza
5
Crispy Crumb Foods
STOP
GRILL
DUAL
MICRO
E
Q
u
a
rtz
D
u
a
l G
rill
R-743
Poultry
Meat Joint
8
7
1
Roast Beef / Lamb
2
Roast Pork
3
Roast Poultry
4
Oven Ready Pizza
5
Crispy Crumb Foods
6
Oven Chips
KG/%TURNSTIR GRILL
MICROCOOK
Auto Cook
Auto Defrost
STOP
CLEAR
START
AUTO MINUTE
AUTO COOK/
DEFROST
GRILL
DUAL
MICRO
10min. 1min. 10sec.
1.0KG 0.1KG PCS
1.0KG 0.1KG PCS
KG/%TURNSTIR GRILL
MICRO COOK
Poultry
Meat Joint
8
7
Auto Defrost
START
AUTO MINUTE
Plug the oven into your electricity supply.
The display will flash:
Press the STOP/CLEAR key
once to clear the display.
GRILLING
Example of basic grilling:
To grill for 4 minutes, using the
high rack, opposite.
Place the food on top of the high rack, in the
centre of the turntable and close the door.
To enter cooking time, press the 1 min key four
times.
Press the MICRO/GRILL/DUAL key six times to
select the grill mode.
KG/%TURNSTIR GRILL
MICRO COOK
3
Roast Poultry
4
Oven Ready Pizza
5
Crispy Crumb Foods
STOP
GRILL
DUAL
MICRO
1.
2.
3.
4.
5.
1.
2.
3.
4.
Press the START/AUTO MINUTE key.
The display will count down.
Poultry
Meat Joint
8
7
Auto Defrost
START
AUTO MINUTE
4.
1.
2.
3.
Turntable
Coupling
Turntable
Support
Q
u
a
rtz
D
u
KG/%TURNSTIR GRILL
MICROCOOK
Auto Cook
AUTO COOK/
1
Roast Beef / Lamb
DEFROST
2
Roast Pork
MICRO
3
Roast Poultry
GRILL
DUAL
4
Oven Ready Pizza
5
Crispy Crumb Foods
STOP
CLEAR
6
Oven Chips
Auto Defrost
START
AUTO MINUTE
7
Meat Joint
Poultry
8
10min. 1min. 10sec.
1.0KG 0.1KG PCS
a
l G
rill
E
R-743
umb Foods
hips
frost
STOP
CLEAR
START
 Loading...