

CLEANING AND MAINTENANCE
42
Website: http://www.sharp.co.uk/support Help Line: 08705 274277 (office hours)
ACCESSORIES
Accessories should be washed in a mild washing-up
liquid solution and dried. They are dishwasher safe.
OUTER CABINET
Wipe the outer cabinet with a mild detergent solution on
a soft cloth. The control panel must be wiped clean
whilst the door is open, therefore inactivating the oven.
WARNINGS-
WARNINGS:
• It is hazardous for anyone other than a
competent person to carry out any
service or repair operation which
involves the removal of a cover which
gives protection against exposure to
microwave energy.
• The door seal stops microwave leakage during oven
operation, but does not form an airtight seal. It is
normal to see drops of water, light or feel warm air
around the oven door. Food with a high moisture
content will release steam and cause condensation
inside the door which may drip from the oven.
• Repairs & Modifications: Do not attempt to operate
the oven if it is not working properly.
• Outer Cabinet & Lamp Access: Never remove the
outer cabinet. This would be very dangerous due to
high voltage parts inside which must never be
touched, as this could be fatal. As your oven is not
fitted with a lamp access cover, if the lamp fails, do
not attempt to replace the lamp yourself, call a
Service Technician appointed by SHARP.
If you think the oven is not working properly there are
some simple checks you can carry out yourself before
calling an engineer. This will help prevent unnecessary
service calls if the fault is something simple.
Simply answer “YES” or “NO” to the following questions:
(Put half a cup of water in the oven, on the turntable
and close the door. Programme the oven to cook for 1
minute and select 100P.)
1. Does the oven lamp come on when it is cooking?
YES/NO
2. Does the turntable rotate? YES/NO
3. Does the cooling fan work? (Check by placing your
hand above the air vent openings) YES/NO
4. After 1 minute does the "beep" sound?
YES/NO
5. Is the water in the cup hot? YES/NO
6. (Take the cup out of the oven and close the door. Set
the grill time for 3 minutes).
At the end of 3 minutes, does the grill heating
element become hot? YES/NO
If you answer “NO” to any question first check that the
oven is plugged in properly and the fuse has not blown,
if there is no fault with either, check against the
troubleshooting chart on page 43.
• Keep the waveguide cover clean at all times. If you
leave grease or fat in the cavity, it may overheat,
smoke or even catch fire when next using the oven.
• Never use spray cleaners, oven pads or abrasive
scourers as these damage the surface of the oven.
• Do not allow grease or dirt to build up on
the door seals and adjacent parts as
this may prevent the door from closing
correctly and may cause a leakage of
microwaves. To clean use a mild
detergent solution on a soft damp cloth.
OVEN INTERIOR
Clean the microwave oven cavity after each
use with a mild detergent solution on a soft
cloth, pay special attention to the
waveguide cover.
After Grill, Dual, AutoCook and Express Cook
modes the oven cavity, door, cabinet and
accessories will become very hot. Before cleaning,
ensure that they have cooled down.
Slight tarnishing of the oven cavity around the area of
the grill heater is likely to occur, this effect does not
indicate a problem.
Take care not to let soapy water drip through the small
holes in the oven walls and the cavity floor particularly
if the turntable and roller stay are removed. Excess
water spillage through these holes will cause damage
to the oven interior. It is important that the door seals
and sealing surfaces are kept clean at all times, wipe
regularly with a damp cloth.
TROUBLESHOOTING
R-654M O/M & C/B 05/04/2001 11:01 Page 42
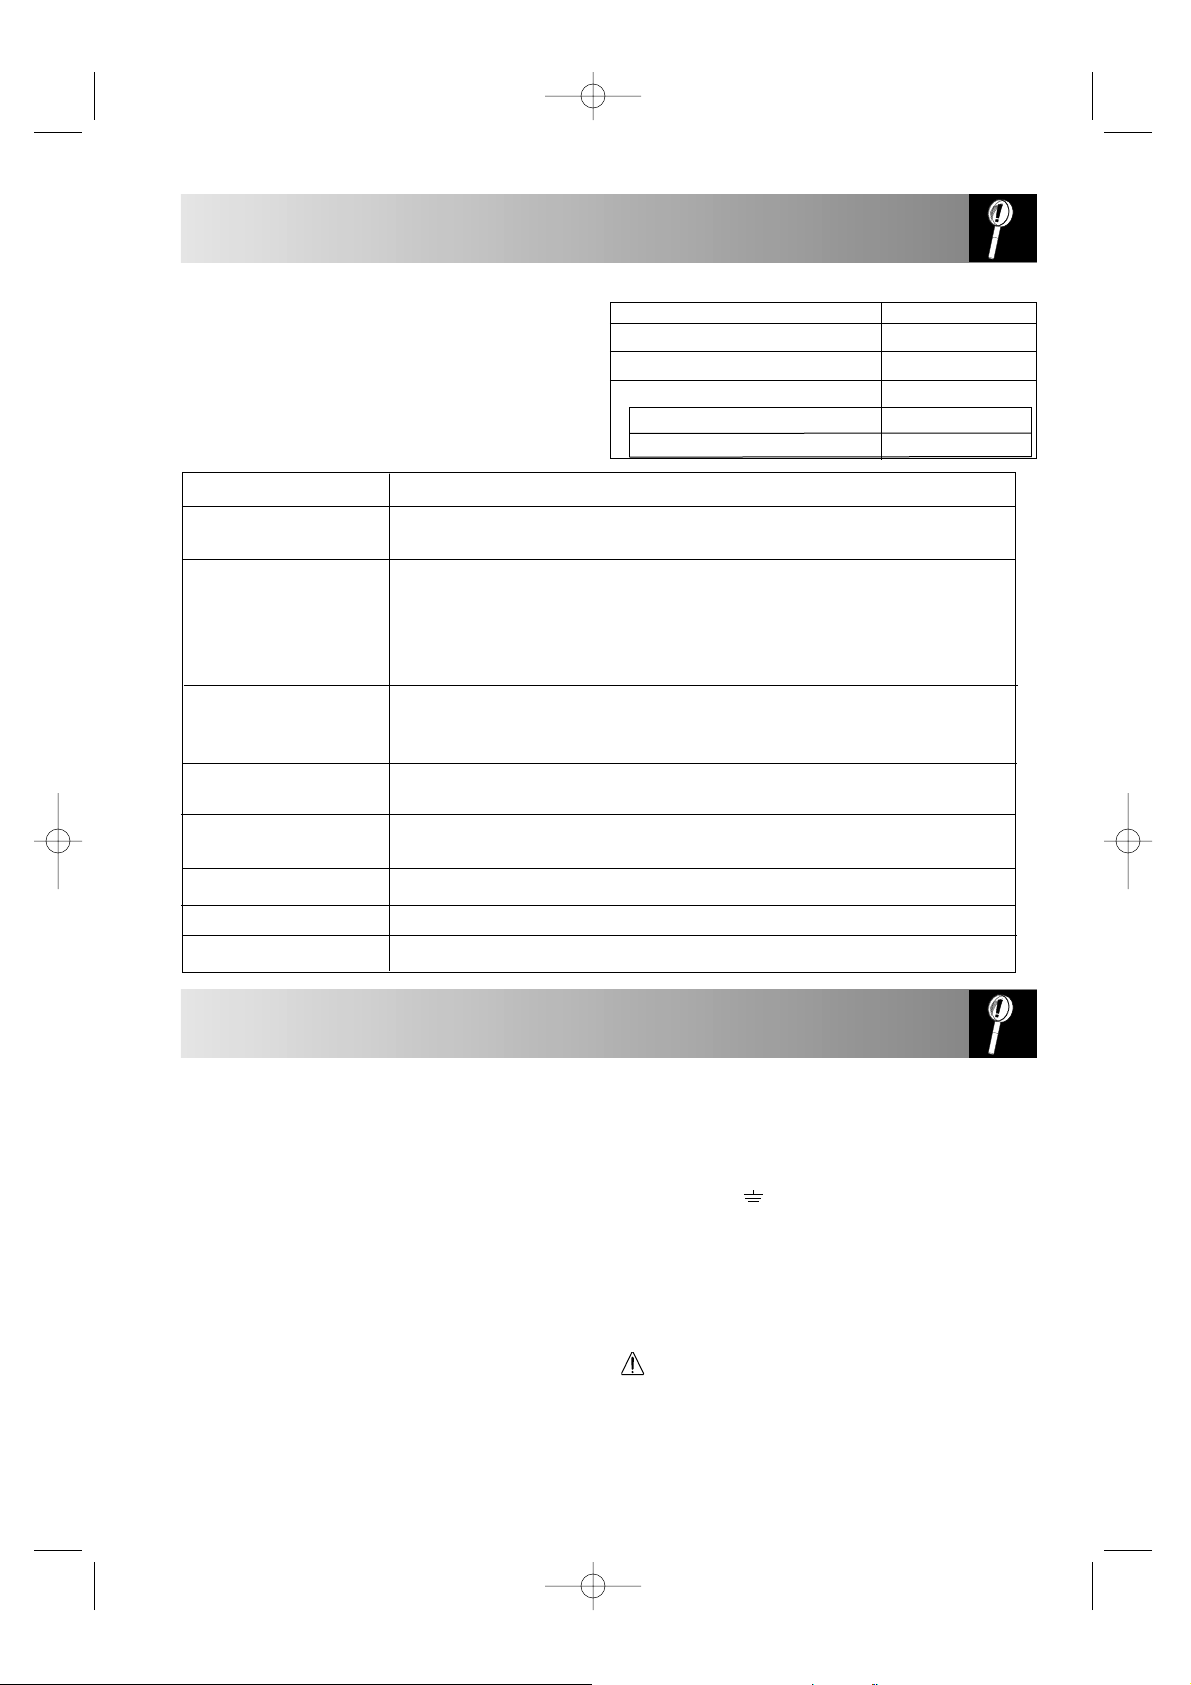
TROUBLESHOOTING
COOKING MODE
Microwave 100P cooking
Grill cooking
Dual grilling
with Microwave 50 P
with Microwave 30 P and 10 P
STANDARD TIME
40 MINUTES
45 MINUTES
Grill 10 MINUTES
Grill 45 MINUTES
43
Website: http://www.sharp.co.uk/support Help Line: 08705 274277 (office hours)
POSSIBLE CAUSE
When oven is working, air circulates within the cavity. The door does not form an
airtight seal so air may escape from the door.
The oven cavity will normally be colder than the food being cooked, and so steam
produced when cooking will condense on the colder surface. The amount of steam
produced depends on the water content of the food being cooked. Some foods,
such as potatoes have a high moisture content. Condensation trapped in the door
glass should clear after a few hours.
Arcing will occur when a metallic object comes into close proximity to the oven cavity
during cooking. This may possibly roughen the surface of the cavity, but would not
otherwise damage the oven.
Ensure all “eyes” are removed and stand directly onto the turntable or in a heat
resistant flan dish or similar.
Check the door is closed properly.
Ensure correct power level has been selected.
The microwave energy pulses ON/OFF during cooking/defrosting.
The cabinet may become warm to the touch - keep children away.
Outer cabinet is hot.
PROBLEM
Draught circulates around
the door.
Flashing or arcing from
within the cavity when
cooking.
Arcing potatoes.
After setting the time, the
oven does not start.
Oven cooks too slowly.
Oven makes a noise.
Condensation forms in the
oven, and may drip from
the door.
The wires in the mains cable are colour coded as
shown opposite:
As the colours of the cores in the mains lead of your
oven may not correspond with the coloured marking
identifying the terminals in your plug, connect the wires
as shown:
Make sure the terminal screws are tight and the cable is
held securely by the cable grip where it enters the plug.
Like most appliances in your home, your oven must be
connected to a single phase 230-240 Volt, 50Hz
alternating current supply.
If you do not make the proper electrical connections you
might damage the oven or injure yourself. Neither
SHARP nor the supplier will be liable if this happens.
green and yellow stripes = EARTH
blue = NEUTRAL
brown = LIVE
• The green and yellow wire to the plug terminal
marked E or or coloured green or coloured
green and yellow.
• The blue wire to the plug terminal marked N or
coloured black or coloured blue.
• The brown wire to the plug terminal marked L or
coloured red or coloured brown.
WARNING!
THIS APPLIANCE MUST BE EARTHED.
IF YOU HAVE ANY DOUBTS ABOUT YOUR
ELECTRICAL SUPPLY ASK A QUALIFIED
ELECTRICIAN.
TO REPLACE THE MAINS PLUG
NOTE:
If you cook food for more than the standard time
(see chart opposite) on the same cooking mode, the
oven’s safety mechanisms will automatically activate.
The microwave power level will be reduced or the
grill heating elements will turn on and off.
R-654M O/M & C/B 05/04/2001 11:01 Page 43

CALLING FOR SERVICE
44
Website: http://www.sharp.co.uk/support Help Line: 08705 274277 (office hours)
Subject to the conditions listed below, SHARP
Electronics (U.K.) Ltd (hereafter called “the Company”),
guarantee to provide for the repair of, or, at its option
replace this SHARP equipment, or any component
thereof, (other than Glass Turntables), which is faulty or
below standard, as a result of inferior workmanship or
materials.
The conditions of the Guarantee:
1 This Guarantee shall only apply to defects or faults
which are notified to the Company, or its Service
Technician appointed by Sharp, within one year
from the date of purchase of the equipment,
provided that this Guarantee shall extend for a
further period of one year in respect of microwave
oven magnetron parts only.
2 This Guarantee covers equipment intended for
private domestic use only. This oven is suitable for
domestic food preparation and is not designed for
commercial, industrial or laboratory use. This
Guarantee does not apply to equipment used in the
course of a business, trade or profession. Only use
the microwave oven for cooking, defrosting or
reheating of food. SHARP declines any liability for
damages caused by improper use.
3 This Guarantee does not cover any faults or defects
caused by accident, misuse, fair wear and tear,
neglect, tampering with the equipment, or any
attempt at adjustment or repair other than by a
Service Technician Appointed by Sharp.
4 Please clean your microwave oven regularly and
remove any stains or fat residues without delay.
Failure to do this may affect the quality and safety of
the product or prejudice your guarantee.
5 In the unlikely event of your equipment requiring
repair, please contact the dealer or supplier from
whom it was purchased. You will need to provide
proof of date of purchase to the repairing company.
Please keep your invoice or receipt, which is
supplied at the time of purchase. Where it is not
possible to contact the dealer or supplier from whom
the oven was purchased, please contact the
telephone number given below. You will then be
given details of how to obtain service.
Telephone: 08705 274277 (office hours)
6 This Guarantee is offered as an additional benefit to
the consumer’s statutory rights and does not affect
these rights in any way.
SHARP parts and accessories have been specifically
designed for SHARP Microwaves.
No liability can be accepted for any inaccuracies or
omissions in this publication, although every possible
care has been taken to make it as complete and
accurate as possible.
• For general information & assistance with oven
queries, please contact our
Customer Information Centre:
U.K.: 08705 274277 (office hours)
Ireland: 01 676 0648 (office hours)
Website: http://www.sharp.co.uk/support
• Replacement accessories may be obtained from our
main parts distributor Willow Vale Electronics Ltd.
Telephone: 0121 766 5414
• If you are unable to resolve a problem using the
checks covered on the last few pages, do not
attempt to service this microwave oven
yourself.
• Contact the dealer or supplier from whom the oven
was purchased in order to obtain service. Where this
is not possible, please contact the SHARP Customer
Information Centre, telephone:
08705 274277 (office hours).
GUARANTEE
R-654M O/M & C/B 05/04/2001 11:01 Page 44

45
SPECIFICATIONS
Website: http://www.sharp.co.uk/support Help Line: 08705 274277 (office hours)
AC Line Voltage . . . . . . . . . . . . . . . . . . . . . . . . . . . . . .Single phase 230-240 V, 50 Hz
Power Consumption:
Microwave . . . . . . . . . . . . . . . . . . . . . . . . . . . . . . . . . .1.25 kW
Grill . . . . . . . . . . . . . . . . . . . . . . . . . . . . . . . . . . . . . . .1.05 kW
Microwave/Grill . . . . . . . . . . . . . . . . . . . . . . . . . . . . . .2.25 kW
Input Current:
Microwave . . . . . . . . . . . . . . . . . . . . . . . . . . . . . . . . . .5.5 A
Output power:
Microwave . . . . . . . . . . . . . . . . . . . . . . . . . . . . . . . . . .800 W (IEC 60705)
Grill . . . . . . . . . . . . . . . . . . . . . . . . . . . . . . . . . . . . . . .1000 W
MAFF heating category . . . . . . . . . . . . . . . . . . . . . . . . .E
Microwave frequency . . . . . . . . . . . . . . . . . . . . . . . . . .2450 MHz
Outside Dimensions . . . . . . . . . . . . . . . . . . . . . . . . . . .449(W) x 282(H) x 388(D) mm
Cavity Dimensions . . . . . . . . . . . . . . . . . . . . . . . . . . . .290(W) x 194(H) x 313(D) mm
Oven capacity . . . . . . . . . . . . . . . . . . . . . . . . . . . . . . .18 litres
Cooking uniformity . . . . . . . . . . . . . . . . . . . . . . . . . . . .Turntable diameter (272mm)
Weight . . . . . . . . . . . . . . . . . . . . . . . . . . . . . . . . . . . . .Approx. 14kg
This oven complies with the requirements of
Directives 89/336/EEC and 73/23/EEC as
amended by 93/68/EEC.
As part of a policy of continuous improvement, we
reserve the right to alter design and specification
without notice.
No part of this publication may be reproduced,
stored in a retrieval system or transmitted in any
form, electronically, mechanically, photocopied,
recorded, translated or other means without prior
permission from SHARP Electronics (U.K.) Ltd.
The illustrations, technical information and data
contained in this publication to our best
knowledge, were correct at the time of going to
print. The right to change specifications, at any
time, without notice, is reserved as part of our
policy of continuous development and
improvement.
R-654M O/M & C/B 05/04/2001 11:02 Page 45

SHARP ELECTRONICS (U.K.) LTD
Manchester, U. K.
U.K.: 08705 274277 (office hours)
Ireland: 01 676 0648 (office hours)
Website: http://www.sharp.co.uk/support
PRINTED IN THE UK
TINS-A258URR0
100% of the pulp used
in making this paper comes
from sustainable forests
R-654M O/M & C/B 05/04/2001 11:02 Page 46
 Loading...