

Page 1

LIQUID CRYSTAL MONITOR
MONITOR DE CRISTAL LÍQUIDO
ÉCRAN À CRISTAUX LIQUIDES
FLÜSSIGKEITSKRISTALLMONITOR
MONITOR A CRISTALLI LIQUIDI
ЖИДКОКРИСТАЛЛИЧЕСКИЙ
МОНИТОР
LİKİT KRİSTAL MONİTÖR
Setup Guide
Guía de conguración
Guide d’installation
Bedienungsanleitung
Guida per l’utilizzo
Руководство по установке
Kurulum Kılavuzu
ENGLISHDEUTSCH ESPAÑOLITALIANO FRANÇAISРУССКИЙTÜRKÇE
PN-Q901
PN-Q801
PN-Q701
PN-Q601
TINS-G779WJN2
Page 2

ENGLISH
IMPORTANT INFORMATION
WARNING: TO REDUCE THE RISK OF FIRE OR ELECTRIC SHOCK,
DO NOT EXPOSE THIS PRODUCT TO RAIN OR
MOISTURE.
Information on the Disposal of this Equipment and its Batteries
IF YOU WISH TO DISPOSE OF THIS EQUIPMENT OR ITS BATTERIES, DO NOT USE THE ORDINARY
WASTE BIN, AND DO NOT PUT THEM INTO A FIREPLACE!
Used electrical and electronic equipment and batteries should always be collected and treated
SEPARATELY in accordance with local law.
Separate collection promotes an environment-friendly treatment, recycling of materials, and minimizing
final disposal of waste. IMPROPER DISPOSAL can be harmful to human health and the environment due
to certain substances! Take USED EQUIPMENT to a local, usually municipal, collection facility, where
available.
Remove USED BATTERIES from equipment, and take them to a battery collection facility; usually a place
where new batteries are sold.
If in doubt about disposal, contact your local authorities or dealer and ask for the correct method of
disposal.
ONLY FOR USERS IN THE EUROPEAN UNION, AND SOME OTHER COUNTRIES; FOR INSTANCE
NORWAY AND SWITZERLAND: Your participation in separate collection is requested by law.
The symbol shown above appears on electrical and electronic equipment and batteries (or the packaging)
to remind users of this. If ‘Hg’ or ‘Pb’ appears below the symbol, this means that the battery contains
traces of mercury (Hg) or lead (Pb), respectively.
Users from PRIVATE HOUSEHOLDS are requested to use existing return facilities for used equipment and
batteries. Batteries are collected at points of sale. Return is free of charge.
If the equipment has been used for BUSINESS PURPOSES, please contact your SHARP dealer who will
inform you about take-back. You might be charged for the costs arising from take-back. Small equipment
(and small quantities) might be taken back by your local collection facility. For Spain: Please contact the
established collection system or your local authority for take-back of your used products.
This equipment complies with the e-waste (Management and Handling) Rules, 2016.
On restriction of the hazardous constituents as specified in rule 16 in electrical and electronic equipment.
For more information to recycle properly, please see the website.
http://www.sbsil.com
CAUTION
RISK OF ELECTRIC
SHOCK
DO NOT OPEN
CAUTION: TO REDUCE THE RISK OF ELECTRIC
SHOCK, DO NOT REMOVE COVER.
NO USER-SERVICEABLE PARTS
INSIDE.
REFER SERVICING TO QUALIFIED
SERVICE PERSONNEL.
The lightning flash with arrowhead symbol,
within a triangle, is intended to alert the user to
the presence of uninsulated “dangerous voltage”
within the product’s enclosure that may be of
sufficient magnitude to constitute a risk of
electric shock to persons.
The exclamation point within a triangle is
intended to alert the user to the presence of
important operating and maintenance (servicing)
instructions in the literature accompanying the
product.
NOTE FOR USERS IN U.K.
IMPORTANT
The wires in this mains lead are coloured in accordance with the following code:
BLUE: “NEUTRAL”
BROWN: “LIVE”
CONNECTING PLUG TO MAINS LEAD:
As the colours of the wires in the mains lead of this apparatus may not correspond with
the coloured markings identifying the terminals in your plugs, proceed as follows:
• The wire which is coloured BLUE must be connected to the terminal which is
marked with the letter N or coloured BLACK.
• The wire which is coloured BROWN must be connected to the terminal which is
marked with the letter L or coloured RED.
CAUTION:
Do not connect the Live (BROWN) wire or the neutral (BLUE) wire to the earth terminal of
your 3 pin mains plug.
1
Page 3

DEAR SHARP CUSTOMER SAFETY PRECAUTIONS
Thank you for your purchase of a SHARP LCD product. To ensure safety and many years of
trouble-free operation of your product, please read the Safety Precautions carefully before using
this product.
SAFETY PRECAUTIONS
Electricity is used to perform many useful functions, but it can also cause personal injuries and property
damage if improperly handled. This product has been engineered and manufactured with the highest priority
on safety. However, improper use can result in electric shock and/or fire. In order to prevent potential danger,
please observe the following instructions when installing, operating and cleaning the product. To ensure your
safety and prolong the service life of your LCD product, please read the following precautions carefully before
using the product.
1. Read instructions — All operating instructions must be read and understood before the product is
operated.
2. Keep this manual in a safe place — These safety and operating instructions must be kept in a safe place
for future reference.
3. Observe warnings — All warnings on the product and in the instructions must be observed closely.
4. Follow instructions — All operating instructions must be followed.
5. Cleaning — Unplug the power cord from the AC outlet before cleaning the product. Use a dry cloth to
clean the product. Do not use liquid cleaners or aerosol cleaners. Do not use dirty cloths. Doing so may
damage the product.
6. Attachments — Do not use attachments not recommended by the manufacturer. Use of inadequate
attachments can result in accidents.
7. Water and moisture — Do not use the product near water. Do not install the product in a place where
water may splash onto it. Be careful of equipment which drains water such as an air-conditioner.
8. Ventilation — The vents and other openings in the cabinet are designed for ventilation.
Do not cover or block these vents and openings since insufficient ventilation can cause overheating and/
or shorten the life of the product. Do not place the product on a sofa, rug or other similar surface, since
they can block ventilation openings. Do not place the product in an enclosed place such as a bookcase or
rack, unless proper ventilation is provided or the manufacturer’s instructions are followed.
9. Power cord protection — The power cords must be routed properly to prevent people from stepping on
them or objects from resting on them.
10. The LCD panel used in this product is made of glass. Therefore, it can break when the product is dropped
or applied with impact. Be careful not to be injured by broken glass pieces in case the LCD panel breaks.
11. Overloading — Do not overload AC outlets or extension cords. Overloading can cause fire or electric
shock.
12. Entering of objects and liquids — Never insert an object into the product through vents or openings. High
voltage flows in the product, and inserting an object can cause electric shock and/or short internal parts.
For the same reason, do not spill water or liquid on the product.
13. Servicing — Do not attempt to service the product yourself. Removing covers can expose you to high
voltage and other dangerous conditions. Request a qualified service person to perform servicing.
14. Repair — If any of the following conditions occurs, unplug the power cord from the AC outlet, and request
a qualified service person to perform repairs.
a. When the power cord or plug is damaged.
b. When a liquid was spilled on the product or when objects have fallen into the product.
c. When the product has been exposed to rain or water.
d. When the product does not operate properly as described in the operating instructions.
Do not touch the controls other than those described in the operating instructions. Improper adjustment
of controls not described in the instructions can cause damage, which often requires extensive
adjustment work by a qualified technician.
e. When the product has been dropped or damaged.
f. When the product displays an abnormal condition. Any noticeable abnormality in the product indicates
that the product needs servicing.
15. Replacement parts — In case the product needs replacement parts, make sure that the service person
uses replacement parts specified by the manufacturer, or those with the same characteristics and
performance as the original parts. Use of unauthorized parts can result in fire, electric shock and/or other
danger.
16. Safety checks — Upon completion of service or repair work, request the service technician to perform
safety checks to ensure that the product is in proper operating condition.
17. Wall mounting — When mounting the product on a wall, be sure to install the product according to the
method recommended by the manufacturer.
18. Heat sources — Keep the product away from heat sources such as radiators, heaters, stoves and other
heat-generating products (including amplifiers).
19. Batteries — Incorrect use of batteries may cause the batteries to burst or ignite. A leaky battery may
corrode the equipment, dirty your hands or spoil your clothing. In order to avoid these problems, make
sure to observe the precautions below:
• Use the specified batteries only.
• Install the batteries with due attention to the plus (+) and minus (-) sides of the batteries according to the
instructions in the compartment.
• Do not mix old and new batteries.
• Do not mix batteries of different types. Voltage specifications of batteries of the same shape may vary.
• Replace an exhausted battery with a new one promptly.
• If you will not use the remote control for a long time, remove the batteries.
• If leaked battery fluid gets on your skin or clothing, rinse immediately and thoroughly. If it gets into your
eye, bathe your eye well rather than rubbing and seek medical treatment immediately. Leaked battery
fluid that gets into your eye or your clothing may cause a skin irritation or damage your eye.
20. Usage of the monitor must not be accompanied by fatal risks or dangers that, could lead directly to death,
personal injury, severe physical damage or other loss, including nuclear reaction control in nuclear facility,
medical life support system, and missile launch control in a weapon system.
21. Do not stay in contact with the parts of the product that become hot for long periods of time. Doing so
may result in low-temperature burns.
22. Do not modify this product.
WARNING:
To prevent the spread of fire, keep candles or other open flames
away from this product at all times.
WARNING:
This is a Class A product. In a domestic environment this product may cause radio interference in
which case the user may be required to take adequate measures.
To maintain compliance with EMC regulations, use shielded cables to connect to the following
terminals: PC/AV HDMI input terminal, PC/AV D-SUB input terminal and RS-232C input terminals.
Where the mains plug or an appliance coupler is used as the disconnect device, the disconnect
device shall remain readily operable.
ENGLISHITALIANO DEUTSCHESPAÑOL FRANÇAISTÜRKÇEРУССКИЙ
2
Page 4
TIPS AND SAFETY INSTRUCTIONSSAFETY PRECAUTIONS
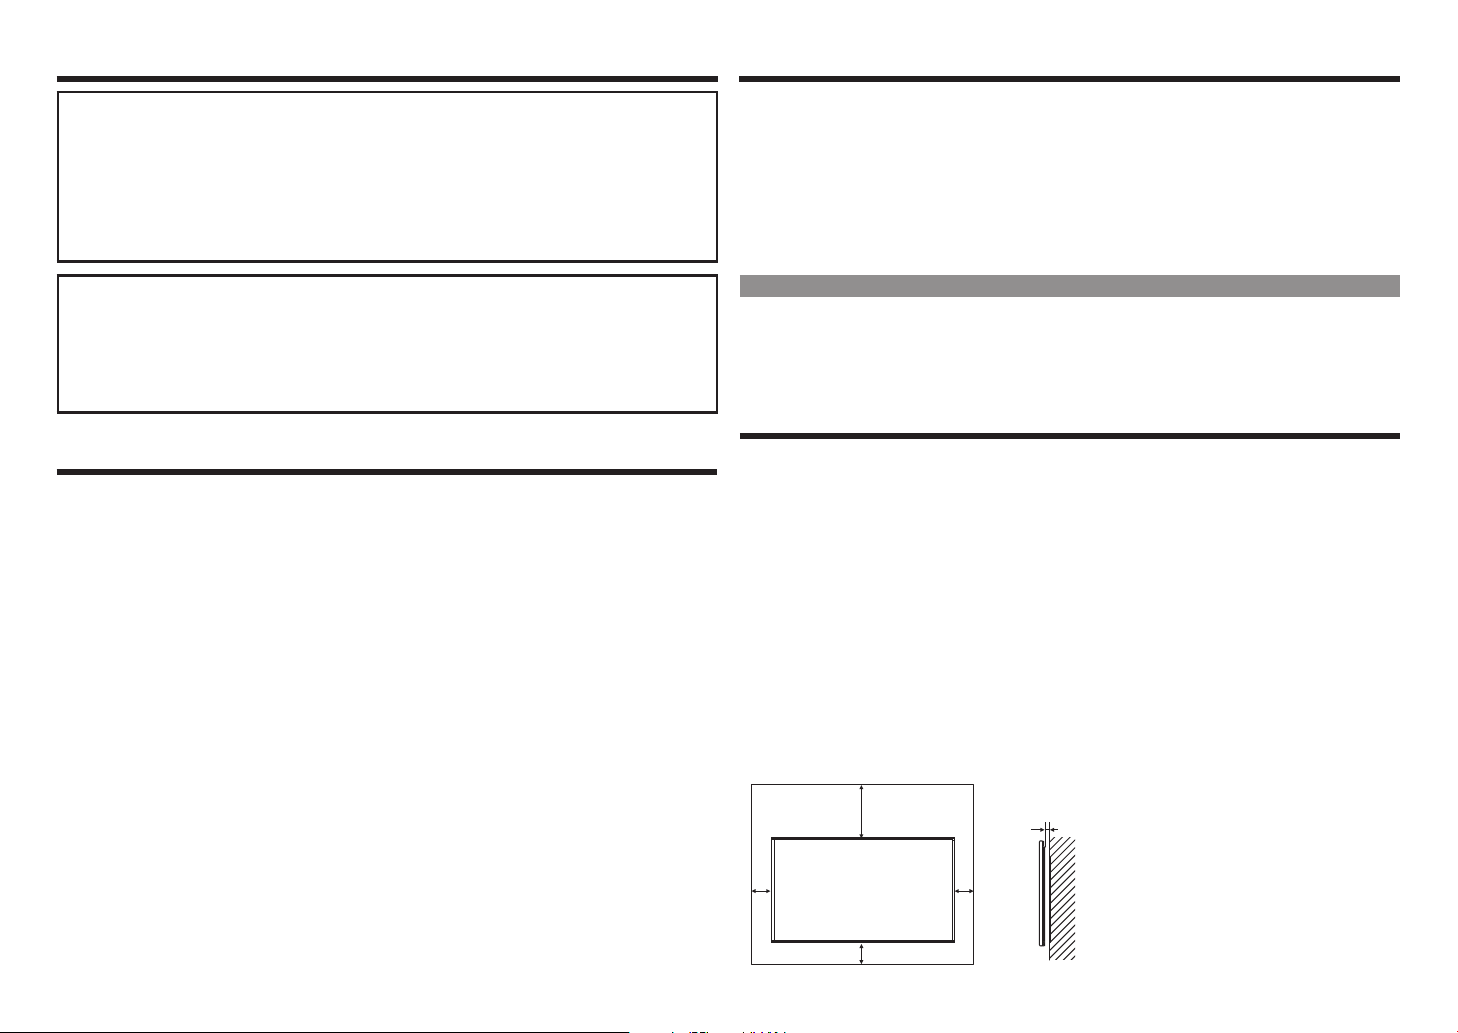
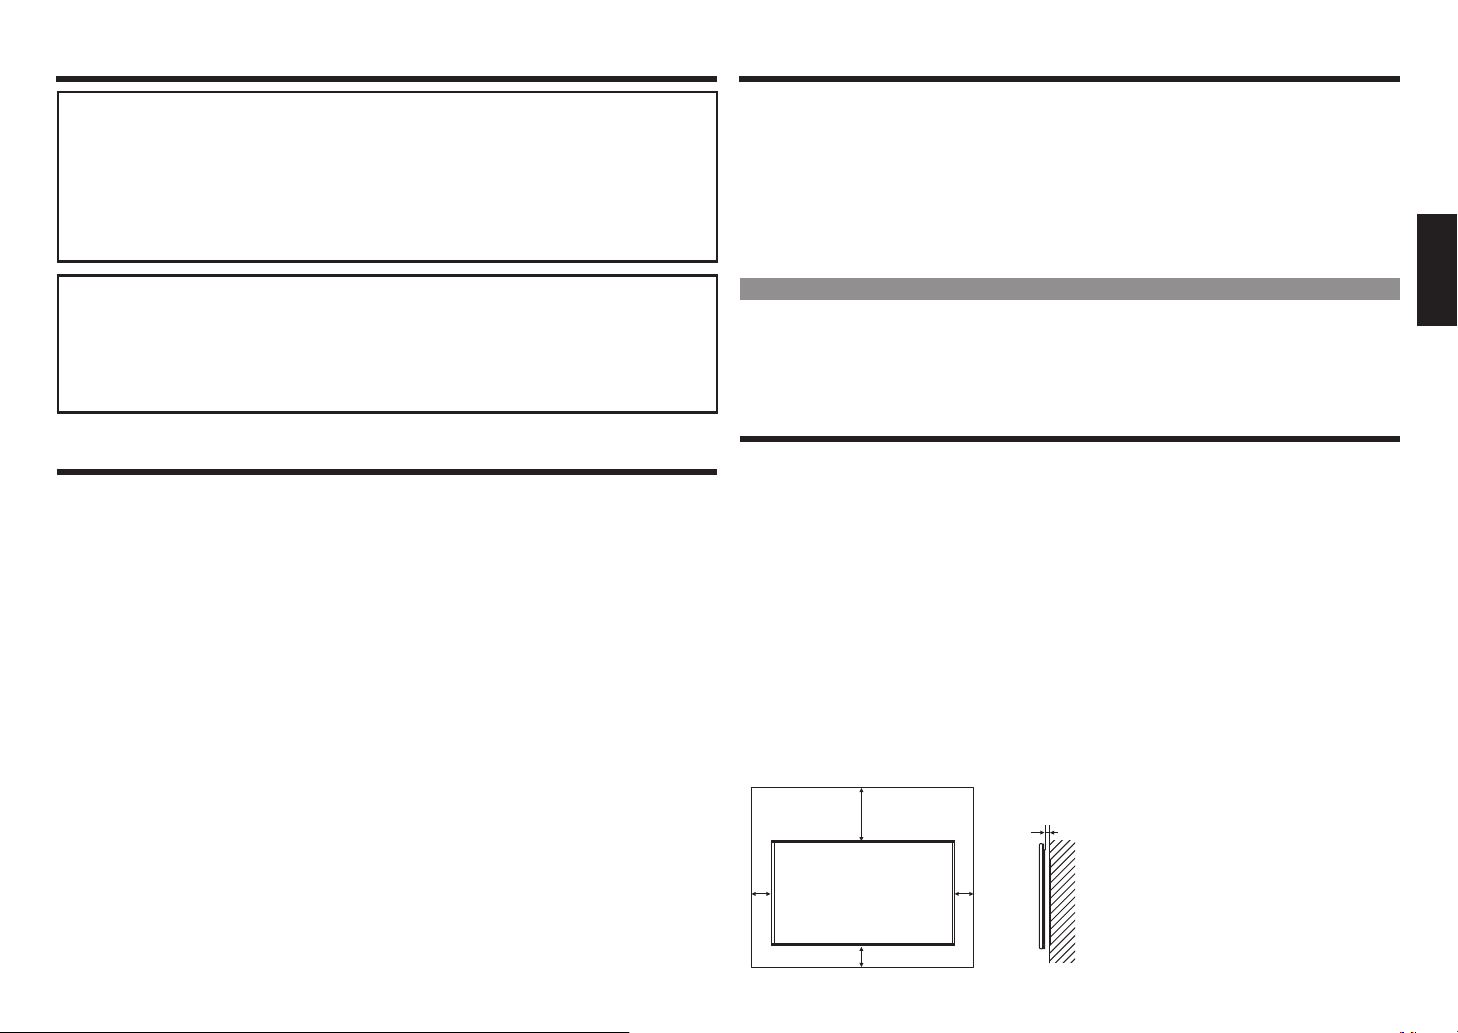
Unit: inch [mm]
If a monitor is not positioned in a sufficiently stable location, it can be potentially hazardous due to
falling. Many injuries, particularly to children, can be avoided by taking simple precautions such as:
• Using fixing devices like wall mount brackets recommended by the manufacturer.
• Only using furniture that can safely support the monitor.
• Ensuring the monitor is not overhanging the edge of the supporting furniture.
• Not placing the monitor on tall furniture (for example, cupboards or bookcases) without anchoring
both the furniture and the monitor to a suitable support.
• Not standing the monitors on cloth or other materials placed between the monitor and supporting
furniture.
• Educating children about the dangers of climbing on furniture to reach the monitor or its controls.
Especially for child safety
– Don’t allow children to climb on or play with the monitor.
– Don’t place the monitor on furniture that can easily be used as steps, such as a chest of drawers.
– Remember that children can become excited while watching a program, especially on a “larger than
life” monitor. Care should be taken to place or install the monitor where it cannot be pushed, pulled
over, or knocked down.
– Care should be taken to route all cords and cables connected to the monitor so that they cannot be
pulled or grabbed by curious children.
TIPS AND SAFETY INSTRUCTIONS
– The TFT color LCD panel used in this monitor is made with the application of high precision technology.
However, there may be minute points on the screen where pixels never light or are permanently lit. Also, if
the screen is viewed from an acute angle there may be uneven colors or brightness. Please note that these
are not malfunctions but common phenomena of LCDs and will not affect the performance of the monitor.
– Do not display a still picture for a long period, as this could cause a residual image.
– Never rub or tap the monitor with hard objects.
– Please understand that SHARP CORPORATION bears no responsibility for errors made during use by
the customer or a third party, nor for any other malfunctions or damage to this product arising during use,
except where indemnity liability is recognized under law.
– This monitor and its accessories may be upgraded without advance notice.
– Do not use the monitor where there is a lot of dust, where humidity is high, or where the monitor may come
into contact with oil or steam. Do not use in an environment where there are corrosive gases (sulfur dioxide,
hydrogen sulfide, nitrogen dioxide, chlorine, ammonia, ozone, etc.). As this could lead to fire.
– Ensure that the monitor does not come into contact with water or other fluids. Ensure that no objects such
as paper clips or pins enter the monitor as this could lead to fire or electric shock.
– Do not place the monitor on top of unstable objects or in unsafe places. Do not allow the monitor to receive
strong shocks or to strongly vibrate. Causing the monitor to fall or topple over may damage it.
– Do not use the monitor near heating equipment or in places where there is likelihood of high temperature, as
this may lead to generation of excessive heat and outbreak of fire.
– Do not use the monitor in places where it may be exposed to direct sunlight.
– Please be sure to constantly remove dust and garbage that has attached to the ventilation opening. If dust
collects in the ventilation opening or the inside of the monitor, it may lead to excessive heat, outbreak of fire,
or malfunction.
Please request a cleaning of the inside of the monitor from an authorized SHARP servicing dealer or service
center.
– Images cannot be rotated on this monitor.
When using in portrait orientation, you will need to prepare appropriately orientated content in advance.
– The AC outlet shall be installed near the equipment and shall be easily accessible.
– Continuous operating time and warranty.This product is designed for a maximum daily use of 16 hours.
Continual use in excess of 16 hours per day is not covered by the warranty.
The Power Cord
– Use only the power cord supplied with the monitor.
– Do not damage the power cord nor place heavy objects on it, stretch it or over bend it. Also, do not add
extension cords. Damage to the cord may result in fire or electric shock.
– Do not use the power cord with a power tap.
Adding an extension cord may lead to fire as a result of overheating.
– Do not remove or insert the power plug with wet hands. Doing so could result in electric shock.
– Unplug the power cord if it is not used for a long time.
– Do not attempt to repair the power cord if it is broken or malfunctioning. Refer the servicing to the service
representative.
LED Backlight
• The LED backlight in this product has a limited lifetime.
* If the screen gets dark or does not turn on, it may be necessary to replace the LED backlight.
* This LED backlight is exclusive to this product and must be replaced by an authorized SHARP servicing
dealer or service center. Please contact an authorized SHARP servicing dealer or service center for
assistance.
MOUNTING PRECAUTIONS
• This product is for use indoors.
• A mounting bracket compliant with VESA specifications is required.
• Since the monitor is heavy, consult your dealer before installing, removing or moving the monitor.
• Mounting the monitor on the wall requires special expertise and the work must be performed by an
authorized SHARP dealer. You should never attempt to perform any of this work yourself. Our company will
bear no responsibility for accidents or injuries caused by improper mounting or mishandling.
• Use the monitor with the surface perpendicular to a level surface. If necessary, the monitor may be tilted up
to 20 degrees upward or downward.
• This monitor should be used at an ambient temperature between 0°C and 40°C. Provide enough space
around the monitor to prevent heat from accumulating inside.
• If it is difficult to provide sufficient space for any reason such as the installation of the monitor inside a
housing, or if the ambient temperature may be outside of the range of 0°C to 40°C, install a fan or take
other measures to keep the ambient temperature within the required range.
• Temperature condition may change when using the monitor together with the optional equipments
recommended by SHARP. In such cases, please check the temperature condition specified by the optional
equipments.
• Do not block any ventilation openings. If the temperature inside the monitor rises, this could lead to a
malfunction.
• Do not place the monitor on a device which generates heat.
7-7/8 [200]
2
[50]
2 [50]
3
5/16 [7]
2
[50]
Page 5
ESPAÑOL
INFORMACIÓN IMPORTANTE
ADVERTENCIA: PARA REDUCIR EL RIESGO DE FUEGO O
DESCARGA ELÉCTRICA, NO EXPONGA ESTE
PRODUCTO A LA LLUVIA NI A LA HUMEDAD.
Información sobre la eliminación de este equipo y sus pilas
SI DESEA ELIMINAR ESTE EQUIPO O SUS PILAS, ¡NO UTILICE EL CUBO DE LA BASURA ORDINARIO
NI LOS TIRE A LA CHIMENEA!
El equipo eléctrico y electrónico y las baterias siempre se deben recoger y tratar POR SEPARADO de
acuerdo con la ley local.
La recogida por separado promueve un tratamiento ecológico, el reciclaje de los materiales y minimiza la
eliminación de la basura. La ELMIIINACIÓN INAROPIADA puede ser perjudicial para la salud humana y el
medio ambiente debido a ciertas sustancias. Lleve el EQUIPO UTILIZADO a un servicio de recogida local,
normalmente municipal, donde la recogida sea posible.
Retire las PILAS UTILIZADAS del equipo y llévelas a un servicio de recogida de pilas, normalmente un
lugar donde se vendan pilas nuevas.
Si tiene dudas acerca de la eliminación, contacte con las autoridades locales o con su distribuidor y
pregunte por el método de eliminación correcto.
SOLO PARA USUARIOS DE LA UNIÓN EUROPEA Y ALGUNOS OTROS PAÍSES, POR EJEMPLO,
NORUEGA Y SUIZA: su participación en la recogida por separado es obligatoria por ley.
El símbolo mostrado arriba, aparece en el equipo eléctrico y electrónico y en las pilas (o en el embalaje)
para recordar esto a los usuarios. Si antes del símbolo aparece «HG» o «Pb», significa que la batería
contiene trazas de mercurio (Hg) o plomo (Pb), respectivamente.
Los usuarios de HOGARES PRIVADOS deben utilizar los servicios de devolución existentes para el equipo
utilizado y las pilas. Las pilas se recogen en los puntos de venta. La devolución es gratuita.
Si el equipo se ha utilizado para PROPÓSITOS EMPRESARIALES, contacte con su distribuidor de
SHARP, quien le informará sobre la retirada. Pueden cargarle los costes de la retirada. Los equipos
pequeños (cantidades pequeñas) deben ser retirados por el servicio de recogida local. Para España:
contacte con el sistema de recogida establecido o la autoridad local para retirar sus productos usados.
Este equipo cumple con las normas de los desechos electrónicos (gestión y tratamiento) de 2016.
Respecto a las restricciones de componentes peligrosos, como se especifica en la norma 16 de los
equipos eléctricos y electrónicos.
Para obtener más información a fin de reciclar de forma correcta, consulte la página web.
http://www.sbsil.com
PRECAUCIÓN
RIESGO DE DESCARGA
ELÉCTRICA NO ABRIR
PRECAUCIÓN: PARA REDUCIR EL RIESGO
CONSULTE CON EL SERVICIO DE
DE DESCARGA ELÉCTRICA, NO
RETIRE LA CUBIERTA.
NO UTILICE PIEZAS ÚTILES DENTRO.
MANTENIMIENTO PARA UN
SERVICIO PERSONAL CUALIFICADO.
El símbolo de un relámpago con una flecha
dentro de un triángulo pretende alertar al
usuario de la presenia de un «voltaje peligroso»
no aislado dentro de la cubierta del producto
que puede ser de suficiente magnitud para
constituir un riesgo de descarga eléctrica
para las personas.
La exclamación dentro de un triángulo pretende
alertar al usuario de la presencia de instrucciones
importantes de funcionamiento y de
mantenimiento (servicio) en el libro que
acompaña al producto.
NOTA IMPORTANTE PARA LOS
USUARIOS DE UK
Los cables de este cable de alimentación están coloreados de acuerdo con el
siguiente código:
AZUL: «NEUTRO»
MARRÓN: «FASE»
CONECTAR LA CLAVIJA A LA RED ELÉCTRICA
Ya que los colores de los cables del cable de alimentación de este aparato pueden
no corresponder con las marcas de colores que identifican las terminales en sus clavijas,
proceda cono se explica a continuación:
• El hilo de color AZUL debe conectarse a la terminal marcada con la letra N o de color
NEGRO.
• El hilo de color MARRÓN debe conectarse a la terminal marcada con la letra L o de
color ROJO.
PRECAUCIÓN:
No conecte el cable de fase (MARRÓN) o el cable neutro (AZUL) al terminal de tierra
de su clavija de 3 polos.
4
Page 6
QUERIDO CLIENTE DE SHARP PRECAUCIONES DE SEGURIDAD
Gracias por su compra de un producto LCD SHARP. Para garantizarr la seguridad y varios años de
funcionamiento sin problemas de su producto, lea las instrucciones de seguridad antes de utilizar
este producto.
PRECAUCIONES DE SEGURIDAD
La electricidad se utiliza para llevar a cabo varias funciones útiles, pero también puede causar lesiones
personales y daños en las propiedades si se maneja inadeacuadamente. Este producto ha sido diseñado
y producido con la seguridad como mayor prioridad. Sin embargo, un uso inadecuado puede causar una
descarga eléctrica y/o fuego. Para prevenir la posibilidad de peligro, observe las siguientes instrucciones
durante la instalación, funcionamiento y limpieza del producto. Para garantizar su seguridad y prolongar la
vida de su producto LCD, lea las siguientes precauciones cuidadosamente antes de utilizar el producto.
1. Lea las sinstrucciones— Se deben leer y entender todas las instrucciones antes de poner el producto en
funcionamiento.
2. Mantenga este manual en un lugar seguro — Estas instrucciones de seguridad y funcionamiento deben
mantenerse en un lugar seguro para futuras referencias.
3. Observe las advertencias — Se deben observer atentamente todas las advertencies en el producto y en
las instrucciones.
4. Siga las instrucciones — Deben seguirse todas las instrucciones de funcionamiento.
5. Limpieza — Desenchufe el cable de alimentación de la toma de corriente alterna antes de limpiar el
producto. Use un trapo seco para limpiar el producto. No utilice productos de limpieza líquidos o en
aerosol. No utilice trapos húmedos. Esto puede dañar el producto.
6. Accesorios — No utilice accesorios no recomendados por el fabricante. Utilizar accesorios inadeccuados
puede causar accidentes.
7. Agua y humedad — No utilice el producto cerca del agua. No instale el producto en un lugar donde
el agua pueda salpicarle. Tenga cuidado con los equipos que puedan soltar agua como el aire
acondicionado.
8. Ventilación — Las entradas de ventilación y demás aberturas de la caja están diseñadas para ventilación.
No cubra ni bloquee estas aberturas ya que podría producir un recalentamiento del aparato y además
acortaría su vida útil. No coloque el producto en un sofá, alfombra u otra superficie similar ya que
pueden bloquear las aperturas de ventilación. No lo coloque en lugares cerrados, tales como librerías o
estanterías, a menos que tenga una ventilación adecuada o el fabricante lo especifique.
9. Protección del cable — Los cables de alimentación se deben orientar correctamente para prevenir que la
gente los pise o haya objetos apoyados en ellos.
10. El panel LCD utilizado en este product o está hecho de cristal. Sin embargo, se puede romper cuando el
producto se cae o se coloca con impacto. Tenga cuidado de no herirse con las piezas del cristal roto en
caso de que el panel LCD se rompa.
11. Sobrecarga — No sobrecargue la toma de corriente alterna ni los cables de extensión. Una sobrecarga
puede causar fuego o descargas eléctricas.
12. Entrada de objetos y líquidos — No inserte nunca un objeto en el producto a través de las ventilaciones o
aperturas. Circula alto voltaje por el producto e insertar un objeto podría causar una descarga eléctrica y/
o cortocircuitos en las piezas internas.
Por la misma razón, no derrame agua ni líquido en el producto.
13. Revisión—No intente revisar el producto usted mismo. La extracción de las cubiertas puede exponerle a
alta tensión y a otras condiciones peligrosas. Solicite un técnico de servicio para realizar el mantenimiento.
14. Reparación — Si se da una de las siguientes condiciones, desconecte el cable de alimentación de la toma
de corriente alterna y solicite una persiona de mantenimiento cualificada para realizar las reparaciones.
a. Cuando el cable de alimentación o la clavija esté dañado.
b. Cuando un líquido se derrame en el producto o cuando caigan objetos en el producto.
c. Cuando el producto haya estado expuesto a la lluvia o al agua.
d. Cuando el producto no funcione correctamente como se describe en las instrucciones de
funcionamiento.
No toque más mandos que aquellos descritos en las instrucciones de funcionamiento. Los ajustes
incorrectos de los mandos no descritos en las instrucciones pueden causar daños que normalmente
necesitan un gran trabajo de ajuste por un técnico cualificado.
e. Cuando el producto se haya caído o dañado.
f. Cuando el producto musetra una condición anormal. Cualquier anormalidad evidente en el producto
indica que el producto necesita mantenimiento.
15. Piezas de recambio — En caso de que el producto necesite piezas de recambio, asegúrese de que la
persona de mantenimiento utiliza piezas de recambio especificadas por el fabricante o aquellas con las
mismas características y rendimiento que las piezas originales. El uso de piezas no autorizadas pueden
causar fuergo, descargas eléctricas y/u otros daños.
16. Verificación de la seguridad — Tras la finalización del trabajo de mantenimiento o reparación, solicite al
servicio técnico llevar a cabo las comprobaciones de seguridad para asegurar que el producto está en
condiciones de funcionamiento apropiadas.
17. Montaje en la pared — Cuando monte el producto en la pared, asegúree de instalar el producto de
acuerdo con el método recomendado por el fabricante.
18. Focos de calor — Mantenga el producto alejado de los focos de calor y los radiadores, calefactores,
estufas y otros productos que generen calor (incluidos los amplificadores).
19. Pilas — El uso incorreto de las pilas puede causar explosiones o fuego. Una bacteria con una fuga puede
carcomer el equipo, ensuciar sus manos o estropear su ropa. Para evitar estos problemas, asegúrese de
observar las siguientes precauciones:
• Utilice únicamente las pilas especificadas.
• Instale las pilas poniendo la atención adecuada al polo positivo (+) y negativo (-) de las pilas de acuerdo
con las instrucciones del compartimento.
• No mezcle pilas antiguas y nuevas.
• No mezcle pilas de diferentes tipos. Las especificaciones de voltaje de las pilas del mismo tamaño
pueden variar.
• Reemplace las pilas gastadas por unas nuevas inmediatamente.
• Si no va a utilizar el mando a distancia durante un tiempo, retire las pilas.
• Si el líquido de una pila con una fuga llega a su piel o a su ropa, lávese indediatamente y
completamente. Si entra en sus ojos, lave muy bien su ojo en lugar de frotarlo y busque tratamiento
médico de inmediato. El líquido de una fuga de la pila que llegue a sus ojos o a su ropa puede causar
irritación de la piel o daño en sus ojos.
20. El uso del monitor no debe ir acompañado de riesgos dañinos o peligros que lleven directamente a la
muerte, heridas personales, daños físicos severos u otras pérdidas incluyendo el control de la reacción
nuclear en los servicios nucleares, sistemas médicos de soporte vital y control de lanzamiento misil en
sistemas de armas.
21. No permanezca en contacto con las partes del producto que se calientan durante largos periodos de
tiempo. Hacer esto, puede causar quemaduras de baja temperatura.
22. No modifique este producto.
ADVERTENCIA:
Para prevenir propagación de incendio, mantenga en todo momento velas y
otras llamas descubiertas lejos de este producto.
ADVERTENCIA:
Este es un producto de clase A. En un ambiente doméstico, este producto puede causar
radiointerferencias; en ese caso, el usuario puede necesitar tomar medidas adecuadas.
Para cumplir con las normativas CEM, utilice cables blindados para conectar los terminales
siguientes: terminal de entrada HDMI PC/AV, terminal de entrada D-SUB PC/AV y terminales de
entrada RS-232C.
5
Page 7
CONSEJOS E INSTRUCCIONES DE SEGURIDADPRECAUCIONES DE SEGURIDAD
Unidad: pulgada (mm)
Si el monitor no está posicionado en una ubicación suficientemente estable, puede ser muy
peligroso debido a las lesiones de caída, particularmente de los niños; se puede prevenir tomando
precauciones simples como:
• Utilizar dispositivos fijos como soportes de montaje en la pared recomendados por el fabricante.
• Utilizar solo muebles que puedan soportar de forma segura el monitor.
• Asegurar el monitor sin que cuelgue por un lado del mueble.
• No colocar el monitor en muebles altos (por ejemplo, armarios o librerías) sin anclar ni el mueble ni
el monitor a un soporte apropiado.
No poner el monitor sobre ropa u otros materiales colocados entre el monitor y el mueble de soporte.
•
• Eduque a los niños sobre los peligros de trepar un mueble para alcanzar el monitor o sus mandos.
Para seguridad infantil especialmente
– No permita que los niños trepan o jueguen con el monitor.
No coloque el monitor en un mueble que pueda utilizarse facilmente como escalones, como una cómoda.
–
– Recuerde que los niños pueden entusiasmarse viendo un programa, especialmente en una pantalla
«larger than life». Tenga cuidado de colocar o instalar el monitor donde no se pueda empujar, volcar
o derribar.
– Tenga cuidado al colocar todos los cordones y cables conectados al monitor, de modo que los
niños curiosos no puedan sacarlos ni agarrarlos.
CONSEJOS E INSTRUCCIONES DE SEGURIDAD
– El panel LCD color TFT utilizado en este monitor está hecho aplicando la tecnología más precida. Sin
embargo, puede haber puntos mínimos en el monitor donde los píxeles nunca se enciendan o estén
iluminados permanentemente. También, si el monitor se ve desde un ángulo agudo, puede haber colores
irregulares o brillantes. Tenga en cuenta que esto no son fallos sino fenómenos comunes de los LCD y no
afectarán al rendimiento de la pantalla.
– No muestre una imagen inmovilizada durante un largo periodo, ya que podría causar una imagen residual.
– No tape ni golpee nunca el monitor con objetos duros.
– Entienda que SHARP CORPORATION no se hace responsable de los errores realizados durante el uso por
parte del cliente o de terceras partes ni de cualquier otro fallo o daño de este producto producido durante
su uso, excepto cuando la responsabilidad de indemnización este reconocida por ley.
– Este monitor y sus accesorios pueden actualizarse sin aviso previo.
– No utilice el monitor donde haya mucho polvo, dondehaya mucha humedad o donde el monitor pueda
contactar con aceite o vapor. No lo utilice en un ambiente donde haya gases corrisivos (dióxido de azufre,
sulfuro de hidrógeno, dióxido de nitrógeno, cloro, amoníaco, ozono, etc.). Esto podría causar fuego.
– Asegúrese de que el monitor no está en contacto con agua ni otros líquidos. Asegúrese de que no se
introducen objetos como clips o alfileres en el monitor, ya que podría causar fuego o descargas eléctricas.
– No coloque el monitor en la parte superior de objetos inestables o en lugares no seguros. No permita que el
monitor reciba golpes o vibraciones fuertes. Hacer que el monitor caiga o se precipite puede dañarlo.
– No utilice el monitor cerca de un equipo de calefacción o en lugares donde haya posibilidad de altas
temperaturas, ya que esto puede llevar a la generación de calor excesivo y un brote de fuego.
– No utilice el monitor en lugares donde pueda estar expuesto directamente a la luz solar.
– Asegúrese de retirar constantemente el polvo y la suciedad que se haya pegado a la apertura de ventilación.
Si se acumula polvo en la apertura de ventilación o en el interior del monitor, se podría causar un calor
excesivo, un brote de fuego o un fallo.
Solicite una limpieza del interior del monitor a un distribuidor de servicio SHARP autorizado o al Centro de Servicios.
– Las imágenes no se pueden girar en este monitor.
Cuando utilice una orientación vertical, tendrá que preparar el contenido orientado adecuadamente con
antelación.
– La toma de corriente alterna se debe instalar cerca del equipo y debe ser fácilmente accesible.
– Tiempo de funcionamiento continuado y garantía.Este producto se ha diseñado para un uso diario máximo
de 16 horas. La garantía no cubrirá un uso continuado que sobrepase las 16 horas al día.
El cable de alimentación
– Utilice solo el cable de alimentación suministrado con el monitor.
– No dañe el cable de alimentación, no coloque objetos pesados sobre él, no lo estire ni lo doble. Tampoco
añada cables de extensión. Los daños en el cable pueden causar fuego o descargas eléctricas.
– No utilice el cable de alimentación con un generador de energía.
Añadir un cable de extension puede causar fuego como resultado del sobrecalentamiento.
– No retire ni inserte la clavija con las manos mojadas. Hacer esto, puede causar descargas eléctricas.
– Desconecte el cable de alimentación si no se utiliza durante un largo tiempo.
– No intente reparar el cable de alimentación si está roto o tiene un fallo. Consulte con el servicio de
mantenimiento del vendedor.
Retroiluminación LED
• La reetroiluminación de este producto tiene una vida limitada.
* Si la pantalla se pone negra o no se enciende, será necesario reemplazar la retroiluminación LED.
* Esta retroiluminación LED es exclusiva para este producto y debe reemplazarse por un distribuidor
de servicio SHARP autorizado o Centro de Servicios. Contacte con un distribuidor de servicio SHARP
autorizado o con el Centro de Servicios para asistencia.
PRECAUCIONES DE MONTAJE
• Este producto es para uso interior.
• Es necesario un soporte de montaje conforme con las especificaciones de VESA.
• Ya que el monitor es pesado, consulte con su distribuidor antes de instalar, retirar o mover el monitor.
• Montar el monitor en la pared require una experiencia especial y el trabajo debe realizarlo un distribuidor de
SHARP autorizado. Nunca debe intentar llevar a cabo ninguno de estos trabajos usted mismo. Nuestra compañía
no se hará responsable de accidentes o lesiones causadas por un montaje incorrecto o un mal manejo.
• Utilice el monitor con la superficie perpendicular al nivel del suelo. Si es necesario, el monitor puede ser
inclinado 20 grados hacia arriba o hacia abajo.
• Este monitor debe utilizarse en un ambiente de temperatura entre 0°C y 40°C. Proporcione espacio
suficiente alrededor del monitor para prevenir que el calor se acumule dentro.
• Si es dificl proporcionar suficiente espacio por cualquier razón, como la instalación del monitor dentro de
una casa o si la temperatura ambiente puede estar fuera del rango de 0°C hasta 40°C, instale un ventilador
o tome otras medidas para mantener la temperatura ambiente dentro del rango necesario.
• Las condiciones de temperatura pueden cambiar al utilizar el monitor junto con los accesorios opcionales
recomendados por SHARP. En ese caso, compruebe las condiciones de temperatura especificadas en los
accesorios opcionales.
• No bloquee ninguna apertura de ventilación. Si la temperatura dentro del monitor asciende, puede llevar a
un mal funcionamiento.
• No coloque el monitor en un dispositivo que genere calor
7-7/8 [200]
2
[50]
2 [50]
6
5/16 [7]
2
[50]
ITALIANO DEUTSCHESPAÑOL FRANÇAISTÜRKÇEРУССКИЙ ESPAÑOLITALIANO DEUTSCHESPAÑOL FRANÇAISTÜRKÇEРУССКИЙ
Page 8
FRANÇAIS
CHOC ÉLECTRIQUE, NE PAS EXPOSER CE PRODUIT
INFORMATIONS IMPORTANTES
Informations sur l’élimination de cet appareil et de ses piles
SI VOUS SOUHAITEZ JETER CET APPAREIL OU SES PILES, N’UTILISEZ PAS LA POUBELLE
ORDINAIRE, ET NE LES JETEZ PAS AU FEU !
Les appareils électriques et électroniques et les piles usages doivent toujours être collectés et traités
SÉPARÉMENT conformément à la loi locale.
La collection séparée soutient un traitement écologique, un recyclage des matériaux et une réduction
de l’élimination des déchets au final. UNE ÉLIMINATION INAPPROPRIÉE peut être nocive pour la santé
humaine et l’environnement à cause de certaines substances ! Portez VOS APPAREILS USAGÉS dans
une déchetterie locale, généralement municipale, le cas échéant.
Retirez les PILES USAGÉES des appareils et jetez-les dans un centre de collecte de piles ; généralement
un lieu qui vend des piles neuves.
En cas de doute sur leur élimination, contactez les autorités locales ou le fournisseur et demandez la
bonne méthode d’élimination. UNIQUEMENT POUR LES UTILISATEURS DE L’UNION EUROPÉENNE
ET DE CERTAINS AUTRES PAYS ; PAR EXEMPLE LA NORVÈGE ET LA SUISSE : votre participation à la
collecte séparée est requise par la loi.
Le symbole ci-dessus apparaît sur les appareils électriques et électroniques et sur les piles (ou leur
emballage) pour rappeler ceci aux utilisateurs. Si « Hg » ou « Pb » apparaissent sous le symbole, cela
signifie que la pile contient des traces de mercure (Hg) ou de plomb (Pb), respectivement.
Dans les ménages PRIVÉS, les utilisateurs sont priés d’utiliser les installations de retour existantes pour
les appareils et les piles usagés. Les piles sont collectées dans les points de vente. Leur retour est gratuit.
Si l’appareil a été utilisé à des FINS COMMERCIALES, veuillez contacter votre fournisseur SHARP qui
vous informera sur sa reprise. Si cette reprise engendre des coûts, ceux-ci pourraient vous être facturés.
Les petits appareils (et les petites quantités) peuvent être repris par votre installation de collecte locale.
Pour l’Espagne : veuillez contacter le système de collecte établi ou votre autorité locale pour la reprise de
vos produits usagés.
Cet équipement est conforme aux Règles (de gestion et de traitement) des déchets électroniques de 2016.
Selon les restrictions sur les composants dangereux telles que spécifiées dans la règle 16 sur les
équipements électriques et électroniques.
Pour plus d’informations sur un meilleur recyclage, consultez le site Web.
http://www.sbsil.com
AVERTISSEMENT:
AFIN DE RÉDUIRE LE RISQUE D’INCENDIE OU DE
À LA PLUIE OU À L’HUMIDITÉ.
ATTENTION
RISQUE DE CHOC
ÉLECTRIQUE
NE PAS OUVRIR
ATTENTION: AFIN DE RÉDUIRE LE RISQUE DE
CHOC ÉLECTRIQUE, NE PAS
RETIRER LE COUVERCLE.
NE CONTIENT AUCUNE PIÈCE
RÉPARABLE PAR L’UTILISATEUR.
CONFIER L’ENTRETIEN À DES
PERSONNES QUALIFIÉES.
REMARQUE POUR LES UTILISATEURS AU
ROYAUME-UNI IMPORTANT
Les couleurs des fils dans ce cordon d’alimentation sont conformes au code couleur suivant :
BLEU : « NEUTRE »
MARRON : « SOUS TENSION »
CONNECTER LA PRISE AU CORDON D’ALIMENTATION :
Comme les couleurs des fils du cordon d’alimentation de cet appareil peuvent ne pas
correspondre aux marquages de couleur identifiant les terminaux dans vos prises,
procédez comme suit :
• Le fil de couleur BLEUE doit être connecté au terminal qui est marqué de la lettre N
ou de couleur NOIRE.
• Le fil de couleur MARRON doit être connecté au terminal qui est marqué de la lettre L
ou de couleur ROUGE.
ATTENTION:
Ne pas connecter le fil sous tension (MARRON) ou le fil neutre (BLEU) au terminal de terre
de votre prise secteur à 3 broches.
Le symbole d’un éclair terminé par une flèche,
à l’intérieur d’un triangle, alerte l’utilisateur de la
présence d’une « tension dangereuse » non
isolée à l’intérieur du boîtier du produit, qui peut
être de magnitude suffisante pour constituer
un risque de choc électrique pour les personnes.
Le point d’exclamation à l’intérieur d’un triangle
alerte l’utilisateur de la présence d’instructions
de fonctionnement et d’entretien (révision)
importantes dans la documentation
accompagnant le produit.
7
Page 9
CHER CLIENT(E) SHARP PRÉCAUTIONS DE SÉCURITÉ
Merci d’avoir acheter un produit SHARP LCD. Afin de garantir la sécurité et de nombreuses années
de fonctionnement sans problème de votre produit, lisez soigneusement les Précautions de
sécurité avant d’utiliser ce produit.
PRÉCAUTIONS DE SÉCURITÉ
De l’électricité est utilisée pour réaliser de nombreuses fonctions utiles mais elle peut également blesser les
personnes et endommager les biens si elle n’est pas manipulée correctement. Ce produit a été conçu et
fabriqué avec comme objectif prioritaire la sécurité. Cependant, une utilisation incorrecte peut provoquer un
choc électrique et/ou un incendie. Afin d’éviter un danger potentiel, veuillez observer les instructions suivantes
lors de l’installation, du fonctionnement et du nettoyage du produit. Pour garantir votre sécurité et prolonger la
durée de service de votre produit LCD, veuillez lire les précautions suivantes soigneusement avant d’utiliser le
produit.
1. Lire les instructions — Toutes les instructions liées au fonctionnement doivent être lues et comprises avant
de faire fonctionner le produit.
2. Conserver ce manuel dans un endroit sûr — Ces instructions de sécurité et de fonctionnement doivent
être conservées dans un endroit sûr pour consultation ultérieure.
3. Observer les avertissements — Tous les avertissements sur le produit et figurant dans les instructions
doivent être observés minutieusement.
4. Suivre les instructions — Toutes les instructions de fonctionnement doivent être suivies.
5. Nettoyage — Débranchez le câble d’alimentation de la prise secteur avant de nettoyer le produit. Utiliser
un chiffon sec pour nettoyer le produit. N’utilisez pas de produits nettoyant liquides ou en aérosols. Ne
pas utiliser un chiffon sale. Le faire pourrait endommager le produit.
6. Accessoires — Ne pas utiliser d’accessoires non recommandés par le fabricant. L’utilisation d’accessoires
inadaptés peut entraîner des accidents.
7. Eau et humidité — Ne pas utiliser le produit à proximité d’un point d’eau. Ne pas installer le produit dans
un endroit où il risque de recevoir des projections d’eau. Faire attention aux appareils qui évacuent de l’eau,
comme un climatiseur.
8. Ventilation — Les évents et autres ouvertures du coffret sont destinés à la ventilation.
Ne les recouvrez pas et ne les bloquez pas car une ventilation insuffisante risque de provoquer une
surchauffe et/ou de réduire la durée de vie de l’appareil. Ne pas placer le produit sur un canapé, un tapis
ou toute autre surface similaire, car ils peuvent bloquer les ouvertures de ventilation. Ne le placez pas dans
des endroits clos comme une bibliothèque ou une étagère, sauf si une ventilation adéquate est prévue ou
si les instructions du fabricant sont respectées.
9. Protection du cordon d’alimentation — Les cordons d’alimentation doivent être installés correctement
pour éviter que des personnes marchent dessus ou que des objets soient posés dessus.
10. Le panneau CD utilisé dans ce produit est fait en verre. Par conséquent, il peut se casser lorsque le
produit tombe ou reçoit un impact. Faire attention de ne pas se blesser avec du verre brisé au cas où le
panneau LCD se casse.
11. Surcharge — Ne pas surcharger les prises secteur ou les cordons d’alimentation. Une surcharge peut
causer un incendie ou un choc électrique.
12. Insertion d’objets et de liquides — Ne jamais insérer d’objet dans le produit par les conduites ou les
ouvertures. Une haute tension parcourt le produit, et l’insertion d’un objet peut causer un choc électrique
et/ou mettre des pièces internes en court-circuit.
Pour la même raison, ne pas verser d’eau ou de liquide sur le produit.
13. Entretien — Ne tentez pas de procéder vous-même à l’entretien de l’appareil. La dépose des couvercles
risque de vous exposer à de hautes tensions et d’autres situations dangereuses. Demandez qu’une
personne qualifiée réalise l’entretien.
14. Réparation — Si l’un des états suivants se produit, débrancher le cordon d’alimentation de la prise
secteur, et demander à une personne qualifiée d’effectuer les réparations.
a. Lorsque le cordon d’alimentation ou la prise sont endommagés.
b. Lorsque du liquide a été projeté sur le produit ou lorsque des objets sont tombés dans le produit.
c. Lorsque le produit a été exposé à la pluie ou à de l’eau.
d. Lorsque le produit ne fonctionne pas correctement comme décrit dans les instructions de
fonctionnement.
Ne pas toucher les commandes autres que celles décrites dans les instructions de fonctionnement. Un
ajustement incorrect de commandes non décrites dans les instructions peut entraîner des dommages,
ce qui nécessite souvent un important travail d’ajustement par un technicien qualifié.
e. Lorsque le produit est tombé ou a été endommagé.
f. Lorsque le produit affiche un état anormal. Toute anormalité visible du produit indique que le produit a
besoin d’une révision.
15. Pièces de rechange — Au cas où le produit a besoin de pièces de rechange, s’assurer que le réparateur
utilise des pièces de rechange spécifiées par le fabricant, ou des pièces possédant les mêmes
caractéristiques et performances que les pièces d’origine. L’utilisation de pièces non autorisées peut
causer un incendie, un choc électrique et/ou d’autres dangers.
16. Vérifications de sécurité — Après réalisation d’une révision ou de réparations, demander au technicien de
service de réaliser des vérifications de sécurité pour garantir que le produit est en état de fonctionnement
correct.
17. Montage mural — Lors du montage mural du produit, s’assurer d’installer le produit conformément à la
méthode recommandée par le fabricant.
18. Sources de chaleur — Maintenir le produit loin de sources de chaleur comme des chauffages, des
radiateurs, des fours et tout autre produit dégageant de la chaleur (y compris les amplificateurs).
19. Piles — L’utilisation incorrecte des piles peut provoquer l’explosion ou l’inflammation des piles. Une pile
qui coule peut corroder l’appareil, salir vos mains ou abîmer vos vêtements. Afin d’éviter ces problèmes,
s’assurer d’observer les précautions ci-dessous :
• Utiliser uniquement les piles spécifiées.
• Installer les piles en respectant les pôles plus (+) et moins (-) des piles conformément aux instructions se
trouvant dans le compartiment.
• Ne pas mélanger des piles neuves et anciennes.
• Ne pas mélanger de piles de différents types. Les spécifications de tension des piles d’une même forme
peuvent varier.
• Remplacer rapidement une pile morte par une pile neuve.
• Si vous n’utilisez pas la télécommande pendant une longue période, retirer les piles.
• Si le liquide de piles ayant coulé entre en contact avec votre peau ou vos vêtements, rincer
immédiatement et abondamment. S’il entre en contact avec vos yeux, bien rincer l’œil au lieu de le
frotter et demander un avis médical immédiatement. Le liquide de piles ayant coulé qui entre en contact
avec vos yeux ou vos vêtements peut provoquer une irritation de la peau ou endommager vos yeux.
20. L’utilisation d’un écran ne doit pas s’accompagner de risques ou de dangers mortels susceptibles
d’entraîner la mort, des dommages corporels, des dommages physiques sévères ou toute autre perte,
y compris le contrôle d’une réaction nucléaire dans une installation nucléaire, un système de respirateur
artificiel médical, et le contrôle du lancement d’un missile dans un système d’armement.
21. Ne pas rester en contact avec les pièces du produit qui deviennent chaudes pendant de longues
périodes. Ce contact pourrait causer des brûlures à basse température.
22. Ne pas altérer ce produit.
AVERTISSEMENT :
Pour empêcher la propagation d’un incendie, tenez toujours bougies ou autres
flammes nues à l’écart de ce produit.
AVERTISSEMENT :
Ceci est un produit de classe A. Dans un environnement domestique, ce produit peut entraîner des
interférences radio pour lesquelles l’utilisateur pourra être appelé à prendre des mesures adéquates.
Pour garantir la conformité avec les réglementations EMC, utilisez des câbles blindés pour connecter
les terminaux suivants : terminal d’entrée PC/AV HDMI, terminal d’entrée PC/AV D-SUB et terminaux
d’entrée RS-232C.
ITALIANO DEUTSCHESPAÑOL FRANÇAISTÜRKÇEРУССКИЙ ESPAÑOLITALIANO FRANÇAISESPAÑOL DEUTSCHTÜRKÇEРУССКИЙ
8
Page 10
ASTUCES ET INSTRUCTIONS DE SÉCURITÉPRÉCAUTIONS DE SÉCURITÉ
Si un écran n’est pas placé dans un endroit suffisamment stable, il peut être potentiellement
dangereux à cause de chutes possibles. De nombreuses blessures, particulièrement chez les enfants,
peuvent être évitées en prenant de simples précautions telles que :
• Utiliser des appareils de fixation comme des supports muraux recommandés par le fabricant.
• Utiliser uniquement des meubles capables de supporter l’écran sans risque.
• S’assurer que l’écran ne dépasse du bord de meuble de support.
• Ne pas placer l’écran que un meuble haut (par exemple, un placard ou une bibliothèque) sans
ancrer au préalable le meuble et l’écran à un support convenable.
• N
e pas placer les écrans sur un chiffon ou d’autres matériaux placés entre l’écran et le meuble de support.
• Éduquer les enfants quant aux dangers liés à l’escalade des meubles pour atteindre l’écran ou ses
commandes.
Plus spécifiquement pour la sécurité des enfants
– Ne pas laisser les enfants monter sur ou jouer avec l’écran.
–
Ne pas placer l’écran sur un meuble qui peut être utilisé facilement comme escabeau telle une commode.
– Se rappeler que les enfants peuvent s’enthousiasmer en regardant un programme, surtout sur un
écran « plus grand que nature ». Il faut veiller à placer ou installer l’écran là où il ne peut être ni
poussé, ni tiré, ni renversé.
– Il faut veiller à acheminer tous les cordons et tous les câbles connectés à l’écran de manière à ce
qu’ils ne puissent pas être tirés ou attrapés par des enfants curieux.
ASTUCES ET INSTRUCTIONS DE SÉCURITÉ
– Le panneau LCD TFT couleur utilisé dans cet écran est réalisé par l’application d’une technologie de haute précision.
Cependant, des pixels qui ne s’allument jamais ou qui sont éclairés en permanence sont susceptibles
d’apparaître sur l’écran. Aussi, si l’écran est regardé d’un angle aigu, les couleurs ou la luminosité peuvent
ne pas être uniformes. Remarque : il ne s’agit pas de défaillance mais d’un phénomène courant pour les
écrans LCD et cela n’affectera pas les performances de l’écran.
– Ne pas afficher d’image fixe pendant une longue période, car cela pourrait entraîner une image résiduelle.
– Ne jamais frotter ou taper sur l’écran avec des objets durs.
– Veuillez noter que SHARP CORPORATION n’est en aucun cas responsable des erreurs faites lors de
l’utilisation par le client ou un tiers, ni de tout autre défaillance ou dommage du produit survenant pendant
son utilisation, sauf si une assurance dommages est reconnue par la loi.
– Cet écran et ses accessoires peuvent être mis à niveau sans préavis.
– Ne pas utiliser l’écran dans un endroit plein de poussière, où l’humidité est élevée, ou dans un endroit où
l’écran peut entrer en contact avec de l’huile ou de la vapeur. Ne pas utiliser dans un environnement abritant
des gaz corrosifs (dioxyde de soufre, sulfure d’hydrogène, dioxyde d’azote, chlore, ammoniac, ozone, etc.).
Cela pourrait entraîner un incendie.
– S’assurer que l’écran n’entre pas en contact avec de l’eau ou d’autres fluides. S’assurer qu’aucun objet comme
des trombones ou des épingles n’entrent dans l’écran, car cela pourrait entraîner un incendie ou un choc électrique.
– Ne pas placer l’écran sur des objets instables ou dans des endroits peu sûrs. Ne pas administrer de choc
violent ni faire vibrer fortement l’écran. Faire tomber ou basculer l’écran peut l’endommager.
– Ne pas utiliser l’écran près d’un appareil chauffant ou dans des endroits où la température est susceptible
d’être élevée, car cela peut causer une production de chaleur excessive et un départ d’incendie.
– Ne pas utiliser l’écran dans des endroits où il pourrait être exposé aux rayons directs du soleil.
– S’assurer de toujours retirer la poussière ou les déchets attachés à l’ouverture de ventilation. Si de la
poussière s’accumule dans l’ouverture de ventilation ou à l’intérieur de l’écran, cela peut entraîner une
chaleur excessive, un départ d’incendie ou une défaillance.
Demander un nettoyage de l’intérieur de l’écran auprès d’un service après-vente ou un centre de réparation
SHARP agréé.
– Les images ne peuvent pas être tournées sur cet écran.
Lors d’une utilisation en portrait, vous devrez préparer à l’avance un contenu orienté correctement.
– La prise secteur doit être installée près de l’appareil et doit être facile d’accès.
– Durée de fonctionnement en continu et garantie. Ce produit est conçu pour une utilisation quotidienne
maximale de 16 heures. Une utilisation en continu supérieure.
Le cordon d’alimentation
• Le rétroéclairage LED de ce produit possède une durée de vie limitée.
PRÉCAUTIONS DE MONTAGE
• Ce produit est destiné à une utilisation à l’intérieur.
• Un support mural conforme aux spécifications VESA est nécessaire.
• Comme l’écran est lourd, consulter votre fournisseur avant d’installer, de retirer ou de déplacer l’écran.
• Monter l’écran sur le mur nécessite une expertise spéciale et ce travail doit être réalisé par un fournisseur
• Utiliser l’écran avec la surface perpendiculaire à une surface plane. Au besoin, l’écran peut être penché de
• Cet écran doit être utilisé à une température ambiante comprise entre 0 °C et 40 °C. Prévoir assez d’espace
• S’il est difficile de fournir un espace suffisant pour quelque raison que ce soit, comme l’installation de
• La condition de température peut changer lors de l’utilisation de l’écran avec les appareils optionnels
• Ne pas bloquer les ouvertures de ventilation. Si la température à l’intérieur de l’écran augmente, cela
• Ne pas placer l’écran sur un appareil qui dégage de la chaleur.
9
– Utiliser uniquement le cordon d’alimentation fourni avec l’écran.
– Ne pas endommager le cordon d’alimentation ni placer d’objets lourds dessus, l’étirer ou trop le courber.
Également, ne pas ajouter de rallonge. Un cordon endommagé peut entraîner un incendie ou un choc électrique.
– Ne pas utiliser le cordon d’alimentation avec une multiprise.
L’ajout d’une rallonge peut entraîner un incendie dû à une surchauffe.
– Ne pas retirer ou insérer la fiche secteur avec les mains humides. Cela pourrait entraîner un choc électrique.
– Débrancher le cordon d’alimentation s’il n’est pas utilisé pendant une longue période.
– Ne pas essayer de réparer le cordon d’alimentation s’il est cassé ou défaillant. Confier la réparation au
représentant de l’entretien.
Rétroéclairage LED
* Si l’écran devient noir ou ne s’allume pas, il peut être nécessaire de remplacer le rétroéclairage LED.
* Ce rétroéclairage LED est exclusif à ce produit et doit être remplacé par un service après-vente ou un
centre de réparation SHARP agréé. Contacter un service après-vente ou un centre de réparation SHARP
agréé pour vous aider.
SHARP agréé. Vous ne devez jamais essayer de réaliser ce travail vous-même. Notre société se sera en aucun
cas responsable des accidents ou des blessures causés par un montage ou une manipulation incorrects.
20 degrés vers le haut ou vers le bas.
autour de l’écran pour empêcher une accumulation de chaleur à l’intérieur.
l’écran dans un boîtier, ou si la température ambiante peut dépasser la plage de 0 °C à 40 °C, installer un
ventilateur ou prendre d’autres mesures pour conserver une température ambiante dans la plage requise.
recommandés par SHARP. Dans ce cas, vérifier la condition de température spécifiée par les appareils
optionnels.
pourrait entraîner une défaillance.
7-7/8 [200]
2
[50]
2 [50]
Unité : pouce (mm)
5/16 [7]
2
[50]
Page 11
DEUTSCH
WICHTIGE INFORMATIONEN
WARNUNG: UM DAS RISIKO VON FEUER ODER STROMSCHLAG ZU
VERMEIDEN, SETZEN SIE DIESES PRODUKT NICHT
REGEN OR FEUCHTIGKEIT AUS.
Hinweise zur Entsorgung dieses Gerätes und der Batterien
WENN SIE DIESE AUSRÜSTUNG ODER IHRE BATTERIEN ENTSORGEN WOLLEN, VERWENDEN SIE
NICHT DEN ÜBLICHEN ABFALLBEHÄLTER UND NICHT EINEN OFEN ODER KAMIN!
Gebrauchte elektrische und elektronische Geräte und Batterien sollten grundsätzlich gesammelt und
gemäß den geltenden Gesetzen GESONDERT behandelt werden.
Eine gesonderte Sammlung fördert eine umweltfreundliche Behandlung, Recycling von Materialien
und minimiert die endgültige Beseitigung von Abfällen. UNSACHGEMÄSSE ENTSORGUNG kann
durch bestimmte Stoffe schädlich für die menschliche Gesundheit und die Umwelt sein! Schaffen
Sie GEBRAUCHTE GERÄTE zu einer lokalen, normalerweise städtischen, Sammlungsanlage, wenn
vorhanden.
Entfernen Sie VERBRAUCHTE BATTERIEN aus dem Gerät und bringen Sie sie zu einer
Batteriesammelstelle; Meistens ist das ein Ort, wo neue Batterien verkauft werden.
Wenn Sie Zweifel an der Entsorgung haben, wenden Sie sich an Ihren örtlichen Behörden oder Händler
und fragen Sie nach der richtigen Entsorgungsmethode.
NUR FÜR BENUTZER IN DER EUROPÄISCHEN UNION UND IN ANDEREN LÄNDERN; ZUM
BEISPIEL NORWEGEN UND SCHWEIZ: Ihre Teilnahme an einer gesonderten Sammlung ist gesetzlich
vorgeschrieben.
Das Symbol, das oben gezeigt wird, erscheint auf elektrischen und elektronischen Geräten und Batterien
(oder der Verpackung), um die Benutzer daran zu erinnern. Wenn unterhalb des Symbols “Hg” oder “Pb”
erscheint, bedeutet dies, dass die Batterie Spuren von Quecksilber (Hg) oder Blei (Pb) enthält.
Benutzer von PRIVATEN HAUSEHALTEN werden aufgefordert, vorhandene Rücknahmestellen für
gebrauchte Geräte und Batterien zu nutzen. Die Batterien werden an den Verkaufsstellen gesammelt. Die
Rückgabe ist kostenlos.
Wenn das Gerät für GESCHÄFTLICHE ZWECKE verwendet wurde, wenden Sie sich bitte an Ihren
SHARP-Händler, der Sie über die Rücknahme informiert. Die Kosten für die Rücknahme können Ihnen in
Rechnung gestellt werden. Kleine Geräte (und kleine Mengen) können von Ihrer örtlichen Sammelstelle
zurückgenommen werden. Für Spanien: Für die Rücknahme Ihrer gebrauchten Produkte wenden Sie sich
bitte an das etablierte Sammelsystem oder Ihre örtliche Behörde.
Dieses Gerät entspricht den Regeln für die Abfallentsorgung (Management und Handhabung), 2016.
Zur Beschränkung der gefährlichen Bestandteile gemäß Regel 16 in Elektro- und Elektronikgeräten.
Weitere Informationen zum ordnungsgemäßen Recycling finden Sie auf der Website.
http://www.sbsil.com
http://www.sbsil.com
VORSICHT
GEFAHR EINES
ELEKTRISCHEN
SCHLAGES
NICHT ÖFFNEN
VORSICHT: ZUR VERMEIDUNG DES RISIKOS
VON ELEKTRISCHEN SCHLÄGEN,
ENTFERNEN SIE NICHT DIE HÜLLE.
KEINE BENUTZERGEBRAUCHSFÄHIGEN TEILE INNEN.
BEDIENUNGSANLEITUNG NUR FÜR
QUALIFIZIERTES SERVICEPERSONAL.
Der Blitz mit dem Pfeilspitze-Symbol innerhalb
eines Dreiecks soll den Benutzer auf das
Vorhandensein einer nicht isolierten
"gefährlichen Spannung" innerhalb des
Produktgehäuses hinweisen, die von
ausreichender Größe sein kann, um ein Risiko
eines elektrischen Schlags für Personen
darzustellen.
Das Ausrufezeichen innerhalb eines Dreiecks
soll den Benutzer auf wichtige Bedienungs- und
Wartungsanweisungen in der dem Produkt
beiliegenden Literatur hinweisen.
WICHTIGER HINWEIS FÜR
BENUTZER IN U.K.
Die Drähte in diesem Netzkabel sind in Übereinstimmung mit dem folgenden Code
gefärbt:
BLAU: "NULL"
BRAUN: "SPANNUNGSFÜHREND"
ANSCHLUSSSTECKER AN DIE NETZKABEL:
Falls die Farben der Drähte im Netzkabel dieses Gerätes nicht mit den farbigen
Markierungen übereinstimmen, die die Anschlüsse in den Steckern kennzeichnen, gehen
Sie wie folgt vor:
• Der mit BLAUER Farbe gekennzeichnete Draht muss an die Klemme angeschlossen
werden, die mit dem Buchstaben N oder SCHWARZ gekennzeichnet ist.
• Der mit BRAUN gekennzeichnete Draht muss an die Klemme angeschlossen werden,
die mit dem Buchstaben L oder ROT gekennzeichnet ist.
VORSICHT:
Verbinden Sie das spannungsführende Kabel (BRAUN) oder das neutrale Kabel (BLAU)
nicht mit der Erdungsklemme Ihres 3 - poligen Netzsteckers.
10
Page 12
LIEBER SHARP KUNDE SICHERHEITSVORKEHRUNGEN
Vielen Dank für den Kauf eines SHARP LCD Produkts. Um die Sicherheit und den langjährigen
störungsfreien Betrieb Ihres Produktes zu gewährleisten, lesen Sie bitte die Sicherheitshinweise
sorgfältig durch, bevor Sie das Produkt in Betrieb nehmen.
SICHERHEITSVORKEHRUNGEN
Elektrizität wird verwendet, um viele nützliche Funktionen auszuführen, aber es kann auch zu Verletzungen
und Sachschäden bei unsachgemäßer Handhabung führen. Dieses Produkt wurde mit der höchsten Priorität
für Sicherheit entwickelt und hergestellt. Eine unsachgemäße Verwendung kann jedoch zu einem elektrischen
Schlag und/oder Feuer führen. Um mögliche Gefahren zu vermeiden, beachten Sie beim Einbau, Betrieb und
Reinigung des Gerätes die folgenden Hinweise. Um die Sicherheit zu gewährleisten und die Lebensdauer
Ihres LCD-Produkts zu verlängern, lesen Sie bitte die folgenden Vorsichtsmaßnahmen sorgfältig durch, bevor
Sie das Produkt verwenden.
1. Hinweise lesen - Alle Betriebsanleitungen müssen vor Inbetriebnahme des Gerätes gelesen und
verstanden werden.
2. Bewahren Sie diese Anleitung an einem sicheren Ort auf. - Diese Sicherheitshinweise und
Bedienungsanleitungen müssen zur späteren Verwendung an einem sicheren Ort aufbewahrt werden.
3. Warnhinweise beachten - Alle Warnungen auf dem Produkt und in der Anleitung sind genau zu beachten.
4. Anweisungen befolgen - Alle Anweisungen sind zu befolgen.
5. Reinigung - Ziehen Sie das Netzkabel aus der Steckdose, bevor Sie das Produkt reinigen. Reinigen Sie
das Produkt mit einem trockenen Tuch. Verwenden Sie keine flüssigen Reiniger oder Aerosol-Sprays.
Verwenden Sie keine verschmutzten Tücher. Andernfalls kann das Produkt beschädigt werden.
6. Zusatzgeräte - Verwenden Sie keine Zusatzgeräte, die nicht vom Hersteller empfohlen werden. Die
Verwendung von unzulänglichem Zubehör kann zu Unfällen führen.
7. Wasser und Feuchtigkeit - Verwenden Sie das Produkt nicht in der Nähe von Wasser. Stellen Sie das
Produkt nicht an Orten auf, an denen Wasser auf ihn spritzen kann. Achten Sie auf Geräte, die Wasser,
wie zum Beispiel eine Klimaanlage, ablassen.
8. Belüftung—Das Gehäuse weist Schlitze und andere Öffnungen auf, die der Belüftung dienen.
Diese Öffnungen dürfen nicht blockiert werden, da ungenügende Belüftung zu einem Wärmestau und/
oder einer Verkürzung der Produktlebensdauer führen kann. Stellen Sie das Produkt nicht auf ein Sofa,
einen Teppich oder eine ähnliche Oberfläche, da diese die Belüftungsöffnungen blockieren können. Das
Gerät ist nicht für Einbau bestimmt und darf nicht an beengten Plätzen wie in Bücherschränken oder
Regalen aufgestellt werden.
9. Netzkabelschutz - Die Netzkabel müssen ordnungsgemäß verlegt werden, um zu verhindern, dass
Personen darauf treten oder Gegenstände darauf stehen.
10. Das in diesem Produkt verwendete LCD ist aus Glas. Daher kann es brechen, wenn das Produkt fallen
gelassen oder mit Stoß versetzt wird. Achten Sie darauf, dass Sie nicht durch zerbrochene Glasstücke
verletzt werden, falls die LCD-Anzeige zerbricht.
11. Überlastung - Überlasten Sie keine Wechselstromsteckdosen oder Verlängerungskabel. Überlastung kann
Feuer oder elektrischen Schlag verursachen.
12. Einbringen von Gegenständen und Flüssigkeiten - Niemals einen Gegenstand durch die Öffnungen oder
die Öffnungen in das Produkt einführen. Hochspannungsflüsse im Produkt und das Einsetzen eines
Objekts können elektrischen Schlag und/oder kurze interne Teile verursachen.
Verschütten Sie aus dem gleichen Grund weder Wasser noch Flüssigkeiten auf das Produkt.
13. Wartung—Versuchen Sie nicht, das Produkt selbst zu warten. Beim Entfernen von Abdeckungen bestehen
Stromschlag- und andere potentielle Gefahren. Wenden Sie sich an einen qualifizierten Kundendienst.
14. Reparatur - Wenn eine der folgenden Bedingungen eintritt, ziehen Sie das Netzkabel aus der Steckdose
und wenden Sie sich an einen qualifizierten Kundendienst, um Reparaturen durchzuführen.
a. Wenn das Netzkabel oder der Netzstecker beschädigt ist.
b. Wenn eine Flüssigkeit auf das Produkt verschüttet wurde oder wenn Gegenstände in das Produkt
gefallen sind.
c. Wenn das Produkt Regen oder Wasser ausgesetzt wurde.
d. Wenn das Produkt nicht ordnungsgemäß arbeitet, wie in der Bedienungsanleitung beschrieben.
Berühren Sie nicht die Bedienelemente, die nicht in der Bedienungsanleitung beschrieben sind. Eine
unsachgemäße Einstellung der Bedienelemente, die nicht in der Anleitung beschrieben ist, kann
zu Schäden führen, die häufig durch umfangreiche Einstellungsarbeiten durch einen qualifizierten
Techniker notwendig sind.
e. Wenn das Produkt fallengelassen oder beschädigt wurde.
f. Wenn das Produkt einen anormalen Zustand anzeigt. Jede Auffälligkeit des Produktes weist darauf hin,
dass das Produkt gewartet werden muss.
15. Ersatzteile - Falls das Produkt Ersatzteile benötigt, vergewissern Sie sich, dass die Kundendienstperson
Ersatzteile verwendet, die vom Hersteller angegeben wurden oder die dieselben Eigenschaften und
Eigenschaften wie die Originalteile aufweisen. Die Verwendung nicht zugelassener Teile kann zu Feuer,
elektrischen Schlägen und/oder anderen Gefahren führen.
16. Sicherheitskontrollen - Nach Beendigung von Wartungs- oder Reparaturarbeiten den Servicetechniker
auffordern, Sicherheitsüberprüfungen durchzuführen, um sicherzustellen, dass das Produkt
ordnungsgemäß funktioniert.
17. Wandmontage - Bei der Montage des Produkts an einer Wand muss das Produkt gemäß der vom
Hersteller empfohlenen Methode installiert werden.
18. Wärmequellen - Halten Sie das Produkt von Wärmequellen wie Heizkörpern, Heizungen, Öfen und
anderen wärmeerzeugenden Produkten (einschließlich Verstärkern) fern.
19. Batterien - Falscher Gebrauch von Batterien kann dazu führen, dass die Batterien platzen oder sich
entzünden. Eine undichte Batterie kann das Gerät korrodieren, Ihre Hände schmutzig machen oder Ihre
Kleidung verderben. Um diese Probleme zu vermeiden, beachten Sie bitte die folgenden Hinweise:
• Verwenden Sie nur die angegebenen Batterien.
• Setzen Sie die Batterien gemäß den Anweisungen im Fach mit den Plus- (+) und Minusseiten (-) der
Batterien ein.
• Verwenden Sie keine alten und neuen Batterien.
• Mischen Sie keine Batterien verschiedener Typen. Spannungsangaben von Batterien derselben Form
können variieren.
• Ersetzen Sie die Batterie mit einem neuen Akku sofort.
• Wenn Sie die Fernbedienung längere Zeit nicht benutzen, entfernen Sie die Batterien.
• Wenn ausgetretene Batterieflüssigkeit auf Haut oder Kleidung gelangt, sofort gründlich ausspülen.
Wenn es in Ihr Auge gelangte, dann baden Sie Ihr Auge gut mit Wasser, anstatt zu reiben, und suchen
Sie ärztliche Behandlung sofort auf. Ausgelaufene Batterieflüssigkeit, die in Ihr Auge oder Ihre Kleidung
gelangt, kann Hautreizungen oder Augenschäden verursachen.
20. Die Verwendung des Bildschirms darf nicht mit tödlichen Gefahren oder Gefahren einhergehen, die
unmittelbar zum Tod, zu Körperverletzungen, schweren körperlichen Schäden oder anderen Verlusten
führen können, einschließlich der Kontrolle der Kernreaktion in der kerntechnischen Anlage, des Systems
zur Unterstützung der Rettung und der Raketenabwehr in einem Waffensystem.
21. Bleiben Sie nicht länger in Kontakt mit den Teilen des Produkts, die über längere Zeit heiß werden.
Andernfalls kann es zu Verbrennungen bei niedriger Temperatur kommen.
22. Ändern Sie dieses Produkt nicht.
WARNUNG:
Wegen Brandgefahr dürfen Kerzen oder andere offene Feuerquellen niemals
in der Nähe dieses Produkts verwendet werden.
WARNUNG:
Dies ist ein Produkt der Klasse A. In einer häuslichen Umgebung kann dieses Produkt Funkstörungen
verursachen. In diesem Fall kann der Benutzer entsprechende Maßnahmen ergreifen.
Um die Einhaltung der EMV-Richtlinien zu gewährleisten, verwenden Sie abgeschirmte Kabel, um die
folgenden Verbindunganschlüsse herzustellen:
PC/AV HDMI-Eingangsanschluss, PC/AV D-SUB-Eingangsanschluss und RS-232CEingangsanschluss.
11
Page 13
TIPPS UND SICHERHEITSHINWEISESICHERHEITSVORKEHRUNGEN
Falls ein Monitor nicht an einem ausreichend stabilen Ort positioniert ist, kann es durch Herunterfallen
gefährlich werden. Viele Verletzungen, besonders für Kinder, können vermieden werden, indem
einfache Vorkehrungen befolgt werden wie:
• Verwenden Sie Befestigungsvorrichtungen wie Wandhalterungen, die vom Hersteller empfohlen
werden.
• Verwenden Sie nur Möbel, die den Monitor sicher tragen können.
• Sicherstellen, dass der Monitor nicht über den Rand des darunter befindlichen Möbels hinausragt.
• Setzen Sie den Monitor nicht auf hohe Möbel (z. B. Schränke oder Bücherschränke), ohne die Möbel
und den Monitor an einem geeigneten Träger zu verankern.
• Die Monitore nicht auf Tüchern oder anderen Materialien aufstellen, die zwischen Monitor und
Stützmobiliar platziert sind.
• Erziehen Sie Kinder über die Gefahren des Kletterns auf Möbel, um den Monitor oder seine
Bedienelemente zu erreichen.
Besonders für Kindersicherheit
– Kinder dürfen nicht auf den Monitor klettern oder damit spielen.
– Stellen Sie den Monitor nicht auf Möbel, die leicht als Stufen verwendet werden können, wie z. B.
eine Kommode.
– Erinnern Sie sich, dass Kinder sehr erregt werden können, während Sie ein Programm anschauen,
besonders auf einem übergroßen Monitor. Vorsicht ist geboten, um den Monitor entsprechend zu
platzieren oder zu installieren, wo er nicht gedrückt, gezogen oder heruntergeschlagen werden
kann.
– Achten Sie darauf, dass alle Kabel und Kabel, die an den Monitor angeschlossen sind, so geführt
werden, dass sie nicht von neugierigen Kindern gezogen oder gepackt werden können.
TIPPS UND SICHERHEITSHINWEISE
– Das TFT-Farb-LCD-Panel, welches in diesem Monitor verwendet wird, ist mit der Anwendung von hoher
Präzisionstechnologie hergestellt.
Es können jedoch kleine Bildpunkte auf dem Bildschirm auftreten, die niemals oder permanent leuchten.
Auch wenn der Bildschirm unter einem spitzen Winkel betrachtet wird, kann es ungleichmäßige Farben oder
Helligkeit geben. Bitte beachten Sie, dass es sich nicht um Fehlfunktionen, sondern um häufige Phänomene
von LCDs handelt und die Leistung des Monitors nicht beeinträchtigt wird.
– Kein Standbild länger anzeigen, da dies zu einem verbleibenden Bild führen kann.
– Niemals mit harten Gegenständen den Monitor berühren oder beklopfen.
– Bitte haben Sie Verständnis, dass SHARP CORPORATION keine Verantwortung für Fehler trägt, die
während des Gebrauchs durch den Kunden oder Dritten entstehen, sowie für sonstige Funktionsstörungen
oder Schäden am Produkt, die während des Gebrauchs entstehen, es sei denn, die Haftpflicht ist gesetzlich
anerkannt.
– Dieser Monitor und sein Zubehör können ohne vorherige Ankündigung aktualisiert werden.
– Verwenden Sie den Monitor nicht wo starker Staub, hohe Luftfeuchtigkeit oder Berührungen mit Öl oder
Dampf gegeben sind. Nicht in Umgebungen mit korrosiven Gasen (Schwefeldioxid, Schwefelwasserstoff,
Stickstoffdioxid, Chlor, Ammoniak, Ozon usw.) verwenden, da dies zu einem Brand führen kann.
– Vergewissern Sie sich, dass der Monitor nicht mit Wasser oder anderen Flüssigkeiten in Berührung kommt.
Stellen Sie sicher, dass keine Gegenstände wie Büroklammern oder Stifte in den Monitor gelangen, da dies
zu Bränden oder Stromschlägen führen kann.
– Setzen Sie den Monitor nicht auf instabile Gegenstände oder an unsichere Orte. Achten Sie darauf, dass
der Monitor keine starken Erschütterungen empfängt oder stark vibriert. Fall der Monitor herunterfällt oder
stürzt, kann er dabei beschädigt werden.
– Verwenden Sie den Monitor nicht in der Nähe von Heizgeräten oder an Orten, an denen hohe Temperaturen
auftreten, da dies zu übermäßiger Hitze und Brandausbruch führen kann.
– Verwenden Sie den Monitor nicht an Orten, an denen er direktem Sonnenlicht ausgesetzt ist.
– Achten Sie darauf, ständig Staub und Müll zu entfernen, der an der Lüftungsöffnung angebracht ist. Wenn
sich Staub in der Lüftungsöffnung oder im Inneren des Monitors sammelt, kann es zu übermäßiger Hitze,
Feuerausbruch oder Funktionsstörungen kommen.
Bitte fordern Sie eine Reinigung des Innenraums des Monitors von einem autorisierten SHARPKundendienst oder einer Kundendienststelle an.
– Bilder können auf diesem Monitor nicht gedreht werden.
Bei der Verwendung in Hochformat, müssen Sie im Voraus entsprechende Orientierungseinstellungen
vorbereiten.
– Die Steckdose muss in der Nähe des Gerätes installiert sein und leicht zugänglich sein.
– Dieses Produkt ist für einen maximal 16-stündigen Betrieb pro Tag ausgelegt. Ein kontinuierlicher Betrieb
während mehr als 16 Stunden pro Tag wird von der Garantie nicht gedeckt.
Das Netzkabel
– Verwenden Sie nur das mit dem Monitor gelieferte Netzkabel.
– Das Netzkabel darf nicht beschädigt oder schwere Gegenstände daraufgelegt, gedehnt oder verbogen
werden. Schließen Sie auch keine Verlängerungskabel an. Beschädigungen am Kabel können zu Bränden
oder Stromschlägen führen.
– Verwenden Sie das Netzkabel nicht mit einem Stromanschluss.
Das Hinzufügen eines Verlängerungskabels kann durch Überhitzung zu Feuer führen.
– Netzstecker bitte nicht mit nassen Händen entfernen oder einstecken, andernfalls besteht
Stromschlaggefahr.
– Ziehen Sie den Netzstecker, wenn er längere Zeit nicht benutzt wird.
– Versuchen Sie nicht das Netzkabel zu reparieren, wenn es defekt ist oder Störungen auftreten. Wenden Sie
sich an den Kundendienst.
LED-Hintergrundbeleuchtung
• Die LED-Hintergrundbeleuchtung in diesem Produkt hat eine begrenzte Lebensdauer.
* Wenn der Bildschirm dunkel wird oder sich nicht einschaltet, kann es erforderlich sein, die LED-
Hintergrundbeleuchtung zu ersetzen.
* Diese LED-Hintergrundbeleuchtung ist ausschließlich für dieses Produkt vorgesehen und muss durch
einen autorisierten SHARP-Kundendienst oder ein Kundendienstzentrum ersetzt werden. Bitte wenden Sie
sich an einen autorisierten SHARP-Kundendienst.
MONTAGEVORSICHTSMASSNAHMEN
• Dieses Produkt ist für den Innenbereich bestimmt.
• Ein Befestigungswinkel nach VESA-Spezifikation ist erforderlich.
• Da der Monitor schwer ist, wenden Sie sich bitte an Ihren Fachhändler, bevor Sie den Monitor installieren,
entfernen oder verschieben.
• Die Montage des Monitors an der Wand erfordert besondere Kenntnisse, und die Arbeit muss von
einem autorisierten SHARP-Händler durchgeführt werden. Sie sollten nie versuchen eine dieser Arbeiten
selbst durchzuführen. Unsere Firma trägt keine Verantwortung für Unfälle oder Verletzungen, die durch
unsachgemäße Montage oder unsachgemäße Handhabung verursacht werden.
• Verwenden Sie den Monitor mit der Oberfläche senkrecht zu einer ebenen Fläche. Bei Bedarf kann der
Monitor um bis zu 20 Grad nach oben oder nach unten geneigt werden.
• Dieser Monitor sollte bei einer Umgebungstemperatur zwischen 0°C und 40°C eingesetzt werden.
Stellen Sie genügend Platz um den Monitor zur Verfügung, um zu verhindern, dass sich Hitze im Inneren
ansammelt.
ENGLISHDEUTSCH ESPAÑOLITALIANO FRANÇAISРУССКИЙTÜRKÇE
12
Page 14

Einheit: Zoll (mm)
MONTAGEVORSICHTSMASSNAHMEN
• Falls es schwierig ist, genügend Platz aus irgendeinem Grund zur Verfügung zu haben, wie die Installation
des Monitors in einem Gehäuse, oder falls die Umgebungstemperatur außerhalb des Bereichs von 0 °C bis
40 °C liegen kann, dann installieren Sie einen Ventilator oder nehmen Sie andere Maßnahmen vor, um die
Umgebungstemperatur im gewünschten Bereich zu halten.
• Die Temperatur kann sich bei Verwendung des Monitors zusammen mit den von SHARP empfohlenen
optionalen Geräten ändern. Überprüfen Sie in solchen Fällen die von den optionalen Geräten angegebene
Temperatur.
• Blockieren Sie keine Belüftungsöffnungen. Wenn die Temperatur im Inneren des Monitors ansteigt, kann
dies zu einer Fehlfunktion führen.
• Stellen Sie den Monitor nicht auf ein Gerät, das Wärme erzeugt.
2
[50]
7-7/8 [200]
2 [50]
5/16 [7]
2
[50]
13
Page 15
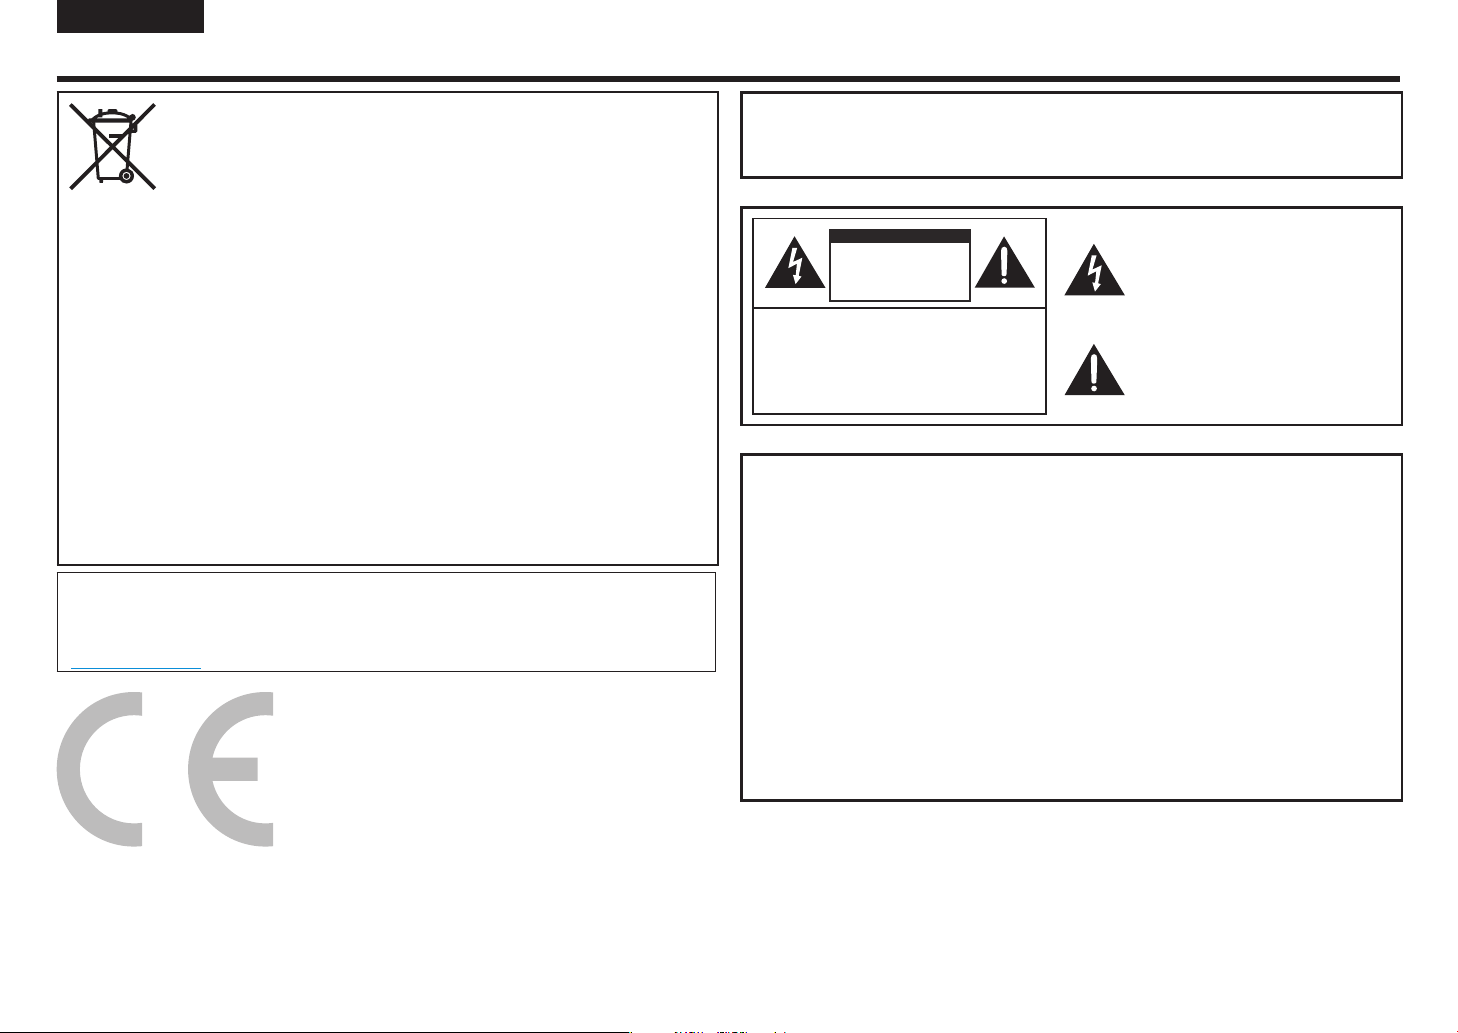
ITALIANO
INFORMAZIONE IMPORTANTE
AVVERTIMENTO: PER RIDURRE IL RISCHIO DI INCENDIO O
ELETTROSHOCK, NON ESPORRE QUESTO
PRODOTTO ALLA PIOGGIA O ALL'UMIDITÀ.
Informazione sullo smaltimento del dispositivo e delle sue batterie
SE DESIDERI SMALTIRE QUESTA ATTREZZATURA, E LE SUE BATTERIE, NON UTILIZZARE COMUNI
BIDONI DELL’IMMONDIZIA E NON BRUCIARLA ALL’INTERNO DI UN FUOCO!
Rimuovere le BATTERIE USATE dall’attrezzatura, e smaltirle all’interno di una struttura dedita alla raccolta
delle batterie, normalmente un luogo dove vengono vendute batterie nuove.
Nel caso di dubbi riguardo allo smaltimento, contattare le autorità locali o il rivenditore e domandare il
metodo corretto di smaltimento.
SOLO PER GLI UTENTI APPARTENENTI ALL’UNIONE EUROPEA, ED ALCUNE ALTRE NAZIONI; PER
ESEMPIO NORVEGIA E SVIZZERA: l’utilizzo della raccolta differenziata è richiesto per legge.
Il simbolo mostrato qui sopra appare sui dispositivi elettrici ed elettronici, e sulle batterie (o sulla
confezione), in modo da ricordare tutto questo agli utenti. Se appaiono le denominazioni ‘Hg’ o ‘Pb’ al
di sotto del simbolo, questo significa che la batteria contiene rispettivamente tracce di mercurio (Hg) o
piombo (Pb).
Agli utenti appartenenti a NUCLEI FAMIGLIARI viene richiesto di utilizzare le piattaforme ecologiche per
smaltire i dispositivi usati e le batterie. Le batterie vengono raccolte nei punti di vendita. La restituzione è
senza costi .
Se il dispositivo è stato utilizzato a SCOPI COMMERCIALI, si prega di contattare il vostro rivenditore
SHARP, sarà lui ad informarvi riguardo al processo di ritiro. Potrebbe essere imposto un costo sul ritiro.
I dispositivi di piccole dimensioni (e per piccole quantità) potrebbe essere possibile smaltire l’attrezzatura
presso una piattaforma ecologica. Per la Spagna: si prega di contattare il sistema per la raccolta
differenziata, o la vostra autorità locale per il ritiro di prodotti usati.
Questo dispositivo sottostà alle normative e-waste (trattamento e gestione) 2016.
In conformità alle limitazioni relative ai componenti pericolosi come specificato nella normativa 16 relativa a
dispositivi elettrici ed elettronici.
Per maggiori informazioni su come eseguire correttamente la raccolta differenziata, si prega di consultare il
sito Web.
http://www.sbsil.com
ATTENZIONE
RISCHIO DI
ELETTROSHOCK
NON APRIRE
ATTENZIONE: PER RIDURRE IL RISCHIO DI
RIVOLGERSI A PERSONALE
ELETTROSHOCK, NON RIMUOVERE
LA COPERTURA. NON SONO
PRESENTI PARTI INTERNE
UTILIZZABILI DALL'UTENTE.
QUALIFICATO.
Il simbolo rappresentante un fulmine che termina
con una freccia, all'interno di un triangolo,
serve ad avvertire l'utente della presenza di
“tensione elettrica pericolosa” non isolata
all'interno del prodotto, questa può essere
di magnitudine sufficiente a costituire un
rischio di elettroshock per una persona.
Il punto esclamativo all'interno di un triangolo
serve ad avvertire l'utente della presenza
di importanti istruzioni operative e di
manutenzione (servizio tecnico) all'interno
delle istruzioni che accompagnano il prodotto.
NOTA IMPORTANTE PER GLI UTENTI
DELLA GRAN BRETAGNA
I cavi elettrici all'interno di questo dispositivo sono colorati in accordo al seguente codice:
BLU: “NEUTRO”
MARRONE: “LIVE”
COLLEGARE LA SPINA ALLA RETE ELETTRICA:
Dato che i colori dei fili elettrici di questo apparato potrebbero non corrispondere ai
colori identificabili nei terminali delle vostre prese, procedere come di seguito:
• Il filo di color BLU deve essere collegato al terminale indicato con la
lettera N o di colore NERO.
• Il filo di color MAROONE deve essere collegato al terminale indicato con la lettera L
o di colore ROSSO.
ATTENZIONE:
Non collegare il filo Live (MARRONE) o il filo neutro (BLU) alla terra del terminale
della vostra presa a 3 poli.
14
Page 16
CARO CLIENTE SHARP PRECAUZIONI LEGATE ALLA SICUREZZA
Grazie per aver acquistato un prodotto LCD SHARP. Per assicurare la sicurezza del prodotto,
e molti anni di utilizzo senza problemi del stesso, ti preghiamo di leggere con attenzione le
precauzioni legate alla sicurezza prima di utilizzare questo prodotto.
PRECAUZIONI LEGATE ALLA SICUREZZA
L'elettricità viene utilizzata per svariate funzioni utili, però quando usata in modo improprio, può anche essere
causa di incidenti personali e danneggiamenti alle proprietà. Questo prodotto è stato progettato e fabbricato
seguendo i più alti standard inerenti alla sicurezza. In ogni modo, l'utilizzo improprio può causare elettroshock
e/o incendi. Per poter prevenire pericoli potenziali, si prega di osservare le seguenti istruzioni durante
installazione, utilizzo e pulizia del prodotto. Per garantire la propria sicurezza, e prolungare la vita del prodotto
LCD, si prega di leggere attentamente le seguenti precauzioni prima di utilizzare il prodotto.
1. Leggere le istruzioni — Tutte le istruzioni relative all'utilizzo del prodotto devono essere lette e comprese
prima di utilizzare il prodotto.
2. Tenere questo manuale in un luogo sicuro — Queste istruzioni di utilizzo del prodotto, e relative alla
sicurezza, devono essere tenute in un posto sicuro come futuro riferimento.
3. Osservare gli avvisi — Tutti gli avvisi presenti su questo prodotto, e all'interno delle istituzioni, devono
essere attentamente osservati.
4. Seguire le istruzioni — Tutte le istruzioni di utilizzo di questo prodotto devono essere seguite.
5. Pulizia — Scollegare il cavo di alimentazione dalla presa di corrente prima di pulire il prodotto. Utilizzare un
panno asciutto per pulire il prodotto. Non usare liquidi o spray per la pulizia. Non utilizzare panni sporchi.
Farlo potrebbe portare al danneggiamento del prodotto.
6. Accessori — Non utilizzare accessori non raccomandati dal produttore. L'utilizzo di accessori inadeguati
può causare incidenti.
7. Acqua e umidità— Non utilizzare questo prodotto in presenza di acqua. Non installare il prodotto in
un luogo dove schizzi d'acqua possono finire sul prodotto. Prestare attenzione a dispositivi per la
deumidificazione, come per esempio i condizionatori d'aria.
8. Ventilazione—I fori e altre aperture dell’unità centrale sono state progettate per la ventilazione.
Non coprire o bloccare questi fori e aperture poiché una scarsa ventilazione potrebbe provocare un
surriscaldamento e/o accorciare la vita del prodotto. Non posizionare il prodotto su divano, tappeto o
superfici similari, dato che queste bloccano le aperture per la ventilazione. Non collocare il prodotto in
luoghi racchiusi come librerie o scaffali che non abbiano una ventilazione appropriata o che non seguano
le istruzioni del fabbricante.
9. Protezione del cavo di alimentazione — I cavi di alimentazione devono essere posizionati in modo
adeguato, per prevenire che le persone li calpestino o che oggetti vengano posizionati sopra di essi.
10. Il pannello LCD utilizzato in questo prodotto è fatto di vetro. Di conseguenza, è possibile si rompa quando
il prodotto viene fatto cadere o viene colpito. Nel caso il pannello LCD venga rotto, prestare attenzione a
possibili incidenti causati da pezzi di vetro.
11. Sovraccarico — Non sovraccaricare le prese della corrente, o le prolunghe. Il sovraccarico può causare
incendi o elettroshock.
12. Inserimento di oggetti e liquidi — Non inserire mai un oggetto all'interno del prodotto attraverso le ventole
o le aperture. Il prodotto è attraversato da corrente e inserire un oggetto può causare elettroshock e/o
mettere in corto circuito delle parti interne.
Per la stessa ragione, non schizzare acqua o liquidi sul prodotto.
13. Manutenzione—Non cercate di effettuare voi la manutenzione del prodotto. Rimuovere le coperture può
esporvi al rischio di scossa e ad altri spiacevoli inconvenienti. Richiedere che sia un addetto qualificato ad
eseguire il lavoro.
14. Riparazione — Nel caso si verifichi una delle seguenti condizioni, scollegare il cavo di alimentazione dalla
presa di corrente e richiedere che una persona qualificata esegua le riparazioni.
a. Quando il cavo di alimentazione o la spina è danneggiato.
b. Quando viene fatto schizzare un liquido sul prodotto o quando un oggetto è caduto all'interno del
prodotto.
c. Quando il prodotto è stato esposto ad acqua o pioggia.
d. Quando il prodotto non funziona in modo corretto, come descritto all'interno delle istruzioni di utilizzo.
Non toccare i controlli se non come descritto all'interno delle istruzioni di utilizzo. Una regolazione
impropria dei controlli, non descritta all'interno delle istituzioni, può causare danni e questi spesso
richiedono un ampio lavoro di regolazione da parte di un tecnico qualificato.
e. Quando il prodotto è stato fatto cadere o è stato danneggiato.
f. Quando il prodotto mostra un funzionamento anomalo. Qualsiasi anomalia del prodotto indica che il
prodotto necessita di manutenzione.
15. Sostituzione delle parti — Nel caso sia necessaria la sostituzione di parti del prodotto, assicurarsi
che il tecnico utilizzi parti di sostituzione specificate dal produttore, o parti con le stesse prestazioni e
caratteristiche di quelle originali. L'utilizzo di parti non autorizzate può causare l'incendio, elettroshock e/o
altri pericoli.
16. Controlli di sicurezza — Al termine della manutenzione o servizio di riparazione, richiedete al tecnico di
eseguire i controlli relativi alla sicurezza, in modo da garantire che il prodotto sia in condizioni corrette di
utilizzo.
17. Montaggio a muro — Quando il prodotto viene montato al muro, assicurarsi di installare il prodotto in
accordo al metodo raccomandato dal produttore.
18. Fonti di calore — Mantenere il prodotto lontano da fonti di calore quali radiatori, stufe, caloriferi e altre fonti
di calore (includendo gli amplificatori).
19. Batterie — L'utilizzo non corretto delle batterie può far sì che le batterie brucino o scoppino. Una batteria
che perde può corrodere il dispositivo, sporcare le vostre mani o macchiare i vostri vestiti. Per evitare
queste problematiche, assicurarsi di seguire le seguenti precauzioni:
• Utilizzare solamente le batterie specificate.
• Installare le batterie con la dovuta attenzione ai poli più (+) e meno (-) delle batterie, secondo le istruzioni
presenti all'interno del compartimento.
• Non mescolare batterie nuove e vecchie.
• Non mescolare differenti tipi di batterie. Le specifiche tecniche di voltaggio delle batterie della stessa
forma possono essere differenti.
• Sostituire rapidamente una batteria scarica con una nuova.
• Se non si utilizza il telecomando per lungo tempo, rimuovere le batterie.
• Se del liquido fuoriuscito dalla batteria si sparge sulla vostra pelle o vestiti, risciacquare immediatamente
e abbondantemente. Se questo tocca i vostri occhi, lavatevi bene e non strofinateli, successivamente
cercate subito soccorso medico. Il fluido che esce dalla batteria e viene a contatto con i vostri occhi, o i
vostri vestiti, può causare irritazioni della pelle o danneggiare i vostri occhi.
20. L'utilizzo del monitor non deve essere accompagnato a rischi di morte, o pericoli che, possano condurre
direttamente alla morte, incidenti personali, danneggiamento fisico grave o altre perdite, includendo
controllo di reazioni nucleari in strutture dedicate all'energia nucleare, respiratori artificiali, controlli per il
lancio dei missili in un sistema missilistico.
21. Non restare in contatto diretto con parti del prodotto che si surriscaldano per lunghi periodi di tempo.
Farlo può causare bruciature a bassa temperatura.
22. Non modificare questo prodotto.
ATTENZIONE:
Per evitare il rischio d’incendio, mantenere sempre lontano il prodotto da
candele o fiamme aperte.
ATTENZIONE:
Questo è un prodotto di classe A. All'interno di un ambiente domestico, questo prodotto può causare
interferenze radio, in tal caso l'utente potrebbe essere tenuto ad intraprendere le misure necessarie.
Per sottostare alla conformità relativa alle normative EMC, utilizzare cavi schermati per collegare i
seguenti terminali: ingresso PC/AV HDMI, ingresso PC/AV D-SUB e ingresso RS-232C.
15
Page 17
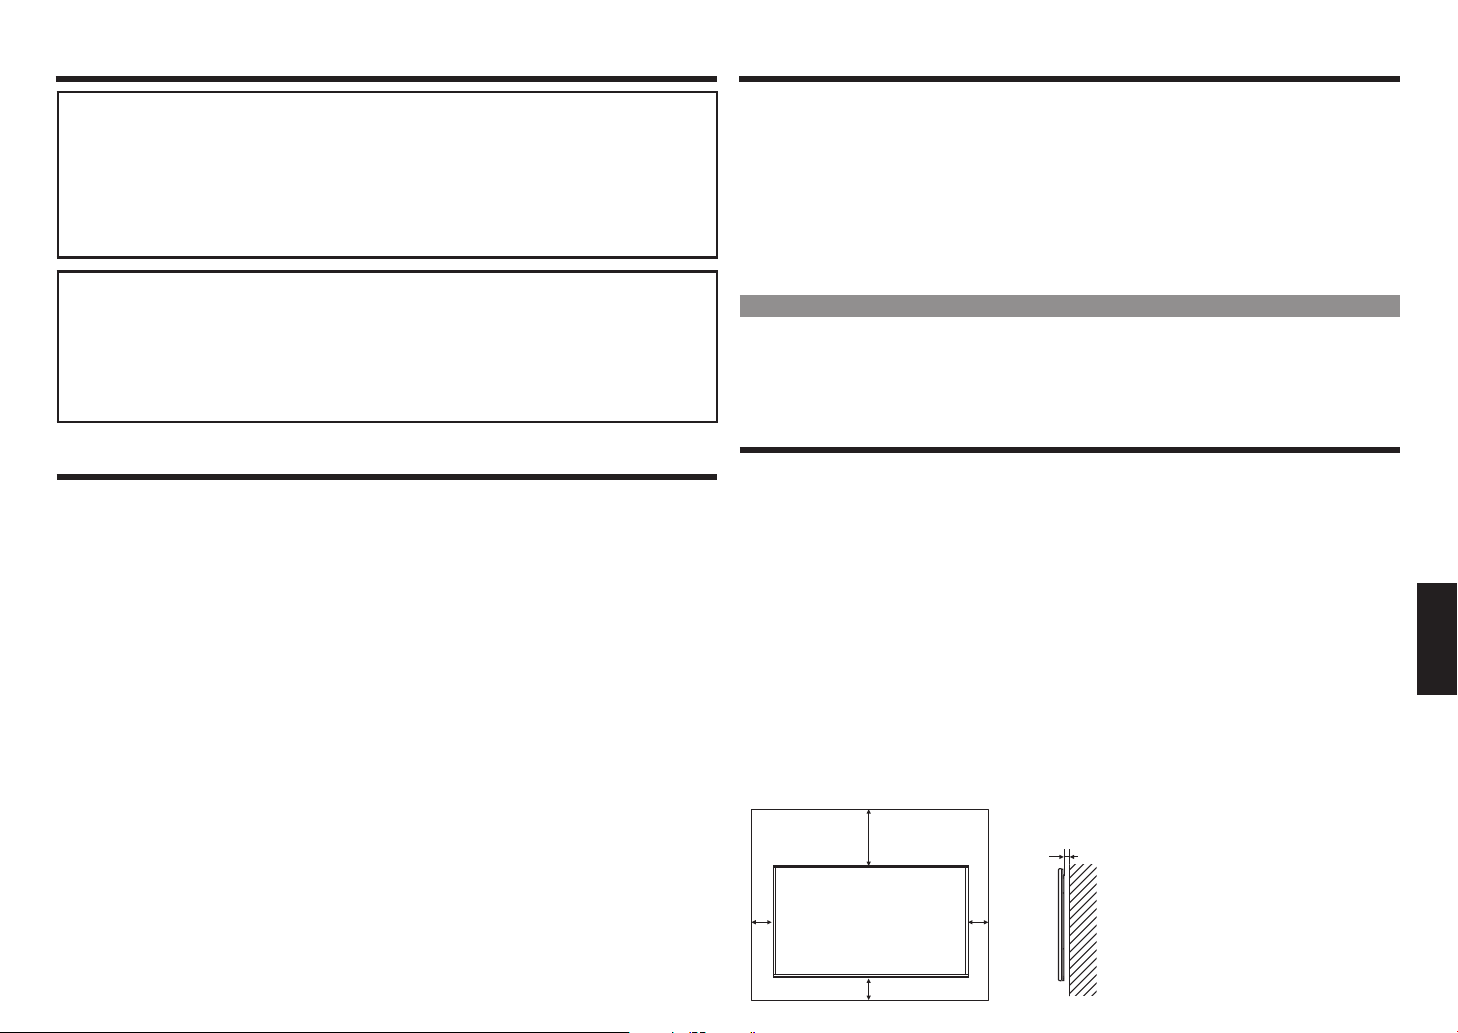
CONSIGLI E ISTRUZIONI SULLA SICUREZZAPRECAUZIONI LEGATE ALLA SICUREZZA
Se un monitor non viene posizionato in un luogo sufficientemente stabile, può essere potenzialmente
pericoloso data la possibilità che possa accadere. Molti infortuni, particolarmente quelli a bambini,
possono essere evitati attraverso semplici precauzioni quali:
• Utilizzare dispositivi di fissaggio, come supporti di montaggio a muro, raccomandati dal produttore.
• Utilizzare solamente mobili che possono supportare in modo sicuro il monitor.
• Assicurarsi che il monitor non sporga da un lato del mobile utilizzato come supporto.
• Non posizionare il monitor su mobili alti (per esempio librerie o armadietti) senza ancorare entrambi,
il monitor e il mobile, ad un supporto adatto.
• Non posizionare i monitor su tessuti, o altri materiali posti tra il monitor e il mobile di supporto.
•
Educare i bambini riguardo ai pericoli di arrampicarsi sui mobili per raggiungere il monitor o i suoi controlli.
Specificatamente per la sicurezza dei bambini
– Non permettere ai bambini di arrampicarsi sul monitor o giocare con esso.
– Non posizionare il monitor su mobili che possono essere utilizzati facilmente come gradini, per
esempio una cassettiera.
– Ricordarsi che i bambini possono eccitarsi mentre guardano un programma, specialmente su un
monitor “Fuori dall'ordinario”. Prestare attenzione quando si posiziona e installa il monitor, non
posizionarlo dove può essere spinto, tirato ho fatto cadere.
– Prestare attenzione quando si posizionano i cavi collegati al monitor, in modo che non possano
essere tirati o afferrati da bambini curiosi.
CONSIGLI E ISTRUZIONI SULLA SICUREZZA
– Il pannello TFT LCD a colori utilizzato in questo monitor è stato prodotto con una tecnologia di alta
precisione. In ogni caso, potrebbero esserci minuscoli punti sullo schermo dove i pixel non si accendono
mai o restano permanentemente accesi. Inoltre, se si guarda lo schermo da un angolo di visione acuto,
potrebbe essere ravvisata una luminosità e dei colori variabili. Si prega di notare che non si tratta di
malfunzionamenti, ma di fenomeni comuni relativi agli LCD, e non influiranno sulle prestazioni del monitor.
– Non visualizzare un'immagine fissa per un lungo periodo, dato che questo può causare un'immagine residua.
– Non strofinare o toccare mai il monitor con oggetti duri.
– Si prega di comprendere che SHARP CORPORATION non è responsabile per errori da parte del cliente, o di
terzi, commessi durante l'utilizzo né tanto meno per qualsiasi malfunzionamento o danno a questo prodotto
derivante dal suo utilizzo, tranne quando la responsabilità di indennizzo è stata riconosciuta dalla legge.
– Questo monitor, e i suoi accessori, possono essere aggiornati senza previe notifiche.
– Non utilizzare il monitor in ambienti con alta concentrazione di polvere, alta umidità o dove il monitor può
entrare in contatto con olio o vapore. Non utilizzare all'interno di un ambiente dove sono presenti gas
corrosivi (biossido di zolfo, acido solforico, biossido di azoto, cloro, ammoniaca, ozono, ecc.). Dato che
questo può causare un incendio.
– Assicurarsi che il monitor non venga in contatto con acqua o altri fluidi. Assicurarsi che nessun oggetto,
come per esempio delle graffette o puntine finiscano all'interno del monitor, dato che questo può causare
un incendio o elettroshock.
– Non posizionare il monitor sopra oggetti non stabili, o in luoghi non sicuri. Non permettere che il monitor
subisca forti scosse o forti vibrazioni. Far cadere il monitor potrebbe danneggiarlo.
– Non utilizzare il monitor in prossimità di dispositivi che si surriscaldano, o in luoghi dove è possibile che si
generi un'alta temperatura, dato che questo potrebbe generare un surriscaldamento e un principio di incendio.
– Non utilizzare il monitor in luoghi dove potrebbe essere esposto alla luce diretta.
– Si prega di assicurarsi di rimuovere costantemente polvere e sporcizia che potrebbe essere rimasta nelle aperture
di ventilazione. Nel caso la polvere si accumuli all'interno delle aperture di ventilazione, o all'interno del monitor,
questo potrebbe portare ad un surriscaldamento eccessivo e generare un incendio o mal funzionamento.
Si prega di richiedere una pulizia interna del monitor da un fornitore autorizzato, o da un centro di servizio SHARP.
– Le immagini non possono essere ruotate su questo monitor.
Quando si utilizza un orientazione verticale, sarà necessario preparare anticipatamente il materiale in modo corretto.
– La presa di corrente deve essere installata vicino al dispositivo e deve essere facilmente accessibile.
– Operatività continua e garanzia. Questo prodotto è progettato per un utilizzo massimo giornaliero pari a 16
ore. L’utilizzo continuo eccedente le 16 ore al giorno non è coperto da garanzia.
Il cavo di alimentazione
– Utilizzare solamente il cavo di alimentazione fornito assieme al monitor.
– Non danneggiare il cavo di alimentazione, non posizionare oggetti pesanti sullo stesso, né tirarlo e tanto meno
piegarlo. Inoltre, non aggiungere prolunghe. Il danneggiamento del cavo potrebbe causare un incendio o elettroshock.
– Non utilizzare il cavo di alimentazione con una spina di alimentazione.
L'aggiunta di una prolunga potrebbe causare un incendio o creare un surriscaldamento.
– Non rimuovere, o inserire, la spina di alimentazione con le mani bagnate. Farlo potrebbe causare un elettroshock.
– Scollegare la presa di alimentazione se non si utilizza il prodotto per lungo tempo.
– Non tentare di riparare il cavo di alimentazione nel caso sia corrotto o malfunzionante. Richiedere assistenza
tecnica da un tecnico specializzato.
Retroilluminazione LED
• L'illuminazione LED all'interno di questo prodotto ha un tempo di vita limitato.
* Se lo schermo diviene scuro, o non si accende, potrebbe essere necessario sostituire la retroilluminazione LED.
* Questa retroilluminazione LED è esclusiva di questo prodotto e deve essere sostituita da un rivenditore
autorizzato o da un centro di assistenza SHARP. Si prega di contattare un rivenditore autorizzato o un
centro di assistenza SHARP.
PRECAUZIONI RELATIVE AL MONTAGGIO
• Questo prodotto è destinato all'uso interno.
• È richiesto un supporto di montaggio che sottostia alle specifiche tecniche VESA.
• Dato che il monitor è pesante, consultare il proprio rivenditore prima dell'installazione, rimozione o
spostamento del monitor.
• Il montaggio a muro del monitor richiede una conoscenza specifica e il lavoro deve essere eseguito da un rivenditore
autorizzato SHARP. Non dovreste mai provare ad eseguire voi stessi questo lavoro. La nostra compagnia non sarà
responsabile per incidenti o infortuni causati da un montaggio, o dal cattivo utilizzo, del monitor.
• Utilizzare il monitor su di una superficie piana. Se necessario, il monitor può essere inclinato sino a 20° in
avanti e indietro.
• Questo monitor dovrebbe essere utilizzato all'interno di un ambiente con una temperatura tra 0°C e 40°C.
Garantire abbastanza spazio attorno al monitor per prevenire che il calore di accumuli al suo interno.
• Se per qualsiasi ragione risulta difficile garantire lo spazio sufficiente, come per esempio nel caso di
installazione del monitor all'interno di un'abitazione, o se la temperatura ambientale risulta al di fuori
dall'intervallo suggerito, da 0°C a 40°C, installare un ventilatore o intraprendere altre misure in modo da
mantenere la temperatura ambientale all'interno dell'intervallo richiesto.
• Le condizioni di temperatura possono cambiare durante l'utilizzo del monitor assieme a dispositivi opzionali
raccomandati da SHARP. In tali casi, si prega di controllare le condizioni di temperatura specificate per ogni
dispositivo opzionale.
• Non bloccare le aperture di ventilazione. Se aumenta la temperatura all'interno del monitor, questo può
portare al malfunzionamento.
• Non posizionare il monitor su di un dispositivo che generi calore.
Unità: pollice (mm)
5/16 [7]
2
[50]
16
7-7/8 [200]
2
[50]
2 [50]
ENGLISHITALIANO DEUTSCHFRANÇAISTÜRKÇEРУССКИЙ ITALIANO
Page 18
РУССКИЙ
ВАЖНАЯ ИНФОРМАЦИЯ
Информация по утилизации этого оборудования и батареек
ЕСЛИ ВЫ ХОТИТЕ УТИЛИЗИРОВАТЬ ЭТО ОБОРУДОВАНИЕ ИЛИ БАТАРЕЙКИ, НЕ
ВЫБРАСЫВАЙТЕ ИХ В ОБЫЧНЫЙ МУСОРНЫЙ КОНТЕЙНЕР И НЕ СЖИГАЙТЕ!
Вышедшее из употребления электрическое оборудование и батарейки следует всегда собирать
и перерабатывать РАЗДЕЛЬНО в соответствии с местным законодательством.
Раздельный сбор обеспечивает безопасную для окружающей среды переработку, повторное
использование материалов и минимизацию количества конечных отходов.
УТИЛИЗАЦИЯ С НАРУШЕНИЕМ ПРАВИЛ может нанести вред здоровью человека и окружающей
среде из-за присутствия некоторых вредных веществ!
Сдайте ВЫШЕДШЕЕ ИЗ УПОТРЕБЛЕНИЯ ОБОРУДОВАНИЕ в местный, обычно муниципальный,
приемный пункт, если таковой имеется по месту жительства.
Извлеките из оборудования ВЫШЕДШИЕ ИЗ УПОТРЕБЛЕНИЯ батарейки и сдайте их в пункт
приема батареек; обычно, это место, где продаются новые батарейки.
Если имеются сомнения по поводу утилизации, обратитесь в органы местной власти или к
дилеру и выясните, как правильно производить утилизацию.
ТОЛЬКО ДЛЯ ПОЛЬЗОВАТЕЛЕЙ В ЕВРОПЕЙСКОМ СОЮЗЕ И НЕКОТОРЫХ ДРУГИХ СТРАНАХ,
НАПРИМЕР, НОРВЕГИИ И ШВЕЙЦАРИИ:
Ваше участие в раздельном сборе требуется законом.
Показанный выше символ наносится на электрическое и электронное оборудование и батарейки
(или на упаковку), чтобы напомнить пользователям о данном требовании.
Если под символом имеется обозначение “Hg” или “Pb”, это значит, что батарейка содержит
следовые количества ртути (Hg) или свинца (Pb) соответственно.
Пользователи из ЧАСТНЫХ ДОМОВЛАДЕНИЙ должны сдавать вышедшее из употребления
оборудование и батарейки в приемные пункты.
Прием батареек осуществляется в местах продажи.
Возврат производится бесплатно.
Если оборудование использовалось в КОММЕРЧЕСКИХ ЦЕЛЯХ, пожалуйста, обратитесь к
своему дилеру SHARP, который проинформирует вас о правилах возврата.
Возможно, за услуги возврата потребуется внести оплату.
Не исключено, что малогабаритное оборудование (в небольшом количестве) можно будет сдать
в ваш местный приемный пункт.
Для Испании:
Пожалуйста, обратитесь в установленную систему сбора или в органы местной власти, чтобы
сдать вышедшие из употребления изделия.
Данное оборудование подпадает под действие Правил (по сбору, переработке и обращению)
для отходов электронного и электрического оборудования, 2016 г.
Согласно правилу 16, на содержание опасных составляющих в электрическом и электронном
оборудовании налагаются определенные ограничения.
Чтобы получить более подробную информацию по обеспечению правильной утилизации,
пожалуйста, посетите веб-сайт.
http://www.sbsil.com
17
Page 19
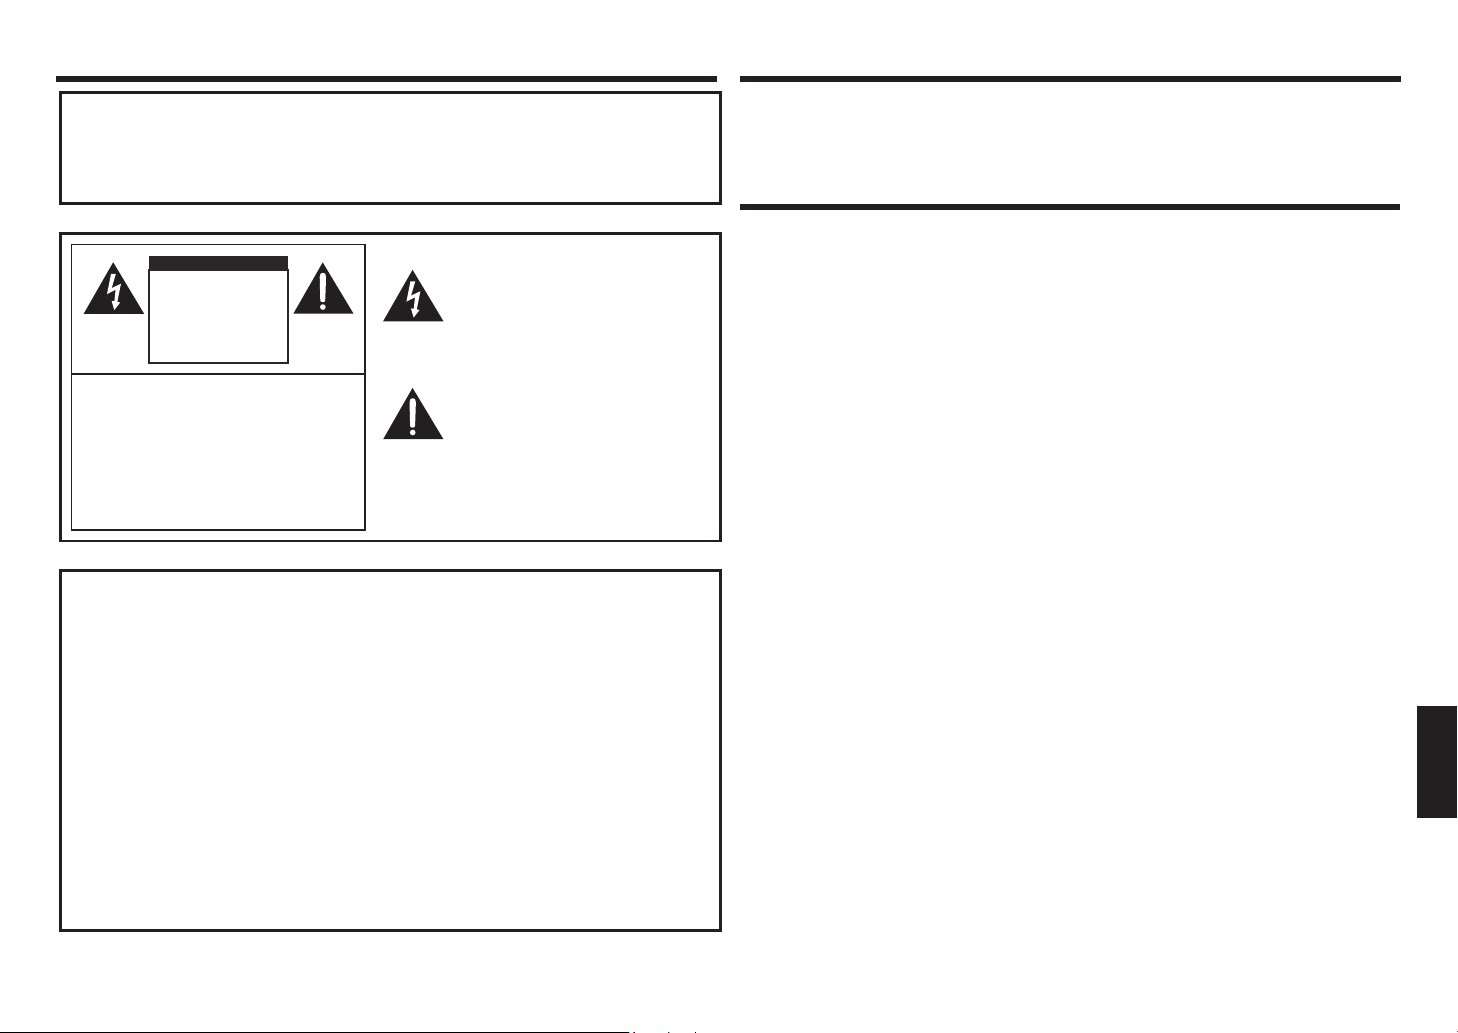
ВАЖНАЯ ИНФОРМАЦИЯ
ОСТОРОЖНО: ВО ИЗБЕЖАНИЕ ОПАСНОСТИ ПОЖАРА ИЛИ
ПОРАЖЕНИЯ ЭЛЕКТРИЧЕСКИМ ТОКОМ НЕ
ДОПУСКАЙТЕ ПОПАДАНИЯ ДАННОГО ИЗДЕЛИЯ
ПОД ДОЖДЬ ИЛИ ПОД ДЕЙСТВИЕ ВЛАГИ.
ВНИМАНИЕ
ОПАСНОСТЬ
ПОРАЖЕНИЯ
ЭЛЕКТРИЧЕСКИМ
ТОКОМ
НЕ ВСКРЫВАТЬ
ВНИМАНИЕ: ВО ИЗБЕЖАНИЕ ОПАСНОСТИ
ПОРАЖЕНИЯ ЭЛЕКТРИЧЕСКИМ
ТОКОМ НЕ СНИМАЙТЕ КРЫШКУ.
ВНУТРИ НЕТ КОМПОНЕНТОВ,
ОБСЛУЖИВАЕМЫХ
ПОЛЬЗОВАТЕЛЕМ.
ДЛЯ ПРОВЕДЕНИЯ
ОБСЛУЖИВАНИЯ ОБРАТИТЕСЬ К
КВАЛИФИЦИРОВАННОМУ
СЕРВИСНОМУ ПЕРСОНАЛУ.
ПРИМЕЧАНИЕ ДЛЯ ПОЛЬЗОВАТЕЛЕЙ В ВЕЛИКОБРИТАНИИ
ВАЖНО
Провода сетевого электропитания имеют следующие цветовые обозначения:
СИНИЙ: "НОЛЬ"
КОРИЧНЕВЫЙ: "ФАЗА"
ПОДКЛЮЧЕНИЕ ВИЛКИ К ЭЛЕКТРОСЕТИ:
Поскольку провода сетевого электропитания этого аппарата могут не
соответствовать по цветовому обозначению клеммам в вашей сетевой вилке,
действуйте следующим образом:
• Провод, окрашенный СИНИМ необходимо присоединять к клемме,
обозначенной буквой N или помеченной ЧЕРНЫМ.
• Провод, окрашенный КОРИЧНЕВЫМ необходимо присоединять к клемме,
обозначенной буквой L или помеченной КРАСНЫМ.
ВНИМАНИЕ:
Не подключайте провод фазы (КОРИЧНЕВЫЙ) или ноля (СИНИЙ) к клемме
заземления 3-контактной сетевой вилки.
Значок вспышки молнии со стрелкой внутри
треугольника предупреждает пользователя о
наличии внутри корпуса изделия
неизолированного "опасного напряжения",
которое может иметь достаточную величину
для создания риска поражения человека
электрическим током.
Восклицательный знак в треугольнике
предупреждает пользователя о важных
инструкциях по эксплуатации и обслуживанию
(уходу) в сопровождающей документации к
изделию.
УВАЖАЕМЫЙ ПОКУПАТЕЛЬ SHARP,
Благодарим ваз за приобретение изделия компании SHARP LCD.
Для обеспечения безопасной и многолетней беспроблемной эксплуатации вашего изделия,
пожалуйста, внимательно прочтите раздел "Меры предосторожности".
МЕРЫ ПРЕДОСТОРОЖНОСТИ
Электричество применяется для выполнения множества полезных функций, но при неправильном
обращении оно также способно причинять травмы и материальный ущерб.
Данный продукт разработан и произведен с высшим приоритетом в отношении безопасности.
Однако его использование с нарушением мер предосторожности может привести к поражению
электрическим током и/или пожару.
С целью предотвращения потенциальной опасности, пожалуйста, соблюдайте приведенные ниже
инструкции в процессе установки, эксплуатации и чистки изделия.
Для обеспечения вашей безопасности и продления срока службы вашего изделия с ЖК-экраном,
пожалуйста, внимательно прочтите меры приведенные далее предупреждения, прежде чем
приступить к пользованию изделием.
1. Прочтите инструкции — Прежде чем приступить к эксплуатации изделия, необходимо прочесть
и понять все инструкции по эксплуатации.
2. Храните это руководство в надежном месте – Данные инструкции по технике безопасности и
эксплуатации необходимо сохранить в надежном месте, чтобы иметь возможность обращаться к
ним в будущем.
3. Соблюдайте предупреждения — Необходимо тщательно соблюдать все указания в
предупреждениях, указанных на изделии и в инструкциях.
4. Следуйте инструкциям – Необходимо следовать всем инструкциям по эксплуатации.
5. Очистка — Прежде чем приступать к чистке изделия, отсоедините вилку сетевого шнура
от розетки электросети. Для чистки изделия используйте сухую ткань. Для чистки изделия
используйте влажную ткань. Не используйте грязную ветошь. Это может привести к
повреждению изделия.
6. Принадлежности — Не используйте принадлежностей, не рекомендованных производителем.
Использование неподходящих принадлежностей может привести к несчастным случаям.
7. Вода и влага — Не пользуйтесь изделием вблизи воды. Не устанавливайте изделие в таком
месте, где на него могут попадать брызги. Будьте осторожны с оборудованием, которое сливает
воду, например, с кондиционерами.
8. Вентиляция — Вентиляционные и другие отверстия в корпусе предназначены для вентиляции.
Не закрывайте и не загромождайте данные щели и отверстия, так как недостаточная
вентиляция может привести к перегреву и/или сокращению срока эксплуатации изделия. Не
размещайте изделие на диване, на ковре или аналогичной поверхности, поскольку при этом
может происходить загораживание вентиляционных отверстий. не размещайте его в закрытом
пространстве, таком как книжный шкаф или полка, не обеспечив соответствующую вентиляцию,
указанную в инструкциях производителя.
9. Защита сетевого шнура — Сетевые шнуры необходимо располагать должным образом, чтобы
на них не наступали люди и чтобы на них не стояли никакие предметы.
10. ЖК-панель, используемая в данном изделии, изготовлена из стекла. Поэтому она может
разбиться, если изделие упадет или подвергнется удару. Будьте осторожны, чтобы не
пораниться осколками стекла, в случае если ЖК-панель будет разбита.
11. Перегрузка — Не допускайте перегрузки сетевых розеток или удлинительных кабелей.
Перегрузка может привести к пожару или поражению электрическим током.
12. Попадание посторонних предметов и жидкостей — Не допускайте попадания в изделие
никаких предметов через вентиляционные щели или отверстия. В изделии присутствует
высокое напряжение, поэтому попадание постороннего предмета может привести к поражению
электрическим током и/или короткому замыканию внутренних компонентов. По этой же причине
не допускайте попадания в данное изделие воды или жидкостей.
18
ENGLISHITALIANO DEUTSCHESPAÑOL FRANÇAISРУССКИЙTÜRKÇE
Page 20
МЕРЫ ПРЕДОСТОРОЖНОСТИ
МЕРЫ ПРЕДОСТОРОЖНОСТИ
13. Обслуживание — Не пытайтесь обслуживать изделие самостоятельно. После снятия крышек
Вы можете оказаться под воздействием высокого напряжения и прочих опасностей. Для
выполнения обслуживания привлекайте квалифицированный сервисный персонал.
14. Ремонт — При возникновении какого-либо из описанных ниже явлений отключите вилку шнура
питания от сетевой розетке и обратитесь к квалифицированному сервисному специалисту для
выполнения ремонта.
a. Когда поврежден шнур питания или вилка.
b. Когда на изделие пролита жидкость или в него попали посторонние предметы.
c. Когда данное изделие попало под дождь или в воду.
d. Когда данное изделие не функционирует должным образом, как описано в инструкциях по
эксплуатации.
Не прикасайтесь к органам управления, отличным от тех, что описаны в инструкциях
по эксплуатации. Неверный выбор настроек с использованием органов управления, не
описанный в инструкциях, может привести к неполадкам, для устранения которых часто
требуют выполнение большого объема работ по настройке квалифицированным техником.
e. Когда продукт подвергся падению или поврежден.
f. Когда изделие ведет себя явно аномальным образом. Любые заметные аномалии в изделии
указывают на то, что изделие нуждается в обслуживании.
15. Запасные части — В случае если для изделия требуются запасные части, проследите за тем,
чтобы сервисный специалист применял запасные части согласно спецификациям производителя
или с такими же самыми характеристиками и эксплуатационными свойствами, как оригинальные
компоненты. Применение не одобренных производителем компонентов может привести к
пожару, поражению электрическим током и/или представлять другие опасности.
16. Проверки для обеспечения безопасности — После выполнения обслуживания или ремонтных
работ попросите техника выполнить проверки, чтобы удостовериться в том, что изделие
находится в должном рабочем состоянии.
17. Настенный монтаж — При использовании монтажа изделия на стене проследите за тем, чтобы
изделие было установлено согласно рекомендациям производителя.
18. Источники тепла — Не допускайте воздействия на изделие источников тепла, например,
радиаторов отопления, обогревателей, печей и других тепловыделяющих изделий (включая
усилители).
19. Батарейки — Некорректное использование батареек может вызвать разрыв или возгорание
батареек. Утечки из батареек могут вызвать коррозию оборудования, запачкать руки или
одежду. Во избежание подобных проблем, обязательно соблюдайте следующие меры
предосторожности:
• Используйте только батарейки, которые соответствуют спецификациям.
• Устанавливайте батарейки, обращая особое внимание на то, чтобы положительная (+) и
отрицательная (-) клеммы были сориентированы в отсеке согласно инструкциям.
• Не устанавливайте вместе старые и новые батарейки.
• Не устанавливайте вместе батарейки различных типов. Характеристики напряжения батареек
одной и той же формы могут различаться.
• Заменяйте батарейки с израсходованным зарядом, не откладывая эту процедуру.
• Если вы не пользуетесь пультом дистанционного управления в течение длительного периода
времени, извлеките батарейки.
• Если жидкость, вытекшая из батарейки, попадет на кожу или одежду, немедленно и тщательно
смойте ее. Если она попала в глаза, смойте ее большим количеством воды, избегая
растирания, и немедленно обратитесь к врачу. Жидкость, вытекшая из батарейки, которая
попала в глаза или на одежду, может вызвать раздражение кожи или повреждение глаз.
20. Запрещается использовать данный монитор в таких областях применения, которые
сопровождаются риском для жизни или опасностями, которые непосредственно могут привести
к летальному исходу, травмам, тяжелым физическим повреждениям или иному ущербу, включая
управление ядерными реакциями на атомном предприятии, медицинские системы поддержания
жизнедеятельности и управление запуском ракет в системах вооружений.
21. Не допускайте длительного контакта с компонентами изделия, которые имеют повышенную
температуру. Это может привести к низкотемпературным ожогам.
22. Не вносите изменения в конструкцию изделия.
ОСТОРОЖНО:
Во избежание возгорания никогда не допускайте нахождения
свечей или открытого пламени вблизи данного изделия.
ОСТОРОЖНО:
Данное изделие относится к классу A.
В бытовых условиях данное изделие может создавать помехи радиосвязи: в этом случае от
пользователя может потребоваться принятие адекватных мер.
Для обеспечения соответствия нормативам по ЭМС, применяйте экранированные кабели для
подключения к следующим терминалам: входной терминал PC/AV HDMI, входной терминал PC/
AV D-SUB и входной терминалы RS-232C.
Если монитор устанавливается в недостаточно устойчивом положении, он представляет
потенциальную опасность вследствие падения. Многих травм, особенно у детей, можно
избежать, соблюдая следующие меры предосторожности:
• Используйте крепежные устройства вроде кронштейнов для настенного монтажа,
рекомендуемых производителем.
• Используйте только такую мебель, которая может служить надежной опорой для монитора.
• Следите за тем, чтобы монитор не выступал за край мебели, которая является его опорой.
• Не устанавливайте монитор на высокой мебели (например, на шкафах для посуды или
книжных шкафах) без дополнительного крепления как мебели, так и монитора к надежной
опоре.
• Не ставьте мониторы на ткань или иные материалы, размещаемые между монитором и
мебелью, которая служит опорой.
• Расскажите детям о том, что карабкаться по мебели, чтобы достать монитор или его органы
управления, опасно.
Особенное внимание следует уделять безопасности детей
– Не позволяйте детям карабкаться на монитор или играть с ним.
– Не устанавливайте монитор на мебели, которую легко можно использовать в качестве
ступенек, например, на комодах с выдвижными ящиками.
– Помните, что при просмотре передач дети могут возбуждаться, особенно на мониторе,
который дает изображение "больше, чем в жизни". Следует позаботиться о том, чтобы
монитор был установлен в таком месте, где его нельзя было столкнуть, опрокинуть или
свалить.
– Следует позаботиться о прокладке всех проводов и кабелей, подключенных к монитору, чтобы
слишком любознательные дети не могли потянуть или схватиться за них.
19
Page 21
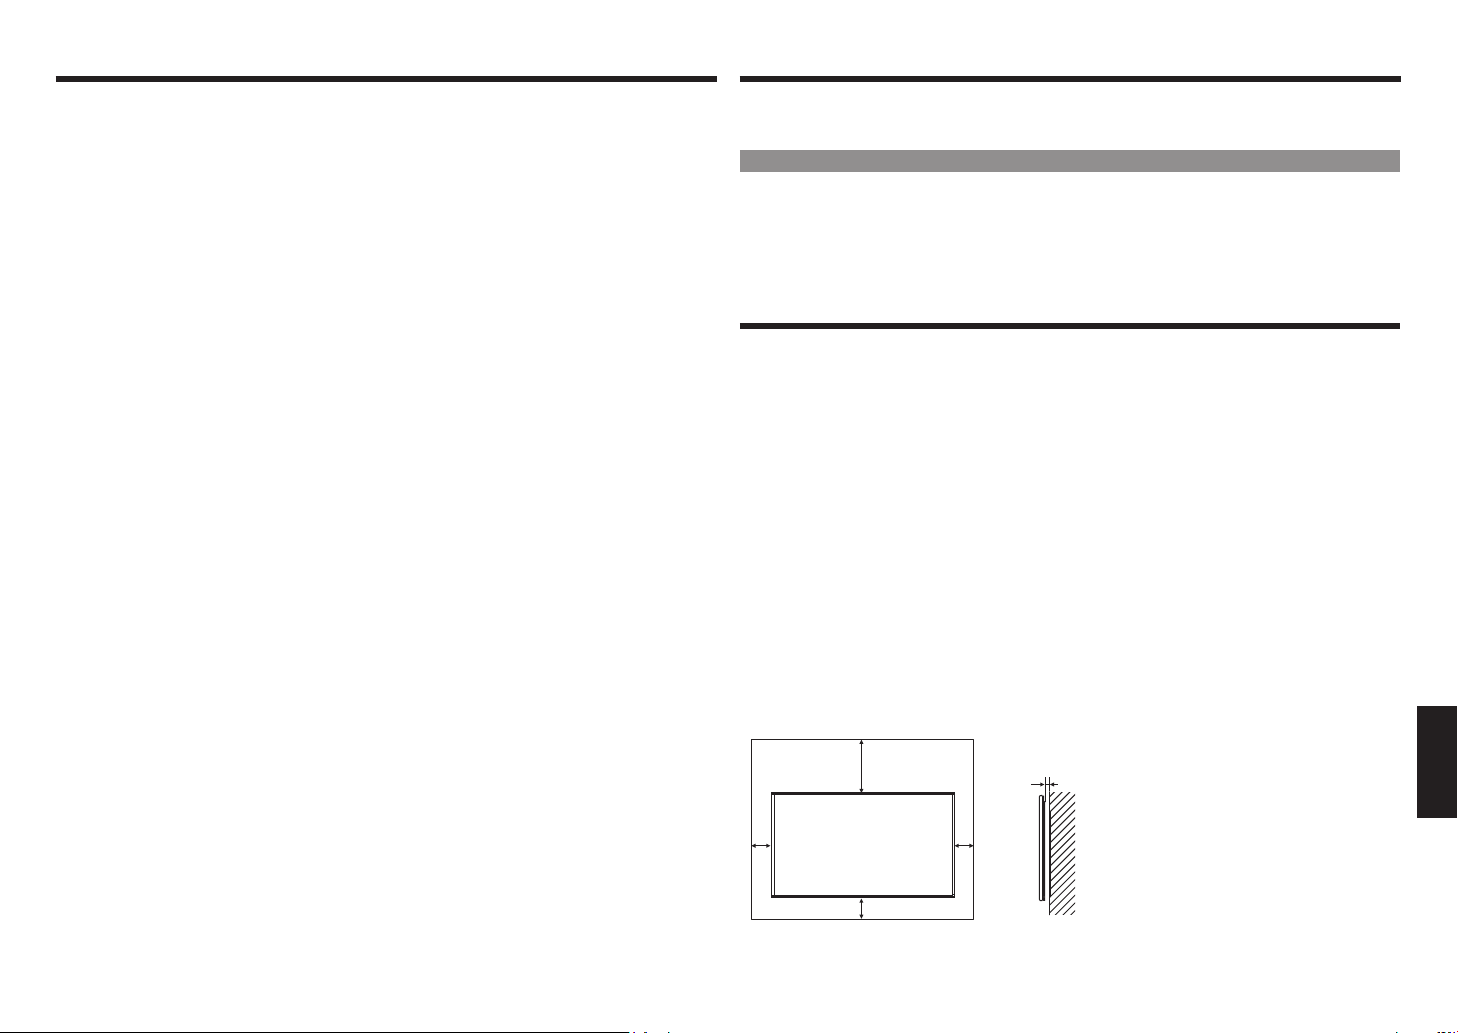
РЕКОМЕНДАЦИИ И ИНСТРУКЦИИ ПО ТЕХНИКЕ БЕЗОПАСНОСТИ
РЕКОМЕНДАЦИИ И ИНСТРУКЦИИ ПО ТЕХНИКЕ БЕЗОПАСНОСТИ
–Цветная тонкопленочная (TFT) ЖК-панель изготовлена с применением прецизионных технологий.
Однако на экране могут присутствовать немногочисленные отдельные точки, в которых пиксели
не загораются или постоянно светятся. Также, если на такой экран смотреть под острым углом,
будет заметна неравномерность цветопередачи или яркости. Пожалуйста, учтите, что эти явления
не являются признаками неисправности, но обычны для ЖК-экранов и не влияют отрицательным
образом на работоспособность монитора.
–Не выводите неподвижное изображение в течение длительного периода времени, поскольку это
вызовет появление остаточного изображения.
–Не трите и не тыкайте в монитор твердыми предметами.
–Пожалуйста, примите во внимание, что SHARP CORPORATION не несет ответственности ни
за ошибки, допущенные в процессе эксплуатации покупателем или третей стороной, ни за
иные неисправности или повреждения данного изделия, возникшие в процессе эксплуатации,
за исключением случаев, когда ответственность за возмещение ущерба установлена согласно
закону.
–Конструкция и комплект поставки монитора и принадлежностей к нему могут обновляться без
предварительного уведомления.
–Не используйте монитор в местах, где много пыли, высокая влажность, или где на монитор может
попасть масло или пар. Не используйте изделие в условиях, где присутствуют коррозионно-
активные газы (диоксид серы, сероводород, диоксид азота, хлор, аммиак, озон и т.д.). Это может
привести к пожару.
–Проследите за тем, чтобы на монитор не попадала вода или другие жидкости. Проследите за тем,
чтобы в монитор не могли попасть такие предметы, как скрепки или булавки, поскольку это может
привести к пожару или поражению электрическим током.
–Не устанавливайте монитор поверх неустойчивых предметов или в небезопасных местах. Не
допускайте воздействия на монитор сильных ударов или сильной вибрации. При падении или
опрокидывании монитор может быть поврежден.
–Не используйте монитор рядом с нагревательным оборудованием или в местах, где он может
подвергнуться воздействию высоких температур, поскольку это может привести к образованию
чрезмерного количества тепла и к возгоранию.
–Не используйте монитор в местах, где он может подвергнуться воздействию прямых солнечных
лучей.
–Пожалуйста, регулярно убирайте пыль и мусор с вентиляционных щелей. В случае накопления
пыли на вентиляционных отверстиях или внутри монитора возможет перегрев, возгорание
или выход монитора из строя. Для проведения чистки внутренних компонентов обращайтесь к
официальному дилеру или в сервисный центра SHARP.
–На этом мониторе не предусмотрена функция поворота изображения. При использовании
монитора в вертикальной ориентации, вам следует заранее позаботиться о наличии
соответствующего содержимого для отображения в этой ориентации.
–Розетка электросети должна находиться вблизи оборудования и легко доступна.
–Время непрерывной эксплуатации и гарантия. Данное изделие предназначено для эксплуатации
в течение не более 16 часов в сутки. Непрерывная эксплуатация в течение более 16 часов в сутки
не подпадает под действие гарантии.
Шнур питания
–Используйте только шнур питания, поставляемый в комплекте с монитором.
–Во избежание повреждений шнура питания, не ставьте на него тяжелых предметов, не
растягивайте и не сгибайте его. Также не используйте удлинителей. Повреждение шнура может
привести к пожару или поражению электрическим током.
–Не используйте шнур питания с разветвителем. Добавление удлинителя может привести к пожару
в результате перегрева.
–Не извлекайте и не вставляйте сетевую вилку мокрыми руками. Это может привести к поражению
электрическим током.
–Отключайте шнур питания от электросети, если вы не пользуетесь изделием в течение
длительного периода времени.
–Не пытайтесь отремонтировать шнур питания в случае повреждения или неисправностей. Для
проведения обслуживания обратитесь к сервисному представителю.
Светодиодная подсветка
• Срок службы элементов светодиодной подсветки в данном изделии ограничен.
* Если экран стал темным или не включается, возможно, необходимо заменить элементы
светодиодной подсветки.
* Элементы светодиодной подсветки являются специфическими для данного изделия и должны
заменяться только официальным дилером или сервисным центром SHARP. Пожалуйста,
обратитесь за помощью к официальному дилеру или в сервисный центр SHARP.
МЕРЫ ПРЕДОСТОРОЖНОСТИ ПРИ МОНТАЖЕ
• Данное изделие предназначено для эксплуатации внутри помещения.
• Требуется монтажный кронштейн, соответствующий спецификациям VESA.
• Поскольку монитор имеет большой вес, обратитесь к дилеру, прежде чем устанавливать, снимать
или перемещать монитор.
• Настенный монтаж монитора требует специального опыта, поэтому работы должны выполняться
официальным дилером SHARP. Не пытайтесь проводить эти работы самостоятельно. Наша
компания не несет ответственности за несчастные случаи или травмы, вызванные ошибками
монтажа и неправильным обращением.
• Монитор должен устанавливаться так, чтобы его поверхность была перпендикулярна горизонтали.
При необходимости монитор можно наклонять на 20 градусов вверх или вниз.
• Данный монитор следует эксплуатировать при окружающей температуре от 0°C до 40°C. Вокруг
монитора должно оставаться достаточно свободного пространства, чтобы внутри него не
аккумулировалось тепло.
• При возникновении по каким-либо причинам трудностей с обеспечением достаточного
пространства, например, при установке монитора в жилом помещении, или если окружающая
температура выходит за пределы диапазона от 0°C до 40°C, установите охлаждающий вентилятор
или примите меры для поддержания окружающей температуры в допустимом диапазоне.
• Температурные условия могут измениться, если монитор используется вместе с дополнительным
оборудованием, рекомендуемым компанией SHARP. В этом случае, пожалуйста, проверьте,
соответствуют ли температурные условия спецификациям дополнительного оборудования.
• Не загораживайте вентиляционные отверстия. При повышении температуры внутри монитора
возможен его выход из строя.
• Не устанавливайте монитор на устройстве, которое выделяет тепло.
7-7/8 [200]
2
[50]
2 [50]
20
Единицы измерения: дюймы (мм)
5/16 [7]
2
[50]
ENGLISHITALIANO DEUTSCHESPAÑOL FRANÇAISРУССКИЙTÜRKÇE
Page 22
TÜRKÇE
ÖNEMLİ BİLGİ
UYARI: YANGIN VEYA ELEKTRİK ÇARPMASI TEHLİKESİNİ
AZALTMAK İÇİN CİHAZI YAĞMURA VEYA NEME MARUZ
BIRAKMAYIN.
Bu Ekipmanın ve Pillerinin İmha Edilmesi Hakkında Bilgi
BU EKİPMANI VEYA PİLLERİNİ İMHA EDERKEN NORMALDE KULLANDIĞINIZ ÇÖP KUTUSUNA
VEYA ATEŞE ATMAYIN!
Kullanılmış elektrik ve elektronik ekipman ve piller her zaman ayrı olarak toplanmalı ve yerel kurallara
uygun olacak şekilde, AYRI AYRI atılmalıdır.
Bu ekipmanları birbirlerinden ayrı toplamak çevreyle dost olmanıza, materyallerin geri dönüşüme
kazandırılmasına ve sonuçta oluşacak atık maddenin azaltılmasına yardımcı olur. Bu duruma UYGUN
OLMAYAN BİR İMHA İŞLEMİ insan sağlığına ve çevreye zarar verebilir! KULLANILMIŞ EKİPMANI,
mevcut ise belediyelere ait toplama tesislerine götürün.
KULLANILMIŞ PİLLERİ ekipmandan çıkarın ve pillerin satıldığı pil toplama tesisine götürün.
İmha etmede herhangi bir ikileme düşerseniz, yerel yetkililerle veya satın aldığınız mağazayla iletişime
geçin ve doğru imha yöntemini öğrenin.
AVRUPA BİRLİĞİNDEKİ VE NORVEÇ VE İSVİÇRE GİBİ BAZI ÜLKELERDEKİ KULLANICILAR İÇİN:
Ayrı ayrı toplamak kanunen zorunludur.
Elektrik ve elektronik ekipman ve pillerin (veya ambalajlarının) üzerinde görünen bu sembol,
kullanıcılara bu durumu hatırlatmak için konulmuştur. Eğer sembolün alt kısmında ‘Hg’ veya ‘Pb’
ibareleri bulunuyorsa, pil eser miktarda cıva (HG) veya kurşun (PB) içeriyor demektir.
ÖZEL MÜLKİYETTE ikamet eden kullanıcıların, kullanılmış ekipman ve pilleri var olan geri dönüşüm
tesislerine götürmeleri gerekmektedir. Piller satış noktalarında toplanmaktadır. Geri götürmek tamamen
ücretsizdir.
Ekipman İŞ AMACIYLA kullanılmışsa, ürünün geri alınmasında sizi bilgilendirmesi için SHARP
satıcınızla iletişime geçin. Geri alım sonucunda belirli bir miktarda ücretlendirilebilirsiniz. Küçük
ekipmanlar (ve az miktardaki), yerel toplama tesisleri tarafından geri alınabilir. İspanya’daki kullanıcılar
için: Lütfen mevcut toplama sisteminizle veya yerel yetkililerle, kullanılmış ürünlerin geri alınması
konusunda iletişime geçin.
Bu ekipman 2016 e-atık (Kullanım ve Taşıma) Kurallarına uyumludur.
Elektrikli ve elektronik ekipmanlarda, 16. kuralda belirtilen tehlikeli bileşenlerin kullanımı kısıtlanmıştır.
En uygun geri dönüşüm yöntemi hakkında daha fazla bilgi için aşağıdaki internet sitesine bakınız.
http://www.sbsil.com
DİKKAT
ELEKTRİK ÇARPMA
TEHLİKESİ
AÇMAYIN
DİKKAT: ELEKTRİK ÇARPMA TEHLİKESİNİ
AZALTMAK İÇİN KAPAĞI AÇMAYIN.
İÇİNDE KULLANICININ MÜDAHALE
EDEBİLECEĞİ HİÇBİR PARÇA YOKTUR.
SERVİS İȘLEMİ İÇİN YETKİLİ SERVİS
PERSONELİNE BAȘVURUN.
Üçgen içindeki ok bașlıklı șimșek ișareti,
yalıtılmamıș "tehlikeli voltaj" durumunun mevcut
olduğunu ve insanlar için elektrik çarpma
tehlikesi yaratabileceğini kullanıcıya
bildirmektedir.
Üçgen içindeki ünlem ișareti, cihazla birlikte
verilen kılavuzda, cihazın kullanım ve bakımıyla
(servisiyle) ilgili önemli talimatlar bulunduğunu
bildirir.
İNGİLTERE'DE İKAMET EDEN
KULLANICILAR İÇİN UYARI
Güç kablosunun içindeki teller așağıdaki koda göre renklendirilmiștir:
MAVİ: "NÖTR"
KAHVERENGİ: "ELEKTRİKLİ"
GÜÇ KABLOSUNU PRİZE BAĞLAMAK:
Güç kablosunun içindeki tellerin renkleri, priz ucundaki renk etiketleriyle uyușmuyorsa
așağıdaki gibi olacak șekilde devam edin:
• MAVİ renkli tel, N harfiyle belirtilmiș veya SİYAH renkli uca bağlanmalıdır.
• KAHVERENGİ renkli tel, L harfiyle belirtilmiș veya KIRMIZI renkli uca bağlanmalıdır.
DİKKAT:
Elektrikli (KAHVERENGİ) veya nötr (MAVİ) teli 3 pinli prizinizin topraklama ucuna
bağlamayın.
21
Page 23
DEĞERLİ SHARP MÜŞTERİSİ GÜVENLİK ÖNLEMLERİ
SHARP LCD cihazını satın aldığınız için teşekkür ederiz. Güvenliğinizi sağlamak ve cihazı uzun
yıllar boyunca sorunsuz bir şekilde kullanmak için, kullanmadan önce Güvenlik Önlemleri
bölümünü dikkatlice okuyun.
GÜVENLİK ÖNLEMLERİ
Elektrik, birçok yararlı fonksiyonu gerçekleştirmek için kullanılır. Fakat aynı zamanda, düzgün bir
şekilde kullanılmazsa ziki yaralanmalara ve maddi zarara neden olabilir. Bu cihaz güvenliğe büyük
öncelik verilerek tasarlanmış ve üretilmiştir. Fakat hatalı kullanım elektrik çarpmasıyla ve/veya yangınla
sonuçlanabilir. Potansiyel tehlikeyi önlemek için kurulum, kullanım ve temizlik işlemleri sırasında aşağıdaki
talimatları izleyin. Güvenliğinizi sağlamak ve LCD cihazınızın kullanım ömrünü uzatmak için kullanmadan
önce aşağıdaki önlemleri dikkatlice okuyun.
1. Talimatları okuyun — Ürünü kullanmadan önce kullanım talimatları tamamen okunmalıdır.
2. Bu kılavuzu güvenli bir yerde saklayın — Güvenlik ve kullanım talimatları daha sonraki kullanımlarınız
için güvenli bir yerde saklanmalıdır.
3. Uyarıları inceleyin — Cihaz ve talimatlar hakkındaki tüm uyarıları dikkatle inceleyin.
4. Talimatları takip edin — Kullanım talimatlarına haryen uyulmalıdır.
5. Temizlik — Cihazı temizlemeden önce güç kablosunu AC prizinden çıkarın. Temizlemek için nemli bir
bez kullanın. Sıvı veya aerosol şeklindeki temizleyicileri kullanmayın. Kirli bez kullanmayın. Kirli bez
kullanmak cihaza zarar verebilir.
6. Donanımlar — Üretici tarafından önerilmeyen donanımları kullanmayın. Uygun olmayan donanımların
kullanılması kazalara yol açabilir.
7. Su ve nem — Cihazı suya yakın yerlerde kullanmayın. Cihazı üzerine su sıçrayabilecek yerlere
koymayın. Klima gibi su damlatan cihazlara karşı dikkatli olun.
8. Havalandırma—Kabindeki havalandırma delikleri veya diğer açıklıklar havalandırma amacıyla
tasarlanmıştır.
Bu havalandırma deliklerini ve açıklıkların önünü kapatmayın veya örtmeyin, çünkü yetersiz
havalandırma aşırı ısınmaya ve/veya ürünün kullanım ömrünün azalmasına neden olabilir. Cihazı
koltuk, halı veya benzer yüzeylere yerleştirmeyin. Bu yüzeyler havalandırma deliklerini engelleyebilir.
gerekli havalandırmayı sağlamadan veya üreticinin talimatlarını izlemeden, ürünü kitaplık veya bölme
gibi kapalı bir yere yerleştirmeyin.
9. Güç kablosunu koruma — Güç kablolarının üzerine basılmasını veya eşyaların altında ezilmesini
engellemek amacıyla düzgün bir şekilde yönlendirilmelidir.
10. Bu cihazda kullanılan LCD panel camdan üretilmiştir. Bu sebeple, cihaz düşerse veya üzerine darbe
alırsa kırılabilir. LCD panelinin kırılması halinde, kırılan cam parçalarıyla yaralanmamak için dikkatli
olun.
11. Aşırı yükleme — AC prizlerine veya uzatma kablolarına aşırı yükleme yapmayın. Aşırı yükleme
yangına veya elektrik çarpmasına sebep olabilir.
12. Nesne ve sıvı girmesi — Cihaza, deliklerden veya açıklıklardan nesne sokmayın. Cihaz içinden yüksek
voltaj geçtiği için, içine nesne sokmak, elektrik çarpmasına ve/veya iç parçaların kısa devre yapmasına
sebep olabilir.
Bu sebepten dolayı, cihaza su veya sıvı damlatmayın.
13. Servis işlemi—Ürüne kendiniz servis işlemi yapmaya çalışmayın. Kapakları söktüğünüzde yüksek
voltaja ve başka tehlikeli koşullara maruz kalabilirsiniz. Servis işlemi için yetkili servis personeli talep
edin.
14. Servis — Aşağıdaki durumlardan herhangi birinin meydana gelmesi halinde, güç kablosunu AC
prizinden çıkarın ve tamir için yetkili servis personeli talebinde bulunun.
a. Güç kablosu veya ş zedelendiğinde.
b. Cihazın üzerine su damlarsa veya nesne düşerse.
c. Cihaz yağmura veya neme maruz kalırsa.
d. Cihaz çalıştırma talimatlarında belirtildiği gibi çalışmazsa.
Çalıştırma talimatlarında belirtilenler haricinde kontrol düğmelerine basmayın. Kontrollerin yanlış
ayarlanması, yetkili teknisyen tarafından yapılacak geniş kapsamlı bir tamir gerektiren hasara sebep
olabilir.
e. Cihaz düştüğünde veya hasar gördüğünde.
f. Cihaz anormal bir durum sergilediğinde. Fark edilen herhangi bir anormal durum, cihazın servise
ihtiyacı olduğunun bir göstergesidir.
15. Yedek parça — Cihazın yedek parçaya ihtiyacı olması durumunda, servis personelinin üretici
tarafından sağlanan veya orijinal parçalarla aynı özelliklere ve performansa sahip olan yedek parçaları
kullandığından emin olun. Bu durumda olmayan parçaların kullanımı yangın, elektrik çarpması ve/veya
diğer tehlikelerle sonuçlanabilir.
16. Güvenlik denetimi — Servis veya tamir işleminin tamamlanmasından sonra, servis teknisyeninden,
cihazın düzgün olarak çalıştığından emin olmak için güvenlik denetimi yapmasını talep edin.
17. Duvara monte etmek — Cihazı duvara monte ederken, üretici tarafından önerilen şekilde işlemi
gerçekleştirdiğinizden emin olun.
18. Isı kaynakları — Cihazı radyatör, ısıtıcı, soba ve diğer ısı kaynaklarından (amplikatör dahil) uzak
tutun.
19. Pil — Pillerin yanlış kullanılması yanmalarına veya tutuşmalarına sebep olabilir. Pilden kaynaklanacak
sızıntı cihazı aşındırabilir, ellerinizi kirletebilir veya kıyafetinizi mahvedebilir. Bu tip sorunlarla
karşılaşmamak için aşağıdaki önlemleri incelediğinizden emin olun:
• Yalnızca belirtilen pilleri kullanın.
• Pilleri artı (+) ve eksi (-) kutuplarına dikkat ederek yerleştirin.
• Eski ve yeni pilleri karıştırmayın.
• Farklı türdeki pilleri karıştırmayın. Aynı şekildeki pillerin voltaj özellikleri değişkenlik gösterebilir.
• Bitmiş pili geciktirmeden yenileyin.
• Uzaktan kumandayı uzun bir süre kullanmayacaksanız pillerini çıkarın.
• Pil sızıntısının teninize veya kıyafetinize temas etmesi durumunda hemen suyla durulayın. Gözünüze
temas etmesi durumunda, silmek ve ilaç kullanmak yerine, gözünüzü hemen yıkayın. Gözünüzle
veya kıyafetlerinizle temas eden pil sızıntısı, cilt tahrişine sebep olabilir veya gözünüze zarar verebilir.
20. Bu monitörü kullanmak direk ölümle sonuçlanacak ziksel yaralanma, ciddi ziki zarar veya nükleer
tesiste nükleer reaksiyon kontrolü,tıbbi yaşam destek sistemi ve bir silah sistemindeki füze atış kontrolü
gibi diğer kayıpları beraberinde getirmez.
21. Cihazın ısınan parçaları ile uzun süre temas halinde kalmayın. Bu durum yanıklara sebep olabilir.
22. Cihaz üzerinde değişiklik yapmayın.
UYARI:
Yangın çıkmasını önlemek için, her zaman mumları ve diğer açık
alevleri bu üründen uzak tutun.
UYARI:
Bu, A Sınıfı bir cihazdır. Evde kullanımı sırasında radyo interferansına sebep olabilir. Bu gibi
durumlarda kullanıcının bazı önlemler alması gerekebilir.
EMC yönetmeliğine uyumluluğu sürdürmek için, aşağıda belirtilen uçbirimleri bağlarken blendajlı kablo
kullanın: PC/AV HDMI giriş uçbirimi, PC/AV D-SUB giriş uçbirimi, ve RS-232C giriş uçbirimleri.
ENGLISHITALIANO DEUTSCHESPAÑOL FRANÇAISTÜRKÇETÜRKÇE
22
Page 24
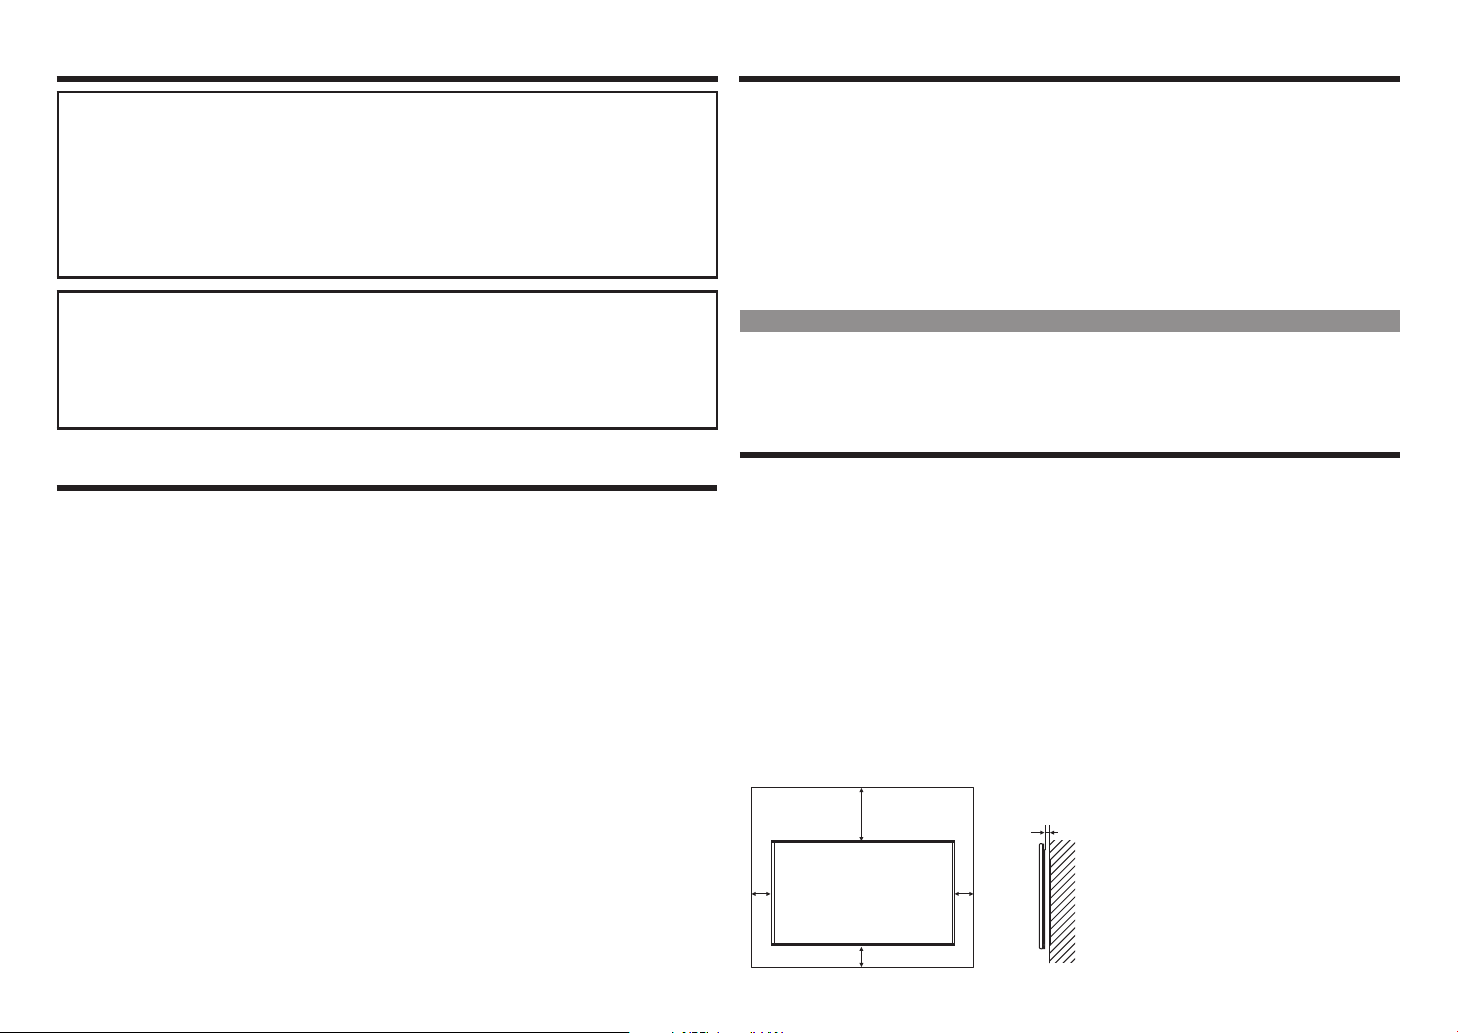
İPUÇLARI VE GÜVENLİK TALİMATLARIGÜVENLİK ÖNLEMLERİ
Monitör sabit bir yere yerleştirilmediği takdirde, düşme tehlikesiyle karşı karşıya kalabilir. Özellikle
çocukların hasar görebileceği çoğu yaralanmalar birkaç basit önlem alarak önlenebilir:
• Üretici tarafından önerilen duvar monte aparatı gibi sabitleme aletleri kullanmak.
• Monitörü güvenli bir şekilde taşıyabilen mobilyalar kullanmak.
• Monitörün, üzerinde bulunduğu mobilyanın köşesine yakın durmadığından emin olmak.
• Monitörü, mobilya ve monitör güvenli bir şekilde sabitlenmedikçe yüksek mobilyaların üzerine (dolap
veya kitaplık gibi) yerleştirmemek.
• Monitörü bir örtünün veya mobilya ile monitörün arasına konacak herhangi bir materyalin üzerine
yerleştirmemek.
• Çocuklara, monitöre yetişmek için mobilyalara tırmanmanın oluşturabileceği tehlikeler hakkında bilgi
vermek.
Özellikle çocuk güvenliği için
– Çocukların monitöre tırmanmasına ve monitörle oynamasına izin vermeyin.
– Monitörü şifonyer gibi kolayca basamak olarak kullanılabilecek mobilyaların üzerine yerleştirmeyin.
– Çocukların “gerçekten daha canlı” bir monitörde izledikleri bir programdan dolayı
heyecanlanabileceklerini aklınızdan çıkarmayın. Monitörü yerleştirirken veya kurarken, itilemeyeceği,
çekilemeyeceği veya devrilemeyeceği bir yere yerleştirin.
– Meraklı çocuklar tarafından tutulmaması veya çekilmemesi için, monitöre bağlı tüm kablolar dikkatlice
yönlendirilmelidir.
İPUÇLARI VE GÜVENLİK TALİMATLARI
– Bu monitörde kullanılan TFT renkli ekran LCD panel, yüksek hassasiyetli teknoloji uygulanarak
yapılmıştır.
Fakat, ekranın üzerinde, piksellerin hiç yanmadığı veya sürekli yandığı küçük noktalar olabilir. Ayrıca,
ekrana dar bir açıdan bakılması durumunda belirsiz renkler veya parlaklıklar gözlemlenebilir. Bu gibi
belirtiler arızadan ziyade LCD'lerin genel bir özelliğidir ve monitörün çalışmasını etkilemeyecektir.
– Hareketsiz bir fotoğrafı çok uzun süre görüntülemeyin. Bu durum fotoğrafın izinin ekranda kalmasına
sebep olabilir.
– Sert bir cisimle monitöre vurmayın.
– SHARP CORPORATION, müşteri veya üçüncü bir kişi kaynaklı sorunlardan veya cihazın kullanımı
sırasında meydana gelebilecek herhangi bir arızadan veya hasardan, hukuken tazminat sorumluluğu
tanınmadıkça sorumlu değildir.
– Bu monitör ve aksesuarları önceden bilgilendirilmeden geliştirilebilir.
– Monitörü fazla toz, yüksek nem, yağ veya buharla temas halinde olacağı durumlarda kullanmayın.
Aşındırıcı gazların (sülfür dioksit, hidrojen sülfür, azot dioksit, klor, amonyak, azon vb.) bulunduğu
ortamlarda kullanmayın. Bu gibi durumlar yangına yol açabilir.
– Monitörün su veya diğer sıvılarla temasa geçmeyeceğinden emin olun. Ataş veya raptiye gibi küçük
nesnelerin monitöre girmediğinden emin olun. Bu durum yangına veya elektrik çarpmasına yol açabilir.
– Monitörü sabit olmayan nesnelerin üzerine veya güvensiz yerlere yerleştirmeyin. Monitörün sert darbe
alacağı veya titreyeceği durumlardan kaçının. Monitörün düşmesi veya devrilmesi hasara yol açabilir.
– Monitörü ısıtıcılardan veya yüksek ısı ihtimali olan ekipmanlardan uzak tutun. Bu durum aşırı ısınmaya
ve yangın çıkmasına sebep olabilir.
– Direk olarak gün ışığına maruz kalacağı yerlerde kullanmayın.
– Havalandırma deliklerini tıkayan tozu ve çöpleri sık sık temizleyin. Monitörün içinde veya havalandırma
deliklerinde toz birikmesi aşırı ısınmaya, yangın çıkmasına veya arızaya sebep olabilir.
Lütfen yetkili bir SHARP servisinden monitörün içinin temizlenmesini talep edin.
– Bu monitörde fotoğraar döndürülemez.
Dikey pozisyonda kullanmak için, en uygun şekilde yönlendirilmiş içeriği hazırlamanız gerekmektedir.
– AC prizi ekipmanın yakınına kurulmalıdır ve kolaylıkla ulaşılabilir olmalıdır.
– Sürekli çalışma süresi ve garanti. Bu ürün maksimum 16 günlük kullanım için tasarlanmıştır saat. Günde
16 saatten fazla sürekli kullanım garanti kapsamında değildir.
Güç Kablosu
– Yalnızca monitörle birlikte verilen güç kablosunu kullanın.
– Güç kablosuna zarar vermeyin, üzerine ağır eşya yerleştirmeyin, çekmeyin veya bükmeyin. Ayrıca
uzatma kablosu eklemeyin. Kablonun zarar görmesi yangına veya elektrik çarpmasına sebep olabilir.
– Güç kablosunu çoklayıcıyla kullanmayın.
Uzatma kablosu eklemek, aşırı ısınma sonucunda yangına yol açabilir.
– Islak elle şi takıp çıkarmayın. Bu durum elektrik çarpmasına sebep olabilir.
– Uzun bir süre kullanılmayacaksa güç kablosunu şten çıkarın.
– Güç kablosu bozulduğunda veya çalışmadığında tamir etmeye çalışmayın. Servis işlemi için servis
temsilcisine başvurun.
LED Arka Işık
• Cihazda bulunan LED arka ışık, belirli kullanım ömrüne sahiptir.
* Ekranın kararması veya açılmaması halinde, LED arka ışığını değiştirmeniz gerekebilir.
* LED arka ışığı, bu cihaza özeldir ve yetkili SHARP servisi tarafından değiştirilmelidir. Lütfen yardım için
yetkili bir SHARP servisiyle iletişime geçin.
MONTAJ ÖNLEMLERİ
• Bu cihaz içeride kullanım için uygundur.
• VESA özelliklerine uyumlu bir monte aparatı gerekmektedir.
• Ağır olduğu için, monitörü kurmadan ve taşımadan önce satıcınıza danışın.
• Monitörü duvara monte etmek özel uzmanlık gerektirmektedir ve bu işlem mutlaka yetkili bir SHARP
satıcısı tarafından gerçekleştirilmelidir. Bu işlemlerin hiçbirini kendiniz yapmamalısınız. SHARP uygun
olmayan montaj veya taşımadan kaynaklanan kazalardan veya yaralanmalardan sorumlu değildir.
• Monitörü düz bir yüzeye dik olacak şekilde yerleştirin. Gerekli olması durumunda, monitörü 20 dereceye
kadar aşağı veya yukarı çevirebilirsiniz.
• Bu monitör, 0°C ve 40°C sıcaklıkları arasında bir ortamda kullanılmalıdır. İçinde ısı birikmesini önlemek
için monitörün etrafında yeterli boşluk bırakın.
• Monitör kurulumunda herhangi bir sebepten dolayı yeterli alan sağlanamıyorsa veya ortam sıcaklığı
0-40°C aralığından yüksekse, sıcaklığı gerekli aralıkta tutmak için bir fan kurun veya gerekli diğer
önlemleri aldığınızdan emin olun.
• Sıcaklık koşulları SHARP tarafından önerilen, opsiyonel ekipmanların monitörle birlikte kullanılmasına
bağlı olarak değişebilir. Bu gibi durumlarda opsiyonel ekipmanlar için belirtilen sıcaklık koşullarını kontrol
edin.
• Havalandırma deliklerini kapatmayın. Monitör içindeki sıcaklığın yükselmesi arızaya sebep olabilir.
• Monitörü ısı üreten bir aygıtın üzerine koymayın.
7-7/8 [200]
2
[50]
2 [50]
23
Birim: inch (mm)
5/16 [7]
2
[50]
Page 25
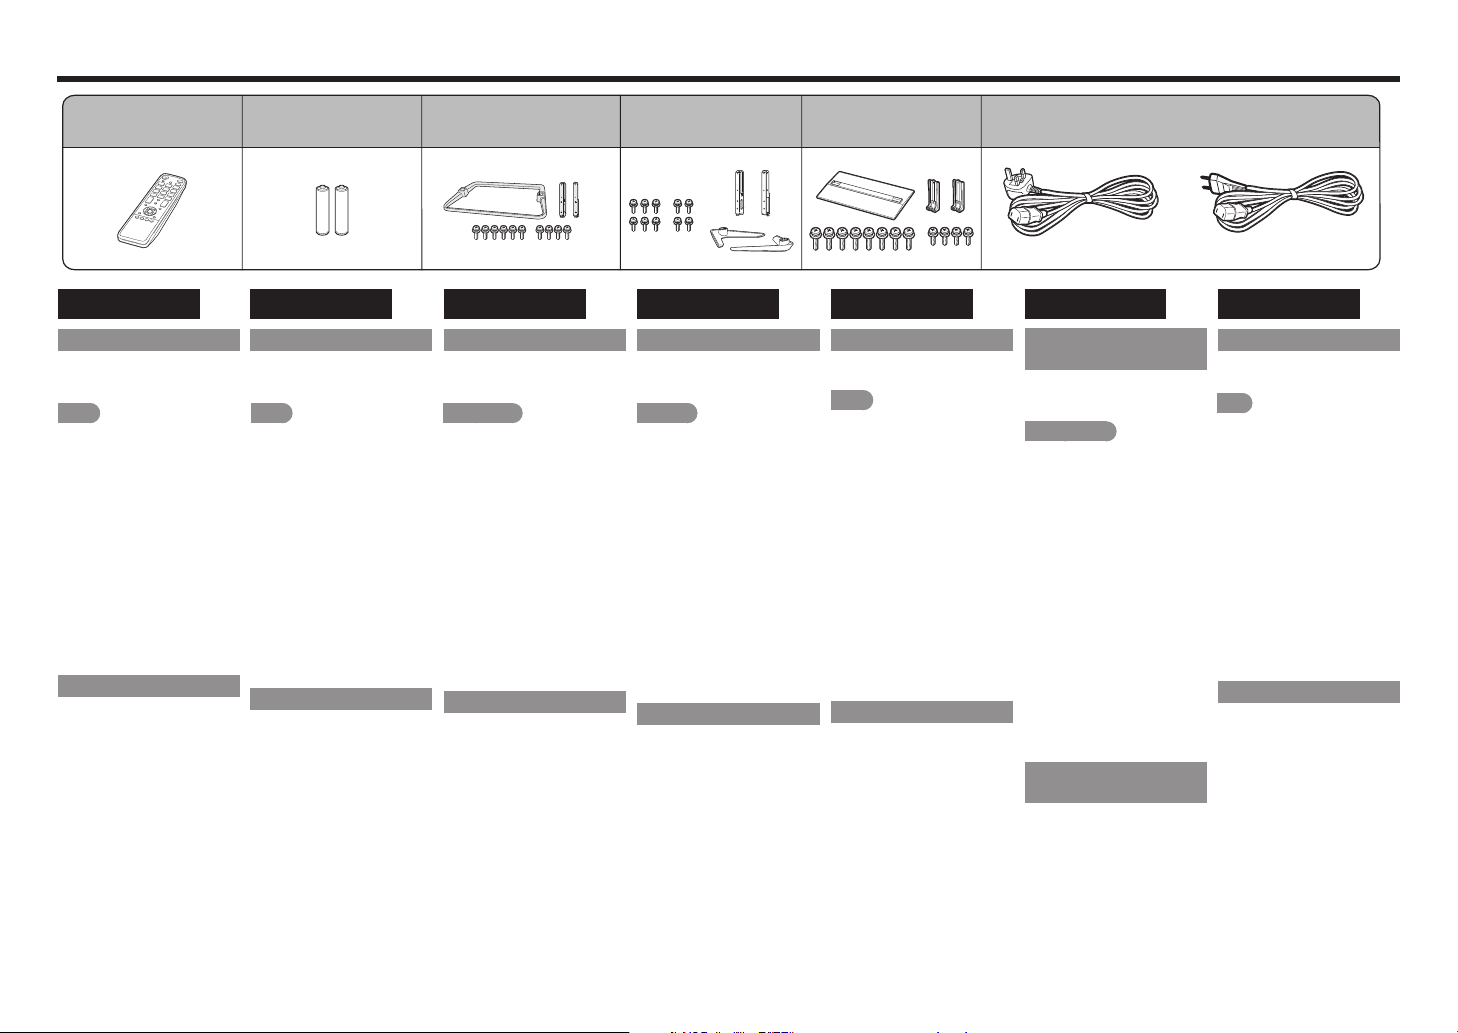
Accessories/Accesorios/Accessoires/Zubehör/Accessori/
Принадлежности
/Aksesuarlar
1
ENGLISH
Supplied Accessories
Make sure the following
accessories are provided with the
product.
NOTE
• Always use the AC cord supplied
with the Monitor.
• The illustrations above are for
explanation purposes and may
vary slightly from the actual
accessories.
Remote control unit (x1)
1
"AAA " size battery (x2)
2
Stand unit (x1)
3
(for PN-Q701 and PN-Q601)
Stand unit (x1)
4
(for PN-Q801)
Stand unit (x1)
5
(for PN-Q901)
AC cord (x2)
6
(for PN-Q901 and PN-Q801)
■Setup Guide (this publication)
Optional Accessories
The listed optional accessories
are available for the Liquid Crystal
Television. Please purchase them
at your nearest shop.
• Additional optional accessories
may be available in the near
future. When purchasing, please
read the newest catalogue for
compatibility and check the
availability.
•
2
ESPAÑOL
Accesorios suministrados
Asegúrese de que se proporcionan
los siguientes accesorios con el
producto.
NOTA
• Utilice siempre el cable AC
suministrado con el monitor.
• Las ilustraciones anteriores son
para própositos explicativos y
pueden diferenciarse ligeramente
de los accesorios actuales.
Mando a distancia ( x 1)
1
Pila "AAA " (x2)
2
Soporte ( x 1)
3
(para PN-Q701 y PN-Q601)
Soporte ( x 1)
4
(para PN-Q801)
Soporte ( x 1)
5
(para PN-Q901)
Cable AC (x2)
6
(para PN-Q901 y PN-Q801)
■Guía de configuración (esta
publicación)
Accesorios opcionales
Los accesorios listados están
disponibles para la televisión
de cristal líquido. Adquiera este
accesorio en la tienda más
cercana.
• En el futuro cercano podrán
encontrarse disponibles
accesorios opcionales
adicionales. Lea el catálogo
más reciente para conocer la
compatibilidad y la disponibilidad
de esos accesorios.
3
FRANÇAIS
Accessoires fournis
S’assurer que les accessoires
suivants sont fournis avec le
produit.
REMARQUE
• Toujours utiliser le cordon
secteur fourni avec l’écran.
• Les illustrations ci-dessus
servent d’explication et peuvent
être légèrement différentes des
accessoires réels.
Télécommande ( x 1)
1
Pile AAA (x2)
2
Ensemble du socle ( x 1)
3
(pour PN-Q701 et PN-Q601)
Ensemble du socle ( x 1)
4
(pour PN-Q801)
Ensemble du socle ( x 1)
5
(pour PN-Q901)
Cordon secteur (x2)
6
(pour PN-Q901 et PN-Q801)
■Guide d’installation (la présente
publication)
Accessoires en option
Les accessoires optionnels listés
sont disponibles pour la télévision
à cristaux liquides. Vous les
trouverez chez votre revendeur le
plus proche.
• D’autres accessoires en option
peuvent être disponibles dans
un proche avenir. Lors de vos
achats, lisez le catalogue le
plus récent pour la compatibilité
et vérifiez la disponibilité des
accessoires.
4
DEUTSCH
Mitgeliefertes Zubehör
Stellen Sie sicher, dass das
folgende Zubehör mit dem Produkt
geliefert wird.
HINWEIS
• Verwenden Sie immer das
mit dem Monitor gelieferte
Netzkabel.
• Die obigen Abbildungen dienen
der Erläuterung und können
vom tatsächlichen Zubehör
abweichen.
Fernbedienung ( x 1)
1
"AAA" Größe Batterie (x2)
2
Ständer ( x 1)
3
(Für PN-Q701 und PN-Q601)
Ständer ( x 1)
4
(Für PN-Q801)
Ständer ( x 1)
5
(Für PN-Q901)
Netzkabel (x2)
6
(Für PN-Q901 und PN-Q801)
■Installationsanleitung (diese
Anleitung)
Sonderzubehör
Das aufgelistete optionale Zubehör
ist für den Monitor erhältlich. Sie
können es bei Ihrem Fachhändler
erwerben.
• Möglicherweise wird in naher
Zukunft im Fachhandel weiteres
Sonderzubehör verfügbar.
Bitte prüfen Sie beim Kauf
im neuesten Katalog die
Kompatibilität und fragen Sie
nach der Erwerbsmöglichkeit.
24
5
ITALIANO
Accessori forniti
Assicurarsi che i seguenti accessori
siano forniti assieme al prodotto.
NOTA
• Utilizzare sempre il cavo di
alimentazione fornito con il
monitor.
• Le illustrazioni sopra
riportate sono a puro scopo
esemplificativo e potrebbero
essere leggermente differenti
dagli attuali accessori.
Telecomando ( x 1)
1
Batteria "AAA" (x2)
2
Stand ( x 1)
3
(per PN-Q701 e PN-Q601)
Stand ( x 1)
4
(per PN-Q801)
Stand ( x 1)
5
(per PN-Q901)
Cavo di alimentazione (x2)
6
(per PN-Q901 e PN-Q801)
■Guida di utilizzo (questa
pubblicazione)
Accessori opzionali
Gli accessori opzionali elencati
sono disponibili per televisioni a
cristalli liquidi. Si prega di acquistarli
presso il rivenditore più vicino.
• Accessori opzionali
supplementari possono diventare
disponibili in futuro. Al momento
del loro acquisto si prega di
leggere l’ultimo catalogo per
la compatibilità e controllare la
disponibilità.
6
РУССКИЙ
Прилагаемые
принадлежности
Убедитесь в том, что к изделию
прилагаются перечисленные
ниже принадлежности.
ПРИМЕЧАНИЕ
•
Всегда используйте только
шнур питания, поставляемый
в комплекте с монитором.
•
Приведенные выше
иллюстрации предназначены
только для описательных
целей: фактический вид
принадлежностей может
незначительно отличаться.
Пульт дистанционного
1
управления (x1)
Батарейки размера "AAA" (x2)
2
Подставка (x1)
3
(для PN-Q701 и PN-Q601)
Подставка (x1)
4
(для PN-Q801)
Подставка (x1)
5
(для PN-Q901)
Шнур питания (x2)
6
(для PN-Q901 и PN-Q801)
Руководство по установке
■
(эта публикация)
Дополнительные
принадлежности
Перечисленные дополнительные
принадлежности поставляются для
жидкокристаллического телевизора.
Пожалуйста, приобретите их в
ближайшем магазине.
•
В ближайшем будущем
могут появиться новые
дополнительные
принадлежности. При покупке,
пожалуйста, прочтите
новейший каталог для
выяснения совместимости и
проверьте их наличие.
TÜRKÇE
Birlikte verilen aksesuarlar
Aşağıdaki aksesuarların ürünle
birlikte verildiğinden emin olun.
NOT
• Yalnızca Monitörle birlikte verilen
AC kablosunu kullanın.
• Yukarıdaki resimler örnek
amaçlıdır ve asıl aksesuarlar
farklılık gösterebilir.
Uzaktan kumanda ünitesi ( x 1)
1
2 "AAA" tipi pil (x2)
2
Stant ünitesi ( x 1)
3
(PN-Q701 ve PN-Q601
cihazları için)
Stant ünitesi ( x 1)
4
(PN-Q801 cihazı için)
Stant ünitesi ( x 1)
5
(PN-Q901 cihazı için)
AC kablosu (x2)
6
(PN-Q901 ve PN-Q801
cihazları için)
■Kurulum Kılavuzu (bu yayım)
İsteğe bağlı aksesuarlar
Likit Kristal Televizyon'a uygun
opsiyonel aksesuar listesi
mevcuttur. Lütfen en yakın
mağazadan alınız.
• Yakın gelecekte ilave isteğe
bağlı aksesuarlar da piyasaya
sürülecektir. Satın alırken,
uyumluluk için en yeni kataloğu
okuyup bulunabilirliğini kontrol
edin.
Page 26
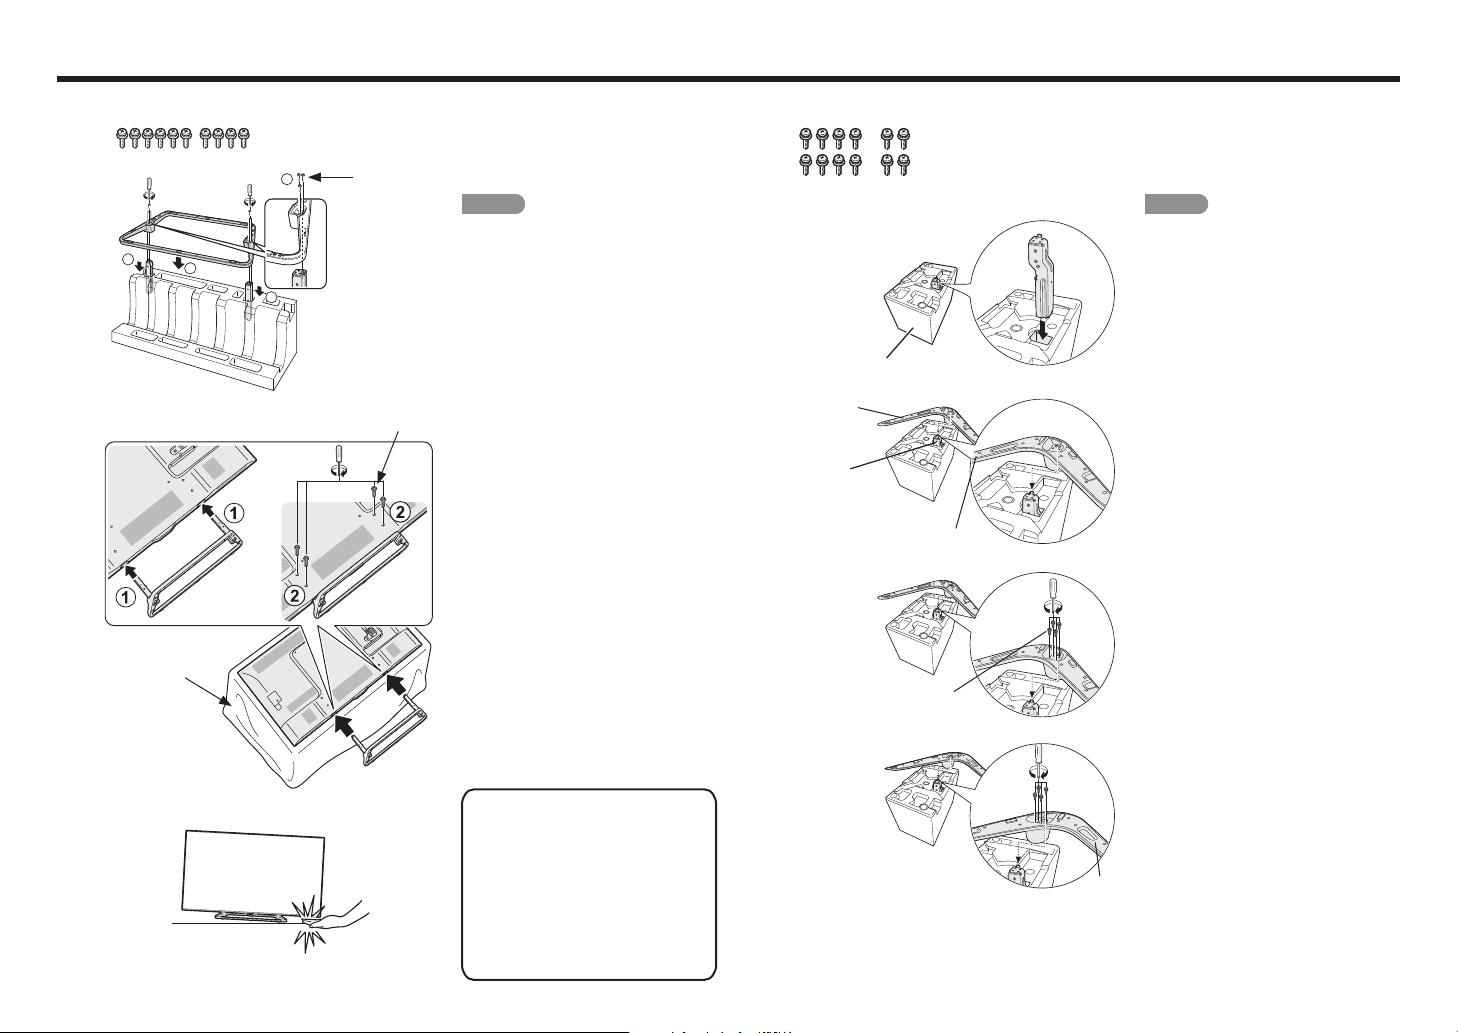
Attaching the Stand
TOP-R
■PN-Q701/PN-Q601
1
2
1
3
Soft cushion
• Before attaching (or detaching) the
stand, unplug the AC cord.
• Before performing work spread
cushioning over the base area to lay
3
2
1
Screws
Screws
the Monitor on. This will prevent it from
being damaged.
CAUTION
• Be sure to follow the instructions.
Incorrect installation of the stand may
result in the Monitor falling over.
Confirm that there are 10 screws
1
supplied with the stand unit.
1 Set the post for the stand unit onto
2
the polystyrene foam.
Attach the base to the post.
2
Insert and tighten the 6 screws
3
into the 6 holes on the bottom of
the base.
• Hold the stand unit securely with one
hand, and then tighten the screws.
1 Insert the stand into the openings
3
on the bottom of the Monitor.
• Make sure that the stand is firmly
inserted into the Monitor. Improper
installation may result in tilting of the
Monitor set.
Insert and tighten the 4 screws
2
into the 4 holes on the rear of the
Monitor.
■PN-Q801
1
2
(Example: Right Stand)
Stand base
Supporting post
"R"
Screws
• Before attaching (or detaching) the
stand, unplug the AC cord.
• Before performing work spread
cushioning over the base area to lay
the Monitor on. This will prevent it from
being damaged.
CAUTION
1
• Be sure to follow the instructions.
Incorrect installation of the stand may
result in the Monitor falling over.
Confirm that there are 12 screws
1
supplied with the stand unit.
1 Set the post for the stand unit into
2
the TOP-R polystyrene foam.
Attach the base to the post.
2
Insert and tighten the 4 screws
3
2
3
into the 4 holes on the bottom of
the base.
• Hold the stand unit securely with one
hand, and then tighten the screws.
Assemble the left stand as well as
4
the right stand.
• In the installation procedure, be
careful not to catch your fingers
between the Monitor set and the
floor.
• Do not remove the stand from the
Monitor unless using an optional
wall mount bracket to mount it.
• After attaching the stand to the
Monitor, do not hold the stand
when you put up, set up, move or
lay down the Monitor.
EN 1
"L"
4
Page 27
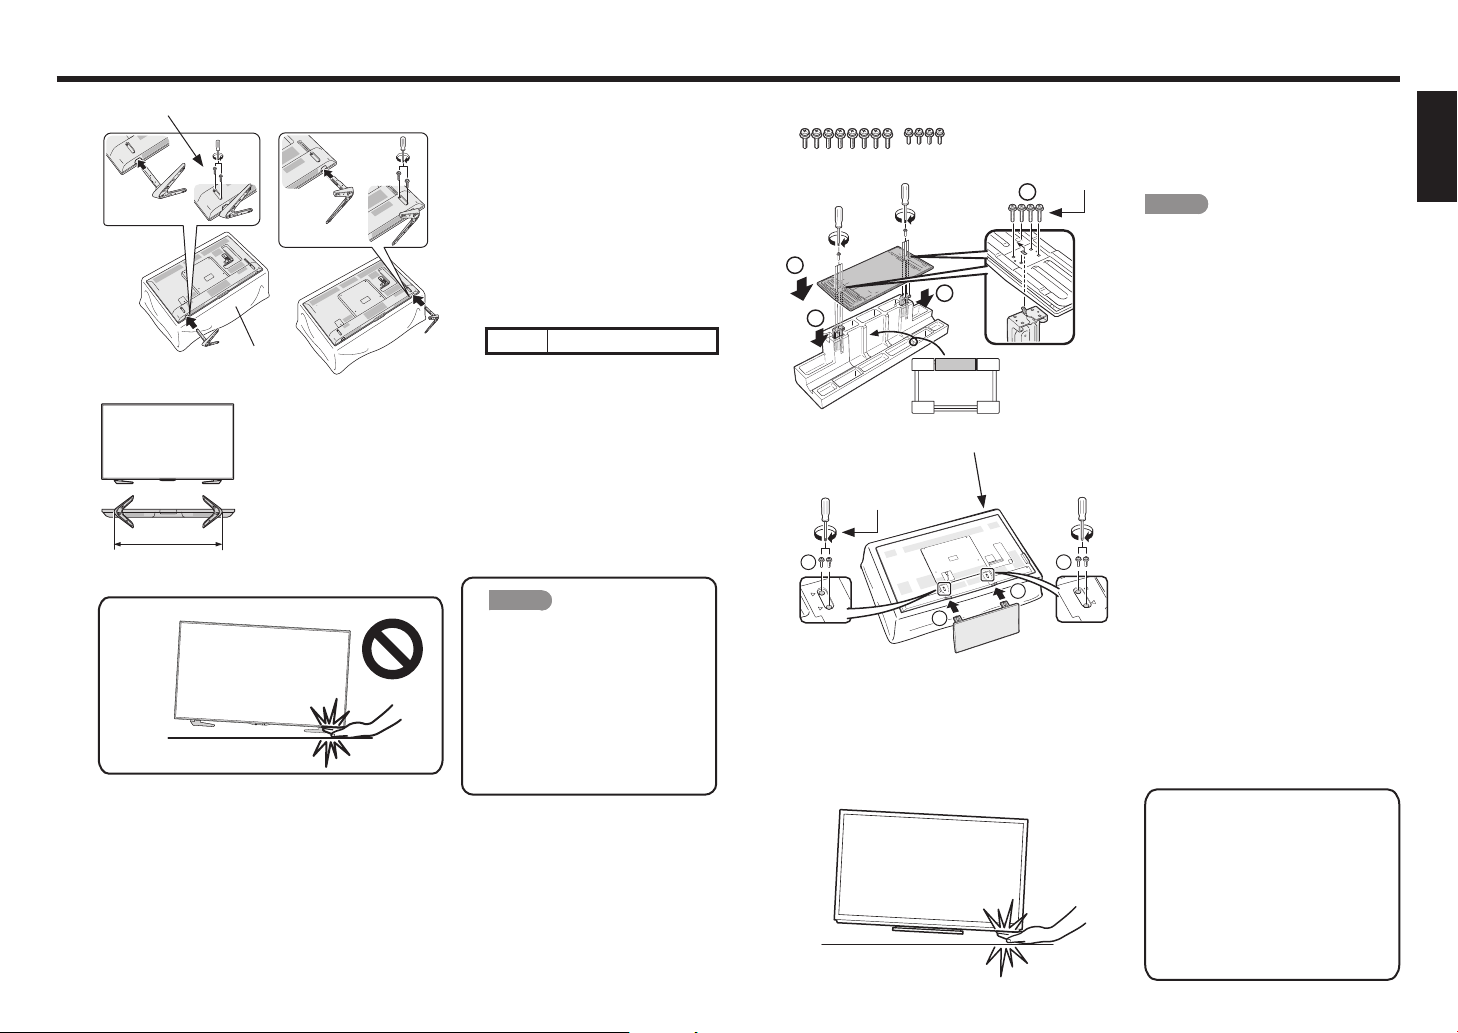
Attaching the Stand
3
Build the work table. (See page EN 3.)
4
Screws
Soft cushion
3
Insert the stand into the openings
4
on the rear of the Monitor, and then
tighten the 4 screws into the 4 holes
on the rear of the stand unit.
• Make sure that the stand is firmly
inserted into the Monitor.
Improper installation may result in tilting
of the Monitor set.
The stands can be inserted into the
5
Monitor so that they face the inside or
the outside of the Monitor.
Unit: inch (mm)
A 65 7/8 (1673)
1
2
■PN-Q901
Long screws
2
1
1
FRONT
5
4
Short screws
A
2
CAUTION
• In the installation procedure, be
careful not to catch your fingers
between the Monitor set and the
floor.
• Do not remove the stand from the
Monitor unless using an optional
wall mount bracket to mount it.
• After attaching the stand to the
Monitor, do not hold the stand
when you put up, set up, move or
lay down the Monitor.
Soft cushion
2
1
1
• Before attaching (or detaching) the
stand, unplug the AC cord.
• Before performing work spread
cushioning over the base area to lay
the Monitor on. This will prevent it from
being damaged.
CAUTION
• Be sure to follow the instructions.
Incorrect installation of the stand may
result in the Monitor falling over.
Confirm that there are 12 screws
1
(8 long screws and 4 short screws)
supplied with the stand unit.
1 Set the post for the stand unit onto
2
the polystyrene foam.
2 Attach the base to the post.
3 Insert and tighten the 8 screws
into the 8 holes on the bottom of
the base.
• Hold the stand unit securely with one
hand, and then tighten the screws.
Build the work table. (See page EN 3.)
3
1 Insert the stand into the openings
4
on the bottom of the Monitor.
• Make sure that the stand is firmly
inserted into the Monitor. Improper
installation may result in tilting of the
Monitor set.
Insert and tighten the 4 screws
2
into the 4 holes on the rear of the
Monitor.
• In the installation procedure, be
careful not to catch your fingers
between the Monitor set and the
floor.
• Do not remove the stand from the
Monitor unless using an optional
wall mount bracket to mount it.
• After attaching the stand to the
Monitor, do not hold the stand
when you put up, set up, move or
lay down the Monitor.
ENGLISHITALIANO DEUTSCHESPAÑOL FRANÇAISTÜRKÇEРУССКИЙ
EN 2
Page 28
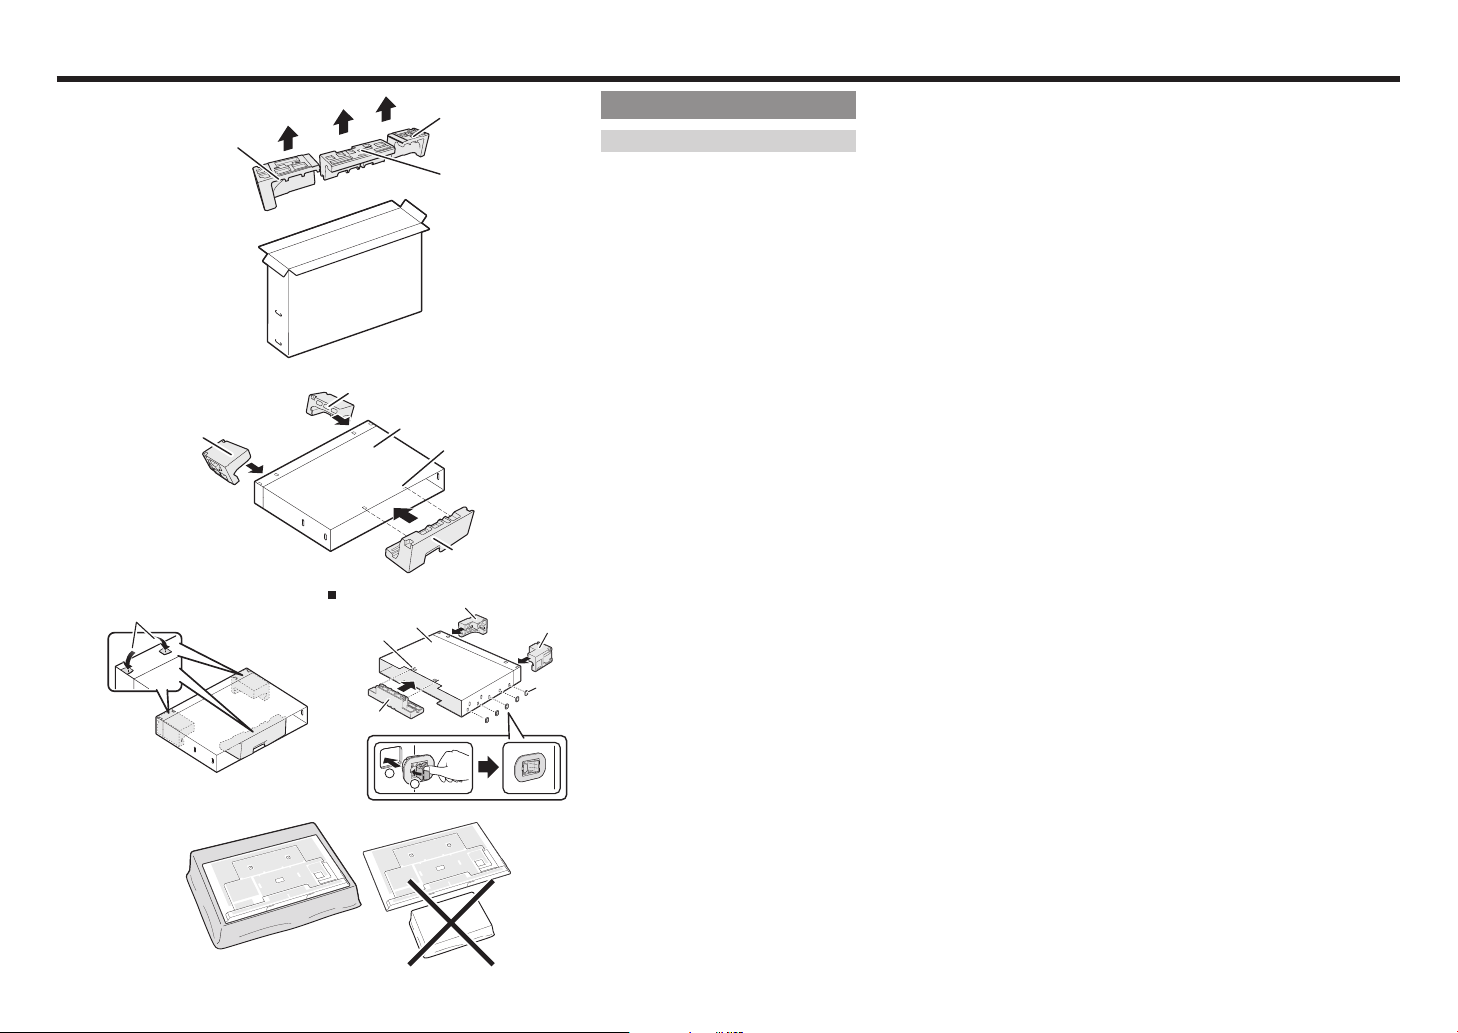
Attaching the Stand
1
2
3
Push-in tabs
TOP-L
TOP-L
BACK
TOP-R
PN-Q901
TOP-C
LINE
TOP-R
90/80 inch only
Building the Work Table
TOP-C
CASE
LINE
TOP-C
TOP-L
CASE
1
2
TOP-R
JOINT
Before attaching the stand to the Monitor,
build a work table on which to rest the
Monitor.
• To build the table, use the cushioning
materials used in the packaging.
• Of the cushioning materials used, TOP-C
is also used during stand unit assembly.
Be sure to assemble the stand unit
before building the work table.
Insert each of the cushioning materials
1
in the respective directions shown in
the figure.
• Insert TOP-L and TOP-R into the left
and right sides of the case respectively.
• Insert TOP-C to fit between the lines
on the other side of the case.
The case is equipped with push-in
2
tabs to hold the cushioning materials
in place. Push in the tabs (2 for each
location) to secure the cushioning
materials in the case.
PN-Q901
After you have built the work table,
3
Attach the joints and close the case.
Insert a joint into the hole on the
1
side of the case.
Pressing the tab, fix the joint into
2
place.
spread a blanket or similar soft cloth
over the table and then lay the Monitor
display down on the covered table
before attaching the stand to the
Monitor.
• Do not use a small table for this.
• For information on attaching the stand,
See page
EN 1
to
EN 2
EN 3
Page 29
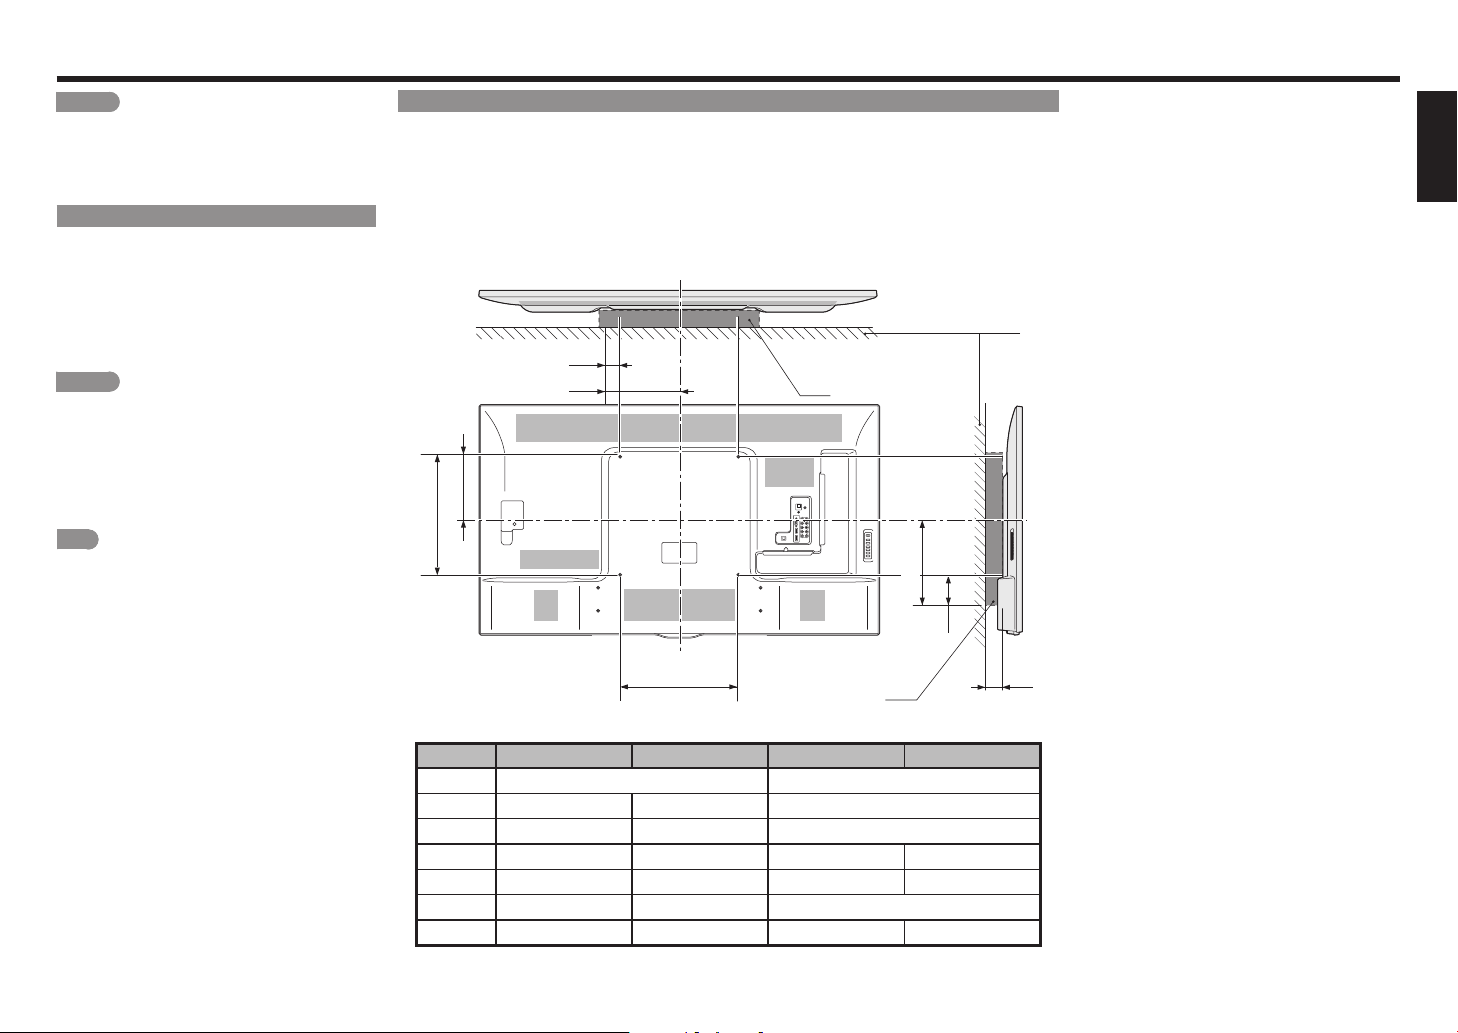
Setting the Monitor on the Wall
CAUTION
• Installing the Monitor requires special skill that
should only be performed by qualified service
personnel. Customers should not attempt to do the
work themselves. SHARP bears no responsibility
for improper mounting or mounting that results in
accident or injury.
Hanging on the wall
The wall mount kit (sold separately) allows you to mount
the Monitor on the wall. For detailed information on
installing the wall mount, see the instructions provided
with the product.
We recommend you to contact a technician for
assistance when installing it.
SHARP is not responsible for any damage to the product
or injury to yourself or others if you elect to install the wall
mount on your own.
CAUTION
• Install your wall mount on a solid wall
perpendicular to the floor.
When you want to attach the wall mount to
surfaces other than plaster board, please contact
your nearest retailer/adviser for additional
information. If you install the Monitor on a ceiling
or slanted wall, it may fall and result in severe
personal injury. Always have two people mount
the Monitor on a wall.
NOTE
• Due to the terminal configuration on this Monitor,
when you wall-mount this model, make sure there is
enough space between the wall and the Monitor for
the cables.
• To use this Monitor mounted on a wall, remove the
AC cord holder on the rear of the Monitor, and then
use the screws supplied with the wall mount bracket
to secure the bracket to the rear of the Monitor.
Wall Mount Kit Specifications
Standard dimensions for wall mount kits are shown below
*1 : WALL
*2 : WALL MOUNT KIT
a1 : Maximum distance from mounting hole.
a2 : Maximum distance from the Monitor's center.
b1 : Distance between the Monitor's center and the mounting hole.
b2 : Maximum distance from the Monitor's center.
b3 : Maximum distance from the mounting hole.
c1 : Minimum gap.
a1
a2
*2
b1
B
b2
A
PN-Q901 PN-Q801 PN-Q701 PN-Q601
(A-B) 23 5/8 (600) - 15 3/4 (400) 15 3/4(400) - 15 3/4(400)
a1 1 37/64 (40) 2 3/8 (60) 2 3/8 (60)
a2 13 25/64 (340) 14 3/16 (360) 10 1/4 (260)
b1 7 7/8 (200) 8 9/32 (210) 8 9/32 (210) 8 43/64 (220)
b2 14 49/64 (375) 10 61/64 (278) 10 29/32 (277) 10 9/16 (268)
b3 6 57/64 (175) 3 7/16 (87) 3 7/16 (87)
c1 3 5/32 (80) 2 9/16 (65) 1 15/16 (49) 1 31/32 (50)
*2
*1
b3
Unit: inch (mm)
ENGLISHITALIANO DEUTSCHESPAÑOL FRANÇAISTÜRKÇEРУССКИЙ
c1
EN 4
Page 30
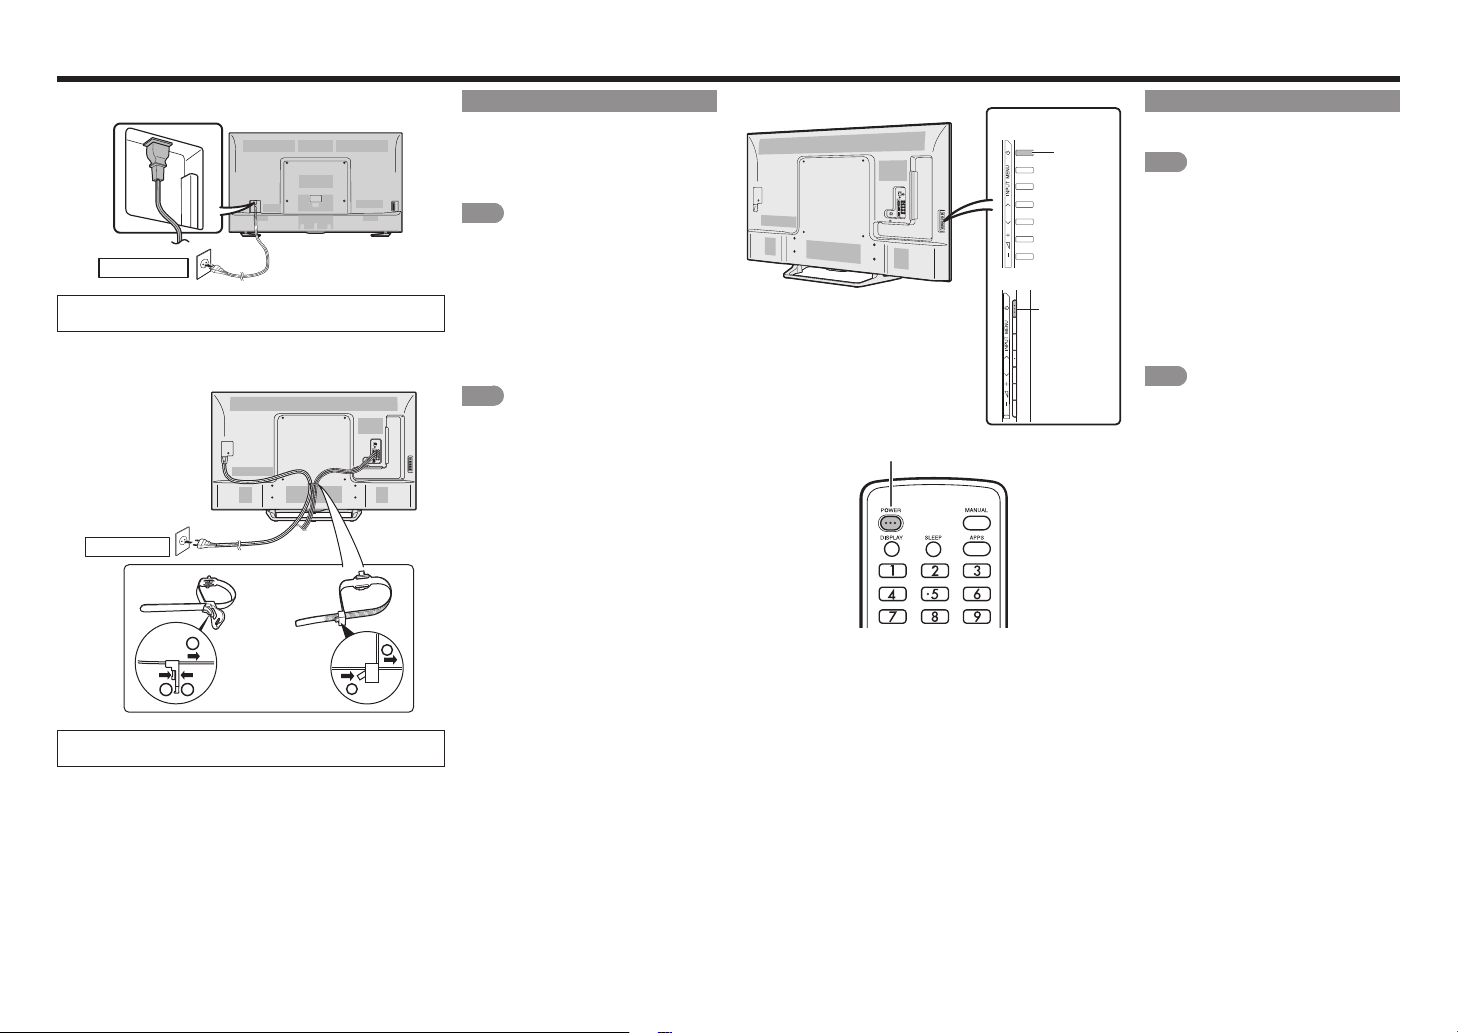
AC power supply
■PN-Q901/PN-Q801
AC outlet
• Place the Monitor close to the AC outlet, and keep the power
plug within reach.
■PN-Q701/PN-Q601
AC outlet
2
or
2
AC connection
Connect the AC plug for the Monitor
1
into the AC outlet.
• Place the Monitor close to the AC
outlet, and keep the power plug within
reach.
NOTE
• TO PREVENT RISK OF ELECTRIC
SHOCK, DO NOT TOUCH UNINSULATED PARTS OF ANY CABLES
WITH THE AC CORD CONNECTED.
When turning on the Monitor for
2
the first time, press POWER on the
Monitor.
Insert the batteries into the remote
3
control unit. (See page
NOTE
• Speakers cannot be detached from the
Monitor.
• The Monitor angle cannot be adjusted.
EN 6
.)
POWER (On/Standby)
H
PN-Q801/PN-Q701/
PN-Q601
POWER
H
PN-Q901
POWER
Turning On/Off the Power
Press POWER on the Monitor or on the
remote control unit to turn the power on.
NOTE
• The Initial Installation starts when the
Monitor powers on for the first time. If
the Monitor has been turned on before,
the Initial Installation will not be invoked.
For changing the settings of the Initial
Installation, please select "Easy Setup" on
the Initial Setup menu.
Press POWER on the Monitor or on
the remote control unit again to turn the
power off.
• The Monitor enters standby and the
image on the screen disappears.
NOTE
• If you are not going to use this Monitor for a
long period of time, be sure to remove the
AC cord from the AC outlet.
• Weak electric power is still consumed even
when the Monitor is turned off.
1
1
• Place the Monitor close to the AC outlet, and keep the power
plug within reach.
1
EN 5
Page 31

Remote Control Unit Connection
1
2
3
Remote control sensor
30°
30°
*: The angle is 6° when the stand
is attached. (for PN-Q901 only)
17´ (5 m)
30°
30°*
Installing Batteries in the
Remote Control Unit
If the remote control fails to operate Monitor
functions, replace the batteries in the remote
control unit.
Open the battery cover.
1
Insert two "AAA" size batteries
2
(supplied with the product).
• Place the batteries with their terminals
corresponding to the (+) and (–)
indications in the battery compartment.
Close the battery cover.
3
CAUTION
Improper use of batteries can result in chemical
leakage or explosion. Be sure to follow the instructions
below.
• Do not mix batteries of different types. Different
types of batteries have different characteristics.
• Do not mix old and new batteries. Mixing old and
new batteries can shorten the life of new batteries
or cause chemical leakage in old batteries.
• Remove batteries as soon as they are worn out.
Chemicals that leak from batteries that come in
contact with skin can cause a rash. If you find any
chemical leakage, wipe thoroughly with a cloth.
• The batteries supplied with this product may have a
shorter life expectancy due to storage conditions.
• If you will not be using the remote control unit for
an extended period of time, remove batteries from
it.
Using the Remote Control Unit
Use the remote control unit by pointing it towards
the remote control sensor on the Monitor.
Objects between the remote control unit and
the remote control sensor may prevent proper
operation.
■Cautions regarding the remote
control unit
• Do not expose the remote control unit to shock.
In addition, do not expose the remote control unit
to liquids, and do not place it in an area with high
humidity.
• Do not install or place the remote control unit under
direct sunlight. The heat may cause deformation of
the remote control unit.
• The remote control unit may not work properly if
the remote control sensor on the Monitor is under
direct sunlight or strong lighting. In such cases,
change the angle of the lighting or the Monitor, or
operate the remote control unit closer to the remote
control sensor.
IMPORTANT:
IF THE UNIT DOES NOT POWER ON - UNPLUG
THE MONITOR FROM THE OUTLET AND
REPEAT THE INSTALLATION STEPS.
Types of Connection
For connecting the Monitor to external equipment, use commercially available cables.
• The illustrations of the terminals are for explanation purposes and may vary slightly from the actual products.
■Connecting to video equipment or PC
■Image quality differs depending on the terminal used. To enjoy clearer images, check the output terminals
of your external equipment and use its appropriate terminals for higher quality images.
Image
Quality
HD
Quality
Standard
Quality
Terminal on the
Monitor
Cable Pages
HDMI-certified cable
Ø 3.5 mm stereo minijack cable
HDMI-certified cable
Component video cable
Audio cable
AV cable
■Connecting to audio equipment
Check the output terminals of your external equipment and use its appropriate terminals.
Terminal on the Monitor Cable
Optical fiber cable
Audio cable
Terminal on external
equipment
AUDIO
Terminal on external
equipment
OPTICAL
DIGITAL AUDIO INPUT
ANALOG AUDIO IN
EN 7, EN 8
EN 8
EN 7
EN 7
Pages
EN 8
EN 8
ENGLISHITALIANO DEUTSCHESPAÑOL FRANÇAISTÜRKÇEРУССКИЙ
EN 6
Page 32

Connection
PR (Red)
You can connect many types of external equipment to your Monitor. To view external source images, select
the input source by pressing INPUT on the remote control unit or on the Monitor.
For connecting the Monitor to external equipment, use commercially available cables.
CAUTION
• To protect equipment, always turn off the Monitor before connecting any external equipment.
• Please read the relevant operation manual (Blu-ray disc player, etc.) carefully before making connections.
Connecting a Blu-ray Disc/DVD Player or HD Cable/Satellite Set-top Box
■When using an HDMI cable (HDMI IN 1, 2 or 3):
• The HDMI (High Definition Multimedia Interface) terminal is an audio-video interface that enables a connection for
audio and video signals using a single cable. The HDMI IN terminal supports high-resolution video input.
• To enjoy 1080p display capability, connect your external equipment using an HDMI-certified cable or a component
cable and set the equipment to 1080p output.
• Supported Audio format: Linear PCM, Dolby Digital, DTS, sampling rate 32/44.1/48kHz.
• When you connect ARC-compatible equipment, use HDMI IN 1.
HDMI-certified cable
HDMI OUT
■When using a Component cable (COMPONENT/VIDEO IN):
• To enjoy 1080p display capability, connect your external equipment using an HDMI-certified cable or a component
cable and set the equipment to 1080p output.
• When you connect a component cable to the COMPONENT/VIDEO IN terminal, switch Input Select to
COMPONENT.
P
(Blue)
B
Y (Green)
Component video cable
Connecting a VCR, Game Console, Camcorder or Cable/Satellite Set-top Box
■When using a Composite cable (COMPONENT/VIDEO IN or VIDEO IN 1):
• When you connect an AV cable to the COMPONENT/VIDEO IN terminal, switch Input Select to VIDEO.
AV cable
VIDEO (Yellow)
AUDIO-L (White)
AUDIO-R (Red)
AV cable
VIDEO (Yellow)
AUDIO-L (White)
AUDIO-R (Red)
AUDIO-L
AUDIO-R
(White)
(Red)
COMPONENT OUT
Audio cable
EN 7
Page 33

Connection
HD Cable/Satellite set-top box
Optical fiber cable
Connecting a Surround System/Audio System
■When connecting an AV amplifier for a surround system
• Letting the Monitor output the audio to an AV amplifier:
*1 When you connect ARC-compatible equipment, use HDMI IN 1.
• If the image is not in sync with the audio, check the settings of the connected surround system.
HDMI-certified cable *1
OPTICAL
DIGITAL AUDIO INPUT
■When connecting an audio amplifier
It is possible to output audio through the DIGITAL AUDIO OUT terminal.
• In this case, set "DIGITAL AUDIO" to "PCM" or "Bitstream". (Refer to built-in operation manual.)
Optical fiber cable
HDMI INHDMI OUT
OPTICAL
DIGITAL AUDIO INPUT
HDMI OUT
Connecting a PC
Refer to built-in operation manual for a list of PC signals compatible with the Monitor.
■When using an HDMI cable (HDMI IN 1, 2 or 3):
• Depending on the board, only video signals may be output. In this case, in addition to connecting an HDMI-certified
cable to the HDMI IN 2 terminal, connect a Ø 3.5 mm stereo minijack cable to the AUDIO IN terminal and set "Audio
Select" to "HDMI+Analog". (Refer to built-in operation manual.)
• The HDMI IN terminals only support digital signal.
HDMI-certified cable
HDMI OUT
or
HDMI-certified cable
HDMI OUT
Ø 3.5 mm stereo minijack cable
■When using an analog RGB cable (PC IN):
• When using an analog RGB cable, input the audio signal to the AUDIO IN terminal of PC IN.
Analog RGB cable (D-sub 15-pin cable or VGA cable)
AUDIO
ENGLISHITALIANO DEUTSCHESPAÑOL FRANÇAISTÜRKÇEРУССКИЙ
Audio cable
ANALOG AUDIO IN
EN 8
Ø 3.5 mm stereo minijack cable
RGBAUDIO
Page 34

Introduction
3
Viewing the Built-in Operation Manual
Initial Installation
Perform the following steps before you
press POWER on the remote control unit.
Insert the batteries into the remote
1
control unit.
Plug in the AC cord to the AC outlet.
2
Language (Language setting)
Select from among 6 language: English,
French, Spanish, German, Italian and
Viewing the Built-in Operation Manual
Press MANUAL on the remote control unit to display operation information on the screen.
To search for an item from the table of contents, and to search for a particular term and to find troubleshooting
information, press MANUAL while watching the Monitor and then select the applicable item from the manual
cover page that appears.
Press MANUAL while watching the Monitor.
1
This displays the built-in operation manual screen.
When you select contents, its page will be displayed.
2
You can turn over the page one by one for these arrow marks.
3
Russian.
Press a/b to select the desired
1
language listed on the screen, and
2
then press ENTER.
ETHERNET terminal
AUDIO IN terminal
PC IN
terminal
(shared for PC IN and
HDMI IN 2) *2
VIDEO IN 1 terminals
AUDIO OUT terminals
COMPONENT/
VIDEO IN
terminals
*5
HDMI IN 2 terminal
HDMI IN 1 terminal
ARC: Audio
Return Channel
*3
DIGITAL AUDIO OUT
terminal
Power Saving
Select "Yes" or "No" to configure default
1
Display seting.
Press c/b to select "Yes" or "No".
2
Press ENTER to enter the setting.
ENG 1-1
Completed
The settings confirmation screen is
3
displayed. Confirm the information
displayed on the screen, and then
press ENTER.
Examples of the settings
confirmation screen
NOTE
• You can also display the built-in operation manual by selecting "Information" > "Manual" from the menu screen.
• When USB mode, Home Network mode, or Internet application is used, can not be displayed the built-in operation
manual.
EN 9
Page 35

Using a PC
Adjusting the PC Image
You can adjust the position of the image input a PC
by selecting
"Initial Setup" > "Input Settings" > "Fine Sync."
Fine Sync.
Ordinarily you can easily adjust the picture as
necessary to change image position using "Auto
Sync.". In some cases, however, manual adjustment
is needed to optimize the image.
Input Signal: Select the input signal.
1024×768
1360×768
Auto Sync.: For automatically adjusting the PC
image.
Yes : Auto Sync. starts and "Now adjusting the
image." is displayed.
No : This function does not work.
H-Pos. : Centers the image by moving it to the left
or right.
V-Pos. : Centers the image by moving it up or
down.
Clock : Adjust when the image flickers with
vertical stripes.
Phase : Adjust when characters have low
contrast or when the image flickers.
NOTE
• Auto Sync. may fail if the computer image has low
resolution, has unclear (black) edges, or is moved while
executing "Auto Sync.".
• Be sure to connect the PC to the Monitor and switch it
on before starting "Auto Sync.".
• It is not necessary to adjust the "Clock" or "Phase"
when a digital signal is being input, so it cannot be
selected.
• The default cursor position may not be in the center,
because the screen position variable ranges may be
asymmetrical.
• The screen position variable ranges depend on the
View Mode or the signal type. The ranges can be seen
on the position-setting screen.
Setting Audio Input
Audio Select
This function sets the terminal to output the
computer audio.
The adjustment items vary depending on the input
source.
Select the input source corresponding to the terminal
connected to the PC and then adjust the desired
item.
To perform the operation, refer to "Initial Setup" >
"Input Settings" > "Audio Select".
HDMI 2
HDMI2(Digital) : Select this when the Monitor
HDMI+Analog : Select this when the Monitor
NOTE
• When "Audio Select" is set to "HDMI+Analog", sound
will not be produced if you use only an HDMI-certified
cable to connect HDMI-compatible equipment. To
produce sound, you should make an analog audio
connection.
• If you want to connect HDMI-compatible equipment
using only an HDMI-certified cable, set "Audio Select"
to "HDMI2(Digital)".
and PC are connected using
an HDMI-certified cable and
audio is input via the same
cable.
and PC are connected using
an HDMI-certified cable and
the audio is input via a Ø 3.5
mm stereo minijack.
Control of the Monitor
• The Monitor can be controlled from a PC, control
panels and other devices using the RS-232C or IP.
• Use a cross-type RS-232C cable, ETHERNET
cable (commercially available) for the connections.
NOTE
• This operation system should be used by a person
who is accustomed to using computers.
IP Control
Set this function when operating the Monitor from
equipment connected by LAN. To perform the
operation, refer to "Network Settings".
IP Control
When "IP Control" is selected, "Change" will be
highlighted. Press ENTER.
Detailed Settings
Make the detailed settings (Login ID, password,
etc.).
Follow the on-screen instructions to configure
the settings.
Device Name
• Set the name of the Monitor displayed on other
network devices.
Use the software keyboard to set the name.
Cross-type RS-232C cable
Communication Conditions For RS-232C
Set the RS-232C communication settings on the PC
to match the Monitor's communication conditions.
The Monitor's communication settings are as follows:
Baud rate: 9,600 bps
Data length: 8 bits
Parity bit: None
Stop bit: 1 bit
Flow control: None
Communication Conditions for the IP
Connect to the Monitor with the following settings
made for IP on the PC
IP protocol: TCP/IP
Host IP address: Set the IP address on the
Service: None (Do not select Telnet or
TCP port#: Set a port number on the
Monitor menu
SSH)
Monitor menu (Control port)
When you set your ID and password on the Monitor
menu, you need to enter them as soon as you
connect to the Monitor.
NOTE
• When you use this function, make settings for "IP
Control".
• The connection will be cut off when there has been no
communication for 3 minutes.
ENGLISHITALIANO DEUTSCHESPAÑOL FRANÇAISTÜRKÇEРУССКИЙ
EN 10
ETHERNET cable
LAN
Hub
Page 36

Using a PC
Command 4-digits Parameter 4-digits Return code
When "?" is input for some
Return code (0DH)
Return code (0DH)
Communication Procedure
Send the control commands from the PC via the
RS-232C or IP.
The TV operates according to the received command
and sends a response message to the PC.
Do not send multiple commands at the same time.
Wait until the PC receives the OK response before
sending the next command.
Command format
Eight ASCll codes +CR
C1 C2 C3 C4 P1 P2 P3 P4
Command 4-digits: Command. The text of four
characters.
Parameter 4-digits: Parameter 0-9, x, blank, ?
Parameter
Input the parameter values, aligning left, and fill with
blank(s) for the remainder. (Be sure that 4 values are
input for the parameter.)
When the input parameter is not within an adjustable
range, "ERR" returns. (Refer to "Response code
format".)
Any numerical value can replace the "x" on the table.
0
0009
— 3 0
commands, the present
setting
value
responds.
?
????
Response code format
Normal response
O K
Problem response
(communication error or incorrect command)
E R R
Command table
• Commands not indicated here are not guaranteed to operate.
*1 For RS-232C only.
You can use "Wake On LAN (Magic Packet)" to turn on the power via LAN. It is not possible to turn on the monitor with the IP Control command.
CONTROL ITEM COMMAND PARAMETER CONTROL CONTENTS
POWER ON
COMMAND SETTING
POWER SETTING P O W R 0 _ _ _ Power Off It shifts to standby.
INPUT
SELECTION
AV MODE SELECTION A V M D * _ _ _ 0: (Toggle), 1: STANDARD,
VOLUME V O L M * * * _ Volume (0-100)
POSITION H-POSITION H P O S * * * _ (-50-50) For PC input.
VIEW MODE W I D E * * _ _ 0: (Toggle) [AV],
MUTE M U T E * _ _ _ 0: (Toggle), 1: On, 2: Off
SURROUND A C S U * _ _ _ 0: (Toggle), 1: On, 2: Off
AUDIO SELECTION A C H A x _ _ _ (Toggle)
SLEEP TIMER O F T M * _ _ _ 0: Off,
CC C L C P x _ _ _ (Toggle) Toggle operation of a closed caption.
DEVICE NAME T V N M 1 _ _ _ The device name set in "Device Name" is
MODEL NAME M N R D 1 _ _ _ The model name of the Monitor
SOFTWARE
VERSION
IP PROTOCOL
VERSION
REMOTE CONTROL
BUTTONS
TOGGLE I T G D x _ _ _ (Toggle) It input-switches by the toggle. (It is the same as
1-6 I A V D * _ _ _ 1: HDMI IN1, 2: HDMI IN 2,
V-POSITION V P O S * * * _ (-50-50)
CLOCK C L C K * * * _ (0-100)
PHASE P H S E * * _ _ (0-63)
NOTE
• If an underbar (_) appears in the parameter column, enter a space.
• If an asterisk (*) appears, enter a value in the range indicated in brakets under CONTROL CONTENTS.
• Any numerical value can replace the "x" on the table.
R S P W 0 _ _ _ Off The Power On command rejected.
S W V N 1 _ _ _ The current version of the Monitor software is
I P P V 1 _ _ _ The currently supported version of IP protocol is
R C K Y * * _ _ 0-9: 0-9, 10: DOT, 12: POWER, 13: DISPLAY, 23: OPTION, 24: SLEEP, 31: MUTE, 32: VOL -,
1 _ _ _ On [RS-232C] The Power On command accepted.
2 _ _ _ On [IP] The Power On command accepted.
1 _ _ _ Power On Power On
3: HDMI IN 3, 4: VIDEO IN 1,
5: COMPONENT/VIDEO IN 2,
6: PC IN
2: MOVIE,
4: USER, 5: DYNAMIC (Fixed),
6: DYNAMIC, 7: PC
1: Side Bar [AV],
2: S.Stretch [AV],
3: Zoom [AV],
4: Stretch [AV, USB-Video,
Home Network Video or
Internet applications],
5: Normal [PC],
7: Stretch [PC],
8: Dot by Dot [PC] [AV],
9: Full Screen [AV],
10: Auto [USB- VIdeo, USB-Photo, Home
Network Video, Photo or Internet applications],
11: Original [USB-Video, USB-Photo, Home
Network Video, Photo or Internet applications]
1: OFF TIMER - 30 MIN., 2: OFF TIMER - 60 MIN.,
3: OFF TIMER - 90 MIN., 4: OFF TIMER - 120 MIN.
33: VOL +, 34: CH
45: RETURN, 46: EXIT, 49: AUDIO, 50: A (red), 51: B (green), 52: C (blue), 53: D (yellow), 61: MANUAL
, 35: CH , 36: INPUT, 38: MENU, 40: ENTER, 41: a, 42: b, 43: a, 44: a,
*1
an input change key.)
Although it can choose now, it is toggle operation
in inside.
The screen position variable ranges depend on
the View Mode or the signal type. The ranges can
be seen on the position-setting screen.
0: Although it can choose now, it is toggle
operation in inside.
1: Only available when 4:3 signal is being input.
5: Only available when 4:3 signal is being input.
8: [PC] Available except when UXGA is being
input.
[AV] Only available when 1080i/p is being input.
9: Only available when 720p is being input.
10, 11: Available when USB-Video,
USB-Photo, Home Network Video, Photo or
Internet application is used.
displayed.
displayed.
displayed.
EN 11
Page 37

Troubleshooting
Problem Possible Solution
• No power
• Remote control unit does not
operate.
• No picture
• No sound
• Check if you pressed POWER on the remote control unit.
• Is the AC cord disconnected?
• Has the power been turned on?
• Are batteries inserted with polarity (+, –) aligned?
• Is connection to other components correct?
• Is connection to other components correct?
Page
Page
EN 5
EN 5
.
.
Page
Page
Page
EN 7
EN 7
EN 6
to
to
Page
.
EN 8
EN 8
EN 5
.
.
.
ENGLISHITALIANO DEUTSCHESPAÑOL FRANÇAISTÜRKÇEРУССКИЙ
EN 12
Page 38

Fijar el soporte
PARTE SUPERIOR DCHA
■PN-Q701/PN-Q601
1
2
1
3
Cojín blando
• Antes de poner (o quitar) el soporte,
desenchufe el cable de CA.
• Antes de llevar a cabo el trabajo,
extienda una protección sobre el área
3
2
1
Tornillos
Tornillos
de la base para poner sobre ella el
monitor. Esto evitará que se estropee la
pantalla.
PRECAUCIÓN
• Asegúrese de seguir las instrucciones.
La inslatación incorrecta del soporte
puede causar la caída del monitor.
Confirme que hay 10 tornillos
1
suministrados con la unidad de
soporte.
1 Fije el poste para la unidad
2
de soporte en la espuma de
poliestireno.
2 Fije la base al poste.
Inserte y atornille 6 tornillos en los
3
6 agujeros de la parte inferior de la
base.
• Sujete la unidad de soporte de forma
segura con una mano y atornille los
tornillos.
1 Inserte el soporte en las aperturas
3
en la parte inferior del monitor.
• Asegúrese de que el soporte
está insertado firmemente en el
monitor. La instalación incorrecta
puede causar una inclinación de la
instalación del monitor.
Inserte y atornille los 4 tornillos en
2
los 4 agujeros de la parte trasera
del monitor.
■PN-Q801
1
2
(Ejemplo: soporte derecho)
Base del soporte
Poste de apoyo
"R"
Tornillos
• Antes de poner (o quitar) el soporte,
desenchufe el cable de CA.
• Antes de llevar a cabo el trabajo,
extienda una protección sobre el área
de la base para poner sobre ella el
monitor. Esto evitará que se estropee la
pantalla.
1
PRECAUCIÓN
• Asegúrese de seguir las instrucciones.
La inslatación incorrecta del soporte
puede causar la caída del monitor.
Confirme que hay 12 tornillos
1
suministrados con la unidad de
soporte.
1 Fije el poste para la unidad de
2
soporte en la parte superior
2
3
derecha de la espuma de
poliestireno.
2 Fije la base al poste.
Inserte y atornille 4 tornillos en los
3
4 agujeros de la parte inferior de la
base.
• Sujete la unidad de soporte de forma
segura con una mano y atornille los
tornillos.
Monte el soporte izquiero así como
4
el soporte derecho.
• En el procedimiento de instalación,
tenga cuidado de no pillarse los
dedos entre el monitor y el suelo.
• No retire el soporte del monitor a
menos que utilice un soporte de
montaje de pared opcional para
montarlo.
• Después de unir el soporte al
monitor, no agarre el soporte
cuando cuelgue, instale, mueva o
tumbe el monitor.
ES 1
"L"
4
Page 39

Fijar el soporte
3
Colocar la mesa de trabajo
Tornillos
4
Cojín blando
3
(ver página ES 3).
Inserte el soporte en las aperturas
4
de la parte trasera del monitor y,
después, atornille 4 tornillos en los
4 agujeros en la parte trasera de la
unidad de soporte.
• Asegúrese de que el soporte está
insertado firmemente en el monitor.
La instalación incorrecta puede causar
una inclinación de la instalación del
monitor.
Los soportes pueden insertarse en
5
el monitor de manera que miren el
interior o el exterior del monitor.
Unidad: pulgada (mm)
A 65 7/8 (1673)
1
2
■PN-Q901
2
1
1
PARTE
DELANTERA
Long screws
5
4
Short screws
A
2
PRECAUCIÓN
• En el procedimiento de instalación,
tenga cuidado de no pillarse los
dedos entre el monitor y el suelo.
• No retire el soporte del monitor a
menos que utilice un soporte de
montaje de pared opcional para
montarlo.
• Después de unir el soporte al
monitor, no agarre el soporte
cuando cuelgue, instale, mueva o
tumbe el monitor.
Soft cushion
2
1
1
• Antes de poner (o quitar) el soporte,
desenchufe el cable de CA.
• Antes de llevar a cabo el trabajo,
extienda una protección sobre el área
de la base para poner sobre ella el
monitor. Esto evitará que se estropee la
pantalla.
PRECAUCIÓN
• Asegúrese de seguir las instrucciones.
La inslatación incorrecta del soporte
puede causar la caída del monitor.
Confirme que hay 12 tornillos (8
1
tornillos largos y 4 tornillos cortos)
suministrados con la unidad de
soporte.
1 Fije el poste para la unidad
2
de soporte en la espuma de
poliestireno.
2 Fije la base al poste.
3 Inserte y atornille 8 tornillos en los
8 agujeros de la parte inferior de la
base.
• Sujete la unidad de soporte de forma
segura con una mano y atornille los
tornillos.
Colocar la mesa de trabajo (ver
3
página ES 3).
1 Inserte el soporte en las aperturas
4
de la parte inferior del monitor.
• Asegúrese de que el soporte
está insertado firmemente en el
monitor. La instalación incorrecta
puede causar una inclinación de la
instalación del monitor.
Inserte y atornille 4 tornillos en los
2
4 agujeros de la parte trasera del
monitor.
• En el procedimiento de instalación,
tenga cuidado de no pillarse los
dedos entre el monitor y el suelo.
• No retire el soporte del monitor a
menos que utilice un soporte de
montaje de pared opcional para
montarlo.
• Después de unir el soporte al
monitor, no agarre el soporte
cuando cuelgue, instale, mueva o
tumbe el monitor.
ITALIANO DEUTSCHESPAÑOL FRANÇAISTÜRKÇEРУССКИЙ ESPAÑOLITALIANO DEUTSCHESPAÑOL FRANÇAISTÜRKÇEРУССКИЙ
ES 2
Page 40

Fijar el soporte
PARTE SUPERIOR IZQ
1
PARTE SUPERIOR IZQ
2
Pestañas
3
PARTE POSTERIOR
PARTE SUPERIOR DCHA
CASRCASA
EXTREMO
PARTE SUPERIOR CENTRAL
PN-Q901
EXTREMO
PARTE SUPERIOR CENTRAL
CASRCASA
1
2
PARTE SUPERIOR IZQ
PARTE SUPERIOR
DCHA
PARTE SUPERIOR
CENTRAL
PARTE SUPERIOR
DCHA
JUNTA
90/80 pulgadas solo
Colocar la mesa de trabajo
Antes de sujetar el soporte al monitor,
coloque una mesa de trabajo en la que
apoyar el monitor.
• Para colocar la mesa, utilice los
materialss de protección utilizados en el
embalaje.
• De los materiales de protección
utilizados, la parte superior central
también se utiliza durante el montaje de
la unidad de soporte.
Asegúrese de montar la unidad de
soporte antes de colocar la mesa de
trabajo.
Inserte cada uno de los materiales
1
de protección en las respectivas
direcciones mostradas en la figura.
• Inserte la parte superior izquierda y la
parte superior derecha en los lados
izquierdo y derecho de la carcasa
respectivamente.
• Inserte la parte superior central de
forma ajustada entre los extremos del
otro lado de la carcasa.
La carcasa está equipada con
2
pestañas para sujetar los materiales
de protección una vez colocados.
Presione las pestañas (2 en cada
ubicación) para asegurar los materiales
de protección en la carcasa.
PN-Q901
Después de colocar la mesa de
3
Acople las juntas y cierre la carcasa.
Introduzca una junta en el orificio
1
situado en el lateral de la carcasa.
Pulsando la pestaña, fije la junta
2
en su lugar.
trabajo, extienda una manta o una tela
suave similar sobre la mesa y tumbe
el monitor hacia abajo sobre la mesa
cubierta antes de fijar el soporte al
monitor.
• No utilice una mesa pequeña para
esto.
• Para más información sobre la
sujeción del soporte, ver páginas
ES 1 y ES 2.
ES 3
Page 41

Colocar el monitor en la pared
PRECAUCIÓN
• Instalar el monitor en la pared requiere de
conocimientos especiales que solo debe poner
en práctica el personal de servicio cualificado.
Los clientes no deben intentar hacer el trabajo
ellos mismos. SHARP no se hace responsable
de montajes incorrectos o montajes que causen
accidentes o lesiones.
Colgar en la pared
El kit de montaje de pared (vendido por separado)
le permite montar el monitor en la pared. Para más
información detallada sobre la instalación del montaje
de pared, vea las instrucciones proporcionadas con el
producto.
Le recomendamos que contacte con un técnico para
obtener asistencia cuando lo esté instalando.
SHARP no se hace responsable de ningún daño al
producto o lesión a usted u otras personas si decide
instalar el montaje de pared por su cuenta.
PRECAUCIÓN
• Instale su montaje de pared en una pared sólida
perpendicular al suelo.
Si quiere fijar el montaje de pared a superficies
que no sea yeso, contacte con su tienda/asesor
más cercano para obtener información adicional.
Si instala el monitor en la parte más alta de la
pared o en una pared inclinada, podría caer y
provocar lesiones personales graves. Siempre
tiene que haber dos personas montando el
monitor en la pared.
NOTA
• Debido a la configuración del terminal en este monitor,
cuando monte en la pared este modelo, asegúrese de
que hay espacio suficiente entre la pared y el monitor
para los cables.
• Para utilizar este monitor montado en una pared,
retire el soporte del cable de CA en la parte trasera
del monitor y utilice los tornillos suministrados con el
soporte de montaje en pared para asegurar el soporte
en la parte trasera del monitor.
Especificaciones del kit de montaje en pared
Las dimensiones estándar para los kits de montaje en pared se muestran a continuación:
*1 : PARED
*2 : KIT DE MONTAJE EN PARED
a1 : Distancia máxima desde el agujero de montaje.
a2 : Distancia máxima desde el centro del monitor.
b1 : Distancia entre el centro del monitor y el agujero de montaje.
b2 : Distancia máxima desde el centro del monitor.
b3 : Distancia maxima desde el agujero de montaje.
c1 : Hueco mínimo.
a1
a2
*2
b1
B
b2
A
PN-Q901 PN-Q801 PN-Q701 PN-Q601
(A-B) 23 5/8 (600) - 15 3/4 (400) 15 3/4(400) - 15 3/4(400)
a1 1 37/64 (40) 2 3/8 (60) 2 3/8 (60)
a2 13 25/64 (340) 14 3/16 (360) 10 1/4 (260)
b1 7 7/8 (200) 8 9/32 (210) 8 9/32 (210) 8 43/64 (220)
b2 14 49/64 (375) 10 61/64 (278) 10 29/32 (277) 10 9/16 (268)
b3 6 57/64 (175) 3 7/16 (87) 3 7/16 (87)
c1 3 5/32 (80) 2 9/16 (65) 1 15/16 (49) 1 31/32 (50)
*2
*1
ITALIANO DEUTSCHESPAÑOL FRANÇAISTÜRKÇEРУССКИЙ ESPAÑOLITALIANO DEUTSCHESPAÑOL FRANÇAISTÜRKÇEРУССКИЙ
b3
c1
Unidad: pulgada (mm)
ES 4
Page 42

Fuente de alimentación de CA
■PN-Q901/PN-Q801
Salida de CA
• Coloque el monitor cera de la toma de corriente de CA y
mantenga la clavija a su alcance.
■PN-Q701/PN-Q601
Salida de CA
2
o
Conexión de CA
Conecte la clavija de CA para el
1
monitor en la toma de CA.
• Coloque el monitor cera de la toma de
corriente de CA y mantenga la clavija a
su alcance.
NOTA
• PARA PREVENIR EL RIESGO DE
DESCARGA ELÉCTRICA, NO TOQUE
LAS PIEZAS NO AISLADAS DE
NINGÚN CABLE CON EL CABLE DE CA
CONECTADO.
Cuando encienda el monitor por
2
primera vez, presione ENCENDER en
H
PN-Q801/PN-Q701/
PN-Q601
ENCENDER
H
PN-Q901
ENCENDER
el monitor.
Inserte las pilas en la unidad de
3
control remoto (ver página ES 6).
NOTA
• Los altavoces no pueden separarse del
monitor.
• El ángulo del monitor no puede ajustarse.
2
ENCENDER (encendido/en espera)
Encender/Apagar el botón
Encender
Apriete ENCENDER en el monitor o en la
unidad de control remoto para encender.
NOTA
• La instalación inicial empieza cuando se
enciende el monitor por primera vez. Si
el monitor se ha encendido antes, no se
pedirá la instalación inicial. Para cambiar los
ajustes de la instalación inicial, seleccione
la «configuración fácil» en el menú de
configuración inicial.
Apriete ENCENDER en el monitor o en la
unidad de control remoto de nuevo para
apagar.
• El monitor entra en estado de espera y
la imagen en la pantalla desaparece.
NOTA
• Si no va a utilizar este monitor en un largo
periodo de tiempo, asegúrese de retirar el
cable de CA de la toma de corriente de CA.
• Todavía se consume energía eléctrica débil
incluso cuando el monitor está apagado.
1
1
• Coloque el monitor cera de la toma de corriente de CA y
mantenga la clavija a su alcance.
1
ES 5
Page 43

Unidad de control remoto Conexión
1
2
3
Sensor del mando a distancia
30°
30°
*: El ángulo es de 6º cuando el
17´ (5 m)
30°
30°*
soporte está acoplado
(solo para PN-Q901).
Instalar las pilas en la unidad de
control remoto
Si el control remoto falla para manejar las
funciones del monitor, reemplace las pilas en la
unidad de control remoto.
Abra la tapa de las pilas.
1
Inserte dos pilas «AAA»
2
(suministradas con el producto).
• Coloque las pilas según se indica
mediante los signos de polaridad (+) y
(-) en el compartimiento de pilas.
Cierre la tapa de las pilas.
3
PRECAUCIÓN
La utilización inadecuada de las pilas puede resultar
en fuga del electrolito o en explosión. Cerciórese de
seguir las instrucciones indicadas a continuación.
• No mezcle pilas de diferentes tipos. Las
características difieren entre los diferentes tipos de
pila.
• No mezcle pilas nuevas con pilas viejas. Hacerlo
puede acortar la duración de las pilas nuevas o
causar una fuga del electrolito en las pilas viejas.
• Retire las pilas tan pronto como se agoten. Los
químicos que se desprendan de las pilas y que
hagan contacto con la piel pueden causar un
sarpullido. Si encuentra alguna fuga química,
límpiela completamente con un trapo.
• Las pilas suministradas con este producto pueden
tener una expectativa de vida más corta debido a
las condiciones de almacenamiento.
• Si no va a utilizar la unidad de control remoto
durante un periodo de tiempo largo, retire las pilas.
Utilizar la unidad de control
remoto
Utilice la unidad de control remoto apuntando
hacia el sensor del control remoto del monitor.
Los objetos entre la unidad de control remoto
y el sensor de control remoto pueden evitar un
funcionamiento correcto.
■Precauciones relacionadas con el
mando a distancia
• No exponga el mando a distancia a golpes. Además,
no exponga el mando a distancia a líquidos, y no lo
deje en lugares excesivamente húmedos.
• No exponga el mando a distancia a la luz solar
directa. El calor puede causar una deformación de
la unidad de control remoto.
• La unidad de control remoto puede no funcionar
correctamente si el sensor del control remoto en el
monitor está directamente bajo la luz solar o una
luz fuerte. En esos casos, cambie el ángulo de
iluminación o el monitor, o utilice la unidad de control
remoto más cerca del sensor de control remoto.
IMPORTANTE
SI LA UNIDAD NO SE ENCIENDE - DESCONECTE
EL MONITOR DE LA TOMA DE CORRIENTE Y
REPITA LOS PASOS DE INSTALACIÓN.
Tipos de conexión
Para conectar el monitor al equipamiento externo, utilice los cables disponibles en el mercado.
• Las ilustraciones de los terminales son para propósitos explicativos y pueden diferenciarse ligeramente de los
productos actuales.
■Conectar al equipo de video o PC
■La calidad de la imagen difiere dependiendo del terminal utilizado. Para disfrutar de imágenes más claras,
compruebe la salida de los terminales de su equipamiento externo y utilice sus terminales apropiados para
una mejor calidad de las imágenes.
Calidad
de la imagen
Calidad
HD
Calidad
estándar
Terminal en el
monitor
Cable Páginas
Cable HDMI certificado
Cable minijack estéreo Ø 3,5 mm
Cable HDMI certificado
Cable de video por componentes
Cable de audio
Cable AV
■Conectar al equipo de audio
Comprobar los terminales de salida de su equipamiento externo y utilizar sus terminales adecuados.
Terminal en el monitor Cable
Optical fiber cable
Cable de audio
Terminal en el
equipamiento externo
AUDIO
Terminal en el
equipamiento externo
OPTICAL
DIGITAL AUDIO INPUT
ANALOG AUDIO IN
ES 7,
ES 8
ES 8
ES 7
ES 7
Páginas
ES 8
ES 8
ITALIANO DEUTSCHESPAÑOL FRANÇAISTÜRKÇEРУССКИЙ ESPAÑOLITALIANO DEUTSCHESPAÑOL FRANÇAISTÜRKÇEРУССКИЙ
ES 6
Page 44

Conexión
PR (Rojo)
Puede conectar varios tipos de equipamiento externo a su monitor. Para ver imágenes de fuentes externas,
seleccione una entrada de fuente presionando INPUT en la unidad de control remoto o en el monitor.
Para conectar el monitor al equipo externo, utilice los cables disponibles en el mercado.
PRECAUCIÓN
• Para proteger el equipo, apague siempre el monitor antes de conectar cualquier equipo externo.
• Lea el manual de funcionamiento pertinente (reproductor de discos blu-ray, etc.) atentamente antes de realizar
conexiones.
Conecte el reproductor de discos blu-ray/DVD o cable HD /decodificador de satélite
■Cuando utilice un cable HDMI (ENTRADA HDMI 1, 2 o 3):
• El terminal HDMI (interfaz multimedia de alta definición) es una interfaz de audio-video que permite una conexión
para señales audio y video utilizando un solo cable .El terminal de entrada HDMI es compatible la entrada de video
de alta resolución.
• Para disfrutar una capacidad de visualización de 1800 p, conecte su equipamiento externo utilizando un cable
certificado HDMI o un cable por componentes y fije el equipamiento a la salida de 1080 p.
• Formato de audio compatible: PCM lineal, Dolby Digital, DTS, frecuencia de muestreo 32/44.1/48 kHz.
• Cuando conecte el equipamiento compatible con ARC, utilice la entrada HDMI 1.
Cable HDMI certificado
HDMI OUT
■Cuando utilice un cable por componentes (ENTRADA DE COMPONENTE/ VIDEO):
• Para disfrutar una capacidad de visualización de 1800 p, conecte su equipamiento externo utilizando un cable
certificado HDMI o un cable por componentes y fije el equipamiento a la salida de 1080 p.
• Cuando conecta un cable por componentes al terminal de ENTRADA DE COMPONENTE/ VIDEO, cambie Selección
de entrada a COMPONENTE.
Conectar un VCR, una consola de juegos o un decodificador de cable/satélite.
■Al utilizar un cable compuesto (ENTRADA DE COMPONENTE/VIDEO o ENTRADA DE VIDEO 1):
• Cuando conecte un cable AV al terminal de ENTRADA DE COMPONENTE/VIDEO, cambie Selección de entrada a
COMPONENTE.
Cable AV
VIDEO (Amarillo)
AUDIO-L (Blanco)
AUDIO-R (Rojo)
Cable AV
VIDEO (Amarillo)
AUDIO-L (Blanco)
AUDIO-R (Rojo)
P
Y (Verde)
AUDIO-L
AUDIO-R
(Azul)
B
Cable de video por componentes
(Blanco)
(Rojo
)
Cable de audio
COMPONENT OUT
ES 7
Page 45

Conexión
Cable HD/Decodificador de satélite
Cable de fibra óptica
Conectar un sistema de sonido envolvente/sistema de audio
■Cuando conecte un amplificador AV para un sistema de sonido envolvente
• Dejar que el monitor emita el audio a un amplificador AV:
*1 cuando conecta un equipamiento compatible con ARC, utilice la ENTRADA HDMI 1.
• Si la imagen no está sincronizada con el audio, compruebe la configuración del sistema de sonido envolvente
conectado.
Cable HDMI certificado *1
OPTICAL
DIGITAL AUDIO INPUT
HDMI INHDMI OUT
■Cuando conecte un amplificador de audio
Es posible emitir audio a través del terminal DE SALIDA DE AUDIO DIGITAL.
• En este caso, ajuste «DIGITAL AUDIO» en «PCM» o «Bitstream» (consulte el manual de funcionamiento incorporado).
Cable de fibra óptica
OPTICAL
DIGITAL AUDIO INPUT
Cable de audio
HDMI OUT
Conectar un PC
Consulte el manual de funcionamiento incorporado para ver la lista de señales de PC compatible con el
monitor.
■Cuando utilice un cable HDMI (ENTRADA HDMI 1, 2 o 3):
• Dependiendo de la placa, solo se pueden emitir señales de video. En ese caso, además de conectar un cable HDMI
certificado al terminal de ENTRADA HDMI 2, conecte el cable minijack estéreo Ø 3,5 mm al terminal de ENTRADA
DE AUDIO y ajuste «Selección de audio» a «HDMI + analógico» (consulte el manual de funcionamiento incorporado).
• Los terminales de ENTRADA DE HDMI solo son compatibles con la señal digital.
Cable HDMI certificado
HDMI OUT
ou
Cable HDMI certificado
HDMI OUT
Cable minijack estéreo Ø 3,5 mm
■Cuando utilice un cable RGB análogo (ENTRADA PC):
• Cuando utilice un cable RGB análogo, introduzca la señal de audio en el terminal de ENTRADA DE AUDIO de la
ENTRADA DE PC.
Cable RGB análogo (cable D-sub de 15 pines o cable VGA)
AUDIO
ITALIANO DEUTSCHESPAÑOL FRANÇAISTÜRKÇEРУССКИЙ ESPAÑOLITALIANO DEUTSCHESPAÑOL FRANÇAISTÜRKÇEРУССКИЙ
ANALOG AUDIO IN
ES 8
Cable minijack estéreo Ø 3,5 mm
RGBAUDIO
Page 46

Introducción
3
Visualización del manual de funcionamiento incorporado
Instalación inicial
Realice los siguientes pasos antes de que
presione ENCENDER en la unidad de
control remoto.
Inserte las pilas en la unidad de
1
control remoto.
Enchufe el cable de CA a la salida de
2
CA.
Idioma (configuración del idioma)
Seleccione entre 6 idiomas: inglés,
Visualización del manual de funcionamiento incorporado
Presione MANUAL en la unidad de control remoto para mostrar la información de funcionamiento en la
pantalla.
Para buscar una sección de la tabla de contenidos y para buscar un término particular y encontrar
información de resolución de problemas, presione MANUAL mientras mira el monitor y seleccione la sección
aplicable de la portada que aparece.
Presione MANUAL mientras mira el monitor.
1
Esto muestra la pantalla del manual de funcionamiento incorporado.
Cuando seleccione contenidos, se mostrará esta página.
2
Puede girar la página una por una desde estas marcas en forma de flecha.
3
francés, español, alemán, italiano y ruso.
Presione a/bpara seleccionar el
1
idioma deseado listado en la pantalla
2
y presione INTRO.
ETHERNET terminal
AUDIO IN terminal
PC IN
terminal
(shared for PC IN and
HDMI IN 2) *2
VIDEO IN 1 terminals
AUDIO OUT terminals
COMPONENT/
VIDEO IN
terminals
*5
HDMI IN 2 terminal
HDMI IN 1 terminal
ARC: Audio
Return Channel
*3
DIGITAL AUDIO OUT
terminal
Ahorro de energía
Seleccione «Sí» o «No» para configurar los
1
ajustes de la pantalla por defecto.
Presione
2
«No».
Presione INTRO para entrar en los
ajustes.
para seleccionar «Sí» o
a
/b
ENG 1-1
Completado
Se muestra la pantalla de confirmación
3
de la configuración. Confirme la
información mostrada en la pantalla y
presione INTRO.
Ejemplos de la pantalla de
confirmación de la configuración
NOTA
• También puede visualizar el manual de funcionamiento incorporado seleccionando «Información» > «Manual» en la
pantalla del menú.
• Cuando se utiliza el modo USB, modo Home Network o la aplicación Internet, no se puede mostrar el manual de
funcionamiento incorporado.
ES 9
Page 47

Usar un PC
Ajustar la imagen del PC
Puede ajustar la posición de la entrada de imagen de
PC seleccionando
«Configuración inicial» > «Configuración de entrada»
> «Sincronización».
Sincronización.
Generalmente, puede ajustar la imagen fácilmente
como sea necesario para cambiar la posición
de imagen utilizando «Autosincronización». En
algunos casos, sin embargo, el ajuste del manual es
necesario para optimizar la imagen.
Señal de entrada: Seleccione la señal de entrada.
1024×768
1360×768
Autosincronización: para ajustar de forma
automática la imagen del PC.
Si : Comienza la auto sincronización y se
muestra «Ajustando la imagen».
No : Esta función no funciona.
Pos. H. : Centra la imagen moviéndola hacia la
derecha o hacia la izquierda.
Pos. V. : Centra la imagen moviéndola hacia arriba
o hacia abajo.
Reloj : Ajusta cuando la imagen parpadea con
rayas verticales.
Fase : Ajusta cuando los caracteres tienen poco
contraste o cuando la imagen parpadea.
NOTA
• La autosincronización puede fallar si la imagen del
ordenador tiene una resolución baja, bordes poco
claros (negros) o si se mueve mientras se ejecuta la
«autosincronización».
• Asegúrese de conectar el PC al monitor y encenderlo
antes de comenzar la «Autosincronización».
• No es necesario ajustar el «Reloj» o la «Fase» cuando
se introduce una señal digital de modo que no puede
ser seleccionada.
• La posición del cursor por defecto puede no estar en
el centro ya que los rangos variables de la posición de
la pantalla pueden ser asimétricos.
• Los rangos variables de la posición de la pantalla
dependen del modo de visualización o del tipo de
señal. Los rangos pueden verse en la pantalla de
configuración de posición.
Configuración de entrada de audio
Selección de audio
Esta función configura el terminal para emitir el audio
del ordenador.
Las secciones de ajuste varían dependiendo de la
fuente de entrada.
Seleccione la fuente de entrada correspondiente
al terminal conectado al PC y ajuste la sección
deseada.
Para llevar a cabo la operación, consulte
«Configuración inicial» > "Configuración de entrada"
> "Seleccionar audio".
HDMI 2
HDMI2(Digital) : Seleccione esto cuando
HDMI+Análogo
NOTA
• Cuando en «Seleccionar audio» está establecido
«HDMI+Análogo», no se producirá sonido si se utiliza
solo un cable certificado HDMI para conectar el equipo
compatible con HDMI. Para producir sonido, debe
realizar una conexión de audio análogo.
• Si quiere conectar el equipo compatible con HDMI
utilizando solo un cable certificado de HDMI,
establezca «HDMI2(Digital)» en «Seleccionar audio».
el monitor y el PC estén
conectados utilizando un
cable certificado HDMI y el
audio se introduzca a través
del mismo cable.
: Seleccione esto cuando
el monitor y el PC estén
conectados utilizando un
cable HDMI certificado y el
audio se introduzca a través
de un minijack estéreo Ø 3,5
mm.
Control del monitor
• Se puede controlar el monitor desde un PC,
paneles de control y otros dispositivos utilizando el
RS-232C o IP.
• Utilice un cable de tipo cruzado RS-232C, cable
ETHERNET (disponible en el mercado) para las
conexiones.
NOTA
• Este sistema operativo lo puede utilizar una persona
que esté acostumbrada a utilizar ordenadores.
Control IP
Establezca esta función cuando utilice el monitor
desde equipos conectados por LAN. Para realizar la
operación, consulte «Configuración de red».
Control IP
Cuando «Control IP» está seleccionado, se
resaltará «Cambiar». Presione INTRO.
Configuración detallada
Realice la configuración detallada (ID de acceso,
contraseña, etc.).
Siga las instrucciones de la pantalla para realizar
la configuración.
Nombre del dispositivo
• Configure el nombre del monitor mostrado en otros
dispositivos de red. Utilice el teclado del software
para establecer el nombre.
Cable de tipo cruzado RS-232C
Condiciones de comunicación para RS-232C
Establezca la configuración de comunicación de
RS-232C en el PC para corresponder las
condiciones de comunicación. La configuración de
la comunicación del monitor es la siguiente:
Velocidad de
baudios:
Longitud de
datos:
Bit de paridad: Ninguno
Bit de parada: 1 bit
Control de flujo: Ninguno
9,600 bps
8 bits
Condiciones de comunicación para el IP
Conectar al monitor con la siguiente configuración
realizada para el IP en el PC
Protocolo IP: TCP/IP
Dirección de
alojamiento IP:
Servicio: Ninguno (No seleccione Telnet
Nº de puerto TCP: Establezca un número de
Establezca la dirección IP en
el menú del monitor
o SSH)
puerto en el menú del monitor
(puerto de control)
Cuando establece su ID y su contraseña en el menú
del monitor, tiene que introducirlos tan pronto como
se conecte al monitor.
NOTA
• Cuando utilice esta función, realice la configuración
para «Control IP».
• La conexión se cortará si no ha habido comunicación
durante 3 minutos.
ITALIANO DEUTSCHESPAÑOL FRANÇAISTÜRKÇEРУССКИЙ ESPAÑOLITALIANO DEUTSCHESPAÑOL FRANÇAISTÜRKÇEРУССКИЙ
ES 10
Cable ETHERNET
LAN
Concentrador
Page 48

Usar un PC
Código de retorno (0DH)
Procedimiento de comunicación
Enviar los comandos de control desde el PC a través
del RS-232C o IP.
El televisor funciona según el comando recibido y
envía un mensaje de respuesta al PC.
No envíe múltiples comandos al mismo tiempo.
Espere a que el PC reciba la respuesta de que todo
está bien antes de enviar el siguiente comando.
Formato de comando
Ocho códigos ASCII +CR
C1 C2 C3 C4 P1 P2 P3 P4
Comando de 4 dígitos Parámetro de 4 dígitos Código de retorno
Comando de 4 dígitos: Comando. El texto de cuatro
caracteres.
Parámetro de 4 dígitos: Parámetro 0-9, x, espacio, ?
Parámetro
Introduzca los valores de los parámetros, alineando
a la izquierda, y rellene el resto con espacios en
blanco (asegúrese de introducir cuatro valores para
el parámetro).
Cuando el parámetro de entrada no se encuentre
dentro de la gama ajustable retornará “ERR”
(Consulte “Formato de código de respuesta”).
Cualquier valor numérico puede reemplazar la «x» en la
tabla.
0
0009
— 3 0
Cuando se introduzca “?”
para algunos comandos,
responderá el
valor del
ajuste actual.
Formato de código de respuesta
Respuesta normal
O K
Respuesta al problema
(error de comunicación o comando incorrecto)
E R R
Código de retorno (0DH)
?
????
Tabla de comandos
• No se garantiza que funcionen los comandos que no están indicados aquí.
*1 Solo para RS-232C.
Puede usar "Wake On LAN (Magic Packet)" para encender el equipo a través de LAN. No es posible encender el monitor con el comando de Control IP.
ELEMENTO DE CONTROL COMANDO PARÁMETRO CONTENIDOS DE CONTROL
ACTIVAR LA
CONFIGURACIÓN DE COMANDO
CONFIGURACIÓN DE ENCENDIDO P O W R 0 _ _ _ Apagado Cambia al modo de espera.
SELECCIÓN
DE ENTRADA
SELECCIÓN DE MODO AV A V M D * _ _ _ 0: (conmutador), 1:E STÁNDAR,
VOLUMEN V O L M * * * _ Volumen (0-100)
POSICIÓN POSICIÓN H H P O S * * * _ (-50-50) Para entrada de PC
MODO DE VISUALIZACIÓN W I D E * * _ _ 0: (conmutador) [AV],
SIN SONIDO M U T E * _ _ _ 0: (conmutador), 1: On, 2: Off
SONIDO AMBIENTAL A C S U * _ _ _ 0: (conmutador), 1: On, 2: Off
SELECCIÓN DE AUDIO A C H A x _ _ _ (conmutador)
TEMPORIZADOR DE APAGADO O F T M * _ _ _ 0: Off,
CC C L C P x _ _ _ (conmutador) Alternar la operación de una leyenda.
NOMBRE DEL DISPOSITIVO T V N M 1 _ _ _ Se mostrará el nombre del dispositivo establecido
NOMBRE DEL MODELO M N R D 1 _ _ _ El nombre del modelo del monitor
VERSIÓN DEL
SOFTWARE
VERSIÓN DE PROTOCOLO
DE IP
BOTONES DEL CONTROL
REMOTO
CONMUTADOR
1-6 I A V D * _ _ _ 1: ENTRADA HDMI 1, 2: ENTRADA HDMI 2,
POSICIÓN V V P O S * * * _ (-50-50)
RELOJ C L C K * * * _ (0-100)
RELOJ P H S E * * _ _ (0-63)
NOTA
• Si aparece una barra baja (_) en la columna de parámetros, introduzca un espacio.
• Si aparece un asterisco (*), introduzca un valor del rango indicado entre paréntesis bajo los CONTENIDOS DE CONTROL.
• Cualquier valor numérico puede reemplazar la «x» en la tabla.
R S P W 0 _ _ _ Apagado Comando de encendido rechazado
I T G D x _ _ _ (conmutador) Se introduce por el conmutador (es lo mismo que
S W V N 1 _ _ _ Se muestra la versión actual del software del
I P P V 1 _ _ _ Se muestra la versión admitida actualmente del
R C K Y * * _ _ 0-9: 0-9, 10: PUNTO, 12: ENCENDER, 13: VISUALIZAR, 23: OPCIONES, 24: SUSPENDER, 31:
1 _ _ _ Encendido [RS-232C] Comando de encendido aceptado
2 _ _ _ Encendido [IP] Comando de encendido aceptado
1 _ _ _ Encendido Encendido
3: ENTRADA HDMI 3, 4: ENTRADA VIDEO 1,
5: ENTRADA DE COMPONENTE/VIDEO 2,
6: ENTRADA PC
2: PELÍCULA,
4: USUARIO, 5: DINÁMICO (fijo),
6: DINÁMICO, 7: PC
1: Barra lateral [AV],
2: Alargado [AV],
3: Zoom [AV],
4: Alargado [AV, video de USB, video de la red
doméstica o aplicaciones de Internet],
5: Normal [PC],
7: Alargado [PC],
8: Punto a punto [PC] [AV],
9: Pantalla completa [AV],
10: Automático [video de USB, fotos de USB,
video de la red doméstica, aplicaciones de
fotos o Internet],
11: Original [video de USB, fotos de USB, video
de la red doméstica, aplicaciones de fotos o
Internet],
1: TEMPORIZADOR APAGADO - 30 MIN., 2: TEMPORIZADOR APAGADO - 60 MIN.,
3: TEMPORIZADOR APAGADO - 90 MIN., 4: TEMPORIZADOR APAGADO - 120 MIN.
SILENCIAR, 32: VOL -, 33: VOL +, 34: CANAL
41: a, 42: b, 43: a, 44: a, 45: RETORNO, 46: SALIDA, 49: AUDIO, 50: A (rojo), 51: B (verde), 52:
C (azul), 53: D (amarillo), 61: MANUAL
*1
la tecla de cambio de entrada)
Aunque se puede elegir ahora, se alterna la
operación en el interior.
Los rangos de la posición variable de la pantalla
dependen del modo de visualización o del tipo de
señal. Los rangos pueden verse en la pantalla de
configuración de posición.
0: Aunque se puede elegir ahora, se alterna la
operación en el interior.
1: Solo disponible cuando se introduce la señal
4:3.
5: Solo disponible cuando se introduce la señal
4:3.
8: [PC] Disponible excepto cuando se introduce
UXGA.
[AV] Solo disponible cuando se introducen 1080i/
p.
9: Solo disponible cuando se introducen 720p.
10, 11: Disponible cuando se usa video de USB,
fotos de USB, videos de la red doméstica,
aplicaciones de fotos o Internet.
en «Nombre del dispositivo».
monitor.
protocolo IP.
, 35: CANAL , 36: INPUT, 38: MENÚ, 40: INTRO,
ES 11
Page 49

Resolución de problemas
Problema Solución posible
• No hay
alimentación.
• El mando a
distancia no
funciona.
• No hay imagen.
• No hay sonido.
• Compruebe si ha presionado ENCENDER en la unidad de control remoto
• ¿Está desconectado el cable de CA?
• ¿Se ha encendido?
• ¿Están las pilas insertadas con las polaridades (+, -) bien alineadas?
• ¿Es correcta la conexión a otros componentes?
• ¿Es correcta la conexión a otros componentes?
Página ES 5.
Página ES 5.
Páginas
Páginas
ES 7
ES 7
to
to
Página
ES 8
ES 8
. Página ES 5.
ES 6
.
.
.
ITALIANO DEUTSCHESPAÑOL FRANÇAISTÜRKÇEРУССКИЙ ESPAÑOLITALIANO DEUTSCHESPAÑOL FRANÇAISTÜRKÇEРУССКИЙ
ES 12
Page 50

Fixer le pied
TOP-R
■PN-Q701/PN-Q601
1
2
1
3
Coussin moelleux
• Avant de poser (ou déposer) le socle,
débranchez le cordon secteur.
• Avant de réaliser le travail, disposer
un matelassage sur la base afin d’y
3
2
1
Vis
Vis
poser l’écran. Ceci lui évitera d’être
endommagé.
ATTENTION
• Bien suivre les instructions.
Une installation incorrecte du pied peut
provoquer la chute de l’écran.
Vérifier que 10 vis sont fournies avec
1
le pied.
1 Poser la colonne pour le pied sur
2
la mousse de polystyrène.
2 Fixer la base sur la colonne.
3 Insérer et serrer les 6 vis dans les
6 trous sur le dessous de la base.
• Maintenir le pied fermement d’une
main puis serrer les vis.
1 Insérer le pied dans les ouvertures
3
sur le dessous de l’écran.
• S’assurer que le pied est fermement
inséré dans l’écran. Une installation
incorrecte peut faire basculer
l’ensemble de l’écran.
Insérer et serrer les 4 vis dans les 4
2
trous sur l’arrière de l’écran.
■PN-Q801
1
2
(Exemple : pied droit)
Base du socle
Pied de soutien
"R"
Vis
• Avant de poser (ou déposer) le socle,
débranchez le cordon secteur.
• Avant de réaliser le travail, disposer
un matelassage sur la base afin d’y
poser l’écran. Ceci lui évitera d’être
endommagé.
ATTENTION
1
• Bien suivre les instructions.
Une installation incorrecte du pied peut
provoquer la chute de l’écran.
Vérifier que 12 vis sont fournies avec
1
le pied.
1 Poser la colonne pour le pied dans
2
la mousse de polystyrène TOP-R.
2 Fixer la base sur la colonne.
Insérer et serrer les 4 vis dans les
3
2
3
4 trous sur le dessous de la base.
• Maintenir le pied fermement d’une
main puis serrer les vis.
Assembler le pied gauche ainsi que
4
le pied droit.
• Dans la procédure d’installation,
prendre soin de ne pas se coincer les
doigts entre l’écran et le sol.
• Ne pas retirer le pied de l’écran
sauf pour l’utilisation d’un support
mural optionnel pour le monter.
• Après avoir fixé le pied à l’écran,
ne pas tenir le pied lors du
redressement, de l’installation, du
déplacement ou de la dépose de
l’écran.
FR 1
"L"
4
Page 51

Fixer le pied
Monter la table de travail.
4
Vis
Coussin moelleux
3
(Voir page FR 3.)
Insérer le pied dans les ouvertures à
4
l’arrière de l’écran puis serrer les 4 vis
dans les 4 trous à l’arrière du pied
• S’assurer que le pied est fermement
inséré dans l’écran.
Une installation incorrecte peut
provoquer la chute de l’ensemble de
l’écran.
Les pieds peuvent être insérés dans
5
l’écran de manière à ce qu’ils soient
face à l’intérieur ou à l’extérieur de
l’écran.
Unité : pouce (mm)
A 65 7/8 (1673)
1
2
■PN-Q901
2
1
1
AVANT
3
Vis longues
5
4
Vis courtes
A
2
ATTENTION
• Dans la procédure d’installation,
prendre soin de ne pas se coincer les
doigts entre l’écran et le sol.
• Ne pas retirer le pied de l’écran
sauf pour l’utilisation d’un support
mural optionnel pour le monter.
• Après avoir fixé le pied à l’écran,
ne pas tenir le pied lors du
redressement, de l’installation, du
déplacement ou de la dépose de
l’écran.
Coussin moelleux
2
1
1
• Avant de poser (ou déposer) le socle,
débranchez le cordon secteur.
• Avant de réaliser le travail, disposer
un matelassage sur la base afin d’y
poser l’écran. Ceci lui évitera d’être
endommagé.
ATTENTION
• Bien suivre les instructions.
Une installation incorrecte du pied peut
provoquer la chute de l’écran.
Vérifier que 12 vis (8 vis longues et
1
4 vis courtes) sont fournies avec le
pied.
1 Poser la colonne pour le pied dans
2
la mousse de polystyrène.
2 Fixer la base sur la colonne.
3 Insérer et serrer les 8 vis dans les
8 trous sur le dessous de la base.
• Maintenir le pied fermement d’une
main puis serrer les vis.
Monter la table de travail. (Voir
3
page FR 3.)
1 Insérer le pied dans les ouvertures
4
sur le dessous de l’écran.
• S’assurer que le pied est fermement
inséré dans l’écran. Une installation
incorrecte peut provoquer la chute
de l’ensemble de l’écran.
Insérer et serrer les 4 vis dans les 4
2
trous à l’arrière de l’écran.
• Dans la procédure d’installation,
prendre soin de ne pas se coincer les
doigts entre l’écran et le sol.
• Ne pas retirer le pied de l’écran
sauf pour l’utilisation d’un support
mural optionnel pour le monter.
• Après avoir fixé le pied à l’écran,
ne pas tenir le pied lors du
redressement, de l’installation, du
déplacement ou de la dépose de
l’écran.
FRANÇAISITALIANO DEUTSCHESPAÑOL FRANÇAISTÜRKÇEРУССКИЙ
FR 2
Page 52

Fixer le pied
1
2
3
Languettes
TOP-L
TOP-L
ARRIÈRE
PN-Q901
TOP-C
TOP-R
LIGNE
1
BOÎTIER
2
BOÎTIER
TOP-L
TOP-R
TOP-C
LIGNE
TOP-C
TOP-R
RACCORD
90/80 pouces uniquement
Monter la table de travail
Avant de fixer le pied sur l’écran, monter
une table de travail sur laquelle poser
l’écran.
• Pour monter la table, utiliser les
matériaux de protection utilisés dans
l’emballage.
• Dans les matériaux de protection
utilisés, TOP-C est également utilisé
pendant l’assemblage du pied.
S’assurer d’assembler le pied avant de
monter la table de travail.
Insérer chacun des matériaux
1
de protection dans les directions
respectives indiquées sur la figure.
• Insérer TOP-L et TOP-R dans les
côtés gauche et droit du boîtier
respectivement.
• Insérer TOP-C pour une insertion entre
les lignes sur l’autre face du boîtier.
Le boîtier est équipé de languettes
2
pour maintenir les matériaux de
protection en place. Appuyer sur
les languettes (2 pour chaque
emplacement) afin de fixer les
matériaux de protection dans le
boîtier.
PN-Q901
Après avoir monter la table de travail,
3
Fixer les raccords et fermer le boîtier.
Insérez un raccord dans le trou
1
situé sur le côté du boîtier.
Appuyez sur l’onglet, mettez le
2
raccord en place.
étaler une couverture ou autre linge
doux similaire sur la table, puis poser
l’écran sur la table ainsi recouverte
avant de fixer le pied à l’écran.
• Ne pas utiliser une petite table pour ce
faire.
• Pour plus d’informations la fixation du
pied, Voir pages
FR 1
à
.
FR 2
FR 3
Page 53

Placer l’écran sur le mur
ATTENTION
• L’installation de l’écran nécessite des compétences
spéciales et ne devrait être réalisée que par du
personnel qualifié. Les clients ne doivent pas
essayer de réaliser le travail eux-mêmes. SHARP
n’est en aucun cas responsable d’un montage
incorrect ou d’un montage entraînant un accident
ou des blessures.
Accrochage au mur
Le kit de montage mural (vendu séparément) vous
permet de monter l’écran sur le mur. Pour en savoir plus
sur l’installation du montage mural, voir les instructions
fournies avec le produit.
Nous vous recommandons de contacter un technicien
pour vous aider à l’installer.
SHARP n’est en aucun cas responsable des dommages
causés au produit ou des blessures causées à vousmême ou à autrui si vous choisissez d’installer le support
mural vous-même.
ATTENTION
• Installez votre support mural sur un mur porteur
perpendiculaire au sol.
Lorsque vous désirez fixer le support mural
sur une surface autre qu’une plaque de plâtre,
contactez votre fournisseur/conseiller le plus
proche pour des informations supplémentaires.
Si vous installez l’écran sur un plafond ou un mur
incliné, il peut chuter et provoquer des blessures
physiques. Le montage de l’écran sur un mur doit
toujours se faire à deux.
REMARQUE
• En raison de la configuration du terminal sur cet
écran, lorsque vous fixez ce modèle au mur, assurezvous qu’il y a un espace suffisant entre le mur et l’écran
pour passer les fils.
• Pour utiliser cet écran fixé sur un mur, retirez le
support du cordon secteur à l’arrière de l’écran, puis
utilisez les vis fournies avec le support mural pour fixer
ce support à l’arrière de l’écran.
Spécifications du kit de montage mural
Les dimensions standard pour les kits de montage mural sont indiquées ci-dessous
*1 : MUR
*2 : KIT DE MONTAGE MURAL
a1 : Distance maximale à partir du trou de montage.
a2 : Distance maximale à partir du centre de l’écran.
b1 : Distance entre le centre d’écran et le trou de montage.
b2 : Distance maximale à partir du centre de l’écran.
b3 : Distance à partir du trou de montage.
c1 : Espace minimum.
a1
a2
*2
b1
B
b2
A
PN-Q901 PN-Q801 PN-Q701 PN-Q601
(A-B) 23 5/8 (600) - 15 3/4 (400) 15 3/4(400) - 15 3/4(400)
a1 1 37/64 (40) 2 3/8 (60) 2 3/8 (60)
a2 13 25/64 (340) 14 3/16(360) 10 1/4 (260)
b1 7 7/8 (200) 8 9/32 (210) 8 9/32 (210) 8 43/64 (220)
b2 14 49/64 (375) 10 61/64 (278) 10 29/32 (277) 10 9/16 (268)
b3 6 57/64 (175) 3 7/16 (87) 3 7/16 (87)
c1 3 5/32 (80) 2 9/16 (65) 1 15/16 (49) 1 31/32 (50)
*2
*1
b3
c1
Unité : pouce (mm)
FRANÇAISITALIANO DEUTSCHESPAÑOL FRANÇAISTÜRKÇEРУССКИЙ
FR 4
Page 54

Alimentation CA
■PN-Q901/PN-Q801
Prise secteur
• Placez l’écran près de la prise secteur et maintenez la fiche
secteur à portée.
■PN-Q701/PN-Q601
Prise secteur
2
or
2
Connexion AC
Connectez la prise de l’écran sur la
1
prise secteur.
• Placez l’écran près de la prise secteur
et maintenez la fiche secteur à portée.
REMARQUE
• AFIN D’ÉVITER UN RISQUE DE
CHOC ÉLECTRIQUE, NE TOUCHEZ
PAS LES PARTIES NON ISOLÉES
DES FILS LORSQUE LE CORDON
D’ALIMENTATION EST BRANCHÉ.
Lorsque vous allumez l’écran pour la
2
première fois, appuyez sur MARCHE
sur l’écran.
Insérez les piles dans la
3
télécommande. (Voir page FR 6.)
REMARQUE
• Les haut-parleurs ne peuvent pas être
détachés de l’écran.
• L’angle de l’écran ne peut pas être ajusté.
MARCHE (marche/veille)
H
PN-Q801/PN-Q701/
PN-Q601
MARCHE
H
PN-Q901
MARCHE
Allumer/éteindre
Appuyez sur MARCHE sur l’écran ou sur
la télécommande pour allumer l’écran.
REMARQUE
• L’installation initiale démarre lorsque l’écran
s’allume pour la première fois. Si l’écran
déjà été allumé, l’installation initiale ne sera
pas utilisée. Pour changer les réglages de
l’installation initiale, veuillez sélectionner
« Configuration facile » dans le menu
Configuration initiale.
Appuyez à nouveau sur MARCHE sur
l’écran ou sur la télécommande pour
éteindre l’écran.
• L’écran se met en veille et l’image sur
l’écran disparaît.
REMARQUE
• Si vous n’allez pas utiliser l’écran pendant
une longue période, assurez-vous de
débranche le cordon d’alimentation de la
prise secteur.
• L'écran consomme un faible courant
électrique même lorsqu'il est éteint.
1
1
• Placez l’écran près de la prise secteur et maintenez la fiche
secteur à portée.
1
FR 5
Page 55

Télécommande Connexion
1
2
3
Capteur de télécommande
30°
30°
*: L’angle est de 6° lorsque le pied est fixé.
(uniquement pour le modèle PN-Q901)
17´ (5 m)
30°
30°*
Installer les piles dans la
télécommande
Si la télécommande n’effectue pas les
fonctions de l’écran, remplacez les piles dans la
télécommande.
Ouvrez le couvercle du compartiment
1
des piles.
Insérez deux piles AAA
2
(fournies avec le produit).
• Placez les piles en faisant correspondre
leurs bornes avec les indications (+) et
(–) dans le compartiment des piles.
Refermez le couvercle.
3
ATTENTION
Une utilisation incorrecte des piles peut entraîner une
fuite de produits chimiques ou même une explosion.
Veillez à bien suivre les instructions ci-dessous.
• N’utilisez pas ensemble des piles de types
différents. Les autres piles ont des caractéristiques
différentes.
• N’utilisez pas ensemble des piles usagées et
neuves. Ceci peut raccourcir la durée de vie des
piles neuves ou provoquer des fuites des piles
usagées.
• Retirez les piles dès qu’elles sont usées. Des
produits chimiques coulant des piles et entrant en
contact avec la peau peuvent causer une irritation.
Si vous trouvez une fuite de produits chimiques,
essuyez bien à l’aide d’un chiffon.
• Les piles fournies avec ce produit peuvent avoir une
durée de vie plus courte à cause des conditions de
stockage.
• Si vous n’utilisez pas la télécommande pour une
longue période, retirez les piles.
Utiliser la télécommande
Utilisez la télécommande en la pointant vers le
capteur de télécommande de l’écran. Les objets
placés entre la télécommande et le capteur
de télécommande peuvent empêcher un bon
fonctionnement.
■Précautions sur la télécommande
• N’exposez pas la télécommande à des chocs. Ne
l’exposez pas non plus à des liquides et ne la placez
pas dans des endroits très humides.
• N’installez pas, ni n’exposez la télécommande
directement au soleil. La chaleur peut causer une
déformation de la télécommande.
• La télécommande peur ne pas fonctionnement
correctement si le capteur de télécommande de
l’écran est exposé aux rayons directs du soleil ou à
une forte lumière. Dans ce cas, changez l’angle de
l’éclairage sur l’écran ou utilisez la télécommande
plus près du capteur de télécommande.
IMPORTANT :
SI L’ÉCRAN NE S’ALLUME PAS - DÉBRANCHEZ
L’ÉCRAN DE LA PRISE ET
RÉPÉTEZ LES ÉTAPES D’INSTALLATION.
Types de connexion
Pour connecter l’écran à un appareil externe, utilisez des câbles disponibles dans le commerce.
• Les illustrations des terminaux servent d’explication et peuvent être légèrement différentes des produits réels.
■Connecter à un appareil vidéo ou à un PC
■La qualité d’image varie selon le terminal utilisé. Afin de profiter d’images plus claires, vérifiez les terminaux
de sortie de votre appareil externe et utilisez ses terminaux appropriés pour des images de qualité
supérieure.
Qualité
Terminal sur l’écran Câble Pages
d’image
Câble certifié HDMI
Qualité
HD
Qualité
standard
Câble mini jack stéréo de Ø 3,5 mm
Câble certifié HDMI
Câble vidéo composante
Câble audio
AV cable
■Connecter à un appareil audio
Vérifiez les terminaux de sortie de votre appareil externe et utilisez ses terminaux appropriés.
Terminal sur l’écran Câble Pages
Câble à fibre optique
Câble audio
Terminal sur l’appareil
externe
AUDIO
Terminal sur l’appareil
externe
OPTICAL
DIGITAL AUDIO INPUT
ANALOG AUDIO IN
FR 7,
FR 8
FR 8
FR 7
FR 7
FR 8
FR 8
FRANÇAISITALIANO DEUTSCHESPAÑOL FRANÇAISTÜRKÇEРУССКИЙ
FR 6
Page 56

Connexion
PR (Rouge)
Vous pouvez connecter de nombreux types d’appareils externes à votre écran. Pour voir des images sources
externes, sélectionnez la source d’entrée en appuyant sur ENTRÉE sur la télécommande ou sur l’écran.
Pour connecter l’écran à un appareil externe, utilisez des câbles disponibles dans le commerce.
ATTENTION
• Afin de protéger l’appareil, éteignez toujours l’écran avant de connecter un appareil externe.
• Lisez soigneusement le manuel de fonctionnement pertinent (lecteur Blu-ray, etc.) avant de faire des connexions.
Connecter un lecteur Blu-ray/DVD ou un boîtier externe pour le câble HD/satellite
■Lors de l’utilisation d’un câble HDMI (HDMI IN 1, 2 ou 3) :
• Le terminal HDMI (High Definition Multimedia Interface) est une interface audio-vidéo qui permet une connexion
pour des signaux audio et vidéo utilisant un câble unique. Le terminal HDMI IN supporte l’entrée vidéo de haute
résolution.
• Afin de profiter de l’affichage de 1080p, connectez votre appareil externe à l’aide d’un câble certifié HDMI ou un
câble composante et réglez l’appareil à une sortie de 1080p.
• Format audio supporté : PCM linéaire, Dolby Digital, DTS, taux d’échantillonnage 32/44.1/48kHz.
• Lorsque vous connectez un appareil compatible ARC, utilisez HDMI IN 1.
Câble certifié HDMI
HDMI OUT
■Lors de l’utilisation d’un câble composante (COMPOSANTE/VIDÉO IN) :
• Afin de profiter de l’affichage de 1080p, connectez votre appareil externe à l’aide d’un câble certifié HDMI ou un
câble composante et réglez l’appareil à une sortie de 1080p.
• Lorsque vous connectez un câble composante au terminal COMPOSANTE/VIDÉO IN, changez Sélectionner l’entrée
pour COMPOSANTE.
P
(Bleu)
B
Y (Vert)
Câble vidéo composante
Connecter un magnétoscope, une console de jeux, un caméscope ou un boîtier
externe pour la câble/satellite
■Lors de l’utilisation d’un câble composante (COMPOSANTE/VIDÉO IN ou VIDÉO IN 1) :
• Lorsque vous connectez un câble AV au terminal COMPOSANTE/VIDÉO IN, changez Sélectionner l’entrée pour
VIDÉO.
Câble AV
VIDEO (Jaune)
AUDIO-L (Blanc)
AUDIO-R (Rouge)
Câble AV
VIDEO (Jaune)
AUDIO-L (Blanc)
AUDIO-R (Rouge)
AUDIO-L
AUDIO-R
(Blanc)
(Rouge)
COMPONENT OUT
Câble audio
FR 7
Page 57

Connexion
Boîtier externe pour le câble HD/satellite
Câble à fibre optique
Connecter un système surround/système audio
■Lors de la connexion d’un amplificateur AV pour un système surround
• Laisser l’écran faire passer la sortie audio par un amplificateur AV :
*1 Lorsque vous connectez un appareil compatible ARC, utilisez HDMI IN 1.
• Si l’image n’est pas synchrone avec le son, vérifiez les paramètres du système surround connecté.
Câble certifié HDMI?
OPTICAL
DIGITAL AUDIO INPUT
HDMI INHDMI OUT
■Lors de la connexion d’un amplificateur audio
Il est possible de faire sortir le son par le terminal SORTIE AUDIO NUMÉRIQUE.
• Dans ce cas, réglez « AUDIO NUMÉRIQUE » sur « PCM » ou « Haut débit ». (Consultez le manuel de fonctionnement
intégré.)
Câble à fibre optique
DIGITAL AUDIO INPUT
HDMI OUT
OPTICAL
Connecter un PC
Consultez le manuel de fonctionnement intégré pour avoir une liste des signaux du PC compatibles avec
l’écran.
■Lors de l’utilisation avec un câble HDMI (HDMI IN 1, 2 ou 3) :
• Selon le tableau, seuls les signaux vidéo peuvent sortir. Dans ce cas, en plus de la connexion d’un câble HDMI
certifié au terminal HDMI IN 2, connectez un câble mini jack stéréo de Ø 3,5 mm au terminal AUDIO IN et réglez
« Sélection audio » sur « HDMI+Analogique ». (Consultez le manuel de fonctionnement intégré.)
• Les terminaux HDMI IN supportent uniquement un signal numérique.
Câble certifié HDMI
HDMI OUT
ou
Câble certifié HDMI
HDMI OUT
Câble mini jack stéréo de Ø 3,5 mm
■Lors de l’utilisation d’un câble RVB analogique (PC IN) :
• Lors de l’utilisation d’un câble RVB analogique, entrez le signal audio dans le terminal AUDIO IN de PC IN.
Câble RVB analogique (câble D-sub 15 broches ou câble VGA)
AUDIO
FRANÇAISITALIANO DEUTSCHESPAÑOL FRANÇAISTÜRKÇEРУССКИЙ
Câble audio
ANALOG AUDIO IN
FR 8
Câble mini jack stéréo de Ø 3,5 mm
RGBAUDIO
Page 58

Introduction
3
Afficher le manuel de fonctionnement intégré
Installation initiale
Réalisez les étapes suivantes avant
d’appuyer sur MARCHE sur la
télécommande.
Insérez les piles dans la
1
télécommande.
Branchez le cordon d’alimentation sur
2
la prise secteur.
Langue (réglage de la langue)
Afficher le manuel de fonctionnement intégré
Appuyez sur MANUEL sur la télécommande pour afficher les informations de fonctionnement sur l’écran.
Pour chercher un élément dans la table des matières, et pour chercher un terme particulier et trouver les
informations sur le dépannage, appuyez sur MANUEL tout en regardant l’écran, puis sélectionnez l’élément
applicable à partir de la page de couverture du manuel qui s’affiche.
Appuyez sur MANUEL tout en regardant l’écran.
1
Cela affiche l’écran du manuel de fonctionnement intégré.
Lorsque vous sélectionnez la table des matières, sa page s’affichera.
2
Vous pouvez tourner les pages une par une pour ces flèches.
3
Choisissez parmi 6 langues : anglais,
français, espagnol, allemand, italien et
russe.
Appuyez sur a/b pour sélectionner
1
la langue souhaitée listée sur l’écran,
2
puis appuyez sur ENTRÉE.
ETHERNET terminal
AUDIO IN terminal
PC IN
terminal
(shared for PC IN and
HDMI IN 2) *2
VIDEO IN 1 terminals
AUDIO OUT terminals
COMPONENT/
VIDEO IN
terminals
*5
HDMI IN 2 terminal
HDMI IN 1 terminal
ARC: Audio
Return Channel
*3
DIGITAL AUDIO OUT
terminal
1
Économie d’énergie
Sélectionnez « Oui » ou « Non » pour
configurer le réglage de l’affichage par
défaut.
Appuyez sur
2
« Oui » ou « Non ».
pour sélectionner
a
/b
Appuyez sur ENTRÉE pour entrer le
réglage.
Terminé
L’écran de confirmation des réglages
3
s’affiche. Vérifiez les informations
affichées à l’écran, puis appuyez sur
ENTRÉE.
Exemples de l’écran de
confirmation des réglages
NOTE
• Vous pouvez également afficher le manuel de fonctionnement intégré en sélectionnant « Informations » > « Manuel »
à partir de l’écran du menu.
• En mode USB, en mode Réseau local, ou lorsqu’une application Internet est utilisée, impossible d’afficher le manuel
de fonctionnement intégré.
ENG 1-1
FR 9
Page 59

Utiliser un PC
Ajuster l’image du PC
Vous pouvez ajuster la position de l’image d’un PC
en sélectionnant
« Configuration initiale » > « Réglage d’entrée » >
« Synchro ajustée »
Synchro ajustée
D’ordinaire vous pouvez facilement ajuster l’image
comme vous le souhaitez pour modifier la position de
l’image en utilisant « AutoSync. ». Dans certains cas,
cependant, un ajustement manuel est nécessaire
pour optimiser l’image.
Signal d’entrée : sélectionnez le signal d’entrée.
1024×768
1360×768
Auto Sync. : Pour ajuster automatiquement l’image
Oui : Auto Sync. démarre et « Ajustement de
Non : Cette fonction ne marche pas.
Pos.hori : Centre l’image en la déplaçant vers la
Pos.vert : Centre l’image en la déplaçant de haut
Horloge : Ajuste lorsque l’image scintille avec des
Phase : Ajuste lorsque les caractères ont de
REMARQUE
• Auto Sync. peut ne pas marcher si l’image de
l’ordinateur a une résolution faible, des bords flous
(noirs), ou si elle est déplacée pendant l’exécution de
« Auto Sync. ».
• Assurez-vous de connecter le PC à l’écran et allumezle avant de démarrer « Auto Sync. ».
• Il n’est pas nécessaire d’ajuster l’ « Horloge » ou la
« Phase » lorsqu’un signal numérique est entré, pour
qu’il ne puisse être sélectionné.
• La position du curseur par défaut peut ne pas être
centrée, car les plages de variables des positions à
l’écran peuvent être asymétriques.
• Les plages de variables des positions à l’écran
dépendent du Mode d’affichage ou du type de signal.
Les plages sont visibles sur l’écran de réglage des
positions.
du PC.
l’image en cours » s’affiche.
gauche ou la droite.
en bas.
rayures verticales.
faibles contrastes ou que l’image scintille.
Régler l’entrée audio
Sélection audio
Cette fonction règle le terminal pour sortir le son de
l’ordinateur.
Les éléments d’ajustement varient selon la source
d’entrée.
Sélectionnez la source d’entrée correspondant au
terminal connecté au PC, puis ajustez l’élément
désiré.
Pour réaliser cette opération, consultez
« Configuration initiale » > « Réglages d’entrée » >
« Sélection audio ».
HDMI 2
HDMI2(numérique) : Sélectionnez ceci lorsque
HDMI+Analogique : Sélectionnez ceci lorsque
REMARQUE
• Lorsque « Sélection audio » est réglée sur
« HDMI+Analogique », le son ne sera pas produit si
vous utilisez uniquement un câble HDMI certifié pour
connecter un appareil compatible HDMI. Pour produire
du son, vous devez réaliser une connexion audio
analogique.
• Si vous désirez connecter un appareil compatible
HDMI en utilisant uniquement un câble HDMI certifié,
réglez « Sélection audio » sur « HDMI2 (numérique) ».
l’écran et le PC sont
connectés à l’aide d’un
câble HDMI certifié et le
son passe par le même
câble.
l’écran et le PC sont
connectés à l’aide d’un
câble HDMI certifié et
que le son entre par une
prise mini jack stéréo de
Ø 3,5 mm.
Contrôle de l’écran
• L’écran peut être contrôlé d’un PC, de panneaux
de contrôle et d’autres dispositifs utilisant le RS232C ou l’IP.
• Utilisez un câble de type croisé RS-232C, un câble
ETHERNET (disponible dans le commerce) pour
les connexions.
REMARQUE
• Ce système de fonctionnement doit être utilisé par une
personne habituée à utiliser des ordinateurs.
Contrôle IP
Réglez cette fonction tout en faisant fonctionner
l’écran à partir d’un appareil connecté par LAN. Pour
réaliser l’opération, consultez « Réglages réseau ».
Contrôle IP
Lorsque « Contrôle IP » est sélectionné, «
Changer » apparaîtra en surbrillance. Appuyez
sur ENTRÉE.
Réglages détaillés
Faites les réglages détaillés (Identifiant de
connexion, mot de passe, etc.).
Suivez les instructions à l’écran pour configurer
les réglages.
Nom d'appareil
• Définissez le nom de l’écran affiché sur les autres
dispositifs du réseau.
Utilisez le clavier du logiciel pour définir le nom.
Câble de type croisé RS-232C
Conditions de communication pour le RS-232C
Réglez les paramètres de communication du RS232C sur le PC pour qu’ils correspondent aux
conditions de communication de l’écran. Les
paramètres de communication de l’écran sont les
suivants :
Vitesse de
transmission :
Longueur des
données :
Bit de parité : Aucun
Bit d’arrêt : 1 bit
Contrôle du flux : Aucun
9,600 bps
8 bits
Conditions de communication pour l’IP
Connectez-vous à l’écran avec les réglages suivants
réalisés pour l’IP sur le PC
Protocole IP : TCP/IP
Adresse IP de
l’hôte :
Service: Aucun (Ne sélectionnez pas
N° de port TCP : Réglez un numéro de port
Réglez l’adresse IP dans le
menu de l’écran
Telnet ou SSH)
dans le menu de l’écran (port
de contrôle)
Lorsque vous définissez votre identifiant et votre mot
de passe dans le menu de l’écran, vous devez les
entrer dès que vous vous connectez à l’écran.
REMARQUE
• Lorsque vous utilisez cette fonction, faites des réglages
pour le « Contrôle IP ».
• La connexion sera coupée en l’absence de
communication pendant 3 minutes.
FRANÇAISITALIANO DEUTSCHESPAÑOL FRANÇAISTÜRKÇEРУССКИЙ
FR 10
Câble ETHERNET
LAN
Plateforme
Page 60

Utiliser un PC
Procédure de communication
Transférez les commandes de contrôle du PC via le
RS-232C ou l’IP.
Le téléviseur fonctionne conformément à la
commande reçue et envoie un message de réponse
à l’ordinateur.
N’envoyez pas plusieurs commandes à la fois.
Attendez que l’ordinateur reçoive la bonne réponse
avant d’envoyer la commande suivante.
Format de commande
Huit codes ASCII +CR
C1 C2 C3 C4 P1 P2 P3 P4
Commande 4 chiffres Paramètre 4 chiffres Code de retour
Commande 4 chiffres : Commande. Le texte de
quatre caractères.
Paramètre 4 chiffres : Paramètre 0-9, x, vide, ?
Paramètre
Entrez les valeurs des paramètres, en alignant sur
la gauche et remplissez avec des espaces pour
le restant (veillez à entrer quatre valeurs pour le
paramètre).
Lorsque le paramètre d’entrée n’est pas dans une
plage réglable, « ERR » réapparaît (Reportez-vous à
« Format de code de réponse »).
N’importe quelle valeur numérique peut remplacer le
« x » dans le tableau.
0
0009
— 3 0
Lorsque « ? » est entré pour
certaines commandes, la valeur
de réglage
actuelle
répond.
?
????
Format de code de réponse
Réponse normale
O K
Code de retour (0DH)
Réponse au problème
(erreur de communication ou commande incorrecte)
E R R
Code de retour (0DH)
Table de commande
• Le fonctionnement des commandes non indiquées ici n’est pas garanti.
*1 Uniquement pour le modèle RS-232C.
Vous pouvez utiliser « Wake On LAN (Magic Packet) » pour allumer l'appareil via le LAN. Il n'est pas possible d'allumer le moniteur avec la commande IP Control.
ÉLÉMENT DE CONTRÔLE COMMANDE PARAMÈTRE CONTENU DU CONTRÔLE
MARCHE
RÉGLAGE DES COMMANDES
RÉGLAGE DE PUISSANCE P O W R 0 _ _ _ Marche Il passe en veille.
ENTRÉE
SÉLECTION
SÉLECTION DU MODE AV A V M D * _ _ _ 0 : (Bascule), 1 : STANDARD,
VOLUME V O L M * * * _ Volume (0-100)
EMPLACEMENT POSITION H H P O S * * * _ (-50-50) Pour l’entrée du PC.
MODE D’AFFICHAGE W I D E * * _ _ 0 : (Bascule) [AV],
MISE EN SOURDINE M U T E * _ _ _ 0 : (Bascule), 1 : Activé, 2 : Désactivé
AMBIOPHONIE A C S U * _ _ _ 0 : (Bascule), 1 : Activé, 2 : Désactivé
SÉLECTION AUDIO A C H A x _ _ _ (Bascule)
MINUT. EXTINCTION O F T M * _ _ _ 0 : Désactivé,
CC C L C P x _ _ _ (Bascule) Opération de bascule d’un sous-titre codé.
NOM D' APPAREIL T V N M 1 _ _ _ Le nom du dispositif paramétré dans
NOM DU MODÈLE M N R D 1 _ _ _ Nom du modèle de l’écran
VERSION DU LOGICIEL S W V N 1 _ _ _ La version actuelle du logiciel de l’écran s’affiche.
VERSION DU PROTOCOLE IP I P P V 1 _ _ _ La version du protocole IP actuelle supportée
BOUTONS DE LA
TÉLÉCOMMANDE
BASCULE I T G D x _ _ _ (Bascule) Il entre-change par la bascule. (C’est identique à
1-6 I A V D * _ _ _ 1 : HDMI IN1, 2 : HDMI IN 2,
POSITION V V P O S * * * _ (-50-50)
HORLOGE C L C K * * * _ (0-100)
PHASE P H S E * * _ _ (0-63)
REMARQUE
• Si une barre de soulignement (_) apparaît dans la colonne paramètre, entrez un espace.
• Si un astérisque (*) apparaît, entrez une valeur dans la plage indiquée entre parenthèses sous CONTENU DU CONTRÔLE.
• N’importe quelle valeur numérique peut remplacer le « x » dans le tableau.
R S P W 0 _ _ _ Désactivé Commande de Marche rejetée.
R C K Y * * _ _ 0-9 : 0-9, 10 : POINT, 12 : MARCHE, 13 : AFFICHAGE, 23 : OPTION, 24 : VEILLE, 31 : MUET, 32 :
1 _ _ _ Activé [RS-232C] Commande de Marche acceptée.
2 _ _ _ Activé [IP] Commande de Marche acceptée.
1 _ _ _ Arrêt Marche
3 : HDMI IN 3, 4 : VIDÉO IN 1,
5 : COMPOSANTE/VIDÉO IN 2,
6 : PC IN
2 : FILM,
4 : UTILISATEUR, 5 : DYNAMIQUE (Fixe),
6 : DYNAMIQUE, 7 : PC
1 : Barre latérale [AV],
2 : Étendue [AV],
3 : Zoom [AV],
4 : Étendue [AV, USB Vidéo, Vidéo du réseau
local ou applications Internet],
5 : Normal [PC],
7 : Étendue [PC],
8 : Point par point [PC] [AV],
9 : Plein écran [AV],
10 : Auto [USB Vidéo, USB Photo, Vidéo
du réseau local, ou applications photo ou
Internet],
11 : Original [USB Vidéo, USB Photo, Vidéo du
réseau local, ou applications photo ou Internet]
1 : ARRÊT PAR MINUTERIE - 30 MIN., 2 : ARRÊT PAR MINUTERIE - 60 MIN.,
3 : ARRÊT PAR MINUTERIE - 90 MIN., 4 : ARRÊT PAR MINUTERIE - 120 MIN.
VOL -, 33 : VOL +, 34: CH
44: a, 45 : RETOUR, 46 : QUITTER, 49 : AUDIO, 50 : A (rouge), 51 : B (vert), 52 : C (bleu), 53 : D (jaune),
61 : MANUEL
, 35: CH , 36 : ENTRÉE, 38 : MENU, 40 : ENTRÉE, 41: a, 42: b, 43: a,
*1
une clé de changement d’entrée.)
Même s’il peut désormais choisir, il s’agit d’un
fonctionnement par bascule à l’intérieur.
Les plages de variables des positions de l’écran
dépendent du Mode d’affichage ou du type de
signal. Les plages sont visibles sur l’écran de
réglage des positions.
0 : Même s’il peut désormais choisir, il s’agit d’un
fonctionnement par bascule à l’intérieur.
1 : Disponible uniquement lorsque le signal 4:3
est entré.
5 : Disponible uniquement lorsque le signal 4:3
est entré.
8 : [PC] Disponible sauf lorsque UXGA est entré.
[AV] Disponible uniquement lorsque 1080i/p
est entré.
9 : Disponible uniquement lorsque 720p est entré.
10, 11 : Disponible lorsque USB Vidéo, USB
Photo, Vidéo du réseau local, l’application
Photo ou Internet sont utilisés.
« Nom d'appareil » s’affiche.
s’affiche.
FR 11
Page 61

Dépannage
Problème Solution possible
• Pas d’alimentation.
• La télécommande ne
fonctionne pas.
• Pas d’image.
• Pas de son.
• Vérifiez si vous avez appuyé sur MARCHE sur la télécommande.
• Le cordon secteur est-il débranché ? Page
• L’appareil a-t-il été mis sous tension ?
• Les piles sont-elles en place avec leurs polarités (+, –) alignées ?
6
.
• La connexion à d’autres composantes est-elle correcte ?
FR 8
to
.
• La connexion à d’autres composantes est-elle correcte ?
FR 8
to
.
Page
FR 5
FR 5
FR 5 .
Page
Page
Page
Page Page
FR 7
FR 7
FR
FRANÇAISITALIANO DEUTSCHESPAÑOL FRANÇAISTÜRKÇEРУССКИЙ
.
.
FR 12
Page 62

Anbringen des Ständers
Oben-Rechts
(TOP-R)
■PN-Q701/PN-Q601
1
2
1
3
Weiches Polster
• Vor dem Anbringen (oder Abnehmen)
des Ständers bitte das Netzkabel
trennen.
• Bevor Sie Arbeiten ausführen, breiten
3
2
1
Schrauben
Schrauben
Sie die Polsterung über die Grundfläche
aus, um den Monitor darauf abzulegen.
So schützen Sie den Monitor vor einer
etwaigen Beschädigung.
VORSICHT
• Befolgen Sie die Anweisungen.
Falscher Einbau des Standfußes kann
dazu führen, dass der Monitor umkippt.
Vergewissern Sie sich, dass im
1
Lieferumfang des Gerätes 10
Schrauben vorhanden sind.
1 Setzen Sie die Pfosten für die
2
Ständereinheit in den PolystyrolSchaum ein.
Befestigen Sie den Sockel an den
2
Pfosten.
Schrauben Sie die 6 Schrauben in
3
die 6 Löcher auf der Unterseite der
Basis ein und ziehen Sie sie fest.
• Halten Sie die Ständereinheit mit
einer Hand fest und ziehen Sie die
Schrauben an.
1 Stecken Sie den Ständer in die
3
Öffnungen auf der Unterseite des
Monitors.
■PN-Q801
1
2
(Beispiel: Rechter Ständer)
Ständersockel
Stütze
"R"
• Vor dem Anbringen (oder Abnehmen)
des Ständers bitte das Netzkabel
trennen.
• Bevor Sie Arbeiten ausführen, breiten
Sie die Polsterung über die Grundfläche
aus, um den Monitor zu verlegen. So
schützen Sie den TV vor einer etwaigen
Beschädigung.
1
VORSICHT
• Befolgen Sie die Anweisungen.
Falscher Einbau des Standfußes kann
dazu führen, dass der Monitor umkippt
Vergewissern Sie sich, dass im
1
Lieferumfang des Gerätes 12
Schrauben vorhanden sind.
1 Setzen Sie den Pfosten für die
2
2
3
Ständereinheit in den TOP-RPolystyrol-Schaum ein.
Befestigen Sie den Sockel am
2
Pfosten.
Setzen Sie die 4 Schrauben in
3
die 4 Löcher auf der Unterseite
des Sockels ein und ziehen Sie
sie fest.
• Halten Sie die Ständereinheit mit
einer Hand fest und ziehen Sie die
Schrauben an.
Montieren Sie den linken Ständer
4
genauso wie den rechten
Ständer.
• Achten Sie beim Installationsverfahren
darauf, dass Sie nicht mit den Fingern
zwischen Monitor und Boden gehen.
• Entfernen Sie den Ständer nicht
vom Monitor, es sei denn, Sie
wollen ihn mit einer optionalen
Wandhalterung befestigen.
• Nach dem Anbringen des
Standfußes am Monitor darf
der Fuß nicht gehalten werden,
wenn Sie den Monitor aufstellen,
einstellen, bewegen oder
hinlegen.
DE 1
Schrauben
"L"
4
Page 63

Anbringen des Ständers
3
Bereiten Sie den Arbeitstisch vor.
4
Schrauben
Weiches Polster
3
(Siehe Seite DE 3.)
Setzen Sie den Ständer in die
4
Öffnungen auf der Rückseite des
Monitors ein und befestigen Sie die 4
Schrauben in den 4 Löchern auf der
Rückseite des Ständers.
• Stellen Sie sicher, dass der Ständer
fest in den Monitor eingesetzt ist.
Eine unsachgemäße Installation kann
zum Kippen des Monitors führen.
Die Ständer können in den Monitor
5
eingesetzt werden, so dass sie der
Innenseite oder der Außenseite des
Monitors zugewandt sind.
Einheit: Zoll (mm)
A 65 7/8 (1673)
5
A
VORSICHT
• Achten Sie beim Installationsverfahren
darauf, dass Sie nicht mit den Fingern
zwischen Monitor und Boden gehen.
• Entfernen Sie den Ständer nicht
vom Monitor, es sei denn, Sie
wollen ihn mit einer optionalen
Wandhalterung befestigen.
• Nach dem Anbringen des
Standfußes am Monitor darf
der Fuß nicht gehalten werden,
wenn Sie den Monitor aufstellen,
einstellen, bewegen oder
hinlegen.
1
2
4
■PN-Q901
2
1
2
VORDERSEITE
Kurze Schrauben
1
Weiches Polster
1
Lange
Schrauben
2
1
DE 2
• Vor dem Anbringen (oder Abnehmen)
des Ständers bitte das Netzkabel
trennen.
• Bevor Sie Arbeiten ausführen, breiten
Sie die Polsterung über die Grundfläche
aus, um den Monitor darauf abzulegen.
So schützen Sie den Monitor vor einer
etwaigen Beschädigung.
VORSICHT
• Befolgen Sie die Anweisungen.
Falscher Einbau des Standfußes kann
dazu führen, dass der Monitor umkippt
Vergewissern Sie sich, dass im
1
Lieferumfang des Gerätes 12
Schrauben (8 lange Schrauben und
4 kurze Schrauben) enthalten sind.
1 Setzen Sie die Pfosten für die
2
Ständereinheit in den PolystyrolSchaum ein.
Befestigen Sie den Sockel an den
2
Pfosten.
3 Setzen Sie die 8 Schrauben in die
8 Bohrungen auf der Unterseite
der Basis ein und ziehen Sie sie
fest.
• Halten Sie die Ständereinheit mit
einer Hand fest und ziehen Sie die
Schrauben an.
Bereiten Sie den Arbeitstisch vor.
3
(Siehe Seite DE 3.)
1 Stecken Sie den Ständer in die
4
Öffnungen auf der Unterseite des
Monitors.
• Stellen Sie sicher, dass der Ständer
fest in den Monitor eingesetzt ist.
Eine unsachgemäße Installation
kann zum Kippen des Monitors
führen.
Setzen Sie die 4 Schrauben in die
2
4 Löcher auf der Rückseite des
Monitors ein und ziehen Sie sie
fest.
• Achten Sie beim Installationsverfahren
darauf, dass Sie nicht mit den Fingern
zwischen Monitor und Boden gehen.
• Entfernen Sie den Ständer nicht
vom Monitor, es sei denn, Sie
wollen ihn mit einer optionalen
Wandhalterung befestigen.
• Nach dem Anbringen des
Standfußes am Monitor darf
der Fuß nicht gehalten werden,
wenn Sie den Monitor aufstellen,
einstellen, bewegen oder
hinlegen.
ENGLISHDEUTSCH ESPAÑOLITALIANO FRANÇAISРУССКИЙTÜRKÇE
Page 64

Anbringen des Ständers
PN-Q901
1
Oben Links
(TOP-L)
2
Registerkarteneinschub
3
Oben Links
(TOP-L)
ZURÜCK
Oben-Rechts
(TOP-R)
Oben Mitte
(TOP-C)
Gehäuse
Gehäuse
LINIE
1
2
Oben-Rechts
(TOP-R)
Oben Mitte
(TOP-C)
LINIE
Oben Mitte (TOP-C)
Oben Links (TOP-L)
Oben-Rechts
(TOP-R)
GELENKVERBINDUNG
Nur für 90/80 Zoll Modelle
Aufbau des Arbeitstisches
Bevor Sie den Ständer an den Monitor
anbringen, erstellen Sie einen Arbeitstisch,
auf dem der Monitor ruht.
• Verwenden Sie zum Herstellen
des Tisches die in der Verpackung
verwendeten Polstermaterialien.
• Von den verwendeten
Dämpfungsmaterialien wird TOP-C auch
während der Montage des Ständers
verwendet. Stellen Sie sicher, dass Sie
die Ständereinheit zusammenbauen,
bevor Sie den Arbeitstisch bauen.
Setzen Sie die Polstermaterialien
1
jeweils in die in der Abbildung
dargestellten Richtungen ein.
• TOP-L und TOP-R in die linke bzw.
rechte Seite des Gehäuses einsetzen.
• Setzen Sie TOP-C ein, um zwischen
den Linien auf der anderen Seite des
Gehäuses zu passen.
Das Gehäuse ist mit Einstecklaschen
2
ausgestattet, um die Polstermaterialien
festzuhalten. Drücken Sie die
Laschen (2 für jede Position), um die
Polstermaterialien im Gehäuse zu
sichern.
PN-Q901
Befestigen Sie die Gelenkverbinder
und schließen Sie das Gehäuse.
Setzen Sie einen Gelenkverbinder
1
in die seitliche Öffnung des
Gehäuses ein.
Drücken Sie den anderen
2
Gelenkverbinder in die Lasche,
und fixieren Sie es dort.
Nachdem Sie den Arbeitstisch erstellt
3
haben, breiten Sie eine Decke oder
ein ähnliches weiches Tuch über dem
Tisch aus, und legen Sie dann das
Monitor-Display auf den abgedeckten
Tisch, bevor Sie den Ständer am
Monitor anbringen.
• Verwenden Sie dazu keinen kleinen
Tisch.
• Informationen zum Anbringen des
Ständers, Siehe Seite DE 1 bis DE
2.
DE 3
Page 65

Anbringen des Monitors an der Wand
VORSICHT
• Die Installation des Monitors erfordert besondere
Fähigkeiten, die nur von qualifiziertem
Servicepersonal durchgeführt werden sollten.
Kunden sollten nicht versuchen, die Arbeit selbst
zu tun. SHARP haftet nicht für unsachgemäße
Montage oder Montage, die zu Unfällen oder
Verletzungen führt.
An der Wand montieren
Mit dem Wandmontage-Kit (separat erhältlich) können
Sie den Monitor an der Wand montieren. Detaillierte
Informationen zur Montage der Wandhalterung
entnehmen Sie bitte den mit dem Produkt gelieferten
Anweisungen.
Wir empfehlen Ihnen, sich bei der Installation an einen
Techniker zu wenden.
SHARP ist nicht verantwortlich für Schäden am Produkt
oder Verletzungen für sich selbst oder andere, wenn
Sie sich entscheiden, die Wandhalterung selbst zu
installieren.
VORSICHT
• Installieren Sie Ihre Wandhalterung an einer
festen Wand senkrecht zum Boden.
Wenn Sie die Wandhalterung an andere
Oberflächen wie Gipskartonplatten befestigen
möchten, wenden Sie sich an Ihren nächsten
Händler/Berater. Wenn Sie den Monitor an einer
Decke oder schrägen Wand installieren, kann
er herunterfallen und zu schweren Verletzungen
führen. Es sollten immer zwei Personen den
Monitor an der Wand montieren.
HINWEIS
• Aufgrund der Klemmenkonfiguration dieses Monitors
ist bei der Wandmontage dieses Modells darauf zu
achten, dass zwischen der Wand und dem Monitor
für die Kabel ausreichend Platz ist.
• Um diesen Monitor an einer Wand montieren zu
können, entfernen Sie den Netzkabelhalter auf der
Rückseite des Monitors und verwenden Sie danach
die mitgelieferten Schrauben, um die Halterung an der
Rückseite des Monitors zu befestigen.
Spezifikationen zum Wandmontagesatz
Die Standardmaße für Wandmontagesätze sind unten dargestellt
*1 : WAND
*2 : WANDMONTAGESATZ
a1 : Maximaler Abstand vom Montageloch.
a2 : Maximale Entfernung von der Mitte des Monitors.
b1 : Abstand zwischen dem Monitor und dem Montageloch.
b2 : Maximaler Abstand von der Mitte des Monitors.
b3 : Maximaler Abstand vom Montageloch.
c1 : Mindestlücke.
a1
a2
*2
b1
B
b2
A
PN-Q901 PN-Q801 PN-Q701 PN-Q601
(A-B) 23 5/8 (600) - 15 3/4 (400) 15 3/4(400) - 15 3/4(400)
a1 1 37/64 (40) 2 3/8 (60) 2 3/8 (60)
a2 13 25/64 (340) 14 3/16 (360) 10 1/4 (260)
b1 7 7/8 (200) 8 9/32 (210) 8 9/32 (210) 8 43/64 (220)
b2 14 49/64 (375) 10 61/64 (278) 10 29/32 (277) 10 9/16 (268)
b3 6 57/64 (175) 3 7/16 (87) 3 7/16 (87)
c1 3 5/32 (80) 2 9/16 (65) 1 15/16 (49) 1 31/32 (50)
*2
*1
b3
c1
Einheit: Zoll (mm)
ENGLISHDEUTSCH ESPAÑOLITALIANO FRANÇAISРУССКИЙTÜRKÇE
DE 4
Page 66

Wechselstromversorgung
■PN-Q901/PN-Q801
Steckdose
• Stellen Sie den Monitor nahe an die Steckdose und halten Sie
den Netzstecker in Reichweite.
■PN-Q701/PN-Q601
Steckdose
2
1
1
oder
2
1
Netzanschluss
Stecken Sie den Netzstecker des
1
Monitors in die Steckdose.
• Stellen Sie den Monitor nahe an
die Steckdose und halten Sie den
Netzstecker in Reichweite.
HINWEIS
• ZUR VERMEIDUNG DES RISIKOS
VON ELEKTRISCHEN SCHLÄGEN
BERÜHREN SIE KEINE UNISOLIERTEN
TEILE VON KABELN WENN DAS
ANSCHLUSSKABEL IN DER
STECKDOSE STECKT.
Wenn Sie den Monitor zum ersten Mal
2
einschalten, drücken Sie am Monitor
die POWER Taste.
Legen Sie die Batterien in die
3
Fernbedienung ein. (Siehe Seite
DE 6.)
HINWEIS
• Die Lautsprecher können nicht vom Monitor
getrennt werden.
• Der Monitorwinkel kann nicht eingestellt
werden.
Netzspannung (Ein/Standby)
H
PN-Q801/PN-Q701/
PN-Q601
Netzspannung
H
PN-Q901
Netzspannung
Ein-/Ausschalten der
Stromversorgung
Drücken Sie die POWER Taste am
Monitor oder an der Fernbedienung, um
das Gerät einzuschalten.
HINWEIS
• Die Erstinstallation wird gestartet, wenn der
Monitor zum ersten Mal eingeschaltet wird.
Falls der Monitor zuvor bereits eingeschaltet
wurde, dann wird die Erstinstallation nicht
aufgerufen. Um die Einstellungen der
Erstinstallation zu ändern, wählen Sie im
Einstiegsmenü "Einfache Einstellung".
Drücken Sie die POWER Taste am
Monitor oder auf der Fernbedienung
erneut, um das Gerät auszuschalten.
• Der Monitor geht in den StandbyModus und das Bild auf dem Bildschirm
verschwindet.
HINWEIS
• Wenn Sie diesen Monitor über einen
längeren Zeitraum nicht verwenden,
müssen Sie das Netzkabel aus der
Steckdose ziehen.
• Etwas elektrische Energie wird noch
verbraucht, auch wenn der Monitor
ausgeschaltet ist.
• Stellen Sie den Monitor nahe an die Steckdose und halten Sie
den Netzstecker in Reichweite.
DE 5
Page 67

Fernbedienungseinheit
1
2
3
Fernbedienungssensor
30°
30°
17´ (5 m)
30°
30°*
*: Der Winkel ist 6 °, wenn der Ständer
befestigt ist. (Nur für PN-Q901)
Batterien in die Fernbedienung
einlegen
Falls die Fernbedienung nicht funktioniert,
tauschen Sie die Batterien der Fernbedienung
aus.
Öffnen Sie den Batteriefachdeckel.
1
Legen Sie zwei Batterien des Typs
2
"AAA" ein (im Lieferumfang des
Produkts enthalten).
• Legen Sie die Batterien so ein, dass
die Pole auf die entsprechenden
Markierungen (+) und (-) im Batteriefach
ausgerichtet sind.
Schließen Sie den Batteriefachdeckel.
3
VORSICHT
Die falsche Verwendung von Batterien kann zum
Austreten von Batterieflüssigkeit und Explodieren
der Batterien führen. Stellen Sie sicher, dass die
folgenden Anweisungen befolgt werden.
• Verwenden Sie unterschiedliche Batterietypen
nicht zusammen. Unterschiedliche Typen weisen
unterschiedliche Eigenschaften auf.
• Verwenden Sie alte und neue Batterien nicht
gemeinsam. Dies kann die Lebensdauer der neuen
Batterie verkürzen und evtl. ein Auslaufen der alten
Batterie zur Folge haben.
• Entfernen Sie die Batterien, sobald sie verschlissen
sind. Chemikalien, die aus Batterien austreten,
die mit Haut in Berührung kommen, können einen
Hautausschlag verursachen. Falls Sie chemische
Batterieausläufe finden, dann sollten Sie es
gründlich mit einem Tuch abwischen.
• Die mit diesem Produkt gelieferten Batterien
können aufgrund der Lagerbedingungen eine
kürzere Lebenserwartung aufweisen.
• Wenn Sie die Fernbedienung längere Zeit nicht
benutzen, entnehmen Sie die Batterien.
Verwenden der Fernbedienung
Verwenden Sie die Fernbedienung, indem Sie
sie auf den Fernbedienungssensor auf den
Monitor richten. Gegenstände zwischen der
Fernbedienung und dem Fernbedienungssensor
können einen ordnungsgemäßen Betrieb
verhindern.
■Vorsichtsmaßregeln zur
Fernbedienung
• Setzen Sie die Fernbedienung keinen Stößen
aus. Setzen Sie die Fernbedienung auch keinen
Flüssigkeiten aus und verwahren Sie sie nicht an
Orten mit hoher Feuchtigkeit.
• Setzen Sie die Fernbedienung keiner direkten
Sonnenbestrahlung aus. Die Hitze kann zu
Verformungen der Fernbedienung führen.
• Die Fernbedienung funktioniert möglicherweise nicht
ordnungsgemäß, wenn der Fernbedienungssensor
am Monitor unter direktem Sonnenlicht oder starker
Beleuchtung leuchtet. Ändern Sie in solchen Fällen
den Winkel der Beleuchtung oder des Monitors,
oder betätigen Sie die Fernbedienung näher zum
Fernbedienungssensor.
WICHTIG:
FALLS DAS GERÄT NICHT EINSCHALTET – DANN ZIEHEN
SIE STECKER DES MONITORS AUS DER STECKDOSE UND
WIEDERHOLEN SIE DIE INSTALLATIONSSCHRITTE.
ENGLISHDEUTSCH ESPAÑOLITALIANO FRANÇAISРУССКИЙTÜRKÇE
DE 6
Page 68

Verbindung
PR (Rot)
Verbindungsarten
Verwenden Sie zum Anschließen des Monitors an externe Geräte handelsübliche Kabel.
• Die Abbildungen der Klemmen dienen der Erläuterung und können geringfügig von den tatsächlichen Produkten
abweichen.
■Anschluss an Videogeräte oder PC
Die Bildqualität hängt vom verwendeten Anschlüssen ab. Um klarere Bilder zu erhalten, überprüfen Sie die
Ausgangsklemmen Ihrer externen Geräte und verwenden Sie die entsprechenden Anschlüsse für Bilder von
höherer Qualität.
Bildqualität
HD
Qualität
Standardqualität
(SD Qualität)
Monitoranschluss Kabel Seiten
HDMI-geprüftes Kabel
Ø 3,5 mm Stereo Miniklinke Kabel
HDMI-geprüftes Kabel
Komponenten-Videokabel
Audiokabel
AV-Kabel (Audio/Video-Kabel)
■Anschließen an Audiogeräte
Überprüfen Sie die Ausgangsklemmen Ihrer externen Geräte und verwenden Sie die entsprechenden
Klemmen.
Monitoranschluss
Lichtwellenleiter
Kabel
Audiokabel
Anschluss an
externe Geräte
AUDIO
Anschluss an
externe Geräte
OPTICAL
DIGITAL AUDIO INPUT
ANALOG AUDIO IN
DE 7,
DE 9
DE 9
DE 7
DE 8
Seiten
DE 8, DE 9
DE 8, DE 9
Sie können viele Arten von externen Geräten an Ihren Monitor anschließen. Um mögliche externe Anschlüsse
anzuzeigen, wählen Sie die Eingangsquelle, indem Sie INPUT auf der Fernbedienung oder auf dem Monitor
drücken.
Verwenden Sie zum Anschließen des Monitors an externe Geräte handelsübliche Kabel.
VORSICHT
• Um Geräte zu schützen, schalten Sie den Monitor immer aus, bevor Sie externe Geräte anschließen.
• Lesen Sie vor dem Anschließen die entsprechende Bedienungsanleitung (Blu-ray Disc-Player usw.) sorgfältig durch.
Anschließen eines Blu-ray Disc/DVD-Players oder einer HD-Kabel/Satelliten-Set-TopBox
■Bei Verwendung eines HDMI-Kabels (HDMI IN 1, 2 oder 3):
• Der HDMI-Anschluss (High Definition Multimedia Interface) ist eine Audio-Video-Schnittstelle, die eine Verbindung
für Audio- und Videosignale über ein einziges Kabel ermöglicht. Der HDMI IN-Anschluss unterstützt den
hochauflösenden Videoeingang.
• Um eine 1080p-Anzeige zu ermöglichen, schließen Sie Ihr externes Gerät mit einem HDMI-zertifizierten Kabel oder
einem Komponentenkabel an und stellen das Gerät auf 1080p-Ausgang.
• Unterstütztes Audioformat: Lineares PCM, Dolby Digital, DTS, Abtastrate 32/44.1/48kHz.
• Wenn Sie ARC-kompatible Geräte anschließen, verwenden Sie HDMI IN 1.
HDMI-geprüftes Kabel
HDMI OUT
■Bei Verwendung eines Component-Kabels (COMPONENT/VIDEO IN):
• Um eine 1080p-Anzeige zu ermöglichen, schließen Sie Ihr externes Gerät mit einem HDMI-zertifizierten Kabel oder
einem Komponentenkabel an und stellen das Gerät auf 1080p-Ausgang.
• Wenn Sie ein Component-Kabel an die Buchse COMPONENT/VIDEO IN anschließen, schalten Sie Input Select auf
COMPONENT.
P
(Blau)
B
Y (Grün)
Komponenten-Videokabel
AUDIO-L
AUDIO-R
(Weiß)
(Rot)
Audiokabel
COMPONENT OUT
DE 7
Page 69

HD Kabel/Satelliten-Set-Top-Box
Lichtwellenleiter
Verbindung
Anschließen eines Videorecorders, einer Spielekonsole, eines Camcorders oder einer
Kabel-Box/Satelliten-Set-Top-Box
■Bei Verwendung eines Composite-Kabels (COMPONENT/VIDEO IN oder VIDEO IN 1):
• Wenn Sie ein AV-Kabel an die Buchse COMPONENT/VIDEO IN anschließen, schalten Sie Input Select auf VIDEO.
AV-Kabel (Audio/Video-Kabel)
VIDEO
(Gelb)
AUDIO-L
(Weiß)
AUDIO-R
(Rot)
AV-Kabel (Audio/Video-Kabel)
VIDEO
(Gelb)
AUDIO-L
(Weiß)
AUDIO-R
(Rot)
Anschluss eines Surround-Systems/Audio-Systems
■Beim Anschluss eines AV-Verstärkers an ein Surround-System
• Wenn Sie den Monitor Audio Ausgang an einen AV-Verstärker ausgeben:
*1 Wenn Sie ARC-kompatible Geräte anschließen, verwenden Sie HDMI IN 1.
• Wenn das Bild nicht synchron mit dem Audio ist, überprüfen Sie die Einstellungen des angeschlossenen SurroundSystems.
HDMI-geprüftes Kabel *1
OPTICAL
DIGITAL AUDIO INPUT
HDMI INHDMI OUT
■Beim Anschluss eines Audio-Verstärkers
Es ist möglich, Audio über die Buchse DIGITAL AUDIO OUT auszugeben.
• Stellen Sie in diesem Fall "DIGITAL AUDIO" auf "PCM" oder "Bitstream". (Siehe integrierte Bedienungsanleitung.)
Lichtwellenleiter
OPTICAL
DIGITAL AUDIO INPUT
HDMI OUT
ENGLISHDEUTSCH ESPAÑOLITALIANO FRANÇAISРУССКИЙTÜRKÇE
Audiokabel
ANALOG AUDIO IN
DE 8
Page 70

Verbindung
Einführung
Anschließen eines PCs
Eine Liste der mit dem Monitor kompatiblen PC-Signale finden Sie im integrierten Bedienhandbuch.
■Bei Verwendung eines HDMI-Kabels (HDMI IN 1, 2 oder 3):
• Je nach Grafikkarte können nur Videosignale ausgegeben werden. Verbinden Sie in diesem Fall zusätzlich zum
Anschluss eines HDMI-zertifizierten Kabels an die Buchse HDMI IN 2 ein 3,5 mm Stereo-Miniklink-Kabel an die
Buchse AUDIO IN und stellen Sie "Audio Select" auf "HDMI + Analog". (Siehe integrierte Bedienungsanleitung.)
• Die HDMI IN-Anschlüsse unterstützen nur Digitalsignale.
HDMI-geprüftes Kabel
HDMI OUT
oder
HDMI-geprüftes Kabel
HDMI OUT
Ø 3,5 mm Stereo Miniklinke Kabel
■Bei Verwendung eines analogen RGB-Kabels (PC IN):
• Wenn Sie ein analoges RGB-Kabel verwenden, geben Sie das Audiosignal am AUDIO IN-Anschluss des PC IN ein.
Analoges RGB-Kabel (D-Sub 15-poliges Kabel oder VGA-Kabel)
Ø 3,5 mm Stereo Miniklinke Kabel
AUDIO
RGBAUDIO
Erstinstallation
Führen Sie die folgenden Schritte aus,
bevor Sie POWER auf der Fernbedienung
drücken.
Legen Sie die Batterien in die
1
Fernbedienung ein.
Schließen Sie das Netzkabel an die
2
Steckdose an.
Sprache (Spracheneinstellung)
Wählen Sie aus 6 Sprachen: Englisch,
Französisch, Spanisch, Deutsch,
Italienisch und Russisch.
Drücken Sie a/b um die gewünschte
1
Sprache auszuwählen, die auf dem
Bildschirm angezeigt wird, und
drücken Sie dann die ENTER.
Energiesparen
Wählen Sie "Ja" oder "Nein", um die
Standardanzeige einzustellen.
Drücken Sie
2
"Nein" auszuwählen.
Drücken Sie ENTER, um die
Einstellung zu bestätigen.
Abgeschlossen
Der Bestätigungsbildschirm wird
3
angezeigt. Bestätigen Sie die auf dem
Bildschirm angezeigten Informationen,
und drücken Sie dann die ENTER.
Beispiele für den
Bestätigungsbildschirm
/d um "Ja" oder
a
DE 9
Page 71

Anzeigen der eingebauten Bedienungsanleitung
1
3
Verwenden eines PCs
Anzeigen der eingebauten Bedienungsanleitung
Drücken Sie auf der Fernbedienung MANUAL, um Betriebsinformationen auf dem Bildschirm anzuzeigen.
Um nach einem Element aus dem Inhaltsverzeichnis zu suchen, und nach einem bestimmten Begriff zu
suchen, und Informationen zur Fehlerbehebung zu finden, drücken Sie MANUAL, während Sie den Monitor
benutzen und wählen Sie dann den entsprechenden Eintrag aus dem angezeigten Inhaltsverzeichnis aus.
Drücken Sie MANUAL, während Sie den Monitor benutzen.
1
Dies zeigt den eingebauten Bedienungsanleitung-Bildschirm an.
Wenn Sie Inhalte auswählen, wird ihre Seite angezeigt.
2
Sie können mit den markierten Pfeilen von Seite zu Seite umblättern.
3
2
PC IN
terminal
ENG 1-1
HINWEIS
• Sie können das eingebaute Bedienungshandbuch auch über den Menüpunkt "Informationen" > "Handbuch"
anzeigen.
• Während der USB-Modus, der Home-Network-Modus oder die Internet-Anwendung verwendet wird, kann die
eingebaute Bedienungsanleitung nicht angezeigt werden.
HDMI IN 1 terminal
ARC: Audio
Return Channel
ETHERNET terminal
AUDIO IN terminal
(shared for PC IN and
HDMI IN 2) *2
VIDEO IN 1 terminals
AUDIO OUT terminals
COMPONENT/
VIDEO IN
HDMI IN 2 terminal
*3
DIGITAL AUDIO OUT
terminal
Anpassen des PC-Bildes
Sie können die Position der Bildeingabe eines PCs
anpassen, indem Sie
"Initiale Konfiguration" > "Eingangseinstellungen" >
"Fein-Sync."
Feine Synchronisierung(Fein-Sync.)
Normalerweise können Sie das Bild bei
Bedarf ändern, um die Bildposition mit "Auto
Synchronisierung" zu ändern. In einigen Fällen ist
jedoch eine manuelle Einstellung erforderlich, um das
Bild zu optimieren.
Eingangssignal: Wählen Sie das Eingangssignal.
1024×768
1360×768
Automatische Synchronisation: Zur
automatischen Anpassung des PC-Bildes.
Ja: Automatische Synchronisierung startet.
Nein: Rückkehr zum vorherigen Menüpunkt.
terminals
*5
H-Pos. : Zum Zentrieren der Bildlage durch
Verschieben nach links oder rechts.
V-Pos. : Zum Zentrieren der Bildlage durch
Verschieben nach oben oder unten.
Clock : Zum Anpassen, wenn das Bild mit
vertikalen Streifen flimmert.
Phase : Zum Anpassen, wenn der
Zeichenkontrast niedrig ist oder das Bild
flimmert.
HINWEIS
• Automatische Synchronisation kann fehlschlagen, wenn
das Computerbild eine niedrige Auflösung aufweist,
unklare (schwarze) Kanten aufweist oder während
der Ausführung von "Automatische Synchronisierung"
verschoben wird.
• Schließen Sie den PC an den Monitor an und schalten
Sie ihn ein, bevor Sie "Auto Synchronisierung" starten.
• Es ist nicht notwendig, "Clock" oder "Phase"
einzustellen, wenn ein Digitalsignal eingegeben wird, so
dass es nicht ausgewählt werden kann.
• Die voreingestellte Cursorposition befindet sich
möglicherweise nicht in der Mitte, da die Werte der
Bildschirmpositionsvariablen asymmetrisch sein
können.
• Die Werte der Bildschirmpositionsvariablen hängen
vom Ansichtsmodus oder vom Signaltyp ab. Die
Bereiche sind auf dem Einstellbildschirm zu sehen.
Audioeingang einstellen
Audio auswählen
Diese Funktion stellt die Schnittstelle für die Ausgabe
des Computer-Audiosignals ein.
Die Einstellungen variieren je nach Eingangsquelle.
Wählen Sie die Eingangsquelle, die dem mit dem PC
verbundenen Anschluss entspricht, und stellen Sie
dann das gewünschte Element ein.
Weitere Informationen finden Sie unter "Initiale
Konfiguration" > "Eingangseinstellungen" >
"Audiowahl"
HDMI 2
HDMI2(Digital) : Wählen Sie diese Option,
HDMI+Analog : Wählen Sie diese Option,
HINWEIS
• Wenn "Audiowahl" auf "HDMI + Analog" eingestellt ist,
wird kein Ton wiedergegeben, wenn Sie nur ein HDMIzertifiziertes Kabel verwenden, um HDMI-kompatible
Geräte anzuschließen. Um Ton zu erzeugen, sollten Sie
eine analoge Audioverbindung herstellen.
• Wenn Sie HDMI-kompatible Geräte nur mit einem
HDMI-zertifizierten Kabel anschließen möchten, setzen
Sie "Audio Select" auf "HDMI2 (Digital)".
wenn Monitor und PC über
ein HDMI-zertifiziertes Kabel
angeschlossen sind und
Audio über das gleiche Kabel
eingegeben wird.
wenn Monitor und PC über
ein HDMI-zertifiziertes Kabel
angeschlossen sind und
das Audio über die 3,5-mmStereo-Mini-Klinkebuchse
eingegeben wird.
ENGLISHDEUTSCH ESPAÑOLITALIANO FRANÇAISРУССКИЙTÜRKÇE
DE 10
Page 72

Verwenden eines PCs
Befehl 4-stellig Parameter 4-stellig Rückkehrcode
Bei einigen Befehlen erscheint
Rücklaufcode (0DH)
Rücklaufcode (0DH)
Steuerung des Monitors
• Der Monitor kann von einem PC, Bedienpanels und
anderen Geräten über RS-232C oder IP gesteuert
werden.
• Verwenden Sie für die Verbindungen ein KreuzTyp RS-232C-Kabel, ETHERNET-Kabel
(handelsüblich).
HINWEIS
• Dieses Betriebssystem sollte von einer Person benutzt
werden, die an Computern gewöhnt ist.
IP-Steuerung
Stellen Sie diese Funktion ein, wenn Sie den Monitor
von Geräten betreiben, die über LAN verbunden
sind. Informationen hierzu finden Sie unter
"Netzwerkeinstellungen".
IP-Steuerung
Wenn "IP Control" ausgewählt ist, wird
"Change" markiert. Drücken Sie ENTER.
Detaillierte Einstellungen
Nehmen Sie die detaillierten Einstellungen vor
(Login-ID, Passwort usw.).
Folgen Sie den Anweisungen auf dem
Bildschirm, um die Einstellungen zu
konfigurieren.
Gerätename
• Geben Sie den Namen des Monitors an, der
auf anderen Netzwerkgeräten angezeigt wird.
Verwenden Sie die Softwaretastatur, um den
Namen festzulegen.
Kreuzförmiges
RS-232C-Kabel
Kommunikationsbedingungen Für RS-232C
Stellen Sie die RS-232CKommunikationseinstellungen auf dem PC so ein,
dass die Kommunikationsbedingungen des Monitors
übereinstimmen. Die Kommunikationseinstellungen
des Monitors sind wie folgt:
Baudrate: 9,600 bps
Datenlänge: 8 Bit
Paritätsbit: Keine
Stoppbit: 1 Bit
Durchflussregelung Keine
Kommunikationsbedingungen für das IP
Verbinden Sie sich mit dem Monitor mit den
folgenden Einstellungen für IP auf dem PC
IP-Protokoll: TCP/IP
Host-IP-Adresse: Legen Sie die IP-Adresse im
Service: Kein (wählen Sie nicht Telnet
TCP-Port #: Stellen Sie im Monitor-Menü
Menü Monitor fest
oder SSH)
eine Portnummer ein (SteuerPort)
Wenn Sie Ihre ID und Ihr Kennwort im Menü Monitor
festlegen, müssen Sie diese eingeben, sobald Sie
eine Verbindung zum Monitor herstellen.
HINWEIS
• Wenn Sie diese Funktion verwenden, nehmen Sie die
Einstellungen für "IP Control" vor.
• Die Verbindung wird getrennt, wenn 3 Minuten lang
keine Kommunikation erfolgt.
Datenübertragungsverfahren
Senden Sie die Steuerbefehle vom PC über die RS232C oder IP.
Der TV wird entsprechend den empfangenen
Befehlen gesteuert und sendet eine Antwortmeldung
zum PC.
Senden Sie nicht mehrere Befehle gleichzeitig.
Warten Sie, bis der PC die OK-Antwort empfängt,
bevor der nächste Befehl gesendet wird.
Befehlsformat
Acht ASCII-Codes +CR
C1 C2 C3 C4 P1 P2 P3 P4
Befehl 4-stellig: Befehl. Text mit vier Zeichen.
Parameter 4-stellig: Parameter 0-9, x, leer, ?
Parameter
Geben Sie die Parameterwerte linksbündig ein und
füllen Sie die restlichen Stellen mit Leerzeichen auf
(achten Sie darauf, dass für Parameter vier Werte
eingegeben werden).
Wenn der eingegebene Parameter nicht innerhalb
des Einstellbereichs liegt, erscheint „ERR“ (siehe
„Antwortcode-Format“).
Jeder numerische Wert kann das "x" auf dem Tisch
ersetzen.
0
0 0 0 9
— 3 0
auf Eingabe von „?“ der
aktuelle
Einstellwert.
?
??? ?
Antwortcode-Format
Normalantwort
O K
Problemantwort
(Übertragungsfehler oder nicht korrekter Befehl)
E R R
ETHERNET-Kabel
LAN
Hub
DE 11
Page 73

Verwenden eines PCs
Befehlstabelle
• Die hier nicht angezeigten Befehle sind nicht garantiert.
*1 Nur für RS-232C.
Sie können "Wake On LAN (Magic Packet)" verwenden, um die Stromversorgung via LAN zu aktivieren. Es ist nicht möglich den Monitor mit dem
IP-Control Befehl einzuschalten. Es ist nicht möglich den Monitor mit dem IP-Control Befehl einzuschalten.
CONTROLL-ELEMENT BEFEHL PARAMETER INHALTSKONTROLLE
EIN
BEFEHLSEINSTELLUNG
NETZSPANNUNGSEINSTELLUNG P O W R 0 _ _ _ Netzspannung Aus Es wechselt in den Standby-Modus.
EINGANG
AUSWAHL
AV-MODUSWAHL A V M D * _ _ _ 0: (Umschalten), 1: STANDARD,
LAUTSTÄRKE V O L M * * * _ Volumen (0-100)
BILDLAGE HORIZONTALE
ANSICHTSMODUS W I D E * * _ _ 0: (Umschalten) [AV],
STUMMSCHALTUNG M U T E * _ _ _ 0: (Umschalten), 1: Ein, 2: Aus
RAUMKLANG A C S U * _ _ _ 0: (Umschalten), 1: Ein, 2: Aus
AUDIOAUSWAHL A C H A x _ _ _ (Umschalten)
EINSCHLAF-TIMER O F T M * _ _ _ 0: Aus,
CARBON COPY C L C P x _ _ _ (Umschalten) Schaltet den Betrieb von Untertiteln um.
GERÄTENAME T V N M 1 _ _ _ Der unter "Gerätename" eingestellte Gerätename
MODELLNAME M N R D 1 _ _ _ Der Modellname des Monitors
SOFTWAREVERSION S W V N 1 _ _ _ Die aktuelle Version der Monitor-Software wird
IPPROTOKOLLVERSION I P P V 1 _ _ _ Die aktuell unterstützte Version des IP-Protokolls
FERNBEDIENUNGSTASTEN R C K Y * * _ _ 0: 9, 10: DOT, 12: POWER, 13: DISPLAY, 23: OPTION, 24: SLEEP, 31: MUTE, 32: VOL -,
UMSCHALTEN I T G D x _ _ _ (Umschalten) Es schaltet durch den Umschalten Schalter
1-6 I A V D * _ _ _ 1: HDMI IN1, 2: HDMI IN 2,
POSITION
VERTIKALE
POSITION
UHR C L C K * * * _ (0-100)
PHASE P H S E * * _ _ (0-63)
R S P W 0 _ _ _ Aus Der Power On-Befehl wurde verworfen.
H P O S * * * _ (-50-50) Für PC-Eingang.
V P O S * * * _ (-50-50)
1 _ _ _ Ein [RS-232C] Der Power On-Befehl wurde akzeptiert.
2 _ _ _ Via [IP] Der Power On-Befehl wurde akzeptiert.
1 _ _ _ Netzspannung Ein Einschalten
3: HDMI IN 3, 4: VIDEO IN 1,
5: COMPONENT/VIDEO IN 2,
6: PC IN
2: FILM,
4: BENUTZER, 5: DYNAMISCH (Fixiert),
6: DYNAMISCH, 7: PC
1: Seitenleiste [AV],
2: S. Stretch [AV],
3: Zoom [AV],
4: : Stretch [AV, USB-Video, Home Network
Video- oder Internet-Anwendungen],
5: Normal [PC],
7: Stretch [PC],
8: Punkt bei Punkt [PC] [AV],
9: Vollbildschirm [AV],
10: Auto [USB-Video, USB-Foto, Heimnetzwerk
Video, Foto- oder Internet-Anwendungen],
11: Original [USB-Video, USB-Foto, Home
Network Video, Foto- oder Internet-
Anwendungen]
1: AUS TIMER - 30 MIN., 2: AUS TIMER - 60 MIN.,
3: AUS TIMER - 90 MIN., 4: AUS TIMER - 120 MIN.
33: VOL +, 34: CH
45: RETURN, 46: EXIT, 49: AUDIO, 50: A (rot), 51: B (grün), 52: C (blau), 53: D (gelb), 61: MANUELL
, 35: CH , 36: INPUT, 38: MENU, 40: ENTER, 41: a, 42: b, 43: a, 44: a,
*1
ein. (Es ist die gleiche Weise wie eine
Eingabewechseltaste.)
Obwohl es jetzt wählen kann, ist das innere
Umschalten Schalten in Betrieb.
Die Werte der Bildschirmpositionsvariablen
hängen vom Ansichtsmodus oder vom Signaltyp
ab. Die Bereiche sind auf dem Einstellbildschirm
zu sehen.
0: Obwohl es jetzt wählen kann, ist das innere
Ein/Aus Schalten in Betrieb.
1: Nur verfügbar, wenn 4: 3 Signal eingegeben
wird.
5: Nur verfügbar, wenn 4: 3 Signal eingegeben
wird.
8: [PC] Nur verfügbar, wenn UXGA eingegeben
wird.
[AV] Nur verfügbar, wenn 1080i/p eingegeben
wird.
9: Nur verfügbar, wenn 720p eingespeist wird.
10, 11: Verfügbar, wenn USB-Video, USB-Foto,
Home Network Video, Foto oder Internet
Anwendung verwendet wird.
wird angezeigt.
angezeigt.
wird angezeigt.
HINWEIS
• Wenn ein Unterstrich (_) in der Parameterspalte
erscheint, geben Sie ein Leerzeichen ein.
• Wenn ein Sternchen (*) erscheint, geben Sie einen Wert
in dem Klammern-Bereich ein, der in den Abschnitten
unter INHALTSKONTROLLE angegeben ist.
• Jeder numerische Wert kann das "x" auf dem Tisch
ersetzen.
ENGLISHDEUTSCH ESPAÑOLITALIANO FRANÇAISРУССКИЙTÜRKÇE
DE 12
Page 74

Fehlerbehebung
Problem Mögliche Lösung
• Kein Strom.
• Kein Ansprechen auf
Fernbedienung.
• Kein Bild.
• Kein Ton.
• Prüfen Sie, ob Sie POWER auf der Fernbedienung gedrückt haben.
• Ist das Netzkabel nicht in der Steckdose?
• Ist die Stromversorgung eingeschaltet?
• Batterien in falscher Ausrichtung (+, -) eingelegt?
• Ist die Verbindung zu anderen Komponenten korrekt?
• Ist die Verbindung zu anderen Komponenten korrekt?
DE 5
.
DE 7
DE 7
Seite
bis
bis
DE 9
DE 9
.
.
.
Seite
Seite
DE 5
DE 5
.
Seite
.
DE 6
Seite
Seite
DE 13
Page 75

Montare il supporto
(TOP-R)
■PN-Q701/PN-Q601
1
2
1
3
Assorbi impatto
• Prima di attaccare (o staccare) lo stand,
scollegare il cavo CA.
• Prima di eseguire il lavoro, posizionare
dell'imbottitura sull'area di base in
3
2
1
Viti
Viti
modo da poter appoggiare il monitor. In
questo modo si eviterà di danneggiare il
prodotto.
ATTENZIONE
• Assicurarsi di seguire le istruzioni.
Un'istallazione non corretta del
supporto potrebbe causare la caduta
del monitor.
Controllare che siano presenti le 10
1
viti fornite con l'unità di supporto.
1 Posizionare Il supporto verticale
2
dell'unità di supporto sul polistirolo.
Attaccare la base al supporto
2
verticale.
3 Inserire e stringere le 6 viti nei
corrispondenti 6 buchi nella parte
inferiore della base.
• Tenere fermamente l'unità di
supporto con una mano, e
successivamente stringere le viti.
1 Inserire il supporto nelle relative
3
aperture nella parte inferiore del
monitor.
• Assicurarsi che il supporto sia
inserito fermamente all'interno
del monitor. Un'installazione
non corretta potrebbe causare
l'inclinazione del Monitor.
Inserire e stringere le 4 viti
2
all'interno dei 4 buchi corrispettivi
nella parte posteriore del monitor.
■PN-Q801
1
2
(Esempio: supporto di destra)
Base dello
stand
Montante di
sostegno
PARTE SUPERIORE DESTRA
"R"
Viti
• Prima di attaccare (o staccare) lo stand,
scollegare il cavo CA.
• Prima di eseguire il lavoro, posizionare
dell'imbottitura sull'area di base in
modo da poter appoggiare il monitor. In
questo modo si eviterà di danneggiare il
prodotto.
1
ATTENZIONE
• Assicurarsi di seguire le istruzioni.
Un'istallazione non corretta del
supporto potrebbe causare la caduta
del monitor.
Controllare la presenza delle 12 viti
1
fornite assieme all'unità di supporto.
1 Inserire il supporto verticale
2
dell'unità di supporto all'interno
2
3
della PARTE SUPERIORE DESTRA
(TOP-R) in polistirolo.
Attaccate la base alla parte
2
verticale del supporto.
3 Inserite e stringete le 4 viti nei 4
rispettivi buchi nella parte inferiore
della base.
• Tenere fermamente l'unità di
supporto con una mano, e
successivamente stringete le viti.
Assemblare il supporto di sinistra,
4
così come il supporto di destra.
ITALIANOITALIANO ITALIANO DEUTSCHFRANÇAISTÜRKÇEРУССКИЙ
• Durante la procedura di installazione,
prestare attenzione a non lasciare le
vostre dita tra il monitor e il pavimento.
• Non rimuovere il supporto dal
monitor, almeno non decidiate
di utilizzare un supporto a muro
opzionale per montare il monitor.
• Dopo aver attaccato il supporto
al monitor, non tenere il supporto
quando appendete, posizionate,
muovete o abbassate il monitor.
IT 1
"L"
4
Page 76

Montare il supporto
3
Preparazione del tavolo di lavoro.
4
Viti
Assorbi impatto
3
(Guardare pagina IT 3.)
Inserire il supporto nelle aperture
4
posizionate nella parte posteriore del
monitor, e successivamente stringere
le 4 viti nei rispettivi 4 buchi nella parte
posteriore dell'unità di supporto.
• Assicuratevi che il supporto sia inserito
fermamente all'interno del monitor.
Un'installazione non corretta potrebbe
causare l'inclinazione del Monitor.
I supporti possono essere inseriti
5
all'interno del monitor, in modo che
questi siano direzionati verso l'interno
o esterno del monitor.
Unità: pollice (mm)
A 65 7/8 (1673)
1
2
■PN-Q901
2
1
1
PARTE
FRONTALE
Viti lunghe
5
4
Viti corte
A
2
ATTENZIONE
• Durante la procedura di installazione,
prestare attenzione a non lasciare le
vostre dita tra il monitor e il pavimento.
• Non rimuovere il supporto dal
monitor, almeno non decidiate
di utilizzare un supporto a muro
opzionale per montare il monitor.
• Dopo aver attaccato il supporto
al monitor, non tenere il supporto
quando appendete, posizionate,
muovete o abbassate il monitor.
Assorbi impatto
2
1
1
• Prima di attaccare (o staccare) lo stand,
scollegare il cavo CA.
• Prima di eseguire il lavoro, posizionare
dell'imbottitura sull'area di base in
modo da poter appoggiare il monitor. In
questo modo si eviterà di danneggiare il
prodotto.
ATTENZIONE
• Assicurarsi di seguire le istruzioni.
Un'istallazione non corretta del
supporto potrebbe causare la caduta
del monitor.
Controllare che siano presenti 12
1
viti (8 viti lunghe e 4 viti corte) fornite
con l'unità di supporto.
1 Inserire il supporto verticale
2
dell'unità di supporto all'interno del
polistirolo.
Attaccate la base alla parte
2
verticale del supporto.
3 Inserite e stringete le 8 viti nei 8
rispettivi buchi nella parte inferiore
della base.
• Tenere fermamente l'unità di
supporto con una mano, e
successivamente stringere le viti.
Preparazione del tavolo di lavoro.
3
(Guardare pagina IT 3.)
1 Inserire il supporto nelle aperture
4
posizionate nella parte posteriore
del monitor.
• Assicuratevi che il supporto sia
inserito fermamente all'interno
del monitor. Un'installazione
non corretta potrebbe causare
l'inclinazione del Monitor.
Inserite e stringete le 4 viti nei
2
4 rispettivi buchi nella parte
posteriore del monitor.
• Durante la procedura di installazione,
prestare attenzione a non lasciare le
vostre dita tra il monitor e il pavimento.
• Non rimuovere il supporto dal
monitor, almeno non decidiate
di utilizzare un supporto a muro
opzionale per montare il monitor.
• Dopo aver attaccato il supporto
al monitor, non tenere il supporto
quando appendete, posizionate,
muovete o abbassate il monitor.
IT 2
Page 77

Montare il supporto
PARTE SUPERIORE
SINISTRA (TOP-L)
1
PARTE SUPERIORE
SINISTRA (TOP-L)
Alette a pressione
2
3
PARTE SUPERIORE
DESTRA (TOP-R)
PARTE SUPERIORE
CENTRALE (TOP-C)
RETRO
PARTE SUPERIORE DESTRA (TOP-R)
CASE
LINEA
PARTE SUPERIORE
CENTRALE (TOP-C)
PN-Q901
PARTE SUPERIORE SINISTRA (TOP-L)
CASE
LINEA
PARTE SUPERIORE CENTRALE
(TOP-C)
1
2
PARTE SUPERIORE
DESTRA (TOP-R)
GIUNTO
Solo 90/80 pollici
Preparazione del tavolo da lavoro
Prima di attaccare il supporto al monitor,
preparate un tavolo da lavoro sul quale
appoggiare il monitor.
• Per preparare il tavolo utilizzate il
materiale di imbottitura all'interno della
confezione.
• Tra il materiale di imbottitura utilizzato,
la PARTE SUPERIORE CENTRALE
(TOP-C) viene utilizzata anche durante
l'assemblaggio dell'unità di supporto.
Assicuratevi di assemblare l'unità di
supporto prima di preparare il tavolo di
lavoro.
Inserite ogni materiale di imbottitura
1
seguendo le rispettive direzioni
mostrate all'interno della figura.
• Inserite la PARTE SUPERIORE
SINISTRA (TOP-L) e SUPERIORE
DESTRA (TOP-R) rispettivamente
all'interno dei lati sinistro e destro del
case.
• Inserire la PARTE SUPERIORE
CENTRALE (TOP-C) in modo che si
posizioni tra le linee sull'altro lato del
case.
Il case è dotato di alette a incastro
2
per ospitare i materiali di imbottitura.
Premete le alette (2 per ogni posizione)
in modo da assicurare il materiale di
imbottitura al case.
PN-Q901
Dopo aver preparato il tavolo di
3
Unire i giunti e chiudere il case.
Inserire un giunto all'interno del
1
foro sul lato del case.
Premere la linguetta e posizionare
2
il giunto.
lavoro, stendete un lenzuolo o un
tessuto di materiale simile sul tavolo
e successivamente appoggiate
sul tavolo coperto il monitor con il
display rivolto verso il basso, prima di
attaccare il supporto del monitor.
• Non utilizzate un tavolo di piccole
dimensioni per questo lavoro.
• Per informazioni su come attaccare il
supporto, Guardare le pagine da
.
IT 2
IT 1
ITALIANOITALIANO ITALIANO DEUTSCHFRANÇAISTÜRKÇEРУССКИЙ
a
IT 3
Page 78

Installare a muro il monitor
ATTENZIONE
• L'istallazione del monitor richiede capacità
specifiche e dovrebbe essere eseguita
esclusivamente da personale qualificato. Il cliente
non dovrebbe provare a farlo da solo. SHARP
non ha alcuna responsabilità per un montaggio
improprio, o nel caso di un montaggio che porti ad
incidenti o infortuni.
Montaggio a muro
Il kit di montaggio a muro (venduto separatamente)
permette di montare a muro il monitor. Per informazioni
dettagliate sull'istallazione del supporto a muro, guardare
le istruzioni fornite assieme al prodotto.
Nel caso di istallazione, raccomandiamo di contattare un
tecnico specializzato per l'assistenza.
SHARP non è responsabile per qualsiasi danno al
prodotto, o infortunio nei vostri confronti o nei confronti
di altre persone, nel caso decidiate di installare voi stessi
il supporto a muro.
ATTENZIONE
• Installate il vostro supporto a muro su di una
parete solida perpendicolare al pavimento.
Quando desiderate installare il supporto a muro
su superfici differenti da pareti di calcestruzzo,
contattate il vostro rivenditore/consulente più
vicino per informazioni addizionali. Se installate il
monitor a soffitto, o su pareti inclinate, potrebbe
cadere e causare gravi infortuni personali. Per
il montaggio a parete del monitor è sempre
necessario essere in due persone.
NOTA
• A causa della configurazione degli ingressi di
questo monitor, quando monterete a muro questo
modello, assicuratevi che tra il muro e il monitor ci sia
abbastanza spazio per i cavi.
• Per utilizzare questo monitor montato a muro,
rimuovere il sostegno del cavo di alimentazione nella
parte posteriore del monitor, e successivamente le
viti fornite con il supporto per il montaggio a muro, in
modo da assicurare il supporto alla parte posteriore
del monitor.
Specifiche tecniche del kit per il montaggio a muro
Le dimensioni standard di montaggio a muro sono le seguenti
*1 : MURO
*2 : KIT DI MONTAGGIO A MURO
a1 : Massima distanza dal foro di montaggio.
a2 : Massima distanza dal centro del monitor.
b1 : Distanza tra il centro del monitor e il foro di montaggio.
b2 : Massima distanza dal centro del monitor.
b3 : Massima distanza dal foro di montaggio.
c1 : Distanza minima.
a1
a2
*2
b1
B
b2
A
PN-Q901 PN-Q801 PN-Q701 PN-Q601
(A-B) 23 5/8 (600) - 15 3/4 (400) 15 3/4(400) - 15 3/4(400)
a1 1 37/64 (40) 2 3/8 (60) 2 3/8 (60)
a2 13 25/64 (340) 14 3/16(360) 10 1/4 (260)
b1 7 7/8 (200) 8 9/32 (210) 8 9/32 (210) 8 43/64 (220)
b2 14 49/64 (375) 10 61/64 (278) 10 29/32 (277) 10 9/16 (268)
b3 6 57/64 (175) 3 7/16 (87) 3 7/16 (87)
c1 3 5/32 (80) 2 9/16 (65) 1 15/16 (49) 1 31/32 (50)
*2
*1
b3
c1
Unità: pollice (mm)
IT 4
Page 79

Alimentazione
■PN-Q901/PN-Q801
Presa della
corrente elettrica
• Posizionare il monitor vicino alla presa della corrente elettrica, e
mantenere la spina a portata di mano.
■PN-Q701/PN-Q601
Presa della
corrente elettrica
2
or
2
Collegamento elettrico
Collegare la spina del monitor alla
1
presa elettrica.
• Posizionare il monitor vicino alla presa
della corrente elettrica, e mantenere la
spina a portata di mano.
NOTA
• PER PREVENIRE IL RISCHIO DI
ELETTROSHOCK, NON TOCCARE
LE PARTI NON ISOLATE DEI CAVI
QUANDO IL CAVO DI ALIMENTAZIONE
È STATO COLLEGATO.
Quando accendete il monitor per la
2
prima volta, premette ACCENSIONE
(POWER) sul monitor.
Inserite le batterie all'interno del
3
telecomando. (Guardare pagina IT 6.)
NOTA
• Gli altoparlanti non possono essere separati
dal monitor.
• L'angolazione del monitor non può essere
regolato.
•
H
PN-Q601
H
ACCENSIONE (On/Standby)
PN-Q801/PN-Q701/
ACCENSIONE
PN-Q901
ACCENSIONE
Accensione o spegnimento
dell'alimentazione
Per accendere il prodotto premere
ACCENSIONE (POWER) sul monitor o
sul telecomando.
NOTA
• L'installazione iniziale comincia quando
il monitor viene alimentato per la prima
volta. Se il monitor è stato già acceso
precedentemente, l'installazione iniziale
non verrà avviata. Per modifiche relative
alle impostazioni dell'installazione iniziale,
si prega di selezionare "Easy Setup"
(impostazione semplice) all'interno del
menu iniziale di installazione.
Per spegnere il prodotto premere
nuovamente ACCENSIONE (POWER)
sul monitor o sul telecomando.
• Il monitor entra in stand-by e l'immagine
sullo schermo sparisce.
NOTA
• Nel caso non utilizzate il monitor per un
lungo periodo di tempo, assicuratevi di
rimuovere il cavo di alimentazione dalla
presa elettrica.
• Anche quando il monitor è spento viene in
ogni caso consumata una piccola quantità
di corrente.
ITALIANOITALIANO ITALIANO DEUTSCHFRANÇAISTÜRKÇEРУССКИЙ
1
1
• Posizionare il monitor vicino alla presa della corrente elettrica, e
mantenere la spina a portata di mano.
1
IT 5
Page 80

Telecomando Collegamento
1
2
3
Sensore del telecomando
30°
30°
17´ (5 m)
30°
30°*
*: Quando il supporto è agganciato,
l'angolo è di 6°. (solamente per PN-Q901)
Installazione delle batterie
all'interno del telecomando
Se il telecomando non è in grado di gestire
le funzioni del monitor, sostituire le batterie
all'interno del telecomando.
Aprire il coperchio delle batterie.
1
Inserire due batterie “AAA” (fornite con
2
il prodotto).
• Collocare le batterie con i poli rivolti
verso le corrispondenti indicazioni (+) e
(–) all’interno dell’alloggiamento per le
pile.
Chiudere il coperchio delle pile.
3
ATTENZIONE
Un uso non adeguato può provocare la fuoriuscita
di sostanze chimiche o l’esplosione. Attenersi
scrupolosamente alle seguenti istruzioni.
• Non mischiare batterie di diverso tipo. Batterie di
diverso tipo hanno caratteristiche diverse.
• Non mischiare le pile vecchie con le nuove.
Mischiare le pile vecchie con le nuove può diminuire
la durata delle pile nuove o provocare fuoriuscita di
agenti chimici dalle vecchie.
• Rimuovere le batterie appena si scaricano. Le
sostanze chimiche che possono fuoriuscire
dalle batterie ed entrano in contatto con la pelle,
possono causare irritazioni. Se vi accorgete di una
perdita di sostanze chimiche cercare di pulirla con
un panno.
• Le batterie fornite con questo prodotto potrebbero
durare per poco tempo a causa delle tempistiche di
immagazzinamento.
• Se non utilizzate il telecomando per un periodo
prolungato, rimuovete le batterie dallo stesso.
Utilizzo del telecomando
Utilizzare il telecomando puntato verso il
sensore di controllo del monitor. Gli oggetti tra
il telecomando e il sensore di controllo possono
impedirne il corretto funzionamento.
■Avvertenze per l’uso del
telecomando
• Evitare che il telecomando subisca colpi. Inoltre,
evitare che il telecomando entri in contatto con
liquidi e non collocarlo in ambienti altamente umidi.
• Non installare o collocare il telecomando sotto la
luce solare diretta. Il calore potrebbe causare la
deformazione del telecomando.
• Il telecomando potrebbe non funzionare
propriamente, nel caso il sensore di controllo del
monitor sia posizionato sotto la luce diretta del
sole o sotto un potente fonte di luce. In tali casi
modificare l'angolo di illuminazione sul monitor,
oppure utilizzare il telecomando in prossimità del
sensore di controllo.
IMPORTANTE:
SE L'UNITÀ NON SI ACCENDE – SCOLLEGATE
IL MONITOR DALLA PRESA DI CORRENTE E
RIPETETE I PASSI PER L'INSTALLAZIONE.
Tipi di collegamento
Per collegare il monitor ad un dispositivo esterno, utilizzare i cavi disponibili in commercio.
• Le illustrazioni dei terminali sono a puro scopo esemplificativo, e potrebbero essere leggermente differenti dai
prodotti reali.
■Collegamento ad un dispositivo video o PC
■La qualità dell'immagine differisce a seconda del terminale utilizzato. Per godersi delle immagini chiare,
controllare uscite del proprio dispositivo esterno e utilizzare le porte appropriate per immagini ad alta
qualità.
Qualità
dell'immagine
Qualità
HD
Qualità
standard
Ingressi del
monitor
Cavo Pagine
Cavo HDMI certificato
Cavo stereo minijack da Ø 3.5 mm
Cavo HDMI certificato
Cavo video component
Cavo audio
Cavo di alimentazione
■Collegamento ad un dispositivo audio
Controllare le uscite del dispositivo esterno utilizzando le porte appropriate.
Ingressi del monitor Cavo
Cavo ottico
Cavo audio
Ingressi del
dispositivo esterno
AUDIO
Ingressi del dispositivo
esterno
OPTICAL
DIGITAL AUDIO INPUT
ANALOG AUDIO IN
IT 7, IT 8
Pagine
IT 8
IT 7
IT 7
IT 8
IT 8
IT 6
Page 81

Collegamento
PR (Rosso)
Potrete collegare al vostro monitor molti tipi di dispositivi esterni. Per visionare sorgenti esterne di immagini,
selezionare la sorgente di input, premendo INPUT sul telecomando o sul monitor.
Per collegare il monitor ad un dispositivo esterno, utilizzare i cavi disponibili in commercio.
ATTENZIONE
• Per preservare il dispositivo, spegnere sempre il monitor prima di collegare qualsiasi dispositivo esterno.
• Si prega di leggere attentamente il manuale operativo relativo (lettore Blu-ray, ecc.) prima di eseguire qualsiasi
collegamento.
Collegamento di un lettore Blu-ray/DVD o di un decoder HD/ satellitare
■Quando si utilizza un cavo HDMI (HDMI IN 1, 2 o 3):
• Il terminale HDMI (High Definition Multimedia Interface) è un'interfaccia audio-video che permette un collegamento
tra segnali audio e video utilizzando un singolo cavo. L'ingresso HDMI IN supporta input video in alta risoluzione.
• Per godersi il formato 1080p, collegare il proprio dispositivo esterno utilizzando un cavo certificato HDMI o un cavo
component, e impostare il dispositivo sull'uscita 1080p.
• Formati audio supportati: Linear PCM, Dolby Digital, DTS, campionamento a 32/44.1/48kHz.
• Quando si collega un dispositivo compatibile ARC, utilizzare la porta HDMI IN 1.
Cavo HDMI certificato
HDMI OUT
■Quando si utilizza un cavo component (COMPONENT/VIDEO IN):
• Per godersi il formato 1080p, collegare il proprio dispositivo esterno utilizzando un cavo certificato HDMI o un cavo
component, e impostare il dispositivo sull'uscita 1080p.
• Quando si collega un cavo component al l'entrata COMPONENT/VIDEO IN, selezionare l'input su COMPONENT.
P
(Blu)
B
Y (Verde)
Cavo video component
Collegamento di videoregistratore, console di gioco, videocamera o decoder via
cavo/satellitare
■Quando si utilizza un cavo composito (COMPONENT/VIDEO IN o VIDEO IN 1):
• Quando collegate un cavo AV all'entrata COMPONENT/VIDEO IN, scegliete l'input VIDEO.
Cavo di alimentazione
VIDEO (Giallo)
AUDIO-L (Bianco)
AUDIO-R (Rosso)
Cavo di alimentazione
VIDEO (Giallo)
AUDIO-L (Bianco)
AUDIO-R (Rosso)
ITALIANOITALIANO ITALIANO DEUTSCHFRANÇAISTÜRKÇEРУССКИЙ
AUDIO-L
AUDIO-R
(Bianco)
(Rosso)
COMPONENT OUT
Cavo audio
IT 7
Page 82

Collegamento
Cavo HD/decoder satellitare
Cavo ottico
Collegamento di un sistema audio/surround
■Quando si collega un amplificatore AV per un sistema surround
• Permettete al monitor si far uscire l'audio attraverso un amplificatore AV:
*1 Quando collegate un dispositivo compatibile ARC, utilizzate la porta HDMI IN 1.
• Se l'immagine non è sincronizzata all'audio, controllate le impostazioni del sistema surround collegato.
Cavo certificato HDMI *1
OPTICAL
DIGITAL AUDIO INPUT
HDMI INHDMI OUT
■Quando collegate un amplificatore audio
È possibile far uscire l'audio attraverso un'USCITA AUDIO DIGITALE (DIGITAL AUDIO OUT)
• In questo caso, impostare “AUDIO DIGITALE” (DIGITAL AUDIO) su “PCM” o "Bitstream". (Fare riferimento al manuale
operativo integrato.)
Cavo ottico
OPTICAL
DIGITAL AUDIO INPUT
Cavo audio
HDMI OUT
Collegamento di un PC
Fare riferimento al manuale operativo integrato per un elenco dei segnali PC compatibili con il monitor.
■Quando si utilizza un cavo HDMI (HDMI IN 1, 2 o 3):
• A seconda della scheda, potrebbe essere possibile far uscire solamente i segnali video. In questo caso, oltre a
collegare un cavo certificato HDMI alla porta HDMI IN 2, collegare un cavo stereo minijack da Ø 3.5 mm all'ingresso
AUDIO IN e impostare la “Selezione audio” (Audio Select) su "HDMI+Analogico" (HDMI+Analog). (Fare riferimento al
manuale operativo integrato.)
• I terminali HDMI IN supportano solamente il segnale digitale.
Cavo certificato HDMI
HDMI OUT
o
Cavo certificato HDMI
HDMI OUT
Cavo stereo minijack da Ø 3.5 mm
■Quando si utilizza un cavo RGB Analogico (PC IN):
• Quando si utilizza un cavo RGB analogico, è necessario far uscire il segnale audio dell'ingresso AUDIO IN usando la
porta PC IN.
Cavo RGB analogico (cavo D-sub 15-pin o cavo VGA)
AUDIO
ANALOG AUDIO IN
IT 8
Cavo stereo minijack da Ø 3.5 mm
RGBAUDIO
Page 83

Introduzione
3
Visionare il manuale operativo integrato
Installazione iniziale
Eseguire i seguenti passi prima di premere
Il pulsante di ACCENSIONE (POWER)
sul telecomando.
Inserire le batterie all'interno del
1
telecomando.
Collegare il cavo di alimentazione alla
2
presa di alimentazione.
Lingua (impostazione della lingua)
Visionare il manuale operativo integrato
Premere MANUALE (MANUAL) sul telecomando per visualizzare sullo schermo le informazioni operative.
Per cercare una voce dalla tabella dei contenuti, e per cercare un termine particolare e trovare informazioni
relative alla soluzione dei problemi, premere MANUALE (MANUAL) mentre si sta visualizzando il monitor e
successivamente selezionare la voce dalla pagina principale del manuale che appare.
Premere MANUALE (MANUAL) mentre si sta visualizzando il monitor.
1
Questo visualizzerà la schermata del manuale operativo integrato.
Quando selezionate i contenuti, le rispettive pagine verranno visualizzate.
2
Potrete girare pagina per pagina utilizzando le frecce.
3
ITALIANOITALIANO ITALIANO DEUTSCHFRANÇAISTÜRKÇEРУССКИЙ
Selezionare tra i sei linguaggi disponibili:
inglese, francese, spagnolo, tedesco,
italiano e russo.
Premere a/b per selezionare il
1
linguaggio desiderato elencato sullo
2
schermo, e successivamente premere
ENTER.
ETHERNET terminal
AUDIO IN terminal
PC IN
terminal
(shared for PC IN and
HDMI IN 2) *2
VIDEO IN 1 terminals
AUDIO OUT terminals
COMPONENT/
VIDEO IN
terminals
*5
HDMI IN 2 terminal
HDMI IN 1 terminal
ARC: Audio
Return Channel
*3
DIGITAL AUDIO OUT
terminal
1
Risparmio energetico
Selezionare “Sì” o “No” per configurare le
impostazioni di default del display.
Premere a/b
2
Premere ENTER per accedere alle
per selezionare “Sì” o “No”
impostazioni
Completato
Viene visualizzata la schermata
3
di conferma delle impostazioni.
Confermare le informazioni visualizzate
sulla schermata e successivamente
premere ENTER.
Esempi di schermata per la
conferma delle impostazioni
NOTA
• Potrete inoltre visualizzare il manuale operativo integrato selezionando "Informazioni" (Information) > "Manuale"
(Manual) dalla schermata del menù.
• Quando vengono utilizzate le modalità USB, Home network o Internet, non è possibile visualizzare il manuale
operativo integrato.
ENG 1-1
IT 9
Page 84

Utilizzo di un PC
Regolazione dell'immagine del PC
Potrete regolare la posizione degli input
dell'immagine del PC selezionando
“Impostazioni iniziali” (Initial Setup) > "Impostazioni
input” (Input Settings) > "Sincronizzazione specifica”
(Fine Sync.)
Sincronizzazione specifica (Fine Sync.)
Normalmente potrete regolare facilmente l'immagine
modificando la posizione dell'immagine utilizzando la
funzione "Sincronizzazione automatica” (Auto Sync.).
In ogni caso, a volte è necessaria una regolazione
manuale per ottimizzare l'immagine.
Input del segnale: Selezionare l'input del segnale.
1024×768
1360×768
Sincronizzazione automatica (Auto Sync.): Per
regolare automaticamente l'immagine del PC.
Sì : La Sincronizzazione automatica (Auto Sync.)
inizia e viene visualizzato il messaggio “Ora è
possibile regolare l'immagine”.
No : Questa funzione non è attiva.
Pos. O. : Centrare l’immagine spostandola a
sinistra o a destra.
Pos. V. : Centrare l’immagine spostandola verso
l’alto o verso il basso.
Clock : Regola quando l’immagine balla con
strisce verticali.
Fase : Regola quando i caratteri hanno un
basso contrasto o quando l’immagine
balla.
NOTA
• La Sincronizzazione automatica (Auto Sync.) potrebbe
non riuscire se l'immagine del computer ha una
bassa risoluzione, margini non definiti (neri) o viene
spostata durante l'esecuzione della “Sincronizzazione
automatica” (Auto Sync.).
• Assicuratevi di collegare il PC al monitor e accendetelo
prima di avviare la funzione di “Sincronizzazione
automatica” (Auto Sync.)
• Non è necessario regolare “Orologio” o “Fase” quando
un segnale digitale viene selezionato come input,
quindi la funzione non può essere selezionata.
• La posizione di default del cursore potrebbe non essere
al centro, dato che i range variabili della posizione dello
schermo potrebbero essere asimmetrici.
• I range variabili della posizione dello schermo
dipendono dalla modalità di visualizzazione o dal tipo
di segnale. I range possono essere visualizzati nella
schermata di impostazione della posizione.
Impostazione input audio
Selezione dell'audio
Questa funzione imposta l'uscita dell'audio del
computer.
Le voci per la regolazione possono variare a seconda
della sorgente di input.
Selezionare la sorgente di input corrispondente alla
porta collegata al PC e successivamente regolate
l'impostazione desiderata.
Per eseguire questa operazione, fare riferimento a
"Impostazioni iniziali” (Initial Setup) > "Impostazioni
di input” (Input Settings) > "Seleziona audio” (Audio
Select).
HDMI 2
HDMI2(Digitale) : Selezionate questa
HDMI+Analogico : Selezionate questa funzione
NOTA
• Quando viene impostato “Seleziona audio” su “HDMI+
analogico”, il suono non verrà riprodotto se utilizzate
solamente un cavo HDMI certificato per connettere il
dispositivo compatibile HDMI. Per riprodurre il suono,
dovrete utilizzare un collegamento audio analogico.
• Se desiderate collegare un dispositivo compatibile
HDMI utilizzando solamente un cavo certificato HDMI,
impostate “Seleziona audio” su "HDMI2(Digitale)".
funzione quando il monitor
e il PC sono collegati
utilizzando un cavo HDMI
certificato e l'audio viene
trasmesso tramite lo stesso
cavo.
quando il monitor e il PC
sono collegati utilizzando
un cavo HDMI certificato
e l'audio viene trasmesso
tramite un cavo stereo
minijack da Ø 3.5 mm.
Controllo del monitor
• Il monitor può essere controllato tramite PC,
pannelli di controllo e altri dispositivi che utilizzano
RS-232C o IP.
• Per i collegamenti utilizzare un cavo RS-232C,
ETHERNET (disponibile in commercio).
NOTA
• Questo sistema operativo deve essere utilizzato da una
persona abituata ad utilizzare i computer.
Controllo IP
Impostare questa funzione quando si utilizza il
monitor da un dispositivo collegato tramite LAN.
Per eseguire questa operazione, fare riferimento alle
“Impostazioni di rete” (Network Settings).
Controllo IP
Quando si seleziona il “Controllo IP”, viene
evidenziata la voce “Modifica”. Premere ENTER.
Impostazioni dettagliate
Inserire le informazioni dettagliate (ID login,
password, ecc.).
Seguire le istruzioni sullo schermo per
configurare le impostazioni.
Nome del dispositivo
• Impostare il nome del monitor visualizzato su altri
dispositivi appartenenti alla rete.
Utilizzare la tastiera del software per impostare il
nome.
Cavo incrociato RS-232C
Cavo ETHERNET
Condizioni di comunicazione tramite RS-232C
Le impostazioni del protocollo di comunicazione
RS-232C sul PC sono identiche alle condizioni
di comunicazione del monitor. Le impostazioni di
comunicazione del monitor sono le seguenti:
Baud rate: 9,600 bps
Ampiezza del
dato:
Bit di parità: Nessuno
Stop bit: 1 bit
Controllo del
flusso:
8 bit
Nessuno
Condizioni di comunicazione per l'IP
Collega il monitor utilizzando le seguenti impostazioni
create per l'IP sul PC
Protocollo IP TCP/IP
Indirizzo Host IP: Imposta l'indirizzo IP nel menù
Servizio: Nessuno (Non selezionare
Porta TCP#: Imposta il numero della porta
del monitor
Telnet o SSH)
nel menù del monitor (Porta di
controllo)
Quando si impostano i propri ID e password nel
menù del monitor, è necessario inserirli appena si
connette il monitor.
NOTA
• Quando si utilizza questa funzione, completare le
impostazioni per il “Controllo IP”.
• Il collegamento verrà annullato se manca la
comunicazione per 3 minuti.
LAN
Hub
IT 10
Page 85

Utilizzo di un PC
Codice di
Procedura di comunicazione
Invia i comandi di controllo dal PC tramite RS-232C
o IP.
l televisore funziona in base al comando ricevuto ed
invia un messaggio di risposta al PC.
Non inviare più di un comando alla volta. Attendere
fino a quando il PC riceve la risposta OK, prima di
inviare il comando successivo.
Formato del comando
Otto codici ASCII +CR
C1 C2 C3 C4 P1 P2 P3 P4
Comando a quattro
cifre
Parametro a quattro
cifre
ritorno
Comando a quattro cifre: Comando. Testo di quattro
caratteri.
Parametro a quattro cifre: Parametro 0-9, x, bianco, ?
Parametro
Immettere i valori dei parametri, allinearli a sinistra
e riempire con spazi il resto (controllare di aver
immesso quattro valori per il parametro).
Se il paramento immesso non è compreso in una
gamma regolabile, comparirà il messaggio “ERR”
(Vedere “Formato del codice di risposta”).
All'interno della tabella, qualsiasi valore numerico può
sostituire "x".
0
0009
— 3 0
Il valore d’impostazione corrente
compare quando per alcuni
comandi
s’immette
“?”.
?
????
Formato del codice di risposta
Risposta normale
O K
Codice di ritorno (0DH)
Risposta per problema
(errore di comunicazione o comando errato)
E R R
Codice di ritorno (0DH)
Tabella dei comandi
• I comandi qui non indicati potrebbero non funzionare.
*1 Solamente per RS-232C.
Puoi utilizzare la funzione "Wake On LAN (Magic Packet)" per accendere l'alimentazione tramite LAN. Non è possibile accendere il monitor con il comando
di controllo IP.
VOCE DI CONTROLLO COMANDO PARAMETRO CONTENUTI RELATIVI AI CONTROLLI
ACCENSIONE
IMPOSTAZIONE DEI COMANDI
IMPOSTAZIONI DI ACCENSIONE P O W R 0 _ _ _ Accensione Passa alla modalità di stand-by
INPUT
SELEZIONE
SELEZIONE MODALITÀ AV A V M D * _ _ _ 0: (Pulsante a due funzioni), 1: STANDARD,
VOLUME V O L M * * * _ Volume (0-100)
POSIZIONE POSIZIONE H H P O S * * * _ (-50-50) Per l'input del PC
MODALITÀ DI VISUALIZZAZIONE W I D E * * _ _ 0: (Pulsante a due funzioni) [AV],
SILENZIAMENTO M U T E * _ _ _ 0: (Pulsante a due posizioni), 1: On, 2: Off
SURROUND A C S U * _ _ _ 0: (Pulsante a due posizioni), 1: On, 2: Off
SELEZIONE AUDIO A C H A x _ _ _ (Pulsante a due posizioni)
SPEGNIMENTO O F T M * _ _ _ 0: Off,
CC C L C P x _ _ _ (Pulsante a due posizioni) Utilizzo del tasto a due funzioni per i sottotitoli
NOME DISPOSITIVO T V N M 1 _ _ _ Viene visualizzato il nome del dispositivo
NOME MODELLO M N R D 1 _ _ _ Il nome del modello del monitor
VERSIONE
SOFTWARE
VERSIONE
PROTOCOLLO IP
PULSANTI DEL
TELECOMANDO
PULSANTE A
DUE FUNZIONI
1-6 I A V D * _ _ _ 1: HDMI IN1, 2: HDMI IN 2,
POSIZIONE V V P O S * * * _ (-50-50)
OROLOGIO C L C K * * * _ (0-100)
FASE P H S E * * _ _ (0-63)
NOTA
• Se appare un underscore (_) nella colonna del parametro, inserire uno spazio.
• Se appare un asterisco (*), inserire un valore nell'intervallo indicato tra le parentesi nei CONTENUTI RELATIVI AI CONTROLLI.
• All'interno della tabella, qualsiasi valore numerico può sostituire "x".
R S P W 0 _ _ _ Off Il comando di accensione è stato rifiutato.
I T G D x _ _ _ (Pulsante a due funzioni) Permette di utilizzare gli input utilizzando il
S W V N 1 _ _ _ Viene visualizzata l'attuale versione del software
I P P V 1 _ _ _ Viene visualizzata l'attuale versione del protocollo
R C K Y * * _ _ 0-9: 0-9, 10: PUNTO, 12: ACCENSIONE, 13: DISPLAY, 23: OPZIONE, 24: SOSPENSIONE, 31:
1 _ _ _ On [RS-232C] Il comando di accensione è stato accettato.
2 _ _ _ On [IP] Il comando di accensione è stato accettato.
1 _ _ _ Spegnimento Accensione
3: HDMI IN 3, 4: VIDEO IN 1,
5: COMPONENT/VIDEO IN 2,
6: PC IN
2: FILM,
4: UTENTE, 5: DINAMICO (Fisso),
6: DINAMICO, 7: PC
1: Barra laterale [AV],
2: S.Stretch [AV],
3: Zoom [AV],
4: Stretch [AV, USB-Video, Home Network
Video o applicazioni Internet],
5: Normale [PC],
7: Stretch [PC],
8: Punto per punto [PC] [AV],
9: Schermo intero [AV],
10: Auto [USB-Video, USB-Foto, Home Network
Video, Foto o applicazioni Internet],
11: Originale [USB-Video, USB-Foto, Home
Network Video, Foto o applicazioni Internet ]
1: OFF TIMER - 30 MIN., 2: OFF TIMER - 60 MIN.,
3: OFF TIMER - 90 MIN., 4: OFF TIMER - 120 MIN.
MUTO, 32: VOL -, 33: VOL +, 34: CH
43:a, 44:a, 45: INDIETRO, 46: ESCI, 49: AUDIO, 50: A (rosso), 51: B (verde), 52: C (blu), 53: D (giallo),
61: MANUALE
, 35: CH , 36: INPUT, 38: MENÙ, 40: ENTER, 41: a, 42: b,
*1
pulsante a due funzioni. (È lo stesso che utilizzare
per la modifica un tasto di input.)
Anche se può essere scelto ora, è l'operazione
del pulsante due funzioni all'interno.
I range variabili della posizione della schermata
dipendono dalla modalità di visualizzazione o
dal tipo di segnale. I range possono essere
visualizzati nella schermata di impostazioni della
posizione.
0: Anche se può essere scelto ora, è l'operazione
del pulsante due funzioni all'interno.
1: Disponibile solamente quando come segnale
viene selezionato l'input 4:3.
5: Disponibile solamente quando come segnale
viene selezionato l'input 4:3.
8: [PC] Disponibile tranne quando viene utilizzato
l'input UXGA.
[AV] Disponibile solamente quando viene
utilizzato l'input 1080i/p.
9: Disponibile solamente quando viene utilizzato
l'input 720p.
10, 11: Disponibile quando viene utilizzato USB-
Video, USB-foto, Home Network Video, foto o
le applicazioni in Internet.
criptati.
impostato all'interno delle “Impostazioni relative al
nome del dispositivo”.
del monitor.
IP supportato.
IT 11
ITALIANOITALIANO ITALIANO DEUTSCHFRANÇAISTÜRKÇEРУССКИЙ
Page 86

Risoluzione dei problemi
Problema Possibile soluzione
• Manca l’alimentazione elettrica. • Controllare se avete premuto ACCENSIONE (POWER) sul telecomando.
• Il cavo CA è scollegato?
• L'alimentazione è stata accesa?
• Il telecomando non funziona.
• Nessuna immagine.
• Nessun suono.
• Le batterie sono state inserite con la polarità (+, -) allineata?
• I collegamenti con altre componenti sono corretti?
• I collegamenti con altre componenti sono corretti?
Pagina
IT 5
.
Pagina
IT 5
.
Pagina
IT 5
.
Pagina da
Pagina da
Pagina
IT 7
IT 7
a
a
IT 6
IT 8
IT 8
.
.
.
IT 12
Page 87

Присоединение подставки
TOP-R
■PN-Q701/PN-Q601
1
2
1
3
Мягкий
амортизирующий
материал
• Перед подсоединением (или
отсоединением) подставки выньте
шнур питания переменного тока.
• Прежде чем приступать к
3
2
1
Винты
Винты
выполнению работ, разложите
на рабочей поверхности
амортизирующие подушки, чтобы
положить на них монитор. Это
предотвратит его повреждение.
ВНИМАНИЕ
• Строго следуйте инструкциям.
Некорректная установка подставки
может стать причиной падения
монитора.
Проверьте наличие прилагаемых
1
к подставке 10 винтов.
Установите стойку подставки на
2
1
блоке из пенополистирола.
2 Прикрепите основание к стойке.
Вставьте и затяните 6 винтов
3
крепления в 6 отверстиях снизу
основания.
• Надежно удерживая подставку
одной рукой, затяните винты.
Вставьте подставку в отверстия
1
3
снизу монитора.
• Проследите за тем, чтобы
подставка была надежно до
упора вставлена в монитор.
Неверная установка может
привести к наклону монитора.
Вставьте и затяните 4 винта
2
крепления в 4 отверстиях сзади
монитора.
■PN-Q801
1
2
(Пример: правая подставка)
Основание
подставки
Подпорка для
подставки
"R"
Винты
• Перед подсоединением (или
отсоединением) подставки выньте
шнур питания переменного тока.
• Прежде чем приступать к
выполнению работ, разложите
на рабочей поверхности
амортизирующие подушки, чтобы
положить на них монитор. Это
1
предотвратит его повреждение.
ВНИМАНИЕ
• Строго следуйте инструкциям.
Некорректная установка подставки
может стать причиной падения
монитора.
Проверьте наличие прилагаемых
1
к подставке 12 винтов.
Вставьте стойку подставки
2
1
2
3
TOP-R в блок из
пенополистирола.
2 Прикрепите основание к стойке.
3 Вставьте и затяните 4 винтов
крепления в 4 отверстиях снизу
основания.
• Надежно удерживая подставку
одной рукой, затяните винты.
Соберите левую подставку
4
точно также, как и правую.
ENGLISHITALIANO DEUTSCHESPAÑOL FRANÇAISРУССКИЙTÜRKÇE
• Выполняя процедуру установки,
будьте осторожны, чтобы не
защемить пальцы между монитором
в сборе и поверхностью, на которой
он лежит.
• Не снимайте с монитора
подставку, пока на нем
установлено дополнительное
крепление к стене.
• После присоединения подставки
к монитору, не удерживайте
монитор за подставку, если
его нужно поднять, поставить,
переместить или положить.
RU 1
"L"
4
Page 88

Присоединение подставки
Подготовьте рабочий стол. (См.
Винты
4
Мягкий
Soft cushion
амортизирующий
материал
3
стр. RU 3.)
Вставьте подставку в отверстия
4
сзади монитора и затем затяните
4 винта в 4 отверстиях сзади узла
подставки.
• Проследите за тем, чтобы
подставка была надежно до упора
вставлена в монитор. Неверная
установка может привести к
наклону монитора.
Подставки можно установить в
5
монитор так, чтобы они были
обращены внутрь и наружу
относительно монитора.
Единицы измерения: дюймы (мм)
A 65 7/8 (1673)
1
2
■PN-Q901
2
1
1
ВИД
СПЕРЕДИ
Длинные
винты
3
5
4
Короткие винты
A
2
ВНИМАНИЕ
• Выполняя процедуру
установки, будьте осторожны,
чтобы не защемить пальцы
между монитором в сборе и
поверхностью, на которой он
лежит.
• Не снимайте с монитора
подставку, пока на нем
установлено дополнительное
крепление к стене.
• После присоединения
подставки к монитору,
не удерживайте монитор
за подставку, если его
нужно поднять, поставить,
переместить или положить.
Мягкий амортизирующий
материал
2
1
1
• Перед подсоединением (или
отсоединением) подставки выньте
шнур питания переменного тока.
• Прежде чем приступать к
выполнению работ, разложите
на рабочей поверхности
амортизирующие подушки, чтобы
положить на них монитор. Это
предотвратит его повреждение.
ВНИМАНИЕ
• Строго следуйте инструкциям.
Некорректная установка подставки
может стать причиной падения
монитора.
Проверьте наличие прилагаемых
1
к подставке 12 винтов (8 длинных
и 4 коротких).
Установите стойку подставки на
2
1
блоке из пенополистирола.
2 Прикрепите основание к стойке.
Вставьте и затяните 8 винтов
3
крепления в 8 отверстиях снизу
основания.
• Надежно удерживая подставку
одной рукой, затяните винты.
Подготовьте рабочий стол. (См.
3
стр. RU 3.)
Вставьте подставку в отверстия
1
4
снизу монитора.
• Проследите за тем, чтобы
подставка была надежно до
упора вставлена в монитор.
Неверная установка может
привести к наклону монитора.
Вставьте и затяните 4 винта
2
крепления в 4 отверстиях сзади
монитора.
• Выполняя процедуру
установки, будьте осторожны,
чтобы не защемить пальцы
между монитором в сборе и
поверхностью, на которой он
лежит.
• Не снимайте с монитора
подставку, пока на нем
установлено дополнительное
крепление к стене.
• После присоединения подставки
к монитору, не удерживайте
монитор за подставку, если
его нужно поднять, поставить,
переместить или положить.
RU 2
Page 89

Присоединение подставки
1
Вставные язычки
2
3
TOP-L
TOP-L
ВИД СЗАДИ
TOP-R
PN-Q901
ЛИНИЯ
TOP-C
КОРОБКА
1
КОРОБКА
TOP-L
2
TOP-R
TOP-C
ЛИНИЯ
TOP-C
TOP-R
СОЕДИНИТЕЛЬ
Только для моделей на 90/80
дюймов
Подготовка рабочего стола
Прежде чем присоединять подставку к
монитору, подготовьте рабочий стол,
на котором будет находиться монитор.
• Для подготовки рабочего стола
используйте амортизационные
материалы, применяемые для
упаковки.
• Для сборки узла подставки также
используется элемент TOP-C из
комплекта упаковочных материалов.
Прежде чем подготавливать рабочий
стол, обязательно соберите узел
подставки.
Уставьте каждый из
1
амортизирующих блоков в
соответствующем направлении,
показанном на рисунке.
• Вставьте элементы TOP-L и TOP-R
с левой и с правой сторон коробки
соответственно.
• Вставьте элемент TOP-C, чтобы
он находился между линиями, с
другой стороны коробки.
В коробке предусмотрены
2
вставные язычки для фиксации
амортизирующего материала
на месте. Вставьте язычки (по
2 в каждом из указанных мест),
чтобы закрепить амортизирующий
материал в коробке.
PN-Q901
После подготовки рабочего стола
3
Закрепите соединители и закройте
корпус.
Вставьте соединитель в
1
отверстие сбоку корпуса.
Нажав на ушко, закрепите
2
соединитель на месте.
положите одеяло или аналогичную
мягкую ткань поверх стола и
положите монитор экраном вниз
на накрытый стол, чтобы затем
прикрепить к нему подставку.
• Не используйте для этих операций
стол недостаточного размера.
• Чтобы получить сведения о
присоединении подставки, см. стр.
RU 1 - RU 2.
ENGLISHITALIANO DEUTSCHESPAÑOL FRANÇAISРУССКИЙTÜRKÇE
RU 3
Page 90

Установка монитора на стене
ВНИМАНИЕ
• Установка монитора требует особых
навыков и должна выполняться только
квалифицированным сервисным персоналом.
Покупателю не следует пытаться проводить
эти работы самостоятельно. SHARP не несет
ответственности за неправильно выполненный
монтаж или несчастные случаи и травмы,
возникшие в процессе монтажа.
Подвешивание на стене
Комплект для настенного монтажа (продается
отдельно) позволяет смонтировать монитор на
стене. Для получения подробной информации об
установке настенного кронштейна обратитесь к
инструкции, которая прилагается к изделию.
Для установки данного изделия рекомендуем
обратиться за помощью к специалисту.
Компания SHARP не несет ответственности ни
за какие повреждения изделия, травмы или иной
ущерб, если вы решили установить настенный
кронштейна.
ВНИМАНИЕ
• Устанавливайте настенный кронштейн на
прочной стене перпендикулярно полу.
Если вы желаете прикрепить настенный
кронштейн к поверхности, отличной от
отштукатуренной панели, обратитесь к
ближайшему продавцу/консультанту, чтобы
получить дополнительную информацию. При
установке монитора на потолке или наклонной
стене, он может упасть и нанести серьезные
травмы. Монтировать монитор на стену
необходимо вдвоем.
ПРИМЕЧАНИЕ
• При настенном монтаже этой модели, имеющей
специфическую конфигурацию терминалов,
необходимо проследить за тем, чтобы между
стеной и монитором было достаточно свободного
пространства для подключения кабелей.
• Перед монтажом монитора на стене снимите
держатель шнура питания на задней стенке,
затем с помощью винтов, которые идут в
комплекте с настенным кронштейном закрепите
кронштейн на задней стенке монитора.
Спецификации комплектов для настенного монтажа
Ниже приведены стандартные размеры комплектов для настенного монтажа приведены ниже
:
*1
СТЕНА
:
*2
КОМПЛЕКТ ДЛЯ НАСТЕННОГО МОНТАЖА
:
a1
Максимальное расстояние от монтажного отверстия.
:
a2
Максимальное расстояние от центра монитора.
:
b1
Расстояние от центра монитора до монтажного отверстия.
:
b2
Максимальное расстояние от центра монитора.
:
b3
Максимальное расстояние от монтажного отверстия.
:
c1
Минимальный зазор.
*1
a1
a2
*2
b1
B
b2
b3
A
PN-Q901 PN-Q801 PN-Q701 PN-Q601
(A-B) 23 5/8 (600) - 15 3/4 (400) 15 3/4(400) - 15 3/4(400)
a1 1 37/64 (40) 2 3/8 (60) 2 3/8 (60)
a2 13 25/64 (340) 14 3/16 (360) 10 1/4 (260)
b1 7 7/8 (200) 8 9/32 (210) 8 9/32 (210) 8 43/64 (220)
b2 14 49/64 (375) 10 61/64 (278) 10 29/32 (277) 10 9/16 (268)
b3 6 57/64 (175) 3 7/16 (87) 3 7/16 (87)
c1 3 5/32 (80) 2 9/16 (65) 1 15/16 (49) 1 31/32 (50)
*2
Единицы измерения: дюймы (мм)
c1
RU 4
Page 91

Блок питания переменного тока
■PN-Q901/PN-Q801
Розетка
электросети
• Размещайте монитор недалеко от розетки электросети и
держите вилку сетевого шнура в пределах досягаемости.
■PN-Q701/PN-Q601
Розетка
электросети
2
или
2
Подключение к электросети
Подключите вилку сетевого шнура
1
монитора к розетке электросети.
• Размещайте монитор недалеко
от розетки электросети и держите
вилку сетевого шнура в пределах
досягаемости.
ПРИМЕЧАНИЕ
• ВО ИЗБЕЖАНИЕ ПОРАЖЕНИЯ
ЭЛЕКТРИЧЕСКИМ ТОКОМ,
НЕ ПРИКАСАЙТЕСЬ К
НЕИЗОЛИРОВАННЫМ ЧАСТЯМ
НИКАКИХ КАБЕЛЕЙ, КОГДА ШНУРЕ
ЭЛЕКТРОПИТАНИЯ ПОДКЛЮЧЕН К
СЕТИ.
При включении монитора в первый
2
раз, нажмите кнопку POWER на
мониторе.
Вставьте батарейки в пульт
3
дистанционного управления. (См.
RU 6
.)
стр.
ПРИМЕЧАНИЕ
• Динамики не отсоединяются от
монитора.
• Угол наклона монитора не
регулируется.
H
PN-Q801/PN-Q701/
PN-Q601
H
PN-Q901
POWER (включение/режим ожидания)
POWER
POWER
Включение/выключение
электропитания
Для включения питания монитора
нажмите кнопку POWER на мониторе
или на пульте дистанционного
управления.
ПРИМЕЧАНИЕ
• При первом включении монитора будет
запущена процедура первоначальной
установки. Если монитор включался
ранее, то процедура первоначальной
установки не будет активироваться.
Для изменения настроек, заданных при
первоначальной установке, выберите
пункт "Простая настройка" в меню
"Первоначальная установка".
Чтобы выключить питание
монитора, снова нажмите кнопку
POWER на мониторе или на пульте
дистанционного управления.
• Монитор перейдет в режим
ожидания, и изображение на экране
исчезнет.
ПРИМЕЧАНИЕ
• Если вы не собираетесь пользоваться
этим монитором в течение длительного
периода времени, обязательно
отсоедините шнур электропитания от
розетки электросети.
• Монитор потребляет небольшое
количество электроэнергии даже в
выключенном состоянии.
ENGLISHITALIANO DEUTSCHESPAÑOL FRANÇAISРУССКИЙTÜRKÇE
1
1
• Размещайте монитор недалеко от розетки электросети и
держите вилку сетевого шнура в пределах досягаемости.
1
RU 5
Page 92

Пульт дистанционного управления
1
2
3
Установка батареек в пульт
дистанционного управления
Если пульт дистанционного управления
перестал работать с монитором, следует
заменить батарейки в пульте дистанционного
управления.
Откройте крышку батарейного
1
отсека.
Вставьте две батарейки размера
2
"AAA" (поставляются с изделием).
• Разместите батареи таким
образом, чтобы их контакты
соответствовали значкам (+) и (-) в
гнездах батарейного отсека.
Закройте крышку батарейного
3
отсека.
ВНИМАНИЕ
Неправильное использование батарей может
привести к утечке химикатов или взрыву.
Обязательно следуйте приведенным ниже
инструкциям.
• Не используйте вместе батареи различных
типов. Различные типы батарей имеют
различные характеристики.
• Не используйте вместе старые и новые
батареи. Использование вместе старых
и новых батарей может сократить срок
эксплуатации новых батарей или вызвать
утечку химикатов в старых батареях.
• Сразу же извлекайте разряженные батарейки.
Вытекающий из батареек электролит при
попадании на кожу может вызвать сыпь. Если
вы обнаружите следы утечек химических
веществ, тщательно протрите пульт куском
ткани.
• Из-за длительного хранения, поставляемые в
комплекте с изделием батарейки могут иметь
сокращенный срок эксплуатации.
• Если вы не будете пользоваться пультом
дистанционного управления в течение
длительного периода времени, извлеките из
него батарейки.
Датчик дистанционного
управления
30°
30°
17´ (5 m)
30°
30°*
*: Когда присоединена
подставка, угол составляет 6°.
(только для PN-Q901)
Использование пульта
дистанционного управления
При использовании пульта дистанционного
управления, направляйте его в сторону
приемника сигналов дистанционного
управления на мониторе.
Предметы, которые окажутся между пультом
дистанционного управления и датчиком
дистанционного управления, могут помешать
правильной работе пульта.
■Предостережения относительно
пульта дистанционного
управления
• Не подвергайте пульт дистанционного
управления ударам. Кроме того, не
подвергайте пульт дистанционного
управления воздействию жидкостей, а также
не размещайте его в местах с высокой
влажностью.
• Не устанавливайте и не размещайте пульт
дистанционного управления под прямым
солнечным светом. Пульт дистанционного
управления может деформироваться от
воздействия тепла.
• Пульт дистанционного управления может
работать неправильно, если на приемник
сигналов дистанционного управления
попадают прямые солнечные лучи или яркий
свет. В этом случае измените угол освещения
или монитора, или используйте пульт
дистанционного управления ближе к приемнику
сигналов дистанционного управления.
ВАЖНО:
ЕСЛИ УСТРОЙСТВО НЕ ВКЛЮЧАЕТСЯ –
ОТСОЕДИНИТЕ МОНИТОР ОТ РОЗЕТКИ
ЭЛЕКТРОСЕТИ И ПОВТОРИТЕ ЭТАПЫ
УСТАНОВКИ.
RU 6
Page 93

Подключение
PR (Красный)
Типы подключения
Для подключения к монитору внешнего оборудования используйте имеющиеся в продаже
кабели.
• Изображения терминалов приведены с иллюстративными целями и могут содержать некоторые отличия
от реальных изделий.
■Подключение видеовоспроизводящего оборудования или ПК
Качество изображения меняется в зависимости от используемого терминала. Для просмотра более
четких изображений, проверьте выходные терминалы внешнего оборудования и используйте
соответствующие терминалы для вывода изображения высокого качества.
Качество
изображения
Качество
HD
Стандартное
качество
■Подключение акустического оборудования
Проверьте выходные терминалы внешнего оборудования и используйте соответствующие
терминалы монитора.
Терминал на мониторе
Терминал на
мониторе
Кабель
Сертифицированный кабель HDMI
Кабель с разъемом "мини-джек" Ø3,5 мм
Сертифицированный кабель HDMI
Кабель компонентного видеосигнала
Аудиокабель
AV-кабель
Кабель
Оптоволоконный кабель
Терминал на внешнем
оборудовании
AUDIO
Терминал на внешнем
оборудовании
OPTICAL
DIGITAL AUDIO INPUT
Страницы
RU 7, RU 9
RU 9
RU 7
RU 8
Страницы
RU 8, RU 9
Для подключения к монитору внешнего оборудования используйте имеющиеся в продаже
кабели.
ВНИМАНИЕ
• Чтобы предотвратить повреждение оборудования, всегда выключайте монитор перед тем, как подключать
внешнее оборудование.
• Перед подключением оборудования, внимательно прочитайте соответствующую инструкцию по
эксплуатации (для проигрывателя дисков Blu-ray и т.д.).
Подключение проигрывателя дисков Blu-ray/DVD или приемника цифрового
кабельного/спутникового телевидения в формате HD
■При использовании кабеля HDMI (HDMI IN 1, 2 или 3):
• Терминал HDMI (мультимедийный интерфейс высокой четкости) является аудио-видео интерфейсом,
который обеспечивает передачу аудио и видео сигналов с помощью одного кабеля. Терминал HDMI IN
поддерживает входной видеосигнал в высоком разрешении.
• Чтобы должным образом оценить поддержку дисплеем разрешения 1080p, подключите внешнее
устройство с помощью сертифицированного кабеля HDMI или компонентного кабеля и установите на
оборудовании вывод сигнала с разрешением 1080p.
• Поддерживаемые аудиоформаты: Линейный PCM, Dolby Digital, DTS, частота дискретизации 32/44,1/48
кГц.
• При подключении оборудования, совместимого со стандартом ARC, используйте HDMI IN 1.
Сертифицированный кабель HDMI
HDMI OUT
■При использовании компонентного кабеля (COMPONENT/VIDEO IN):
• Чтобы должным образом оценить поддержку дисплеем разрешения 1080p, подключите внешнее
устройство с помощью сертифицированного кабеля HDMI или компонентного кабеля и установите на
оборудовании вывод сигнала с разрешением 1080p.
• При подключении компонентного кабеля к терминалу COMPONENT/VIDEO IN, переключите вход в меню
"Выбор входа" на COMPONENT.
P
(Синий)
B
Y (Зеленый)
Кабель компонентного видеосигнала
ENGLISHITALIANO DEUTSCHESPAÑOL FRANÇAISРУССКИЙTÜRKÇE
Аудиокабель
ANALOG AUDIO IN
RU 8, RU 9
К данному монитору можно подключать внешнее оборудования различных типов. Для просмотра
изображений с внешнего источника, выберите источник входного сигнала, нажав ВХОД на пульте
дистанционного управления или на мониторе.
RU 7
AUDIO-L
AUDIO-R
(Белый)
(Красный
)
Аудиокабель
COMPONENT OUT
Page 94

Подключение
Приемник цифрового кабельного/спутникового телевидения в формате HD
Оптоволоконный кабель
Подключение кассетного видеомагнитофона, игровой приставки, видеокамеры
или приемника кабельного/спутникового сигнала
■При использовании композитного кабеля (COMPONENT/VIDEO IN или VIDEO IN 1):
• При подключении AV-кабеля к терминалу COMPONENT/VIDEO IN, переключите вход в меню "Выбор
входа" на VIDEO.
AV-кабель
VIDEO (Желтый)
AUDIO-L (Белый)
AUDIO-R (Красный)
AV-кабель
VIDEO (Желтый)
AUDIO-L (Белый)
AUDIO-R (Красный)
Подключение системы объемного звучания/аудиосистемы
■При подключении AV-усилителя для воспроизведения объемного звука
• Аудиосигнал поступает на AV-усилитель через выход монитора:
*1
При подключении оборудования, совместимого со стандартом ARC, используйте HDMI IN 1.
• Если изображение не синхронизировано со звуком, проверьте настройки подключенной системы
объемного звучания.
Сертифицированный кабель HDMI *1
OPTICAL
DIGITAL AUDIO INPUT
HDMI INHDMI OUT
■При подключении усилителя звука
Предусмотрен вывод аудиосигнала через терминал DIGITAL AUDIO OUT.
• В этом случае выберите для опции "ЦИФРОВОЙ ЗВУК" установку "PCM" или "Битовый поток". (Обратитесь
к встроенному руководству по эксплуатации.)
Оптоволоконный кабель
HDMI OUT
RU 8
Аудиокабель
OPTICAL
DIGITAL AUDIO INPUT
ANALOG AUDIO IN
Page 95

Подключение
или
"мини-джек" Ø3,5 мм
Введение
Подключение ПК
Обратитесь к встроенному руководству по эксплуатации, чтобы получить список совместимых с
этим монитором сигналов ПК.
■При использовании кабеля HDMI (HDMI IN 1, 2 или 3):
• В видеокартах некоторых типов может выводиться только видеосигнал. В этом случае, в дополнение к
подключению с помощью сертифицированного кабеля HDMI к терминалу HDMI IN 2, подключите кабель
с разъемом "мини-джек" Ø3,5 мм к терминалу AUDIO IN и выберите для опции "Выбор звукового сигнала"
установку "HDMI+аналоговый". (Обратитесь к встроенному руководству по эксплуатации.)
• Терминалы HDMI IN поддерживают только цифровой сигнал.
Сертифицированный кабель HDMI
HDMI OUT
Сертифицированный
кабель HDMI
HDMI OUT
Кабель с разъемом
"мини-джек" Ø3,5 мм
■При использовании аналогового кабеля RGB (PC IN):
• При использовании аналогового кабеля RGB, подключите аудиосигнал к терминалу AUDIO IN на панели
PC IN.
Аналоговый кабель RGB (15-контактный
кабель D-sub или кабель VGA)
AUDIO
Первоначальная установка
Прежде, чем нажать кнопку POWER на
пульте дистанционного управления,
выполните следующие операции.
Вставьте батарейки в пульт
1
дистанционного управления.
Подключите шнур электропитания
2
к розетке электросети.
Язык (Настройки языка)
Выберите один из 6 языков:
английский, французский, испанский,
немецкий, итальянский и русский.
С помощью a/b выберите из
1
списка на экране желаемый язык и
затем нажмите ENTER.
Энергосбережение
Выберите "Да" или "Нет" для выбора
конфигурации настроек дисплея по
умолчанию.
С помощью
2
или "Нет".
Чтобы подтвердить ввод настроек,
нажмите ENTER
Завершено
Откроется окно подтверждения
3
настроек.
Подтвердите отображаемую на
экране информацию и затем
нажмите ENTER.
Примеры экрана подтверждения
настроек
выберите "Да"
a
/b
ENGLISHITALIANO DEUTSCHESPAÑOL FRANÇAISРУССКИЙTÜRKÇE
Кабель с разъемом
RGBAUDIO
RU 9
Page 96

Просмотр встроенного руководства по эксплуатации
3
Использование ПК
Просмотр встроенного руководства по эксплуатации
Нажмите MANUAL на пульте дистанционного управления, чтобы открыть на экране руководство по
эксплуатации.
Для поиска пункта в содержании, а также для поиска определенного термина или информации об
устранении неполадок в процессе просмотра телепередачи, нажмите MANUAL и затем выберите
подходящий пункт из открывшейся обложки руководства.
В процессе просмотра телепередачи нажмите MANUAL.
1
При этом откроется встроенное руководство по эксплуатации.
При выборе содержания отображается соответствующая страница.
2
С помощью стрелок можно последовательно листать страницы.
3
2
ETHERNET terminal
AUDIO IN terminal
PC IN
terminal
(shared for PC IN and
HDMI IN 2) *2
VIDEO IN 1 terminals
AUDIO OUT terminals
COMPONENT/
VIDEO IN
terminals
*5
HDMI IN 2 terminal
HDMI IN 1 terminal
ARC: Audio
Return Channel
*3
DIGITAL AUDIO OUT
terminal
1
ENG 1-1
ПРИМЕЧАНИЕ
• Также можно отобразить встроенное руководство по эксплуатации, выбрав на экране меню "Информация"
> "Руководство".
• Встроенное руководство по эксплуатации не может отображаться в режиме USB, режиме домашней сети
или при использовании Интернет-приложения.
Настройка изображения с ПК
Положение вводимого с ПК изображения можно
отрегулировать, выбрав опции
"Первоначальная установка" > "Настройки
входа" > "Точная синхронизация"
Точная синхронизация
Как правило, можно легко и должным образом
настраивать положение изображения
с помощью функции "Автоматическая
синхронизация".
Тем не менее, в некоторых случаях для
оптимизации изображения может понадобиться
ручная настройка.
Входной сигнал: Выберите входной сигнал.
1024×768
1360×768
Автоматическая синхронизация:
Предназначена для автоматической настройки
изображения с ПК.
Да : Запустится автоматическая
синхронизация и отобразится сообщение
"Производится настройка изображения.".
Нет : Эта функция не действует.
По гориз. : Центрирует изображение,
По верт. : Центрирует изображение,
Часы : Регулирует мерцающее
Фаза : Регулирует изображение,
ПРИМЕЧАНИЕ
• Автоматическая синхронизация может закончится
неудачей, если компьютерное изображение имеет
низкое разрешение, нечеткие (черные) края или
во время выполнения функции "Автоматическая
синхронизация" изображение перемещалось.
• Перед запуском функции "Автоматическая
синхронизация" убедитесь, что ПК подключен к
монитору и включен.
• Эта функция не может быть выбрана, если
подключен цифровой входной сигнал, поскольку
нет необходимости настраивать параметры
"Частота" или "Фаза".
• Позиция курсора может быть не в центре,
поскольку диапазон изменения положения экрана
может быть асимметричным.
• Диапазон изменения положения экрана зависит
от выбранного режима просмотра или от типа
сигнала. Этот диапазон можно увидеть на экране
настройки положения.
перемещая его влево или вправо.
перемещая его вверх или вниз.
изображение с вертикальными
полосами.
если символы имеет низкую
контрастность или если
изображение мерцает.
Настройки аудиовхода
Выбор звукового сигнала
Эта функция служит для выбора терминала для
вывода компьютерного аудиосигнала.
Варианты настройки различаются в зависимости
от источника входного сигнала.
Выберите источник входного сигнала в
соответствии с тем, какой терминал соединен с
ПК и затем выберите желаемые параметры.
Для выполнения этой операции откройте раздел
меню "Первоначальная установка" > "Настройки
входа" > "Выбор звукового сигнала".
HDMI 2
HDMI2 (цифровой) : Выберите эту
HDMI+аналоговый : Выберите эту
ПРИМЕЧАНИЕ
• Когда для опции "Выбор звукового сигнала"
выбрана установка "HDMI+аналоговый", звук не
будет воспроизводиться, если для подключения
к HDMI-совместимому оборудованию вы
используете только сертифицированный кабель
HDMI. Для воспроизведения звука следует также
подключить аналоговый кабель.
• Если вы хотите подключить HDMI-совместимое
оборудование с использованием только
сертифицированного кабеля HDMI, выберите
для опции "Выбор звукового сигнала" установку
"HDMI2 (цифровой)".
установку, когда
монитор и ПК
соединены
между собой
сертифицированным
кабелем HDMI,
и аудиосигнал
передается по этому
же самому кабелю.
установку, когда
монитор и ПК
соединены
между собой
сертифицированным
кабелем HDMI,
а аудиосигнал
передается с
использованием
отдельного кабеля с
разъемом "мини-джек"
Ø3,5 мм.
RU 10
Page 97

Использование ПК
Команда, 4 разряда Параметр, 4 разряда Код возврата
Если для некоторых команд введен
Код возврата (0DH)
Код возврата (0DH)
Управление монитором
• Управление монитором может осуществляться
с ПК, панелей управления и других устройств
с использованием интерфейса RS-232C или
протокола IP.
• Для этих соединений используйте кабель
RS-232C, кабель ETHERNET перекрестного
типа (приобретается отдельно).
ПРИМЕЧАНИЕ
• Эта операция должна выполняться лицом,
имеющим опыт в обращении с компьютерами.
IP-управление
Настройте эту функцию для управления
монитором с оборудования, подключенного
с использованием локальной сети LAN. Для
выполнения этой операции перейдите в раздел
"Настройки сети".
IP-управление
При выборе опции " IP-управление", опция
"Изменить" будет выделена цветом.
Нажмите ENTER.
Подробные настройки
Задайте подробные настройки
(идентификатор учетной записи, пароль и
т.д.).
Для выбора настроек следуйте инструкциям
на экране.
Кабель RS-232C
перекрестного типа
Наименование устройства
• Задайте имя монитора, отображаемое на
других устройствах в сети.
Для установки имени используйте экранную
клавиатуру.
Настройки интерфейса RS-232C
Задайте настройки обмена данными по
интерфейсу RS-232C на ПК в соответствии с
настройками монитора.
В мониторе используются следующие настройки
связи:
Скорость
передачи
данных:
Длина слова
данных:
Бит четности: Нет
Стоп-бит: 1 бит
Управление
потоком:
9 600 бит/с
8 бит
Нет
Настройки интерфейса для протокола IP
Подключитесь к монитору, выполнив
предварительно следующий настройки
протокола IP на ПК
Протокол IP: TCP/IP
IP-адрес узла
сети:
Сервис: Нет (не выбирайте Telnet
TCP-порт: Задайте номер порта в
Задайте IP-адрес в меню
монитора
или SSH)
меню монитора (порт
управления)
При подключении к монитору необходимо
ввести идентификатор и пароль, которые были
заданы в меню монитора.
ПРИМЕЧАНИЕ
• При использовании этой функции выполните
настройки для опции "IP-управление".
• Если передачи данных не будет происходить в
течение трёх минут, связь будет прервана.
Процедура передачи данных
Отправьте команду управления с ПК через
интерфейс RS-232C или протокол IP.
Телевизор выполнит принятую команду и
пошлет ПК ответное сообщение.
Не посылайте несколько команд одновременно.
Перед отправкой следующей команды
подождите, пока ПК не получит подтверждения
о выполнении команды.
Формат команды
Восемь кодов формата ASCII +CR
C1 C2 C3 C4 P1 P2 P3 P4
Команда, 4 разряда: Команда. Текст, состоящий
из четырех символов.
Параметр, 4 разряда: Параметр 0-9, x, пробел,
?
Параметр
Введите значения параметра, начиная слева,
и заполните пробелами остальное (параметр
обязательно должен состоять из четырех
знаков).
Если введенный параметр выходит за пределы
диапазона настройки, вернется значение «ERR»
(Обратитесь к разделу «Формат кода ответа»).
Знаком «x» в таблице обозначаются любые
численные значения.
0
0 0 0 9
— 3 0
знак «?», в ответ будет послано
значение,
установленное
на данный
?
??? ?
момент.
Формат кода ответа
Обычный ответ
O K
Сообщение об ошибке (ошибка при передаче
данных или неправильная команда)
E R R
ENGLISHITALIANO DEUTSCHESPAÑOL FRANÇAISРУССКИЙTÜRKÇE
Сетевой кабельf
LAN
Сетевой
концентратор
RU 11
Page 98

Использование ПК
Таблица команд
• Выполнение не указанных здесь команд не гарантируется.
*1
Только для RS-232C.
Для включения питания по команде, подаваемой через локальную сеть LAN, можно использовать функцию "Wake On LAN (Magic Packet)".
Монитор нельзя включить с помощью команд «IP control».
ПУНКТ МЕНЮ УПРАВЛЕНИЯ КОМАНДА ПАРАМЕТР СОДЕРЖАНИЕ КОМАНДЫ УПРАВЛЕНИЯ
ВКЛЮЧЕНИЕ ПИТАНИЯ
НАСТРОЙКА КОМАНДЫ
УПРАВЛЕНИЕ ЭЛЕКТРОПИТАНИЕМ P O W R 0 _ _ _ Выключение питания Переход в режим ожидания.
ВХОД
ВЫБОР
ВЫБОР РЕЖИМА AV A V M D * _ _ _ 0: (Переключение), 1: СТАНДАРТ,
ГРОМКОСТЬ V O L M * * * _ Громкость (0-100)
ПОЛОЖЕНИЕ ГОРИЗОНТАЛЬНОЕ
РЕЖИМ ПРОСМОТРА W I D E * * _ _ 0: (Переключение) [AV],
ПРИГЛУШЕНИЕ ЗВУКА M U T E * _ _ _ 0: (Переключение), 1: Вкл., 2: Выкл.
ОКРУЖАЮЩИЙ ЗВУК A C S U * _ _ _ 0: (Переключение), 1: Вкл., 2: Выкл.
ВЫБОР ЗВУКОВОГО СИГНАЛА A C H A x _ _ _ (Переключение)
ТАЙМЕР ВЫКЛЮЧЕНИЯ O F T M * _ _ _ 0: Выкл.,
СКРЫТЫЕ СУБТИТРЫ C L C P x _ _ _ (Переключение) Переключение режима скрытых субтитров.
ИМЯ УСТРОЙСТВА T V N M 1 _ _ _ Отображается название устройства,
НАИМЕНОВАНИЕ МОДЕЛИ M N R D 1 _ _ _ Название модели монитора
ВЕРСИЯ ПРОГРАММНОГО
ОБЕСПЕЧЕНИЯ
ВЕРСИЯ ПРОТОКОЛА IP I P P V 1 _ _ _ Отображается текущая поддерживаемая
КНОПКИ ПУЛЬТА
ДИСТАНЦИОННОГО УПРАВЛЕНИЯ
ПЕРЕКЛЮЧЕНИЕ I T G D x _ _ _ (Переключение) Переключение между входными сигналами.
1-6 I A V D * _ _ _ 1: HDMI IN1, 2: HDMI IN 2,
ПОЛОЖЕНИЕ
ВЕРТИКАЛЬНОЕ
ПОЛОЖЕНИЕ
ЧАСТОТА C L C K * * * _ (0-100)
ФАЗА P H S E * * _ _ (0-63)
R S P W 0 _ _ _ Выкл Команда включения питания отклонена.
H P O S * * * _ (-50-50) Для входного сигнала с ПК.
V P O S * * * _ (-50-50)
S W V N 1 _ _ _ Отображается текущая версия программного
R C K Y * * _ _ 0-9: 0-9, 10: DOT, 12: POWER, 13: DISPLAY, 23: OPTION, 24: SLEEP, 31: MUTE, 32: VOL -,
1 _ _ _ Вкл [RS-232C] Команда включения питания принята.
2 _ _ _ Вкл [IP] Команда включения питания принята.
1 _ _ _ Включение питания Включение питания
(Совпадает с ключом смены входа.)
3: HDMI IN 3, 4: VIDEO IN 1,
5: COMPONENT/VIDEO IN 2,
6: PC IN
2: КИНО,
4: ПОЛЬЗОВАТЕЛЬСКИЙ,
5: ДИНАМИЧЕСКИЙ (фиксированный),
6: ДИНАМИЧЕСКИЙ, 7: ПК
1: Боковая полоса [AV],
2: Растянуть с заполнением экрана [AV],
3: Увеличить [AV],
4: Растянуть [AV, для просмотра видео с
носителей USB, из домашней сети или для
Интернет-приложений],
5: Нормальный [ПК],
7: Растянуть [ПК],
8: Поточечно [ПК] [AV],
9: Полноэкранный [AV],
10: Авто [для просмотра видео и фотографий
с носителей USB, видео и фотографий
из домашней сети или для Интернет-
приложений],
11: Исходный [для просмотра видео и
фотографий с носителей USB, видео и
фотографий из домашней сети или для
Интернет-приложений]
1: ТАЙМЕР ОТКЛЮЧЕНИЯ - 30 МИН., 2: ТАЙМЕР ОТКЛЮЧЕНИЯ- 60 МИН.,
3: ТАЙМЕР ОТКЛЮЧЕНИЯ - 90 МИН., 4: ТАЙМЕР ОТКЛЮЧЕНИЯ - 120 МИН.
33: ГРОМКОСТЬ +, 34: CH
44: s, 45: RETURN, 46: EXIT, 49: AUDIO, 50: A (красная), 51: B (зеленая), 52: C (синяя),
53: D (желтая), 61: MANUAL
, 35: CH , 36: INPUT, 38: MENU, 40: ENTER, 41: a, 42: b, 43: a,
Хотя эти команды доступны для выбора, они
представляют собой внутренние операции
переключения.
Диапазон изменения положения экрана
зависит от выбранного режима просмотра
или от типа сигнала. Этот диапазон можно
увидеть на экране настройки положения.
0: Хотя эти команды доступны для выбора,
они представляют собой внутренние
операции переключения.
1: Доступно, если только входной сигнал
имеет соотношение сторон 4:3.
5: Доступно, если только входной сигнал
имеет соотношение сторон 4:3.
8: [ПК] Доступно, за исключением того случая,
когда входной сигнал имеет разрешение
UXGA .
[AV] Доступно, если только входной сигнал
имеет разрешение 1080i/p.
9: Доступно, если только входной сигнал
имеет разрешение 720p.
10, 11: Доступно для просмотра видео и
фотографий с носителей USB, видео и
фотографий из домашней сети или для
Интернет-приложений.
заданное в параметре "Наименование
устройства".
обеспечения монитора.
версия протокола IP.
*1
RU 12
ПРИМЕЧАНИЕ
• Если в столбце параметров указан знак
подчеркивания (_), введите пробел.
• Если указана звездочка (*), введите значение
из диапазона, указанного в скобках в столбце
СОДЕРЖАНИЕ КОМАНДЫ УПРАВЛЕНИЯ.
• Знаком «x» в таблице обозначаются любые
численные значения.
Page 99

Поиск и устранение неисправностей
Проблема Возможное решение
• Не включается питание. • Если вы нажимали кнопку POWER на пульте дистанционного
• Пульт дистанционного
управления не работает.
• Нет изображения.
• Нет звука.
управления, проверьте следующее.
• Не отсоединился ли шнур питания переменного тока?
• Включено ли питание?
• Установлены ли батарейки с соблюдением полярности (+, -)?
Стр RU 6.
• Правильно ли выполнено подключение к другим компонентам?
Стр. с RU 7 по RU 9.
• Правильно ли выполнено подключение к другим компонентам?
Стр. с RU 7 по RU 9.
Стр RU 5.
Стр RU 5.
Стр RU 5.
ENGLISHITALIANO DEUTSCHESPAÑOL FRANÇAISРУССКИЙTÜRKÇE
RU 13
Page 100

Ayak Ünitesinin Monte Edilmesi
TOP-R
■PN-Q701/PN-Q601
1
2
1
3
Yumuşak yastık
• Standı takmadan (veya sökmeden)
önce, AC kablosunu çıkarın.
• Montaja başlamadan önce yere
yumuşak bir örtü serin ve Monitörü
3
2
1
Vidalar
Vidalar
bu örtünün üzerine koyun. Bu hasar
görmesini önleyecektir.
DİKKAT
• Talimatları izlediğinizden emin olun.
Ayak ünitesinin yanlış monte edilmesi
Monitörün düşmesine sebep olabilir.
Ayak ünitesiyle birlikte 10 adet
1
vidanın verildiğinden emin olun.
1 Ayak ünitesinin çubuklarını
2
köpüğün üzerinde birleştirin.
2 Tabanı çubuğa monte edin.
3 6 vidayı tabanın alt kısmındaki 6
deliğe yerleştirin ve sıkın.
• Ayak ünitesini bir elinizle sıkıca tutun
ve vidaları sıkın.v
1 Ayağı Monitörün alt kısmındaki
3
deliklere yerleştirin.
• Ayağın Monitöre tam olarak
yerleştirildiğinden emin olun.
Yanlış kurulum Monitörün yan
yatmasına sebep olabilir.
2 4 vidayı Monitörün alt kısmındaki
2
4 deliğe yerleştirin ve sıkın.
■PN-Q801
1
2
(Örnek: Sağ Ayak)
Stant tabanı
Destek
"R"
Vidalar
• Standı takmadan (veya sökmeden)
önce, AC kablosunu çıkarın.
• Montaja başlamadan önce yere
yumuşak bir örtü serin ve Monitörü
bu örtünün üzerine koyun. Bu hasar
görmesini önleyecektir.
DİKKAT
1
• Talimatları izlediğinizden emin olun.
Ayak ünitesinin yanlış monte edilmesi
Monitörün düşmesine sebep olabilir.
Ayak ünitesiyle birlikte 12 adet
1
vidanın verildiğinden emin olun.
1 Ayak ünitesinin çubuklarını
2
TOP-R köpük parçasına
yerleştirin.
2 Tabanı çubuğa monte edin.
3 3 4 vidayı alt kısımdaki 4 deliğe
2
3
yerleştirin ve sıkın.
• Ayak ünitesini bir elinizle sıkıca
tutun ve vidaları sıkın.
Sol ayağı da sağ ayakta
4
uyguladığınız adımları izleyerek
takın.
• Kurulum sırasında Monitör ve yer
arasına parmağınızı sıkıştırmamaya
dikkat edin.
• Başka bir duvara monte aparatı
kullanmadığınız sürece, ayakları
Monitörden çıkarmayın.
• Ayakları Monitöre taktıktan sonra,
Monitörü kaldırırken, kurulumunu
yaparken, taşırken veya yatırırken
ayaklarından tutmayın.
TR 1
"L"
4
 Loading...