

Page 1

Controller
Sharp Electronics Corporation
Services and Support Group
1300 Naperville Drive
Romeoville, IL 60446
Network Support Bulletin
Number: NS- ARPB2-022 Date: June 2000 Version/Revision: 1
Model(s): AR-PB2
Installation Troubleshooting Tips Recommended Upgrade Mandatory Upgrade Information
SUBJECT: Installation of Sharpdesk and the Network Scanner Tool
Prerequisites:
AR-NS1 Network Scanner Utilities CD.
AR-PB2A print controller with 48MB RAM or more.
AR-NC3D network card with ROM version of 5.55 or higher.
Sharp Digital Imager compatible with the AR-PB2A print controller connected to the TCP/IP network.
The Sharp Digital Imager must have the scanning feature activated by inputting the product key into the
control panel of the Imager.
PC Minimum System Requirements
Intel Pentium 100 or faster.
Microsoft Windows 95/98 or NT 4.0 with SP4 or later, or Windows 2000.
Internet Explorer 4.01 or later.
32 MB RAM or more.
80 MB hard drive space or more.
SVGA monitor that supports 800 x 600 resolution, 256 colors or better.
TCP/IP protocol installed and correctly configured.
Network Interface Card connected to the TCP/IP network.
Note:
The firmware and software on the Sharp Digital Imager and controller must be the latest versions.
Items in Italics indicate icons, buttons or menu options that are used during this procedure.
Bulletin # NS-ARPB2-022 Page 1 of 11
Page 2
Procedure:
Sharpdesk and the Network Scanner Tool are installed together from the Network Scanner Utilities CD in
this procedure.
1 Close down any applications that are running on the computer.
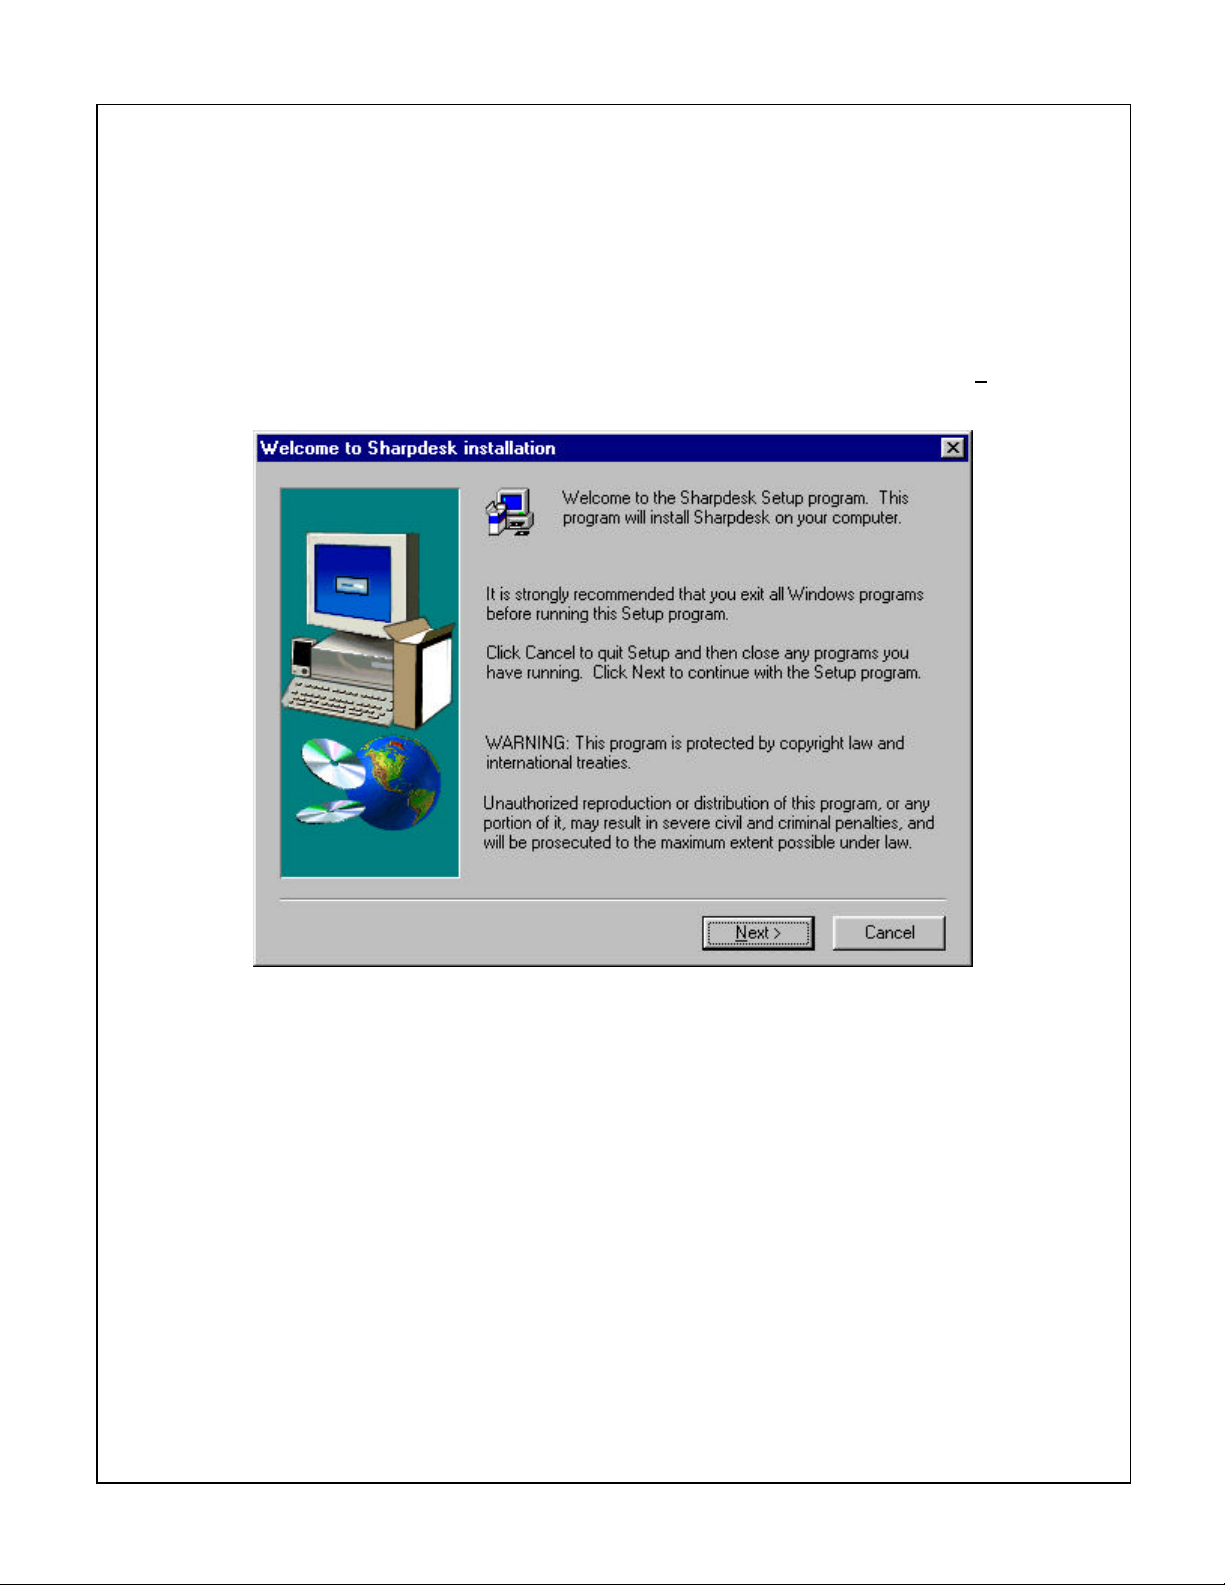
2 Insert the Network Scanner Utilities CD into the CD-ROM drive of the computer. The CD will
automatically start the installation process and display the Welcome screen. Click Next to
continue with the installation.
Bulletin # NS-ARPB2-022 Page 2 of 11
Page 3
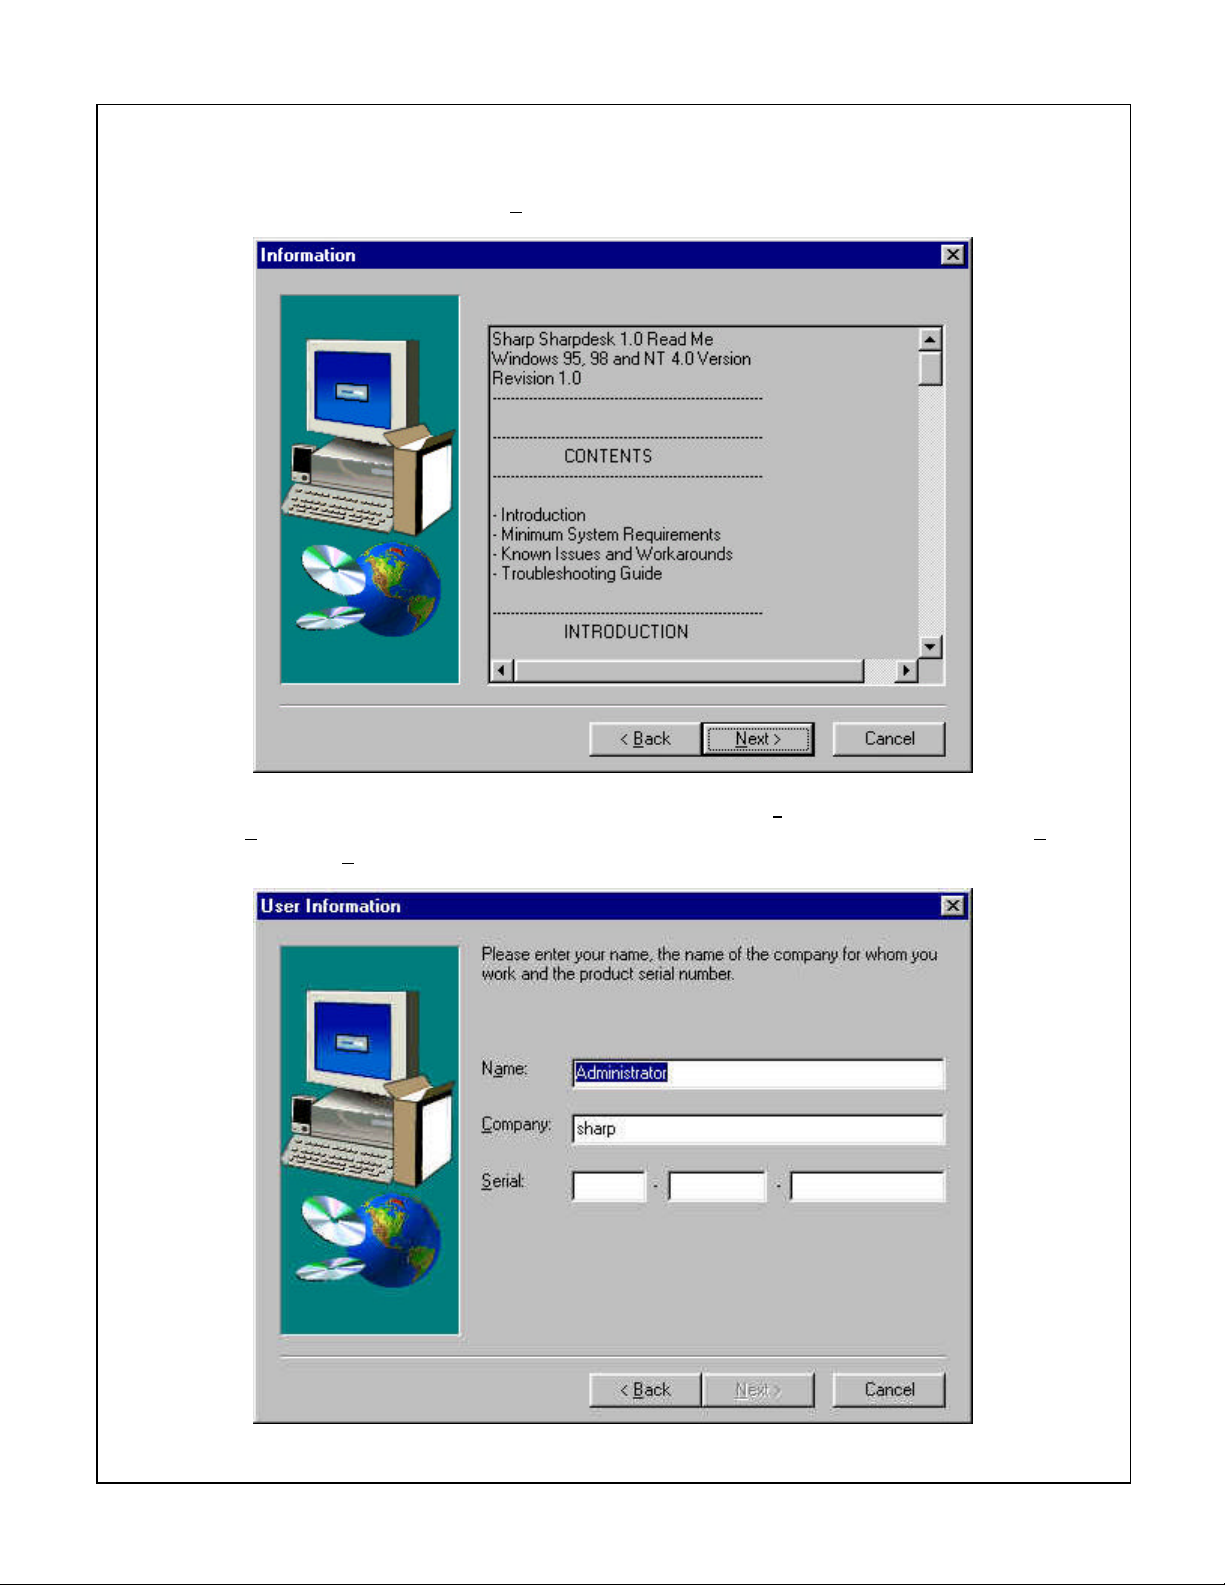
3 The Network Scanner Tool setup will display the Information window, which shows the
Sharpdesk readme file. Click Next.
4 The User Information window requires a user name in the Name field, a business name in the
Company field and a serial number from the front of the AR-NS1 operation manual in the Serial
field. Click Next.
Bulletin # NS-ARPB2-022 Page 3 of 11
Page 4

5 The Software License Agreement will be displayed. Read the agreement and click Yes.
6 The Setup Type window asks for the type of installation to be run. In most cases, click on the
button next to Typical to proceed with the installation.
Bulletin # NS-ARPB2-022 Page 4 of 11
Page 5
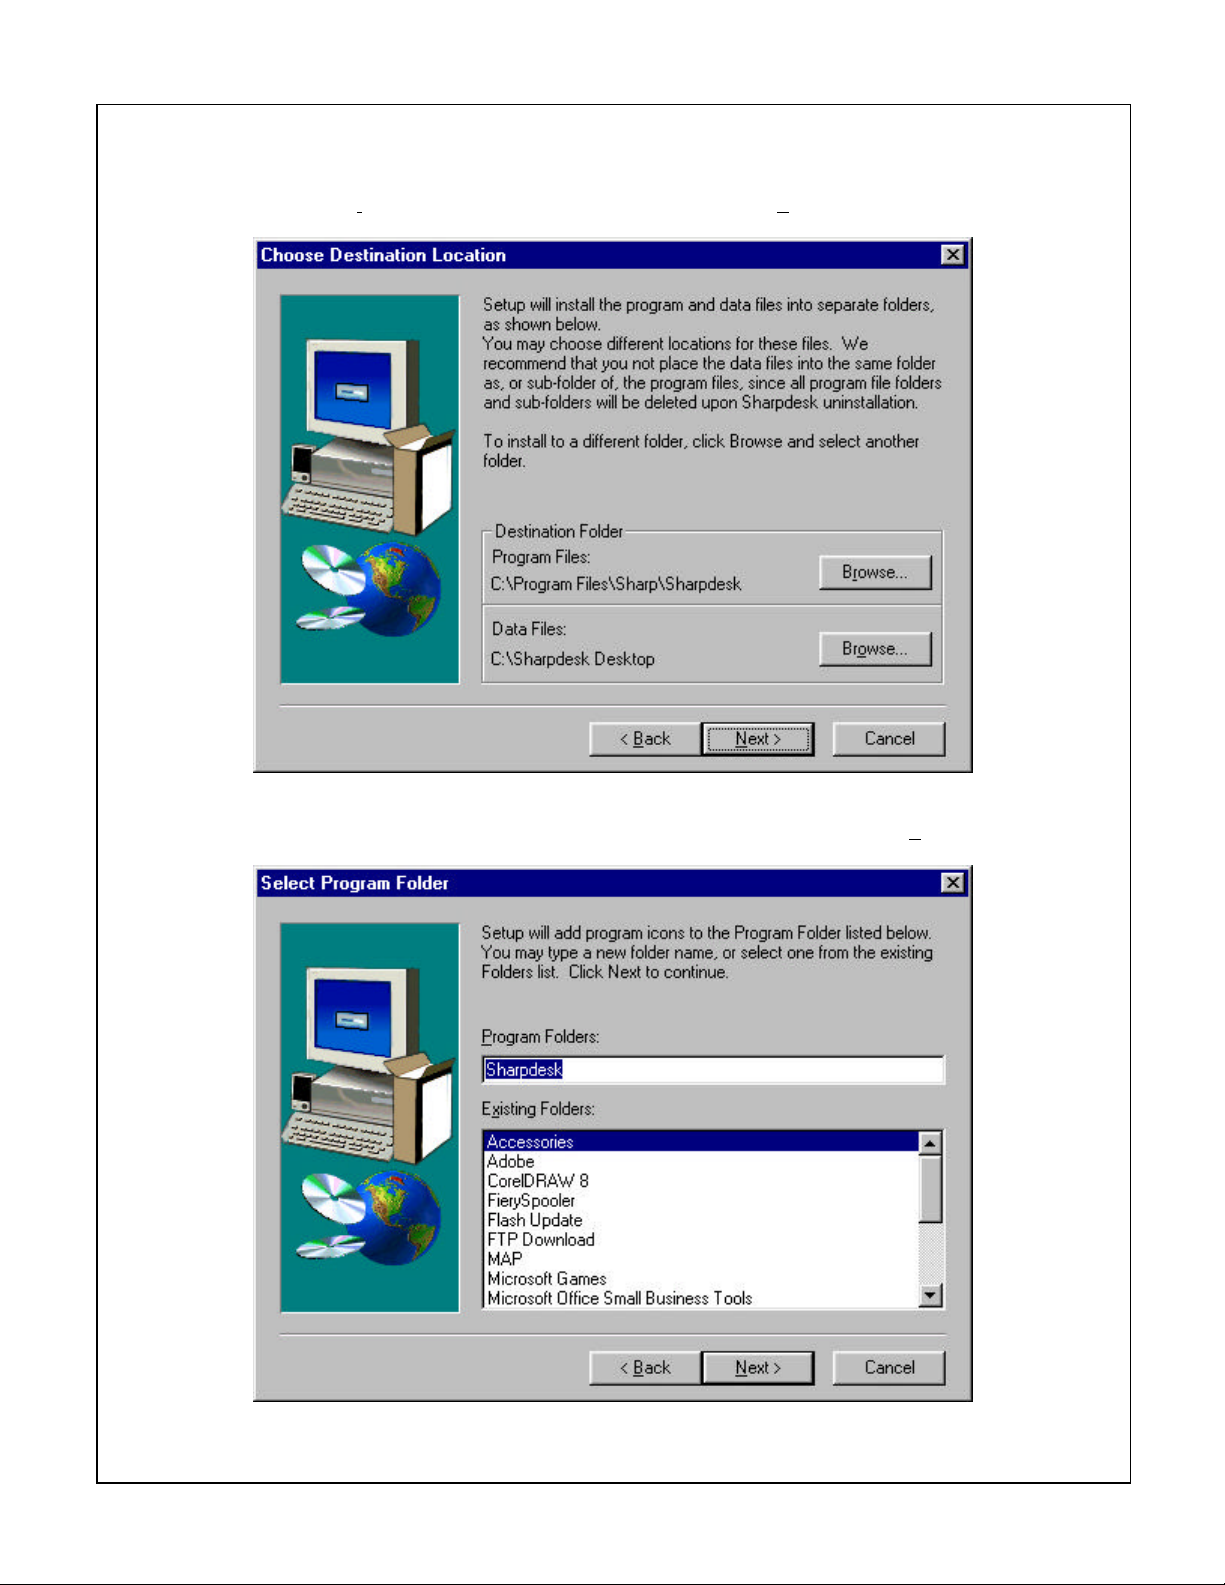
7 The installation program then asks where the Program Files are to be installed and where the
Data Files are to be stored. Accept the default destinations or select new destinations by
clicking on Browse. When the destinations are correct click Next.
8 Setup needs to know where to put the program icons. Accept the default of Sharpdesk, type
another new folder name, or select an existing folder from the list and click Next.
Bulletin # NS-ARPB2-022 Page 5 of 11
Page 6
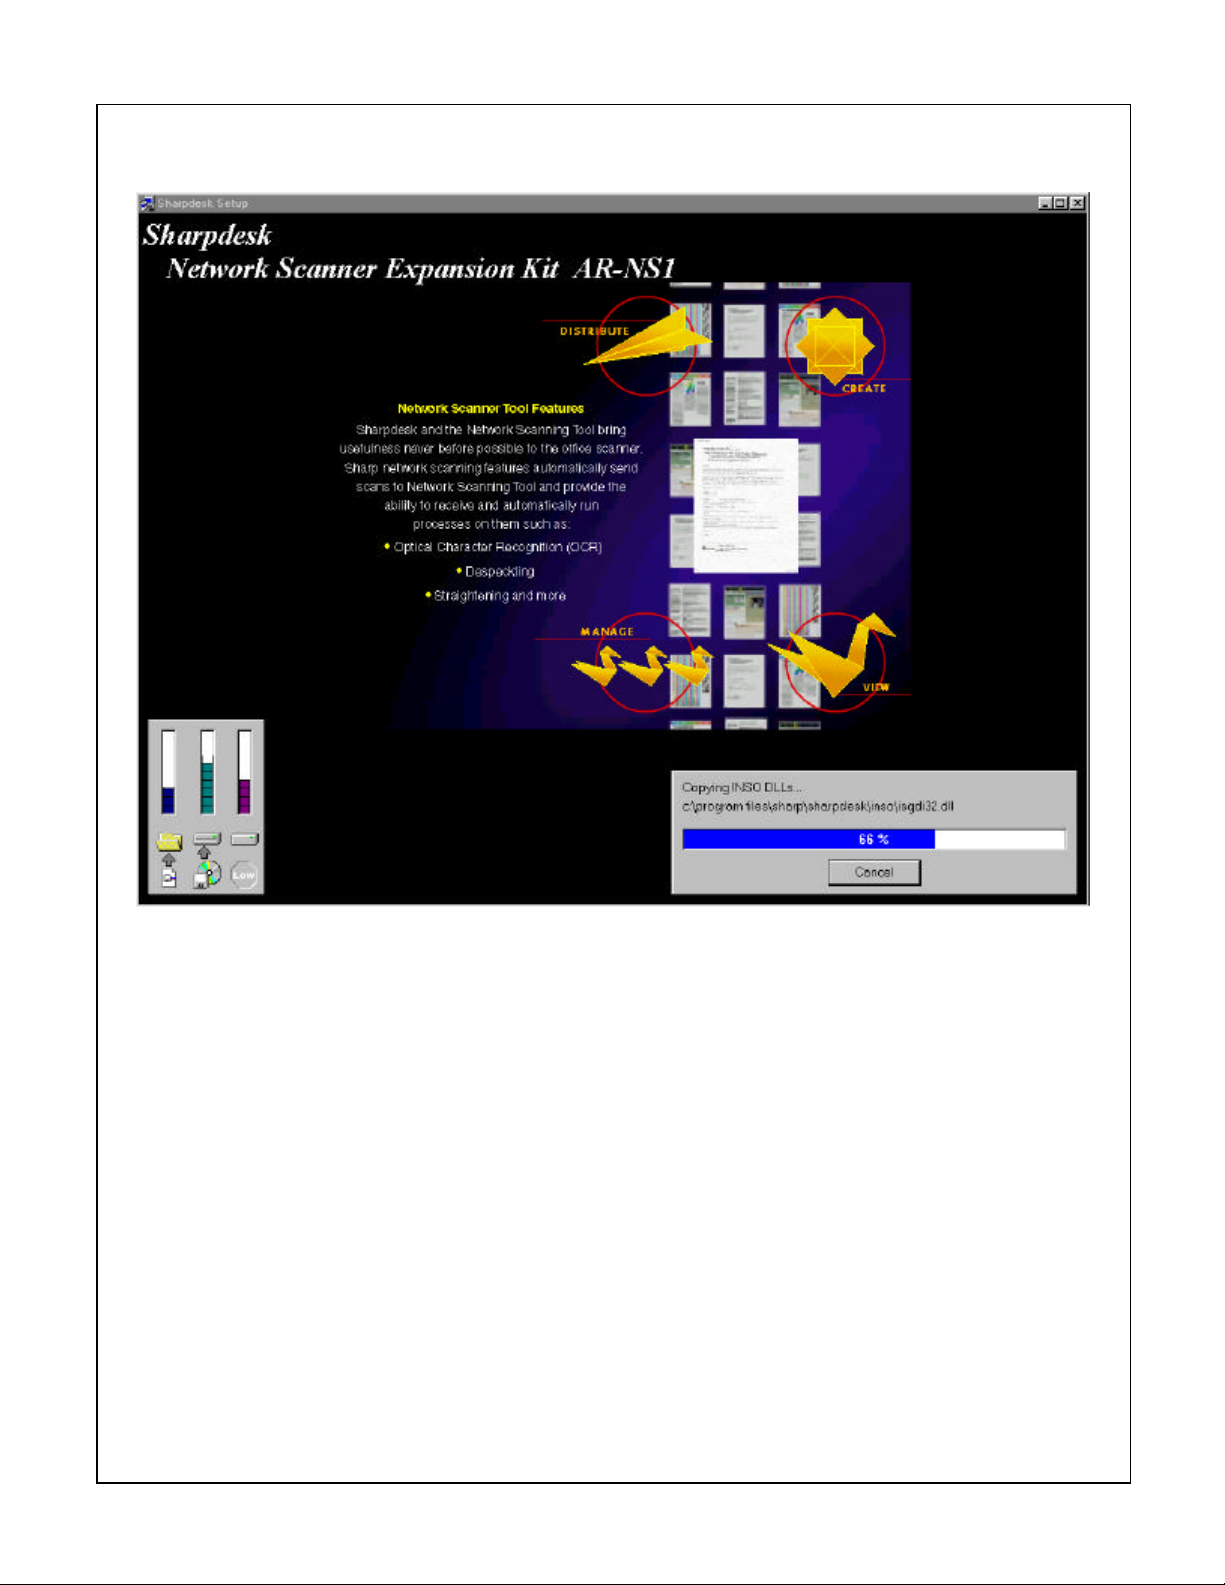
9 Setup will then begin copying the required files to the computer. Wait for this to complete.
Bulletin # NS-ARPB2-022 Page 6 of 11
Page 7
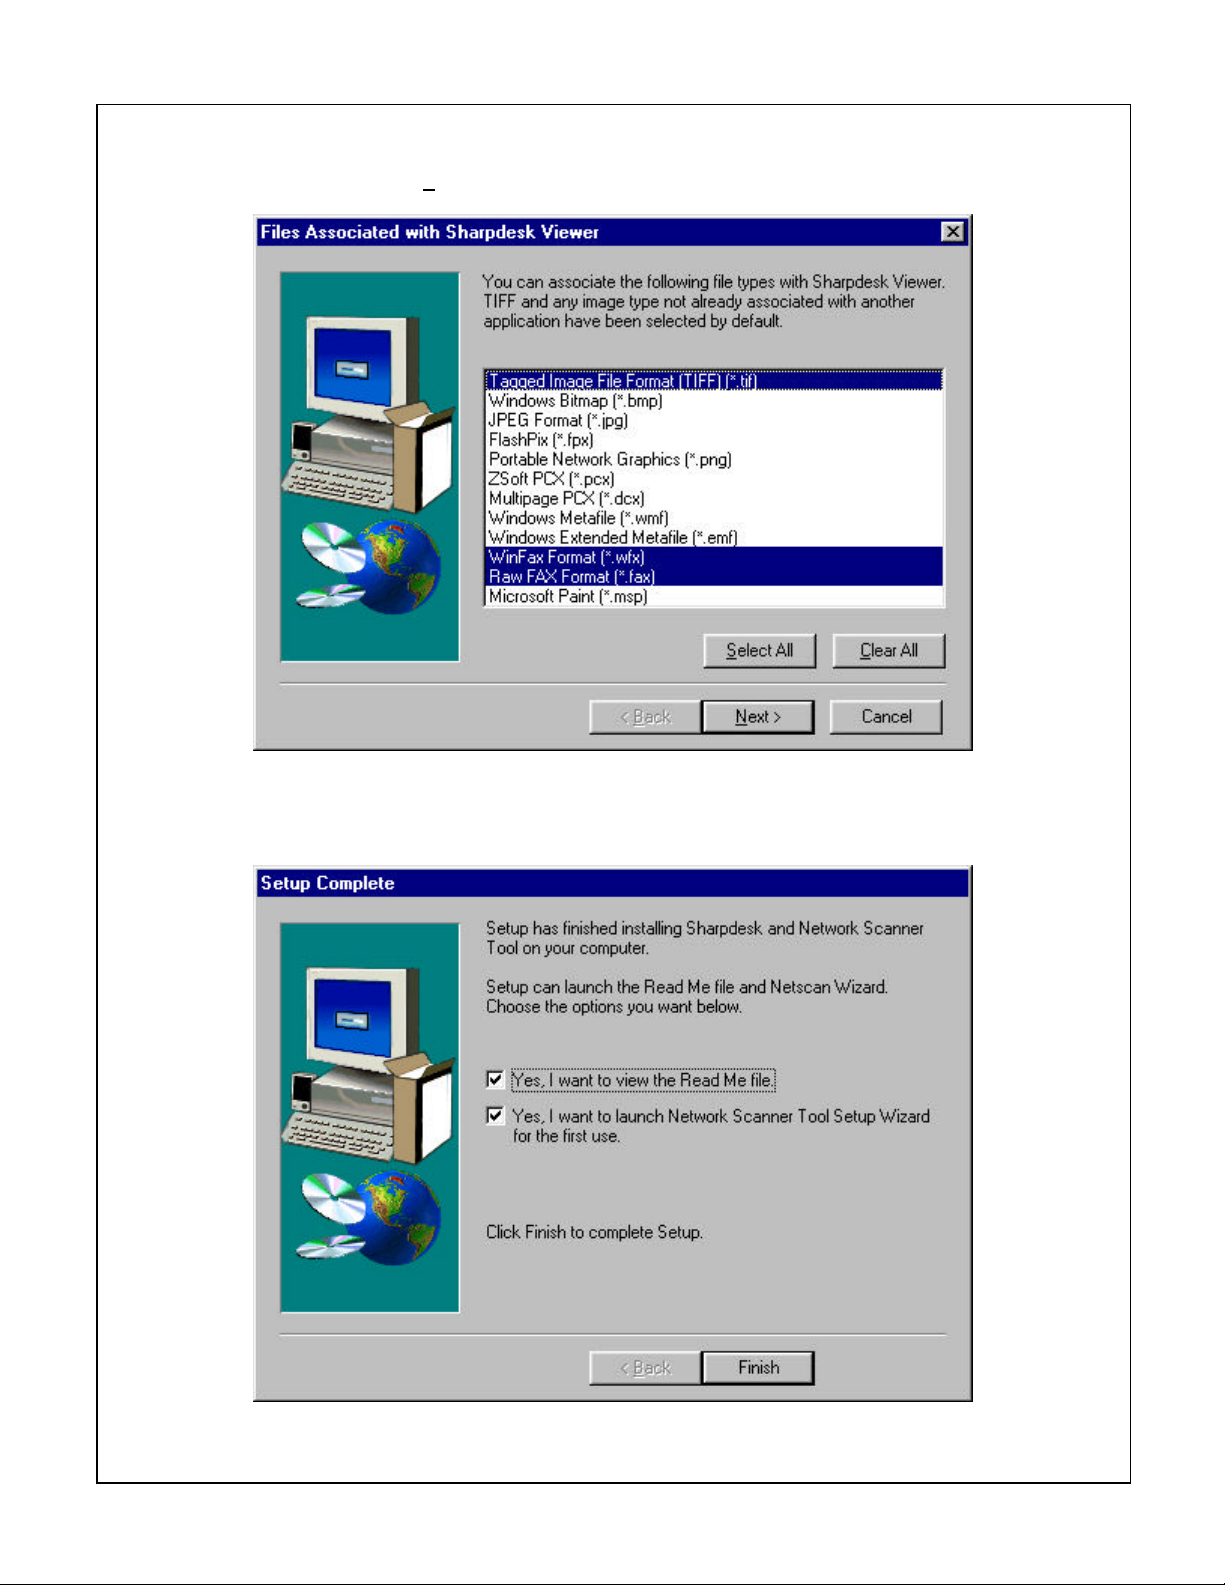
10 Files can be associated with the Sharpdesk Viewer from this screen. Make the desired
selections and click Next.
11 When the Setup Complete screen appears the opportunity to view the read me file and start the
Network Scanner Tool Setup Wizard is presented. Leave the Network Scanner Tool Setup
Wizard option checked. Click Finish to complete setup and to start the selected options.
Bulletin # NS-ARPB2-022 Page 7 of 11
Page 8
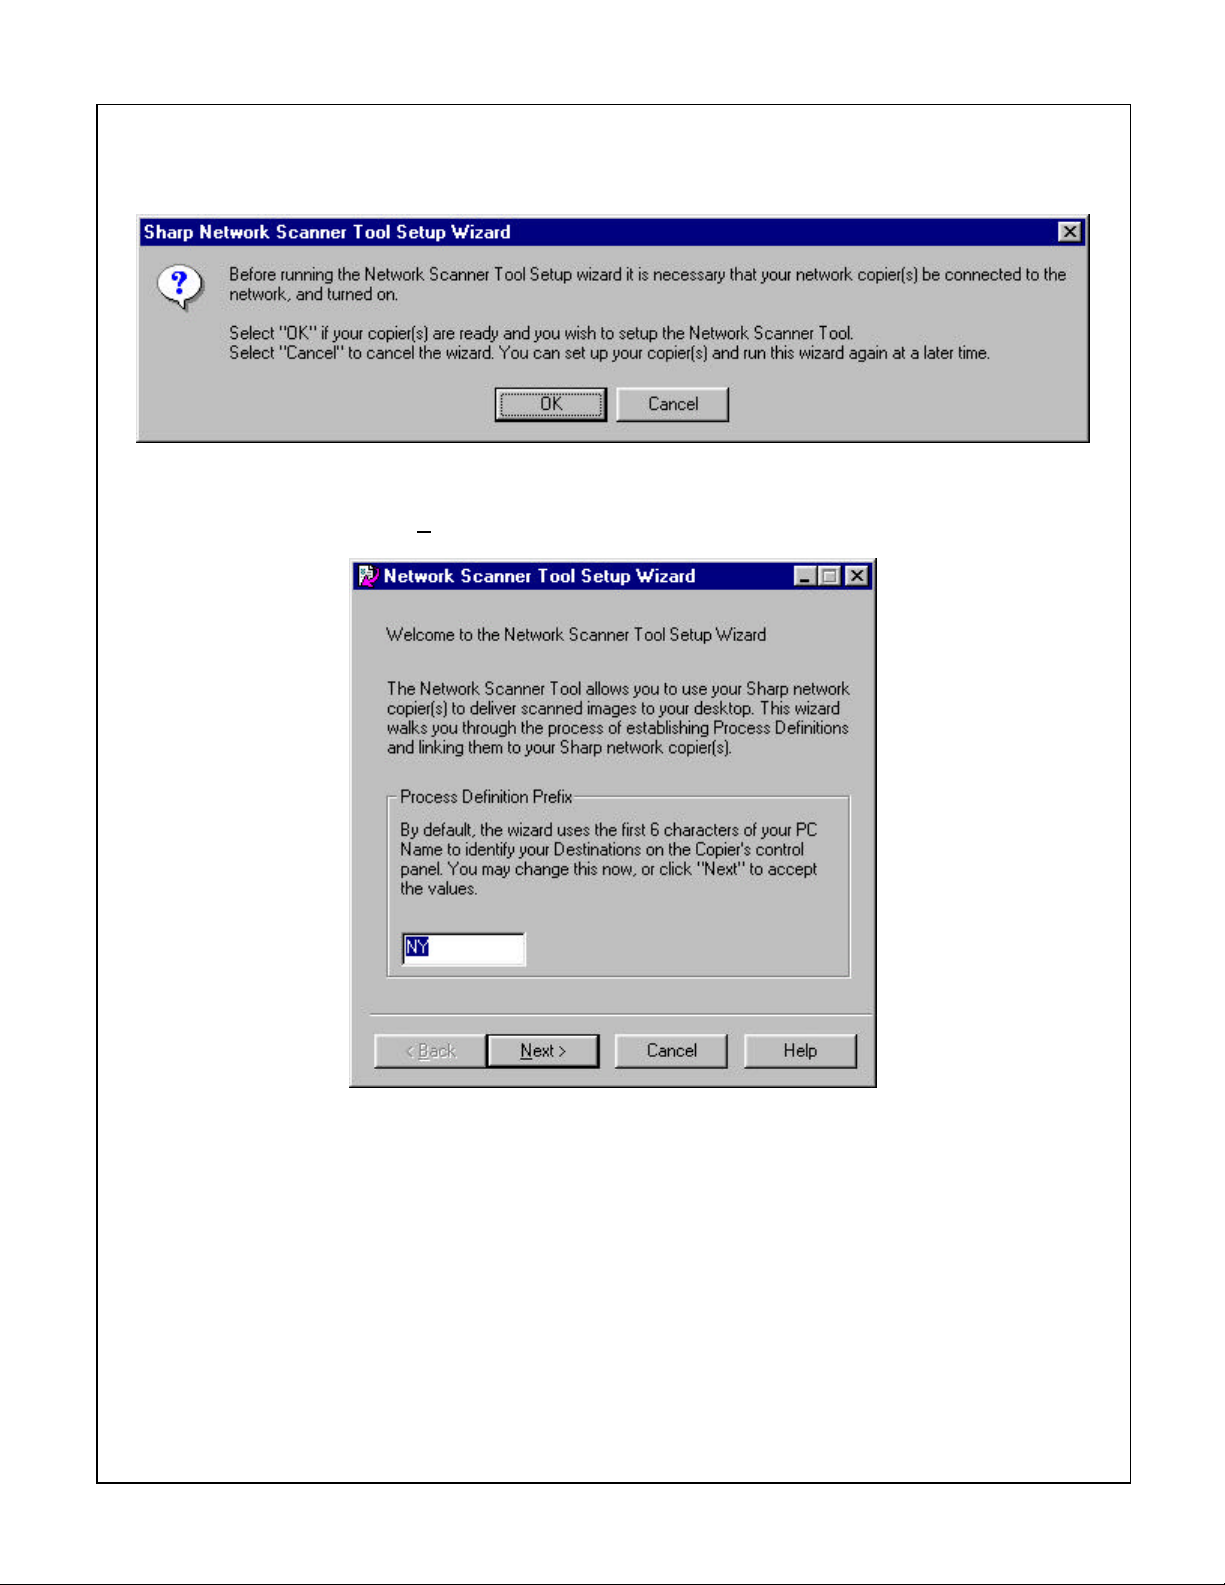
12 The Sharp Network Scanner Tool Setup Wizard will start up. Make sure the Sharp Digital
Imager to be used for scanning is connected to the network and turned on. Click OK.
13 The setup wizard needs to know what the computer name is. The software uses the computer
name by default but this can be changed to any 6 character name not already in use for
scanning. Click on Next.
Bulletin # NS-ARPB2-022 Page 8 of 11
Page 9
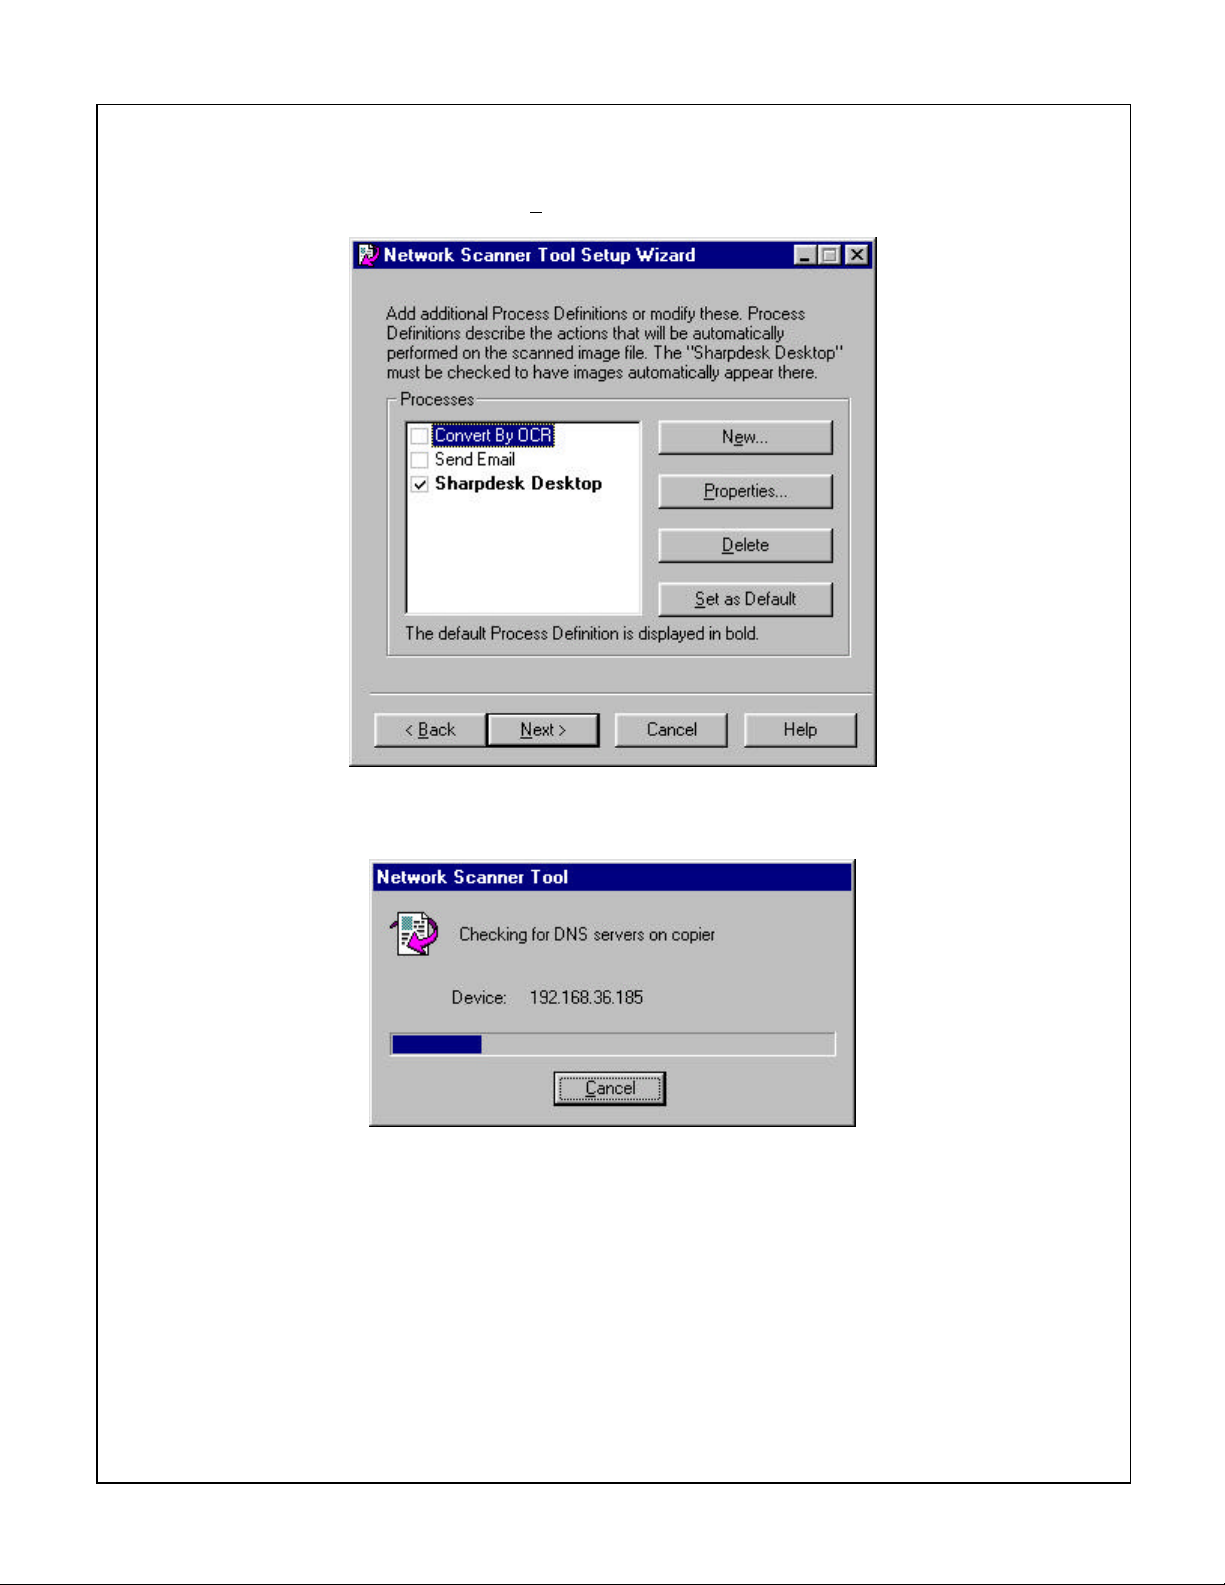
14 The setup wizard allows for selection of Process Definitions which are actions that are to be
executed when an image file is sent to the computer from the Sharp Digital Imager. Make the
appropriate selections and click Next.
15 The software will then detect those Sharp Digital Imagers that have the scanner function
enabled on the network.
Bulletin # NS-ARPB2-022 Page 9 of 11
Page 10

16 Detected scanning enabled Sharp Digital Imagers will now appear under Known Copiers. Click
the check box next to the Sharp Digital Imager to be used. Click Next.
17 To complete the setup wizard, click Finish.
Bulletin # NS-ARPB2-022 Page 10 of 11
Page 11
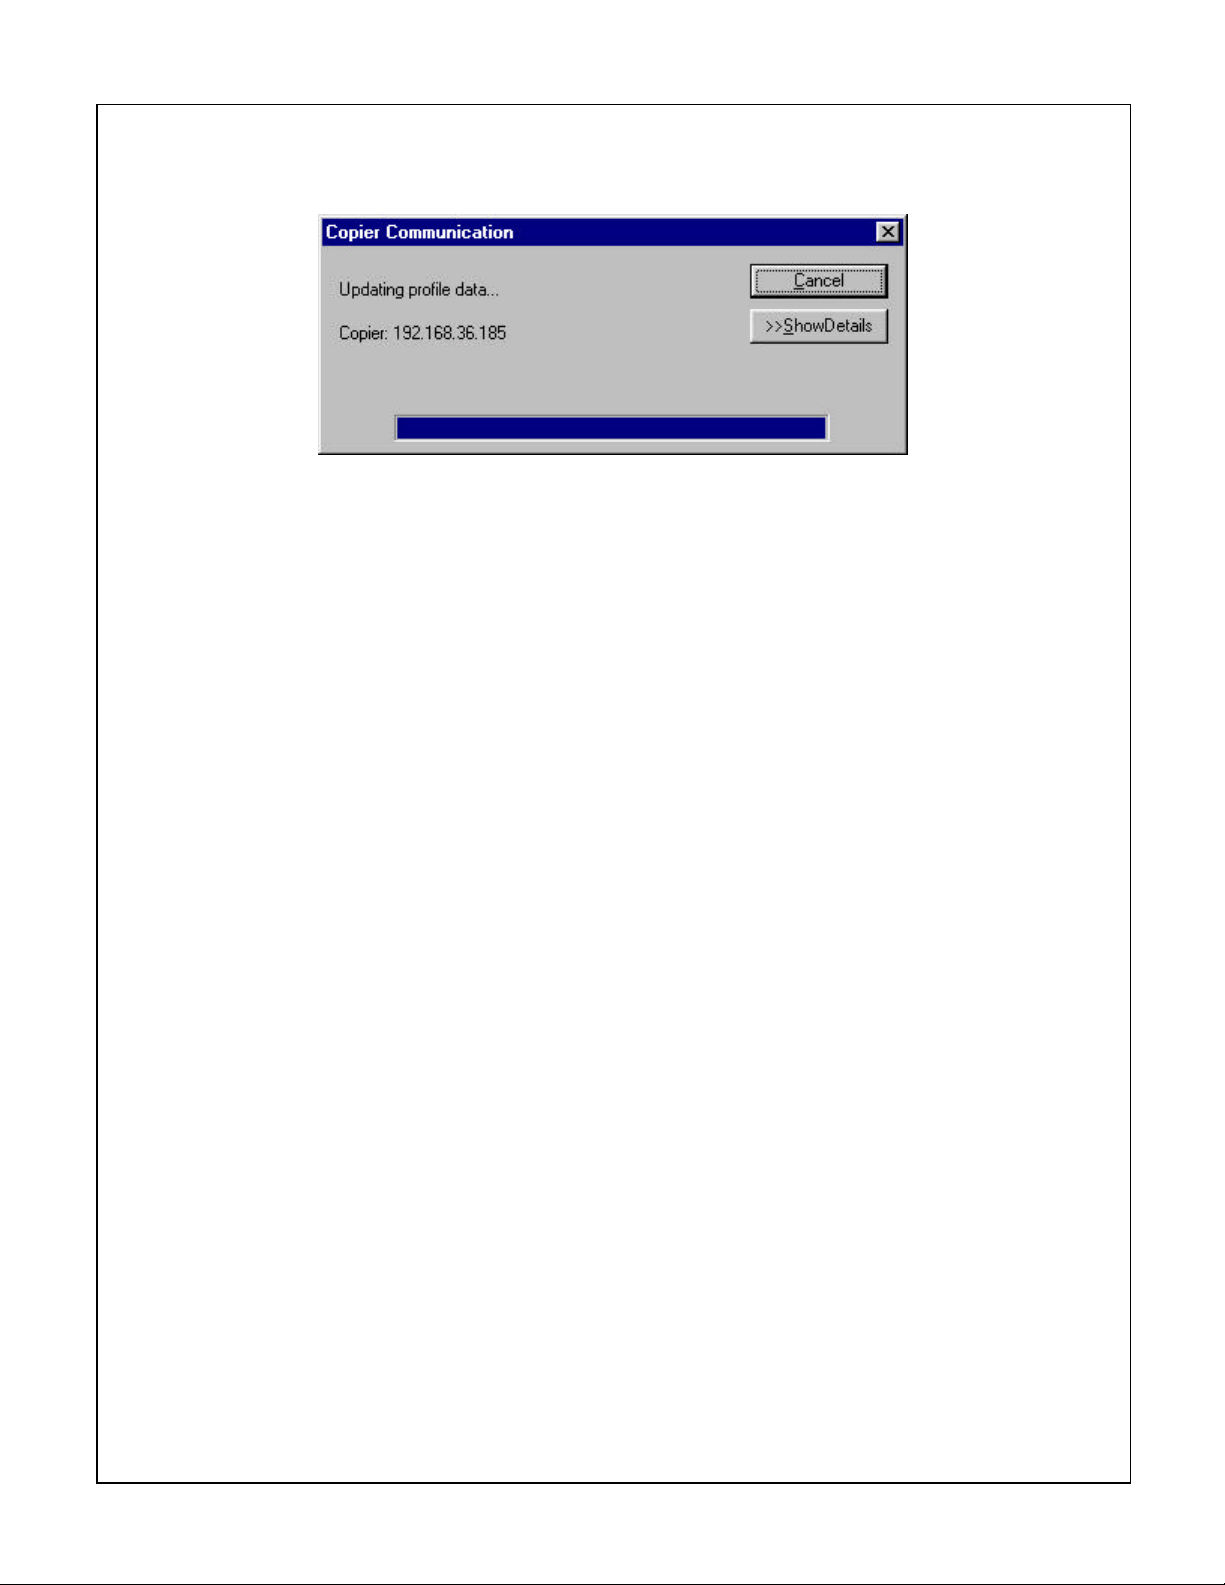
18 The information selected will then be sent to the designated Sharp Digital Imager. Wait for this
to complete the update.
19 The software installation is now complete. Refer to the Operation Manual for instructions on
using Sharpdesk and the Network Scanner Tool.
Bulletin # NS-ARPB2-022 Page 11 of 11
Page 12

Dateiname: ARPB2-022_NS1.doc
Verzeichnis: F:\TS-PP\PPC\Produkte\AR-NS1\Installationsanleitung
Vorlage: F:\Docs\NSB\NSB.DOT
Titel:
Thema:
Autor: Administrator
Stichwörter:
Kommentar:
Erstelldatum: 08.01.01 15:30
Änderung Nummer: 2
Letztes Speicherdatum: 08.01.01 15:30
Zuletzt gespeichert von: SEG304
Letztes Druckdatum: 05.02.01 16:45
Nach letztem vollständigen Druck
Anzahl Seiten: 11
Anzahl Wörter: 679 (ca.)
Anzahl Zeichen: 3.874 (ca.)
 Loading...