

Page 1
VCR/DVD COMBINATION
®
MODEL
OPERATION MANUAL
DV-NC65H
The region number for this DVD player is 2.
NTSC/PAL
2
(01) 676 0648 if telephoning from Ireland).
If you require any advice or assistance regarding your Sharp product, please visit our web-site
www.sharp.co.uk/support. Customers without Internet access may telephone the 08705 274277
during office hours (or
DV-NC65H
100% of the pulp used
from sustainable forests
in making this paper comes
OPERATION MANUAL
TINS-A222WJZZ
Printed in the UK
Osaka, Japan
Manchester M40 5BE
Sharp House, Thorp Road, Newton Heath
SHARP ELECTRONICS (U.K.) LTD.
SHARP CORPORATION
DVNC65HHyo1_4.pm6 30/8/02, 2:10 pm1
Page 2

This equipment complies with the requirements of
Directives 89/336/EEC and 73/23/EEC as amended by 93/68/EEC.
• If you are unable to resolve a problem using the TROUBLESHOOTING guide,
do not remove the cabinet or attempt to service this Unit yourself.
• For service please contact your dealer. If this is not possible, please call our
Customer Information centre for details of your nearest Sharp Service Centre.
• In the unlikely event of this equipment requiring repair during the guarantee period,
you will need to provide proof of the date of purchase to the repairing company.
Please keep your invoice or receipt which is supplied at the time of purchase.
• Certain replacement parts and accessories may be obtained from our main parts
distributor who can be contacted at: Willow Vale Electronics Limited
Tel. 0121 766 5414. Most credit/debit cards accepted.
SHARP Customer Helpline: Tel. 08705 274277 during office hours
(or (01) 676 0648 if telephoning from Ireland)
Alternatively, please visit our web-site:
www.sharp.co.uk/support
• Specifications are subject to change without notice, as part of our policy of
continuous improvement.
• No liability is accepted for any inaccuracies or omissions in this publication, although
every possible care has been taken to make it complete and as accurate as
possible.
SAFETY WARNINGS
Observe all warnings for your safety and to ensure trouble free use of this Unit.
2
DVNC65HHYO2.PM6 30/7/02, 11:26 am2
Page 3
SPECIAL NOTE FOR USERS IN THE U.K.
This VCR/DVD combination unit is suitable only for connection to
the UK mains. The unit is fitted with a moulded 3-pin mains plug
with a 3-amp fuse. The unit does not have a mains power switch.
When connected to the mains, the unit will draw current at all times
to power the clock. Be sure to unplug the unit when it is not to be
used for several months.
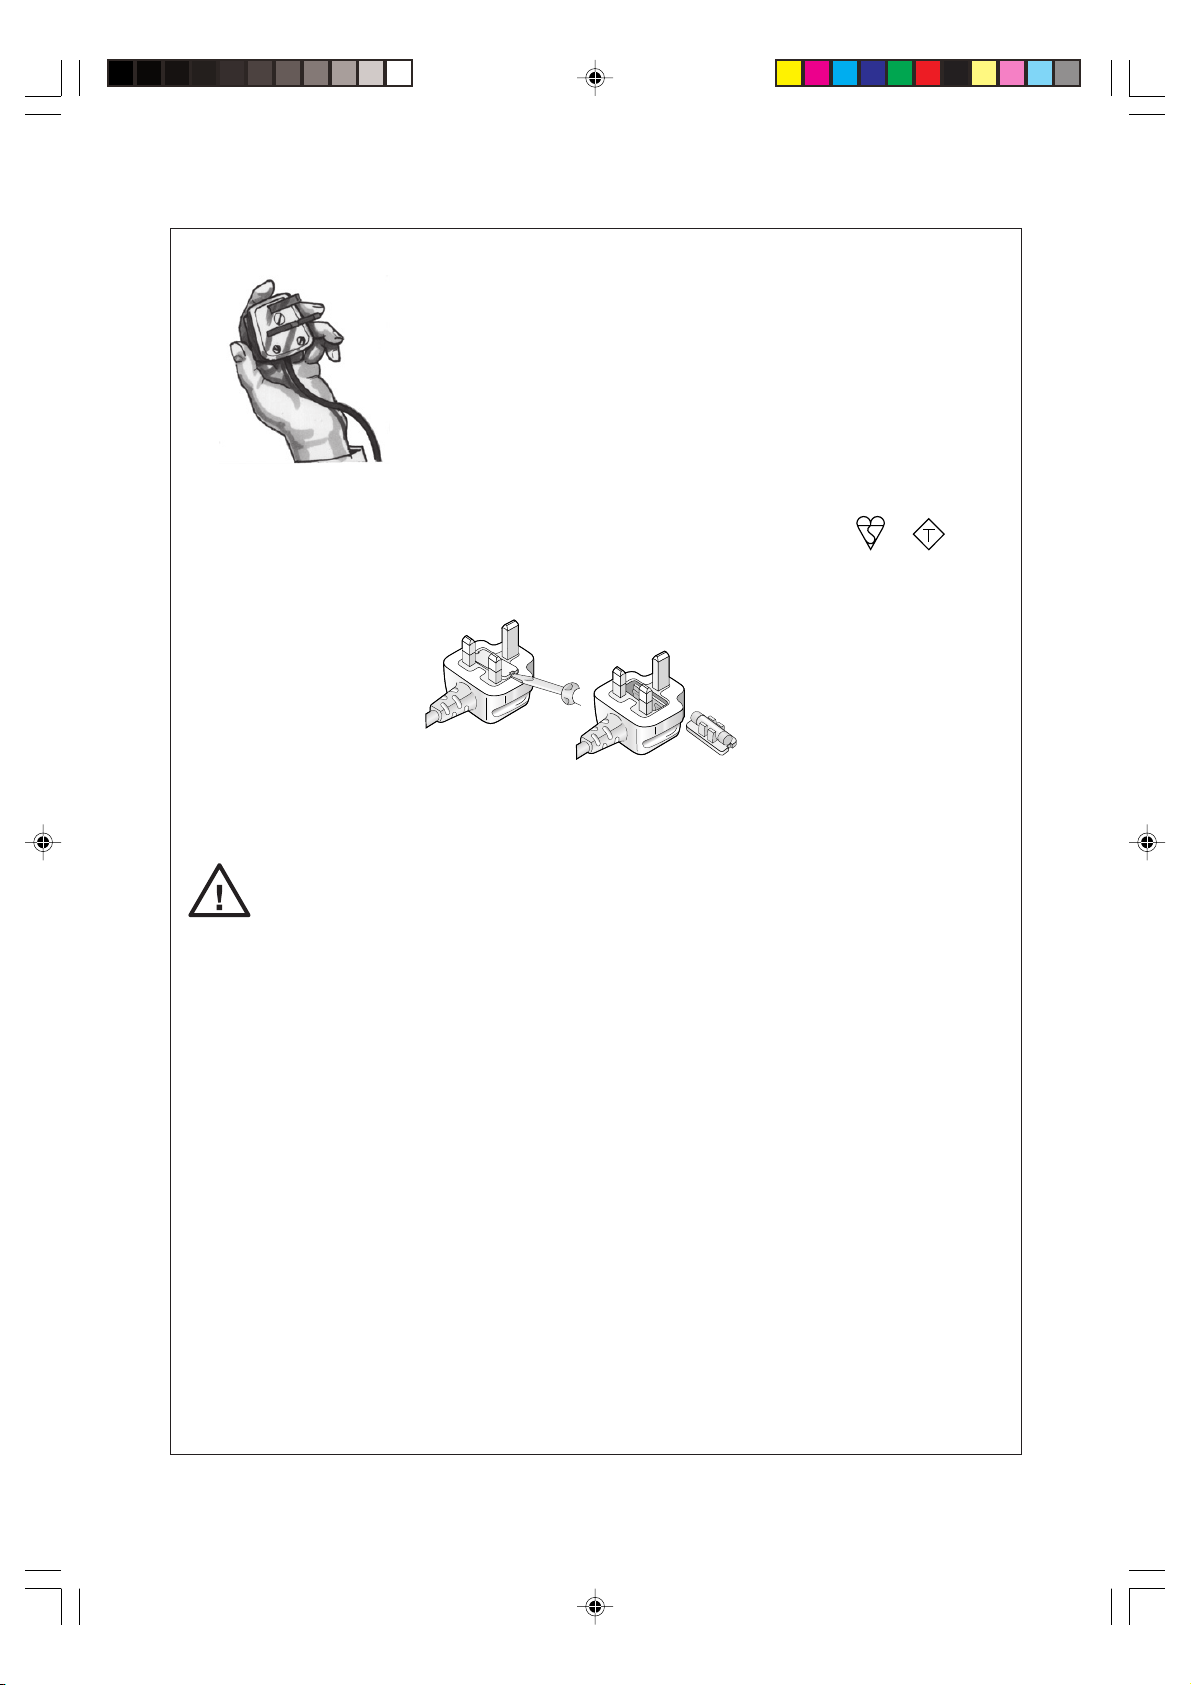
The mains lead of this product is fitted with a non-rewireable (moulded) plug incorporating a 3A fuse.
Should the fuse need to be replaced, a BSI or ASTA approved BS 1362 fuse marked or and of
ASA
the same rating as above, which is also indicated on the pin face of the plug, must be used.
Always refit the fuse cover after replacing the fuse. Never use the plug without the fuse cover fitted.
In the unlikely event of the socket outlet in your home not being compatible with the plug supplied, cut
off the mains plug and fit an appropriate type.
DANGER: The fuse from the cut-off plug should be removed and the cut-off plug destroyed
immediately and disposed of in a safe manner.
Under no circumstances should the cut-off plug be inserted elsewhere into a 13A socket
outlet, as a serious electric shock may occur.
To fit an appropriate plug to the mains lead, follow the instructions below:
IMPORTANT: The wires in the mains lead are coloured in accordance with the following code:
Blue: Neutral
Brown:Live
As the colours of the wires in the mains lead of this product may not correspond with the coloured
markings identifying the terminals in your plug, proceed as follows:
—The wire which is coloured blue must be connected to the plug terminal which is marked N or
coloured black.
—The wire which is coloured brown must be connected to the plug terminal which is marked L or
coloured red.
Ensure that neither the brown nor the blue wire is connected to the earth terminal in your three-pin plug.
Before replacing the plug cover make sure that:
—If the new fitted plug contains a fuse, its value is the same as that removed from the cut-off plug.
—The cord grip is clamped over the sheath of the mains lead and not simply over the lead wires.
IF YOU HAVE ANY DOUBT, CONSULT A QUALIFIED ELECTRICIAN.
DVNC65H003_008.pm6 30/8/02, 10:17 am3
3www.sharp.co.uk/support
Page 4

About This Manual
• All mentions of “the Unit” refer to the DV-NC65H VCR/DVD COMBINATION.
• All mentions of “the Remote” refer to the remote control unit.
• The following table describes the icons used in this Operation Manual.
Icon Meaning
Tips and Hints for easier operation
DVD
DVD
C D
C D
Functions for DVD
Functions for Audio CD
Quick Start Guide (the separate sheet)
GENERAL INFORMATION
CONNECTION AND INITIAL SETTING
VCR, DVD SETUP
WATCHING THE VCR, DVD
OTHER INFORMATION
Important!
Be sure to read this Operation Manual carefully before using the Unit for the first time, and keep it on hand for
future reference when you experience operational problems.
4
DVNC65H003_008.pm6 30/8/02, 10:17 am4
www.sharp.co.uk/support
Page 5

SAFETY INFORMATION
Note:
This unit can be used only where the power
supply is AC 230V-240V, 50Hz. It cannot be used
elsewhere.
CAUTION:
USE OF CONTROLS OR ADJUSTMENTS OR
PERFORMANCE OF PROCEDURES OTHER
THAN THOSE SPECIFIED HEREIN MAY RESULT
IN HAZARDOUS RADIATION EXPOSURE.
AS THE LASER BEAM USED IN THIS UNIT IS
HARMFUL TO THE EYES, DO NOT ATTEMPT TO
DISASSEMBLE THE CABINET. REFER SERVICING TO QUALIFIED PERSONNEL ONLY.
WARNING:
TO REDUCE THE RISK OF FIRE OR ELECTRIC
SHOCK, DO NOT EXPOSE THIS EQUIPMENT TO
RAIN OR MOISTURE.
INFORMATION
GENERAL
• This Unit is classified as a CLASS 1 LASER
product.
• The CLASS 1 LASER PRODUCT label is located
on the rear cover.
• This product contains a low power laser device.
To ensure continued safety do not remove any
cover or attempt to gain access to the inside of
the product. Refer all servicing to qualified
personnel.
CLASS 1
LASER PRODUCT
(Rear of product)
TO REDUCE THE RISK OF FIRE OR ELECTRIC
SHOCK, AND ANNOYING INTERFERENCE, USE
THE RECOMMENDED ACCESSORIES ONLY.
Laser Diode Properties
Material: AlGaInP
Wave length: 650 nm
Emission Duration: Continuous
Laser output: Max. 0.7 mW
Power Lead Protection
To avoid any malfunctions of the unit, and to protect
against electric shock, fire or personal injury, please
observe the following.
• Hold the plug firmly when connecting or
disconnecting the AC power lead.
• Keep the AC power lead away from heating
appliances.
• Never put any heavy object on the AC power lead.
• Do not attempt to repair or reconstruct the AC
power lead in any way.
SA005WJ
CAUTION-LASER RADIATION WHEN OPEN. DO NOT STARE INTO BEAM
OR VIEW DIRECTLY WITH OPTICAL INSTRUMENTS.
VORSICHT-LASERSTRAHLUNG, WENN GEFFNET. BLICKEN SIE NICHT IN DEN STRAHL
UND BETRACHTEN SIE DIESEN NICHT DIREKT MIT OPTISCHEN INSTRUMENTEN.
ATTENTION-RADIATION LASER EN CAS D'OUVERTURE. NE PAS FIXER LE
FAISCEAU NI REGARDER DIRECTEMENT DES INSTRUMENTS OPTIQUES.
VARNING-LASERSTRÅLNING NÄR DENNA DEL ÄR ÖPPNAD. STIRRA EJ IN
I STRÅLEN OCH BETRAKTA EJ STRÅLEN MED OPTISKA INSTRUMENT.
VARO! AVATTAESSA OLET ALTTIINA LASERSÄTEILYLLE. ÄLÄ TUIJOTA
SÄTEESEEN ÄLÄKÄ KATSO SITÄ OPTISEN LAITTEEN LÄPI.
VARNING-LASERSTRÅLNING NÄR DENNA DEL ÄR ÖPPNAD. STIRRA EJ IN I
STRÅLEN OCH BETRAKTA EJ STRÅLEN GENOM OPTISKT INSTRUMENT.
ADVARSEL-LASERSTRÅLING NÅR DEKSEL ÅPNES. STIRR IKKE INN I
STRÅLEN ELLER SE DIREKTE MED OPTISKE INSTRUMENTER.
ADVARSEL-LASERSTRÅLING VED ÅBNING. SE IKKE IND I STRÅLENHELLER IKKE MED OPTISKE INSTRUMENTER.
DVNC65H003_008.pm6 30/8/02, 10:17 am5
5www.sharp.co.uk/support
Page 6

SAFETY INFORMATION
Location and Handling
• Do not place your Unit in enclosed spaces or do
not cover it to prevent excessive temperatures
inside the unit.
• Do not place the Unit in direct sunlight, or near heat
sources.
• Keep the Unit away from strong magnetic fields, i.e.
loudspeakers etc.
• Do not place any object containing water or other
liquids on the Unit. In the event that liquid should
enter the cabinet, unplug the Unit immediately and
contact the retailer or service centre approved by
SHARP immediately.
• Do not remove the Unit cabinet. Touching parts
inside the cabinet could result in electric shock and/
or damage to the Unit. For service and adjustment
inside the cabinet, call a qualified dealer or service
centre approved by SHARP.
Periods of no use
When the unit is not being used, switch the unit to the
Standby mode.
When left unused for a long period of time, the unit
should be unplugged from the household AC socket.
No Fingers or Other Objects Inside
Do not put any foreign object on the disc tray.
Stacking
Place the unit in a horizontal position, and do not
place anything heavy on it.
Condensation
Moisture may form on the pickup lens in the following
conditions:
• immediately after a heater has been turned on.
• in a steamy or very humid room.
• when the unit is suddenly moved from a cold
environment to a warm one.
If moisture forms inside this unit, it may not operate
properly.
In this case, turn on the power and wait about one
hour for the moisture to evaporate.
Cleaning
Unplug your Unit before cleaning. Use a damp cloth
for cleaning. Do not use cleaning fluids or aerosols
which could enter the unit and cause damage, fire, or
electrical shock. These substances may also deteriorate the finish of your Unit.
If there is Noise Interference on the
TV While a Broadcast is being
Received
Depending on the reception condition of the TV,
interference may appear on the TV monitor while you
watch a TV broadcast and the unit is left on. This is
not a malfunction of the unit or the TV. To watch a TV
broadcast, turn off the unit.
Service
Do not attempt to service this Unit yourself. Please
refer any service to the nearest service centre
approved by SHARP.
Copyright
Recording and playback of any material may require
consent.
Please refer particularly to the provisions of the
Copyright Act 1956, the Dramatic and Musical
Performers Protection Act 1958, the Performers
Protection Acts 1963 and 1972 and to any subsequent statutory enactments and orders.
• VIDEO Plus+ and PlusCode are registered
trademarks of Gemstar Development Corporation.
• The VIDEO Plus+ system is manufactured under
license from Gemstar Development Corporation.
Copy Protection
This Unit supports Macrovision copy protection.
On DVDs that include a copy protection code, if the
contents of the DVD are copied using a VCR, the
copy protection code prevents the videotape copy
from playing normally.
Apparatus Claims of U.S.Patent Nos. 4,631,603,
4,577,216, 4,819,098 and 4,907,093 licensed for
limited viewing uses only.
This product incorporates copyright protection
technology that is protected by method claims of
certain U.S. patents and other intellectual property
rights owned by Macrovision Corporation and
other rights owners. Use of this copyright
protection technology must be authorized by
Macrovision Corporation, and is intended for home
and other limited viewing uses only unless
otherwise authorized by Macrovision Corporation.
Reverse engineering or disassembly is prohibited.
Recommended Measures for
Optimum Picture Excellence
The unit is a precision device that is constructed
using extremely accurate technology.
Soiling or friction affecting the pickup lens or disc
drive can impair the image quality.
neither video or audio will be played back. To obtain
optimum picture quality, the Unit should be checked
(cleaning and replacement of some parts) every
1,000 hours. Note that this period varies depending
on the environment (temperature, humidity, dust, etc.)
in which the Unit is used. Contact your authorized
Sharp supplier for details.
Do not attempt to clean the pickup lens yourself.
In the worst case,
6
DVNC65H003_008.pm6 30/8/02, 10:17 am6
www.sharp.co.uk/support
Page 7

Contents
GENERAL INFORMATION
DVD SETUP
INFORMATION
GENERAL
SAFETY INFORMATION ................................ 5
Contents......................................................... 7
Types of Discs that Can Be Played on
This Unit ..................................................... 9
Disc Handling and Maintenance ................ 11
Features ....................................................... 12
Accessories ................................................. 13
Major Components...................................... 14
CONNECTION AND INITIAL SETTINGS
Basic Connection ........................................ 18
Connecting to ANTENNA IN/ANTENNA OUT .. 18
Connecting a TV with LINE 1 (TV) Output
and LINE 2 Input SCARTS .......................... 19
Connecting a TV Equipped with VIDEO/
AUDIO Input Jacks ....................................... 20
DVD Audio Connections ............................. 21
Connecting a TV Equipped with S-VIDEO
Input Jacks ...................................................21
Connecting to Audio Equipment .......................21
Playing 2 channel audio ................................ 21
Playing Dolby Digital (5.1 channel), DTS or
MPEG audio ............................................... 22
Preparations Before Using The Product ... 24
VCR SETUP
VCR Auto Installation ................................. 26
VCR Setup.................................................... 28
Menu Screen ....................................................28
Mode Selection ................................................. 29
Manually Tuning Channel Setting ..................... 30
Channel Sort .................................................... 32
Deleting Channels ............................................33
Re-naming Channels ........................................ 34
Clock Setting .................................................... 35
Manual Clock Setting ....................................35
Post Code Security ........................................... 36
Changing Post Code Pin Number ................. 36
Decoder Switching Operation ........................... 37
Selecting the Output from the VCR ..................37
VCR Display Information ............................ 38
VCR Reset ....................................................... 38
DVD Setup.................................................... 40
About the SET UP Screen ................................ 40
TV MODE Setting ............................................. 41
PARENTAL LEVEL Setting ...........................43
AUDIO Setting ..................................................45
Setting the COMPRESSION
(Dolby Digital output level) ..........................45
Setting the DOLBY DIGITAL .........................46
Setting the MPEG ......................................... 47
Setting the CINEMA VOICE ..........................48
DISC LANGUAGE Setting ................................ 49
Setting SUBTITLE, AUDIO and MENU
languages ................................................... 49
Selecting languages from OTHER ................ 50
DVD Display Information ............................ 51
Operation Mode Indicators ...............................51
Language Code List for Disc Language ... 51
WATCHING THE VCR
Playback....................................................... 54
Playback ........................................................... 54
Picture Disturbance During Playback ............... 54
Pausing and Slow Motion ................................. 55
Fast Forwarding/Rewinding a Video Tape ........55
Forward/Reverse Visual Search .......................55
Automatic Head Cleaning System .................... 55
Playing Back an S-VHS Cassette..................... 56
Playing Back an NTSC Cassette ...................... 56
Blue Mute ......................................................... 57
Colour ............................................................... 57
16:9 Playback and Recording........................... 58
Audio Output Mode ..................................... 59
Hi-Fi Stereo Sound ...........................................59
Nicam Hi-Fi Stereo Soun d ............................... 59
Sharp Super Picture.................................... 60
Auto Repeat/Auto Zero Back ...................... 61
Auto Repeat...................................................... 61
Auto Zero Back ................................................. 61
DPSS (Digital Program Search System) /
Skip Search.............................................. 62
DPSS ................................................................ 62
Skip Search ......................................................62
CONNECTION AND
INITIAL SETTINGS
VCR SETUP
DVD SETUP
WATCHING
THE VCR
WATCHING
THE DVD
INFORMATION
OTHER
DVNC65H003_008.pm6 30/8/02, 10:17 am7
www.sharp.co.uk/support
7
Page 8

Contents
TV Program Recording ............................... 63
Selection of a Channel .................................. 63
Tape Speed Selection ...................................63
Immediate Recording .................................... 63
Simple Timed Recording .................................. 63
Timer Recording.......................................... 64
How to Use the VIDEO Plus+® system
to Make a Recording ....................................64
How to Set a Delayed Recording ..................... 66
Setting a Recording ...................................... 66
How to Check, Change, and Cancel a Delayed
Recording..................................................... 68
Checking a Recording ................................... 68
Changing a Recording .................................. 69
Cancelling a Recording ................................. 69
Recording from Other Equipment ............. 70
Tape Remaining ........................................... 71
Recording a DVD Disc onto a Video
Cassette ................................................... 72
Recording a DVD disc onto a video cassette
(Tape Editing mode) ..................................... 72
WATCHING THE DVD
Preparing to Use the DVD .......................... 74
When connecting a TV with the DVD
output jacks ..................................................74
When connecting a TV with the DVD/VCR
shared output jacks ......................................74
Playback....................................................... 75
Basic Play ......................................................... 75
Fast Forward/Fast Reverse............................... 76
Slow-Motion Play .............................................. 76
Still/Pause......................................................... 77
Frame Advance ................................................ 77
Skip (Forward/Reverse) .................................... 77
Angle Selection ........................................... 78
Playing MP3 Discs ...................................... 79
Regarding MP3 discs ....................................... 79
Playing MP3 discs ............................................79
To play MP3 discs............................................. 80
To play another file (music title)
while playing ................................................ 80
To skip the file while playing .............................80
About the Function Control Screen .......... 81
Direct skip (title/chapter/time) ........................... 82
Sub Title language setting ................................ 83
Angle setting ..................................................... 84
Audio setting ..................................................... 85
Advanced Surround setting ..............................86
Digital Gamma setting ......................................87
Direct Selection of Scenes ......................... 88
Selecting Scenes by Title Number ................... 88
Selecting Scenes from the Menu Screen .........88
Programmed Playback................................ 89
Chapter Programmed Playback ....................... 89
Track Programmed Playback ............................90
MP3 Files Programmed Playback ....................91
Repeat Playback.......................................... 92
Repeat playback ............................................... 92
A-B Repeat .......................................................93
Resume Function ........................................ 94
OTHER INFORMATION
Troubleshooting .......................................... 96
Definition of Terms ...................................... 98
Specifications ............................................ 101
Guarantee .................................................. 102
8
DVNC65H003_008.pm6 30/8/02, 10:17 am8
www.sharp.co.uk/support
 Loading...