

Page 1
CD-DP2400E
1
1
2
2
MINI COMPONENT SYSTEM
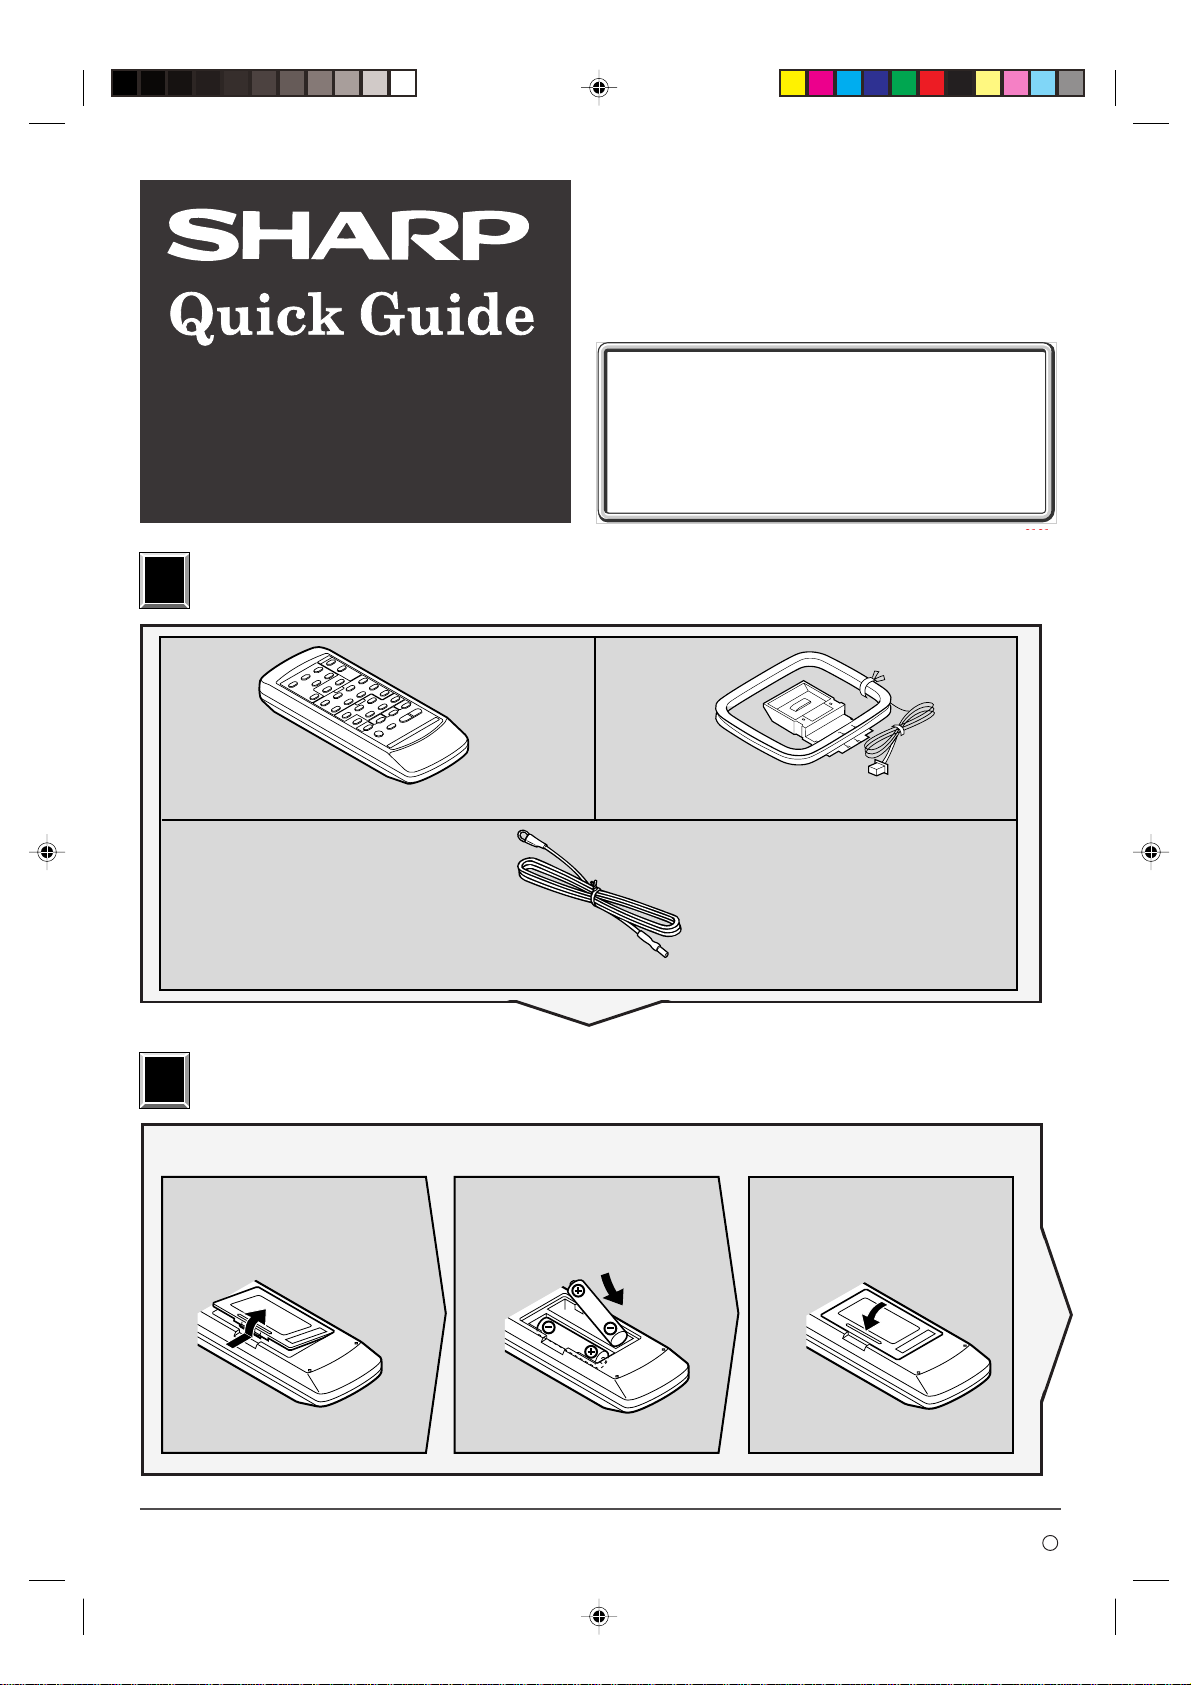
Accessories
Remote control × 1 AM loop aerial × 1
This Quick Guide will help you to correctly
install and operate your system.
If you require any advice or assistance regarding
your Sharp product, please visit our web-site
www.sharp.co.uk/support.
Customers without Internet access may telephone
08705 274277 during office hours (or (01) 676 0648
if telephoning from Ireland).
0101
FM aerial × 1
Battery installation of remote control
Use 2 “AA” size batteries (UM/SUM-3, R6, HP-7 or similar). Batteries are not included.
Remove the
123
battery cover.
Insert the batteries
as shown.
– 1 –
Replace the cover.
TINSE0479AWZZ
02H R KS 1
Page 2

System connections
3
3
FM aerial
AM loop aerial
Surround speaker
(Right)
Front speaker
(Right)
Centre speaker
Surround speaker
(Left)
Front speaker
(Left)
Wall socket
(AC 230 V, 50 Hz)
Surround speaker
(Right)
Front speaker (Right)
Red
Black
Centre speaker
Grey
Orange
RCA lead
(not supplied)
Surround speaker
(Left)
To the line
output sockets
VCR, DVD, etc.
Front speaker (Left)
TV
– 2 –
Page 3

Turn on your system
4
4
The first time the unit is plugged
in, the unit will enter the demonstration mode. Y ou will see words
scroll.
Press the
1
X-BASS/DEMO button
to cancel the demonstration mode.
Listening to a CD (CDs)
1
2
3
12 cm (5”)
8 cm (3”)
4
5
Press the ON/
2
STAND-BY button to
turn the power on.
Press the CD button.
Press the OPEN/CLOSE button to
open the disc tray.
Place the CD(s) on the disc tray, label side up.
When loading a third disc, press the
DISC SKIP button to turn the disc
tray, then place the CD in the open
position.
Press the OPEN/CLOSE button to
close the disc tray.
To select the CD you want to listen
to first, press one of the DISC-1 DISC-3 buttons.
Listening to the radio
FM stereo mode indicator
FM stereo receiving indicator
6
1
2
– 3 –
Press the / button to start playback.
Press the TUNER (BAND) button repeatedly to select the desired frequency band (FM or AM).
Press the TUNING/TIME ( or )
button to tune in to the desired station.
When the TUNING/TIME button is
pressed for more than 0.5 seconds,
scanning will start automatically and
the tuner will stop at the first receivable broadcast station.
To receive an FM stereo transmission:
Press the TUNER (BAND) button to display the
“ST” indicator.
” will appear when an FM broadcast is in
● “
stereo.
Page 4

Listening to a cassette tape (TAPE 1 or TAPE 2)
1
2
3
4
TAPE 1 TAPE 2
■ If trouble occurs
When this product is subjected to strong external interference
(mechanical shock, excessive static electricity, abnormal supply voltage due to lightning, etc.) or if it is operated incorrectly , it
may malfunction.
If such a problem occurs, do the following:
1. Set the unit to the stand-by mode and turn the power
on again.
If the unit is not restored in the previous operation, un-
2.
plug and plug in the unit, and then turn the power on.
Note:
If neither operation above restores the unit, clear all the memory
by resetting it.
Open the cassette door by pushing
the area marked “
Load a cassette into the TAPE 1 or
TAPE 2 cassette compartment with
the side to be played facing toward
you.
Press the T APE (1 2) button to select the cassette you want to listen
to.
Press the / button to start playback.
PUSH EJECT”.
■ Clearing all the memory (reset)
1. Press the ON/STAND-BY button to enter the power
stand-by mode.
Whilst pressing down the
2.
DEMO button, press the ON/STAND-BY button until
“CLEAR AL” appears.
Caution:
This operation will erase all data stored in memory including
clock, timer settings, tuner preset, and CD programme.
■
Maintenance
● Dirty heads, capstans or pinch rollers can cause poor
sound and tape jams. Clean these parts with a cotton swab
moistened with a commercial head/pinch roller cleaner or
isopropyl alcohol.
● When cleaning the heads, pinch rollers, etc., unplug the
unit which contains high voltages.
● After long use, the deck’s heads and capstans may be-
come magnetised, causing poor sound. Demagenetise
these parts once every 30 hours of playing/recording time
by using a commercial tape head demagnetiser. Read the
demagnetiser’s instructions carefully before use.
● Clean the dust or stain on the CD pickup lens using a com-
mercial cleaning disc (brush type).
/
button and the X-BASS/
– 4 –
TAPE 1
TAPE 2
A Playback head
B Capstan
C Pinch roller
D Erase head
E Recording/Playback head
B
A
E
D
C
C
B
 Loading...