

Page 1
Date: May. 14, 1996
COPIER : AR-5040
No. : ARE-011
(Service Information)
ABOUT HANDLING THE DIP SW
1.Model Name: AR-5040
2.General: We are adding instructions on making adjustments to the above models, and also
changing the handling procedures for the DIP SW of the RADF control PWB as
indicated below.
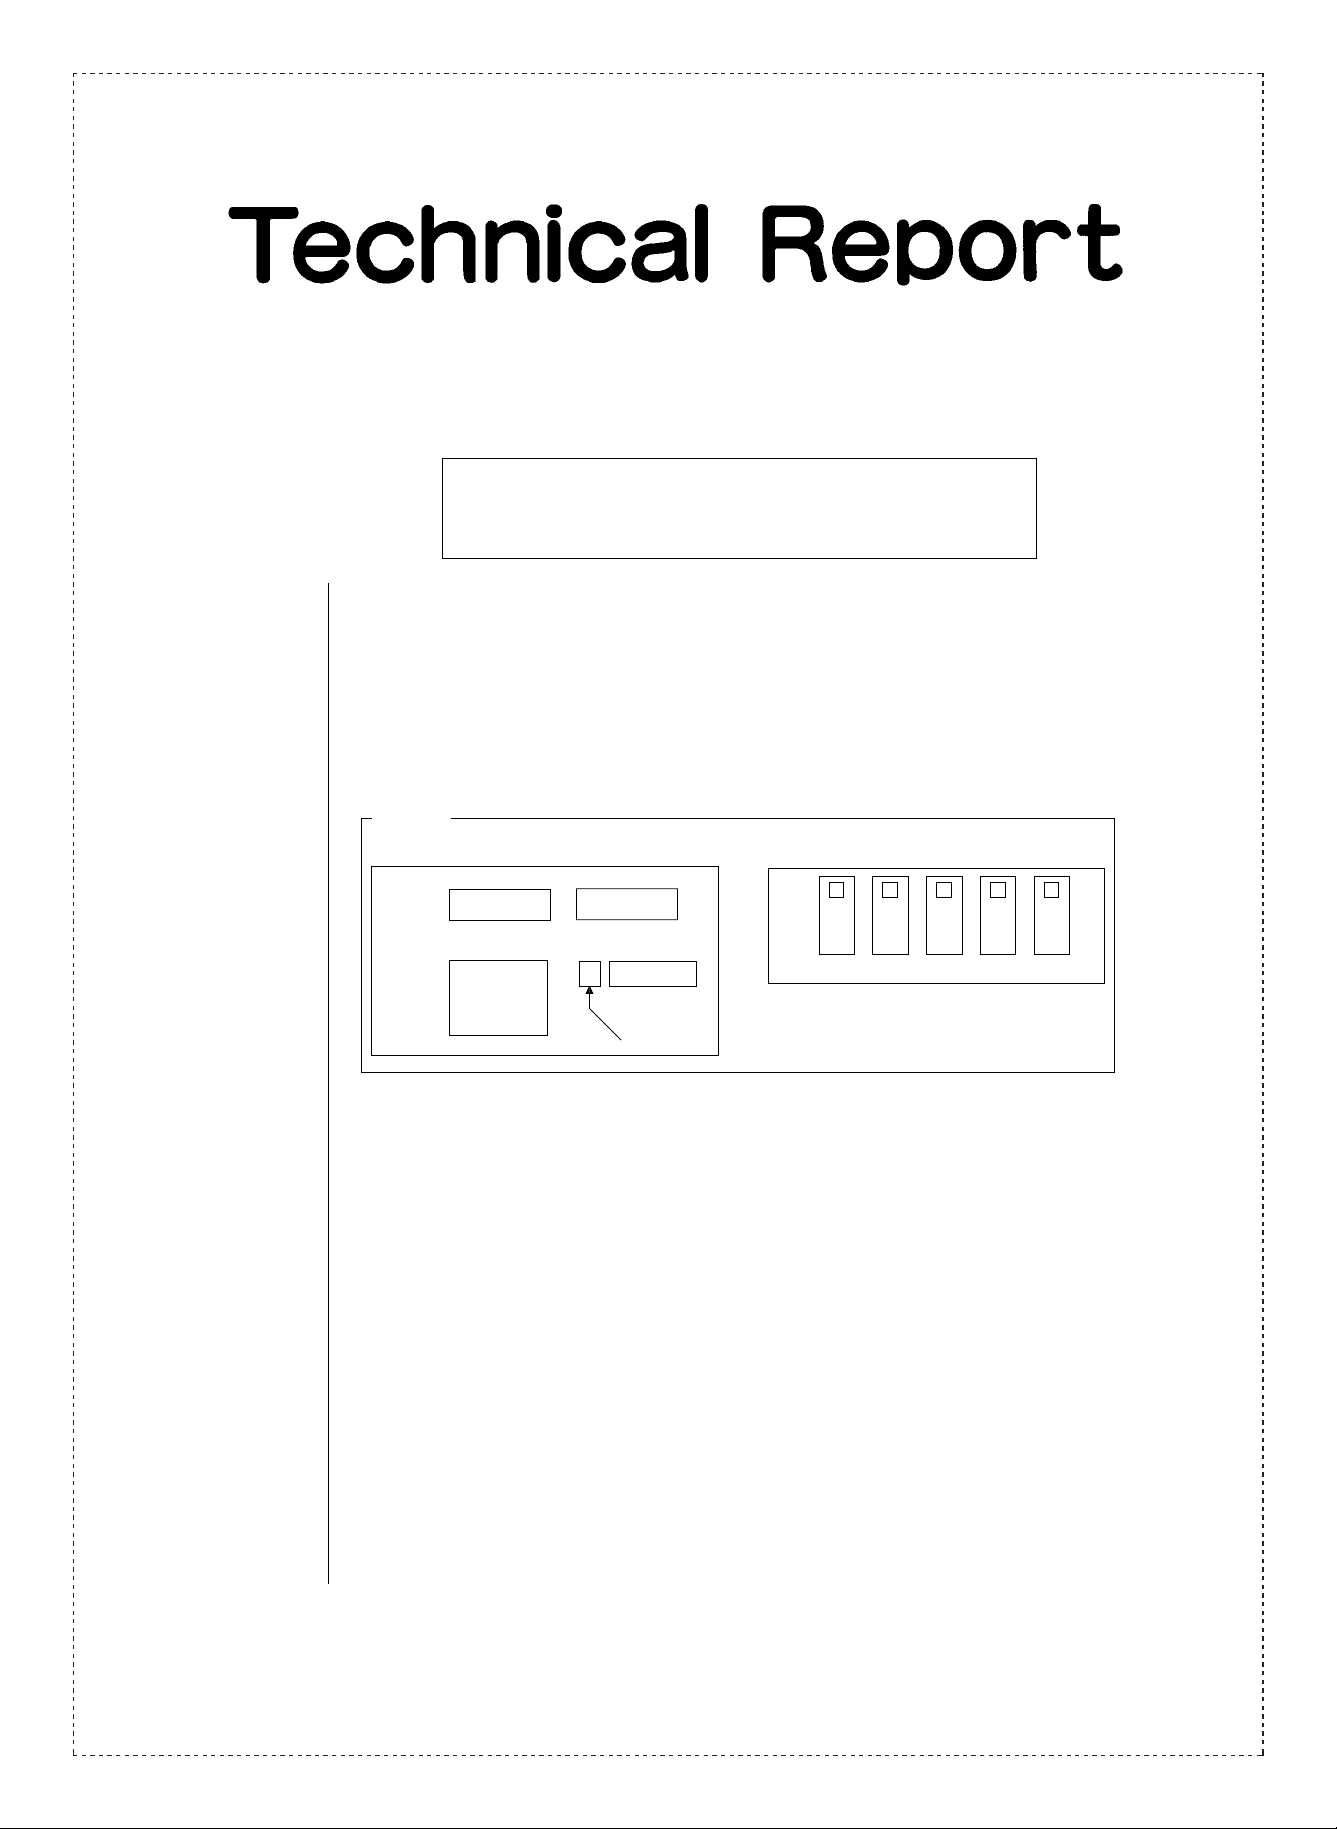
AR-5040
General view of the control PWB General view of the DIP switch
ROM
DIP SW
CPU
PUSH SW
OFF
ON
SW No.1 2345
SHARP CORPORATION Reprography Division
1/2
Green
C
Page 2
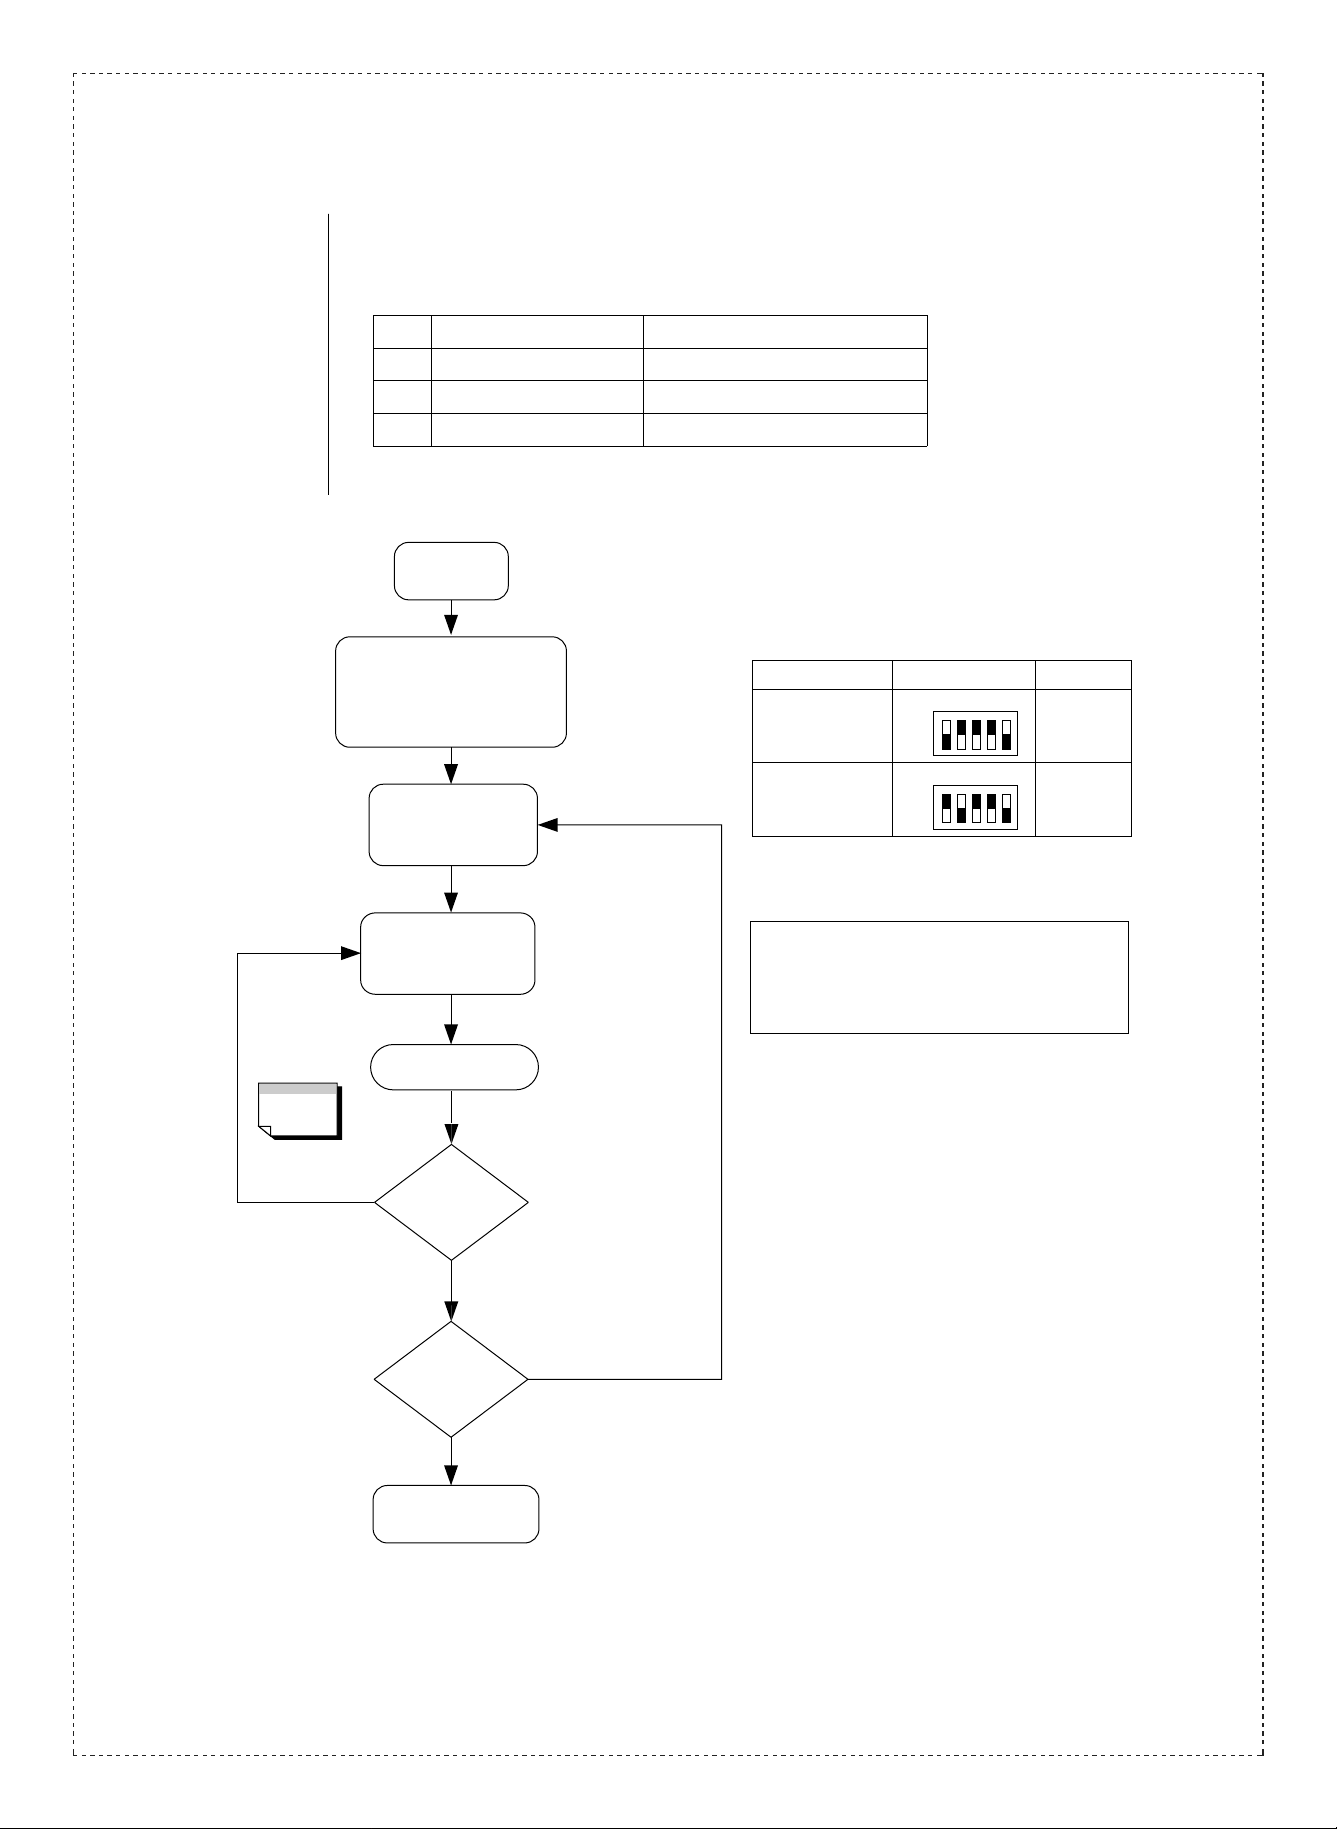
Adjust ments to the ADF
Please carry out the following three adjustments whenever changing any of the
RADF/ADF sensors.
No. Adjustment Part adjusted
1 Initializing the E2PROM Adjustment in ADF unit mode
2 Adjusting each sensor Adjustment in ADF unit mode
3 Original halt position adjustment Adjustment using Sim. 53 of the copier unit
ADF unit mode (E2PROM/sensor) adjustment procedure
Before making adjustments...... Open the ADF back side maintenance cover.
Turn the
copier off
DIP SW settings
While pressing on the switch (Push
SW) above the ADF PWB, turn the
copier on. (Keep the switch on for at
least one second.)
Set the DIP SW
See the DIP SW setting
chart to the right.
Adjustment DIP SW setting
E2 PROM
initialization
Sensor
adjustment
* All sensor adjustments for the AR5040 should follow the
above chart.
ON
OFF
ON
OFF
1
2345
1
2345
Model name
AR-5040
AR-5040
AR-5040
No
1
*
Open and close the paper
supply or paper discharge
cover. (Opening and
closing the ADF also
works.)
Push SW ON
The LED above
the PWB flashes
Yes
Make any other
necessary
adjustments
Yes
AR-5040
Note 1:
*
When there are no problems, LED 1 on the PWB
flashes. When there is a problem with the sensor, LEDs
3 or 4 flash. If this occurs, check each sensor for
trouble.
2/2
Turn off all the push SWs.
Turn the copier off.
That completes the procedure
 Loading...