

Page 1

MODEL
AR-C160
DIGITAL FULL COLOR
DIGITAL FULL COLOR
COPYING MACHINE
COPYING MACHINE
OPERATION MANUAL
OPERATION MANUAL
• GETTING STARTED
• GETTING STARTED
• MAKING COPIES
• MAKING COPIES
• SPECIAL FUNCTIONS
• SPECIAL FUNCTIONS
• SUPPLIES
• SUPPLIES
• COPIER TROUBLE?
• COPIER TROUBLE?
• GENERAL
• GENERAL
INFORMATION
INFORMATION
• OPTIONAL EQUIPMENT
• OPTIONAL EQUIPMENT
Page
Page
1-1
1-1
2-1
2-1
3-1
3-1
4-1
4-1
5-1
5-1
6-1
6-1
7-1
7-1
DigitalDigital
Page 2

❧❧❧❧❧❧❧❧❧❧❧❧❧❧❧❧❧❧❧❧❧❧❧❧❧❧❧❧❧❧❧❧❧❧❧❧❧❧❧❧❧❧❧❧❧❧❧
❧
The power switch positions are marked “I” to indicate power “ON” and
“ ” to indicate stand-by.
In the stand-by position, power is being supplied to a drying heater
within the optical system of the copier.
Caution:
For complete electrical disconnection, pull out the main plug.
The socket-outlet shall be installed near the equipment and shall be
easily accessible.
❧❧❧❧❧❧❧❧❧❧❧❧❧❧❧❧❧
❧
❧
❧❧❧❧❧❧❧❧❧❧❧❧❧❧❧❧❧
❧
❧❧❧❧❧❧❧❧❧❧❧❧❧❧❧❧❧❧❧❧❧❧❧❧❧❧❧❧❧❧❧❧❧❧❧❧❧❧❧❧❧❧❧❧❧❧❧
➢➣➢➣➢➣➢➣➢➣➢➣➢➣➢➣➢➣➢➣➢➣➢➣➢➣➢➣➢➣➢➣
➣
➢
FOR YOUR RECORDS ...
To protect against loss or theft, record and retain for reference the
copier’s serial number located on the right hand side at the rear corner
of the copier.
Model Number AR-C160
Serial Number
Date of Purchase
Place of Purchase
Authorized Sharp Copier
Service Department Number
➣➢➣➢➣➢➣➢➣➢➣➢➣➢➣➢➣➢➣
➢
➣➢➣➢➣➢➣➢➣➢➣➢➣➢➣➢➣➢➣➢➣➢➣➢➣➢➣➢➣➢➣➢➣
➢
➣➢➣➢➣➢➣➢➣➢➣➢➣➢➣➢➣➢➣
➢
Page 3
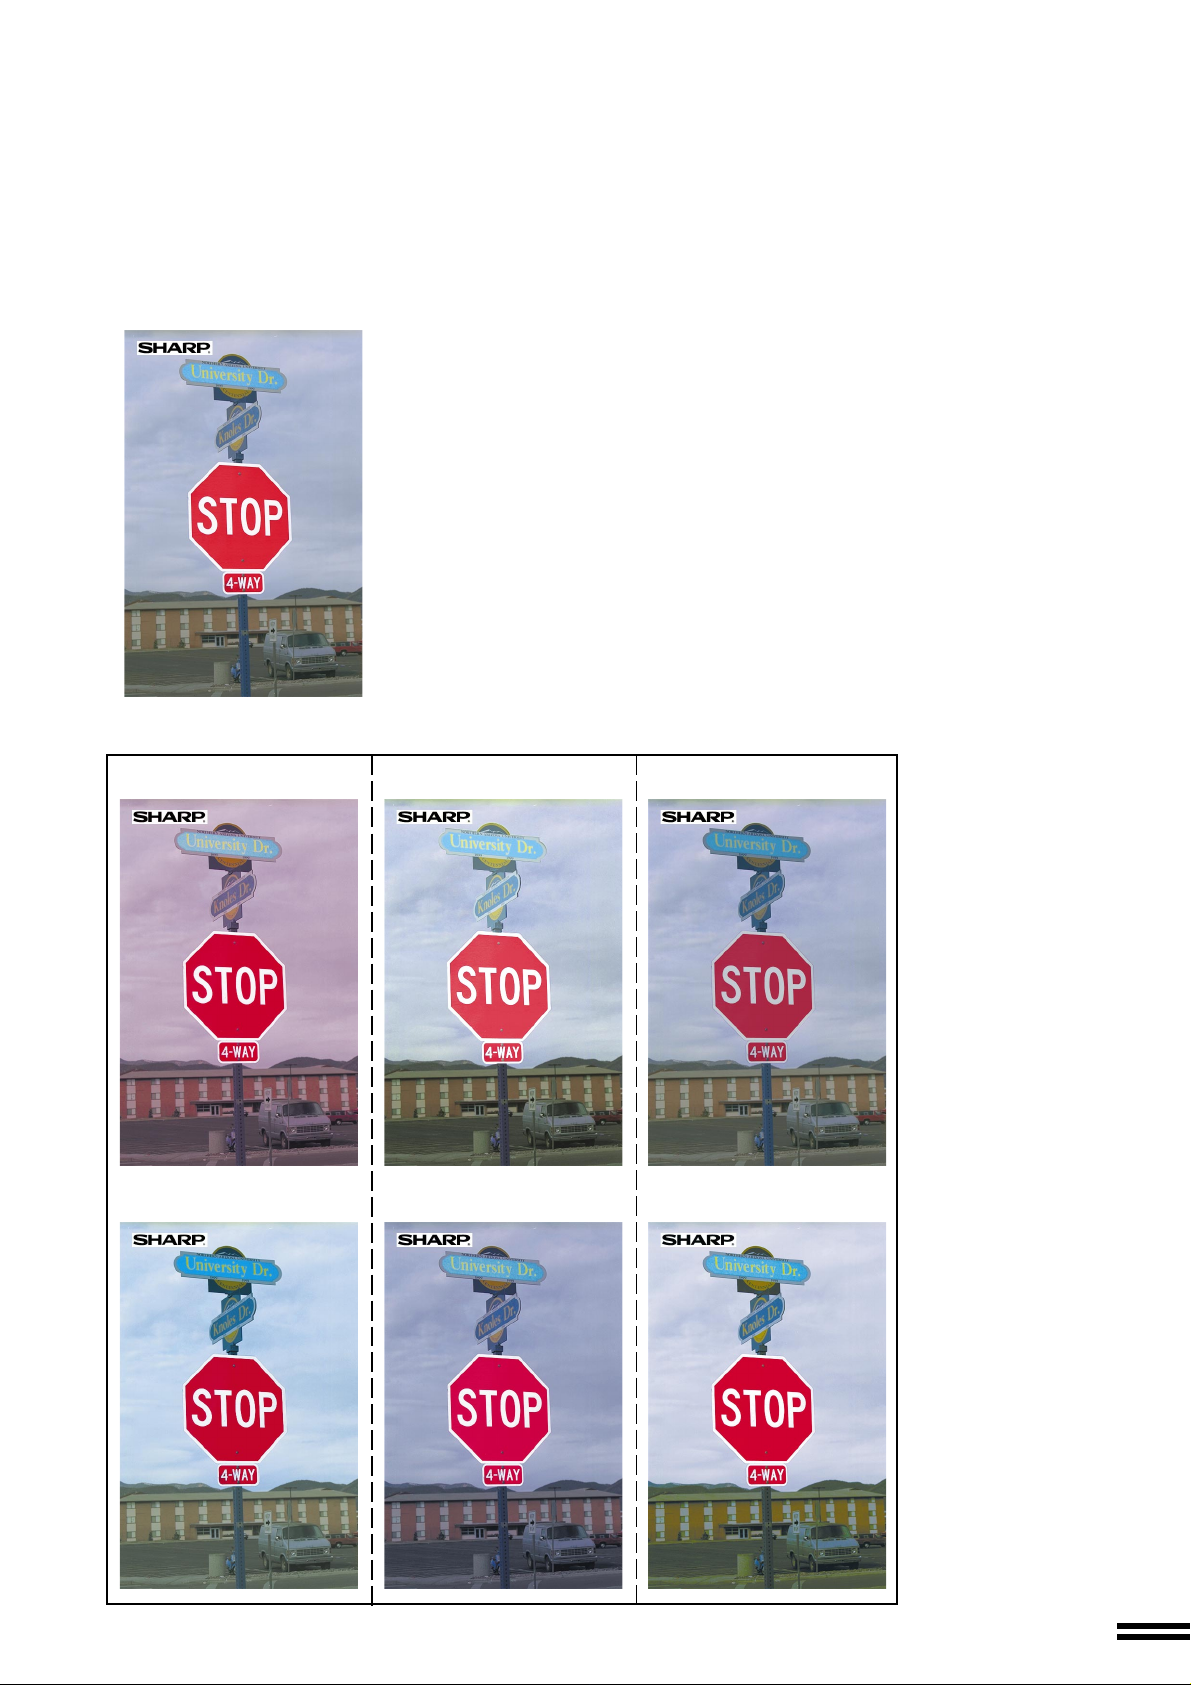
COLOR COPY SAMPLES
The following pages contain samples of the various color copying functions described in this manual. They are
designed to demonstrate the wide range of capabilities and applications for the Sharp AR-C160 digital full color
copying machine.
Note that the samples shown on page 1 to page 8 are not actual copies from the AR-C160 copier. The colors displayed
may differ from those of actual copies.
Color Copying with Special Features
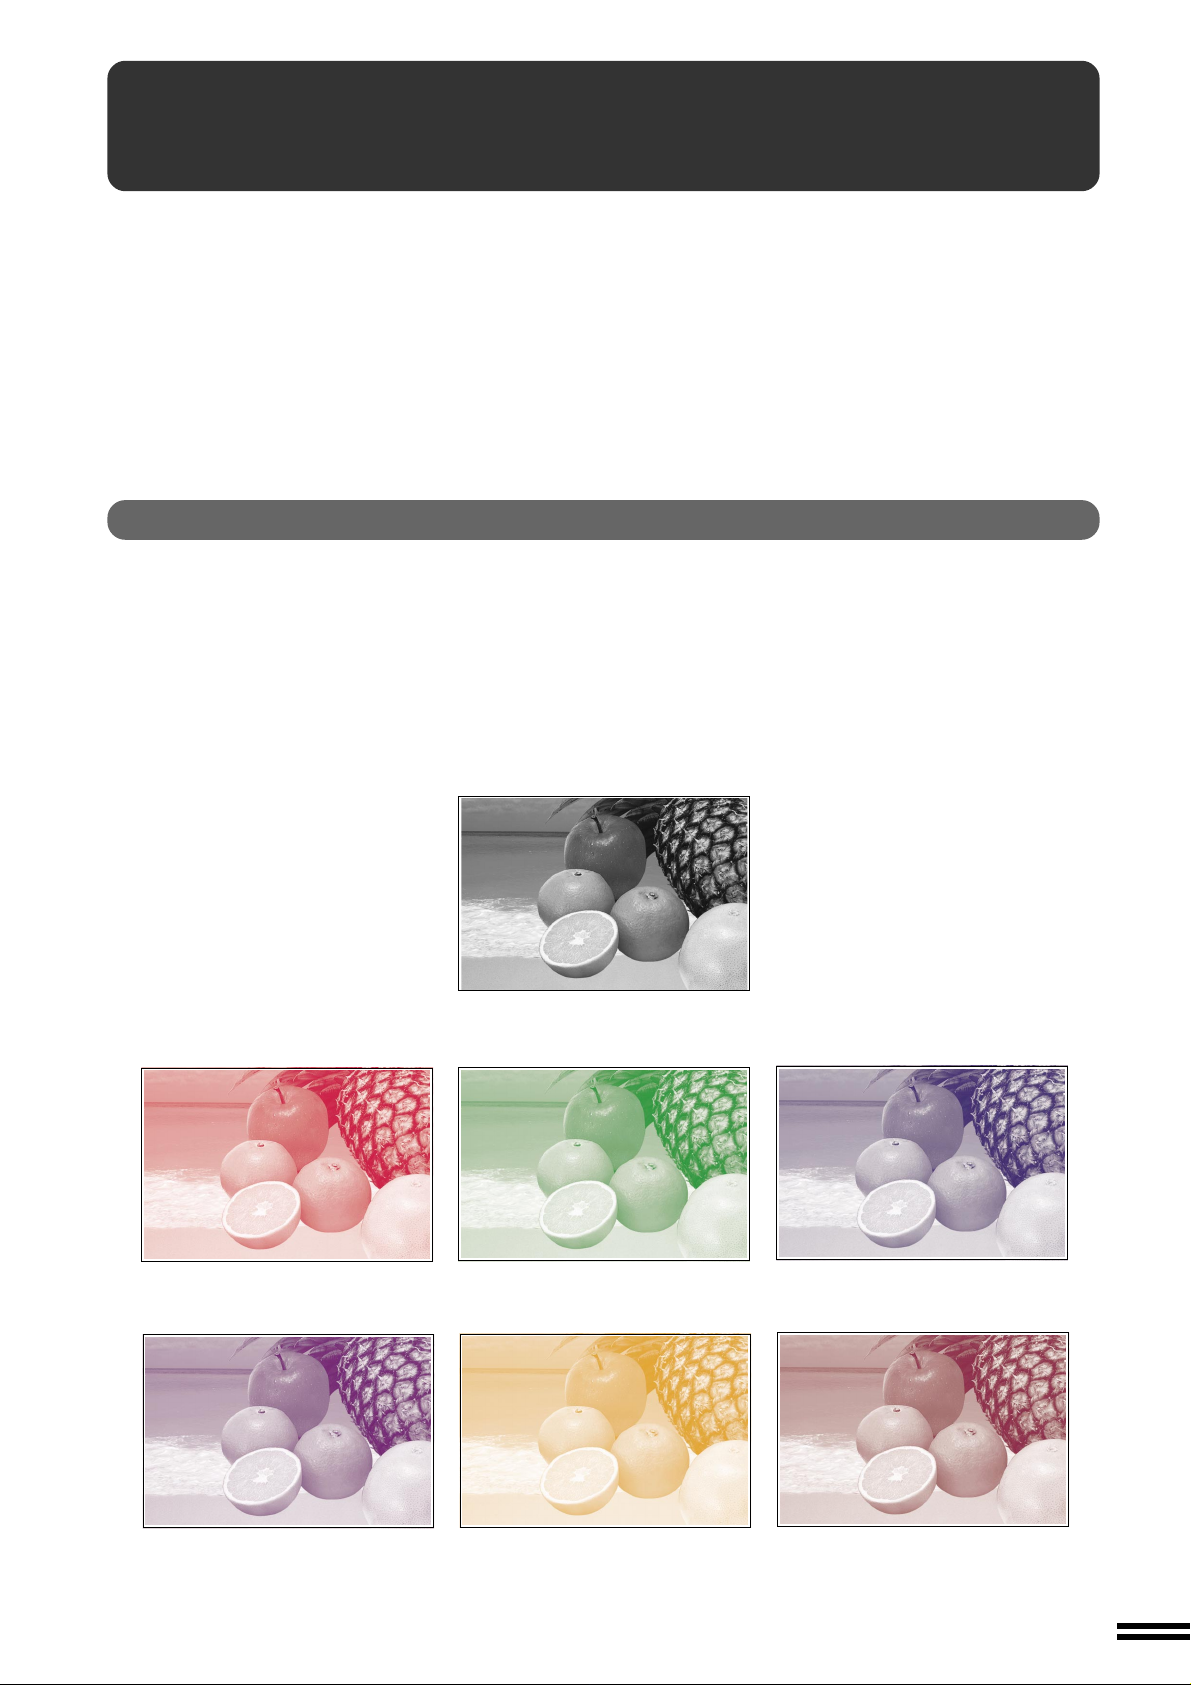
1. Single color copying (See page 3-26.)
The single color function is used to produce copies using a selected single color.
Red
Purple
Original
Green
Orange
Blue
Brown
1
Page 4
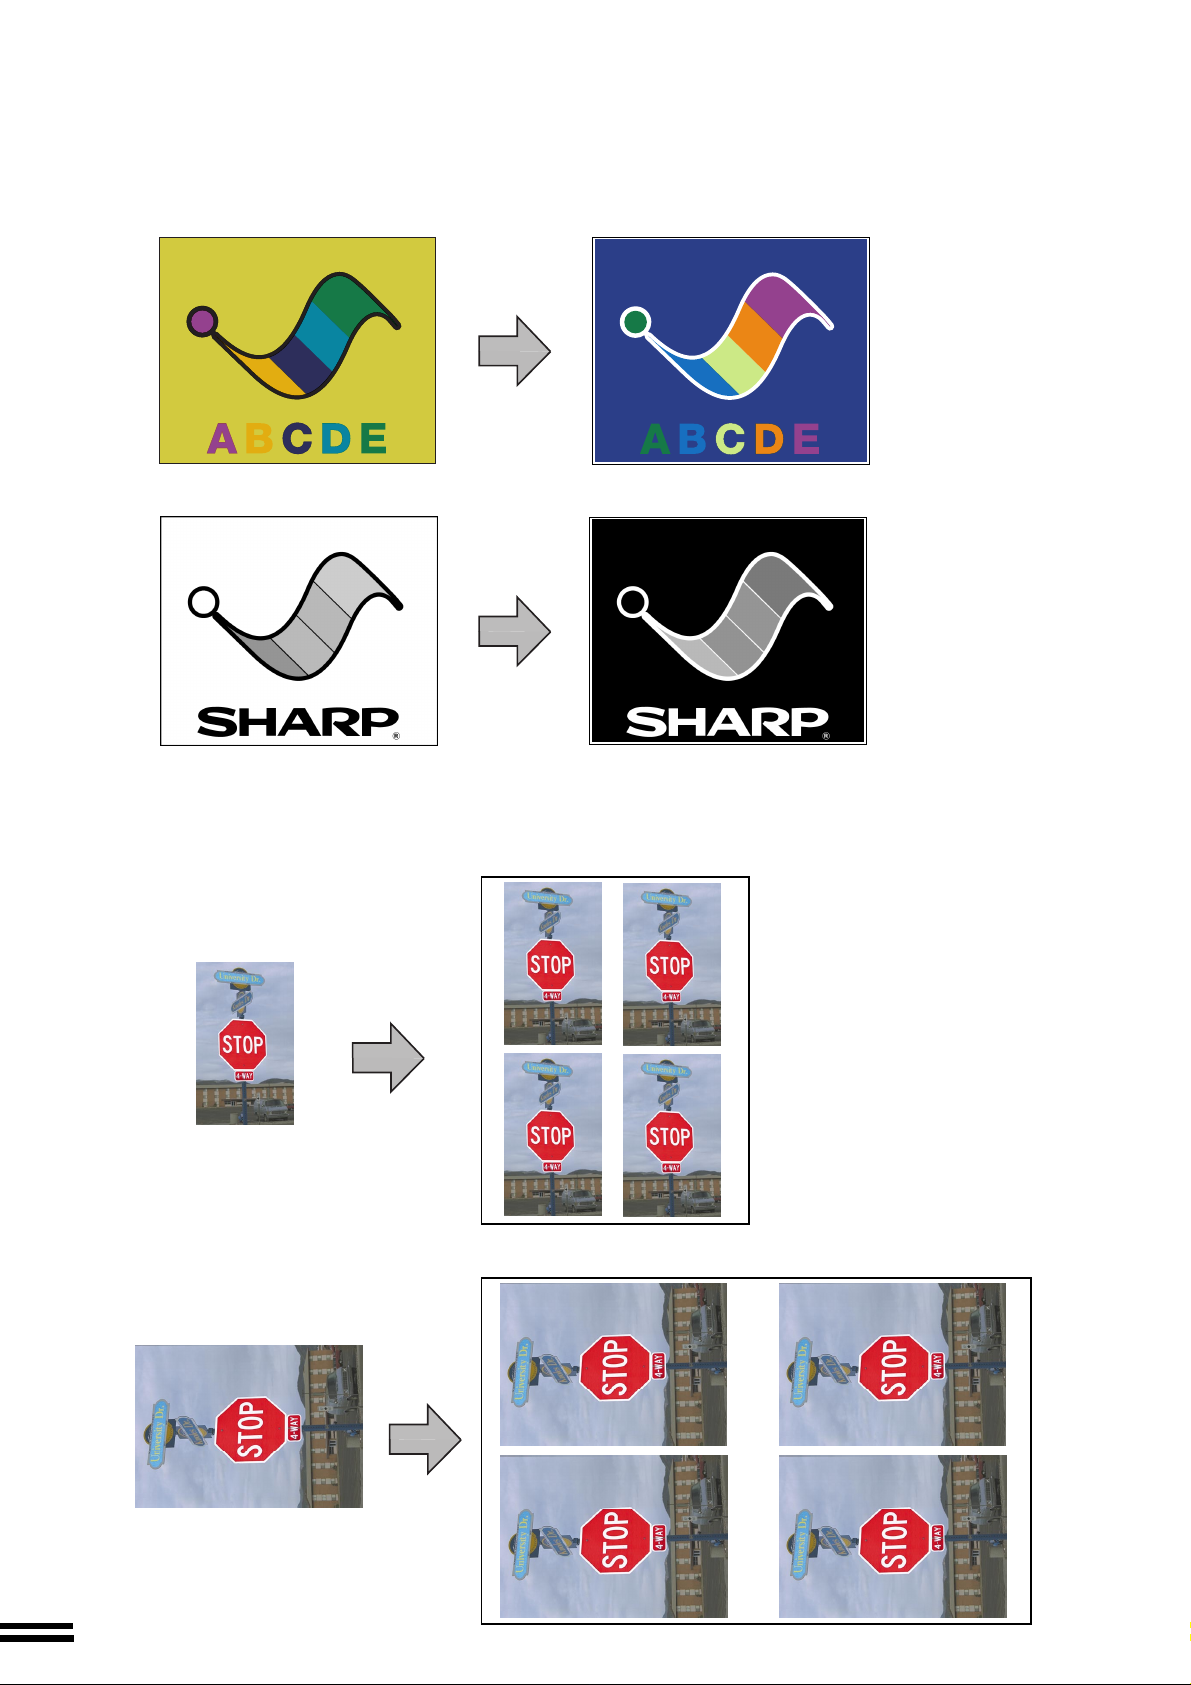
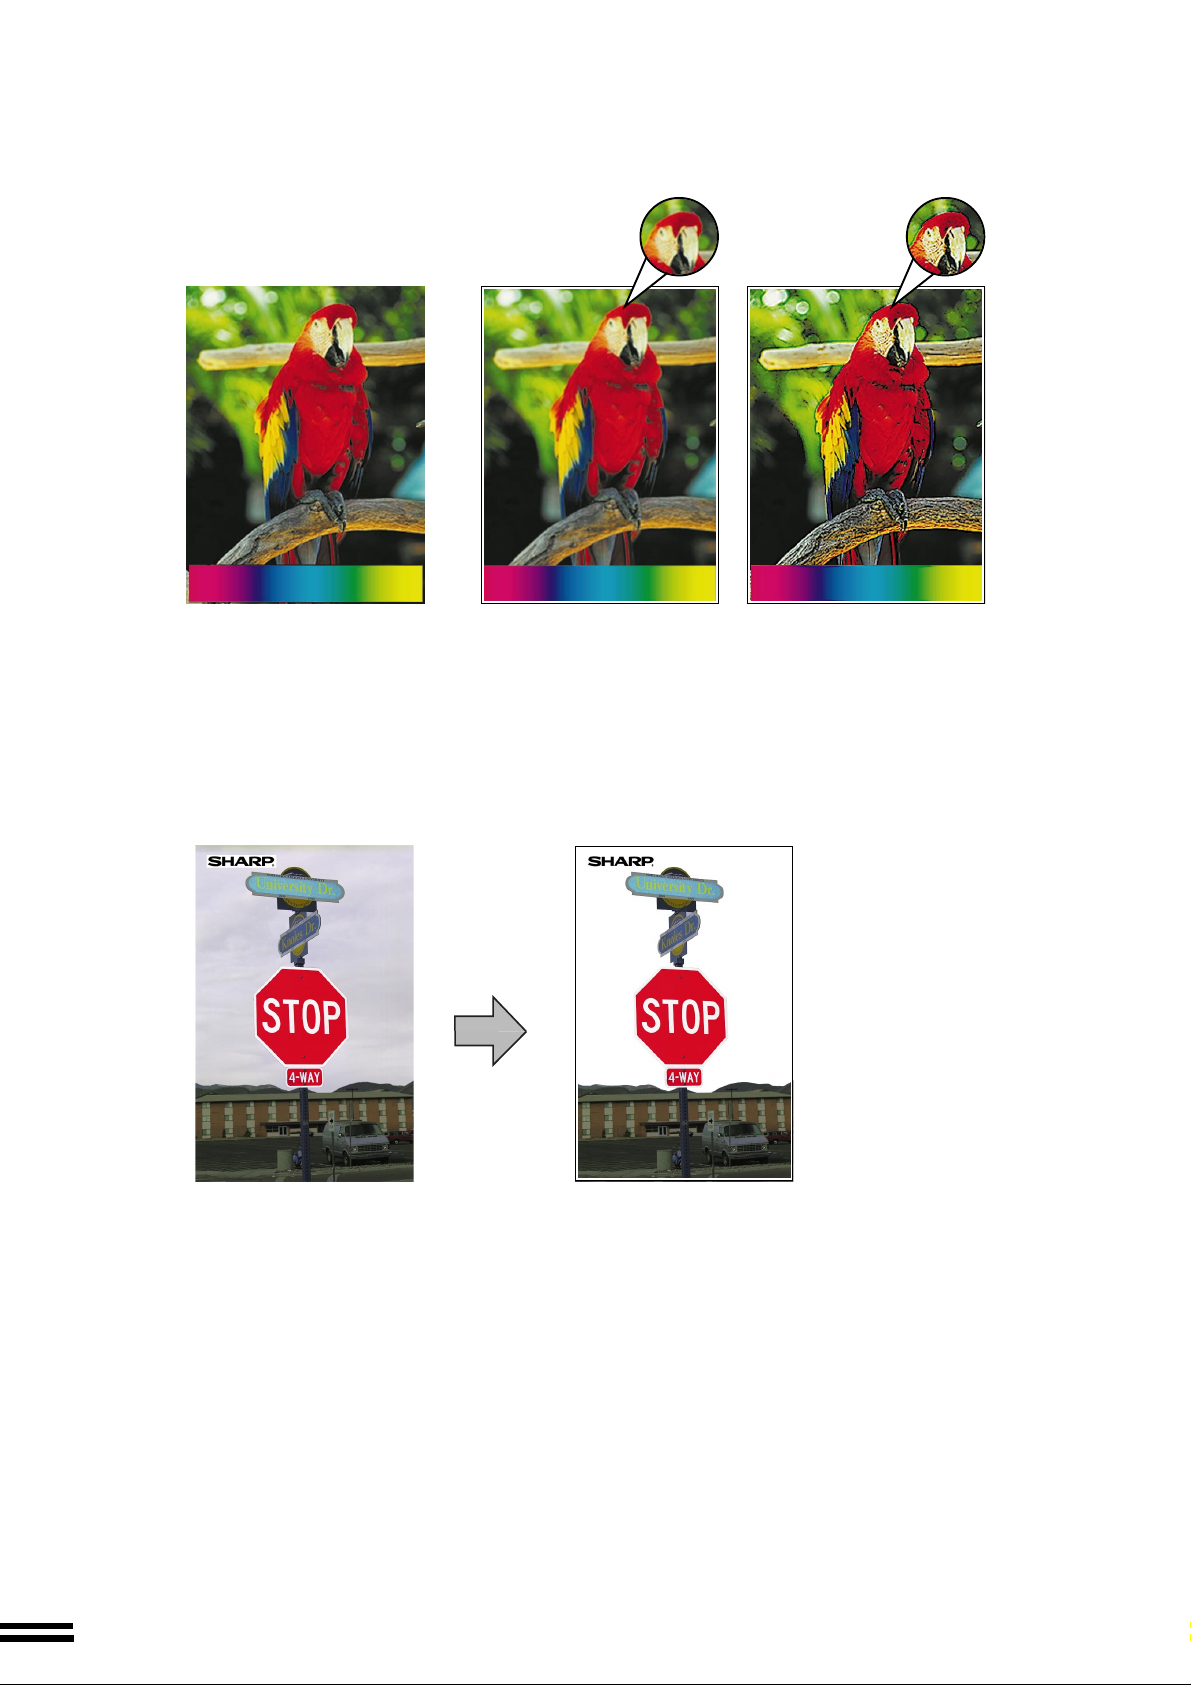
2. Neg./Pos. Reverse (See page 3-28.)
The NEG./POS. REVERSE function is used to transform a color original into its complementary colors. If this function
is selected in the black/white mode, the black and white areas of the original will be reversed.
Original
Color copy
Black/white copy
3. Photo repeat (See page 3-32.)
PHOTO REPEAT is used to produce multiple copies of a photo on a single sheet of copy paper.
Original (3" x 5")
Original (5" x 7")
Copy (8-1/2" x 11")
Copy (11" x 17")
2
Page 5
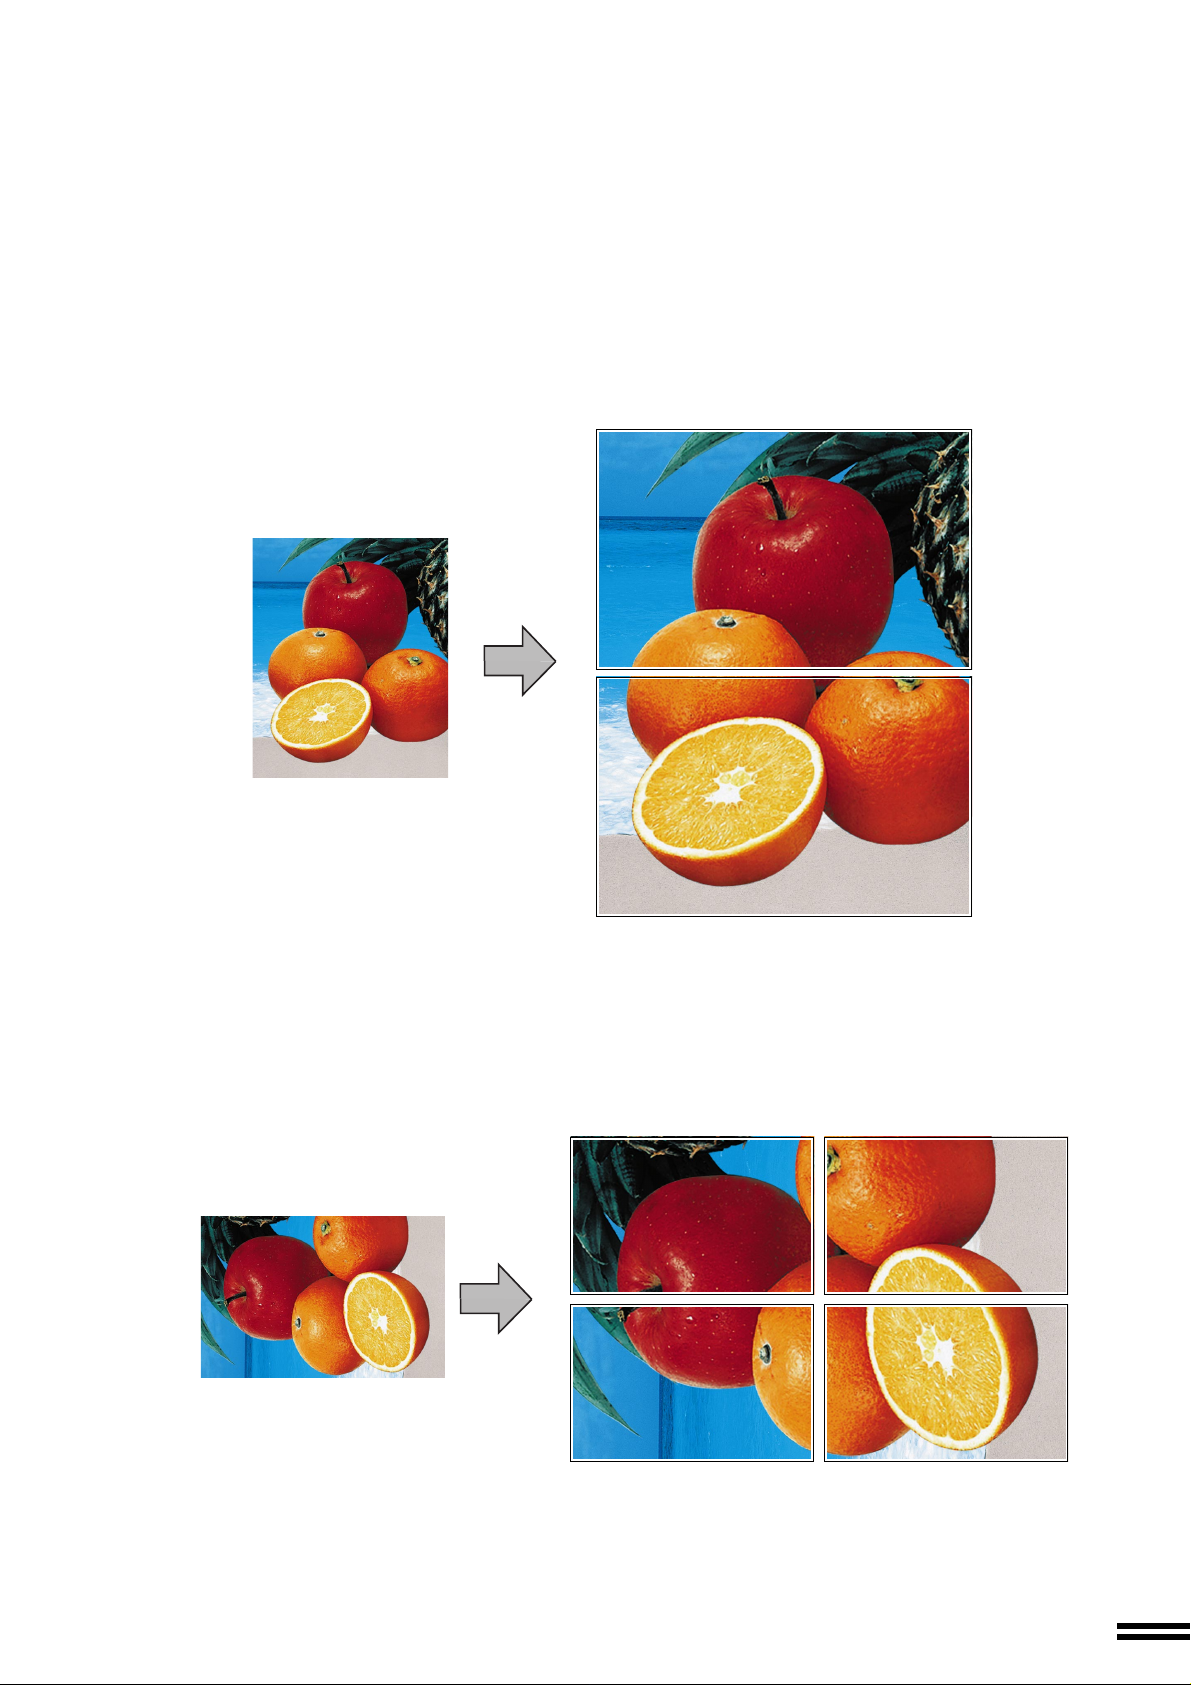
4. Multi-page Enlargement (See page 3-36.)
This function is used to enlarge an original image to a size larger than 11" x 17" and to print portions of the image onto
multiple sheets of paper.
Copies (2 sheets of 11" x 17")
Original (8.5" x 11")
Original (11" x 17")
Copies (4 sheets of 11" x 17")
3
Page 6
Adjustments for Color Copying
1. Exposure adjustments (See page 2-16.)
Exposure selections for this copier should be selected according to the type of originals being copied: TEXT/PRTD.
PHOTO, TEXT/PHOTO, TEXT, PHOTO, PRINTED PHOTO or MAP. Also COLOR TONE ENHANCEMENT can be
specified.
T ext/prtd. photo mode, T e xt/photo mode:
These modes provide the best balance for copying
originals which contain text, printed photos and photos.
Text mode:
This mode is useful for enhancing low density
areas of an original or suppressing high density
background areas.
KEY OPERATOR CODE NUMBER
A key operator code number must be registered
before a key operator program can be used. The
key operator must remember this number . Only
this registered number will allow access to
the key operator programs.
Registering the key operator code number.
1 Press the CUSTOM SETTINGS key .
Photo mode: Printed photo mode:
This mode provides the best quality reproduction of
photographs with fine detail.
Color tone enhancement:
This mode is used to make full color image more vivid.
Original Copy
K
E
Y
O
P
E
R
A
T
O
R
D
C
A
k
e
y
o
p
r
e
e
g
i
s
t
e
p
r
r
o
g
r
a
m
m
c
u
s
t
r
e
r
m
e
g
i
s
t
e
r
t
e
h
d
e
k
e
y
o
R
p
e
e
g
i
s
t
n
e
r
u
m
b
e
r
1
P
r
e
s
s
t
h
e
O
r
a
t
o
r
c
o
d
u
e
n
e
d
b
e
f
o
r
e
a
a
n
b
e
u
s
e
h
d
T
.
e
m
b
e
r
t
h
i
m
s
u
n
n
u
m
b
e
r
a
w
l
i
l
r
a
t
o
r
p
r
o
g
r
a
.
s
m
i
n
g
t
h
e
k
o
e
y
C
U
S
T
O
M
T
S
T
E
R
E
B
M
U
N
E
m
e
k
e
b
l
l
p
N
I
r
r
e
o
t
p
o
a
y
r
e
s
p
i
o
h
y
t
e
k
y
o
l
t
n
O
.
s
r
e
s
e
c
c
a
w
o
e
d
o
c
r
o
t
a
r
e
.
y
e
k
S
G
e
b
t
r
s
u
o
m
t
r
e
b
a
P
o
t
h
o
This mode is useful for copying printed photographs.
4
Page 7
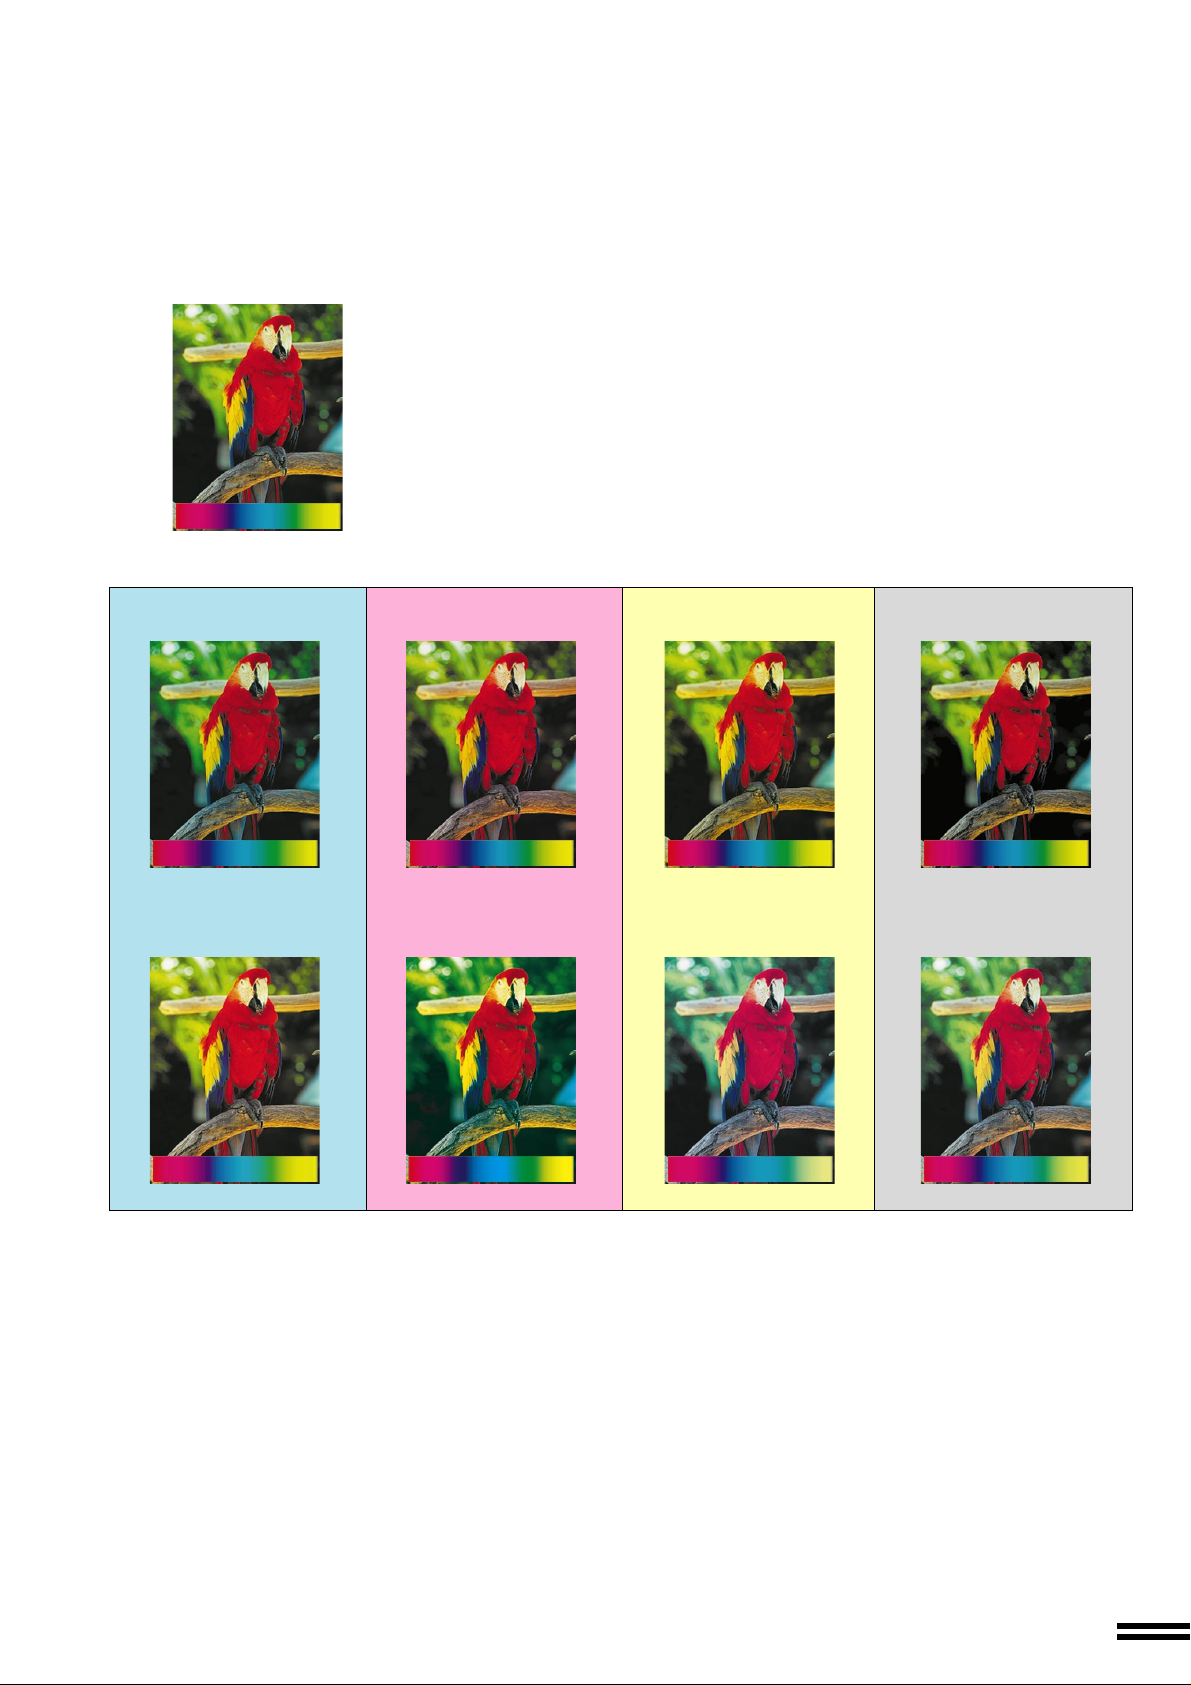
2. RGB Adjust (See page 3-16.)
RGB adjustments function to increase or decrease the overall amount of a single primary color. The amount of change
depends upon the characteristics of the particular original being copied. Generally, lighter toned areas will be affected
to a greater degree than will darker toned areas.
Original
Red +
Red -
Green +
Green -
Blue +
Blue -
5
Page 8
3. Sharpness (See page 3-18.)
This function is used to sharpen or soften image outlines.
Original Softer Sharper
4. Suppress background (See page 3-20.)
This copier can suppress unnecessary background colors on the original image when copying. This function is used
to adjust the density level of background colors to be erased.
Original Copy
6
Page 9
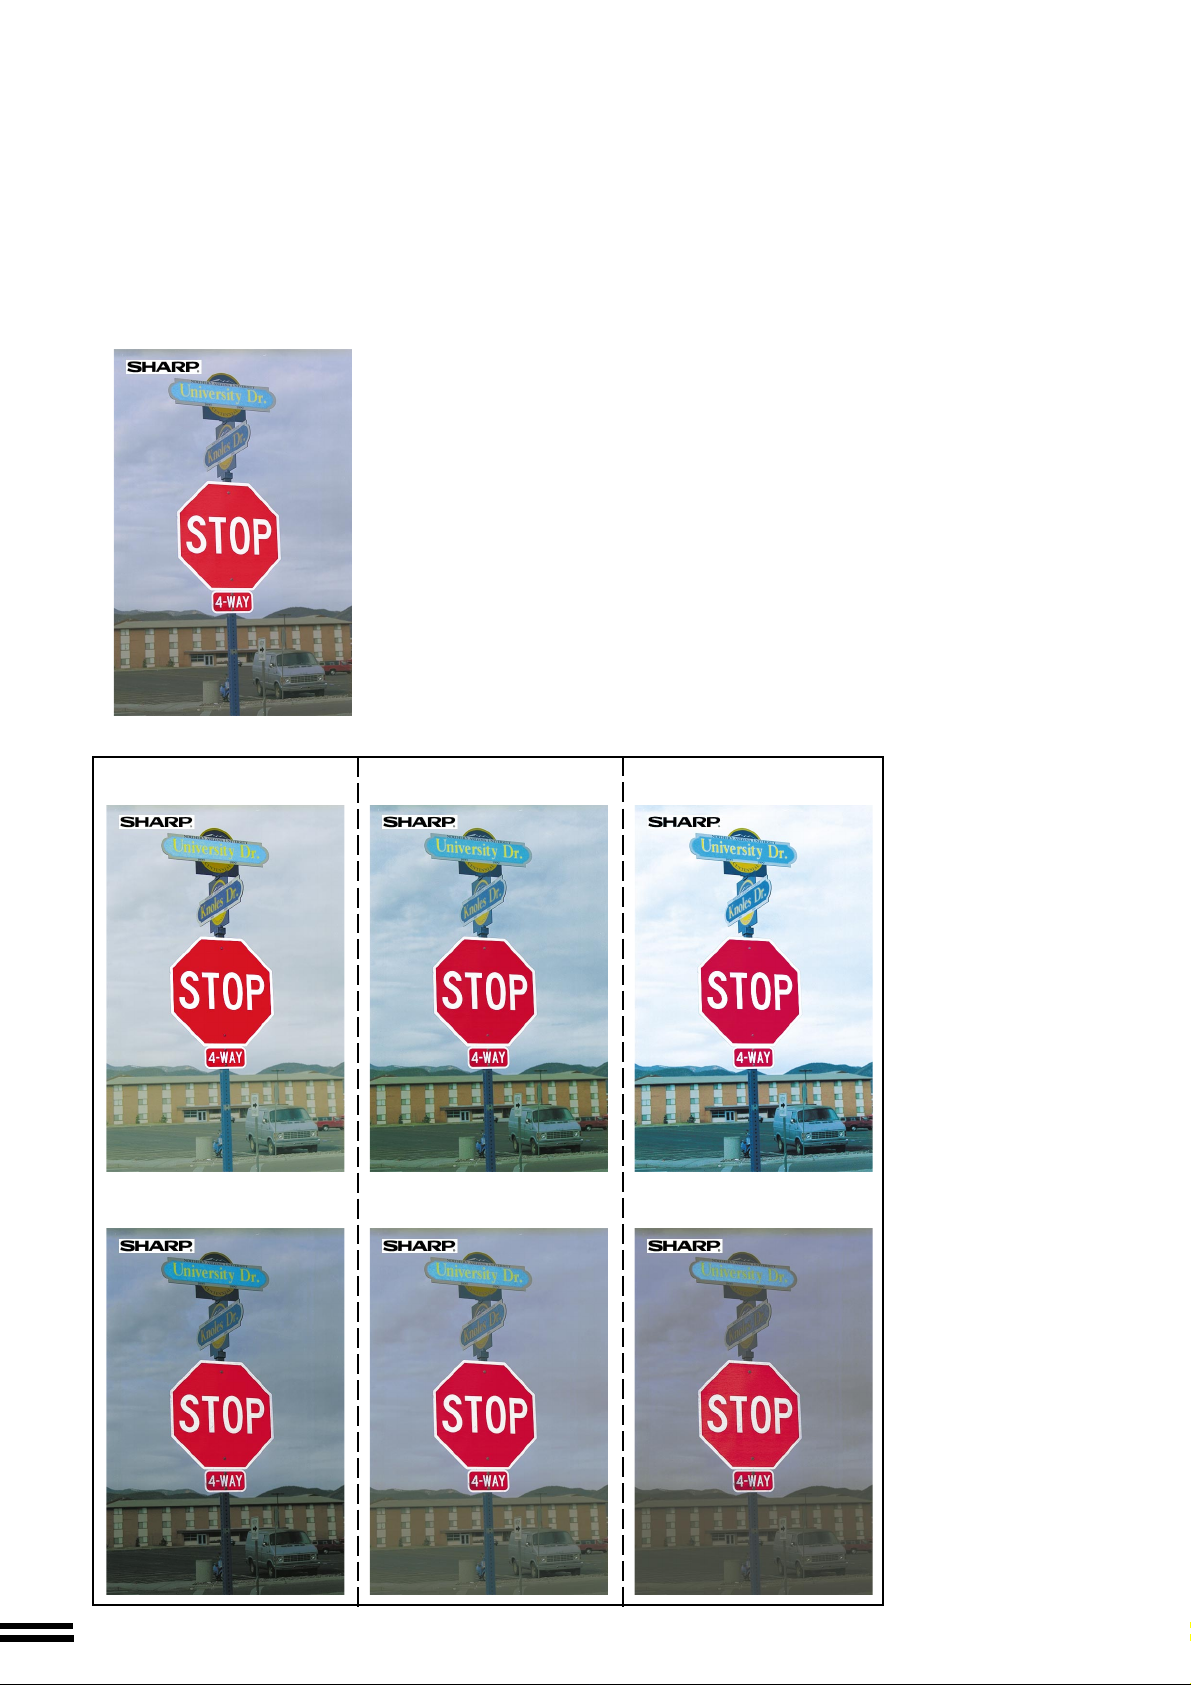
5. Color Balance (See page 3-22.)
The Color Balance function allows the density of colors to be adjusted. Adjusted color samples are shown below.
Original
Cyan adjustment + Magenta adjustment +
Cyan adjustment-
Magenta adjustment -
Yellow adjustment +
Yellow adjustment -
Black adjustment +
Black adjustment -
7
Page 10
6. Brightness/intensity/contrast (See page 3-24.)
This copier allows the level of brightness, intensity or contrast of images to be adjusted. If brightness is selected, color
tone can be darkened or lightened. If intensity is selected, the level of color saturation can be modified between vivid
and dull. If contrast is selected, the contrast between two image areas can be adjusted higher or lower.
Original
Contrast +Brightness + Intensity +
Contrast -Brightness - Intensity -
8
Page 11

CONTENTS
●
INTRODUCTION ....................10
●
USING THIS MANUAL................ 10
CHAPTER 1
GETTING STARTED
●
INSTALLATION REQUIREMENTS ...... 1-2
●
CAUTIONS ....................... 1-3
●
POWER ON AND OFF............... 1-5
Power save modes ................. 1-6
●
INFORMATION FUNCTION ........... 1-7
●
USING THE TOUCH PANEL .......... 1-8
How to use the touch panel ........... 1-8
Selection of function................. 1-8
Function setting icons ............... 1-9
●
COPY MODE AND PRINT MODE...... 1-10
Printing documents from the computer .. 1-10
Using the operation panel in the
print mode ....................... 1-11
How to select the paper type for the
bypass tray ...................... 1-11
General operation steps for the
scanner use ..................... 1-12
CHAPTER 2
MAKING COPIES
●
AUDITING ACCOUNTS .............. 2-2
●
COPYING FROM THE DOCUMENT
GLASS .......................... 2-3
●
USING THE RADF ................. 2-6
●
REDUCTION/ENLARGEMENT/ZOOM .. 2-11
●
SPECIAL PAPERS (manual feed) ...... 2-14
Two-sided copying with bypass tray .... 2-15
●
EXPOSURE ADJUSTMENTS......... 2-16
●
JOB MEMORY ................... 2-18
●
INTERRUPTING A COPY RUN ....... 2-20
CHAPTER 3
SPECIAL FUNCTIONS
●
XY ZOOM ........................ 3-2
●
MARGIN SHIFT.................... 3-4
●
ERASE .......................... 3-6
●
DUAL PAGE COPYING .............. 3-8
●
CENTERING ..................... 3-10
●
TRANSPARENCY FILM WITH
INSERT SHEETS ................. 3-12
●
COVERS ....................... 3-14
●
COLOR ADJUSTMENTS ............ 3-16
RGB adjust ...................... 3-16
Sharpness....................... 3-18
Suppress background .............. 3-20
Color balance .................... 3-22
Brightness/intensity/contrast .......... 3-24
Page
●
IMAGE EDITING FUNCTIONS ........ 3-26
Single color ...................... 3-26
Neg./pos. reverse ................. 3-28
Mirror image ..................... 3-30
Photo repeat ..................... 3-32
11x17 full-bleed ................... 3-34
Multi-page enlargement ............. 3-36
Extra size ....................... 3-38
CHAPTER 4
SUPPLIES
●
PAPER .......................... 4-2
Types and sizes of copy paper ......... 4-2
Loading copy paper ................. 4-2
●
ADDING TONER ................... 4-5
●
USED TONER DISPOSAL ............ 4-8
●
STORAGE OF SUPPLIES ............ 4-9
CHAPTER 5
COPIER TROUBLE?
●
MISFEED REMOVAL................ 5-2
●
MAINTENANCE REQUIRED ......... 5-11
●
TONER COLLECTING CONTAINER OF
TRANSFER UNIT ................. 5-12
●
TROUBLESHOOTING .............. 5-13
CHAPTER 6
GENERAL INFORMATION
●
PART NAMES AND FUNCTIONS....... 6-2
Exterior .......................... 6-2
Interior .......................... 6-3
Operation panel .................... 6-4
Touch panel (Basic screen) ........... 6-5
●
USER MAINTENANCE .............. 6-6
●
TOUCH PANEL CONTRAST
ADJUSTMENT .................... 6-7
●
SPECIFICATIONS .................. 6-8
CHAPTER 7
OPTIONAL EQUIPMENT
●
SYSTEM CONFIGURATION .......... 7-2
●
20-BIN STAPLE SORTER (AR-SS2)..... 7-3
●
LARGE CAPACITY TRAY (AR-LC2N)... 7-15
●
FINISHER (AR-FN4) ............... 7-19
Page
CHAPTER1
CHAPTER2 CHAPTER3
CHAPTER4
CHAPTER5 CHAPTER6 CHAPTER7
9
Page 12

INTRODUCTION
The AR-C160 copier is a digital color image processing copier which provides
high productivity at a color copy speed of 16 copies/minute and convenient
features including intelligent image-editing functions.
Amongst its many useful features and functions are the document feeder
(optional), photo copying, internal auditor, and various special functions such as
dual page copying, margin shift, erase, XY zoom, and NEG./POS. reverse
functions. This copier can be equipped with an optional large capacity tray which
holds 3,000 sheets of copy paper. The machine can also be equipped with an
optional staple sorter or an optional finisher with offset stack function to provide
finished copy sets ready for distribution.
This copier was also designed with ease of use in mind. The easy-to-understand
operation panel with touch panel system and INFORMATION function will guide
the user through most operations. To gain the maximum benefit of all the copier
features, however, it is recommended that users first read this manual to become
familiar with all the copier features.
NOTES:
●
This manual describes only copier features. For a description of optional
printer features, see the separate relevant manual. A brief description of
operation in the PRINT mode is, however, written on pages 1-10 to 1-12.
●
This copier can be equipped with an optional document cover or reversing
automatic document feeder (RADF). The illustrations in this manual are
mainly for the copier with an optional RADF installed.
●
The display on the touch panel varies with installation of optional equipment.
The illustrations of the touch panel in this manual are mainly for the copier with
an optional RADF (AR-RF1) installed.
USING THIS MANUAL
This manual is intended as an operation guide for both general users and key
operators.
For General Users
It is recommended that you read the GETTING STARTED, MAKING COPIES,
and SPECIAL FUNCTIONS sections to become familiar with the available
features and functions of your copier. Then refer to the manual as needed to
become thoroughly familiar with those features you will normally use.
For Key Operators
Please read all sections thoroughly to become familiar with all features and
functions of your copier. Throughout the manual, information which is relevant
to key operator functions is noted by “★ KEY OPERATOR.” Please pay close
attention to these notes and to the SUPPLIES, COPIER TROUBLE?, GENERAL
INFORMATION, and OPTIONAL EQUIPMENT sections so you can ensure
smooth and efficient operation of your machine.
A separate KEY OPERATOR’S GUIDE has been written especially for you. It
contains the programs and programming information that will enable you to tailor
functions for maximum benefit to your company.
10
Page 13

CHAPTER 1
GETTING STARTED
This chapter describes the basic information on the use of this copier.
Page
●●
●
●●
INST ALLATION REQUIREMENTS . . . . . . . . . . . . . . . . . . . . . . . 1-2
●●
●
●●
CA UTIONS. . . . . . . . . . . . . . . . . . . . . . . . . . . . . . . . . . . . . . . . . . 1-3
●●
●
●●
POWER ON AND OFF. . . . . . . . . . . . . . . . . . . . . . . . . . . . . . . . . 1-5
Power save modes . . . . . . . . . . . . . . . . . . . . . . . . . . . . . . . . . . . . 1-6
●●
●
●●
INFORMATION FUNCTION . . . . . . . . . . . . . . . . . . . . . . . . . . . . . 1-7
●●
●
●●
USING THE TOUCH PANEL. . . . . . . . . . . . . . . . . . . . . . . . . . . . . 1-8
How to use the touch panel . . . . . . . . . . . . . . . . . . . . . . . . . . . . . 1-8
Selection of function . . . . . . . . . . . . . . . . . . . . . . . . . . . . . . . . . . . 1-8
Function setting icons. . . . . . . . . . . . . . . . . . . . . . . . . . . . . . . . . . 1-9
●●
●
●●
COPY MODE AND PRINT MODE . . . . . . . . . . . . . . . . . . . . . . . 1-10
Printing documents from the computer. . . . . . . . . . . . . . . . . . . . 1-10
Using the operation panel in the print mode . . . . . . . . . . . . . . . . 1-11
How to select the paper type for the bypass tray . . . . . . . . . . . . 1-11
General operation steps for the scanner use . . . . . . . . . . . . . . . 1-12
CHAPTER1
1-1
Page 14
CHAPTER
1
GETTING STARTED Installation requirements
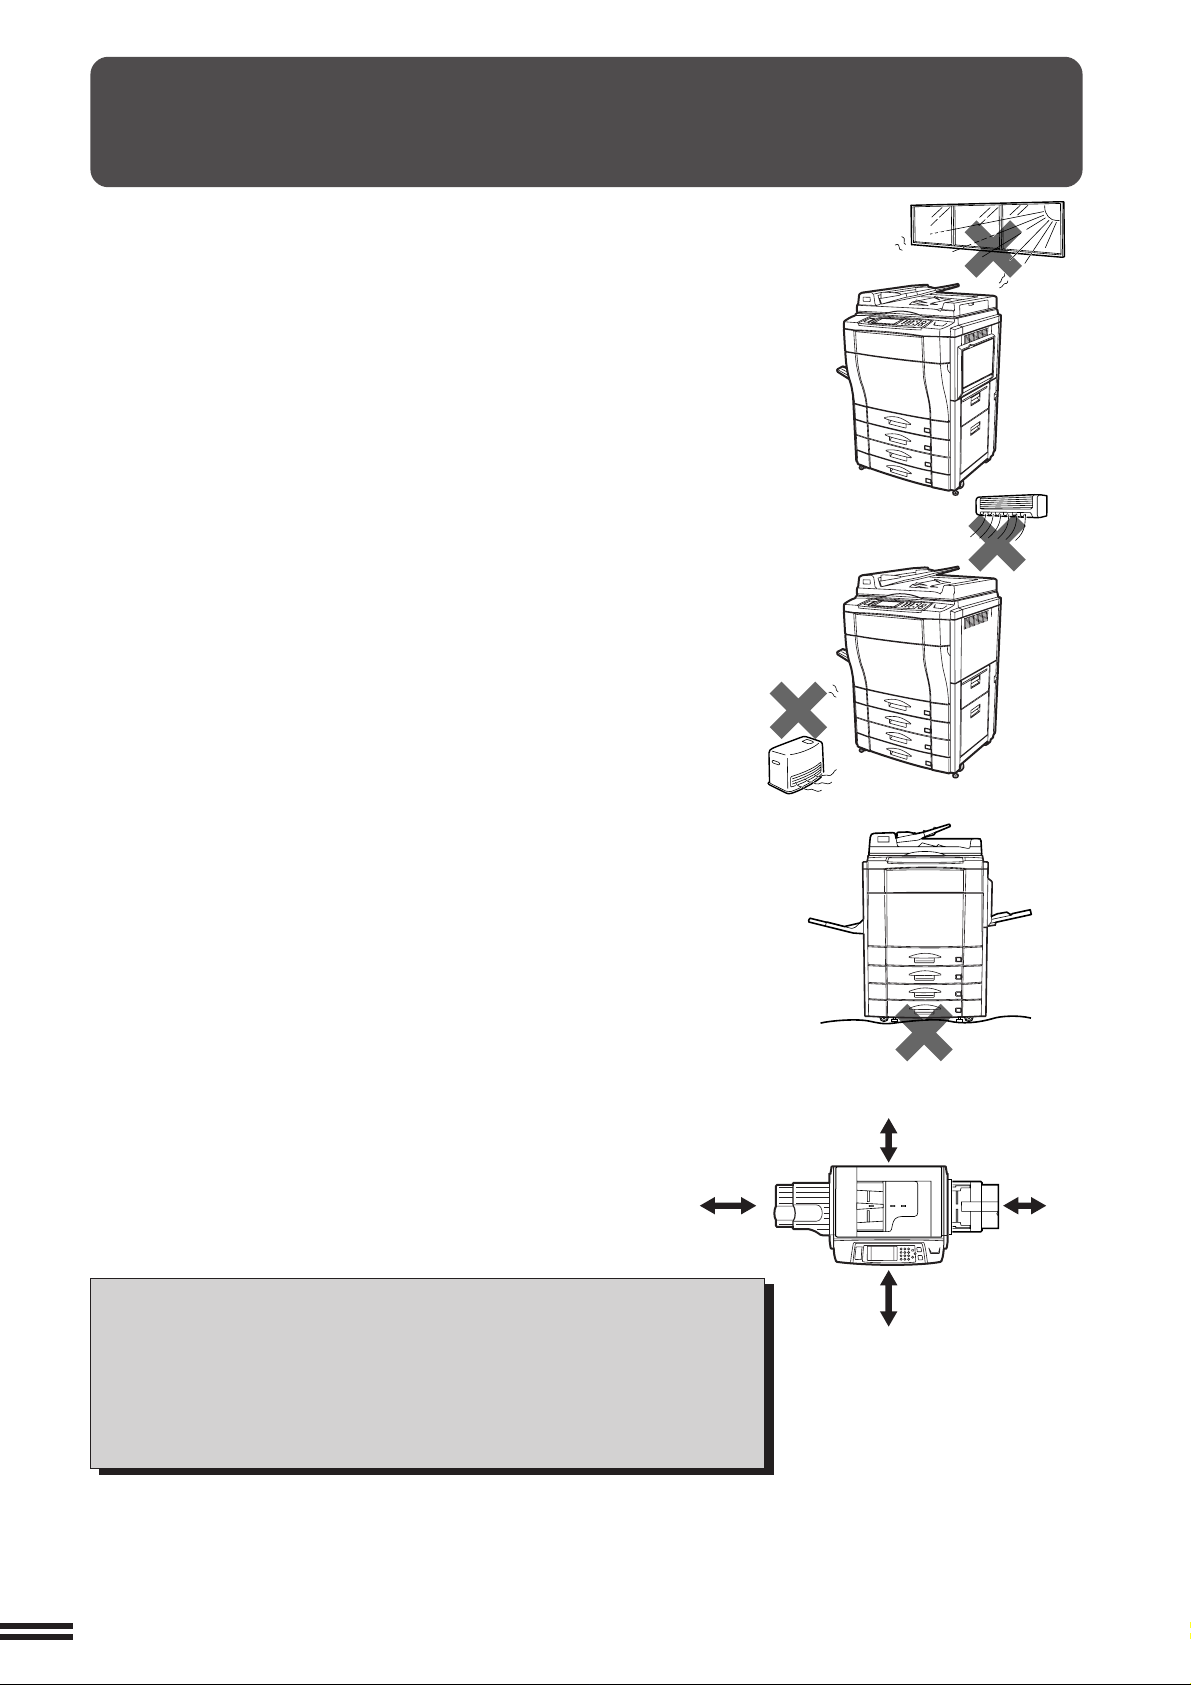
INSTALLATION REQUIREMENTS
To ensure safety and proper machine performance, please note the following
before initial installation and whenever the machine is to be relocated.
1. The copier should be installed near an accessible power outlet for easy
connection.
2. Be sure to connect the power cord only to a power outlet that meets the
specified voltage and current requirements.
Also make certain the outlet is properly grounded.
3. Do not install the machine where it is:
●
damp or humid,
●
exposed to direct sunlight,
●
extremely dusty,
●
poorly ventilated,
●
subject to extreme temperature or humidity changes (e.g., near an air
conditioner or heater).
4. Ensure that the area chosen for the machine location is level.
5. Be sure to allow the required space around the machine for servicing and
proper ventilation.
23-5/8"
(60 cm)
A small amount of ozone is produced within the copier during operation.
The emission level is insufficient to cause any health hazard.
NOTE:
The present recommended long term exposure limit for ozone is 0.1 ppm
(0.2 mg/m3) calculated as an 8 hr. time-weighted average concentration.
However, since the small amount that is emitted may have an objectionable
odor, it is advisable to place the copier in a ventilated area.
11-13/16"
(30 cm)
11-13/16"
(30 cm)
23-5/8"
(60 cm)
1-2
Page 15
CAUTIONS
1. Do not touch the photoconductive drums or paper transport.
Scratches or smudges on them will cause copy defects.
2. The fusing unit is extremely hot. Exercise care in this area.
CHAPTER1
GETTING STARTED Cautions
3. Do not look directly at the light source. Doing so may damage
your eyes.
4. Installation adjusters.
When moving the machine, be sure to raise the installation
adjusters. After moving the machine, lower the installation
adjusters until they reach the floor.
This copier contains fusing oil that is very slippery if leaked
on the floor. Ensure that the machine is located at level
position and take care if it is to be moved that oil leakage does
not occur.
Fusing unit
Lock
Paper transport
Release
5. This copier is equipped with a forgery prevention feature. If paper
that closely resembles paper money is used as an original,
copying may not be performed properly.
“BATTERY DISPOSAL”
THIS MACHINE CONTAINS A MANGANESE DIOXIDE BATTERY WHICH MUST BE DISPOSED
OF PROPERLY. CONTACT YOUR SHARP DEALER OR SERVICER FOR INSTRUCTIONS.
This product utilizes tin-lead solder, and a fluorescent lamp containing a small amount of mercury.
Disposal of these materials may be regulated due to environmental considerations.
For disposal or recycling information, please contact your local authorities or the Electronics Industries
Alliance: www.eia.org
Adjuster
1-3
Page 16
CAUTIONS
CHAPTER
1
GETTING STARTED Cautions
Cautions on laser
Wave length
Pulse times (4.374 µs ±4.4 ns)/7 mm
Output power 0.20 mW - 0.45 mW
SAFETY PRECAUTIONS
785 nm
+10 nm
- 15 nm
This Digital Copier is rated Class 1 and complies with 21 CFR
1040.10 and 1040.11 of the CDRH standards. This means that
the copier does not produce hazardous laser radiation. For your
safety, observe the precautions below.
●
Do not remove the cabinet, operation panel or any other
covers.
●
The copier’s exterior covers contain several safety interlock
switches. Do not bypass any safety interlock by inserting
wedges or other items into switch slots.
Caution
Use of controls or adjustments or performance of procedures other
than those specified herein may result in hazardous radiation
exposure.
1-4
Page 17
POWER ON AND OFF
The power switch is located on the left side of the copier. When the
power switch is turned to the “ON” position, the message “WARMING
UP. PLEASE WAIT.” will appear in the message display. Warming
up takes about 330 seconds. Once the copier is ready, the message
display will change to “READY TO COPY.”, and the START key
indicators will light up, indicating that copying is possible.
If the copier has been programmed in the auditing mode, the message
“ENTER YOUR ACCOUNT NUMBER. -----” will appear after warming
Power on
Power off
up. Once a valid account number has been entered, copying will
become possible.
CHAPTER1
GETTING STARTED Power on and off
●
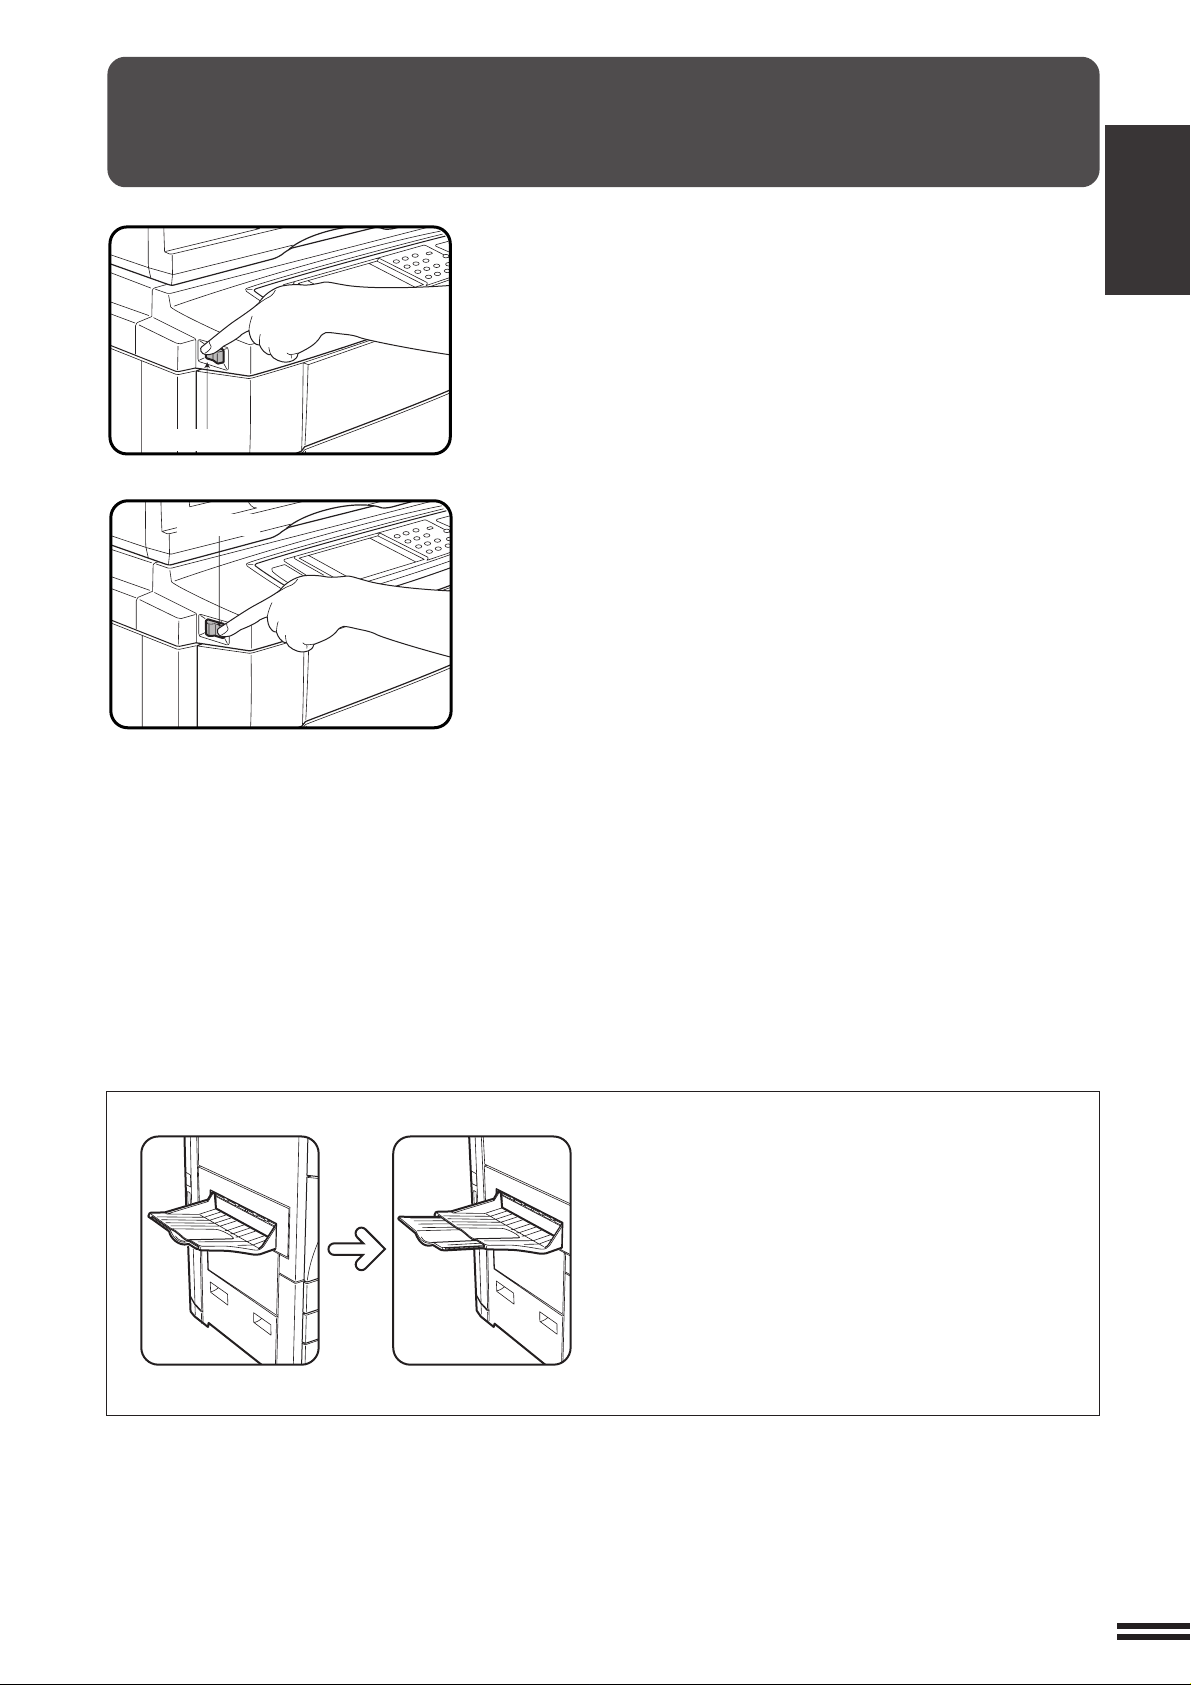
Be sure to extend the tray when paper sizes 8-1/2"
x 14" or larger are to be received.
1-5
Page 18
POWER ON AND OFF
CHAPTER
1
GETTING STARTED Power on and off
Power save modes
The copier has two power save modes to reduce overall power
consumption and thereby reduce the cost of operation and to conserve
natural resources to help reduce environmental pollution. The two
power save modes are preheat mode and sleep mode.
★ KEY OPERATOR
The preheat activation time and the sleep activation time have been
preset at the factory to 15 min. for preheat mode and 60 min. for sleep
mode. These times can be changed as described in the key operator’s
guide. It is suggested that you set appropriate times according to the
actual usage of the copier.
Sleep mode
If the sleep mode is enabled, the copier will enter the mode once a
programmed length of time has elapsed without any copier
operation after the last copy of a run is made or the power is first
turned on. When the copier enters the sleep mode, the display on
the touch panel will disappear. In this condition, power is not
supplied to the fuser in the copier. To exit from the sleep mode,
press the COPY key.
★ KEY OPERATOR See page 25 of the KEY OPERATOR’S GUIDE for
setting the sleep mode timer. See page 30 of the KEY OPERATOR’S
GUIDE for enabling or disabling the sleep mode.
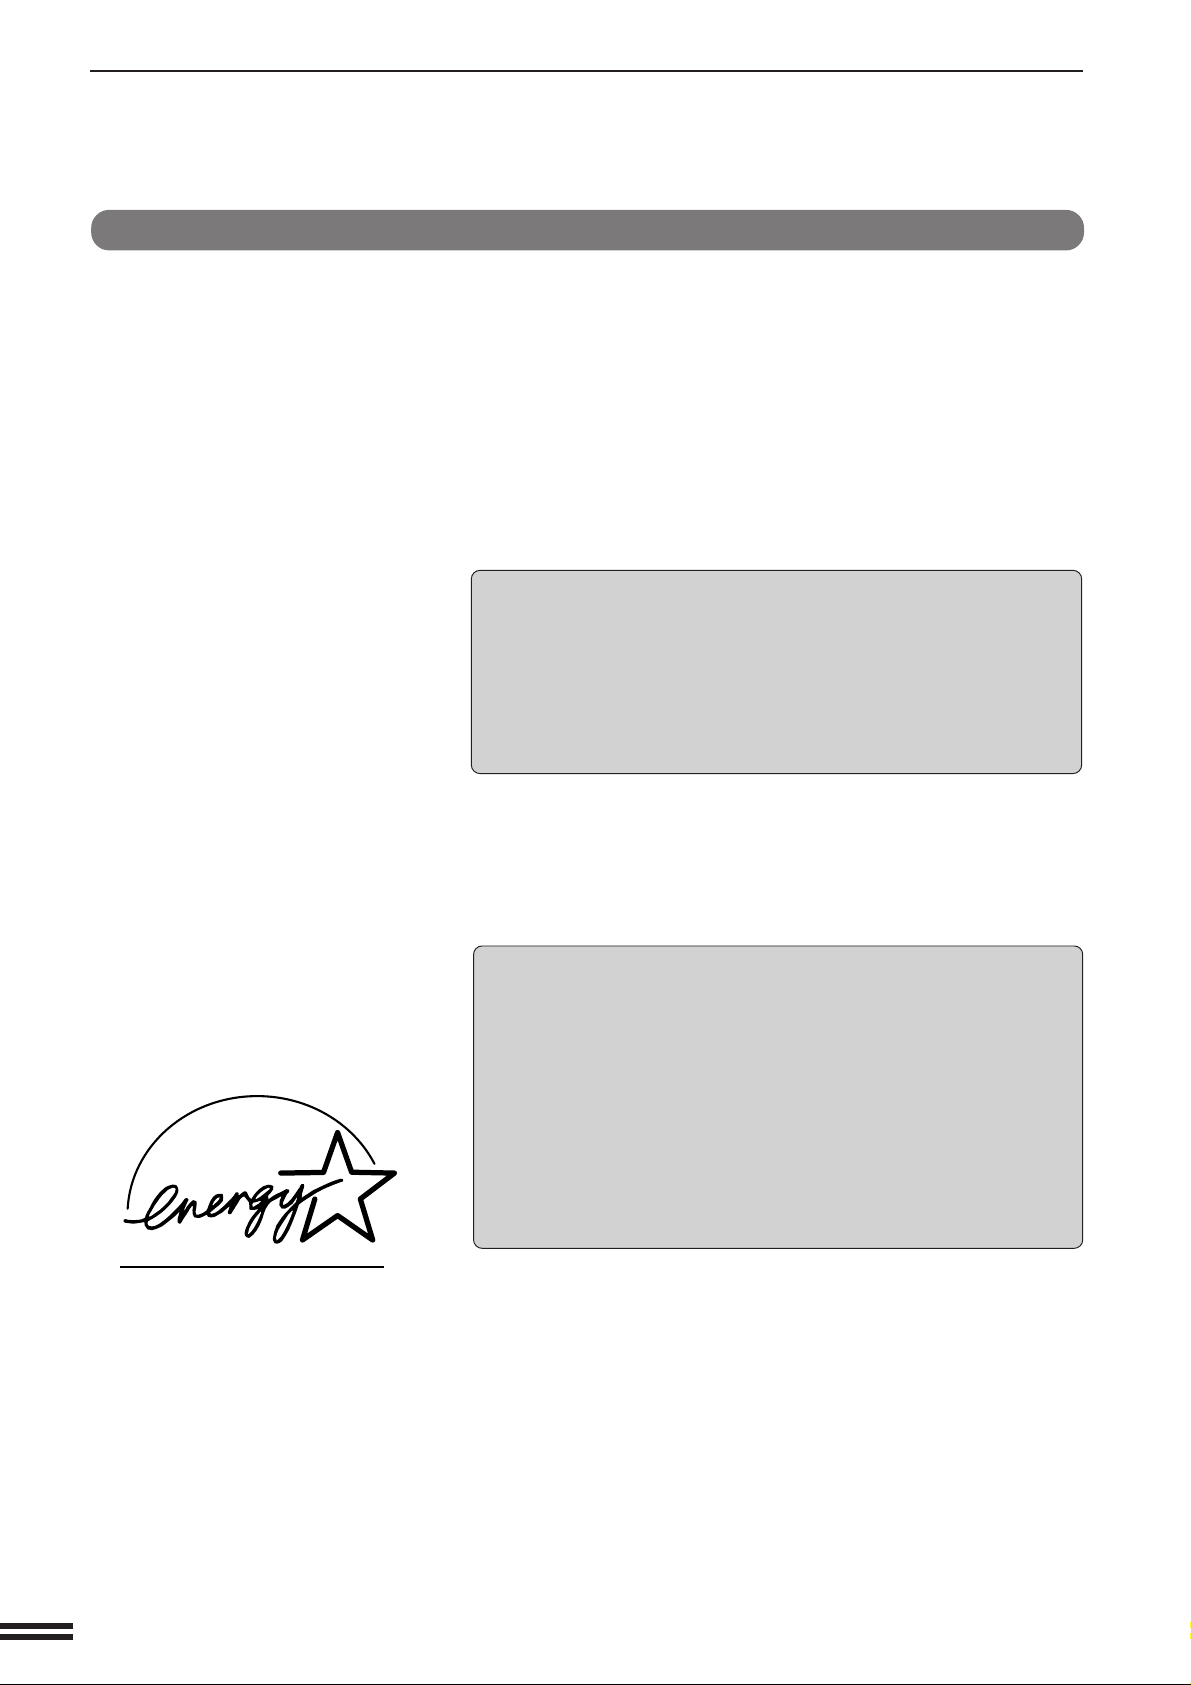
As an ENERGY STAR® Partner,
SHARP has determined that this
product meets the ENERGY
®
STAR
efficiency.
guidelines for energy
Preheat mode
The copier will enter the mode once the set time has elapsed without
any copier operation after the last copy of a run is made or power is
turned on.
When the copier enters the preheat mode, the message “PREHEAT
MODE. PLACE ORIGINALS.” will appear.
In this condition, the fuser in the copier is maintained at a lower heat
level thereby saving power. The preheat level is, however, high
enough to allow the copier to come to a ready condition or begin
copying approximately 30 seconds after any key input is made.
To copy from the preheat mode, make desired copier selections and
press a START key using the normal copying procedure.
★ KEY OPERATOR See page 26 of the KEY OPERATOR’S GUIDE for
information on setting the preheat mode.
1-6
Page 19
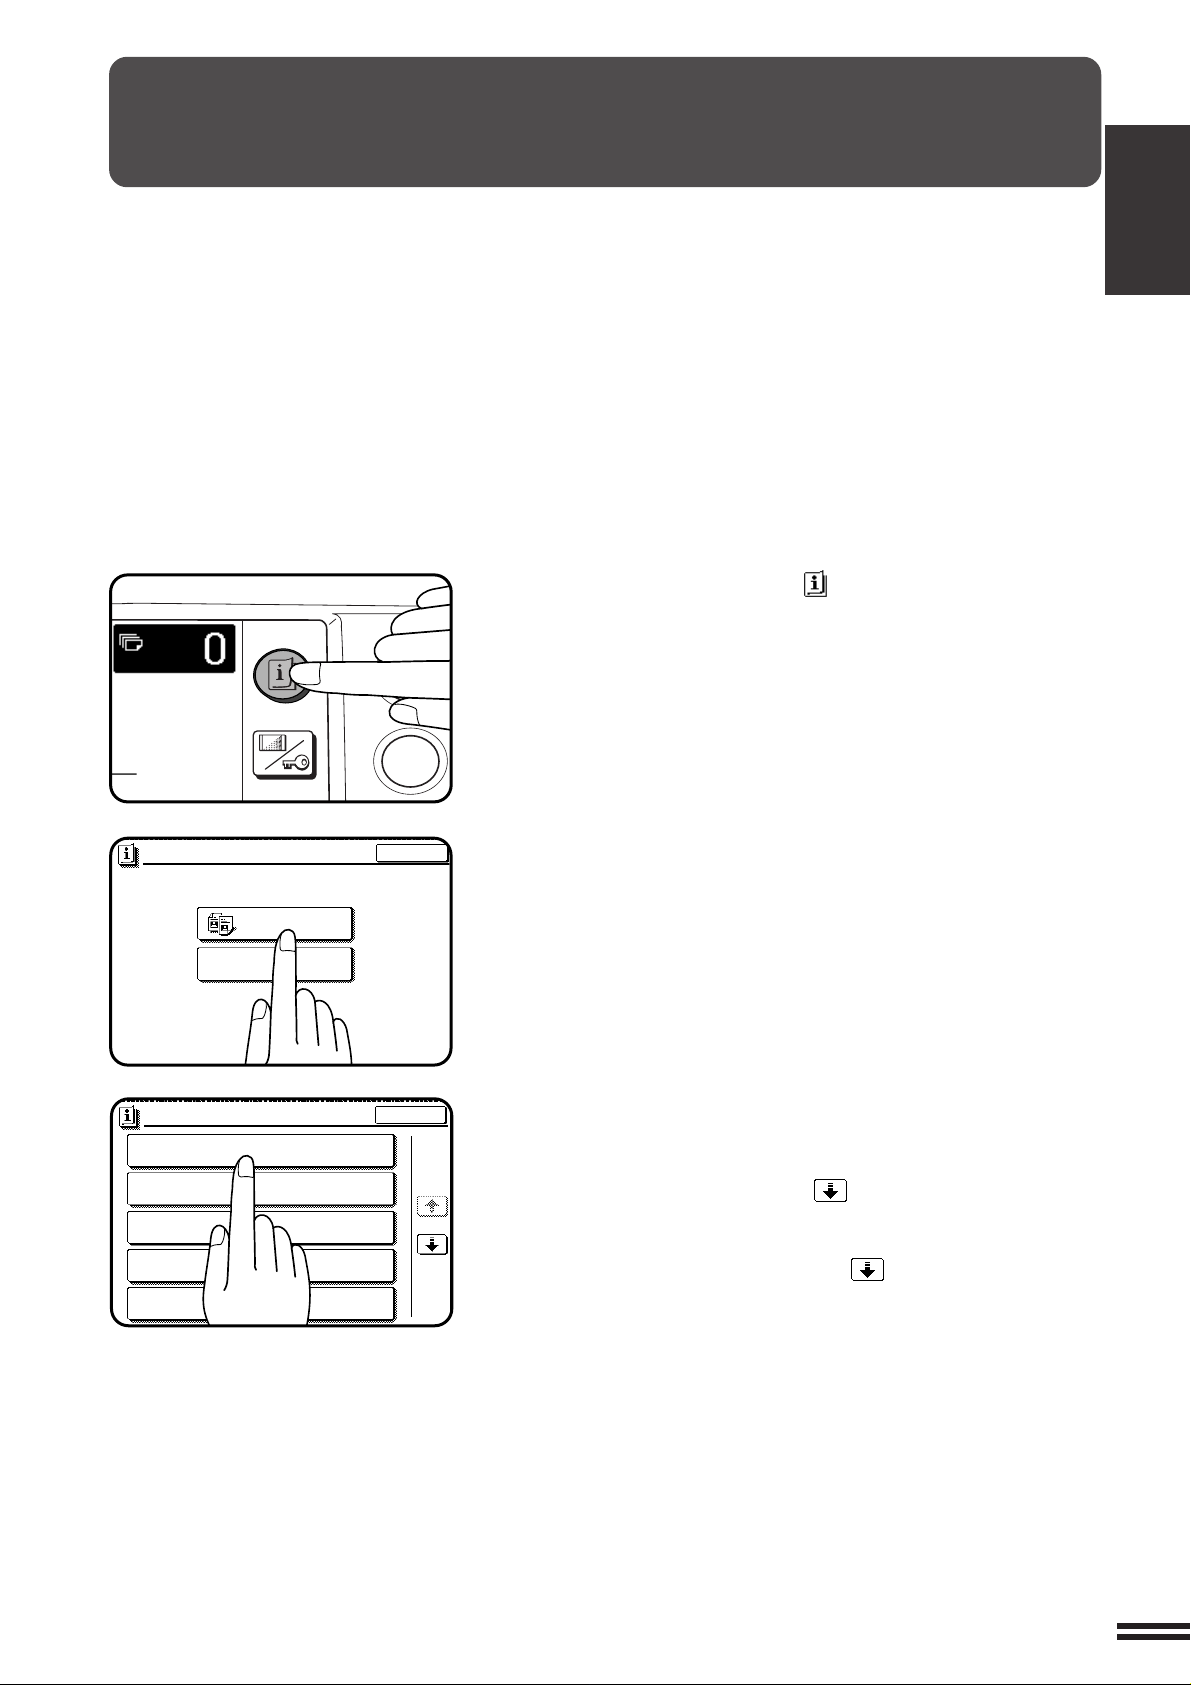
INFORMATION FUNCTION
EXIT
INFORMATION
SELECT INFORMATION.
COPIER
ADDING TONER
EXIT
MAKING 2-SIDED COPIES (2-SIDED COPY)
INFORMATION
SORTING COPIES INTO SETS OR STAPLING
FINISHED SETS OF COPIES (OUTPUT)
USING THE DOCUMENT FEEDER
(
DOCUMENT FEEDER
)
REDUCTION/ENLARGEMENT/ZOOM
(COPY RATIO)
STORING FREQUENTLY USED JOB PROGRAMS
(PROGRAM)
1/5
1
4
INFORMATION
CUSTOM
SETTINGS
The information function provides a quick reference guide to the use
of the various features and functions of this copier. The information
mode can be entered when the copier is in the standby mode.
Press the INFORMATION ( ) key in the standby mode.
1
●
The screen for the information categories will appear.
CHAPTER1
GETTING STARTED Information function
Select the “COPIER” key to display the first screen of
the copier feature items.
2
●
If the toner supply is low, press the ADDING TONER key for
toner replenishment instructions.
Select the feature you would like to know about by
pressing a copier feature item key on the touch panel.
3
●
If the feature you would like to know about is not displayed on the
touch panel, press the scroll ( ) key on the touch panel until
the feature is displayed.
●
If a copier feature item key is pressed, the description for that
feature will appear. Use the scroll ( ) key to display additional
information until all information for that feature has been displayed.
●
To return to the copier feature item screen, press the “INDEX”
key.
●
To exit the INFORMATION mode, press the “EXIT” key on the
touch panel.
1-7
Page 20
CHAPTER
READY TO COPY.
SPECIAL MODES
MARGIN SHIFT ERASE
IMAGE EDITCOVERS
CENTERING
DUAL PAGE
COPY
COLOR
ADJUSTMENTS
TRANSPARENCY INSERTS
OK
AUTO
EXPOSURE PAPER SELECT
100%
COPY RATIO
8/ 11AUTO
1
2
ERASE
EDGE ERASE
CENTER ERASE
EDGE+CENTER
ERASE
CANCEL
1/2
OK
OK
(0~1)
inch
READY TO COPY.
AUTO
EXPOSURE
PAPER SELECT
100%
COPY RATIO
1.8/ 11
2.11 17
3.8/ 14
1
2
1
2
16~28 lbs.
28+~35 lbs.
35+~75 lbs.
TRANSPARENCY
PAPER TYPE
STORE/DELETE
RECALL
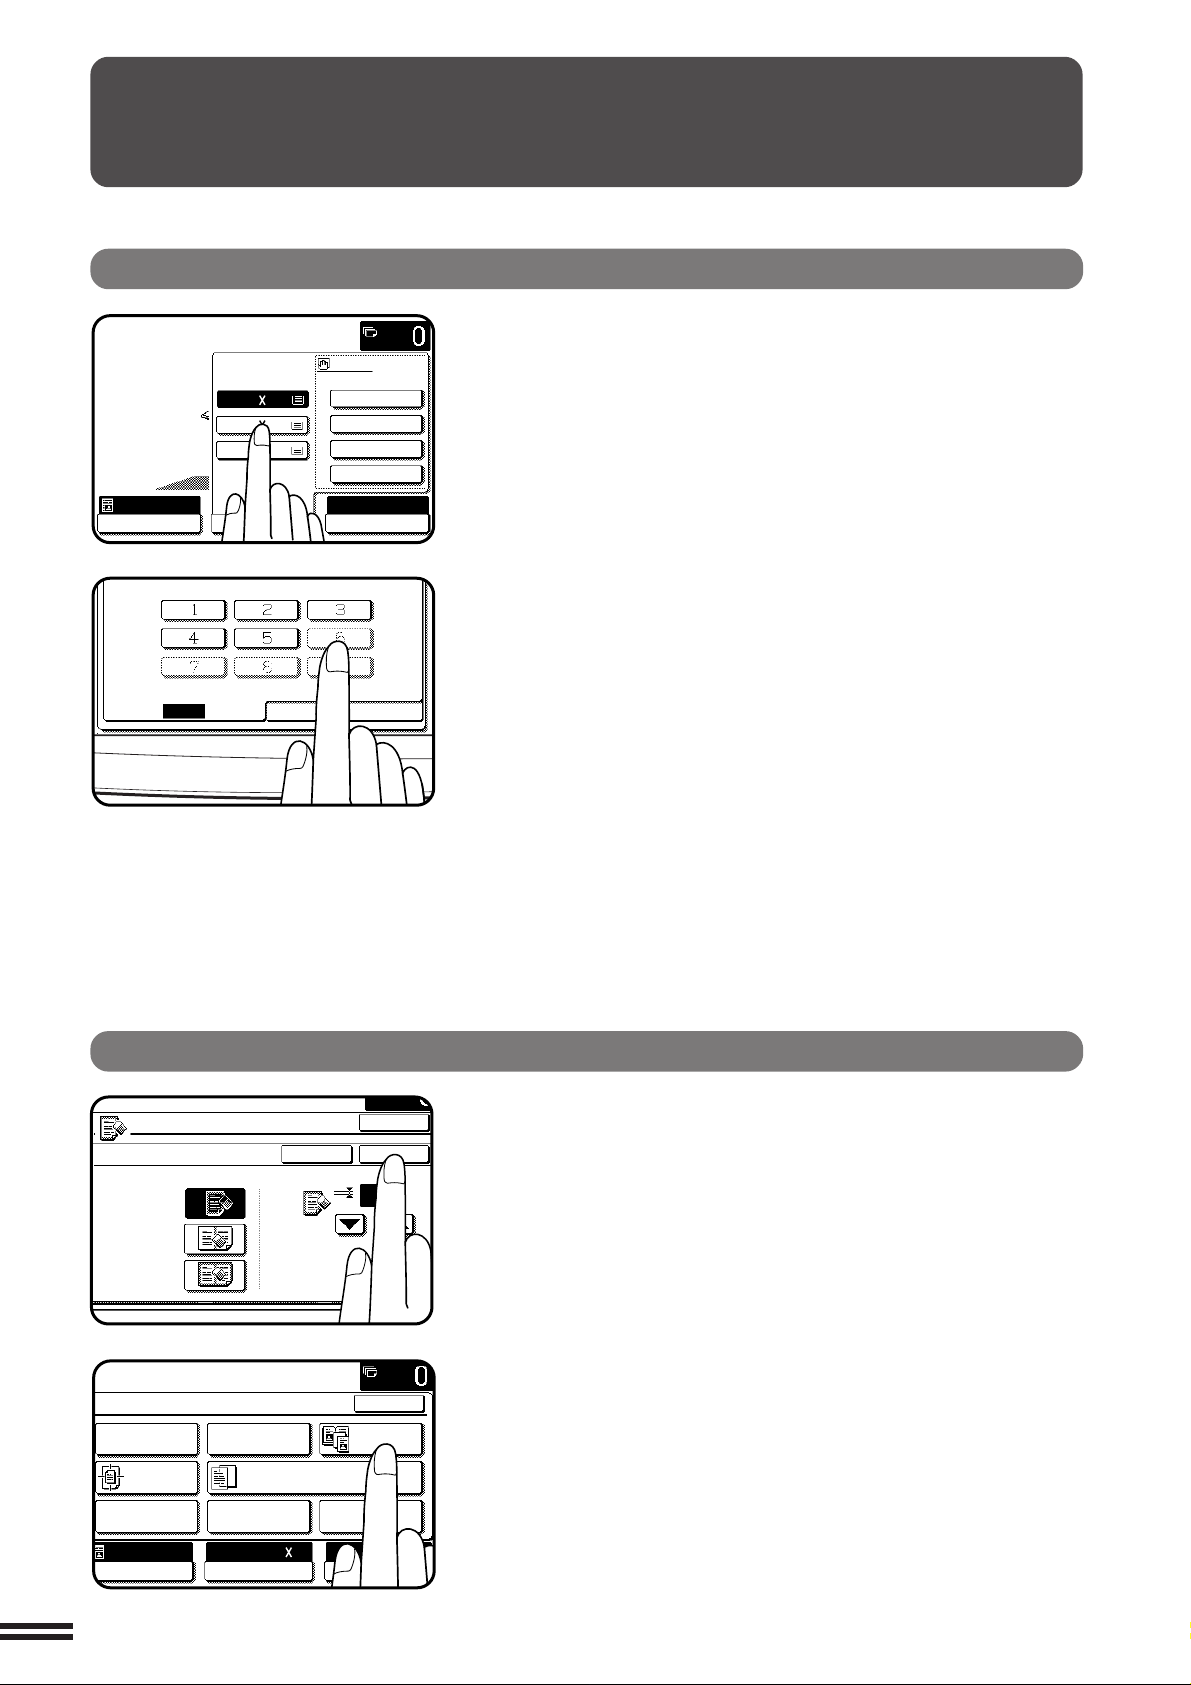
USING THE TOUCH P ANEL
1
How to use the touch panel
GETTING STARTED Using the touch panel
You can set or cancel a function displayed on the touch
panel by pressing (touching) a key with a finger. The touch
key operation can be confirmed with a beep tone (and
highlighting of the touch key).
★★
★ KEY OPERATOR For the beep tone to be heard, the beep tone must be
★★
enabled by a key operator program. See page 27 of the KEY OPERATOR’S
GUIDE.
A grayed out function key represents unavailability of that
function. If a grayed out key is pressed, two short beeps will
sound.
Selection of function
1-8
To register the selected settings for a function, press the
“OK” key on the setting screen. The settings indicated by
a highlighted display will be registered as a selected function.
Some special functions can be selected by pressing the
relevant keys on the SPECIAL MODES screen (page 3-4) or
on the IMAGE EDIT menu (page 3-26) to highlight the keys.
To cancel these functions, press the relevant keys again to
return the keys to the normal display. These functions are:
Dual page copying, Centering, Transparency inserts, Neg./
pos. reverse, Mirror image, and 11x17 full-bleed.
Page 21
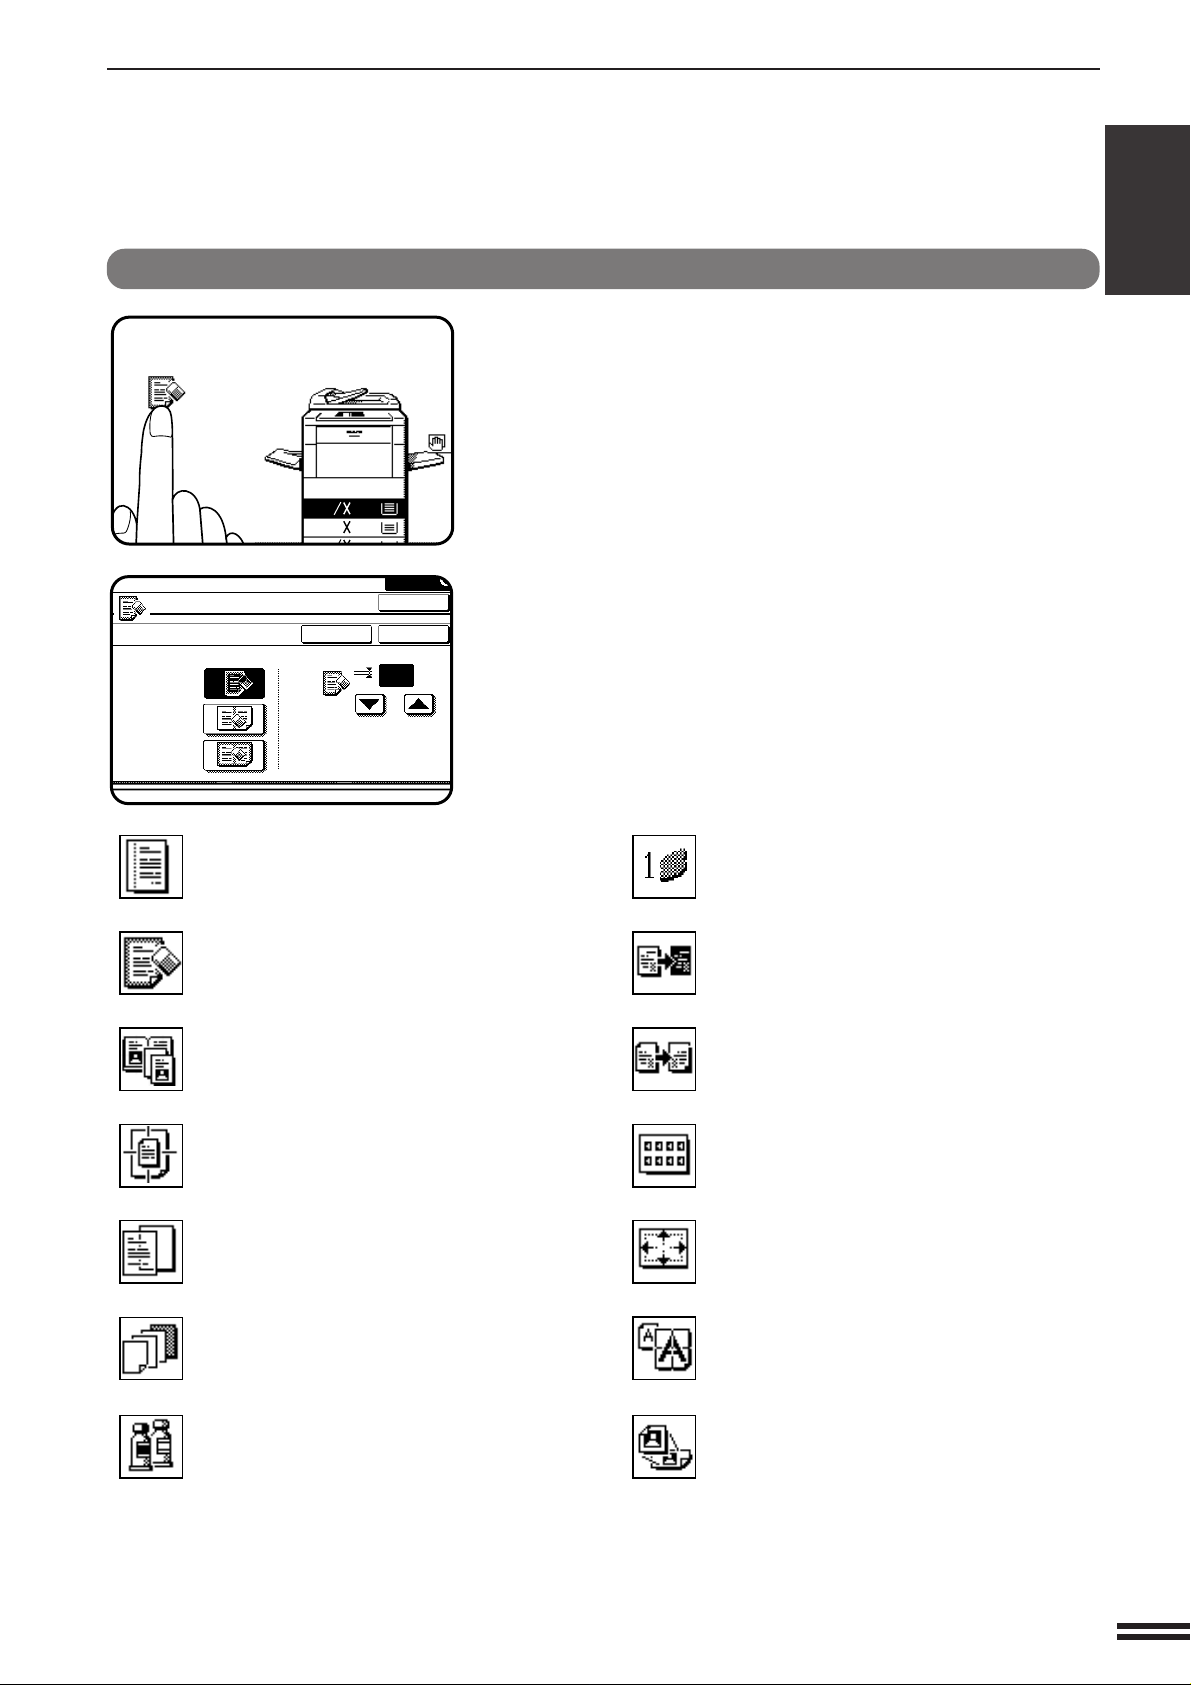
Function setting icons
5
1.
8
11
1
2
2.
1711
READY TO COPY.
ERASE
EDGE ERASE
CENTER ERASE
EDGE+CENTER
ERASE
CANCEL
1/2
OK
OK
(0~1)
inch
* Margin shift (p.3-4)
* Erase (p.3-6)
Dual page copying (p.3-8)
Centering (p.3-10)
Transparency film with insert sheets
(p.3-12)
* Covers (p.3-14)
Color adjustments (p.3-16)
* Single color (p.3-26)
Neg./pos. reverse (p.3-28)
Mirror image (p.3-30)
* Photo repeat (p.3-32)
11 x 17 full-bleed (p.3-34)
Multi-page enlargement (p.3-36)
Extra size (p.3-38)
USING THE TOUCH P ANEL
CHAPTER1
GETTING STARTED Using the touch panel
Icons representing special functions which have been
selected will appear on the basic screen. The functions and
their associated icons are listed below.
The content of the icons of functions indicated by (*) will
vary depending upon particular settings selected for these
functions. The other functions are on or off type functions
and have no associated setting screens.
1-9
Page 22

CHAPTER
1
GETTING STARTED Copy mode and print mode
COPY MODE AND PRINT MODE
An optional power supply kit (AR-PX4) and an optional printer
controller board (AR-PE2) must be installed to use this copier as a
printer.
Printing documents from the computer
In most cases, it is not necessary to use the operation panel when
printing documents from the computer. When a document is sent to
the printer from the computer, the printer will automatically print the
document. However, following the procedure specified below can
help the user ensure that documents are printed accurately. The
procedure assumes that the printer has been properly connected to a
computer, and that a printer driver has been installed.
Check the operation panel to confirm that the ON LINE
indicator is lit. If the ON LINE indicator is not lit, press
1
the PRINT key to select the print mode and then press
the “ONLINE/OFFLINE” key on the touch panel to set
the printer to the on-line condition.
Check the paper tray(s) to ensure that the desired
paper is loaded.
2
Using the computer and any appropriate application
software, load the document to be printed, set any
3
desired features using the installed printer driver, and
give the command to print the document. If necessary,
refer to the documentation for the computer and/or the
application software for help on issuing the necessary
commands.
The printer will print the document.
4
NOTE:
When the printer feature is used, if the ON LINE indicator is
blinking red, this machine cannot execute printing from some
cause. Press the PRINT key to select the print mode. A message
indicating the cause for the error such as no paper or no toner will
be displayed. Check the message and take proper measures.
Selecting the on-line mode
If the printer is in the off-line mode, printing cannot be performed. To
select the on-line mode, follow the procedure below.
1-10
If the printer is in the copy mode, press the PRINT key
to select the print mode.
1
●
The basic screen of the print mode will appear.
Press the “ONLINE/OFFLINE” key on the touch panel
to switch the printer to the on-line mode.
2
To return to the copy mode, press the COPY key.
3
Page 23
COPY MODE AND PRINT MODE
1.
8
1
2
2.
1711
11
3.
8
14
1
2
READY TO PRINT.
ONLINE
OFFLINE
PAPER SELECT
DUPLEX
100%
Using the operation panel in the print mode
The operation panel provides access to many of the printer’s features
and functions. The basic procedure to access the printer’s features
and functions is shown below.
If the printer is in the copy mode, press the PRINT key to
select the print mode.
1
●
The basic screen of the print mode will appear.
Press the “ONLINE/OFFLINE” key on the touch panel to
switch the printer to the off-line mode.
2
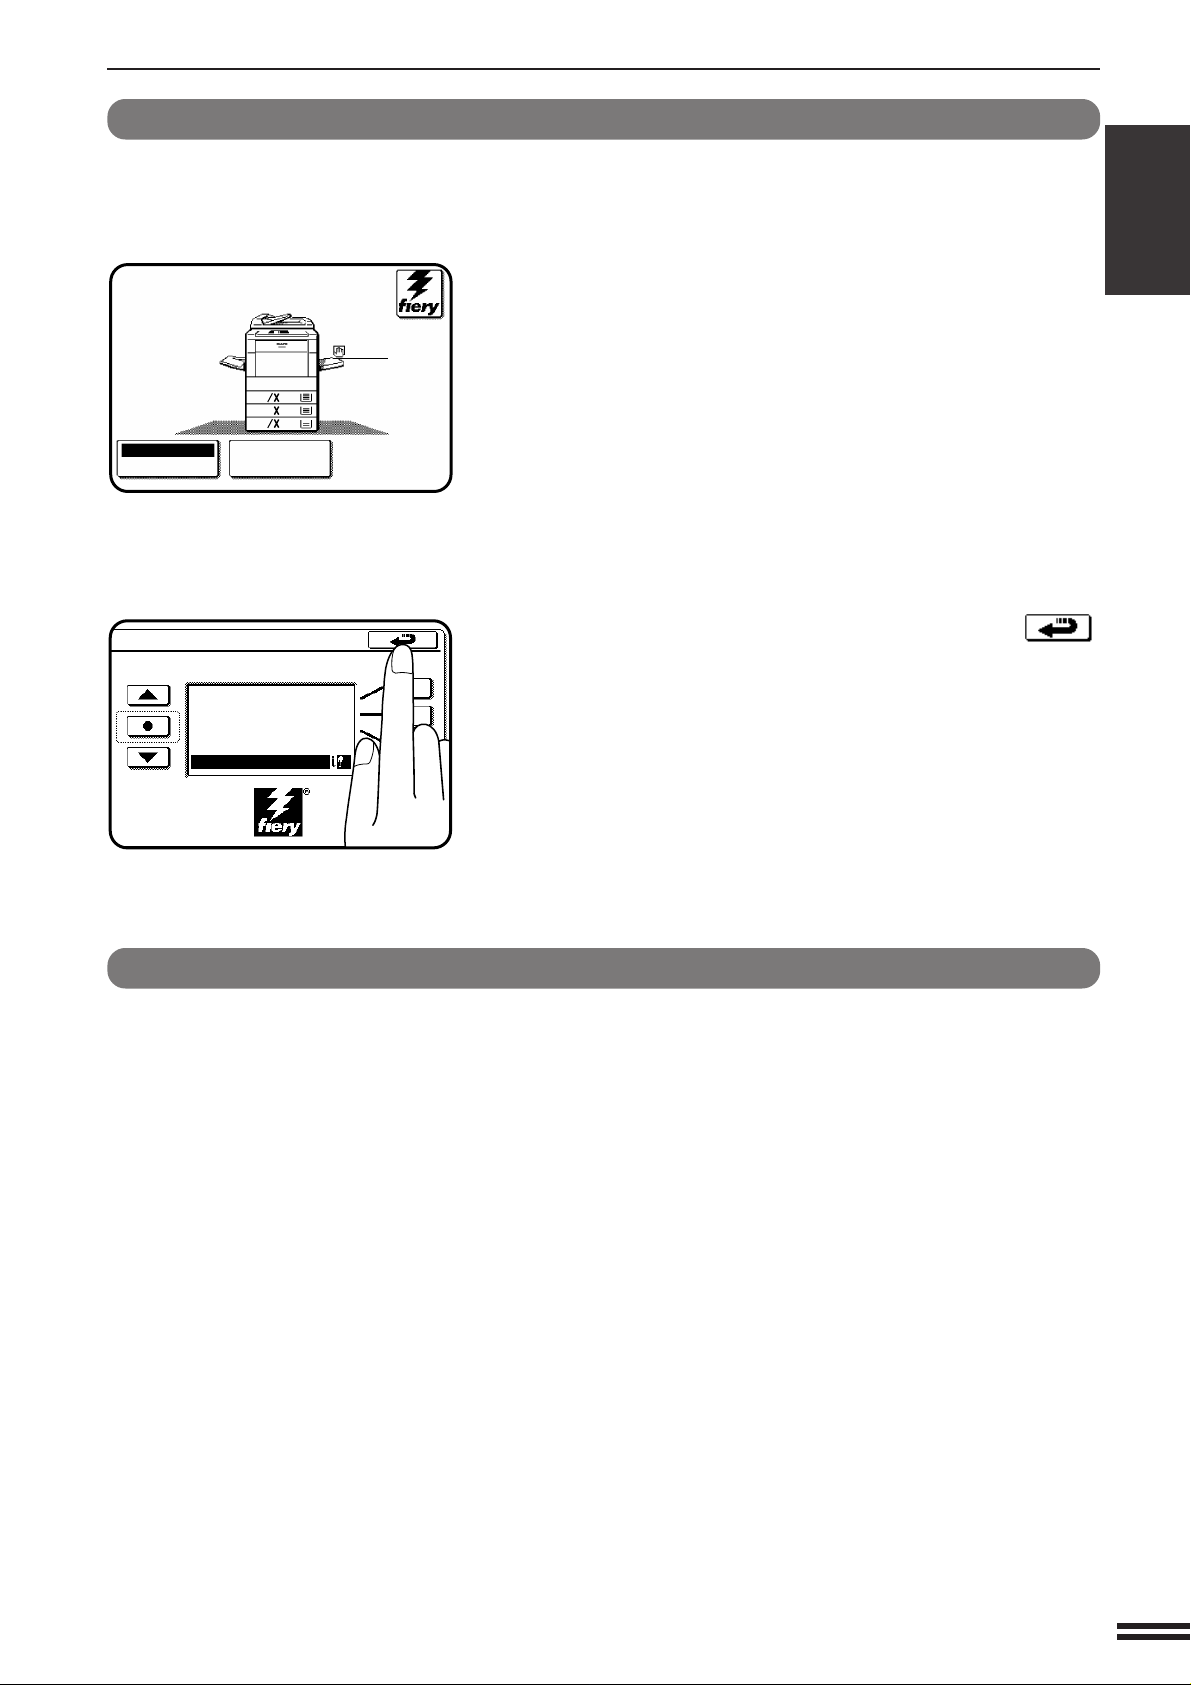
Press the “fiery” key on the touch panel.
3
Use the keys on the touch panel to select the desired
operation.
4
●
For details of the functions in the print mode, see the printer
operation manual.
●
FIERY PRINTER SCREEN
To return to the printer basic screen, press the return ( )
key.
CHAPTER1
GETTING STARTED Copy mode and print mode
AR-C160 PRINTER
idle
5348MB
info
V1.0
How to select the paper type for the bypass tray
Before the paper type can be selected, paper must be placed in the
bypass tray and the key operator program “Enable Bypass-Tray
Type Detection” must be used to enable the selection (see page 33 of
the KEY OPERATOR’S GUIDE). Proceed as follows.
Press the PRINT key to select the print mode.
1
Press the “ONLINE/OFFLINE” key to enter the off-line
mode.
2
Press the “PAPER” key.
3
Use the touch panel to enter the paper type to match the
paper set in the bypass tray.
4
Press the “ONLINE/OFFLINE” key to restore the on-line
mode.
5
1-11
Page 24

COPY MODE AND PRINT MODE
CHAPTER
General operation steps for using the scanner
1
To scan, process or edit document images by using the scanning
feature of the machine, Adobe Photoshop 5.0 or later is needed.
GETTING STARTED Copy mode and print mode
Install the required driver software in your computer in
accordance with the operation manual for the Printer
1
Controller.
Press the PRINT key to display the print mode screen.
2
Check the operation panel to confirm that the ONLINE
key is selected. If not , touch the “ONLINE/OFFLINE” key
3
to select the online status.
Place the original on the document glass or in the
document feeder (optional).
4
NOTE:
Even if multiple originals are set in the document feeder images
must be processed one at a time.
Acquire the image using the application software. For
the details, refer to the operation manual supplied with
5
the application software.
Edit or store the scanned image. Refer to the instructions
supplied with the application software for details.
6
NOTE:
For detailed instructions on using the machine as a scanner, refer
to the operation manual supplied with the Printer Controller.
1-12
Page 25

CHAPTER 2
MAKING COPIES
This chapter describes the basic copying functions such as normal
copying, reduction/enlargement, and exposure adjustments.
Page
●●
●
●●
AUDITING ACCOUNTS . . . . . . . . . . . . . . . . . . . . . . . . . . . . . . . . 2-2
●●
●
●●
COPYING FROM THE DOCUMENT GLASS . . . . . . . . . . . . . . . 2-3
●●
●
●●
USING THE RADF . . . . . . . . . . . . . . . . . . . . . . . . . . . . . . . . . . . . 2-6
●●
●
●●
REDUCTION/ENLARGEMENT/ZOOM . . . . . . . . . . . . . . . . . . . 2-11
●●
●
●●
SPECIAL PAPERS (manual feed). . . . . . . . . . . . . . . . . . . . . . . 2-14
Two-sided copying with bypass tray . . . . . . . . . . . . . . . . . . . . . . 2-15
●●
●
●●
EXPOSURE ADJUSTMENTS . . . . . . . . . . . . . . . . . . . . . . . . . . 2-16
●●
●
●●
JOB MEMORY. . . . . . . . . . . . . . . . . . . . . . . . . . . . . . . . . . . . . . 2-18
●●
●
●●
INTERRUPTING A COPY RUN . . . . . . . . . . . . . . . . . . . . . . . . . 2-20
CHAPTER2
2-1
Page 26
AUDITING ACCOUNTS
12
3
456
789
0
P
C
CA
CLEAR
PROGRAM
AUDIT
INTERRUPT
CLEAR
ALL
N
If this copier has been programmed in the auditing mode, it will not function until an assigned 5-digit account number
has been entered.The auditing mode can be set for both the color and black/white (B/W) copy modes or for only the
color copy mode.
★ KEY OPERATOR See page 9 of the KEY OPERATOR’S GUIDE for setting the auditing mode.
CHAPTER2
If the auditing mode has been set for both the color and B/W copy
modes, the initial status of the message display will be:
ENTER YOUR ACCOUNT NUMBER. -----
MAKING COPIES Auditing accounts
If the auditing mode has been set for only the color copy mode, the
following display will appear when the AUDIT key or the COLOR
COPY START ( ) key is pressed.
ENTER YOUR ACCOUNT NUMBER
FOR COLOR COPYING.
-----
●
Enter your account number using the 10-key pad.
●
As each digit is entered, the dashes in the display will change to
asterisks.
The following message will appear after the number is entered.
ACCOUNT STATUS: COPIES MADE /REMAINING
B/W: 000,000/000,000 CL: 000,000/000,000
“COPIES REMAINING” will appear only if account limit has been
set using a key operator program.
★★
★ KEY OPERATOR See page 16 of the KEY OPERATOR’S
★★
GUIDE for account limit settings.
●
The message will be displayed for several seconds, then change
to the following message.
READY TO COPY.
●
When a copy run is performed, the following message will
appear.
READY TO COPY.
PRESS [AUDIT] WHEN FINISHED.
●
In the interrupt copy mode (see page 2-20), the following
message will appear instead of the message above.
READY TO COPY. WHEN COPYING IS
FINISHED, PRESS [INTERRUPT].
NOTE:
If an unassigned number is entered, the message display will show
“ENTER YOUR ACCOUNT NUMBER.-----”, indicating that the
number was not accepted.
When the key operator program of account number security has
been set:
2-2
If an unassigned number is entered three successive times, the
copier will not accept another number for one minute, and the
following message will appear.
PLEASE SEE YOUR KEY OPERATOR FOR
ASSISTANCE.
★★
★ KEY OPERATOR See page 17 of the KEY OPERATOR’S
★★
GUIDE for account number security.
Page 27
COPYING FROM THE DOCUMENT GLASS
ORIGINAL
8
11
1
2
1.
8
11
1
2
2.
1711
3.
8
14
1
2
READY TO COPY.
AUTO
EXPOSURE PAPER SELECT
100%
COPY RATIO
8/ 11AUTO
1
2
12
3
456
789
0
P
C
CA
CLEAR
PROGRAM
AUDIT
INTERRUPT
CLEAR
ALL
N
Use the document glass for copying single originals,
bound documents, and other originals that cannot be set
in the optional RADF.
●
Only 1-sided to 1-sided and 1-sided to 2-sided
copying can be selected when copying from the
document glass.
●
Duplex copying will not work when a non-standard
sized paper or 5-1/2" x 8-1/2"R paper is used.
●
2-sided to 2-sided or 2-sided to 1-sided copying
cannot be selected when copying from the
document glass. These operations can, however,
be performed simply by turning over the original
manually.
1-sided copies of 1-sided originals
●
Image loss (max. 13/64" (5 mm)) can occur along
the leading edge of the copies. Image loss (max. 9/
32" (7mm)) can occur along the trailing edge of the
copies. Also image loss (max. 1/4" (6 mm) in total)
can occur along the other edges of the copies.
CHAPTER2
MAKING COPIES Copying from the document glass
Original size detector
Centering scale
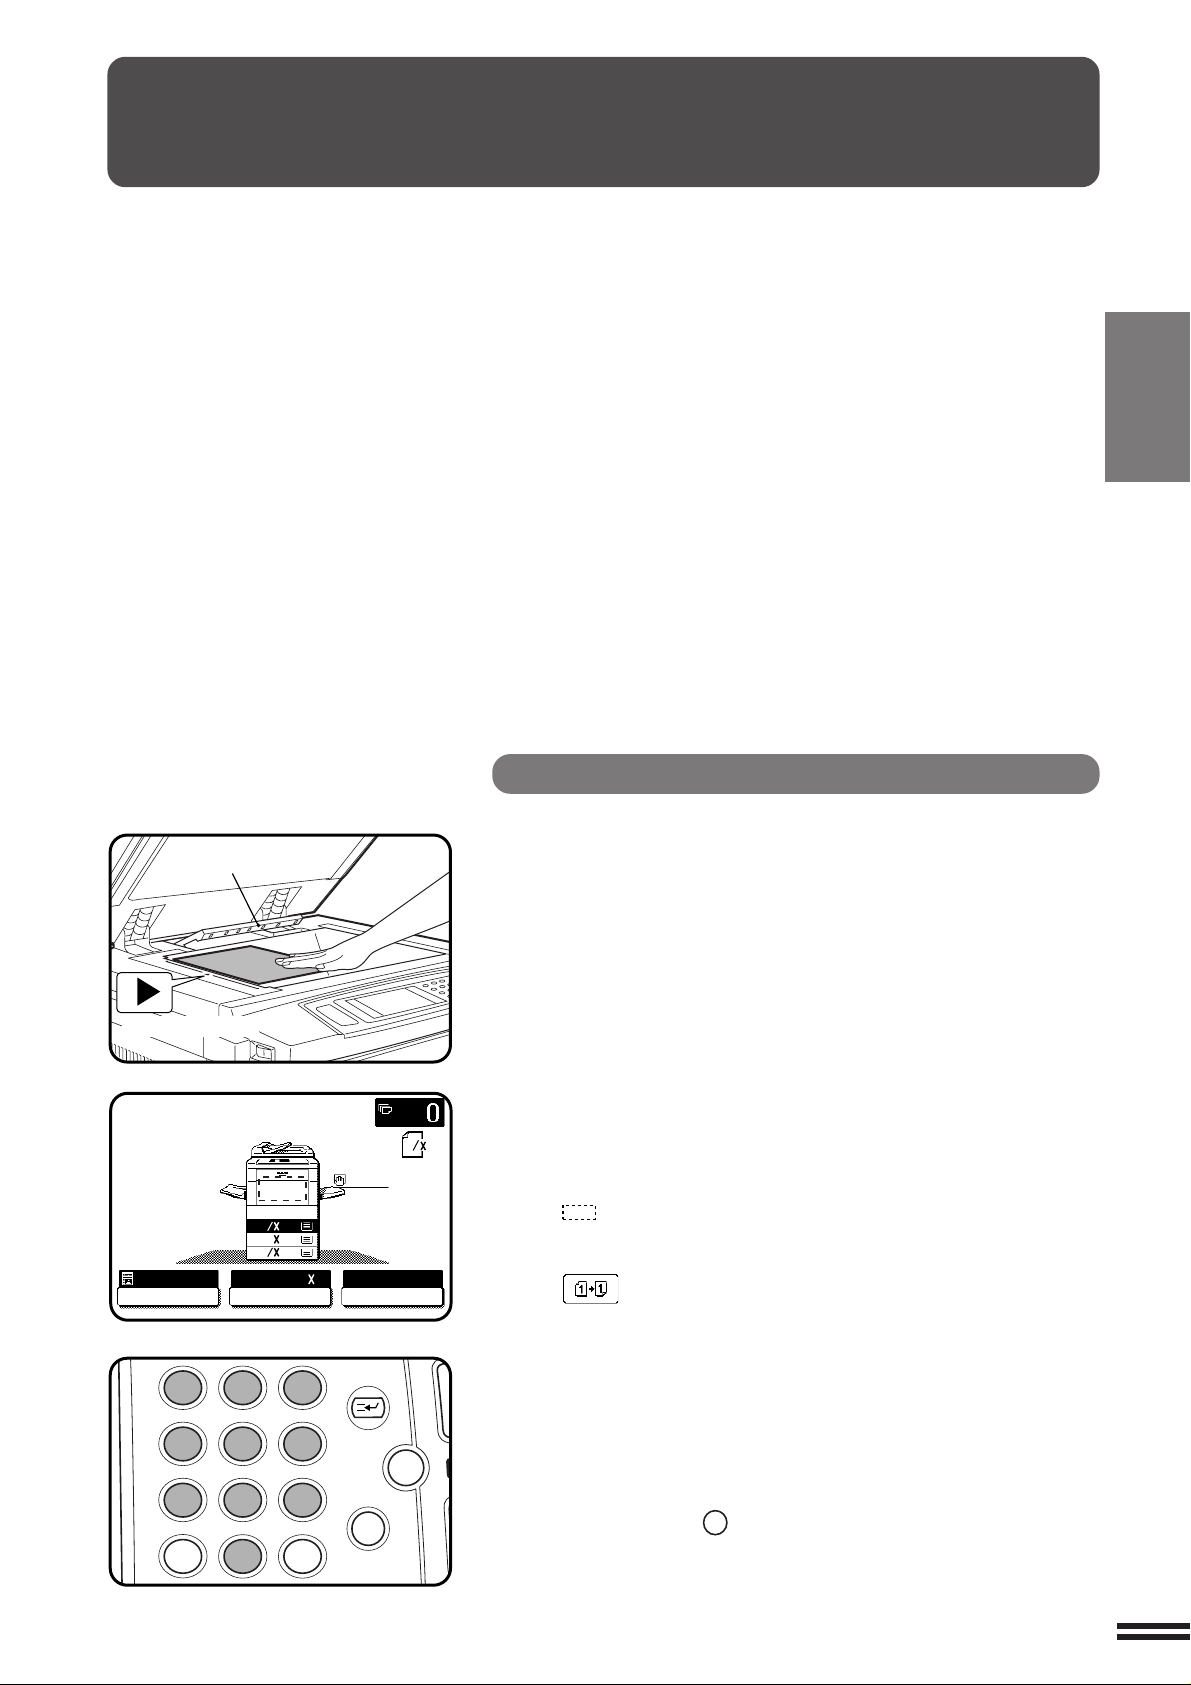
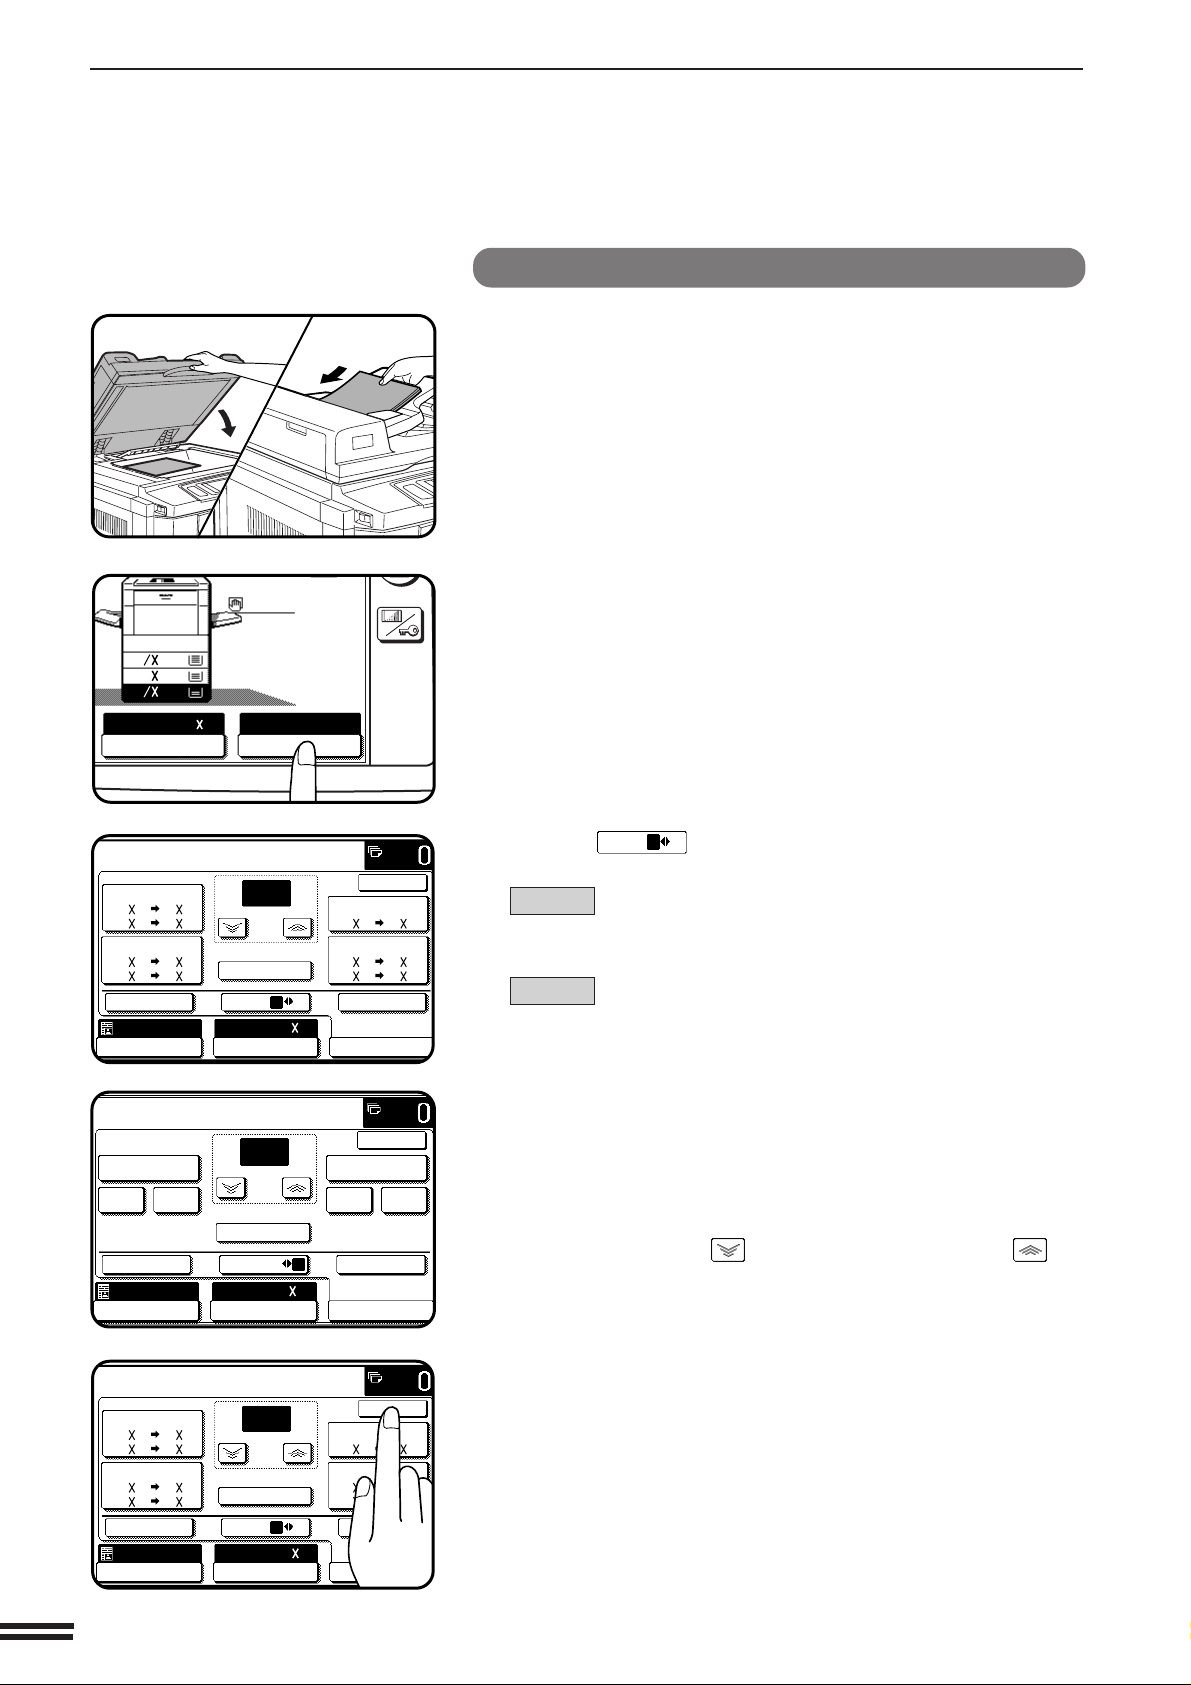
Open the document cover and place an original face
down on the document glass, using the centering scale
1
to position it.
●
When copying multi-page documents, copy from the last page to
the first page.
NOTE:
Do not place objects under the original size detector, because they
may damage it.
Close the document cover.
●
2
The original size will be indicated on the touch panel, and the paper
tray with the corresponding paper size will be automatically selected.
Ensure that the 1-sided to 1-sided copying mode is
selected on the touch panel.
3
●
When no icon is displayed in the area indicated in the illustration
( ), the 1-sided to 1-sided copying mode is selected.
●
If the 1-sided to 1-sided mode is not selected, press the
2-SIDED COPY key and then press the 1-sided to 1-sided key
( ) on the touch panel. Press the “OK” key to return to the
basic screen.
Use the 10-key pad to enter the desired number of
copies.
4
●
The number will be shown in the copy quantity display of the
touch panel.
●
A single copy can be made with the initial setting, i.e., when “0”
is displayed.
●
Use the CLEAR (C) key to cancel an entry if a mistake is made.
2-3
Page 28
COPYING FROM THE DOCUMENT GLASS
OUTPUT
2-SIDED
COPY
AUTO
PRE-COUNT
OK
100%
COPY RATIO
1
2
EVEN NUMBER
ORIGINALS
ODD NUMBER
ORIGINALS
AUTO
EXPOSURE PAPER SELE
8/AUTO
1
2
3
6
9
P
C
CA
CLEAR
PROGRAM
INTERRUPT
CLEAR
ALL
CHAPTER2
MAKING COPIES Copying from the document glass
Original size detector
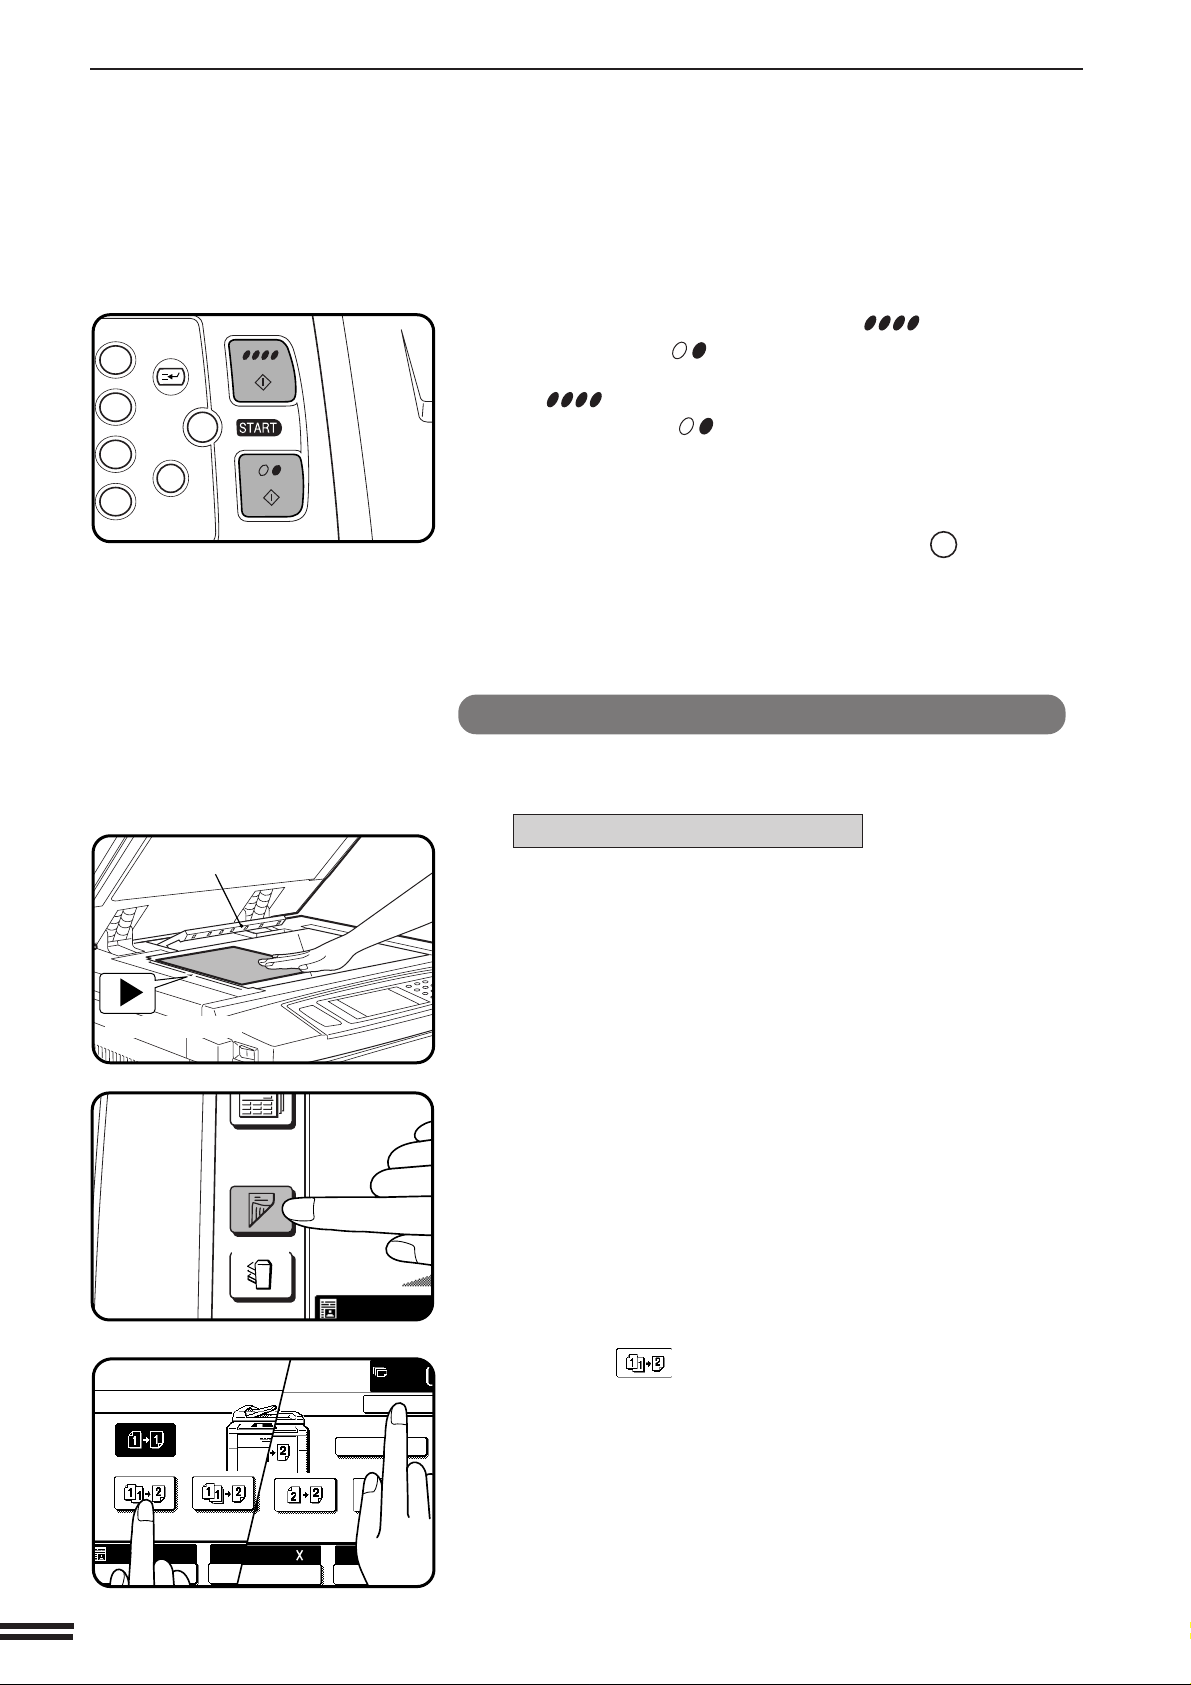
Press the COLOR COPY START ( ) key or BLACK
COPY START (
5
●
To perform color copying, press the COLOR COPY START
( ) key. To perform black/white copying, press the BLACK
COPY START ( ) key.
●
The number in the copy quantity display will decrease by 1 each
time a copy is made. To repeat the same copy sequence with a
different original, simply replace the original and press the
START key.
●
To cancel a copy run, press the CLEAR ALL (CA) key. Copying
will stop and the number in the copy quantity display will be reset
to 0.
) key.
2-sided copies from 1-sided originals
To copy in the 1-sided to 2-sided copy mode, an optional duplex module
(AR-DU2N) must be installed.
For an odd number of originals:
Set the last page of the document onto the document
glass, and copy it in the 1-sided to 1-sided mode.
1
Centering scale
2-4
Press the 2-SIDED COPY key.
2
Press the (EVEN NUMBER ORIGINALS) key on the
touch panel and then press the “OK” key.
3
Page 29
COPYING FROM THE DOCUMENT GLASS
OUTPUT
2-SIDED
COPY
AUTO
3
6
9
P
C
CA
CLEAR
PROGRAM
INTERRUPT
CLEAR
ALL
3
6
9
P
C
CA
CLEAR
PROGRAM
INTERRUPT
CLEAR
ALL
PRE-COUNT
OK
100%
COPY RATIO
1
2
EVEN NUMBER
ORIGINALS
ODD NUMBER
ORIGINALS
AUTO
EXPOSURE PAPER SELE
8/AUTO
1
2
Copy the reminder of the originals in reverse order.
●
4
When making color copies in the duplex mode or making B/W
copies in the duplex mode onto paper 8-1/2" x 14" or larger, only
one copy per original can be made. Even if a multiple number of
copies is set, the number will be changed to 1 when a START key
is pressed.
For an even number of originals:
Press the 2-SIDED COPY key.
1
CHAPTER2
MAKING COPIES
Copying from the document glass
Press the (EVEN NUMBER ORIGINALS) key on the
touch panel and then press the “OK” key.
2
Copy the originals in reverse order.
●
3
When making color copies in the duplex mode or making B/W
copies in the duplex mode onto paper 8-1/2" x 14" or larger, only
one copy per original can be made. Even if a multiple number of
copies is set, the number will be changed to 1 when a START key
is pressed.
2-5
Page 30

USING THE RADF
This copier can be equipped with an optional reversing
automatic document feeder (RADF).
The RADF will handle multiple originals.
●
Before loading originals into the document feeder
CHAPTER2
MAKING COPIES Using the RADF
tray, be sure to remove any staples or paper clips
from them.
●
Damaged or crumpled originals or originals which
have been folded may misfeed in the RADF or cause
incorrect size detection. It is recommended that these
be copied from the document glass and the copies be
used as original documents.
●
When feeding originals which have closely spaced
binding holes punched along an edge, place the
originals so that the punched edge is positioned to the
right or along the side guides.
●
Special originals such as transparency film and tracing
paper should not be fed from the RADF, but should be
placed on the document glass.
●
Duplex copying will not work when a non-standard
sized paper or 5-1/2" x 8-1/2" paper is used.
●
Image loss (max. 13/64" (5 mm)) can occur along the
leading edge of the copies. Image loss (max. 9/32"
(7mm)) can occur along the trailing edge of the
copies. Also image loss (max. 1/4" (6 mm) in total)
can occur along the other edges of the copies.
●
The RADF can handle a maximum of 50 originals of
5-1/2" x 8-1/2" to 8-1/2" x 11" sizes and 30 originals
of 8-1/2" x 14" to 11" x 17" sizes.
●
2-sided to 1-sided copying and 2-sided to 2-sided*
copying can be performed.
* For 2-sided to 2-sided copying, an optional duplex
module (AR-DU2) must be installed.
●
The originals must be set face up in the document
feeder tray.
●
Different size originals with the same width can be
placed in the document feeder tray and automatically
copied onto copy paper of their respective sizes.
The automatic copy ratio selection will not function in
this case.
Stream feeding mode
If the stream feeding mode has been enabled using a key operator
program, the message “NEWLY PLACED ORIGINALS WILL BE FED
AND COPIED AUTOMATICALLY.” will appear and the original feed
indicator will continue to blink for approximately 5 seconds after
feeding of all originals is completed. While this message is displayed,
any new originals placed in the document feeder tray will be fed and
copied automatically.
★ KEY OPERATOR See page 24 of the KEY OPERATOR’S GUIDE
for information on setting the stream feeding mode.
2-6
Page 31

USING THE RADF
ORIGINAL
8
11
1
2
1.
8
11
1
2
2.
1711
3.
8
14
1
2
READY TO COPY.(DOCUMENT FEEDER MODE)
AUTO
EXPOSURE PAPER SELECT
100%
COPY RATIO
8/ 11AUTO
1
2
12
3
456
789
0
P
C
CA
CLEAR
PROGRAM
AUDIT
INTERRUPT
CLEAR
ALL
3
6
9
P
C
CA
CLEAR
PROGRAM
INTERRUPT
CLEAR
ALL
Original
Copy
1-sided copies of 1-sided originals
Adjust the original guides to the size of the originals and
set the originals face up in the document feeder tray.
1
●
The original size will be indicated on the touch panel, and the
paper tray with the corresponding paper size will be automatically
selected.
●
Be sure to remove any original from the document glass before
setting the originals in the document feeder tray. If an original is
left on the document glass, the original reminder indicator will
blink. Remove the original from the document glass in this case.
●
If copy paper of the required size is not installed in any of the
trays, the following message will appear.
LOAD " x " PAPER.
If a tray of the required size is not installed, use the bypass tray
and press the “PAPER SELECT” key on the touch panel to select
the bypass tray.
●
To copy onto a different size paper, use the “PAPER SELECT”
key to make the selection.
CHAPTER2
MAKING COPIES Using the RADF
Ensure that the 1-sided to 1-sided copying mode is
selected on the touch panel.
2
●
When no icon is displayed in the area indicated in the illustration
( ), the 1-sided to 1-sided copying mode is selected.
●
If the 1-sided to 1-sided mode is not selected, press the
2-SIDED COPY key and then press the 1-sided to 1-sided key
( ) on the touch panel. Press the “OK” key to return to the
basic screen.
Use the 10-key pad to enter the desired number of
copies.
3
●
The number will be shown in the copy quantity display of the
touch panel.
●
Use the CLEAR (C) key to cancel an entry if a mistake has been
made.
Press the COLOR COPY START ( ) key or BLACK
COPY START (
4
●
To perform color copying, press the COLOR COPY START
( ) key. To perform black/white copying, press the BLACK
COPY START ( ) key.
●
To cancel a copy run, press the CLEAR ALL (CA) key. Copying
will stop and the RADF will output any originals which have been
fed. Also, the number in the copy quantity display will be reset to
0.
) key.
2-7
Page 32
USING THE RADF
OUTPUT
2-SIDED
COPY
AUTO
PRE-COUNT
EVEN NUMBER
ORIGINALS
ODD NUMBER
ORIGINALS
OK
AUTO
EXPOSURE PAPER SELECT
100%
COPY RATIO
8/ 11AUTO
1
2
PRE-COUNT
EVEN NUMBER
ORIGINALS
ODD NUMBER
ORIGINALS
OK
AUTO
EXPOSURE PAPER SELECT
100%
COPY RATIO
8/ 11
AUTO
1
2
C
CA
CLEAR
INTERRUPT
CLEAR
ALL
12
3
456
789
0
P
C
CL
PROGRAM
AUDIT
INTE
CLE
AL
Originals (1-sided)
CHAPTER2
MAKING COPIES Using the RADF
Copy (2-sided)
Maximum height
line
2-sided copies from 1-sided originals
To copy in the 1-sided to 2-sided copy mode, an optional duplex module
(AR-DU2N) must be installed.
Adjust the original guides to the size of the originals and
set the originals face up in the document feeder tray.
1
Press the 2-SIDED COPY key.
2
EVEN
If the number of originals is known, use the (EVEN
NUMBER ORIGINALS) key or (ODD NUMBER
3
ORIGINALS) key on the touch panel, then proceed to
step 4. If the number of originals is not known, select
“PRE-COUNT” for an automatic count by the RADF and
press the COLOR COPY START ( ) key or BLACK
COPY START (
●
The following message will appear.
PRE-COUNT MODE
NUMBER OF ORIGINALS IS **.
●
If the number of originals exceeds the limit, other messages will
appear .
●
When the count is complete and the number is known, replace
the originals in the document feeder tray and select “EVEN
NUMBER ORIGINALS” or “ODD NUMBER ORIGINALS” as
above.
) key.
Press the “OK” key.
4
Enter the desired number of copies.
●
5
When making color copies in the duplex mode or making B/W
copies in the duplex mode onto paper 8-1/2" x 14" or larger, only
one copy per original can be made. Even if a multiple number of
copies is set, the number will be changed to 1 when a START key
is pressed.
2-8
Press the COLOR COPY START ( ) key or BLACK
COPY START (
6
●
To perform color copying, press the COLOR COPY START
( ) key. To perform black/white copying, press the BLACK
COPY START ( ) key.
●
To cancel a copy run during duplex copying, press the CLEAR
ALL (CA) key.
) key.
Page 33
Original (2-sided)
OUTPUT
2-SIDED
COPY
AUTO
PRE-COUNT
EVEN NUMBER
ORIGINALS
ODD NUMBER
ORIGINALS
OK
AUTO
EXPOSURE PAPER SELECT
100%
COPY RATIO
8/ 11AUTO
1
2
PRE-COUNT
EVEN NUMBER
ORIGINALS
ODD NUMBER
ORIGINALS
OK
AUTO
EXPOSURE PAPER SELECT
100%
COPY RATIO
8/ 11AUTO
1
2
C
CA
CLEAR
INTERRUPT
CLEAR
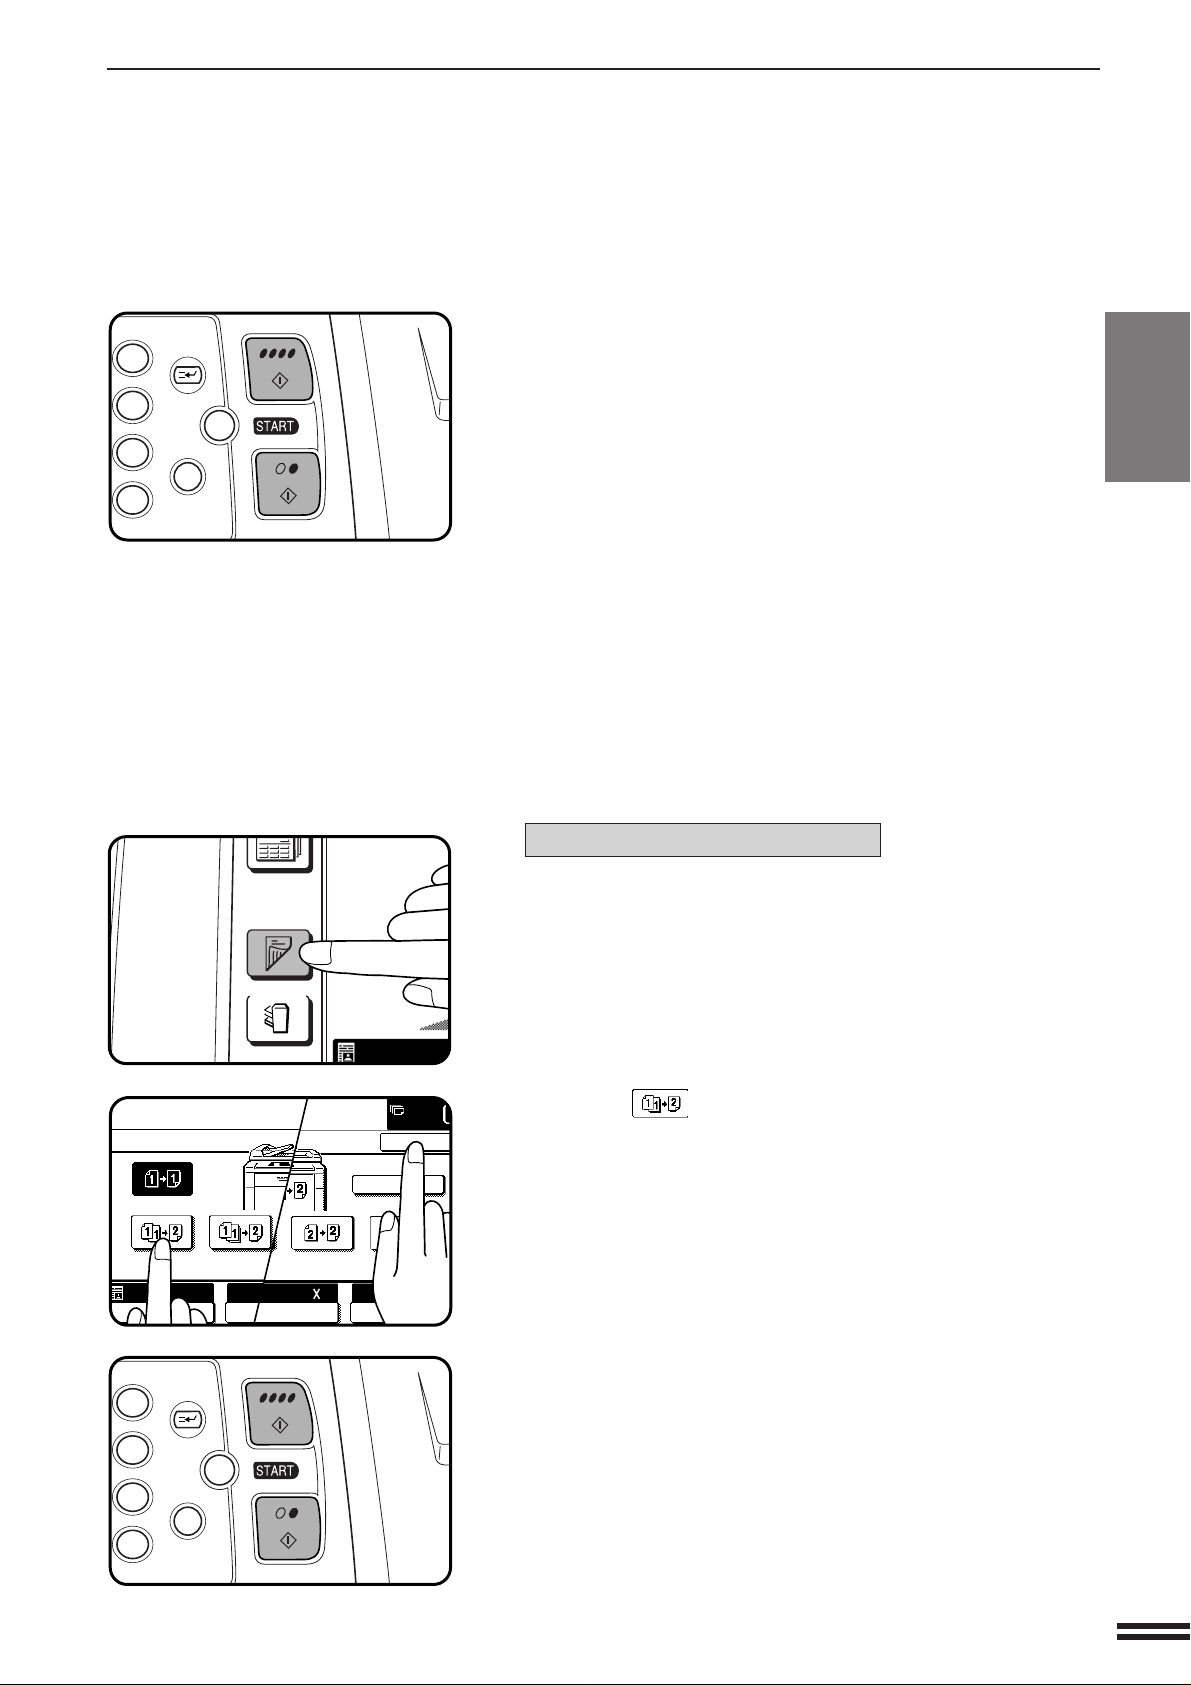
ALL
12
3
456
789
0
P
C
CL
PROGRAM
AUDIT
INTE
CLE
AL
USING THE RADF
2-sided copies from 2-sided originals
Copy (2-sided)
To copy in the 2-sided to 2-sided mode, an optional duplex module (ARDU2N) must be installed.
Maximum height
line
Adjust the original guides to the size of the originals and
set the originals face up in the document feeder tray.
1
Press the 2-SIDED COPY key.
2
Press the key on the touch panel.
3
CHAPTER2
MAKING COPIES Using the RADF
Press the “OK” key.
4
Enter the desired number of copies.
●
5
6
When making color copies in the duplex mode or making B/W
copies in the duplex mode onto paper 8-1/2" x 14" or larger, only
one copy per original can be made. Even if a multiple number of
copies is set, the number will be changed to 1 when a START key
is pressed.
Press the COLOR COPY START ( ) key or BLACK
COPY START (
●
To perform color copying, press the COLOR COPY START
( ) key. To perform black/white copying, press the BLACK
COPY START ( ) key.
●
To cancel a copy run during duplex copying, press the CLEAR
ALL (CA) key.
) key.
2-9
Page 34

USING THE RADF
OUTPUT
2-SIDED
COPY
AUTO
PRE-COUNT
EVEN NUMBER
ORIGINALS
ODD NUMBER
ORIGINALS
OK
AUTO
EXPOSURE PAPER SELECT
100%
COPY RATIO
8/ 11AUTO
1
2
PRE-COUNT
EVEN NUMBER
ORIGINALS
ODD NUMBER
ORIGINALS
OK
AUTO
EXPOSURE PAPER SELECT
100%
COPY RATIO
8/ 11AUTO
1
2
C
CA
CLEAR
INTERRUPT
CLEAR
ALL
12
3
456
789
0
P
C
CL
PROGRAM
AUDIT
INTE
CLE
AL
Original (2-sided)
CHAPTER2
MAKING COPIES Using the RADF
Copies (1-sided)
Maximum height
line
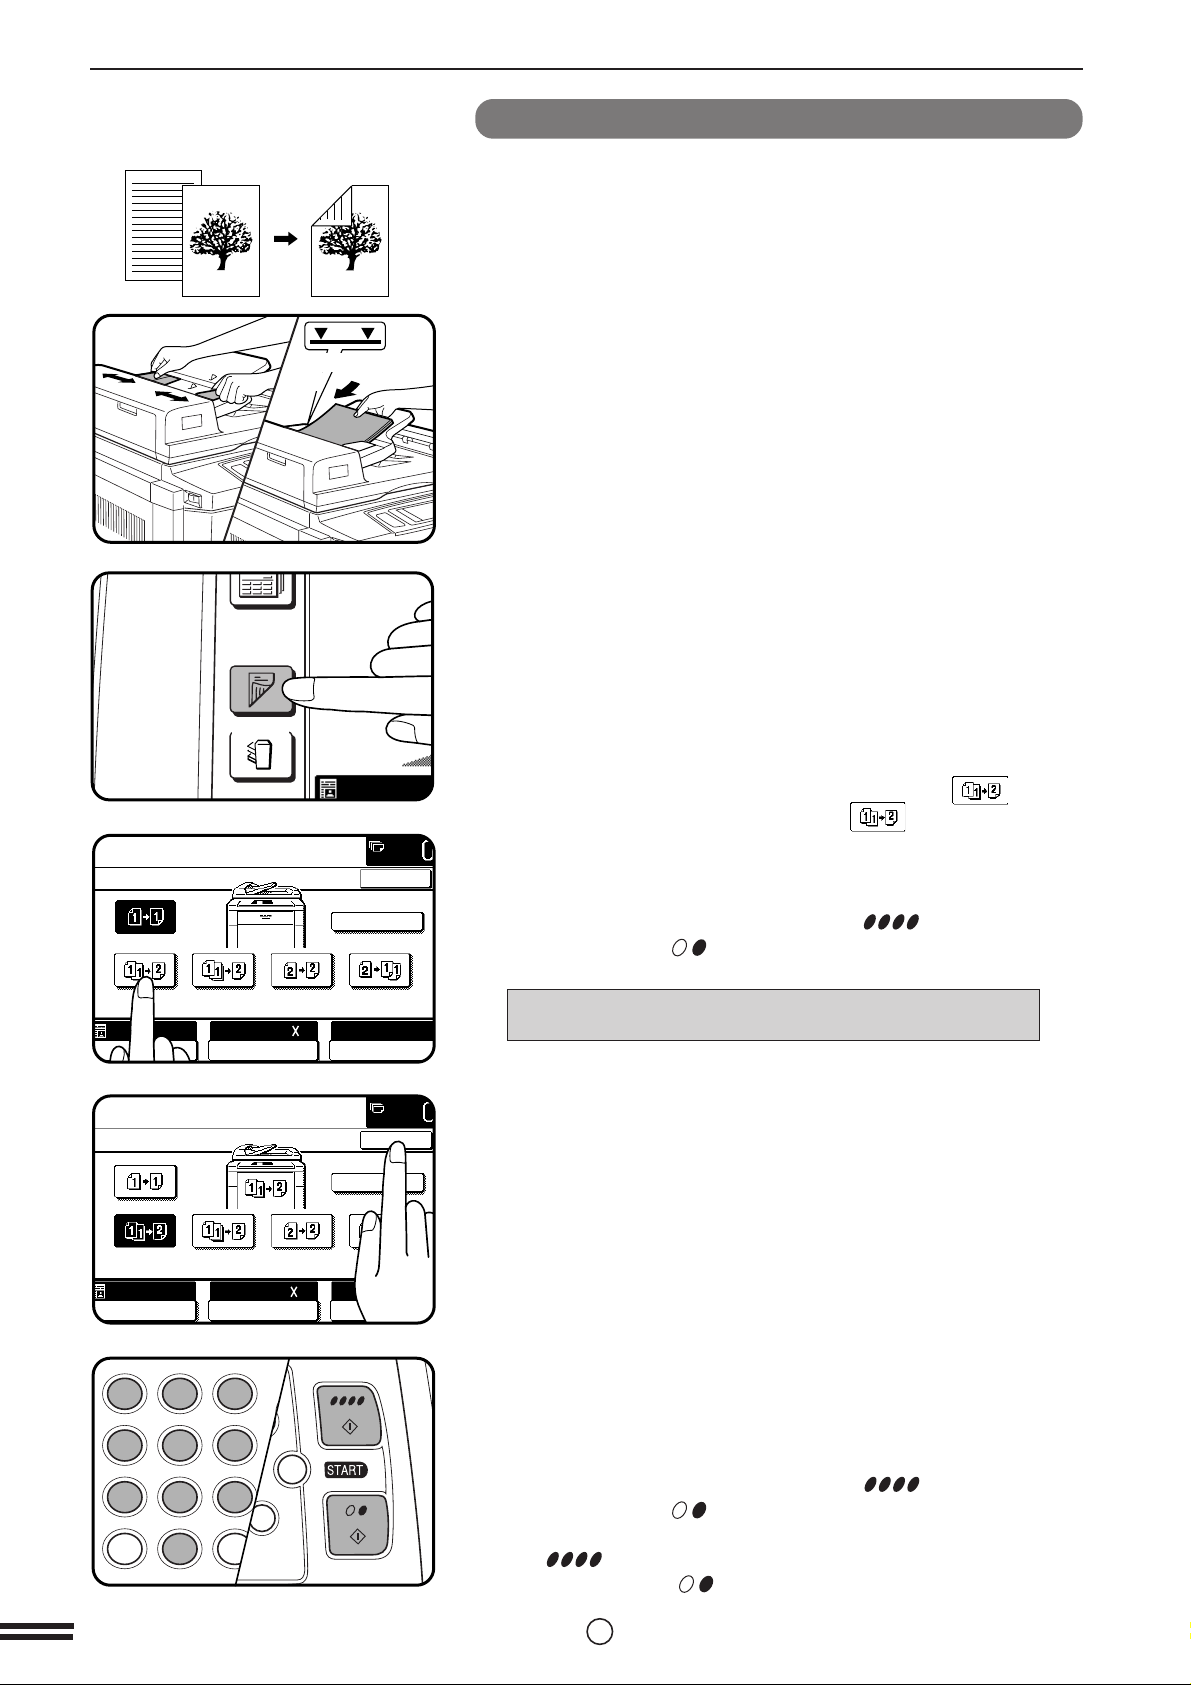
1-sided copies from 2-sided originals
Adjust the original guides to the size of the originals and
set the originals face up in the document feeder tray.
1
Press the 2-SIDED COPY key.
2
2-10
Press the key on the touch panel.
3
Press the “OK” key.
4
Enter the desired number of copies.
5
Press the COLOR COPY START ( ) key or BLACK
COPY START (
6
●
To perform color copying, press the COLOR COPY
START( ) key. To perform black/white copying, press the
BLACK COPY START ( ) key.
●
To cancel a copy run, press the CLEAR ALL (CA) key. Copying
will stop and the RADF will output any originals which have been
fed. Also, the number in the copy quantity display will be reset to
0.
) key.
Page 35
REDUCTION/ENLARGEMENT/ZOOM
READY TO COPY.
AUTO
EXPOSURE
PAPER SELECT
100%
COPY RATIO
1.8/ 11
2.11 17
3.8/ 14
1
2
1
2
16~28 lbs.
28+~35 lbs.
35+~75 lbs.
TRANSPARENCY
PAPER TYPE
11
17
14
SELECT
100%
COPY RATIO
AUTO IMAGE
11 17
C
CA
CLEAR
INTERRUPT
CLEAR
ALL
12
3
456
789
0
P
C
CL
PROGRAM
AUDIT
INTE
CLE
AL
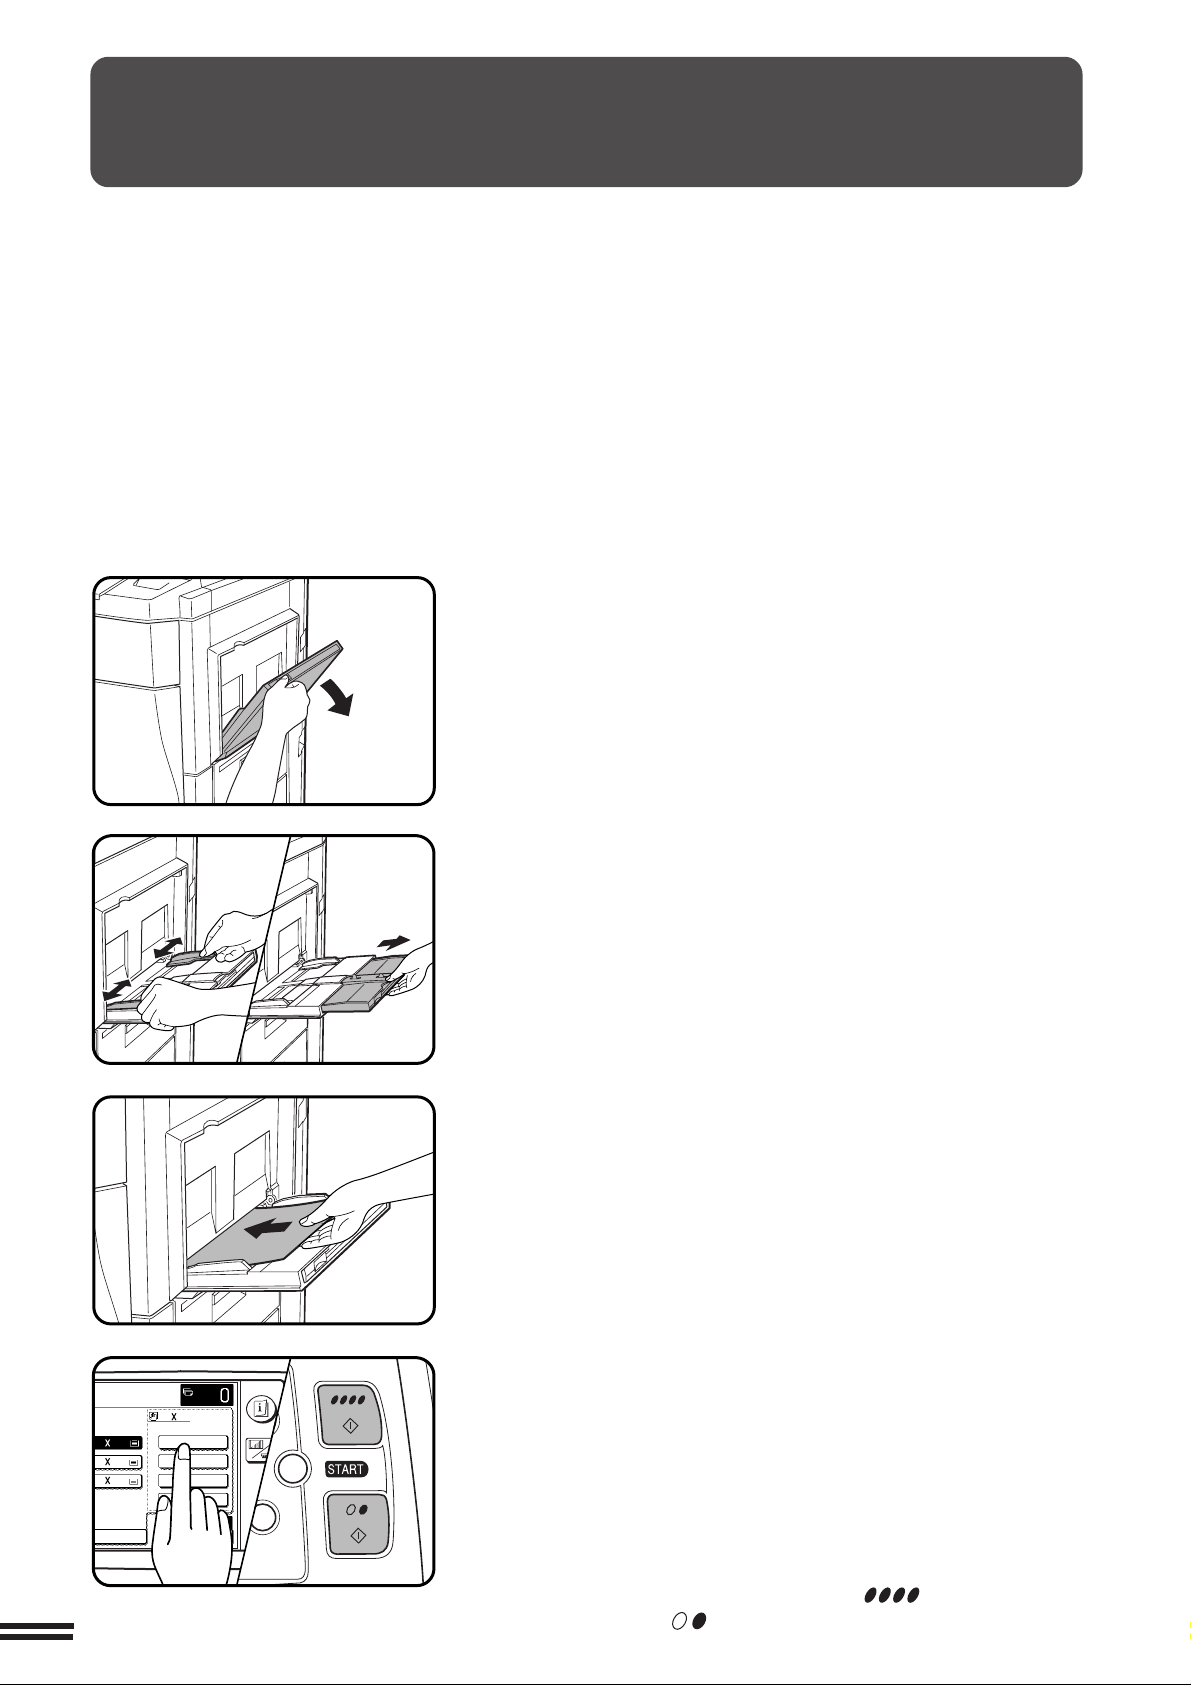
Reduction and enlargement ratios can be selected either
automatically with the “AUTO IMAGE” key or manually with the
reduction, enlargement or “ZOOM” keys on the touch panel. The
zoom function enables precise copy ratio selection from 25% to
400% in 1% increments.
★ KEY OPERATOR A total of four extra preset copy ratios, two each
for reduction and enlargement, can be added. See page 19 of the KEY
OPERATOR’S GUIDE.
Automatic selection
Place the original on the document glass or in the
optional document feeder tray.
1
●
The original size will be detected and indicated on the touch
panel.
CHAPTER2
MAKING COPIES Reduction/Enlargement/Zoom
Press the “PAPER SELECT” key on the touch panel and
select the paper tray with the desired paper size.
2
NOTE:
This feature will not work when original or copy paper is of nonstandard size.
Press the “AUTO IMAGE” key on the touch panel.
3
●
The best reduction or enlargement ratio for the selected paper
size will be automatically set and displayed on the touch panel.
●
If the originals and the selected copy paper are not facing the
same direction, the following message will appear to indicate
how the original should be placed.
ROTATE ORIGINAL FROM TO .
Enter the desired number of copies.
4
Press the COLOR COPY START ( ) key or BLACK
COPY START (
5
●
To cancel the automatic reduction/enlargement mode, press the
“AUTO IMAGE” key again.
) key.
2-11
Page 36
REDUCTION/ENLARGEMENT/ZOOM
1.
8
11
1
2
2.
1711
3.
8
14
1
2
PAPER SELECT
100%
COPY RATIO
AUTO 8/ 14
1
2
CUSTOM
SETTINGS
READY TO COPY.
AUTO
XY ZOOM
100%
ZOOM
%
100
MENU 1 2
77%
EXPOSURE PAPER SELECT
11 17 8/ 14
8/ 14 8/ 11
100%
COPY RATIO
AUTO IMAGE
AUTO 8/ 14
1
2
1
2
1
2
1
2
64%
11 17 8/ 11
8/ 11 5/ 8/
1
2
1
2
1
2
1
2
121%
OK
8/ 14 11 17
1
2
129%
8/ 11 11 17
5/ 8/ 8/ 11
1
2
1
2
121
2
READY TO COPY.
AUTO
XY ZOOM
95
%
50%25
%
141
%
200%400
%
100%
ZOOM
%
100
MENU 1 2
EXPOSURE PAPER SELECT
100%
COPY RATIO
AUTO IMAGE
OK
8/ 14AUTO
1
2
READY TO COPY.
AUTO
XY ZOOM
100%
ZOOM
%
129
MENU 1 2
77%
EXPOSURE PAPER SELECT
11 17 8/ 14
8/ 14 8/ 11
100%
COPY RATIO
AUTO IMAGE
1
2
1
2
1
2
64%
11 17 8/ 11
8/ 11 5/ 8/
1
2
1
2
1
2
1
2
121%
OK
8/ 14 11 17
1
2
129%
8/ 11 11 17
5/ 8/ 8/ 11
1
2
1
2
121
2
11 17AUTO
Manual selection
CHAPTER2
MAKING COPIES Reduction/Enlargement/Zoom
MENU 1
MENU 2
Place the original on the document glass or in the
optional document feeder tray.
1
Press the “COPY RATIO” key on the touch panel.
2
Use the
ratio selection.
3
Menu 1
A.Preset reduction copy ratios are: 77% and 64%.
B.Preset enlargement copy ratios are: 121% and 129%.
Menu 2
A.Preset reduction copy ratios are: 95%, 50%, and 25%.
B.Preset enlargement copy ratios are: 141%, 200%
and 400%.
Use the reduction, enlargement, and “ZOOM” keys on
the touch panel to set the desired copy ratio.
4
MENU 1 2
key to select menu 1 or menu 2 for copy
2-12
Zoom ratios: Any ratio from 25% to 400% can be set in
1% increments.
●
Press a reduction or enlargement key to set the approximate
ratio, then press the key to decrease the ratio or the key
to increase the ratio.
●
To set the horizontal and vertical copy ratios separately, use the
XY ZOOM feature. See page 3-2.
●
To reset the copy ratio to 100%, press the “100%” key on the
touch panel.
●
The message “IMAGE IS LARGER THAN COPY PAPER.” may
appear, indicating that the selected copy ratio is too large for the
copy paper size. However, if you press the START key, a copy
will be made.
Press the “OK” key.
5
Page 37
REDUCTION/ENLARGEMENT/ZOOM
READY TO COPY.
AUTO
EXPOSURE
PAPER SELECT
129%
COPY RATIO
1.8/ 11
2.11 17
3.8/ 14
1
2
1
2
16~28 lbs.
28+~35 lbs.
35+~75 lbs.
TRANSPARENCY
PAPER TYPE
3
6
9
P
C
CA
CLEAR
PROGRAM
INTERRUPT
CLEAR
ALL
12
3
456
789
0
P
C
CA
CLEAR
PROGRAM
AUDIT
INTERRUPT
CLEAR
ALL
Use the “PAPER SELECT” key to select the paper tray
with the desired paper size.
6
●
If the AUTO PAPER SELECT mode is on, the appropriate copy
paper size will have been automatically selected based on the
original size and selected copy ratio.
●
If a tray of the required size is not installed, use the bypass tray
and press the “PAPER SELECT” key to select the bypass tray.
Enter the desired number of copies.
7
Press the COLOR COPY START ( ) key or BLACK
COPY START (
8
) key.
CHAPTER2
MAKING COPIES Reduction/Enlargement/Zoom
2-13
Page 38
SPECIAL PAPERS (manual feed)
C
CA
CLEAR
INTERRUPT
CLEAR
ALL
100%
COPY RATIO
11 17
8/ 14
8/ 11
1
2
1
2
1
2
16~28 lbs.
28+~35 lbs.
35+~55 lbs.
TRANSPARENCY
INFORMATION
CUSTOM
SETTINGS
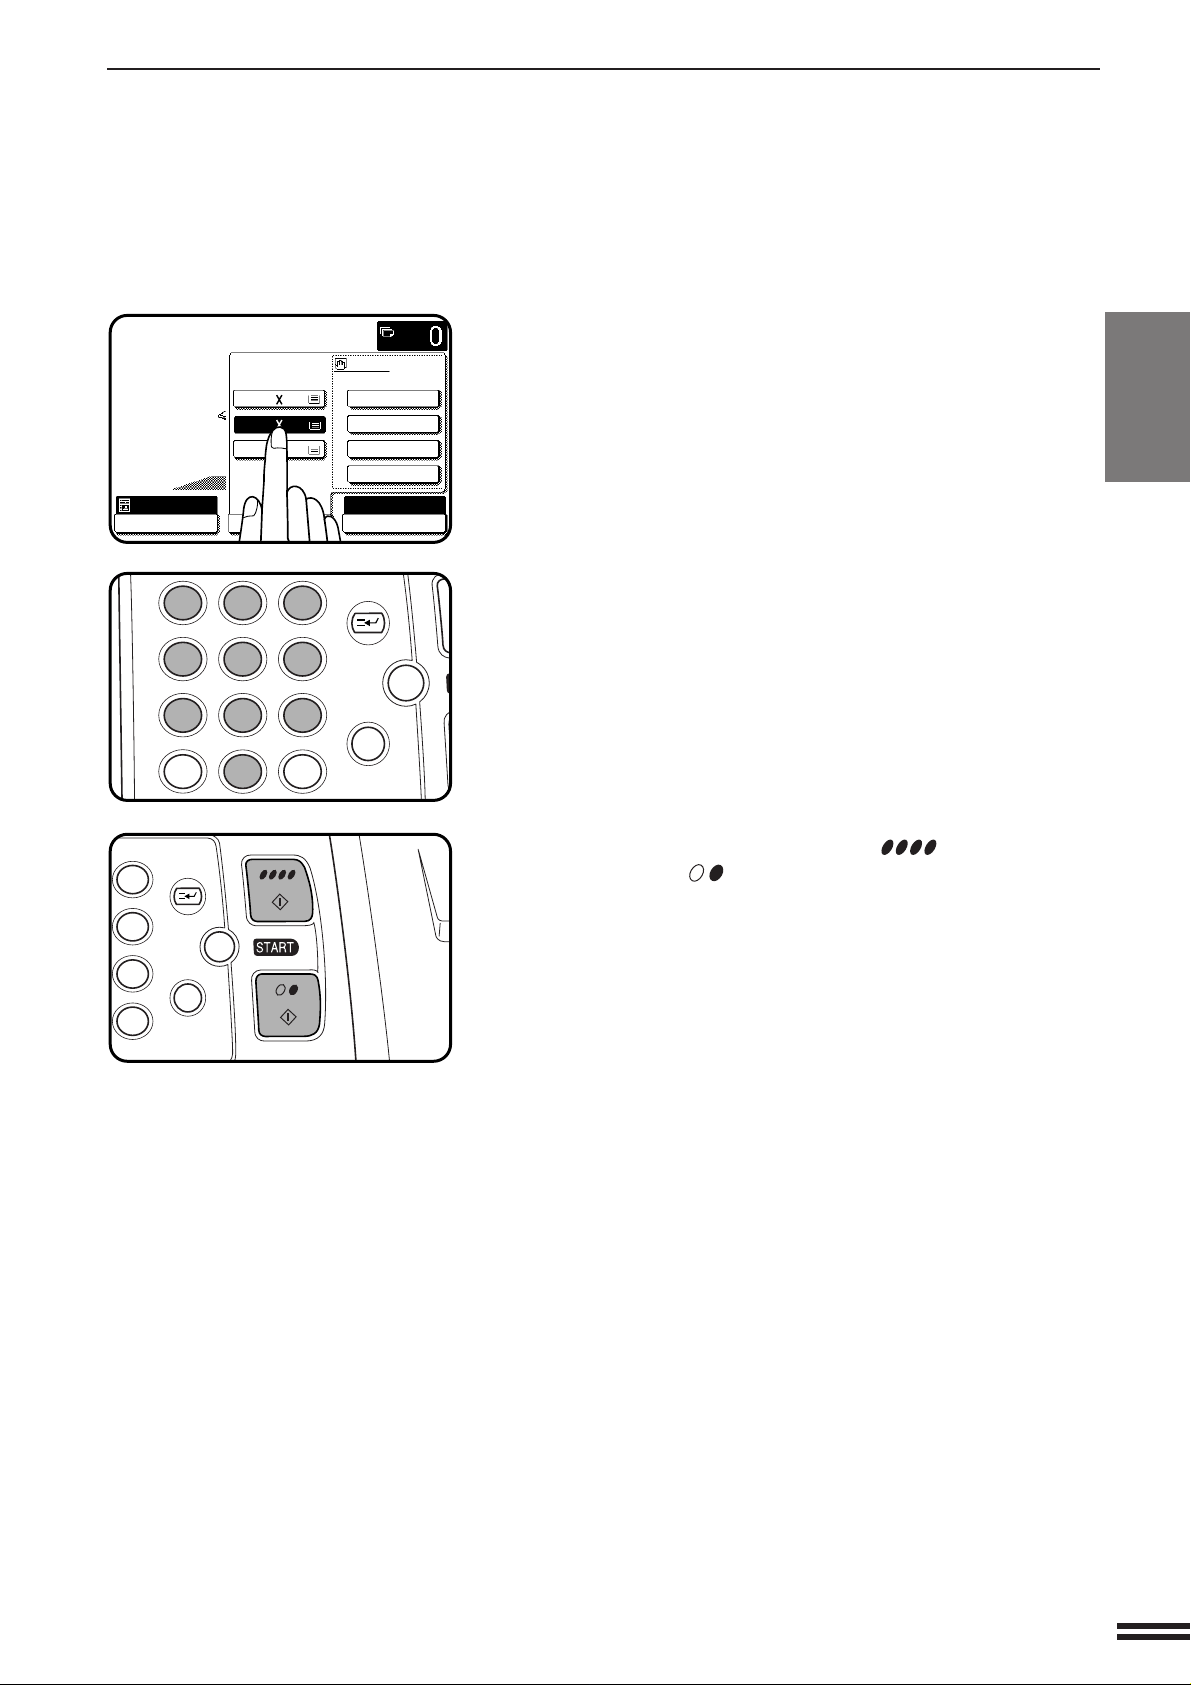
The bypass tray is used to copy onto transparency film and other
special purpose papers. Up to 50 sheets of standard copy paper can
be set in the bypass tray.
●
When copying onto transparency film, the maximum image loss on
CHAPTER2
MAKING COPIES Special papers (manual feed)
the copies will be 13/32" (10 mm) along the leading and trailing
edges and 1/4" (6 mm) in total along the other edges.
Transparency film must be fed long edge into the feed slot.
●
Automatic duplex copying will not work when a non-standard sized
paper is used even if an optional duplex module (AR-DU2N) is
installed. If a duplex copying mode is selected and a non-standard
sized paper is used from the bypass tray, the corresponding onesided mode will be selected automatically when a START key is
pressed.
Place the original on the document glass or in the
optional document feeder tray.
1
Open the bypass tray.
2
2-14
PAPER TYPE
Set the bypass tray guides to the width of the copy
paper.
3
●
Be sure to extend the tray when feeding paper larger than
8-1/2" x 11" size.
●
If the bypass tray guides are set wider than the copy paper, the
inside of the machine may become soiled, resulting in smudges
on succeeding copies.
Insert the copy paper all the way into the bypass tray.
4
●
Special purpose papers other than SHARP recommended
transparency film must be fed individually. Multiple sheets of
SHARP recommended transparency film can be loaded in the
bypass tray.
●
Up to 50 sheets of standard copy paper measuring from
5-1/2" x 8-1/2" to 12" x 18" can be loaded into the bypass tray.
●
When adding paper, first remove remaining paper, combine it
with the paper to be added and then reload as a single stack.
Press the “PAPER SELECT” key on the touch panel and
then select the desired paper type in the bypass tray
5
section.
●
“16 ~ 28 lbs.” (“PLAIN PAPER”), “28+ ~ 35 lbs.” (“HEAVY
PAPER 1”), “35+ ~ 75 lbs.” (“HEAVY PAPER 2”) or
“TRANSPARENCY” can be set.
Set the number of copies.
6
Press the COLOR COPY START ( ) key or BLACK
COPY START (
7
) key.
Page 39

SPECIAL PAPERS (manual feed)
C
CA
CLEAR
INTERRUPT
CLEAR
ALL
100%
COPY RATIO
11 17
8/ 14
8/ 11
1
2
1
2
1
2
16~28 lbs.
28+~35 lbs.
35+~55 lbs.
TRANSPARENCY
INFORMATION
CUSTOM
SETTINGS
Two-sided copying with bypass tray
Two-sided copies can be made manually using the bypass tray. The
procedure described below is useful for users of the copier without an
optional duplex module (AR-DU2N).
Place the first original face down on the document glass
and make a copy.
1
●
1 2
1 2
2
3 4
The first side of the copy can be made using any of the paper feed
stations.
Remove the first original and place the second original
face down on the document glass.
●
Make sure the first and second originals are oriented in the same
way on the document glass.
●
If an optional document feeder is used, the originals must be fed
one at a time.
CHAPTER2
MAKING COPIES Special papers (manual feed)
PAPER TYPE
3 4
1 2
Turn the first copy over without changing its top-bottom
orientation and place it into the bypass tray.
3
●
Be sure to feed the copies one sheet at a time.
Press the “PAPER SELECT” key and select the desired
paper type in the bypass tray section.
4
Press the COLOR COPY START ( ) key or BLACK
COPY START (
5
) key.
2-15
Page 40

EXPOSURE ADJUSTMENTS
AUTO
EXPOSURE
Exposure selections for this copier should be selected according to
the type of originals being copied: TEXT/PRTD. PHOTO, TEXT,
TEXT/PHOTO, PHOTO, PRINTED PHOTO or MAP. (Refer to the
samples on page 4 to see the effects on copy images in relation to
the EXPOSURE ADJUSTMENTS.) If the original image type is
TEXT/PRTD. PHOTO, TEXT or TEXT/PHOTO, the exposure can be
CHAPTER2
adjusted automatically or manually. If the original image type is
PHOTO, PRINTED PHOTO or MAP, the exposure can be adjusted
manually only. If the COPY OF COPY mode is selected only TEXT/
PRTD. PHOTO, TEXT, or PRINTED PHOTO exposure can be
selected and these can only be manually adjusted. If the COLOR
TONE ENHANCEMENT mode is selected, color copies will be more
MAKING COPIES Exposure adjustments
vivid. The standard initial setting of the original image type for this
copier is TEXT/PRTD. PHOTO.
When copying a colored original in the Black/White copy mode, a
colored background with text in the background area may be
copied with the text obscured. Check with the key operator for the
setting of “Disabling of Pre-scan in B/W Copy” program (see page
30 of the Key Operator’s Guide). If pre-scan is enabled, such
obscuring may be reduced.
Automatic
This is the standard initial setting for this copier. In this mode, the
characteristics of an original being copied are “read” by the exposure
system, and exposure adjustments are made automatically.
This optimizes the contrast of the copied images.
Original image type
TEXT/PRTD. PHOTO:
This mode provides the best balance for copying
an original which contains both text and printed
photographs.
TEXT: This mode is useful in enhancing very low density
areas of an original or in suppressing unusually
high-density background areas.
TEXT/PHOTO: This mode provides the best balance for copying
an original which contains both text and
photographs.
PRINTED PHOTO: This mode is useful for copying printed
photographs.
PHOTO: This mode provides the best copies of photographs
with fine details.
MAP: This mode is useful to provide the best shading
and fine details found on most maps.
COPY OF COPY: This mode provides the best result for originals
such as copied text or copied photos. If the check
box is checked, only Text/prtd. photo, Text and
Printed photo mode keys will be shown on the
touch panel and the exposure can only be adjusted
manually.
2-16
Page 41

EXPOSURE ADJUSTMENTS
AUTO
EXPOSURE PAPE
AUTO
TEXT/
PRTD.PHOTO
TEXT
PRINTED
PHOTO
COPY
OF COPY
TEXT/PHOTO
PHOTO
MAP
EXPOSURE
AUTO
COLOR TONE
ENHANCEMENT
MANUAL
PAPER SELECT
100%
COPY RATIO
8/ 11AUTO
1
2
OK
TEXT
PRINTED
PHOTO
COPY
OF COPY
EXPOSURE
AUTO
MANUAL
PAPER SELECT
8/ 1AUTO
TEXT/
PRTD.PHOT
1
2
OUTPUT
2-SIDED
COPY
PRTD.
TE
PRI
PH
COP
OF
AUTO
MANUAL
AUTO
1...3...5
ENHANCEMENT
Press the “EXPOSURE” key on the touch panel.
1
Select “TEXT/PRTD. PHOTO”, “TEXT”, “TEXT/PHOTO”,
“PRINTED PHOTO”, “PHOTO”, or “MAP” depending
2
upon the original type.
●
When making a copy from a copy made by the AR-C160,
checking the box of COPY OF COPY then choosing the proper
alternatives depending upon the content of the original allows for
the best result.
●
When checking the COPY OF COPY check box, TEXT/
PRTD.PHOTO, TEXT and PRINTED PHOTO can be selected.
●
If COLOR TONE ENHANCEMENT is checked, color copies will
be more vivid. COLOR TONE ENHANCEMENT and COPY OF
COPY cannot be selected at the same time. The COLOR TONE
ENHANCEMENT mode cannot be selected with the single color
function. This mode, however, can be used with the RGB adjust
function.
CHAPTER2
MAKING COPIES Exposure adjustments
1...3...5
1...3...5
COLOR TONE
ENHANCEMENT
If “TEXT/PRTD. PHOTO”, “TEXT” or “TEXT/PHOTO”
has been selected in step 2, select “AUTO” or “MANUAL”.
3
●
When the COPY OF COPY check box is checked, the exposure
is automatically set to “MANUAL”.
If the manual mode has been selected, use the and
4
keys to adjust the copy density as desired.
2-17
Page 42

JOB MEMORY
STORE/DELETE
RECALL
JOB PROGRAMS
STORE/DELETE
RECALL
PRESS PROGRAM NUMBER.
EXIT
1.
8
11
1
2
2.
1711
3.
8
14
1
2
AUTO
EXPOSURE PAPER SELECT
100%
COPY RATIO
8/ 11AUTO
1
2
MAKE COPIER SELECTIONS AND PRESS
[OK].
OK
CANCEL
89
0
P
C
CLEAR
PROGRAM
Frequently used job programs can be stored in one of nine storage
registers. This is convenient for quick job recall without losing time
manually reprogramming each aspect of the job.
●
All functions that can be set in the copy mode except the copy
CHAPTER2
MAKING COPIES Job memory
quantity setting can be stored in the job memory.
●
If any function which has been stored in a job program is modified
by a key operator program, the key operator settings will supercede
the previous setting.
★ KEY OPERATOR Job memory replacement/deletion can be
prohibited. See page 28 of the KEY OPERATOR’S GUIDE.
Storing a job program
Press the PROGRAM key.
1
●
The JOB PROGRAMS screen will appear on the touch panel.
2-18
Press the “STORE/DELETE” key on the touch panel.
2
●
To cancel the job memory mode, press the “EXIT” key or the
CLEAR ALL (CA) key.
Select a program number from 1 to 9 on the touch panel.
3
●
The numbers which are highlighted are job registers which
already contain job programs.
●
If a program number containing a registered job program is
selected, a message will appear to confirm the selection. To
replace a stored job program with a new program, press the
“STORE” key and proceed to the next step.
To cancel replacement, press the “CANCEL” key.
Make all copier selections to be stored.
4
NOTE:
When you store color balance settings, make settings before
pressing the PROGRAM key in step 1 because sample copies
cannot be made after pressing the PROGRAM key.
Press the “OK” key to complete the storage.
5
Page 43

Deleting a stored job program
JOB PROGRAMS
STORE/DELETE
RECALL
PRESS PROGRAM NUMBER.
EXIT
JOB PROGRAMS
JOB PROGRAM HAS BEEN ALREADY STORED.
STORE ANOTHER PROGRAM?
OR DELETE?
CANCEL DELETE STORE
STORE/DELETE
RECALL
PRESS PROGRAM NUMBER.
JOB PROGRAMS
STORE/DELETE
RECALL
PRESS PROGRAM NUMBER.
EXIT
JOB PROGRAMS
STORE/DELETE
RECALL
PRESS PROGRAM NUMBER.
EXIT
89
0
P
C
CLEAR
PROGRAM
JOB MEMORY
Follow steps 1 and 2 in “Storing a job program” on the
previous page. (1. Press the PROGRAM key. 2. Press
1
the “STORE/DELETE” key.)
Select the storage register number of the program to be
deleted.
2
●
Be sure to select a number which contains a stored program. If
not, “Storing a job program” operation will start.
Press the “DELETE” key or the “CANCEL” key.
3
●
If the “DELETE” key is pressed, the program will be deleted from
memory.
●
Press the “CANCEL” key to keep the program.
Press the “EXIT” key to exit the job memory mode.
4
CHAPTER2
MAKING COPIES Job memory
Recalling a job program
Press the PROGRAM key.
1
●
The JOB PROGRAMS screen will appear on the touch panel.
●
The numbers which are highlighted are program numbers which
contain stored programs.
Select a stored program from 1 to 9 on the touch panel.
●
2
All selections stored in the program will appear on the touch
panel.
●
The recalled settings may be modified for a particular job run, but
any changes made will not be stored in the job memory. To store
the new settings, follow the “Storing a job program” procedure.
2-19
Page 44

INTERRUPTING A COPY RUN
3
6
CA
INTERRUPT
CLEAR
ALL
3
6
CA
INTERRUPT
CLEAR
ALL
3
6
9
P
C
CA
CLEAR
PROGRAM
INTERRUPT
CLEAR
ALL
INTERRUPT can be used to temporarily stop a long copy run so that
another job can be run.
●
INTERRUPT will not function during duplex copying (when an
optional duplex module (AR-DU2N) is installed).
●
CHAPTER2
MAKING COPIES Interrupting a copy run
Duplex copying, sort, group, staple sort and offset cannot be
selected during interrupt copying. Also job program recall cannot be
selected.
Press the INTERRUPT key.
●
1
2
When the optional document feeder is being used, the copier will
stop after copying any originals which have been fed into the
document feeder. The INTERRUPT indicator will blink until the
copier stops.
When the copier stops, it will return to its initial settings and the
INTERRUPT indicator will light steadily. At this time, the copier
is ready for interrupt copying.
●
If the copier has been programmed in the auditing mode, the
account number entry message will appear. Enter your account
number using the 10-key pad. The number of copies of the
interrupt copying will be accumulated against this account
number.
When the copier stops, remove the original(s) and set
the original(s) for interrupt copying on the document
glass or in the optional document feeder tray.
2-20
Select the desired available copier functions.
3
Press the COLOR COPY START ( ) key or BLACK
COPY START (
4
When the interrupt copy run is complete, press the
INTERRUPT key again to cancel the mode and remove
5
the original(s) used for interrupt copying.
●
The copier will reset itself to the functions which were in use
before the INTERRUPT key was first pressed.
Replace the original(s) for the interrupted job and press
the COLOR COPY START ( ) key or BLACK COPY
6
START (
) key to resume copying.
) key.
Page 45

CHAPTER 3
SPECIAL FUNCTIONS
This chapter describes the special copying functions including various
image editing functions which have been made possible by digital image
processing technology.
●●
●
●●
XY ZOOM. . . . . . . . . . . . . . . . . . . . . . . . . . . . . . . . . . . . . . . . . . . 3-2
●●
●
●●
MARGIN SHIFT . . . . . . . . . . . . . . . . . . . . . . . . . . . . . . . . . . . . . . 3-4
●●
●
●●
ERASE . . . . . . . . . . . . . . . . . . . . . . . . . . . . . . . . . . . . . . . . . . . . . 3-6
●●
●
●●
DUAL PAGE COPYING . . . . . . . . . . . . . . . . . . . . . . . . . . . . . . . . 3-8
●●
●
●●
CENTERING . . . . . . . . . . . . . . . . . . . . . . . . . . . . . . . . . . . . . . . 3-10
●●
●
●●
TRANSPARENCY FILM WITH INSERT SHEETS . . . . . . . . . . . 3-12
●●
●
●●
COVERS . . . . . . . . . . . . . . . . . . . . . . . . . . . . . . . . . . . . . . . . . . 3-14
●●
●
●●
COLOR ADJUSTMENTS. . . . . . . . . . . . . . . . . . . . . . . . . . . . . . 3-16
RGB adjust. . . . . . . . . . . . . . . . . . . . . . . . . . . . . . . . . . . . . . . . . 3-16
Sharpness . . . . . . . . . . . . . . . . . . . . . . . . . . . . . . . . . . . . . . . . . 3-18
Suppress background. . . . . . . . . . . . . . . . . . . . . . . . . . . . . . . . . 3-20
Color balance . . . . . . . . . . . . . . . . . . . . . . . . . . . . . . . . . . . . . . . 3-22
Brightness/intensity/contrast. . . . . . . . . . . . . . . . . . . . . . . . . . . . 3-24
●●
●
●●
IMAGE EDITING FUNCTIONS . . . . . . . . . . . . . . . . . . . . . . . . . 3-26
Single color. . . . . . . . . . . . . . . . . . . . . . . . . . . . . . . . . . . . . . . . . 3-26
Neg. /pos. reverse. . . . . . . . . . . . . . . . . . . . . . . . . . . . . . . . . . . . 3-28
Mirror image . . . . . . . . . . . . . . . . . . . . . . . . . . . . . . . . . . . . . . . . 3-30
Photo repeat. . . . . . . . . . . . . . . . . . . . . . . . . . . . . . . . . . . . . . . . 3-32
11 x 17 full-bleed . . . . . . . . . . . . . . . . . . . . . . . . . . . . . . . . . . . . 3-34
Multi-page enlargement . . . . . . . . . . . . . . . . . . . . . . . . . . . . . . . 3-36
Extra size . . . . . . . . . . . . . . . . . . . . . . . . . . . . . . . . . . . . . . . . . . 3-38
CHAPTER3
Page
3-1
Page 46

XY ZOOM
100%
COPY RATIO
8/ 11
1
2
AUTO
XY ZOOM
//
64
%
11 17 8/ 11
8/ 11 5/ 8/
100%
ZOOM
MENU
EXPOSURE PAPER S
AUTO
1
2
1
2
1
2
1
2
OUTPUT
COPY
READY TO COPY.
AUTO
XY ZOOM
X
Y
100%
ZOOM
100
100
%
%
OK
77
%
64
%
50
%
129
%
200
%
400
%
EXPOSURE PAPER SELECT
100%
COPY RATIO
8/ 11
1
2
AUTO
CANCEL
CHAPTER3
SPECIAL FUNCTIONS XY zoom
Original Copy
The XY ZOOM feature allows the horizontal and vertical copy ratios to
be changed independently. If this feature is selected, the copy ratios
can be set from 25% to 400%.
Place the original on the document glass or in the
optional document feeder tray.
1
3-2
Press the “COPY RATIO” key on the touch panel.
2
Press the “XY ZOOM” key.
3
●
The following screen will appear.
READY TO COPY.
X
100
77
%
64
%
50
%
XY ZOOM CANCEL
AUTO
EXPOSURE PAPER SELECT
Y
100%
100
ZOOM
1
8/ 11AUTO
2
Use the reduction, enlargement , and ZOOM ( , )
keys to change the copy ratio in the horizontal (X)
4
direction.
●
Press a reduction key or an enlargement key to set the
approximate ratio, then press the key to decrease the ratio
or key to increase the ratio.
OK
%
%
129
200
400
100%
COPY RATIO
%
%
%
Page 47

Y
XY ZOOM
TO COPY.
X
Y
100%
ZOOM
50
100
%
%
READY TO COPY.
AUTO
XY ZOOM
X
Y
ZOOM
50
100
77
%
64
%
50
%
EXPOSURE PAPER SELECT
8/ 11AUTO
1
2
%
%
100%
CANCEL
OK
141
%
200
%
400
%
READY TO COPY.
AUTO
EXPOSURE
PAPER SELECT
X-50% Y-77%
COPY RATIO
1.8/ 11
2.11 17
3.8/ 14
1
2
1
2
16~28 lbs.
28+~35 lbs.
35+~75 lbs.
TRANSPARENCY
PAPER TYPE
C
CA
CLEAR
INTERRUPT
CLEAR
ALL
12
3
456
789
0
P
C
CL
PROGRAM
AUDIT
INTE
CLE
AL
5
Press the
●
The copy ratio in the vertical (Y) direction will be highlighted.
key.
Use the reduction, enlargement, and ZOOM ( , )
keys to change the copy ratio in the vertical (Y) direction.
6
●
To change the copy ratio in the horizontal direction again, press
X
the
●
The message “IMAGE IS LARGER THAN COPY PAPER.” may
appear, indicating that the selected copy ratio is too large for the
copy paper size. However, if you press a START key, a copy will
be made.
key.
Press the “OK” key.
7
Press the “PAPER SELECT” key and select the paper
tray with the desired paper size.
8
●
If the AUTO PAPER SELECT mode is on, the appropriate copy
paper size will have been automatically selected based on the
original size and selected copy ratios.
CHAPTER3
SPECIAL FUNCTIONS XY zoom
9
10
Enter the desired number of copies.
Press the COLOR COPY START ( ) key or BLACK
COPY START ( ) key.
●
To cancel this function, press the “CANCEL” key or the “XY
ZOOM” key again as in step 3.
3-3
Page 48

MARGIN SHIFT
Margin is expanded
here.
2-SIDED
COPY
SPECIAL
MODES
READY TO
(Initial setting:
copy image shifted to the right)
CHAPTER3
SPECIAL FUNCTIONS Margin shift
Original
Copy
Expanded margin
The MARGIN SHIFT feature, in its initial setting, shifts the text or image to
the right on one-sided copies and on the front side of two-sided copies. The
text or image is shifted to the left on the reverse side of two-sided copies.
Shift direction can be changed to left or right as described in step 4 below.
●
The standard shift amount is 1/2", but can be changed from 0" to 1" in
1/8" increments.
★ KEY OPERATOR The initial shift setting can be changed from 0" to 1"
in 1/8" increments. See page 20 of the KEY OPERATOR’S GUIDE.
NOTE:
The front side and reverse side are referred to as “SIDE 1” and “SIDE 2”
respectively on the touch panel.
Margin is expanded
here.
Place an original on the document glass or in the
optional document feeder tray.
1
Press the SPECIAL MODES key.
2
●
The SPECIAL MODES screen will appear.
READY TO COPY.
SPECIAL MODES
MARGIN SHIFT ERASE
CENTERING
AUTO
EXPOSURE PAPER SELECT
TRANSPARENCY INSERTS
COLOR
ADJUSTMENTS
1
8/ 11AUTO
2
OK
DUAL PAGE
COPY
IMAGE EDITCOVERS
100%
COPY RATIO
3-4
Page 49
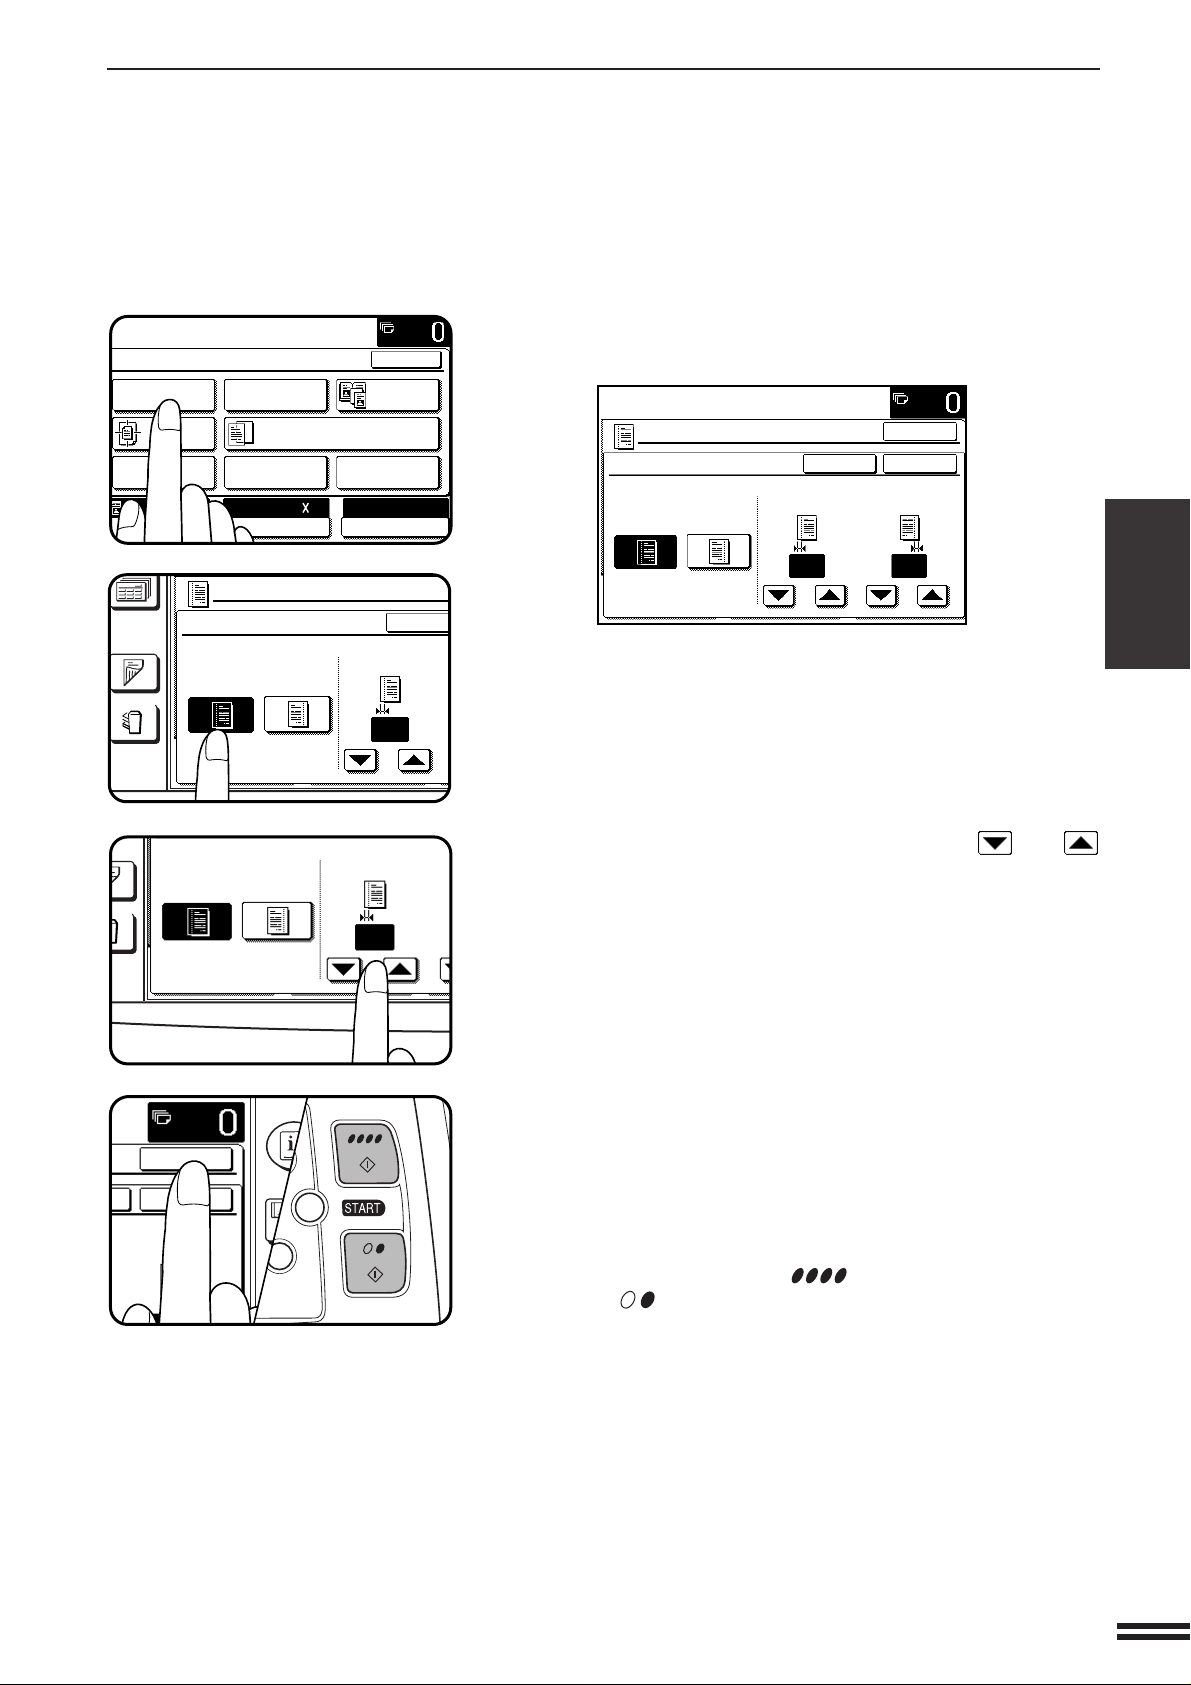
MARGIN SHIFT
READY TO COPY.
SPECIAL MODES
MARGIN SHIFT
ERASE
IMAGE EDITCOVERS
CENTERING
DUAL PAGE
COPY
COLOR
ADJUSTMENTS
TRANSPARENCY INSERTS
OK
AUTO
EXPOSURE PAPER SELECT
100%
COPY RATIO
8/ 11AUTO
1
2
OUTPUT
COPY
MARGIN SHIFT
CANCEL
SIDE 1
1/2
RIGHT LEFT
(0~1)
inch
PUT
PY
SIDE 1
1/2
RIGHT
LEFT
(0~1)
inch
C
CA
CLEAR
INTERRUPT
CLEAR
ALL
INFORMAT
CUSTO
SETTING
OK
OK
SIDE 2
Press the “MARGIN SHIFT” key on the touch panel.
3
●
The setting screen for MARGIN SHIFT will appear.
READY TO COPY.
OK
MARGIN SHIFT
CANCEL
OK
RIGHT LEFT
●
If an optional duplex module (AR-DU2N) is not installed, the
margin shift setting for the reverse side will not be displayed.
SIDE 1 SIDE 2
(0~1)
1/2 1/2
inch
(0~1)
inch
Select the shift direction.
4
●
Select “RIGHT” or “LEFT” on the touch panel. The selected shift
direction will be highlighted.
Select the desired shift amounts using the and
keys.
5
CHAPTER3
SPECIAL FUNCTIONS Margin shift
Press the upper “OK” key on the touch panel.
6
Make all other desired copier selections and press the
COLOR COPY START ( ) key or BLACK COPY
7
START ( ) key.
●
To cancel the MARGIN SHIFT function, select the MARGIN
SHIFT function again and press the “CANCEL” key.
3-5
Page 50
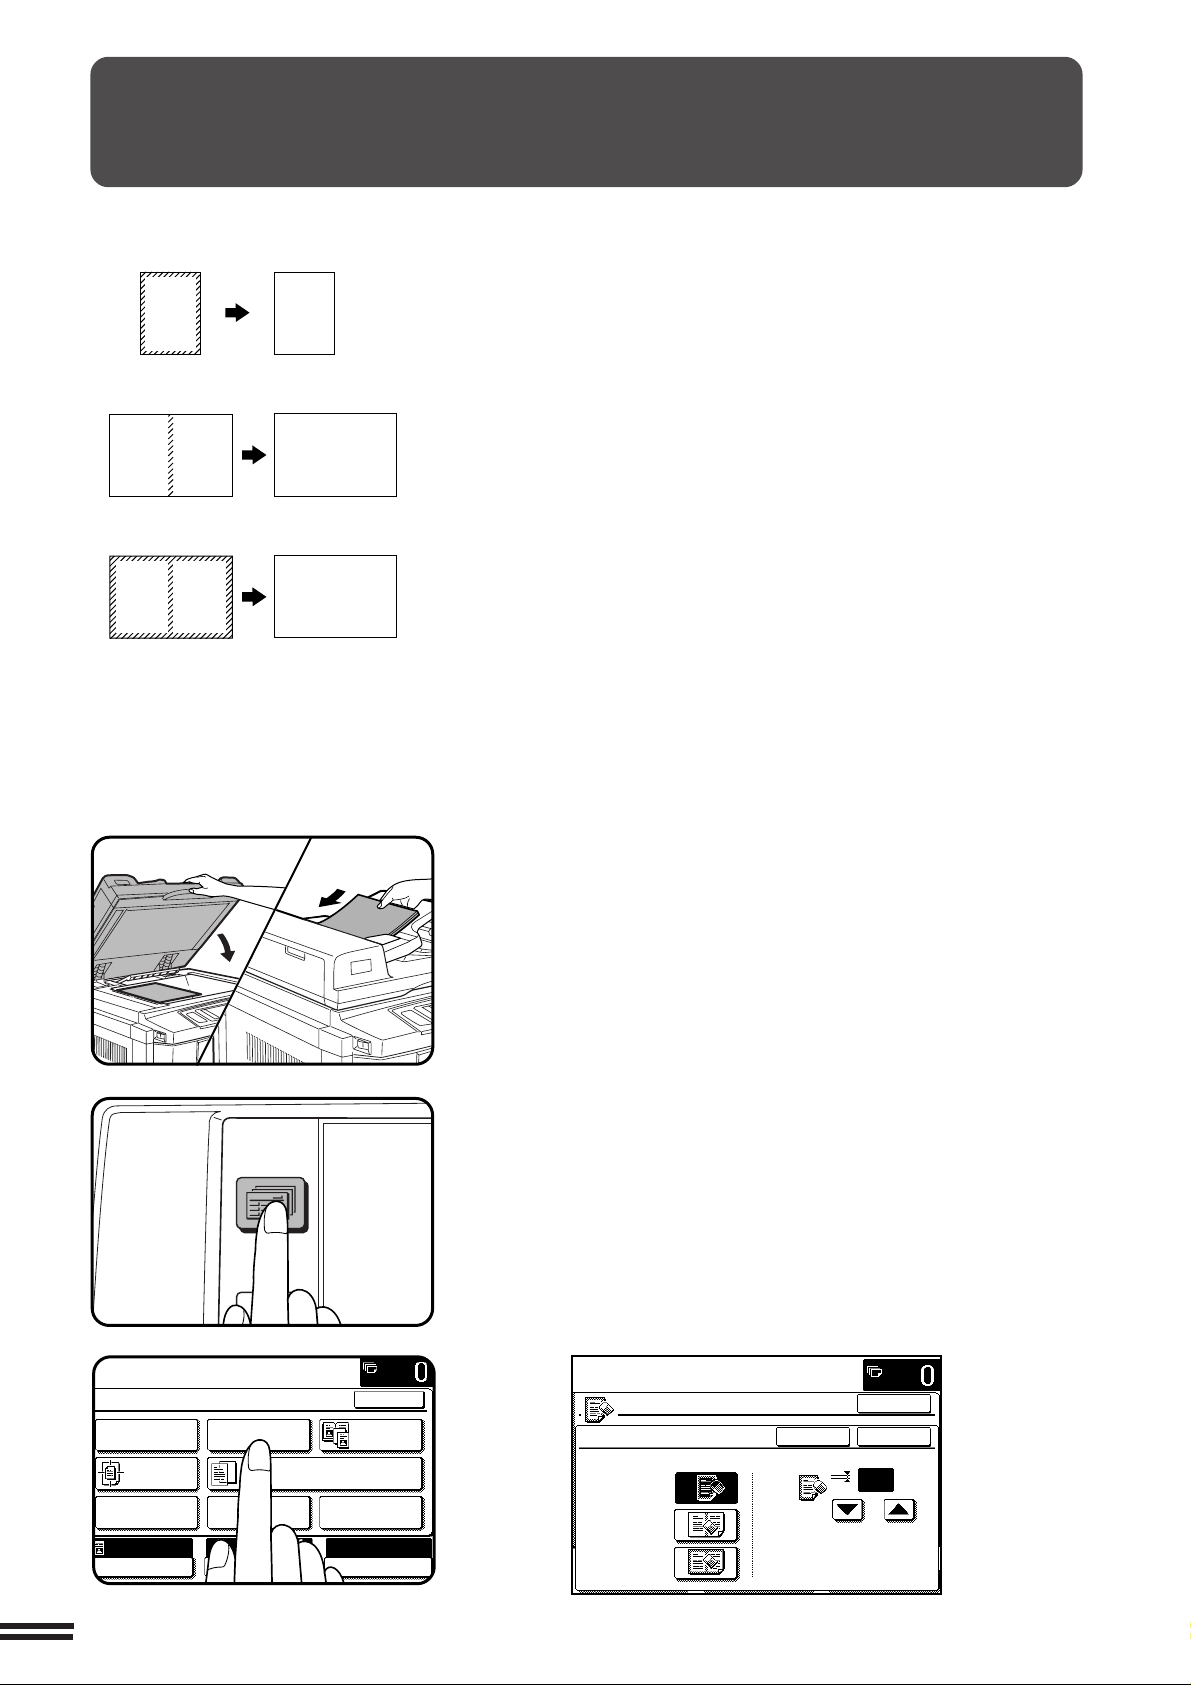
ERASE
2-SIDED
COPY
SPECIAL
MODES
READY TO
READY TO COPY.
SPECIAL MODES
MARGIN SHIFT ERASE
IMAGE EDITCOVERS
CENTERING
DUAL PAGE
COPY
COLOR
ADJUSTMENTS
TRANSPARENCY INSERTS
OK
AUTO
EXPOSURE PAPER SELECT
100%
COPY RATIO
8/ 11AUTO
1
2
(Original) (Copy)
Edge erase
Center erase
A B
CHAPTER3
Edge + center erase
A B
SPECIAL FUNCTIONS Erase
A
A
A B
A B
Erase function can be used to eliminate shadow lines around the edges and
the center part of copies as shown in the illustrations, which are caused
when such originals as thick paper, books or bound documents are used.
3 patterns of erase function, EDGE ERASE, CENTER ERASE and
EDGE+CENTER ERASE can be selected.
●
The standard erase width is 1/2", but can be changed from 0" to 1" in
1/8" increments.
★ KEY OPERATOR The initial setting of the width for edge erase and center
erase can be changed. See page 20 of the KEY OPERATOR’S GUIDE.
3-6
Place an original on the document glass or in the
optional document feeder tray.
1
Press the SPECIAL MODES key.
2
●
The SPECIAL MODES screen will appear.
Press the “ERASE” key on the touch panel.
3
●
The setting screen for ERASE will appear.
READY TO COPY.
OK
ERASE
EDGE ERASE
CENTER ERASE
EDGE+CENTER
ERASE
CANCEL
OK
1/2
(0~1)
inch
Page 51
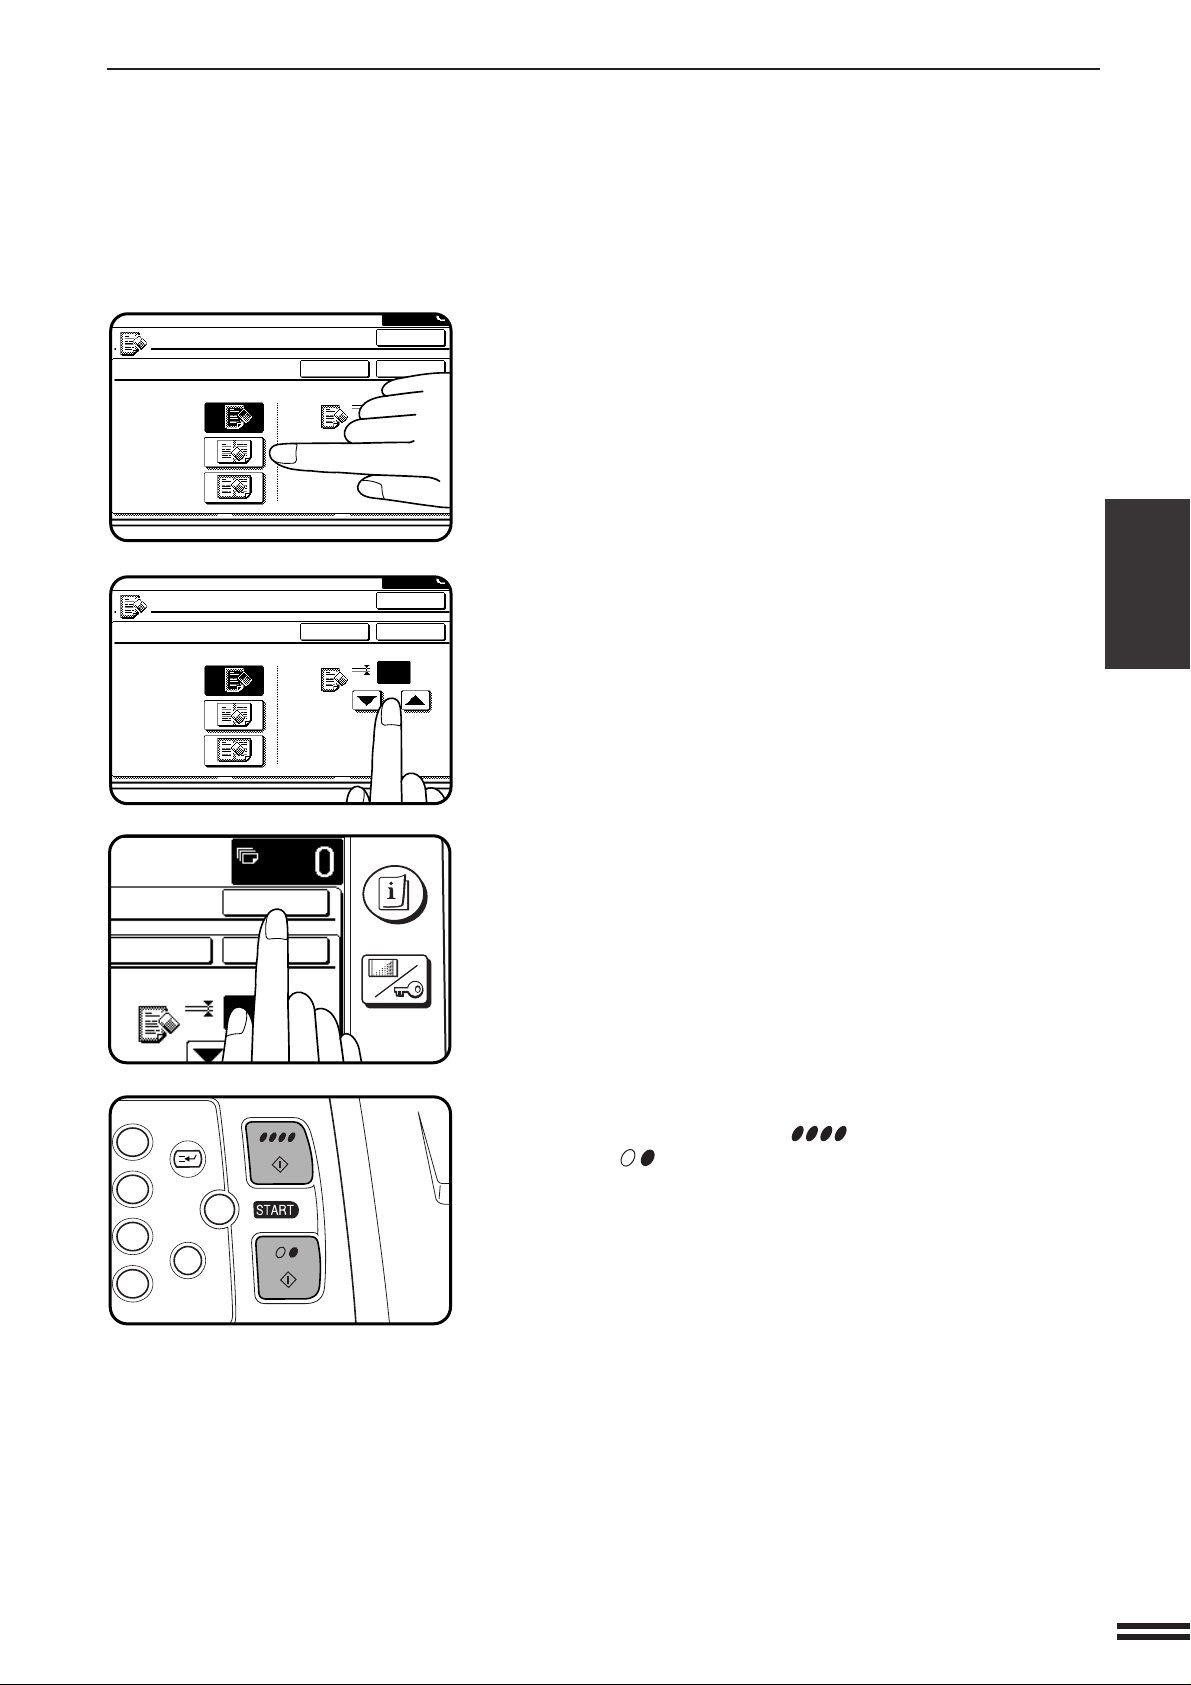
Select the desired erase mode.
ERASE
EDGE ERASE
CENTER ERASE
EDGE+CENTER
ERASE
CANCEL
1
OK
OK
(0~1)
inch
INFORMATION
CUSTOM
SETTINGS
CANCEL
1/2
OK
OK
(0~1)
inch
3
6
9
P
C
CA
CLEAR
PROGRAM
INTERRUPT
CLEAR
ALL
ERASE
EDGE ERASE
CENTER ERASE
EDGE+CENTER
ERASE
CANCEL
1/2
OK
OK
(0~1)
inch
4
●
Select “EDGE ERASE”, “CENTER ERASE” or “EDGE+CENTER
ERASE” on the touch panel. The selected erase mode will be
highlighted.
Adjust the amount of edge erase and/or center erase if
needed.
5
●
The amount can be adjusted between 0" and 1" in 1/8" increments.
ERASE
CHAPTER3
Press the upper “OK” key on the touch panel.
6
Make all other desired copier selections and press the
COLOR COPY START ( ) key or BLACK COPY
7
START ( ) key.
●
To cancel the ERASE function, select the ERASE function again
and press the “CANCEL” key.
SPECIAL FUNCTIONS Erase
3-7
Page 52
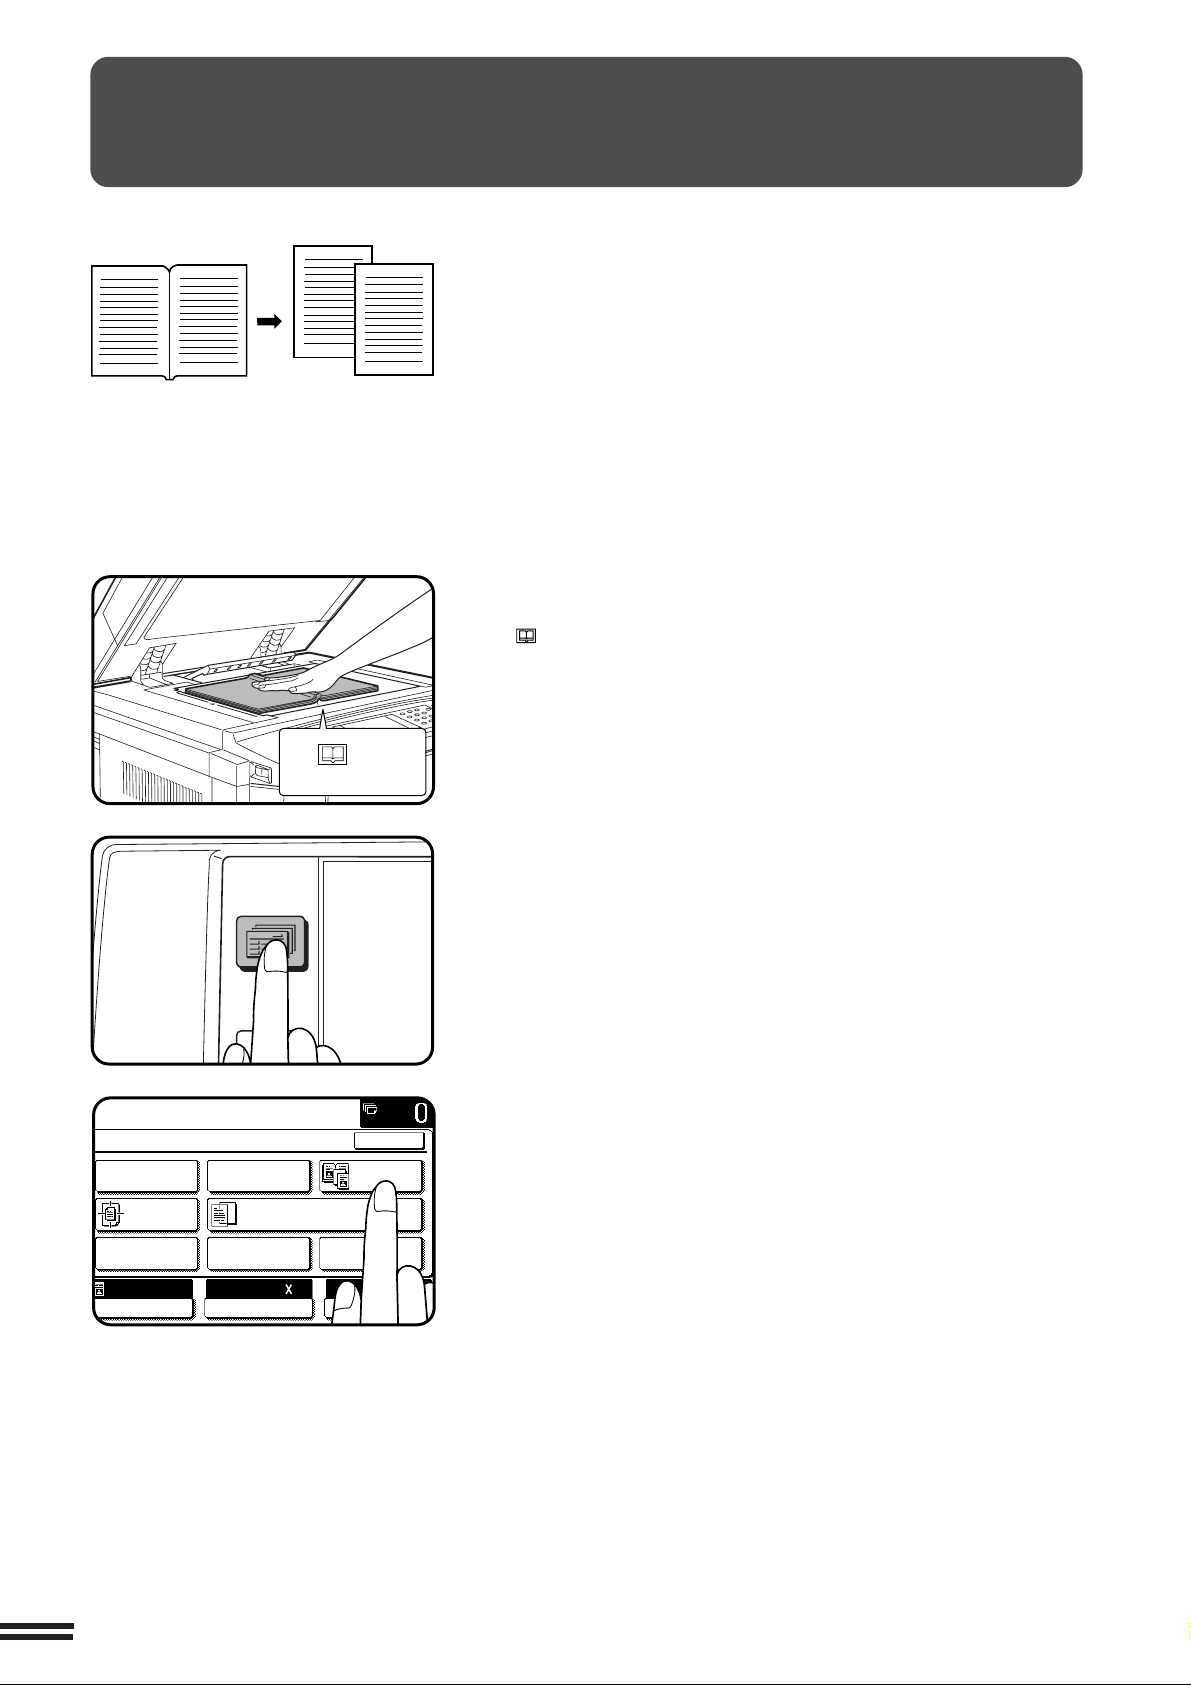
DUAL PAGE COPYING
2-SIDED
COPY
SPECIAL
MODES
READY TO
READY TO COPY.
SPECIAL MODES
MARGIN SHIFT ERASE
IMAGE EDITCOVERS
CENTERING
DUAL PAGE
COPY
COLOR
ADJUSTMENTS
TRANSPARENCY INSERTS
OK
AUTO
EXPOSURE PAPER SELECT
100%
COPY RATIO
8/ 11AUTO
1
2
Original
CHAPTER3
SPECIAL FUNCTIONS Dual page copying
Copies
81/
2
Paper size index
The DUAL PAGE COPY feature produces separate copies of two
documents placed side by side on the document glass. It is especially
useful when copying books and other bound documents.
This feature can be used in the one-sided to two-sided copying mode.
Place the originals on the document glass with the
center of the two pages aligned with the paper size index
1
81/2. Close the document cover.
●
Set the page to be copied first on the left part of the document
glass.
Press the SPECIAL MODES key.
2
●
The SPECIAL MODES screen will appear.
Press the “DUAL PAGE COPY” key on the touch panel.
3
●
The “DUAL PAGE COPY” key will be highlighted.
●
8-1/2" x 11" sized copy paper will be automatically selected.
If 8-1/2" x 11" copy paper is not loaded, copying can be done on
another size.
●
To leave a binding margin on the copy, select the MARGIN
SHIFT function. See page 3-4.
●
To erase shadows caused by document binding, use the EDGE
ERASE feature. See page 3-6.
●
The CENTER ERASE feature is not available with the DUAL
PAGE COPY feature.
3-8
Page 53
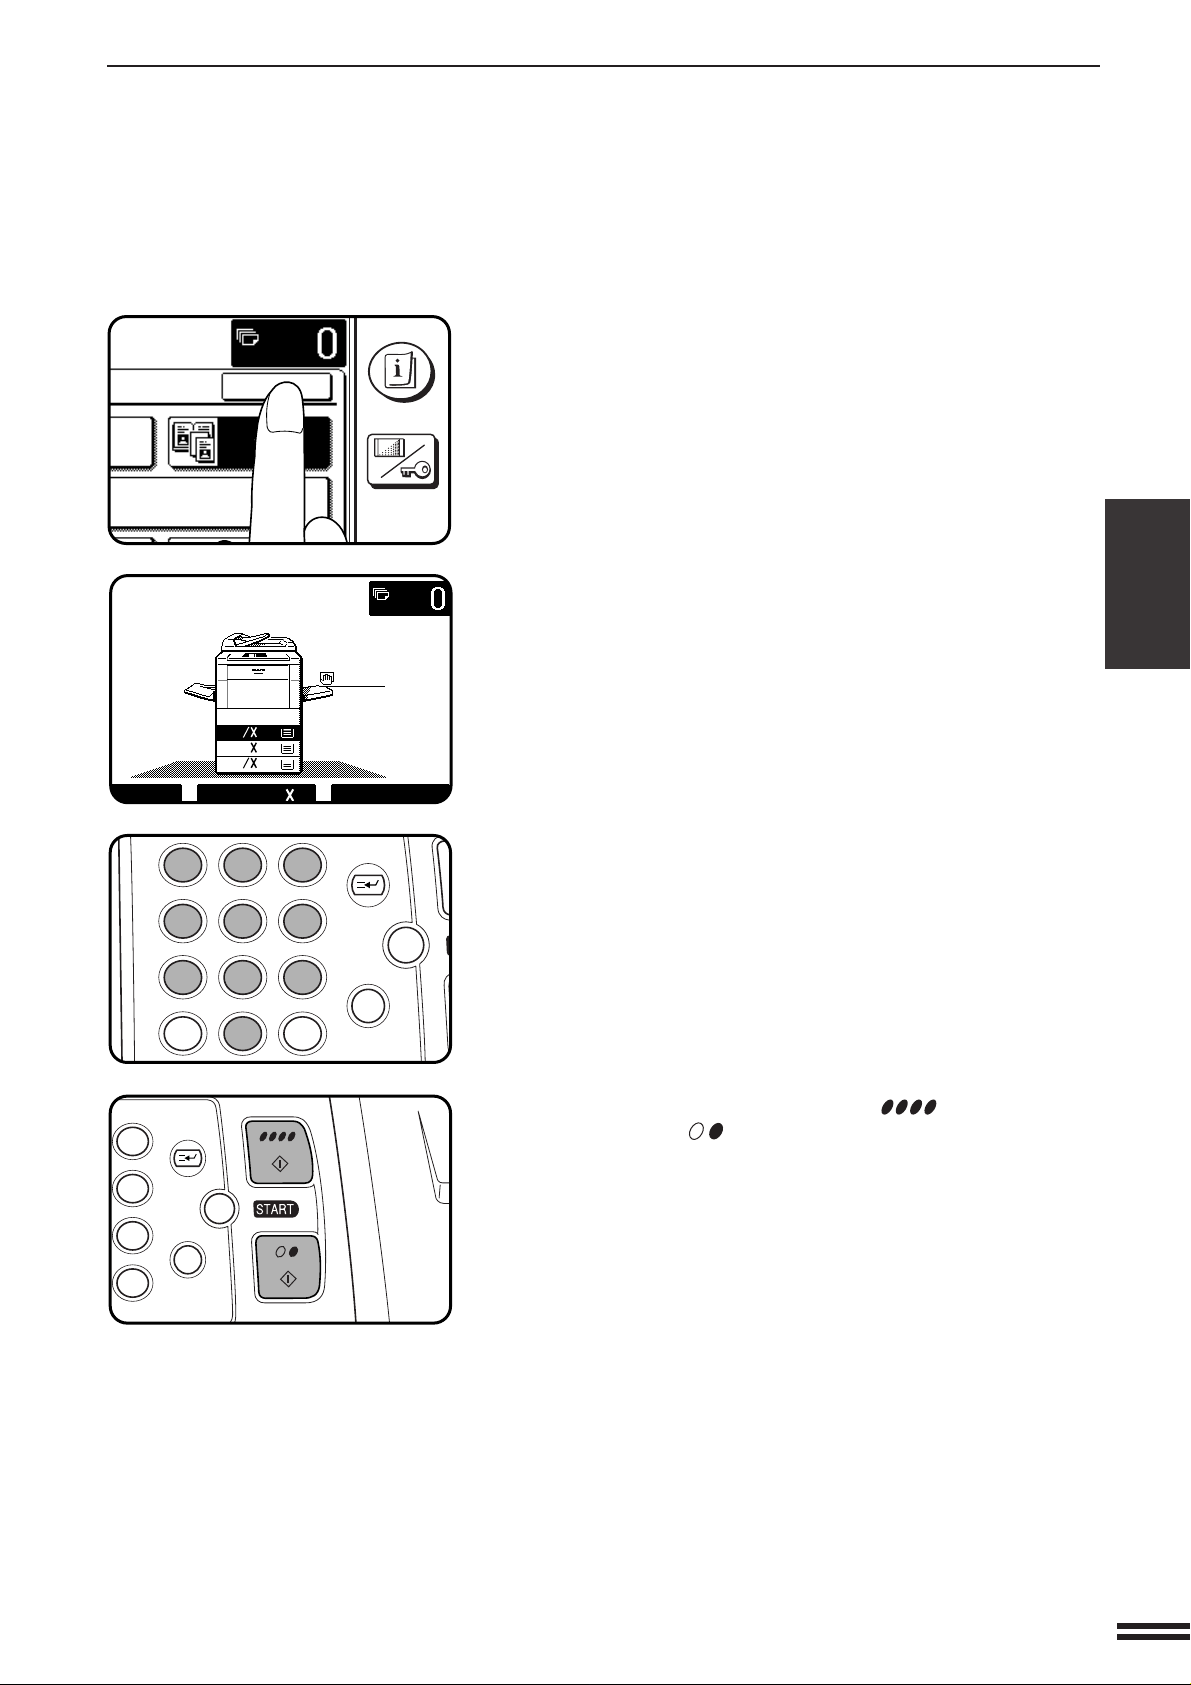
DUAL PAGE COPYING
DUAL PAGE
COPY
OK
INFORMATION
CUSTOM
SETTINGS
1.
8
11
1
2
2.
1711
3.
8
14
1
2
TO COPY.
AUTO
100%
8/ 11AUTO
1
2
12
3
456
789
0
P
C
CA
CLEAR
PROGRAM
AUDIT
INTERRUPT
CLEAR
ALL
3
6
9
P
C
CA
CLEAR
PROGRAM
INTERRUPT
CLEAR
ALL
Press the “OK” key.
4
Ensure that the desired tray is selected.
5
CHAPTER3
Enter the desired number of copies.
6
Press the COLOR COPY START ( ) key or BLACK
COPY START ( ) key.
7
●
To cancel the DUAL PAGE COPY function, press the “DUAL
PAGE COPY” key again on the SPECIAL MODES screen.
SPECIAL FUNCTIONS Dual page copying
3-9
Page 54
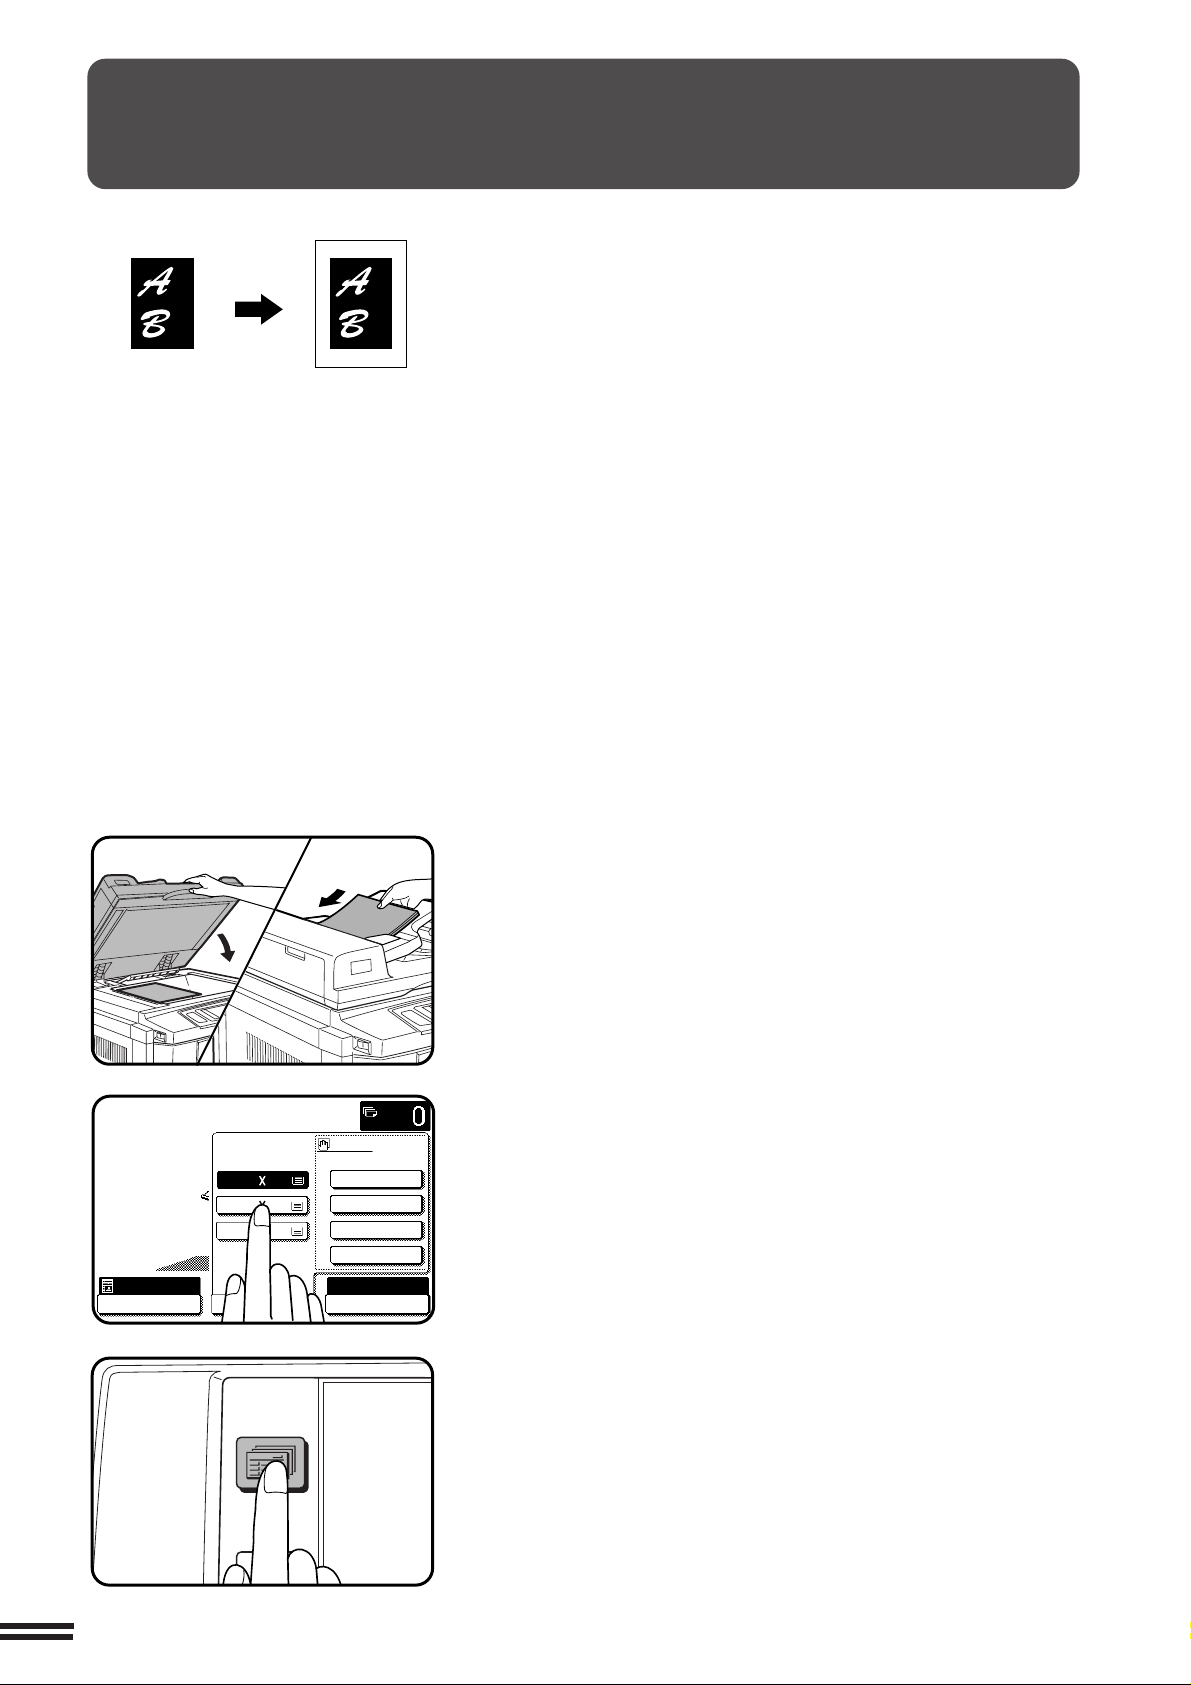
CENTERING
READY TO COPY.
AUTO
EXPOSURE
PAPER SELECT
100%
COPY RATIO
1.8/ 11
2.11 17
3.8/ 14
1
2
1
2
16~28 lbs.
28+~35 lbs.
35+~75 lbs.
TRANSPARENCY
PAPER TYPE
2-SIDED
COPY
SPECIAL
MODES
READY TO
CHAPTER3
SPECIAL FUNCTIONS Centering
Original
Copy
When the original and copy paper are of different sizes, CENTERING
is used to shift the image as a whole to the center of the copy paper.
The image will shift only in the left to right direction, not in the top to
bottom direction.
●
This function can be used to reduce a larger sized original image and
center it on a copy of smaller paper size, as well as center a smaller
original onto a larger sized copy.
●
This function will not work when non-standard size originals or copy
paper are used. This function cannot be selected when enlargement
copying has been selected.
Place the originals on the document glass or in the
optional document feeder tray.
1
Press the “PAPER SELECT” key on the touch panel and
select the desired paper size.
2
Press the SPECIAL MODES key.
3
●
The SPECIAL MODES screen will appear.
3-10
Page 55

Press the “CENTERING” key on the touch panel.
READY TO COPY.
SPECIAL MODES
MARGIN SHIFT ERASE
IMAGE EDITCOVERS
CENTERING
DUAL PAGE
COPY
COLOR
ADJUSTMENTS
TRANSPARENCY INSERTS
OK
AUTO
EXPOSURE PAPER SELECT
100%
COPY RATIO
8/ 11AUTO
1
2
ERASE
DUAL PAGE
COPY
TRANSPARENCY INSERTS
OK
12
3
456
789
0
P
C
CA
CLEAR
PROGRAM
AUDIT
INTERRUPT
CLEAR
ALL
3
6
9
P
C
CA
CLEAR
PROGRAM
INTERRUPT
CLEAR
ALL
4
●
The “CENTERING” key will be highlighted.
Press the “OK” key.
5
CENTERING
CHAPTER3
Make all other desired copier selections and enter the
desired number of copies.
6
Press the COLOR COPY START ( ) key or BLACK
COPY START ( ) key.
7
●
To cancel the CENTERING function, press the “CENTERING”
key again on the SPECIAL MODES screen.
SPECIAL FUNCTIONS Centering
3-11
Page 56
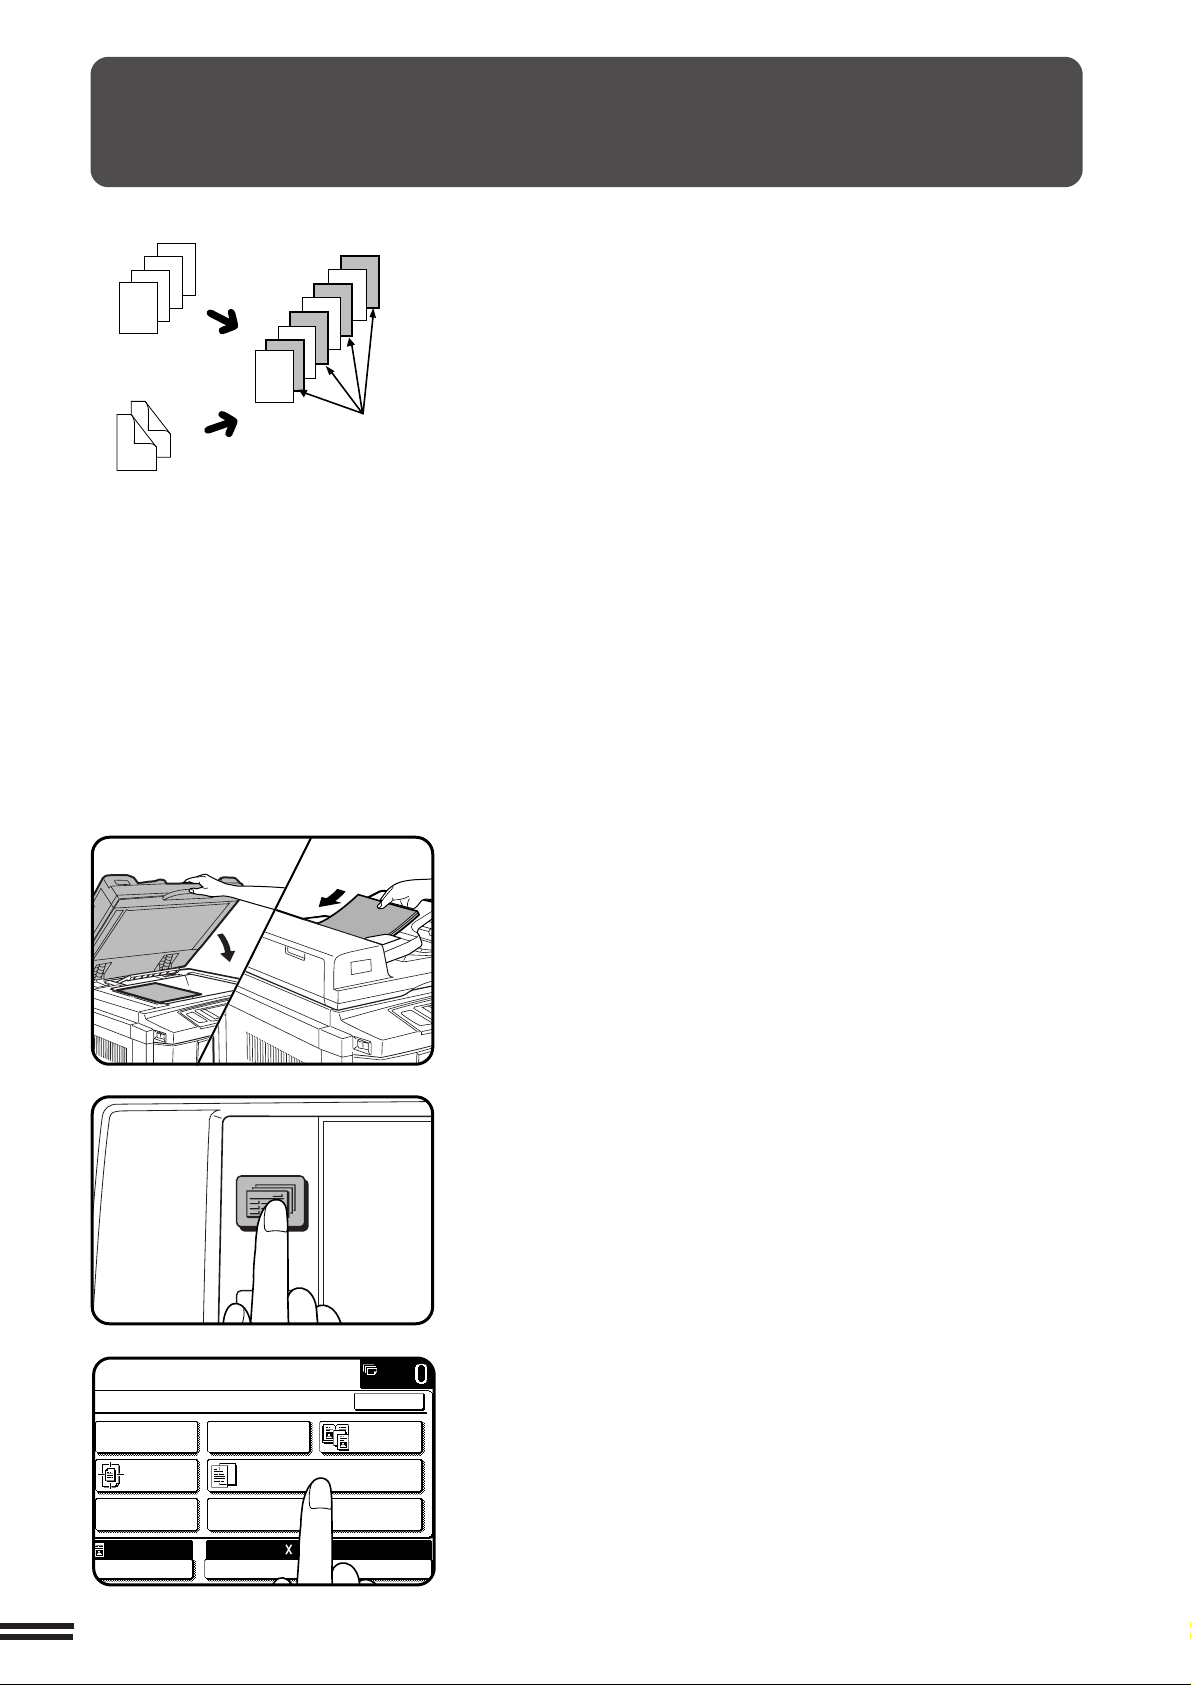
TRANSPARENCY FILM WITH INSERT SHEETS
2-SIDED
COPY
SPECIAL
MODES
READY TO
READY TO COPY.
SPECIAL MODES
MARGIN SHIFT ERASE
IMAGE EDITCOVERS
CENTERING
DUAL PAGE
COPY
COLOR
ADJUSTMENTS
TRANSPARENCY INSERTS
OK
AUTO
EXPOSURE PAPER SELECT
100%
COPY RATIO
8/ 11AUTO
1
2
Originals (1-sided)
4
3
2
1
2
1
Originals (2-sided)
3
1
4
2
CHAPTER3
SPECIAL FUNCTIONS Transparency film with insert sheets
4
3
Insert sheets
When copying onto transparency film, blank insert sheets can be
placed following each transparent sheet.
●
Insert sheets cannot be copied on in any mode.
●
This mode can be selected only in the 1-sided to 1-sided and 2-sided
to 1-sided modes.
●
A multiple number of copies cannot be selected in this mode.
●
Transparency film must be fed from the bypass tray.
●
Insert sheets must be the same size as the transparency film.
●
For best results, use SHARP recommended transparency film.
Place the originals on the document glass or in the
optional document feeder tray.
1
Press the SPECIAL MODES key.
2
●
The SPECIAL MODES screen will appear.
Press the “TRANSPARENCY INSERTS” key on the touch
panel.
3
●
The “TRANSPARENCY INSERTS” key will be highlighted.
3-12
Page 57
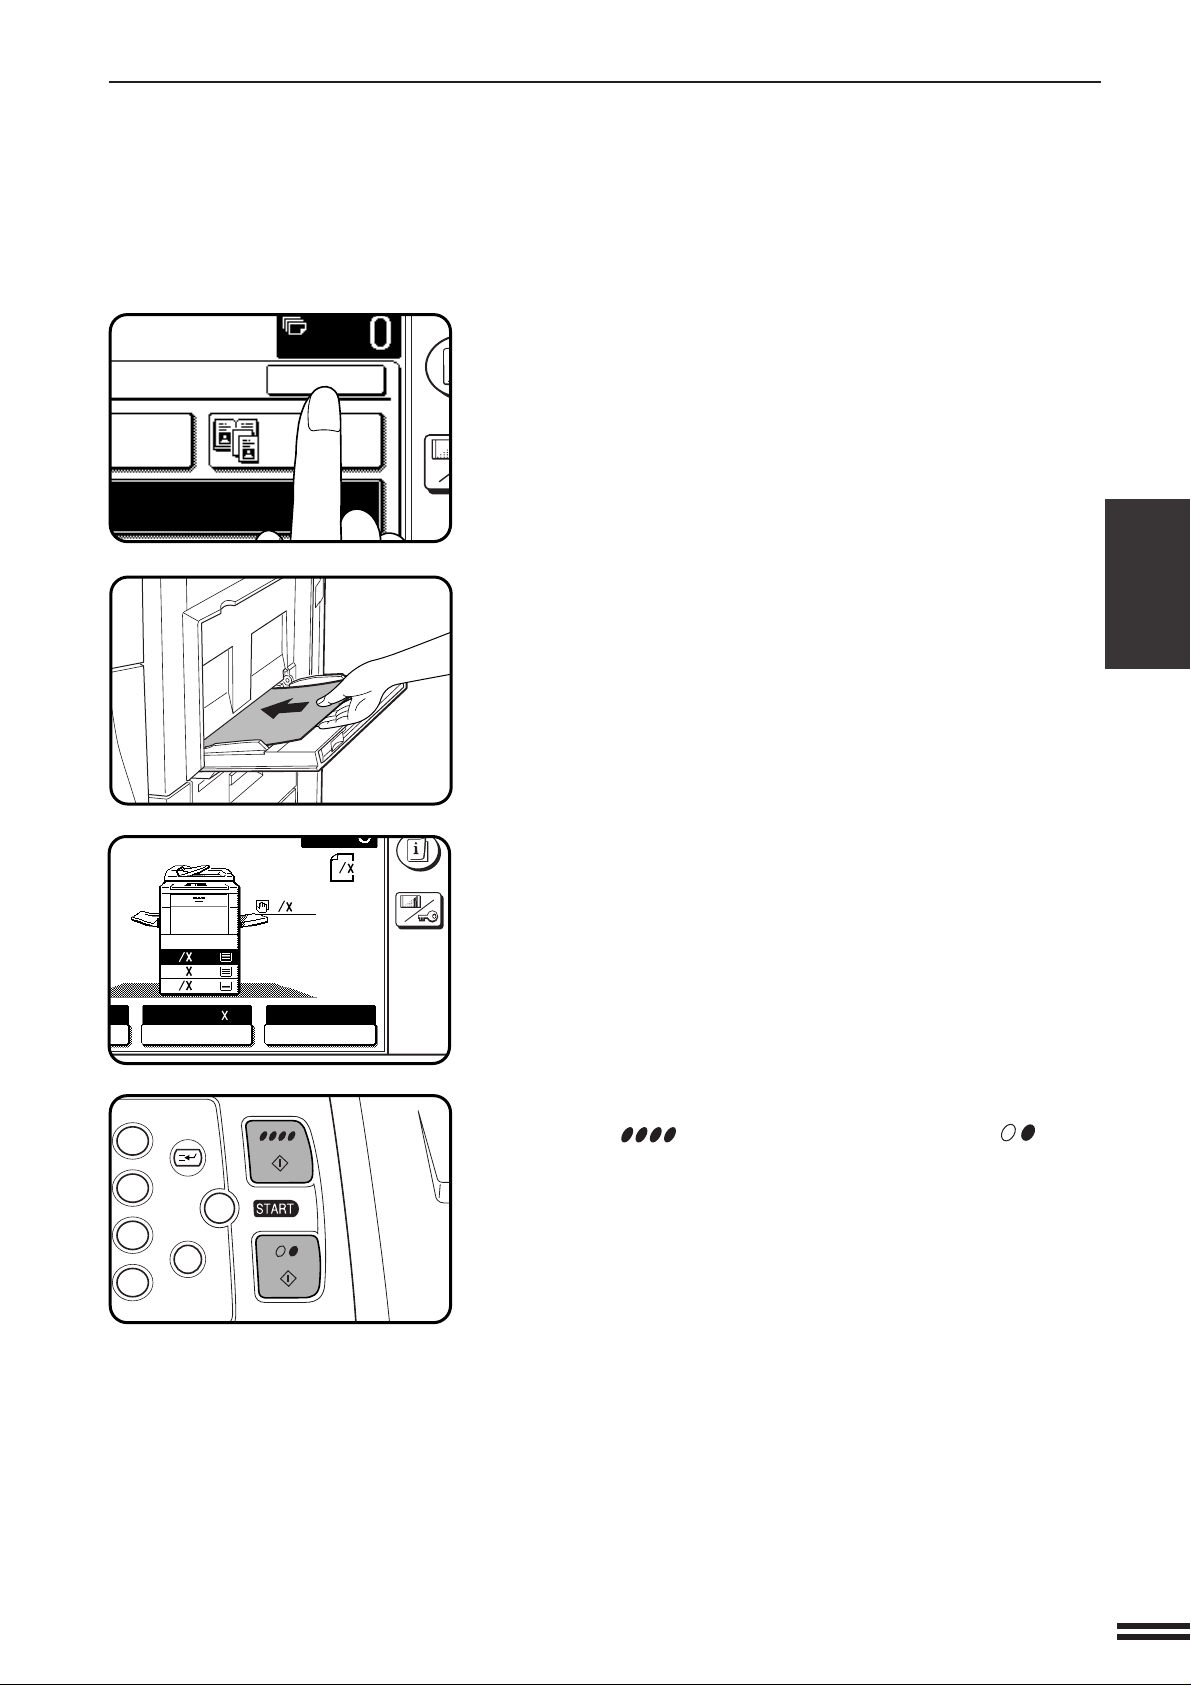
TRANSPARENCY FILM WITH INSERT SHEETS
INFOR
CUS
SET
DUAL PAGE
COPY
OK
CUSTOM
SETTINGS
ORIGINAL
TRANSPARENCY
8
11
1
2
11
8
1.
1
2
8
11
1
2
2.
1711
3.
8
14
1
2
PAPER SELECT
100%
COPY RATIO
8/ 11AUTO
1
2
3
6
9
P
C
CA
CLEAR
PROGRAM
INTERRUPT
CLEAR
ALL
Press the “OK” key.
4
Load transparency film into the bypass tray.
●
5
Set the long edge of the film to be fed into the machine.
CHAPTER3
Ensure that the tray selected for the insert sheets
contains paper of the same size and orientation of the
6
transparency films.
Make all other selections and press the COLOR COPY
START ( ) key or BLACK COPY START ( ) key.
7
●
When copying is completed, remove remaining transparency
film.
●
To cancel the TRANSPARENCY INSERTS function, press the
“TRANSPARENCY INSERTS” key again on the SPECIAL
MODES screen.
SPECIAL FUNCTIONS Transparency film with insert sheets
3-13
Page 58

CHAPTER3
OUTPUT
2-SIDED
COPY
AUTO
2-SIDED
COPY
SPECIAL
MODES
READY TO
READY TO COPY.
SPECIAL MODES
MARGIN SHIFT ERASE
IMAGE EDITCOVERS
CENTERING
DUAL PAGE
COPY
COLOR
ADJUSTMENTS
TRANSPARENCY INSERTS
OK
AUTO
EXPOSURE PAPER SELECT
100%
COPY RATIO
8/ 11AUTO
1
2
SPECIAL FUNCTIONS Covers
COVERS
Covers
The COVERS mode is used to place covers on the front, back, or both
the front and back of multipage documents.
●
To use the COVERS mode, an optional RADF must be installed.
●
Front cover sheets can be copied on, but only on the front side even
in the 1-sided to 2-sided and 2-sided to 2-sided copy modes.
The back side of the original designated as the cover will not be
copied.
●
Back cover sheets cannot be copied on, either on the front side or on
the back side.
●
Cover sheets must be fed from the bypass tray and must be the same
size as the copy paper being used to copy the document.
●
When the COVERS mode is selected, the stream feeding mode of
the RADF will always be off.
Place the originals in the optional document feeder tray.
1
3-14
Press the 2-SIDED COPY key and select the desired
duplex mode if needed. Press the “OK” key to close the
2
duplex selection window.
●
To copy in the 1-sided to 2-sided or 2-sided to 2-sided copy
mode, an optional duplex module (AR-DU2N) must be installed.
Press the SPECIAL MODES key.
3
●
The SPECIAL MODES screen will appear.
Press the “COVERS” key on the touch panel.
4
●
The setting screen for COVERS will appear.
LOAD COVER STOCK INTO BYPASS-TRAY.
OK
COVERS
FRONT
BACK
FRONT+BACK
CANCEL
PRINT ON FRONT COVER?
YES
NO
OK
Page 59

Select cover placement.
COVERS
FRONT
BACK
FRONT+BACK
YES
NO
PRINT ON FRONT
CANCEL
O
O
YES
NO
PRINT ON FRONT COVER?
CANCEL
OK
OK
CUS
SETT
OK
OK
C
CA
CLEAR
INTERRUPT
CLEAR
ALL
12
3
456
789
0
P
C
CL
PROGRAM
AUDIT
INTE
CLE
AL
5
●
Select “FRONT”, “BACK” or “FRONT+BACK” on the touch
panel.
Indicate whether the front cover sheets are copied on or
not.
6
●
Select “YES” or “NO” on the touch panel. If “YES” is selected, the
first page of the document will be copied onto the front cover
sheet.
●
If “BACK” has been selected in step 5, this selection is not
needed.
CO VERS
CHAPTER3
SPECIAL FUNCTIONS Covers
Press the upper “OK” key.
7
Load the cover stock into the bypass tray, making sure
that the cover stock is the same size as the copy paper.
8
●
The message “SELECT PAPER TYPE FOR BYPASS-TRAY.”
will appear if “16 ~ 28 lbs.” (“PLAIN PAPER”), “28+ ~ 35 lbs.”
(“HEAVY PAPER 1”) or “35+ ~ 75 lbs.” (“HEAVY PAPER 2”) has
not been selected.
Select the paper type for the bypass tray.
9
●
Transparency film cannot be selected as cover stock.
●
The START key indicators will light up.
10
Enter the desired number of copies and press the
COLOR COPY START ( ) key or BLACK COPY
START ( ) key.
●
To cancel the COVERS function, select the COVERS function
again and press the “CANCEL” key.
3-15
Page 60

COLOR ADJUSTMENTS
2-SIDED
COPY
SPECIAL
MODES
READY TO
READY TO COPY.
SPECIAL MODES
MARGIN SHIFT ERASE
IMAGE EDITCOVERS
CENTERING
DUAL PAGE
COPY
COLOR
ADJUSTMENTS
TRANSPARENCY INSERTS
OK
AUTO
EXPOSURE PAPER SELECT
100%
COPY RATIO
8/ 11AUTO
1
2
The color adjustments include the following items.
●
RGB adjust: Strengthens or weakens one of three primary colors, red (R), green (G), or blue (B).
●
Sharpness: Sharpens or softens image outlines.
●
Suppress background: Suppresses copying of lighter background areas.
●
Color balance: Adjusts the color, tone, and density of color copies.
●
Brightness/intensity/contrast: These adjust the level of brightness, intensity or contrast of images.
CHAPTER3
SPECIAL FUNCTIONS Color adjustments
RGB ADJUST
This function can be used to strengthen or weaken the three primary
colors, red (R), green (G), or blue (B).
Only one primary color can be adjusted at a time.
If a second primary color is adjusted, the first adjustment will be
cancelled.
(Refer to the samples on page 5 to see the effect on copy images in
relation to the RGB ADJUST.)
Place the original on the document glass or in the
optional document feeder tray.
1
3-16
Press the SPECIAL MODES key.
2
●
The SPECIAL MODES screen will appear.
Press the “COLOR ADJUSTMENTS” key on the touch
panel.
3
●
The COLOR ADJUSTMENTS menu will appear.
READY TO COPY.
SPECIAL MODES
COLOR ADJUSTMENTS
RGB ADJUST
COLOR
BALANCE
BRIGHTNESS INTENSITY
SHARPNESS
OK
OK
SUPPRESS
BACKGROUND
CONTRAST
Page 61

COLOR ADJUSTMENTS
CONTRAST
READY TO COPY.
SPECIAL MODES
COLOR ADJUSTMENTS
RGB ADJUST
BRIGHTNESS INTENSITY
SHARPNESS
SUPPRESS
BACKGROUND
COLOR
BALANCE
OK
OK
OK
OK
-2 · -1 · · 0 · · 1 · 2
READY TO COPY.
SPECIAL MODES
RGB ADJUST
ONLY ONE COLOR CAN BE ADJUSTED.
CANCEL
G(GREEN)R(RED) B(BLUE)
OK
-2 · -1 · · 0 · · 1 · 2
RGB ADJUST
ONLY ONE COLOR CAN BE ADJUSTED.
CANCEL
G(GREEN)R(RED) B(BLUE)
OK
OK
+
-2 · -1 · · 0 · · 1 · 2
READY TO COPY.
RGB ADJUST
ONLY ONE COLOR CAN BE ADJUSTED.
CANCEL
G(GREEN)R(RED) B(BLUE)
C
CA
CLEAR
INTERRUPT
CLEAR
ALL
12
3
456
789
0
P
C
CL
PROGRAM
AUDIT
INTE
CLE
AL
Press the “RGB ADJUST” key on the touch panel.
4
●
The setting screen for RGB ADJUSTMENTS will appear.
READY TO COPY.
SPECIAL MODES
RGB ADJUST
ONLY ONE COLOR CAN BE ADJUSTED.
G(GREEN)R(RED) B(BLUE)
-2 · -1 · · 0 · · 1 · 2
CANCEL
OK
OK
Select a color to be adjusted.
5
●
Select a color from R (RED), G (GREEN), and B (BLUE).
Press the “+” to strengthen the selected color or press
the “-” key to weaken the color.
6
●
The level can be adjusted from -2 to 2 in eleven steps.
CHAPTER3
SPECIAL FUNCTIONS Color adjustments
Press the upper “OK” key.
7
Make all other desired copier selections and enter the
desired number of copies.
8
Press the COLOR COPY START ( ) key.
9
●
The BLACK COPY START ( ) key can be pressed for copying.
However, the RGB ADJUST setting will be ignored.
●
To cancel the RGB ADJUST function, select the RGB ADJUST
function again and press the “CANCEL” key.
3-17
Page 62

COLOR ADJUSTMENTS
2-SIDED
COPY
SPECIAL
MODES
READY TO
READY TO COPY.
SPECIAL MODES
MARGIN SHIFT ERASE
IMAGE EDITCOVERS
CENTERING
DUAL PAGE
COPY
COLOR
ADJUSTMENTS
TRANSPARENCY INSERTS
OK
AUTO
EXPOSURE PAPER SELECT
100%
COPY RATIO
8/ 11AUTO
1
2
CONTRAST
READY TO COPY.
SPECIAL MODES
COLOR ADJUSTMENTS
RGB ADJUST
BRIGHTNESS INTENSITY
SHARPNESS
SUPPRESS
BACKGROUND
OK
OK
SHARPNESS
CHAPTER3
This function is used to sharpen or soften image outlines.
(Refer to the samples on page 6 to see the effect on copy images in
relation to the SHARPNESS.)
Place the original on the document glass or in the
optional document feeder tray.
1
SPECIAL FUNCTIONS Color adjustments
Press the SPECIAL MODES key.
2
●
The SPECIAL MODES screen will appear.
Press the “COLOR ADJUSTMENTS” key on the touch
panel.
3
●
The COLOR ADJUSTMENTS menu will appear.
COLOR
BALANCE
3-18
Press the “SHARPNESS” key on the touch panel.
4
●
The setting screen for SHARPNESS will appear.
READY TO COPY.
OK
CENTERING
SHARPNESS
SOFT SHARP
CANCEL
OK
Page 63

COLOR ADJUSTMENTS
READY TO COPY
SHARPNESS
CANCEL
SOFT SHARP
OK
OK
READY TO COPY
SHARPNESS
CANCEL
SOFT SHARP
OK
OK
12
3
456
789
0
P
C
CA
CLEAR
PROGRAM
AUDIT
INTERRUPT
CLEAR
ALL
3
6
9
P
C
CA
CLEAR
PROGRAM
INTERRUPT
CLEAR
ALL
Press the “SOFT” key to soften image outlines or press
the “SHARP” key to sharpen them.
5
CHAPTER3
Press the upper “OK” key.
6
Make all other desired copier selections and enter the
desired number of copies.
7
SPECIAL FUNCTIONS Color adjustments
Press the COLOR COPY START ( ) key.
8
●
The BLACK COPY START ( ) key can be pressed for
copying. However, the SHARPNESS setting will be ignored.
●
To cancel the SHARPNESS function, select the SHARPNESS
function again and press the “CANCEL” key.
3-19
Page 64

COLOR ADJUSTMENTS
2-SIDED
COPY
SPECIAL
MODES
READY TO
READY TO COPY.
SPECIAL MODES
MARGIN SHIFT ERASE
IMAGE EDITCOVERS
CENTERING
DUAL PAGE
COPY
COLOR
ADJUSTMENTS
TRANSPARENCY INSERTS
OK
AUTO
EXPOSURE PAPER SELECT
100%
COPY RATIO
8/ 11AUTO
1
2
CONTRAST
READY TO COPY.
SPECIAL MODES
COLOR ADJUSTMENTS
RGB ADJUST
BRIGHTNESS INTENSITY
SHARPNESS
SUPPRESS
BACKGROUND
OK
OK
SUPPRESS BACKGROUND
CHAPTER3
This copier can suppress unwanted background areas on the original
images when copying. This function is used to adjust the density
level of background images to be erased.
(Refer to the samples on page 6 to see the effect on copy images in
relation to the SUPPRESS BACKGROUND.)
Place the original on the document glass or in the
optional document feeder tray.
1
SPECIAL FUNCTIONS Color adjustments
Press the SPECIAL MODES key.
2
●
The SPECIAL MODES screen will appear.
Press the “COLOR ADJUSTMENTS” key on the touch
panel.
3
●
The COLOR ADJUSTMENTS menu will appear.
COLOR
BALANCE
3-20
Press the “SUPPRESS BACKGROUND” key on the touch
panel.
4
●
The setting screen for SUPPRESS BACKGROUND will appear.
READY TO COPY.
CENTERING
SUPPRESS BACKGROUND
LIGHT AREAS OF THE ORIGINAL MAY BE SUPPRESSED
AS BACKGROUND.
CANCEL
OK
OK
Page 65
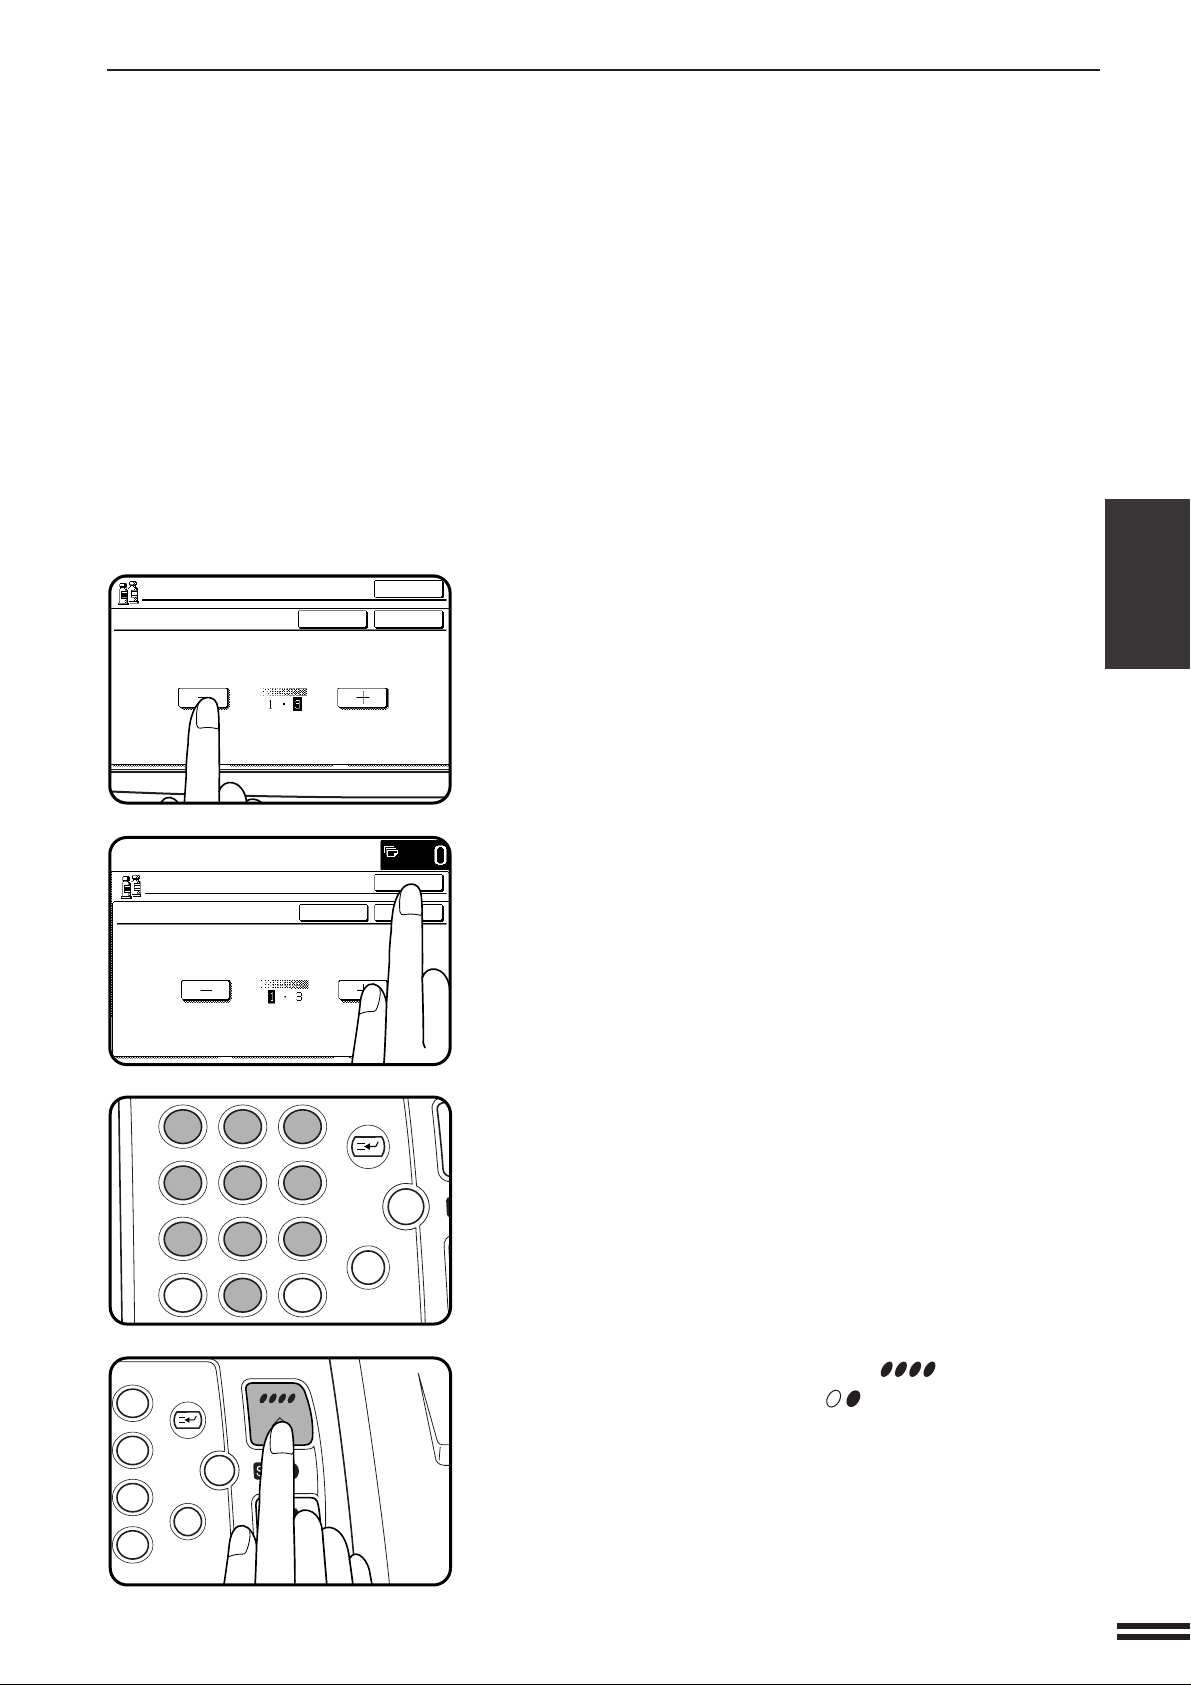
COLOR ADJUSTMENTS
SUPPRESS BACKGROUND
LIGHT AREAS OF THE ORIGINAL MAY BE SUPPRESSED
AS BACKGROUND.
CANCEL
OK
OK
READY TO COPY.
SUPPRESS BACKGROUND
LIGHT AREAS OF THE ORIGINAL MAY BE SUPPRESD
AS BACKGROUND.
CANCEL
OK
OK
12
3
456
789
0
P
C
CA
CLEAR
PROGRAM
AUDIT
INTERRUPT
CLEAR
ALL
3
6
9
P
C
CA
CLEAR
PROGRAM
INTERRUPT
CLEAR
ALL
Use the “-” and “+” keys to select the desired background
suppression level.
5
●
If level 1 is selected, darker background areas will be erased.
The level can be adjusted in three steps. The default setting is
level 3.
CHAPTER3
SPECIAL FUNCTIONS Color adjustments
6
7
8
Press the upper “OK” key.
Make all other desired copier selections and enter the
desired number of copies.
Press the COLOR COPY START ( ) key.
●
The BLACK COPY START ( ) key can be pressed for
copying. However, the SUPPRESS BACKGROUND setting will
be ignored.
●
To cancel the SUPPRESS BACKGROUND function, select the
SUPPRESS BACKGROUND function again and press the
“CANCEL” key.
3-21
Page 66

COLOR ADJUSTMENTS
2-SIDED
COPY
SPECIAL
MODES
READY TO
READY TO COPY.
SPECIAL MODES
MARGIN SHIFT ERASE
IMAGE EDITCOVERS
CENTERING
DUAL PAGE
COPY
COLOR
ADJUSTMENTS
TRANSPARENCY INSERTS
OK
AUTO
EXPOSURE PAPER SELECT
100%
COPY RATIO
8/ 11AUTO
1
2
CONTRAST
READY TO COPY.
SPECIAL MODES
COLOR ADJUSTMENTS
RGB ADJUST
BRIGHTNESS INTENSITY
SHARPNESS
SUPPRESS
BACKGROUND
COLOR
BALANCE
OK
OK
COLOR BALANCE
CHAPTER3
This function is used to adjust the color, tone, and density of color
copies.
The Color Balance setting allows you to adjust the densities of four
colors: cyan, magenta, yellow, and black. The density range is
divided into eight levels for each color, from 1 (lowest density areas)
to 8 (highest density areas). The density can be adjusted one level at
a time or eight levels at once. (Refer to the samples on page 7 to see
the effect on copy images in relation to the COLOR BALANCE.)
Place the original on the document glass or in the
optional document feeder tray.
1
SPECIAL FUNCTIONS Color adjustments
Press the SPECIAL MODES key.
2
●
The SPECIAL MODES screen will appear.
Press the “COLOR ADJUSTMENTS” key on the touch
panel.
3
●
The COLOR ADJUSTMENTS menu will appear.
3-22
Press the “COLOR BALANCE” key on the touch panel.
4
CENTERING
Page 67
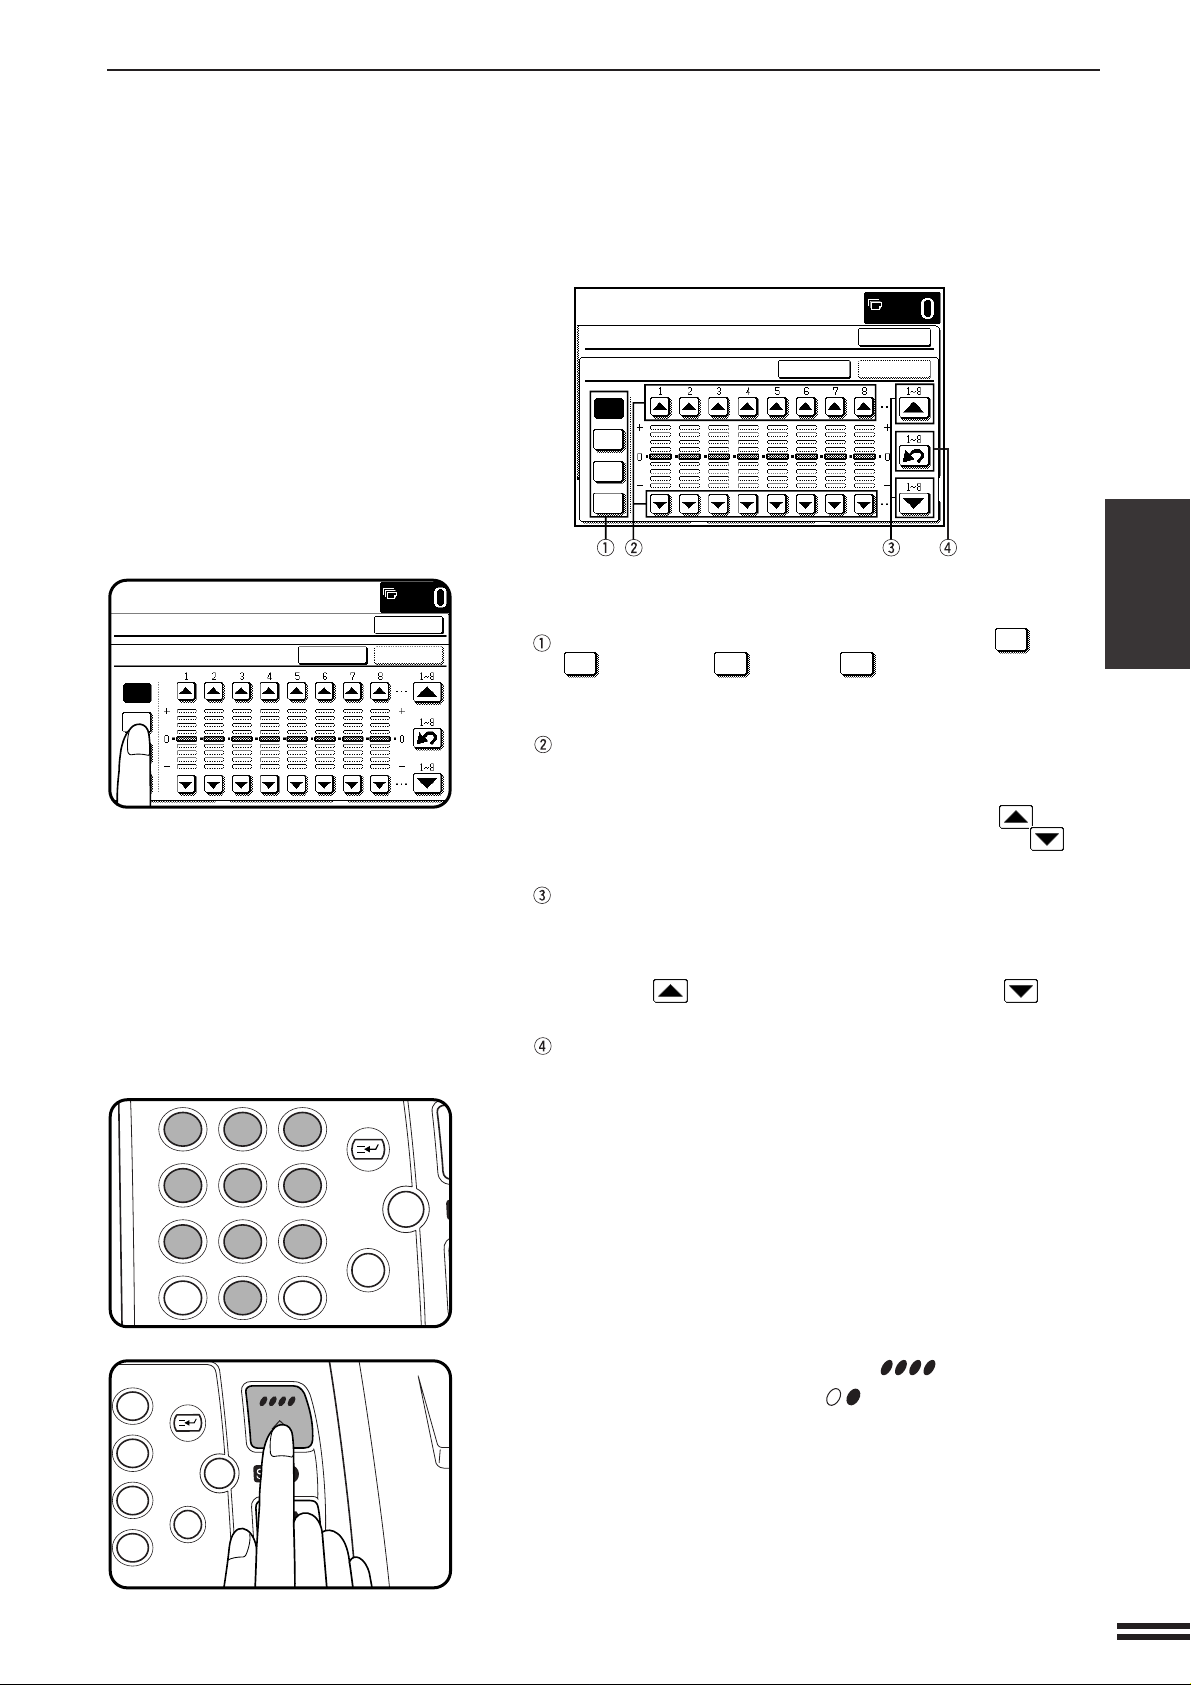
COLOR ADJUSTMENTS
12
3
456
789
0
P
C
CA
CLEAR
PROGRAM
AUDIT
INTERRUPT
CLEAR
ALL
3
6
9
P
C
CA
CLEAR
PROGRAM
INTERRUPT
CLEAR
ALL
READY TO COPY
COLOR BALANCE
M
C
CANCEL
OK
OK
●
The setting screen for COLOR BALANCE will appear.
READY TO COPY.
SPECIAL MODES
COLOR BALANCE
C
M
Y
Bk
CANCEL
OK
OK
Use the keys indicated in the illustration above to adjust
the color balance settings.
5
Use these keys to select the color to be adjusted (C = cyan,
M
= magenta, Y = yellow,
If only the area around the letter inside a key is highlighted, the
settings have been changed from the f actory default settings.
Use these keys to adjust the densities of each of the eight
density lev els.
When one of the keys is pressed, the corresponding indicator
line will move up or down one step. Press the key to
increase the density of the corresponding lev el, or the key
to decrease the density.
Use these keys to change the densities of all eight levels at
once.
When either key is pressed, the indicator lines of all eight le vels
will move up or down one step.
Press the key to increase the density, or the key to
decrease the density.
Use this key to return the densities of all eight levels to the
initial settings.
The initial color balance settings are the values set with key
operator program “Initial Color Balance Setting”. For this reason,
the initial settings may not necessarily be 0 (the middle indicator
position) for all le vels. The initial setting of each level is shown
by a gray indicator. See page 22 of the KEY OPERATOR'S
GUIDE.
Bk
= black).
CHAPTER3
SPECIAL FUNCTIONS Color adjustments
Make all other desired copier selections and enter the
desired number of copies.
6
Press the COLOR COPY START ( ) key.
7
●
The BLACK COPY START ( ) key can be pressed for
copying. However, the COLOR BALANCE settings will be ignored.
●
You can also store color balance settings for repeated use in the
future. (Refer to “Storing a Job Program” on page 2-18). In this
case, complete the color balance setting before pressing the
PROGRAM key bacause color copy samples cannot be made
after the PROGRAM key is pressed.
3-23
Page 68
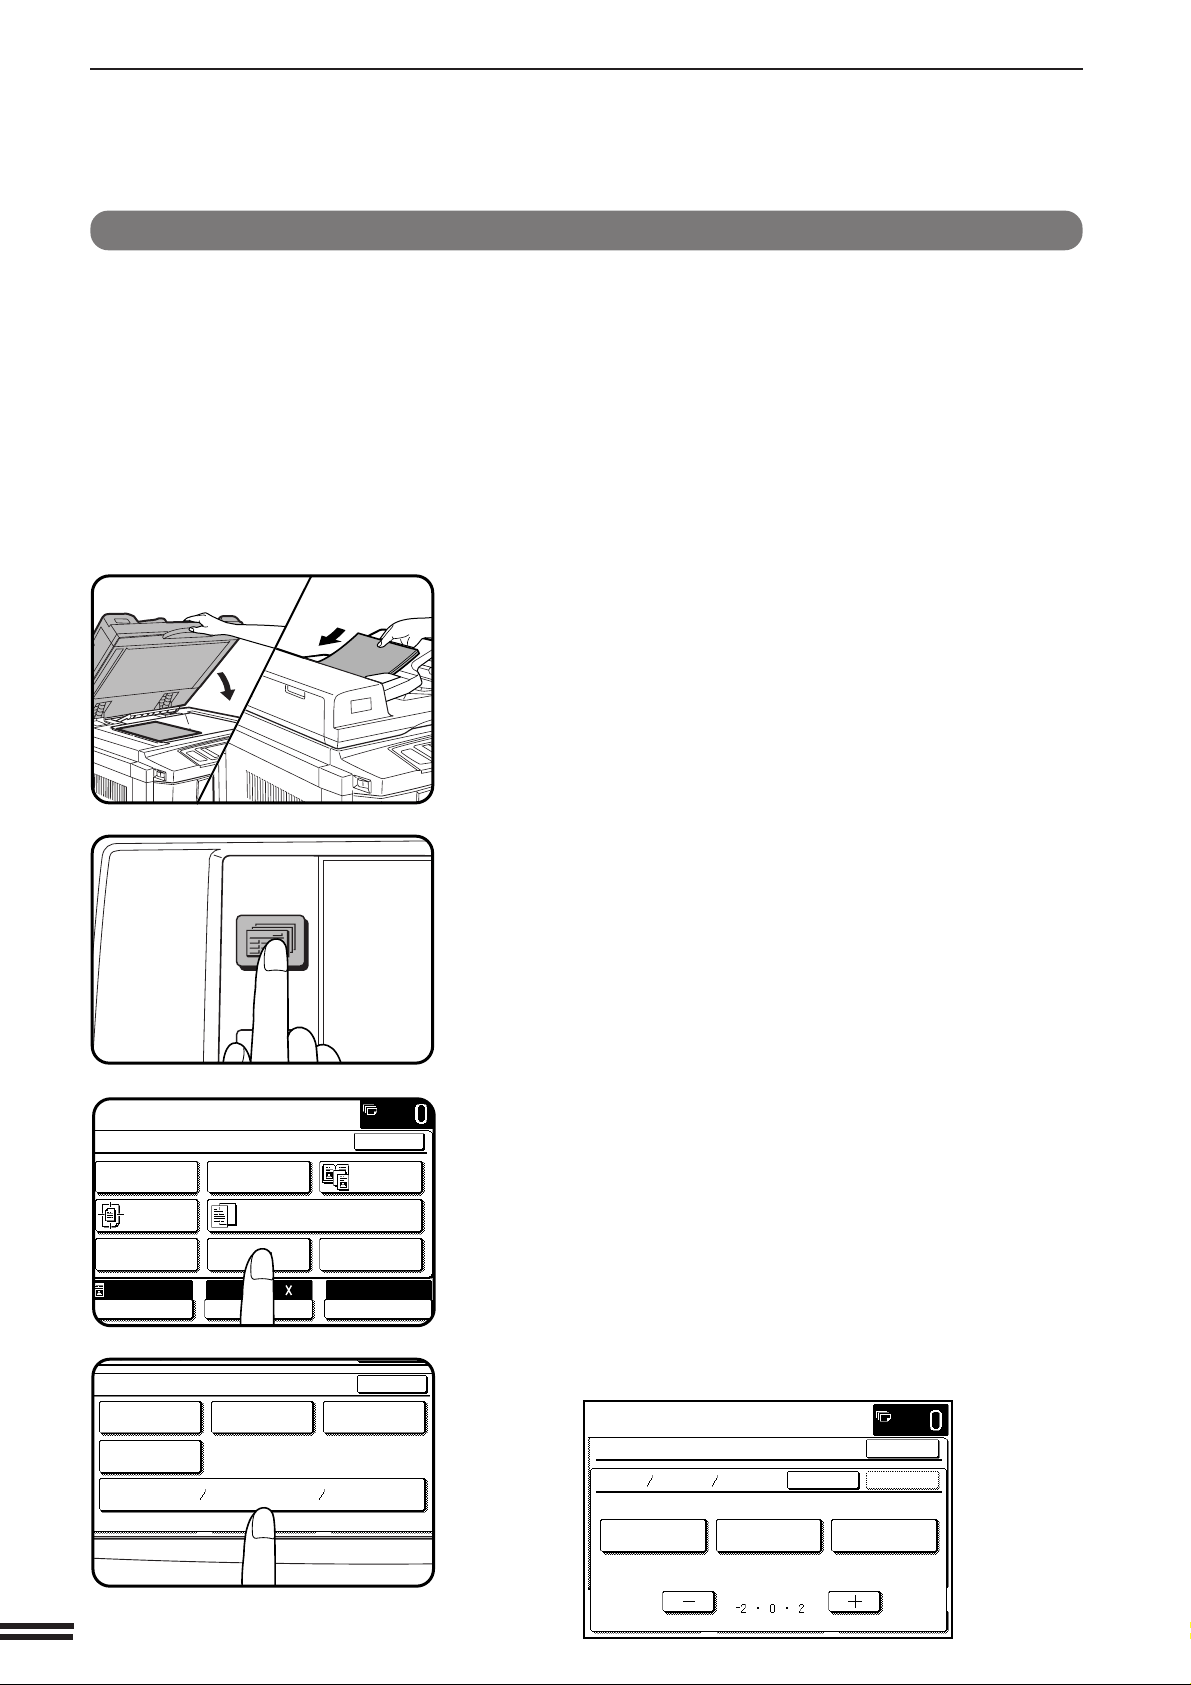
COLOR ADJUSTMENTS
2-SIDED
COPY
SPECIAL
MODES
READY TO
READY TO COPY.
SPECIAL MODES
MARGIN SHIFT ERASE
IMAGE EDITCOVERS
CENTERING
DUAL PAGE
COPY
COLOR
ADJUSTMENTS
TRANSPARENCY INSERTS
OK
AUTO
EXPOSURE PAPER SELECT
100%
COPY RATIO
8/ 11AUTO
1
2
CONTRAST
SPECIAL MODES
COLOR ADJUSTMENTS
RGB ADJUST
BRIGHTNESS INTENSITY
SHARPNESS
SUPPRESS
BACKGROUND
COLOR
BALANCE
OK
OK
BRIGHTNESS /INTENSITY /CONTRAST
CHAPTER3
This copier allows the level of brightness, intensity or contrast of
images to be adjusted. If brightness is selected, color tone can be
darkened or lightened. If intensity is selected, color saturation can be
made to be more vivid or more dull. If contrast is selected, the
contrast between image areas can be made to be higher or lower.
(Refer to the samples on page 8 to see the effect on copy images in
relation to the BRIGHTNESS /INTENSITY /CONTRAST
adjustments.)
Place the original on the document glass or in the
optional document feeder tray.
1
SPECIAL FUNCTIONS Color adjustments
Press the SPECIAL MODES key.
2
●
The SPECIAL MODES screen will appear.
Press the “COLOR ADJUSTMENTS” key on the touch
panel.
3
●
The COLOR ADJUSTMENTS menu will appear.
3-24
Press the “BRIGHTNESS/INTENSITY/CONTRAST” key
on the touch panel.
4
●
The setting screen for BRIGHTNESS/INTENSITY/CONTRAST
will appear.
READY TO COPY.
SPECIAL MODES
BRIGHT INTENS CONT
ONLY ONE FUNCTION IS SELECTABLE.
INTENSITYBRIGHTNESS CONTRAST
CANCEL
OK
OK
Page 69
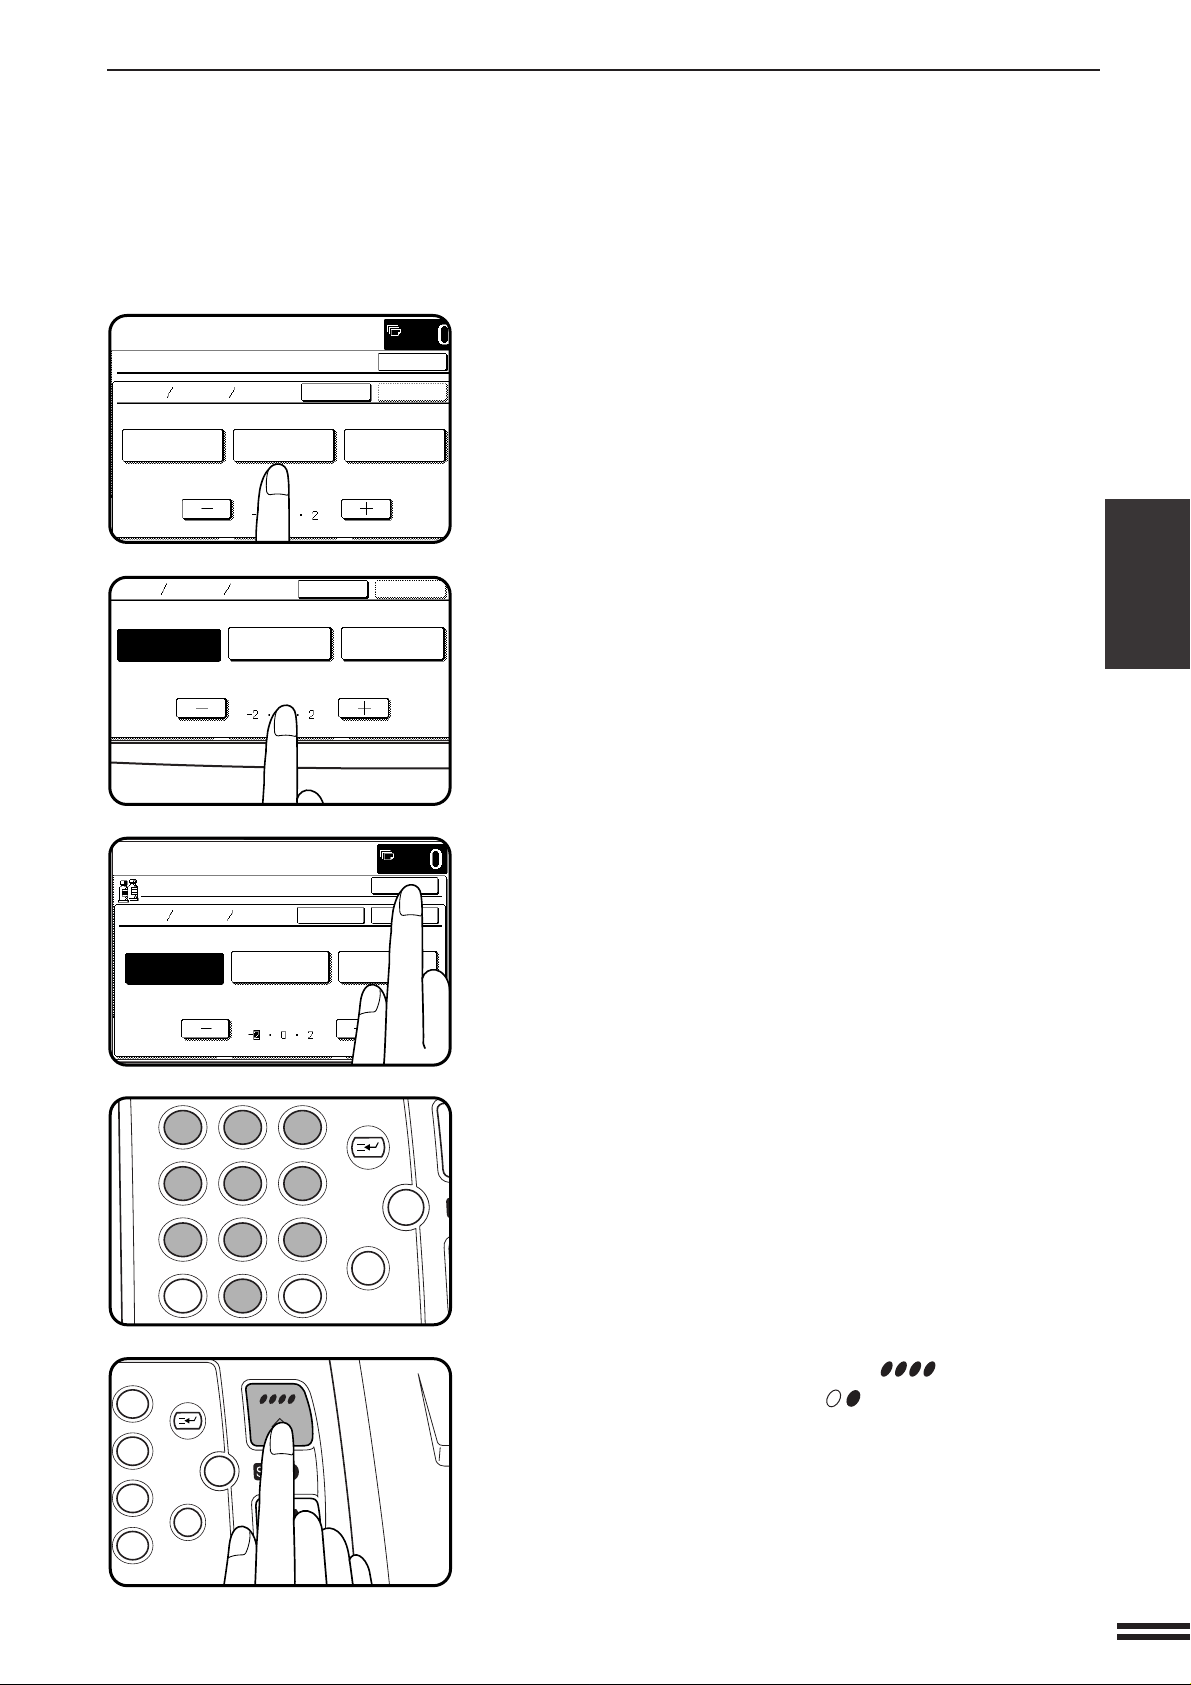
COLOR ADJUSTMENTS
READY TO COPY.
SPECIAL MODES
BRIGHT INTENS CONT
ONLY ONE FUNCTION IS SELECTABLE.
CANCEL
INTENSITYBRIGHTNESS CONTRAST
OK
OK
CANCEL
INTENSITYBRIGHTNESS CONTRAST
OK
READY TO COPY.
BRIGHT INTENS CONT
ONLY ONE FUNCTION IS SELECTABLE.
CANCEL
INTENSITYBRIGHTNESS CONTRAST
OK
OK
12
3
456
789
0
P
C
CA
CLEAR
PROGRAM
AUDIT
INTERRUPT
CLEAR
ALL
3
6
9
P
C
CA
CLEAR
PROGRAM
INTERRUPT
CLEAR
ALL
Select the desired item to be adjusted.
5
●
Select “BRIGHTNESS”, “INTENSITY” or “CONTRAST” on the
touch panel.
Use the “-” and “+” keys to adjust the level of the
selected item.
6
CHAPTER3
Press the upper “OK” key.
7
Make all other desired copier selections and enter the
desired number of copies.
8
SPECIAL FUNCTIONS Color adjustments
Press the COLOR COPY START ( ) key.
9
●
The BLACK COPY START ( ) key can be pressed for
copying. However, the BRIGHTNESS/INTENSITY/CONTRAST
setting will be ignored.
●
To cancel the BRIGHTNESS/INTENSITY/CONTRAST function,
select the BRIGHTNESS/INTENSITY/CONTRAST function
again and press the “CANCEL” key.
3-25
Page 70
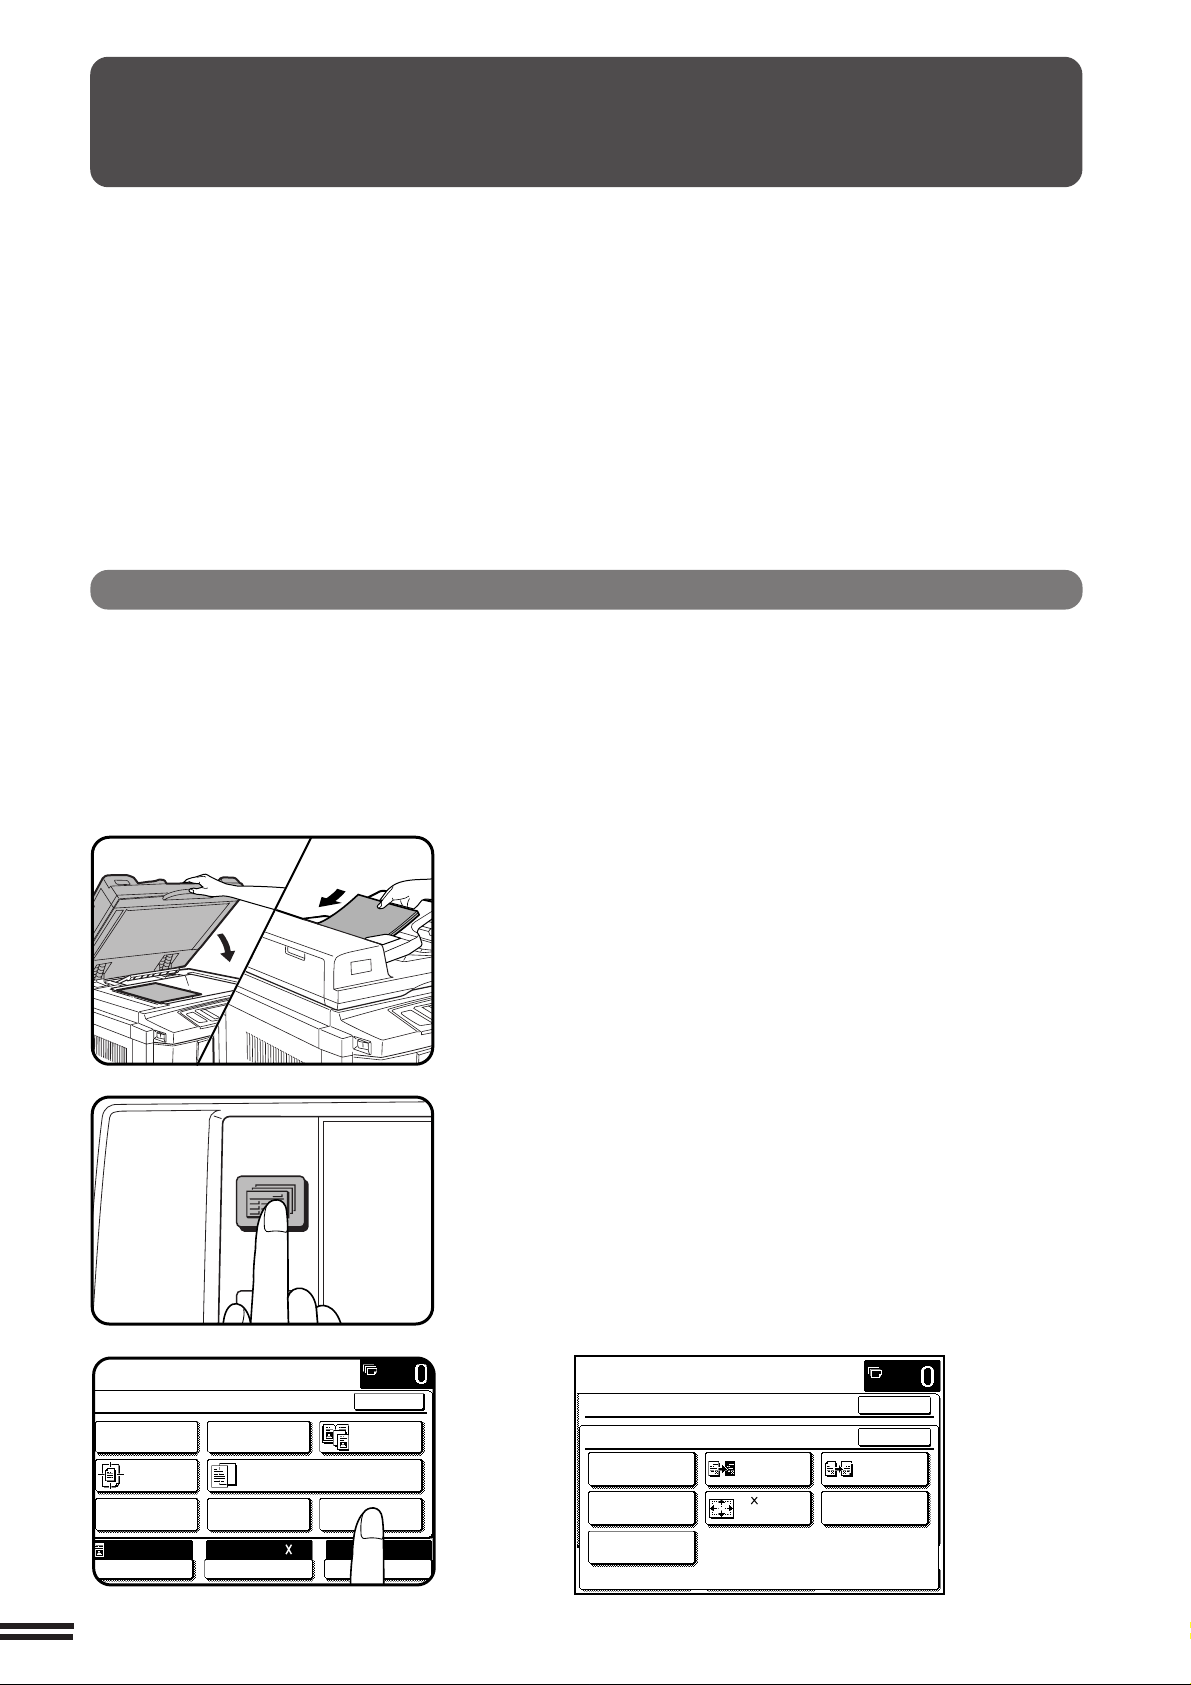
IMAGE EDITING FUNCTIONS
2-SIDED
COPY
SPECIAL
MODES
READY TO
READY TO COPY.
SPECIAL MODES
MARGIN SHIFT
ERASE
IMAGE EDITCOVERS
CENTERING
DUAL PAGE
COPY
COLOR
ADJUSTMENTS
TRANSPARENCY INSERTS
OK
AUTO
EXPOSURE PAPER SELECT
100%
COPY RATIO
8/ 11AUTO
1
2
The image editing functions include the following items.
●
Single color: Produces copies with a selected single color.
●
Neg./pos. reverse: Copies original image in complementary colors.
●
Mirror image: A mirror image of the original is printed.
●
Photo repeat: Produces repeated images of a photo on a single sheet of copy paper.
●
11 x 17 full-bleed: Produces 11" x 17" full image copies onto 12" x 18" copy paper.
●
Multi-page enlargement: Enlarges an original image to a size larger than 11" x 17" and prints divided images onto
multiple sheets of copy paper for assembly into large composite copy.
●
Extra size: Allows copying from an extra sized original or onto extra sized paper.
These functions are selected by pressing the “IMAGE EDIT” key on the SPECIAL MODES screen and pressing the
key of an individual function.
CHAPTER3
SINGLE COLOR
The single color function is used to produce copies with a selected
SPECIAL FUNCTIONS Image editing functions
single color.
(Refer to the samples on page 1 to see the effect on copy images in
relation to the SINGLE COLOR function.)
3-26
Place the originals on the document glass or in the
optional document feeder tray.
1
Press the SPECIAL MODES key.
2
●
The SPECIAL MODES screen will appear.
Press the “IMAGE EDIT” key on the touch panel.
3
●
The IMAGE EDIT menu will appear.
READY TO COPY.
SPECIAL MODES
IMAGE EDIT
SINGLE COLOR
PHOTO REPEAT
EXTRA SIZE
NEG./POS.
REVERSE
11 17
FULL-BLEED
OK
OK
MIRROR
IMAGE
MULTI-PAGE
ENLARGEMENT
Page 71
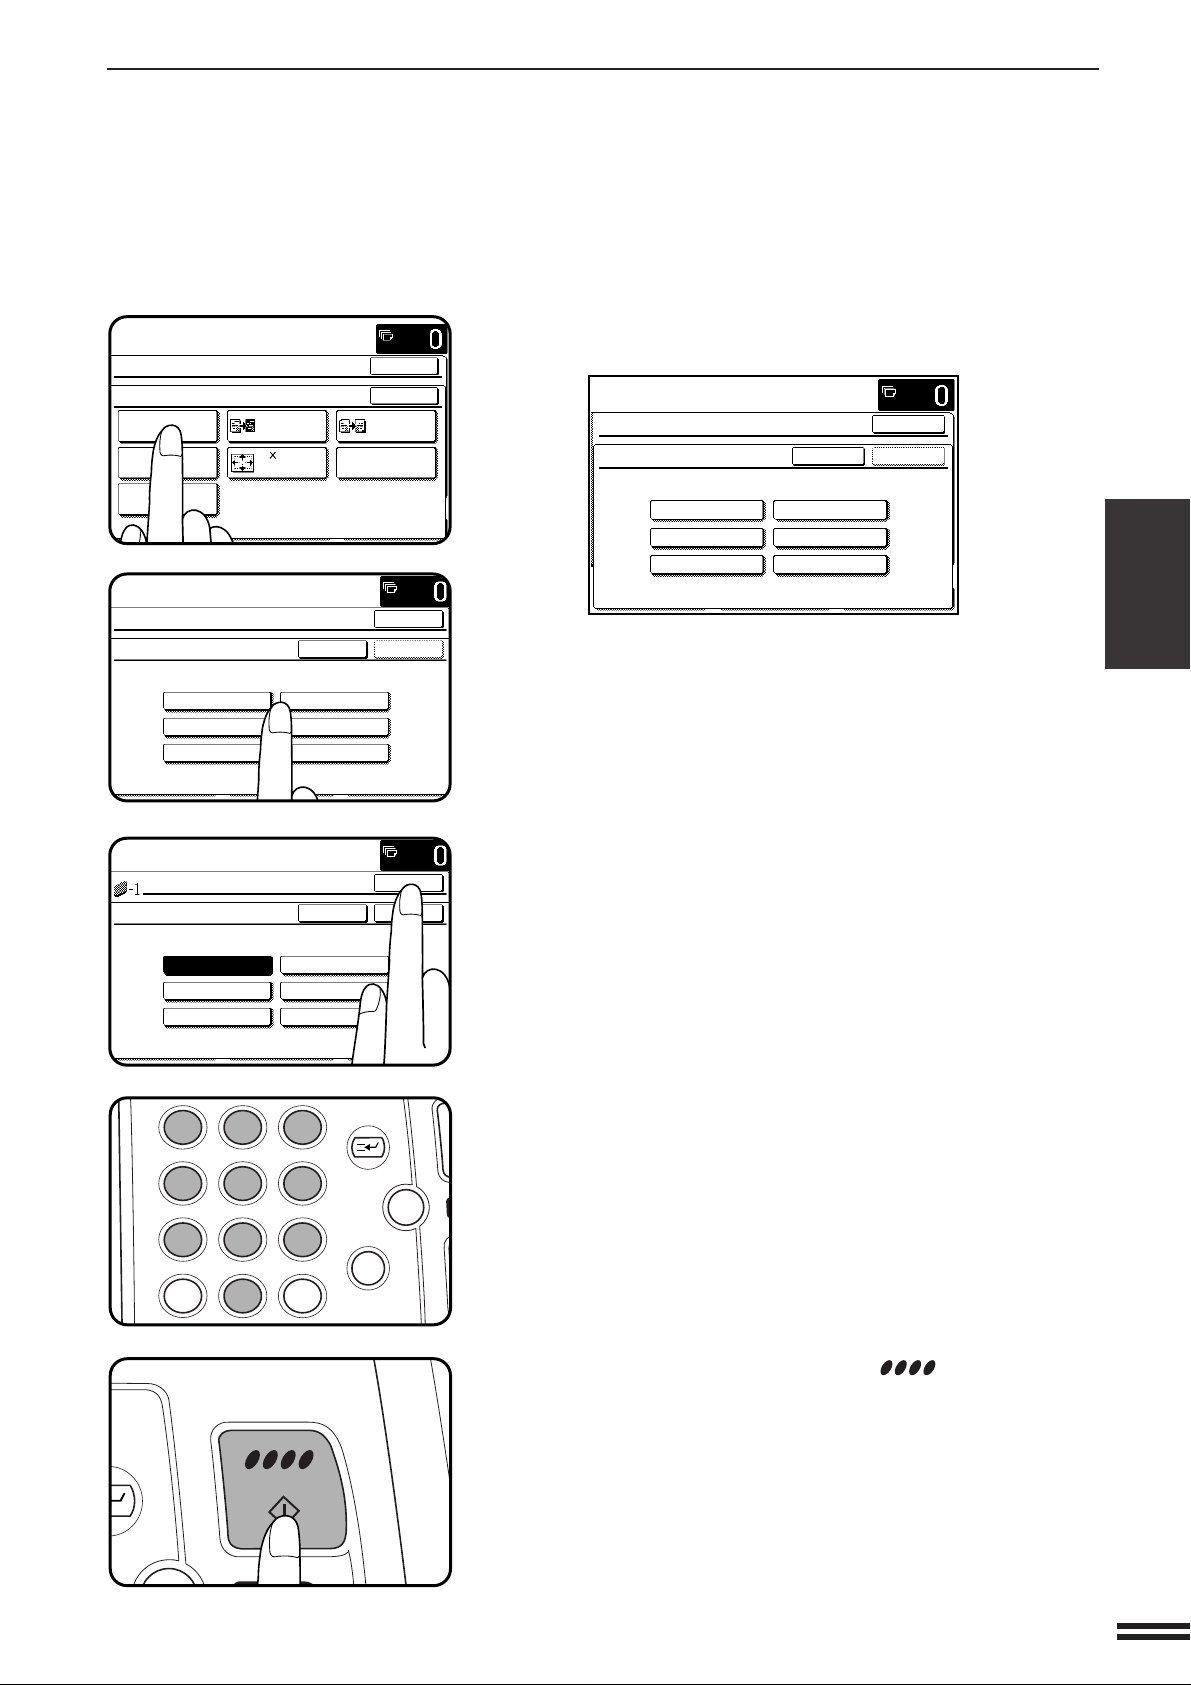
IMAGE EDITING FUNCTIONS
READY TO COPY.
SPECIAL MODES
OK
OK
NEG./POS.
REVERSE
11 17
FULL-BLEED
MIRROR
IMAGE
MULTI-PAGE
ENLARGEMENT
IMAGE EDIT
SINGLE COLOR
PHOTO REPEAT
EXTRA SIZE
READY TO COPY.
SPECIAL MODES
OK
OK
SINGLE COLOR
1 RED
3 BLUE
5 ORANGE
2 GREEN
CANCEL
4 PURPLE
6 BROWN
READY TO COPY.
OK
OK
SINGLE COLOR
1 RED
3 BLUE
5 ORANGE
2 GREEN
CANCEL
4 PURPLE
6 BROWN
12
3
456
789
0
P
C
CA
CLEAR
PROGRAM
AUDIT
INTERRUPT
CLEAR
ALL
RUPT
Press the “SINGLE COLOR” key on the touch panel.
4
●
The setting screen for SINGLE COLOR will appear.
READY TO COPY.
SPECIAL MODES
SINGLE COLOR
1 RED
3 BLUE
5 ORANGE
Select the desired color.
5
●
The selected color key will be highlighted.
Press the upper “OK” key.
6
CANCEL
2 GREEN
4 PURPLE
6 BROWN
OK
OK
CHAPTER3
SPECIAL FUNCTIONS Image editing functions
Make all other desired copier selections and enter the
desired number of copies.
7
Press the COLOR COPY START ( ) key.
8
●
To cancel the SINGLE COLOR function, select the SINGLE
COLOR function again and press the “CANCEL” key.
3-27
Page 72
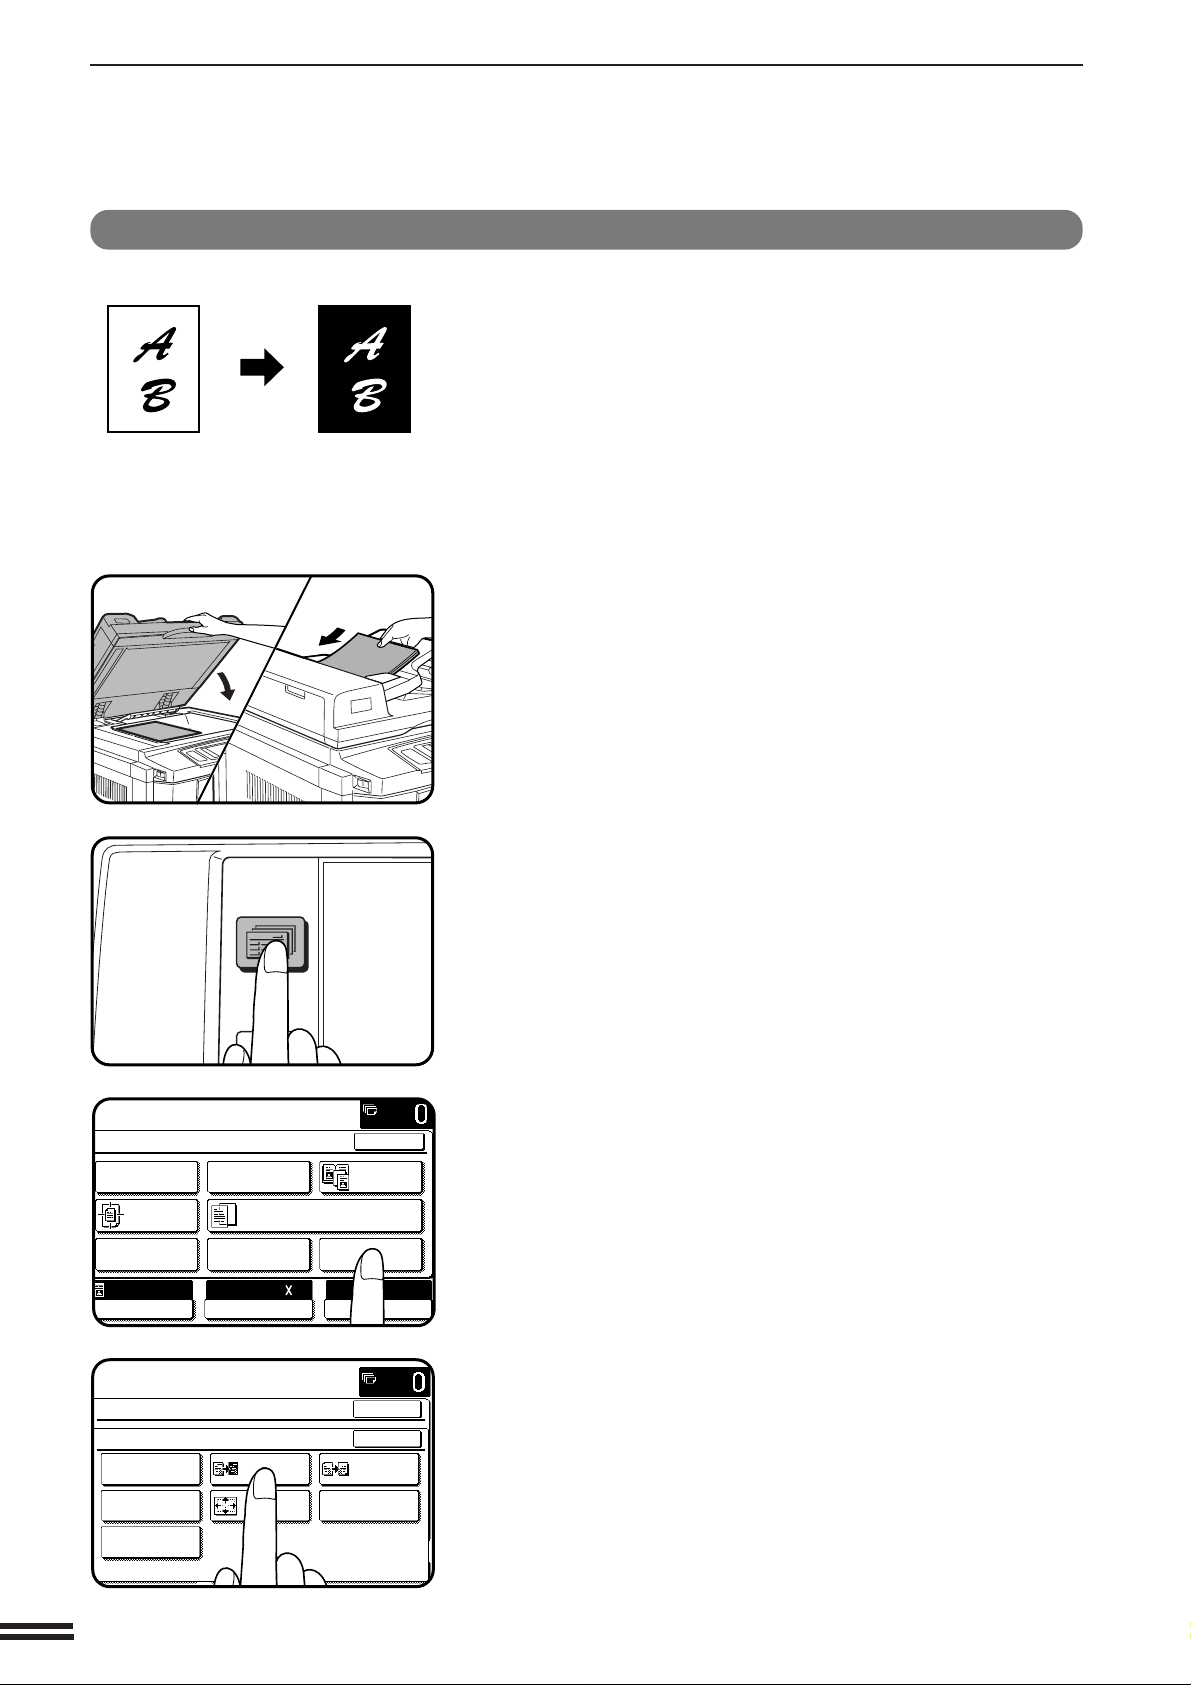
IMAGE EDITING FUNCTIONS
2-SIDED
COPY
SPECIAL
MODES
READY TO
READY TO COPY.
SPECIAL MODES
MARGIN SHIFT
ERASE
IMAGE EDITCOVERS
CENTERING
DUAL PAGE
COPY
COLOR
ADJUSTMENTS
TRANSPARENCY INSERTS
OK
AUTO
EXPOSURE PAPER SELECT
100%
COPY RATIO
8/ 11AUTO
1
2
READY TO COPY.
SPECIAL MODES
OK
OK
NEG./POS.
REVERSE
11 17
FULL-BLEED
MIRROR
IMAGE
MULTI-PAGE
ENLARGEMENT
IMAGE EDIT
SINGLE COLOR
PHOTO REPEAT
EXTRA SIZE
NEG./POS. REVERSE
Original
CHAPTER3
SPECIAL FUNCTIONS Image editing functions
Copy
The NEG./POS. REVERSE function is used to copy the original image
in complementary colors. If this function is selected in the black/white
mode, the black and white areas will be reversed.
(Refer to the samples on page 2 to see the effect on copy images in
relation to the NEG./POS. REVERSE.)
●
When this function is selected, neither the COLOR ADJUSTMENTS
nor the SINGLE COLOR functions can be selected.
Place the original on the document glass or in the
optional document feeder tray.
1
Press the SPECIAL MODES key.
2
●
The SPECIAL MODES screen will appear.
3-28
Press the “IMAGE EDIT” key on the touch panel.
3
●
The IMAGE EDIT menu will appear.
Press the “NEG./POS. REVERSE” key on the touch
panel.
4
●
The “NEG./POS. REVERSE” key will be highlighted.
Page 73
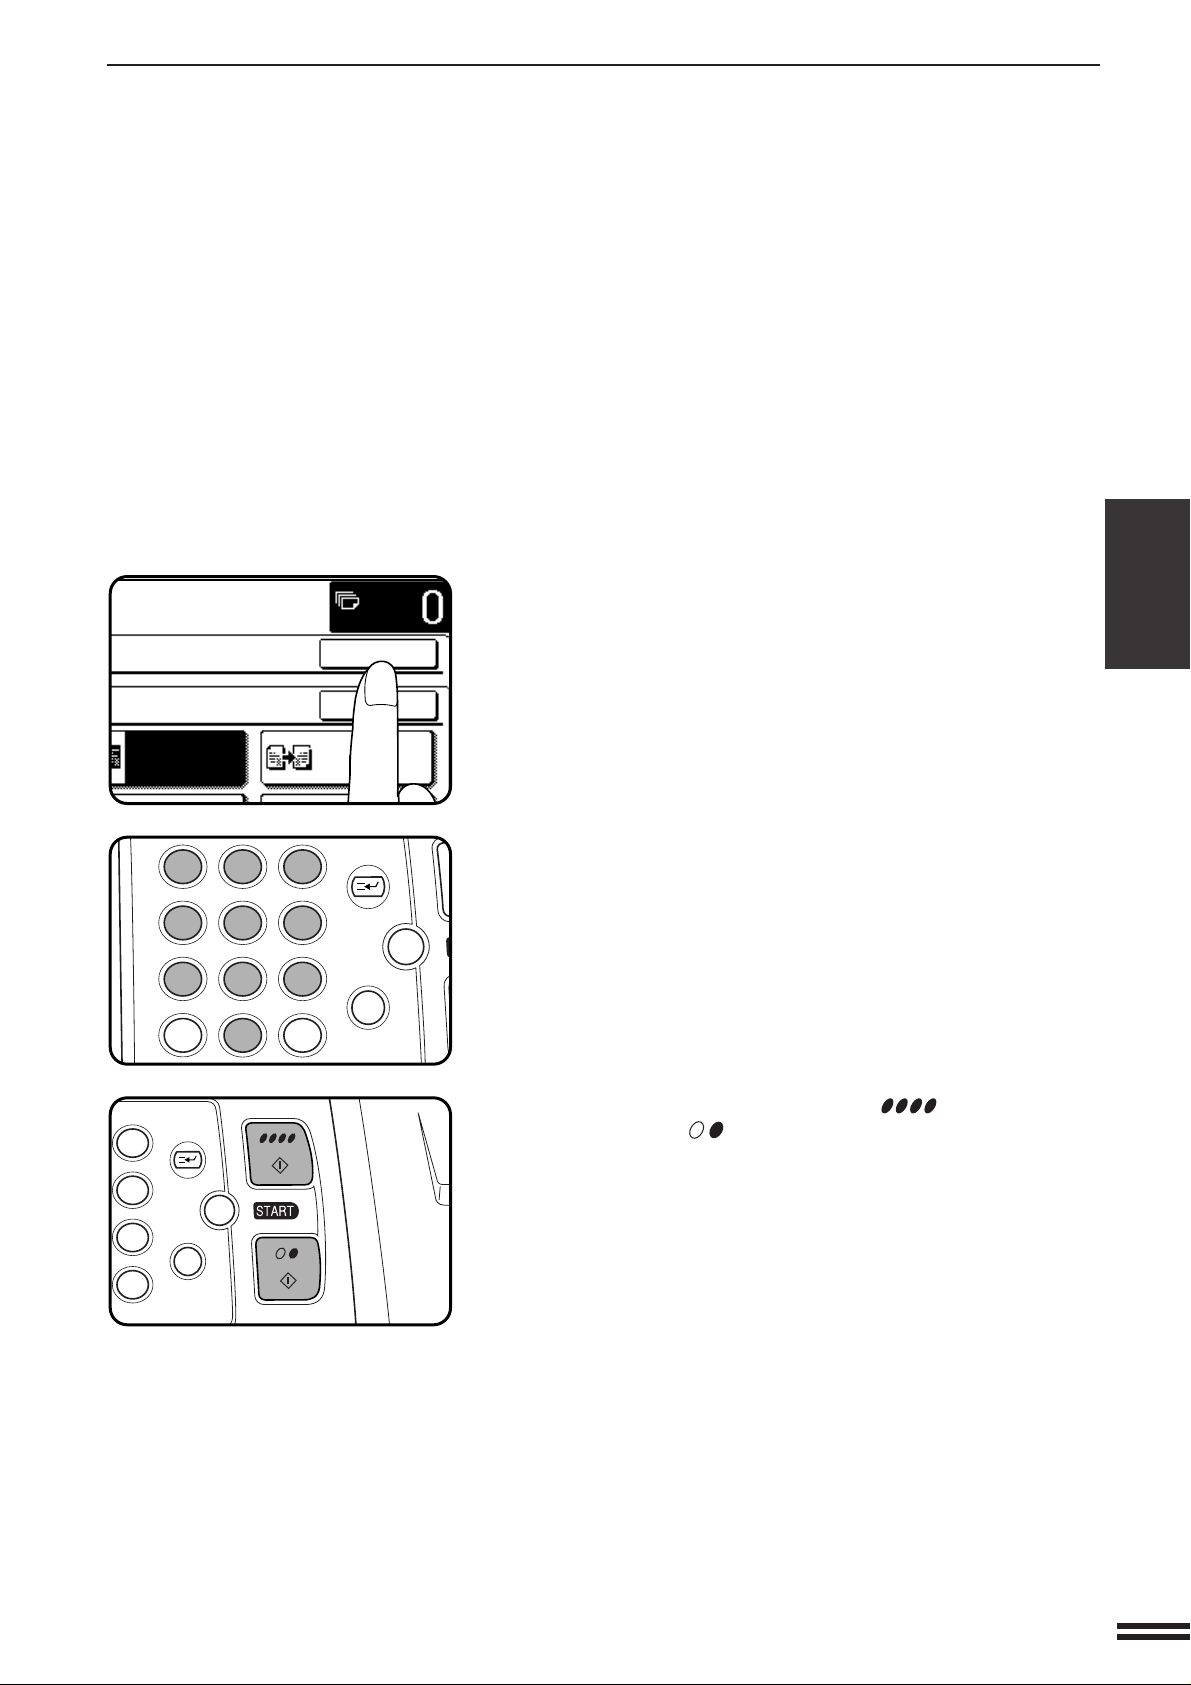
Press the upper “OK” key.
NEG./POS.
REVERSE
MIRROR
IMAGE
OK
OK
12
3
456
789
0
P
C
CA
CLEAR
PROGRAM
AUDIT
INTERRUPT
CLEAR
ALL
3
6
9
P
C
CA
CLEAR
PROGRAM
INTERRUPT
CLEAR
ALL
5
IMAGE EDITING FUNCTIONS
CHAPTER3
Make all other desired copier selections and enter the
desired number of copies.
6
Press the COLOR COPY START ( ) key or BLACK
COPY START ( ) key.
7
●
To cancel the NEG./POS. REVERSE function, press the “NEG./
POS. REVERSE” key again on the IMAGE EDIT menu screen.
SPECIAL FUNCTIONS Image editing functions
3-29
Page 74

IMAGE EDITING FUNCTIONS
2-SIDED
COPY
SPECIAL
MODES
READY TO
READY TO COPY.
SPECIAL MODES
MARGIN SHIFT
ERASE
IMAGE EDITCOVERS
CENTERING
DUAL PAGE
COPY
COLOR
ADJUSTMENTS
TRANSPARENCY INSERTS
OK
AUTO
EXPOSURE PAPER SELECT
100%
COPY RATIO
8/ 11AUTO
1
2
MIRROR IMAGE
Original
AB
CD
CHAPTER3
SPECIAL FUNCTIONS Image editing functions
Copy
This function is used to print a mirror image of the original. The images
will be inverted in the right to left direction on the copies.
AB
CD
Place the originals on the document glass or in the
optional document feeder tray.
1
Press the SPECIAL MODES key.
2
●
The SPECIAL MODES screen will appear.
3-30
Press the “IMAGE EDIT” key on the touch panel.
3
●
The IMAGE EDIT menu will appear.
Page 75

IMAGE EDITING FUNCTIONS
READY TO COPY.
SPECIAL MODES
OK
OK
NEG./POS.
REVERSE
11 17
FULL-BLEED
MIRROR
IMAGE
MULTI-PAGE
ENLARGEMENT
IMAGE EDIT
SINGLE COLOR
PHOTO REPEAT
EXTRA SIZE
NEG./POS.
REVERSE
MIRROR
IMAGE
OK
OK
12
3
456
789
0
P
C
CA
CLEAR
PROGRAM
AUDIT
INTERRUPT
CLEAR
ALL
3
6
9
P
C
CA
CLEAR
PROGRAM
INTERRUPT
CLEAR
ALL
Press the “MIRROR IMAGE” key on the touch panel.
4
●
The “MIRROR IMAGE” key will be highlighted.
CHAPTER3
Press the upper “OK” key.
5
Make all other desired copier selections and enter the
desired number of copies.
6
SPECIAL FUNCTIONS Image editing functions
Press the COLOR COPY START ( ) key or BLACK
COPY START ( ) key.
7
●
To cancel the MIRROR IMAGE function, press the MIRROR
IMAGE again on the IMAGE EDIT menu screen.
3-31
Page 76

IMAGE EDITING FUNCTIONS
2-SIDED
COPY
SPECIAL
MODES
READY TO
READY TO COPY.
SPECIAL MODES
MARGIN SHIFT
ERASE
IMAGE EDITCOVERS
CENTERING
DUAL PAGE
COPY
COLOR
ADJUSTMENTS
TRANSPARENCY INSERTS
OK
AUTO
EXPOSURE PAPER SELECT
100%
COPY RATIO
8/ 11AUTO
1
2
PHOTO REPEAT
Original
C
B
CHAPTER3
SPECIAL FUNCTIONS Image editing functions
Copy
C
CBC
PHOTO REPEAT is used to produce repeated images of a photo on a
C
B
B
B
single sheet of copy paper.
(Refer to the samples on page 2 to see the effect on copy images in relation
to the PHOTO REPEAT mode.)
●
Up to 24 repeats can be made on a single copy sheet. The number of
copies on a single sheet depends on the original size and copy paper
size.
●
Reduction or enlargement cannot be selected with this function. If
reduction or enlargement has been selected, the copy ratio will be reset
to 100% when this function is selected.
●
This function will not work when non-standard size paper is used.
Place the original on the document glass.
1
●
The optional document feeder cannot be used with this function.
●
Place 2 ½" x 4" and 2 ½" x 2 ½" originals as shown below.
Centering scale
Centering scale
3-32
Placing a
~2 " x 4"
original
Press the SPECIAL MODES key.
2
●
The SPECIAL MODES screen will appear.
Press the “IMAGE EDIT” key on the touch panel.
3
●
The IMAGE EDIT menu will appear.
Placing a
~2 " x 2 "
original
Page 77

IMAGE EDITING FUNCTIONS
READY TO COPY.
SPECIAL MODES
OK
OK
NEG./POS.
REVERSE
11 17
FULL-BLEED
MIRROR
IMAGE
MULTI-PAGE
ENLARGEMENT
IMAGE EDIT
SINGLE COLOR
PHOTO REPEAT
EXTRA SIZE
INFOR
CUS
SETT
~3 5"
REPEAT TYPEORIGINAL SIZE
CANCEL
OK
OK
8/ 11
2
1
11 17
~5 7"
1/2
12
3
456
789
0
P
C
CA
CLEAR
PROGRAM
AUDIT
INTERRUPT
CLEAR
ALL
3
6
9
P
C
CA
CLEAR
PROGRAM
INTERRUPT
CLEAR
ALL
INFORMATIO
CUSTOM
SETTINGS
REPEAT TYPEE
CANCEL
OK
OK
8/ 11
2
1
11 17
11 17
Press the “PHOTO REPEAT” key on the touch panel.
4
●
The setting screen for PHOTO REPEAT will appear.
PLEASE SELECT REPEAT TYPE.
SPECIAL MODES
PHOTO REPEAT
~3 5"
~5 7"
Select the desired repeat type.
5
●
Select the copy paper size depending on the original size.
●
When making PHOTO REPEAT copies of a ~2 ½" x4" or ~2 ½"
x 2 ½" original, press the key to change the screen, and then
press the desired repeat type key (8 ½" x 11" or 11" x 17") as
appropriate for the original to be copied.
Press the upper “OK” key.
6
CANCEL
REPEAT TYPEORIGINAL SIZE
1
8/ 11
2
OK
OK
11 17
1/2
CHAPTER3
SPECIAL FUNCTIONS Image editing functions
Make all other desired copier selections and enter the
desired number of copies.
7
●
If the copier has another paper tray (including the bypass tray)
that holds paper of the same size as the selected paper tray, the
tray can also be selected.
Press the COLOR COPY START ( ) key or BLACK
COPY START ( ) key.
8
●
To cancel the PHOTO REPEAT function, select the PHOTO
REPEAT function again and press the “CANCEL” key.
3-33
Page 78

IMAGE EDITING FUNCTIONS
2-SIDED
COPY
SPECIAL
MODES
READY TO
READY TO COPY.
SPECIAL MODES
MARGIN SHIFT ERASE
IMAGE EDITCOVERS
CENTERING
DUAL PAGE
COPY
COLOR
ADJUSTMENTS
TRANSPARENCY INSERTS
OK
AUTO
EXPOSURE PAPER SELECT
100%
COPY RATIO
11 17AUTO
11 x 17 FULL-BLEED
Original
11" x 17" 12" x 18"
CHAPTER3
SPECIAL FUNCTIONS Image editing functions
Copy
In other copy modes, image loss will occur along the copy edges. When the
11 x 17 FULL-BLEED function is used, the full image of an 11" x 17" size
original will be copied onto 12" x 18" size copy paper.
●
Reduction or enlargement cannot be selected with this function. If
reduction or enlargement has been selected, the copy ratio will be reset
to 100% when this function is selected.
Place the original on the document glass and close the
document cover.
1
●
The optional document feeder cannot be used with this function.
3-34
Press the SPECIAL MODES key.
2
●
The SPECIAL MODES screen will appear.
Press the “IMAGE EDIT” key on the touch panel.
3
●
The IMAGE EDIT menu will appear.
Page 79

IMAGE EDITING FUNCTIONS
READY TO COPY.
SPECIAL MODES
OK
OK
NEG./POS.
REVERSE
11 17
FULL-BLEED
MIRROR
IMAGE
MULTI-PAGE
ENLARGEMENT
IMAGE EDIT
SINGLE COLOR
PHOTO REPEAT
EXTRA SIZE
12
3
456
789
0
P
C
CA
CLEAR
PROGRAM
AUDIT
INTERRUPT
CLEAR
ALL
3
6
9
P
C
CA
CLEAR
PROGRAM
INTERRUPT
CLEAR
ALL
MIRROR
IMAGE
OK
OK
Press the “11 x 17 FULL-BLEED” key on the touch panel.
4
●
The “11 x 17 FULL-BLEED” key will be highlighted.
Press the upper “OK” key.
5
CHAPTER3
Load 12" x 18" copy paper into the bypass tray.
6
Press the “PAPER SELECT” key on the touch panel and
then select the paper type (16 ~ 28 lbs., 28+ ~ 35 lbs. or
7
35+ ~ 75 lbs.) in the bypass tray.
Make all other desired copier selections and enter the
desired number of copies.
8
SPECIAL FUNCTIONS Image editing functions
Press the COLOR COPY START ( ) key or BLACK
COPY START ( ) key.
9
●
To cancel the 11 x 17 FULL-BLEED function, press the “11 x 17
FULL-BLEED” key again on the IMAGE EDIT menu screen.
3-35
Page 80
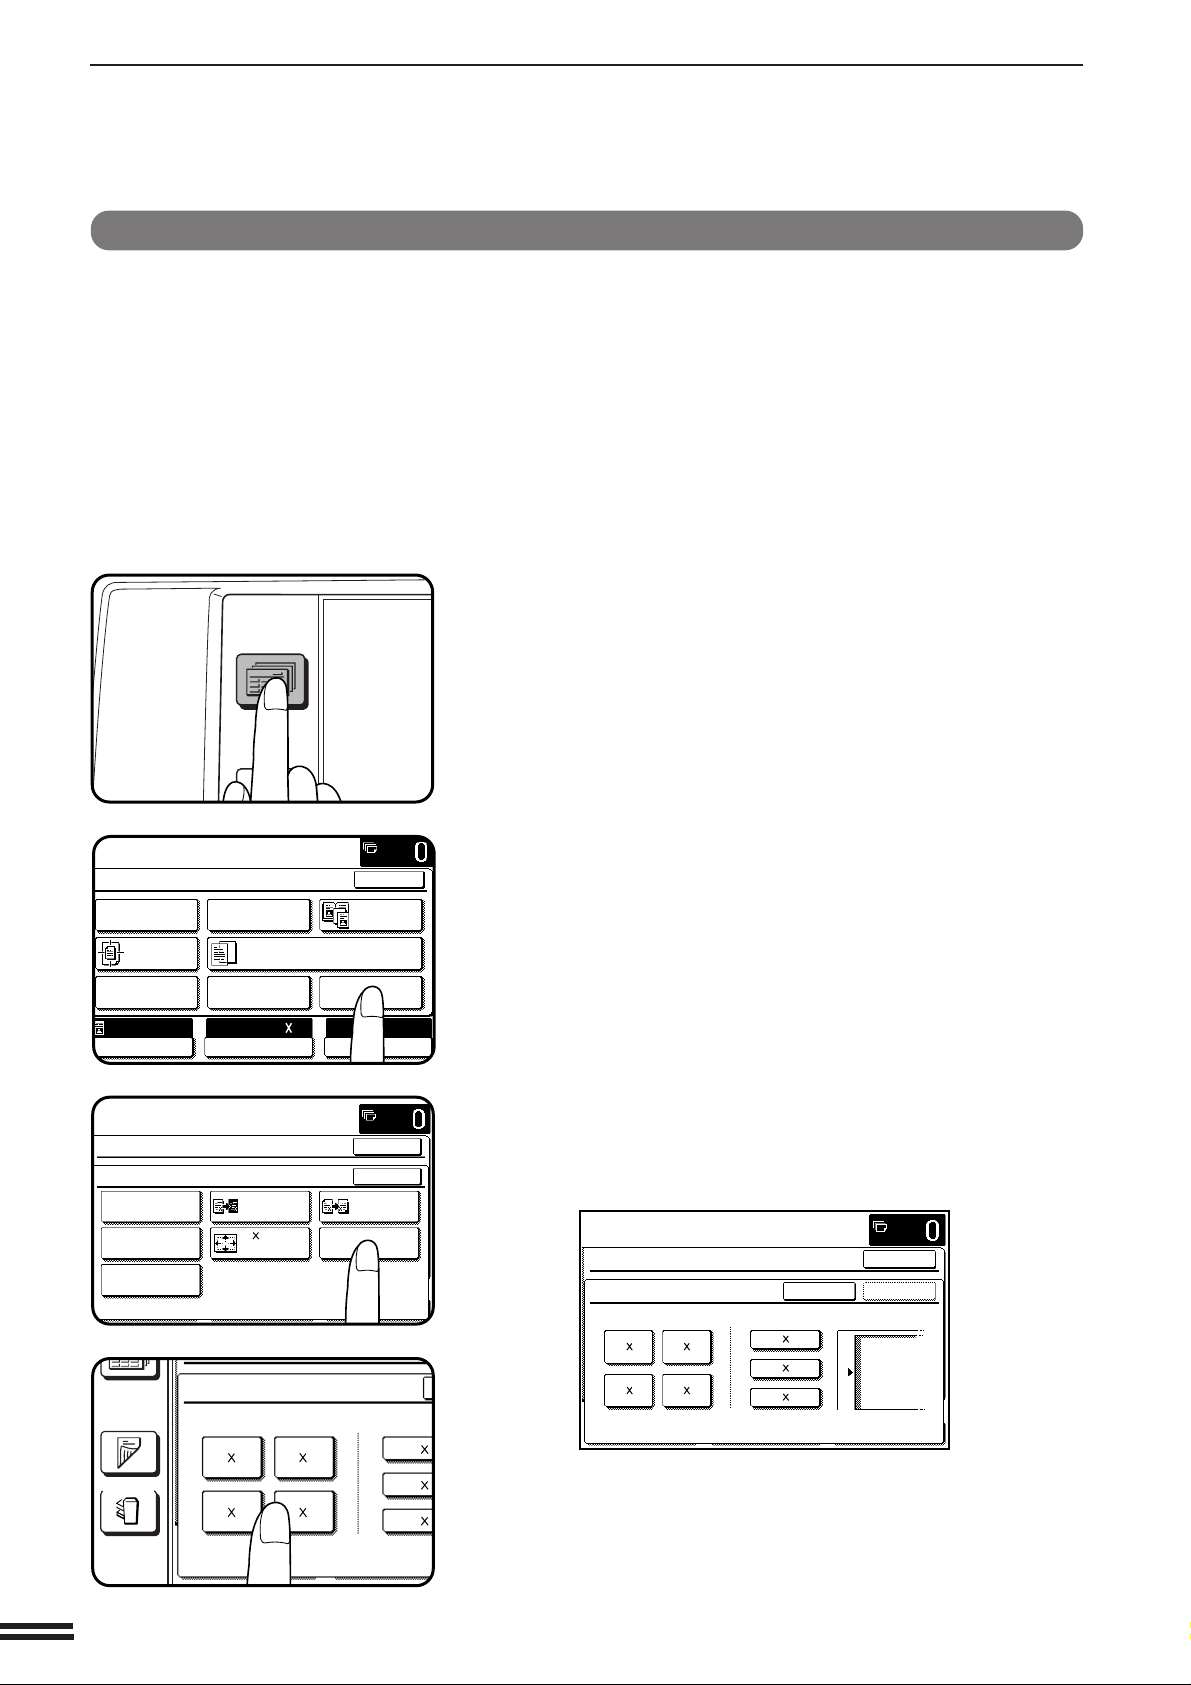
IMAGE EDITING FUNCTIONS
2-SIDED
COPY
SPECIAL
MODES
READY TO
READY TO COPY.
SPECIAL MODES
MARGIN SHIFT
ERASE
IMAGE EDITCOVERS
CENTERING
DUAL PAGE
COPY
COLOR
ADJUSTMENTS
TRANSPARENCY INSERTS
OK
AUTO
EXPOSURE PAPER SELECT
100%
COPY RATIO
8/ 11AUTO
1
2
READY TO COPY.
SPECIAL MODES
OK
OK
NEG./POS.
REVERSE
11 17
FULL-BLEED
MIRROR
IMAGE
MULTI-PAGE
ENLARGEMENT
IMAGE EDIT
SINGLE COLOR
PHOTO REPEAT
EXTRA SIZE
OUTPUT
2-SIDED
COPY
MULTI-PAGE ENLARGEMENT
ENLARGEMENT SIZE ORIGINAL
22 34
44 68
22 17
34 44
11 1
8/ 1
2
1
8/ 1
2
1
MULTI-PAGE ENLARGEMENT
CHAPTER3
This function is used to enlarge an original image to a size larger than 11"
x 17" and print divided images onto multiple sheets of copy paper.
(Refer to the samples on page 3 to see the effect on copy images in relation
to the MULTI-PAGE ENLARGEMENT.)
Press the SPECIAL MODES key.
1
●
The SPECIAL MODES screen will appear.
SPECIAL FUNCTIONS Image editing functions
Press the “IMAGE EDIT” key on the touch panel.
2
●
The IMAGE EDIT menu will appear.
Press the “MULTI-PAGE ENLARGEMENT” key on the
touch panel.
3
●
The setting screen for MULTI-PAGE ENLARGEMENT will
appear.
PLEASE SELECT ENLARGEMENT SIZE AND
ORIGINAL SIZE.
SPECIAL MODES
MULTI-PAGE ENLARGEMENT
ENLARGEMENT SIZE ORIGINAL SIZE & ORIENTATION
22 34
22 17
44 68
34 44
CANCEL
11 17
1
8/ 14
2
1
8/ 11
2
OK
OK
3-36
Select the desired enlargement size.
4
●
Select the desired size among the sizes displayed on the touch
panel.
Page 81

Select the original size.
CANCEL
OK
11 17
8/ 14
2
1
8/ 11
2
1
22 34
44 68
CANCEL
OK
OK
12
3
456
789
0
P
C
CA
CLEAR
PROGRAM
AUDIT
INTERRUPT
CLEAR
ALL
3
6
9
P
C
CA
CLEAR
PROGRAM
INTERRUPT
CLEAR
ALL
5
●
The original sizes that can be used depend on the selected
enlargement size.
●
The original orientation will be indicated depending on the
selected enlargement size and original size.
Press the upper “OK” key.
6
IMAGE EDITING FUNCTIONS
CHAPTER3
Place the original on the document glass in accordance
with the indicated orientation.
7
●
The area of the original that has been specified on the touch
panel will be scanned.
●
The optional document feeder cannot be used with this function.
Make all other desired copier selections and enter the
desired number of copies.
8
●
The paper tray will be automatically selected. If the copier has
another paper tray (including the bypass tray) that holds the
paper of the same size as the selected paper tray, the tray can
also be selected.
SPECIAL FUNCTIONS Image editing functions
Press the COLOR COPY START ( ) key or BLACK
COPY START ( ) key.
9
●
The original image will be divided and copied onto multiple
sheets of paper. Overlapped areas will be made along the
leading and trailing edges of each copy.
●
To cancel the MULTI-PAGE ENLARGEMENT function, select
the MULTI-PAGE ENLARGEMENT function again and press
the “CANCEL” key.
3-37
Page 82
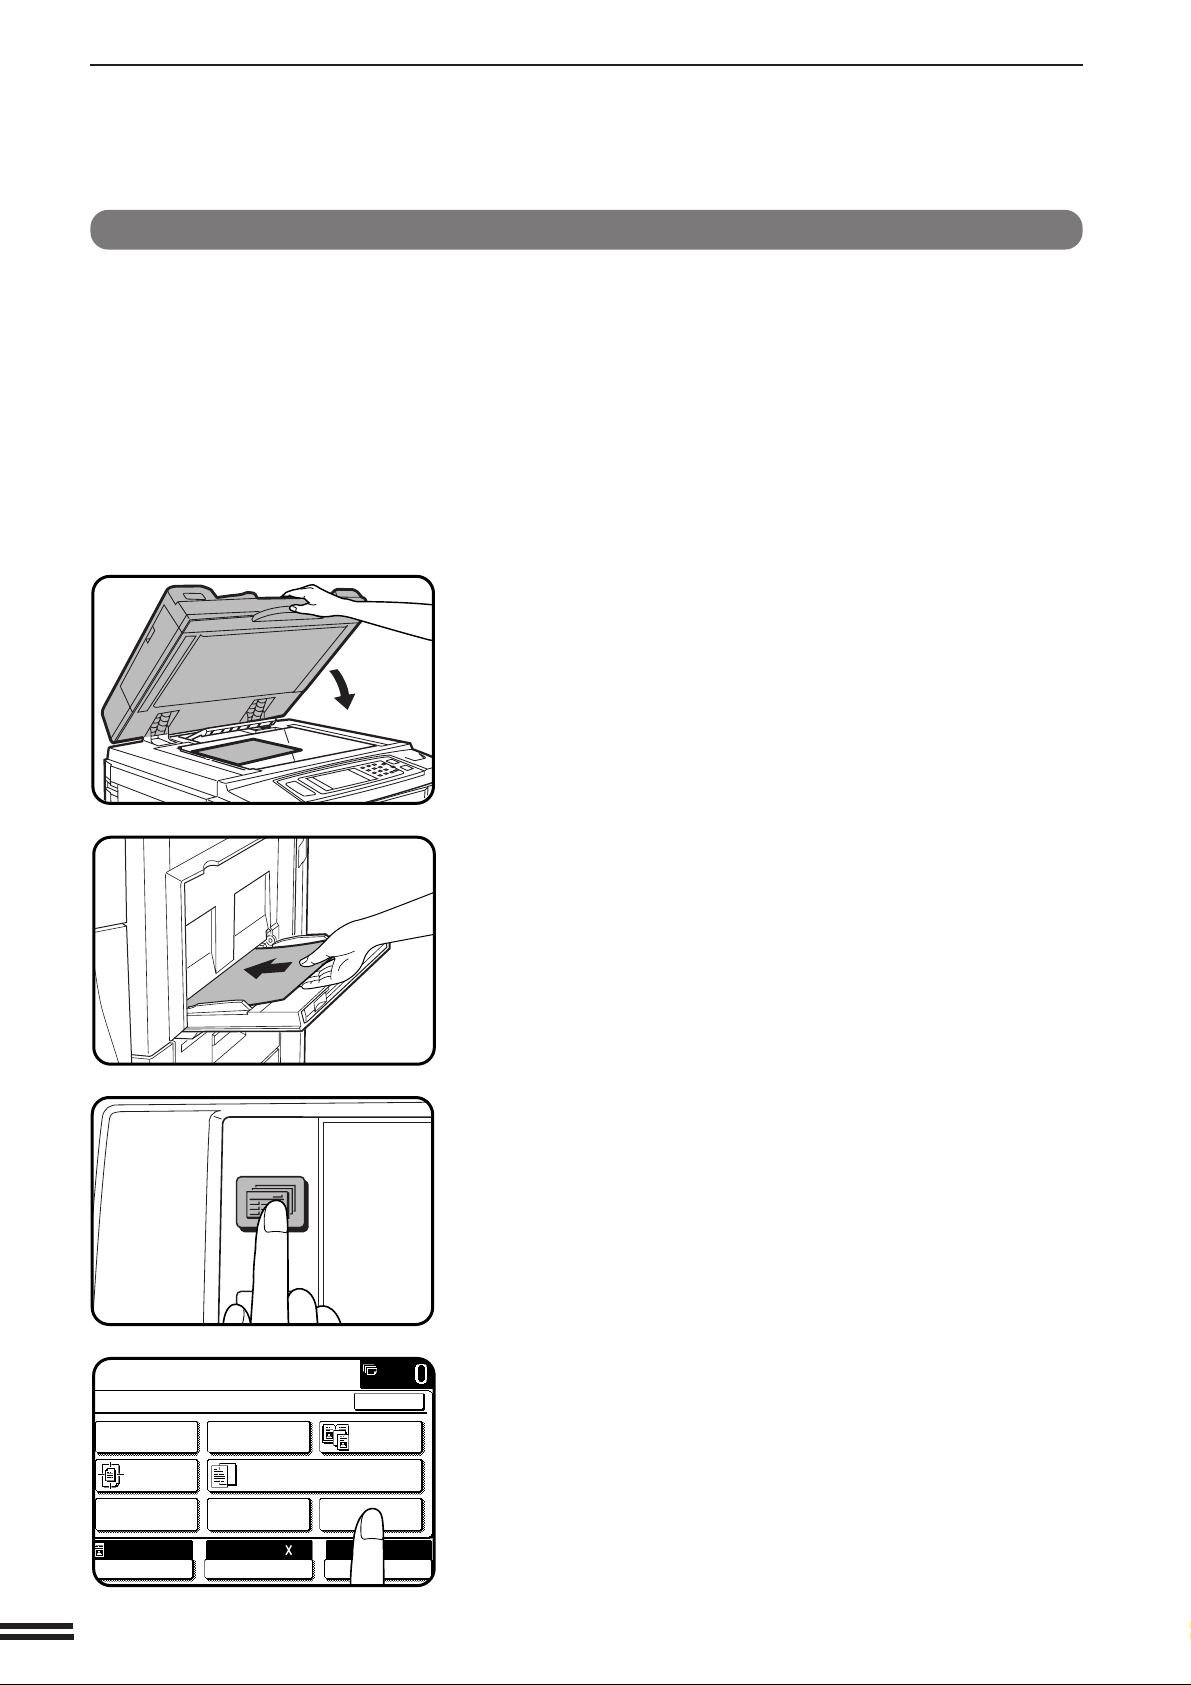
IMAGE EDITING FUNCTIONS
2-SIDED
COPY
SPECIAL
MODES
READY TO
READY TO COPY.
SPECIAL MODES
MARGIN SHIFT
ERASE
IMAGE EDITCOVERS
CENTERING
DUAL PAGE
COPY
COLOR
ADJUSTMENTS
TRANSPARENCY INSERTS
OK
AUTO
EXPOSURE PAPER SELECT
100%
COPY RATIO
8/ 11AUTO
1
2
EXTRA SIZE
CHAPTER3
SPECIAL FUNCTIONS Image editing functions
The EXTRA SIZE function provides a method for entering the dimensions
of non-standard size copy paper and non-standard size originals for the
purpose of automatic enlargement or reduction of the image for a best fit
onto the copy paper.
★ KEY OPERATOR Extra paper size setting for each individual paper tray
of the copier can be made. See page 22 of the KEY OPERATOR’S GUIDE.
Place the non-standard original on the document glass
or the non-standard copy paper into the bypass tray.
1
●
Either one or both can be set.
3-38
Press the SPECIAL MODES key.
2
●
The SPECIAL MODES screen will appear.
Press the “IMAGE EDIT” key on the touch panel.
3
●
The setting screen for IMAGE EDIT selections will appear.
Page 83
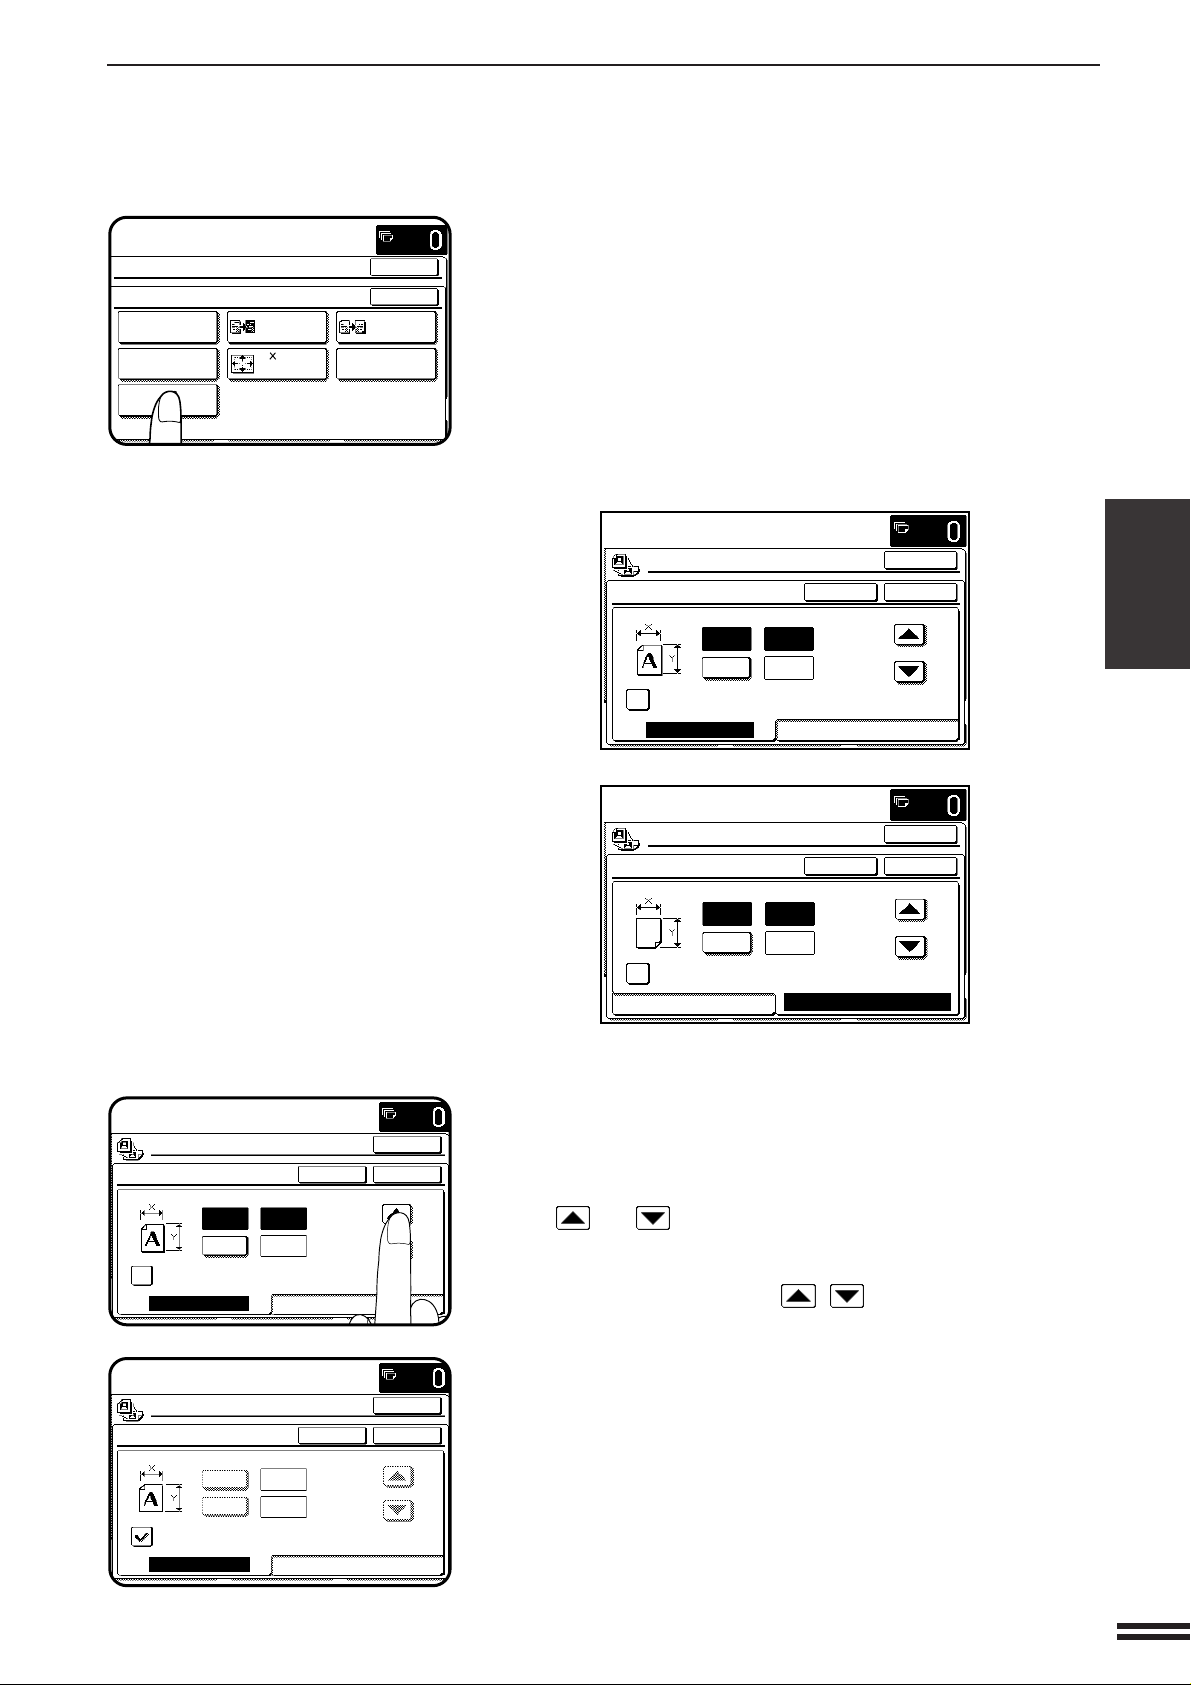
IMAGE EDITING FUNCTIONS
READY TO COPY.
SPECIAL MODES
OK
OK
NEG./POS.
REVERSE
11 17
FULL-BLEED
MIRROR
IMAGE
MULTI-PAGE
ENLARGEMENT
IMAGE EDIT
SINGLE COLOR
PHOTO REPEAT
EXTRA SIZE
4
(5 1/2~17)
inch
(4~11 3/4)
inch
Y
CANCELEXTRA SIZE
ENABLE AUTO SIZE DETECTION
PAPER SIZE FOR BYPASS
OK
OK
READY TO COPY.
X
/
12
4
1
(5 1/2~17)
inch
(4~11 3/4)
inch
Y
CANCELEXTRA SIZE
ENABLE AUTO SIZE DETECTION
PAPER SIZE FOR BYPASS
OK
OK
READY TO COPY.
X
Press the “EXTRA SIZE” key on the touch panel.
4
●
The setting screen for EXTRA SIZE will appear.
●
If an original on the document glass or paper in the bypass tray
is set on opening the EXTRA SIZE screen, the original and paper
dimensions in X (horizontal) and Y (vertical) will be shown
respectively on the ORIGINAL SIZE tab and the PAPER SIZE
FOR BYPASS tab.
As a starting point, the dimensions shown for extra size originals
or paper will be the closest match to standard sizes.
READY TO COPY.
CANCELEXTRA SIZE
(5 1/2~17)
8
5
1
/
2
inch
(4~11 3/4)
1
/
2
inch
X
Y
ENABLE AUTO SIZE DETECTION
ORIGINAL SIZE
PAPER SIZE FOR BYPASS
READY TO COPY.
CANCELEXTRA SIZE
(5 1/2~17)
8
5
1
/
2
inch
(4~11 3/4)
1
/
2
inch
X
Y
ENABLE AUTO SIZE DETECTION
ORIGINAL SIZE
PAPER SIZE FOR BYPASS
CHAPTER3
OK
OK
SPECIAL FUNCTIONS Image editing functions
OK
OK
ORIGINAL SIZE
ORIGINAL SIZE
Adjust the original size on the “ORIGINAL SIZE” tab and
paper size on the “PAPER SIZE FOR BYPASS” tab,
5
respectively.
●
Adjust each X (horizontal) and Y (vertical) dimension using the
and keys.
●
If the “ENABLE AUTO SIZE DETECTION” check box is checked
on either tab, the size detection function will be activated. In this
case, the “X/Y” keys and “ / ” keys will be grayed out not
to allow any input.
3-39
Page 84
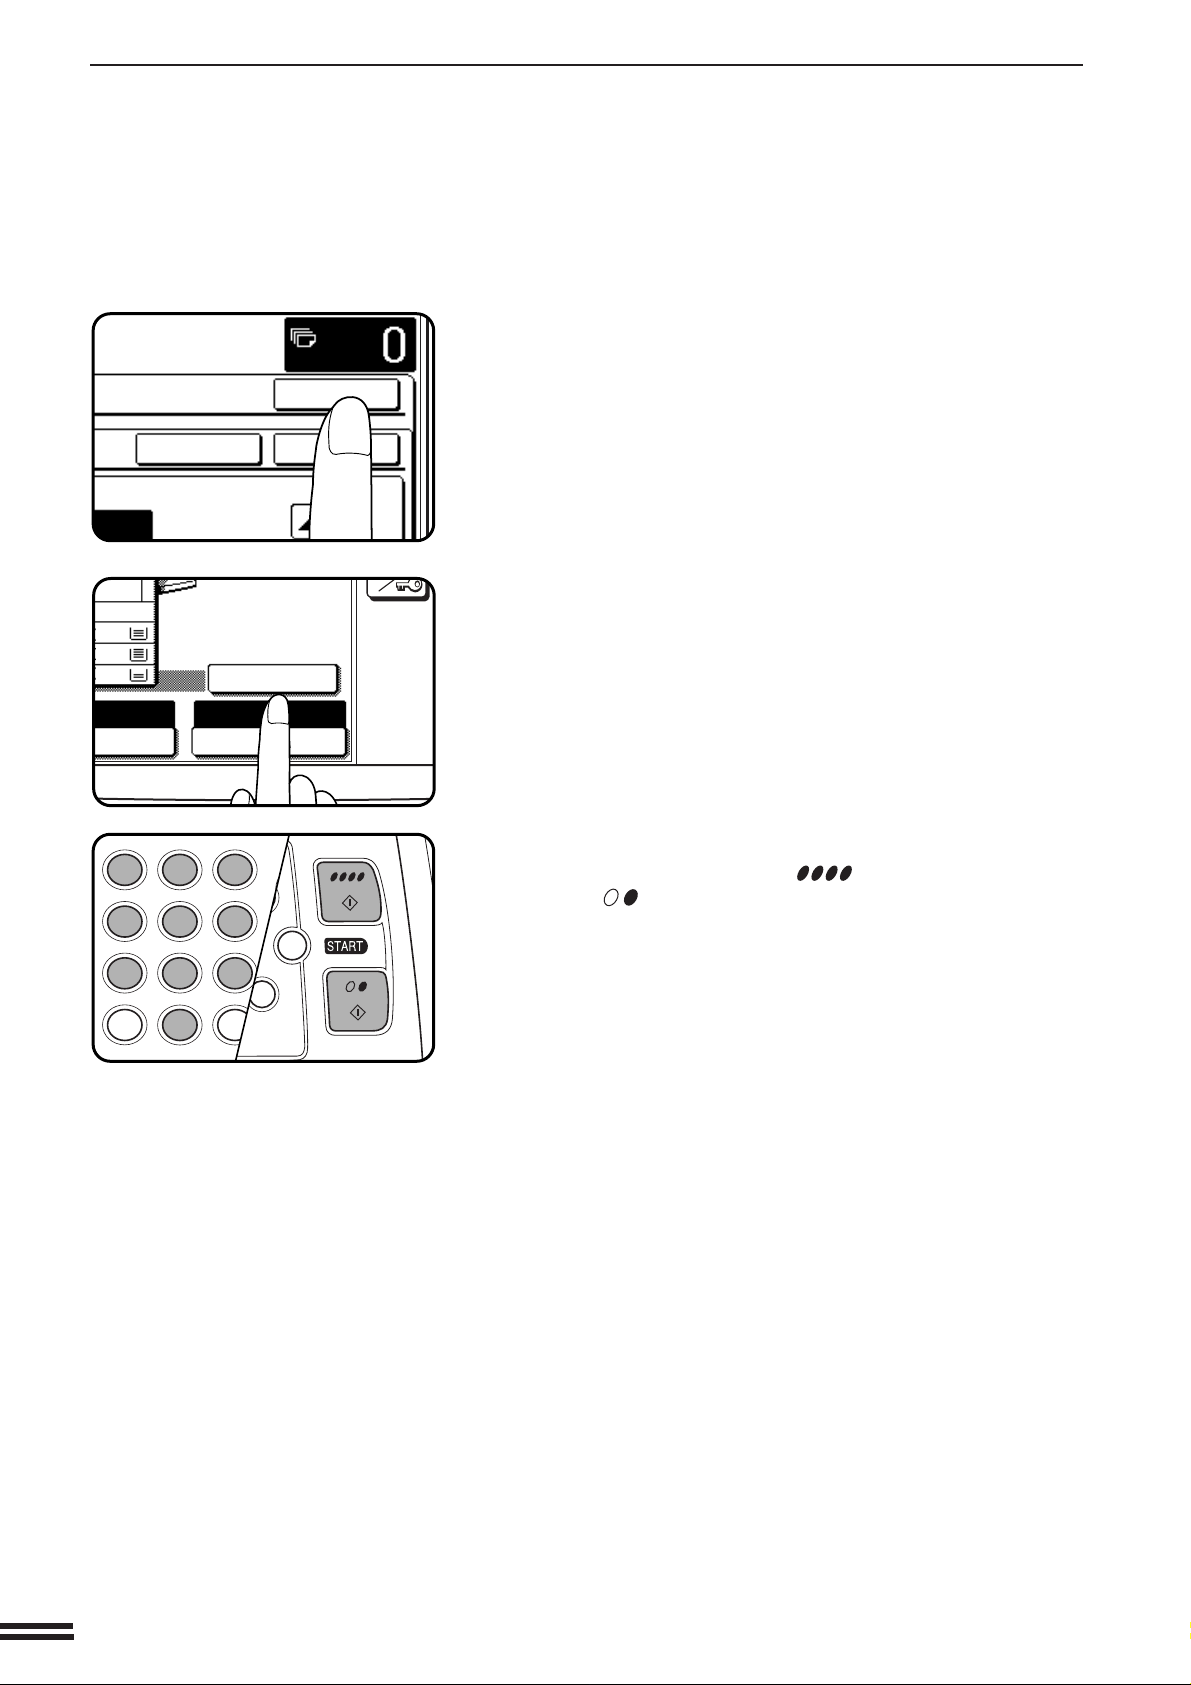
IMAGE EDITING FUNCTIONS
C
CA
CLEAR
INTERRUPT
CLEAR
ALL
12
3
456
789
0
P
C
CL
PROGRAM
AUDIT
INTE
CLE
AL
I
(5 1/2~17)
CANCEL
OK
OK
1
11
17
14
4
SELECT
100%
COPY RATIO
AUTO IMAGE
CHAPTER3
Press the upper “OK” key on the touch panel.
6
Press the “AUTO IMAGE” key on the touch panel.
7
●
Refer to page 2-11 for the AUTO IMAGE function.
SPECIAL FUNCTIONS Image editing functions
Enter the desired number of copies and press either of
the COLOR COPY START ( ) key or BLACK COPY
8
START ( ) key.
3-40
Page 85

CHAPTER 4
SUPPLIES
This chapter describes the supplies for this copier such as paper and
toner.
Page
●●
●
●●
PAPER . . . . . . . . . . . . . . . . . . . . . . . . . . . . . . . . . . . . . . . . . . . . . 4-2
Types and sizes of copy paper . . . . . . . . . . . . . . . . . . . . . . . . . . . 4-2
Loading copy paper . . . . . . . . . . . . . . . . . . . . . . . . . . . . . . . . . . . 4-2
●●
●
●●
ADDING TONER . . . . . . . . . . . . . . . . . . . . . . . . . . . . . . . . . . . . . 4-5
●●
●
●●
USED TONER DISPOSAL . . . . . . . . . . . . . . . . . . . . . . . . . . . . . . 4-8
●●
●
●●
STORAGE OF SUPPLIES . . . . . . . . . . . . . . . . . . . . . . . . . . . . . . 4-9
CHAPTER4
4-1
Page 86

CHAPTER4
PAPER
Types and sizes of copy paper
Size Weight Capacity Special paper
(20 lb. bond paper)
Paper trays 5-1/2" x 8-1/2" 16 lbs. to 28 lbs. 500 sheets
to 11" x 17"
Bypass tray 5-1/2" x 8-1/2" 16 lbs. to 75 lbs. 50 sheets Transparency film, cover stock
to 12" x 18" (Ordinary paper) (104 lbs.), index stock (155 lbs.)
●
For best results, use only paper recommended by SHARP.
SUPPLIES Paper
Loading copy paper
“OPEN TRAY AND ADD PAPER.” will be displayed when there is
no copy paper in a selected paper feed station.
When a selected paper tray is not installed or is improperly installed,
“PUSH PAPER TRAY INTO MACHINE UNTIL IT LATCHES.”
will be displayed. Install it or push it back firmly into place.
For best results, use only Sharp recommended paper.
4-2
Page 87
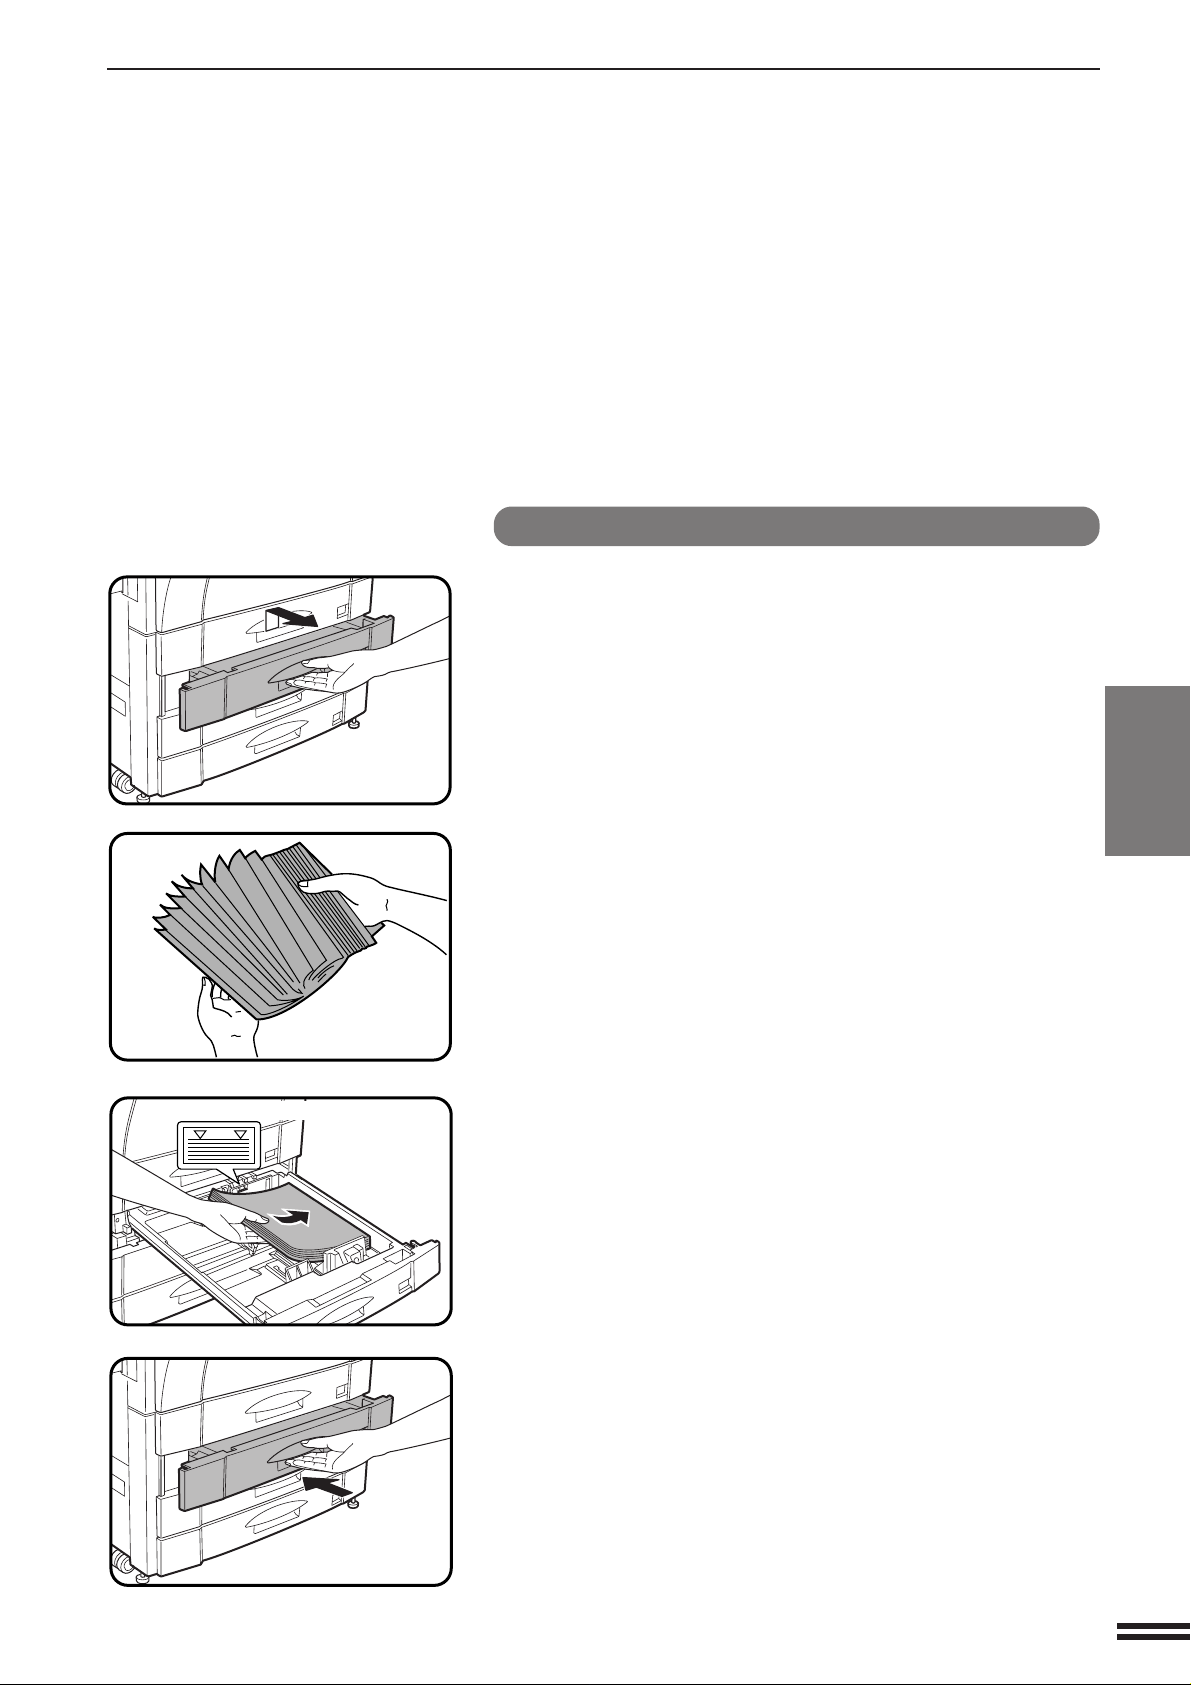
Loading paper in the paper trays
Gently lift and pull out the paper tray.
1
PAPER
Maximum height line
Fan the copy paper and insert it into the tray.
2
●
The tray holds 500 sheets of 20 lb. bond paper.
Do not load paper above the maximum height line.
CHAPTER4
SUPPLIES Paper
Push the paper tray firmly back into the copier.
3
4-3
Page 88
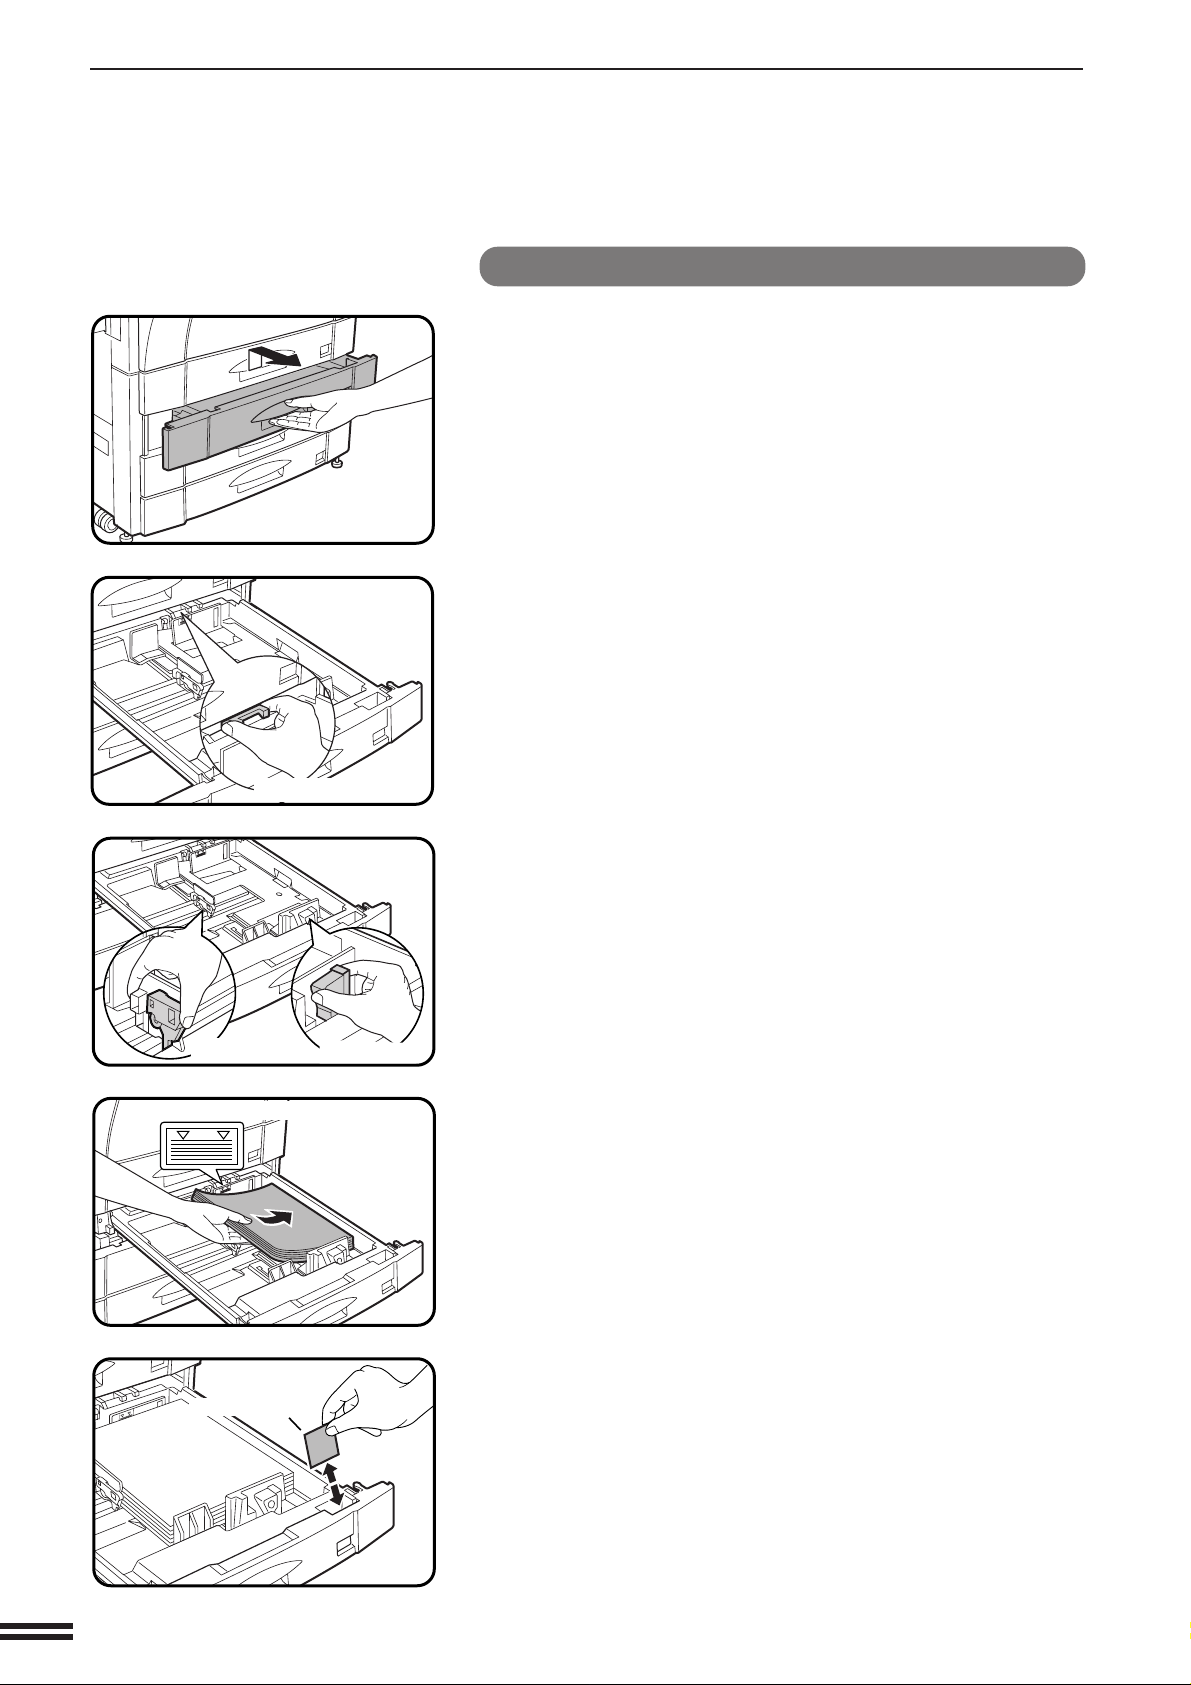
PAPER
Changing the copy paper size in the tray
Gently lift and pull out the paper tray until it stops.
1
Adjust the paper size indicator to match the paper size
to be set.
2
●
Slide the paper size indicator to the right or left to match the paper
size.
CHAPTER4
SUPPLIES Paper
Paper size indicator
Left guide
Maximum height line
Front guide
Adjust the front guide and left guide while squeezing
their lock levers.
3
●
Slide the front and left guides to match the width and length of the
copy paper.
Load copy paper into the tray.
4
4-4
Paper size card
Place the paper size card in the front of the paper tray.
5
●
The paper size card has three faces. Fold the card properly to
show the selected paper size. The paper size indication which
shows through the slot on the front of the copier should match the
selected paper size.
Push the paper tray firmly back into the copier.
6
Page 89
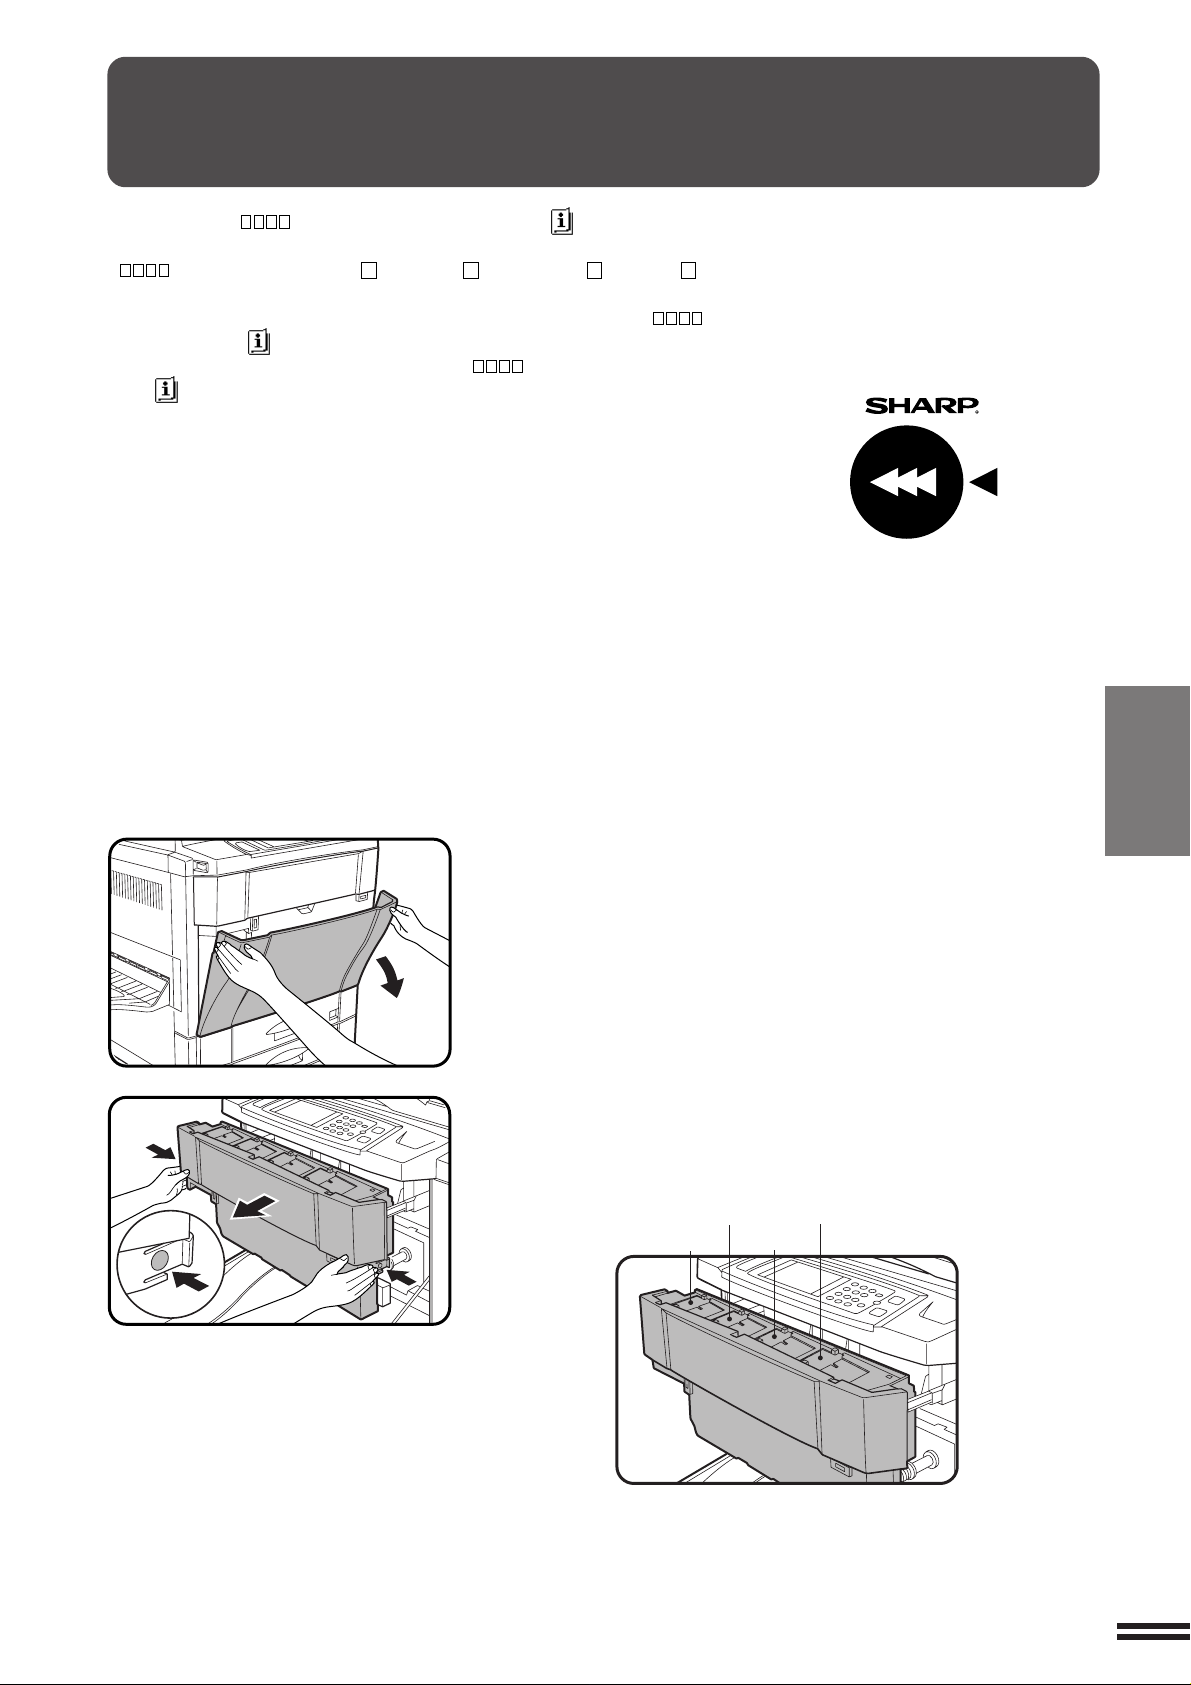
ADDING TONER
The message “ TONER SUPPLY IS LOW. ” will appear in
the message display before the toner supply is completely empty.
( indicate toner types. Y : yellow, M : magenta, C : cyan, BK:
black) If copying is continued, copies will gradually become lighter until
the copier stops and the message display changes to “ADD
TONER.PRESS .” indicating that the toner supply is empty. Toner
can be added any time after the message “ TONER SUPPLY IS
LOW. ” appears. To add toner, stop the copier and proceed as below.
When either message appears, you can use the INFORMATION key
for detailed information as necessary.
If any color toner supply is empty, color copying cannot be performed.
However, black/white copying can be performed unless the black
toner supply is empty.
During long copy runs of multiple originals containing many images
and/or dark shades, “TONER REPLENISHMENT IN PROGRESS.” may
appear and the copier may stop making copies even though toner is
left.
The copier will automatically cycle and replenish the toner to the
normal level and then the START key indicator will light up. Press the
START key to resume copying.
For best copying results, be sure to use
only Sharp Genuine Supplies which are
designed, engineered, and tested to
maximize the life and performance of
Sharp copiers.
Look for the Genuine Supplies label on
the toner package.
GENUINE SUPPLIES
CHAPTER4
Open the front cover.
1
Push the lock release buttons on both sides of the toner
box and pull the toner box out slowly until it stops.
2
●
The toner hoppers are located as below.
Magenta
Yellow
Black
Cyan
SUPPLIES Adding toner
4-5
Page 90

ADDING TONER
5 x
20 x
Tap on the top of the new toner cartridge 5 times. Then
hold the toner cartridge horizontally and vigorously
3
shake it about 20 times. This will loosen the toner and
allow it to flow more easily into the toner hopper.
CHAPTER4
SUPPLIES Adding toner
CAUTION
Be sure to perform these steps. If not, toner may not flow easily into
the toner hopper.
Place the new toner cartridge with the protrusions into
the notches of the relevant toner hopper as shown.
4
●
The left example shows the toner hopper of black toner.
Slide the toner cartridge along the guides over the toner
hopper.
5
Sealing tape
4-6
Hold the toner cartridge with one hand while pulling on
the sealing tape to remove it.
6
●
It will take about 40 seconds for the cartridge to empty.
Page 91

ADDING T ONER
Tap on the top of the toner cartridge to ensure that the
cartridge completely empties.
7
8
9
10
CAUTION
Be sure to perform this step. If not, some toner may be scattered
when the cartridge is removed.
Slide the empty toner cartridge back along the guides
and remove it.
●
The cartridge opening will be closed as it is moved back along
the guides.
Push the toner box back into the copier.
Close the front cover.
NOTE:
Add only one cartridge of the color toner indicated as being low or
empty.
CHAPTER4
SUPPLIES Adding toner
4-7
Page 92

USED TONER DISPOSAL
“REPLACE USED TONER CONTAINER. PRESS FOR GUIDANCE.”
will appear when the toner collecting container is full.
The copier will stop and will not operate until a new container has been
installed. Replace the toner collecting container as described below.
When the above message is displayed, you can use the INFORMATION
key for detailed information as necessary.
Open the toner collecting container cover.
1
●
Push once on the door to unlatch and open it.
CHAPTER4
SUPPLIES Used toner disposal
New container Removed container
Disengage and remove the container from the copier.
2
●
Toner cannot be reused. Do not transfer used toner to the toner
hopper.
●
Remove the cap from a new toner collecting container and use
it to cover the full toner collecting container.
●
Keep the full toner collecting container until the next regular
service call. Your authorized Sharp Service Technician will
collect the container for disposal.
Install a new toner collecting container until it clicks into
place.
3
4-8
Close the toner collecting container cover.
4
Page 93

STORAGE OF SUPPLIES
The supplies of this copier replaced by the user include copy paper,
toner, toner collecting container, and staple cartridges for the optional
staple sorter (AR-SS2) and the finisher (AR-FN4).
Photoconductive drum
The AR-C160 Copier has advanced process control technology
which improves copy quality uniformity. This feature stabilizes copy
quality throughout the life of the photoconductive drum by automatically
compensating for the changes in drum characteristics due to wear,
operator use patterns, and environmental conditions. The automatic
adjustments are made in response to a sensor that detects the
reflectance characteristics of the drum.
For best copying results, be sure to use
only Sharp Genuine Supplies which are
designed, engineered, and tested to
maximize the life and performance of
Sharp copiers. Look for the Genuine
Supplies label on the toner package.
GENUINE SUPPLIES
CHAPTER4
WARNING
This feature requires drums containing the special reflectance area
(recommended Sharp genuine photoconductive drum), to prevent
low image density copies from poor process control and possible
damage to the machine. If you use other drums, the process control
system cannot run properly.
Proper storage
Store the supplies in a location that is:
1
●
clean and dry,
●
at a stable temperature,
●
not exposed to direct sunlight.
Store copy paper in the wrapper and lying flat.
2
●
Paper stored in packages standing up or out of the wrapper may
curl or become damp, resulting in paper misfeeds.
SUPPLIES Storage of supplies
4-9
Page 94

Page 95

CHAPTER 5
COPIER TROUBLE?
This chapter describes how to remove misfed originals and paper and
other common trouble remedies.
Page
●●
●
●●
MISFEED REMO VAL . . . . . . . . . . . . . . . . . . . . . . . . . . . . . . . . . . 5-2
●●
●
●●
MAINTENANCE REQUIRED . . . . . . . . . . . . . . . . . . . . . . . . . . . 5-11
●●
●
●●
TONER COLLECTING CONTAINER OF TRANSFER UNIT . . . 5-12
●●
●
●●
TROUBLESHOOTING . . . . . . . . . . . . . . . . . . . . . . . . . . . . . . . . 5-13
CHAPTER5
5-1
Page 96
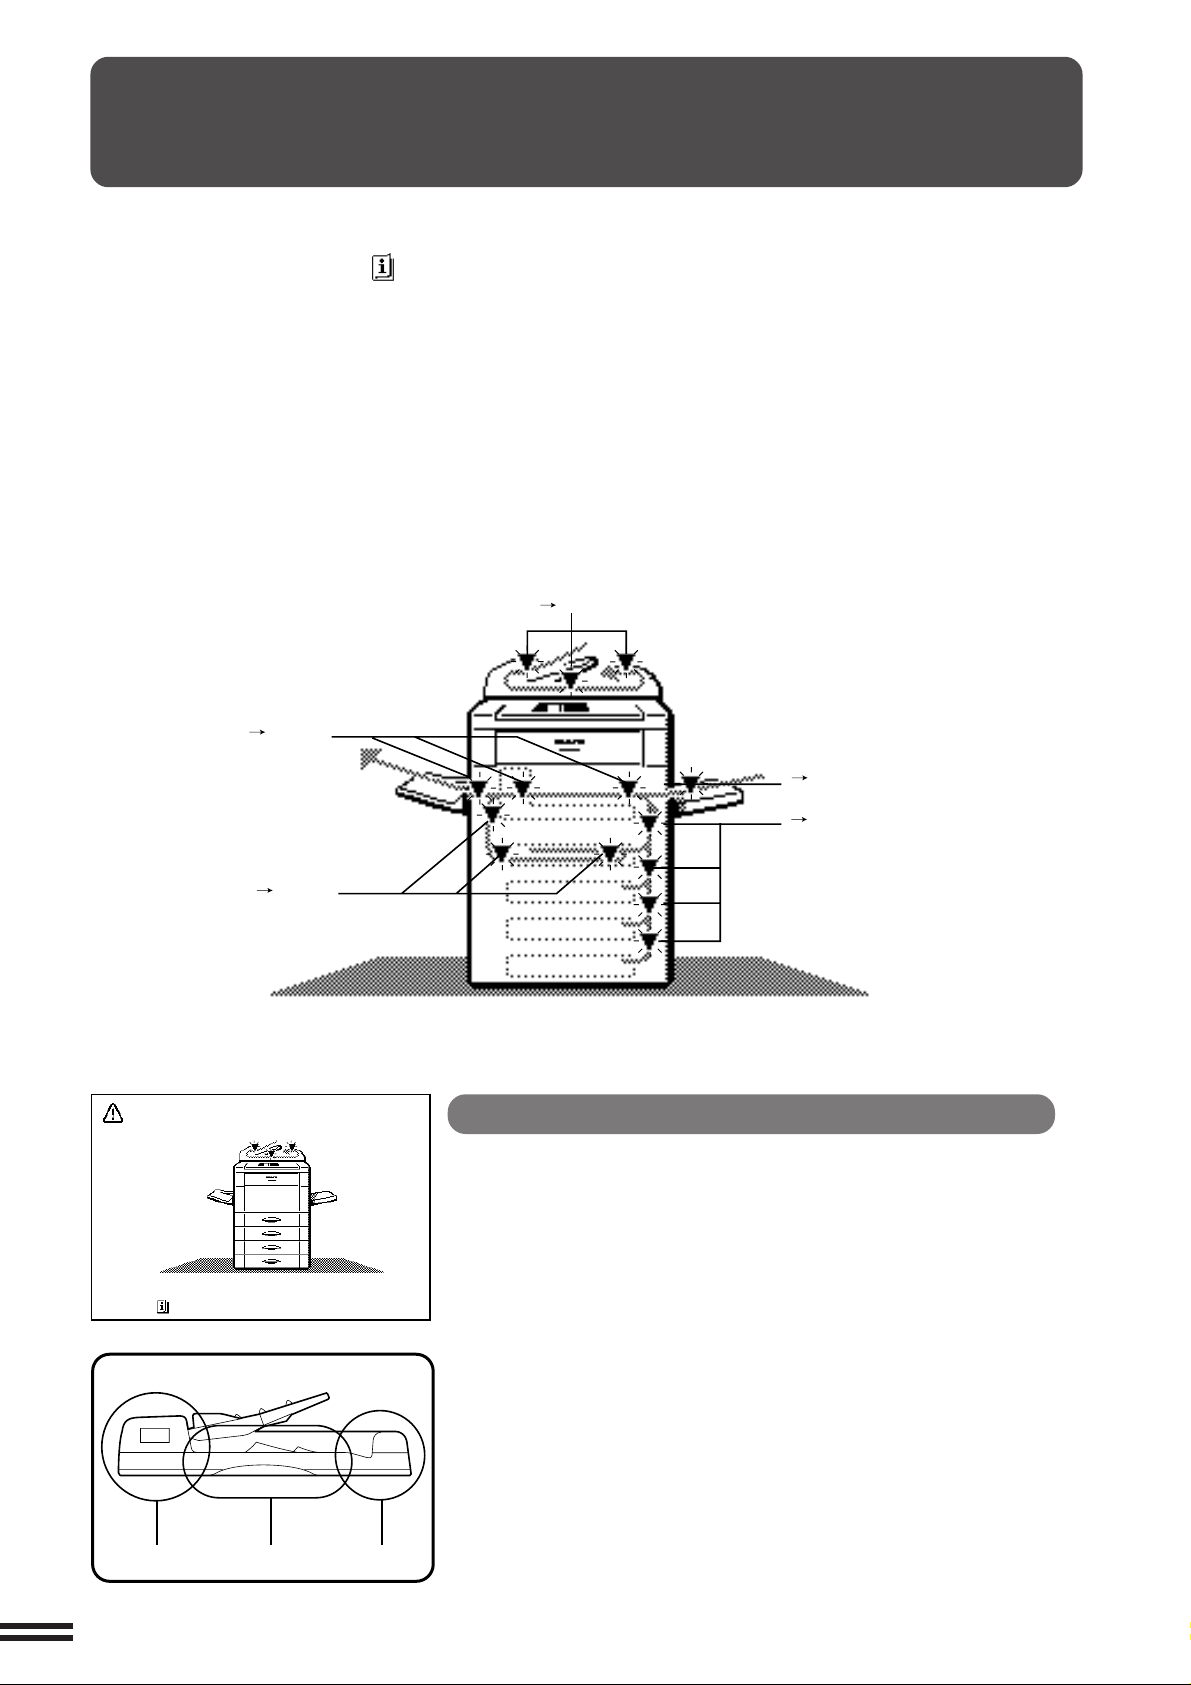
MISFEED REMOVAL
When a misfeed occurs, the copier will stop.
The message “MISFEED HAS OCCURRED. CLEAR
INDICATED AREA. PRESS FOR RECOVERY
INSTRUCTIONS.” will appear with a display of paper
misfeed locations. Press the INFORMATION key for
more detailed information as necessary.
First confirm the misfeed locations.
For misfeeds in an optional staple sorter, see page 7-13.
For misfeeds in an optional large capacity tray, see page
7-17.
For misfeeds in an optional finisher, see page 7-26.
( P. 5-2)
( P. 5-6)
If paper becomes accidentally torn during removal, be
sure to remove all pieces. Be careful not to damage the
photoconductive drum or the corona wires.
( P. 5-3)
CHAPTER5
COPIER TROUBLE? Misfeed removal
MISFEED HAS OCCURRED.
CLEAR INDICATED AREA.
PRESS FOR RECOVERY INSTRUCTIONS.
( P. 5-5)
( P. 5-9)
Misfeed in the optional RADF
When the optional RADF misfeeds an original sheet, the copier will
stop and the misfeed message will appear.
An original misfeed may occur at one of three locations:
(A) in the RADF feed section, (B) in the exit roller, or (C)
under the transport belt.
5-2
ABC
Page 97

MISFEED REMOVAL
Feeding roller cover
Exit roller cover
(A) Open the feeding roller cover and pull the original gently
to the right and out from the document feeder tray.
●
Be sure to open and close the document feeder cover to cancel
the misfeed display.
(B) Open the exit roller cover and gently pull the original
out.
●
Be sure to open and close the document feeder cover to cancel
the misfeed display.
(C) Open the feeding roller cover and the document feeder
cover, and remove the original.
CHAPTER5
MISFEED HAS OCCURRED.
CLEAR INDICATED AREA.
PRESS FOR RECOVERY INSTRUCTIONS.
NOTE:
After misfed originals are removed from locations A, B and/or C, a
message may appear indicating the number of originals which must
be returned to the document feeder tray. Return the originals and
press the START key to resume copying.
Misfeed in the bypass tray
Open the front cover.
1
COPIER TROUBLE? Misfeed removal
5-3
Page 98
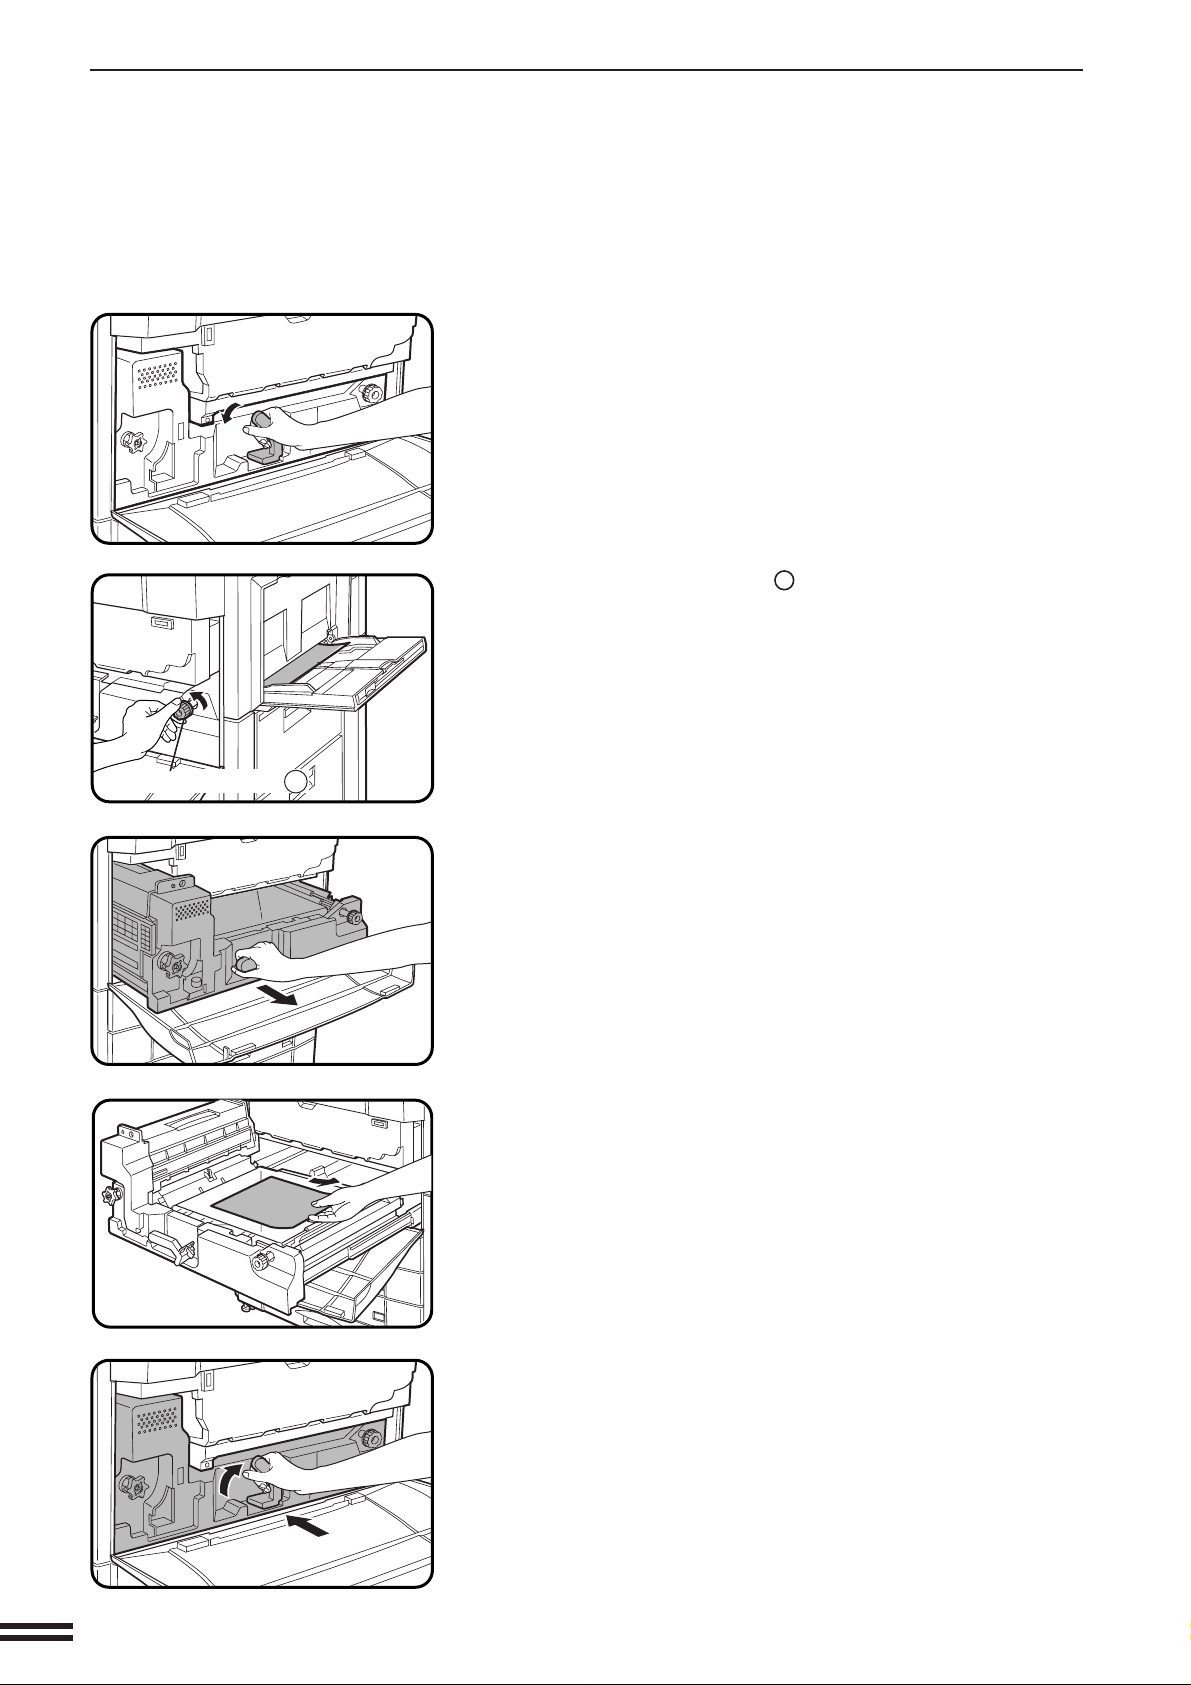
MISFEED REMOVAL
Turn the transport lever to the left.
2
●
Do not pull out the paper transport in this step.
Turn roller rotating knob A in the direction of the arrow
to feed the misfed paper into the copier.
3
●
Do not pull the misfed paper out through the bypass tray because
unfixed toner may soil the inside of the copier.
Roller rotating knob A
CHAPTER5
COPIER TROUBLE? Misfeed removal
Pull out the paper transport.
4
Remove the misfed paper.
5
5-4
Push the paper transport back securely into the copier
and turn the transport lever back.
6
Page 99
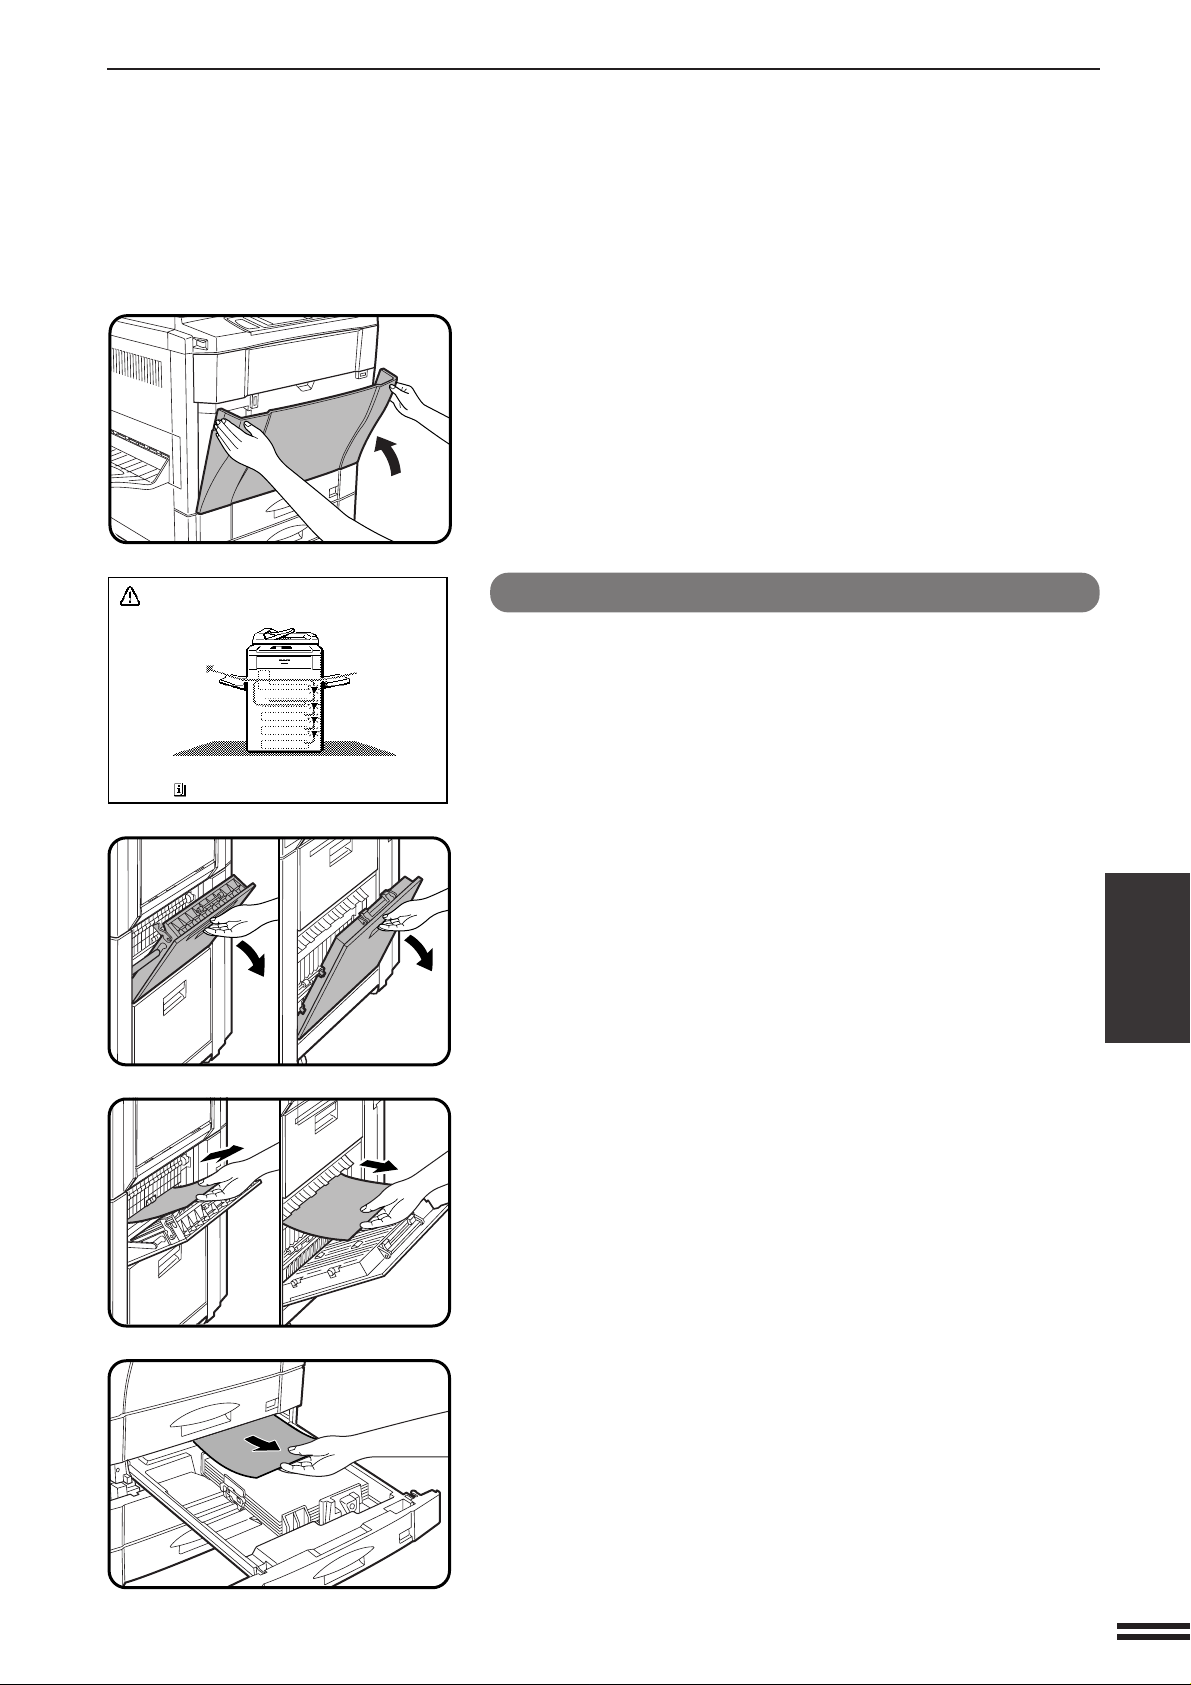
Close the front cover.
7
MISFEED REMOVAL
MISFEED HAS OCCURRED.
CLEAR INDICATED AREA.
PRESS FOR RECOVERY INSTRUCTIONS.
Misfeed in the paper trays
Open the right side covers.
1
●
Grasp the handle and gently open the cover.
Remove the misfed paper.
2
●
Be careful not to tear the misfed paper during removal.
CHAPTER5
COPIER TROUBLE? Misfeed removal
If the paper cannot be seen from the side, pull out the
paper tray which was in use and remove the misfed
3
paper.
●
Be careful not to tear the misfed paper during removal.
5-5
Page 100

MISFEED REMOVAL
Close the paper tray and the side covers.
4
●
Confirm that the misfeed display is cleared.
MISFEED HAS OCCURRED.
CLEAR INDICATED AREA.
PRESS FOR RECOVERY INSTRUCTIONS.
CHAPTER5
COPIER TROUBLE? Misfeed removal
Misfeed in the transport area, exit area and
fusing area
Open the front cover.
1
Turn the transport lever to the left.
2
●
Do not pull out the paper transport in this step.
5-6
Roller rotating knob B
Check to see if any paper is misfed in the exit area.
3
●
If any paper is misfed, turn roller rotating knob B in the direction
of the arrow to remove the misfed paper.
NOTE:
Be sure to turn roller rotating knob B only in the direction of the
arrow. If the knob is turned in the opposite direction, the copier may
malfunction.
 Loading...