

Page 1

MODEL
AR-C160
DIGITAL FULL COLOR
DIGITAL FULL COLOR
COPYING MACHINE
COPYING MACHINE
KEY OPERATOR,S GUIDEKEY OPERATOR,S GUIDE
• KEY OPERATOR CODE
• KEY OPERATOR CODE
NUMBER
NUMBER
• KEY OPERATOR
• KEY OPERATOR
PROGRAMS
PROGRAMS
• KEY OPERATOR
• KEY OPERATOR
ASSISTANCE CALL
ASSISTANCE CALL
Page
Page
2
2
4
4
35
33
DigitalDigital
Page 2

Page 3

This KEY OPERATOR’S GUIDE contains information on all of
the programs for use by the key operator. The programs allow
the key operator to tailor many functions of the AR-C160 for
specific modes of operation. These programs can only be
accessed after a key operator code number has been entered.
Please familiarize yourself with this entire guide. Keep it handy,
and refer to it for the information you need to keep the copier
operating smoothly.
CONTENTS
Page
●
KEY OPERATOR CODE NUMBER . . . . . . . . . . . . . . 2
Registering the key operator code number . . . . . . . . . 2
●
KEY OPERATOR PROGRAMS . . . . . . . . . . . . . . . . . 4
Using the key operator programs . . . . . . . . . . . . . . . . 7
●
KEY OPERATOR ASSISTANCE CALL . . . . . . . . . . 35
1
Page 4

KEY OPERATOR CODE NUMBER
1
4
7
CUSTOM
SETTINGS
1
2
CUSTOM SETTINGS
AUTO
EXPOSURE PAPER SELECT
100%
COPY RATIO
8/ 11AUTO
EXIT
DISPLAY
CONTRAST
KEY OPERATOR
PROGRAMS
KEY OPERATOR PROGRAMS
EXIT
TOTAL COUNT
PROGRAM LIST
PRINTOUT
COPIER
KEY OPERATOR PROGRAMS
COPIER MODE
OTHER FUNCTION
SETTINGS
ENABLE/DISABLE
SETTINGS
TIMER SETTINGS
ACCOUNT CONTROL
AUTO COLOR CALIBRATION
OK
456
789
0
P
C
CLEAR
PROGRAM
AUDIT
CLEAR
ALL
A key operator code number must be registered before a key operator
program can be used. The key operator must remember this number. Only
this registered number will allow access to the key operator programs.
Registering the key operator code number
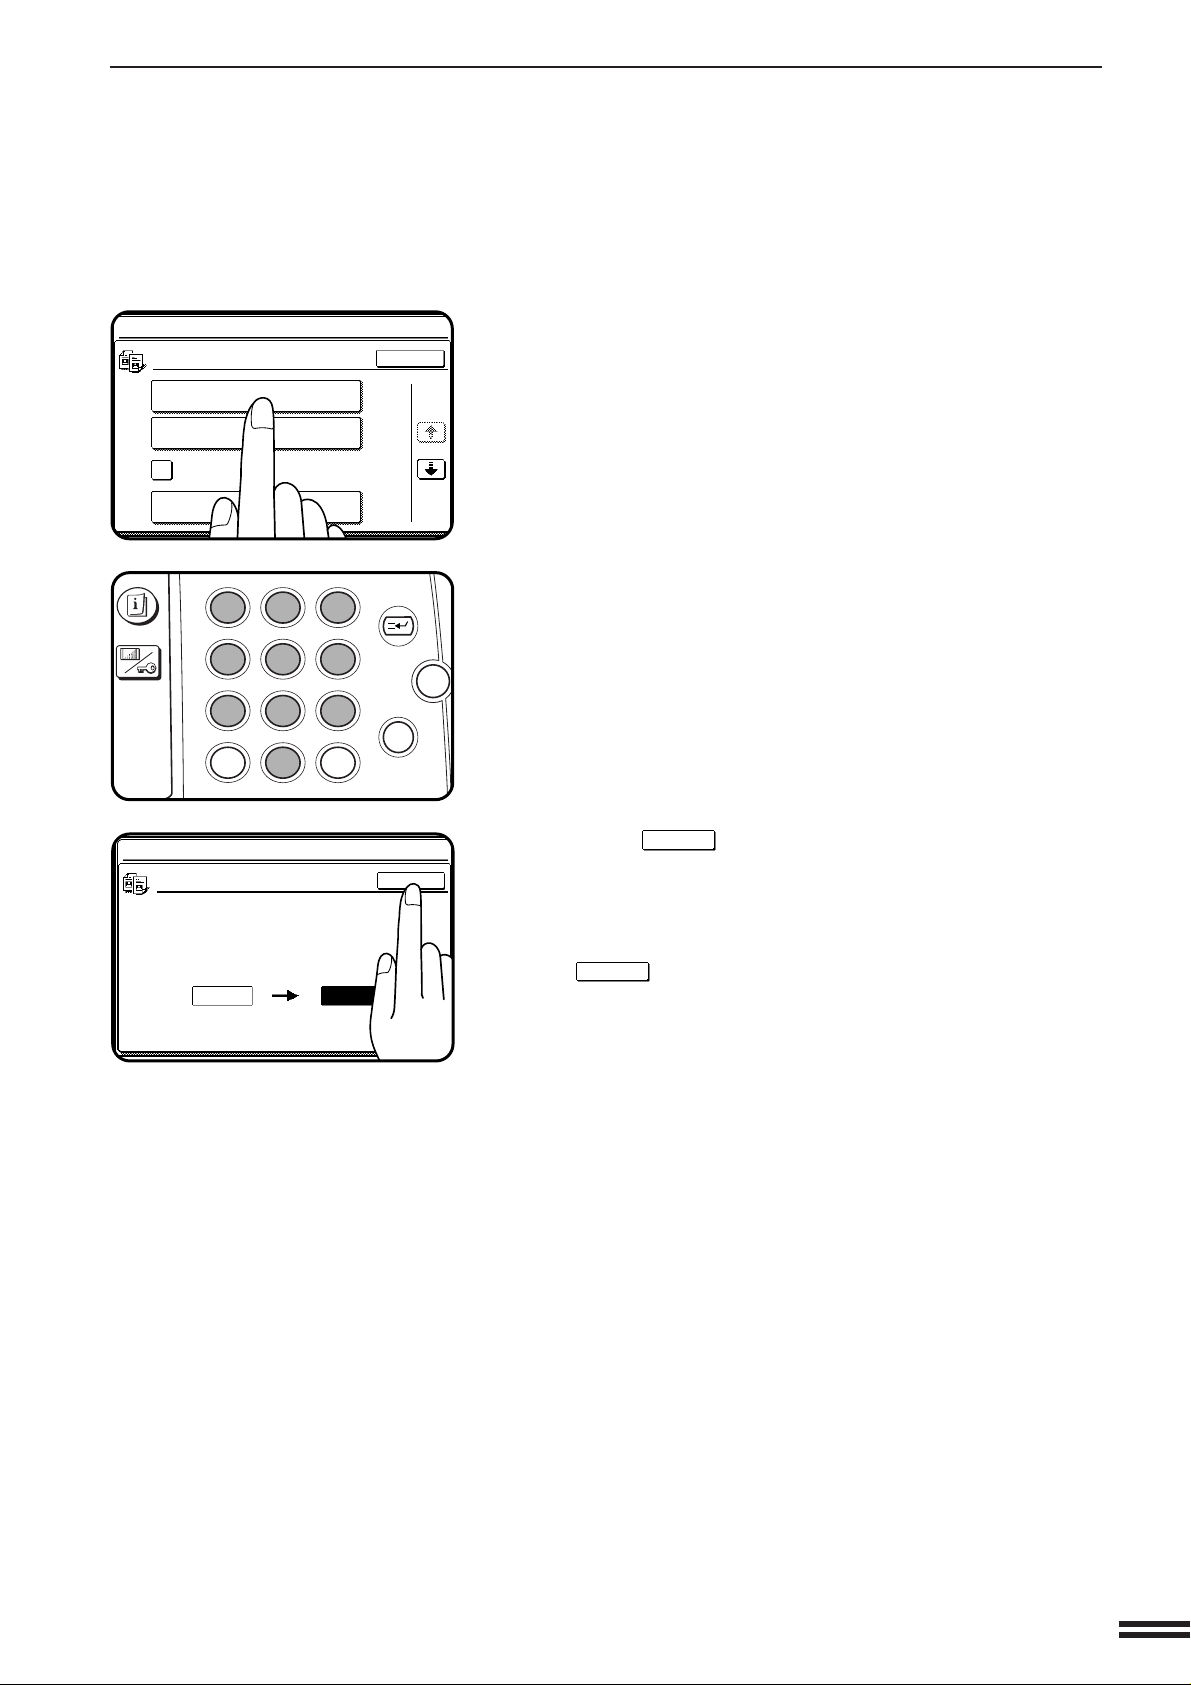
Press the CUSTOM SETTINGS key.
1
Press the “KEY OPERATOR PROGRAMS” key on the
touch panel.
2
●
The following display will appear.
KEY OPERATOR PROGRAMS
ENTER KEY OPERATOR CODE.
KEY OPERATOR CODE
-----
Enter 0 five times using the 10-key pad.
3
●
As each 0 is entered, the dashes in the display will change to
asterisks.
Press the “COPIER” key on the touch panel.
4
EXIT
2
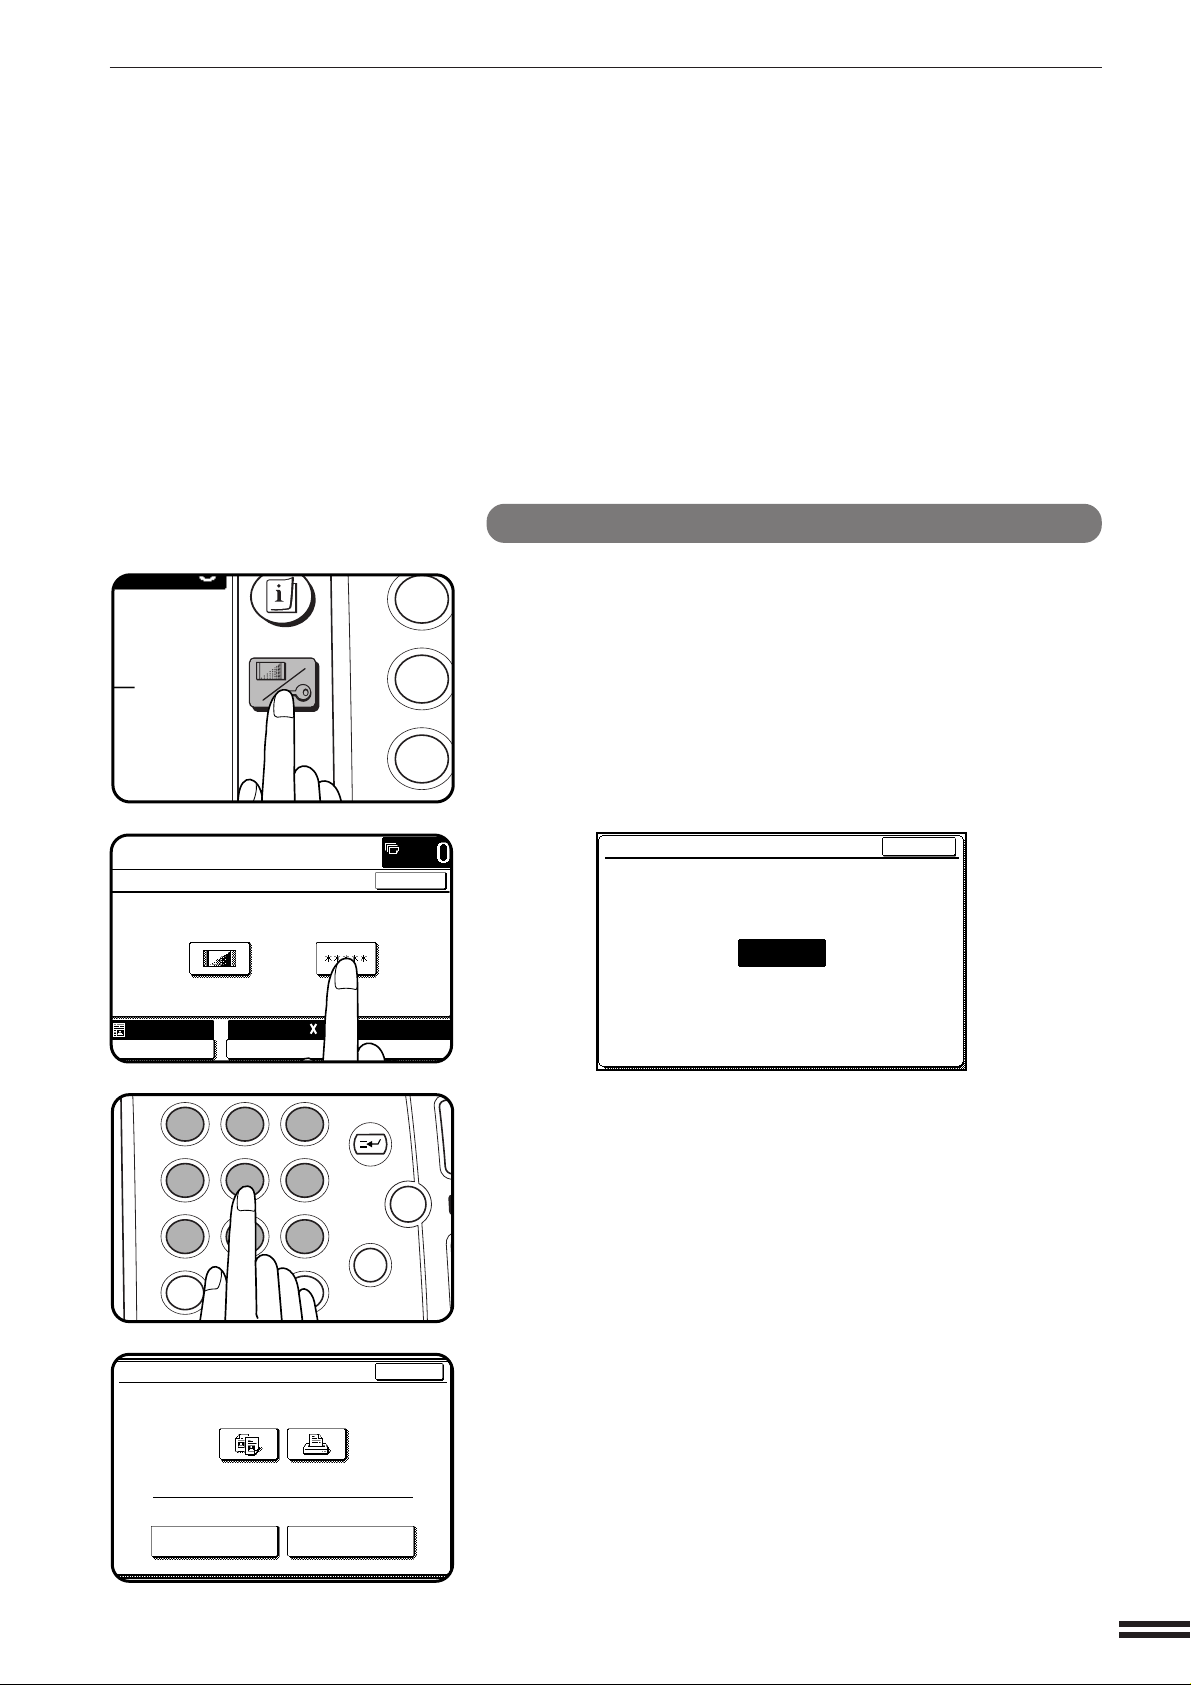
Press the “OTHER FUNCTION SETTINGS” key.
5
Page 5
KEY OPERATOR CODE NUMBER
KEY OPERATOR PROGRAMS
OTHER FUNCTION SETTINGS
KEY OPERATOR CODE NUMBER
CHANGE
EXPOSURE ADJUSTMENT
ADD OR CHANGE EXTRA PRESET
RATIOS
TONER SAVE MODE(B/W)
R:2
E:0
C:3.5
B:3.5
1/4
OK
KEY OPERATOR PROGRAMS
INPUT A NEW CODE NUMBER AND PRESS [OK].
KEY OPERATOR CODE
NUMBER CHANGE
00000
PRESENT
NEW
OK
16805
12
3
456
789
0
P
C
CA
CLEAR
PROGRAM
AUDIT
INTERRUPT
CLEAR
ALL
INFORMATION
CUSTOM
SETTINGS
Press the “KEY OPERATOR CODE NUMBER CHANGE”
key.
6
Choose a new 5-digit code number and enter it using the
10-key pad.
7
OK
key.
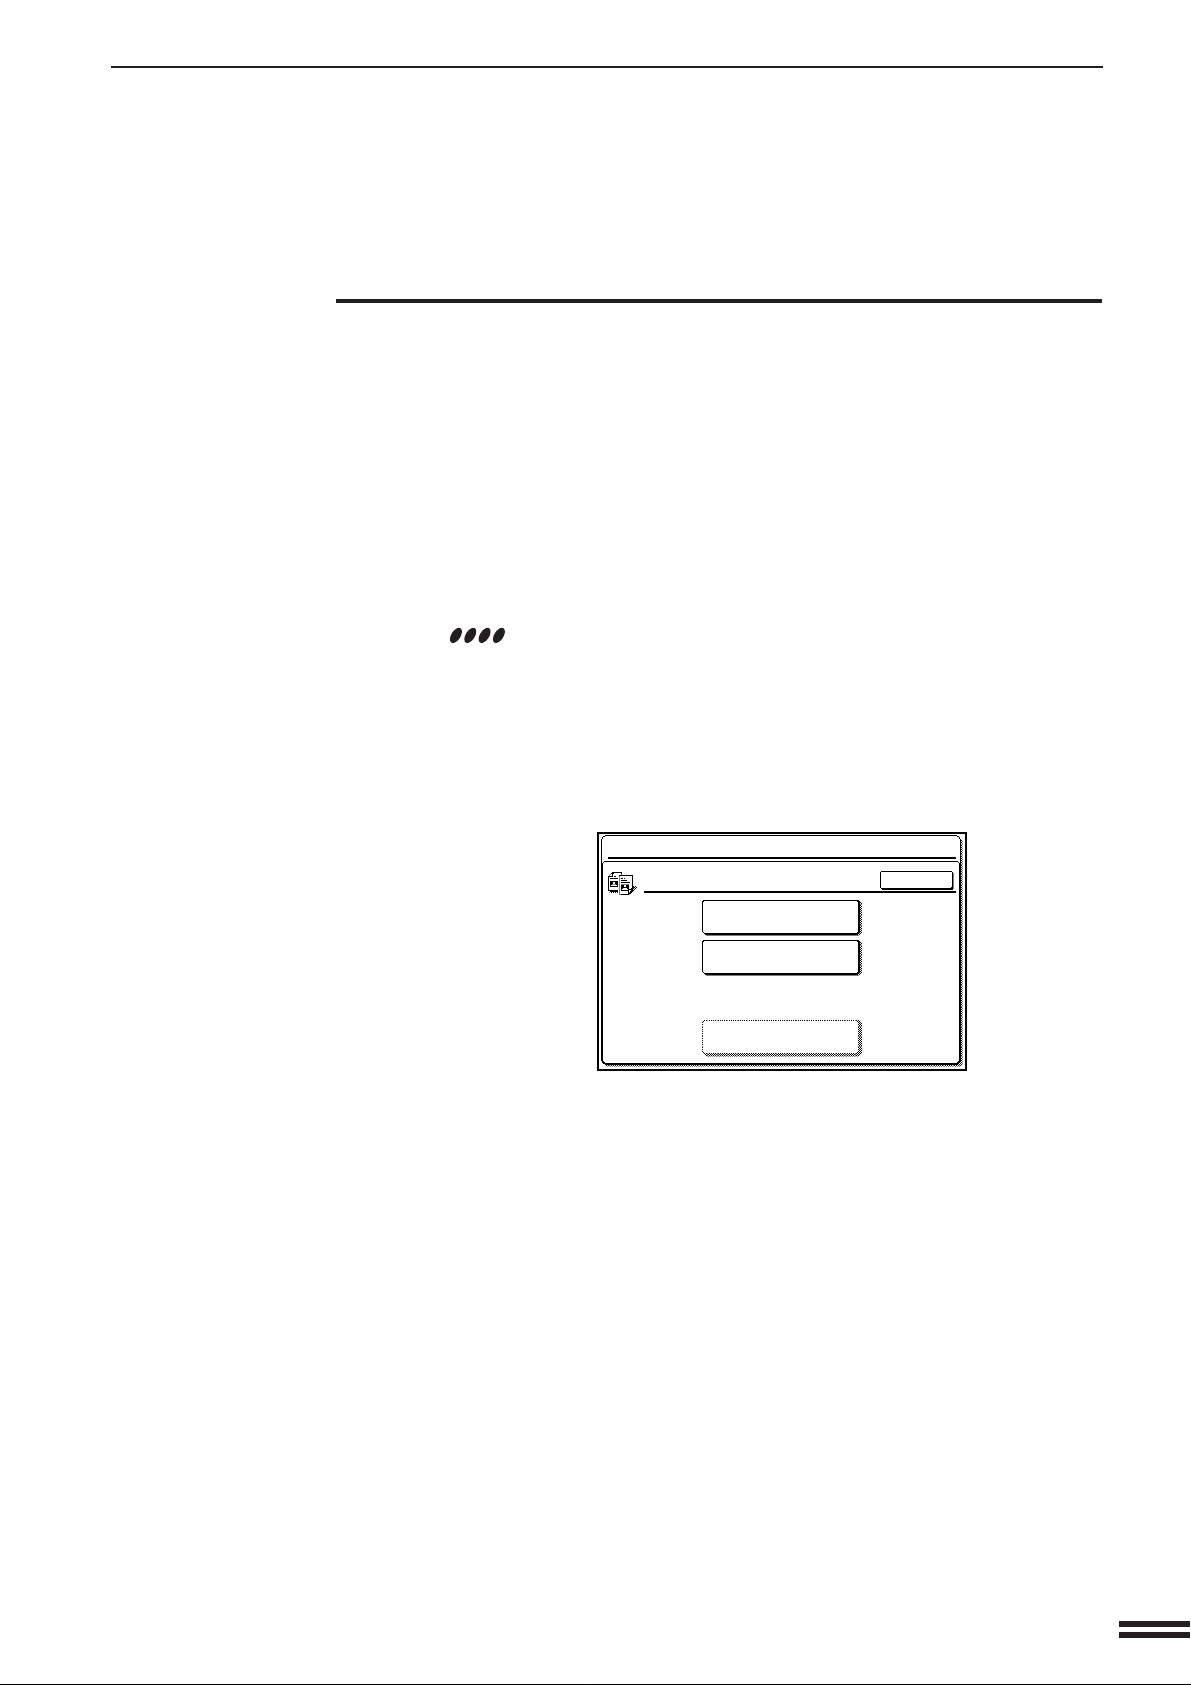
8
Press the
●
The code number will change from the factory setting to the new
setting.
To continue with other key operator programs, press
9
the
OK
key and then select another program.
To exit the key operator program mode, press the
CLEAR ALL key.
3
Page 6

KEY OPERATOR PROGRAMS
A complete list of all key operator programs is provided below. These programs can
only be accessed by first entering the key operator code number.
The copier key operator programs are grouped into four categories: account control,
other function settings, timer settings, and enable/disable settings.
COPIER KEY OPERATOR PROGRAMS
Category Program Name Function Page No.
Account Control Auditing Mode Enables or disables the basic auditing mode, which 9
controls access to copier.
Number of Copies Displays the total number of copies made against 10
per Account account numbers.
Billing by Account Displays the accumulated cost of copies against 11
account numbers.
Resetting Account Resets all audit accounts or selectively resets 12
individual accounts.
Account Number Registers accounts, deletes accounts, changes an 13
Control account number, or prints all registered account
numbers.
Price/Copy Setting Sets up to 4 levels of price per copy against account 14
numbers.
Account Limit Sets the maximum number of copies which can be 16
Setting made against a registered account number.
Account Number Guards against trial and error entering of audit 17
Security account numbers.
Other Function Key Operator Code Changes the key operator code number. 18
Settings Number Change
Exposure Lightens or darkens copies in the automatic 18
Adjustment exposure mode.
Toner Save Mode Reduces toner consumption in black/white copying. 18
(B/W)
Add or Change Adds or changes reduction and enlargement preset 19
Extra Preset Ratios copy ratios.
Setting a Maximum Sets the maximum number of copies that can be 19
Number of Copies selected.
Initial Margin Shift Sets the initial margin shift values. 20
Setting
Erase Width Sets the initial amount of the erase area. 20
Adjustment
4
Initial Status Sets the copier’s initial settings in the ready 21
Setting condition.
Page 7

KEY OPERATOR PROGRAMS
Category Program Name Function Page No.
Transfer Belt Position Switches the transfer belt to either the B/W side or 21
the color side.
Initial Color Balance Sets the initial color balance settings. 22
Setting
Size Setting for Sets a paper size in each tray with [EXTRA] setting. 22
[EXTRA]
Require Key Prevents the copier from being started by people 2 3
Operator Code other than key operator.
Stream Feeding Enables the stream feeding mode for copying 24
Mode from the optional document feeder.
Override Sorter Bin Cancels limit control of operation in case of bin 24
Capacity Limit capacity overflow of an optional staple sorter.
Timer Settings Sleep Mode Sets a time interval after which the copier enters the 25
Setting sleep mode after copying is completed.
Auto Clear Setting Sets a time interval after which the copier returns 25
to the initial settings.
Preheat Mode Sets the time that elapses before the copier enters 26
Setting the preheat mode after copying is completed.
Message Time Sets the length of time that messages are displayed. 26
Setting
Enable/Disable Disabling of Beep Enables or disables sounding of beep when keys 27
Settings When Keys Touched are touched.
Disabling of Auto Prevents automatic paper selection. 27
Paper Selection
Disabling of Auto Prevents automatic switching between the paper 27
Tray Switching trays.
Disabling of Prohibits the use of the bypass tray during 28
Bypass-Tray duplex copying. (Duplex copying can be performed
in Duplex Copy when an optional duplex module is installed.)
Disabling Prevents stored programs from being replaced or 28
Deletion of Job deleted.
Programs
Disabling of Prevents the use of the optional document feeder 28
Document Feeder when it malfunctions.
Disabling of Duplex Temporarily prevents the optional duplex system from 28
Copying operating when it malfunctions. Allows the use of the
copier but not the duplex system.
5
Page 8

KEY OPERATOR PROGRAMS
Category Program Name Function Page No.
Disabling of Prevents damage to the stapler while awaiting 29
Stapler repair service.
(The stapler is included in the optional staple sorter
(AR-SS2).)
Disabling of Prevents the selection of COVERS mode. 29
Covers Mode (The COVERS mode can be used when an optional
document feeder is installed.)
Disabling of Provides or prevents access to key operator programs 29
PC/Modem Access through a PC/modem without key operator code entry.
Disabling of Sleep Disables the sleep mode. 30
Mode
Disabling of Disables pre-scan in black/white copying. 30
Pre-scan in B/W
Copy
Other Programs Total Count Recalls the total counts, including counts of the 31
copier, document feeder, duplex module, and stapler.
Program List Sequentially prints available key operator programs. 31
Printout
Auto Color Calibration Enables automatic color gradation correction when it 32
becomes misadjusted.
PRINTER KEY OPERATOR PROGRAMS (optional)
Program Name Function Page No.
Enable Bypass-Tray Size Enables or disables paper size detection for the bypass tray. 33
Detection
Enable Bypass-Tray Type Enables or disables paper type detection for the bypass tray. 33
Detection
Prohibit Bypass-Tray Selection Enables/disables bypass tray selection in the ‘Auto Tray 34
Switching’ mode.
Prohibit Auto Tray Switching Enables/disables automatic switching between paper trays 34
during printing when paper runs out.
Disabling of Stapler Prevents damage to the stapler while awaiting repair service. 34
(The stapler is included in the optional finisher (AR-FN4).)
6
Page 9
KEY OPERATOR PROGRAMS
1
4
7
CUSTOM
SETTINGS
1
2
CUSTOM SETTINGS
AUTO
EXPOSURE PAPER SELECT
100%
COPY RATIO
8/ 11AUTO
EXIT
DISPLAY
CONTRAST
KEY OPERATOR
PROGRAMS
KEY OPERATOR PROGRAMS
EXIT
TOTAL COUNT
PROGRAM LIST
PRINTOUT
COPIER PRINTER
12
3
456
789
0
P
C
CA
CLEAR
PROGRAM
AUDIT
INTERRUPT
CLEAR
ALL
N
Using the key operator programs
Press the CUSTOM SETTINGS key.
1
Press the “KEY OPERATOR PROGRAMS” key on the
touch panel.
2
●
The following display will appear.
KEY OPERATOR PROGRAMS
ENTER KEY OPERATOR CODE.
KEY OPERATOR CODE
-----
EXIT
Enter the key operator code number.
3
●
The dashes in the display will change to asterisks.
Press the “COPIER” key or the “PRINTER” key on the
touch panel.
4
●
To access the copier key operator programs, press the “COPIER”
key.
●
If an optional power supply kit and an optional printer controller
have been installed, the “PRINTER” key is displayed. To access
the printer key operator programs, press the “PRINTER” key.
7
Page 10

KEY OPERATOR PROGRAMS
ACCOUNT CONTROL
AUDITING MODE
NUMBER OF COPIES PER ACCOUNT
BILLING BY ACCOUNT
RESETTING ACCOUNT
1/2
OK
KEY OPERATOR PROGRAMS
COPIER MODE
OTHER FUNCTION
SETTINGS
ENABLE/DISABLE
SETTINGS
TIMER SETTINGS
ACCOUNT CONTROL
AUTO COLOR CALIBRATION
OK
KEY OPERATOR PROGRAMS
6
9
P
C
CA
CLEAR
PROGRAM
CLEAR
ALL
5
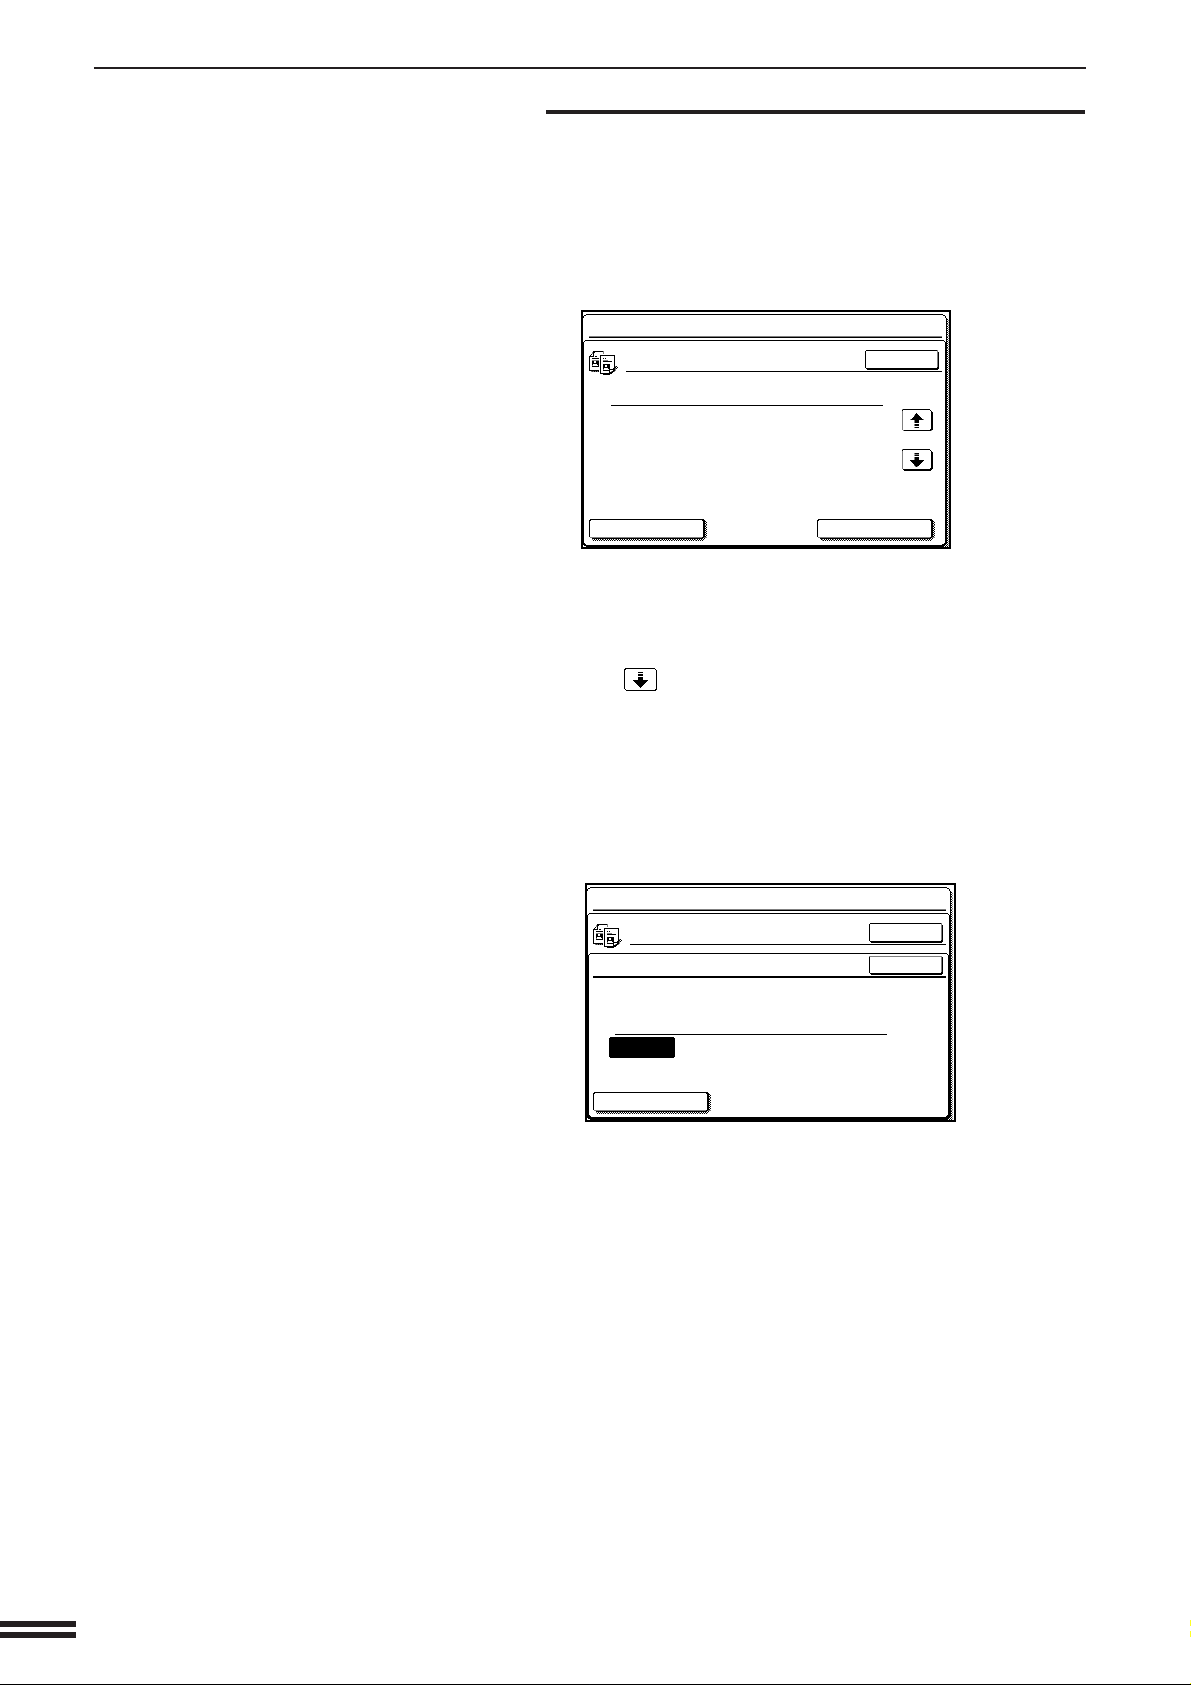
Select the desired category on the touch panel.
Example: To select the account control category, press the
“ACCOUNT CONTROL” key.
●
If you have selected “PRINTER” in step 4, this step is not needed.
Press the key of the desired program on the touch panel.
Example: To see the number of copies per account, press the
6
“NUMBER OF COPIES PER ACCOUNT” key.
●
For some programs, a check box is displayed to the left of the
program name. If the box is pressed, a check mark will appear and
the program will be set. If the box is pressed again, the check mark
will disappear and the program will be canceled.
●
For other programs, the program setting screen of the program
will appear when the program key is pressed.
●
If and/or keys are displayed, additional programs can be
displayed using these keys.
Follow instructions for the program.
7
●
If a mistake is made during entry, press the CLEAR (C) key to
clear the entry.
●
To continue with other key operator programs, press the “OK” key
and then select another program.
To exit the key operator program mode, press the CLEAR
ALL key.
8
8
Page 11
ACCOUNT CONTROL
The programs of this category are used to set the internal auditor
functions. These programs can be selected by pressing the “ACCOUNT
CONTROL” key and then selecting the desired program key.
Auditing Mode
This program is used to enable or disable the basic auditing mode.
The auditing mode can be set for both the color and black/white (B/
W) copy modes and for only the color copy mode.
When the auditing mode is disabled, the message in the display will
be “READY TO COPY.” Access to copying is open to any operator.
When the auditing mode has been set for both the color and B/W
copy modes, the message in the display will be “ENTER YOUR
ACCOUNT NUMBER. -----”. Copying in this state is limited to
operators with an assigned 5-digit account number.
If the auditing mode has been set for only the color copy mode, B/W
copying is open to any operator but color copying is limited to
operators with an assigned 5-digit account number. When the AUDIT
key or the COLOR COPY START ( ) key is pressed, the
message “ENTER YOUR ACCOUNT NUMBER FOR COLOR
COPYING. -----” will appear.
A maximum of 400, 5-digit account numbers can be assigned. Use
key operator program “Account Number Control” (page 13) to assign
account numbers.
When the “AUDITING MODE” key is pressed, the following display
will appear.
KEY OPERATOR PROGRAMS
KEY OPERATOR PROGRAMS
AUDITING MODE
COLOR & B/W
COLOR ONLY
DISABLE
OK
1. Select the desired auditing mode or select “DISABLE”
to disable the auditing mode that has been set.
2. Press the “OK” key to exit the program.
9
Page 12
KEY OPERATOR PROGRAMS
Number of Copies per Account
This program is used to display or print the total number of copies
made against each account number in the color copy mode and B/W
copy mode respectively.
An 11" x 17" or a 12" x 18" copy is counted as two copies.
When the “NUMBER OF COPIES PER ACCOUNT” key is pressed,
the following display will appear.
KEY OPERATOR PROGRAMS
NUMBER OF COPIES PER ACCOUNT
ACCOUNT
NUMBER
16805 : COLOR 600,000600,000
16900 : COLOR 500,000500,000
ACCOUNT SEARCH
●
The display varies with the auditing mode setting (COLOR & B/
W or COLOR ONLY). The display above appears when the
COLOR & B/W auditing mode has been set.
COPY
NUMBER OF
MODE
COPIES MADE
B/W 500,000500,000
B/W 800,000800,000
OK
MAXIMUM
PRINT
1/2
1. Press the key to advance through the accounts.
●
To print all accounts, press the “PRINT” key. To stop printing
after starting, press the “CANCEL” key.
●
If “---, ---” is displayed in a column of MAXIMUM, the account limit
has not been set for the account.
●
To display the number of copies for a specified account, press
the “ACCOUNT SEARCH” key.
KEY OPERATOR PROGRAMS
NUMBER OF COPIES PER ACCOUNT
ACCOUNT SEARCH MODE
INPUT ACCOUNT NUMBER.
ACCOUNT
NUMBER
-----
NEXT SEARCH
●
Enter the desired account number using the 10-key pad. Press
COPY
NUMBER OF
MODE
COPIES MADE MAXIMUM
COLOR
B/W
---,---
0
0
OK
OK
---,---
---,---
the “NEXT SEARCH” key to enter another account number or
press the lower “OK” key to return to the initial screen.
2. Press the upper “OK” key to exit the program.
10
Page 13

Billing by Account
This program is used to display or print the accumulated cost of
copies made when a relevant price per copy has been set using
program “Price/Copy Setting”.
When the “BILLING BY ACCOUNT” key is pressed, the following
display will appear.
KEY OPERATOR PROGRAMS
BILLING BY ACCOUNT
ACCOUNT
NUMBER
16805 : COLOR 600000.000000
16900 : COLOR 500000.000000
ACCOUNT SEARCH
●
The display varies with the auditing mode setting (COLOR & B/
W or COLOR ONLY). The display above appears when the
COLOR & B/W auditing mode has been set.
KEY OPERATOR PROGRAMS
OK
COPY
MODE
BILLING
B/W 500000.000000
B/W 800000.000000
1/2
PRINT
1. Press the key to advance through the accounts.
●
To print all accounts, press the “PRINT” key. To stop printing
after starting, press the “CANCEL” key.
●
To display the billing for a specified account, press the
“ACCOUNT SEARCH” key.
KEY OPERATOR PROGRAMS
BILLING BY ACCOUNT
ACCOUNT SEARCH MODE
INPUT ACCOUNT NUMBER.
ACCOUNT
NUMBER
NEXT SEARCH
●
Enter the desired account number using the 10-key pad. Press
COPY
MODE BILLING
COLOR
B/W
---,---
OK
OK
0
0
the “NEXT SEARCH” key to enter another account number or
press the lower “OK” key to return to the initial screen.
2. Press the upper “OK” key to exit the program.
11
Page 14

KEY OPERATOR PROGRAMS
Resetting Account
This program is used to reset all audit accounts or to selectively reset
individual accounts.
When the “RESETTING ACCOUNT” key is pressed, the following
display will appear.
KEY OPERATOR PROGRAMS
RESETTING ACCOUNT
ACCOUNT
NUMBER
16805 : COLOR 600,000600,000
16900 : COLOR 500,000500,000
ACCOUNT SEARCH RESET
●
If “---, ---” is displayed in a column of MAXIMUM, the account limit
has not been set for the account.
COPY
NUMBER OF
MODE
COPIES MADE
B/W 500,000500,000
B/W 800,000800,000
ALL ACCOUNTS
OK
MAXIMUM
1/2
To reset all accounts
1. Press the “RESET” (ALL ACCOUNTS) key on the touch
panel.
2. Press the “YES” key.
3. Press the “OK” key to exit the program.
To reset a single account
1. Press the key of an account to be reset.
●
To display other account numbers, press the or key.
2. Press the “YES” key.
3. Continue with steps 1 and 2 for other account numbers.
Press the “OK” key to exit the program.
12
Page 15

Account Number Control
This program is used to register accounts, delete accounts, change an
account number, or print all account numbers.
When the “ACCOUNT NUMBER CONTROL” key is pressed, the
following display will appear.
KEY OPERATOR PROGRAMS
ACCOUNT NUMBER CONTROL
To register accounts
1. Press the “ENTER” key.
KEY OPERATOR PROGRAMS
OK
ENTER
DELETE
CHANGE
PRINT
2. Enter a 5-digit account number (00001 to 99999) using
the 10-key pad.
●
Select a number different from the key operator code number.
3. Press the “ENTER” key.
●
If a number that is already registered is entered, the message
“THIS NUMBER IS ALREADY USED.” will appear. Press the
“OK” key and enter another number.
4. To enter other account numbers, repeat steps 2 and 3.
Press the “OK” key twice to exit the program.
To delete accounts
1. Press the “DELETE” key.
2. To delete all accounts, press the “DELETE” (ALL
ACCOUNTS) key on the touch panel.
●
A message will appear to confirm the selection. Press the
“YES” key to delete all accounts. If you decide not to delete all
accounts, press the “NO” key.
3. To delete an individual account, enter the account
number to be deleted using the 10-key pad.
4. Press the “ENTER” key.
5. Continue with steps 3 and 4 for other account numbers.
Press the “OK” key twice to exit the program.
13
Page 16

KEY OPERATOR PROGRAMS
To change an account number
1. Press the “CHANGE” key.
2. Enter the account number to be changed using the
10-key pad.
3. Enter a new account number.
4. Press the “ENTER” key.
●
If a number that is already registered is entered, the message
“THIS NUMBER IS ALREADY USED.” will appear. Press the
“OK” key and enter another number.
5. To change other account numbers, repeat steps 2 to 4.
Press the “OK” key twice to exit the program.
To print all registered account numbers
1. Press the “PRINT” key.
●
The copier will start printing. To stop printing after starting,
press the “CANCEL” key.
2. Press the “OK” key to exit the program.
Price/Copy Setting
This program is used to set the price per copy. Four price per copy
values can be set (#1, #2, #3, and #4). As copies are made, the
cumulative cost of the copies is kept in memory.
When the “PRICE/COPY SETTING” key is pressed, the following
display will appear.
KEY OPERATOR PROGRAMS
PRICE/COPY SETTING
INPUT NEW UNIT PRICE AND PRESS [ENTER].
USE INTERRUPT KEY FOR DECIMAL POINT.
PRICE CODE
# 1 80
# 2 60
# 3 180
# 4 90
OK
PRESENT PRICE NEW PRICE
ENTER
1/2
14
1. Enter the new price for price code #1 by using the 10-key
pad and then press the “ENTER” key.
●
Use the INTERRUPT key for decimal points.
●
If the “ENTER” key is pressed without entering a value, the
price per copy will not be changed.
Page 17

KEY OPERATOR PROGRAMS
2. Similarly enter the prices for price codes #2 to #4.
●
The following display will appear.
KEY OPERATOR PROGRAMS
PRICE/COPY SETTING
PRICE CODE
# 1 100.000
# 2 10
# 3 180
# 4 90
PRESENT PRICE
ACCOUNT NUMBER MODE PRICE CODE
COLOR #
B/W #
ALL ACCOUNTS ENTER
3. Enter the account number for which the price code is
set, and then press the “ENTER” key.
●
To set a single price code for all accounts, press the “ALL
ACCOUNTS” key and then press the “ENTER” key.
4. Enter the price code (#1 - #4) for color copying and then
press the “ENTER” key.
●
Enter the number using “1” through “4” keys of the 10-key pad.
●
If only the “ENTER” key is pressed without entering any price
code or “0” is pressed, no price per copy will be set, or previous
setting will remain valid.
OK
2/2
5. Enter the price code (#1 - #4) for black/white copying and
then press the “ENTER” key.
●
Enter the number using “1” through “4” keys of the 10-key pad.
●
If only the “ENTER” key is pressed without entering any price
code or “0” is pressed, no price per copy will be set, or previous
setting will remain valid.
6. Continue with steps 3 to 5 for other individual accounts.
Press the “OK” key to exit the program.
15
Page 18

KEY OPERATOR PROGRAMS
Account Limit Setting
This program is used to set the maximum number of copies which can
be made against a registered account number.
When the “ACCOUNT LIMIT SETTING” key is pressed, the following
display will appear.
KEY OPERATOR PROGRAMS
ACCOUNT LIMIT SETTING
INPUT ACCOUNT NUMBER TO BE LIMITED.
OK
ACCOUNT
NUMBER
-----
ALL ACCOUNTS
COPY
NUMBER OF
MODE
COPIES MADE MAXIMUM
COLOR
B/W
ENTER
To set a limit
1. Enter the account number to be limited.
2. Enter the upper limit (max. 999,999) for the account.
●
The limit can be set for color copying and black/white copying
respectively.
●
If a limit for the account has been already set, the limit will be
displayed. Press the CLEAR (C) key before entering a new
upper limit.
●
0 can be set as the upper limit. If 0 is set, copying in the
specified mode (color or black/white) will be disabled against
the account.
●
To cancel a limit, press the CLEAR (C) key and proceed to
step 3 without entering a limit.
3. Press the “ENTER” key.
4. To limit other accounts, repeat steps 1 to 3. Press the
“OK” key to exit the program.
To set a limit for all accoounts
1. Press the “ALL ACCOUNTS” key on the touch panel.
●
“ALL” will appear under “ACCOUNT NUMBER”.
2. Enter the upper limit (max. 999,999) for all accounts.
●
To cancel the limit for all accounts, press the CLEAR (C) key
and proceed to step 3 without entering a limit.
3. Press the “ENTER” key.
4. Press the “OK” key to exit the program.
16
Page 19

Account Number Security
This program is used to make it difficult for users to gain access to
accounts by entering code numbers through trial and error. If this
program is selected and an operator enters three successive invalid
account numbers, the copier will not accept another number for one
minute and the message “PLEASE SEE YOUR KEY OPERATOR FOR
ASSISTANCE.” will appear.
To enable the account number security function, press the
check box of “ACCOUNT NUMBER SECURITY” to display a
check mark in the check box.
To disable this function, press the check box of this program
again to clear the check mark in the check box.
KEY OPERATOR PROGRAMS
17
Page 20

KEY OPERATOR PROGRAMS
OTHER FUNCTION SETTINGS
The programs of this category are used to adjust various settings of
copier functions. These programs can be selected by pressing the
“OTHER FUNCTION SETTINGS” key and then selecting the desired
program key.
Key Operator Code Number Change
See page 2, KEY OPERATOR CODE NUMBER.
Exposure Adjustment
Use this program to lighten or darken copies in the automatic exposure
mode. The factory setting is level 3 for both color copying and black/
white copying.
When the “EXPOSURE ADJUSTMENT” key is pressed, the following
display will appear.
KEY OPERATOR PROGRAMS
EXPOSURE ADJUSTMENT
AUTO EXPOSURE CAN BE ADJUSTED.
COLOR
B/W
1. Adjust the exposure using the and keys.
●
The exposure level can be adjusted for color copying and black/
white copying respectively.
2. Press the “OK” key.
Toner Save Mode (B/W)
The toner save mode will reduce toner consumption by approximately 10% in black/white copying regardless of exposure mode and
original image type. Copies will be lighter but still adequate for
general use. Selection of this mode does not affect color copying.
OK
18
To turn on the toner save mode, press the check box of
“TONER SAVE MODE (B/W)” to display a check mark in the
check box.
To turn off the toner save mode, press the check box of this
program again to clear the check mark in the check box.
Page 21

Add or Change Extra Preset Ratios
Two extra preset copy ratios can be added within both the reduction
range (25% to 99%) and the enlargement range (101% to 400%). Only
added preset copy ratios can be changed. The standard preset copy
ratios are fixed in memory and cannot be changed.
When the “ADD OR CHANGE EXTRA PRESET RATIOS” key is
pressed, the following display will appear.
KEY OPERATOR PROGRAMS
ADD OR CHANGE EXTRA
PRESET RATIOS
SELECT THE RATIO TO BE ADDED OR CHANGED AND
SET NEW PRESET RATIO.
REDUCTION
(25~99)
1. Press a key under “REDUCTION” or “ENLARGEMENT”
on the touch panel.
●
The selected key will be highlighted.
KEY OPERATOR PROGRAMS
OK
ENLARGEMENT
60
(101~400)
2. Use the and keys to set the desired copy ratio.
●
To decrease or increase the copy ratio rapidly, press and hold
the or key.
●
To add or change other extra preset copy ratios, repeat steps 1
and 2.
●
To cancel an extra preset ratio, select the copy ratio and press
the CLEAR (C) key.
3. Press the “OK” key.
Setting a Maximum Number of Copies
Use this program to limit the maximum number of copies per copy run
which can be input in the copy quantity display.
When the “SETTING A MAXIMUM NUMBER OF COPIES” key is
pressed, the following display will appear.
KEY OPERATOR PROGRAMS
SETTING A MAXIMUM
NUMBER OF COPIES
INPUT THE NUMBER AND PRESS
[OK]
OK
.
MAXIMUM NUMBER OF COPIES
(1~999)
165
1. Input the number using the 10-key pad.
●
A number from 1 to 999 can be set.
2. Press the “OK” key.
19
Page 22
KEY OPERATOR PROGRAMS
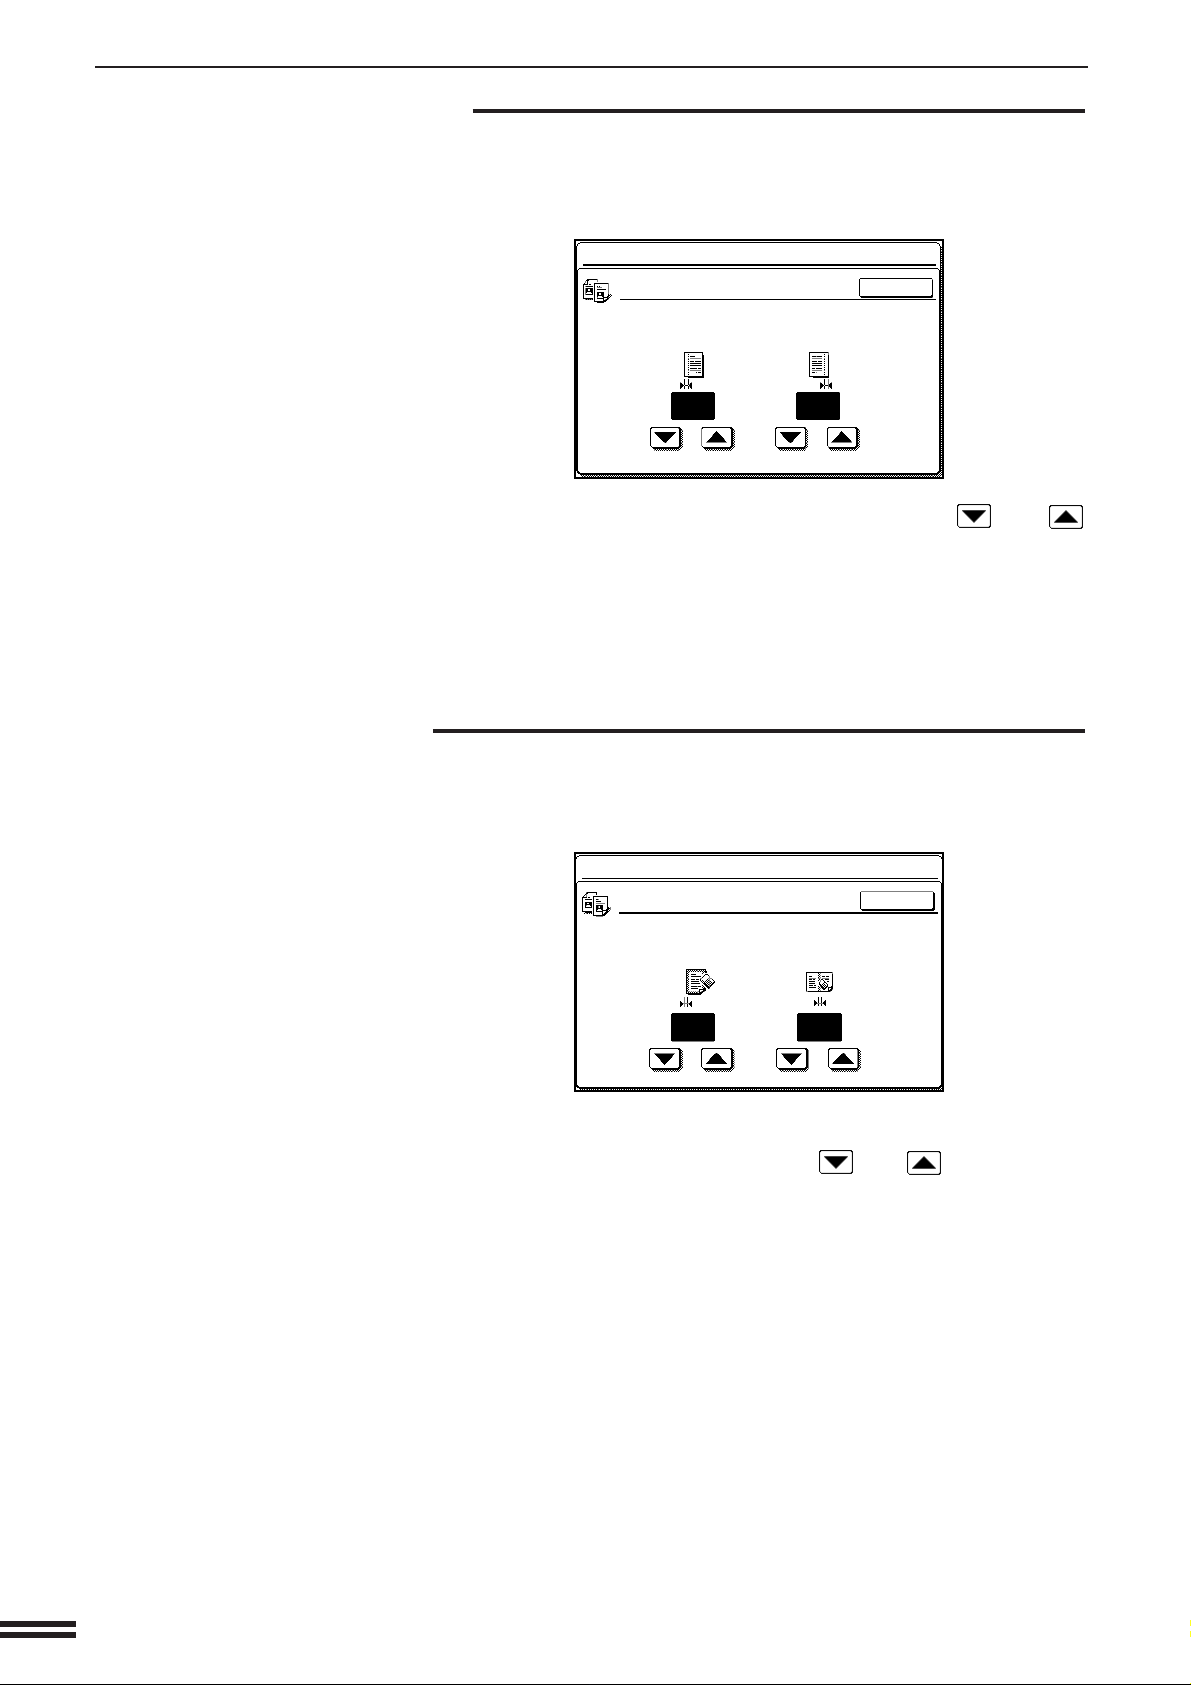
Initial Margin Shift Setting
Set the initial margin shift value with this program.
When the “INITIAL MARGIN SHIFT SETTING” key is pressed, the
following display will appear.
KEY OPERATOR PROGRAMS
INITIAL MARGIN SHIFT
SETTING
SET THE INITIAL MARGIN SHIFT.
SIDE 1
SIDE 2
OK
OK
1. Adjust the value for each side using the and
keys.
●
The value can be set from 0" to 1" in 1/8" increments.
●
If an optional duplex module (AR-DU2N) is not installed, the
value for the reverse side (side 2) is not displayed.
2. Press the “OK” key.
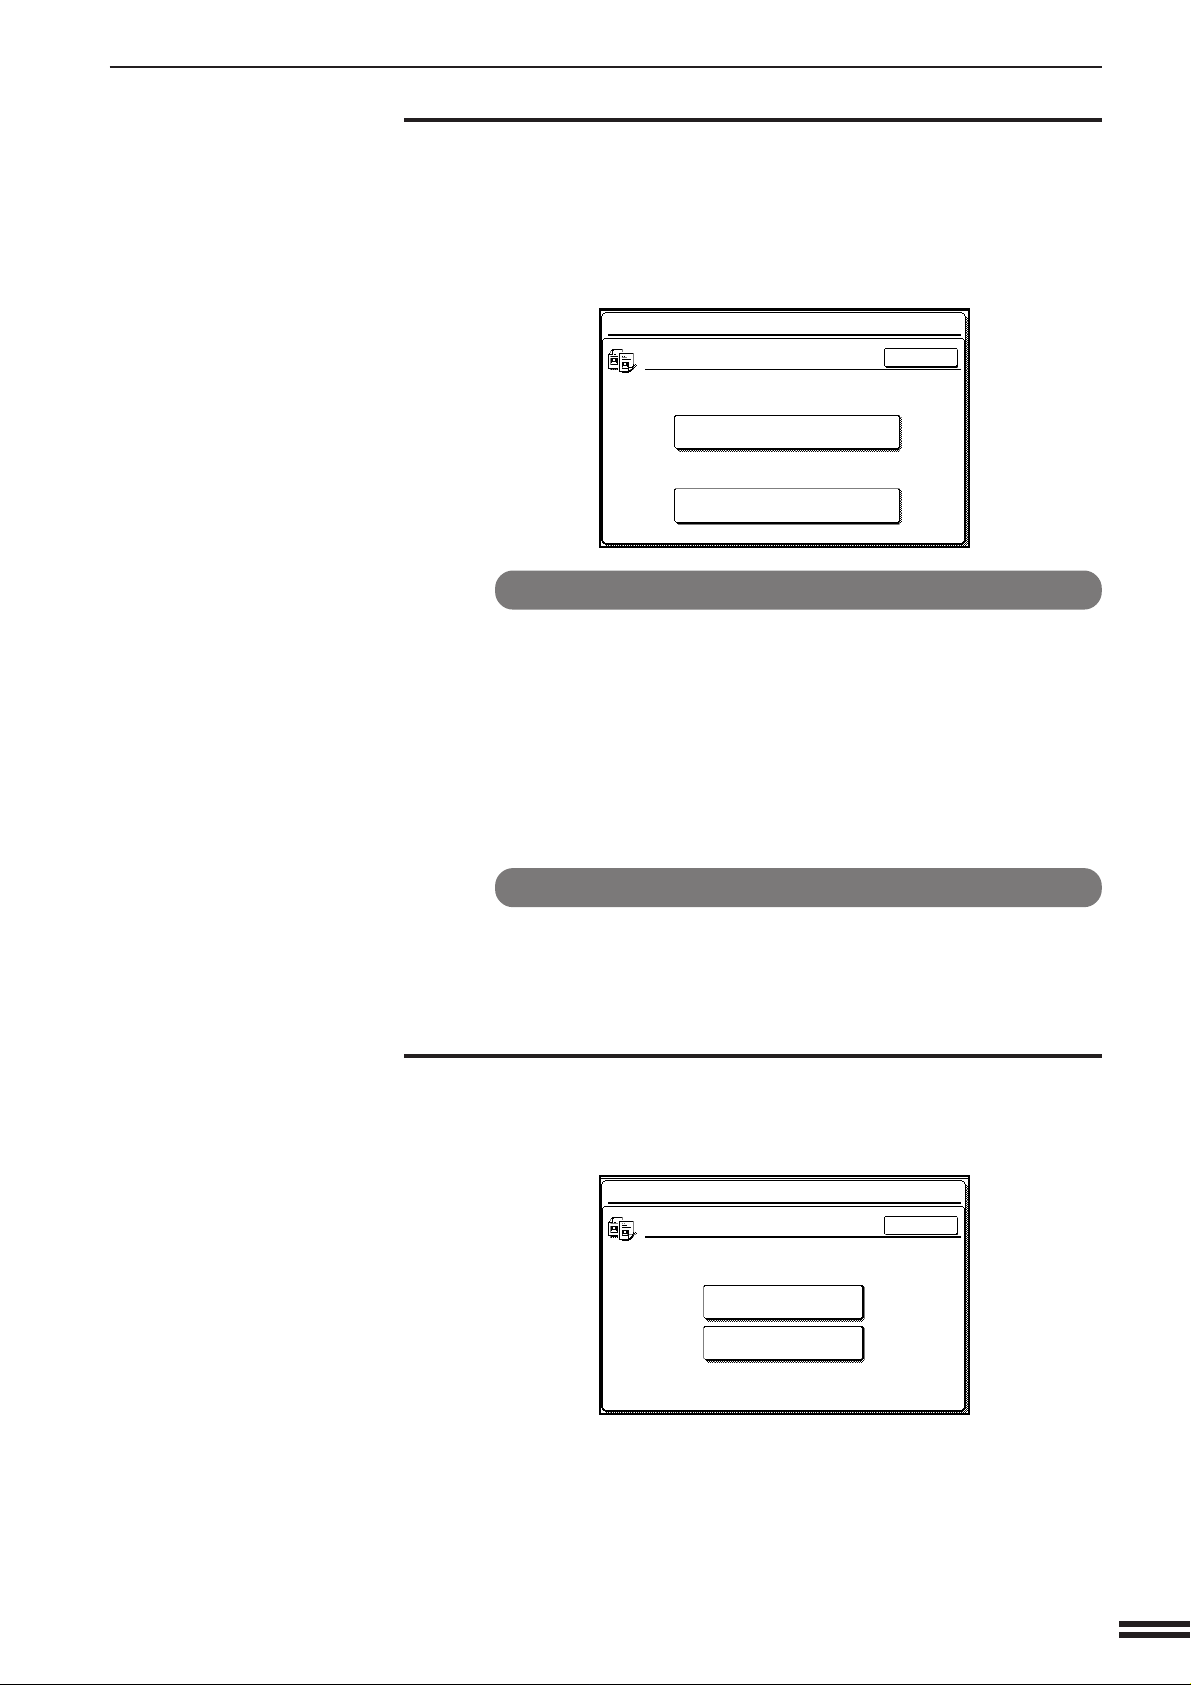
Erase Width Adjustment
Set the initial setting of the amount of the erase area with this program.
When the “ERASE WIDTH ADJUSTMENT” key is pressed, the
following display will appear.
KEY OPERATOR PROGRAMS
ERASE WIDTH ADJUSTMENT
SET THE INITIAL ERASE WIDTH.
EDGE ERASE CENTER ERASE
(0~1)
1/2 1/2
inch
(0~1)
inch
OK
1/2
(0~1)
inch
1/2
(0~1)
inch
1. Adjust the values for the edge erase and the center
erase respectively using the and keys.
●
The values can be set from 0" to 1" in 1/8" increments.
2. Press the “OK” key.
20
Page 23
Initial Status Setting
The copier will assume the initial settings when it is turned on, when the
CLEAR ALL key is pressed, or when the auto clear interval has
elapsed after a copy run. Use this program to establish the initial
settings.
When the “INITIAL STATUS SETTING” key is pressed, the following
display will appear.
KEY OPERATOR PROGRAMS
INITIAL STATUS SETTING
SET THE INITIAL STATUS.
ESTABLISH NEW INITIAL
SETTINGS.
RETURN TO THE FACTORY DEFAULT
SETTINGS.
To establish new initial settings
KEY OPERATOR PROGRAMS
OK
1/4 1/4
1. Press the “ESTABLISH NEW INITIAL SETTINGS.” key.
2. Select all initial settings on the operation panel.
●
The following functions cannot be set:
Number of copies, XY zoom, automatic copy ratio selection,
interrupt, special functions, information, and LCD contrast.
3. Press the “OK” key.
To return to the factory default settings
Press the “RETURN TO THE FACTORY DEFAULT SETTINGS.”
key.
Transfer Belt Position
This program is used to select the home position of the transfer belt
either to the B/W side or the COLOR side. The default setting is the
COLOR side.
KEY OPERATOR PROGRAMS
TRANSFER BELT POSITION
OK
COLOR
1/4 1/4
B/W
1. Press the key of the desired home position, “COLOR” or
“B/W”.
2. Press the “OK” key.
21
Page 24
KEY OPERATOR PROGRAMS
Initial Color Balance Setting
Color balance settings that have been adjusted using the special
function of “Color Balance” explained on page 3-22 of the Operation
Manual can be called up and set as initial color balance settings* by
storing them ahead of time in a job program (page 2-18 of the
Operation Manual). Use this feature when you want to repeatedly use
settings for a favorite color or for correction when a change occurs in
the color balance.
* Preset values displayed when you select the special function of
“Color Balance”. The factory default settings are the “0” position for
all eight levels of each color.
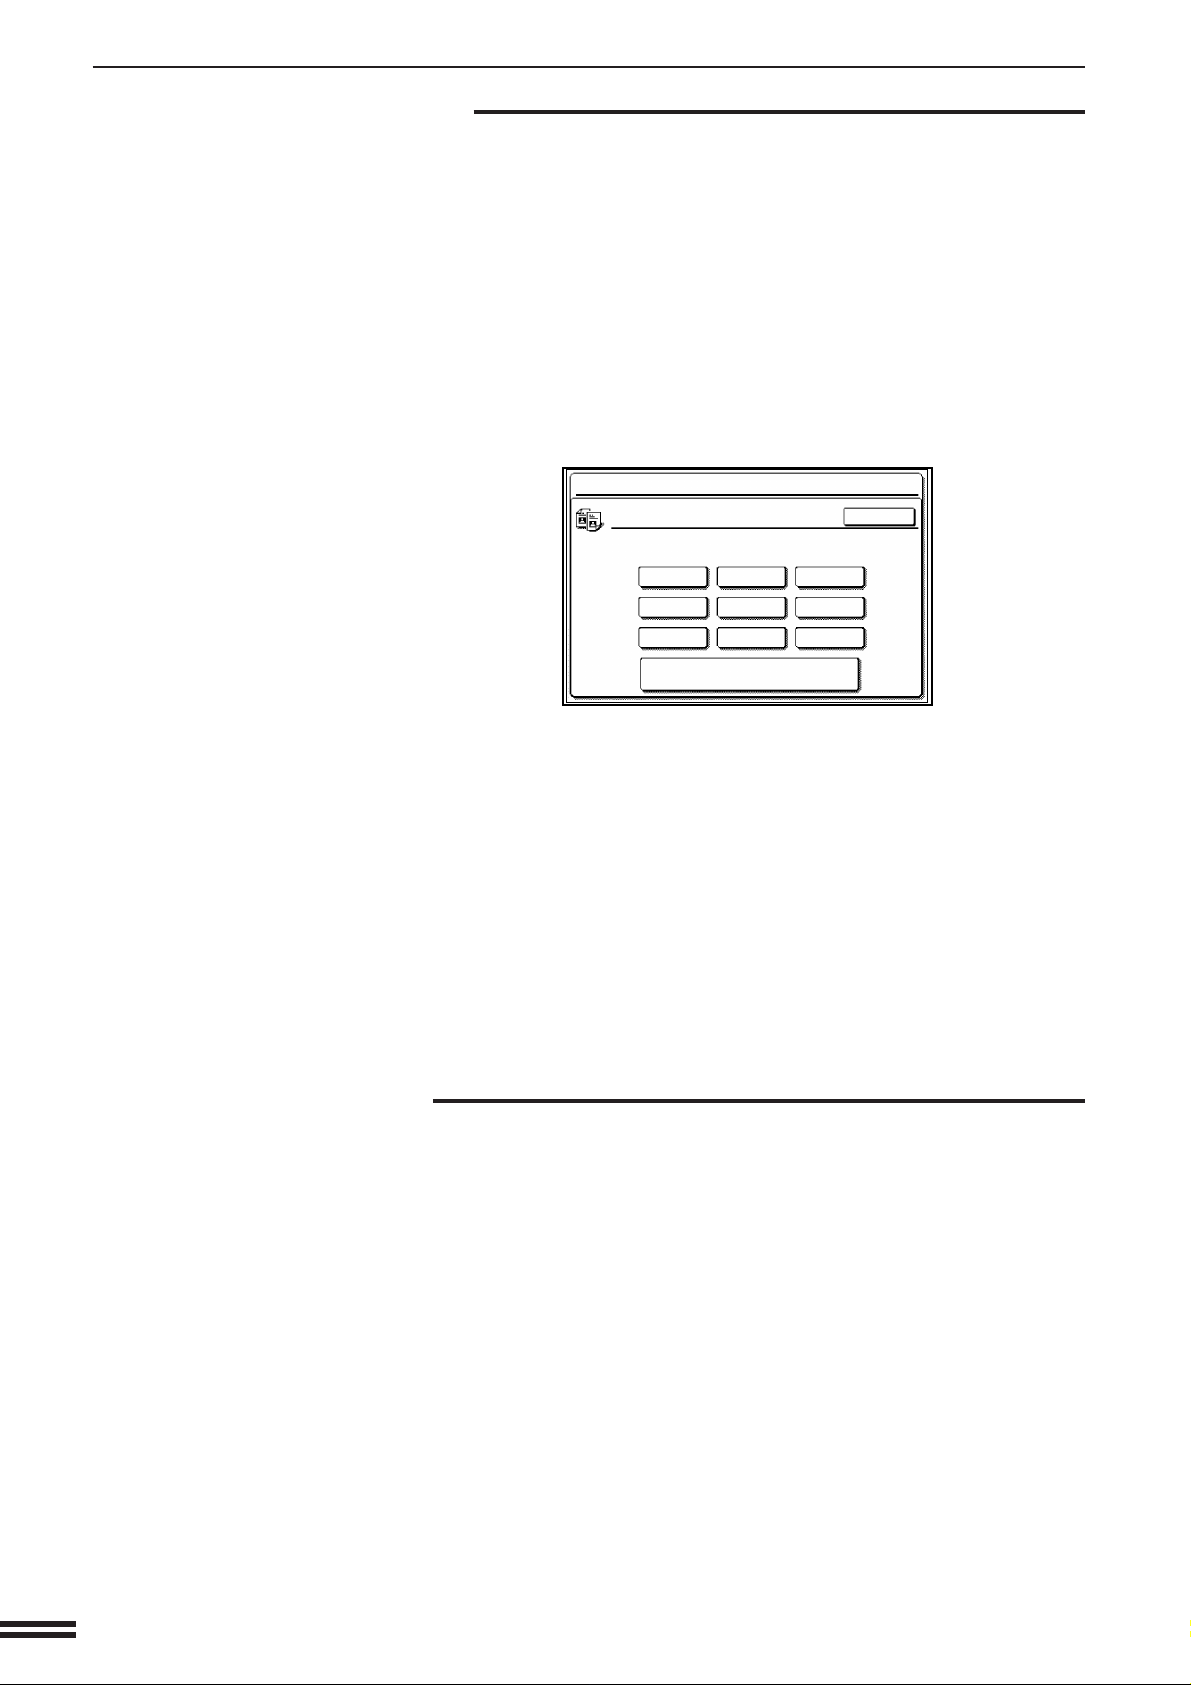
When the “INITIAL COLOR BALANCE SETTING” key is pressed, the
following display will appear.
KEY OPERATOR PROGRAMS
INITIAL COLOR BALANCE SETTING
PRESS PROGRAM NUMBER IN WHICH COLOR BALANCE
PROGRAM IS REGISTERED.
123
456
789
RETURN TO THE FACTORY DEFAULT
SETTING.
OK
1. Press the job program number key in which the color
balance settings have been stored.
●
If a job program number key is pressed that does not have color
balance settings, a warning message will appear.
●
To return color balance settings that have been stored as initial
settings to the factory default settings (the “0” position for all eight
levels of each color), press the “RETURN TO THE FACTORY
DEFAULT SETTINGS” key.
2. Press the “OK” key.
●
The color balance settings stored in the job program number key
that was pressed are set as the initial settings.
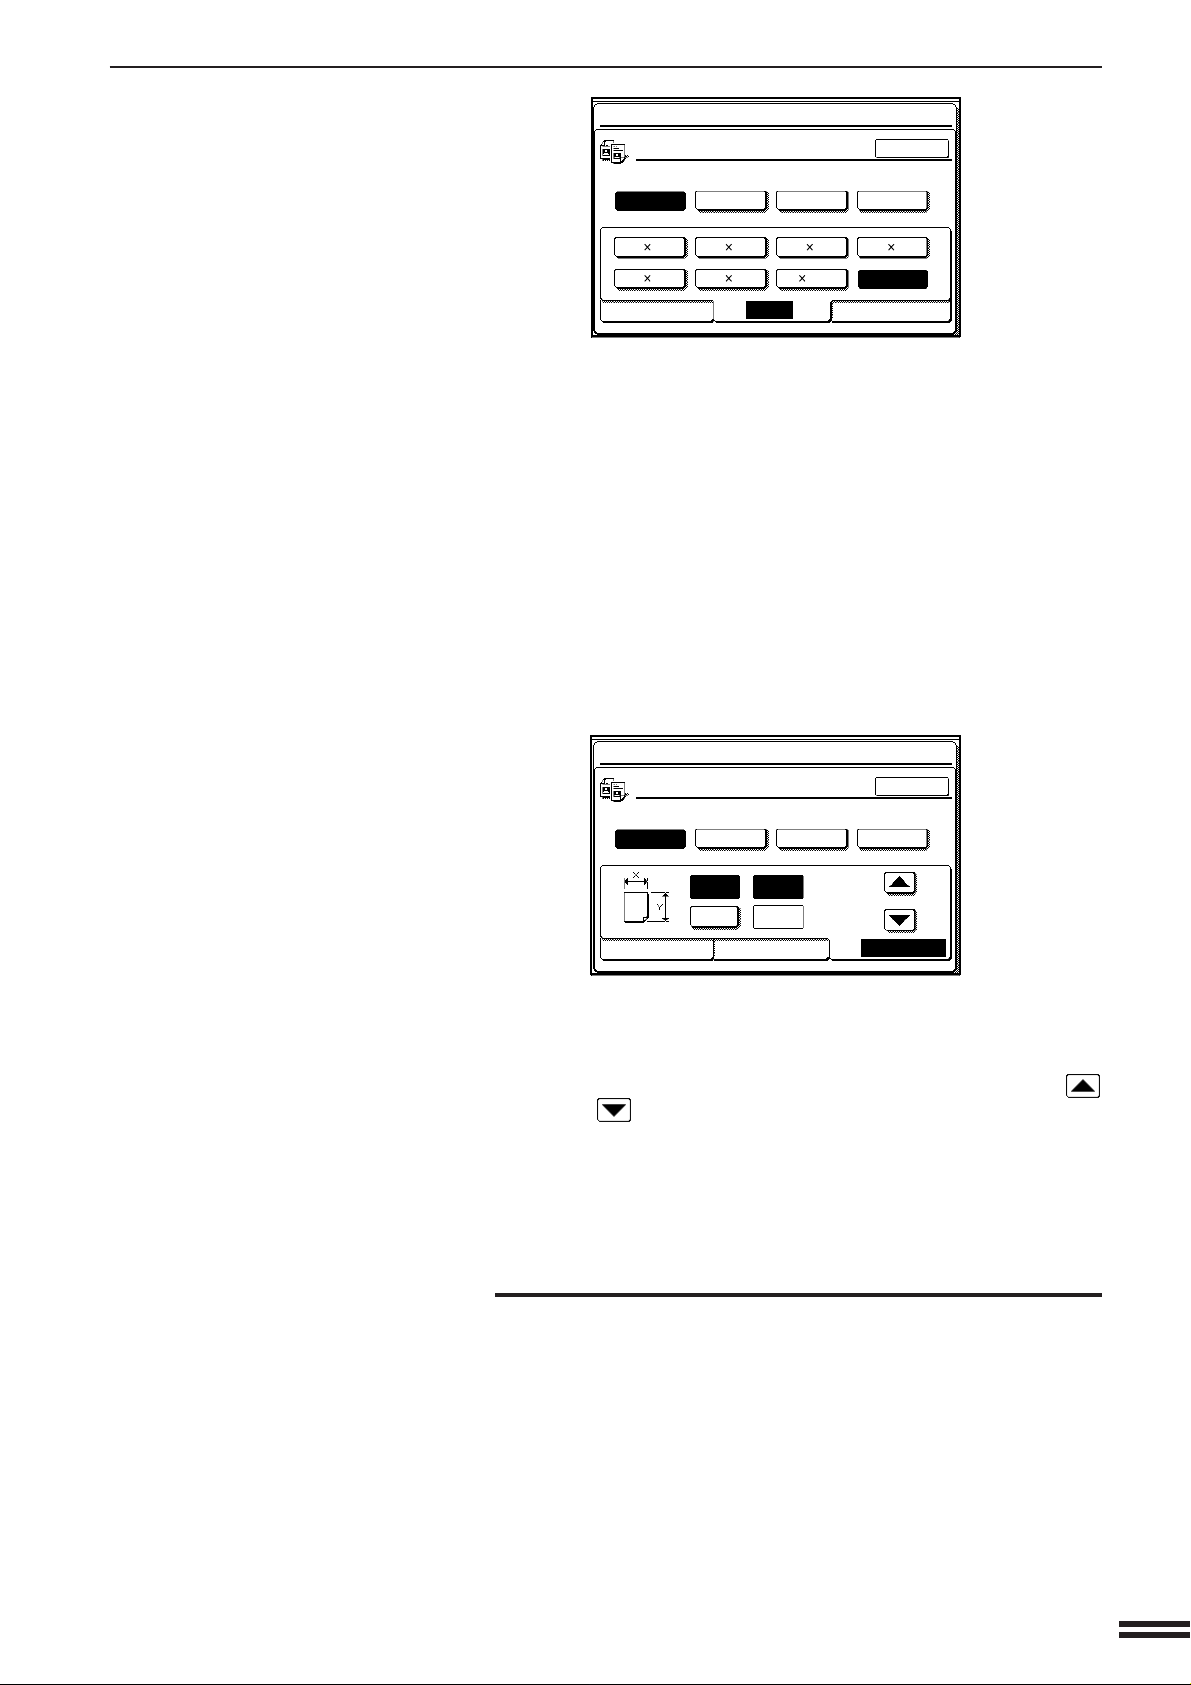
Size Setting for [EXTRA]
This program allows the paper size to be set for each paper tray. The
setting through this program will only be effective when the paper size
indicator of the paper tray is set to [EXTRA].
When the “SIZE SETTING FOR [EXTRA]” key is pressed, the following
display will appear.
22
Page 25
KEY OPERATOR PROGRAMS
KEY OPERATOR PROGRAMS
SIZE SETTING FOR [EXTRA]
PAPER TRAY
1 234
OK
11 17 8/ 14
1
8/ 11R 5/ 8/ 7/ 10/R EXTRA
2
1
2
212
AB SIZE INPUT
1
8/ 13 8/ 11
2
1
412
INCH
1
2
1
1. Select a paper tray on the touch panel.
●
Up to 4 PAPER TRAY keys appear depending on the number
of the paper tray installed (except an optional large capacity
tray).
2. Select a paper size for “EXTRA” setting.
To select a size of AB series, press the “AB” key and press a desired
paper size.
●
Select the paper size which matches the paper to be loaded into
the paper tray.
●
This setting can also be used for paper trays in an optional 500sheet paper drawer (AR-CS2N).
KEY OPERATOR PROGRAMS
SIZE SETTING FOR [EXTRA]
PAPER TRAY
1 234
OK
AB
3. To set a desired paper size for the “EXTRA” paper, press
the “SIZE INPUT” key and input the paper size.
●
Adjust X (horizontal) and Y (vertical) dimensions using the
and keys.
●
The value can be set in 1/8" increments from 5-1/2" to 17" for X
and from 7-1/4" to 11-3/4" for Y.
4. Press the “OK” key.
Require Key Operator Code
This program is used to prevent the copier from being started by
people other than key operator. If this program is set, the message
“ENTER KEY OPERATOR CODE. -----” will appear each time the
power switch is turned to the “ON” position.
(5 1/2~17)
5
7
INCH
1
/
1
/
2
inch
(7 1/4~11 3/4)
4
inch
SIZE INPUT
X
Y
To require key operator code entry for access to the copier,
press the check box of “REQUIRE KEY OPERATOR CODE”
to display a check mark in the check box.
To enable access to the copier without key operator code
entry, press the check box of this program again to clear the
check mark in the check box.
23
Page 26

KEY OPERATOR PROGRAMS
Stream Feeding Mode
This program is only available when the optional RADF is installed and
used to enable the stream feeding mode of the optional document
feeder. When the stream feeding mode is enabled, additional originals
which are set in the document feeder tray within 5 seconds after the last
original in a stack was fed will be fed and copied automatically.
To enable the stream feeding mode, press the check box of
“STREAM FEEDING MODE” to display a check mark in the
check box.
To disable this mode, press the check box of this program
again to clear the check mark in the check box.
Override Sorter Bin Capacity Limit
This program is only available when the optional staple sorter is
installed and used to control operation in case of bin capacity
overflow of an optional staple sorter. If the control is canceled,
copying in the SORT, STAPLE SORT, or GROUP mode can be
started even if copies remain in a sort bin. Also, copying can be
continued even if the number of copies in a sort bin exceeds the limit,
though copies will not be stapled.
To cancel the control, press the check box of “OVERRIDE
SORTER BIN CAPACITY LIMIT” to display a check mark in
the check box.
To restore the control, press the check box of this program
again to clear the check mark in the check box.
(It is recommended not to cancel this control except for the case of
necessity.)
24
Page 27

TIMER SETTINGS
The programs of this category are used to set the timers for some
functions. These programs can be selected by pressing the “TIMER
SETTINGS” key and then selecting the desired program key.
Sleep Mode Setting
The sleep mode is a function to turn off the power to the fusing unit
automatically once a programmed length of time has elapsed without
any copier operation after the last copy of a run is made or power is
turned on.
This function lowers the user’s electricity bill, reduces waste of natural
resources, and cuts down on environmental pollution.
The programmed time is set to 60 minutes for this function on
completion of shipment from the factory. The default time can be
changed optionally within the prescribed range of time. We suggest
you set the most appropriate time according to your usage pattern.
Use this program to set the time interval. The interval can be set in 1
minute increments between 10 and 240 minutes.
When the “SLEEP MODE SETTING” key is pressed, the following
display will appear.
KEY OPERATOR PROGRAMS
SLEEP MODE SETTING
SET THE TIME INTERVAL FROM LAST COPY
UNTIL SLEEP IN 1 MIN. INCREMENTS.
KEY OPERATOR PROGRAMS
OK
1. Enter the time interval using the and keys.
2. Press the “OK” key.
Auto Clear Setting
Use this program to set the time interval to return the copier to the initial
settings after the last copy of a run has been completed. The time can
be set from 10 to 240 seconds in 10 second increments.
When the “AUTO CLEAR SETTING” key is pressed, the following
display will appear.
KEY OPERATOR PROGRAMS
AUTO CLEAR SETTING
SET THE TIME FOR AUTO CLEAR.
TIME:
TIME:
60
60
(10~240)
min.
(10~240)
sec.
OK
CANCEL TIMER
1. Set the desired time interval using the and keys.
●
To disable the auto clear, press the check box of “CANCEL
TIMER” to display a check mark in the check box.
2. Press the “OK” key.
25
Page 28

KEY OPERATOR PROGRAMS
Preheat Mode Setting
Preheat mode functions to control the power consumption by lowering
the temperature of the fusing unit to a programmed level once a
programmed length of time has elapsed without any copier operation
after the last copy of a run is made or power is turned on. This function
lowers user’s electricity bill, reduces waste of natural resources, and
cuts down on environmental pollution. The programmed time is set to
15 minutes for this function on completion of shipment from the factory.
The default time can be changed optionally within the prescribed range
of time. We suggest you set the most appropriate time according to
your usage pattern.
This program is used to set the time that elapses before the copier
enters the preheat mode after copying is completed. The interval can
be set between 10 and 240 minutes in 1 minute increments.
When the “PREHEAT MODE SETTING” key is pressed, the following
display will appear.
KEY OPERATOR PROGRAMS
PREHEAT MODE SETTING
SET THE TIME FOR PREHEAT MODE.
OK
1. Set the desired time interval using the and keys.
2. Press the “OK” key.
Message Time Setting
This program is used to adjust the length of time that messages are
displayed in the range of 1 to 12 seconds in 1 second increments.
When the “MESSAGE TIME SETTING” key is pressed, the following
display will appear.
KEY OPERATOR PROGRAMS
MESSAGE TIME SETTING
SET THE TIME FOR MESSAGES.
TIME:
TIME:
15
6
(10~240)
min.
(1~12)
sec.
OK
26
1. Set the time using the and keys.
2. Press the “OK” key.
Page 29

ENABLE/DISABLE SETTINGS
The programs of this category are used to enable or disable some
functions. These programs can be set or canceled by pressing the
check box of each program.
Disabling of Beep When Keys Touched
This program is used to enable or disable the beep function. If this
function is enabled, a beep sound will be produced when you press a
key on the operation panel including the touch panel.
To disable the beep function, press the check box of
“DISABLING OF BEEP WHEN KEYS TOUCHED” to display a
check mark in the check box.
To enable the beep function, press the check box of this
program again to clear the check mark in the check box.
KEY OPERATOR PROGRAMS
Disabling of Auto Paper Selection
This program is used to prevent automatic paper selection. When
disabled, the copier will not automatically select a paper tray containing
paper that matches the size of the original placed on the document
glass or in the optional document feeder.
To disable auto paper selection, press the check box of
“DISABLING OF AUTO PAPER SELECTION” to display a
check mark in the check box.
To restore this function, press the check box of this program
again to clear the check mark in the check box.
Disabling of Auto Tray Switching
This program prevents automatic switching between the paper trays.
To disable auto tray switching, press the check box of
“DISABLING OF AUTO TRAY SWITCHING” to display a
check mark in the check box.
To restore this function, press the check box of this program
again to clear the check mark in the check box.
27
Page 30

KEY OPERATOR PROGRAMS
Disabling of Bypass-Tray in Duplex Copy
This program is used to disable the use of the bypass tray when making
duplex copies.
To disable use of the bypass tray when making duplex
copies, press the check box of “DISABLING OF BYPASSTRAY IN DUPLEX COPY” to display a check mark in the
check box.
To restore use of the bypass tray, press the check box of this
program again to clear the check mark in the check box.
Disabling Deletion of Job Programs
This program is used to prevent stored programs from being replaced
or deleted. If this program is set, storing of job programs is also
disabled.
To prevent job programs stored in memory from being
replaced or deleted, press the check box of “DISABLING
DELETION OF JOB PROGRAMS” to display a check mark in
the check box.
To allow replacement/deletion, press the check box of this
program again to clear the check mark in the check box.
Disabling of Document Feeder
This program is used to prevent the use of the optional document
feeder when it malfunctions.
To prohibit use of the document feeder, press the check box
of “DISABLING OF DOCUMENT FEEDER” to display a check
mark in the check box.
To enable use of the document feeder, press the check box
of this program again to clear the check mark in the check
box.
Disabling of Duplex Copying
This program is used to enable or disable the optional duplex system.
If a malfunction occurs within the duplex system of the copier, the
system can be disabled until it is serviced. The rest of the copier in the
meantime will remain operable.
28
Page 31

To disable the duplex system, press the check box of
“DISABLING OF DUPLEX COPYING” to display a check
mark in the check box.
To enable the duplex system, press the check box of this
program again to clear the check mark in the check box.
Disabling of Stapler
This program is used to enable or disable the stapler of the optional
staple sorter (AR-SS2). If the stapler malfunctions, it can be disabled
to prevent further malfunction or possible damage to the stapler until
it is serviced.
To disable the stapler, press the check box of “DISABLING
OF STAPLER” to display a check mark in the check box.
To enable the stapler, press the check box of this program
again to clear the check mark in the check box.
Disabling of Covers Mode
KEY OPERATOR PROGRAMS
This program is used to prevent selection of the COVERS mode.
To disable the COVERS mode, press the check box of
“DISABLING OF COVERS MODE” to display a check mark in
the check box.
To enable use of the mode, press the check box of this
program again to clear the check mark in the check box.
Disabling of PC/Modem Access
This program is used to determine whether persons other than
persons who know the key operator code number will be permitted
access via a computer or other equipment, either directly or through a
telephone line, to the copier’s key operator programs.
To require key operator code entry for access to key operator
programs, press the check box of “DISABLING OF PC/
MODEM ACCESS” to display a check mark in the check box.
To permit remote access to key operator programs without
key operator code entry, press the check box of this program
again to clear the check mark in the check box.
NOTE:
The customers must choose the setting of this program by themselves.
If this program is not set, external operators can access the key
operator programs from a computer or other equipment without key
operator code entry. If this program is set, external operators must
enter the key operator code to access the key operator programs. (This
program is set in the factory default setting.)
29
Page 32

KEY OPERATOR PROGRAMS
Disabling of Sleep Mode
The sleep mode is used to turn off the power to the fusing unit
automatically once a programmed length of time has elapsed without
any copier operation after the last copy of a run is made or power is
turned on. This mode lowers the user’s electricity bill, reduces waste
of natural resources, and cuts down on environmental pollution.
Depending on how the machine is to be used, you may wish for some
reasons to disable this mode. This can be done using this program.
NOTE:
Since we would like you to fully understand the purpose of this mode,
we suggest that you enable this mode and set the most appropriate
time using program “SLEEP MODE SETTING” (page 25).
To disable the auto power shut-off mode, press the check
box of “DISABLING OF SLEEP MODE” to display a check
mark in the check box.
To restore the mode, press the check box of this program
again to clear the check mark in the check box.
Disabling of Pre-scan in B/W Copy
This copier performs a pre-scan in black/white copying to check the
density of background of the original. The pre-scan operation allows
cleaner copies to be obtained but copying speed will be slower. This
program is used to disable pre-scan in black/white copying.
To cancel pre-scan in black/white copying, press the check
box of “DISABLING OF PRE-SCAN IN B/W COPY” to display
a check mark in the check box.To restore pre-scan, press the
check box of this program again to clear the check mark in
the check box.
30
Page 33

KEY OPERATOR PROGRAMS
OTHER PROGRAMS
The following two programs are not included in the four categories. The
programs can be selected by pressing the relevant key on the touch
panel after the key operator program mode is selected.
Total Count
This program is used to display the total counts, including counts of the copier,
document feeder, duplex module, and stapler.
An 11" x 17" or a 12" x 18" copy is counted as two copies.
A two-sided copy is counted as two copies (four copies for 11"x 17").
Covers and transparency inserts are counted as one copy even if they are
blank.
The lists printed with the key operator programs are included in “SELF
PRINTS”.
When the “TOTAL COUNT” key is pressed, the following display will appear.
KEY OPERATOR PROGRAMS
TOTAL COUNT
COPIES : 600,000 SELF PRINTS
(COLOR) (COLOR)
COPIES : 500,000 SELF PRINTS
(B/W) (B/W)
DUPLEX : 500,000
DOCUMENT
FEEDER
STAPLER : 500,000
: 600,000
PRINT
PRINTS : 500,000
(COLOR)
PRINTS : 800,000
(B/W)
SCANNER
MODE
OK
: 500,000
: 500,000
: 800,000
The total counts for all units in use will be displayed.
To print these counts, press the “PRINT” key.
Press the “OK” key to exit the program.
Program List Printout
This program is used to print out the list of available key operator
programs.
When the “PROGRAM LIST PRINTOUT” key is pressed, the following
display will appear.
KEY OPERATOR PROGRAMS
PROGRAM LIST PRINTOUT
SELECT MODE.
Press the “COPIER” key.
●
The copier will start printing. To stop printing after starting, press
the “CANCEL” key.
●
The “PRINTER” and “ALL PROGRAMS” keys are used when an
optional printer feature is installed.
OK
COPIER PRINTER
ALL PROGRAMS
31
Page 34

KEY OPERATOR PROGRAMS
BLACK
Place the test patch as shown.
Auto Color Calibration
The Auto Color Calibration program enables automatic color
gradation correction when it becomes misadjusted.
NOTE:
The color gradation may not be sufficiently corrected after one correction
cycle. If so, a re-execution of the program may be necessary.
This program can be selected by pressing the “AUTO COLOR
CALIBRATION” key on the category menu screen.
KEY OPERATOR PROGRAMS
COPIER MODE
OK
OTHER FUNCTION
SETTINGS
ENABLE/DISABLE
SETTINGS
AUTO COLOR CALIBRATION
TIMER SETTING
ACCOUNT CONTROL
1. Select the “AUTO COLOR CALIBRATION” key on the
category menu screen.
●
The following display will appear.
KEY OPERATOR PROGRAMS
AUTO COLOR CALIBRATION
USE 11" 17" PAPER FOR THIS ADJUSTMENT.
PRESS [EXECUTE] TO PRINT THE TEST PATCH.
OK
EXECUTE
2. Press the “EXECUTE” key.
●
The copier will print the test patch.
3. After the test patch is printed, place it on the document
glass of the copier with 5 white sheets of the same size
on top of it and press the “EXECUTE” key again.
●
Place the test patch on the document glass as shown in the
illustration.
●
The copier will start scanning the test patch on the document
glass and the adjustment will automatically be made.
4. Press the “OK” key to exit the program.
●
To re-execute the calibration, repeat all the steps.
32
Page 35

KEY OPERATOR PROGRAMS
PRINTER KEY OPERATOR PROGRAMS
The following programs can be selected only if an optional power
supply kit and an optional printer controller have been installed. Select
“PRINTER” after entering the key operator code number. Then select
the desired program.
Enable Bypass-Tray Size Detection
This program is used to enable or disable paper size detection of the
bypass tray in the print mode. This setting does not affect the paper
size detection in the copy mode.
●
When the check mark is on, automatic size detection is enabled for
the bypass tray and the tray is included as an alternative for auto tray
switching for the print mode.
●
When the check mark is off, the bypass is not included as an
alternative for automatic tray switching and the paper in the bypass
tray is always defined as special paper.
To enable paper size detection of the bypass tray in the print
mode, press the “ENABLE BYPASS-TRAY SIZE DETECTION”
box to display a check mark.
To disable paper size detection, press the checked box again
to clear the check mark.
NOTE:
If images larger than the paper in the bypass tray are printed, the toner
image outside the paper area will be wasted and will tend to dirty some
machine parts. After disabling the size detection, be careful to print
images that are the same size or smaller than the paper used.
Enable Bypass-Tray Type Detection
This program is used to ensure that the paper type selected for copying
and printing are the same.
●
When the check mark is on, the paper types selected for copying
and printing will be compared. These must be the same for automatic
paper feeding to function.
●
When the check mark is off, the settings for copier and printer can
be different and will not be compared. When the settings are
different, a selection from the printer driver will override any selection
made at the copier. When printing with the check mark off, make
sure to select the correct paper type. Selecting a wrong paper type
might cause a misfeed or other malfunction.
To enable paper type detection of the paper tray, press the
check box of “ENABLE BYPASS- TRAY TYPE DETECTION”
to display a check mark.
To disable it, press the checked box again to clear the check
mark.
33
Page 36

KEY OPERATOR PROGRAMS
Prohibit Bypass-Tray Selection
If this program is set, the bypass tray will not be selected for a print job
that specifies auto paper selection or during auto tray switching.
To prohibit bypass tray selection, press the “PROHIBIT
BYPASS-TRAY SELECTION” box to display a check mark.
To restore bypass tray selection, press the checked box
again to clear the check mark.
Prohibit Auto Tray Switching
This program prevents automatic switching between paper trays for
print jobs. This program does not affect the auto tray switching function
in the copy mode.
To prohibit automatic tray switching, press the “PROHIBIT
AUTO TRAY SWITCHING” box to display a check mark.
To restore automatic tray switching, press the checked box
again to clear the check mark.
Disabling of Stapler
This program is used to disable use of the stapler of an optional finisher
(AR-FN4). If the stapler malfunctions, it can be disabled to prevent
further malfunctioning and possible damage to the stapler until it can
be serviced.
To disable the stapler, press the check box of “DISABLING
OF STAPLER” to display a check mark in the check box.
To enable the stapler, press the check box of this program
again to clear the check mark in the check box.
34
Page 37
KEY OPERATOR ASSISTANCE CALL
When the copier is in need of service or care not usually performed
by general users, the copier will stop and one of the following
messages listed below will appear.
Message Remedy
CHECK STAPLER POSITION OR STAPLE JAM. See page 7-11 of the Operation Manual for staple jam
removal. If the trouble cannot be easily remedied, use key
operator program “DISABLING OF STAPLER” (page 29) to
prevent the use of the stapler.
Contact your authorized Sharp Service Center for service.
SORTER IS OUT OF SERVICE. Contact your authorized Sharp Service Center for service.
PRESS [CA] TO CANCEL JOB. (This message will appear when the optional staple sorter
(AR-SS2) malfunctions.)
DUPLEX SYSTEM IS OUT OF SERVICE. Use key operator program “DISABLING OF DUPLEX
COPYING” (page 28) to prevent the use of the optional
duplex system. Contact your authorized Sharp Service
Center for service.
THE DOCUMENT FEEDER IS OUT OF Use key operator program “DISABLING OF DOCUMENT
SERVICE. PRESS [CA] TO CANCEL JOB. FEEDER” (page 28) to prevent the use of the optional
document feeder. Contact your authorized Sharp Service
Center for service.
SELECTED PAPER TRAY IS OUT OF SERVICE. Contact your authorized Sharp Service Center for service.
PLEASE SELECT ANOTHER PAPER TRAY.
CALL FOR SERVICE. With this message, an alphanumeric code will appear to
CODE: - indicate a malfunction has occurred which cannot be
corrected by the key operator.
Contact your authorized Sharp Service Center for service.
Be sure to report the alphanumeric code information as
well. This will enable the Service Center to prepare to
correct the malfunction associated with the code.
35
Page 38

AR-C160
SHARP ELECTRONICS CORPORATION
Sharp Plaza, Mahwah, New Jersey 07430-2135.
SHARP CORPORATION
PRINTED IN JAPAN
2001E KS1
TINSE2099FCZZ
 Loading...