

Page 1
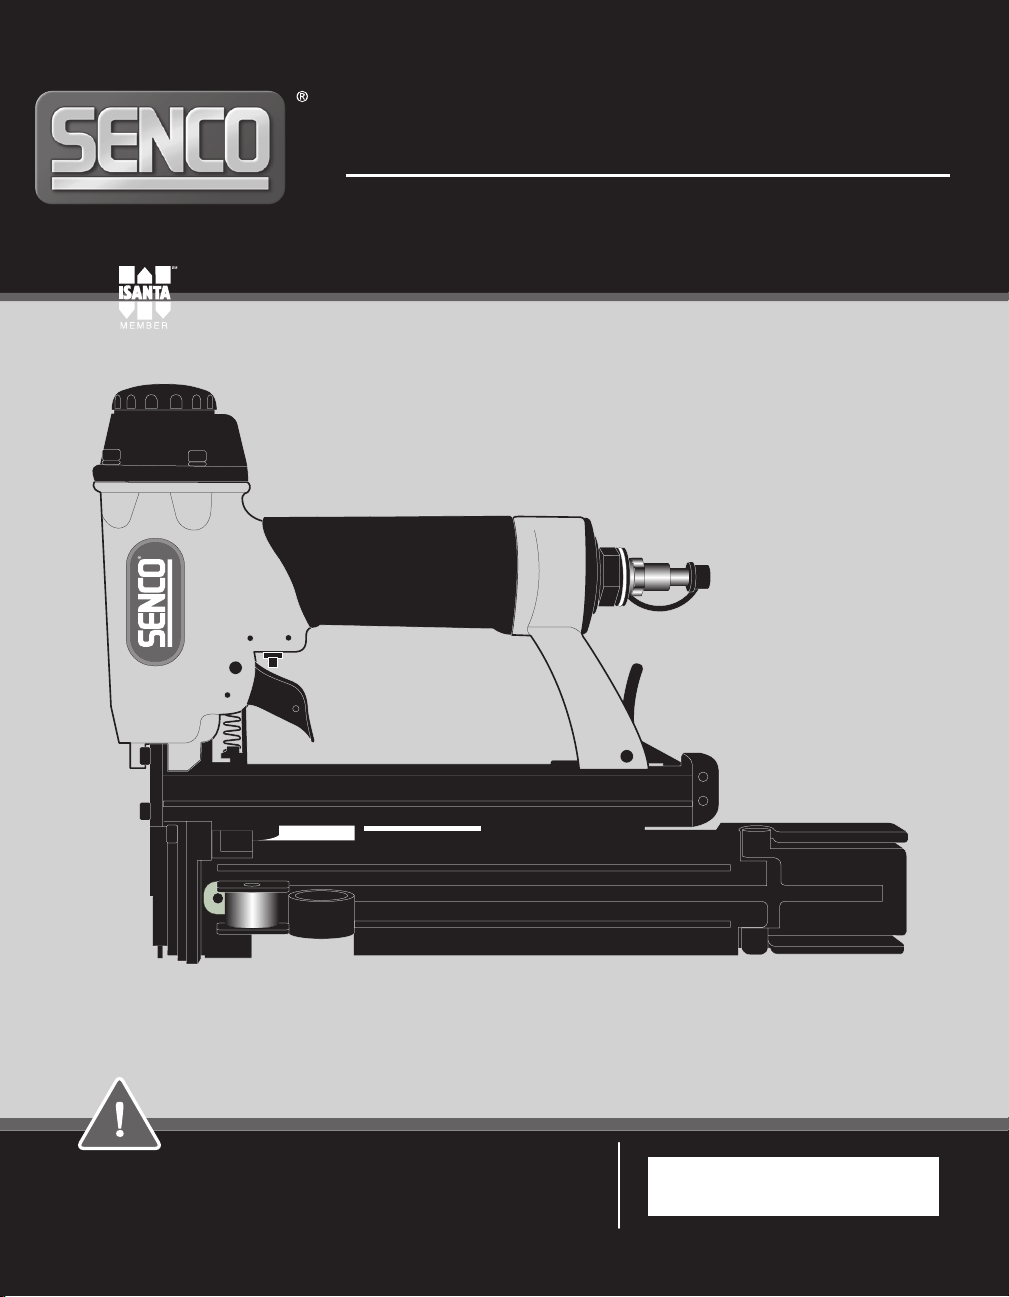
BC58
6
B
UTTON CAP
S
TAPLER
Operating Instructions
Instrucciones de Operación
Mode d’Emploi
Questions? Comments?
call SENCO’s toll-free Action-Line: 1-800-543-459
or e-mail: toolprof@senco.com
www.senco.com
Warnings for the safe use of this tool are included in this manual.
Los avisos para el uso seguro de esta herramienta están incluidos
en este manual.
Les consignes pour l’utilisation en toute sécurité de cet outil se
trouvent dans ce manuel.
Senco Products, Inc.
8485 Broadwell Road
Cincinnati, Ohio 45244
© 2000, 2006 by Senco Products, Inc.
NFD84A - Issued May 4, 2006
Page 2

English
Español Français
TABLE OF
CONTENTS
Maintenance 3
Tool Use 4
Specications 6
EMPLOYER’S
RESPONSIBILITIES
Employer must enforce
compliance with the
safety warnings and
all other instructions
which accompany this
tool as shipped from the
manufacturer.
Keep this manual available for use by all people
assigned to the use of this
tool.
For personal safety and
proper operation of this
tool, read and understand
all of these instructions
carefully.
TABLA DE MATERIAS
Mantenimiento 3
Uso de la Herramienta
4
Especicaciones 6
RESPONSABILIDADES DEL
EMPLEADOR
El empleador debe hacer
cumplir las advertencias de
seguridad y todas las otras
instrucciones que acompañan
a esta herramienta como se la
despacha desde el fabricante.
Mantenga este manual disponible para que lo usen todas
las personas destinadas a hacer uso de esta herramienta.
Por razones de seguridad personal y la adecuada operación
de esta herramienta, lea y
comprenda todas estas instrucciones cuidadosamente.
TABLE DES MATIÈRES
Entretien 3
Utilisation de l’outil 4
Spécications 6
RESPONSABILITÉS DE
L’EMPLOYEUR
L’employeur doit faire appliquer les consignes de
sécurité et toutes les autres
instructions qui accompagnent cet outil tel qu’il est
livré par son constructeur.
Ayez ce manuel à la disposition de toutes les
personnes chargées
d’utiliser cet outil.
Pour assurer la sécurité personnelle et le bon
emploi de cet outil, lisez et
assimilez soigneusement
toutes ces instructions.
2
Page 3

Maintenance
Maintenimiento
Entretien
English
l Read and understand “SAFETY
INSTRUCTIONS” manual
shipped with this tool before
using tool.
l All screws should be kept tight.
Loose screws result in unsafe
operation and parts breakage.
l With tool disconnected, make
daily inspection to assure free
movement of trigger. Do not use
tool if trigger sticks or binds.
l Squirt SENCO pneumatic oil
(5 to 10 drops) into the air
inlet twice daily (depending on
frequency of tool use). Other oils
may damage O-rings and other
tool parts.
l Wipe tool clean daily and inspect
for wear. Use non-ammable
cleaning solutions only if necessary–DO NOT SOAK.
Caution: Such solutions may
damage O-rings and other tool
parts.
l Keep tool pointed away from
yourself and others and connect
air to tool.
Español Français
l Antes de usar la herramienta lea
y comprenda el manual “INSTRUCCIONES DE SEGURIDAD” despachado con ella.
l Todos los tornillos tienen que
mantenerse apretados. Los
tornillos sueltos pueden producir
una operación poco segura y la
rotura de piezas.
l Con la herramienta desconec-
tada, haga inspecciones diarias
para asegurar el movimiento
libre del gatillo. No use la herramienta si el gatillo se pega o se
atasca.
l Aplique aceite neumático
SENCO en la entrada de aire
dos veces al día (dependiendo
de la frecuencia de uso, 5 a 10
gotas). Otros aceites pueden
dañar las juntas tóricas y otras
piezas de la herramienta.
l Use soluciones de limpieza
ininamable
solamente si es necesarioNO LA REMOJE.
Precaución: Tales soluciones
pueden dañar
las juntas tóricas y otras piezas
de la herramienta.
l Mantenga la herramienta apun-
tando en la dirección opuesta a
su cuerpo y a otras personas y
conecte el aire a la herramienta.
l Lisez et assimilez le manuel
“INSTRUCTIONS DE SÉCURITÉ” livré avec cet outil avant
de l’utiliser.
l Toutes les vis doivent être main-
tenues serrées à fond. Les vis
desserrées entraînent un manque de sûreté du fonctionnement
et la rupture de pièces.
l L’outil étant déconnecté de l’ar-
rivée d’air comprimé, effectuez
une inspection journalière pour
assurer le libre mouvement de la
détente. N’utilisez pas l’outil si la
détente colle ou se coince.
l Avec une burette, placer 5 à 10
gouttes d’huile pneumatique
SENCO dans l’arrivée d’air
deux fois par jour (dépend
de l’intensité de l’utilisation
de l’appareil). D’autres huiles
pourraient endommager les
joints toriques et d’autres
pièces de l’outil.
l Nettoyez l’outil chaque jour à
l’aide d’un chiffon et inspectezle pour déceler une éventuelle
usure. Utilisez uniquement des
solvants non inammables en
cas de nécessité-NE LE FAITES
PAS TREMPER !
Attention : De tels produits
peuvent endommager les joints
et autres pièces de l’appareil.
l Maintenez l’outil pointé à l’écart
d’autres personnes et de vousmême et raccordez l’air à l’outil.
3
Page 4

Tool Use
1
2
1
2
1
2
Uso de la Herramienta
Utilisation de l’Outil
English
l To load staples:
Depress latch and slide rail
open.
l Lay strip of staples into maga-
zine. Use only genuine SENCO
staples. Do not load with trigger
depressed.
l Push rail forward until it latches. l Empuje el carril hacia adelante
l To load caps:
Pull feeder shoe back completely,
opening magazine door to left.
l Para cargar:
l Coloque la tira de grapas dentro
l Para cargar las tapas:
Jale la zapata alimentadora
Español Français
Oprima el cerrojo y deslice el
carril abriéndolo.
del cargador. Use solamente
grapas SENCO auténticos. No
cargue con el gatillo oprimido.
hasta cerrario.
hasta atrás, abriendo la puerta
del cargador hacia la izquierda.
l Pour charger :
Appuyer sur le verrou et ouvrir
le rail en le tirant.
l Insérer la bande d’agrafes dans
le magasin. Utilisez uniquement
les véritables agrafes SENCO.
Veillez à ne pas appuyer sur la
détente quand vous chargez.
l Pousser le rail jusqu enclique-
tage.
l Pour charger les capuchons:
Ramenez complétement le
sabot de chargement, en
ouvrant la porte du magasin sur
la gauche.
l Insert caps with string extending
out back side of magazine. Once
caps are in, hold in place, and
remove string by pulling. Close
magazine door.
l Inserte las tapas con el cordel
extendido hacia fuera por el
lado posterior del cargador. Una
vez que las tapas están adentro, sujételas en su lugar y jale
el cordel para sacarlo. Cierre la
puerta del cargador.
l Insérez les capuchons avec
le ressort dépassant du côté
arrière du magasin. Une fois
les capuchons entrés, main
tenez-les en place et enlevez
le ressort en tirant. Refermez
la porte du magasin.
4
Page 5

Tool Use
2
1
1
2
Uso de la Herramienta
Utilisation de l’Outil
English
l With a “Dual-Action” trigger, nails
can be driven two ways:
a) Position safety element
against work surface and pull
trigger...“Trigger Fire.”
b) To drive a nail, pull trigger
and push safety element against
work surface. Each time the
safety element is pushed against
the work surface a nail will be
driven. This “bottom-re” mode
of operation is preferred when
high production, rapid fastener
placement is desired.
l Fire tool once to advance/load
rst cap.
l Lift tool completely from work
surface between shots to feed
next cap.
Español Français
l Las herramientas con gatillo de
accion doble pueden ser disparadas de dos maneras:
a)Oprima el seguro contra la
supercie de trabajo y apriete el
gatillo...Disparo de gatillo.
b)Para disparar un clavo, oprima
el gatillo y empuje el elemento
de seguridad contra la supercie
de trabajo. Cada vez que empuje
el elemento de seguridad contra
la supercie de trabajo, disparará un clavo. Este modo de
operación de “disparo inferior”
o “por rebote” es el preferido
cuando se desea alta productividad y rápida colocación del
clavo.
l Dispare la herramienta una vez
para avanzar/cargar la primera
tapa.
l Levante completamente la
herramienta de la supercie de
trabajo entre cada disparo para
hacer avanzar la próxima tapa.
l Les appareils équipés de
déclenchement “au toucher / par
gâchette” peuvent être utilisés
de 2 façons différentes :
a)Déclenchement par “gâchette”:
Appliquer le palpeur de sécurité
de l’appareil à l’endroit désiré et
activer la gâchette.
b)Pour planter un clou, tirez sur
la détente et poussez l’élément
de sécurité contre la surface
de travail. Chaque fois que
l’élément de sécurité est poussé
contre la surface de travail un
clou est planté. Le mode de
fonctionnement en “tir continu”
est préférable si vous désirez
placer des attaches rapidement
avec forte productivité.
l Actionnez l’outil une fois pour
faire avancer/charger le premier
capuchon.
l Soulevez complètement l’outil
de la surface de travail entre les
déclenchements an d’alimenter
avec le capuchon suivant.
5
Page 6

TECHNICAL SPECIFICATIONS
1/2"
13 mm
.050"
1,27 mm
.019"
,48 mm
A
English
Minimum to maximum operating pressure
AirConsumption(60cyclesperminute)
Air Inlet
MaximumSpeed(cyclesperminute)
Weight
StapleCapacity
Tool size: Height
Tool size: Length
Toolsize:Width:MainBody
4A0001N
80–120psi
.77 scfm
1
⁄4 in. NPT
15
(Sencomatic)
2.0lbs.
110-185
5 15⁄16 in.
1
9
⁄2 in.
1 15⁄
in.
16
BC58
5.5–8.3 bar
21.8 liter
1
⁄
in. NPT
4
15
(Sencomatic)
0.9kg
110-185
151 mm
241 mm
49mm
ESPECIFICACIONES TECNICAS
Español
Presión de operación mínima y máxima
Consumo de aire (60 ciclos por minuto)
Entrada de aire
Velocidad máxima (ciclos por segundo)
Peso
Capacidad de grapas por cargador
Tamaño de la herramienta: Altura
Tamaño de la herramienta: Longitud
Tamaño de la herramienta: Ancho (Cuerpo)
BC58
5,5–8,3 bar
21,8 liter
1
⁄4 in. NPT
15(Sencomatic)
0,9kg
110-185
151 mm
241 mm
49mm
SPÉCIFICATIONS TECHNIQUES
Français
Pression de travail min. et max.
Consommationd’air(60cyclesparminute)
Admission d’air
Vitessemaximum(cyclesparseconde)
Poids
Capacité de projectiles par magasin
Dimensions de l’outil: hauteur
Dimensions de l’outil: longueur
Dimensionsdel’outil:largeur:corpsdel’appareil)
BC58
5,5–8,3 bar
21,8 liter
1
⁄4 in. NPT
15(Sencomatic)
0,9kg
110-185
151 mm
241 mm
49mm
Specications Especicaciones Spécications
English
Español Français
1/4
5/16
3/8
1/2
5/8
A
mm
6
8
10
13
16
6
Code
inches
F04
F05
F06
F08
F10
Page 7

SENCO TOOL & PARTS WARRANTY
This tool has been designed and constructed using
the highest standards of material and workmanship.
TOOL AND PARTS WARRANTY:
The length of this guarantee is one year from date of purchase by the original retail purchaser. Dur-
Senco’s option, any original part or parts for the original retail purchaser. This will
be done free of charge, provided the parts are determined defective in materials
or workmanship upon examination by a Senco Authorized Warranty Service Center
(exception: rubber o-rings and seals, driver blades). Any replacement part provided will
carry a warranty for the balance of the period of warranty applicable to the part it replaces.
This warranty will be honored, only if:
A) Clean, dry, regulated compressed air has been used, at air pressure not exceeding the
maximum indicated on the tool casting;
B) No evi dence of a bu se, or fa ilu re to fol low re commende d operational m aintenan ce, or
modication of the tool is present (read Operator Manual for use and maintenance instructions);
C) Whe n repair or replacemen t of pa rts or tools is necessary, the or iginal re ta il purchase r
retur ns t he comple te too l or pa r t, wit h tran spo rta tio n prep aid, to th e near est Se nco
Auth orized Warran ty Servi ce Center, with purchase re ceipt or other pos itive proof that
the part or tool is within the warranty period.
THIS WARRANTY IS THE ONLY WARRANTY ON THIS TOOL, AND ALL OTHER
WARRANTIES, WHETHER ORAL, WRITTEN, EXPRESS, OR IMPLIED, INCLUDING, BUT
NOT LIMITED TO, THE IMPLIED WARRANTY OF MERCHANTABILITY OR PARTICULAR PURPOSE, ARE
SOLELY AND EXCLUSIVELY AS STATED ABOVE. SENCO PRODUCTS, INC. SHALL IN
NO EVENT BE LIABLE FOR INCIDENTAL, CONSEQUENTIAL, INDIRECT, OR SPECIAL
DAMAGES. IN NO EVENT, WHETHER AS A RESULT OF A BREACH OF CONTRACT,
WARRANTY, TORT (INCLUDING NEGLIGENCE) OR OTHERWISE, SHALL SENCO’S LIABILITY EXCEED
OR LIABILITY. ANY LIABILITY CONNECTED WITH THE USE OF THIS TOOL SHALL
TERMINATE UPON THE EXPIRATION OF THE WARRANTY PERIOD SPECIFIED ABOVE.
ing this period, Senco Products, Inc., will repair or replace at
EXCLUDED. BUYER’S OR USER’S REMEDIES ARE
THE PRICE OF THE TOOL WHICH HAS GIVEN RISE TO THE CLAIM
earthquake, hurricane or other disaster resulting only from the forces of nature. Such a claim will be honored
Senco will also replace any tool destroyed by an Act of God such as ood,
previously submitted a completed warranty registration card, and then submits proof of ownership and an ac-
documented by an insurance carrier, police department, or other ofcial
governmental source. To obtain instructions for ling a claim call 1-800-543-4596.
Replacement of Tool Due to Natural Disaster
provided that such original retail purchaser had
ceptable statement describing such Act of God
SENCO PRODUCTS, INC.
CINCINNATI, OHIO 45244-1611 USA
 Loading...