

Page 1
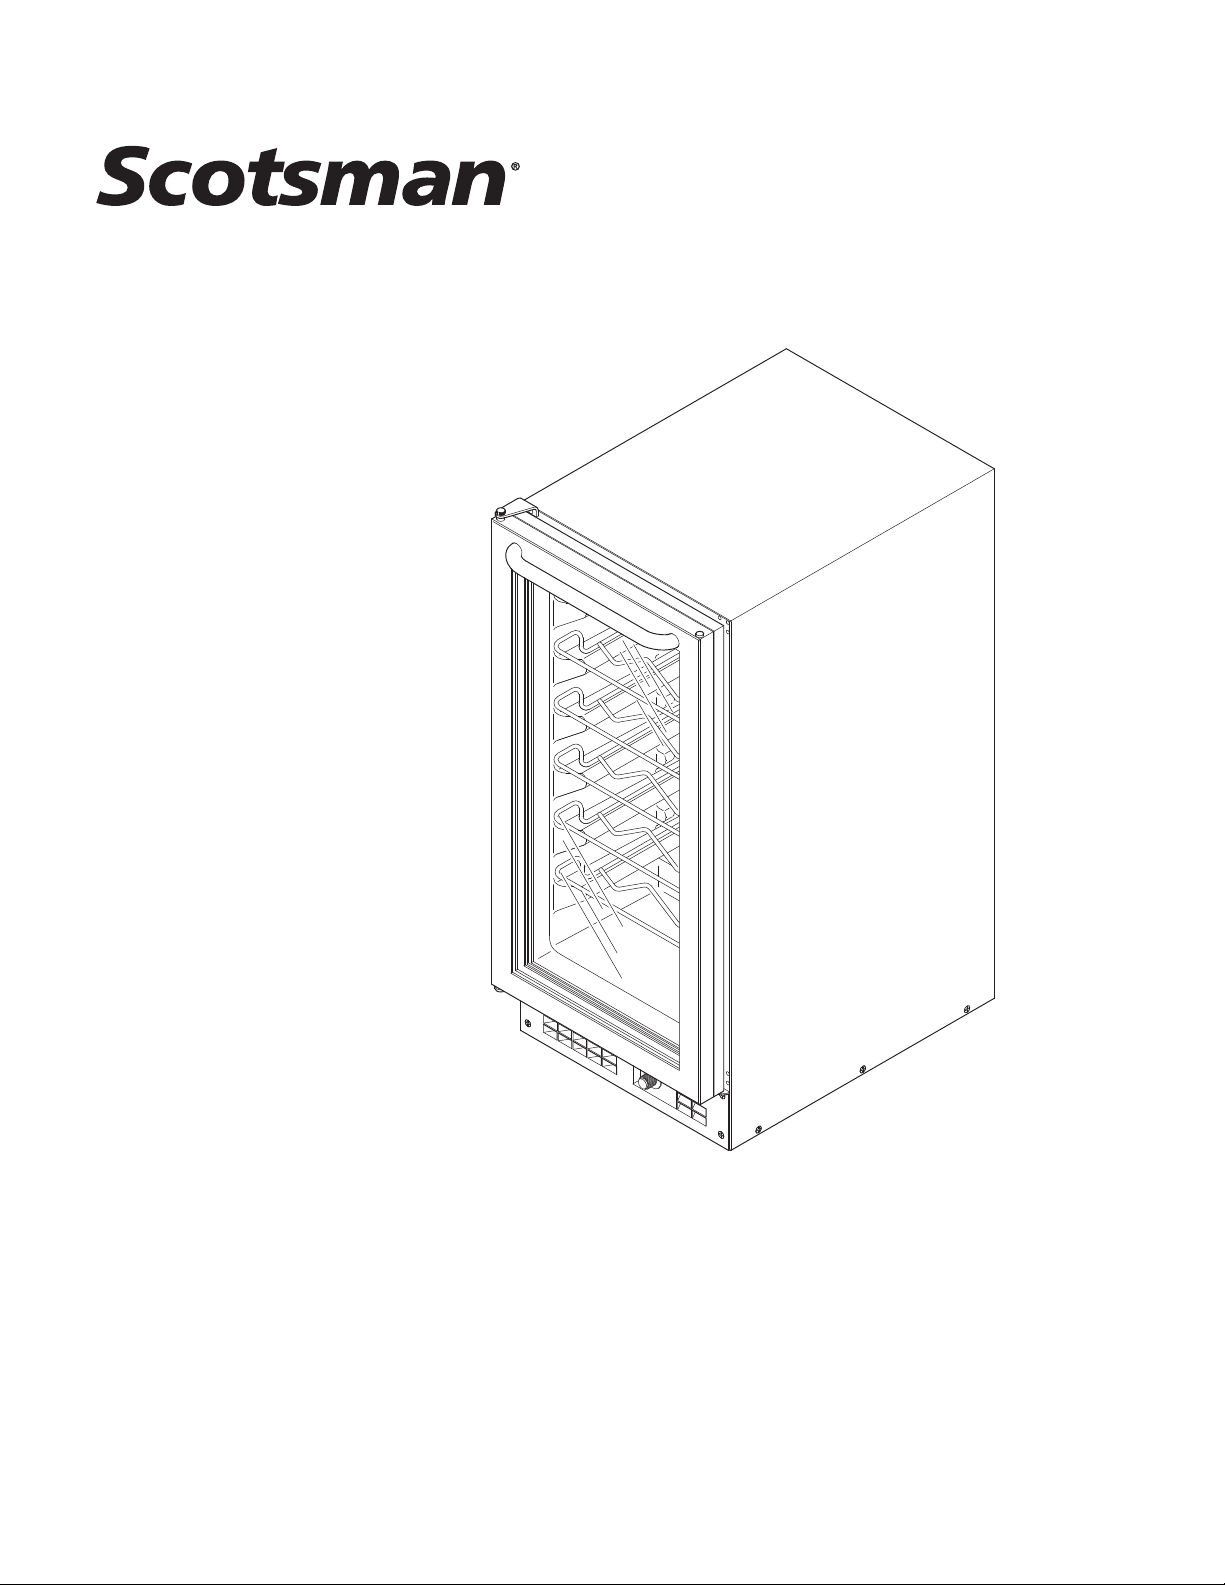
Product Manual for
Wine Storage Unit
model
SCV32
Page 2
Introduction
SCV32
Scotsman’s SCV Wine Storage Unit is designed for
the refrigeration, storage and display of wine
bottles. In order to provide efficient operation, the
cabinet is insulated and the door has two panes of
glass. A door gasket provides sealing between the
door and the cabinet. Six slide out storage racks
with stops are provided for ease of loading or
removal.
The SCV can be built into an under counter
application without loss of capacity or efficiency
due to the forced draft condenser under the unit.
Table of Contents
Introduction ················································ 1
Install It ·················································· 2
Layout Drawings ············································· 3
Reversing Door Swing ·········································· 4
This manual outlines the installation, use and
maintenance of the wine storage unit. Please keep
it for future reference and observe the Warning or
Caution notes.
Place It ·················································· 5
Switch It On ················································ 6
Load It ·················································· 7
Set the Temperature ··········································· 8
Temperature Control ··········································· 9
Maintenance ··············································· 10
Troubleshooting ·············································· 11
Light Bulb Replacement ········································· 12
Drain System ··············································· 13
Danger
Before discarding the product this unit replaces,
when discarding this product at the end of its
or
useful life:
! Risk of Child Entrapment
·
Take off the door
·
Leave the shelves in place so that children
may not easily climb inside.
June 2003
Page 1
Page 3
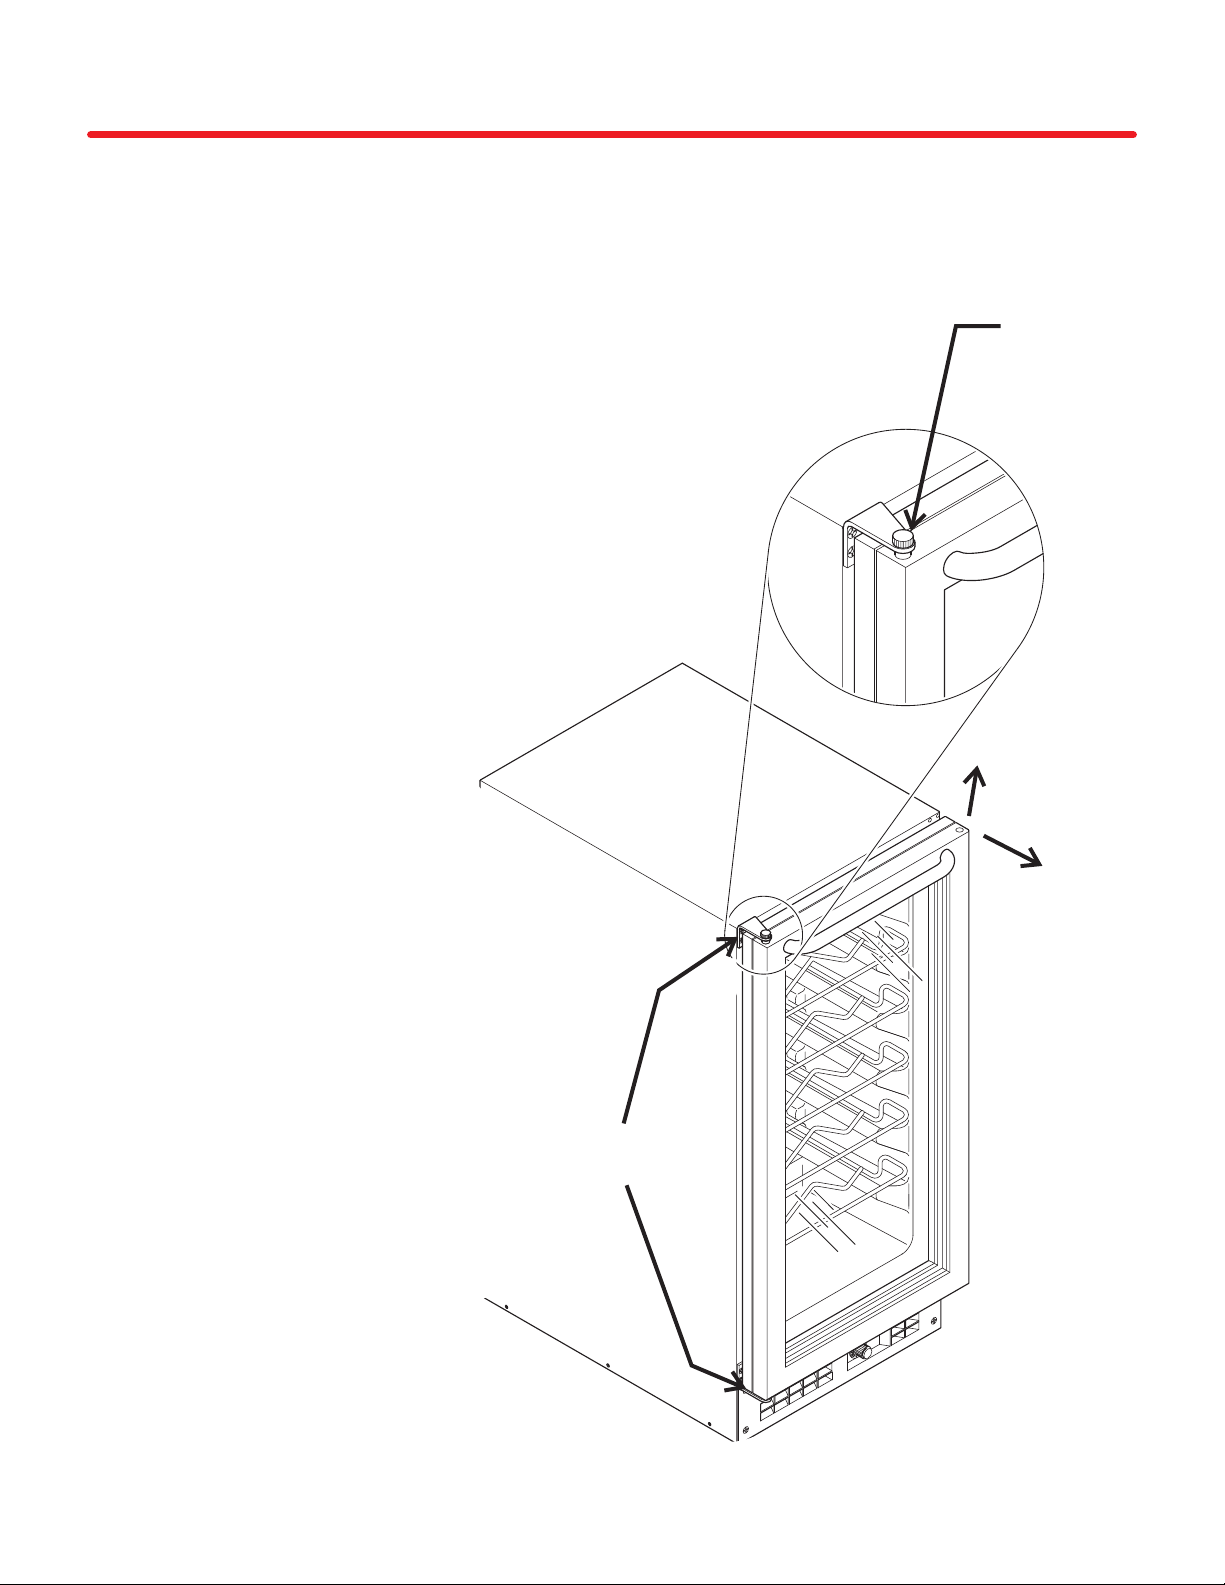
SCV32
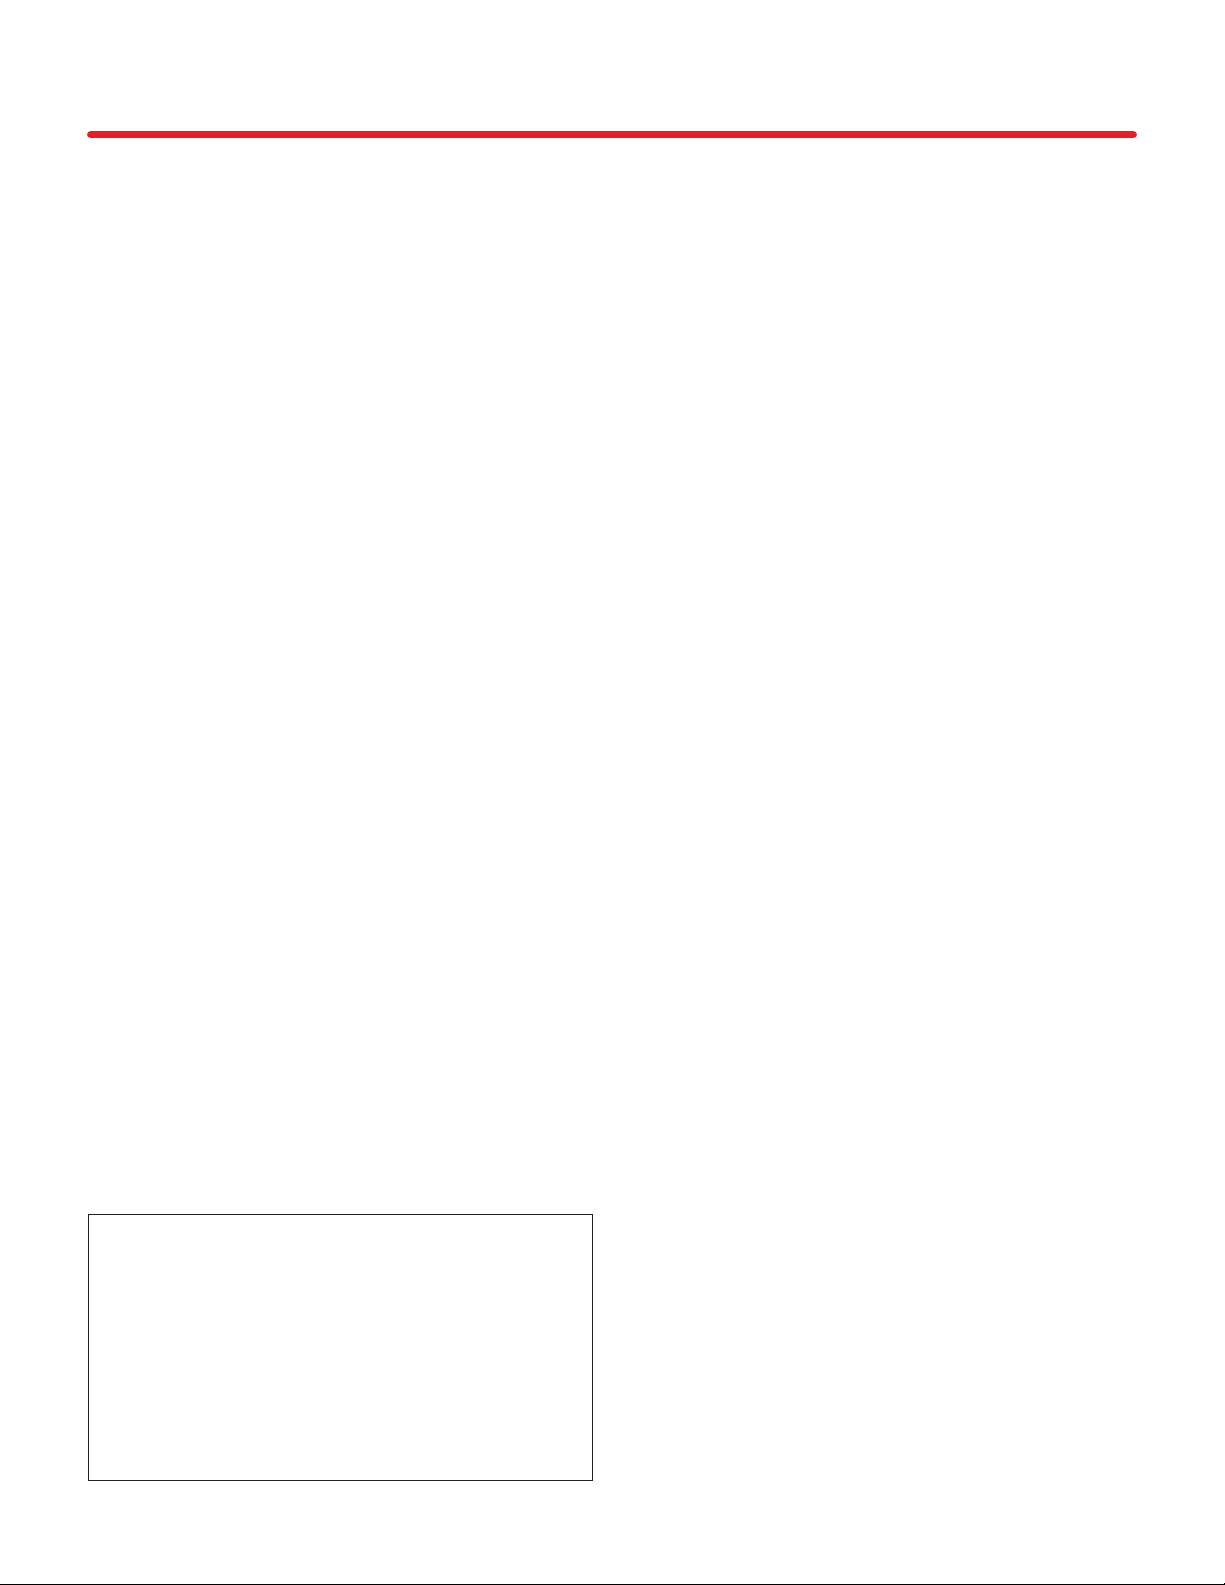
Install It
The SCV32 is designed to be installed indoors, in a
controlled environment. The operational limits are:
Voltage: 104 to 126 VAC 60 Hz
·
Room Temperature: 50 to 100oF.
·
Note: Due to possible door contact
with another cabinet, corner
installations may limit rack removal.
The vents at the bottom front must be kept clear of
obstructions. Blocking these vents will reduce the
ability of the unit to keep the wine at the proper
temperature, and may damage the refrigeration
system.
The unit should be on its own electrical circuit and
no extension cords can be used. It pulls 1.1 amps
or between 100 and 160 watts when operating.
Vents
Racks
Serial Number
Plate
Wine bottles are heavy. A fully loaded unit will
weigh up to 200 lb. Be sure the flooring is
adequate for the weight.
Remove any tape or other packaging material from
inside the unit. Check that all racks move freely.
Note: Door handle is for opening door only. Do
NOT pick the unit up by the handle.
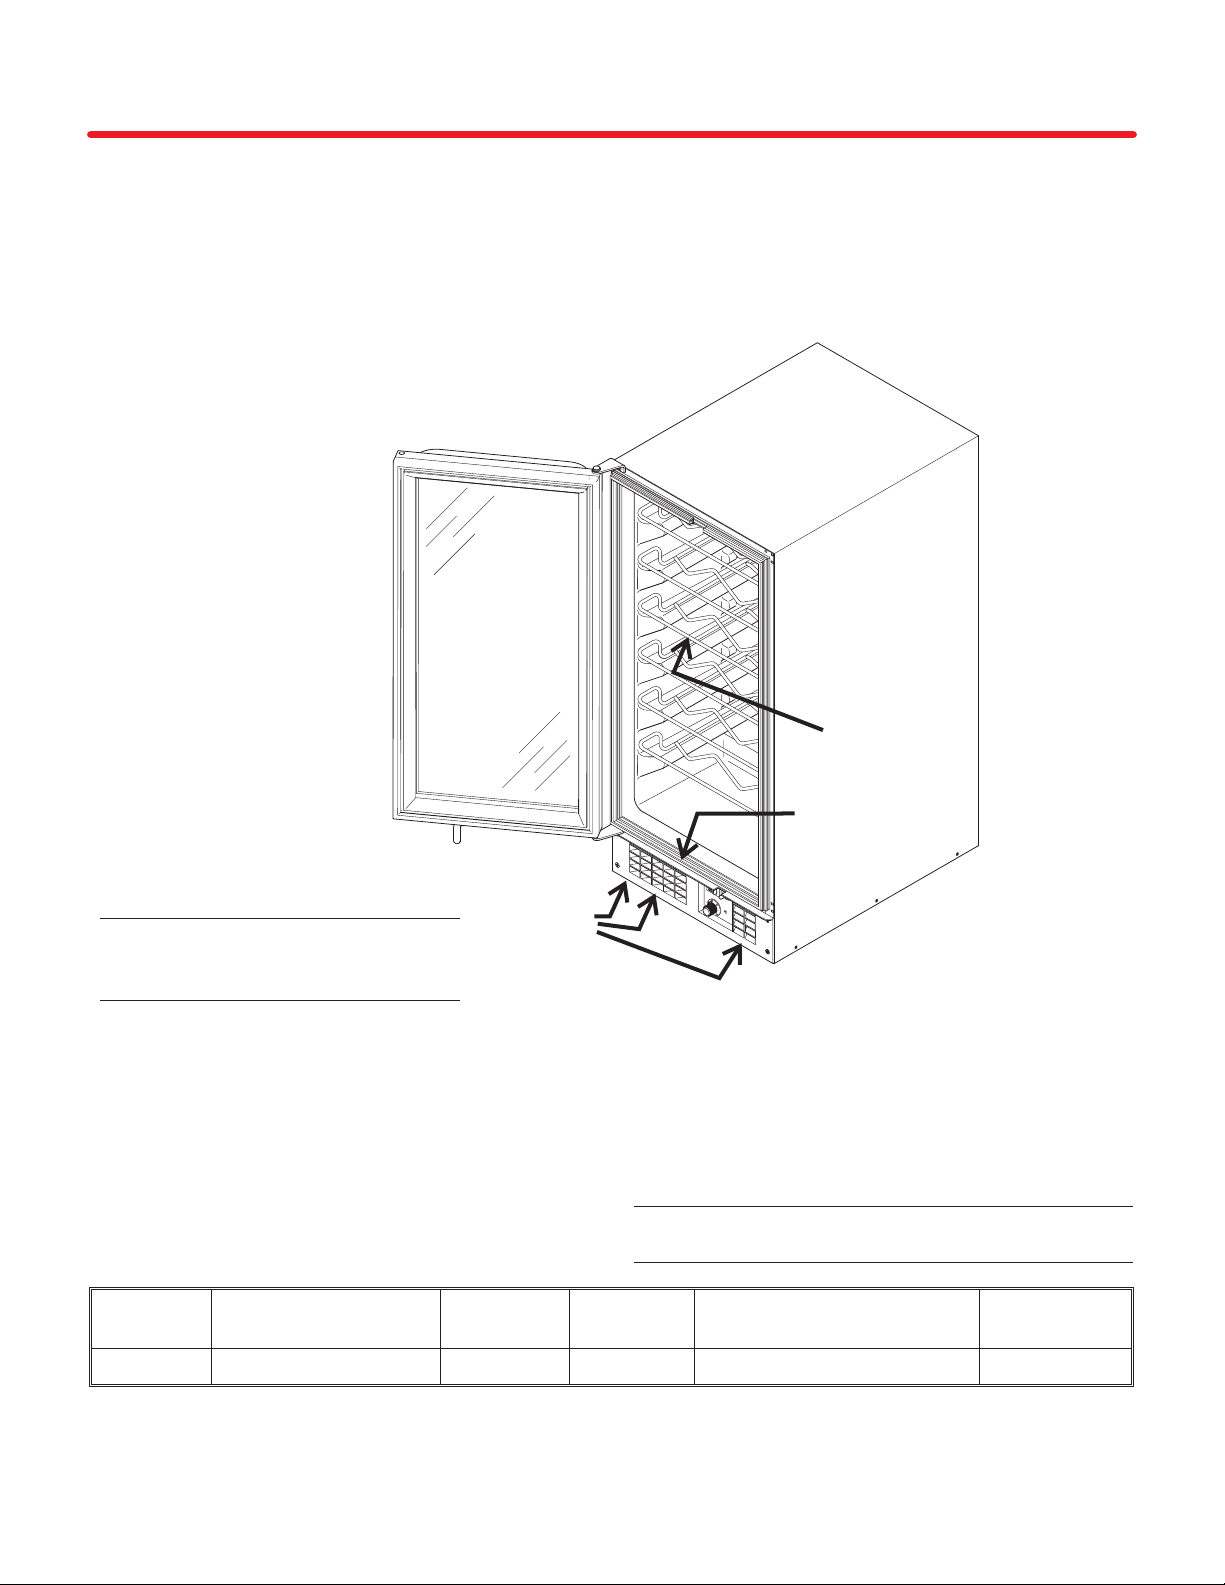
Model Basic Dimensions* Compressor Condenser Basic Electrical Refrigerant
Charge
SCV32-1SB 15”wx333/8” h x 21” d 1/16 HP Forced Draft 115 volts, 60 Hz, Single Phase 2.75 oz R-134a
* Width does not include clearance for built ins (extra 1/8” each side recommended), Height does not
include hinge, Depth does not include door. See the drawing on the next page for more detail.
June 2003
Page 2
Page 4
Layout Drawings
SCV32
Numbers in [brackets] are millimeters
NOTE: DOORS OPEN 175˚
FROM RIGHT OR LEFT SIDES
2.8
1/8"
SCREWHEAD
ALLOWANCE
43.2
1 3/4"
381
15"
2.8
1/8"
SCREWHEAD
ALLOWANCE
Top View
760.2
29 7/8"
[101.6]
4"
96.7
3 3/4"
846.6
33 3/8"
MIN TO
FLOOR
11.3
1/2"
Side View
539.6
21 1/4"
July 2003
Page 3
Page 5
SCV32
Reversing Door Swing
Determine if the door swing needs to be reversed.
If it does, follow these instructions:
1. Open the door.
2. Remove the hinge pin from the top hinge (it
unscrews). Save the pin and the spacer.
3. Tilt the door out just enough to clear the hinge
and lift the door off the bottom pin.
4. Remove the upper hinge from the cabinet and
insert the pin removed in step 2. Be sure it is in
tight.
5. Mount the hinge to the bottom position on the
opposite side.
6. Move spacer from original lower hinge to new
lower hinge.
7. Remove the original lower hinge and move to
the top position, opposite side.
7. Remove the pin from the hinge.
8. Place door on bottom hinge pin. Align door with
hole in top hinge, add spacer from step 2
and insert pin. Tighten pin.
Accessory Kit
A kit is available to fill in the space to the
left and right when the SCV32 is installed in a
cabinet with an 18” wide space. The kit number is
KCE18B.
Remove hinge
pin
Tilt Out &
Lift Up
Switch hinges top to bottom & left
to right when reversing swing
June 2003
Page 4
Page 6

Place It
Locate the leg levelers. Rotate them to level the
unit left to right and front to back.
If the unit is built in and the electrical socket is
behind the installed location, plug the unit in and
slide it back into place. Check for stability and
adjust legs if needed.
If the unit is free standing, move it into place and
check for stability. Adjust legs if needed. Plug it in
to an electrical socket of the correct voltage.
SCV32
Note: Only connect to a properly grounded
electrical outlet. Do not use an extension cord.
Follow all local, state and national codes.
Adjust Legs to Level the Cabinet
June 2003
Page 5
Page 7

SCV32
Switch It On
Locate the temperature control knob at the bottom
front of the unit. Rotate the knob clockwise to an
operating position.
You should immediately hear a humming noise and
feel air blowing in and out the vents near the knob.
After 10 minutes open the door and feel the back
panel inside the cabinet. It should feel cold to the
touch.
To switch refrigeration off: Rotate the temperature
control knob fully counter clockwise. The light will
still be functional.
Temperature
Control Knob
Cool Air
In
June 2003
Page 6
Warm Air Out
Page 8

Load It
SCV32
The six racks are designed to hold five bottles
each with the necks pointing at each other. Two
additional bottles may be placed on the bottom for
a total of 32. If large bottles do not fit between the
racks, remove a lower rack and place the bottles
on the rack below.
The racks are removable and reversible. To
remove a rack, take off the bottles on that rack and
pull it out until it stops, then lift up the front of the
rack and remove it from the unit.
Bottles can be arranged to suit individual needs.
Reversing every other rack allows more light to
penetrate the lower racks for an improved display
of a full cabinet.
Note: Rack removal will be difficult if the door
cannot open to at least 115
application.
o
, as in a corner
Caution: Loaded racks contain heavy wine
bottles and when several are pulled out the
unit can tip forward unexpectedly.
June 2003
Page 7
Page 9

SCV32
Set the Temperature
Rotate the temperature adjustment knob until the
desired temperature is lined up with the indicator.
Interior cabinet temperatures will be a bit warmer
at the top or front and cooler at the bottom. See the
next page for details.
Temperature Reference:
There are several temperature zones inside the
SCV cabinet. The warmest position is at the top,
coldest at the bottom. The temperature can also be
controlled by rotating the temperature control knob.
1 is the warmest setting, 7 is the coldest.
When fully loaded with room temperature product
the SCV32 will operate continuously for as much
as 24 hours to reduce the temperature inside the
cabinet to the desired point. After it has shut off it
should remain off for a long while.
If the unit is lightly loaded or empty, it will turn on
and off frequently.
Switch the Light On or Off
The Display Light automatically switches on when
the door is opened. To have it on when the door is
closed, move the light switch to the ON position.
Light Switch
Temperature
Control Knob
June 2003
Page 8
Indicator Mark
Page 10

Temperature Control
Wines should be stored at the temperature
recommended for the type of wine.
Red wines should be kept at about 60oF.
·
White wines should be kept at about 50oF.
·
Sparkling wines should be kept at about 45oF.
·
This range corresponds to the rack positions. The
upper two racks will be the warmest, and that is
where the red wines should be placed.
The middle two racks are where the white wines
should go, and the bottom area is where sparkling
wines should be kept.
Once the wines have been placed in the correct
racks, the temperature control can be adjusted to
bring the temperature to the correct range. Place a
thermometer in the wine storage unit and check
over several days to determine the temperature.
In very warm conditions the unit may run
continuously.
SCV32
This table can be used as a starting point in
establishing the proper temperature.
Temperature Knob Position Typical Middle of Cabinet Temperature*
o
155
353
550
745
F.
o
F.
o
F.
o
F.
* Temperature will vary a few degrees as refrigeration system switches on and off.
June 2003
Page 9
Page 11

SCV32
Maintenance
Little maintenance is required other than keeping
the unit clean. The evaporator in the back of the
cabinet is the cycle-defrost type. Any frost that
develops on it during operation melts and drains
away when the unit is off. Water from the
evaporator drains into a pan at the bottom of the
cabinet and evaporates into the room air.
About once a year check the drain trough by
·
pouring about a half-cup of water in it to be
sure it drains well.
The outside of the cabinet can be kept clean
·
by wiping it with a mild soap and water.
The inside liner can be washed using any
·
non-petroleum based soap and water.
The door glass may be cleaned with any
·
glass cleaner.
The door gasket can be removed for cleaning
·
by pulling it out of its track.
The air cooled condenser should be vacuumed
once or twice per year to remove any lint that may
have been drawn into it. To get access, use a
phillips screwdriver to remove the kickplate and
use an accessory probe on the vacuum cleaner
hose to reach back on the left side to remove any
lint from the front of the condenser fins.
Removal of Door Gasket
Remove Kickplate
Careful, Do
Not Damage
Fins
June 2003
Page 10
Vacuum Fins
Page 12

Troubleshooting
Symptom Possible Cause Probable Fix
Cabinet too warm Switched off Check temperature control
SCV32
Cabinet wrong temperature Temperature control out of
adjustment
Temperature control failure Call for service
Operates too long Dirty condenser fins Clean condenser fins
Cabinet full of warm product Unit must operate for many hours to
Door gasket not tight Check gasket fit
Thick frost on evaporator Shut unit off until frost melts off, check
Unit in very warm conditions Sunlight or high room temperatures
Makes excessive noise Fan will make noise May be normal
Fan blade contacting shroud Check for free fan blade rotation
Will not cool Dirty condenser fins Clean condenser fins
Fan motor not turning blade Check fan motor/call for service
Low on refrigerant Check system/call for service
Compressor not operating Check compressor/call for service
Thick frost on evaporator Gasket not sealing Check gasket
Check adjustment
cool warm product
thick frost symptom below
will increase operating time
Door not closing Check door
Thermostat not keeping unit off long
enough
Excessive operating time Check for cause (see above)
Cabinet light does not work properly Light burned out Replace bulb
Door switch does not close Check/replace door switch
Cannot switch light on with door
closed
Water running from inside cabinet Drain trough hose plugged Clean hose
Water leak Drain hose out of position Call for service
Drain pan overfilling Check door and door gasket
Check thermostat. Should cut in at
o
F evaporator temp. Cut out varies.
44
Check/replace rocker switch
February 2003
Page 11
Page 13

SCV32
Light Bulb Replacement
The light bulb in the top of the cabinet will last for a
long time, however when it does burn out, it is
easily changed.
1. Unplug the unit.
Electrical Shock
Hazard
Disconnect electrical
power before
beginning service
2. Remove the top rack.
3. Pull the plug from the socket in the top of the
unit.
4. Remove the bulb from its holder.
5. Install new bulb in the reverse order of steps 4
through 1.
Unplug Unit Before Service
Light Bulb
Socket
February 2003
Page 12
Page 14

Drain System
SCV32
The SCV has an internal drain system. Inside the
unit, moisture forms on the refrigerated panel in the
back. That moisture drains into a trough, and from
the trough through a hose to a pan.
The drain hose must be directly above the pan or
water may leak onto the base of the unit.
Drain Hose
Above Pan
Refrigerated
Panel
(Evaporator)
Drain
Trough
Drain
Hose
Detail of Drain System
Front View of SCV32
June 2003
Page 13
Page 15

Page 16

SCOTSMAN
775 CORPORATE WOODS PARKWAY
VERNON HILLS, IL 60061
800-533-6006
WWW.SCOTSMAN-ICE.COM
17-2992-01
 Loading...