

Page 1
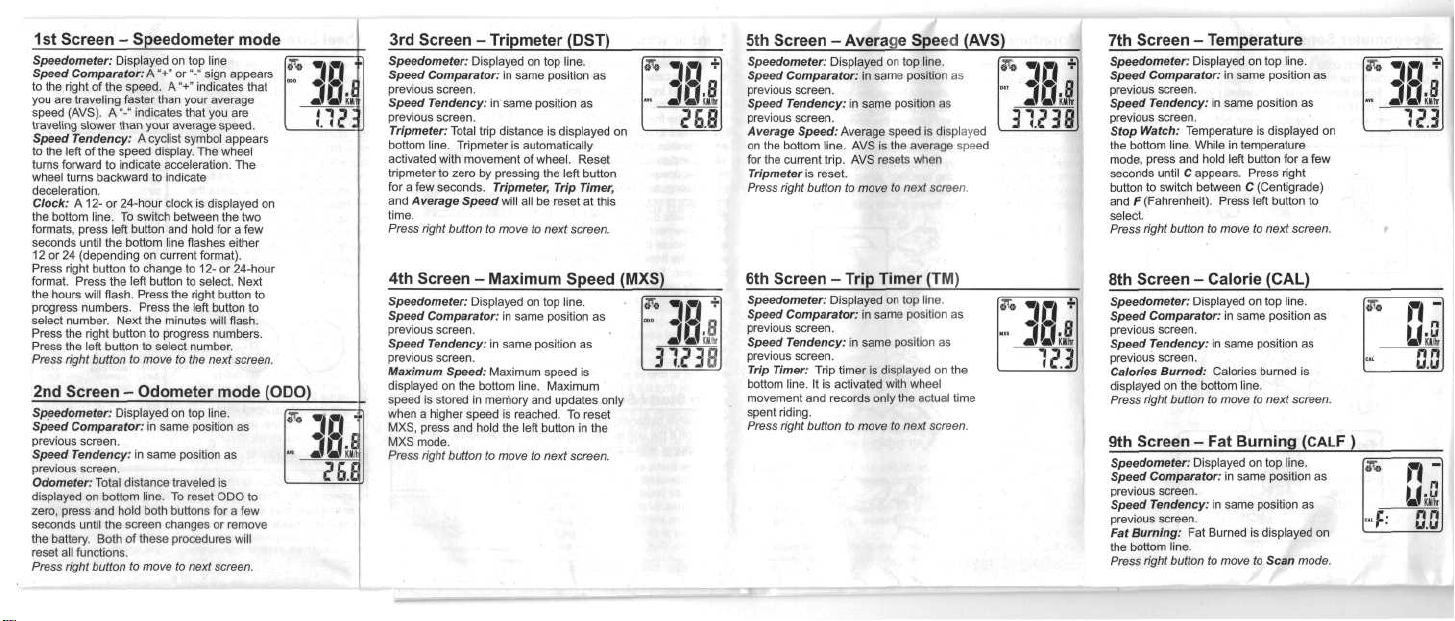
1st
Screen - Speedometer mode
Speedometer:
Speed
to
the
you
are
speed
traveling
Speed
to
the
turns forward
wheel
deceleration.
Clock:
the
bottom
formats,
seconds until
12
or
Press right button
format. Press
the
hours will flash. Press
progress numbers. Press
select number. Next
Press
Press
Press
2nd
Speedometer:
Speed
previous screen.
Speed
previous screen.
Odometer;
displayed
zero,
seconds
the
battery. Both
reset
Press
Displayed
on top
Comparator:
right
traveling faster than your average
(AVS).
slower
Tendency: A cyclist symbol appears
left
of the
turns backward
A12-
press left button
24
(depending
the
right button
the
left button
right button
A"+"
of the
speed.
A"-"
indicates that
than
your
speed
to
indicate acceleration.
or
24-hour clock
line.
To
switch between
the
bottom line flashes either
on
to
change
the
left button
the
to
to
move
line
or"-"
sign appears
A"+"
indicates that
you are
average
speed.
display.
The
wheel
to
indicate
is
displayed
the two
and
hold
for a few
current format).
to 12- or
to
select. Next
the
right button
the
left
button
minutes will flash.
to
progress numbers.
select number.
to the
next screen.
The
24-hour
Screen - Odometer mode (ODO)
Displayed
on top
Comparator:
Tendency:
Total distance traveled
on
bottom line.
press
and
hold
until
the
screen changes
functions.
right button
of
to
all
in
in
same position
both buttons
these procedures
move
line.
same position
is
To
reset
ODO to
for a few
or
to
next screen.
as
as
remove
will
7th
3rd
Screen - Tripmeter (DST)
Speedometer:
Speed
previous
Speed
previous screen.
Tripmeter:
bottom line. Tripmeter
activated with movement
tripmeter
for a few
on
to
to
and
time.
Press
4th
Speedometer:
Speed
previous screen.
Speed
previous screen.
Maximum
displayed
speed
when a higher speed
MXS, press
MXS
Press
Displayed
on top
Comparator:
screen.
Tendency:
Total trip distance
to
zero
seconds.
Average
right
button
by
Tripmeter,
Speed
to
in
in
same position
pressing
will
move
same position
is
displayed
is
automatically
of
wheel. Reset
the
Trip
all be
reset
to
next screen.
line.
as
as
left button
Timer,
at
this
on
Screen - Maximum Speed (MXS)
Displayed
on top
Comparator:
Tendency:
on the
is
stored
mode.
right
in
in
same position
Speed: Maximum speed
bottom line. Maximum
in
memory
is
and
hold
the
button
to
move
line.
same position
and
updates
reached.
To
left
button
to
next screen.
as
as
is
reset
in the
only
5th
Screen
-Average
Speedometer:
Speed
previous
Speed
previous
Average
on
the
for the
Tripmeter
Press
6th
Speedometer:
Speed
previous screen.
Speed
previous screen.
Trip
bottom line.
movement
spent riding.
Press
Displayed
Comparator:
screen.
Tendency:
screen.
Speed: Average speed
bottom
line.
current trip.
is
reset.
right
button
on top
in
same position
in
same position
AVS is the
AVS
resets when
to
move
to
Screen - Trip Timer (TM)
Displayed
Comparator:
Tendency:
Timer:
Trip
It is
and
right
button
on top
in
same position
in
same position
timer
is
displayed
activated with wheel
records only
to
move
the
to
Speed (AVS)
line.
as
as
is
displayed
average speed
next screen.
line.
as
as
on the
actual time
next screen.
Screen - Temperature
Speedometer:
Speed
previous screen.
Speed
previous screen.
Stop
the
bottom
mode,
seconds until C appears. Press right
button
and F
select.
Press
8th
Speedometer:
Speed
previous screen.
Speed
previous screen.
Calories
displayed
Press
9th
Speedometer:
Speed
previous screen.
Speed
previous screen.
Fat
Burning:
the
bottom line.
Press
Displayed
on top
Comparator:
Tendency:
Watch:
press
to
switch between C (Centigrade)
(Fahrenheit). Press left button
right
in
Temperature
line.
While
and
hold left button
button
to
in
same position
move
same position
is
displayed
in
temperature
to
next screen.
line.
for a few
Screen - Calorie (CAL)
Displayed
on top
Comparator:
Tendency:
Burned: Calories burned
on the
right button
Screen
Comparator:
Tendency:
right button
in
bottom line.
to
- Fat
Displayed
in
Fat
Burned
to
in
same position
move
in
same position
move
line.
same position
to
next screen.
Burning
on top
line.
same position
is
displayed
to
Scan mode.
as
as
on
to
as
as
is
(CALF
as
as
on
)
Page 2
Scan
In
Scan mode,
and
seconds.
Press
Freeze
Press
display
which will
the
right key.
display
crossing
be
in
function
Odometer
The
you
odometer
ODO
seconds
the
right
Press
Then
Repeat
desired
digit, computer
the
modes.
button
Each
screen cycles through
screen
to
return
to
TM
right
Frame Memory
the
left button, Freeze Frame Memory
at the end of a
be
will
stop
the
either
to
work.
Odometer Reset Function allows
to
reenter your
has
mode,
until
button
the
left
the
next
process until
number. After selection
ride segment.
flashing,
can be
To
reset
the
memory, press
flashing.
finish
ODO,
press
the
button
This
line
of a
DST;
MXS,
Reset
Function
total
distance
been reset
to
the
left
button
last digit flashes. Press
to
adjust
the
to
select
number
will
start
all
digits
will
return
to ODO
time trial.
zero.
displayed
at a
is
particularly
or TM
after
In the
for a few
number.
to
flash.
reset
of
last
mode.
TM,
later time
Note:
the
to
DS7",
for
DST,
the
mode
about
can
left button;
useful
Computer must
is
Speedometer mode.
read
AVS,
number.
the
are
MXS, AVS,
4
lock
the
and
AVS,
by
pressing
when
for
this
Troubleshooting
Malfunction
No
speedometer reading
Slow
display
Black
Display
Display readout fades
No
trip
distance
the
Display
shows
figures
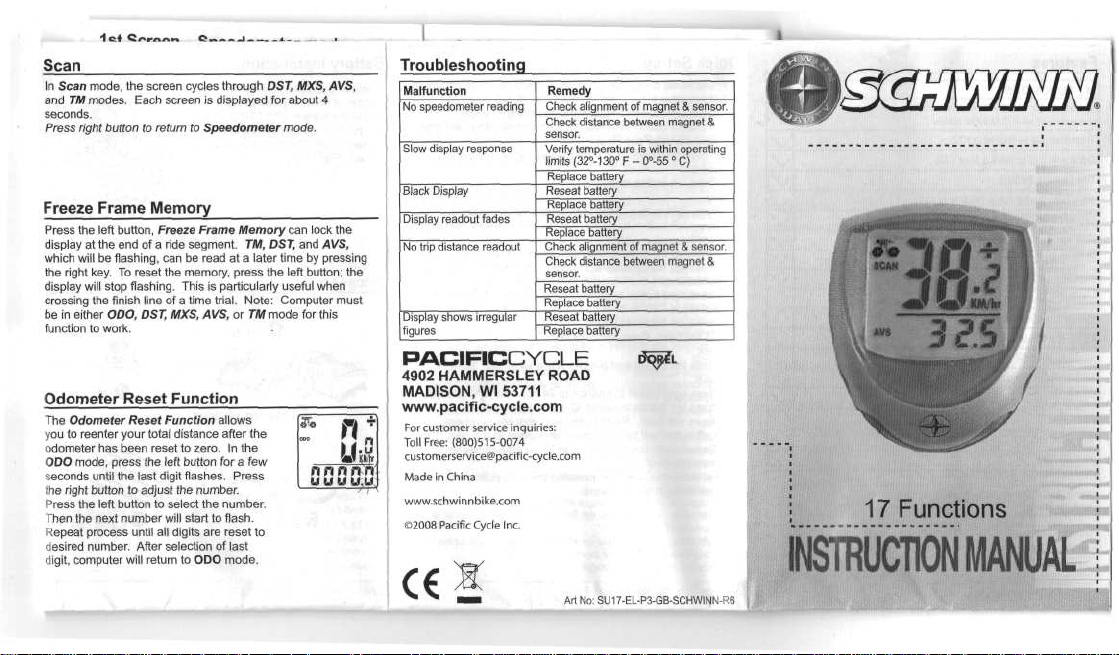
PACIFICCYCLE
4902
HAMMERSLEY
MADISON,
www.pacific-cycle.com
For
customer service inquiries:
Toll
Free:
customerservice@pacific-cycle.com
Made
in
China
www.schwinnbike.com
©2008
Pacific
response
readout
irregular
Wl
53711
(800)515-0074
Cycle
Inc.
Remedy
Check
alignment
Check
distance
sensor.
Verify
temperature
limits1 30
Replace
battery
Reseat
battery
Replace
battery
Reseat
battery
Replace
battery
Check
alignment
Check
distance
sensor.
Reseat
battery
Replace
battery
Reseat
battery
Replace
battery
ROAD
Art
No:
SU17-EL-P3-GB-SCHWINN-R6
of
magnet & sensor.
between
magnet
is
within
of
magnet & sensor.
between
magnet
&
operating
)
&
17
Functions
Page 3

Features
17
FUNCTIONS
Speedometer
(accuracy
Tripmeter
Odometer
Trip
Maximum Speed
Digital Clock
Average
Scan
Freeze Frame Memory
Speed
Speed Tendency
Odometer
Maintenance Program
Step Counter
Calorie Counter
Fat
TemperatureC to) /
EL
Timer
Speed
(DST
Comparator
Burned
Backlight
(0 -
99.9 M/hr
of +/- 0.5
M/hr
(Up to
99.9
M or KM)
(Up to
9999.9
(9:59'59")
(Up to
(12/24
hour selectable)
(Up to
MXS, AVS,
(+
or
Reset-Function
(In
pedometer mode)
(0.0
to
(0.0
to
9999
or
M or KM)
99.9
99.9
TM)
(TM and
-) (
9999 Calories)
Grams)
or
KM/tir)
KM/hr)
M or KM)
M or KM)
AVS)
(14T - 122T)
\/
Quick
Set-up
1.
Press either button.
2.
Set
tire size:
Press right button. Flashing number will change.
left
button
to
Press
3.
Miles/Kilometer
Press right button
miles.
Press
left
4. Age
Press right button. Flashing number will change.
left
Press
5.
Weight
Press right button. Flashing number will change.
Press left button
6.
Maintenance
Press right button
800
miles.
Press left button
C1
will flash. Press either button.
7.
Clock
Press left button
flash.
Press
right button
left
Press
Hours
will
Left button will select number
Repeat selection
was
selected.
8.
After computer
move through
select number
per
Hour
to
switch between kilometers
button
to
select.
button
to
select number
to
select number
to
choose between 200, 400,
to
select.
and
hold
to
change
button
to
select
flash. Right button will progress numbers.
of
minutes
is set up,
pressing
the
functions.
for a few
to 24
12
or 24
and
in
same manner
the
and
move
and
move
and
move
seconds.
hour clock,
hour clock.
move
right button will
to
minutes.
to
next
and
to
next
to
next digit.
600 or
12
if
desired.
as
hour
will
digit.
digit.
Battery
Installation
Remove
the
bottom
Install
the
battery cover. Replace
shown (Fig.
battery cover from
of the
computer using a coin.
the
battery
positive
(+)
1).
(3V/
pole facing
Accessories
Mounting Bracket
Battery
CR2032) with
the
the
cover
Sensor
3v
2
the
as
Fig.1
Computer Battery
( 3V /
Cable Ties
CR2032
Magnet
)
I
Speedometer
Clamp
the
magnet onto a spoke
4).
Attach
ties.
Make sure
come within
3).
the
(Fig.
cable
the
wheel turns (Fig.
should
sensor (Fig.
Sensor & Magnet
of the
sensor
to the
the
magnet cycles past
2). As the
1 mm of the
front wheel
front fork
magnet passes
sensor,
but not
using
the
the
touch
as
shown
the two
sensor
sensor,
the
as
it
Page 4

Mounting
Using a Phillips screwdriver, attach
the
a
snug
nandlebar
a
small Phillips screwdriver. Loosen
then
computer
Bracket
computer
around
jutton.
Bracket
right
side
of the
handlebar
fit,
place a rubber shim between
(Fig,
6).To
retighten
the
screws
to the
mounting bracket: Slide
until
it
snaps firmly into position (Fig. 7).To remove
from
the
mounting bracket: Wrap your forefinger
the
front
of the
Push
the
computer forward
Fig.
5
(Fig.
adjust
the
position
to
secure
mounting bracket. Press
the
mounting bracket
5). If
necessary,
the
bracket
of the
the
screws. Adjust,
the
bracket.To attach
the
unit onto
with
your
thumb.
to
and the
computer:
the
the
release
to
achieve
Use
and
the
the
Sensor wiring
Route
the
sensor wire
fork,
using
bottom
and
loosely,
but
to
allow
the
handlebars
much tension
much tension could loosen
from
the
computer
to the
computer.
that
there
is not too
that
the
wire does
:ree
movement
wheel.
Route
around
the
handlebar. Excess wire should
carefully looped
stem with cable ties.
up the
cable
ties
to
top. Wire must
must
front wheel
to
front
secure
have
enough slack
and
turn without putting
on the
sensor wire.
and
interrupt input
However,
much
not
interfere with
or
spinning
the
remaining wire
brake
cable
and
secured
not
the
be
slack
of the
front
it at the
hang
too
Too
wire
certain
and
front
and the
be
to the
Wheel Size Input
To
set the
wheel size
or
replacement
and
hold
both buttons
seconds.
The
Wheel Size Input Mode. Multiply
the
wheel diameter
by
3.1416
to
factor
the
to
left button
the
Press
mile/kilometer selection. (Note:
removing
wheel size.)
determine
[C].
To
computer, press
progress
the
to
right button
the
left
the
of the
battery,
for a few
unit will switch
(d) in
input
wheel
the
digit
and
select
the
digit
for
fast
advance).
button again
battery
will
after
press
to
millimeters
the
wheel
factor into
right button
press
(hold
for
erase
the
For
your convenience,
you may
refer
wheel
your correct wheel
factor.
to the
chart below
for
Auto Start / Stop
To
preserve
batteries,
the
switch
off if the
will
reappear with a press
Fig.
7
sensor.
cycle computer will automatically
unit
is
left
unused
for
on
either button
over 5 minutes. Display
or
input from
the
Distance traveled
with
IV
Me/Kilometer
Press
the
Kilometer (KM). Press
After
this selection,
mode
and is
one
wheel revolution
right button
ready
in
millimeters
Selection
to
choose between Mile
the
left button
the
computer
for
use.
will
to
make
switch
(M) and
the
selection.
to
speedometer
 Loading...