


GUI Operation
DVR Viewer
Ver1.0.0

Index
1. System Requirements …………………………………………………3
2. Program Install ………………………………………………………4
3. Main Screen ……………………………………………………………7
3-1 Select Folder ………………………………………………………7
3-2 Video Search ………………………………………………………8
3-3 Play …………………………………………………………………9
3-4 Layout ………………………………………………………………10
3-5 Camera ………………………………………………………………11
3-6 Daylight ……………………………………………………………12
3-7User Interface ……………………………………………………13
4. Detail Search ………………………………………………………16
4-1 Zoom …………………………………………………………………16
4-2 Pan …………………………………………………………………17
4-3 Filtering …………………………………………………………18
4-4 Save Image …………………………………………………………19
4-5 Print Preview ……………………………………………………20
4-6 Print ………………………………………………………………21
4-7 Show/Hide Thumbnail Image ……………………………………22
4-8 AVI …………………………………………………………………23
4-9User Interface …………………………………………………24
5. Exit ……………………………………………………………………27
2

1. System Requirements
¡ CPU : Intel® Celeron 2.4Ghz or higher
¡ Physical Memory : 256MB or higher
¡ Video Card : 1024x768(32Bit True Color)
¡ Monitor Resolution: 1024x786
¡ LAN Card : 10/100Mbps Ethernet
¡ HDD : Minimum 10GB free space
¡ DirectX Version : 8.1 or higher
¡ OS : Windows 2000/ Windows XP
3
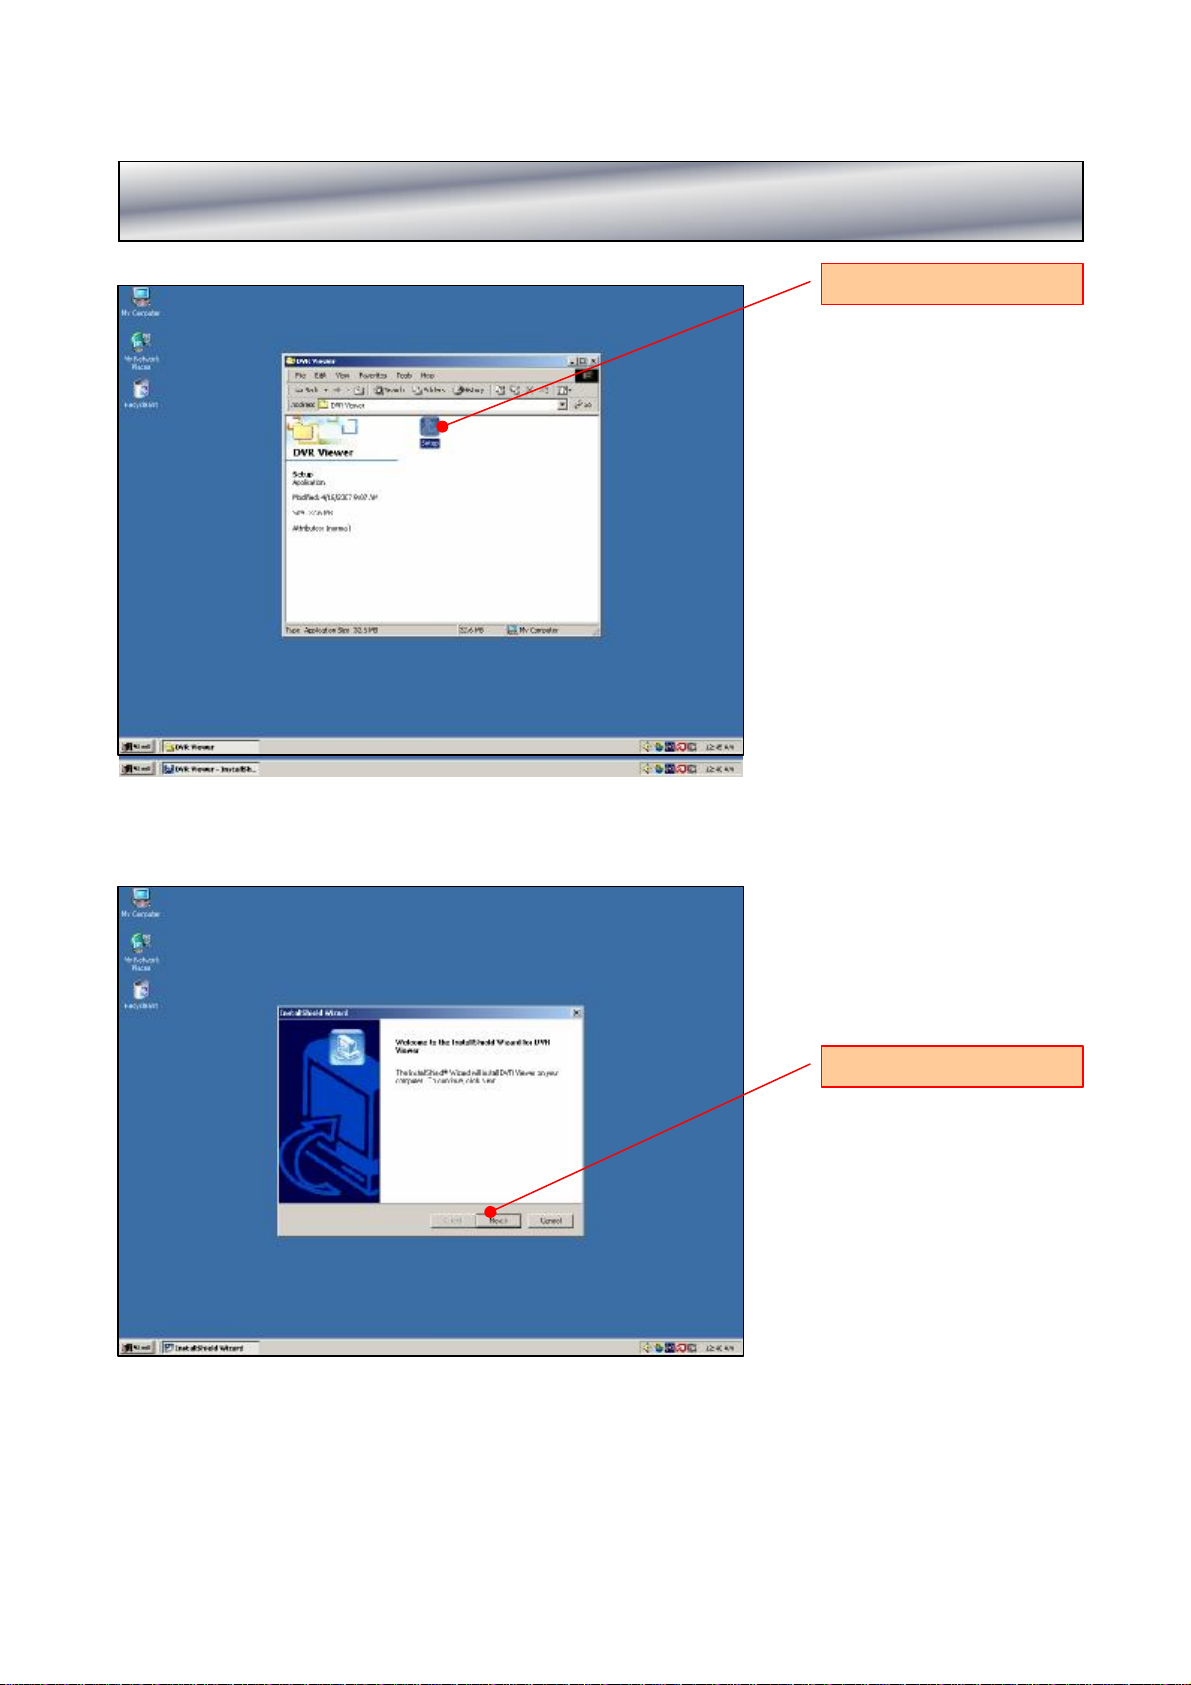
2. Program Install
Click
Click
4
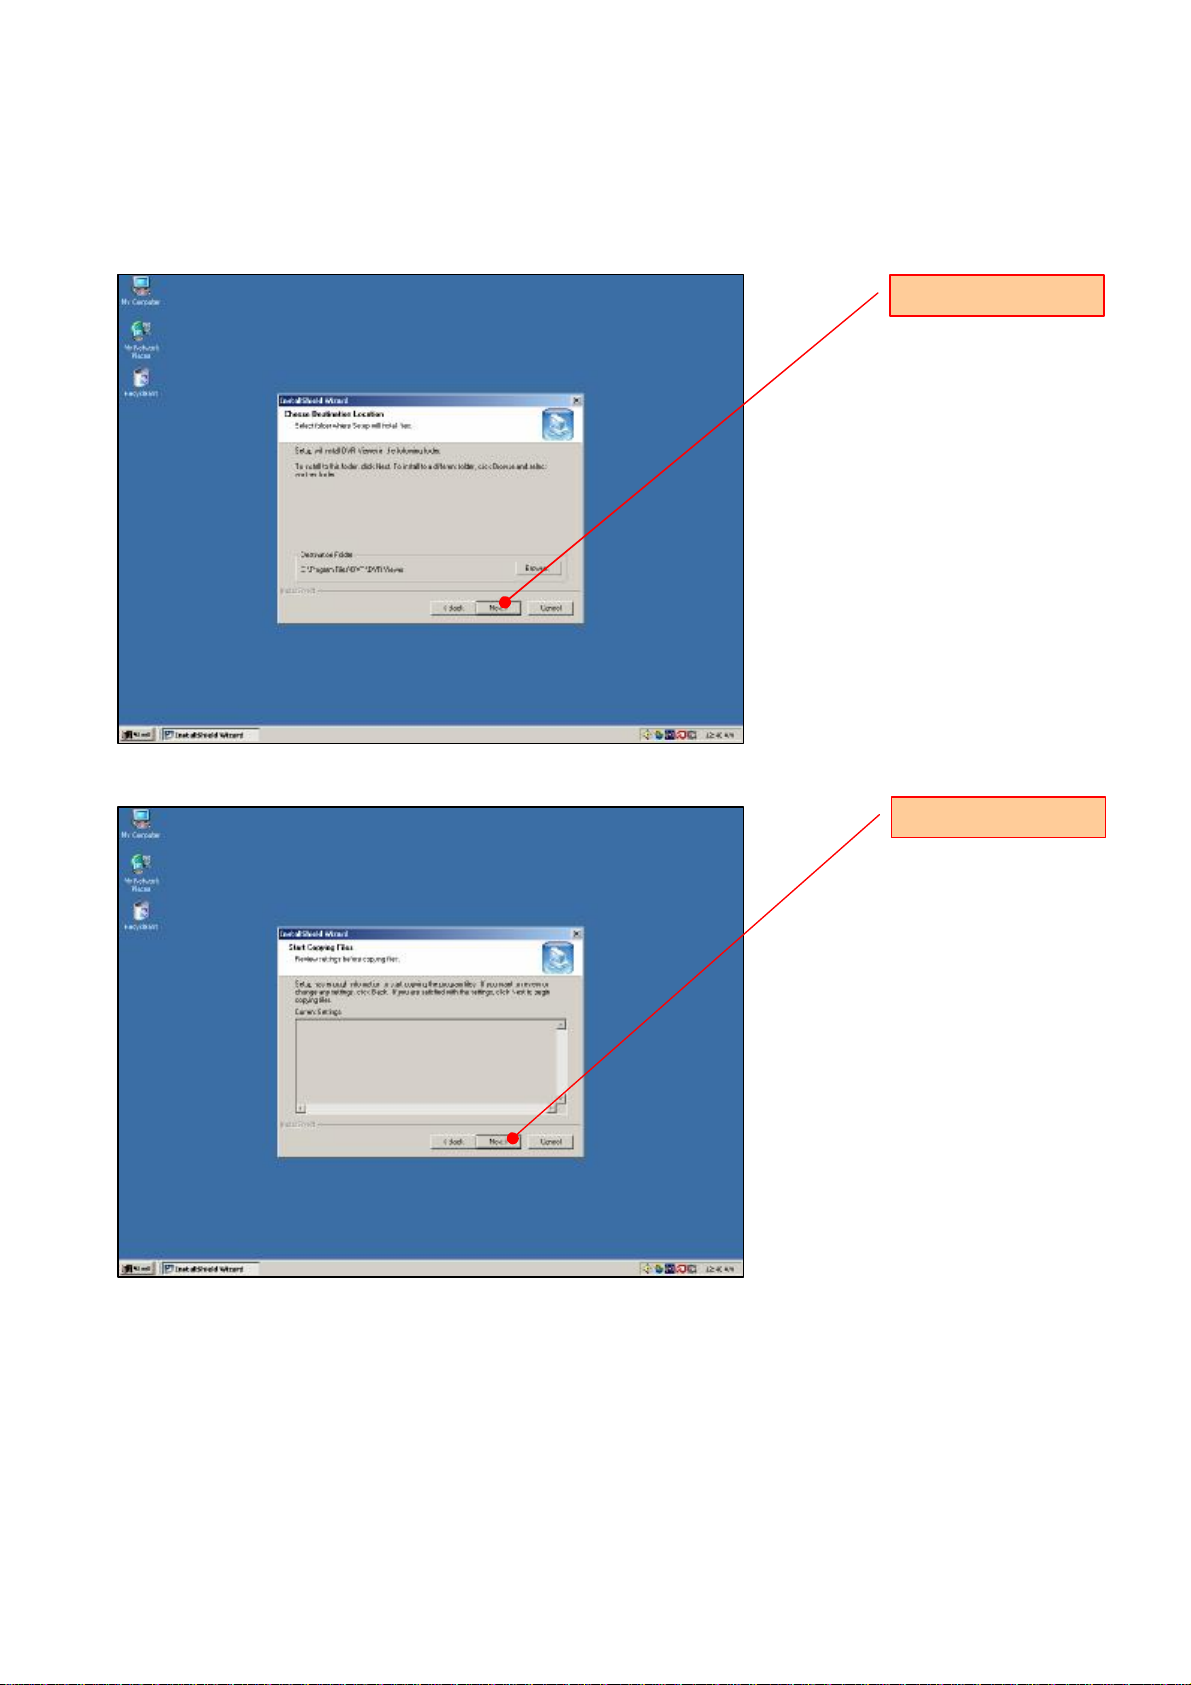
Click
Click
5
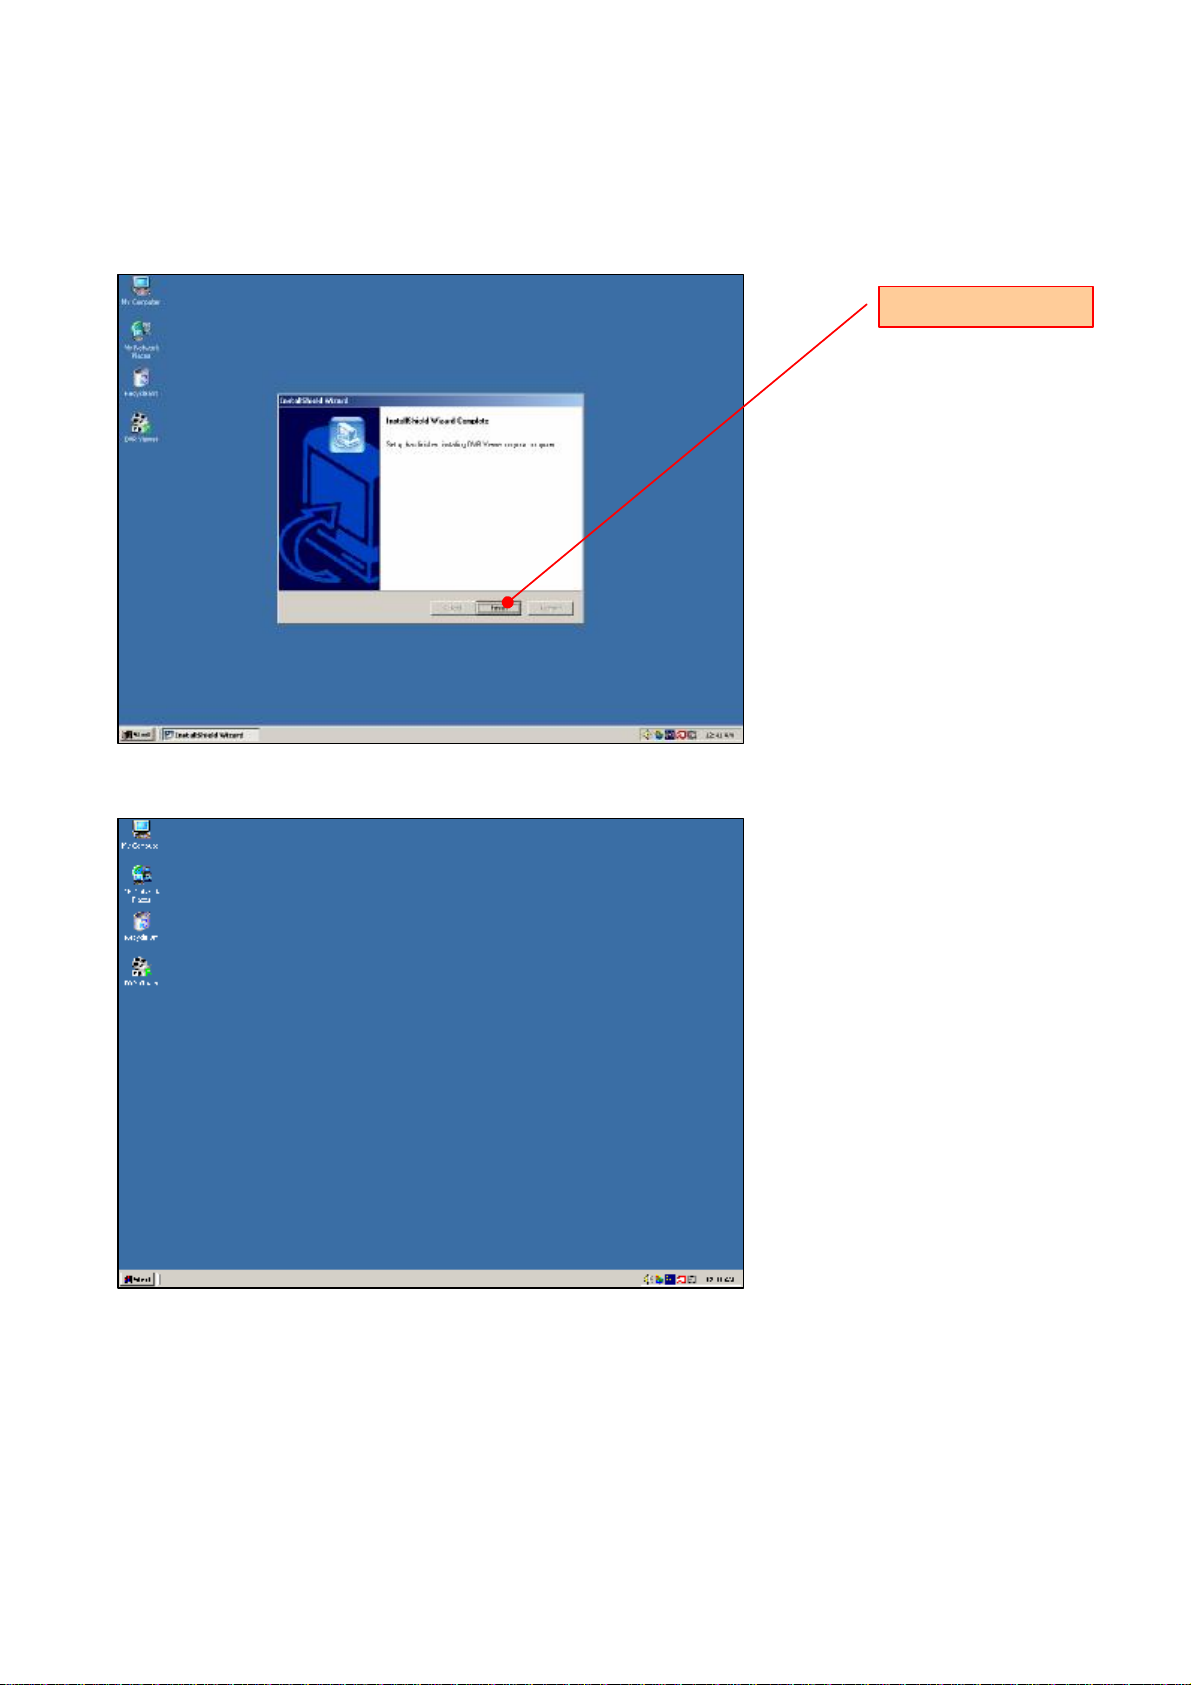
Click
6
3. Main Screen
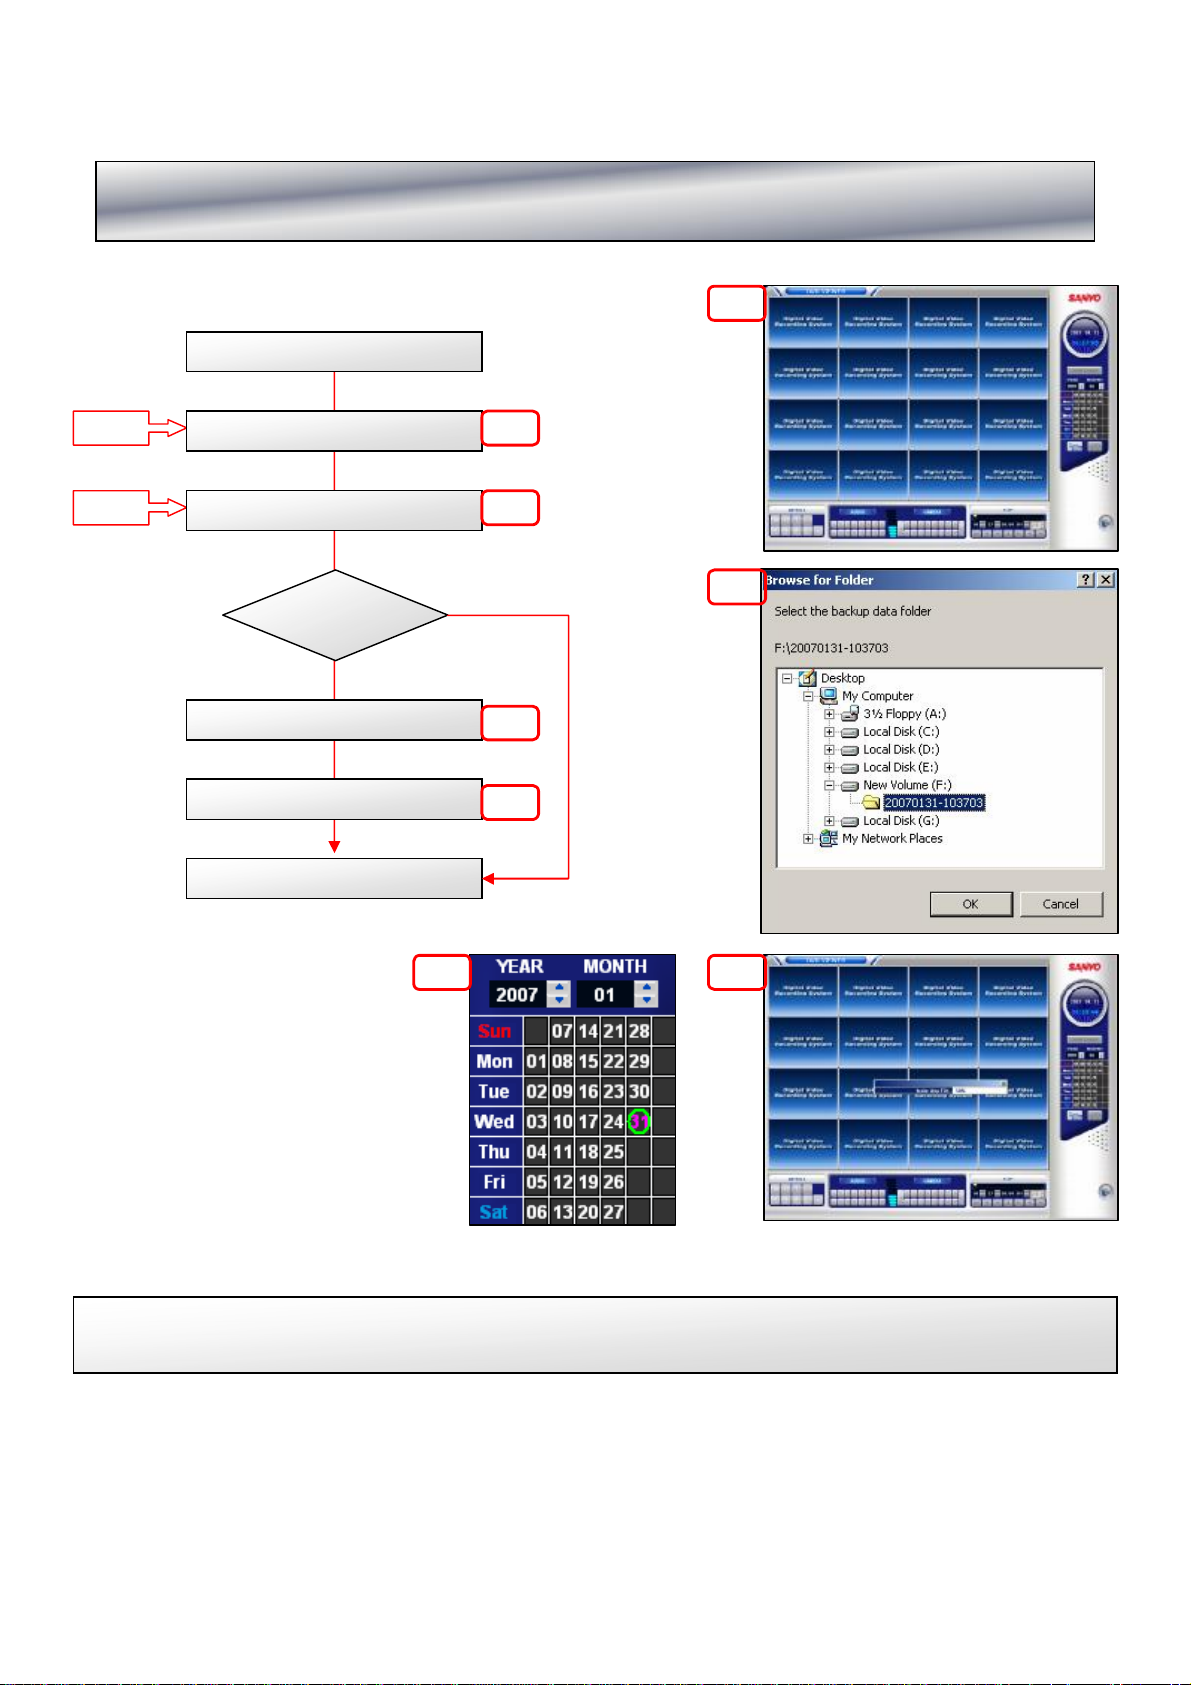
3-1 Select Folder
Start Viewer
Step:1
Step:2
Select Backup Folder
Browse For Folder
Make Map File
Display Calendar
Data ?
Yes
No
P1
P1
P2
P2
P3
P4
End
P4
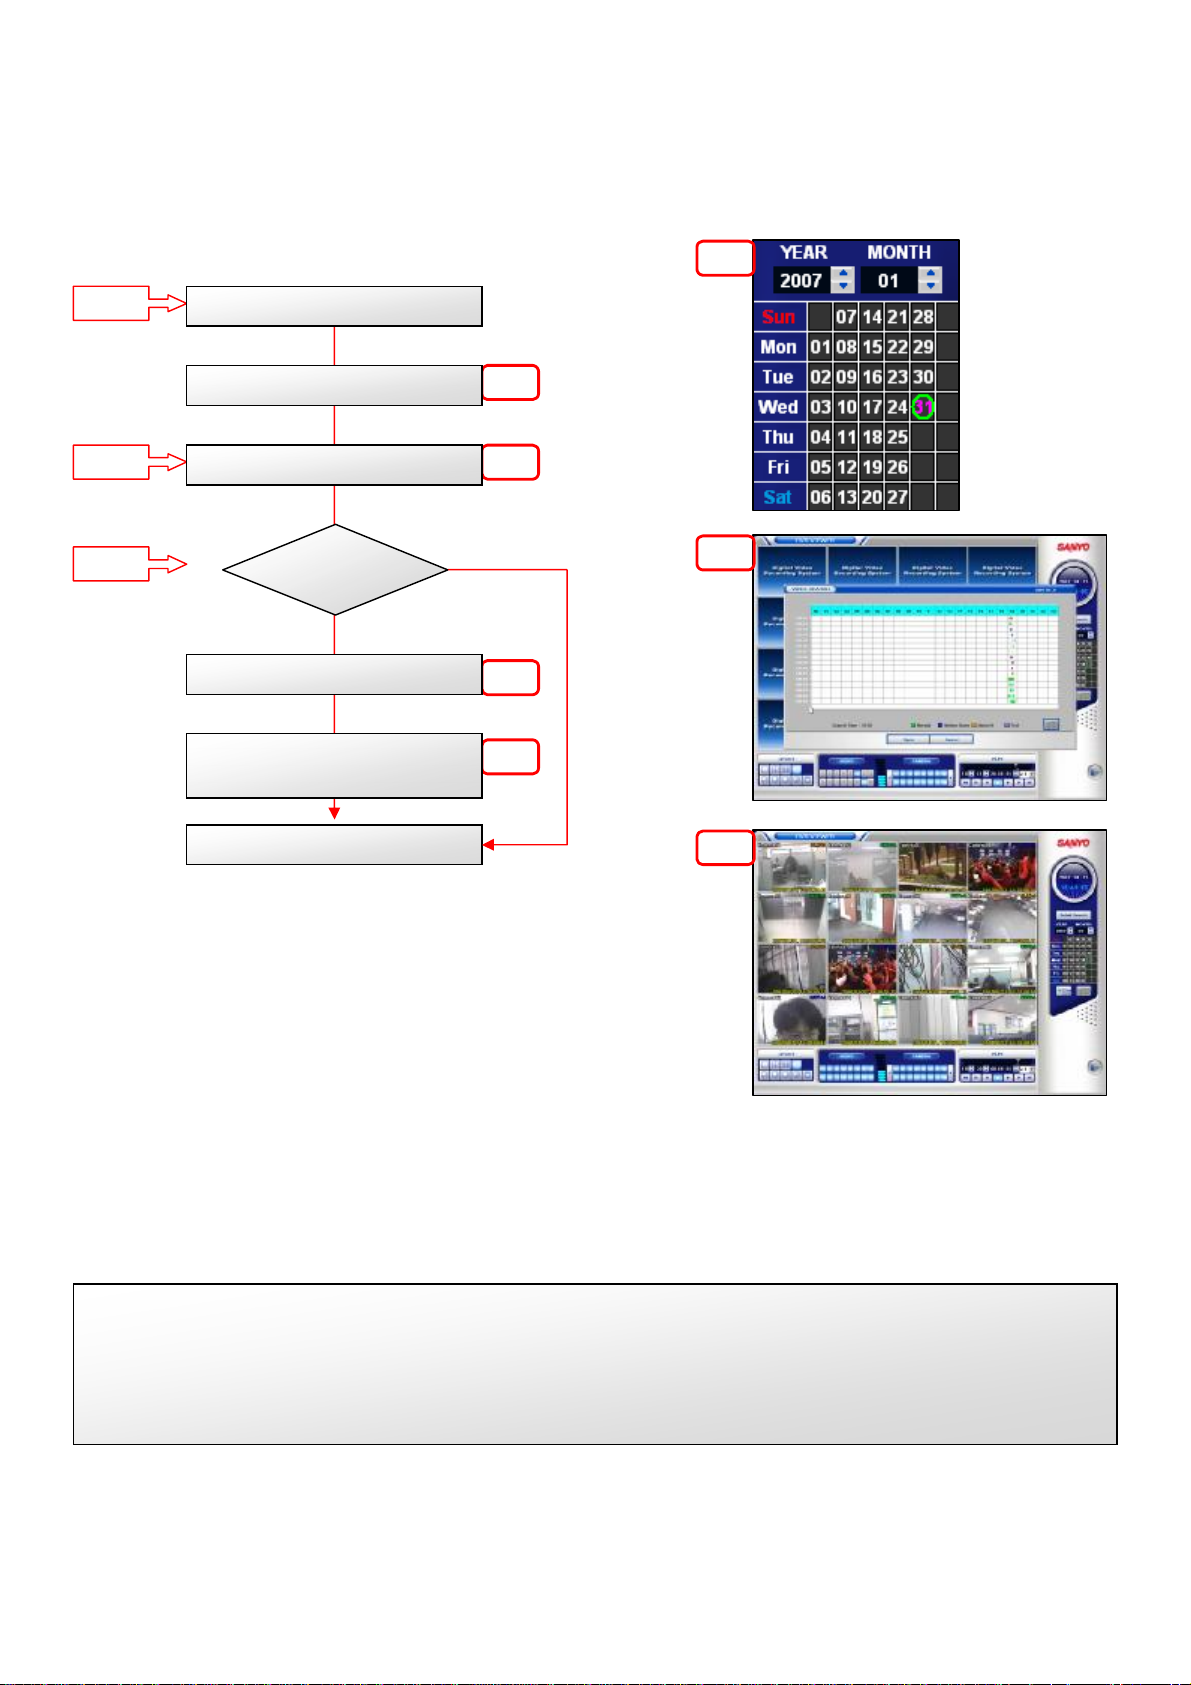
Step 1 : Click the DVR Backup Folder
Step2 :Select the backup Drive Folder and click the OK.
P3
7
3-2 Video Search
P1
Step:1
Step:2
Step:3
Select Calendar
Display Video Search
Select Time
Open?
Yes
Go to Main Screen
Show the recorded images
of the selected time
End
P1
P2
Cancel
P3
P3
P2
P3
Step 1 : Select the DVR Backup Folder and then click the date with the recorded date in green circle
from the calendar.
Step2 :Select the time from Video Search.
Step 3 : Click the Open and the copied images of the selected time will be displayed into the viewing
window.
8
3-3 Play
P1
Step:1
Step:2
Step:3
Step:4
Select Calendar
Select Time
Play
Stop?
End
P1
P2
P3
P2
P3
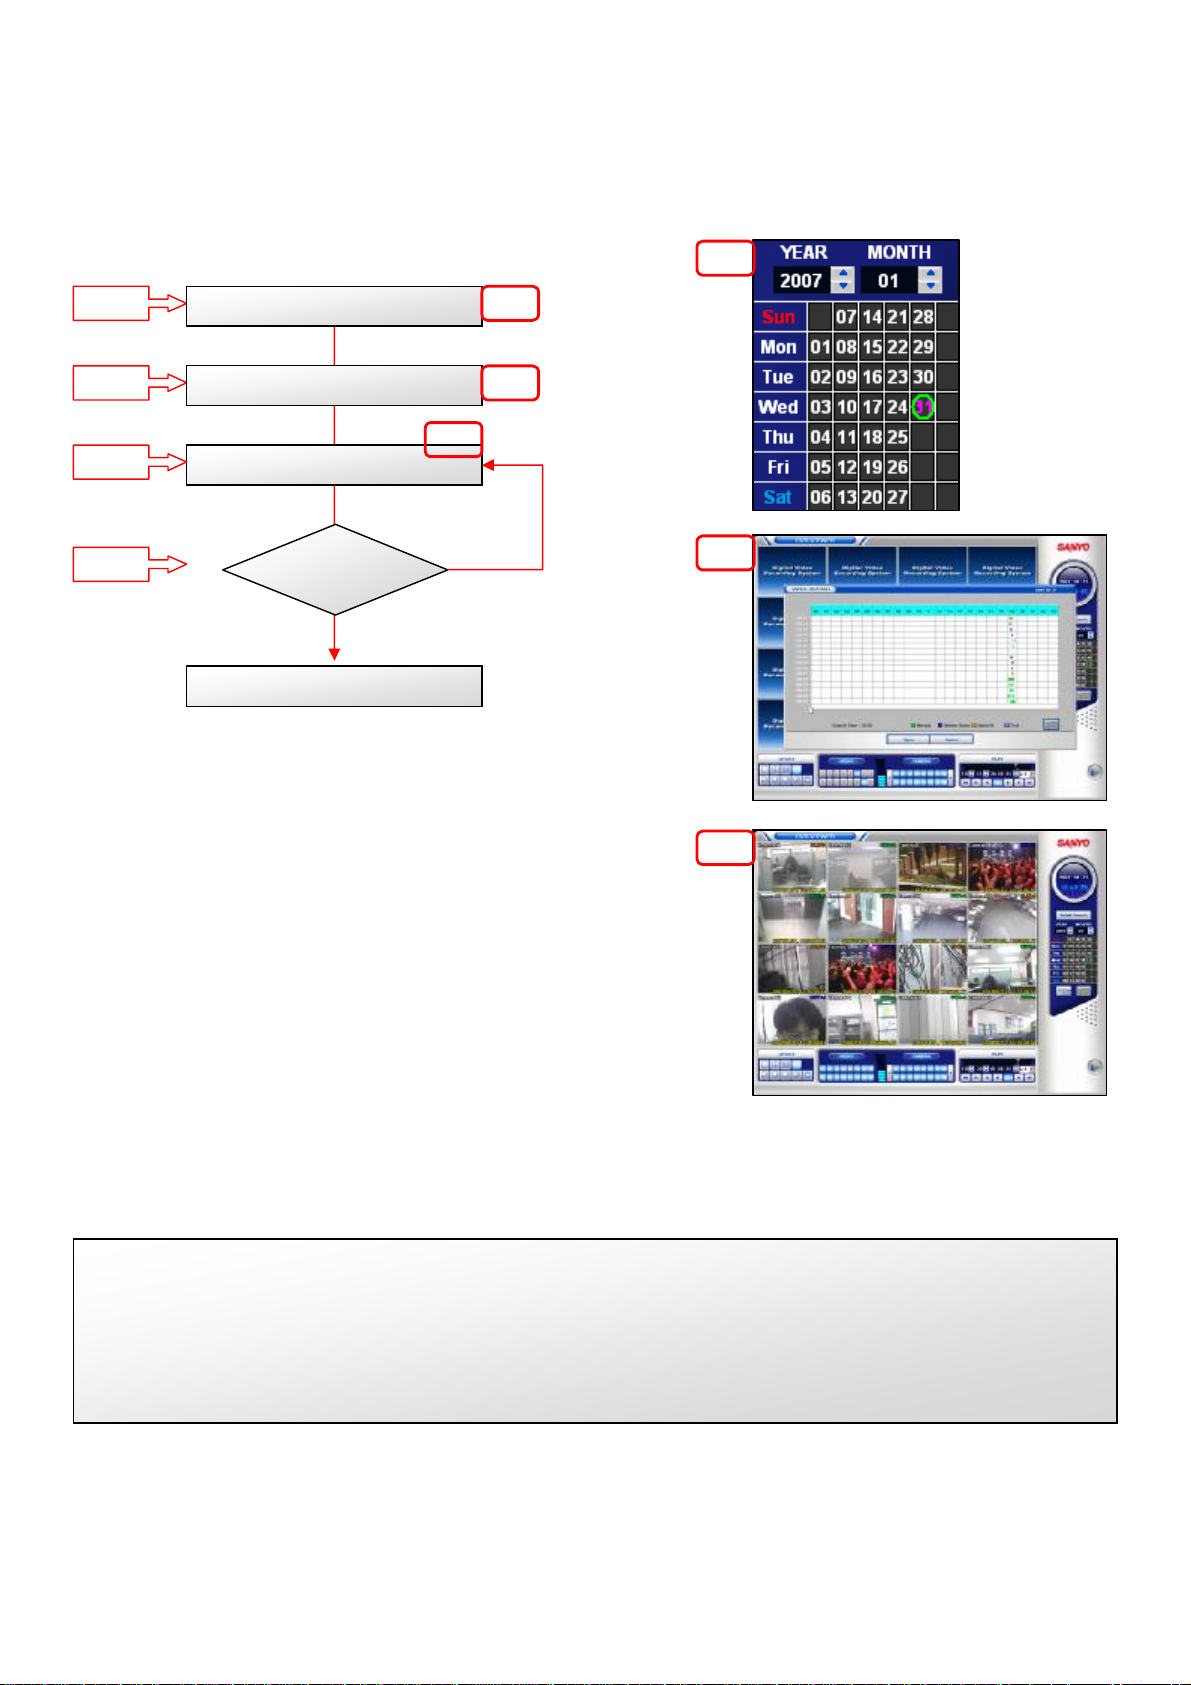
Step 1 : Select the DVR Backup Folder and then click the date with the recorded date in green circle
from the calendar.
Step2 :Select the time from Video Search. Click the Open and the copied images of the selected time
will be displayed into the viewing window.
Step 3 : Click the Playback.
Step 4 : Click the Stop.
9

3-4 Layout
P1
Step:1
Select Layout
End
P1
P2
Step 1 : Select the viewing layout during playing .
1x1,2x2,3x3,4x4,1+5,1+7,1+12,1+16
10

3-5 Camera
Step:1
P1
P1
Select Layout
Step:2
Click Next Channel
4x4 or 1+16
Layout?
No
Next Channel
End
P2
Yes
P2
P3
P4
P3
P4
Step 1 : Select the Layout
1) It is not available at 4x4 Layout
2) It is not available at 1+16 Layout
Step2 : Click the Next button.
1) 2x2 Layout : Show 1~4 camera and 1~4 button is enabled (P2)
2) NEXT : Show 5~8 camera and 5~8 button is enable. (P4)
11

3-6 Daylight
P1
Step:1
Step:2
Select Calendar
Cancel Daylight
Date ?
Yes
Daylight button is activated
Daylight
Button
Click ?
Yes
Show “Daylight Data”
Show Normal data
P1
No
P2
P2
Daylight is inactivated
Step1 : Select “circled date”
It shows “Daylight button”only on the normal search.
Step2 : Click “Daylight button”
P1
12

3-7User Interface
2
1 6
① Select DVR Backup Folder
② Calendar
③ Play
④ Layout
⑤ Camera
⑥ Daylight Search
⑦ Audio Volume Control
⑧ Mini Map
⑨ Play Speed
7
54 3
8
9
13

3-7-1Button Interface
① Select the folder with DVR Backup Data
② Select the data in green circle from the calendar.
③ Playback the backup data.
④ Select the viewing layout (1x1,2x2,3x3,4x4,1+5,1+7,1+12,1+16)
⑤ Click the Next to see the next layout. (Not available at 4x4 / 1+16 Layout
⑦ Adjust the Audio Volume level
(Only available at the 1x1 Layout)
⑧ Show the mini map of the selected data.
⑨ Adjust the playback Speed (x1 to x5)
NOTE:
Click the Daylight if the selected data has the daylight recorded data.
The Daylight button is only enabled when the selected date has the daylight recorded data.
14

3-7-2
15

4-1 Zoom
4. Detail Search
P1
Step:1
Step:2
Step:3
Step:4
Select Channel
Select Detail Search
Select Zoom
Mouse D&D
End
P1
P1
P2
P3
P2
P3
Step 1 : Click the images from the viewing window.
Step 2 : Click the Detail Search
Step3:Click the Zoom
Step 4 : Drag and Drop the image.
16

4-2 Pan
P1
Step:1
Step:2
Select Pan
Mouse D & D
End
P1
P2
P2
N
Step 1 : Click the Pan
Step 2 : Drag & Drag the image.
17

4-3 Filtering
P1
Step:1
Step:2
Select Image
Select Filtering
End
P1
P2
P2
Step 1 : Select a thumbnail image from the panorama view.
Step 2 : Select the Filtering
Smooth the blocked edge area.
18

4-4 Save Image
P1
Step:1
Step:2
Step:3
Step:4
Step:5
Select Image
Select Save Image
Message
Select Folder & type
Save
End
P1
P1
P2
P3
P3
P2
P3
Step 1 : Select thumbnail images from the panorama view.
1) White rectangle : Not selected
2) Blue rectangle : Selected image showing on the main view.
3) Yellow rectangle : Selected image
Step 2 : Click the Save Image
Step 3 : Click the OK
Step 4 : Set the Folder directory and enter the file name and select the file type (JPG/BMP)
Step 5 : Click the Save
19

4-5 Print Preview
P1
Step:1
Step:2
Step:3
Step:4
Step:5
Select Image
Select Print Preview
Select Layout
Print
Printer ?
Print & Message
End
P3
P1
P1
P2
P3
P2
P3
Step 1 : Select the images from the panorama view
Step 2 : Click the Print Preview
Step 3 : Select the print Layout
Step 4 : Click the Print
Step 5 : Click the OK
20

4-6 Print
P1
Step:1
Step:2
Step:3
Select Image
Select Print
Complete Message
End
P1
P1
P2
P2
Step 1 : Select the image from the panorama view.
Step 2 : Click the Print (Print the selected images as 1x2 Layout)
Step 3 : Click the OK
21

4-7 Show/Hide Thumbnail Image
P1
Step:1
Step:2
Select Show
Select Hide
P1
P2
P2
Step 1 : Show the panorama view (Thumbnail image) (default)
Step 2 : Hide the panorama view
22

4-8 AVI
P1
Step:1
Step:2
Step:3
Step:4
Select Image
Select AVI
Select Duration
& Audio &
Folder & File Name
Select OK
Start AVI Backup
End
P1
P1
P2
P2
P2
P3
P3
Step 1 : Select the image for AVI Backup.
Step 2 : Click the AVI
Step 3 : Set the Duration ( Hour:0~60Min,Sec:0~50)
Check the Audio Data Backup if backup the audio file with images.
Select the Folder and enter the file name
Step 4 : Click the OK
23

4-9User Interface
1
2
3 4
① Bright
② Contrast
③ Zoom
④ Pan
⑤ Filtering
13
12
5
7
9
1514
⑧ Print
⑨ Show/Hide Thumbnail Image
⑩ AVI
⑪ Exit
⑫ Thumbnail Image
6
8
10
11
⑥ Save Image
⑦ Print Preview
⑬ Audio Volume Control
⑭ Camera
⑮ Play
24

4-9-1Button Operation
① Adjust the brightness of the selected image. (000~255)
② Adjust the contrast of the selected image. (000~255)
③ Adjust the image size.
④ Move the image.
⑤ Smooth the blocked edge area.
⑥ Save the image as JPG/BMP file format.
⑦ Preview the images as selected layout.
Layout : 1x2,2x4,4x8
⑧ Print the images as 1x2 Layout
⑨ Show / Hide the panorama view (Thumbnail Image)
⑩ Save the selected image as AVI file format.
Duration à Min : 0~60 , Sec : 0,10,20,30,40,50
⑪ Exit Viewer Program
⑫ Show the thumbnail Image as 3x9 Layout
⑬ Adjust the volume level when audio Data exists.
⑭ Select a camera. (1 to 16)
⑮ Adjust the playback control
25

4-9-2Button Process
26

5. Exit
P1
Step:1
Step:2
Select Exit
Select OK
End Program
P1
P1
Click the Right
button of mouse to show detail
information
Step 1 : Exit the Backup viewer
Step2 :Click the OK
27
 Loading...