

Page 1
INSTRUCTION MANUAL
Colour television
CE20WLD25-B
Please read this Instruction book before using your television.
We wish you many hours of pleasure from your new television.
Problems with set-up?
Call 0870 240 7475
Page 2

Contents
Remote Control Buttons ..............................................................................................................................2
LCDTV .......................................................................................................................................................2
Preparation.................................................................................................................................................3
Safety Precautions .....................................................................................................................................3
Before Switching On Your TV .................................................................................................................... 4
Switching The TV ON/OFF ......................................................................................................................... 5
Navigating the Menu System ......................................................................................................................5
InitialSettings..............................................................................................................................................5
Basic Operations ........................................................................................................................................6
Everyday Operation ................................................................................................................................... 7
IDTVMenuSystem .....................................................................................................................................9
Analogue TV Menu Map .......................................................................................................................... 15
Analogue TV Menu System ...................................................................................................................... 16
Other Features ......................................................................................................................................... 20
Teletext ..................................................................................................................................................... 20
ConnectPeripheral Equipment .................................................................................................................. 21
Tips .......................................................................................................................................................... 22
Appendix A: AerialConnection .................................................................................................................. 22
Specifications ........................................................................................................................................... 23
ConnectPeripheral Equipment .................................................................................................................. 24
PeripheralEquipment Connections ........................................................................................................... 24
English -1 -
Page 3
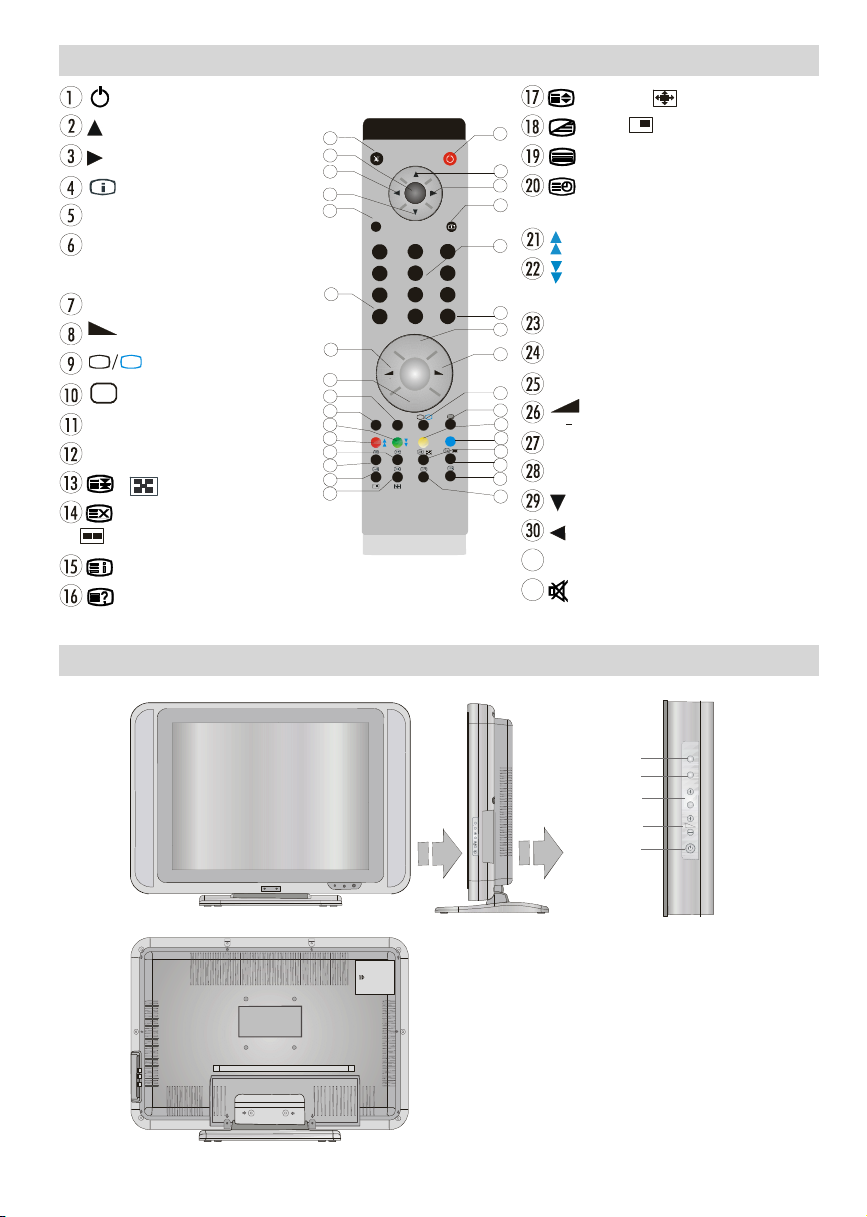
Remote Control Buttons
+
DTV
31
WIDE
= StandBy
= Cursor Up
= CursorRight
= Info
0 - 9 =DirectProgram
-/-- / EXIT=Doubledigit /
NoFunction
P + =ProgrammeUp
= VolumeUp
TV
=TV / Digital TV Mode
AV
= External Source
Yellowbutton= Feature Menu
Bluebutton=InstallationMenu
/ =Hold/NoFunction
=Update,ScreenFormatChange
/ =NoFunction
/ GUIDE=IndexPage
= Reveal
32
31
30
29
28
27
26
25
24
23
22
21
20
19
18
17
M
OK
ABC DEF GHI
1 2 3
JKL MNO PQR
4 5 6
STU VWX YZ
7 8 9
0
PP
P+
P-
TV
P<P
LCD TV
=Expand/ /WIDE=NoFunction
1
2
3
4
5
=Mix, =NoFunction
= Teletext
=Time/ subtitle on/off in the digital
mode
/Redbutton= PageUp / SoundMenu
/ Green button= Page Down / Picture
Menu
6
P<P/ SWAP=PreviousProgramme/Swap
7
8
I-II = Mono/Stereo- DualA-B
P -= Programme Down
9
= Volume Down
PP = PictureModeSelection
OK/SELECT=Store/ Stillpicture
= Cursor Down
= Cursor Left
M = Menu
= Mute
English -2 -
TV/AV
MENU
- P/CH +
MENU
P/CH
POWER
MENU
P/CH
ON/OFF
Page 4
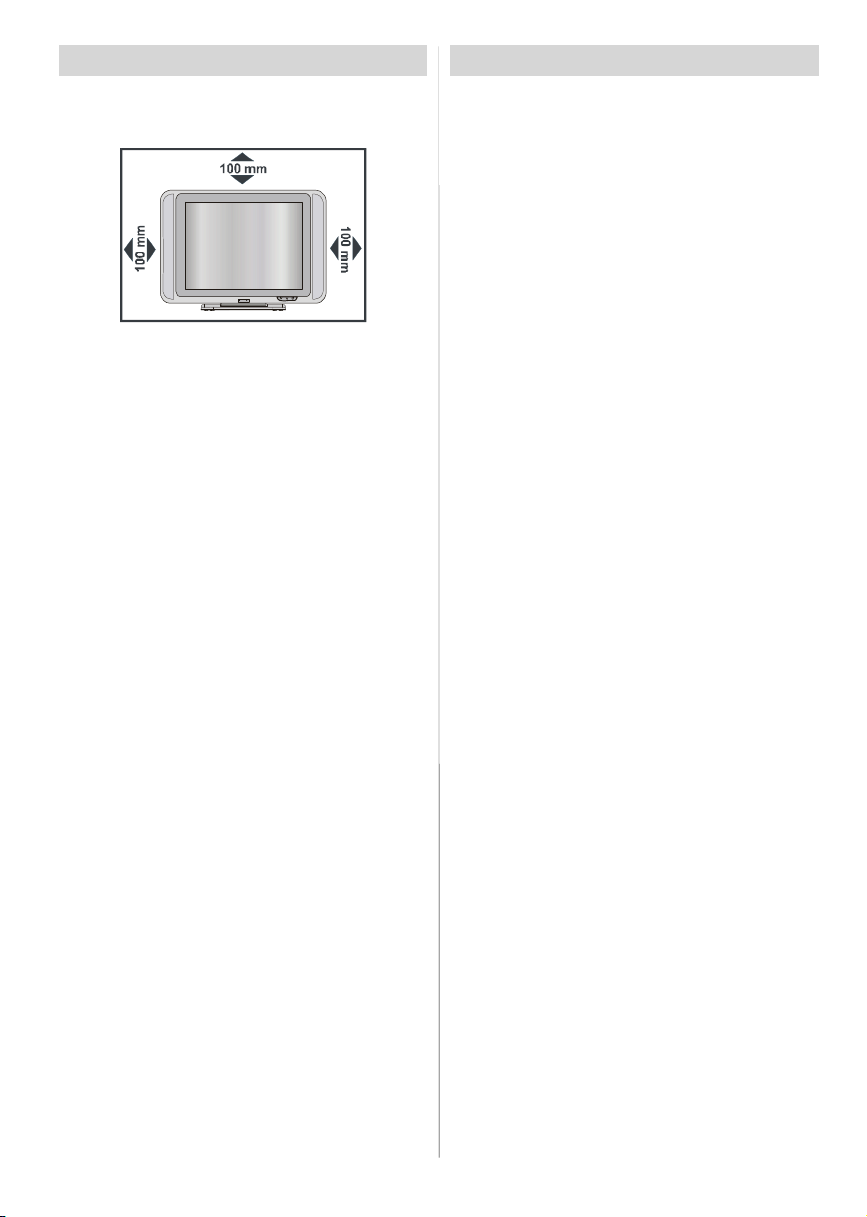
Preparation
Forventilation, leave a spaceof at least 10 cm freeall
around the set. To preventany fault and unsafe situa-
tions, pleasedo notplaceanyobjects on topoftheset.
Use this apparatusin moderateclimates.
Features
• Remote controlledcolour television.
• Fully integratedDigital TV (DVB-T)
• 100 programmes from VHF, UHF bands or cable
channels can be preset.
• It can tune cable channels.
• Controlling the TV is very easy by its menu driven
system.
• It has 2 Scart sockets for external devices (such as
video, video games, audio set, etc.)
• Stereo sound system (German+Nicam).
• Full function Teletext .
Fastext(10 Pages), TOP text.
• Favorite Channel
• Channel Lock
• Headphone connection.
•A.P.S. (Automatic ProgrammingSystem).
•All programmes can be named.
• Forward or backward automatic tuning.
•Sleeptimer.
• Child Lock.
• Automatic sound mute when no transmission.
•NTSCPlayback.
• AV in and S-VHS in are available.
•AVL (AutomaticVolumeLimiting)
• When no valid signal is detected, after5 minutes the
TV switches itself automatically to stand-by mode.
• PLL (Frequency Search)
•Audio Line Out
English -3 -
Safety Precautions
Please read the following recommended safety precautions carefully for your safety.
1. Power Source
The set should be operated only from a 220-240V
AC, 50 Hz. outlet. Ensure you select the correct volt-
age setting for your convenience.
2. Power Cord
Do not place the set, a piece of turniture, etc. on the
power cord (mains lead) or pinch the cord. Handle
the powercord by the plug Do not pull out the plug by
tugging the cord and never touch the power cord
when your hands are wet as this could cause a short
circuitorelectricshockNevermake a knot inthe cord
or tie it with other cords. The power cords should be
placed in such a way that they are not likely to be
stepped on A damaged power cord can cause fire or
give you an electric shock. When it is damaged and
need to be changed, it should be done by qualified
personnel.
3. Moisture and Water
Donotusethisequipmentin a humidanddampplace
(avoidthe bathroom,the sink in the kitchen,and near
the washingmachine).Do not exposethisequipment
to rain or water, as this may be dangerousand do not
place objects filled with liquids, such as flower vases,
on top of the set.Avoid from dripping or splashing. If
any solid object or liquid falls into the cabinet, unplug
the set and have it checked by qualified personnel
before operating it any further.
4. Cleaning
Before cleaning, unplug the adaptor from the wall
outlet. Do not use liquidor aerosol cleaners. Use soft
and dry cloth.
5. Ventilation
The slots and openings on the back cover are intended for ventilation and to ensure reliable opera-
tion.Toprevent overheating, these openingsmust not
be blocked or covered in anyway.
6. Heat and Flames
The set should not be placed near to naked flames
and sources of intense heat, such as an electric
heater. Ensure that no naked flame sources,such as
lighted candles, are placed on top of the set.
7. Lightning
In case of storm and lightning or when going on holiday, disconnect the power cord from the wall outlet.
8. Replacement Parts
Whenreplacementparts arerequired, be sure the service technician has used replacement parts which are
Page 5
specified by the manufactureror have the same specifications as the originalone. Unauthorisedsubstitutions
may result in fire, electrical shock, or other hazards.
9. Servicing
Please refer all servicing to qualified personnel. Do
notremovethe cover yourselfas this may result in an
electric shock.
Instructions for waste disposal:
• Packaging and packaging aids are recyclable and
should principally be recycled. Packaging materi-
als, such as foil bag, must be kept away from children.
• Battery, including those which is heavy metal-free,
should not be disposed of with household waste.
Please dispose of used battery in an environmentally sound manner. Find out about the legal regu-
lations which apply in your area.
• Cold cathode fluoresant lamp in LCD PANEL contains a small amount of mercury, please follow lo-
cal ordinates or regulations for disposal.
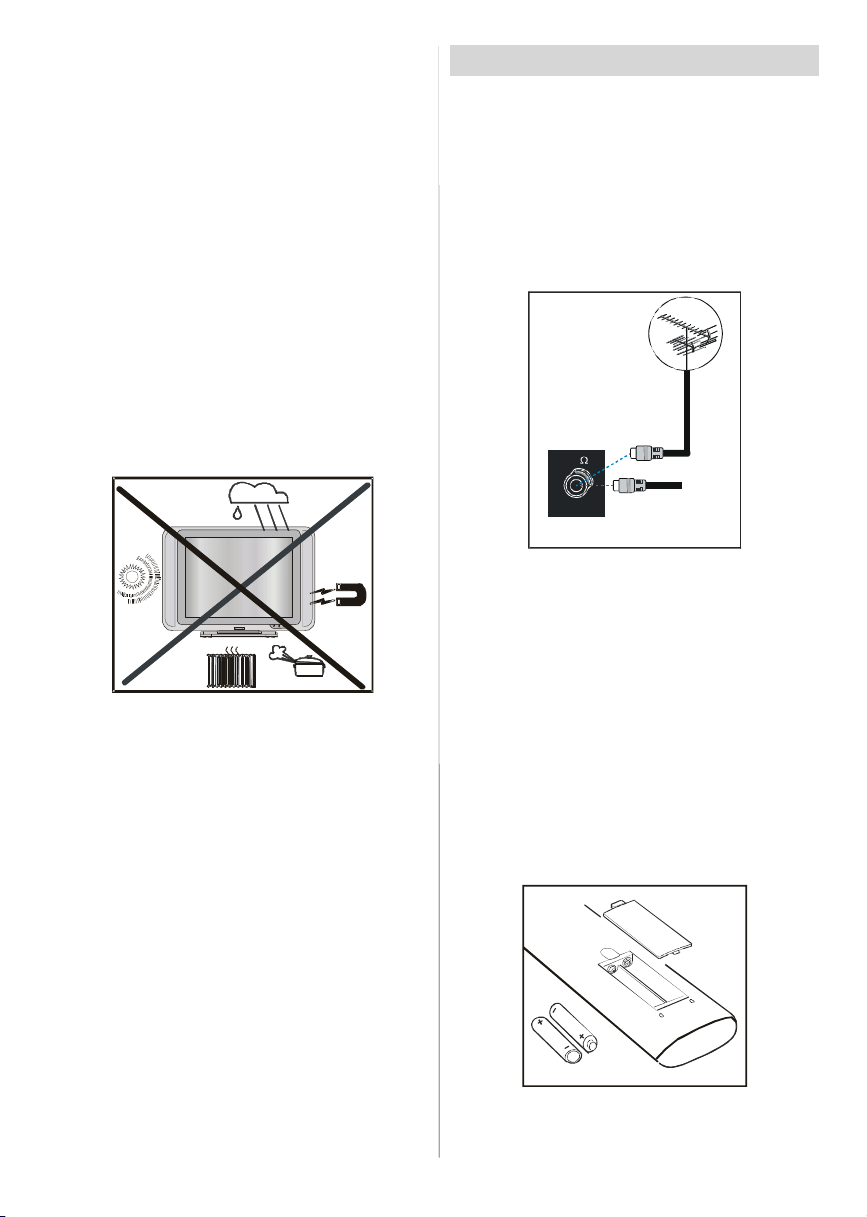
Before Switching On Your TV
Power Connection
IMPORTANT : The TV set is designed to operate on
220-240V AC 50Hz.
Connections To The Aerial Input Socket
•Connect the aerialor cableTVplugto theAerialinput
socketlocatedat the rear of the TV andconnectthe
cable plug coming out from the TV out socket locatedon the devices (VCR, DVB etc.) to this socket
as well.
“The mains plug is the disconnect device and
shall remain readily operable.”
Warning: To prevent injury, this device must be se-
curely attached to the floor/wall in accordance with
the installation instructions.
"The LCD panel is very high technology product with
about a million thin film transistors, giving you fine
picture details. Occasionally, a few non-active pixels
may appear on the screen as a fixed point of blue,
greenor red. Please notethat this does not affect the
performance of your product."
“DONOTLEAVEYOURTVATSTAND-BYOROPERATINGWHENYOULEAVEYOURHOUSE”
VHF/UHF
REAR OF THE TV
CABLE TV
Inserting Batteries In The Remote
ControlHandset
WARNING :Remotecontrolis batteryincluded.Aplas-
tic protector is used to disconnect the batteries in
orderto preventthe battery life from reducing. Please
remove the plastic protector before the first use.
Inserting The Battery In The Remote
ControlHandset
• Removethebatterycoverlocatedon theback of the
handset by gently pulling backwards from the indi-
cated part.
• Insert two AAA/R03 or equivalent type batteries
inside. Place the batteries in the right directions.
• Replace the battery cover.
Note: Remove the battery from remote control handset when it is not to be used for a long period. Other-
wise it can be damaged due to any leakage of battery.
English -4 -
Page 6
Switching The TV ON/OFF
To switch the TV on:
Your TV will switch on in two steps:
1- Connect the power to 220-240V AC, 50Hz, press
power on/off button. Then the TV switches itself
to stand-by mode (optional).
2- To switch on the TV from stand-by mode either:
Press a digit button on the remote control so that a
programme number is selected, or Press the "P-" or
"P+" button on the TV or press the “
button on the remote control, so that last mode
switched off is selected.
By either method the TV willswitch on. When the TV
is operated for the first time, the following screen
appears:
Language
Country
Check the antenna cable
For more information on this process, see “Install
Menu” section.
To switch the TV off:
• Press the “ (stand-by)”button on the remote con-
trol or stand-by button on the TV, so the TV will
switch to stand-by mode.
To power down the TV completely, unplug the power
cord from the mains socket.
” or “ ”
English
U.K.
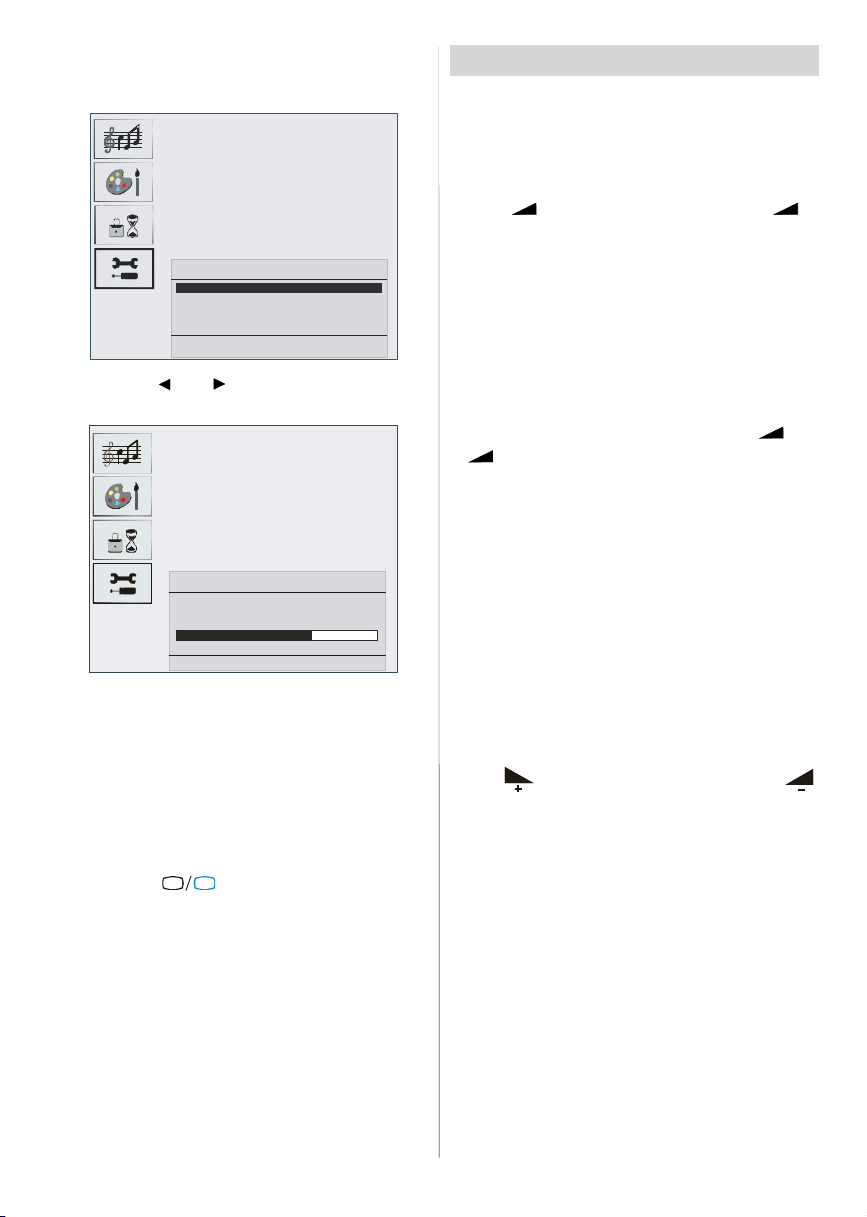
3- Use “
4- Press “
” or “
” button to highlight.
” or “
” buttons to change the settings.
PressOK to set as default.
5- To exit the menu or return from sub-menu screen,
press M.
These explanations are available for the navigation
of the whole Menu System. to select options that are
explained in the following parts, refer to “Navigat-
ing The Menu System”.
Initial Settings
When the TV is turned on for the first time, it is in the
digitalmode.
Because this isthe first time theTV is used,there areno
channelsstoredinthememoryandthefollowingmessage
appears onthescreen.
Please ensure aerial isplugged in.
Do you want to start automatic search?
Yes No
• Tostart installationprocess, select“Yes”, to cancel
select “No”.
•To selectan option“Yes orNo”, highlightthe item by
using
TheIDTVwillautomaticallytunetotheUHFtransmision
channels21to 68lookingfordigitalterrestrialTVbroad-
casts and displaying the names of channels found.
This process will take about five minutes. To cancel
searching, you can press the "M" button at any time
during the process.
or buttons and press the “OK” button.
AUTOMATIC SEARCH
Channels:
BBC ONE
BBC TWO
BBC CHOICE
Navigating the Menu System
Fornavigation
To confirm
choices
SELECT
OK
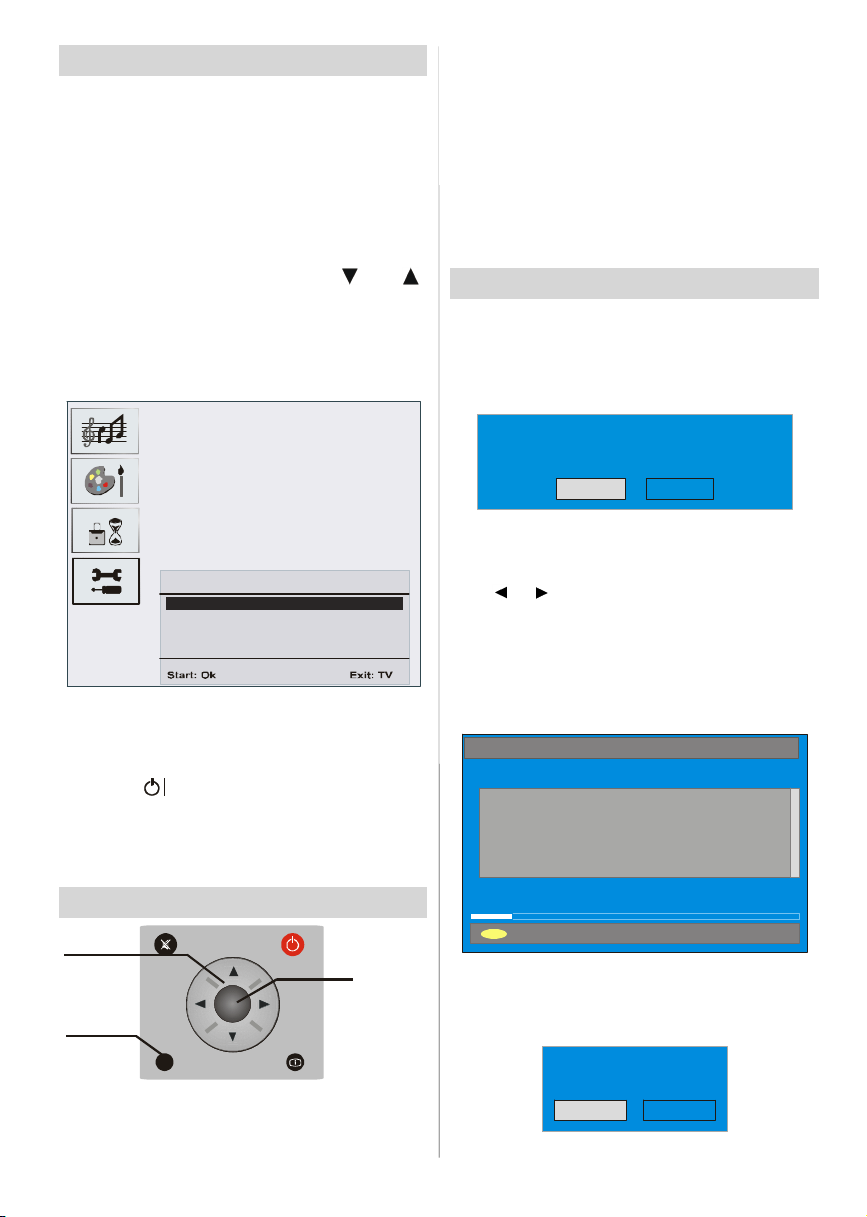
1- Press M to display the menu.
2- Press “
“
” or “
” for more options.
M
INFO
” button to select an icon. Press
menu options
English -5 -
12 %
MENU
Cancel searching
After Automatic Search process is completed, the
followingmessage asking for analoguechannel search
appears on the screen. TV switches to the analogue
TVmode.
Do you want to search for
analogue channels?
Yes
No
Page 7
To seach for analogue channels, select “Yes”. The
menubelowis displayedtosearchfor analoguechan-
nels.
Country
All prestor ed programs
will be del ated
Start: OK
Back: Men u
U.K.
Exit: TV
By pressing “ ” or “ ” button, adjust the “Country” item. Press “OK” button to continue:
State: Fine scanning ...
Exit : TV
After APS is finalized, a programme list will appearon
the screen. In the programme list you will see the
programme numbers and names assigned to the
programmes.
If you do not accept the locations and / or the
programme names of programmes, you can change
themin Programmenu.FordetailsseeProgrammenu
on page 22.
To display channel list in IDTV, switch to the IDTV via
pressing the “
TV
” button. Then press the "M"
buttonto entermain menu, Channel List willbe highlighted.Pressthe“SELECT”buttonto enterthemenu.
English -6 -
Basic Operations
You can operate your TV using both the remote
control and onset buttons.
Operation with the buttons on the TV
VolumeSetting
• Press “ -” button to decrease volume or “ +”
button to increase volume, so a volume level scale
(slider)willbe displayed at the middleof the bottom
on the screen.
Programme Selection
• Press “P/CH +” buttonto select the next programme
or“P/CH -”buttonto select thepreviousprogramme.
EnteringMain Menu
• Press the “MENU”buttonto enterMainmenu.In the
Mainmenu selectsub-menu using“P/CH -”or “P/CH
+” buttons and enter the sub-menu using “
+” buttons. To learn the usage of the menus,
“
refer to the Menu System sections.
AV Mode
Press the “TV/AV” button at the control panel on the
the TV to switch your TV to AV modes.
Operation with Remote Control
The remote control of your TV is designed to control
all the functions of the model you selected. The func-
tions will be described in accordance with the menu
system of your TV.
Functions of the menu system are described in the
following sections.
VolumeSetting
Press “ “buttonto increase volume. Press “ ”
button to decrease volume. A volume level scale
(slider)will be displayed in the middleat the bottom of
the screen.
Programme Selection (Previous or next
programme)
• Press “P-” button to selectthe previousprogramme.
• Press“P+” button to select the next programme.
Programme Selection (direct access):
Press digit buttons on the remote control to select
programmes between 0 and 9. TV will switch to the
selectedprogramme.To select programmesbetween
10 - 999 (for IDTV) or 10-99 (for analogue),press the
digit buttons consecutively which programme you
want to select (eg. for programme 27, first press 2
and then 7). When it is late to press second digit
buttononly the firstdigitprogrammewill be displayed.
The limit of the delay time is 3 seconds.
-” or
Page 8
Pressdirectlytheprogrammenumbertoreselectsingle
digitprogrammes.
Note : In Analogue mode please press -/-- button for
the programme selection
Everyday Operation
Pressingthe“
ing television programmes will switch the TV set be-
tweendisplayingthedigitalterrestrialtelevisionbroadcasting and its normal analogue broadcasting.
Information Banner
Wheneveryou changechannel,using the “P-” / “P+”
button or the digit buttons, TV displays the channel
picturealongwithaninformation bannerat thebottom
of the screen. This will remain on the screen for approximately three seconds. The information banner
can also be displayed at any time while watching TV
by pressing the “INFO” button on the remote control.
Now: 50/50
Next:Ace Lighting
1. BBC ONE
The information banner gives a number of facts on
the channel selected and the programmes on it. The
name of the channelis displayed,alongwithits channellist numberand an indicationof the strengthof the
signal received on this tuning channel.
Hi n t
Not a ll chann els br oad ca st the pro gramme
data. If the name and times of the programme
is not available then “ No Information Avail-
able” are displayed in the information banner.
Icons are also displayed in the information banner
and if this channel is a favourite channel:
Favourite channel icon
If the selected channel is locked, you must enter the
correct four digit code to view the channel.
Electronic Programme Guide (EPG)
Some, but not all, channels send information about
the current and next events. Please note that event
informationisupdatedautomatically.Ifthereisnoevent
information data available in channels, only channel
names with “No Information Available” banner is
displayed.
• Press “GUIDE” buttonto view the EPG menu.
• In EPG Menu, you can easily see the extended help
TV
”button atanytime whilewatch-
Enter Lock Key
Signal Level:
.
09:25 - 11:00
11:00 - 11:25
13:15
English -7 -
information by pressing“INFO” button and by pressing this button again you can close this window.
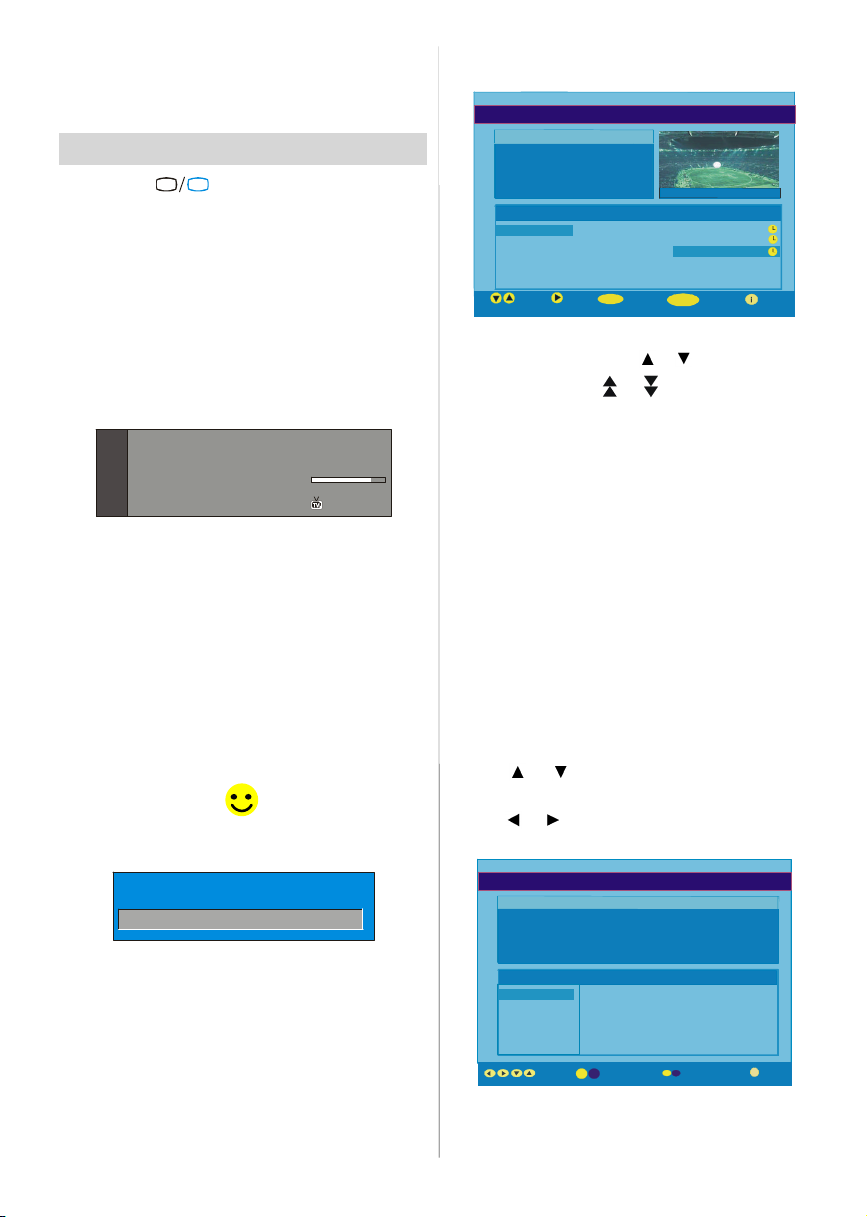
ELECTRONIC PROGRAMMEGUIDE(Now&Next) Saturday 21/8 13:48
ITVNews 14:00-15.00
Rolling national and international news
including breakingnewsas it happens,
businessupdates, sportsresultsand
weather summaries.
Channels CurrentProgramme NextProgramme
40. BBC NEWS24 BBC News BBCNews
41. ITVNews ITVNews ITVNews
50. FourText No Information No Information
51. BBCi BBCi BBCi
Current
Navigate
Reminder 7 Day EPG More
•In theEPGMenuallchannels are displayed.Current
channelis highlighted.Use
channels. Also press
or buttonstochange
or buttons to make page
up/down scroll for the channels.
• If you highlight an event, short event description,
extended event description, start and finish times of
event are displayed on the screen.
• When thecurrentprogramme is highlighted, the box
is switched to the highlighted channel by pressing the
“SELECT”button.
• If you press the “SELECT”button when a nextevent
is highlighted, a reminder is set for the highlighted
programmeandaclock appearsacrossthehighlighted
channelline.
Programme reminders can be set to signal that a
programme is about to start when you are watching
anotherchannel. If youset reminderto a programme,
then you will be asked for switching to that channel
when the reminder time is reached.
• Press the “M” button to view the 7 day EPG.
• Press
or button to navigate in Channels or
Programmes.
• Press
or button to navigate throughthe chan-
neland programmelist.
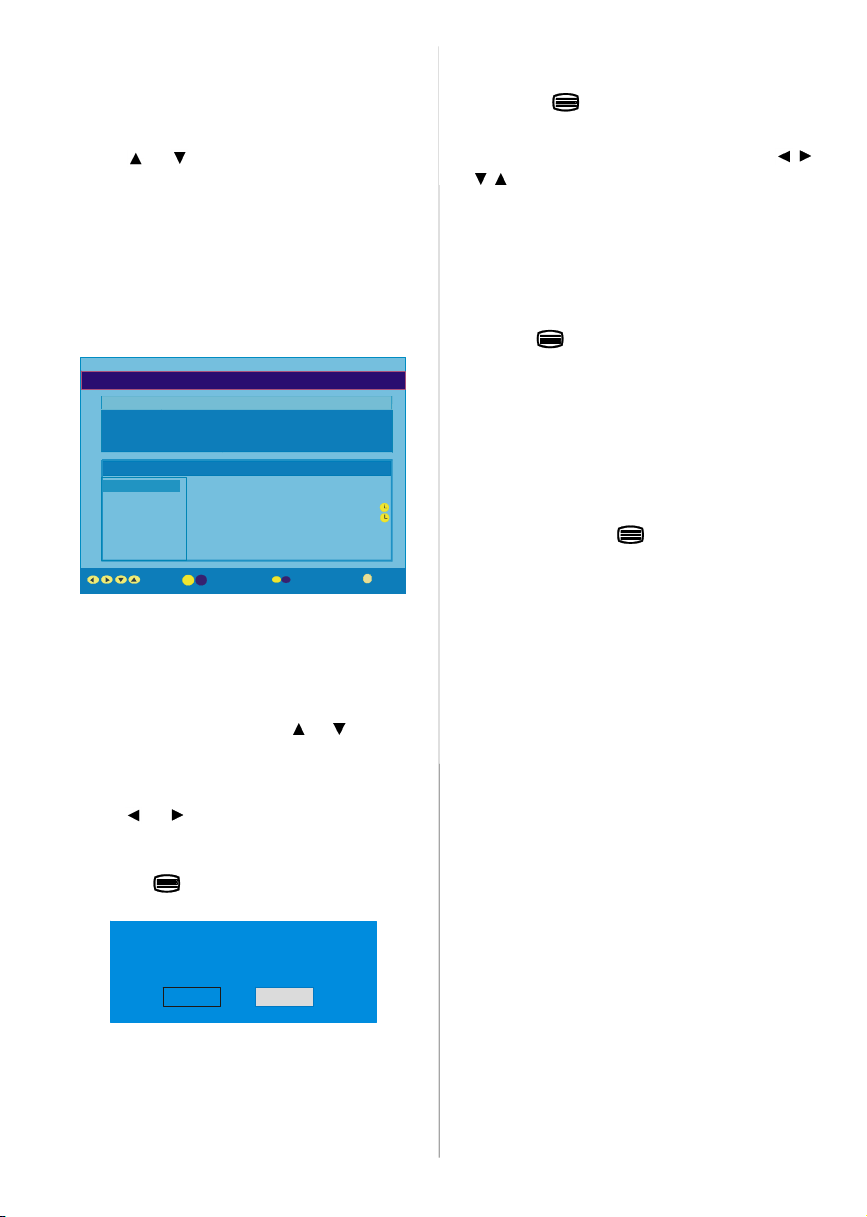
ELECTRONIC PROGRAMMEGUIDE(7 Day) Saturday 21/8 13:49
Chuckle Vision 13:00-14:00
Triple bill.In the Ring/Romany Days/On the Radio: Paul and Barry
grapple withthe world of wrestling; hunt for a mysteriousEmperor's
underpants;and record their firstp op song.
Channels Programmeson Saturday 21/8, 13:00 - 15:00
30. CBBC Channel 13:00 Chuckle Vision (Now)
40. BBC NEWS24 14:00 Tracy Beaker
41. ITVNews 14:55 Newsround
50. FourText
800. BLUE/LEFT1k...
801. CCIR17/1kHz...
DayNavigate
•With“RED/GREEN” buttonsyou canchangesched-
ule time. By pressing “YELLOW/BLUE” youcan advance the schedule backward / forward of a day.
Page 9
• If youpress “INFO” buttonyoucan see the detailed
help information easily.And by pressing “INFO” but-
ton again you can exit Help menu.
•Thestarting time for EPG is thecurrent time.Youcan
see the event information for the next two hours. By
pressing
or button, you can go to the next/
previous hours while Programmes list is highlighted.
• lf youpress the “SELECT”buttonwhena next event
is highlighted, a reminder is set for the highlighted
programme and a clock appears on the screen.
Programme reminders can be set to signal that a
programme is about to start when you are watching
anotherchannel. If youset reminderto a programme,
then you will be asked for switching to that channel
when the reminder time is reached.
ELECTRONIC PROGRAMMEGUIDE(7 Day) Saturday 21/8 13:51
Newsround 16:55-17:00
CBBC joinsthe Newsround team, keeping you up to date on the latest
storiesand eventshapp ening at home and ab road.
Channels Programmes on Saturday 21/8, 15:00 - 17:00
30. CBBC Channel 15:00 Even Stevens
40. BBC NEWS24 15:50 Newsround Showbiz
41. ITVNews 16:00 BasilBrush
50. Four Text 16:55 Newsround
51. BBCI
800. BLUE/LEFT1k...
801. CCIR17/1kHz...
DayNavigate
Displaying The Subtitles
With Digital terrestrial broadcasting (DVB-T), some
programmes are broadcast with subtitles. Subtitles
can be displayed when watchingthese programmes.
Press the “M” button to displaythe Main menu, highlight the Configuration line using
press the “SELECT” button to display the Configurationmenu.
Highlight the “Subtitle” item in Configuration menu
and use
or button to set Subtitle to off or a
language.
If “Subtitle” is on via selectingone language option,
pressing the
button causes the following warn-
ing message display on the screen.
Interactive services cannot be used
while subtitlesare on. Would you like
to turn subtitles off now?
Yes No
or button and
Digital teletext is sometimes broadcast at the same
time as normal broadcasting.
1. Press the
button.
The digital teletext information appears.
2. Operate it with the coloured buttons,
/ /
/ buttons and OK button.
The operation method may differ depending on the
contents of the digital teletext.
Follow the instructions displayed on digital teletext
screen.
• When “Press SELECT” button or similar message
appears on the screen, press the “SELECT” button.
• When the
(Text) button is pressed, the TV re-
turns to television broadcasting.
•WithDigitalterrestrialbroadcasting(DVB-T),inaddi-
tionto digitalteletextbroadcastingatthesame time as
normal broadcasting, there are also channels with
just digital teletext broadcasting.
• The aspect ratio when watching a channel with just
digitalteletext broadcasting is the same as the aspect
ratio of the picture watched previously.
• When you press the
(Text) button again, the
digital teletext screen is displayed.
Over Air Download
To ensure that your IDTV always has the most up-todate information,pleaseensurethat after use it is set
toits standbymode.At 3AMeachday, the IDTV automatically searches for any new information which
may be broadcast and will download this to your
IDTV automatically. This operation will normally take
approximately 30 seconds.
If you want to do this, you need to set Automatic
Download to “Enabled” in Receiver Upgrade setting. For details see page 12.
Widescreen
Dependingon the type of broadcast beingtransmitted,
programmes can be viewed in a number of formats.
Pressthe “WIDE”buttonrepeatedly to selectbetween
Auto, 4:3, 16:9, Subtitle or Cinema.
When Auto is selected, the format being displayedis
determined by the picture being broadcast.
Please Note: Menu size changes depending on the
chosen image size.
Digital Teletext
With Digital terrestrial broadcasting (DVB-T), in addition to pictures and sound, you can also watchdigital
teletext.
English -8 -
Page 10

IDTV Menu System
The IDTV menu can only be shown when watching
Digital terrestrial broadcasting. Press the “
buttonto turn IDTV on while TV is in analogue mode.
Press the "M" button. The menu below appears on
the screen:
Main Menu
Channel List
Installation
Timers
Language
TV Setup
Common Interface
Channel List
Usingthe or buttonon the remotecontrolinMain
menu, make sure that the first item, Channel List, is
highlighted and press the “SELECT”buttonto display
the Channel List.
The following operations can be performed in this
menu:
1. Navigating the whole list of channels
2. Deleting channels
3. Renaming channels
4. Adding locks to channels
5. Setting favourites
Channel List is the place where the channels are
managed.
TV
“Select” item on Channel List menu is highlighted by
using
or button.
Then the name and number of the selected channel
will be displayed in the top-left and top-right of the
”
channel display at the top-right of the screen, respectively.
Deleting the channels in the channel list
Press or button to selectthe channelthatwill be
deleted.
Press
Channel List menu. As seen on Channel List menu,
SELECT is written next to Delete item at the bottom
of the screen to indicate that press the “SELECT”
buttonto delete thehighlighted channelin the channel
list.
Press the “SELECT’’ button to delete the highlighted
channel in the channellist. Then the message below
appears on the screen.
or button to select the ‘’Delete’’ item on
CHANNELLIST 1 BBC ONE
1. BBC ONE
2. BBC TWO
3. ITV 8
4. Channel 4
5. BBC THREE
6. Teletext
7. BBC FOUR
8. Sky Travel
9. UKHistory
10. RTL
Select
Delete Edit Name Lock Favourites
Function SelectChannel Delete More
The selected service willbe permanently
deleted. Are you sure?
Yes No
1. BBC ONE
2. BBC TWO
3. ITV 8
4. Channel 4
5. BBC THREE
6. Teletext
7. BBC FOUR
8. Sky Travel
9. UKHistory
10. RTL
Select Delete Edit Name Lock Favourites
Function SelectChannel Watch More
Navigating the whole channel list
Press or button for selecting the previous or
next channel. You can press
or button to move
page up or page down.
To watch a specificchannel,highlightit using
or
button and then press “SELECT” button, while the
English -9 -
Press or button to highlight the desired option.
If “SELECT’’ button is pressed while “Yes” is high-
lighted, the highlighted channel is deleted. Selecting
“No” cancels the delete operation.
Renaming channels
To rename a specific channel, the channel must be
highlighted via pressing
light theEdit Name item by pressing
Press the “SELECT” to activaterename feature.
or buttonandthen high-
or button.
Page 11

1. BBC ONE
2. BBC TWO
3. ITV 8
4. Channel 4
5. BBC THREE
6. Teletext
7. BBC FOUR
8. Sky Travel
9. UKHistory
10. RTL
Select
Delete EditName Lock Favourites
Function SelectChannel Edit Name More
Now pressing or buttonmoves to the previous/
next character. Pressing
or button toggles the
current character, i.e., ‘b’ character becomes ‘a’ by
and ‘c’ by . Pressing the numeric buttons ‘0...9’
replaces the highlighted character with the characters printed above the button one by one as the but-
ton is pressed.
Press the "M" button to cancel the editing or “SE-
LECT” button to save the new name.
Adding locksto channels
Channel Locking provides a password-protected access to channels selectedbyparents.In order to lock
a channel you should know the Parental Lock pass-
word (default value is set to 0000 in the factory and
can only be changedfrom the Configuration Menu).
Select the channel to be locked by highlightingit and
select the “Lock” optionby pressing
When the “SELECT” button is pressed, a password
box is displayed.
or button.
only the favourite channels are navigated. To set a
favourite you should highlight the “Favourites” item
at bottom of the ChannelList menu.
Use the
or button to highlight the “Favourites”
item at the base of the screen and then, in turn, highlight each channel you want to add to the favourites
list, using the
and buttons (or / buttons),
and press the “SELECT”button.
A channel selected as a favourite appears in the
main channellist with a favourites icon (
) against
thechannelname.
CHANNELLIST 1 BBC ONE
1. BBC ONE
2. BBC TWO
3. ITV 8
4. Channel 4
5. BBC THREE
6. Teletext
7. BBC FOUR
8. Sky Travel
9. UKHistory
10. RTL
Select Delete Edit Name Lock Favourites
Function SelectChannel Add/Remove... More
On Screen Help PressingINFO Button
For all menus press the “INFO” button to display the
helpinformationaboutthemenufunctions.For Chan-
nel Listmenu the following message is displayed on
the screen.
highlighted channel.
PressMENUto exitthisscreen.
CHANNELLIST 1 BBC ONE
1. BBC ONE
2. BBC TWO
3. ITV 8
4. Channel 4
5. BBC THREE
6. Teletext
7. BBC FOUR
8. Sky Travel
9. UKHistory
10. RTL
Select Delete Edit Name Lock Favourites
Function
Select Channel Lock/Unlock More
Enter Lock Key
Enter the password using the digit buttons on the
remote control. The Lock icon
will now be dis-
playednext to the selectedchannel.Repeatthesame
operation to cancel the Lock.
Setting Favourites
You can set various channels as favourites so that
English -10-
Installation
The Installation menu mainly intends to help you for
building a Channel Table in the most efficient way.
Main Menu
Channel List
Installation
Timers
Language
TV Setup
Common Interface
This menu includes the following items:
1. Add New Channels
2.First TimeInstallation.
Page 12

ADD NEW CHANNELS:
This tuning menu consists of two parts:
Automatic Search
Manual Search
Installation
Add New Channels
FirstTime Installation
Automatic Search
Manual Search
Automatic Search:
Automatic search is started by pressing the “OK”
button in the auto-search pop up menu. All the ser-
vices are searched and a channel table is created
automatically.
All channels found are stored in a sorted form with
respect to their channel numbers. Some services
may not appearwith the correct channel number. At
the time of printing, not all broadcasters are sending
theirchannelnumberinformation.
Manual Search:
In manual search, the number of the multiplex is enteredmanuallyandonlythat multiplexis searched for
the channels. For every valid channel number,signal
level, signal quality and network name are shown at
the bottom of the screen.
In both manual and auto search any existing channel
in the database is not re-stored to avoid redundant
duplicates of that channel.
FIRST TIME INSTALLATION
The user can use this item to load default settings,
which had been loaded to the receiver at the factory.
To install factory settings, highlight “First Time In-
stallation” menu and press the “OK” button, then
you will be asked to confirm for deleting all channels
and settings.
Installation
Add New Channels
Please ensure aerial isplugged in.
Do you want to start automatic search?
Yes No
Pressthe“OK”buttonto start installation.Aftersearch
is completed for digital channels, a message asking
searchfor analoguechannels appears on the screen.
Do you want to search for
analogue channels?
Yes
No
Press the “OK” button to search for analogue
channels.The following menu appears on the screen
for analogue channel search.
Country
All prestored prog rams
will be delated
Start: OK
Back: Menu Exit: TV
U.K.
By pressing “ ” or “ ” button, adjust the “Country” item. Press “OK” button to continue:
State: Fine scanning ...
Are you sure you want to delete all digital channels
and settings for first time installation?
Yes
No
By selecting YES and pressing the “OK” button, the
existing channel table will be deleted.
After factory settings is loaded, “First Time Instal-
lation” menu will be displayed.
English -11-
Exit : TV
After APS is finalized, the programme table will appear on the screen. In the programme table you will
see the programme numbers and namesassignedto
theprogrammes.
If you do not accept the locations and / or the
programme names, you can change them in the Programtable.
Page 13

Configuration
Press the "M" button to display the Main Menu and
button twice to highlight Configuration, then
the
press the “SELECT” button to display the Configura-
tion menu. Press the "M" button to leavethe menu.
Main Menu
Channel List
Installation
Timers
Language
TV Setup
Common Interface
The various configuration functions are displayed in a
list, alongwith a quarter-screenimage of the currently
selected channel. You can select a function by highlightingthecorrespondingmenuline usingthe
button.
or
This function enables or disables the favourite channel list mode. See Channel List menu Favourites on
page12.
Use
or button to turn on/off favourite mode. If
the “Favourite Mode” is on, in normal operating
mode pressing “P+” and “P-” buttons will only navi-
gate through the channels that were previously defined as favourites in Channel List.
EPG Preference
Digital terrestrial television channels can broadcast
simultaneous Next&Now and 7-Day electronic
programme.
Highlight theEPG PreferencelineintheConfiguration
menuand use the
or buttonto selectNext&Now
or 7-Day.
Receiver Upgrade
TheIDTVcanbe upgradedviatheconfigurationmenu,
enteredfrom the main menu.
In the Configuration menu, highlight the “Receiver
Upgrade” item by pressing
or buttonand press
the “SELECT” button to start upgrade process.
There are two possibilities for Receiver software to
be upgraded: automatic and manual.
Audio Language
Subtitle
Favourite Mode
EPG Preference
Receiver Upgrade
English
Off
Off
Now&Next
V.1.5
More
Audio Language
Digital terrestrial television channels can broadcast
simultaneoussoundtracksinmorethan onelanguage.
This function selects which language soundtrack you
will hear when switching to a channel broadcasting
with the multiple soundtracks.
Highlight the Audio Language line in the Configura-
tionmenuand use the
or buttontocyclethrough
the language options.
Subtitle
Digital terrestrial television channels can broadcast
subtitles displayed on-screen for the hard-of-hear-
ing.This functionselectsthedesired subtitlelanguage
and enables the automatic displayof subtitles when-
ever subtitle information is broadcast.
Highlight the Subtitle line in the Configuration menu
and use the
or button to cycle through “Off”
and language options.
English -12-
Audio Language
Subtitle
Favourite Mode
EPG Preference
Receiver Upgrade
AutomaticDownload
Search for New Version
MENU
Exit More
English
Off
Off
Now&Next
V.1.5
Enabled
Automatic Download (Automatic upgrade)
Automatic Download can be enabled or disabled
by pressing
or button.If it is enabled,thenthere
are two ways for automatic upgrade. The first one is
checking the existence of a new software every time
the IDTV goes to standby.The second one is waking
upat03:00a.m. everynight, providedthat the IDTVis
left in standby mode. Both automatic upgrade meth-
ods result in standby mode either upgraded or not.
If the automatic upgrade is set to “Disabled” then this
function will not work.
Search For New Version (Manual upgrade)
Manual upgrade starts if the “Search for New Version” item is highlighted by using
or buttonand
activated via pressing the “SELECT” button.
After “Search for New Version” is activated, the
Page 14

IDTV tunes to each frequency that have been stored
in its database and looks for the new software.
Software Upgrade
Searching forupgrade. Please wait, or
pressMENUto cancel.
Search Progress:
Parental Settings
Some channels broadcast material which you do not
want younger members of the family to watch. Any
channel can be ‘locked’ so that it cannot be selected
for viewing without first a four-digit PIN code being
entered. In this way any channel not suitable for
younger viewers can be protected.
Thisfunctionenablesor disables the menu protection
system and allows the PIN code to be changed.
Use
or button to go to ParentalSettingsoption.
Pressthe“SELECT”button to enterParental Settings
Menu. A box asking for the lock key is displayed.
Highlight the Timers line by pressing
or button
and press the “SELECT”button to display the Timer
menu.
Main Menu
Channel List
Installation
Timers
Language
TV Setup
Common Interface
Up to five separate timer events can be set and each
is displayed in the Timer screen, showing the event
number, the channeltobeselected,thestarttime, end
time,date and the mode - whetherthat event is active
(and will be acted on) or not.
Enter Lock Key
There is only one key which is set to “0000” initially.
Enter lock key. If wrong Lock key is entered, the fol-
lowing message is displayed on the screen and it is
returned back.
Wrong Lock Key
If it is correct, the Parental Settings Menu including
following items is displayed:
Menu Lock Installation
Set Lock Key
Thereyoucan set/reset lockingfor the MainMenu,or
the Installation Menu to restrict access. If the menu
lock is disabled, there willbe free access to the menu
system. Also in this menu you can change the lock
key and set/change parental lock mode.
Disabled: All menus are unlocked.
Main Menu: Main menu is accessible only with the
correct lock key. So the user cannot add, delete, rename, move channels, cannot set timers.
Installation: Installation menu is locked, so the user
cannot add channels.
Changes will be updated after exiting Configuration
Menu.
Timers
You can set a timer to switch the TV to any channel
without yourintervention.Thisis also for makingvideo
recordings of programmes when you are out.
Display the Main Menu by pressing the "M" button.
English -13-
TIMER MENU
No Channel Name Start End Date Mode
1. ITV 1 20:00 21:00 12/05/2005 Active
2. BBC ONE 00:00 00:00 01/01/2005 Inactive
3. BBC ONE 00:00 00:00 01/01/2005 Inactive
4. BBC ONE 00:00 00:00 01/01/2005 Inactive
5. BBC ONE 00:00 00:00 01/01/2005 Inactive
6. BBC ONE 00:00 00:00 01/01/2005 Inactive
ToggleMode Exit Edit Timer More
MENU
• To set an event, highlight its mode button using the
or button and press the “SELECT” button to
display the timer entry window.
3. ITV 1
Start:
00:00
End:
00:00
Date:
03/06/2005
Mode:
Once
• Here the five settings of channel name, start time,
end time, date and frequency mode can be set. You
can move freely between each setting using the
or buttons.
• The channelname is set usingthe
or buttonto
displaythechannelwhichbroadcaststheprogramme.
• The start time, end time and date are each set with
the digit buttons on the remote control in 24-hour for-
mat.
• The frequency mode determines how often the
receiver operates this event and is set with the
button to be either Once,Daily, or Weekly.
If an invalid number for the start or end times or the
date is entered, “Entered time is not valid” message
appears on the menu.
or
Page 15

If timer actionoccurs while the TV is watched,the TV
switches to the selected channel. When timer ex-
pires, the TV switches to the channel which it is
switched from.
Selected digital channel will be output via Scart-2.
You should connect your VCR to Scart-2 for record-
ing digital broadcast.
Language
Some programmes are broadcast in two or more languages simultaneously. The language heard can be
selected from the Language Menu.
•Pressthe"M" buttontodisplaytheMainMenuanduse
or buttonto highlighttheLanguagelineand press
the“SELECT”button.
Main Menu
Channel List
Installation
Timers
Language
TV Setup
Common Interface
• Use the or button to highlight the soundtrack
language required and press the “SELECT” button.
Normal viewing, with the required language
soundtrack, can be resumed by pressing the "M"
button.
Languages
English
TV Setup
To be able to go through TV functions, you can use
thisitem.
The digital TV Setup menu screen is accessed from
the main menu. Press the "M" button to display the
main menu and use
Setup”, press the “SELECT” button to display TV
Setup menu screen.
or button to highlight “TV
Main Menu
Channel List
Installation
Timers
Language
TV Setup
Common Interface
English -14-
Detailed information about Sound, Picture and Featuremenus are in AnalogueTV Menu System section
on page 19.
Common Interface
• Press the "M" button to display the Main Menu and
use the
Interface” line and press the “SELECT” button.
It is required to subscribe to a pay channel company
toviewthepaychannelsoftheDigitalTerrestrialbroad-
casting.
Obtainthe ConditionalAccessModule(CAM) and the
Viewing card by subscribing to a pay channel company, then insert those to the Television using the
following procedure.
1. Switch off the TV and unplug from the mains.
2. Insert the CAM, then Viewing Card to the
slot that is located in the terminal cover at the
left-hand side of the TV (from front view).
• The CAM should be correctly inserted, it is impossible to insert fully if reversed. The CAM or the TV
terminal may be damaged if the CAM is forcefully
inserted.
3. Connect the TV to the mains supply, switch
on and then wa it for few moments until the
card is activated.
•SomeCAMsmayrequirethefollowingsetup.Please
set the CAM by entering the IDTV menu, Common
Interface then pressing the “SELECT” button. (CAM
set up menu is not displayed when it is not required.)
• To see the viewing contract information:
EnterIDTV;pressthe"M" button,thenhighlightCom-
mon Interface and press the “SELECT” button.
• When no module is inserted, “No Common Inter-
face module detected” message appears on the
screen.
• Refer to the module instructionmanualfor details of
the settings.
or button to highlight the “Common
Main Menu
Channel List
Installation
Timers
Language
TV Setup
Common Interface
Page 16

Analogue TV Menu Map
-Programme
-Colour System
-Auto Programming System
SOUND
Volume
Balance 0
Sound Mode Stereo
AVL On
Effect Off
Back : Menu Exit : TV
PICTURE
Picture Mode Bright
Brightness
Contrast
Colour
Sharpness
Back : Menu Exit : TV
SOUND MENU
-Volume
-Balance
-Sound Mode
-AVL
-Effect
-Equalizer
-Mode
-HP Volume
-Store
FEATURES
Sleep Timer Off
Language English
Child Lock Off
EXT2 Output TV
Menu Colour Gr ay
Back : Menu Exit : TV
A.P.S.
Back : Menu Exit : TV
-Brightness
-Contrast
-Colour
-Sharpness
-Colour Temp
-Picture zoom
-Store
FEATURES MENU INSTALL MENU
-Sleep Timer
-Language
-Childlock
-EXT2 Output
-Menu Colour
-Favorite Mode
-Programming
-Band
-Channel
-Standard
-Search
-VCR Mode
-Decoder
-Store
-APS
-Txt. Region
-Program Table
A menu map is provided above. For details of the items,
refer to relevant explanations in the “MENU SYSTEM”.
English -15-
Page 17

Analogue TV Menu System
Sound Menu
Volume
Balance 0
Sound Mode Stereo
AVL On
Effect Off
Exit : TV
Volume/HP Volume
• By pressing
•Press
option.
Balance
• By pressing
• Press
balance.Balance level can be adjusted between -
32 and 32.
Sound Mode
• By pressing
• Press
Dual I or Dual I I mode, only if the selectedchannel
supports that mode.
AVL
• By pressing
• Press
Effect
• By pressing
• Press
Equalizer
• By pressing
• Press
Inequalizermenu,themodecanbechangedtoFlat,
Speech, Music, Personal and Jazz. Select the
desired frequency by
or decrease the frequency gain by pressing
button.
Note: Equalizer menu settings can be altered only
when the Sound Mode is in Personal.
Store Program
• By pressing
• Press
“Stored” will be displayed on the screen.
/
select Volume / HP Volume.
/
buttonto changethe levelof the selected
/
select Balance.
/
button to change the level of the
/
select Sound Mode.
/
button, you can select Mono, Stereo,
/
select AVLVL.
/
button to set the AVLas on or off.f.
/
select Effect.
/
button to set Effect as on or off.
/
select Equalizer.
/
button to change the Equalizer setting.
/
button and increase
/
button, select Store.
or “OK” button to store the adjustments.
English -16-
/
Picture Menu
Picture Mode Bright
Brightness
Contrast
Colour
Sharpness
Back : Menu Exit : TV
Picture Mode
• By pressing
• Press
options: Bright, Standart, Soft and Manual.
Brightness/Contrast/Colour/Sharpness/Tint
• By pressing
tion.
• Press
Hint: Tint (Hue) is displayed in picture menu when
the TV receives an NTSC signal.
ColourTemp
• By pressing/
• Press
Cool, Normal and Warm.
Room Lightning
• By pressing
• By pressing
these options: Normal, Bright and Movie.
Picture Zoom
• By pressing
• Use
/buttons,to change picture zoom to Auto,
4:3, 16:9, Cinema and Subtitle.
Store Program
• By pressing
• Press
“Stored” will be displayed on the screen.
/
button, select Picture Mode.
/
button to choose from one of these
/
button, select the desired Op-
/
button to set the level.
button select Colour Temp.
/
to choose from one of these options:
/
button select Room Lightning.
/ button, you can select one of
/
button select Picture Zoom.
/
button select Store.
or “OK” button to store the adjustments.
Page 18

Features Menu
Install Menu
FEATURES
Language English
Child Lock Off
Gray
Exit : TV
Off
TV
Sleep Tim er
• By pressing
• Press
/
select “Sleep Timer”.
/button to set the Sleep Timer..
The timer can be programmed between Off and 120
minutes in steps of 10 minutes.
Language
• By pressing
• Use
/
/
button, select Language.
button to select the language.
Child Lock
• By pressing
• Press
off.When on is selected, the TV can only be con-
trolled by the remote control handset. In this case
the control panel buttons, except the Standby but-
ton, will not work. Hence, if one of these buttons is
pressed, “Child Lock On” will be displayed on the
screen.
EXT2 Output
• By pressing
/
• Use
EXT3or SVHS.
Note: If the currently watched source is analogue TV,
a connected device displays analogue TV source as
well. If this source is set to digital mode, connected
device displays digital source. In order to avail this
function, EXT-2 Output should be set to TV/DTV.
/
select Child Lock.
/
button to set the Child Lock on or
/
select EXT2 Output.
button,to set Ext-2 Out to TV/DTV, EXT1,
Menu Colour
• By pressing
• Use
/
Transparent or Gray.
/
select Menu Colour.
button to change menu background to
Favourite Mode
• By pressing
/
•Use
Channel List menu Favourites).
/
select Favourite Mode.
buttonto setFavourite mode on or off (See
INSTALL
A.P.S.
Back : Menu Exit : TV
Programming
• By pressing
• After pressing “
pears on the screen.
/select Programming.
” button, programming menu ap-
Programme 4
Band S
Channel 30
Standard BG
Back : Menu Exit : TV
PAL
Programme
• By pressing
• By pressing “
program number.You can also enter a number via
digit buttons on the remote control. There are 100
program storage between 0 and 99.
/
select Programme.
” / “ ” button, you can select the
Band
• By pressing/
• By pressing “
channel type to C or S .
select Band.
” / “ ” button, you can change the
Channel
• By pressing
• Use “
ber.You canalsoenteranumberviadigit buttonson
the remote control.
/
select Channel.
” / “ ”buttons to change the channel num-
English -17-
Page 19

Standard
• By pressing
• Use “
D/K, I or L/L'.
/
select Standart.
” / “ ” button to change the standard to B/G,,
Colour System
• By pressing
• Use
/
PAL, SECAM or AUTO.
/
select Colour System.
button to change the colour system to
Search
• By pressing
• Press
stop when a signal is found.
Note: If you press the buttons with one-step moves,a
frequency of 0.25 Mhz will be advanced.However if
you press the buttons all at once,it will advance
automatically. To stop searching at a certain time,
you may press
/
select Search.
/
button to start search. The search will
/
buttons.
VCR Mode
• By pressing
/
• Use
Hint: If you want to watch a DVD , then you have to
set this item as “off”.
/
select VCR mode.
buttons to set VCR Mode on or off.
Decoder
You can use this mode to connect any decoder to
your TV.
• By pressing
• Press the
/
select Decoder
/
buttons to turn it ON or OFF..
When you switch the Decoder setting to OFF, EXT1
outputwill be muted. In this case, EXT1 outputwillnot
be available to display video. If it is switched ON, the
EXT-1 output will be the selected video source. Any
decoder can be connected to EXT1 to unscramble
required video signal.
Hint: Decoder setting should be stored separately
for each programme.
Store
• By pressing
• Press
“Stored” will be displayed on the screen.
A.P.S.
• By pressing
• Press “
menu appears on the screen.
/
button select Store.
or “OK” button to store the adjustments.
/
button select A.P.S.S.
” button to enter the A.P.S. menu. A.P.S.
Auto. Programming System
Country
Warning! All prestored programs
will be deleted
Start : Ok
Back : Menu
U.K.
Exit : TV
A.P.S. (Auto Programming System) Country
Press / button to select your country. If you want
to exit from A.P.S. function, press the “TV” button.
For going back, press “M”.
WhenyoupressOKbuttonforstartingAPS, all stored
programs will be erased and the following screen
will be displayed.
State: Fine scanning ...
Exit : TV
Wheneveryou pressthe “
TV
”button,A.P.S.func-
tionstops and Channel table appears on the screen.
If you wait until the end of A.P.S., Channel table is
displayed with the programmes found and located.
Teletext Region
• By pressing
• Using
Teletext region. There are five options to select :
West Europe, East Europe, Turk/Gre, Cyrillic
and Arabic/Hebrew.
/button select Teletext Region.
/
buttons in the Install menu, select your
Install menu in AV modes
The following screen appears in the install menu:
English -18-
Page 20

INSTALL
Programming
Txt. Region West Europe
Back : Menu Exit : TV
Programming
• By pressing
• After pressing “
pears on the screen.
VCR Mode
Store
Back : Menu Exit : TV
/
select Programming Mode.
” button, programming menu ap-
PAL
Off
Colour System
• By pressing
• By pressing “
colour system to PAL, SECAM or AUTO.
/
select Colour System.
” / “ ” button, you can change the
Program Table
P01
P01 BBC 1
P02 C 04
P03 P13
P04 P14
P05 P15
P06 P16
P07 P17
P08 P18
P09 P19
P10 P20
Delete
Name
By moving the cursorin four directions you can reach
20 programmes in the same page. Youcan scroll the
pages up or down by pressing the navigationbuttons
to see all the programmesin TV mode(exceptthe AV
mode).By cursoraction,programmeselectionis done
automatically.
P11
P12
Move
A.P.S
Exit: TV
Name:
To change the name of a programme, select the
programme and press the YELLOW button.
The first letter of the selected name starts to blink.
Press
/
button to change that letter and
/
button to select the other letters. By pressing the
YELLOW button, you can store the name.
Move:
Select the programme that you want to insert by
navigationbuttons. PresstheGREENbutton.Bynavi-
gation buttons, move the selected programme to the
decidedprogramme spaceandpresstheGREENbut-
ton again.
Delete:
Todeletea programme, presstheREDbutton.Pressing the RED button again erases the selected
programme from the programme list, and the programmes below shift one up.
APS (Auto Programming System)
When you press the BLUE button for APS,Auto Programming System Menu will appear on the Screen.
Favourite Mode:
You can set various channels as favourites so that
only the favourites are navigated. To set a favourite,
use navigation buttons to select a channel and then
press the “
” item. The channel selected as a
favourite appears in the Program Table with a
favourites icon (
) againstthe channel name. For
removing a favourite, carry out the same operation.
Toexit,pressMENU.
Program Lock :
Program Lock
Enter PIN
Change PIN
Back : Menu Exit : TV
Program Locking provides a password-protected access to channels selected by parents. In orderto lock
a channel you should know the Program Lock password (default value is set to 0000 in the factory and
can only be changedfrom the Program Lock Menu).
Enter PIN :
Select the channel that you desire to lock by highlightingit and press
is pressed, Program lock menu will be displayed on
screen.After entering the pin code, desired channel
will be locked. The programlock icon will appearnext
to the channel name. When the locked channel is
selectedthrough P+orP-buttons, thefollowingwarn-
ing screen will be displayed:
Program Is Locked!
from Program Table.
button. Whenthe“ ”button
English -19-
Page 21

Change PIN
Enter new PIN
SOURCE
EXT-3
• By pressing
• Use “
ing “
the screen.
Program Lock
Back : Menu Exit : TV
EnteroldPINcodethroughdigitbuttons andthenenter
your new PIN code. Program Lock menu will be dis-
played on the screen when you enter new PIN code.
Program Lock
/
button , select Change PIN.
” buttonto changethePIN code.After press-
” button, the following message appears on
Personal Preference
By pressing this button, you may adopt the previous
settings that you had stored before.
Menu System in AV Modes
TV
EXT1
EXT2
SVHS
DTV
Back : Menu Exit : TV
Program Lock Menu will again be displayed short
after the identification of new PIN.
Hint: If you forget your Program Lock password, you
can deactivate the Program Lock by using the code
7910 and be able to set new password for future use.
Thus, do keep this code in a safe place for future
references.
Other Features
TV Status
Pr ogr amme Numb er, Progra mme Na me,
Sound Indicator and Zoom Mode are displayed
on the screen when a new programme is entered or
button is pressed.
Mute Indicator
It is placed in the upper side of the screen when
enabled.
To cancel mute, there are two alternatives; the first
one is pressing the
increasing/decreasing the volume level.
AV Modes
By pressingthe AV button you can switch your TV to
AV modes (except being in teletext). Pressing this
button consecutively will switch the TV in one of the
optional AV modes: TV, EXT1, EXT2, EXT3, SVHS,
DTV. To remove source osd from screen press “TV”
or“MENU”button.InorderthequittheAV Mode,press
TV
or the “P+, P-” button.
button and the second one is
English -20-
Sound/Picture/Features/Install Menu
The items in these menus are described at Sound,
Picture, Features and Install Menu explained in
“Menu System”.
Teletext
Youcan displayTeletext informationon your TV.Each
channel which broadcasts teletext, transmits a page
with information on how to use its teletext system
(usually page 100). Depending on the TV channel,
teletextis transmittedin differentsystems.Thecolours
used in the options line correspond with the colour
buttons of your remote control.
• Ensure that the TV is receiving a good signal, or
some text errors may occur.
• When four coloured items appear at the bottom of
the text page,Fasttext is available.Fasttext allows
you to access pages quickly and easily.Press the
corresponding coloured button to access the page.
Special Teletext Functions
“ ” To Display a page of text.
The view text services press “
viewing press again.Programmescannot be changed
until text is cancelled.
• To select a page, press the number buttons or programbuttons(P+, P-).
• To select index page, press “
•To select superimposed over the programme on the
screen, press “
•Press“
again to enlarge the bottom half of the page.Press
again to revert normal size.
”onceto enlargetophalfofthe page,press
”.
”. To return normal
” button.
Page 22

• To discover solutionson quiz and games press “ ”
•At times it is convenient to holda page of text.Press
“
”to holda page.Thepagewill be held on screen
until the button pressed again.
•To selectsubcodepagespress “
are subsections of long Teletext pages that can only
be displayed on the screenone sectionat a time.
• Time information will be displayed on screen after
pressing “
teletexttransmission,noinformationwillbedisplayed.
• To exit text press “
”button.Iftheprogramme doesnothave
”.
”.Subcodepages
Pat mode
Intextmode,press “ ” buttonto displaytheteletext
page of the channel at the main window. It is dis-
played at the left window. Press “
(iþaret) button to exit from teletext.
Note: If the signal becomes insufficient, the teletext
mode will be quitted.
” button or TV
Fastext
Your TV supports the 10 page Teletext system. When
the page number of any of the 10 pages in memory is
entered, the system will not search for the requested
page;insteadit willdisplaythepageautomatically. If the
requestedpageis notin memory,thesystemwillsearch
forthe requested pagenumber and savethe 10 pages
includingtherequestedpageintomemoryafterfindingit.
• Press the
forward one page at a time.
• Press the
backward one page at a time.
button to move the Teletext screen
button to move the Teletext screen
ForFastext
The subject-heading for the information may have a
particular colour.
•PressanappropriateRED,GREEN,YELLOW orBLUE
button in order to reach the relevant page quickly.
TOP text
TOPtextmodeofoperationwillbe activatedautomatically according to the transmission.
• If TOP text transmission is present, colour coded
buttons will appear in status row.
• If TOP text transmission is not present, status row
will not appear.
Thesubject-headingfor informationmay be located in
colored box.
In Topmode the “-P/CH” or “P/CH+” commands will
request the nextor previous pagerespectively. If TOP
texttransmission is not available, in case of operation
ofthesecommands, wraparoundoccurs.Forexample
page100 appearsto be one greater than page199.
English -21-
Connect Peripheral Equipment
Via The Scart
The TV has 2 Scart sockets. If you want to connect
peripherals (e.g.video, decoder, etc.) which haveScart
socketstotheTV,youcanuseSCARTsocketoftheTV.
Note: If an external device is connected via the Scart
sockets, the TV will automatically switch to AV mode.
If both sockets areemployedat the sime time, SCART
1 becomes the preferential.
Via Aerial Input
If the device you want to connect does not have a
Scart socket, you should connect it to the Aerial input
of the TV.
If the VCR is connected via Aerial input, it is
suggested to use Programme 0.
Decoder
If you are subscribed to cable TV offers, the
organisation will supply you a corresponding decoder
unit to allow the programmes to be unscrambled.
For further information consult your dealer.
Connect a decoder with an aerial socket to
the TV
• Connect the aerial cable.
Connect a decoder without an aerial socket
to the TV
• Connect the decoder to the EXTERNAL socket of
TV with a RCA cable. Through the SCART/RCA
socket of the decoder, you may attain a better display resolution.
TV And Video Recorder
• Connect the aerial cables.
Betterpicture quality can be obtained if you also connect a Scart cable to SCART sockets.
Playback NTSC
• Connect NTSC VCR playerto a Scart socket of the
TV.
Then, press the “AV” button to select EXT1 or EXT2.
Copy Facility
Source selection for VCR recording.
• Select Feature menu.
• SelectSCART 2 Out by pressing
• For copying the picture that comes from the tuner,
selectSCART1.
Note : Scart-1 socket cannot be used as DTV output.
Please use Scart-2 instead.
/
button.
Page 23

Camera And Camcorder
To Connect To AV Input
Connectyourcamera or camcorderto EXT-3 input of
the TV.
• Connect your equipment to the TV via VIDEO (yellow), AUDIO R (red) and AUDIO L (white) inputs.
You must connect the jacks into the input with the
same colour.
To ConnectToS-VHSInput
Connect your camera or camcorder S-VHS input of
the TV.
• Connect your equipmentto the TV via S-VHS input
and audio inputs of AV inputs by using S-VHS
cables.
Connect The Decoder To The Video
Recorder
Some video recorders have a special Scart socket
for decoder.
• Connect a Scart cable to the Scart socket of your
decoder and to the special Scart socket of your
video recorder. Refer to the booklet of your video
recorder.
Connecting Headphones
Use the stereo headphone socket of the TV, to connect headphones.
Note: If you want to connect more equipment to your
TV, consult your dealer.)
Audio Lineout
To connect the external speakers to your TV, use
Line Outs of the TV.
No Picture
Is the aerial connected properly? Are the plugs connected tightly to the aerial socket? Is the aerial cable
damaged? Are suitable plugs used to connect the
aerial? If you are in doubt, consult your dealer.
No Picture means that your TV is not receiving a
transmission. Have you selected the correct button
on the remote control?Try once more.
Sound
You can not hear any sound. Did you perhaps interrupt the sound, pressing the
Soundis coming from only one of the speakers.Isthe
balance set to one extreme? See Sound menu.
button?
Remote Control
Your TV no longer responds to the remote control.
Perhaps the batteries are exhausted. If so you can
still use the local buttons at the bottom of the TV.
Appendix A: AerialConnection
Outdoor Aerial Connec tion
Round 75 ohm coaxial cable
Rear of TV
Tips
Care Of The Screen
Clean the screen with a slightly damp, soft cloth. Do
not use abrasive solvents as they may damage the
TV screen coating layer.
Poor Picture
Haveyouselectedthecorrect TV system? Is your TV
set or house aerial located too close to non-earthed
audioequipmentor neon lights, etc.?
Mountains or high buildings can cause double pic-
tures or ghost images. Sometimes you can improve
the picture quality by changing the direction of the
aerial.
Is the picture or Teletext unrecognisable? Check if
you have entered the correct frequency.
The picture quality may degrade when two peripher-
als are connectedto the TV at the same time. In such
a case, disconnect one of the peripherals.
English -22-
Page 24

Specifications
TV BROADCASTING
PAL/SECAMB/GD/KK'I/I'L/L'
RECEIVINGCHANNELS
VHF(BANDI/III)
UHF(BANDU)
HYPERBAND
CABLE TV (S1-S20/ S21-S41)
NUMBEROF PRESET CHANNELS
100
CHANNELINDICATOR
On Screen Display
RF AERIAL INPUT
75 Ohm (unbalanced)
OPERATINGVOLTAGE
220-240V AC 50Hz.
AUDIO
German+NicamStereo
AUDIO OUTPUT POWER (W
2 x 3
POWER CONSUMPTION (W)
70 W
0.8 W (Stand-by)
PANEL
16:9 display, 20” Screen Size
DIMENSIONS (mm)
DIMENSIONS (mm)
D L H
225
90
630
630
394
360 5,7
) (%10THD)
RMS.
Weight (kg)
6,2
With foot
English -23-
Page 25

Connect Peripheral Equipment
SATELLITE RECEIVER
AUDIO
VIDEO IN
(R)(L)
ANT.IN
ANTENNA
POWERCABLE
AUDIOLINEOUT(L,R)
AUDIOINPUT(L,R)
VIDEOINPUT
S-VHSINPUT
SCART2
SCART1
ANTENNA
HEADPHONE
CISlot
VIDEO
CAMCORDER
Peripheral Equipment Connections
IN
English -24-
Page 26

Important Instruction
For your own safety read following instruction carefully before attempting to connect this unit to the mains
supply.
MAINS (AC) OPERATION
The wires in the mains lead are coloured in accordance with the following code :
GREEN
&
YELLOW
(Earth)
(if there is
earth cable)
BLUE
(Neutral)
IMPORTANT
As the colours of the wires in the mains lead of this appliance may not correspond with the coloured
markings identifying the terminals in your plug, proceed as follows:
The wire which is coloured green and yellowmust be connected to the terminal whichis markedwith
the letter E, or by the earth symbol, or coloured green or green and yellow.
The wire whichis colouredblue or black must be connected to the terminal which is marked with the
letterN or coloured Black.
The wire which is coloured brown or red must be connected to the terminal which is marked with the
letter L or coloured Red.
For continued protection against risk of fire, replace only with same type and rating of fuse (ASTA
approved 5A 250VAC fuse).
FUSE
BROWN
(Live)
CAUTION
TOPREVENTELECTRICSHOCKDISCONNECTFROMTHEMAINSBEFOREREMOVINGCOVER.NO
USERSERVICEABLEPARTSINSIDE.REFERSERVICINGTOQUALIFIEDSERVICEPERSONNEL.
SAFETY PRECAUTION
THISEQUIPMENTMUSTBEDISCONNECTEDFROMTHEMAINSWHENNOTINUSE.DONOTALLOW
THISUNITTOBEEXPOSEDTORAINORMOISTURE.
English -25-
Page 27

THE GUARANTEE
The seller of this equipment (the vendor) warrants to
the initial retail purchaser that if the equipment
becomes defective, and the defect is shown to be due
to faulty materials or workmanship within a period of
12 Months from the date of sale to the original
purchaser it will be repaired (or at the vendors sole
option) replaced free of charge, always providing that:
The equipment has at all times been used in
accordance with the operating instructions issued by
the manufacturer, and has not been connected to an
electrical supply for which it has not been properly
adjusted.
Unauthorised repairs or modifications, which have not
been expressly approved by the manufacturer, shall
render this guarantee null and void.
This guarantee is not transferable and is only
applicable in the UK.
Nothing in this express warranty affects the statutory
rights available to the purchaser of this equipment
EXCLUSIONS
SANYO shall not be liable for any removal
or installation or re-installation of the equipment.
The warranty does not coverFailure due to fair
wear and tear of any item.
Cosmetic items, remote controls or parts and
consumable items such as lamps, filters,
batteries, tapes, cables or connectors.
Accidental damage or damage caused by
negligence or misuse by the user.
Failure caused by lightning strike, storage or
operation outside the specified environment,
incorrect installation, lack of routine maintenance
outlined in the operating instructions supplied
with the unit, incorrect fitting of lamps, filters,
batteries or other consumables or parts.
Units not originally supplied by SANYO Europe Ltd
through a UK Reseller.
Dear Customer.
Thank you for buying SANYO. This equipment should
give you many years of pleasure and faithful service but
in the event that a fault occurs, the following notes
for you guidance may be helpful:-
1: PLEASE RETAIN YOUR PURCHASE RECEIPT
WHICH WILL BE REQUIRED FOR SERVICE
DURING WARRANTY.
2: If your SANYO equipment proves faulty during the
period of guarantee, take it or send it back to the
dealer who originally supplied it together with this
guarantee and the proof of purchase. We have
made arrangements with our approved dealers
under which they will carry out in guarantee service
repairs on our behalf. In this way, we hope to
reduce to a minimum the amount of time you will be
without your equipment.
3: If for some reason it is impossible to return the
equipment to the original supplier, please contact
our Customer Relations Department at the address
below for further advice.
4: Should the equipment require servicing after the
expiry of the guarantee period, take or send it to
the original supplier or any other Sanyo dealer.
He will be pleased to give you a quotation for the
repair.
Customer Relations Department,
SANYO Europe Ltd.
SANYO House,
18, COLONIAL WAY,
Watford, Hertfordshire, WD24 4PT.
Tel: 01923 246363
042-02514/1.5
50107492
R
SANYO Electric Co., Ltd.
 Loading...