

Page 1
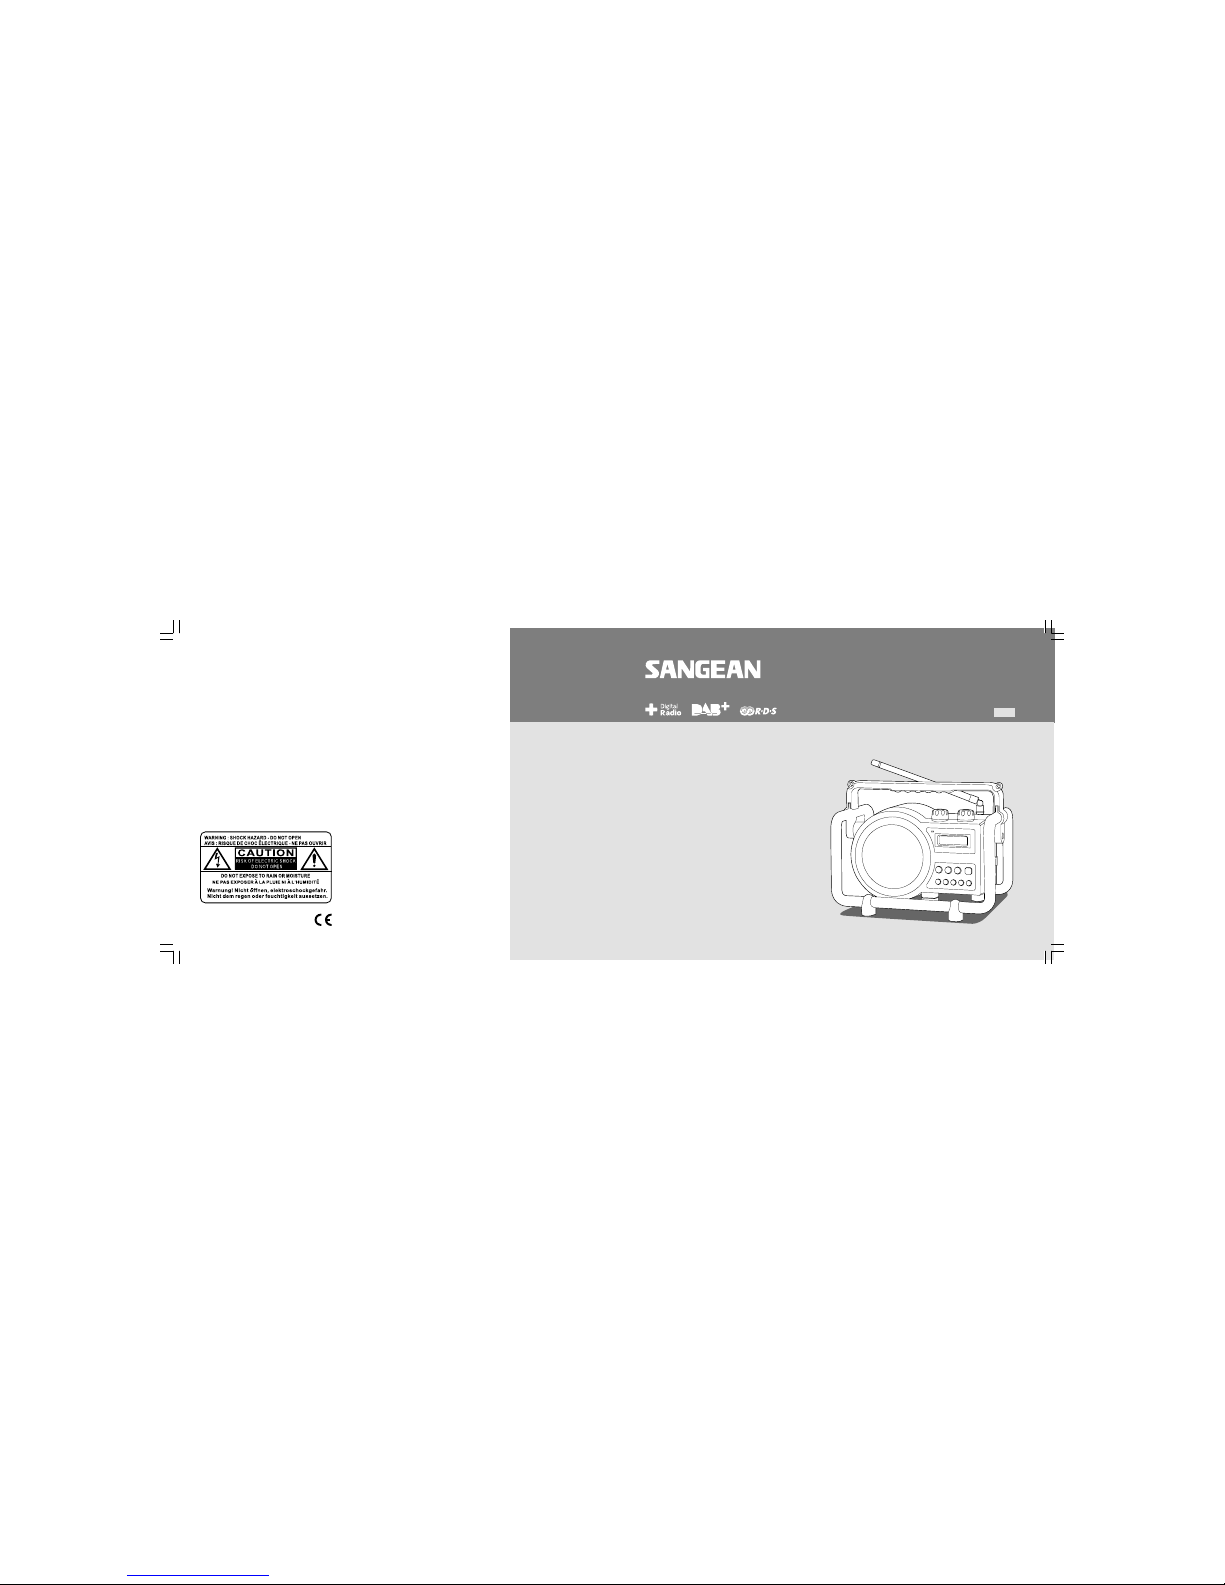
FM RDS/DAB Digital Radio
DAB+BO X
3A81UC1000000
Operating instruction GB
Page 2

1
Table of Contents
Important Safety Instructions ................................................. 2
Controls ................................................................................... 3-5
Power the Radio & Charge the batteries ........................... 6-7
Using the Radio for the First time ........................................... 7
Operating Your Radio – DAB .................................................. 8
Selecting a Station & Secondary Service – DAB ................ 9
Display Modes – DAB ........................................................... 10
Finding New Stations & Manual Tuning – DAB ................. 11
Autoselect – DAB ................................................................... 12
Dynamic Range Control (DRC) settings – DAB ................ 13
Prune stations ......................................................................... 14
Operating Your Radio – FM .................................................. 15
Manual Tuning – FM .............................................................. 16
Display Modes – FM .............................................................. 17
Stereo / Mono (FM) ................................................................ 18
Presetting Stations / Recalling a Preset in DAB and
FM modes .......................................................................... 18-19
Factory Reset / Software Version ................................... 20-21
Information ............................................................................... 22
Page 3

2
Important Safety Instructions
1. Read these instructions.
2. Keep these instructions.
3. Heed all warnings
4. Follow all instructions
5. Do not use this apparatus near water.
6. Clean only with dry cloth.
7. Do not block any ventilation openings. Install in accordance with
the instructions.
8. Do not install near any heat such as radiators, heat registers,
stoves or other apparatus (including amplifiers) that produce heat.
9. Do not defect the safety purpose of the polarized or
grounding-type plug. A polarized plug has two blades with one wider
than the other. A grounding type plug has two blades and a third
grounding prong. The wide blade or the third prong are provided for
your safety. If the provided plug does not fit into your outlet,
consult an electrician for replacement of the obsolete outlet - USA
version only.
10. Protect the power cord from being walked on or pinched particularly
at plug, convenience receptacle, and the point where they exit from
the apparatus.
11. Only use the attachments specified by the manufacturer.
12. Use only with the cart, stand, tripod, bracket, or table specified by
the manufacture, or sold with the apparatus. When a cart is used,
use caution when moving the cart/apparatus combination to avoid
injury from tip-over.
13. Unplug this apparatus during lightning storms or when unused for
long periods of time.
14. Refer all servicing to qualified service personnel. Servicing is
required when the apparatus has been damaged in anyway,
such as power-supply cord or plug is damaged, liquid has been
spilled or objects have fallen into the apparatus, the apparatus has
been exposed to rain or moisture, does not operate normally,
or has been dropped.
15. To reduce the risk or fire electric shock, do not expose this
appliance to rain or moisture.
16. The shock hazard marking and associated graphical symbol is
provided on the bottom panel of unit.
17. Apparatus shall not be exposed to dripping or splashing and no
objects filled with liquids, shall be placed on the apparatus.
18. For outdoors use, to avoid electric shock, use battery only during a
raining day or the weather is wet.
GB
Page 4

3
1.
2.
3.
4.
5.
6.
7.
8.
9.
10.
11.
Volume control knob
Tuning control / Select knob
FM/DAB+ antenna
LCD display
Charge LED indicator
Power On/Off button
Band button
Auto Tune button
Info button
Preset stations
Speaker
Controls
/
Page 5

4
12.
13.
14. Aux In socketBattery compartment
Power cord storage
Controls
GB
Page 6
5
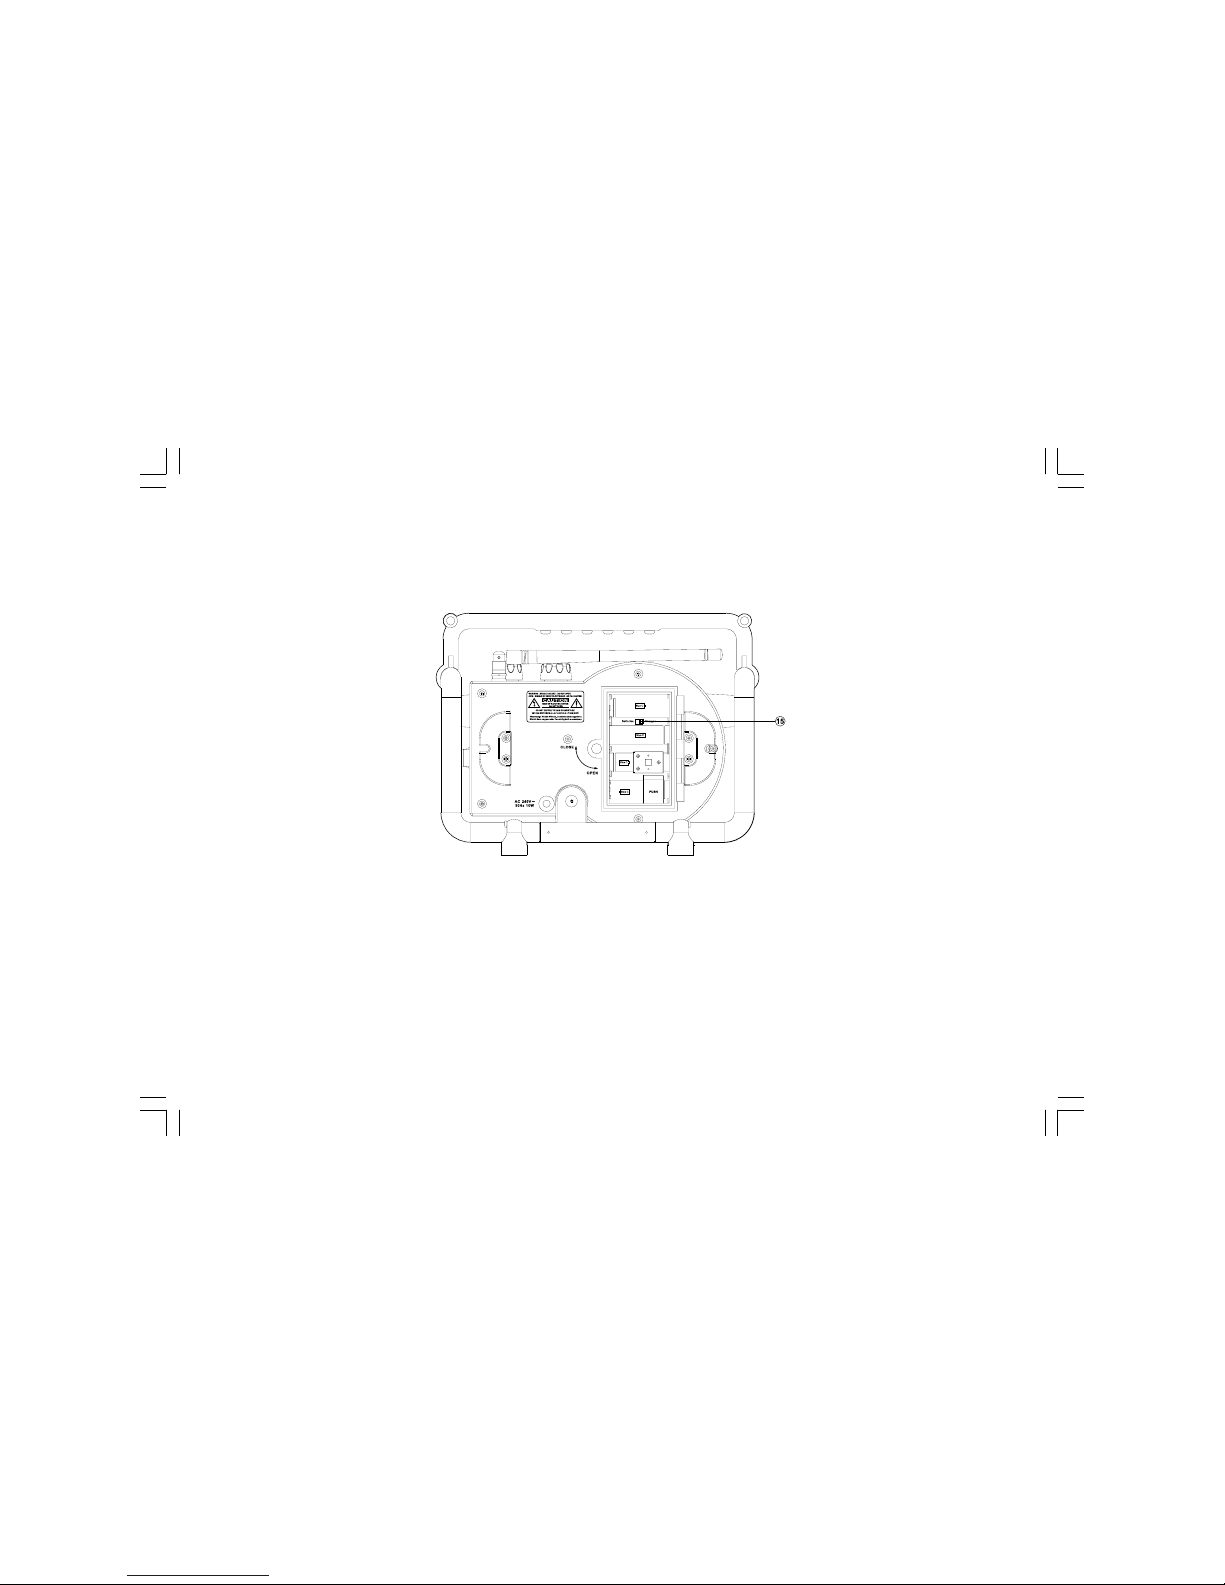
15.
Alkaline/NiMH/NiCad rechargeable battery switch
Controls
Page 7

6
Power the radio
1. Installing the batteries, first turn battery cover fixture anti-clockwise
to loosen and pull down the battery cover.
Note:
Before you insert the batteries, if you use non-rechargeable
batteries, make sure NiMH/Alkaline switch to Alkaline position.
2. Insert 4 x C size (UM-2) batteries into the compartment. Ensure the
battery is inserted in accordance with the diagram shown.
Close the battery cover and fasten the fixture by turning clockwise.
If the radio is not to be used for any extended period of time, it is
recommended that the battery is removed from the radio.
Reduced power, distortion and a “stuttering sound” or low battery LED
indicator in red color is on are all signs that the batteries need replacing
or recharged (see below charge the batteries).
3. AC Operation
Before plug the AC power cord into the AC socket, be sure the voltage
is correct. If you have batteries in the radio and connect AC power cord
into the AC socket, the batteries will automatically be disconnected.
AC power cord storage is designed to store the cord when the radio is
not in use.
GB
Page 8

7
Charge the batteries
Reduced power, distortion and a “stuttering sound” or low battery red
LED is on are all signs that the batteries need recharged if you use
rechargeable batteries to power the radio.
Note:
The radio can be charged only when the radio is off.
Connect the AC power cord into the AC socket to charge the batteries,
be sure the battery type switch is set to Ni/MH position.
When the radio is charged, the green Charge LED will be flashing,
and stop flashing (the green LED is on) when the radio is fully charged.
Charging time takes approx. 4-6 hours depending on capacity of the
rechargeable batteries in use.
Using the radio for the first time
1. Place your radio on a flat surface.
2. Fully extend the antenna on the top of your radio. Adjust the antenna
so it is as vertical as possible extending above the radio.
3. Insert the adaptor plug into the AC socket located on the rear of
your radio. Plug the adaptor into a standard mains outlet. The display
will show “Welcome to DAB” for a few seconds and then the display
will show “Clock not set…”. During this time the radio is to find a
DAB clock radio station. After a short time the current time will
appear on the display.
4. If no stations are found, “Clock not set…” will be displayed.
Please press the Power button to switch on your radio. It may be
necessary to relocate your radio to a position giving better reception.
You should then carry out a scan to find stations as described on the
subject as “Display modes – DAB”. Then please press the Power
button again to switch off your radio. After a short time the current
time will appear on the display to replace “Clock not set…”.
IMPORTANT:
The mains adaptor is used as the means of connecting the radio to the
mains supply. The mains socket used for the radio must remain
accessible during normal use. In order to disconnect the radio from the
mains completely, the mains adaptor should be removed from the
mains outlet completely.
Page 9

8
Operating your radio – DAB
1. Straighten the rubber antenna properly which is for both DAB and
FM reception. Press the Power On/Off button to switch on
your radio.
2. Press the Band button to select DAB band.
3. If this is the first time the radio is used, a quick scan of Band III DAB
channels will be carried out. The display will show “Clock not set…”.
If the radio has been used before, the last used station will
be selected.
4. During Autotune, as new stations are detected, the station counter
on the right hand side of the display will increase and station will be
added to the list. The top line of the display shows a bar graph
indicating progress of autotune.
5. When the Autotune is completed, the first station (in numeric-alpha
order 0…9…A…Z) will be selected.
6. If the station list is still empty after the Autotune, your radio will
display “No DAB Station”.
7. If no signals are found, it may be necessary to relocate your radio to
a position giving better reception.
2
GB
Page 10

9
Selecting a station – DAB
1. The top line of the display shows the name of the station
currently selected.
2. Rotate the Tuning control to scroll through the list of
available stations.
3. Press and release the Tuning control knob to select the station.
The display may show “Connecting…” while your radio finds the
new station.
4. Adjust the Volume control to the required setting.
Note:
If after selecting a station, the display shows “not available” it may be
necessary to relocate your radio to a position giving better reception.
Secondary service – DAB
1. Certain radio stations have one or more secondary services
associated with them. If a station has a secondary service
associated with it, the display will show “>>” next to the station
name on the station list. The secondary service will then appear
immediately after the primary service as you rotate the Tuning
control knob.
2. Press and release the Tuning control knob to select the station.
4
2,3
Page 11

10
Display mode – DAB
Your radio has six display modes:
1. Press and release the Info button to cycle through the
various modes.
a.
b.
c.
d.
e.
f.
g.
h.
displays scrolling text messages such as
artist/track name, phone in number, etc.
displays the signal strength of radio
reception. The clear unfilled rectangle
indicates minimum signal level required for
satisfactory reception.
displays type of station being listened to e.g.
Pop, Classic, News etc.
displays name of multiplex to which current
station belongs.
displays current channel and frequency.
displays the bit error rate for the current
station being listened to.
displays the digital bit rate and the audio type
for the currently tuned DAB station.
displays the current time and date.
Scrolling text (DLS)
Signal strength
Program type
Multiplex name
Channel & frequency
Signal error
Bit rate / audio type
Time & date
GB
Page 12

11
Finding new stations – DAB
As time passes new stations may become available. To find new
stations proceed as follows:
1. To carry out a full scan of the entire DAB Band III frequencies press
and hold the Info button. The display will show “Full scan”.
2. Press and release the Tuning control to confirm setting. As new
stations are found, the station counter on the right hand side of the
display will increase and stations will be added to the list.
Manual Tuning – DAB
Manual tuning allows you to tune directly to the various DAB band
III channels.
1. Press and hold the Info button for 2 seconds, display will show
“Full scan”.
2. Rotate the Tuning control knob to find “Manual tune”. Press and
release the Tuning control to enter DAB channels in the list.
Rotate the Tuning control to select required DAB channel.
When required DAB channel is found, press and release the
Tuning control to select the required DAB channel.
1
2
2
Page 13

12
Autoselect – DAB
As an alternative to pressing the Select knob to select a station your
radio can be set so as to automatically select a station.
1. When you tune to a station that you wish to have Autoselect,
press and hold the Tuning control / Select knob until the display
shows “Auto selection ON”.
2. Rotate the Tuning control until the station you required is visible on
the display. After a few seconds your radio will automatically select
the station shown on the display.
3. To switch off autoselect press and hold the Tuning control /
Select knob until the display shows “Auto selection OFF”.
1-3
GB
Page 14

13
Dynamic Range Control (DRC) setting – DAB
DRC can make quieter sound easier to hear when your radio is used in
a noisy environment.
1. In DAB band, press and hold the Info button for 2 seconds,
display will show “Full scan”.
2. Rotate the Tuning control knob to find “DRC value”. Press and
release the Tuning control knob to enter adjustment mode.
3. Rotate the Tuning control knob to select required DRC setting
(default is off)
DRC off DRC is switched off, Broadcast DRC will be ignored.
DRC low DRC level is set to 1/2 that sent by broadcaster.
DRC high DRC is set as sent by broadcaster.
4. Press and release the Tuning control to confirm the setting.
The display will return to normal tuning mode.
2-4
Page 15

14
Prune stations
If you move to a different part of the country, some of the stations which
were listed may no longer be available. Also from time to time,
some DAB services may stop broadcasting, or may change location
or frequency. Stations which cannot be found, or which have not been
received for a very long time are shown in the station list with a
question mark. The prune stations function will delete the marked DAB
stations from your station list.
1. Press and hold the Info button and the display will show “Full scan”.
2. Rotate the Tuning control knob to find “Prune”, then rotate the
Tuning control to select Yes or No. To activate the Prune function
select “Yes”, and press and release the Tuning control to confirm
the setting.
2
GB
Page 16

15
Operating your radio – FM
1. Straighten the antenna properly above the radio. Press the Power
On/Off button to switch on your radio.
2. Press the Band button to select FM waveband.
3. Press and release the Auto Tune button, your radio will search
upwards and stop automatically when it finds a station of
sufficient strength.
4. When the waveband end is reached, your radio will recommence
tuning from the opposite waveband end.
5. Adjust the Volume control to the required setting.
6. To switch off your radio, press the Power On/Off button.
2
5
3
Page 17

16
Manual tuning – FM
1. Press the Power On/Off button to switch on your radio.
2. press the Band button to select FM waveband.
3. Rotate the Tuning control rightward or leftward to tune to a station.
The frequency will change in steps of 50 kHz. When the waveband
end is reached, the radio will recommence tuning from the opposite
waveband end.
4. Set the Volume Control to the required setting. To switch off
your radio, press the Power On/Off button.
2
4
3
GB
Page 18

17
Display Modes – FM
On FM the bottom line of the display can be set to any of the
following modes:
1. Press and release the Info button repeatedly to cycle through the
various modes.
displays scrolling text messages such as artist/
track name, phone in number etc.
displays type of station being listened to e.g.
Pop, Classic, News, etc.
displays the frequency of the station being
listened to.
displays the audio type of the station being
listened to.
displays the current time and date
a.
b.
c.
d.
e.
Radio text
Program type
Frequency
Audio type
Time & date
Page 19

18
Stereo / Mono (FM)
1. If a station being received is weak some hiss may be audible.
To reduce the hiss repeatedly, repeatedly press the Info button until
the audio type of FM radio station shows on the display.
2. Rotate the Tuning control to switch between “Stereo” or “Mono”,
and press and release the Tuning control to confirm the setting.
Preset stations in DAB and FM modes
There are 5 memory presets for each DAB/FM wavebands.
1. Press the Power On/Off button to switch on your radio.
2. Tune to the required station as previously described.
3. Press and hold the required Preset button until the display show e.g.
Preset 2 stored. The station will be stored under the chosen
preset button. Repeat this procedure for the remaining presets.
4. Station stored in the memories may be over written by following the
above procedure.
2
3
GB
Page 20

19
Recall a preset in DAB and FM modes
1. Press the Power On/Off button to turn on the radio.
2. Select the required waveband.
3. Momentarily press the required Preset button, the preset number and
station will appear in the display.
2
3
Page 21

20
Factory reset
If your radio fails to operate or some digits on the display are missing
or incomplete, carry out the following procedure.
1. Press and hold the Info button for 2 seconds.
2. Rotate the Tuning control to select System, then press and release
the Tuning control. The display will show Factory Reset. Press and
release the Tuning control to enter the setting, then press and
release the Tuning control to confirm the reset.
3. A full reset will be performed. All presets and station lists will
be erased. After a system reset, the radio will be restarted and a
scan of the DAB band III will be performed.
2,3
GB
Page 22

21
Software version
The software display cannot be altered and is just for your reference.
1. To view software version, press and hold the Info button. Rotate the
Tuning control to select System.
2. Press and release the Tuning control to enter the setting. Rotate the
Tuning control to find SW version, then press and release the Tuning
control to view the software version of your radio.
Clock Time
Display will show clock time only when the radio is synchronized with
CT function of DAB radio or FM RDS.
2
Page 23

22
If at any time in the future you should need to dispose of this product please note that: Waste electrical products should not
be disposed of with household waste. Please recycle where facilities exist. Check with your Local Authority or retailer for
recycling advice. (Waste Electrical and Electronic Equipment Directive)
Information
Display backlight
Using batteries to power the radio, when the radio is switched on,
press any button except Power button will illuminate the LCD display for
approx. 10 seconds.
Using AC power to power the radio, when radio is switched on,
LCD display will be always illuminated.
Aux In socket
The Aux In socket is to connect audio source like MP3 player or
CD walkman and listen the audio program via radio speaker.
Remove the rubber cover, connect the audio source with a 3.5mm
audio connector wire, press the Band button to AUX band and
rotate the Volume Control to play the audio program.
Specification
Frequency Coverage:
FM 87.50 – 108 MHz
DAB 174.928 – 239.200 MHz
Power Requirements
Mains:
AC 230V/50 Hz/10W (Europe)
AC 120V/60 Hz/10W (USA)
Batteries: 4 X C size ( UM-2 )
Output Power:
2 Watt 10% T.H.D. @ 100 Hz @ DC battery 6V
5 Watt 10% T.H.D. @ 100 Hz @ AC 230V or 120V
GB
 Loading...