

Samsung SYNCMASTER 204BM User Manual
LCD MONITOR
204BM
quick start guide
ii
r
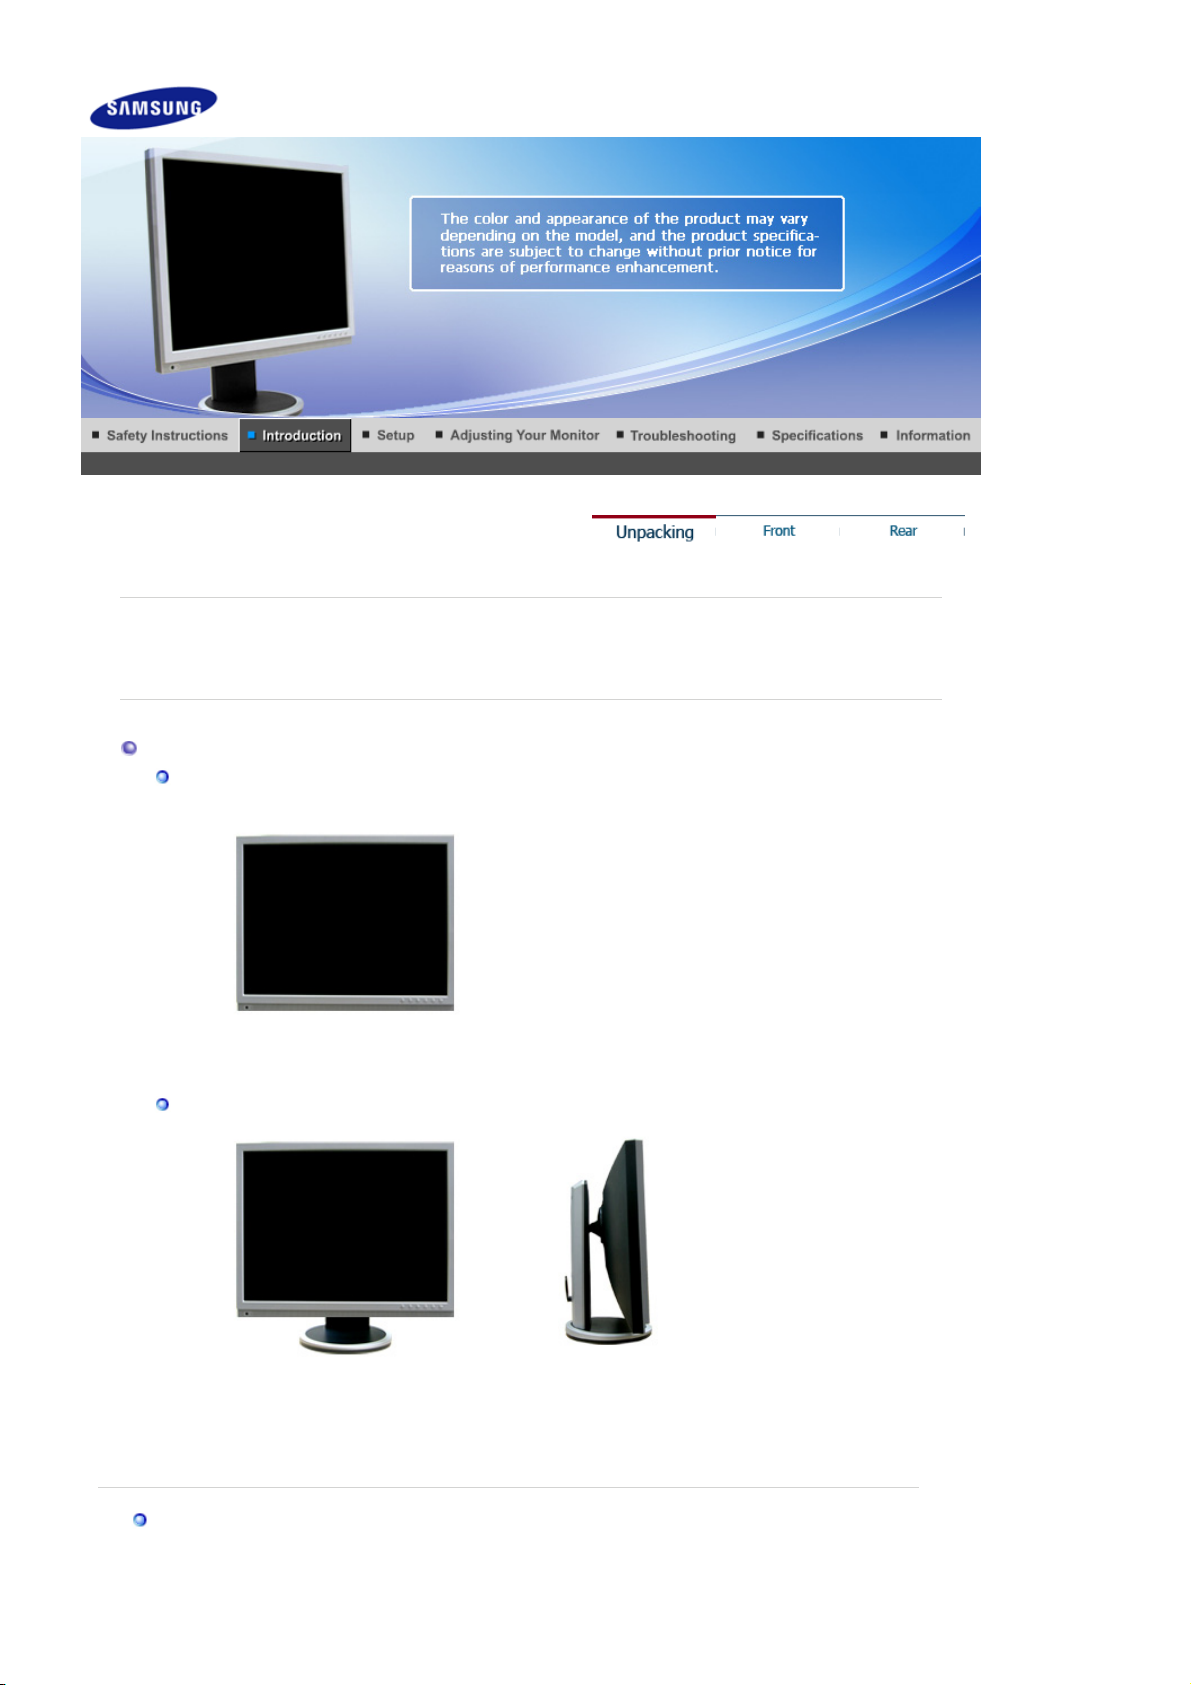
Unpacking
Without Stand
Please make sure the following items are included with your monitor.
If any items are missing, contact your dealer.
Contact a local dealerto buy optional items.
With Stand
Manual
Monito
HAS Stand

A
p
y
)
Cable
Sold se
Quick Setup Guide
D-Sub Cable Power Cord
aratel
Warranty Card
(Not available in all locations)
User's Guide, Monitor Driver,
Natural Color, MagicTune™,
MagicRotation software
udio Cable
Front
DVI Cable Set-Bracket Screws (4 EA

MENU button [ ]
MagicBright button
[]
Opens the OSD menu. Also use to exit the OSD menu or return
to the previous menu.
MagicBright is a new feature providing optimum viewing
environment depending on the contents of the image you are
watching. Currently seven different modes are available:
Custom, Text, Internet, Game, Sport and Movie, Dynamic
Contrast. Each mode has its own pre-configured brightness
value. You can easily select one of seven settings by simply
pressing MagicBright control button.
1) Custom
Although the values are carefully chosen by our engineers,
the pre-configured values may not be comfortable for your
eyes depending on your taste.
If this is the case, adjust the brightness and contrast by using
the OSD menu.
2) Text
For documentations or work involving a lot of text.
3) Internet
For working with a mixture of images such as text and
graphics.
4) Game
For watching motion pictures such as a game.
5) Sport
For watching motion pictures such as a sport.
6) Movie
For watching motion pictures such as a DVD or Video CD.
7) Dynamic Contrast
Dynamic Contrast is to automatically detect distribution of
inputted visual signal and adjust to create optimum contrast.
>>Click here to see an animation clip
Volume button[ ]
Adjust buttons
When OSD is not on the screen, push the button to adjust
volume.
Adjust items in the menu.
[]
Enter button [ ] /
Source button
AUTO button
Power button [ ] /
Power indicator
Headphone
connection terminal [
]
See PowerSaver described in the manual for further information regarding power saving
functions. For energy conservation, turn your monitor OFF when it is not needed, or when
leaving it unattended for long periods.
Activates a highlighted menu item. /
Push the ' ', then selects the video signal while the OSD is off.
(When the source button is pressed to change the input mode, a
message appears in the upper left of the screen displaying the
current mode -- Analog or Digital input signal.)
Note : If you select the Digital mode, you must connect your
monitor to the graphic card's DVI port using the DVI cable.
When the 'AUTO' button is pressed, the Auto Adjustment screen
appears as shown in the animated screen on the center. Auto
adjustment allows the monitor to self-adjust to the incoming
Analog signal. The values of fine, coarse and position are
adjusted automatically. (Available in Analog mode only)
>>Click here to see an animation clip
Use this button for turn the monitor on and off. /
This light glows Blue during normal operation, and blinks Blue
once as the monitor saves your adjustments.
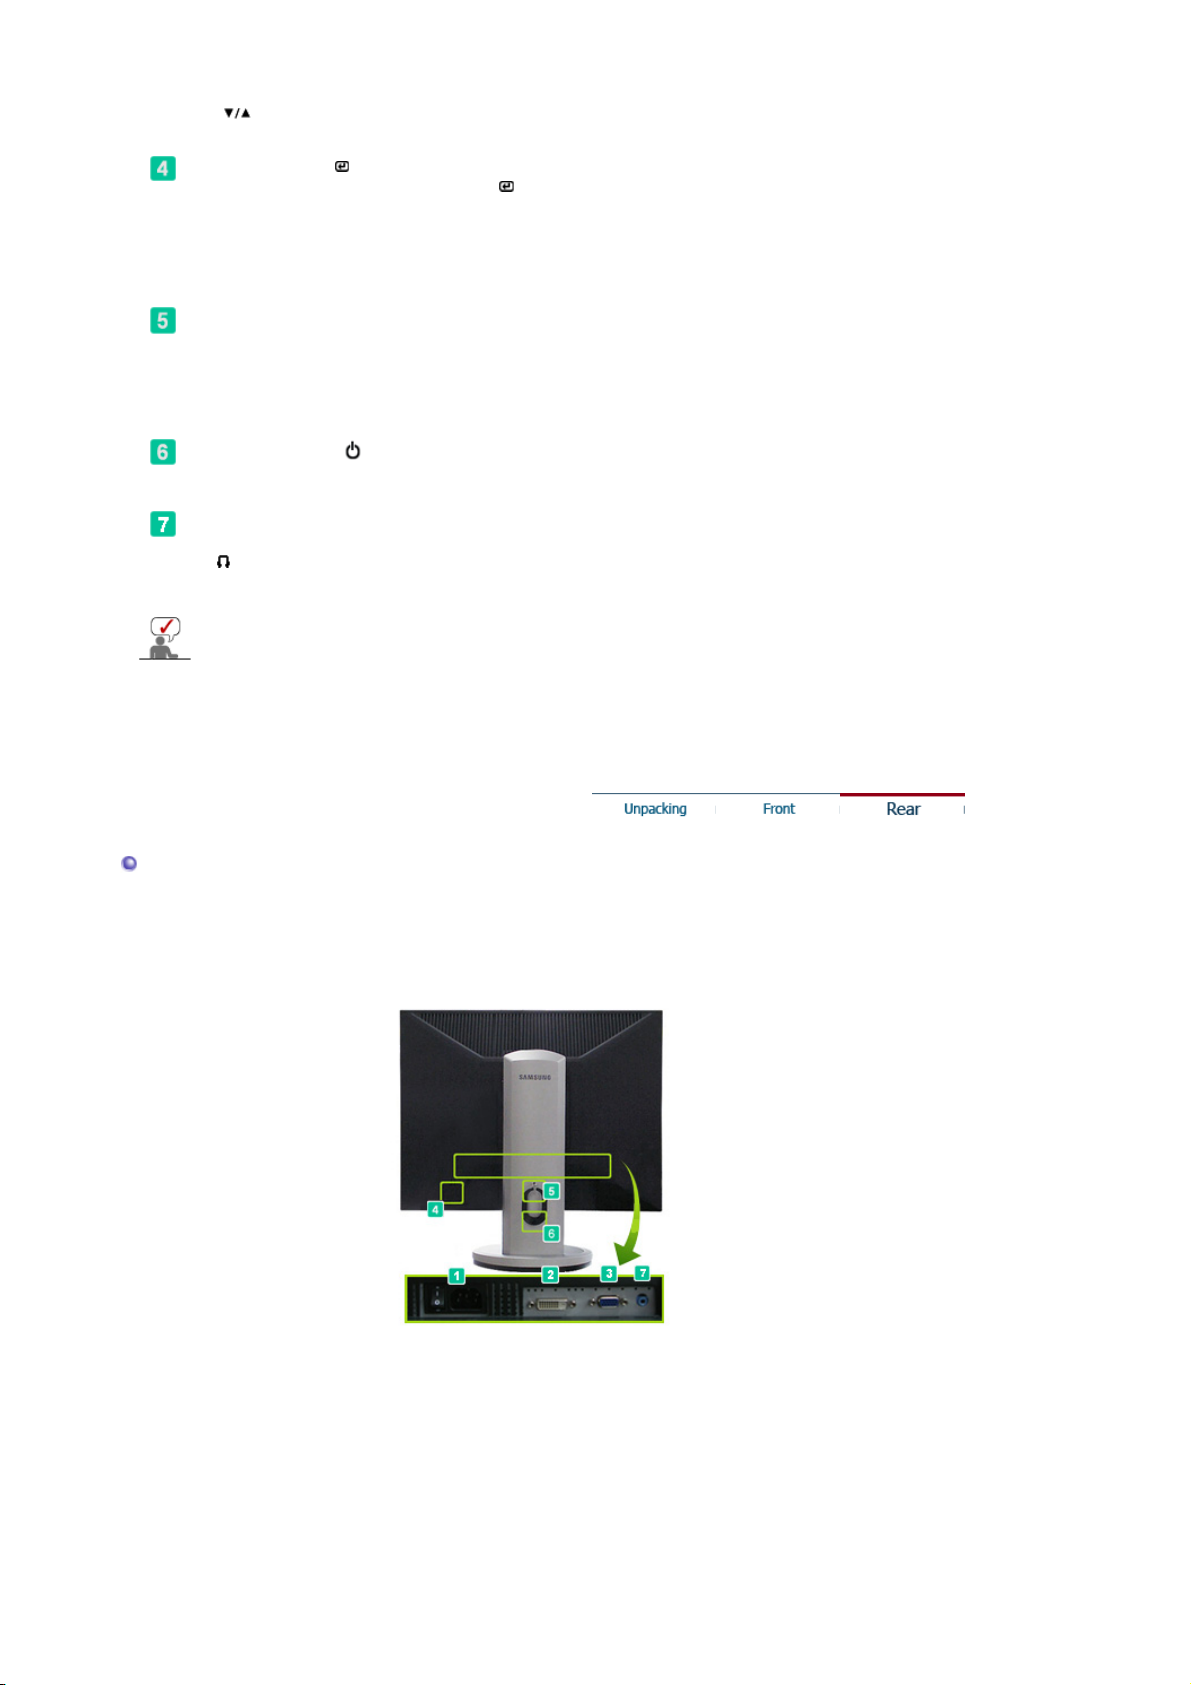
Rear
(The configuration at the back of the monitor may vary from product to product.)
HAS Stand
1. POWER ON/OFF Switch
Use this button for turn the monitor on and off
2. POWER port
receptacle.
: Power cord, plugs into monitor and wall
:
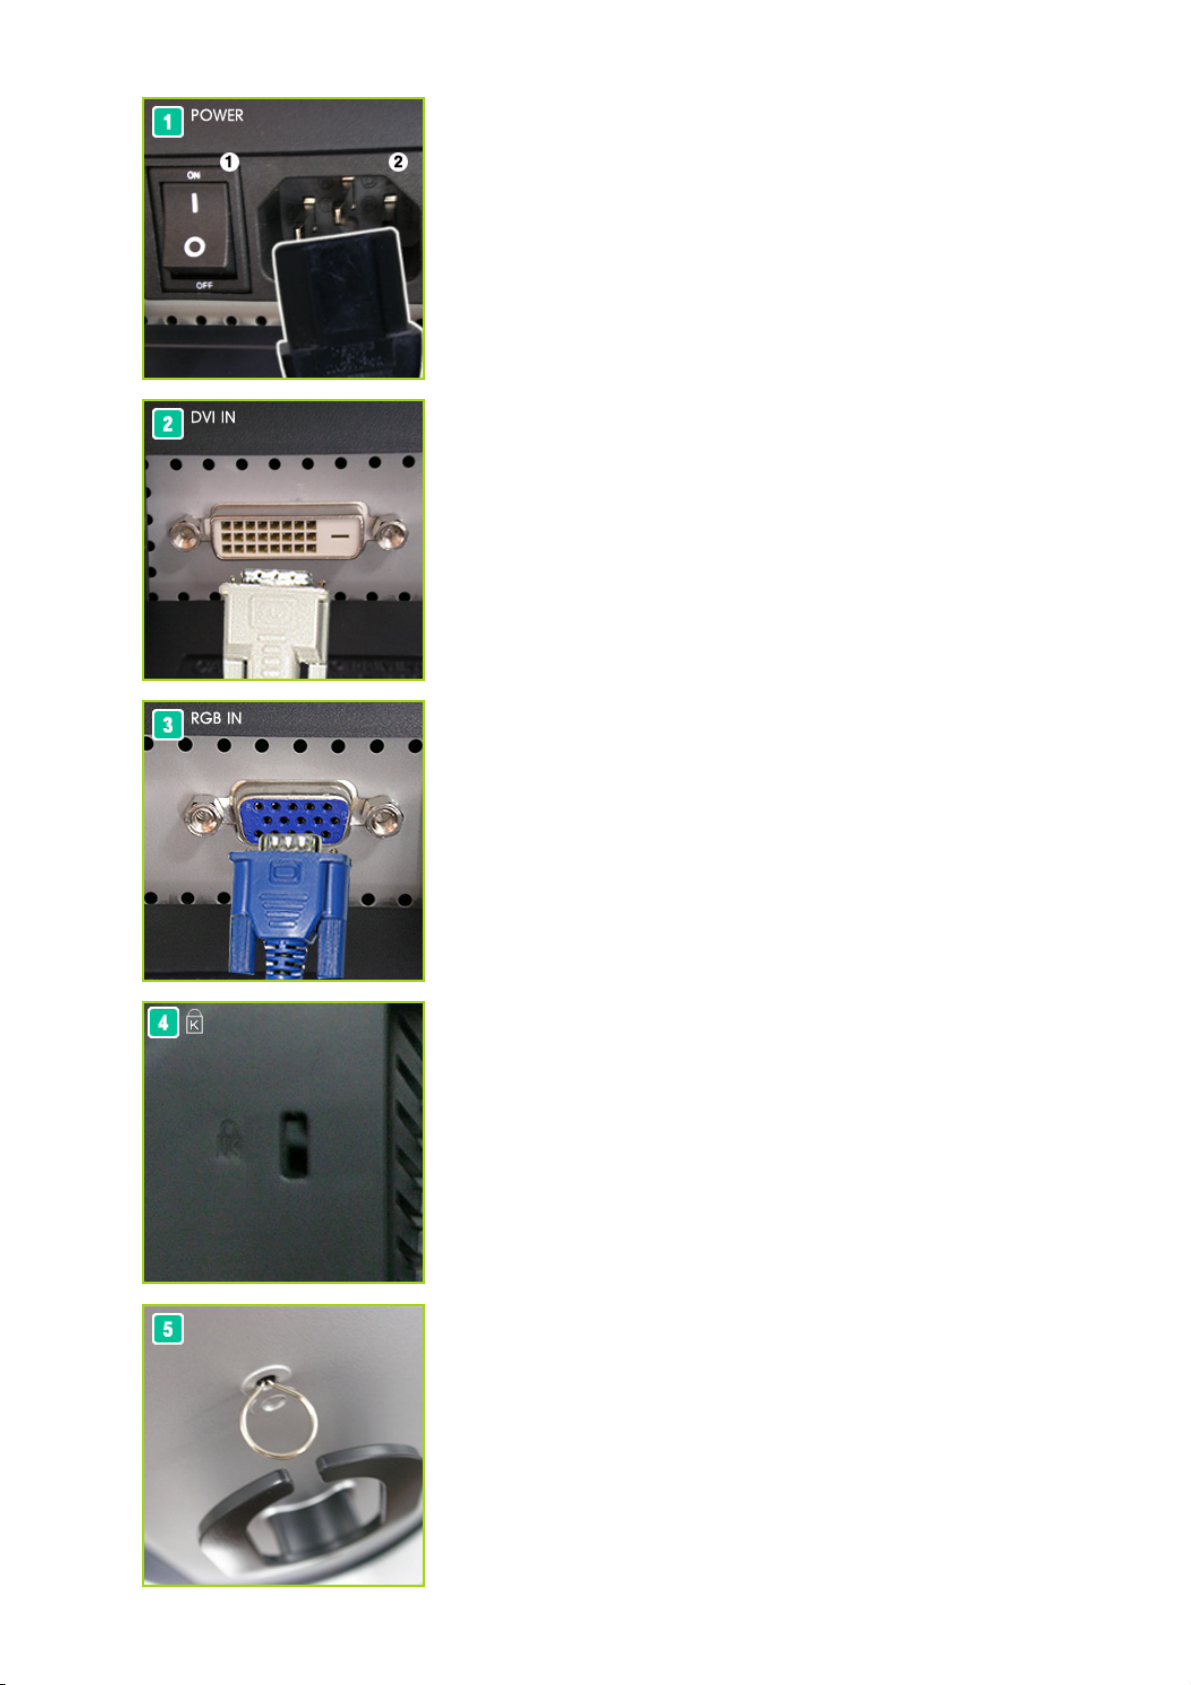
DVI IN port
back of your monitor. (SOURCE: Digital)
: Connect the DVI Cable to the DVI IN port on the
RGB IN port
the back of your monitor. (SOURCE: Analog)
Kensington Lock
physically fix the system to something when using it in a public
place. (The locking device has to be purchased separately.)
For using a locking device, contact the place of purchase.
:Connect the signal cable to the RGB IN port on
: The Kensington lock is a device used to
Stand Stopper
monitor up and down.
: Remove the fixing pin on the stand to lift the

Cable Fix Ring:
When connecting the cable is finished
fix the cables to the Cable Fix Ring.
See Connecting the Monitor for further information regarding cable connections.
AUDIO IN:
Connect the audio cable for your monitor to the audio port on
the back of your computer.

Connecting the Monitor
Connect the power cord for your monitor to the power port on the back of the monitor.
Plug the power cord for the monitor into a nearby outlet.
Use appropriate connection for your computer.
If the monitor and the computer are connected, you can turn them on and use them.
Using the D-sub (Analog) connector on the video card.
Connect the signal cable to the 15-pin, D-sub port on the back of your monitor.
[ DVI IN ]
Cable Fix Ring
When connecting the cable is finished fix the cables to the
Cable Fix Ring.
[ RGB IN ]
Using the DVI (Digital) connector on the video card.
Connect the DVI Cable to the DVI IN port on the back of your monitor.
Connected to a Macintosh.
Connect the monitor to the Macintosh computer using the D-sub connection cable.
 Loading...