

Samsung SP-1614C, SP-1213C, SP-2514N, SP-1654N, SP-2504C User Manual
...
This device complies with Part 15 of the FCC Rules.
Operation is subject to the following two conditions:
(1) this device may not cause harmful interference, and
(2) this device must accept any interference received, including interference
that may cause undesired operation.
SAMSUNG ELECTRONICS CO., LTD.
STORAGE SYSTEM DIVISION
HEAD OFFICE: 94-1, IM SOO-DONG, GUMI-CITY KYUNG BUK, KOREA 730-350
FAX : 82-54-479-55673. Making Computer Detect the New Device
1MB = 1,000,000bytes / 1GB = 1,000,000,000 bytes.
Actual accessible capacity may vary from advertised capacity due to formatting and
partitioning of the hard drive, as well as due to your computer's operating system.
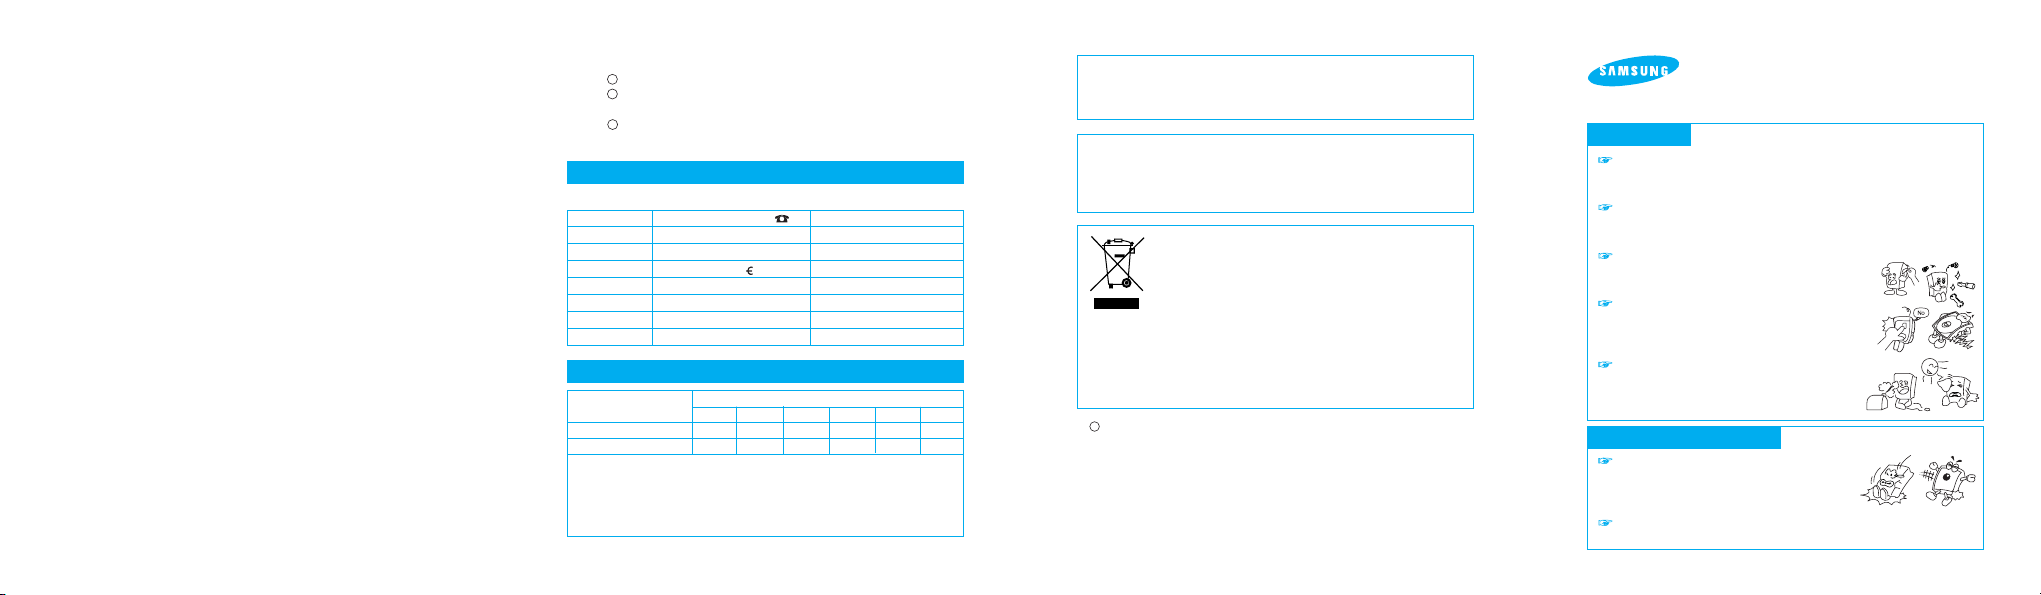
Do not drop, shock or strike.
If apply impact to the HDD, it causes a Bad Sector by crashing between Head and
Media. Do not stack. Do not external shock and vibration.
Do not remove all items, such as Hard drive label, warranty label.
Warranty void if any stickers or labels are removed or
damaged. Never disassemble hard drives.
Do not touch the circuit board with hands or tools.
Protect the HDD from Electrostatic Discharge(ESD).
MR Head is very sensitive in Electrostatic. Keep the HDD in
their static shielding bag.
Avoid extreme temperatures and humidity places.
Humidity causes a drive malfunction by reacting with an
ingredient of oil in Disk and Head surface. Also, parts
can be corrode by leaving in humidity.
Please visit www.samsunghdd.com (Utility Dowmload) and use the Disk
Manager for solving the hardware barrier.
Although my drive is bigger than 32GB and Disk Management recognize the
hard drive, it is only shown as 32 GB.
There are two ways for setting jumpers.
One is the general jumper setting for recognizing the drive's own capacity,
the other is the 32GB clip jumper setting for recognizing only 32GB capacity
whatever the real capacity is.It seems that you have set the 32GB clip
jumper.
Although my drive supports up to UDMA 133, it is recognized as UDMA 100.
Please visit www.samsunghdd.com and use the HUTIL for confirming or
switching the UDMA mode on your drive if your motherboard supports
UDMA-6. Because some motherboards have a problem for supporting
UDMA-6(133), we set UDMA mode as UDMA-5(100) during the production.
You can switch the drive's UDMA modes with the HUTIL. (HUTIL has been
uploaded onto www.samsunghdd.com)
I am looking for a Software & Firmware (mainly about drivers) but I found
nothing.
Where I can find I want ?
We don't release any firmwares.
Because the product has been already optimized with its own configurations.
IDE (PATA & SATA) drive does not need any drivers. You just have to make
a partition and format your drive for using.
Please make sure whether you had partitioned and formatted.
First of all, you must partition and format for recognizing the new drive in the
Windows Explorer.
Within Win98 series, please use the Fdisk.
Within Win2000 & Win-XP, please use the Disk Management.
When installing Win2000 or Win-XP, the installation process includes the
new drive in the Windows Explorer.
To open the Disk Management
Click Start, point to Settings, and then click Control Panel.
Double-click Administrative Tools, and then double-click Computer
Management.
In the left panel, expand Storage, and then expand Disk
Management.
3.5" HDD INSTALLATION GUIDE
Samsung does NOT guarantee any data on your drive,
please always BACK-UP your precious data.
Precautions
Q4
Q5
Q6
C
This marking shown on the product or its literature, indicates
that it should not be disposed with other household wastes at
the end of its working life. To prevent possible harm to the
environment or human health from uncontrolled waste
disposal, please separate this from other types of wastes and
recycle it responsibly to promote the sustainable reuse of
material resources.
Household users should contact either the retailer where they purchased this
product, or their local government office, for details of where and how they
can take this item for environmentally safe recycling.
Business users should contact their supplier and check the terms and
conditions of the purchase contract.
This product should not be mixed with other commercial wastes for disposal.
Samsung Electronics Co., Ltd. Printed in Korea. BF68-00235A REV03
When use an external case
Do not drop or fall while using and being
storage the external case.
An external case is easy to transfer, but can be
shocked easily also.
Check the External case's Grounding
External case's Grounding prevents HDD malfunction form ESD.
If you have any comments or questions regarding a Samsung products.
Country Customer Care Center Web Site
CANADA 1-800-SAMSUNG (7267864)
U.S.A
1-800-SAMSUNG (7267864)
www.samsung.com
GERMANY 01805 - 121213 ( 0,14Min)
www.samsung.de
RUSSIA
8-800-200-0400
www.samsung.ru
AUSTRALIA
1300 362 603
www.samsung.com/au
UKRAINE
8-800-502-0000
www.samsung.com/ur
U.K
0870 SAMSUNG (7267864)
www.samsung.com/uk
Parts
Toxic and hazardous substances or elements
Printed Circuit Assemblies
Head Disk Assemblies
O : Indicates that the concentration of the hazardous substance in all homogeneous
materials in the parts is below the relevant threshold of the SJ/T11363-2006 standard.
X : Indicates that the concentration of the hazardous substance of at least one of all
homogeneous materials in the parts is above the relevant threshold of the
SJ/T11363-2006 standard.
Pb
Hg
Cd
Cr
PBB
PBDE
X
O
X
O
OOOOOOO
O
6+
www.samsung.com/ca
1
2
3
The Names and Content of Toxic and Hazardous Substances or Elements
Contact SAMSUNG WORLD WIDE

Note: In some rare cases SATA 1.5Gb/s hosts can not establish SATA
interface connection with SATA 3.0Gb/s devices due to interface
protocol issues.
In this case you should switch your drive to SATA 1.5Gb/s speed
with a software which we are providing via www.samsunghdd.com.
Installing the hard disk
SATA
Interface
Cable
2. Partitioning and Formatting the Drive
Refer to your Operating System manual or system manual for
partitioning and formatting.
Power Cable
Computer
Main Board
Serial SATA
Host Adapter
Attach the SATA interface cable to the interface connector on the hard disk
drive. The connector is keyed and will fit in only one way.
Attach the power cable to the power receptor on the hard disk drive. The
connector is keyed and will fit in only one way.
Check all other cable connections before turning on your computer.
CAUTION!: Do not force or rock the connectors into their sockets on the
hard disk drive. Push them in straight until they are seated.
PATA Installation
Configuring your Hard Disk Drive (Master, Slave)
1
2
3
Regular Pin Setting:
If your computer's maximum support level is under 32 GB:
Set as Master (AB)
Set as Slave
Select Cable (EF)
Set as Master (AB + CD)
Set as Slave (CD) Select Cable (CD + EF)
SATA Installation
(a) Turn off the power of your computer.
(b) Unplug the external power cables to the computer.
(c) Open the cover of your Computer.
Cover opening mechanism and the location of the hard disk drive may
vary from one computer to another. (Consult your computer manual)
(d) Insert the HDD into an available 3.5" bay in your computer and secure
it to computer and secure it to the chassis using the provided screws.
(e) Connect Cables.
Do Not Connect
In Reverse !!
Note: - Turn off the system power !
- Cover opening mechanism and the location of the hard disk drive
may vary from one computer to another.
Turn off the computer, unplug the external cables,
and open computer cover. Mount the hard disk
drive in the designated place in the computer
with screws provided with the product.
Connect 40 pin interface cable and power cable.
Make sure that the direction of the cables are
correct and matches the shape of the receptacles
when connecting cables. Incorrect cable connection
may damage the hard disk drive.
Pin No.1
Installation Your Hard Drive
1
2
1. Making Computer Detect the New Device
1
Note: Run the CMOS (BIOS) set-up program to detect the new hard disk
drive.
Go into CMOS screen during the booting of the computer. For descriptive
details of the program, refer to the computer's user's manual.
Make the computer detect the hard disk.
If your computer supports IDE HDD Auto Detection, the hard disk drive will
automatically be detected.
If your computer does not support auto detect, go into the User Define
Mode and by referring written information on the product, set the correct
settings for Cylinder, Head, and Sector and if some Bios must be, set the
HDD Mode to LBA.
Save the changed details and exit.
2
1
2
3
Additional information can be obtained at www.samsunghdd.com.
HDD does not be recognized in BIOS setup.
First, confirm whether each cable was connected correctly.
Confirm whether Jumper-setting is correct.
Confirm whether BIOS setup became correctly.
Even though the HDD recognized in BIOS setup, it does not be seen in
Windows.
Confirm whether did correctly partition and format.
Partition can be created through the Fdisk or Installing OS according
to OS's version.
Although my drive is larger than 137GB, it is only shown as 137GB.
There are two reasons of the 137GB (128GiB) capacity barrier.
One is a hardware barrier which some motherboards do not support 48 bit
LBA.The other is a software barrier which Windows2000 and Windows XP
do not support larger than 137GB.
Please refer below URLs for recognizing larger than 137GB in the software
barrier.
For download the SP3 for Win2000:
www.microsoft.com/windows2000/downloads/servicepacks/sp3/default.asp
For editing the registry for Win2000:
http://support.microsoft.com/default.aspx?scid=kb;en-us;305098
For download the SP1 for Win-XP:
www.microsoft.com/WindowsXP/pro/downloads/servicepacks/sp1/default.asp
FAQs
1
2
3
1
2
3. Samsung World Wide Web Site
Q1
Q2
Q3
 Loading...