


Table of Contents
Device Functions ...........................................4
Setting Up Your Device ................................ 6
Turning Your Device On and Off .......................... 9
Locking and Unlocking Screen ............................ 9
Initial Device Configuration .................................... 9
Home Screen ................................................10
Contacts ........................................................ 11
Creating a New Contact ....................................... 11
Adding a Number to an Existing Contact ......... 11
Deleting an Existing Contact ............................... 12
Messages ......................................................13
Create and Send a Message ..............................13
Connections .................................................14
Connecting to Bluetooth.......................................14
Connecting to Wi-Fi ............................................... 15

Apps & More .................................................16
Installing Apps ........................................................16
Samsung Smart Switch ........................................ 16
Gmail (Google Account) ....................................... 16
Setting Up Your Email Accounts .......................17
Internet ......................................................................18
Multi Window ........................................................... 19
Camera .....................................................................20
Lock Screen ............................................................21
2

3
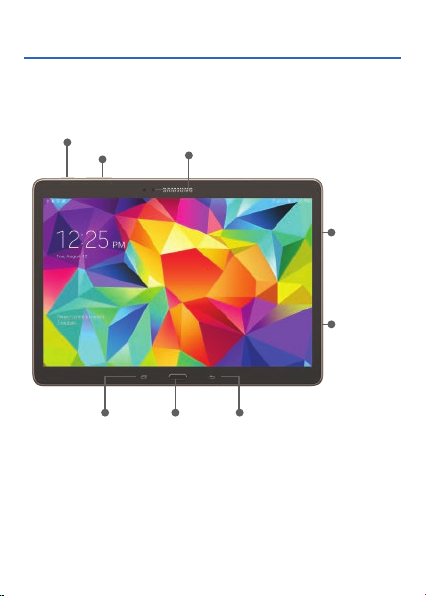
Device Functions
FPO
Power/Lock
4
Volume
Recent
Front-Facing
Camera
Home
microSD
Slot
SIM card
Slot
Back
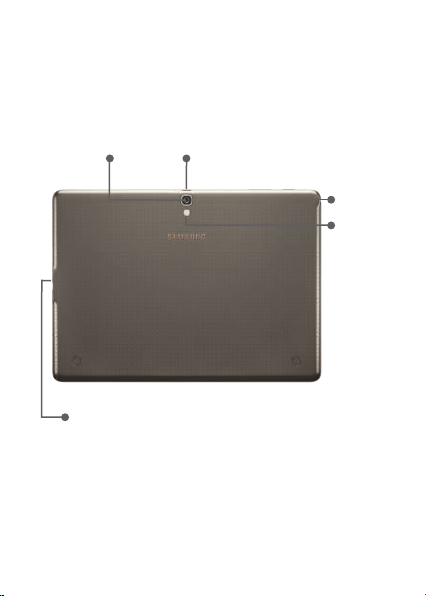
Camera
Lens
FPO
Charging/USB
Port
IR
Transmitter
Headset
Flash
5
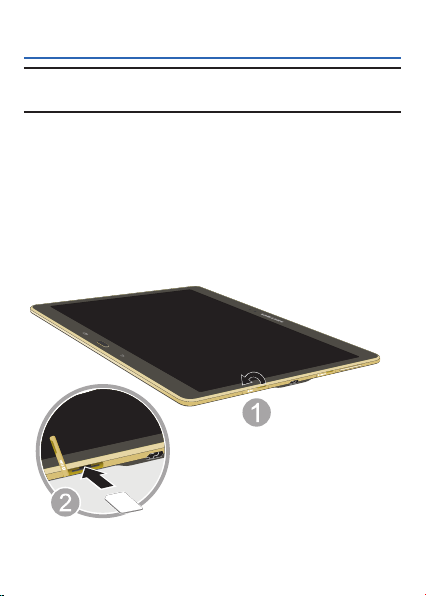
Setting Up Your Device
Caution! Do not attempt to remove the back cover
as it can not be removed.
Step 1. Install the SIM
● Remove the slot cover (1) and slide the SIM
card into the SIM card slot until it is secured
into place (2).
● Replace the slot cover once the card is
securely inserted.
6

Step 2. Install the optional microSD card
● Remove the slot cover (1) and slide the
microSD™ card into the card slot until it is
secured into place (2).
● Replace the slot cover once the card is
securely inserted.
7
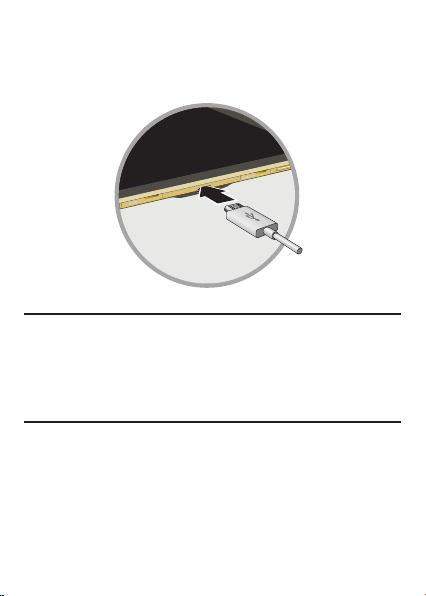
Step 3. Charging the Device
● Before turning on your device, charge it fully.
Be sure to use the charger that came with the
device.
Warning! Please use only an approved charging
8
accessory to charge your device.
Improper handling of the charging port,
as well as the use of an incompatible
charger, may cause damage to your
device and void the warranty.

Turning Your Device On and Off
1. To turn ON, press and hold the Power/Lock
key.
2. To turn OFF, press and hold Power/Lock key
and follow the prompts.
Locking and Unlocking Screen
1. To Lock, press the Power/Lock key.
2. To Unlock, press the Power/Lock key then
swipe your finger across the screen.
Initial Device Configuration
1. Select a language and tap Next or tap
Accessibility if you are visually impaired or
hard of hearing.
2. Follow the on-screen instruction to complete
the set up process.
Note: If you do not set up or log into your Gmail
account during this process, you can later
access Gmail from within the Applications
page.
9
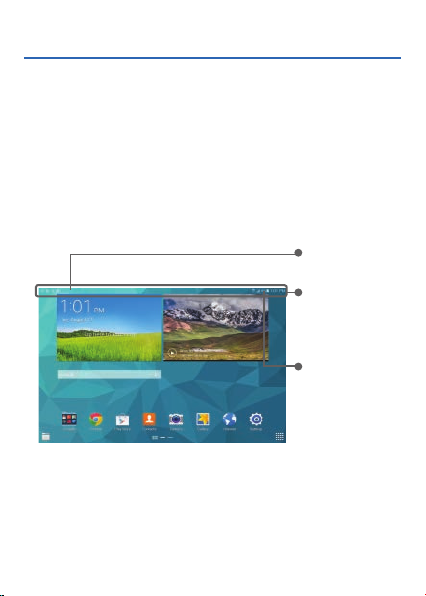
Home Screen
Swipe your fingers left or right to view the entire
Home screen. Customize the screen with widgets
and shortcuts to your favorite applications.
Status Bar
The Status bar appears at the top of your Home
screen. Icons indicating your device’s status and
new notification alerts appear on the Status bar.
Notification
Area
Status Bar
Status Area
Notification Screen
The Notification area indicates new message events
(data sync status, new messages, calendar events,
call status, etc).
10
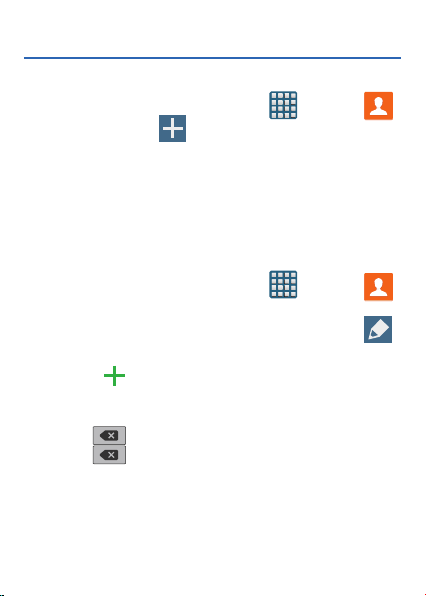
Contacts
Creating a New Contact
1. From the Home screen, tap Apps g
Contacts g Save Contact to.
2. Tap a destination type (Device, SIM, Google,
or Add new account) (depending on where
you want to save the new contact information).
3. Enter the desired information.
4. Tap Save to store the new entry.
Adding a Number to an Existing Contact
1. From the Home screen, tap Apps g
Contacts.
2. Tap a contact name from the list and tap
Edit.
3. Tap within the phone number area and
enter a new phone number.
● If you make a mistake while dialing, tap
to clear t he last digit. Touch and hold
to clear t he entire sequence.
4. Tap Save to complete and store the new
entry.
11

Deleting an Existing Contact
1. From the Home screen, tap Contacts.
2. Tap a contact name from the list and select
Delete g OK.
12
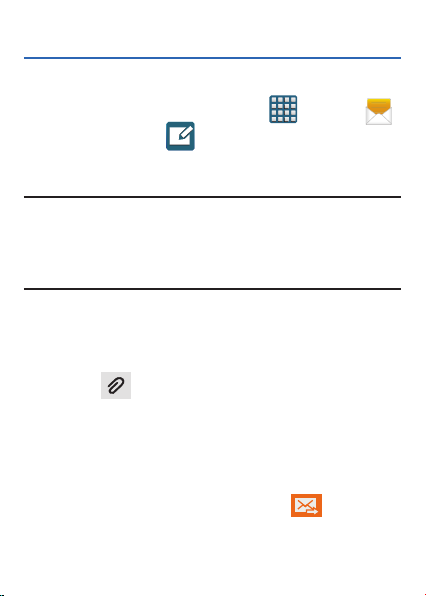
Messages
Create and Send a Message
1. From the Home screen, tap Apps g
Messages g New message.
2. Enter either the recipient’s phone number or
e-mail address.
Note: If adding a recipient from among Groups,
Favorites, or Contacts, tap the contact to
place a check mark alongside the entry and
tap Done. The contact will be placed in the
recipient field.
3. Tap the Enter message field and use the
on-screen keypad to enter a message.
4. Add more recipients by tapping the recipient
field.
5. Tap
your message (such as images, videos, audio
files, etc..).
6. Select the file and complete the on-screen
instructions to insert it to the current
message.
7. Review your message and tap
Attach to insert various file types to
Send.
13
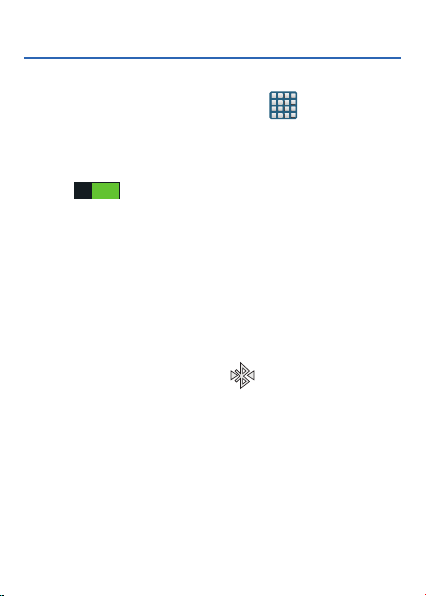
Connections
Connecting to Bluetooth
1. From the Home screen, tap Apps g
Settings g Connections tab.
2. In a single motion touch and slide the
Bluetooth slider to the right to turn it on
ON
ON
(
).
3. If necessary, tap Scan. Review the list of
discovered in-range Bluetooth® devices.
4. Tap a device from the list to initiate pairing.
5. Enter the passkey/PIN code, if needed, and
tap OK.
6. The external device will then have to also
accept the connection and enter your
device’s PIN code. Once successfully paired
to an external device, appears within the
Status area.
14
Connecting to Wi-Fi
1. From the Home screen, tap Apps g
Settings g Connections tab.
2. In a single motion touch and slide the Wi-Fi
ON
slider to the right to turn it on (
3. Tap Scan to display a list of Wi-Fi networks
in-range.
4. Tap a network to connect and enter the
password if prompted. When connected you
will see in the status bar.
ON
).
15
Apps & More
Installing Apps
Apps are available to download from Google Play™.
1. From the Home screen, tap Apps g
Play Store.
2. If prompted, follow the on-screen prompts to
add an existing Google account.
Samsung Smart Switch
Easily move over your photos, videos, music, apps
and more with Samsung Smart Switch™. Get started
today at www.samsungsmartswitch.com.
Gmail (Google Account)
Before you can access Google™ applications, you
must first sign into or set up a new Gmail™ account.
These applications sync between your device and
your online Google account.
► From the Home screen, tap
Gmail.
● Tap New to create a new account and
follow the on-screen instructions.
● Tap Existing if you already have an
account, enter your Email and Password
16
and follow the on-screen instructions.
Apps g
Setting Up Your Email Accounts
Check email on the go with popular Internet-based
email accounts, including Yahoo!® Mail, etc..
1. From the Home screen, tap Apps g
Email.
2. Enter your email address and password into
the appropriate fields and tap Next.
3. At the Account options screen, select the
frequency which the device should check for
new email on the server and tap Next.
4. At the Set up email screen, name the account
and enter a screen name to identify yourself
on this account.
5. Tap Done to store the new account.
Note: Record your email account information.
Please keep this document in a safe place.
17
Internet
Take the Internet on the go. You can reach the latest
news, get the weather and follow your stocks.
► From the Home screen, tap Apps g
Internet.
To enter a URL:
You can access a website quickly by entering the
URL. Websites are optimized for viewing on your
device.
► From the homepage tap the URL field at the
top of the screen, enter the URL and tap
To add a new window:
1. From your browser window, tap
window at the top of the screen. A new
browser window displays.
2. Scroll across the screen to view the currently
active windows and tap an entry to launch the
selected Internet window.
To delete an open window:
1. From your browser window, tap
window at the top of the screen. A new
browser window displays.
18
Add
Delete
.
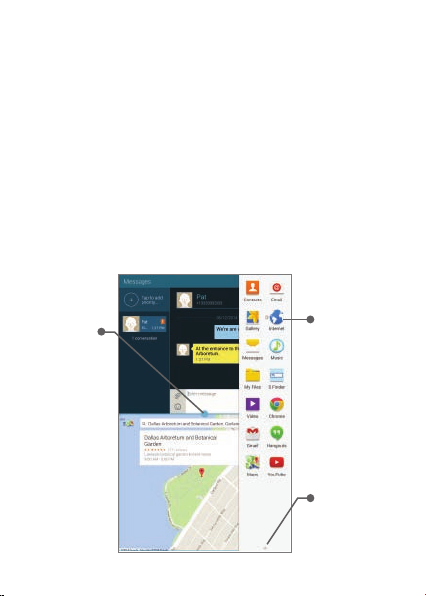
Multi Window
Run multiple applications on the current screen at
the same time.
1. Activate the Multi Window feature:
● Using two fingers, touch and drag the
Status bar downwards.
● Tap the Multi window entry to activate the
feature.
2. To display the Multi window tab, swipe from
the right side of the screen to open the
application panel.
Tap to
adjust
screen
size,
switch
layouts,
or close
screen
List ing of
available
apps
Edit list of
available
apps
19

Camera
This device gives you the magic of professional
digital photography. With stunning photographic
output and a range of exceptionally rich professional
shooting modes, editing features and various apps.
Going pro has never been this easy or this fun.
► From the Home screen, tap Apps g
Camera.
Self-Portrait
Settings Image
20
Shooting
Mode
View
Finder
Camcorder
Camera
Mode
Viewer

Lock Screen
This menu contains features that allows you to
configure the device’s security parameters.
To secure data and limit device access, set the
device to require a screen unlock pattern each time
you turn on the device, or every time the device
wakes up from sleep mode (when the screen
automatically turns off) .
► From the Home screen, tap
Settings g Device tab g Lock screen g
Screen lock.
The Screen lock menu allows to choose from a
variety of locking features.
ata is received. Character length/file size of
messages/attachments may be limited. T-Mobile
is not liable for content of messages/attachments
or for any failures, delays or errors in any T-Mobile
generated alerts or notifications. Your data session,
plan, or service may be slowed, suspended,
terminated, or restricted if you use your service in
a way that interferes with or impacts our network or
ability to provide quality service to other users, if you
roam for a significant portion of your usage, or if you
use a disproportionate amount of bandwidth during
a billing cycle. You may not use your plan or device
for prohibited uses.
Apps g
21

2223242526


Notes
___________________________________________
___________________________________________
___________________________________________
___________________________________________
___________________________________________
___________________________________________
___________________________________________
___________________________________________
___________________________________________
___________________________________________
___________________________________________
___________________________________________
___________________________________________
___________________________________________
___________________________________________
___________________________________________
___________________________________________
___________________________________________
___________________________________________
___________________________________________
___________________________________________
___________________________________________
___________________________________________
___________________________________________
___________________________________________
DRAFT
Internal Use Only
ANDROID
This document is watermarked because certain important information in the document has not yet been verified.
This document has been sent to you as a draft and for informational purposes only.
The document should only be used for internal purposes and may not be distributed outside of Samsung,
except to Samsung's carrier customer for testing purposes. Distributing the
document outside of Samsung, except to Samsung's carrier customer for testing purposes could result in legal exposure
to the company if the preliminary, unverified information in the draft turns out to be inaccurate.
TA B L E T
Health and Safety and Warranty Guide
Please read this manual before operating your
device and keep it for future reference.
GH68-42315A

DRAFT
Internal Use Only
Warning!
This product contains chemicals known to the
State of California to cause cancer and
reproductive toxicity.
Intellectual Property
All Intellectual Property, as defined below, owned by or
which is otherwise the property of Samsung or its
respective suppliers relating to the SAMSUNG mobile
device, including but not limited to, accessories, parts,
or software relating there to (the “mobile device”), is
proprietary to Samsung and protected under federal
laws, state laws, and international treaty provisions.
Intellectual Property includes, but is not limited to,
inventions (patentable or unpatentable), patents, trade
secrets, copyrights, software, computer programs, and
related documentation and other works of authorship.
You may not infringe or otherwise violate the rights
secured by the Intellectual Property. Moreover, you
agree that you will not (and will not attempt to) modify,
prepare derivative works of, reverse engineer,
decompile, disassemble, or otherwise attempt to create
source code from the software. No title to or ownership
in the Intellectual Property is transferred to you. All
T807R4_HS_English_PS_082214_R1

DRAFT
Internal Use Only
applicable rights of the Intellectual Property shall
remain with SAMSUNG and its suppliers.
Open Source Software
Some software components of this product incorporate
source code covered under GNU General Public License
(GPL), GNU Lesser General Public License (LGPL),
OpenSSL License, BSD License and other open source
licenses. To obtain the source code covered under the
open source licenses, please visit:
http://opensource.samsung.com
.
Disclaimer of Warranties;
Exclusion of Liability
EXCEPT AS SET FORTH IN THE EXPRESS WARRANTY
CONTAINED ON THE WARRANTY PAGE ENCLOSED WITH
THE PRODUCT, THE PURCHASER TAKES THE PRODUCT
"AS IS", AND SAMSUNG MAKES NO EXPRESS OR
IMPLIED WARRANTY OF ANY KIND WHATSOEVER WITH
RESPECT TO THE PRODUCT, INCLUDING BUT NOT
LIMITED TO THE MERCHANTABILITY OF THE PRODUCT
OR ITS FITNESS FOR ANY PARTICULAR PURPOSE OR
USE; THE DESIGN, CONDITION OR QUALITY OF THE
PRODUCT; THE PERFORMANCE OF THE PRODUCT; THE
WORKMANSHIP OF THE PRODUCT OR THE
 Loading...