

Samsung SGH-Z107M User Manual

*
Some of the contents of this manual may differ from your phone, depending upon the software
installed or your service provider.
World Wide Web
http://www.samsungmobile.com
Printed in Korea
Code No.:GH68-05958A
English. 09/2004. Rev.1.0
Samsung SGH-Z107M
User guide

Welcome
Congratulations on choosing the Samsung
SGH-Z107M.
Your new Samsung SGH-Z107M uses 3G (3rd
Generation) technology, also known as UMTS.
This technology allows fast data connections
similar to broadband speeds, enabling video
capture using its built-in camcorder, and sending
and receiving video, including video ca lls.
The SGH-Z107M features today’s most adv anced
technology including a built - in rota tin g d igita l
camera and high-quality TFT colour screen that
reproduces 260,000 different colour shades (four
times more than other colour screens). It also
features 64 polyphonic ringtones.
Copyright © 2004 By Samsung. All rights reserved.
This User’s Guide is published by Samsung.
Some of the contents in this User’s Guide may differ
from your phone, depending on your service provider or
on the software installed.
Improvements and changes to this User’s Guide due to
typographical errors, inaccuracies of current
information, or improvement of software or hardw are,
may be made by Samsung without notice.
2

Contents
Important Safety Precautions . . . . . . . . . . . 5
Unpacking . . . . . . . . . . . . . . . . . . . . . . . . . . 7
Your Phone. . . . . . . . . . . . . . . . . . . . . . . . . . 8
Phone Layout . . . . . . . . . . . . . . . . . . . . . . . . . . . . 8
Display . . . . . . . . . . . . . . . . . . . . . . . . . . . . . . . 10
External Light . . . . . . . . . . . . . . . . . . . . . . . . . . 12
Getting Started. . . . . . . . . . . . . . . . . . . . . . 13
Inserting/Removing the SIM Card . . . . . . . . . . . . . 13
Installing/Removing/Charging the Battery . . . . . . . 14
Switching the Phone On or Off . . . . . . . . . . . . . . . 16
Selecting Functions and Options . . . . . . . . . . . . . . 17
Switching Applications . . . . . . . . . . . . . . . . . . . . . 19
Call Functions. . . . . . . . . . . . . . . . . . . . . . . 20
Making a Call . . . . . . . . . . . . . . . . . . . . . . . . . . . 20
Ending a Call . . . . . . . . . . . . . . . . . . . . . . . . . . . 22
Answering a Call . . . . . . . . . . . . . . . . . . . . . . . . . 22
Rejecting a Call. . . . . . . . . . . . . . . . . . . . . . . . . . 22
Adjusting the Volume . . . . . . . . . . . . . . . . . . . . . 23
Accessing Options During a Call . . . . . . . . . . . . . . 23
Using Video Call Features. . . . . . . . . . . . . . . . . . . 28
Using the Headset. . . . . . . . . . . . . . . . . . . . . . . . 30
Entering Text . . . . . . . . . . . . . . . . . . . . . . . 31
Changing the Text Input Mode . . . . . . . . . . . . . . . 31
Using T9 Mode . . . . . . . . . . . . . . . . . . . . . . . . . . 33
Using ABC Mode . . . . . . . . . . . . . . . . . . . . . . . . . 34
Using Number Mode . . . . . . . . . . . . . . . . . . . . . . 35
Using Symbol Mode. . . . . . . . . . . . . . . . . . . . . . . 36
Using Menu Functions . . . . . . . . . . . . . . . . 37
Accessing a Menu Function by Scrolling . . . . . . . . . 37
Shortcuts to Menu Functions. . . . . . . . . . . . . . . . . 39
List of Menu Functions . . . . . . . . . . . . . . . . . . . . . 40
SAT (SIM Application Toolkit) . . . . . . . . . . 42
t-zones . . . . . . . . . . . . . . . . . . . . . . . . . . . 43
Call register . . . . . . . . . . . . . . . . . . . . . . . . 46
All, Dialled, Missed or Received Calls
Data Calls
Call Costs
Call Times
(Menu 3-5)
(Menu 3-6)
(Menu 3-7)
. . . . . . . . . . . . . . . . . . . . . . 47
. . . . . . . . . . . . . . . . . . . . . . 47
. . . . . . . . . . . . . . . . . . . . . . 48
(Menu 3-1~4)
. 46
Messages . . . . . . . . . . . . . . . . . . . . . . . . . . 49
Write
(Menu 4-1)
(Menu 4-2)
Inbox
Email Box
Outbox
(Menu 4-5)
Drafts
Templates
Delete All
Settings
Memory Status
. . . . . . . . . . . . . . . . . . . . . . . . . 49
. . . . . . . . . . . . . . . . . . . . . . . . . 56
(Menu 4-3)
(Menu 4-4)
(Menu 4-6)
(Menu 4-7)
(Menu 4-8)
. . . . . . . . . . . . . . . . . . . . . . 57
. . . . . . . . . . . . . . . . . . . . . . . . 58
. . . . . . . . . . . . . . . . . . . . . . . . . 58
. . . . . . . . . . . . . . . . . . . . . . 59
. . . . . . . . . . . . . . . . . . . . . . 60
. . . . . . . . . . . . . . . . . . . . . . . 60
(Menu 4-9)
. . . . . . . . . . . . . . . . . . 64
My Media . . . . . . . . . . . . . . . . . . . . . . . . . . 65
Exploring the Multimedia Files. . . . . . . . . . . . . . . . 65
Contacts . . . . . . . . . . . . . . . . . . . . . . . . . . . 70
Search Contact
(Menu 6-2)
New
Viewing Contact Information. . . . . . . . . . . . . . . . . 73
(Menu 6-1)
. . . . . . . . . . . . . . . . . . . . . . 71
. . . . . . . . . . . . . . . . . . 70
3

Contents
Groups
(Menu 6-3)
Speed Dial
My Name Card
Copy All to Phone
Service Number
Memory Status
. . . . . . . . . . . . . . . . . . . . . . . . 74
(Menu 6-4)
. . . . . . . . . . . . . . . . . . . . . 75
(Menu 6-5)
(Menu 6-7)
(Menu 6-8)
. . . . . . . . . . . . . . . . . . 76
(Menu 6-6)
. . . . . . . . . . . . . . . . 76
. . . . . . . . . . . . . . . . . 76
. . . . . . . . . . . . . . . . . . 76
Organiser . . . . . . . . . . . . . . . . . . . . . . . . . . 77
Calendar
Today’s Event
Alarm
Schedule
Anniversary
Task List
Memo
Missed Event Alarm
World Clock
Calculator
Converter
Media Player
(Menu 7-1)
(Menu 7-3)
(Menu 7-4)
(Menu 7-5)
(Menu 7-6)
(Menu 7-7)
(Menu 7-9)
(Menu 7-0)
(Menu 7-*)
(Menu 7-#)
. . . . . . . . . . . . . . . . . . . . . . 77
(Menu 7-2)
. . . . . . . . . . . . . . . . . . . 78
. . . . . . . . . . . . . . . . . . . . . . . . . 78
. . . . . . . . . . . . . . . . . . . . . . 79
. . . . . . . . . . . . . . . . . . . . 80
. . . . . . . . . . . . . . . . . . . . . . 80
. . . . . . . . . . . . . . . . . . . . . . . . 81
(Menu 7-8)
. . . . . . . . . . . . . . . . . . . . . . 82
. . . . . . . . . . . . . . . . . . . . . . 82
. . . . . . . . . . . . . . . 81
. . . . . . . . . . . . . . . . . . . . 81
. . . . . . . . . . . . . . . . . . 83
Camera . . . . . . . . . . . . . . . . . . . . . . . . . . . 86
Taking a Picture . . . . . . . . . . . . . . . . . . . . . . . . . 86
Recording a Video . . . . . . . . . . . . . . . . . . . . . . . . 88
Settings . . . . . . . . . . . . . . . . . . . . . . . . . . . 91
Profiles
(Menu 9-1)
(Menu 9-2)
Phone
(Menu 9-3)
Display
(Menu 9-4)
Call
Network
Connections
Security
Date & Time
Own Number
(Menu 9-5)
(Menu 9-7)
Memory Status
. . . . . . . . . . . . . . . . . . . . . . . 91
. . . . . . . . . . . . . . . . . . . . . . . . 93
. . . . . . . . . . . . . . . . . . . . . . . 95
. . . . . . . . . . . . . . . . . . . . . . . . . . 96
. . . . . . . . . . . . . . . . . . . . . . 100
(Menu 9-6)
(Menu 9-8)
(Menu 9-9)
. . . . . . . . . . . . . . . . . . . 101
. . . . . . . . . . . . . . . . . . . . . . 103
. . . . . . . . . . . . . . . . . . . 105
. . . . . . . . . . . . . . . . . . 106
(Menu 9-0)
. . . . . . . . . . . . . . . . . 106
Reset Settings
Internet
(Menu 9-*)
(Menu 9-#)
. . . . . . . . . . . . . . . . . . 107
. . . . . . . . . . . . . . . . . . . . . . . 107
Solving Problems . . . . . . . . . . . . . . . . . . . 109
Access Codes . . . . . . . . . . . . . . . . . . . . . . 111
Phone Password. . . . . . . . . . . . . . . . . . . . . . . . . 111
PIN. . . . . . . . . . . . . . . . . . . . . . . . . . . . . . . . . . 111
PIN2. . . . . . . . . . . . . . . . . . . . . . . . . . . . . . . . . 112
PUK . . . . . . . . . . . . . . . . . . . . . . . . . . . . . . . . . 112
PUK2 . . . . . . . . . . . . . . . . . . . . . . . . . . . . . . . . 112
Call Barring Password . . . . . . . . . . . . . . . . . . . . . 112
Health and Safety Information. . . . . . . . . 113
SAR Certification Information. . . . . . . . . . . . . . . . 113
Precautions When Using Batteries . . . . . . . . . . . . 114
Road Safety. . . . . . . . . . . . . . . . . . . . . . . . . . . . 115
Operating Environment. . . . . . . . . . . . . . . . . . . . 115
Electronic Devices . . . . . . . . . . . . . . . . . . . . . . . 115
Potentially Explosive Environments. . . . . . . . . . . . 117
Emergency Calls . . . . . . . . . . . . . . . . . . . . . . . . 117
Other Important Safety Information . . . . . . . . . . . 118
Care and Maintenance . . . . . . . . . . . . . . . . . . . . 118
Glossary . . . . . . . . . . . . . . . . . . . . . . . . . . 120
Index . . . . . . . . . . . . . . . . . . . . . . . . . . . . 123
4

Important Safety Precautions
Read these guidelines before using your wireless
phone. Failure to comply with them m a y be
dangerous or illegal.
Road Safety at All Times
Do not use a hand-held phone while driving;
park the vehicle first.
Switching Off When Refuelling
Do not use the phone at a refuelling point
(service station) or near fuels or chemicals.
Switching Off in an Aircraft
Wireless phones can cause interference. Using
them in an aircraft is both illegal and dangerous.
Switching Off in Hospitals
Switch off your phone near medical equipment.
Follow any regulation s or rules in fo rce .
Interference
All wireless phones may be subject to
interference, which could affect their
performance.
Special Regulations
Meet any special regulations in force in the area
you are in and always switch off your phone
whenever it is forbidden to use it, or when it may
cause interference or danger (in a hospital for
example).
Sensible Use
Use only in the normal position (held to the ear).
Avoid unnecessary contact with the antenna
when the phone is switched on.
5

Important Safety Precautions
Emergency Call
Ensure the phone is switched on and in service.
Cancel all running applications before making an
emergency call. Key in the emergency number
for your present location, then press the key.
Give all the necessary information as accurately
as possible. Do not end the call until given
permission to do so.
Water Resistance
Your phone is not water-resistant. Keep it dry.
Accessories and Batteries
Use only Samsung-approved accessories and
batteries.
Qualified Service
Only qualified service personnel may install or
repair your phone.
For more detailed safet y information, see “He alth
and Safety Information” on page 113.
CAUTION
RISK OF EXPLOSION IF A BA T TERY IS REPLACED
BY AN INCORRECT TYPE.
DISPOSE OF USED BATTERIES ACCORDING TO
THE INSTRUCTIONS.
6
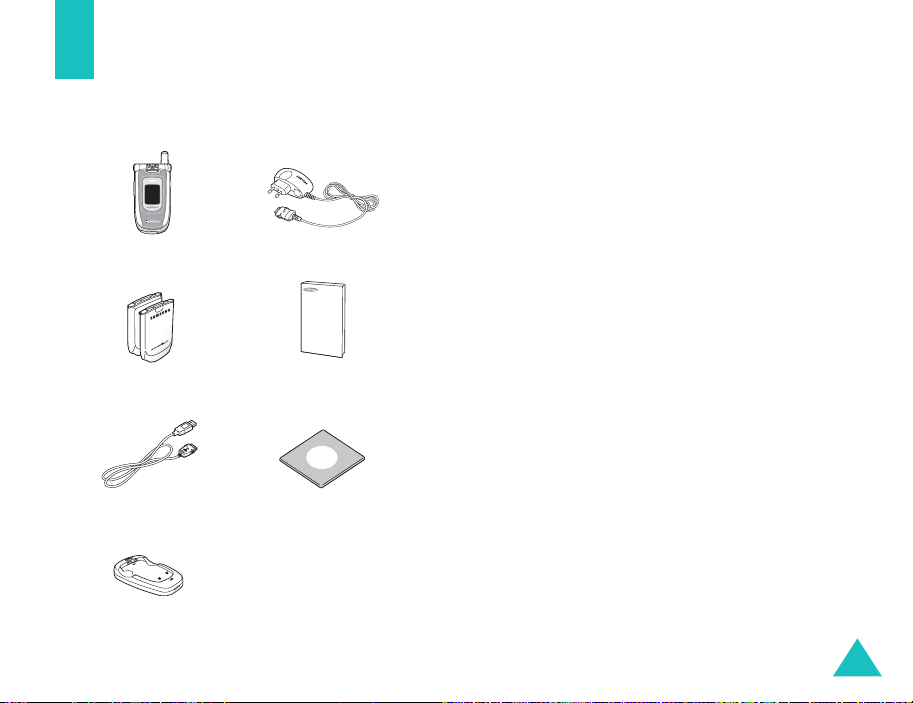
Unpacking
Your package contains the following items: In addition, you can obtain the following
Phone
Batteries
Data Link Cable
Battery Holder
Travel Charger
Owner’s Manual
PC Link CD
accessories for your phone from your local
Samsung dealer.
• Standard / Extended Battery
•Desktop Charger
• Car Charger
• Car Cradle
• Stylish Handsfree Car Kit
• PC Data Link Kit
Notes
:
• Use only the supplied or an approved headset for
the Z107M model. The device comes with two
batteries in the package. The larger battery has a
higher capacity.
• The items supplied with your phone and av ailable
accessories may be different, depending on your
country or service provider.
7
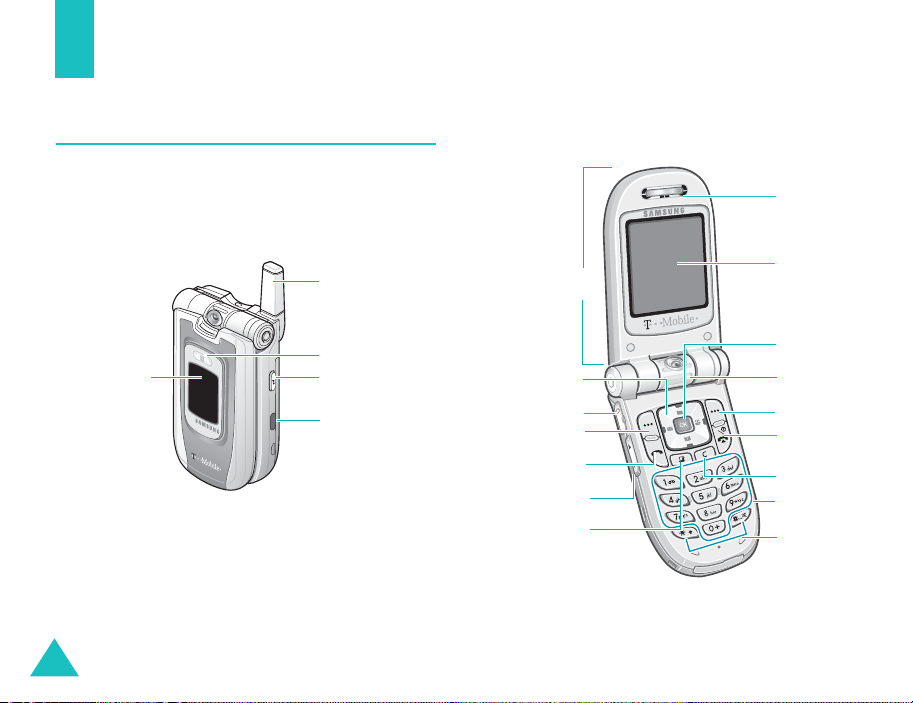
Your Phone
Phone Layout
The following illustrations show th e m ain
elements of your phone:
Closed
Antenna
External
display
8
External light
Reject key
Infrared port
Open
Folder
Navigation/
Scroll keys
Headset
jack
Soft key (left)
Send key
Volume/Menu
browse keys
Application switch
key
Earpiece
Main display
Menu/OK key
Camera module
Soft key (right)
Power On/Off /
End key
Correction/Back
key
Alphanumeric
keys
Special function
keys

Your Phone
Key Description
Performs the functions indicated by
the text above them, on the
(soft keys)
bottom line of the display.
In menu mode: scrolls through the
menu options.
In idle mode: the Up key activates
My Media
the
enters the
The Left key enters
screen and the Right key enters the
Call register
In menu mode: selects the
highlighted menu or option.
In idle mode: enters the main
menu.
Makes or answers a call.
In idle mode: accesses call records.
Lets you open the Call, Messages,
or t-zones applications wi thou t
quitting the current application.
and the Down key
Search Contact
Short msg.
menu.
menu.
Key Description
Deletes entered numbers or text.
In menu mode, returns to the
previous menu.
Ends a call.
Switches the phone on and off
when held down.
In menu mode: exits the current
screen and takes you back to idle
mode.
Enters numbers, letters, and some
special characters.
Used for various purposes in
different functions.
The key inserts a pause when
held down while entering a number .
In idle mode: the key enters or
exits silent mode when held down.
(continued)
9
Your Phone
Key Description
(on the left side of the phone)
During a call: adjusts the earpiece
volume.
In idle mode with the handset
open: adjusts the key volume .
In the idle mode with the handset
closed: turns on the external
display’s backlight when held down.
The volume keys on the left side of
the phone also turn the picture
upside down / mirror image while
in camera mode or during a video
telephone call.
(on the right side of the phone)
Rejects incoming calls when the
handset is closed.
10
(continued)
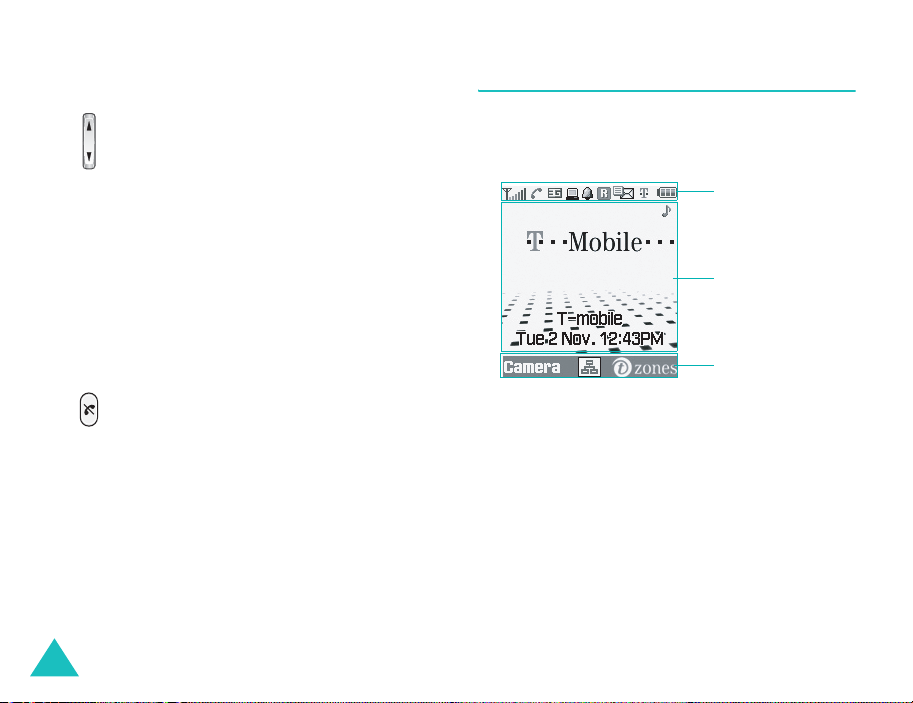
Display
Display Layout
The display has three areas.
Icons
Text and
graphic area
Soft key
indicators
Area Description
First line Displays various icons (see
Middle Displays messages,
Last line Shows the current functions
page 11).
instructions, and any
information that you enter:
the number you are dialling,
for example.
assigned to the two soft k eys.

Your Phone
Icons
Icon Description
Shows the received signal strength.
The greater the number of bars, the
better the signal.
Informs you which calling mode you
are in.
• : A call is in progress.
• : A call is impossible.
• : A video call is in progress.
• : A video call has been
disconnected.
Informs you whether you are in a 2.5G
or 3G (UMTS) network.
• : You are in a 3G (UMTS) network.
• : You are retrieving and sending
data in a 3G (UMTS) network.
This icon is animated.
• : You are calling in a 3G (UMTS)
network.
• : You are in a 2.5G network.
• : You are retrieving and sending
data in a 2.5G network. This
icon is animated.
• : You are calling in a 2.5G
network.
Icon Description
Appears when your phone is connected
(continued)
to a PC running the internet wizard or
is synchronised with a PC.
• : You are connected to a PC.
• : This icon is animated while
browsing on the PC.
• : This icon is animated while
synchronising with a PC.
Appears when you set an alarm.
Appears when you are out of your
home area and have logged onto a
different network (i.e., when travelling
in other countries).
Informs you of the type of message
received.
• : E-mail message
• : Multimedia message
• : Configuration message
• : Text message
• : Voice mail
11
Your Phone
Icon Description
Appears when the Infrared port is
actived. For detail, see page 94.
Appears when you connect the phone
to the computer by the Infrared port.
Tells you your phone’s sound profile.
• : T-Mobile profile
• : Car profile
• : Silent profile
• : Meeting profile
• : Outdoor profile
When your phone’s sound profile is set
to Normal profile, no profile icons will
display.
Appears when you access a secured
web page or when you are connected
to the network using a security
protocol while loading Java MIDlets.
Shows the level of your battery. The
more bars you see, the more power
you have left.
(continued)
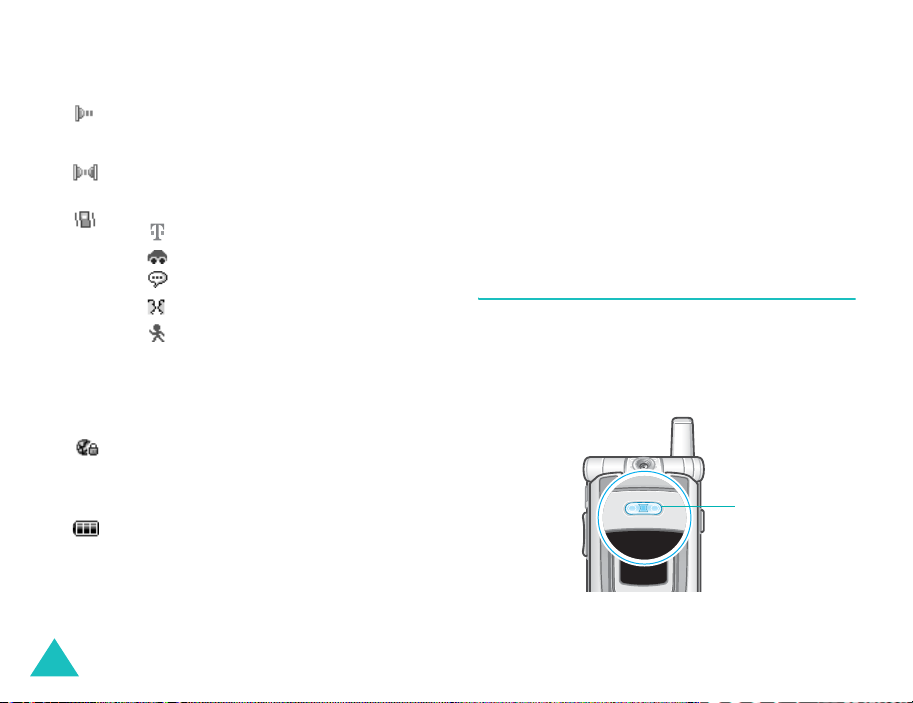
External Display
Your phone has an external display on the fo lder
cover. It indicates when you have an incoming
call or message, and alerts you at the specified
time when you set an alarm.
When you hold down one of the volume keys, the
external display backlight illuminates.
External Light
The external light is at the front of the phone.
The light flashes when you are in a service area
and when you switch your phone on. It also
functions as a flash when you take photos.
External light
12
Getting Started
Inserting/Removing the SIM Card
Your SIM Card is already loaded with your
subscription details, such as your PIN.
• Keep SIM cards out of the reach of small children.
• The SIM card and its contacts can easily be
damaged by scratches or bending, so be careful when handling, inserting, or removing the
card.
• When installing the SIM card, always make
sure that the phone is switched off before you
remove the battery.
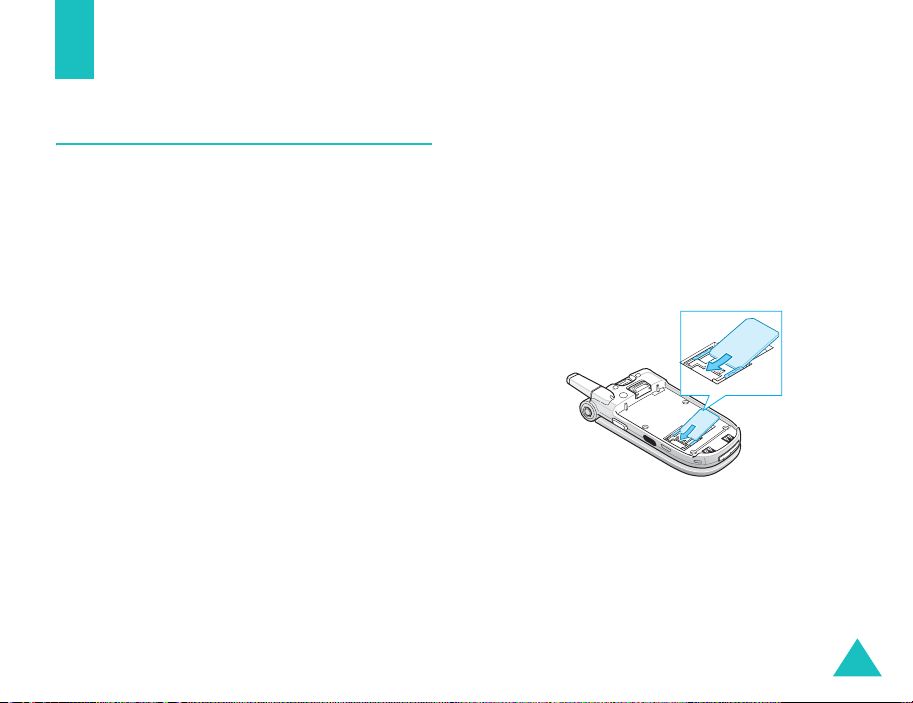
Inserting the SIM Card
1. If necessary , rem o v e th e batt ery b y referring to page 15.
2. Insert and slide the SIM card under the two tabs, ensuring that the notched corner is at the top left and the gold contacts of the card face down into the phone.
13
Getting Started
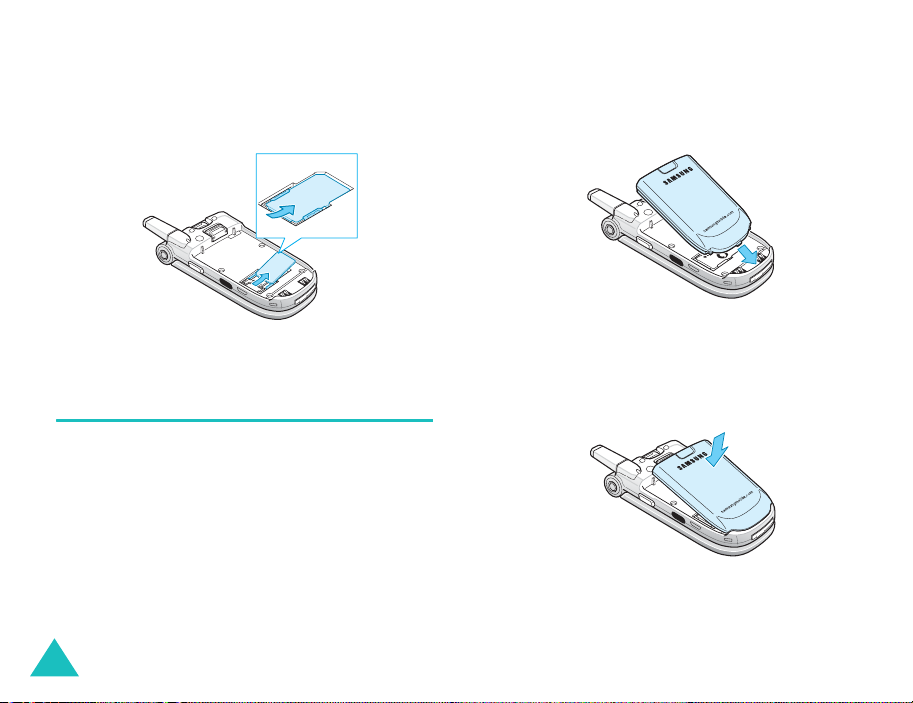
Removing the SIM Card
T o re move the SIM card, slide the card out of the holder, as shown.
Installing/Removing/Charging the Battery
Your phone is powered by a rechargeable Li-ion
battery. Use only approved batteries and
chargers. Ask your local Samsung dealer for
further details.
Note
: You must fully c harge the batte ry before
using your phone for the first time. A
discharged standard battery is fully
recharged in approximately 120 minutes.
Installing the Battery
1. Insert the teeth on the bottom of the battery into the corresponding slots on the phone.
2. Press the battery against the back of the phone until it clicks into place.
Make sure that the battery is properly
installed before switching the phone on.
14
Getting Started
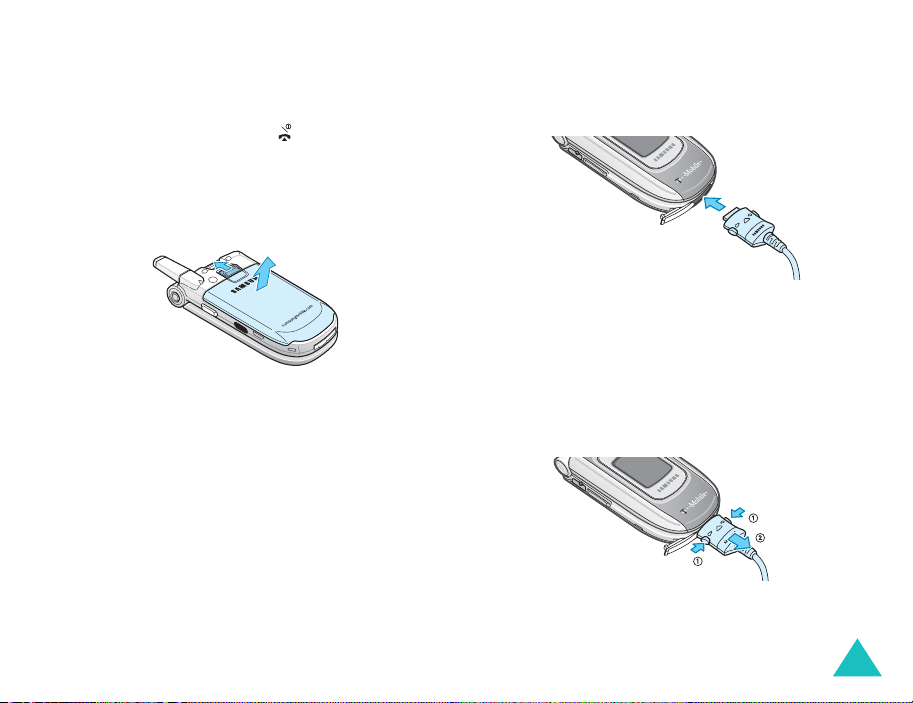
Removing the Battery
1. If the phone is on, switch it off first by pressing and holding the key until the power-off animation is displayed.
2. To remove the battery, press and hold the catch above the battery. Lift the battery aw ay from the phone.
Charging with the Travel Charger
Note
: The phone can be used while the battery is
being charged, but this causes the battery to
charge more slowly.
1. Plug the travel charger connector into the bottom of the phone. Check that the arrow on the connector is facing up, as is the phone.
2. Plug the charger into a standard AC wall outlet.
3. When charging is finished, unplug the charger from the power outlet and from the phone by pressing the grey buttons on both sides of the connector and pulling the connector out.
15
Getting Started
Low Battery Indicator
When the battery is weak and only a few minutes
of talk time remain, the battery sensor informs
you in the following ways:
• An empty battery icon flashes ( ).
• You hear a warning tone.
• A message is briefly shown on the display.
After 5 minutes, the message is again briefly
shown. The message will appear one last time
just before the phone automatically switches
off.
When the battery becomes too weak for the
phone to operate, it switches off automatically.
Switching the Phone On or Off
1. Open the phone.
2. Press and hold the key until the phone switches on.
3. If the phone asks for a PIN, enter the PIN
code and press the
further details, see page 122.
The phone begins searching for your network.
When it finds the network, you will see the
network operator’s name. Yo u can make or
receive a call only when connected to a
network.
Note
: To change the language, use the
Language
further details, see page 93.
Confirm
menu (Menu 9-2-4); for
soft key. For
16

Getting Started
4. T o switch the phone off , press and hold the key until the power-off animation displays.
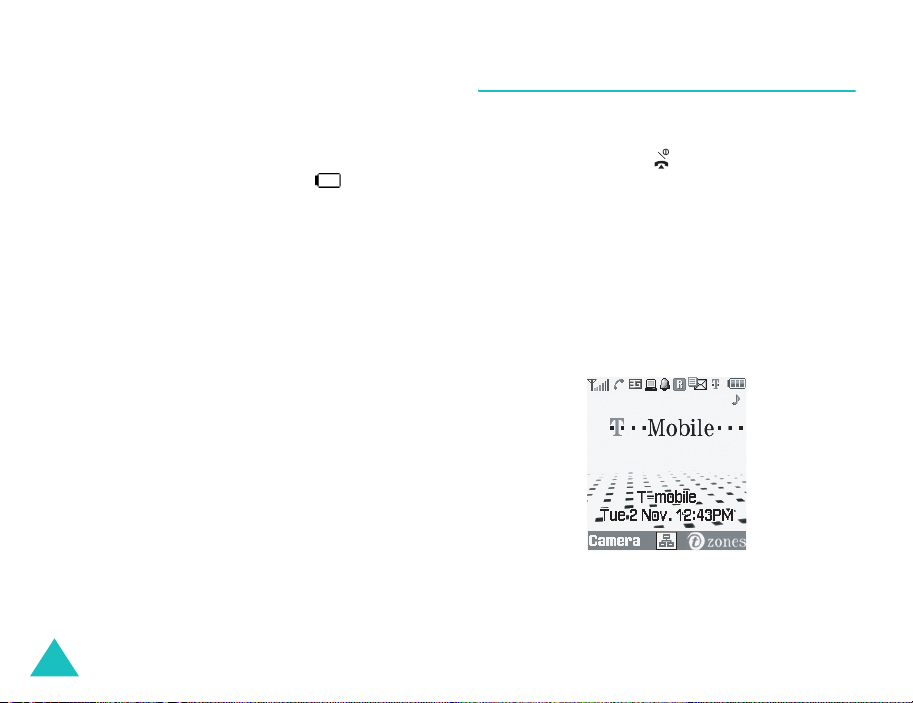
Selecting Functions and Options
You can select different functions and option
menus using the two soft keys ( and ).
The roles of the soft keys vary according to the
phone feature you're using. To see what action
will occur or which menu will be accessed by
pressing them, look at the bottom line of the
display (just above each soft key).
Example
:
Press the left soft
key to access
Camera mode.
Press the right
soft key to access
t-zones.
17
Getting Started
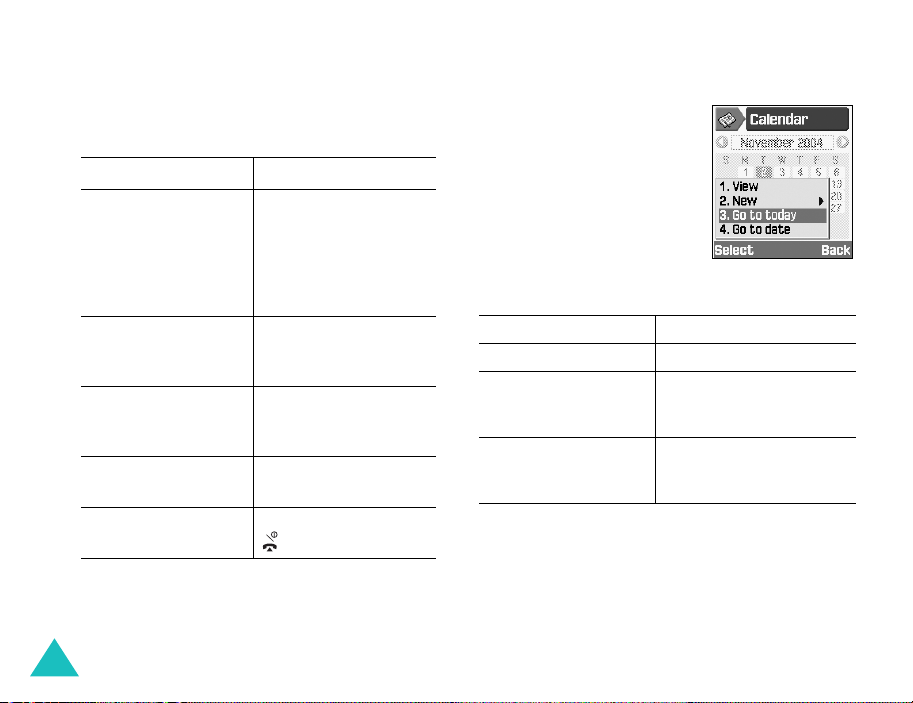
To view the various functions and options
available and to select the one you want:
1. Press the appropriate soft key.
2.
To Press the
select the:
• function displayed
• option highlighted
Select/Save
or the
OK
soft key
key.
If it is numbered, you
can press the
corresponding
number key.
scroll up or down
Up or Down scroll key.
through the menus
or options
scroll left or right
through the menus
Left or Right scroll
key .
or options
Back
move back up one
level in the structure
return to idle mode
soft key or the
C
key .
Back
soft key or the
key.
In some functions, you may be asked for a PIN or
password. Enter the code and press the
soft key or the
OK
key .
Confirm
Using an Option list
When you press the
Options
function, a list of available
options displays.
If the display cannot show
all of the available options,
an Up or Down arrow shows
that you can scroll through
the rest of the list.
soft key in a
To Press the
scroll through the list Up or Down scroll key.
OK
select the option
highlighted
key,
or the corresponding
number key.
Back
exit the menu and
soft key.
return to the
previous screen
Select
soft key
18
Getting Started
When an option has suboptions, an arrow is shown on
the right.
Press
the
Select
the Right scroll key and the
sub-option list appears. You can use it in the
same way as a normal option list.
To exit the sub-option list, press the Left scroll
key or the
Back
soft key or
soft key.
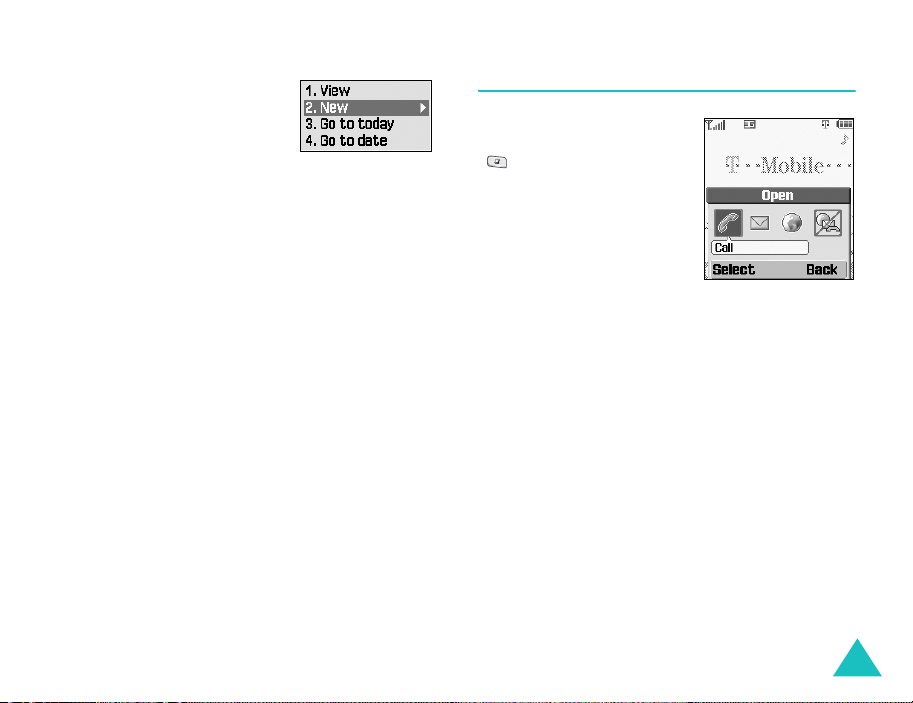
Switching Applications
When you press the
Application switch key
( ), you can quickly
switch to the Call,
Messages, or t-zones
applications – without
losing your place in
whatever other application
or menu you're using at the
time.
The coloured icon means an application is
running, and grey means it's not running. Scroll
through
Left and Right scroll keys and press the
soft key to launch the application. Choose
all?
For example, you can be making an entry in the
Organiser, then use the Application switch key to
open
finished, you can then press the
return to your Organiser entry.
Call, Messages
to end the applications.
Call
to make a phone call. When you've
, and
t-zones
Back
using the
Select
End
soft key to
19
Call Functions
Making a Call
Using the Number Keypad
When the idle screen displays, enter the area
code and phone number, and press the key.
Correcting the Number
To clear the Press
last digit displayed the C key .
whole display and hold the C key for
more than one second.
Making an International Call
1. Press and hold down the 0 key for the international prefix. The + character appears.
2. Enter the country code, area code, and phone number and press the key.
20
Using Call Records
Your phone stores records of dialled, received,
and missed calls chronologically. The last call is
saved in the first position.
To recall any of these numbers:
1. In idle mode, press the key.
2. Press the Left or Right scroll key to scroll to the desired type of call; all, dialled calls, missed calls, or received calls.
3. Use the Up and Down scroll keys to scroll through the list until the number highlights.
4. To dial the number, press the key.
You can also use the
3). See page 46.
Call register
menu (Menu

Call Functions
Making a Call Using Contacts
You can store contact information, such as
names and phone numbers that you use
regularly, in the SIM card and the phone’s
memory. This information is stored in one list,
called Contacts. For more information about
adding contacts, see page 71.
1. Find the number you want to dial. For further details about searching for a
number, see page 70.
2. To dial the number, press the key.
Viewing Missed Calls
The number of missed calls displays on the idle
screen immediately after a call is missed.
If you have a subscription that includes Caller
Line Identification (CLI) and you are unable to
answer a call for any reason, you can find out
who was calling you and then call the person
back.
To view the missed call immediately:
1. Open the folder. The pop-up window shows that you have missed calls.
2. If there is more than one number, select the number you want to phone back and press the key.
To use the missed call options, see page 46.
Making a Call Using a Pause
When you call automated systems, like banking
services, you are often required to enter a
password or account number. Instead of
manually entering the numbers each time, you
can enter them before dialling, separated by a
pause.
1. In idle mode, enter the first number of a service, such as the bank’s teleservice number.
2. Press and hold the key to insert a pause. A “P” appears, meaning that a pause will
occur at that point in the dialling sequence.
21

Call Functions
3. Enter the number that needs to follow the pause, such as your account number.
4. Repeat steps 2 and 3 to add more pauses and numbers, if necessary.
5. Press the key to dial.
6. When prompted, press the key to send the DTMF (Dual Tone Multi-frequency) tones of the number that follows the pause.
The number is sent to the system.
7. Repeat Step 6, as you are prompted.
Ending a Call
When you want to finish your call, briefly press
the key, or close the handset, or press the
End call
option in the call options.
Answering a Call
When someone calls you, the phone rings and an
incoming call box displays.
If the caller can be identified, the caller’s phone
number, or name if stored in Contacts, displays.
If the incoming call is a restricted call (the caller
has opted to not send his/her phone number for
identification), the display shows
is unknown, the display shows
1. To answer a call, open the handset. If it is
already open, press the key, the
or the
Accept
soft key.
2. End the call by closing the handset or pressing the key.
Note
: You c a n a n s w er a ca ll while using the menu
functions. The current operation is cancelled.
Withheld
Anonymous
OK
; if it
.
key ,
Rejecting a Call
To reject an incoming call, press and hold the
key on the right side of the phone.
22
Call Functions
When the phone is open, you can also press the
Reject
soft key or the key.
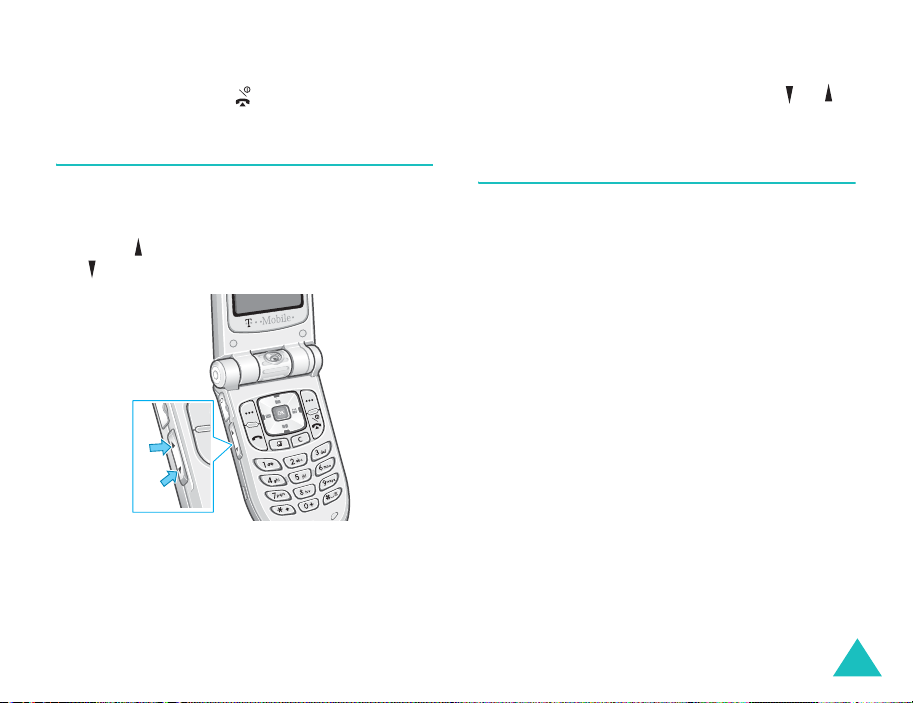
Adjusting the Volume
If you wish to adjust the earpiece vo lum e du rin g
a call, use keys on the left side of the phone.
Press the key to increase the volume level and
the key to decrease the level.
Using these keys, you can also adjust the key
tone volume in idle mode with the handset open.
Note
: When a call comes in, you can mute the call
ringer by pressing and holding the or
key .
Accessing Options During a Call
Your phone provides a number of control
functions that you can use during a call.
Putting a Call on Hold
You can place the current call on hold whenever
you want. You can mak e another call while you
have a call in progress if your network supports
this service. Of these two calls, one is active and
the other is on hold and you can switch between
them.
To place a call on hold, simply press the
soft key. You can reactivate the call whenever
you want, by pressing the
Unhold
Making a Second Call
To make a call while you have a call in progress:
1. Press the
Options
soft key.
Hold
soft key.
23

Call Functions
2. Select
New call
and press the OK key.
3. Enter the phone number you want to dial and
press the key,
Call
soft key, or OK key to
make the second call.
The first call is automatically put on hold.
Note
: You can first enter a phone number and then
press the
New call
Options
option.
soft key. Then select the
Or alternatively:
1. Put the current call on hold by pressing the
Hold
soft key.
2. Make the second call in the normal way.
T o switch be tween the two calls , simply press the
SWAP
soft key . The current call is placed on hold
and the call on hold is reactivated so that you can
continue conversing with the other person.
T o end the current call, press the key . The call
on hold is still on hold. To reactivate this call
press the
Unhold
soft key.
To end both calls at one time, close the f older, or
press the
Options
soft key and select
End calls
Answering a Waiting Call
You can answer an incoming call while you have
a call in progress, if this service is supported by
the network and you have activated the
menu option; see page 98. Your phone alerts you
to an incoming call by sounding a call waiting
tone.
To answer a call while you have a call in
progress:
1. Press the
2. In the select box, select
the incoming call. The first call is
automatically put on hold.
If you want to end the first call, select the
End active call
you can answer the incoming call.
3. To switch between the two calls, press the
SWAP
T o end the current call, press the key. The call
on hold is automatically reactivated.
.
Accept
soft key.
soft key.
Accept
or
End held call
Waiting
to answer
. And then
24

Call Functions
To end both calls at one time, close the f older, or
press the
Options
soft key and select
End calls
Making a Conference Call
The Conference Call feature is a network service
that allows up to five people to take part
simultaneously in a call. You can make a
conference call by making or receiving another
call while you are on an active ca ll.
Setting up the Conference Call
1. Call the first participant in the normal way.
2. Make a second call, referring to page 23. OR Answer a waiting call, referring to page 24.
3. To join the first participant to the conference
call, press the
Join
using the Up and Down scroll keys.
4. Press the
5. To add a new person to the conference call, repeat steps 2 to 4, as needed.
OK
Options
key.
soft key and select
Holding a Private Conversation With One
.
Participant
To speak privately with one person during a
conference call:
1. Press the
Press the
Options
OK
key .
soft key and select
2. Press the Up or Down scroll key to scroll to
the participant you want to split off and press
the
OK
key.
Now you can talk privately to that person. The
other participants can continue to converse
with each other.
You can switch between the conference call
and the split call by pressing the
key.
3. To return to the conference call, press the
Options
OK
soft key and select
key .
All the conference call participants can now
hear each other.
Removing One Participant
SWAP
Join
. Press the
Split
soft
.
25

Call Functions
1. Press the
Drop
2. Press the Up or Down scroll key to scroll to
the participant you want to remove and press
the
The call ends with that participant, but you
can continue to talk to the other participants.
You can end the conference call by closing the
phone or pressing the key.
Options
option. Press the OK key.
OK
key.
soft key and select the
Searching Contacts
You can search for a number in Contacts during a
call.
1. Press the
2. Press the Up or Down scroll key to select
Contacts
3. Enter the first few letters of the name you want to find.
For further details about entering text, see
page 31.
Options
and press the OK key .
soft key.
For further details of the Contacts feature, see
page 70.
Sending a Text Message
You can send a text message during a normal call
or conference call. You can send the message to
other people as well as to your current call
participants.
1. Press the
2. Press the Up or Down scroll key to select
Send text msg.
The list of all the call participants appea rs .
3. Scroll to the person to whom you want to
send the message and press the
A check mark appears in front of the selected
person. Repeat this step as needed.
4. When you have finished selecting recipients,
press the
Write
5. Write your message and press the
soft key and select the
press the
Options
Options
option. Then press the OK key .
OK
soft key.
and press the OK key.
soft key and select the
Send
option. Then
key.
OK
Options
key.
26

Call Functions
For further details about entering text, see
page 31.
6. Enter any other phone number to which you want to send the message.
If you want to add more numbers, press the
Down scroll key and enter a number. Repeat
as needed.
7. When you finish entering the numbers, press
the
Options
option. And then press the
For more information on the SMS feature, refer
to page 49.
soft key and select the
OK
key.
Send
Making a memo
You can make a memo during a normal call or
conference call.
1. Press the
2. Press the Up or Down scroll key to select
Memo
3. Enter the memo. Use the Down scroll key to move to the date field and then enter the date.
Options
and press the OK key .
soft key.
4. When you finish entering the memo, press
the
Options
option or press the
Or,
1. Enter the number(s).
2. Press the
3. Press the Up or Down scroll key to select
Save to memo
For further details about entering text, see
page 31.
soft key and select the
OK
key .
Options
soft key.
and press the OK key .
Save
Switching the Microphone Off (Mute)
You can temporarily sw itch y our phone’s
microphone off, so that the person you are
talking to cannot hear you.
Example
To switch the microphone off temporarily:
1. Press the
2. Press the Up or Down scroll key to select
: You wish to say something to another
person in the room but do not want the
calling party to hear you.
Options
Mute
and press the OK key .
soft key.
27

Call Functions
The Mute icon ( ) appears on the display and
your party can no longer hear you.
To switch the microphone back on:
1. Press the
2. Press the Up or Down scroll key to select
Unmute
The Mute icon disappears.
Options
and press the OK key.
soft key.
Mute/Unmute Key Tones
You can turn the key tones off or on. If you select
Mute key tone
any key tones, which allows you to press keys
without hearing annoying key tones during a call.
, your phone does not transmit
Sending DTMF Tones
You can send a number to the other person
during a call. The number sent will appear on the
display of the other person’s phone.
1. Press the
2. Press the Up or Down scroll key to select
Send DTMF
Options
soft key.
and press the OK key .
3. Enter the number you want to send and press
the
Send
soft key.
Using Video Call Features
When in a 3G (UMTS) service area, your phone
can make or receive a video call which allo ws you
to see another person on the screen during a
conversation. The other person’s phone must
support the video call feature.
Note:
If the other person does not turn their
camera on, you will not be able to see him or
her. Y ou can com mun icate only by voice.
Making a Video Call
1. In idle mode, enter a phone number to dial. You can also use phone numbers in call records.
Or,
Turn on the camera by pressing the Left soft
key.
2. Press the
V-Call
soft key.
28

Call Functions
When your call is connected, the other person
appears on the screen.
3. Use the
4. Use the
Note
Show me soft key to see the image of
yourself as the other person sees you.
Options
Camera(Video), V oice-Video all, or Keytone.
: The Video call service is a sp ec ia l feat ur e of
the 3G (UMTS) network. You can make and
receive a video call whe n th e 3 G ic on (
is displayed.
soft key to mute the Voice,
)
Receiving a Video Call
You can receive a video call the same as
receiving a normal call, except that you can see
the person on the screen.
See page 22 for details about answering a call.
Changing View Options
You can change the screen mode for video calls
to PIP (Picture-in-Picture). In the PIP mode, the
display has a main and a sub-frame where you
can see yourself on the screen, as well as the
other person.
To change the screen mode, press the
key until you see the desired status. The
following modes are available:
• See the other person only in the main fram e
• See yourself only in the m ain frame
• See the other person in the main frame and
yourself in the sub-frame
• See yourself in the main frame and the other
person in the sub-frame
View
soft
Turning Your Voice or Video On or Off
You can mute your voice or turn the video off
during a video call.
During a video call, press the
display the option list.
The following options are available:
Mute voice
can see you, but cannot hear you.
Mute camera
person can hear you, but cannot see you.
Mute all
off. The other person cannot hear or see you.
: mutes your voice. The other person
: turns the camera off. The other
: mutes your voice and turns the camera
Options
soft key to
29
 Loading...