

Page 1
4-1
Samsung Electronics
4. Troubleshooting
4.1 Tech Mode
4.1.1 How to Enter Tech Mode
In TECH MODE, the technician can check the machine and perform various test to isolate the cause of a malfunction.
To enter the TECH MODE, press MENU, #, 1, 9, 3, 4 in sequence, and the LCD briefly displays ‘ ’, the machine has
entered service (tech) mode.
While in TECH MODE, the machine still performs all normal operations.
To return to normal user mode, press MENU, #, 1, 9, 3, 4 in sequence again, or turn the power off, then on by unplugging and plugging the power cord. Options changed while in TECH MODE do not remain changed unless you clear the
machine’s memory. Because the explanation of the User Mode items is already mentioned at the User guide in detail, It
will not be described at Service manual.
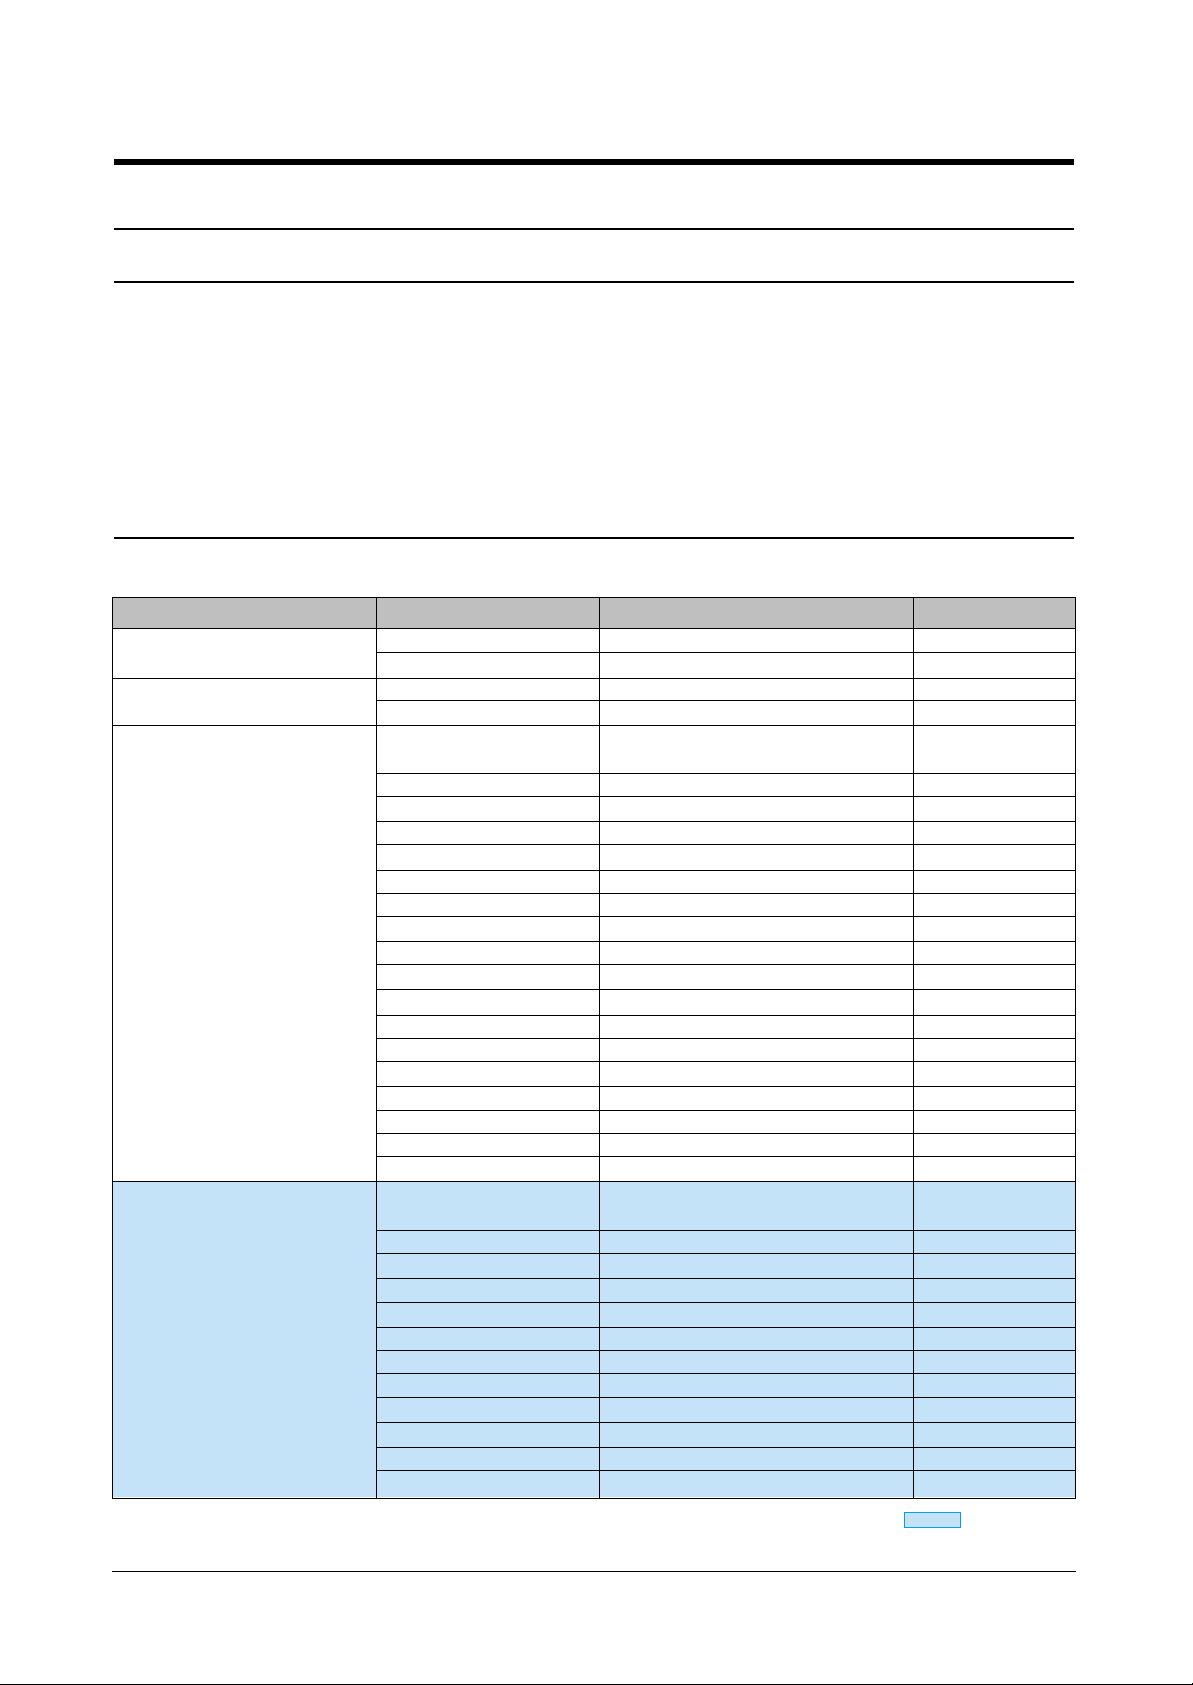
4.1.2 Selectable Options
A default values are different by nations. Please check the default values for coming under nations.
*
FUNCTION ITEM CONTENT DEFAULT
SET SYSTEM ID Fax Number
Fax Name
SET DATE & TIME Date Format EUROPE/USA
Date&Time
SETUP SYSTEM Language English/German/French/Italian/
(In User Mode) Spanish/Portuguese/Dutch
Sending Confirm ON/OFF/Error Error
Paper Size A4/Letter/Legal A4
Auto Reduction ON/OFF ON
Discard Size [00-30]mm 15 mm
Ring To Answer [2-7] 2
Rcv. Start Code [0-9] *9*
ECM Mode ON/OFF ON
Send From Memory ON/OFF ON
Caller ID ON, ON/w Junk Fax, OFF ON
Set Junk Fax No. Add , Delete
Auto Journal ON/OFF ON
DRPD Mode
Remote Test ON/OFF OFF
Silent Mode Manual/Daily Manual
Resolution Standard/Fine/Superfine Standard
Contrast Normal/Lighten/Photo/Darken Normal
Image TCR ON/OFF OFF
SETUP SYSTEM Modem Speed 14400/12000/9600/7200/ 14400bps
(In Tech Mode) 4800/2400 bps
Fax TX Level [00-15] dBm -12 dBm
Fax RX Level [43-48] dBm -48 dBm
CNG Count [1-4] 2
T1 Time [030-150] 055
Fax Error Rate 5/10/20 % 10%
Flash Time 100/280/600 ms 100 ms
Pause Time [1-9] sec 4 sec
Make/Break 33/66 , 40/60 33/66
Ring ON Time [00-99] * 10 ms 15 * 10 ms
Ring OFF Time [00-99] * 10 ms 80 * 10 ms
DTMF High Level [00-99] dBm -08 dBm
: Only Tech Mode
Page 2
Troubleshooting
4-2
Samsung Electronics
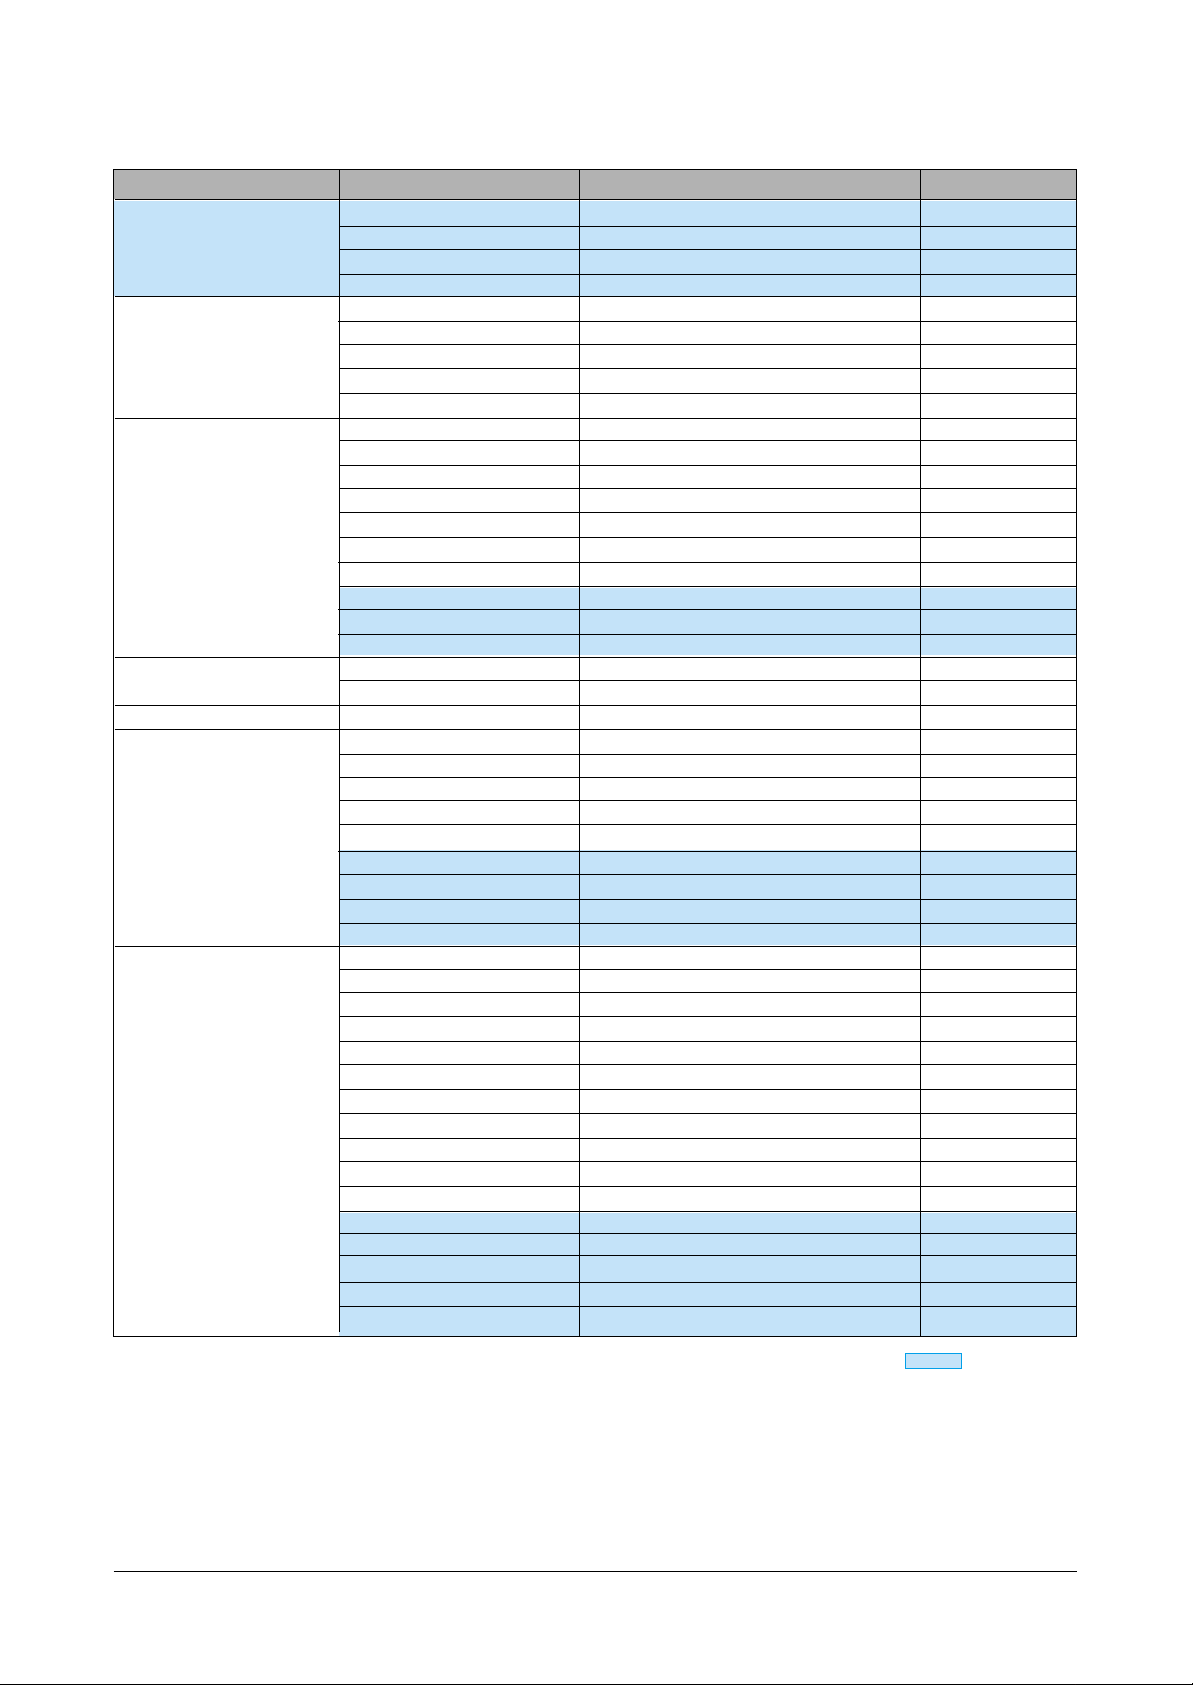
FUNCTION ITEM CONTENT DEFAULT
DTMF Low Level [00-99] dBm -11 dBm
USB Mode FASK/SLOW
PWM Value Setup [000-208] 105
Dial Mode Tone/Pulse Different by nations
ADVANCED FAX Set Broadcasting
Set Delayed Fax
Set Polling Send
Cancel Schedule
Set Fax Forward
SETUP TAM Save Charge ON/OFF OFF
(ONly SF-335T) Call Monitor ON/OFF ON
ICM Record Time 0/30/60/90 sec 60
Remort Password [000-999] #139#
Silence Action Disconnect/Receive Fax/Record Silence Disconnect
Howler Action Disconnect/Record Howler Disconnect
Message Forward ON/OFF OFF
Howler Time [000-150] ms 090
Silence Time [000-200] ms 105
Parallel Level [100-200] 130
SETUP SOUND Alarm Sound ON/OFF
Key Sound ON/OFF
MEMORY CLEAR All Memory Clear
MAINTENANCE Clean Head
Align Head
View Ink Level
Adjust Scanner
Self Test
ASF Test
Modem Test
DTMF Test
Program Download
REPORT/HELP Help List
Send Journal
Received Journal
Phonebook
Sending Confirm
Schedule Inform
System Data
Caller ID
Junk Fax
TAM Status
Print Fax
Shading Profile
Protocol Dump
NVRAM Dump
Memory Dump
Task History
4.1.2 Selectable Options (cont.)
: Only Tech Mode
Page 3

Troubleshooting
4-3
Samsung Electronics
♦ Modem Speed
You can set the maximum modem speed.
Communication is done with modem speed automatically set at lower speed when communicating with the
modem with lower speed since communication is done
on the standard of the side where modem speed is low for
transmission/reception. It is better set 14400 bps as
default setting.
(14400 → 12000 → 9600 → 7200 → 4800 → 2400 bps).
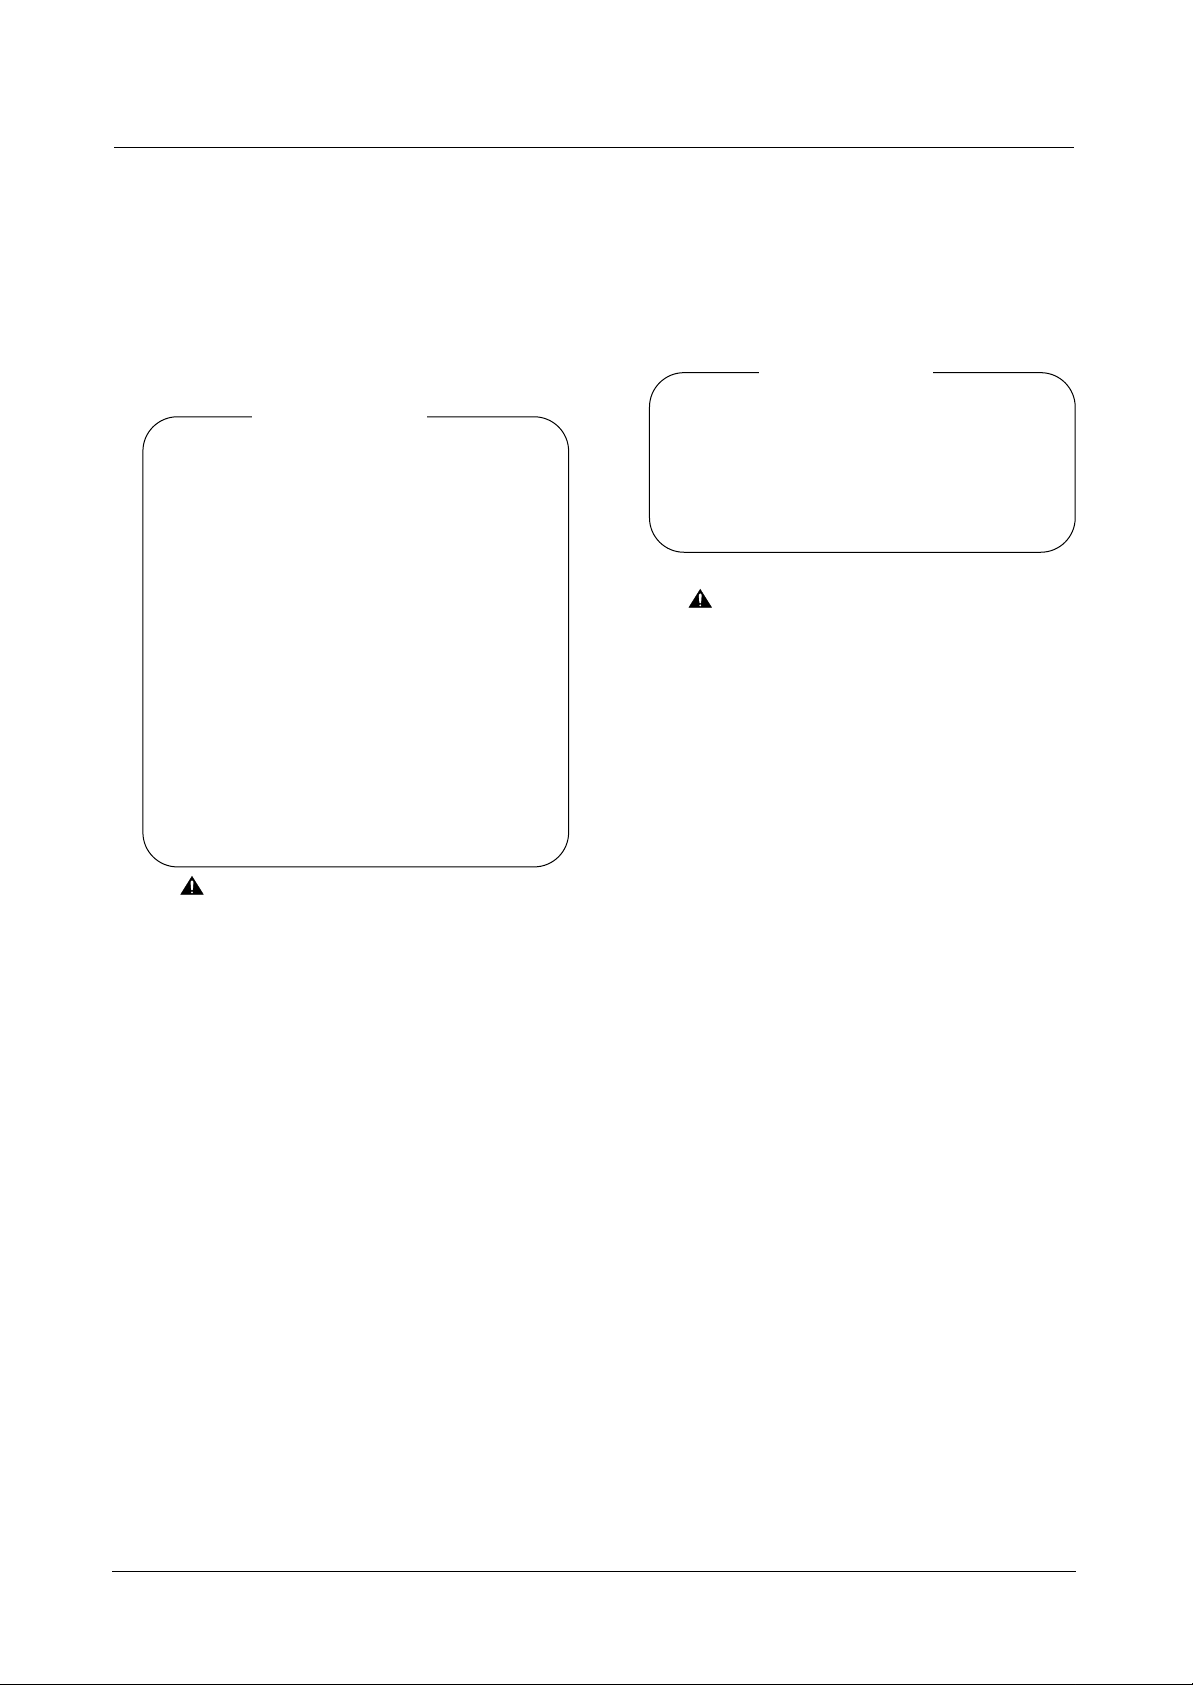
♦ Fax TX Level
You can set the level of the transmission signal. T ypically,
the Tx level should be under -12 dBm. The level within the
range of 1 to -15 dBm is acceptable.
The Send Fax Level is set at the best condition in the shipment from factory. Never
change settings arbitrarily.
♦ Fax RX Level
• You can set the level of the receiving signal.
• The reception level may be too low due to the cable
losses.
• If it is set to -43 dBm, the reception sensitivity will be
between 0 and -43 dBm. If it is set to -48 dBm, the
reception sensitivity will be between 0 and -48 dBm.
♦ CNG Count
The function is to control the CNG TONE cognition times
for entering receiving mode from the AUTO MODE or
ANS/FAX MODE
♦ T1 Time
It is the certain time to be converting to ST ANDBYin case
of a receiver doesn't answer when caller uses AUTO
DIAL, such as ONE-TOUCH/SPEED DIAL/RESERVED
SENDING and etc.
♦ FAX ERROR RATE
• When the error rate is about to be over the setting value,
the Baud rate automatically lowers up to 2400 bps to
make the error rate remain below the setting value.
• You can select the rate between 5% and 10%., 20%
♦ Flash Time
When the recall button on the OPE is pressed, it displays
time to operate a recall. It is possible to select 100,280 or
600 milliseconds.
♦ Pause Time
• Pause time mean delay time (unit: second) inserted
between dial number signal and the next number of signal in the automatic dial (One touch, Speed dial, Redial)
and the manual dial.
• Caution : The Send Fax Level is set at the best condi-
tion in the shipment from factory. Never
change settings arbitrarily.
♦ Make/Break
• Select the dial pulse make and break time: 33/66 or
40/60
• Caution : Send Fax Level is set at the best condition in
the shipment from factory. Never change settings arbitrarily.
♦ Ring On Time
It is used to acknowledge the effective ring. When a
phone call coming, a ring is ringing if an input range of the
ring is bigger than ring-on-time. The input range is 00990ms.
♦ Ring Off Time
Once you are in the Ring On Time Mode, if the ring signal
is not equal to or greater than the ring off time, you should,
increase the ring count.
If the ring signal is not set equal to or less than the ring off
time, do not increase the ring count. Instead, check the
Ring On & Off time again. The input range is between
00~990msec.
♦ DTMF High Level
• Select high frequency level when dialing in the MF
mode. The input range is between 00~15dBm.
• Caution : The DTMF High Level is set at the best condi-
tion in the shipment from factory. Never
change settings arbitrarily . (DTMF : Dual Tone
Multi-Frequency)
♦ DTMF Low Level
• Select low frequency level when dialing in theMF mode.
The input range is between 00~15dBm.
• Caution : The DTMF Low Level is set at the best condi-
tion in the shipment from factory. Never
change settings arbitrarily . (DTMF : Dual Tone
Multi-Frequency)
♦ USB Mode
Selectable USB packet size, Fast and Slow.(SF-331P
only)
♦ PWM Value Setup
This function is used in factory for production not for service
person. If a service person tries to use it, an image can be
abnormal during printing; therefore, do not touch it.
4.1.2.1 Setup System (In Tech Mode)
Page 4

Troubleshooting
4-4
Samsung Electronics
♦ Save Charge
When the user accesses the product from the outside via
phone, if the New ICM messages are exist, the product
answers after ringing as number of Rings to Answer the
user set. If there are no New ICM messages, the product
will answer after ringing as number of Rings to Answer
plus two times more. The user can check whether there
is New ICM message or not using this function without
physical phone line connection and this makes to save
money for the user. On or Off is selectable.
• ICM((In Coming Message)
♦ Call Monitor
When the caller leave a message on the product, the user
can hear the caller's message via speaker of the product
using this function. On or Off is selectable.
♦ ICM Record Time
The user can specify the maximum recording time for
ICM message. If this maximum recording time is elapsed,
the product will disconnect the line. 0, 30, 60 or 90seconds are selectable.
♦ Remote Password
When the user accesses the product from the outside via
phone, the user should specify this remote password to
keep user's personal privacy . The user can change 3 digits of the password except two # and the default value is
#139#.
♦ Silence Action
When the product recording ICM message, if the silence
is continued for 10seconds, the user can select the operation of the product about this silence. Disconnect,
Recording silence or Receiving fax are selectable.
♦ Howler Action
The howler means serious noise such like siren.
Technically we decide as a howler signal if the input signal is maintained by active state for 9 seconds without any
transition between active and inactive states. The user
can select the operation of the product at howler tone is
detected. Disconnect or Recording howler are selectable.
♦ Message Forward
When you're out of the office or home and you want to be
notified whenever there is new message left on your
machine, you need to use the Message Forwarding feature supplied with
your machine.In TAM Mode,you can set your machine to
transfer incoming calls to another number.In order to use
the Message Forwarding feature.
♦ Howler Time
While the setting value is over, it acknowledges the
Howler tone as Howler tone. The possible setting rage is
[000~150] (Unit : 100 ms).
♦ Silence Time
While the setting value is over, it acknowledges the
Silence as Silence. The possible setting range is
[000~200] (Unit : 100 ms).
♦ Silence Level
When a signal lower than setting value is coming, it
acknowledges it as Silence.
♦ Parallel Level
During OGM is playing or ICM is being recorded, when a
signal level difference is bigger than setting value it
acknowledger parallel is lift.
4.1.2.2 Setup TAM (Only SF-335T)
Page 5
Troubleshooting
4-5
Samsung Electronics
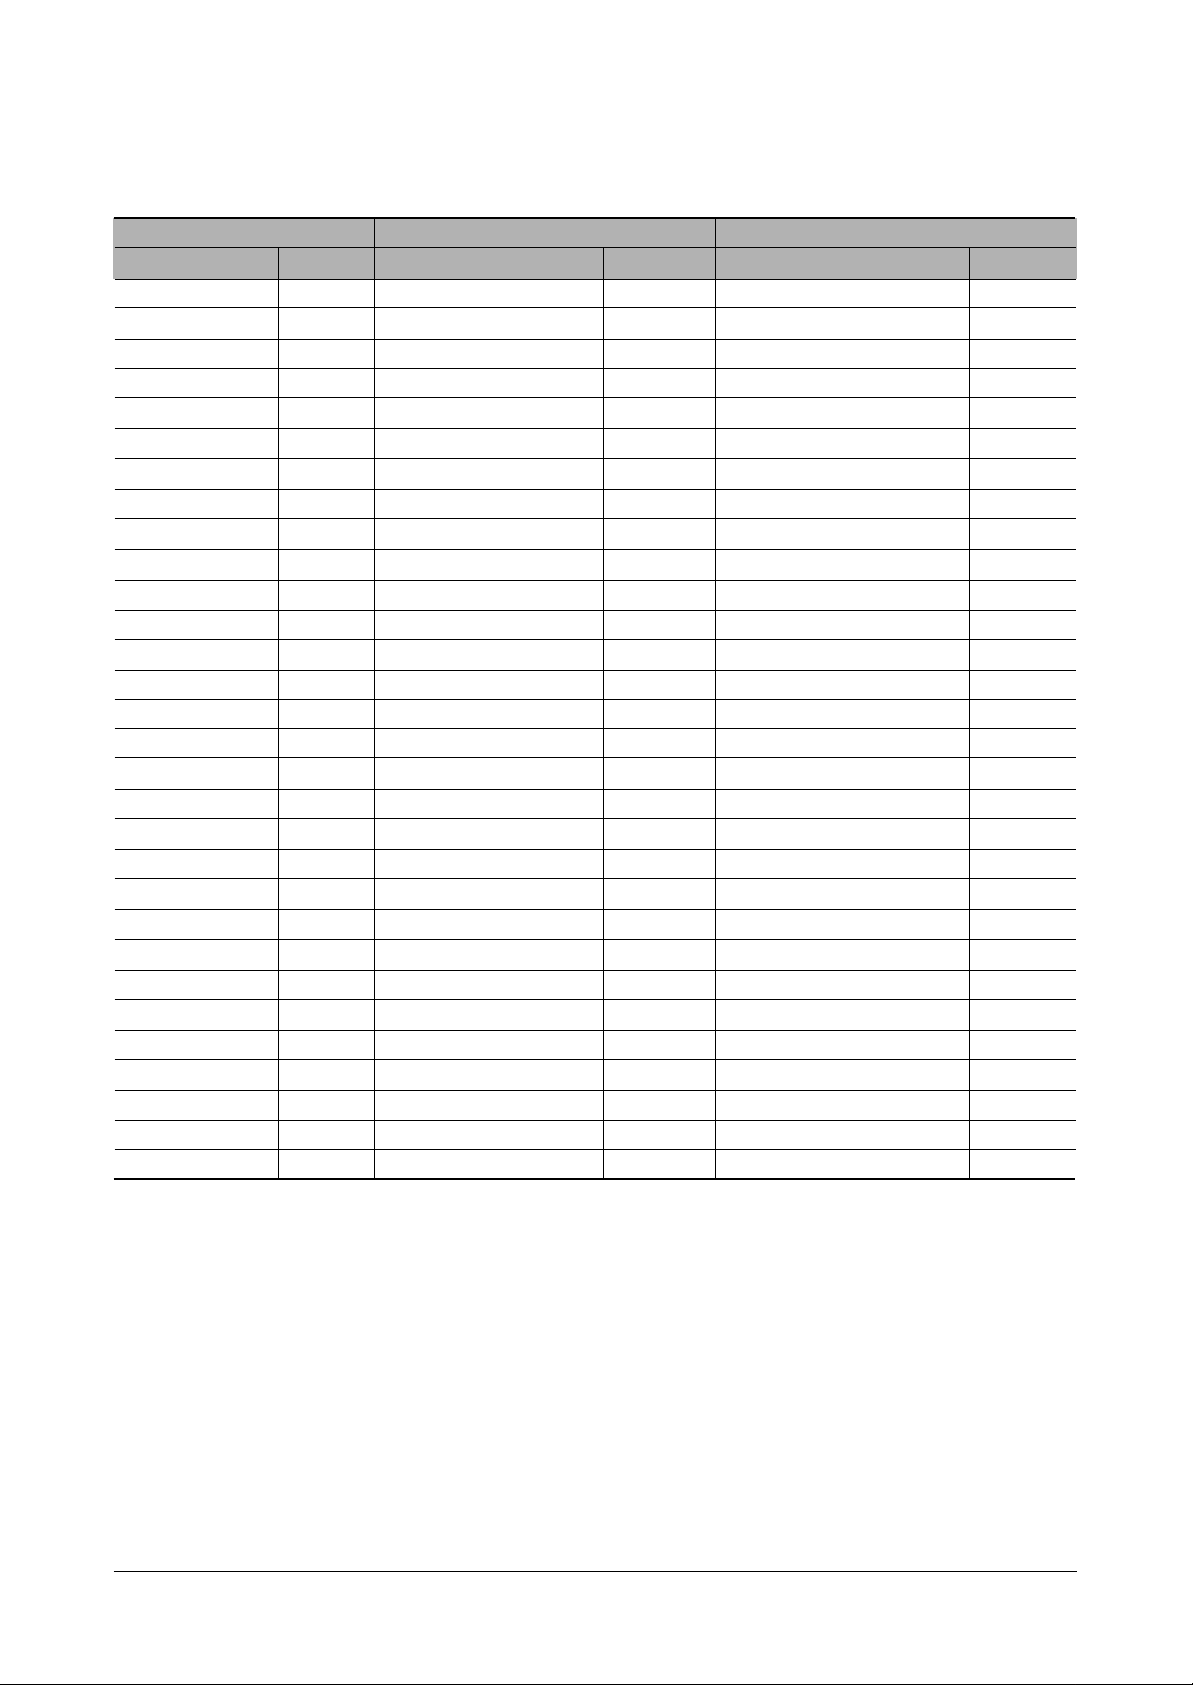
♦ ALL MEMORY CLEAR
This is a function to return a system to the initial state.
There are two ways for performing MEMORY CLEAR.
♦ Using TECH MODE
In the TECH MODE, perform a MEMORY CLEAR.
It is a function to help to select a firmware for the right
nation after replacing a main board.
• Operation method •
1. Enter to the TECH MODE by pressing
MENU, #, 1, 9, 3, 4 in order.
2. Press "MENU" button until "MEMORY
CLEAR" is displayed at LCD window.
3. When push a "ENTER" button, a message
that requests to input a country code will be
displayed.
4. Input a country code you wish then, press
"ENTER" button.
5. Country name will be displayed at LCD.
6. If it is correct, press "ENTER" button. If not,
press "CANCEL" button to return to the previous step.
7. MEMORY CLEAR will be performed. (Please
refer to the country code in the below table)
Caution : By each country, the default values
are little different. After replace the
main board, perform this function for
setting the firmware fitted for each
country to make a machine to work
properly .
♦ Using BUTTON
When the machine is abnormally operated, this function is performed for resetting the system to initial value.
All the setting values are returned to the default values,
and inputted information by user will be erased but
country code.
• Operation method •
1. Turn off the power.
2. Turn on the power while press "STOP" button.
3. Press "STOP" button until the "MEMORY
CLEAR" is displayed at LCD panel.
Note : This method doesn't have a function to
input the country code.
4.1.2.3
MEMORY CLEAR
Page 6
Troubleshooting
4-6
Samsung Electronics
EUROPE ASIA AMERICA
Country Code Country Code Country Code
England 01 Korea 31 USA 61
Germany 02 Australia 32 Canada 62
Switzerland 03 NewZealand 33 Brazil 63
Austria 04 SouthAfrica 34 Chile 64
Italy 05 Chinese 35 Mexico 65
France 06 HongKong 36 Panama 66
Spain 07 Singapole 37 Argentina 67
Portugal 08 India 38 Peru 68
Netherlands 09 Indonesia 39 Colombia 69
Belgium 10 Malaysia 40 Uruguay 70
Sweden 1 1 VietNam 41 Venezuela 71
Norway 12 Philippines 42 Reserve_USA 72
Finland 13 Bangladesh 43 Reserve_USA2 73
Denmark 14 Israel 44 Reserve_USA3 74
Hungary 15 Kuwait 45 Reserve_USA4 75
Poland 16 Iran 46
Czecho 17 Iraq 47
Yugo 18 UAE 48
Romania 19 Syria 49
Bulgaria 20 Lebanon 50
Turkey 21 Jordan 51
Greece 22 SaudiArabia 52
Russia 23 Egypt 53
ReserveEU1 24 Tunisia 54
Reserve_EU2 25 Morocco 55
Reserve_EU3 26 Thailand 56
Reserve_EU4 27 Taiwan 57
Reserve_EU5 28 Reserve_Asia3 58
Reserve_EU6 29 Reserve_Asia4 59
Eu_Std 30 Asia_Std 60
< Rhine Country Code >
Page 7

Troubleshooting
4-7
Samsung Electronics
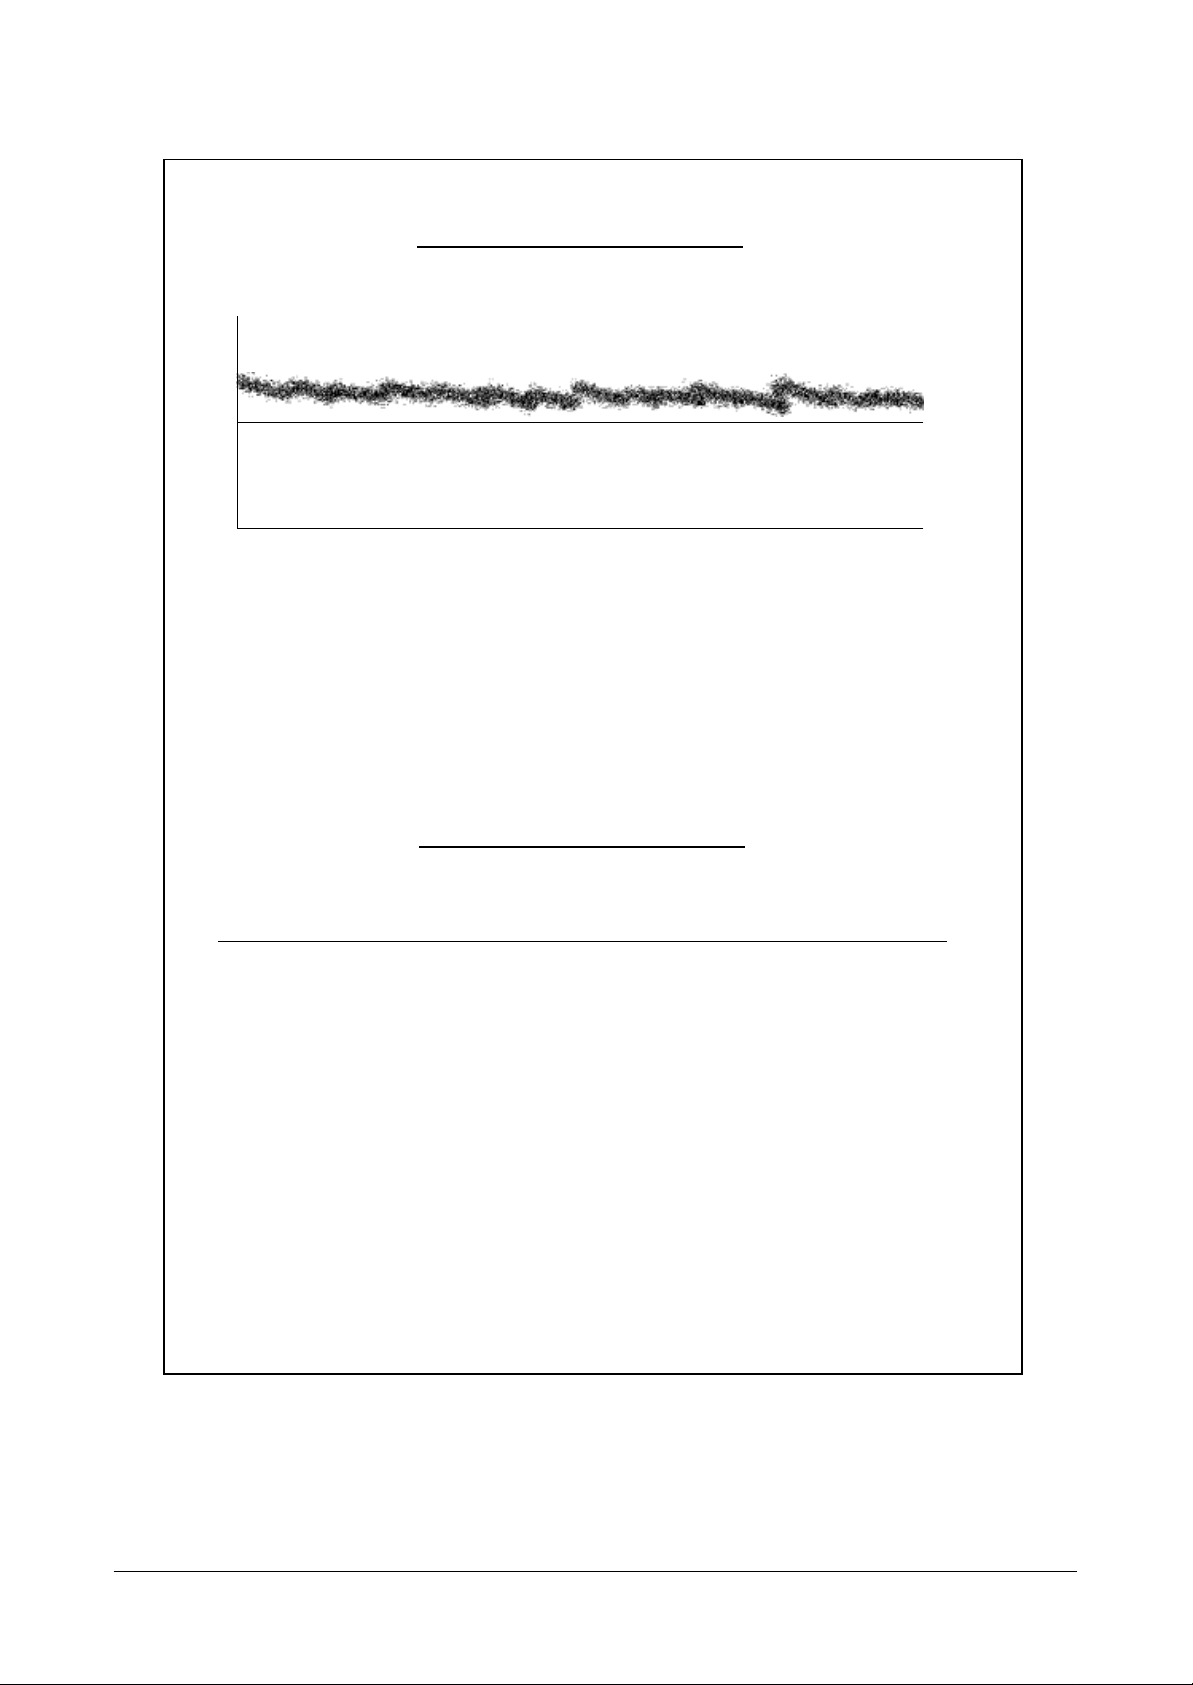
♦ Clean Head
When white lines are appeared, when image is printed
poorly in part, sweep the nozzle of the ink cartridge and
contacting surface of the cartridge, then clean the cartridge.
Until it gets better, do it several times.
On the inkjet print system, the print quality can be degraded by several causes , and the main root cause among
the causes will be from the head.If the print quality is not
good, the user should do this process to get a good print
quality . This operation can be initiated from the printer dri ver menu or Maintenance menu from the control panel of
the product. When the operation is initiated , the diagonal
patterns and purge patterns are printed out. The first diagonal pattern is to indicate the current nozzle status before
cleaning. The 3 purge patterns are operations for cleaning cartridge.This operation includes purging , wiping and
spitting. The second diagonal pattern is to indicate the
current nozzle status after cleaning.
♦ Align Head
Using this feature to get fine print quality when a vertical
line is printed not in straight or when ink cartridge is just
replaced.
♦ View Ink Level
To check the amount of the mounted ink cartridge.
The product has no ink level monitor sensor. Therefore
the firmware counts ink dot whenever the ink is fired , and
we call it as ink level monitor gauge. This is not automatic method , so the user should do proper operation whenever the user installs the new ink head. The firmware will
record the ink dot count be fired into the backup information memory whenever the printing job is finished and the
machine is in idle state. The user can monitor the current
ink level on the Maintenance menu. The level will be displayed as like x/8 and this value indicates the remained
ink level.
If the current ink level reaches to 1/8 , the firmware will display 'Install new cartridge'. message to indicate current
remained ink can be exhausted soon .
This message will be displayed continuously unless the
ink is replaced and the user selects the New Ink. Under
Ink Low state , the received fax message will not be printed out unless the user replaces the ink and selects the
New Ink. But , PC printing and copy job will be done under
this Ink low condition.
4.1.2.4 Maintenance
[ Clean Head ]
Page 8
Troubleshooting
4-8
Samsung Electronics
Shading Profile
Shading History
Maximum Lever : 0196 OK
Minimum Lever : 0135 OK
CIS LED on time : 4960
CIS MAX. UP : 0018 OK
CIS MAX. DV : 0032 OK
CIS Lower Counter : 0000
CIS Lower Valur : 0135
255
0 1728
NO. Shading Time Stored Checksum Calculated Checksum
1. 01-01 2002 13:02 Ox428e 0x428e
[ Adjust Scanner ]
Page 9

Troubleshooting
4-9
Samsung Electronics
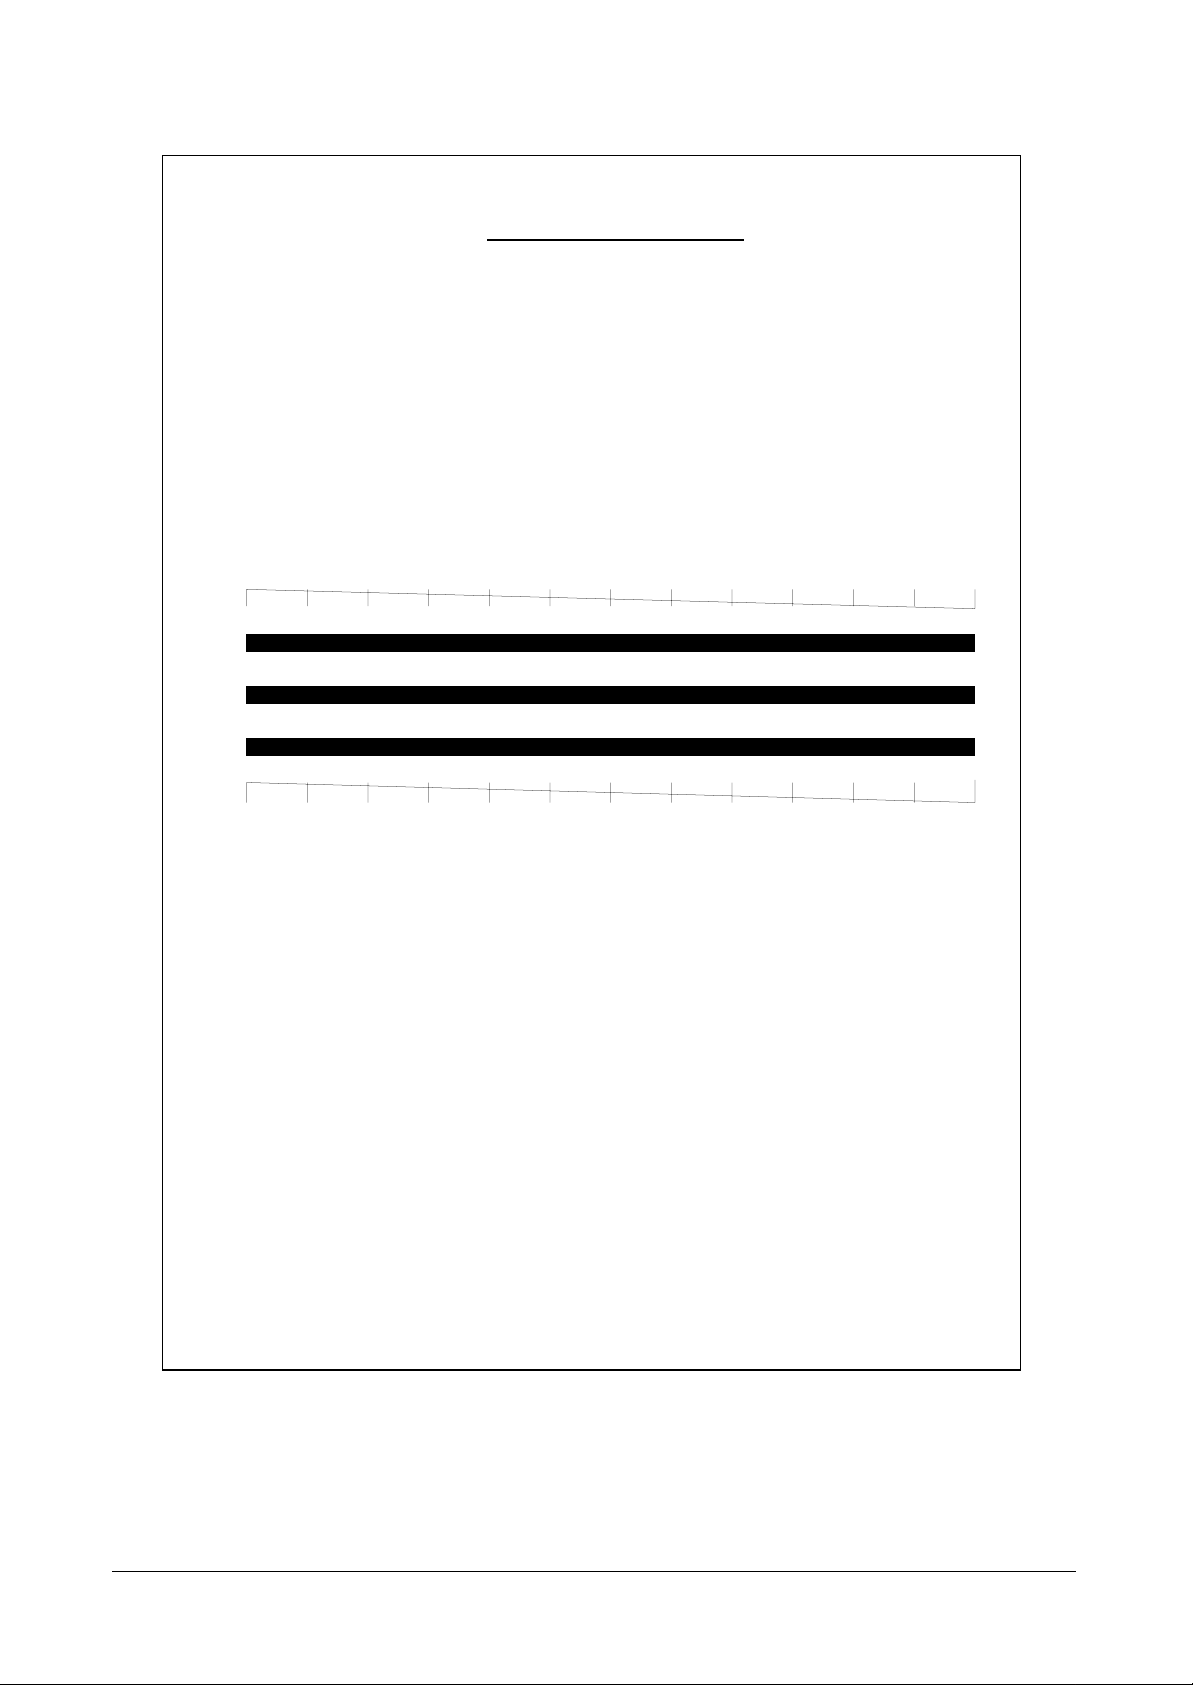
♦ Adjust Scanner(see page 4.8)
Use this adjustment feature to achieve best image (scan)
quality depending on the characteristics of the CIS
(Contact Image Sensor) parts.
Use this feature to correct the reference of the CIS if you
experience bad copy images. When using this feature, a
white paper should be used to get clean copy images.
1. Select [Adjust Scanner] in Service mode
2. Press
'Start/Enter'(A message “Load white paper docu-
ment and press Start/Enter”
is displayed on LCD)
3. Place the empty white paper (Letter size) in a Feeding
unit.
4. The original is scanned when press 'Start/Enter' button.
5. After finish the scan, a message is displayed on LCD
and the ìAdjust scanner profileî is outputted.
6. If the outputted image is different to the normal image,
a CIS is inferiority.
Caution :
1. Always perform Adjust Scanner
after replacing the CIS.
2. Always use a clean white paper in
Adjust Scanner (Maximum paper
width: Letter Size).
3. Adjust Scanner may be performed even in the User Mode but
Adjust Scanner profile is output
only in the TECH MODE.
<Reference>
The CIS type scanner needs scanner adjustment operation to get a good scanning quality. This is called as
Shading Compensation .
All kinds of scanner use light have a distortion according
to component tolerance. This tolerance can make a distorted scan signal. To cover this problem , the firmware
has a reference scan waveform into the non-volatile
memory for each CIS .
This reference waveform will be made in the factory when
producing the product. But , the scanner , CIS , characteristics can be changed as it is used therefore the scanning quality can be different with first time. At this time , the
user should initiate this operation from the control panel
menu using white document. Then the old reference
waveform will be replaced with new reference waveform
for current CIS characteristics. This function can be initiated in Maintenance menu.
When the new shading waveform is generated , the
waveform will be stored into a Flash memory sector , and
the checksum value is calculated and stored also.
Whenever the scanning job is initiated , the checksum
value is re-calculated and compared with stored checksum value. If the value is different , the Firmware regards
as the shading waveform be stored into Flash memory is
broken due to unknown reason and will display the message to indicate retrying Adjusting Scanner operation
before the scanning job.
♦ Self Test (see page 4.11)
It is possible to check whether a machine works properly
or not.
ROM Version/Connect Telephone Line/Shading area
checksum check/Modem check/Cartridge check, etc.
♦ ASF Test
The function is to test the function of ASF (AUT O SHEET
FEEDER), and it is needed in the production progress.
Service person doesn't need to use it.
♦ Modem Test
Use this feature to hear various transmission signals to
the telephone line from the modem and to check the
modem.
If no transmission signal sound is heard, it means that the
modem part of the main board is poor.
♦ DTMF Test
DTMF (Dual Tone Multi Frequency) signal. When you
press any key on the number keypad including • and #,
you will hear the corresponding key tone.
Page 10

Troubleshooting
4-10
Samsung Electronics
♦ Program Download (Firmware Upgrade)
A new firmware can be downloaded from PC through
USB CABLE. Connect the machine to PC with USB
CABLE, and use additional Firmware upgrade utility.
To download the F/W code,
First, the machine should be Download mode status.
(See How to enter the download mode in machine)
• How to enter the download mode in machine.
1) Press the buttons in sequence
(Menu, #, 1, 9, 3, 4)
2) Press the Menu button repeatedly until
“Maintenance” is display
ed.
3) Press the Start/Enter button when “Maintenance”
is displayed.
4) Press the Scroll/Volume button repeatedly until
“Program Download” is displayed.
5) Press the Start/Enter button when “Program
Download” is displayed.
Second, files needed for download is as follow (Files are
needed for download)
1) ROM FIle
2) SSMFPUSB.inf
3) SSMFPUSB.sys
4) SSUSBCI.DLL
5) usbdown.bat
6) usblist.exe
7) dwcdpcl.bin
8) lxusbopn.dll
• How to Download •
1. Connect a printer and PC with USB CABLE.
2. When a communication box of Plug & Play
shows up, select the location in where the
‘SSMFPUSB.INF’ is.
3. If the communication box of Plug & Play
doesn’t show up, please do the step 6.
4. After USB driver is set up, for confirm it,
select the ‘properties’ by pressing right
mouse button of ‘my computer’ on the
Desktop.
5. Check whether the SF-331P in
‘SamsungUSB’ exists or not at tap in Setting
control. (If not, the down load is impossible)
6. Open a DOS window, change the Directory
Path to where the FIRMWARE exists.
7. Input “USBLIST <FIRMWARE filename>”
and enter.
Page 11
Troubleshooting
4-11
Samsung Electronics
Self Test
VO.90B 21/06/2002 SF-330 CHECKSUM : FC2EH
Paper Size : A4
1.Tel. Line Test : Check Telephone Line Cord
2. Shading Test : Ok
3. Modem Test : Ok
4. Cartridge Test :
- Head Test Result : OK
- Ink Level : 8/8
[ Self Test ]
Page 12
Troubleshooting
4-12
Samsung Electronics
System Data
Date : 10-JUL-2002 WED 12:02
Name : SVC MANUAL
Tel. : 0312003956
Total Page Counts : 17
Total Feed Document Counts : 1
Options Item Status
SET DATE & TIME
Date Format [USA/Europe] Europe
SETUP SYSTEM
Modem Speed [14.4K/12.0K//9.6K/7.2K/4.8K/2.4K] 14.4 KBPS
Fax TX Level [00-15] 12
Fax RX Level [40-50] 48
CNG Count [1-4] 2
T1 Time [030-150] 55
Fax Error Rate [5% /10% /20%] 10%
Flash Time [100ms/280ms/600ms] 100ms
Pause Time [1-9] 4
Make/Break [40:60 /33:66] 33:66
Ring On Time [00-99] x 10ms 15
Ring Off Time [00-99] x 10ms 90
DTMF High Level [00-15] 08
DTMF Low Level [00-15] 11
Usb Mode [Fast/Slow] Fast
PWM Value Setup [000-208] 109
Dial Mode [Tone/Pulse] Tone
ADVANCED FAX
Fax Forward [Off/forward/(Forward&Print)] Off
SETUP TAM
Save Charge [On/Off] on
Call Monitor [On/Off] on
ICM Record Time [30sec/60sec/90sec] 60sec
Remote Password [000-999] #139#
Silence Action [Disconnect/Receive Fax/Record Silence] Disconnect
Howler Action [Disconnect/Receive Howler] Disconnect
Message Forward [on/Off] Off
Howler Time [000-150] 90*100ms
Silence Time [000-200] 105*100ms
Silence Level [00-48] -36dBm
Parallel Level [100-200] 130
SETUP SOUND
Alarm Sound [On/Off] On
Key Sound [On/Off] On
Flash Rom Version : V0.90T
[ System Data ]
Page 13

Protocol Dump
Date : 10-JUL-2002 WED 12:03
Name : SVC MANUAL
Tel. : 0312003956
S/R FCF FIF Data ASCII
Tx/Rx Speed : 2.4
Tx/Rx Resolution :
Tx/Rx Mode : G3
T30_State
T30_Error
OK
T4_Return
00:T4_SUCCESS
01:T4_UNKNOWN_IN-FORMAT
02:T4_UNKNOWN_OUT_FORMAT
03:T4_ILLEGAL_CONVERSION
04:T4_ABORTED
05:T4_DECODE_ERROR
06:T4_TIME_OUT_ERROR
07:T4_NO_REAL_IMAGE
08:T4_NOT_FOUND_RTC
09:T4_MEMORY_FULL
0a:T4_TASK_BEGINNING
Troubleshooting
4-13
Samsung Electronics
4.1.2.5 Report/Helf
♦ Help List
It shows a brief description on the machine's basic functions and commands.
Use it as a quick reference guide
♦ Sent Journal
This journal shows a specific information concerning
transmission activities, the time and dates of up to 40 of
the most recent transmissions.
♦ Received Journal
This journal shows a specific information concerning
reception activities, the time and dates of up to 40 of the
most recent receptions.
♦ Phonebook
It lists all telephone numbers that have been stored in the
machine.
♦ Sending Confirm
It shows the result of the last send operation.
♦ Schedule Inform
This list shows a specific information on the documents
currently stored for delayed transmission. It provides the
operation number, starting time, type of operation, etc.
♦ System Data (see page 4.12)
This list provides a list of the user system data settings
and tech mode settings.
♦ Caller ID
In the country which supports CALLER ID, information of
the dates and numbers of calls is stored when RING is
receiving.
(CALLER ID : it is a telephone service to send a caller's
number to the receiver.)
♦ Junk Fax
It is possible not to receive a fax by registering a specific
number, from which you don't want to get fax, with the
Caller ID function.
The fax number registered as Junk Fax can be checked.
A maximum 20 numbers can be registered.
♦ TAM Status
The list shows recorded date & time, recording time and
index of the OGM, ICMs and conversation messages.
♦ Fax Print
The machine stores fax data into memory as far as the
memory is available and lets you print it at laster time.
♦ Shading Profile
It shows the result of the Adjust Scanner.
♦ Protocol Dump
This list shows the sequence of the CCITT group 3 T.30
protocol during the most recent sending or receiving operation. Use this list to check for send and receive errors. If
a communication error occurs while the machine is in
TECH mode, the protocol list will print automatically.
[ Protocol Dump ]
Page 14

Troubleshooting
4-14
Samsung Electronics
♦ NVRAM Dump
NVRAM(nonvolatile random access memory) is nonvolatile RAM, therefore, information still reminds after
power off.
Arelative information of using amount of ink cartridge can
be checked.
♦ Memory Dump
Ainner information, which helps to analyze a cause when
a machine has failed during operation, can be printed out.
This is a function to check the memory area to improve a
machine. Do not handle it at will.
♦ Task History
Ainner information, which helps to analyze a cause when
a machine has failed during operation, can be printed out.
This function works to improve goods. When it is handled
at will, it can be malfunctioned. Do not handle it at will.
♦ POWER FAILURE
After the power is off and on , if the received fax image or
stored scheduled fax image are lost , this report is printed
out automatically to indicate what image was lost .
That is , if the power is off during the machine operates ,
the current information can't be backed up .
♦ MULTI COMMUNICATION
When sending original documents to 2 or more locations
with broadcasting , the product prints out the transmission
results automatically after all transmissions are completed.
NVRAM Dump
Date : 13-MAY-2002 MON 14:09
Name : SVC MANUAL
Tel. : 0312003956
< Device Identification >
MFG : Samsung;
MDL : SF-331P;
CMD : MLC, PCL, PML;
CLASS : PRINTER;
DESCRIPTION : Samsung SF-331P;
< Dot Count Variables >
Black Dot Count : 9035623
Color Cyan Dot Cout : 0
Color Magenta Dot Count : 0
Color Yellow Dot Count : 0
Total Black Dot Count : 9078831
Total Color Cyan Dot Count : 0
Total Magenta Dot Count : 0
Total Yellow Dot Count : 0
< Page Count Variables >
Totoal Page count : 23
< Alignment Variables >
Horizontal Align Value : 6
[ NVRAM Dump ]
Page 15
Troubleshooting
4-15
Samsung Electronics
4.2 Maintenance
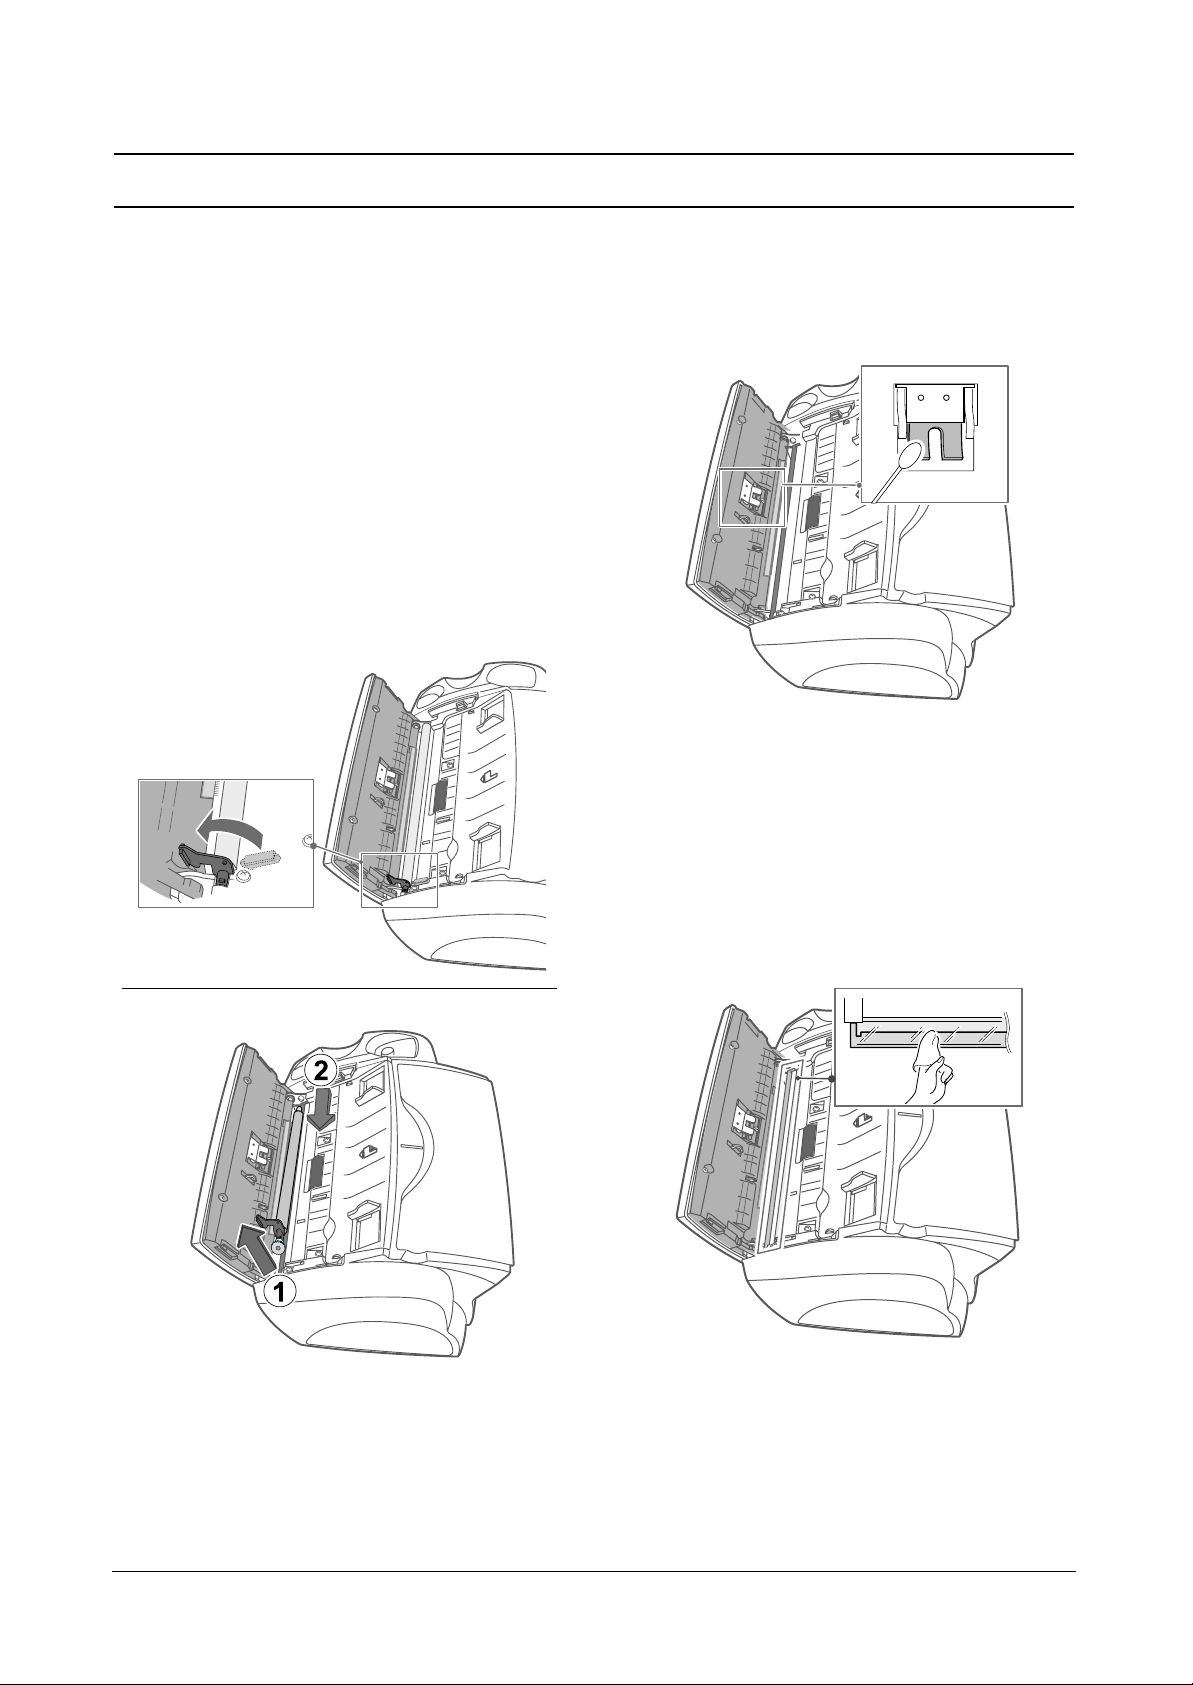
4.2.1 Cleaning the document scanner
To keep your machine working properly, occasionally
clean the White Roller, ADF Rubber, and the Scanning
Glass. If they are dirty, documents sent to another fax
machine won t be clear.
If you turn the power off to clean the scanner, documents
stored in memory will be lost.
1. Open the Control Panel.
2. Remove the White Roller.
• At the right-hand end of the White Roller there is a bushing that is secured with a small tab.
• Push the tab slightly inward, then rotate towards you.
Then pull up the right-hand part to take it out.
3. Wipe the roller surface with a soft cloth dampened with
water.
4. Clean the ADF Rubber piece at the back of the Control
Panel, too.
5. Carefully wipe the Scanning Glass with a soft, dry cloth.
• If the glass is very dirty, first wipe it with a slightly
dampened cloth, then with a dry one.
• Be careful not to scratch the glass surface.
6. Replace the roller in reverse order, and then close the
Control Panel firmly until it clicks into place.
Page 16

Troubleshooting
4-16
Samsung Electronics
4.2.2 Replacing the print cartridge
When you notice that the print becomes light or “Ink Low.Install new ink cartridge”appears in the display, replace the print cartridge. You should replace the cartridge with the same one which was provided with the machine.
The part number for replacement cartridges are:
•mono : INK-M40, color: INK-C40 (available only for SF-331P)
1. Prepare a cartridge.
•Take out a cartridge from its packaging and carefully remove the tape covering the printhead.
•Hold the cartridge by the colored top or black areas only. Do not touch the copper area.
2. Press “Cartridge” .The Cartridge Carrier moves to the install position.
3. Open the Control Panel and Cartridge Compartment cover.
4. Push down the cartridge, and remove it.
5. Place the cartridge in the Carrier, then push it firmly until it clicks into place.
•If the cartridge moves loosely in the Carrier, it has not clicked into place. Repeat this step.
6. Replace the Cartridge Compartment Cover and Control Panel.
7. Press “Start/Enter”.
8. Press 1 for new cartridge, or 2 for the old one.
•In case you selected the 1: “New” , the alignment form will print.
•When you put in a new cartridge, you must choose 1: “New” .
•When you put in a used cartridge, choose 2: “Used” . This helps you to check the correct amount of ink you have left.
•If you mix up several used cartridges, it is not possible to check the correct amount of remaining ink. Once you have put in a
new cartridge, use it until it is completely exhausted.
9. Enter the number which represents the straightest line, and press “Start/Enter” .
Page 17

Troubleshooting
4-17
Samsung Electronics
4.2.3 Cleaning the cartridge
To maintain good printing quality, we recommend you occasionally wipe the and Contacts as described below:
For print cartridge and print quality problems, see section 4.4.
4.2.3.1 Wiping and contacts
When the print is not clear or dots are missing, the problem may be caused by dried ink on the:
•Print cartridge contacts
•Print cartridge carrier contacts
1. Press “Cartridge” .
2. Open the Control Panel and Cartridge Compartment Cover and remove the cartridge.
3. Gently blot and wipe the contacts dry.
• Use a clean cloth dampened with water only to gently clean the entire copper-colored area,
including contacts.
4. Reinstall the cartridge and close the Cover and Panel.
• If you spend a long time cleaning the cartridge, the cartridge carrier may have moved back
to the original position. If so, press “Cartridge” again to move the carrier to the install position.
5. Press 1 for new cartridge, or 2 for the old one.
• If the line is still broken, clean the Cartridge Carrier contacts. For more information, see "Cleaning the cartridge carrier contacts" on page 4.17.
4.2.3.2 Cleaning the cartridge carrier contacts
Before cleaning these parts, there should be no scheduled job such as Delayed Fax, Send Polling, or faxes received into memory. Once you have unplugged the power cord from the machine, all data will be lost.
1. Press “Cartridge” .
2. Open the Control Panel and Cartridge Compartment Cover and remove the
cartridge.
3. Remove the print cartridge.
4. Unplug the power cord from the electrical outlet of the rear of the machine.
5. Clean the Cartridge Carrier contacts with clean and dry cloth.
6. Plug in the power cord and reinstall the cartridge.
4.2.3.3 Print cartridge maintenance
The print cartridge life is very sensitive to the content of the received fax or a copy you made. To increase its life, we recom-mend
you follow the instructions below:
• DO NOT unpack the cartridge until you are ready to use it.
• Store it in the same environment as the printer.
• If you have unpacked the cartridge but are not using it, store it in a storage unit. If you do not have a storage unit, store the
cartridge in an airtight plastic bag.
• DO NOT leave it exposed for an extended period.
• DO NOT refill the cartridge. The warranty will not cover damage caused by using refilled cartridges.
Page 18

Troubleshooting
4-18
Samsung Electronics
4.2.5 LCD error messages
Display Status/Solution Related to:
Display Adjust scanner first
in Maintenance menu
Check white paper
document and try
again
Clean white roller,
glass and try again
Duplicated with
[Speed No.xx ]
The xx indicates the location number.
Exceeded Job Memory
Cancel scheduled job
and try again
Exceeded Total Message Memory
ICM Memory Full
Ink Low.Install new
ink cartridge
Install ink cartridge
Install mono ink
cartridge
Job Not Assigned
Junk Fax Empty
Junk Fax Full
Load Document
Memory Full
Memory Full
Press Start/Enter to
continue
Memory Received
When it toggles with:
Ink Low.Install new
ink cartridge
Load paper and press
Start/Enter
Install ink cartridge
The shading waveform to be used as a reference is corrupted due to
unknown reason. Adjust the scanner to fix this problem as described in
"Adjust Scanner" on page 4.9.
The scanning level is too low to compare with reference level. T o adjust
shading, you should use the plain and white paper.
The scanning level is slightly low, which can affect the image quality.
To clean concerned parts, see "Cleaning the document scanner" on
page 4.15.
The same number has already been registered into another speed dial
location.
The broadcasting and delayed fax can hold 5 jobs in total. Cancel
scheduled job and try again.
The machine can hold up to 100 messages (OGM + ICM + recorded
conversations).
Erase old messages to make a room in the memory.
The voice memory is full. No more caller’s messages can be recorded
(Total recording time is about 15 minutes).
The print cartridge has run out of ink. To install a new Print Car- tridge,
see "Replacing the print cartridge" on page 4.16. Although this message is displayed, you can make a copy or print a report. But, stored
data in memory can be printed by changing the cartridge.
Print cartridge is not installed or improperly installed.
The mono print cartridge should be installed to copy, print a report or
receive a fax.
You attempted to cancel the scheduled job but there is no jobs scheduled.
You attempted to delete the junk fax number when there is no junk fax
number.
The machine can hold 20 junk fax numbers but you tried to add more.
You have tried to make a copy and there is no document loaded into
the machine.
Memory has become full while receiving a fax.
Memory has become full while scanning a document. Press
“Start/Enter” to send or copy the scanned pages only. To cancel the
job press “Stop/Cancel” and try again when memory becomes available, or split the new document into smaller parts.
The machine has data stored in memory. Depending on the message
do as follows:
Replace the print cartridge with new one.
Load the paper, and press “Start/Enter”. There might be paper out.
Scanner
Scanner
Scanner
Telephone
Fax
TAM (SF-335T only)
TAM (SF-335T only)
Cartridge
Cartridge
Cartridge
(SF-331P only)
Fax
Fax
Fax
Document
Fax
Fax/Copy
Fax
Page 19

Troubleshooting
4-19
Samsung Electronics
Display Status/Solution Related to:
No answer from
remote fax
No CID Number
No Dial Number
No Message
No New Message
Not Found
Number already reg-
istered
Number Not Assigned
Poll Code Error
Poll job exists
already
Polling Error
Check remote site
Record T AM OGM
Remove jammed document
System Busy
Try again later
To redial now,press
Start/Enter
The other machine has not answered after all your attempts to send a
fax.
The machine could not detect the CID (Caller ID) number.
There is no number in the redial memory, which is successfully dialled
up to now.
There is no message to play or erase.
There is no new caller message.
The number you are searching does not exist in memory.
The number you are trying to register already exists in the phone-book
or junk fax list.
There is no number assigned to the One-Touch or two-digit Speed
number.
The remote user entered wrong poll code.
You have programmed a polling send. Cancel scheduled job and try
again.
The machine you want to poll is not ready to answer your poll. The
person you are polling should have loaded their fax machine with a
document and be in send poll state.
To select TAM receive mode, you should record OGM prior to pressing the Answer button.
Th
e document you are sending has jammed in the feeder. To clear the-
document jam, see "Document jams during transmission" on page 4.22
.
You tried to copy or fax a document which is longer than 390mm.
There is no available resource to execute job you ordered.
The machine is waiting to automatically redial the fax number that was
busy or did not answer.
Fax
Telephone
Telephone
TAM (SF-335T only)
TAM (SF-335T only)
Telephone
Telephone
Telephone
Fax
Fax
Fax
TAM (SF-335T only)
Document
Fax
Fax
Page 20

Troubleshooting
4-20
Samsung Electronics
4.2.6 Fixing Simple Problems (A quotation from users Guide)
The problem may be listed in "LCD error messages" on page 4.18. The chart below shows other problems users can solve
themselves.
Fax problems
Problem Solution
The machine is not working, Unplug the power cord and plug it in again. Check that your socket is live.
there is no display
and the buttons are not working.
No dial tone. Check that the phone is connected properly. Check the phone socket in the wall by
plugging in another phone.
The numbers stored in memory Make sure the numbers are programmed correctly.
do not dial correctly. To print a Phonebook Report, see "To Print a report" on page 4.13.
The document does not feed Be sure the document is not wrinkled, and you are putting it in correctly.
into the machine. Check that the document is the right size and not too thick or too thin.
You cannot receive faxes Check if “TEL” appears on the right side of the display.
automatically. In TEL mode, you cannot receive a fax automatically. Be sure the handset is seated on
the cradle properly.
The machine cannot receive Do not hang up the handset before pressing “Start/Enter”.
faxes manually.
The machine does not send anything. Check that the document is loaded face down. should show up in the dis-play.
You may have hung up the handset before you pressed “Start/Enter”.
Check if the machine to which you are sending can receive your fax.
You cannot poll another machine. The fax machine you are polling may be using a poll code.
The fax you received has blank The machine sending to you may be faulty. Anoisy phone line can cause line errors.
bits on it. Check your machine by making a copy.
Spots or lines missing from Check if your phone line is noisy. Check if the printhead is clean by making a copy.
the fax you receive.
You are receiving poor quality copies. The fax machine sending to you may have a dirty scan glass.
Check for a noisy phone line.
Some of the stretched words on The machine sending to you had a temporary document jam.
the fax you receive
Your machine does not make copies. Make sure your document is loaded face down.
There are lines on copies or Check your scan glass for marks and clean it
documents you send. (see "Cleaning the document scanner" on page 4.15.)
The machine dials a number, The remote fax machine may be turned off, or unable to answer incoming calls.
but fails to make a connection with Speak with the remote operator and ask for the problem to be rectified.
a remote fax machine.
You cannot store a document . There may not be enough memory available to hold the document you want to store.
in memory If the display shows a “Memory Full” message, delete any documents you no longer
need, then retry the document.
Blank areas appear at the bottom You may have selected the wrong paper settings. To select the proper paper size.
pages, with only a small strip of
material printed at the top.
Page 21

Troubleshooting
4-21
Samsung Electronics
Print quality problems
Problem Solution
Light or blurred characters. Check Ink Level Viewas described in "Ink level view" on page 4.7.
If the printer cartridge has completely run out, “Ink Low.Install new ink cartridge”is dis-
played. To install a new print cartridge, see "Replacing the print cartridge" on page 4.17
.
Make sure the print cartridge is installed correctly.
To clean the print cartridge, see "Cleaning the cartridge" on page 4.17.
Smudged or dark characters. Make sure the paper is straight and unwrinkled. Let ink dry before handling the paper.
To clean the Print Cartridge, See 4.17 .
Characters with white lines. ”If Ink Low.Install new ink cartridge” is displayed, install a new print cartridge as described
in "Replacing the print cartridge" on page 4.16.
Remove and reinstall the print cartridge. Clean the Print Cartridge. See 4.17 .
Improperly formed or misaligned Clean the print cartridge (see "Cleaning the cartridge" on page 4.17.)
characters.
Abnormal black horizontal lines. Clean the cartridge carrier (see "Cleaning the cartridge carrier contacts" on page 4.17.)
Paper feeding problems
Problem Solution
Paper is jammed during Clear paper jam as described in "Paper jams during printing" on page 4.22.
printing.
Paper sticks together. You can load up to 50 sheets in the ASF (Automatic Sheet Feeder).
Check if you overloaded. Humid conditions may cause some paper to stick together.
Paper fails to feed. Remove any obstructions inside the printer.
Multiple sheets of paper When loading paper, do not force the paper down into the printer.
feed. If multiple sheets have caused a paper jam, clear the paper jam.
(see "Paper jams during printing" on page 4.22.)
Paper skews or buckles in ASF can hold up to 50 sheets. Make sure the paper guides do not cause the paper to
the automatic sheet feeder. bow in the bin. When loading paper, do not force it down into the printer.
Page 22

Troubleshooting
4-22
Samsung Electronics
4.2.7 Clearing jams
4.2.7.1 Document jams during transmission
If a document jams during transmission or copying, Remove jammed document appears in the display. DO NOT pull the document out of the slot. Doing so could harm your machine.
• To clear document jam:
1. Open the Control Panel.
2. Carefully remove the jammed document.
3. Close the Control Panel firmly until it clicks into place.
• Paper jams during printing
If the fax paper jams while you are receiving or printing, Remove jammed paper and press Stop/Cancel appears in the message. DO NOT pull it out. Doing so could harm the fax machine.
If the paper is jammed in the Received Paper Output Area
1. Remove the jammed paper by pulling it out smoothly in the direction of
the arrow as shown.
2. Press Stop/Cancel .
If the paper is jammed in the Paper Feed Area
1. Remove the jammed paper as shown.
2. Reload new paper with the print side facing toward you.
3. Press Stop/Cancel when finished.
Page 23

Troubleshooting
4-23
Samsung Electronics
4.3. Troubleshooting
4.3.1 Defective Operation (LCD WINDOW ) Display . . . . . . . . . . . . . . . . . . . . . .page(4.24)
4.3.2 No Power . . . . . . . . . . . . . . . . . . . . . . . . . . . . . . . . . . . . . . . . . . . . . . . . . . . . . .page(4.24)
4.3.3 Defective LCD Operation . . . . . . . . . . . . . . . . . . . . . . . . . . . . . . . . . . . . . . . . . .page(4.25)
4.3.4 Defective Operation of Key Button . . . . . . . . . . . . . . . . . . . . . . . . . . . . . . . . . . .page(4.25)
4.3.5 Paper Jam . . . . . . . . . . . . . . . . . . . . . . . . . . . . . . . . . . . . . . . . . . . . . . . . . . . . .page(4.26)
4.3.6 Defective Paper Feed (1) . . . . . . . . . . . . . . . . . . . . . . . . . . . . . . . . . . . . . . . . . .page(4.26)
4.3.7 Defective Paper Feed (2) -Display of NO PAPER . . . . . . . . . . . . . . . . . . . . . . . .page(4.27)
4.3.8 Defective Document Feed . . . . . . . . . . . . . . . . . . . . . . . . . . . . . . . . . . . . . . . . .page(4.27)
4.3.9 Multi-Feeding (1) . . . . . . . . . . . . . . . . . . . . . . . . . . . . . . . . . . . . . . . . . . . . . . . .page(4.28)
4.3.10 Defective ADF . . . . . . . . . . . . . . . . . . . . . . . . . . . . . . . . . . . . . . . . . . . . . . . . . .page(4.28)
4.3.11 Defective Sensing-ink . . . . . . . . . . . . . . . . . . . . . . . . . . . . . . . . . . . . . . . . . . . .page(4.29)
4.3.12 Defective Sensing-paper . . . . . . . . . . . . . . . . . . . . . . . . . . . . . . . . . . . . . . . . . .page(4.29)
4.3.13 Defective Motor Drive (LF) . . . . . . . . . . . . . . . . . . . . . . . . . . . . . . . . . . . . . . . . .page(4.30)
4.3.14 Defective Motor Drive (CR) . . . . . . . . . . . . . . . . . . . . . . . . . . . . . . . . . . . . . . . .page(4.30)
4.3.15 Defective Motor Drive (TX) . . . . . . . . . . . . . . . . . . . . . . . . . . . . . . . . . . . . . . . . .page(4.31)
4.3.16 Blank Page Print Out (When Copying) . . . . . . . . . . . . . . . . . . . . . . . . . . . . . . . .page(4.31)
4.3.17 Blank Page Print Out (When Receiving) . . . . . . . . . . . . . . . . . . . . . . . . . . . . . . .page(4.32)
4.3.18 Vertical Black Line (When Copying) . . . . . . . . . . . . . . . . . . . . . . . . . . . . . . . . . .page(4.32)
4.3.19 Vertical Black Line (When Receiving) . . . . . . . . . . . . . . . . . . . . . . . . . . . . . . . . .page(4.33)
4.3.20 Contaminated Stains on Paper . . . . . . . . . . . . . . . . . . . . . . . . . . . . . . . . . . . . . .page(4.33)
4.3.21 Bad printed Image . . . . . . . . . . . . . . . . . . . . . . . . . . . . . . . . . . . . . . . . . . . . . . .page(4.34)
4.3.22 Vertical Lines are printed crookedly . . . . . . . . . . . . . . . . . . . . . . . . . . . . . . . . . .page(4.34)
4.3.23 Bad Color (Intensity) . . . . . . . . . . . . . . . . . . . . . . . . . . . . . . . . . . . . . . . . . . . . .page(4.35)
4.3.24 No Dial Tone . . . . . . . . . . . . . . . . . . . . . . . . . . . . . . . . . . . . . . . . . . . . . . . . . . .page(4.35)
4.3.25 Defective MF DIAL . . . . . . . . . . . . . . . . . . . . . . . . . . . . . . . . . . . . . . . . . . . . . . .page(4.36)
4.3.26 Defective FAX FORWARD/RECEIVE . . . . . . . . . . . . . . . . . . . . . . . . . . . . . . . . .page(4.36)
4.3.27 Defective FAX FORWARD . . . . . . . . . . . . . . . . . . . . . . . . . . . . . . . . . . . . . . . . .page(4.37)
4.3.28 Defective FAX RECEIVE (1) . . . . . . . . . . . . . . . . . . . . . . . . . . . . . . . . . . . . . . . .page(4.37)
4.3.29 Defective FAX RECEIVE (2) . . . . . . . . . . . . . . . . . . . . . . . . . . . . . . . . . . . . . . . .page(4.38)
4.3.30 Defective FAX RECEIVE (3) . . . . . . . . . . . . . . . . . . . . . . . . . . . . . . . . . . . . . . . .page(4.38)
4.3.31 Defective FAX RECEIVE (4) . . . . . . . . . . . . . . . . . . . . . . . . . . . . . . . . . . . . . . . .page(4.39)
4.3.32 Defective Automatic Receiving . . . . . . . . . . . . . . . . . . . . . . . . . . . . . . . . . . . . . .page(4.39)
4.3.33 The Printer is Not Working (1) . . . . . . . . . . . . . . . . . . . . . . . . . . . . . . . . . . . . . .page(4.40)
4.3.34 The Printer is Not Working (2) . . . . . . . . . . . . . . . . . . . . . . . . . . . . . . . . . . . . . .page(4.40)
4.3.35 Abnormal Printing . . . . . . . . . . . . . . . . . . . . . . . . . . . . . . . . . . . . . . . . . . . . . . .page(4.41)
4.3.36 Spool Error and Release of Spool Error . . . . . . . . . . . . . . . . . . . . . . . . . . . . . . .page(4.42)
• The solutions of troubleshooting in this 'Service Manual' explain the expected causes and
how to check according to each problem and describe how to replace the defected parts (unit
of ASS'Y) if necessary.
• The contents of this 'Service Manual' describe general ones only among many kinds of problems and causes while using the Product.
• The contents of this 'Service Manual' describe mainly technical explanations of the Product
H/W and parts on the assumption that there is no problem in S/W.
Page 24

Troubleshooting
4-24
Samsung Electronics
4.3.1 Defective Operation (LCD WINDOW ) Display
4.3.2 No Power
• Description
• Location 1.OPE ASS'Y 2.Connection between the Main B'D and OPE ASS'Y 3.Main B'D.
Strange characters are displayed on the OPE Panel and buttons are not operated.
Check and Cause Solution
1. Clear the memory.
2. Check if OPE HARNESS is connected to the Main
Board correctly.
1. Try again after clearing the memory.
2. After confirming that OPE HARNESS is connected to the
Main Board correctly, if it is so, then replace the OPE
ASS'Y and Main Board in sequence.
• Description
• Location
1.Power code 2.Connection between the Main B'D and Power HARNESS 3.Power ASS'Y 4.Main B'D.
While the power S/W is turned on, it does not work at all.
Check and Cause Solution
1. Check if the connection of power code is normal. 1. Try to replace the power code.
2. If all the connections are correct, try to replace the power
ASS'Y and the Main B/D in sequence.
Page 25

Troubleshooting
4-25
Samsung Electronics
4.3.3 Defective LCD Operation
4.3.4 Defective Operation of Key Button
• Description The LCD screen is not turned on or has a strange display.
Check and Cause Solution
1. Clear the memory. (See page 4.5).
2. Confirm to catch a click sound, while a key on the
OPE panel is pressed on.
1. The key is wrong itself or wrongly assembled.
2. Even after the key has been replaced, it is still wrong, try
to replace the OPE ASS'Yand the Main B'D in
sequence.
• Description
• Location 1. OPE ASS'Y 2. Main Board
The button of the OPE Panel is not operated..
Check and Cause Solution
1. Confirm to catch a click sound while the key is pressed
on.
2. Check if a specific key is pressed by another equipment.
1. If you cannot catch a click sound, the key is wrong itself
or wrongly assembled.
2. Even after the key has been replaced, it is still wrong, try
to replace the OPE ASS'Yand the Main B'D in
sequence.
Page 26

Troubleshooting
4-26
Samsung Electronics
4.3.5 Paper Jam
4.3.6 Defective Paper Feed (1)
• Description
• Location ASF ASS'Y
The paper is jammed inside the set and not exited from.
Check and Cause Solution
1. Check if the paper is crumpled or preprinted.
2. Check if too many sheets of recording paper are put
into ASF (Automatic Sheet Feeder).
(Standard : up to 50 sheets).
3. Check if the remaining papers are stuck in the frame
base.
1. If the papers jammed or pieces of the paper are stuck
inside the set, remove them and then try it again.
2. If the problem still exists, try to replace ASF ASS'Y.
• Description
• Location ASF ASS'Y
A recording paper is tilted while feeding.
Check and Cause Solution
1. Check if the paper guide of ASF (Automatic Sheet
Feeder) is set up properly with the width of recording
paper.
2. Check if too many sheets of recording paper are put
into ASF (Automatic Sheet Feeder).
(Standard: up to 50 sheets).
3. Check if the recording paper is crumpled or preprinted.
1. After all have been checked, the problem still exists, try
to replace the ASF ASS'Y.
Page 27

Troubleshooting
4-27
Samsung Electronics
4.3.7 Defective Paper Feed (2)-Display of NO PAPER
4.3.8 Defective Document Feed
• Description
• Location ASF ASS'Y
paper does not feed into the printer.
Check and Cause Solution
Press ENTER button to check. Even if the ENTER button is pressed, a recording paper is
not drawn into, then try to replace the ASF ASS'Y.
• Description
• Location OPE ASS'Y
It cannot feed the documents to be scanned.
Check and Cause Solution
Check if the paper feeding is normal on the OPE panel.
(If some part of the paper is pulled into, it may be drawn
automatically .)
1. Replace the contaminated or damaged part.
2. If you cannot confirm the damaged part with the naked
eye, try to replace the OPE ASS'Yand the Main B'D in
sequence.
Page 28

Troubleshooting
4-28
Samsung Electronics
4.3.9 Multi-Feeding (1)
4.3.10 Defective ADF
• Description
• Location ASF ASS'Y
Multiple-sheets of recording paper are fed at once.
Check and Cause Solution
1. Adjust the paper guide of ASF to the width of paper
correctly .
2. Check if the recording paper is preprinted or crumpled.
3. Check if too many sheets of recording paper are put
into ASF (Automatic Sheet Feeder).
(Standard: up to 50 sheets).
1. Blow several times of puff into the paper in order to prevent static electricity.
2. Even after the papers are loaded correctly, if multiple
sheets of paper are still fed at once, then try to replace
the ASF ASS'Y.
• Description
• Location OPE ASS'Y.
ADF (Automatic document Feeder) is not properly operated.
Check and Cause Solution
1. Check if ADF rubber and HOLDER rubber are damaged.
2. Check if the document sensors of OPE ASS'Y
(2 paper sensors) are normal.
1. Replace the contaminated or damaged part.
2. If you cannot confirm the damaged part with the naked
eye, try to replace the OPE ASS'Y.
Page 29

Troubleshooting
4-29
Samsung Electronics
4.3.11 Defective Sensing-ink
4.3.12 Defective Sensing-paper
• Description
• Location 1.Main B'D 2.Cartridge ASS'Y
The ink is put in the set, but it cannot sensed.
Check and Cause Solution
1. Check if the cartridge is installed in the cartridge box
properly .
(It makes a click sound normally when it is normal.)
2. Check if the cartridge box is operated normally.
1. Even after the cartridge is installed normally, it still cannot
sense, then try to replace the Main B'D.
2. In case the cartridge box is not moved from side to side,
check the Flat Cable connection between the Main PBA
& Frame Home Unit, and even after being connected
properly, if it is still not improved, then try to replace the
cartridge ASS'Y.
• Description
• Location 1.Main B'D 2. LF Motor
The recording papers are put in already, but it cannot be sensed.
Check and Cause Solution
1. Check if the ENTER key on the OPE panel is pressed. 1. Refer to "Defective Paper Feed".
2. Even if the ENTER key on the OPE panel is pressed, it
still cannot sense, then try to replace the Main B'D and
LF Motor in sequence.
Notes:
Product has no paper sensor, instead it displays ERROR
when it cannot pick up the paper.
Page 30

Troubleshooting
4-30
Samsung Electronics
4.3.13 Defective Motor Drive (LF)
4.3.14 Defective Motor Drive (CR)
• Description
• Location 1.LF Motor 2.Main B'D.
The motor drive of Line Feeder is not working.
Check and Cause Solution
1. Check if the connector of LF Motor is connected to the
Main B'D normally.
1. Try to replace the LF Motor ASS'Y and the Main B'D in
sequence.
• Description
• Location 1.CR Motor 2.Main B'D.
The drive of CR Motor is not working.
Check and Cause Solution
1. Check if the connector of CR Motor is connected to
the Main B'D normally.
1. Try to replace the CR Motor ASS'Y, the Main B'D in
sequence.
Page 31

Troubleshooting
4-31
Samsung Electronics
4.3.15 Defective Motor Drive (TX)
4.3.16 Blank Page Print Out (When Copying)
• Description
• Location 1.TX Motor 2.Main B'D.
The TX Motor is not driven.
Check and Cause Solution
1. Check if the connector of TX Motor is connected to the
Main B'D normally.
1. Try to replace the TX Motor ASS'Y and the Main B'D in
sequence.
• Description
• Location 1.CIS ASS'Y 2.Main B'D
Blank page is printed out when copying.
Check and Cause Solution
1. Check if the recording papers are inserted reversely.
2. Perform the Adjust Scanner in the TECH MODE.
(See page 4.9)
1. Insert the paper with the copy side to be faced down.
2. In case the output waveform is abnormal in the Adjust
Scanner, replace the CIS ASS'Y, while replace the Main
B'D in normal.
Notes:
After replacing CIS, you must perform a Adjust Scanner.
Page 32

Troubleshooting
4-32
Samsung Electronics
4.3.17 Blank Page Print Out (When Receiving)
4.3.18 Vertical Black Line (When Copying)
• Description
• Location 1.Ink cartridge 2.Main B'D.
Blank page is printed out when receiving.
Check and Cause Solution
1. Check if the sender transmits the document properly.
2. Check if there remains some amount of ink.
(Ex: COPY TEST/SELF TEST)
1. Replace the ink cartridge.
2. If it is normal in the Copy Test and in the Self Test, try to
replace the Main B'D.
• Description
• Location 1.CIS ASS'Y 2.Main B'D.
Vertical black lines occur in the printing.
Check and Cause Solution
1. Check if there are substance materials on CIS.
2. Perform a Adjust Scanner to check if the waveform is
normal. (See page 4.9)
3. Clean the cartridge nozzle.
1. If there are some stains on the surface of CIS, wipe them
off with alcohol (IPA).
2. If the CIS waveform is abnormal, replace the CIS ASS'Y.
3. Clean the nozzle and confirm again.
4. After confirming the CIS waveform and cleaning the nozzle, if the vertical black lines still occur, then try to replace
the Main B'D.
Notes:
After replacing the CIS, you must perform a Adjust Scanner.
Page 33

Troubleshooting
4-33
Samsung Electronics
4.3.19 Vertical Black Line (When Receiving)
4.3.20 Contaminated Stains on Paper
• Description
• Location Main B'D.
It is normal when copying, but the vertical black lines occur in the printing when receiving.
Check and Cause Solution
1. Check if the FAX status of the transmitting side is normal.
(Ex. Let the transmitter copy once.)
2. Clean the cartridge nozzle.
(See page 4.7)
1. Even when the transmitting side is normal and after having finished cleaning, if the same problem still exists, then
try to replace the Main B'D.
• Description
• Location 1.CIS ASS'Y 2.Main B'D.
Contaminated stains on the copied and received paper occur in the printing.
Check and Cause Solution
1. Check the status of document.
2. Check the waveform by performing a Adjust Scanner.
(See page 4.9)
1. If the CIS waveform is abnormal, try to replace the CIS
ASS'Y.
2. In case the CIS waveform is normal but the print quality
is bad, try to replace the Main B'D.
Notes :
After replacing the CIS, you must perform a Adjust Scanner (using
clean papers).
Page 34

Troubleshooting
4-34
Samsung Electronics
4.3.21 Bad Printed Image
4.3.22 Vertical Lines are printed crookedly
• Description
• Location 1.CIS ASS'Y
The copied and received image is light or bad.
Check and Cause Solution
1. Check the CIS waveform.
(See page 4.9 : Adjust Scanner)
2. Test and check the cartridge arrangement.
(See page 4.7 : Align Head)
3. Clean the cartridge nozzle.
(See page 4.7 : Clean Head)
1. In case the CIS waveform is good, clean the outlet of
cartridge.
2. In case the CIS waveform is abnormal, try to replace the
CIS ASS'Y.
3. Even after cleaning the outlet of nozzle, the received data
image is still bad, then replace the cartridge.
4. Try to replace the Main B'D.
Notes:
After replacing the CIS, you must perform a Adjust Scanner
(using pure clean papers).
• Description
• Location Cartridge
The vertical lines are printed crookedly.
Check and Cause Solution
1. Test and check the cartridge arrangement.
(See page 4.7 : Align Head)
1. Perform the cartridge arrangement to set up black/color
newly. Repeat it several times until you get the sufficient
condition.
Page 35

Troubleshooting
4-35
Samsung Electronics
4.3.23 Bad Color (Intensity)-only SF-331P
4.3.24 No Dial Tone
• Description
• Location 1.Capacity of Ink Cartridge
The color is different from the original document in the printing.
Check and Cause Solution
1. It may occur when the amount of specific ink in the ink
cartridge (color) is deficient.
1. After checking if the capacity of ink cartridge is deficient,
try to replace it.
• Description
• Location 1.LIU B'D 2.OPE ASS'Y 3.Main B'D.
While on-hook button is pressed, there is no dial tone.
Check and Cause Solution
1. Check if the telephone line cord is connected to TEL
LINE correctly.
2. Check if it makes CLICK sound while OHD key is
pressed.
3. Check the connection of HARNESS between the LIU
and the Main B'D.
4. Check if the SPEAKER is connected correctly.
1. If the telephone cord is normal but there is no dial tone,
then try to replace the LIU B'D.
2. If you cannot hear the OHD CLICK sound, the OPE
ASS'Y may be defective. Try to replace the OPE ASS'Y.
3. Check the connection of Speaker, and try to replace it.
4. Lastly, try to replace the Main B'D.
Page 36

Troubleshooting
4-36
Samsung Electronics
4.3.25 Defective MF DIAL
4.3.26 Defective FAX FORWARD/RECEIVE
• Description
• Location 1.LIU B'D 2.OPE ASS'Y 3.Main B'D.
The MF DIAL is not functioning.
Check and Cause Solution
1. Check if the telephone line is connected correctly.
2. Wile the BUTTON KEY is pressed, check to catch a
CLICK sound.
3. Check the connection of HARNESS between the LIU
and the Main PBA.
1. If you cannot catch the OHD CLICK sound, the OPE
ASS'Y may be defective. Try to replace the OPE ASS'Y.
2. If you can catch a CLICK sound, after checking the connection of HARNESS between the LIU and the Main
PBA, try to replace the HARNESS.
3. The problem still persists, then replace the LIU and the
main B'D in sequence.
Notes:
Product supports the MF DIAL type only.
• Description
• Location 1.LIU B'D 2.Main B'D.
The FAX FORWARD/RECEIVE is not functioning.
Check and Cause Solution
1. Check if you can catch a dial tone by pressing OHD.
2. Check if you can catch a RECEIVE tone while
MODEM testing in the TECH mode.
1. If the MODEM testing is normal and there is no dial tone,
then try to replace the LIU B'D.
2. If the MODEM testing is abnormal, try to replace the
Main B'D.
Page 37

Troubleshooting
4-37
Samsung Electronics
4.3.27 Defective FAX FORWARD
4.3.28 Defective FAX RECEIVE (1)
• Description
• Location Telephone line
RECEIVE is functioning, but FORWARD is not functioning or the received data are broken.
Check and Cause Solution
1. Check if there is NOISE when pressing on-hook dial.
2. Check the RECEIVE condition by trying to forward a
FAX to another fax machine from the forwarding side
FAX.
3. Check if the telephone line connected to the Product is
contaminated or gets stripped off or down.
1. If it makes NOISE while on-hooking, replace or repair the
telephone line.
• Description
• Location Telephone line
FORWARD is functioning, but RECEIVE is not functioning or the received data are broken.
Check and Cause Solution
1.Check if there is NOISE when pressing on-hook dial.
2.Check the RECEIVE condition by trying to receive a
FAX at another fax machine.
1.If it makes NOISE while on-hooking, replace or repair the
telephone line.
Page 38

Troubleshooting
4-38
Samsung Electronics
4.3.29 Defective FAX RECEIVE (2)
4.3.30 Defective FAX RECEIVE (3)
• Description
• Location Telephone line
The received data are lengthened or cut in the printing.
Check and Cause Solution
1. Check if there is NOISE when pressing on-hook dial.
2. Ask to the forwarding side, check the image quality of
another machine receiving a FAX additionally sent to.
1. If it makes NOISE, rearrange the telephone line. (Refer
to 'Defective FAX RECEIVE'.)
2. Check if the FAX status of the forwarding side is also normal.
• Description
• Location 1.OPR panel 2.LIU B'D 3.Main B'D.
The phone is ringing continuously, but it cannot receive.
Check and Cause Solution
Check if the RECEIVE mode is TEL MODE or FAX
MODE.
Even when the RECEIVE mode is changed to FAX MODE,
it cannot receive, then replace the LIU and the Main B'D in
sequence.
Page 39

Troubleshooting
4-39
Samsung Electronics
4.3.31 Defective FAX RECEIVE (4)
4.3.32 Defective Automatic Receiving
• Description
• Location Telephone line
The received data is reduced by more than 50% in the printing.
Check and Cause Solution
Check the FAX status of the forwarding side. After checking the data of the forwarding side, correct the
FAX of the forwarding side.
• Description
• Location 1.The RECEIVE mode (LCD WINDOW) 2.LIU BOARD 3.Main B'D.
The automatic receiving function is not working.
Check and Cause Solution
1. Check if the RECEIVE mode is TEL MODE or FAX
MODE.
1. If the RECEIVE mode is set to the TEL MODE, reset it to
the FAX MODE.
2. Even after the RECEIVE mode is changed to the FAX
mode, it cannot receive, then try to replace the LIU and
the Main B'D in sequence.
Page 40

Troubleshooting
4-40
Samsung Electronics
4.3.33 The Printer is Not Working (1)- Only SF-331P
4.3.34 The Printer is Not Working (2)- Only SF-331P
• Description
While the power is turned on, the printer is not working at all by the PRINT command from the computer.
Check and Cause Solution
1. Perform the Printer Self-Test.
(See page 4.9)
2. Check if the PC and the printer cable are properly connected.
3. Check if the printer driver is correctly installed.
1. Check the power source of the printer first and perform the
Printer Self-Test. If the test results in printing, it is considered
as there is no problem in the printer itself. If the printer is not
working, the function may be defective (not due to S/W), so
take another proper measure.
2. Check the status of the printer connection, and if it is defective, replace the printer cable (USB).
3. Check the connection between PC and printer port (USB
port). Check if the printer driver at the Printers on the Control
Panel is installed. If the printer driver is properly setup, check
in which program the printing is not working. The best way is
to try printing from the Wordpad, the WINDOWS basic program. Sometimes, the print out is normal within the WINDOWS basic programs, but it may not work in a specific program. In such case, reinstall the printer driver.
• Description Even after the Print command, there is no response at all or the printing speed is low.
Check and Cause Solution
It may due to wrong setup of the environment rather than
malfunction of the printer itself. And in case that abnormal
characters are printed out, also check the environment
setup.
1. Secure the hard disk space.
2. Printing error occurs even if there is enough space in
the hard disk.
3. Reboot the system, and try printing again.
1. Not working with the message 'Insufficient memory' means that
the hard disk space to store the print information is insufficient
rather than the RAM insufficiency. In this case, secure more
space for the hard disk.
Secure more space for C drive by using the Disk utilities program at 'PROGRAM - ACCESSORIES - SYSTEM TOOL' from
the Start menu.
2. The connection of the cable or printer port is not properly setup.
3. If characters are printed abnormally, the cable or the printer driver may be defective. Turn the PC and printer off, and reboot
the system to try printing again. If the problem still exists, double
click to install the printer from My Computer and right-click the
mouse, then click 'Test Print' button at the bottom of the file
information tab. If normal characters are not printed again, the
cable must be defective so replace the cable with a new one.
Page 41

Troubleshooting
4-41
Samsung Electronics
4.3.35 Abnormal Printing ( Only SF-331P)
• Description
The printing is not working properly even when the cable has no problem.
(even after the cable is replaced)
If the printer won't work at all or strange characters are only printed,
it may be the printer driver problem.
Check and Cause Solution
1. Printer driver error.
2. Error due to insufficient memory.
(The printing job sometimes stops during proceeding or
not completed due to insufficient memory.)
1. Check 'My Computer - Printers'.
(If the printer driver is installed not compatible with the
printer currently installed or an error occurs in the driver file,
remove the existing driver and reinstall the printer driver.
2. This is because of an insufficient virtual memory.
(It does not mean the actual capacity of RAM but the
space of hard disk.)
Delete unnecessary files to secure enough space of the
hard disk and try printing again.
Name of Printer Port :
To reinstall the printer driver, do after removing the current driver.
• While installing the driver, Set and PC should be connected.
(The printer setup may be wrong if they are not connected during installing.)
Page 42

Troubleshooting
4-42
Samsung Electronics
4.3.36 Spool Error and Release of Spool Error
• Description
Spool (Simultaneous Peripheral Operations Online) refers to process the document to be read and
stored in the hard disk or the mass storage media, and then to be printed at more convenient time.
While the printer is outputting other file, the file requested to output is undergone to be spooled in the
hard disk, the spool error may occur if a problem occurs in this process.
First, delete the Spool Data if the Spool Error occurs.
Check and Cause Solution
I. Insufficient space of the hard disk set as the default
spool directory.
2. In case a collision with other program is expected.
3. When an application program or the printer driver file
is damaged.
4. If some of OS related files are damaged or malfunctioning due to virus infections.
5. The memory is less than that recommended by the
OS.
1. Delete unnecessary files to provide more hard disk space
and try printing job.
2. Exit all other programs except the program currently
using, if possible, and print again.
3. Delete the printer driver completely and reinstall it.
4. After rebooting the computer, check viruses, restore the
damaged files and reinstall the program, then try print ing
again.
5. Add memory to the PC.
How to delete the data in the spool manager :
In the spool manager, the installed drivers and the list of all the documents waiting to be
printed are shown. Select the data of the document to be deleted and select Document menu
--> Delete.
If you intend to delete the current document being printed, the data being transferred to the
printer will be printed out and then the document will be removed. Before choosing the document data, the document menu is still inactive.
Or Hold the document in the waiting list and repeat the routine as the above or exit the Spool
manager
Page 43

Troubleshooting
4-43
Samsung Electronics
4.4 Print Cartridge & Print Quality
4.4.1 Print Cartridge Maintenance
The top of the carriage contains a spring latch for the print cartridge. The spring latch provides tension for consistent snapin of the print cartridge. The print cartridge should only be replaced when the carriage is in the designated service position, which is controlled from the product’s front panel.
When installing a print cartridge, the bottom portion of the print cartridge should be installed into the carriage assembly as
shown in Figure 1. Once the bottom is seated in the carriage, push the top portion of the cartridge toward the carriage until
it snaps into place beneath the spring latch. Always ensure that the electrical contacts inside the carriage are clean. Do
not handle or touch the contacts because oil from the user’s fingers can corrode the electrical contacts (see Figure in section b for carriage and cartridge contact cleaning instructions).
The service station, at the left end of the carriage path, contains two wipers and two nozzle caps to provide servicing and
capping for either a monochrome or a color print cartridge (see Figure 2). The caps and wipers are mounted on a rotary
assembly, which incorporates a micro-switch for accurate positioning.
The service station wipes and caps the orifice plate of the print cartridge after each print job and at predefined set points
to ensure long product life. The orifice plate on the print cartridge is wiped to remove any excess ink, which could harden
and cause the nozzles to clog. The print cartridge is then capped to prevent the ink nozzles from drying out. The cap vents
into a rubber base through a vent line, so that all atmospheric interactions with the nozzles occur through the vent (see
Table 1 in section 4.4.4.2 for cartridge life information).
<Figure 1. Installing the print cartridge> <Figure 2. Service station and components>
Page 44

Troubleshooting
4-44
Samsung Electronics
4.4.2 Tool for Troubleshooting
The following tools are recommended for servicing and troubleshooting the Graphic Print Bar graphics print bar:
• Lint free swabs (cotton swabs are not recommended)
• Torx #’s T8 & T10 drivers
• Small flat head screwdrivers
• Needle-nose pliers
4.4.3 Print Quality
This section provides possible causes and solutions for print quality problems.
4.4.3.1 Poor Print Quality
Unacceptable print quality can include:
• Faded, faint, fuzzy, or smeared printout
• Inconsistent print density
• Missing dots or White Lines in Print (see section 4.4.3.2)
For print quality problems, check the following:
1. The print cartridge can cause print quality problems.
2. The paper can cause print quality problems.
a. Verify that the paper meets the specifications of a high quality plain paper copier media for standard mono-
chrome printing. If color printing is being performed on a media suited only to text printing, the quality may
be unacceptable. For high quality color printing, media that is designed for high-quality color inkjet printing is
recommended. SEE MEDIA SPECIFICATION in Chapter 2: Specificatons
b. Some papers that meet the paper specifications may not provide acceptable print quality. Try a different
brand or type of paper.
c. Turn the stack of paper over and try printing on the other side of the paper. (Most papers have a recom-
mended print side, which is identified on the paper packaging. If print quality improves, no further troubleshooting is necessary.
Note : The Graphic Print Bar is designed to work well with most types of paper, although variables in
paper manufacturing and composition can significantly affect print quality and paper handling.
Most paper manufactured for high-quality photocopying yields good results for general monochrome printing. For high density, high quality color printing, paper should be tested before large
quantities are purchased, in order to ensure desirable performance.
SEE MEDIA SPECIFICATION in Chapter 2: Specificatons
3. Heavy concentrations of ink can cause the paper to buckle and produce smeared printouts. Try a different type
of paper specifically suited for inkjet printing which can absorb more ink when printing.
4. Ink from damp and buckled paper can leave excess ink on components in the paper path. Clean ink residue
from mechanism components if they are contaminated by wet ink.
5. Crusted ink on the print cartridge nozzles can cause smearing and missing dots
(see section 4.4.3.4 about cleaning crusted ink from the nozzles).
6. Damage to the encoder strip can cause print quality problems. Check for problems with the encoder strip and
spring. If necessary, replace affected parts.
Page 45

4.4.3.2 Missing Dots
If any rows of dots are missing on printouts (as shown in Figure3 ), check for the following problems:
1. The print cartridge may be past its expiration date, running out of ink, or faulty. If so, replace the print cartridge.
2. The print cartridge may not be making good electrical contact with the carriage assembly. Make sure that the
print cartridge is seated and pressed securely against the carriage contacts. Remove and reinstall the print cartridge, making sure that the cartridge snaps into the carriage assembly, as shown in Figure 4.
3. The carriage contacts or print cartridge contacts may be dirty (see section 4.4.3.3 about cleaning the electrical
contacts).
4. The print cartridge may have been stored uncapped and out of the mechanism, which can cause a severely dried
out, clogged nozzle. (see section 4.4.3.4 about cleaning the orifice plate and print cartridge nozzles).
If the ink cartridge is only missing a few dot rows, the cartridge may have a damaged or scratched nozzle.
If the nozzle appears scratched or damaged in any way, replace the cartridge.
5. There may be a hardware problem. Check the following:
a. The flex circuit (between the carriage assembly and the logic PBA) may not be making good contact.
Reinstall the flex circuits into connectors on the logic PBA.
b. The carriage assembly may be faulty. Check for problems with the carriage assembly. If necessary , replace
the carriage drive system. Refer to the procedure in section.
< Figure 4. Properly installed print cartridge >
Troubleshooting
4-45
Samsung Electronics
< Figure 3. Example of missing dots shown as partial printed rows (white stripes) in the printout >
Page 46

Troubleshooting
4-46
Samsung Electronics
4.4.3.3 Cleaning the Carriage Contacts and Cartridge Contacts
1. Use only lint-free swabs moistened with water. Do not use cotton swabs.
2. Clean the contacts as shown in Figure 5.
Caution : Do not clean the print cartridge nozzles or orifice plate with swabs.
3. Let the contacts dry after cleaning.
4. Reinstall the print cartridge into the carriage assembly.
4.4.3.4 Cleaning Crusted Ink from Print Cartridge Nozzles
Storing an uncapped print cartridge outside of the service station can cause a crust of ink on the nozzles.
Do not install an ink-crusted print cartridge into the product.
Caution : Use care during cleaning to avoid staining your hands or clothes with ink from the print cartridge.
1. Hold the print cartridge by the top of the cartridge.
2. Scrape dried ink off of the orifice plate into a trash container , using the edge of an index card or other rigid paper
stock (see Figure 6).
3. Follow the host printer’s instructions to initiate a printing self-test to produce a page of printed information.
• If dots are not missing toward the end of the printout, the print cartridge was successfully restored to operating condition.
• If dots are missing toward the end of the printout, removing dried ink did not restore print cartridge operation.
Replace the print cartridge.
<Figure 5. Cleaning the electrical contacts on the carriage (left) and print cartridge (right)>
<Figure 6. Removing crusted ink from the print cartridge >
Page 47

Troubleshooting
4-47
Samsung Electronics
4.4.4 Print Cartridges
The Graphic Print Bar graphics print bar uses consumer replaceable print cartridges.
Warning : Print cartridge ink contains chemical substances, which may be harmful if swallowed. Keep new
and used cartridges out of reach of children.
Caution : Do not use refilled print cartridges. Attempting to refill a print cartridge can cause a sudden drainage
and/or leakage of ink, which can damage the product and possibly personal property.
4.4.4.1 Print Cartridge Care
1. Keep unused print cartridges sealed in their original packaging. When replacing a print cartridge, install the new
cartridge promptly.
2. Do not turn the product off with the print cartridge out of the service station (left end of the carriage path). The
service station cap seals the print cartridge nozzles from exposure to air , to minimize the formation of dried ink in
the nozzles.
3. Do not allow the print cartridge contacts and nozzles to touch any surface or object, including your fingers. Skin
oil and dust can cause print quality or missing dots problems.
4. Store print cartridges at room temperature.
4.4.4.2 Print Cartridge Expiration
Using print cartridges that are past their expiration date can cause print quality problems. The print cartridge life specification is shown in the following table:
The open life specification of the cartridge is valid for use in an office environment, with a printing frequency of at least once
a month.
To determine if a print cartridge is past its expiration date, read the use before date printed on the box and ensure the print
cartridge is sealed in its original packaging. The print cartridge should be installed before the date shown on the package
(see Figure 7). The print cartridge expiration date is also printed on the front of the cartridge body.
< Figure 7. Use before date on print cartridge package >
Ink cartridge Sealed in original package Open, maintained (capped)
(shelf life) in service station
M40, C40 18 Months 180 Days
< Table 1. Print cartridge life specification >
Page 48

Troubleshooting
4-48
Samsung Electronics
4.4.4.3 Causes for Short Print Cartridge Life
There are several causes for short print cartridge life, which are discussed in this section.
1. Printed pages containing graphics or dense print have a higher percentage of ink coverage than specified for
average print cartridge life when printing in text mode.
The percentage of ink coverage on printed pages has a significant impact on the number of pages per print cartridge. Heavy concentrations of ink reduce the number of pages per print cartridge.
2. The print cartridge may be past its expiration date.
3. The printing device may have been turned off with the print cartridge out of the service station and the nozzles
uncapped, leaving them exposed to the atmosphere. This could lead to crusted ink on or in the nozzles may
lead to a shorter print life (see section 4.4.3.4 for removing crusted ink).
This can also cause misdirected nozzles if ink is allowed to harden on the nozzle plate.
This is again caused by the product being turned off with the print cartridge out of the service station for a long
period of time allowing the nozzle plate to dry out. If the print out has small white lines (caused by either a missing nozzle or a clogged or misdirected nozzle) clean the print head nozzle by scraping the excessive ink of f and
then reinstall the cartridge into the product. If the cartridge servicing routine does not clear the clogged nozzles,
the cartridge must be replaced.
4. The original print cartridge package may have been opened. Print cartridges have a longer life sealed in their
original package. This is usually true if the cartridge is exposed to higher than normal temperatures.
5. The print cartridge may be faulty.
However, frequent occurrences of faulty print cartridges may indicate problems with service station mechanism.
6. The service station may be faulty, which can lead to several types of problems including ink crusting, plugging of
nozzles, or air forced into the nozzles.
If replacing the cap and wiper do not resolve the cartridge problem, replace the entire service station assembly.
 Loading...