

Page 1

Wireless network setup
Machines without a display screen
Connecting in PBC mode
Press and hold the (WPS) button on the control panel for about 2 - 4
1
seconds until the status LED blinks quickly.
The machine starts connecting to the wireless network. The LED blinks
slowly for up to two minutes until you press the PBC button on the
access point (or wireless router).
Press the WPS (PBC) button on the access point (or wireless router).
2
a The light blinks fast on the WPS LED. The machine is connecting to
the access point (or wireless router).
b When the machine is successfully connected to the wireless
network, the WPS LED light stays on.
Connecting in PIN mode
The network configuration report, including PIN, must be printed (see
1
"Printing a network configuration report" on page 141).
You need to enter the eight-digit PIN within two minutes on the
3
computer that is connected to the access point (or wireless router).
The LED blinks slowly for up to two minutes until you enter the eightdigit PIN.
The WPS LED blinks in the order below:
a The light blinks fast on the WPS LED. The machine is connecting to
the access point (or wireless router).
b When the machine is successfully connected to the wireless
network, the WPS LED light stays on.
Re-connecting to a network
When the wireless function is off, the machine automatically tries to re-connect
to the access point (or wireless router) with the previously used wireless
connection settings and address.
In the following cases, the machine automatically re-connects to the
wireless network:
• The machine is turned off and on again.
In ready mode, press and hold the (Cancel or Stop/Clear) button on
the control panel for about 5 seconds. You can find your machine’s PIN.
Press and hold the (WPS) button on the control panel for more than
2
4 seconds until the status LED stays on.
The machine starts connecting to the access point (or wireless router).
• The access point (or wireless router) is turned off and on again.
2. Using a Network-Connected Machine
161
Page 2

Wireless network setup
Canceling the connection process
To cancel the wireless network connection when the machine is connecting to
the wireless network, press and release the (Cancel or Stop/Clear) on the
control panel. You need to wait 2 minutes to re-connect to the wireless
network.
Disconnecting from a network
To disconnect the wireless network connection, press the (WPS) button on
the control panel for more than two seconds.
• When the Wi-Fi network is in idle mode: The machine is immediately
disconnected from the wireless network and the WPS LED turns off.
• When the Wi-Fi network is being used: While the machine waits until the
current job is finished, the light blinks fast on the WPS LED. Then, the
wireless network connection is automatically disconnected and the WPS
LED turns off.
15
Using the menu button
Some menus may not appear in the display depending on options or
models. If so, it is not applicable to your machine (see "Menu overview" on
page 33).
Before starting, you will need to know the network name (SSID) of your wireless
network and the network key if it is encrypted. This information was set when
the access point (or wireless router) was installed. If you do not know about your
wireless environment, please ask the person who set up your network.
After completing the wireless network connection, you need to install a
machine driver to print from an application (see "Installing driver over the
network" on page 144).
Press the (Menu) button on the control panel.
1
Press Network > Wireless > WLAN Settings.
2
2. Using a Network-Connected Machine
162
Page 3

Wireless network setup
Press the OK to select the setup method you want.
3
• Wizard (recommended): In this mode, the setup is automatic. The
machine will display a list of available networks from which to
choose. After a network is chosen then printer will prompt for the
corresponding security key.
• Custom: In this mode, users can give or edit manually their own SSID
, or choose the security option in detail.
16
Setup using Windows
Shortcut to the Wireless Setting program without the CD: If you have
installed the printer driver once, you can access the Wireless Setting
program without the CD. From the Start menu, select Programs or All
Programs > Samsung Printers > your printer driver name > Wireless
Setting Program.
• A machine installed with a wireless network interface
• USB cable
Creating the infrastructure network
Check whether the USB cable is connected to the machine.
1
Turn on your computer, access point, and machine.
2
Insert the supplied software CD into your CD-ROM drive.
3
Select the Wireless Setting and Installation option.
4
Read the License Agreement, and select I accept the terms of the
5
License Agreement. Then, click Next.
The software searches the wireless network.
6
If the software has failed to search the network, check if the USB cable is
connected properly between the computer and machine, and follow the
instructions in the window.
Access point via USB cable
Items to prepare
• Access point
• Network-connected computer
• Software CD that was provided with your machine
2. Using a Network-Connected Machine
163
Page 4
Wireless network setup
• If wireless network set up has been set before, the Wireless Network
Setting Information window appears.
If you want to reset the wireless settings, check the check box and click
Next.
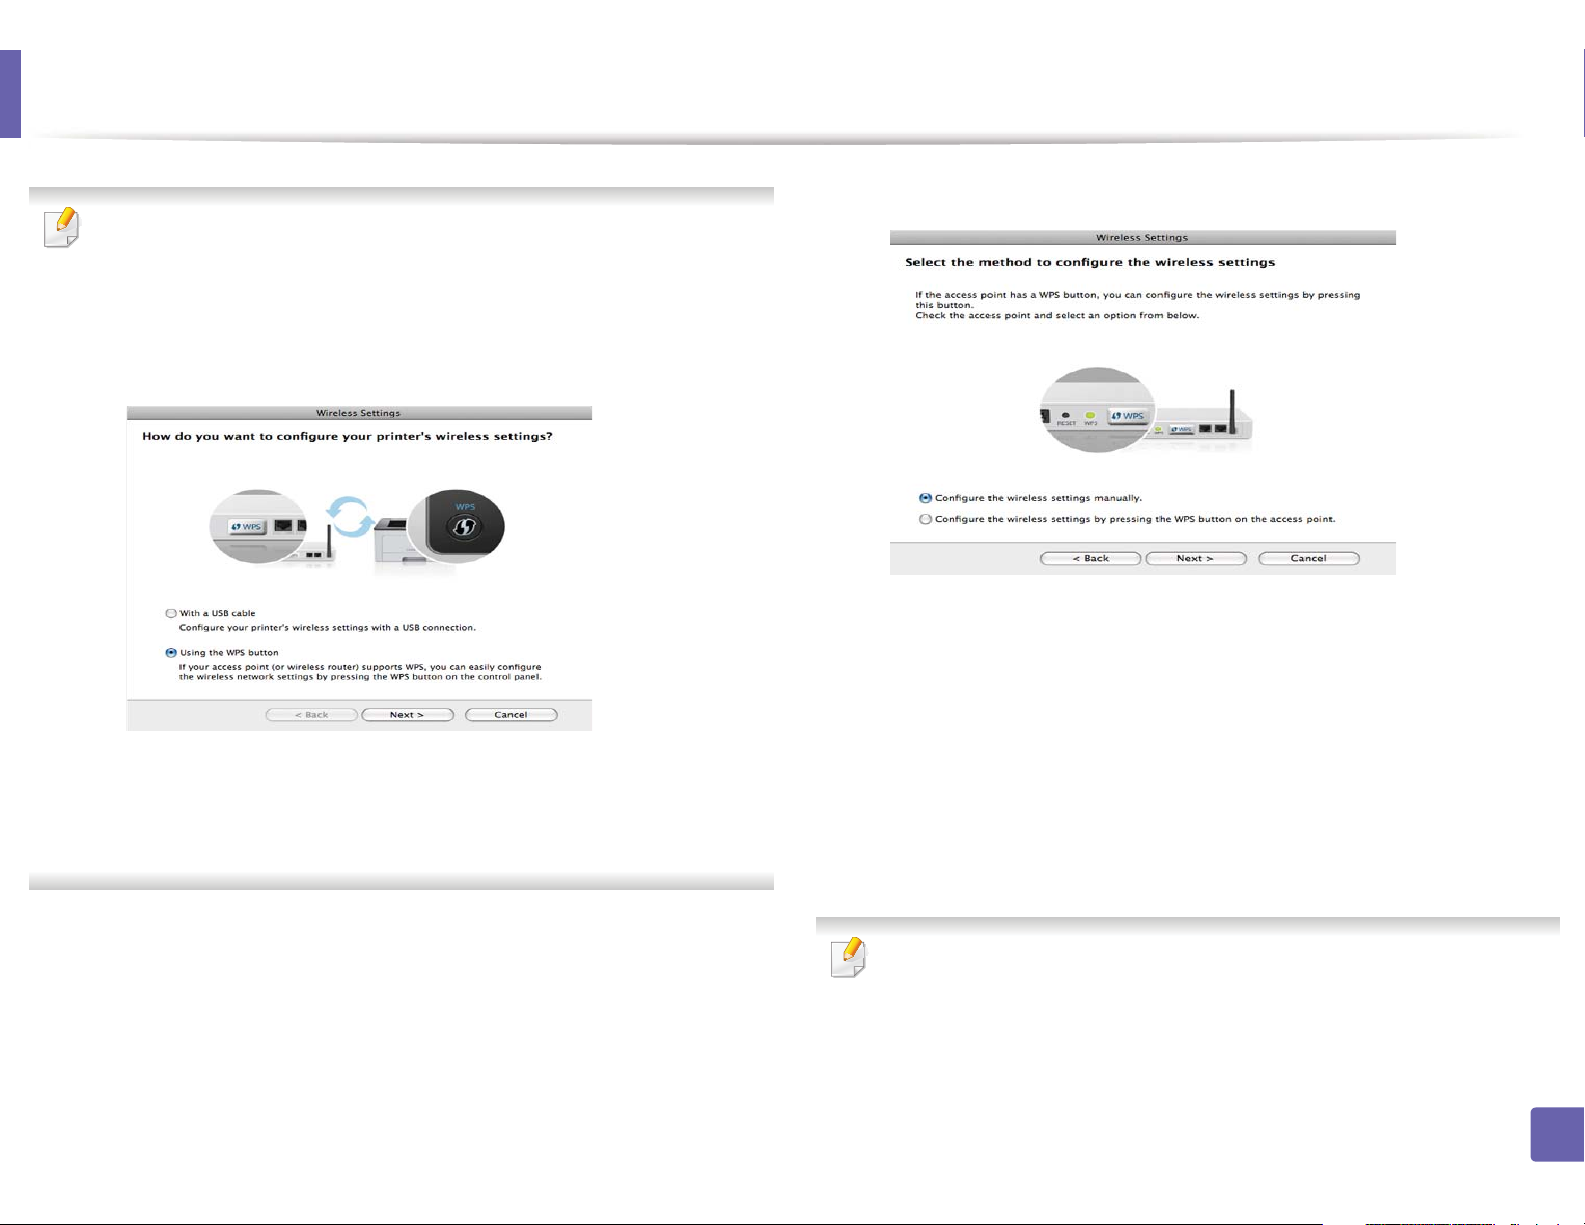
• For models that support the WPS button (without a USB cable
connection), the window shown below will appear.
- With a USB Cable: Connect the USB cable and click Next, then go to
step 7.
- Using the WPS button: See "Access point via WPS button (without a
USB cable connection)" on page 167.
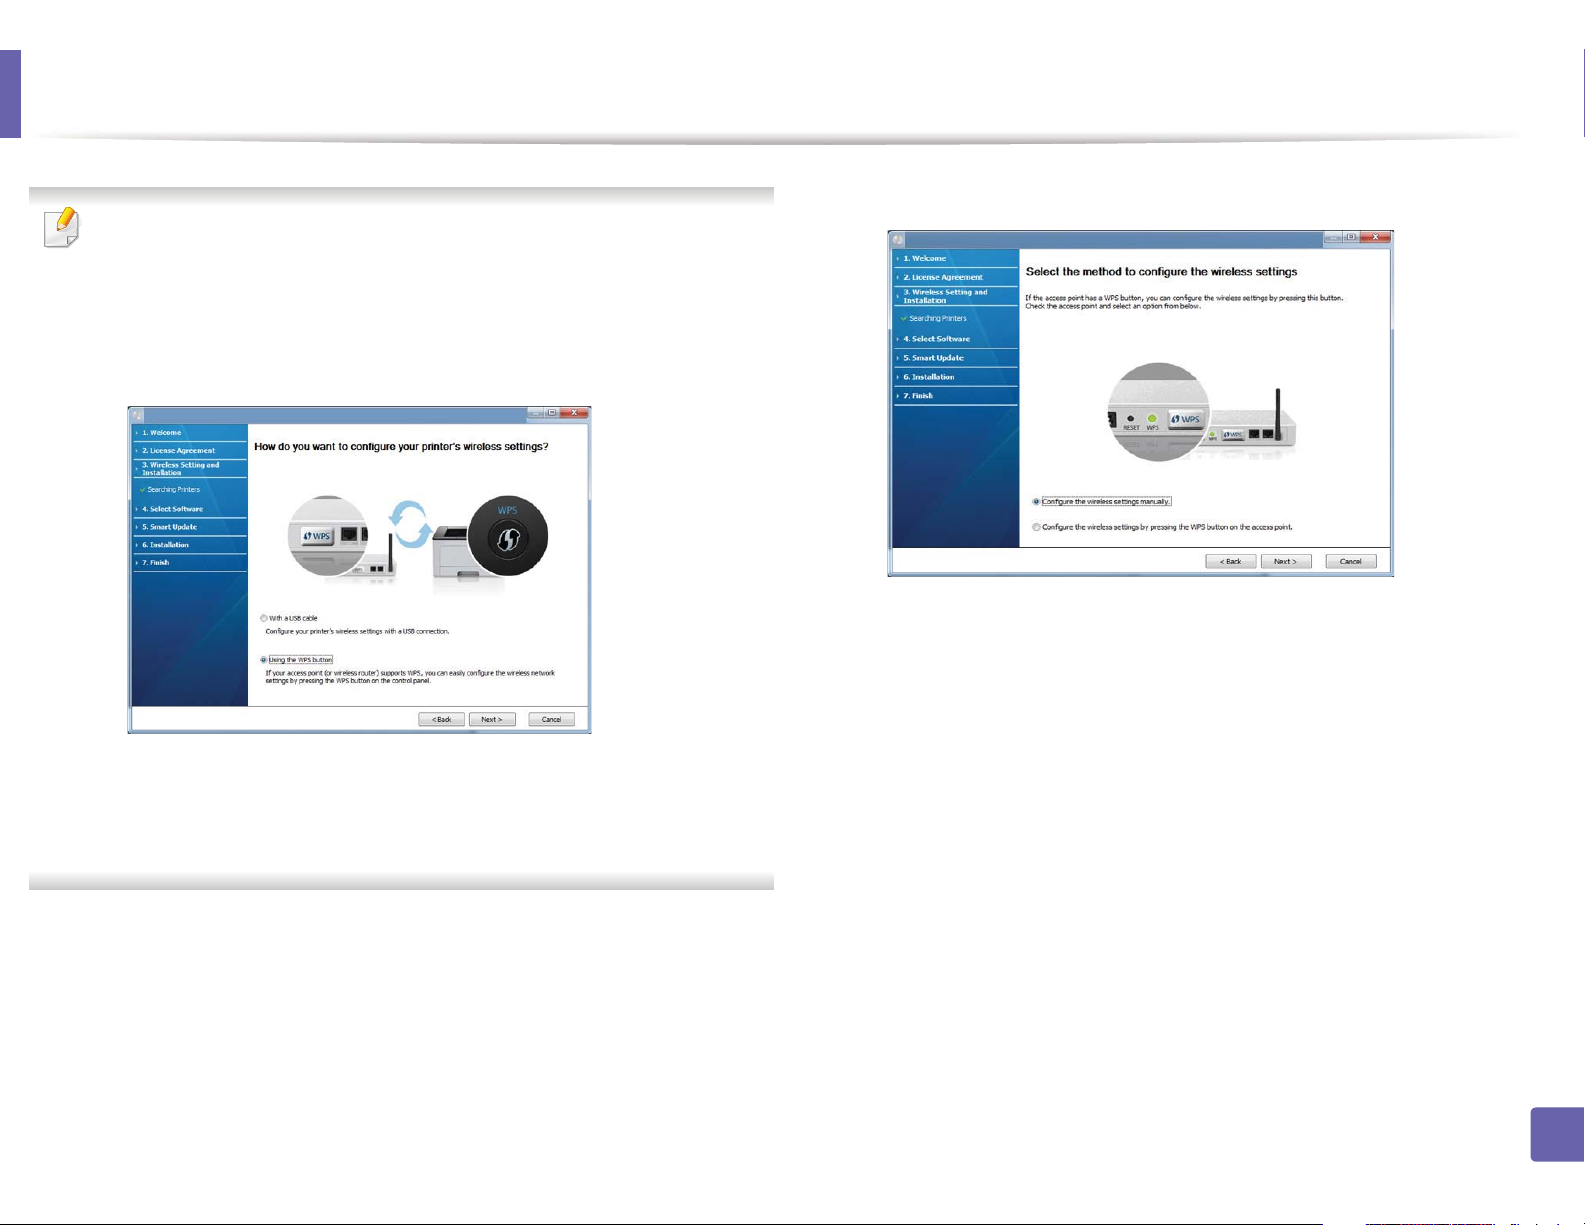
Select the method to use from the wireless set up method window.
7
• Configure the wireless settings manually.: Go to step 8.
• Configure the wireless settings by pressing the WPS button on
the access point.: Connect to the wireless network by press the WPS
button on the access point (or wireless router).
- Follow the instructions in the window. When you are done
configuring the wireless network settings, go to step 11.
After searching, the window shows the wireless network devices. Select
8
the name (SSID) of the access point you are using and click Next.
2. Using a Network-Connected Machine
164
Page 5

Wireless network setup
If you cannot find the network name you want to choose, or if you want to
set the wireless configuration manually, click Advanced Setting.
• Enter the wireless Network Name: Enter the SSID of the access point
(SSID is case-sensitive).
• Operation Mode: Select Infrastructure.
• Authentication: Select an authentication type.
Open System: Authentication is not used, and encryption may or may
not be used, depending on the need for data security.
Shared Key: Authentication is used. A device that has a proper WEP key
can access the network.
WPA Personal or WPA2 Personal: Select this option to authenticate the
print server based on a WPA Pre-Shared Key. This uses a shared secret key
(generally called Pre Shared Key pass phrase), which is manually
configured on the access point and each of its clients.
• Encryption: Select the encryption (None, WEP64, WEP128, TKIP, AES,
TKIP AES).
• Network Key: Enter the encryption network key value.
• Confirm Network Key: Confirm the encryption network key value.
The wireless network security window appears when the access point has
security settings.
The wireless network security window appears. The window may differ
according to its security mode: WEP or WPA.
• WEP
Select Open System or Shared Key for authentication and enter the
WEP security key. Click Next.
WEP (Wired Equivalent Privacy) is a security protocol preventing
unauthorized access to your wireless network. WEP encrypts the data
portion of each packet exchanged on a wireless network using a 64-bit
or 128-bit WEP encryption key.
• WPA
Enter the WPA shared key and click Next.
WPA authorizes and identifies users based on a secret key that changes
automatically at regular intervals. WPA also uses TKIP (Temporal Key
Integrity Protocol) and AES (Advanced Encryption Standard) for data
encryption.
• WEP Key Index: If you are using WEP Encryption, select the appropriate
WEP Key Index.
2. Using a Network-Connected Machine
165
Page 6
Wireless network setup
The window shows the wireless network settings and checks if the
9
settings are correct. Click Next.
• For the DHCP method
If the IP address assignment method is DHCP, check if DHCP is shown
in the window. If it shows Static, click Change TCP/IP to change the
assignment method to DHCP.
• For the Static method
If the IP address assignment method is Static, check if Static is shown
in the window. If it shows DHCP, click Change TCP/IP to enter the IP
address and other network configuration values for the machine.
Before entering the IP address for the machine, you must know the
computer’s network configuration information. If the computer is
set to DHCP, you must contact the network administrator to get the
static IP address.
For example,
If the computer’s network information is as shown below,
- IP address: 169.254.133.42
10
11
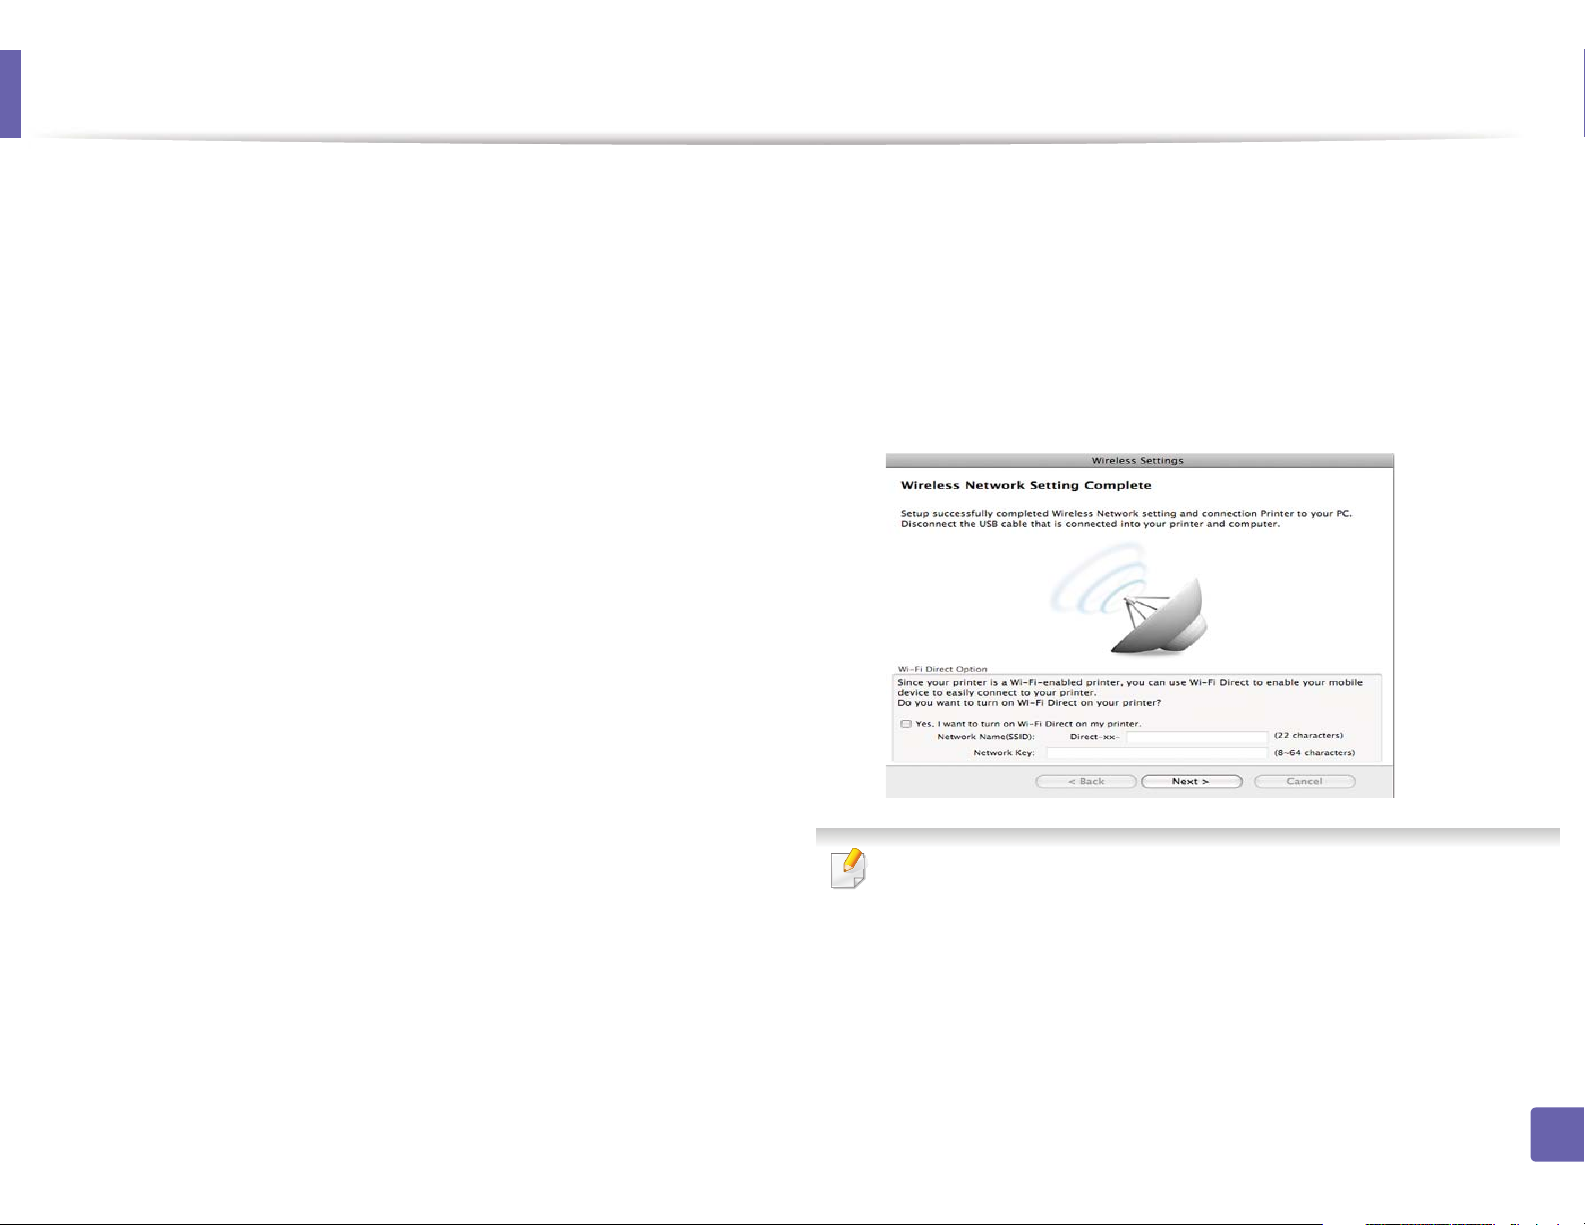
When the window that tells you that the network cable connection is
confirmed appears, disconnect the network cable and click Next.
If the network cable is connected, it may have trouble finding the
machine when configuring the wireless network.
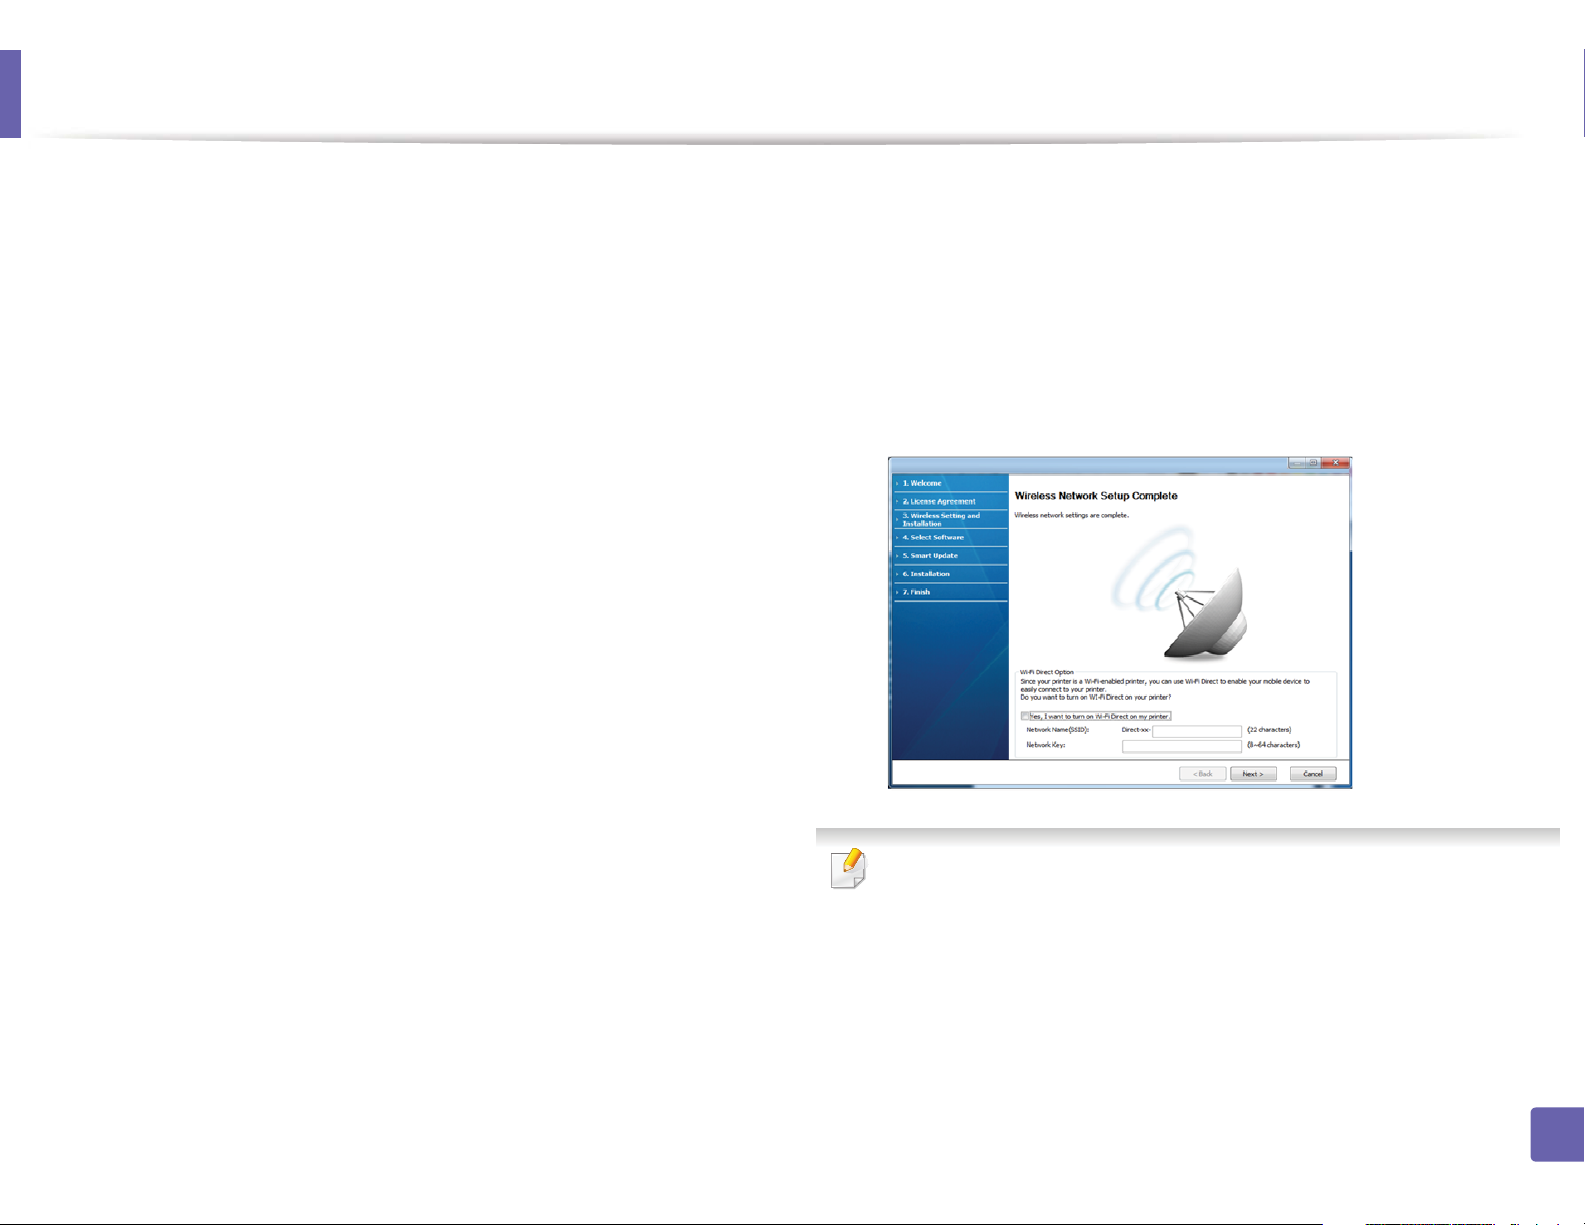
Wireless network setting is completed. To print from a Wi-Fi Direct
supported mobile device, set the Wi-Fi Direct Option (see "Setting up WiFi Direct" on page 183).
- Subnet Mask: 255.255.0.0
Then, the machine’s network information should be as follows:
- IP address: 169.254.133.43
- Subnet Mask: 255.255.0.0 (Use the computer’s subnet mask.)
- Gateway: 169.254.133.1
Wi-Fi Direct Option:
• Wi-Fi Direct option appears on the screen only if your printer supports
this feature.
• Can start to build Wi-Fi Direct by using Samsung Easy Printer Manager
(see "Setting up Wi-Fi Direct" on page 183).
2. Using a Network-Connected Machine
166
Page 7

Wireless network setup
12
13
14
15
16
17
• Network Name(SSID): The default Network Name is the model name
and the maximum length is 22 characters (not including "Direct-xx-").
• Network Key is the numeric string, and the size is 8 ~ 64 characters.
When the wireless network set up is completed, disconnect the USB
cable between the computer and machine. Click Next.
Click Next when the Confirm Printer Connection window appears.
Select the components to be installed. Click Next.
After selecting the components, you can also change the machine name,
set the machine to be shared on the network, set the machine as the
default machine, and change the port name of each machine. Click Next.
After installation is finished, a window asking you to print a test page
appears. If you want to print a test page, click Print a test page.
Otherwise, just click Next and go to step 18.
If the test page prints out correctly, click Yes.
If not, click No to reprint it.
Access point via WPS button (without a USB cable
connection)
For models that have a WPS button, you can set the wireless network using the
WPS button (without a USB connection) and access point (or a router) WPS
button.
Items to prepare
• Access point (or wireless router)
• Network-connected computer
• Software CD that was provided with your machine
• The machine installed with a wireless network interface
Creating the infrastructure network
Turn on your computer, access point, and machine.
1
Insert the supplied software CD into your CD-ROM drive.
2
Select the Wireless Setting and Installation option.
3
18
If you want to register your machine with the Samusng web site and
receive useful information, click On-line Registration. If not, click
Finish.
Read the License Agreement, and select I accept the terms of the
4
License Agreement. Then, click Next.
2. Using a Network-Connected Machine
167
Page 8
Wireless network setup
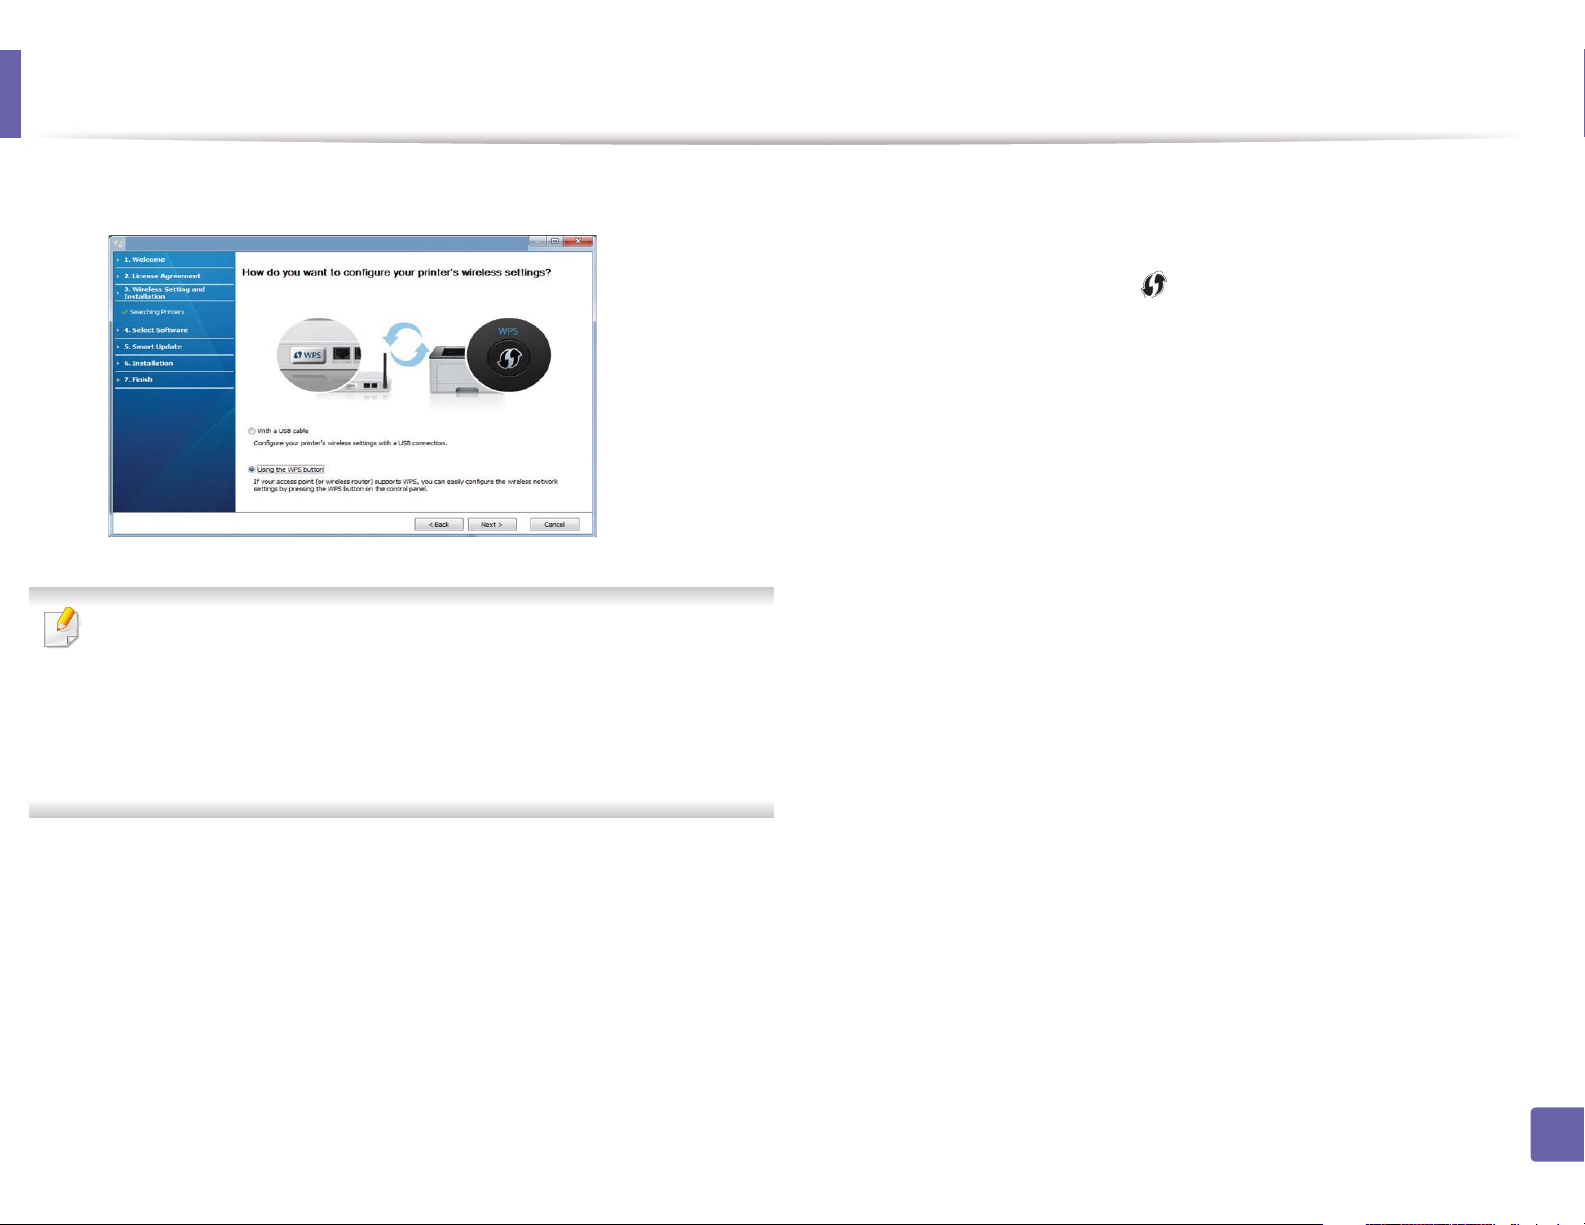
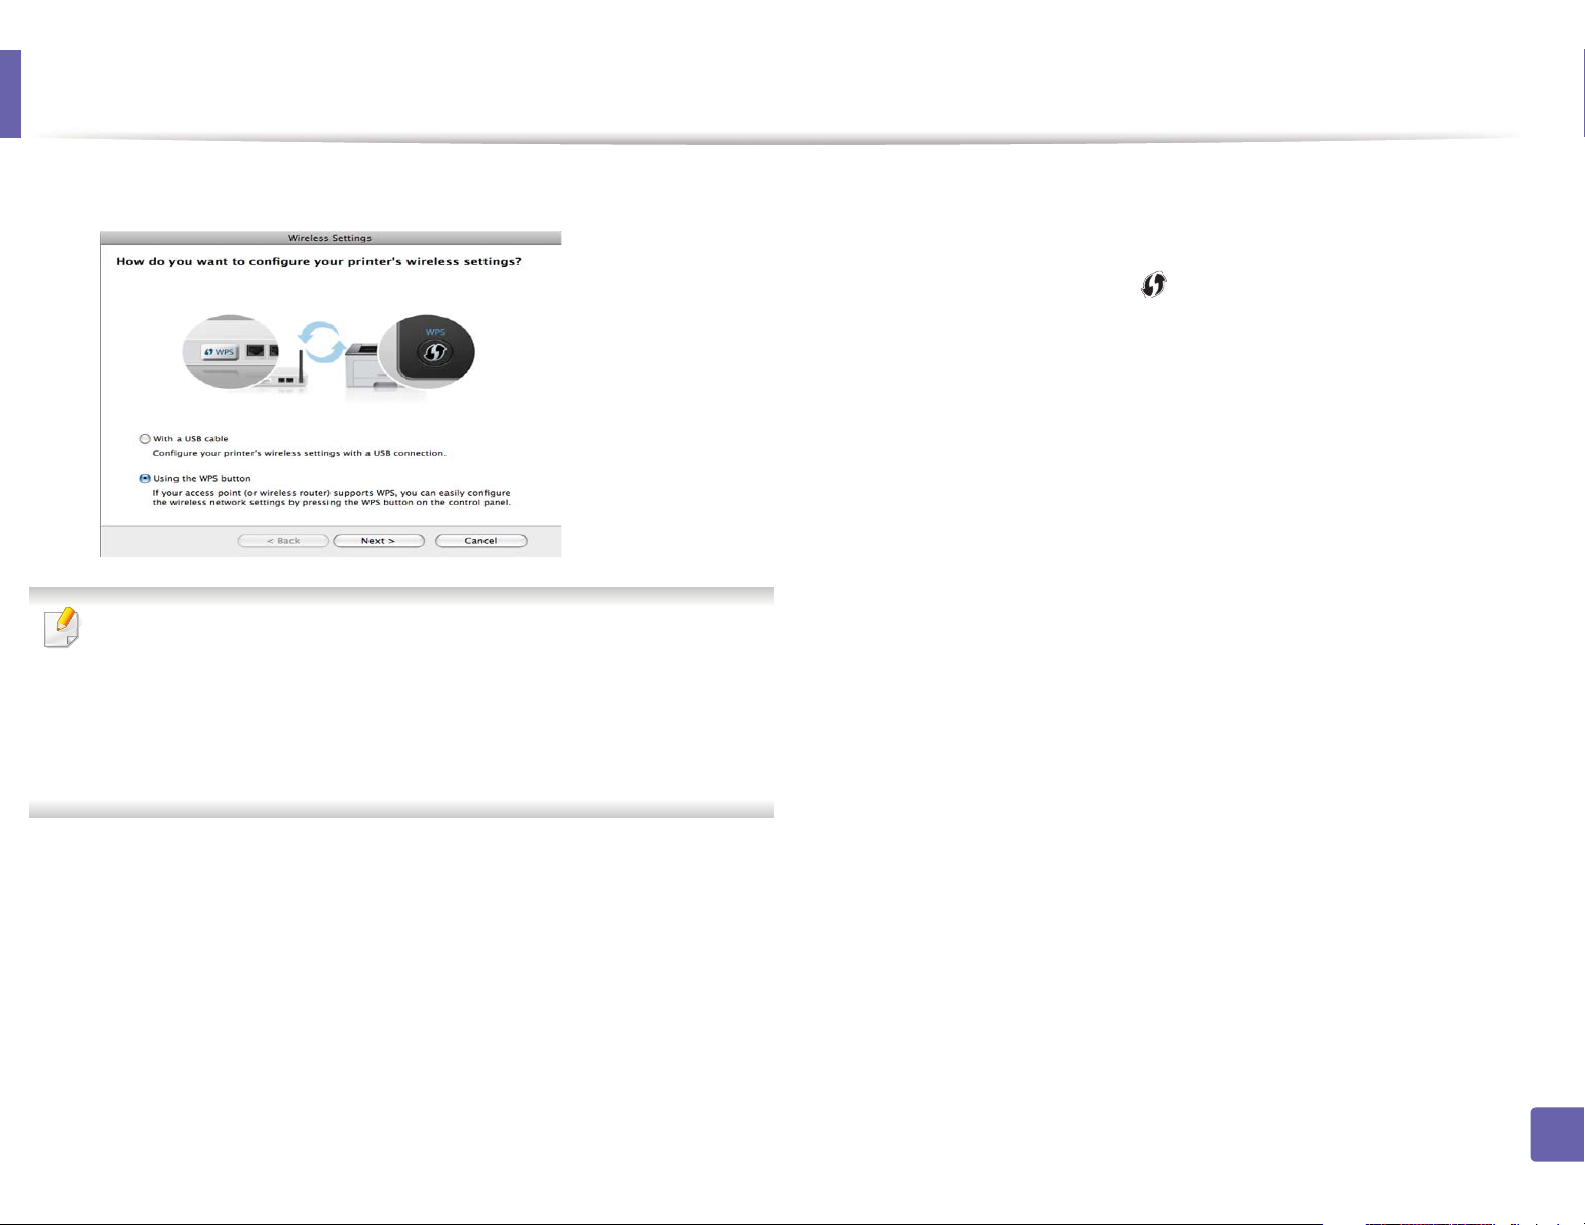
Select Using the WPS button and click Next.
5
• For models that support WPS button, the above window appears.
• If your machine is connected with a USB cable, the above window does
not appear. Disconnect the USB cable if you want to set up the wireless
network using the WPS button.
• If you want to set up the wireless network using the USB cable, refer to
"Access point via USB cable" on page 163.
Follow the instructions on the window to set up the wireless network.
7
• For models with a display screen, follow the steps below.
a Press and hold the (WPS) button on the control panel for
about 2-4 seconds.
The machine waits up to 2 minutes for the WPS button on the
access point (or a router) to be pressed.
b Press the WPS (PBC) button on the access point (or wireless
router).
The messages are displayed on the display screen in the order
below:
- Connecting: The machine is connecting to the access point
(or wireless router).
- Connected: When the machine is successfully connected to
the wireless network, the WPS LED light stays on.
The next window asks you to check if your access point (or wireless
6
router) supports WPS or not.
If the access point (or wireless router) has a WPS button, select Yes and
click Next.
2. Using a Network-Connected Machine
168
Page 9

Wireless network setup
- SSID Type: After completing the wireless network
connection process, the AP’s SSID information appears on
the display.
• For models without a display screen, follow the steps below.
a Press and hold the (WPS) button on the control panel for
about 2 - 4 seconds until the status LED blinks quickly.
The machine starts connecting to the wireless network. The LED
blinks slowly for up to two minutes until you press the PBC
button on the access point (or wireless router).
b Press the WPS (PBC) button on the access point (or wireless
router).
- The light blinks fast on the WPS LED while it is connecting to
the access point (or wireless router).
- When the machine is successfully connected to the wireless
network, the WPS LED light stays on.
The Wireless Network Setting Complete window appears. Click Next.
8
Click Next when the Confirm Printer Connection window appears.
9
12
13
14
After the installation is finished, a window asking you to print a test page
appears. If you want to print a test page, click Print a test page.
Otherwise, just click Next and go to step 14.
If the test page prints out correctly, click Yes.
If not, click No to reprint it.
If you want to register your machine with the Samusng web site and
receive useful information, click On-line Registration. If not, click
Finish.
Ad hoc via USB cable
If you do not have an access point (AP), you may still connect the machine
wirelessly to your computer by setting up an ad-hoc wireless network by
following the simple steps below.
Items to prepare
• Network-connected computer
10
11
Select the components to be installed. Click Next.
After selecting the components, you can also change the machine name,
set the machine to be shared on the network, set the machine as the
default machine, and change the port name of each machine. Click Next.
• Software CD that was provided with your machine
• A machine installed with a wireless network interface
• USB cable
2. Using a Network-Connected Machine
169
Page 10

Wireless network setup
Creating the ad hoc network in Windows
Check whether the USB cable is connected to the machine.
1
Turn on your computer and the wireless network machine.
2
Insert the supplied software CD into your CD-ROM drive.
3
Select the Wireless Setting and Installation option.
4
Read the License Agreement, and select I accept the terms of the
5
License Agreement. Then, click Next.
The software searches the wireless network.
6
If the software has failed to search the network, check if the USB cable is
connected properly between the computer and machine, and follow the
instructions in the window.
If you want to change the ad hoc settings, click the Advanced Setting
button.
• Enter the wireless Network Name: Enter the SSID name you want (SSID
is case-sensitive).
• Operation Mode: Select ad hoc.
• Channel: Select the channel. (Auto Setting or 2412 MHz to 2467 MHz).
• Authentication: Select an authentication type.
Open System: Authentication is not used, and encryption may or may
not be used, depending on the need for data security.
Shared Key: Authentication is used. A device that has a proper WEP key
can access the network.
• Encryption: Select the encryption (None, WEP64, WEP128).
• Network Key: Enter the encryption network key value.
• Confirm Network Key: Confirm the encryption network key value.
• WEP Key Index: If you are using WEP Encryption, select the appropriate
WEP Key Index.
After searching the wireless networks, a list of wireless networks your
7
machine has searched appears.
If you want to use the Samsung default ad hoc setting, select the last
wireless network on the list, Network Name(SSID) is Portthru and
Signal is Printer Self Network.
Then, click Next.
If you want to use other ad hoc settings, select another wireless network
from the list.
The wireless network security window appears when the ad hoc network
has security enabled.
Select Open System or Shared Key for the authentication and click Next.
• WEP (Wired Equivalent Privacy) is a security protocol preventing
unauthorized access to your wireless network. WEP encrypts the data
portion of each packet exchanged on a wireless network using a 64-bit
or 128-bit WEP encryption key.
The window showing the wireless network setting appears. Check the
8
settings and click Next.
2. Using a Network-Connected Machine
170
Page 11
Wireless network setup
Before entering the IP address for the machine, you must know the
computer’s network configuration information. If the computer’s network
configuration is set to DHCP, the wireless network setting should also be
DHCP. Likewise, if the computer’s network configuration is set to Static, the
wireless network setting should also be Static.
If your computer is set to DHCP and you want to use the Static wireless
network setting, you must contact the network administrator to get the
static IP address.
• For the DHCP method
If the IP address assignment method is DHCP, check if DHCP is shown in
the Wireless Network Setting Confirm window. If it shows Static, click
Change TCP/IP to change the assignment method to Receive IP
address automatically (DHCP).
• For the Static method
If the IP address assignment method is Static, check if Static is shown in
the Wireless Network Setting Confirm window. If it shows DHCP, click
Change TCP/IP to enter the IP address and other network configuration
values for the machine.
For example,
If the computer’s network information is as shown follows:
- IP address: 169.254.133.42
- Subnet Mask: 255.255.0.0
Then, the machine’s network information should be as below:
- IP address: 169.254.133.43
- Subnet Mask: 255.255.0.0 (Use the computer’s subnet mask.)
- Gateway: 169.254.133.1
10
11
12
13
14
15
The Wireless Network Setting Complete window appears. Click Next.
9
When the wireless network settings are completed, disconnect the USB
cable between the computer and machine. Click Next.
If the Change PC Network Setting window appears, follow the steps in the
window.
Click Next if you are finished with the computer’s wireless network settings.
If you set the computer’s wireless network to DHCP, it will take several
minutes to receive the IP address.
Click Next when the Confirm Printer Connection window appears.
Select the components to be installed. Click Next.
After selecting the components, you can also change the machine name,
set the machine to be shared on the network, set the machine as the
default machine, and change the port name of each machine. Click Next.
After the installation is finished, a window asking you to print a test page
appears. If you want to print a test page, click Print a test page.
Otherwise, just click Next and go to step 16.
If the test page prints out correctly, click Yes.
If not, click No to reprint it.
2. Using a Network-Connected Machine
171
Page 12

Wireless network setup
16
17
If you want to register your machine with the Samusng web site and
receive useful information, click On-line Registration. If not, click
Finish.
Setup using Macintosh
Items to prepare
• Access point
• Network-connected computer
• Software CD that was provided with your machine
• A machine installed with a wireless network interface
• USB cable
5
6
7
8
9
10
11
Double-click the MAC_Installer folder > Installer OS X icon.
Click Continue.
Read the license agreement and click Continue.
Click Agree to agree to the license agreement.
When the message that warns that all applications will close on your
computer appears, click Continue.
Click Wireless Network Setting button on the User Options Pane.
The software searches the wireless network.
If the software has failed to search the network, check if the USB cable is
connected properly between the computer and machine, and follow the
instructions in the window.
Access point via USB cable
Check whether the USB cable is connected to the machine.
1
Turn on your computer, access point, and machine.
2
Insert the supplied software CD into your CD-ROM drive.
3
Double-click the CD-ROM icon that appears on your Macintosh desktop.
4
2. Using a Network-Connected Machine
172
Page 13
Wireless network setup
• If wireless network setting has been set before, Wireless Network
Setting Information window appears.
If you want to reset the wireless settings, check the check box and click
Next.
• For models that support the WPS button (without a USB cable
connection), the window shown below will appear.
- With a USB Cable: Connect the USB cable and click Next, then go to
step 7.
- Using the WPS Button: See "Access point via WPS button (without a
USB cable connection)" on page 167.
12
13
Select the method to use from the wireless set up method window.
• Configure the wireless settings manually.: Go to step 13.
• Configure the wireless settings by pressing the WPS button on
the access point.: Connect to the wireless network by press the WPS
button on the access point (or a wireless router).
- Follow the instructions in the window. When you are done
setting the wireless network settings, go to step 16.
After searching, the window shows the wireless network devices. Select
the name (SSID) of the access point you are using and click Next.
When you set the wireless configuration manually, click Advanced Setting.
• Enter the wireless Network Name: Enter the SSID of the access point
(SSID is case-sensitive).
• Operation Mode: Select Infrastructure.
2. Using a Network-Connected Machine
173
Page 14

Wireless network setup
• Authentication: Select an authentication type.
Open System: Authentication is not used, and encryption may or may
not be used, depending on the need for data security.
Shared Key: Authentication is used. A device that has a proper WEP key
can access the network.
WPA Personal or WPA2 Personal: Select this option to authenticate the
print server based on the WPA Pre-Shared Key. This uses a shared secret
key (generally called Pre Shared Key pass phrase) that is manually
configured on the access point and each of its clients.
• Encryption: Select the encryption. (None, WEP64, WEP128, TKIP, AES,
TKIP, AES)
• Network Key: Enter the encryption network key value.
• Confirm Network Key: Confirm the encryption network key value.
• WEP Key Index: If you are using WEP Encryption, select the appropriate
WEP Key Index.
The wireless network security window appears when the access point has
security enabled.
The wireless network security window appears. The window may differ
according to its security mode: WEP or WPA.
• WEP
Select Open System or Shared Key for the authentication and enter the
WEP security key. Click Next.
WEP (Wired Equivalent Privacy) is a security protocol preventing
unauthorized access to your wireless network. WEP encrypts the data
portion of each packet exchanged on a wireless network using a 64-bit
or 128-bit WEP encryption key.
• WPA
Enter the WPA shared key and click Next.
WPA authorizes and identifies users based on a secret key that changes
automatically at regular intervals. WPA also uses TKIP (Temporal Key
Integrity Protocol) and AES (Advanced Encryption Standard) for data
encryption.
2. Using a Network-Connected Machine
174
Page 15
Wireless network setup
14
The window shows the wireless network settings and check if settings
are right. Click Next.
• For the DHCP method
If the IP address assignment method is DHCP, check if DHCP is shown
in the window. If it shows Static, click Change TCP/IP to change the
assignment method to DHCP.
• For the Static method
If the IP address assignment method is Static, check if Static is shown
in the window. If it shows DHCP, click Change TCP/IP to enter the IP
address and other network configuration values for the machine.
Before entering the IP address for the machine, you must know the
computer’s network configuration information. If the computer is
set to DHCP, you must contact the network administrator to get the
static IP address.
For example:
If the computer’s network information is shown as follows:
- IP address: 169.254.133.42
15
16
When the window that tells you that the network cable connection is
confirmed appears, disconnect the network cable and click Next.
If the network cable is connected, it may have trouble finding the
machine when configuring the wireless network.
Wireless network setting is completed. To print from a Wi-Fi Direct
supported mobile device, set the Wi-Fi Direct Option (see "Setting up WiFi Direct" on page 183).
- Subnet Mask: 255.255.0.0
Then, the machine’s network information should be as shown
below:
- IP address: 169.254.133.43
- Subnet Mask: 255.255.0.0 (Use the computer’s subnet mask.)
- Gateway: 169.254.133.1
Wi-Fi Direct Option:
• Wi-Fi Direct Option appears on the screen only if your printer supports
this feature.
• Can start to build Wi-Fi Direct by using Samsung Easy Printer Manager
(see "Setting up Wi-Fi Direct" on page 183).
2. Using a Network-Connected Machine
175
Page 16

Wireless network setup
• Network Name(SSID): The default Network Name is the model name
and the maximum length is 22 characters (not including "Direct-xx-").
• Network Key is the numeric string, and the size is 8 ~ 64 characters.
17
18
When the wireless network settings are completed, disconnect the USB
cable between the computer and machine.
Wireless network set up is completed. After the installation is finished,
click Quit.
After completing the wireless network connection, you need to install a
machine driver to print from an application (see "Installation for Macintosh"
on page 134).
Setting the access point using the WPS button
For models that have a WPS button, you can set the wireless network using the
WPS button (without a USB connection) and access point (or a router) WPS
button.
• Software CD that was provided with your machine
• A machine installed with a wireless network interface
Creating the infrastructure network
Turn on your computer, access point, and machine.
1
Insert the supplied software CD into your CD-ROM drive.
2
Double-click the CD-ROM icon that appears on your Macintosh desktop.
3
Double-click the MAC_Installer folder > Installer OS X icon.
4
Click Continue.
5
Read the license agreement and click Continue.
6
Click Agree to agree to the license agreement.
7
When the message that warns that all applications will close on your
8
computer appears, click Continue.
Click the Wireless Network Setting button on the User Options Pane.
9
Items to prepare
• Access point (or wireless router)
• Network-connected computer
2. Using a Network-Connected Machine
176
Page 17
Wireless network setup
10
Select Using the WPS button and click Next.
• For models that support the WPS button, the above window appears.
• If your machine is connected with a USB cable, the above window does
not appear. Disconnect the USB cable if you want to set up the wireless
network using the WPS button.
• If you want to set up the wireless network using the USB cable, refer to
"Access point via USB cable" on page 172.
12
Follow the instructions in the window to set up the wireless network.
• For models with a display screen, follow the steps below:
a Press and hold the (WPS) button on the control panel for
about 2-4 seconds.
The machine waits up to 2 minutes for the WPS button on the
access point (or a router) to be pressed.
b Press the WPS (PBC) button on the access point (or wireless
router).
The messages are displayed on the display screen in the order
below:
- Connecting: The machine is connecting to the access point
(or wireless router).
- Connected: When the machine is successfully connected to
the wireless network, the WPS LED light stays on.
11
The next window asks you to check if your access point (or wireless
router) supports WPS or not.
If the access point (or wireless router) has a WPS button, select Yes and
click Next.
2. Using a Network-Connected Machine
177
Page 18
Wireless network setup
13
- SSID Type: After completing the wireless network
connection process, the AP’s SSID information appears on
the display.
• For models without a display screen, follow the steps below:
a Press and hold the (WPS) button on the control panel for
about 2 - 4 seconds until the status LED blinks quickly.
The machine starts connecting to the wireless network. The LED
blinks slowly for up to two minutes until you press the PBC
button on the access point (or wireless router).
b Press the WPS (PBC) button on the access point (or wireless
router).
- The light blinks fast on the WPS LED. The machine is
connecting to the access point (or wireless router).
- When the machine is successfully connected to the wireless
network, the WPS LED light stays on.
Wireless network set up is completed. After installation is finished, click
Quit.
After completing the wireless network connection, you need to install a
machine driver to print from an application (see "Installation for Macintosh"
on page 134).
Ad hoc via USB cable
If you do not have an access point (AP), you may still connect the machine
wirelessly to your computer by setting up an ad hoc wireless network by
following these simple directions.
Items to prepare
• Network-connected computer
• Software CD that was provided with your machine
• A machine installed with a wireless network interface
• USB cable
Creating the ad hoc network in Macintosh
Check whether the USB cable is connected to the machine.
1
Turn on your computer and the wireless network machine.
2
Insert the supplied software CD into your CD-ROM drive.
3
Double-click the CD-ROM icon that appears on your Macintosh desktop.
4
Double-click the MAC_Installer folder > Installer OS X icon.
5
Click Continue.
6
Read the license agreement and click Continue.
7
2. Using a Network-Connected Machine
178
Page 19

Wireless network setup
8
9
10
11
12
Click Agree to agree to the license agreement.
When the message that warns that all applications will close on your
computer appears, click Continue.
Click Wireless Network Setting button on the User Options Pane.
The software searches for wireless network devices.
If the search has failed, check if the USB cable is connected between the
computer and machine properly, and follow the instructions in the window.
After searching the wireless networks, a list of wireless networks your
machine has searched appears.
If you want to use the Samsung default ad hoc setting, select the last
wireless network on the list, which Network Name(SSID) is Portthru
and Signal is Printer Self Network.
Then, click Next.
If you want to use other ad hoc settings, select another wireless network
from the list.
13
• Authentication: Select an authentication type.
Open System: Authentication is not used, and encryption may or may
not be used, depending on the need for data security.
Shared Key: Authentication is used. A device that has a proper WEP key
can access the network.
• Encryption: Select the encryption (None, WEP64, WEP128).
• Network Key: Enter the encryption network key value.
• Confirm Network Key: Confirm the encryption network key value.
• WEP Key Index: If you are using WEP Encryption, select the appropriate
WEP Key Index.
The wireless network security window appears when the ad hoc network
has security setting.
Select Open System or Shared Key for the authentication and click Next.
• WEP (Wired Equivalent Privacy) is a security protocol preventing
unauthorized access to your wireless network. WEP encrypts the data
portion of each packet exchanged on a wireless network using a 64-bit
or 128-bit WEP encryption key.
The window showing the wireless network settings appears. Check the
settings and click Next.
If you want to change ad hoc settings, click the Advanced Setting button.
• Enter the wireless Network Name: Enter the SSID name (SSID is case-
sensitive).
• Operation Mode: Select ad hoc.
• Channel: Select the channel (Auto Setting or 2412 MHz to 2467 MHz).
2. Using a Network-Connected Machine
179
Page 20

Wireless network setup
14
Before entering the IP address for the machine, you must know the
computer’s network configuration information. If the computer’s network
configuration is set to DHCP, the wireless network setting should also be
DHCP. Likewise, if the computer’s network configuration is set to Static, the
wireless network setting should also be Static.
15
When the window that tells you that the network cable connection is
confirmed appears, disconnect the network cable and click Next.
If the network cable is connected, it may have trouble finding the
machine when configuring the wireless network.
The wireless network connects according to the network configuration.
If your computer is set to DHCP and you want to use Static wireless network
setting, you must contact the network administrator to get the static IP
address.
• For the DHCP method
If the IP address assignment method is DHCP, check if DHCP is shown in
the Wireless Network Setting Confirm window. If it shows Static, click
Change TCP/IP to change the assignment method to Receive IP
address automatically (DHCP).
• For the Static method
If the IP address assignment method is Static, check if Static is shown in
the Wireless Network Setting Confirm window. If it shows DHCP, click
Change TCP/IP to enter the IP address and other network configuration
16
18
Wireless network set up is completed. After installation is finished, click
Quit.
After completing the wireless network connection, you need to install a
machine driver to print from an application (see "Installation for Macintosh"
on page 134).
Using a network cable
values for the machine.
For example,
If the computer’s network information is shown as follows:
- IP address: 169.254.133.42
Machines that do not support the network port will not be able to use this
feature (see "Rear view" on page 23).
- Subnet Mask: 255.255.0.0
Then, the machine’s network information should be as shown below:
- IP address: 169.254.133.43
- Subnet Mask: 255.255.0.0 (Use the computer’s subnet mask.)
- Gateway: 169.254.133.1
Your machine is a network compatible machine. To enable your machine to
work with your network, you will need to perform some configuration
procedures.
2. Using a Network-Connected Machine
180
Page 21

Wireless network setup
• After completing the wireless network connection, you need to install a
machine driver to print from an application (see "Installing driver over
the network" on page 144).
• See your network administrator, or the person that set up your wireless
network, for information about your network configuration.
Items to prepare
• Access point
• Network-connected computer
• Software CD that was provided with your machine
• A machine installed with a wireless network interface
• Network cable
IP setting using SetIP Program (Windows)
This program is used to manually set the network IP address of your machine
using its MAC address to communicate with the machine. The MAC address is
the hardware serial number of the network interface and can be found in the
Network Configuration Report.
See "Setting IP address" on page 141.
Configuring the machine’s wireless network
Before starting you will need to know the network name (SSID) of your wireless
network and the network key if it is encrypted. This information was set when
the access point (or wireless router) was installed. If you do not know about your
wireless environment, please ask the person who set up your network.
To configure wireless parameters, you can use SyncThru™ Web Service.
Printing a network configuration report
You can identify the network settings of your machine by printing a network
configuration report.
See "Printing a network configuration report" on page 141.
Using SyncThru™ Web Service
Before starting wireless parameter configuration, check the cable connection
status.
2. Using a Network-Connected Machine
181
Page 22
Wireless network setup
Check whether or not the network cable is connected to the machine. If
1
not, connect the machine with a standard network cable.
Start a web browser such as Internet Explorer, Safari, or Firefox and enter
2
your machine’s new IP address in the browser window.
For example,
Click Login on the upper right of the SyncThru™ Web Service website.
3
Type in the ID and Password then click Login.
4
• ID: admin
• Password: sec00000
When the SyncThru™ Web Service window opens, click Network
5
Settings.
Click Wireless > Wizard.
6
Wizard will help you setup the wireless network configuration. However, if
you want to set the wireless network directly, select Custom.
Select the one Network Name(SSID) in the list.
7
• SSID: SSID (Service Set Identifier) is a name that identifies a wireless
network, access points, and wireless devices attempting to connect
to a specific wireless network must use the same SSID. The SSID is
case sensitive.
• Operation Mode: Operation Mode refers to the type of wireless
connections (see "Wireless network name and network key" on page
156).
- Ad-hoc: Allows wireless devices to communicate directly with
each other in a peer-to-peer environment.
- Infrastructure: Allows wireless devices to communicate with
each other through an access point.
If your network’s Operation Mode is Infrastructure, select the SSID of the
access point. If the Operation Mode is Ad-hoc, select the machine’s SSID.
Note that “portthru” is the default SSID of your machine.
Click Next.
8
If the wireless security setting window appears, enter the registered
password (network key) and click Next.
The confirmation window appears, please check your wireless setup. If
9
the setup is right, click Apply.
2. Using a Network-Connected Machine
182
Page 23
Wireless network setup
Disconnect the network cable (standard or network). Your machine should
then start communicating wirelessly with the network. In case of Ad-hoc
mode, you can use a wireless LAN and wired LAN simultaneously.
19
Turning the Wi-Fi network on/off
If your machine has a display, you can also turn on/off the Wi-Fi from the
machine’s control panel using the Network menu.
Check whether the network cable is connected to the machine. If not,
1
connect the machine with a standard network cable.
Start a web browser such as Internet Explorer, Safari, or Firefox and enter
2
your machine’s new IP address in the browser window.
For example,
When the SyncThru™ Web Service window opens, click Network
5
Settings.
Click Wireless > Custom.
6
You can also turn the Wi-Fi network on/off.
20
Setting the Wi-Fi Direct for mobile printing
Wi-Fi Direct is an easy-to-setup peer-to-peer connecting between method for
your printer and a mobile device that provides a secure connection and better
throughput than ad hoc mode.
With Wi-Fi Direct, you can connect your printer to a Wi-Fi Direct network while
concurrently connecting to an access point, You can also use a wired network
and a Wi-Fi Direct network simultaneously so multiple users can access and print
documents both from Wi-Fi Direct and from a wired network.
• You cannot connect to the internet through the printer’s Wi-Fi Direct.
• The supported protocol list may differ from your model, Wi-Fi Direct
networks do NOT support IPv6, network filtering, IPSec, WINS, and SLP
services.
Click Login on the upper right of the SyncThru™ Web Service website.
3
Type in the ID and Password, then click Login.
4
• ID: admin
• Password: sec00000
Setting up Wi-Fi Direct
You can enable Wi-Fi Direct feature by one of the following methods.
2. Using a Network-Connected Machine
183
Page 24

Wireless network setup
From the USB cable-connected computer(recommended)
• When setting from the supplied software CD, see the access point via USB
cable.
- Windows user, see "Access point via USB cable" on page 163.
- Macintosh user, see "Access point via USB cable" on page 172.
• After the driver installation is complete, Samsung Easy Printer Manager can
be set and changes in the Wi-Fi Direct can be made.
Samsung Easy Printer Manager is Available for Windows
and Macintosh OS users only.
- From the Start menu, select Programs or All Programs > Samsung
Printers > Samsung Easy Printer Manager > Device Settings >
Network.
Wi-Fi Direct On/Off: Select On to enable.
Device Name: Enter the printer’s name for searching for your
printer on a wireless network. By default, the device name is the
model name.
IP Address: Enter the IP address of the printer. This IP address is
used only for the local network and not for the infrastructure wired
or wireless network. We recommend using the default local IP
address (the default local IP address of the printer for Wi-Fi Direct is
192.168.3.1 )
Group Owner: Activate this option to assign the printer the Wi-Fi
Direct group’s owner. The Group Owner acts similar to a wireless
access point. We recommend activating this option.
Network Key: If your printer is a Group Owner, a Network Key is
required for other mobile devices to connect to your printer. You
can configure a network key yourself, or can remember the given
Network Key that is randomly generated by default.
From the machine (Machines with a display screen)
• Select Network > Wireless > Wi-Fi Direct from the control panel.
•Enable Wi-Fi Direct.
From the network-connected computer
If your printer is using a network cable or a wireless access point, you can enable
and configure Wi-Fi Direct from SyncThru™ Web Service.
• Access SyncThru™ Web Service, select Settings > Network Settings >
Wireless > Wi-Fi Direct.
• Enable or disable Wi-Fi Direct and set other options.
•For Linux OS users,
- Print an IP network configuration report to check the output (see
"Printing a network configuration report" on page 141).
2. Using a Network-Connected Machine
184
Page 25

Wireless network setup
- Access SyncThru Web Service, select Settings > Network Settings
> Wireless > Wi-Fi Direct.
- Enable or disable Wi-Fi Direct.
Setting up the mobile device
• After setting up Wi-Fi Direct from the printer, refer to the user manual of the
mobile device you are using to set its Wi-Fi Direct.
• After setting up Wi-Fi Direct, you need to download the mobile printing
application (For example: Samsung Mobile printer) to print from your
smartphone.
• When you have found the printer you want to connect to from your
mobile device, select the printer and the printer's LED will blink. Press the
WPS button on the printer and it will be connected to your mobile
device.
• If your mobile device does not support WPS, you need to enter the
"Network Key" of a printer instead of pushing the WPS button.
21
Troubleshooting
Problems during setup or driver installation
Printers Not Found
• Your machine may not be turned on. Turn on your computer and the
machine.
• USB cable is not connected between your computer and machine. Connect
the machine to your computer using the USB cable.
• The machine does not support wireless networking. Check the machine's
user's guide included on the software CD supplied with your machine and
prepare a wireless network machine.
Connecting Failure - SSID Not Found
• The machine is unable to find the network name (SSID) you have selected or
entered. Check the network name (SSID) on your access point and try
connecting again.
• Your access point is not turned on. Turn on your access point.
2. Using a Network-Connected Machine
185
Page 26
Wireless network setup
Connecting Failure - Invalid Security
• Security is not configured correctly. Check the configured security on your
access point and machine.
Connecting Failure - General Connection Error
• Your computer is not receiving a signal from your machine. Check the USB
cable and your machine’s power.
Connecting Failure - Connected Wired Network
• Your machine is connected with a wired network cable. Remove the wired
network cable from your machine.
PC Connection Error
• The configured network address is unable to connect between your
computer and machine.
- For a DHCP network environment
The receives the IP address automatically (DHCP) when computer is
configured to DHCP.
Subnet Mask: 255.255.0.0
Then the machine’s network information should be as below:
IP address: 169.254.133.43
Subnet Mask: 255.255.0.0 (Use the computer’s subnet mask.)
Gateway: 169.254.133.1
Other problems
If problems occur while using the machine on a network, check the following:
For information on the access point (or wireless router), refer to its own
user's guide.
• Your computer, access point (or wireless router), or machine may not be
turned on.
• Check the wireless reception around the machine. If the router is far from
the machine or there is an obstacle, you might have difficulty receiving the
signal.
- For a Static network environment
The machine uses the static address when the computer is configured
to static address.
For example,
If the computer’s network information is as shown below:
IP address: 169.254.133.42
• Cycle the power for the access point (or wireless router), machine, and
computer. Sometimes cycling the power can recover network
communication.
2. Using a Network-Connected Machine
186
Page 27

Wireless network setup
• Check whether firewall software (V3 or Norton) is blocking the
communication.
If the computer and the machine are connected on the same network and it
cannot be found when searching, firewall software might be blocking the
communication. Refer to the user's guide for the software to turn it off and
try searching for the machine again.
• Check whether the machine's IP address is allocated correctly. You can
check the IP address by printing the network configuration report.
• Check whether the access point (or wireless router) has a configured
security (password). If it has a password, refer to the access point (or wireless
router) administrator.
• Check the machine's IP address. Reinstall the machine driver and change the
settings to connect to the machine on the network. Due to the
characteristics of DHCP, the allocated IP address could change if the
machine is not used for a long time or if the access point has been reset.
Register the product's MAC address when you confogure the DHCP server
on the access point (or wireless router). Then you can always use the IP
address that is set with the MAC address. You can identify the Mac address
of your machine by printing a network configuration report (see "Printing a
network configuration report" on page 141).
• When using the ad hoc mode, in operating systems such as Windows Vista,
you might need to set the wireless connection setting every time you use
the wireless machine.
• You cannot use infrastructure mode and ad hoc mode at the same time for
Samsung wireless network machines.
• The machine is within the range of the wireless network.
• The machine is located away from obstacles that could block the wireless
signal.
Remove any large metal objects between the access point (or wireless
router) and the machine.
Make sure the machine and wireless access point (or wireless router) are not
separated by poles, walls, or support columns containing metal or concrete.
• The machine is located away from other electronic devices that may
interfere with the wireless signal.
Many devices can interfere with the wireless signal, including a microwave
oven and some Bluetooth devices.
• Whenever the configuration of your access point (or wireless router)
changes, you must do the product's wireless network setup again.
• Check the wireless environment. You might not be able to connect to the
network in the infrastructure environment where you need to type in a
user's information before connecting to the access point (or wireless router).
• This machine only supports IEEE 802.11 b/g/n and Wi-Fi. Other wireless
communication types (e.g., Bluetooth) are not supported.
2. Using a Network-Connected Machine
187
Page 28

3. Useful Setting Menus
This chapter explains how to browse the current status of your machine, and the method of setting for advanced
machine setup.
• Before you begin reading a chapter 189
• Print menu 190
• Copy menu 191
• Fax menu 198
• Scan menu 202
• System setup 204
• Admin setup 216
• Custom setup 217
Page 29

Before you begin reading a chapter
This chapter explains all the features available for this series' models to help users easily understand the features.
You can check the features available for each model in the Basic Guide (see "Menu overview" on page 33).
The following are tips for using this chapter
• The control panel provides access to various menus to set up the machine or use the machine’s functions. These menus can be accessed by pressing (Menu).
• Some menus may not appear on the display depending on options or models. If so, it is not applicable to your machine.
• For models that do not have the (Menu) on the control panel, this feature is not applicable (see "Control panel overview" on page 24).
• Some menu names may differ from your machine depending on its options or the models.
3. Useful Setting Menus
189
Page 30
Print menu
Some menus may not appear in the display depending on options or
models. If so, it is not applicable to your machine (see "Menu overview" on
page 33).
To change the menu options:
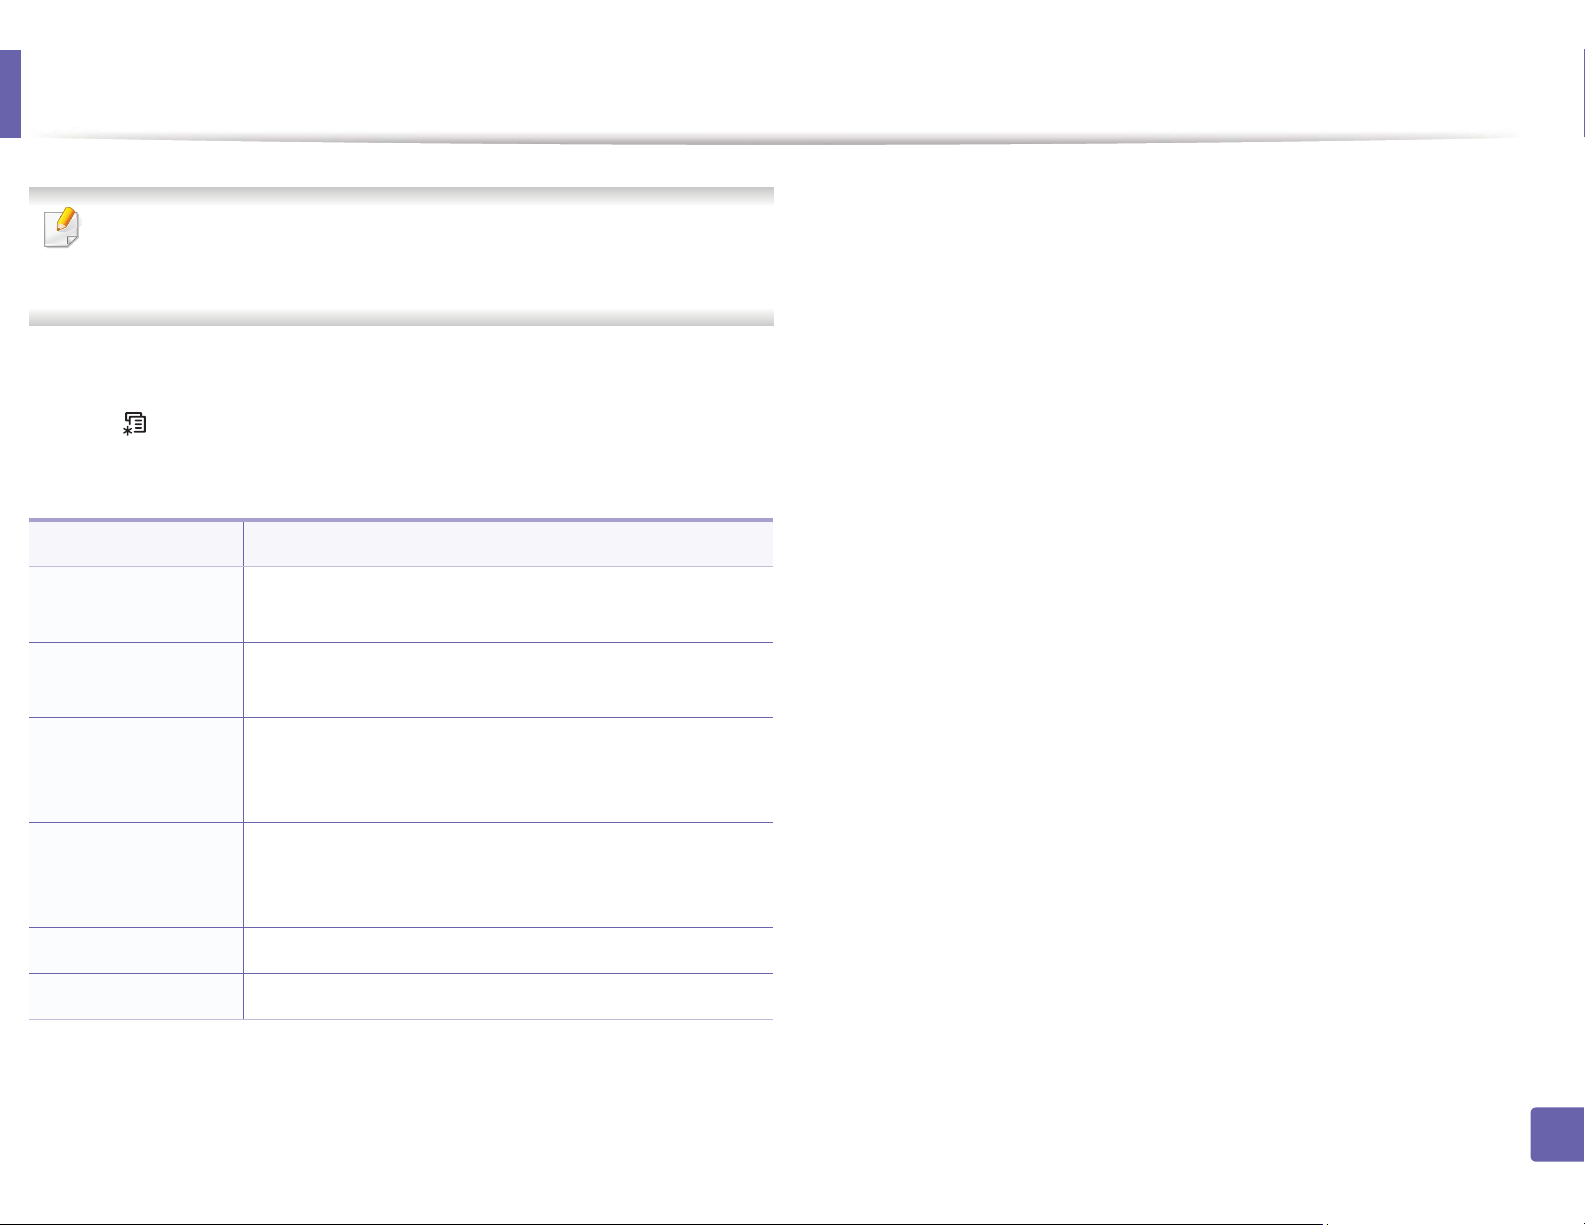
• Press (Menu) > Print Setup on the control panel.
• Or press Setup > Machine Setup > Print Setup on the touch screen.
Item Description
Orientation
Copies
Resolution
Darkness
Darken Text Prints text darker than on a normal document.
Emulation Sets the emulation type and option.
Selects the direction in which information is printed on a
page.
You can enter the number of copies using the number
keypad.
Specifies the number of dots printed per inch (dpi). The
higher the setting, the sharper printed characters and
graphics.
Lightens or darkens the print on the page. The Normal
setting usually produces the best result. Use the Light
toner density setting to save toner.
3. Useful Setting Menus
190
Page 31

Copy menu
1
Copy feature
Item Description
Reduces or enlarges the size of a copied image (see
"Reduced or enlarged copy" on page 60).
Some menus may not appear in the display depending on options or
models. If so, it is not applicable to your machine (see "Menu overview" on
page 33).
To change the menu options:
• Press (copy) > (Menu) > Copy Feature on the control panel.
• Or press Setup > Machine Setup > Default Setting > Copy Default on the
touch screen.
• Or press Copy > select the menu item you want on the touch screen.
Item Description
• Scan Size
Sets the image size.
• Original Size
Copies
You can enter the number of copies using the number
keypad.
Reduce/Enlarge
If the machine is set Eco mode, reduce and
enlarge features are not available.
Adjusts the brightness level to make a copy that is
Darkness
easier to read, when the original contains faint
markings and dark images (see "Darkness" on page 59)
Adjusts the contrast level to scan an original that is
Contrast
easier to read, when the original contains too faint or
too dark contents (see "Contrast" on page 59)
Original Type
Improves the copy quality by selecting the document
type for the current copy job (see "Original" on page 59)
Orientation Sets the original image’s orientation.
Layout
Adjusts the layout format such as poster, clone, ID copy,
2/4-up, booklet, etc.
3. Useful Setting Menus
191
Page 32
Copy menu
Item Description
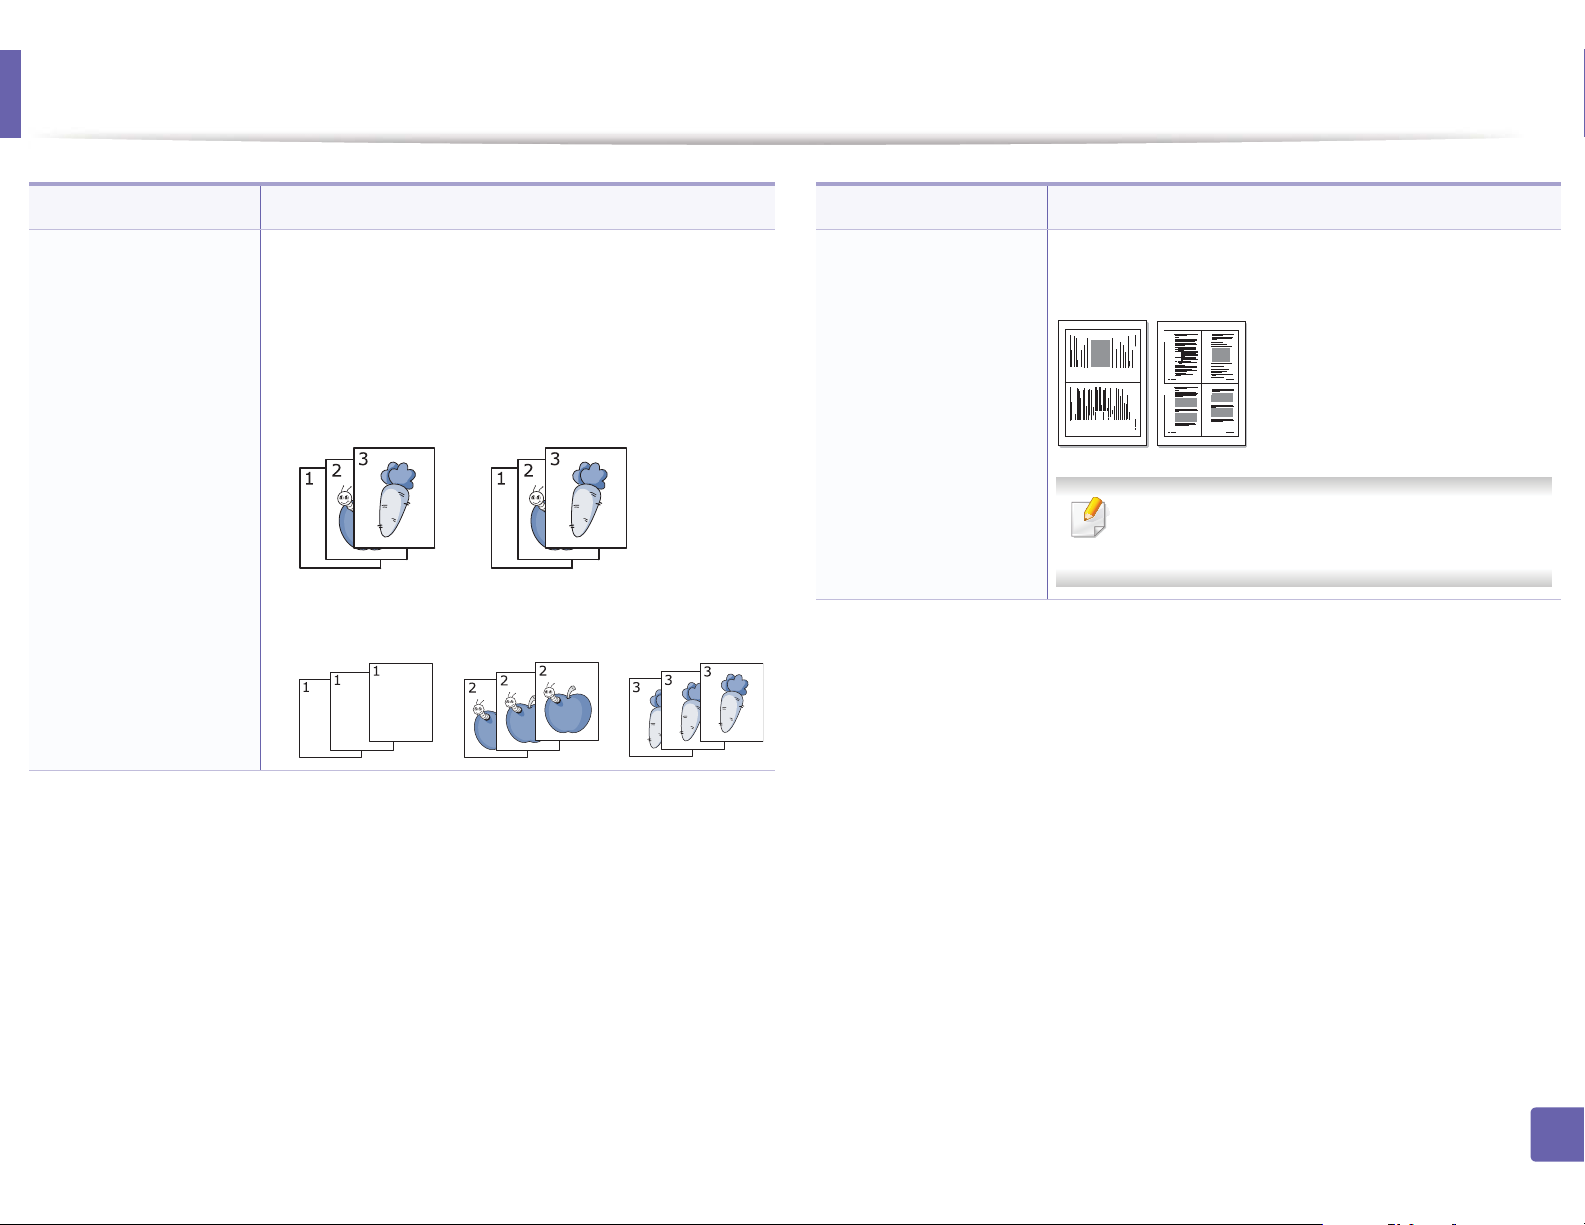
• Copy Collation
• Collate Copy
Set the machine to sort the copy job. For example, if you
make 2 copies of a 3 page original, one complete 3 page
document will print followed by a second complete
document.
• On: Prints output in sets to match the sequence of
originals.
• Off: Prints output sorted into stacks of individual
pages.
Item Description
• 2-up or 4-up
• N-up Copy
Reduces the size of the original images and prints 2 or 4
pages onto one sheet of paper.
1 2
3 4
1 2
This copy feature is available only when you
load originals into the document feeder.
3. Useful Setting Menus
192
Page 33
Copy menu
Item Description
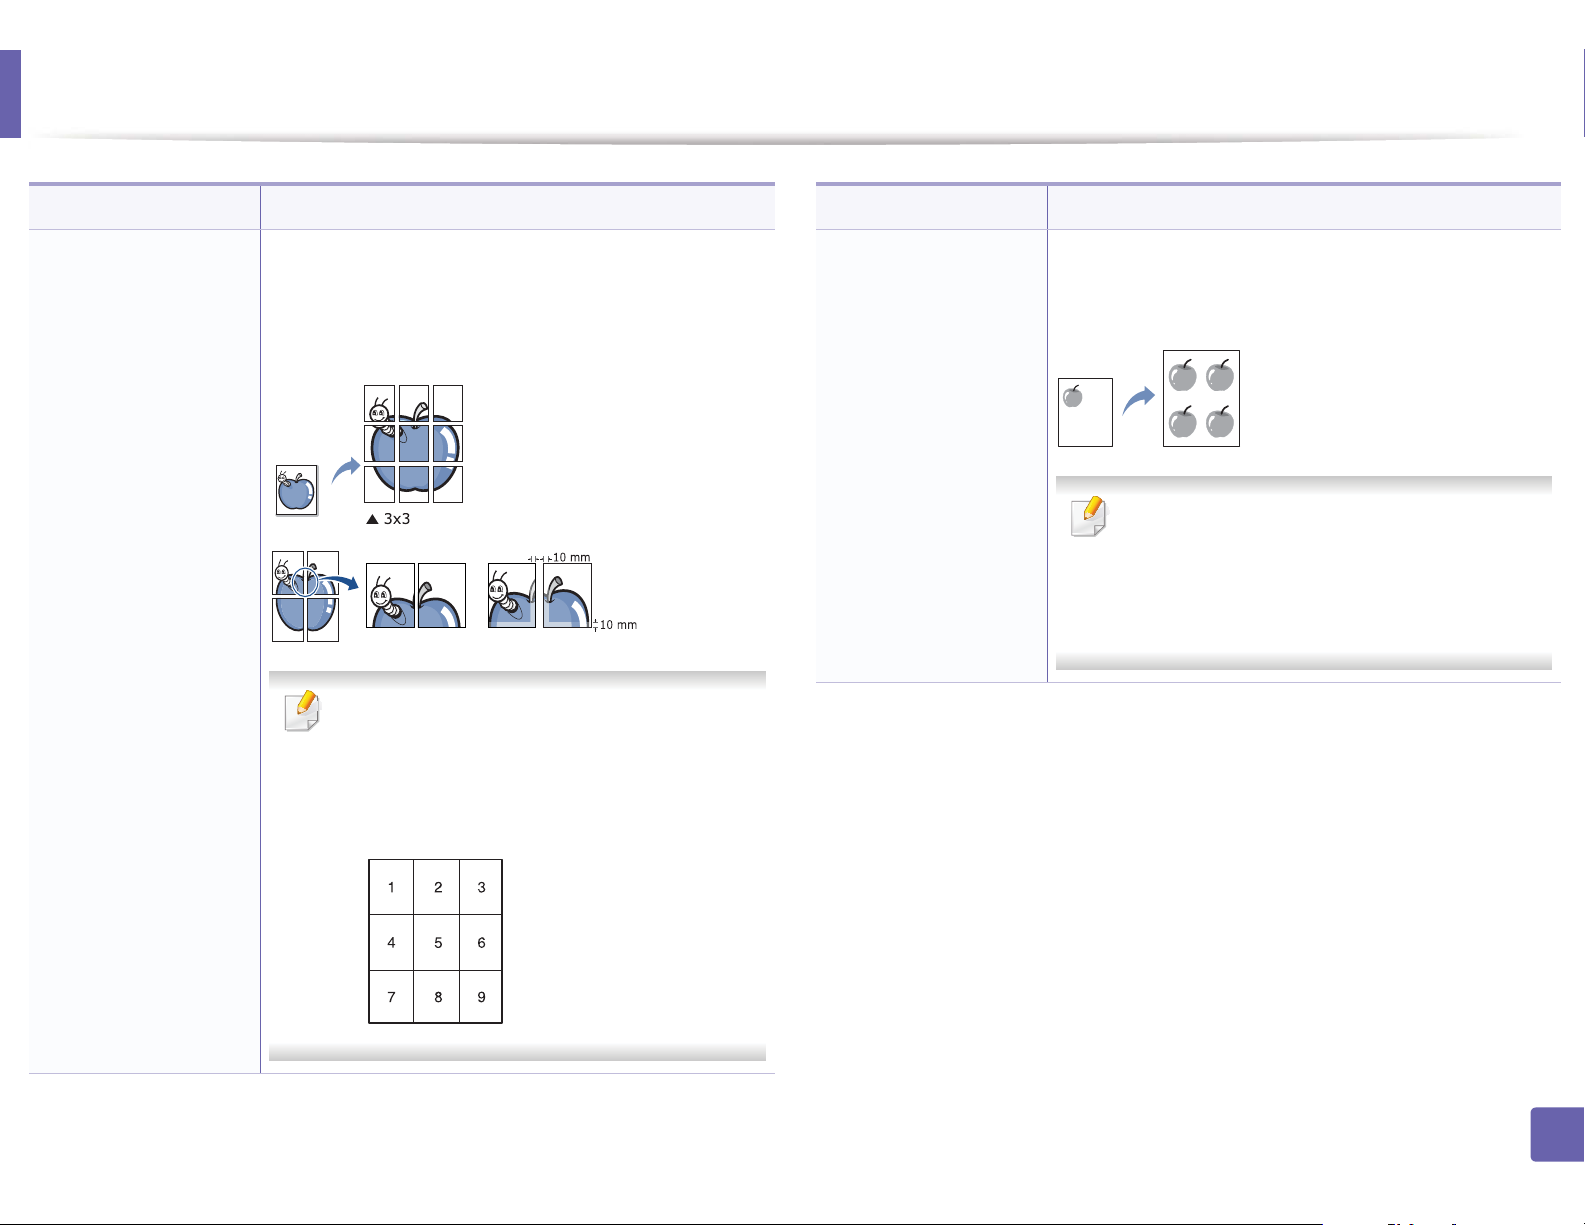
Poster Copy
Prints a single-page document onto 4 (Poster 2x2), 9
(Poster 3x3), or 16 (Poster 4x4) sheets of paper, for the
purpose of pasting the sheets together to form one
poster-size document.
• This copy feature is available only when you
place originals on the scanner glass.
• Your original is divided into 9 portions. Each
portion is scanned and printed one by one in
the following order:
Item Description
Clone Copy
Prints multiple original images on a single page. The
number of images is automatically determined by the
original image and the paper size.
• This copy feature is available only when you
place originals on the scanner glass.
• You cannot adjust the copy size using
Reduce/Enlarge for the Clone Copy
feature.
3. Useful Setting Menus
193
Page 34
Copy menu
Item Description
Book Copy
The Book Copy feature allows you to copy an entire
book. If the book is too thick, lift the cover until its
hinges are caught by the stopper and then close the
cover. If the book or magazine is thicker than 30 mm,
start copying with the cover open.
• Off: Does not use this feature.
• Left Page: Use this option to print left page of the
book.
• Right Page: Use this option to print right page of the
book.
• Both Page: Use this option to print both pages of
the book.
This copy feature is available only when you
place originals on the scanner glass.
Item Description
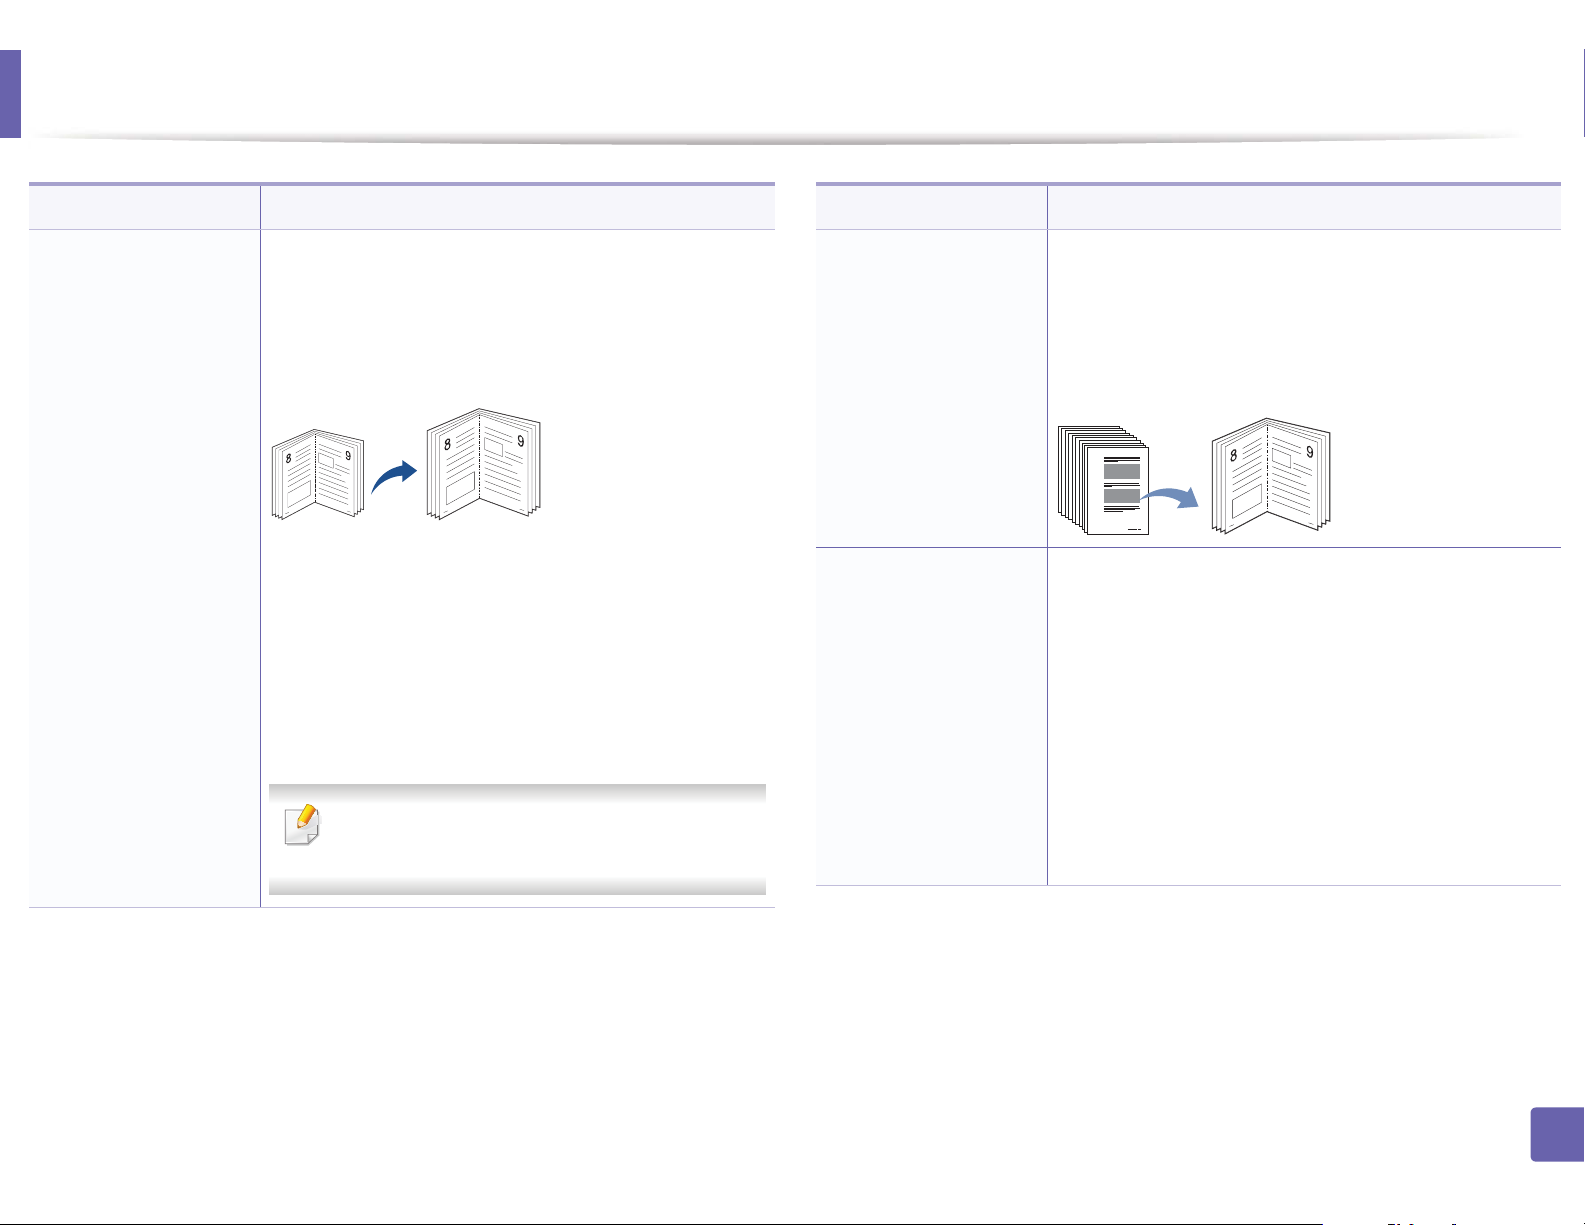
Booklet
Adjust Bkgd
The machine automatically prints on one or both sides
of the paper, which are then folded to produce a
booklet with all of the pages in the correct sequence.
The machine will reduce and correctly adjust the
position of each image to fit on the selected paper.
Prints an image without its background. This copy
feature removes the background color and can be
helpful when copying an original containing color in
the background, such as a newspaper or a catalog.
• Off: Does not use this feature.
• Auto: Optimizes the background.
• Enhance Lev.1~2: The higher the number is, the
more vivid the background is.
• Erase Lev.1~4: The higher the number is, the lighter
the background is.
3. Useful Setting Menus
194
Page 35
Copy menu
Item Description
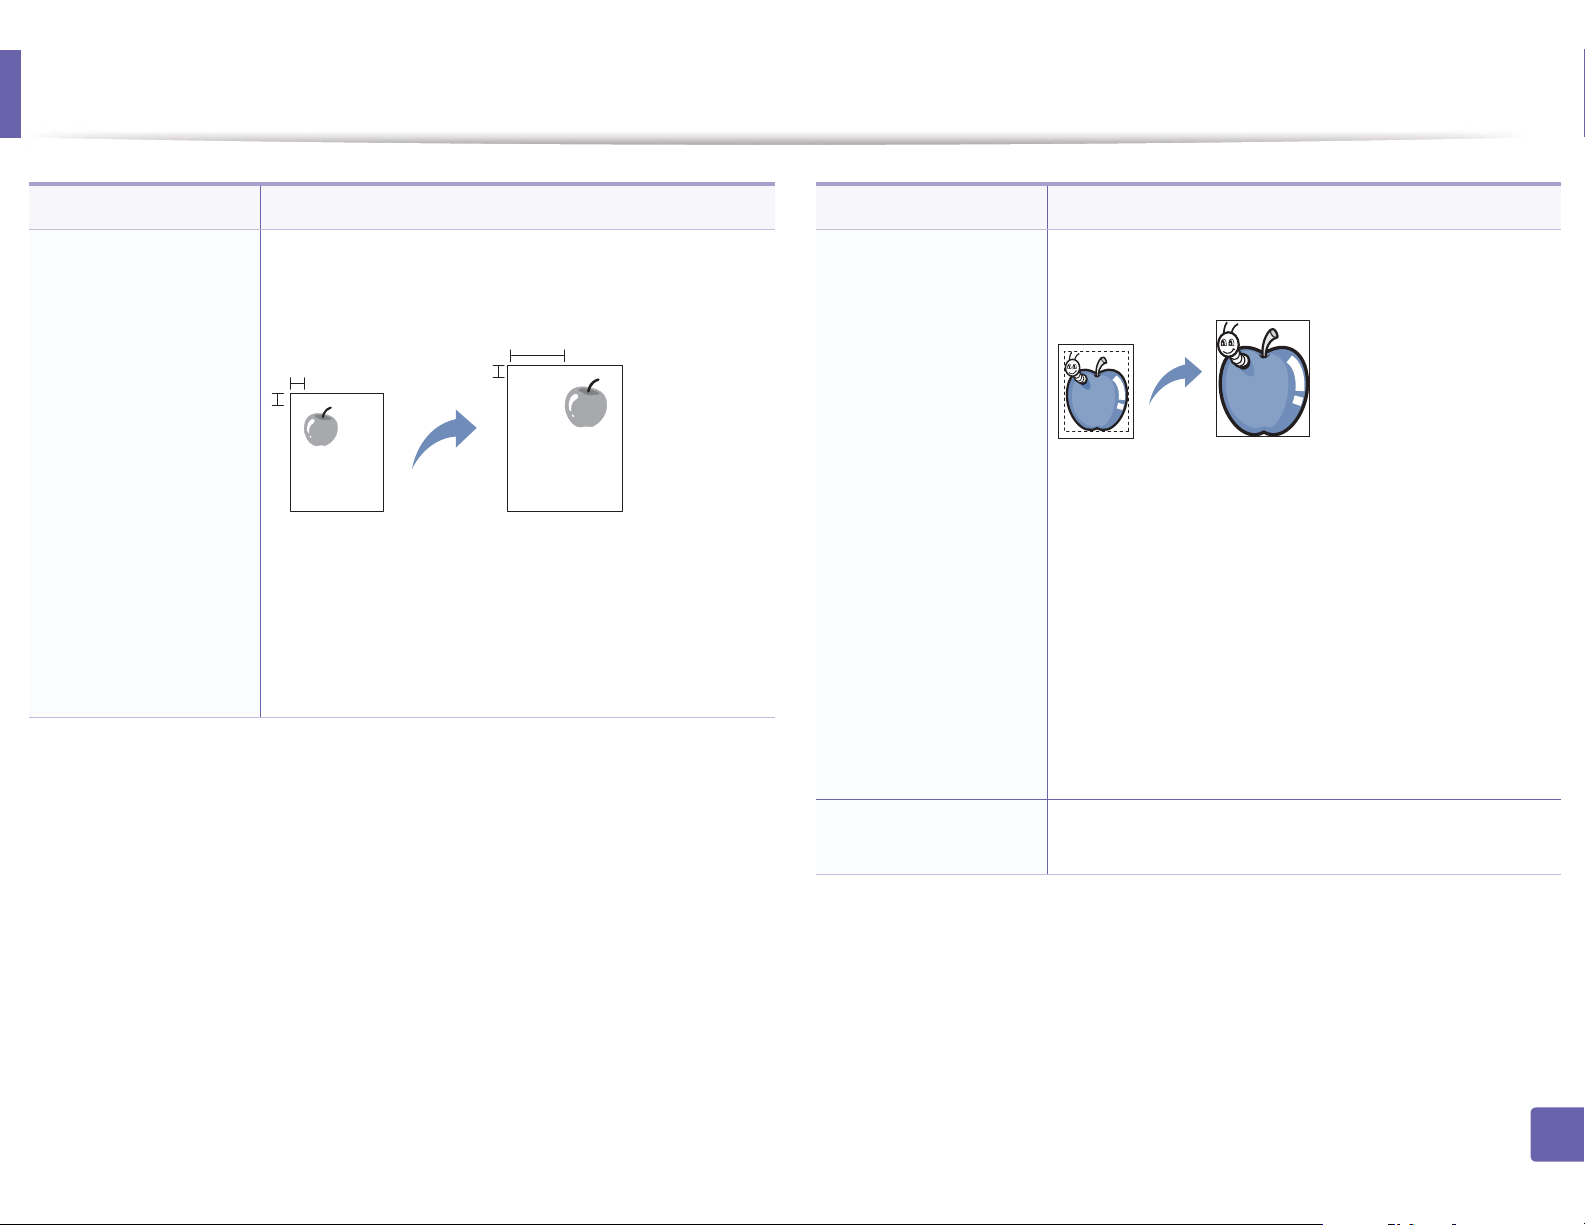
Margin Shift copying
Allows you to create a binding edge for the document.
The image can be adjusted up or down on the page
and/or shifted to the right or left.
• Off: Does not use this feature.
• Auto Center: Automatically copy in the center of the
paper. This feature is available only when you place
originals on the scanner glass.
• Custom Margin: Enter the left, right, top, bottom
margin using Number keypad.
Item Description
Edge Erase copying
Allows you to erase spots, drill holes, fold creases and
staple marks along any of the four edges of a document.
• Off: Does not use this feature.
• SmallOriginal: rases the edge of the original if it is
small. This feature is available only when you place
originals on the scanner glass.
• Hole Punch: Erases the marks of bookbinding holes.
• Book Center: Erases the middle part of the paper
which is black and horizontal, when you copy a
book. This feature is available only when you place
originals on the scanner glass.
• Border Erase: Enter the left, right, top, bottom
margin using Number keypad.
Gray Enhance
copying
When you make a copy in gray scale, use this feature to
get better quality of copy-output.
3. Useful Setting Menus
195
Page 36
Copy menu
2
5
Item Description
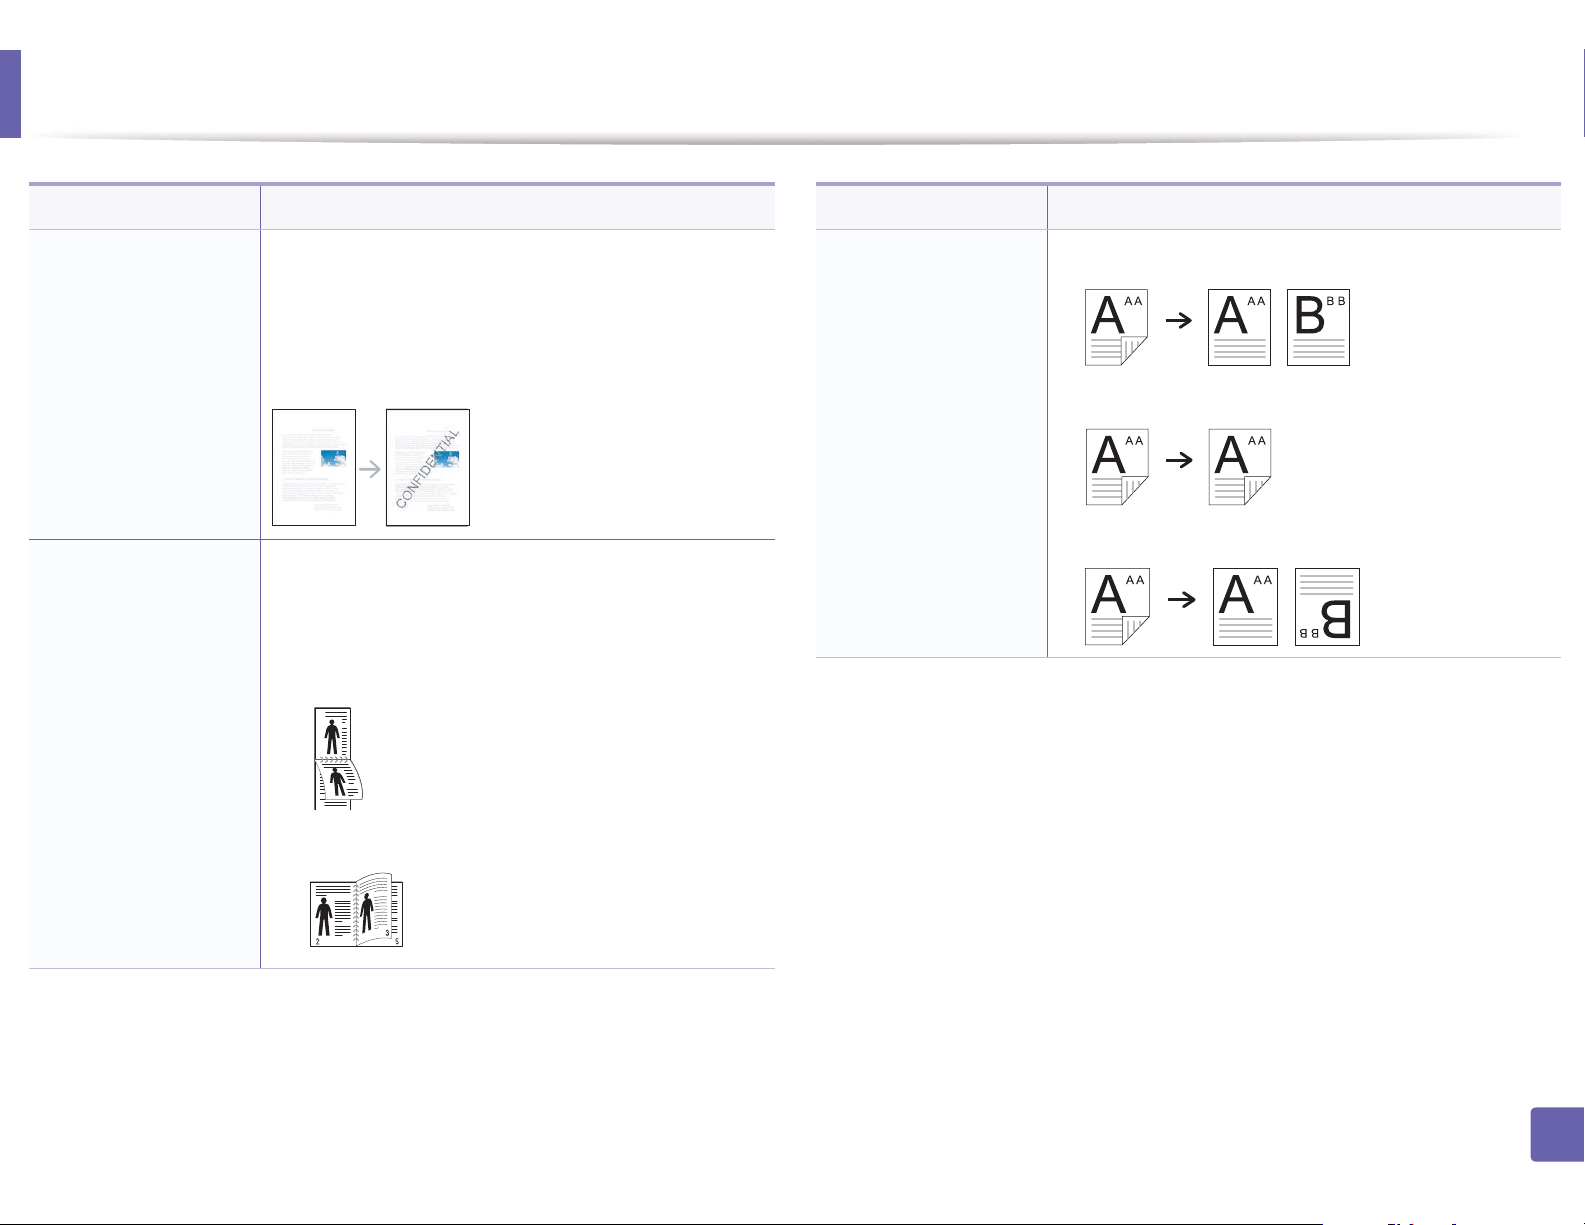
Watermark copying
Duplex
The watermark option allows you to print text over an
existing document. For example, you use it when you
want to have large gray letters reading “DRAFT” or
“CONFIDENTIAL” printed diagonally across the first
page or all pages of a document.
You can set the machine to print copies on both sides of
paper.
• Off: Prints in normal mode.
• 1->2Side Short
Item Description
• 2->1Side
• 2->2Side
Duplex (continue)
• 2->1Side ROT2
3
• 1->2Side Long
3. Useful Setting Menus
196
Page 37

Copy menu
2
Copy Setup
Some menus may not appear in the display depending on options or
models. If so, it is not applicable to your machine (see "Menu overview" on
page 33).
To change the menu options:
Press (copy) > (Menu) > Copy Setup on the control panel.
Item Description
Change Default
Resets the value or setting to the printer’s out-of-box
state.
3. Useful Setting Menus
197
Page 38

Fax menu
3
Fax Feature
Some menus may not appear in the display depending on options or
models. If so, it is not applicable to your machine (see "Menu overview" on
page 33).
Item Description
The default document settings procedure good results
when using typical text-based originals. However, if you
Resolution
send originals that are of poor quality, or contain
photographs, you can adjust the resolution to produce
a higher quality fax (see "Resolution" on page 67).
Duplex prints the received fax on both sides of paper.
To change the menu options:
• Press (fax) > (Menu)> Fax Feature on the control panel.
• Or press Setup > Machine Setup > Default Setting > Fax Default on the
touch screen.
• Or press Fax > select the menu item you want on the touch screen.
Item Description
• Scan Size
Sets the image size.
• Original Size
Adjusts the contrast level to scan an original that is
Contrast
easier to read, when the original contains too faint or
too dark contents.
Adjusts the brightness level to scan an original that is
Darkness
easier to read, when the original contains faint
markings and dark images (see "Darkness" on page 67).
Multi Send
Delay Send
Priority Send
Sends a fax to multiple destinations (see "Sending a fax
to multiple destinations" on page 65).
You cannot send a color fax using this feature.
Sets your machine to send a fax at a later time when you
will not be present (see "Delaying a fax transmission" on
page 255).
You cannot send a color fax using this feature.
Scans the original into memory and immediately
transmits it when the current operation is finished.
Priority transmission will interrupt a sending to multiple
destinations between stations (example, when the
transmission to station A ends, before transmission to
station B begins) or between redial attempts (see
"Sending a priority fax" on page 256).
3. Useful Setting Menus
198
Page 39

Fax menu
Item Description
Forward
Secure Receive
Add Page
Cancel Job
4
Sending setup
Forwards the received or sent fax to other destination
by a fax or PC. If you are out of office but have to receive
the fax, this feature may be useful.
• See "Forwarding a sentGfax to another destination"
on page 256.
• See "Forwarding a received fax" on page 257.
Stores the received fax in memory without printing out.
To print received documents, you need to enter the
password. You can prevent your received faxes from
being accessed by unauthorized people (see "Receiving
in secure receiving mode" on page 261).
Adds additional documents to a reserved delay fax job
(see "Adding documents to a reserved fax" on page
255).
Cancels the delayed fax job which is saved in memory
(see "Canceling a reserved fax job" on page 256).
To change the menu options:
• Press (fax) > (Menu) > Fax Setup > Sending on the control panel.
• Or press Setup > Machine Setup > Default Setting > Fax Default on the
touch screen.
Item Description
Redial Times
Redial Term Sets the time interval before automatic redialling.
Prefix Dial
ECM Mode
Send Report
Sets the number of redial attempts. If you enter 0, the
machine will not redial.
Sets a prefix of up to five digits. This number dials
before any automatic dial number is started. It is useful
for accessing a PABX exchange.
Sends faxes using error correction mode (ECM) to
makes sure the faxes are sent smoothly without any
error. It may take more time.
Sets the machine to print a report whether a fax
transmission was successfully completed or not. If you
select On-Error, the machine prints a report only when
a transmission is not successful.
Some menus may not appear in the display depending on options or
models. If so, it is not applicable to your machine (see "Menu overview" on
page 33).
Image TCR
Dial Mode
Prints a transmission report with a minimized image of
the first page of the fax sent.
Sets the dialing mode to either tone or pulse. This
setting may not be available depending on your
country.
3. Useful Setting Menus
199
Page 40

Fax menu
Item Description
Sends faxes at a preset toll-saving time to save on call
Toll Save
Setup Wizard
5
costs. This setting may not be available depending on
your country.
Makes it easy to configure the necessary fax options
such as machine ID, fax number, etc.
Receiving setup
Some menus may not appear in the display depending on options or
models. If so, it is not applicable to your machine (see "Menu overview" on
page 33).
To change the menu options:
• Press (fax) > (Menu) > Fax Setup > Receiving on the control panel.
Item Description
Ring To Answer
Stamp RCV Name
Rcv Start Code
Auto Reduction
Discard Size
Junk Fax Setup
Specifies the number of times the machine rings before
answering an incoming call.
Automatically prints the page number, and the date
and time of reception at the bottom of each page of a
received fax.
Initiates fax reception from an extension phone
plugged into the EXT socket on the back of the
machine. If you pick up the extension phone and hear
fax tones, enter the code. It is preset to *9* at the
factory.
Automatically reduces an incoming fax page to fit the
size of the paper loaded in the machine.
Discards a specific length from the end of the received
fax.
Blocks any unwanted faxes that you stored in the
memory as junk fax numbers. This setting may not be
available depending on your country.
• Or press Setup > Machine Setup > Default Setting > Fax Default on the
touch screen.
Item Description
Receive Mode Selects the default fax receiving mode.
DRPD Mode
Enables a user to use a single telephone line to answer
several different telephone numbers. You can set the
machine to recognize different ring patterns for each
number. This setting may not be available depending
on your country (see "Receiving faxes using DRPD
mode" on page 260).
3. Useful Setting Menus
200
Page 41

Fax menu
Item Description
Duplex Print
• Doc Box Saving
• Document Box
Saving
Prints the received fax data on both sides of the paper.
You can save the paper usage.
Stores received faxes in the common box. This menu
only appears when an optional mass storage device
(HDD) drive has been installed (see "Variety feature" on
page 10).
3. Useful Setting Menus
201
Page 42

Scan menu
6
Scan feature
Some menus may not appear in the display depending on options or
models. If so, it is not applicable to your machine (see "Menu overview" on
page 33).
Item Description
• SMB Default
• SMB
Send Report
Sets scan destination to an SMB server. You scan the
originals and send the scanned image to an SMB server
(see "Scanning to FTP/SMB server" on page 245).
Prints a confirmation report showing whether the
scanned image sending was successful.
To change the menu options:
• Press (scan) > (Menu) > Scan Feature on the control panel.
• Or press Setup > Machine Setup > Default Setting > Scan Default on the
touch screen.
• Or press Scan > select the menu item you want on the touch screen.
Item Description
• USB Default
• USB
• E-mail Default
• Send Email
• Custom Email
• FTP Default
• FTP
Sets scan destination to a USB. You scan the originals
and save the scanned image to a USB device.
Sets scan destination to an email. You scan the originals
and email the scanned image to destinations (see
"Scanning to email" on page 244).
Sets scan destination to an FTP server. You scan the
originals and send the scanned image to an FTP server
(see "Scanning to FTP/SMB server" on page 245).
Local PC
Network PC
Document Box
Shared Boxes
Sets scan destination to a usb-connected computer.
You scan the originals and save the scanned image to a
directory such as My Documents (see "Basic Scanning"
on page 63).
Sets scan destination to a network-connected
computer. You scan the originals and save the scanned
image to a directory such as My Documents (see
"Scanning from network connected machine" on page
243).
Sets scan destination to a Document Box. You scan the
originals and send the scanned image to the storage
which called Document Box in the machine.
Sets scan destination to a shared folder. You can create
and use the shared folder (see "Using shared folder
features" on page 264).
3. Useful Setting Menus
202
Page 43

Scan menu
7
Scan setup
Some menus may not appear in the display depending on options or
models. If so, it is not applicable to your machine (see "Menu overview" on
page 33).
To change the menu options:
• Press (scan) > (Menu) > Scan Setup on the control panel.
• Or press Setup > Machine Setup > Default Setting > Scan Default on the
touch screen.
Item Description
Contrast
Item Description
Adjust the contrast level to scan lighter or darker than
the original.
• Scan Size
• Original Size
Original Type Sets the original document’s type.
Resolution Sets the image resolution.
Color Mode Sets the color mode.
File Format
Darkness Adjusts the brightness level to scan.
Sets the image size.
Sets the file format in which the image is to be saved. If
you select BMP, JPEG, TIFF, or PDF, you can select to
scan multiple pages.
3. Useful Setting Menus
203
Page 44

System setup
8
Machine setup
Some menus may not appear in the display depending on options or
models. If so, it is not applicable to your machine (see "Menu overview" on
page 33).
Item Description
Select Form
HDD Spooling
Form overlay is images stored on the printer’s mass
storage device (HDD) as a special file format that can be
printed in layers on any document.
When On, stores documents on the mass storage device
(HDD) for network printing.
To change the menu options:
• Press (Menu) > System Setup > Machine Setup on the control panel.
• Or press Setup > Machine Setup > Initial Setup on the touch screen.
Item Description
Machine ID
Fax Number
Date & Time Sets the date and time.
Clock Mode
Form Menu
Sets the machine ID which will be printed at the top of
each fax page that you send.
Sets the fax number which will be printed at the top of
each fax page that you send.
Selects the format for displaying time between 12 hr. and
24 hr.
• Off: Prints in normal mode.
• Single Form: Prints all page using the first form.
• Double Form: Prints the front page using the first
form and the back page using the second form.
Language
Default Mode
Default Paper Size You can set the default paper size to use.
Power Save
Scan PWR Save
System Timeout
Sets the language of the text that appears on the control
panel display.
Sets the machine’s default mode among fax mode, copy
mode, or scan mode.
Sets how long the machine waits before going to power
save mode.
When the machine does not receive data for an extended
period of time, power consumption is automatically
lowered.
Sets how long the machine’s scanner part waits before
going to power save mode.
When the scanner does not receive data for an extended
period of time, power consumption is automatically
lowered.
Sets the time that the machine remembers previously
used copy settings. After the timeout, the machine
restores the default copy settings.
3. Useful Setting Menus
204
Page 45

System setup
G
Item Description
Job Timeout
Wakeup Event
Auto Continue
• Altitude Adj.
• Altitude
Adjustment
Sets the length of time the printer waits before printing
the last page of a print job that does not end with a
command to print the page.
You can set the condition to wake up from power-save
mode. Set the item on.
• Button
power button, the machine wake up from the power
save mode.
• Scanner: When you insert paper in the document
feeder, the machine wake up from the power save
mode.
• Printer: When you open or close the paper tray, the
machine wake up from the power save mode.
Determine whether or not the machine continues
printing when it detects the paper does not match the
paper settings.
• Off: If a paper mismatch occurs, the machine waits
until you insert the correct paper.
• On: If a paper mismatch occurs, an error message will
display. The machine waits for about 30 second, then
automatically clear the message and continue
printing.
Optimize print quality according to the machine’s
altitude.
Press: GWhen you press any button except
Item Description
Auto CR
Firmware Version Shows the product’s firmware version.
AutoComplete
• Tray Chaining
• Auto Tray Switch
Paper Substit.
Paper Substitution
Paper Mismatch
Allows you to append the required carriage return to
each line feed, which is useful for Unix or DOS users.
Provides suggestions while you type an email address or
fax number. This enables you to find and select the data
without typing it in completely.
Determine whether or not the machine continues
printing when it detects the paper does not match. For
example, if both tray 1 and tray 2 are filled with the same
size paper, the machine automatically prints from tray 2
after the tray 1 runs out of paper.
This option does not appear if you selected Auto
for Paper Source from printer driver.
Automatically substitutes the printer driver’s paper size
to prevent the paper mismatch between Letter and A4.
For example, if you have A4 paper in the tray but you set
the paper size to Letter in the printer driver, the machine
prints on A4 paper and vice versa.
Determine whether to disregard the paper mismatch
error or not. Select Off, then the machine does not stop
printing even if the paper mismatches.
3. Useful Setting Menus
205
Page 46

System setup
Item Description
The printer detects the printing data from computer
PrintBlankPage
Multi-Bin
Default Source Sets the tray to use as a default.
Address Book Views or prints the phone book or email address list.
Maintenance
whether a page is empty or not. You can set to print or
skip the blank page.
• Mode: Selects the multi-bin mode you want to use.
• Default Bin: Selects the bin to use as a default.
• Clean Drum: Cleans the OPC drum of the cartridge by
printing a sheet.
• Clean Fuser: Cleans the fuser by printing a sheet.
• CLR Empty Msg.: This option appears only when
toner cartridge is empty.
• Supplies Info.: Allows you to check how many pages
are printed and how much toner is left in the cartridge.
• TonerLow Alert: If toner in the cartridge has run out,
a message informing the user to change the toner
cartridge appears. You can set the option for this
message to appear or not.
• Paper Stacking: If you use a machine in a humid area,
or you are using the damp print media caused by a
high humidity, the print-outs on the output tray may
be curled and may not be stacked properly. In this
case, you can set the machine to use this function to
let print-outs stacked firmly. But, using this function
will make the print speed slow.
Item Description
Import Setting
Export Setting
Toner Save
Quiet Mode
Eco Settings
Clear Setting Restores the machine’s factory default settings.
Imports data stored on a USB memory stick to the
machine.
Exports data stored on a USB memory stick to the
machine.
Activating this mode extends the life of your toner
cartridge and reduces your cost per page beyond what
one would experience in the normal mode, but it reduces
print quality.
You can reduce the printing noise by turning this menu
on. However, the printing speed and quality may be
declined.
Allows you to save print resources and enables ecofriendly printing.
• Default Mode: Select whether to turn the Eco mode
on or off.
On force (On-Forced): Sets the Eco mode on with
password. If a user wants to turn the Eco mode
on/off, the user needs to enter the password.
• Select Template (Select Temp.): Selects the eco
template set from the SyncThru™ Web Service.
3. Useful Setting Menus
206
Page 47

System setup
9
Paper setup
Some menus may not appear in the display depending on options or
models. If so, it is not applicable to your machine (see "Menu overview" on
page 33).
To change the menu options:
• Press (Menu) > System Setup > Paper Setup on the control panel.
• Or press Setup > Machine Setup > Paper Setup on the touch screen.
Item Description
Paper Size
Paper Type Chooses the type of the paper for each tray.
Sets the paper size as A4, Letter, or other paper sizes,
according to your requirements.
10
Sound / Volume
Some menus may not appear in the display depending on options or
models. If so, it is not applicable to your machine (see "Menu overview" on
page 33).
To change the menu options:
• Press (Menu) > System Setup > Sound/Volume on the control panel.
• Or press Setup > Machine Setup > Initial Setup > Sound/Volume on the
touch screen.
Item Description
Key Sound
Turns the key sound on orGoff. With this option set to on,
a tone sounds each time a key is pressed.
Paper Source Selects from which tray the paper is used.
Margin Sets the margins for the document.
Activates the tray confirmation message. If you open and
Tray Confirm
close a tray, a window asking you whether to set the
paper size and type for the tray just opened appears.
Alarm Sound
Turns the alarm sound on orGoff. With this option set to
on, an alarm tone sounds when an error occurs or fax
communication ends.
3. Useful Setting Menus
207
Page 48
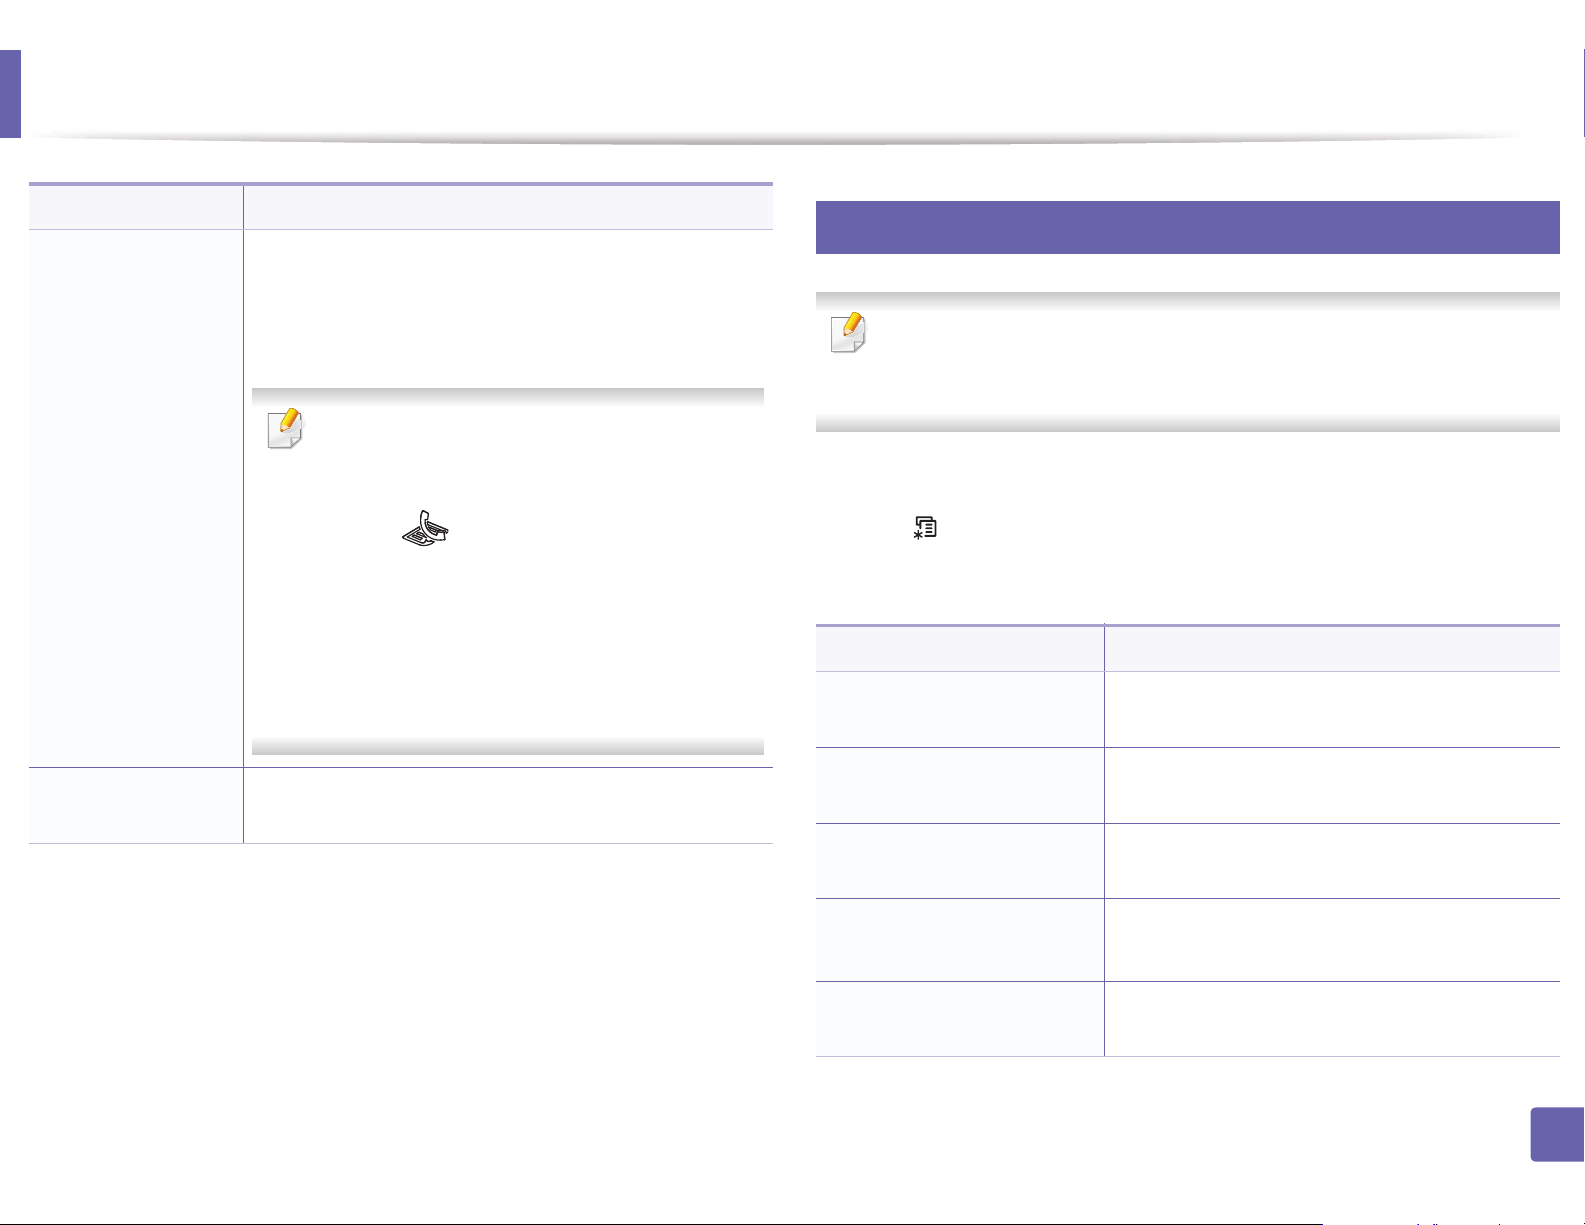
System setup
Item Description
Turns on or off the sounds from the telephone line
through the speaker, such as a dial tone or a fax tone.
With this option set to Comm. which means the speaker
is on until the remote machine answers.
11
Report
Some menus may not appear in the display depending on options or
models. If so, it is not applicable to your machine (see "Menu overview" on
page 33).
Speaker
Ringer
You can adjust the volume level using On Hook
Dial. You can adjust the speaker volume only
when the telephone line is connected.
a Press (fax) on the control panel.
b Press On Hook Dial. A dial tone sounds from
the speaker.
c Press the arrows until you hear the volume you
want.
d Press On Hook Dial to save the change and
return to ready mode.
Adjusts the ringer volume. For the ringer volume, you can
select off, low, middle, and high level.
To change the menu options:
• Press (Menu) > System Setup > Report on the control panel.
• Or press Setup > Machine Setup > Reports on the touch screen.
Item Description
Menu Map
All Reports
Configuration
• Supplies Info.
Prints the menu map which shows the layout and
current settings of this machine.
Prints all kinds of reports that this machine
provides.
Prints a report on the machine's overall
configuration.
Prints supplies’ information page.
• Supplies Information
Address Book
Prints all of the email addresses currently stored
in the machine’s memory.
3. Useful Setting Menus
208
Page 49

System setup
Item Description
Demo Page
Fax Send
Fax Sent
Fax Received
Email Sent
• Schedule Jobs
• Fax Scheduled Jobs
JunkFax
• Network Conf.
• Network Configuration
Prints the demo page to check whether your
machine is printing properly or not.
Prints a transmission report including the fax
number, the number of pages, the elapsed time
of the job, the communication mode, and the
communication results for fax job. You can set up
your machine to automatically print a
transmission confirmation report after each fax
job.
Prints information on the faxes you have recently
sent.
Prints information on the faxes you have recently
received.
Prints information on the emails you have
recently sent.
Prints the document list currently stored for
delayed faxes along with the starting time and
type of each operation.
Prints the fax numbers specified as junk fax
numbers.
Prints information on your machine’s network
connection and configuration.
Item Description
• User Auth
• Local User
Authentication
PCL Font Prints the PCL font list.
• PS Font
• PS3 Font List
EPSON Font Prints the EPSON font list.
KSC5843 Font Prints the KSC5843 font list.
KSC5895 Font Prints the KSC5895 font list.
KSSM Font List Prints the KSSM font list.
• Net User Auth
• Network User
Authentication
Usage Counter
Fax Options Prints the information of a fax reports.
• Stored Job List
• Stored Jobs
• Completed Job
Prints the authorized users who are allowed to
use the email function.
Prints the PS/PS3 font list.
Prints the users and their IDs who logged in the
domain.
Prints a usage page. The usage page contains the
total number of pages printed.
Prints jobs currently stored in the optional
memory or on a mass storage device (HDD).
Prints list of completed jobs.
• Completed Jobs
3. Useful Setting Menus
209
Page 50

System setup
Item Description
This is used only available when Job Accounting
Accounting Report
12
is enabled from the SyncThru™ Web Admin
Service. You can print a report of printout counts
for each user.
Maintenance
Some menus may not appear in the display depending on options or
models. If so, it is not applicable to your machine (see "Menu overview" on
page 33).
To change the menu options:
• Press (Menu) > System Setup > Maintenance on the control panel.
• Or press Setup > Machine Setup > Initial Setup on the touch screen.
Item Description
Supplies Life
TonerLow Alert
• Serial Number
• Serial No.
Paper Stacking
Color
Ram Disk
Shows the supply life indicators (see "Monitoring the
supplies life" on page 78.)
Customizes the level to alert toner low or toner empty
(see "Setting the toner low alert" on page 79).
Shows the machine’s serial number. When you call for
service or register as a user on the Samsung website, you
can find this.
Enables the automatic linking feature for trays. when one
tray is not available for paper empty or mismatch, this
option allows your printer to feed paper from another
available tray.
Allows you to adjust the color setting such as contrast
level, color registration, color density, etc.
Sets some part of ram disk to the job storage area. Using
the storage area activates the job manage menu (see "Job
manage" on page 211). This allows the data from your
computer to be sent to the print queue of the ram disk.
Item Description
CLR Empty Msg.
Ignore Toner
When toner cartridge is empty, this option appears. You
can clear the empty message.
You can set the machine to ignore the toner empty
message and continue printing except incoming faxes.
3. Useful Setting Menus
210
Page 51

System setup
13
Clear setting
Item Description
• Scan Setup
• Scan Default
Restores all of the scan options to the factory
default.
Some menus may not appear in the display depending on options or
models. If so, it is not applicable to your machine (see "Menu overview" on
page 33).
To change the menu options:
• Press (Menu) > System Setup > Clear Setting on the control panel.
• Or press Setup > Machine Setup > Restore Options on the touch screen.
Item Description
All Settings
Printer Setup
Paper Setup
Clears all of the data stored in memory and resets
all of your settings to the factory default.
Restores all of the printer options to the factory
default.
Restores all of the paper options to the factory
default.
System Setup
Network Setup
Address Book
• Fax Sent
Restores all of the system options to the factory
default.
Restores all of the network options to the factory
default. (Reboot required.)
Clears all of the email address entries stored in
memory.
Clears all records of sent faxes.
• Sent Report
Email Sent Clears all records of sent emails.
• Fax Received
Clears all records of received faxes.
• Fax RCV Report
• Rcvd Report
14
Job manage
• Fax Setup
• Fax Default
• Copy Setup
• Copy Default
Restores all of the fax options to the factory
default.
Restores all of the copy options to the factory
default.
Some menus may not appear in the display depending on options or
models. If so, it is not applicable to your machine (see "Menu overview" on
page 33).
3. Useful Setting Menus
211
Page 52
System setup
To change the menu options:
• Press (Menu) > System Setup > Job Manage on the control panel.
Item Description
Active Job Shows the print job lists that are waiting to be printed.
Store Job Shows the print job lists that are stored on the disk.
File Policy
15
If the memory already has the same name when you
entered a new file name, you can rename or overwrite it.
Image overwrite
Some menus may not appear in the display depending on options or
models. If so, it is not applicable to your machine (see "Menu overview" on
page 33).
16
USB setup
Some menus may not appear in the display depending on options or
models. If so, it is not applicable to your machine (see "Menu overview" on
page 33).
• Press USB on the touch screen.
Option Description
Print From Views the file list from the File Navigation. Select a file to
print.
Scan to USB
File Manage Views the file list from the File Navigation. Select a file to
Sets scan destination to a USB. You scan the originals and
save the scanned image to a USB device.
delete. You can format the USB device.
• Press (Menu) > System Setup > ImageOverwrite on the control panel.
Item Description
Manual
You can overwrite the embedded USB memory to clear
all of the data stored in.
Show Space Shows the remaining space.
3. Useful Setting Menus
212
Page 53

System setup
17
Emulation setup
Some menus may not appear in the display depending on options or
models. If so, it is not applicable to your machine (see "Menu overview" on
page 33).
• Press (Menu) > Print Setup > Emulation on the control panel.
Item Description
Emulation Type
Setup Sets the detailed settings for the selected emulation type.
The machine language defines how the computer
communicates with the machine.
18
Email setup
Some menus may not appear in the display depending on options or
models. If so, it is not applicable to your machine (see "Menu overview" on
page 33).
• Press Setup > Machine Setup > Email Setup on the touch screen.
Option Description
SMTP Server Sets the SMTP server configuration.
Send to Self
Default To Address Sets an email destination address as a default one.
Default From Sets a sender’s email address as a default one.
Sets to send the mail to yourself so that you can
back up the email or use as a reminder.
Default Subject Sets an email’s subject as a default one.
3. Useful Setting Menus
213
Page 54

System setup
19
Address book setup
Some menus may not appear in the display depending on options or
models. If so, it is not applicable to your machine (see "Menu overview" on
page 33).
• Press Setup > Machine Setup > Address Book on the touch screen.
Option Description
PhoneBook
Email
20
Adds, views, prints or deletes the phone book list. You
also can create a group.
Adds, views, prints or deletes the email list. You also can
create a group.
Doc Box Feature
• Press (Menu) > Document Box > Doc Box Feature on the control
panel.
Option Description
Add From Scan Stores scanned documents in a box. The stored file will be
named automatically as
"yearmonthdayhourminutesecond".
Task From Box Prints a document from a box.
Doc Box Setup
• Press (Menu) > Document Box > Doc Box Setup on the control panel.
Option Description
Document box setup
Some menus may not appear in the display depending on options or
models. If so, it is not applicable to your machine (see "Menu overview" on
page 33).
Add From Scan
Task From Box
Sets the default options for storing the document to a
box.
Sets the default options for printing the document from a
box.
3. Useful Setting Menus
214
Page 55

System setup
21
Network setup
Some menus may not appear in the display depending on options or
models. If so, it is not applicable to your machine (see "Menu overview" on
page 33).
• Press (Menu)> Network on the control panel,
• Or press Setup > Machine Setup > Network Setup on the touch screen.
Option Description
Selects the appropriate protocol and configure
parameters to use the network environment.
Option Description
Wireless Selects this option to use the wireless network.
Clear Setting
• Network Conf.
• Network
Reverts the network settings to the default values.
(Reboot required.)
This list shows information on your machine’s network
connection and configuration.
Configuration
Net. Activate You can sets whether to use Ethernet on or off.
Http Activate
You can sets whether to use SyncThru™ Web Service or
not.
TCP/IP (IPv4)
There are lots of parameters to be set. If you are
not sure, leave as is, or consult the network
administrator.
TCP/IP (IPv6)
Selects this option to use the network environment
through IPv6 (see "IPv6 configuration" on page 153).
Ethernet Speed Configure the network transmission speed.
You can selects the user authentication for network
802.1x
communication. For detailed information consult the
network administrator.
3. Useful Setting Menus
215
Page 56

Admin setup
G
Item Description
Password Protect
Change
Password
Maintenance
Sets the password to access the Admin
On to use this option and enter the passwordU
Changes the machine’s password for accessing the Admin
Setup.
• Clean Fuser: Cleans the fuser by printing a sheet. The
printed sheet has toner debris on it.
• CLR Empty Msg.: Prevents the Toner Low Alert
message from appearing on the display.
• Supplies Info.: Allows you to check how many pages are
printed and how much toner is left in the cartridge.
• Toner Low Alert: If toner in the cartridge has run out, a
message informing the user to change the toner
cartridge appears. You can set the option for this
message to appear or not.
• Ram Disk: Enables/disables RAM disk to manage jobs.
Depending on the installed optional memory size, you
can set the RAM disk size to between 32 and 64 MB. This
option does not appear if you have installed mass storage
device (HDD).
Setup menu.GSelect
3. Useful Setting Menus
216
Page 57

Custom setup
This menu appears only when the XOA (eXtensible Open Architecture) web
application is installed. Contact the administrator to use this menu.
Some menus may not appear in the display depending on options or
models. If so, it is not applicable to your machine (see "Menu overview" on
page 33).
• Press (Menu)) > Custom on the control panel.
3. Useful Setting Menus
217
Page 58

4. Special Features
This chapter explains special copying, scanning, faxing, and printing features.
• Altitude adjustment 219
• Storing email address 220
• Entering various characters 222
• Setting up the fax address book 223
• Registering authorized users 226
• Printing features 227
• Scan features 242
• Fax features 253
• Using shared folder features 264
• Using memory/hard drive features 265
• The procedures in this chapter are mainly based on Windows 7.
• It may be necessary to press OK to navigate to lower-level menus for some models.
Page 59

Altitude adjustment
0
4,000 m
(13,123 ft)
3,000 m
(9,842 ft)
2,000 m
(6,561 ft)
1,000 m
(3,280 ft)
4
3
2
1
Print quality is affected by atmospheric pressure, which is determined by the
height of the machine above sea level. The following information will guide you
on how to set your machine for the best print quality.
Before you set the altitude value, determine the altitude where you are.
1 High 3
2 High 2
3 High 1
4 Normal
• If your machine is connected to the network, you can set the altitude via
SyncThru™ Web Service (see "Using SyncThru™ Web Service" on page
270).
• You can also set the altitude in System Setup option on the machine’s
display (see "Machine’s basic settings" on page 38).
You can set the altitude value from Device Settings in 6DPVXQJ(DV\3ULQWHU
0DQDJHUprogram or Machine section in Printer Settings Utility program.
• For Windows and Macintosh users, see "Device Settings" on page 275.
• For Linux users, see "Using Smart Panel" on page 278.
4. Special Features
219
Page 60

Storing email address
This feature may not be available depending on model or optional goods
(see "Features by models" on page 7).
You can set up address book with the email addresses you use frequently via
SyncThru™ Web Service and then easily and quickly enter email addresses by
entering the location numbers assigned to them in address book.
1
Storing on your machine
To scan and send an image as an email attachment, you need to set up email
address using SyncThru™ Web Service.
Access the SyncThru™ Web Service (see "Using SyncThru™ Web Service"
1
on page 270).
If you need to set SMB or FTP sever information, check SMB or FTP and set
the information.
Click Apply.
6
If you make a group, click Address Book > E-mail Group > Add Group.
7
Select the Speed No. and enter Group Name.
8
You can easily add individual address if you check Yes for Add individual(s)
after this group is created.
Click Apply.
9
Click Login on the upper right of the SyncThru™ Web Service website.
2
Type in the ID and Password then click Login.
3
• ID: admin
• Password: sec00000
Click Address Book > Individual > Add.
4
Select the Speed No. and enter e-mail address and fax number.
5
4. Special Features
220
Page 61

Storing email address
2
Searching for an email address
Searching sequentially through memory
Select (scan) > (Address Book) > Search&Send > Select an
1
address group > All on the control panel.
Or select Setup > Machine Setup > Next > Address Book > Email >
View List > Individual or Group on the touch screen.
Search through the entire memory in index (numerical) order, and select
2
the name and address you want.
Searching with a particular first letter
Select (scan) on the control panel.
1
Press (Address Book) > Search&Send > Select an address group >
2
ID on the control panel.
Enter the first few letters of the name you want.
3
Press the arrows until the name and number you want appears.
4
4. Special Features
221
Page 62

Entering various characters
As you perform various tasks, you may need to enter names and numbers. For
example, when you set up your machine, you enter your name or your
company’s name, and the fax number. When you store fax numbers or email
addresses in memory, you may also enter the corresponding names.
Key Assigned numbers, letters, or characters
1@ / . ‘ 1
2A B C a b c 2
3
Entering alphanumeric characters
Press the button until the correct letter appears on the display. For example, to
enter the letter O, press 6, labeled with MNO. Each time you press 6, the display
shows a different letter, M, N, O, m, n, o and finally 6. To find the letter that you
want to enter, see "Keypad letters and numbers" on page 222.
• You can enter a space by pressing 1 twice.
• To delete the last digit or character, press the left/right or up/down arrow
button.
4
Keypad letters and numbers
3D E F d e f 3
4 G H I g h i 4
5J K L j k l 5
6M N O m n o 6
7P Q R S p q r s 7
8T U V t u v 8
9W X Y Z w x y z 9
0& + - , 0
* * % ^ _ ~ ! # $ ( ) [ ]
(These symbols are available when you type for network authentication.)
# # = | ? " : { } < > ;
(These symbols are available when you type for network authentication.)
• Special character sets may differ from your machine depending on its
options or the models.
• Some of the follow key values may not appear depending on the job you
are doing.
4. Special Features
222
Page 63

Setting up the fax address book
You can set up speed number with the fax numbers you use frequently via
SyncThru™ Web Service and then easily and quickly enter fax numbers by
entering the location numbers assigned to them in address book.
5
Registering a speed dial number
Select (fax) > (Address Book) > New&Edit > Speed Dial on
1
the control panel.
Or select Setup > Machine Setup > Next > Address Book > Phone
Book > View List > Individual > (options) > Add on the touch
screen.
Enter a speed dial number and press OK.
2
If an entry is already stored in the number you choose, the display shows the
message to allow you to change it. To start over with another speed dial
number, press (Back).
6
Using speed dial numbers
When you are prompted to enter a destination number while sending a fax,
enter the speed dial number at which you stored the number you want.
• For a one-digit (0-9) speed dial number, press and hold the
corresponding digit button on the number keypad for more than 2
seconds.
• For a two- or three-digit speed dial number, press the first digit button(s)
and then hold down the last digit button for more than 2 seconds.
• You can print the address book list by selecting (fax) >
(Address Book) > Print.
7
Editing speed dial numbers
Enter the name you want and press OK.
3
Enter the fax number you want and press OK.
4
Press the (Cancel or Stop/Clear) button to return to ready mode.
5
Select (fax) > (Address Book) > New&Edit > Speed Dial on
1
the control panel.
Or select Setup > Machine Setup > Next > Address Book > Phone
Book > View List > Individual on the touch screen.
Enter the speed dial number you want to edit and press OK.
2
Change the name and press OK.
3
4. Special Features
223
Page 64

Setting up the fax address book
Change the fax number and press OK.
4
Press (Cancel or Stop/Clear) to return to ready mode.
5
8
Registering a group dial number
Select (fax) > (Address Book) > New&Edit > Group Dial on
1
the control panel.
Or select Setup > Machine Setup > Next >Address Book > Phone
Book > View List > Group> (options) > Add on the touch
screen.
Enter a group dial number and press OK.
2
If an entry is already stored in the number you choose, the display shows the
message to allow you to change it. To start over with another speed dial
number, press (Back).
When you have finished, select No when Another No.? appears and
7
press OK.
Press (Cancel or Stop/Clear) to return to ready mode.
8
9
Editing group dial numbers
Select (fax) > (Address Book) > New&Edit > Group Dial on
1
the control panel.
Or select Setup > Machine Setup > Next > Address Book > Phone
Book > View List > Group on the touch screen.
Enter the group dial number you want to edit and press OK.
2
Enter a new speed dial number to add and press OK, then Add? appears.
3
Enter a speed dial number stored in the group and press OK, Delete?
appears.
Search by entering the first few letters of the speed dial’s name to put in
3
the group.
Select the name and number you want and press OK.
4
Select Yes when Add? appears.
5
Repeat step 3 to include other speed dial numbers into the group.
6
Press OK to add or delete the number.
4
Repeat step 3 to add or delete more numbers.
5
Select No at the Another No.? and press OK.
6
Press (Cancel or Stop/Clear) to return to ready mode.
7
4. Special Features
224
Page 65

Setting up the fax address book
10
Searching address book for an entry
There are two ways to search for a number in memory. You can either scan from
A to Z sequentially, or you can search by entering the first letters of the name
associated with the number.
Select ct (fax) > (Address Book) > Search&Dial > Speed Dial
1
or Group Dial on the control panel.
Enter All or ID and press OK.
2
Press the name and number or the keypad button labeled with the letter
3
you want to search.
For example, if you want to find the name “MOBILE,” press the 6 button,
which is labeled with “MNO.”
Press (Cancel or Stop/Clear) to return to ready mode.
4
Select ct (fax) > (Address Book) > Print on the control panel.
1
Press OK.
2
The machine begins printing.
11
Printing address book
You can check your (Address Book) settings by printing a list.
4. Special Features
225
Page 66

Registering authorized users
This feature may not be available depending on model or optional goods
(see "Features by models" on page 7).
If you have connected your machine to a network and set up the network
parameters correctly, you can scan and send images over the network. To send
a scanned image through email or via network server safely, you must register
account information of authorized users to your local machine using SyncThru™
Web Service.
Access the SyncThru™ Web Service (see "Using SyncThru™ Web Service"
1
on page 270).
Click Login on the upper right of the SyncThru™ Web Service website.
2
Type in the ID and Password then click Login.
3
• ID: admin
Enter User Name, Login ID, Password, Confirm Password, E-mail
8
Address, and Fax Number.
You can easily add individual address if you check Yes for Add individual(s)
after this group is created.
Click Apply.
9
• Password: sec00000
Click Security > User Access Control > Authentication.
4
Select Local Authentication in the Authentication Method, and click
5
Apply.
Click OK in the confirmation pop-up window.
6
Click User Profile > Add.
7
4. Special Features
226
Page 67

Printing features
• For basic printing features, refer to the Basic Guide (see "Basic printing"
on page 52).
• This feature may not be available depending on model or optional goods
(see "Features by models" on page 7).
12
Changing the default print settings
Click the Windows Start menu.
1
Select Control Panel > Devices and Printers.
2
Right-click on your machine.
3
Select Printing preferences.
4
If Printing preferences has a ൘, you can select other printer drivers
connected to the selected printer.
If you want to change the settings for each print job, change it in Printing
Preferences.
13
Setting your machine as a default machine
Click the Windows Start menu.
1
Select Control Panel > Devices and Printers.
2
Select your machine.
3
Right-click your machine and select Set as Default Printer.
4
If Printing preferences has a ൘, you can select other printer drivers
connected to the selected printer.
Change the settings on each tab.
5
Click OK.
6
4. Special Features
227
Page 68
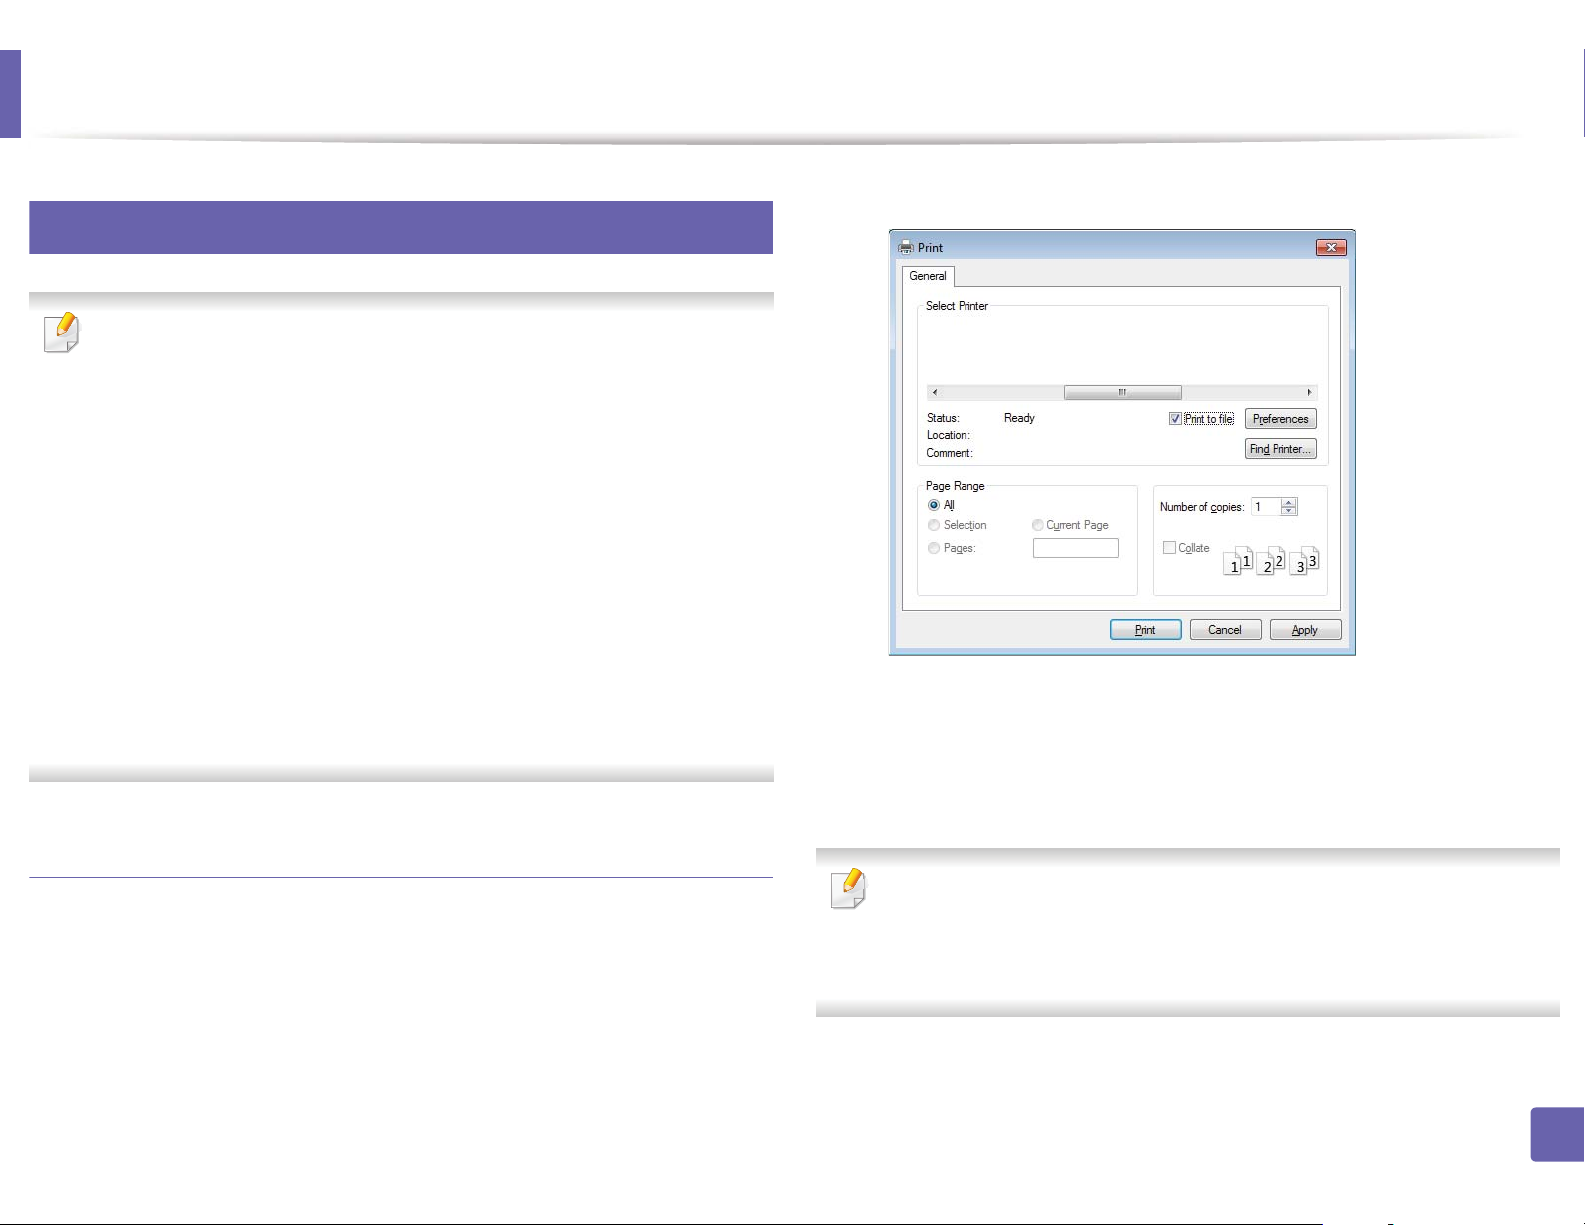
Printing features
14
Using advanced print features
XPS printer driver: used to print XPS file format.
• See "Features by models" on page 7.
• The XPS printer driver can be installed only on Windows Vista OS or
higher.
• Install optional memory when an XPS job does not print because the
printer is out of memory.
• For models that provide XPS driver on the software CD:
- You can install the XPS printer driver when you insert the software CD
into your CD-ROM drive. When the installation window appears,
select Advanced Installation > Custom Installation. You can select
the XPS printer driver in the Select Software and Utilities to Install
window.
• For models that provide XPS driver from the Samsung website,
www.samsung.com > find your product> Support or downloads.
Check the Print to file box in the Print window.
1
Click Print.
2
Type in the destination path and the file name, and then click OK.
3
For example, c:\Temp\file name.
Printing to a file (PRN)
You will sometimes need to save the print data as a file.
If you type in only the file name, the file is automatically saved in My
Documents, Documents and Settings, or Users. The saved folder may
differ, depending on your operating system or the application you are
using.
4. Special Features
228
Page 69
Printing features
Understanding special printer features
You can use advanced printing features when using your machine.
To take advantage of the printer features provided by your printer driver, click Properties or Preferences in the application’s Print window to change the print
settings. The machine name, that appears in the printer properties window may differ depending on the machine in use.
• Some menus may not appear on the display depending on options or models. If so, it is not applicable to your machine.
• Select the Help menu or click the button from the window or press F1 on your keyboard and click on any option you want to know about (see "Using help"
on page 55).
Item Description
Multiple Pages per
Side
Selects the number of pages to print on a single sheet of paper. To print more than one page per sheet, the pages will be reduced in size and
arranged in the order you specify. You can print up to 16 pages on one sheet.
4. Special Features
229
Page 70
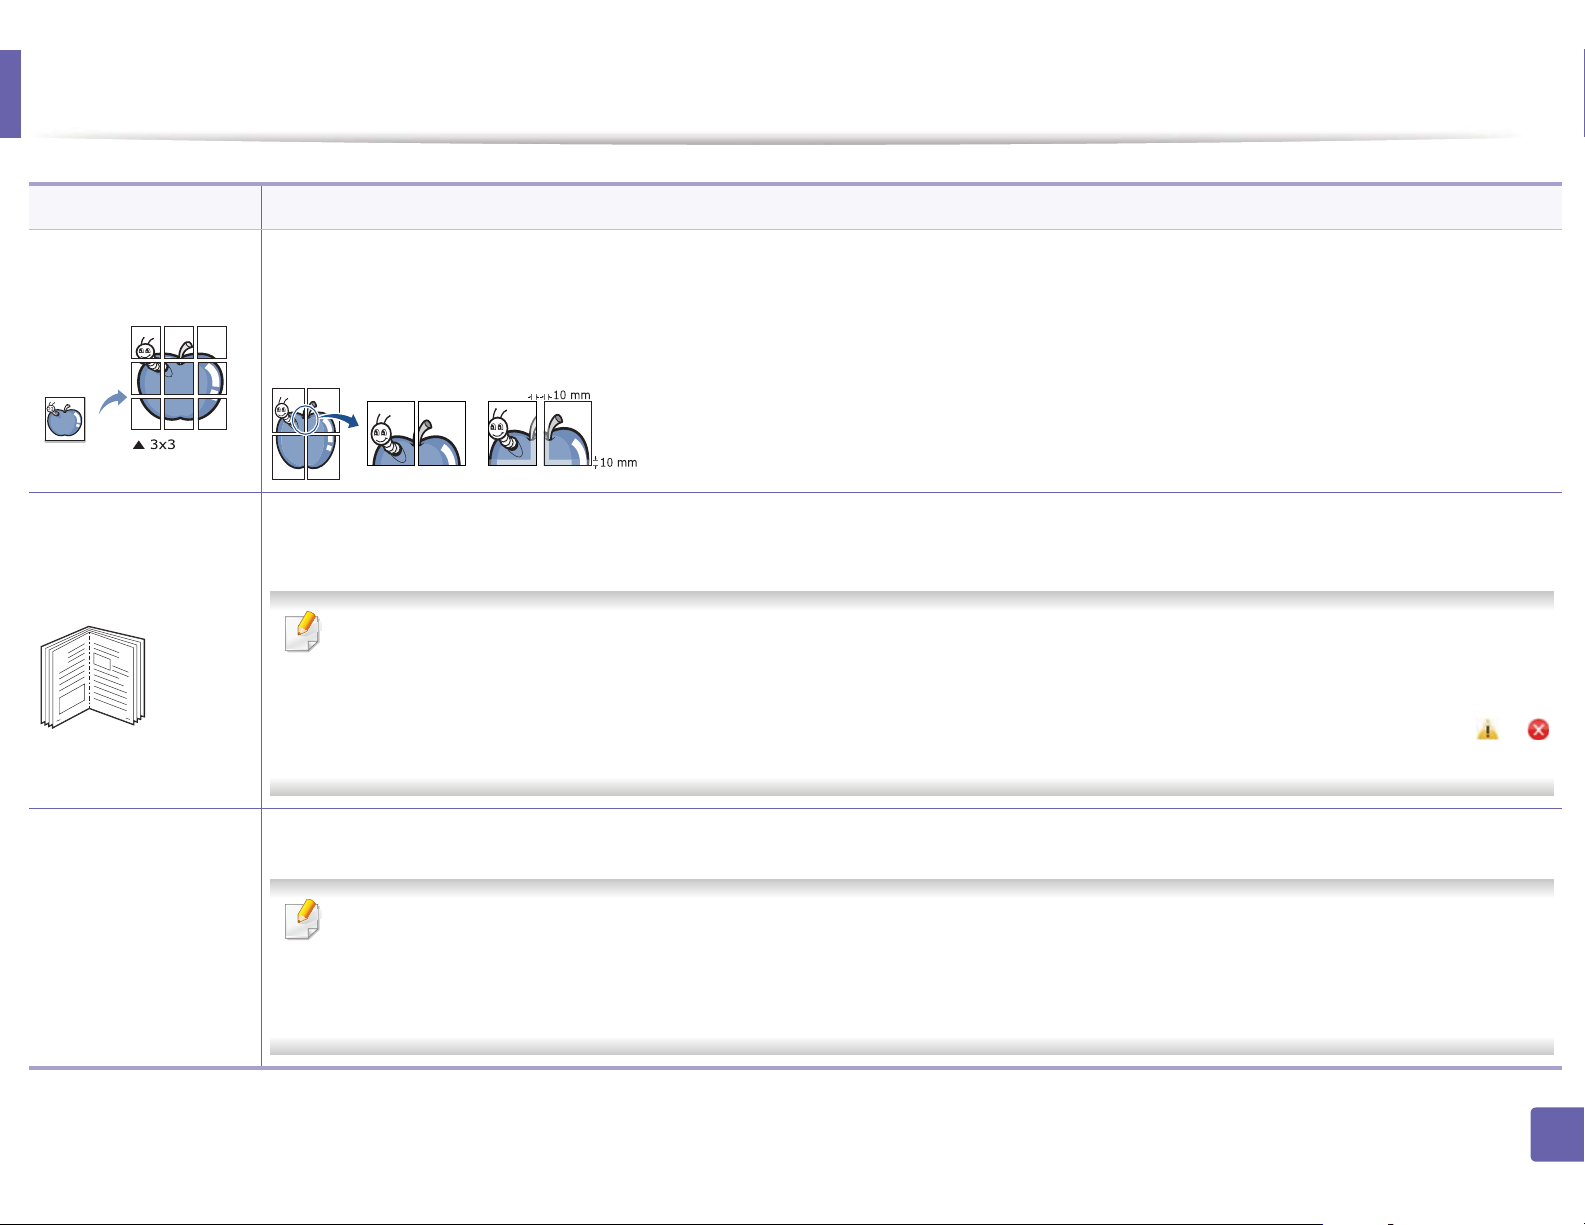
Printing features
Item Description
Prints a single-page document onto 4 (Poster 2x2), 9 (Poster 3x3), or 16 (Poster 4x4) sheets of paper, for the purpose of pasting the sheets
Poster Printing
together to form one poster-size document.
Select the Poster Overlap value. Specify Poster Overlap in millimeters or inches by selecting the radio button on the upper right of Basic tab
to make it easier to paste the sheets together.
Prints your document on both sides of a sheet of paper and arranges the pages so that the paper can be folded in half after printing to produce
a booklet.
Booklet Printing
8
9
• Double-sided
Printing
• Double-sided
Printing (Manual)
a
• If you want to make a booklet, you need to print on Letter, Legal, A4, US Folio, or Oficio sized print media.
• The Booklet Printing option is not available for all paper sizes. Select the available paper Size option under the Paper tab to see what
paper sizes are available.
• If you select an unavailable paper size, this option can be automatically canceled. Select only available paper (paper without or
mark).
Print on both sides of a sheet of paper (duplex). Before printing, decide how you want your document oriented.
a
• You can use this feature with Letter, Legal, A4, US Folio or Oficio sized paper
• If your machine does not have a duplex unit, you should complete the printing job manually. The machine prints every other page of
the document first. After that, a message appears on your computer.
• Skip Blank Pages feature does not work when you select the duplex option.
4. Special Features
230
Page 71

Printing features
Item Description
• Double-sided
Printing
• Double-sided
Printing (Manual)
Paper Options Changes the size of a document to appear larger or smaller on the printed page by entering in a percentage by which to enlarge or decrease the
• Printer Default: If you select this option, this feature is determined by the settings you have selected on the control panel of the machine.
This option is available only when you use the PCL/XPS printer driver.
• None: Disables this feature.
a
• Long Edge: This option is the conventional layout used in bookbinding.
• Short Edge: This option is the conventional layout used in calendars.
• Reverse Double-Sided Printing: Check this option to reverse the print order when duplex printing. This option is not available when you
use Double-sided Printing (Manual).
document.
Watermark The watermark option allows you to print text over an existing document. For example, you use it when you want to have large gray letters
reading “DRAFT” or “CONFIDENTIAL” printed diagonally across the first page or all pages of a document.
4. Special Features
231
Page 72
Printing features
Item Description
Watermark
(Creating a
watermark)
Watermark
(Editing a watermark)
Watermark
(Deleting a
watermark)
Overlay
a
a To change the print settings from your software application, access Printing Preferences.
b Click the Advanced tab, select Edit from the Watermark drop-down list. The Edit Watermarks window appears.
c Enter a text message in the Watermark Message box.
You can enter up to 256 characters. The message displays in the preview window.
a To change the print settings from your software application, access Printing Preferences.
b Click the Advanced tab, select Edit from the Watermark drop-down list. The Edit Watermarks window appears.
c Select the watermark you want to edit from the Current Watermarks list and change the watermark message and options.
d Click Update to save the changes.
e Click OK or Print until you exit the Print window.
a To change the print settings from your software application, access Printing Preferences.
b Click the Advanced tab, select Edit from the Watermark drop-down list. The Edit Watermarks window appears.
c Select the watermark you want to delete from the Current Watermarks list and click Delete.
d Click OK or Print until you exit the Print window.
This option is available only when you use the PCL/SPL printer driver (see "Software" on page 7).
An overlay is text and/or images stored in the computer hard disk drive (HDD) as a special file format that can be printed on any document.
Overlays are often used to take the place of letterhead paper. Rather than using preprinted letterhead, you can create an overlay containing
exactly the same information that is currently on your letterhead. To print a letter with your company’s letterhead, you do not need to load
preprinted letterhead paper in the machine: just print the letterhead overlay on your document.
To use a page overlay, you must create a new page overlay containing your logo or image.
• The overlay document size must be the same as the document you print with the overlay. Do not create an overlay with a watermark.
• The resolution of the overlay document must be the same as that of the document you will print with the overlay.
4. Special Features
232
Page 73

Printing features
Item Description
a To save the document as an overlay, access Printing Preferences.
b Click the Advanced tab, and select Edit from the Text drop-down list. Edit Overlay window appears.
Overlay
(Creating a new page
overlay)
Overlay
(Using a page overlay)
a
a
c In the Edit Overlay window, click Create.
d In the Save As window, type a name up to eight characters in the File name box. Select the destination path, if necessary (The default is
C:\Formover).
e Click Save. The name appears on the Overlay List.
f Click OK or Print until you exit the Print window.
The file is not printed. Instead, it is stored on your computer hard disk drive.
a Click the Advanced tab.
b Select the desired overlay from the Text drop-down list.
c If the overlay file you want does not appear in the Text drop-down list, select Edit... from the list and click Load. Select the overlay file you
want to use.
If you have stored the overlay file you want to use in an external source, you can also load the file when you access the Open window.
After you select the file, click Open. The file appears in the Overlay List box and is available for printing. Select the overlay from the Overlay
List box.
d If necessary, check Confirm Page Overlay When Printing box. If this box is checked, a message window appears each time you submit a
document for printing, asking you to confirm printing an overlay on your document.
If this box is not checked and an overlay has been selected, the overlay automatically prints with your document.
e Click OK or Print until you exit the Print window.
Overlay
(Deleting a page
overlay)
a
a In the Printing Preferences window, click the Advanced tab.
b Select Edit in the Text drop down list.
c Select the overlay you want to delete from the Overlay List box.
d Click Delete.
e When a confirming message window appears, click Yes.
f Click OK or Print until you exit the Print window. You can delete page overlays that you no longer use.
4. Special Features
233
Page 74

Printing features
Item Description
• This feature is available only if you have installed the optional memory or mass storage device (HDD) (see "Variety feature" on page
10).
• Some menus may not appear on the display depending on options or models. If so, it is not applicable to your machine.
• Print Mode: The default Print Mode is Normal, which is for printing without saving the printing file in the memory.
- Normal: This mode prints without storing your document in the optional memory.
Print Mode
- Proof: This mode is useful when you print more than one copy. You can print one copy first to check, then print the rest of the copies later.
- Confidential: This mode is used for printing confidential documents. You need to enter a password to print.
- Store: Select this setting to save a document in the mass storage device (HDD) without printing.
- Store and Print: This mode is used when printing and storing document at the same time.
- Spool: This option can be useful when handling large amounts of data. If you select this setting, the printer spools the document into the
mass storage device (HDD) and then prints it from the mass storage device (HDD) queue, decreasing the computer’s work load.
- Print Schedule: Select this setting to print the document at a specified time.
• User ID: This option is used when you need to find a saved file using the control panel.
• Job Name: This option is used when you need to find a saved file using the control panel.
Encrypts printing data first, and transmits it to the machine. This feature protects the printing information even though the data is snatched on
a network.
Job Encryption
Job Encryption feature is enabled only when the mass storage device (HDD) is installed. The mass storage device (HDD) is used to
decrypt the printing data (see "Variety feature" on page 10).
a. This option is not available when you use XPS driver.
4. Special Features
234
Page 75

Printing features
15
Using Direct Printing Utility
• Direct Printing Utility may not be available depending on model or
optional goods (see "Software" on page 7).
• Available for Windows OS users only.
What is Direct Printing Utility?
Direct Printing Utility is a program that sends the PDF files directly to your
machine to print without having to opening the file.
To install this program, select Advanced Installation > Custom Installation
and put a check mark in this program when you install the printer driver.
• Mass storage device (HDD) should be installed on your machine, to print
files using this program. (see "Variety feature" on page 10).
• You cannot print PDF files that are restricted. Deactivate the printing
restriction feature and retry printing.
• You cannot print PDF files that are restricted by a password. Deactivate
the password feature, and retry printing.
Printing
There are several ways you can print using the Direct Printing Utility.
From the Start menu select Programs or All Programs > Samsung
1
Printers > Direct Printing Utility > Direct Printing Utility.
The Direct Printing Utility window appears.
Select your machine from the Select Printer drop-down list and click
2
Browse.
Select the file you wish to print and click Open.
3
The file is added in the Select Files section.
Customize the machine settings for your needs.
4
Click Print. The selected PDF file is sent to the machine.
5
Using the right-click menu
Right-click on the PDF file to print and select Direct Printing.
1
The Direct Printing Utility window appears with the PDF file is added.
• Whether or not a PDF file can be printed using the Direct Printing Utility
program depends on how the PDF file was created.
• The Direct Printing Utility program supports PDF version 1.7 and below.
For higher versions, you must open the file to print it.
Select the machine to use.
2
Customize the machine settings.
3
4. Special Features
235
Page 76

Printing features
Click Print. The selected PDF file is sent to the machine.
4
16
Macintosh printing
Some features may not be available depending on models or options. It
means that the features are not supported.
Printing a document
When you print with a Macintosh, you need to check the printer driver settings
in each application you use. Follow the steps below to print from a Macintosh:
Open the document to print.
1
Open the File menu and click Page Setup (Document Setup in some
2
applications).
Choose your paper size, orientation, scaling, other options, and make
3
sure that your machine is selected. Click OK.
Open the File menu and click Print.
4
Changing printer settings
You can use advanced printing features when using your machine.
Open an application and select Print from the File menu. The machine name,
which appears in the printer properties window, may differ depending on the
machine in use. Except for the name, the composition of the printer properties
window is similar to the following.
Printing multiple pages on one sheet
You can print more than one page on a single sheet of paper. This feature
provides a cost-effective way to print draft copies.
Open an application, and select Print from the File menu.
1
Select Layout from the drop-down list under Orientation. In the Pages
2
per Sheet drop-down list, select the number of pages you want to print
on one sheet of paper.
Select the other options to use.
3
Click Print.
4
The machine prints the selected number of pages to print on one sheet
of paper.
Choose the number of copies and indicate which pages to print.
5
Click Print.
6
4. Special Features
236
Page 77

Printing features
Printing on both sides of the paper
Some features may not be available depending on models or options. It
means that the features are not supported (see "Variety feature" on page
10).
Before printing in the duplex mode, decide on which edge you will be binding
your finished document. The binding options are, as follows:
• Long-Edge Binding: This option is the conventional layout used in book
binding.
• Short-Edge Binding: This option is the type often used with calendars.
From your Macintosh application, select Print from the File menu.
1
Select Layout from the drop-down list under Orientation.
2
Select a binding orientation from the Two-Sided option.
3
Using help
Click the question mark on the bottom-left corner of the window and click on
the topic you want to know about. A pop-up window appears with information
about that option's feature, which is provided from the driver.
17
Linux printing
Select the other options to use.
4
Click Print and the machine prints on both sides of the paper.
5
If you print more than 2 copies, the first copy and the second copy might
print on the same sheet of paper. Avoid printing on both sides of paper
when you are printing more than 1 copy.
Some features may not be available depending on models or options. It
means that the features are not supported.
4. Special Features
237
Page 78

Printing features
Printing from applications
There are a lot of Linux applications that allow you to print using Common UNIX
Printing System (CUPS). You can print on your machine from any such
application.
Open an application, and select Print from the File menu
1
Select Print directly using lpr.
2
In the LPR GUI window, select the model name of your machine from the
3
printer list and click Properties.
Change the print job properties using the following four tabs displayed
4
at the top of the window.
• General: Changes the paper size, the paper type, and the
orientation of the documents. It enables the duplex feature, adds
start and end banners, and changes the number of pages per sheet.
Automatic/manual duplex printing may not be available depending on
models. You can alternatively use the lpr printing system or other
applications for odd-even printing.
• Text: Specifies the page margins and set the text options, such as
spacing or columns.
• Graphics: Sets image options that are used when printing image
files, such as color options, image size, or image position.
• Advanced: Sets the print resolution, paper source, and destination.
Click Apply to apply the changes and close the Properties window.
5
Click OK in the LPR GUI window to start printing.
6
The Printing window appears, allowing you to monitor the status of your
7
print job.
To abort the current job, click Cancel.
Printing files
You can print many different types of files on your machine using the standard
CUPS, directly from the command line interface. The CUPS lpr utility allows you
to do that, but the driver’s package replaces the standard lpr tool by a much
more user-friendly LPR GUI program.
To print any document file:
Enter lpr <file_name> from the Linux shell command line and press
1
Enter. The LPR GUI window appears.
When you type only lpr and press Enter, the Select file(s) to print
window appears first. Just select any files you want to print and click
Open.
In the LPR GUI window, select your machine from the list, and change
2
the print job properties.
Click OK to start printing.
3
4. Special Features
238
Page 79

Printing features
Configuring Printer Properties
Using the Printer Properties window provided by the Printers configuration,
you can change the various properties for your machine as a printer.
Open the Unified Driver Configurator.
1
If necessary, switch to Printers configuration.
Select your machine on the available printers list and click Properties.
2
The Printer Properties window appears.
3
The following five tabs display at the top of the window:
• General: Allows you to change the printer location and name. The
name entered in this tab displays on the printer list in Printers
configuration.
• Connection: Allows you to view or select another port. If you change
the machine port from USB to parallel or vice versa while in use, you
must re-configure the machine port in this tab.
Click OK to apply the changes and close the Printer Properties window.
4
18
Unix printing
Some features may not be available depending on models or options. It
means that the features are not supported (see "Features by models" on
page 7).
Proceeding the print job
After installing the printer, choose any of the image, text, PS or HPGL files to
print.
Execute “printui <file_name_to_print>” command.
1
For example, if you are printing “document1”
• Driver: Allows you to view or select another machine driver. By
clicking Options, you can set the default device options.
• Jobs: Shows the list of print jobs. Click Cancel job to cancel the
selected job and select the Show completed jobs check box to see
previous jobs on the job list.
• Classes: Shows the class that your machine is in. Click Add to Class
to add your machine to a specific class or click Remove from Class
to remove the machine from the selected class.
printui document1
This will open the UNIX Printer Driver Print Job Manager in which the
user can select various print options.
Select a printer that has been already added.
2
Select the printing options from the window such as Page Selection.
3
Select how many copies are needed in Number of Copies.
4
4. Special Features
239
Page 80

Printing features
To take advantage of the printer features provided by your printer driver,
press Properties.
Press OK to start the print job.
5
Changing the machine settings
The UNIX printer driver Print Job Manager in which the user can select various
print options in printer Properties.
The following hot keys may also be used: “H” for Help, “O” for OK, “A” for Apply,
and “C” for Cancel.
General tab
• Paper Size: Set the paper size as A4, Letter, or other paper sizes, according
to your requirements.
• Paper Type: Choose the type of the paper. Options available in the list box
are Printer Default, Plain, and Thick.
Automatic/manual duplex printing may not be available depending on
models. You can alternatively use the lpr printing system or other
applications for odd-even printing.
• Multiple pages: Print several pages on one side of the paper.
• Page Border: Choose any of the border styles (e.g., Single-line hairline,
Double-line hairline)
Image tab
In this tab, you can change the brightness, resolution, or image position of your
document.
Text tab
Set the character margin, line space, or the columns of the actual print output.
HPGL/2 tab
• Use only black pen: To print all graphics in black.
• Paper Source: Select from which tray the paper is used. By default, it is Auto
Selection.
• Orientation: Select the direction in which information is printed on a page.
• Duplex: Print on both sides of paper to save paper.
• Fit plot to page: Fit the entire graphic into a single page.
4. Special Features
240
Page 81

Printing features
Margins tab
• Use Margins: Set the margins for the document. By default, margins are not
enabled. The user can change the margin settings by changing the values in
the respective fields. Set by default, these values depend on the page size
selected.
• Unit: Change the units to points, inches, or centimeters.
Printer-Specific Settings tab
Select various options in the JCL and General frames to customize various
settings. These options are specific to the printer and depend on the PPD file.
4. Special Features
241
Page 82

Scan features
• For basic scanning features, refer to the Basic Guide (see "Basic scanning"
on page 63).
• This feature may not be available depending on model or optional goods
(see "Features by models" on page 7).
• The maximum resolution that can be achieved depends upon various
factors, including computer speed, available disk space, memory, the
size of the image being scanned, and bit depth settings. Thus, depending
on your system and what you are scanning, you may not be able to scan
at certain resolutions, especially using enhanced dpi.
19
Basic scanning method
This feature may not be available depending on model or optional goods
(see "Variety feature" on page 10).
You can scan the originals with your machine via an USB cable or the network.
The following methodoloqies can be used for scanning your documents:
• Scan to PC: Scan the originals from the control panel. Then, the scanned
data will be stored in the connected computers My Documents folder (see
"Basic Scanning" on page 63).
• TWAIN: TWAIN is the one of a preset imaging applications. Scanning an
image launches the selected application, enabling you to control the
scanning process. This feature can be used via the local connection or the
network connection (see "Scanning from image editing program" on page
246).
• Samsung Scan Assistant/SmarThru 4/SmarThru Office: You can use this
program to scan images or documents.
- See "Scanning with Samsung Scan Assistant" on page 247.
- See "Scanning with SmarThru 4" on page 248
- See "Scanning with SmarThru Office" on page 248
• WIA: WIA stands for Windows Images Acquisition. To use this feature, your
computer must be connected directly with the machine via an USB cable
(see "Scanning using the WIA driver" on page 247).
• USB Memory: You can scan a document and save the scanned image onto
an USB memory device.
• Email: You can send the scanned image as an email attachment (See
"Scanning to email" on page 244).
• FTP/SMB: You can scan an image and upload it to an FTP/SMB server (see
"Scanning to FTP/SMB server" on page 245).
4. Special Features
242
Page 83
Scan features
20
Setting the scan settings in the computer
This feature may not be available depending on model or optional goods
(see "Features by models" on page 7).
Open Samsung Easy Printer Manager (see "Using Samsung Easy
1
Printer Manager" on page 273).
Select the appropriate machine from the Printer List.
2
Select Scan to PC Settings menu.
3
Select the option you want.
4
• Scan Activation: Determines whether or not scanning is enabled on
the device.
21
Scanning from network connected machine
The machine that does not support the network interface, it will not be able
to use this feature (see "Rear view" on page 23).
Make sure the printer driver is installed on your computer using the software CD,
since the printer driver includes the scan program (see "Installing the driver
locally" on page 30).
Place a single document face down on the document glass, or load the
1
documents face up into the document feeder (see "Loading originals" on
page 49).
Select (Scan) > Scan to PC > Network PC on the control panel.
2
Or select Scan > Network PC on the touch screen.
• Basic tab: Contains settings related to general scan and deviceG
settings.
• Image tab: Contains settings related to image altering.
Press Save > OK.
5
If you see Not Available message, check the port connection.
Select your registered computer ID, and enter the Password if
3
necessary.
4. Special Features
243
Page 84

Scan features
Setting up an email account
• ID is the same ID as the registered scan ID for 5COUWPI'CU[2TKPVGT
/CPCIGT! Switch to advanced mode!Scan to 2% Settings.
• Password is the 4 digit number registered password for 5COUWPI'CU[
2TKPVGT/CPCIGT! Switch to advanced mode!Scan to 2%
Settings.
Select the option you want and press OK.
4
Scanning begins.
5
Scanned image is saved in computer’s C:\Users\users name\My
Documents. The saved folder may differ, depending on your operating
system or the application you are using.
Access the SyncThru™ Web Service (see "Using SyncThru™ Web Service"
1
on page 270).
Select Settings > Network Settings and Outgoing Mail Server(SMTP).
2
Enter the IP address in dotted decimal notation or as a host name.
3
Enter the server port number, from 1 to 65535.
4
Check the box next to SMTP Requires Authentication to require
5
authentication.
Enter the SMTP server login name and password.
6
Press Apply.
7
22
Scanning to email
This feature may not be available depending on model or optional goods
(see "Features by models" on page 7).
• If the authentication method of SMTP server is POP3 before SMTP, put a
check mark of SMTP Requires POP Before SMTP Authentication.
• Enter the IP address and port number.
4. Special Features
244
Page 85

Scan features
Scanning and sending an email
Place a single document face down on the document glass, or load the
1
documents face up into the document feeder (see "Loading originals" on
page 49).
Select (scan) > Scan to Email on the control panel.
2
Or select Scan > Send Email on the touch screen.
Enter the login name and password if you configured on SyncThru™ Web
3
Service (see "Using SyncThru™ Web Service" on page 270).
Enter the sender’s and recipient’s email address.
4
You can send an email to yourself by activating the Auto Send To Self
option in the Settings > Scan > Scan To E-mail on SyncThru™ Web Service.
Enter an email subject and press OK.
5
Select the file format to scan, and press OK.
6
Enter the SMTP server login name and password.
7
23
Scanning to FTP/SMB server
This feature may not be available depending on model or optional goods
(see "Features by models" on page 7).
Setting up an FTP/SMB server
Access the SyncThru™ Web Service (see "Using SyncThru™ Web Service"
1
on page 270).
Select Address Book > Individual > Add.
2
Check the box next to Add FTP or Add SMB.
3
Enter the IP address in dotted decimal notation or as a host name.
4
Enter the server port number, from 1 to 65535.
5
Check the box next to Anonymous, then the server permits the access
6
of unauthorized people.
The machine begins scanning and then sends the email.
8
Enter the login name and password.
7
Enter the domain name if your server is joined to the certain domain,
8
otherwise just enter your computer name which is registered to the SMB
server.
4. Special Features
245
Page 86

Scan features
Enter the path for saving the scanned image.
9
• The folder to save the scanned image must be on the root.
• The folder properties need to be setup as a share.
• Your user name should have the rights to read and write the folder.
10
Press Apply.
Scanning and sending to FTP/SMB server
Make sure that your machine is connected to a network.
1
Place a single document face down on the document glass, or load the
2
documents face up into the document feeder (see "Loading originals" on
page 49).
24
Scanning from image editing program
You can scan and import documents at the image editing software such as
Adobe Photoshop, if the software is TWAIN-compliant. Follow the steps below
to scan with TWAIN-compliant software:
Make sure that the machine is connected to your computer and
1
powered on.
Place a single document face down on the document glass, or load the
2
documents face up into the document feeder (see "Loading originals" on
page 49).
Open an application, such as Adobe Photoshop.
3
Click File > Import, and select the scanner device.
4
Select (scan) > Scan to SMB or Scan to FTP on the control panel.
3
Or select Scan > SMB or FTP on the touch screen.
Select a server and scan format you want.
4
The machine begins scanning and then sends the scanned image to the
5
specified server.
Set the scan options.
5
Scan and save your scanned image.
6
4. Special Features
246
Page 87

Scan features
25
Scanning using the WIA driver
Your machine supports the Windows Image Acquisition (WIA) driver for
scanning images. WIA is one of the standard components provided by Microsoft
Windows 7 and works with digital cameras and scanners. Unlike the TWAIN
driver, the WIA driver allows you to scan and easily adjust images without using
additional software:
The WIA driver works only on Windows OS (not supported Windows 2000)
with a USB port.
Make sure that the machine is connected to your computer and
1
powered on.
Place a single document face down on the document glass, or load the
2
documents face up into the document feeder (see "Loading originals" on
page 49).
Click Start > Control Panel > Hardware and Sound > Devices and
3
Printers.
Right-click on device driver icon in Printers and Faxes > Start Scan.
4
Choose your scanning preferences and click Preview to see your
6
preferences affect the picture.
Scan and save your scanned image.
7
26
Scanning with Samsung Scan Assistant
• This feature may not be available depending on model or optional goods
(see "Features by models" on page 7).
• You can use the OCR (Optical Character Reader) feature from Samsung
Scan Assistant program.
Make sure that the machine is connected to your computer and
1
powered on.
Place a single document face down on the document glass, or load the
2
documents face up into the document feeder (see "Loading originals" on
page 49).
Click Start > All programs > Samsung Printers, and start Samsung
3
Scan Assistant.
New Scan application appears.
5
Select the Help menu or click the button from the window and click on
any option you want to know about.
4. Special Features
247
Page 88

Scan features
Set the scan options.
4
Click Scan.
5
27
Scanning with SmarThru 4
• This feature may not be available depending on model or optional goods
(see "Features by models" on page 7).
• You can use the OCR (Optical Character Reader) feature from SmarThru 4
program.
Make sure that the machine is connected to your computer and
1
powered on.
Place a single document face down on the document glass, or load the
2
documents face up into the document feeder (see "Loading originals" on
page 49).
• Print: You can print images you have saved.
Select the Help menu or click the button from the window and click on
any option you want to know about.
Click Scan to.
5
Select destination among Application, E-mail, Folder, OCR, or Web.
6
If needed, click Settings to customize the settings.
7
Click Scan.
8
28
Scanning with SmarThru Office
• This feature may not be available depending on model or optional goods
(see "Features by models" on page 7).
Double-click the SmarThru 4 icon.
3
The SmarThru appears.
4
• Scan to: You can scan an image and save it to an application or
folder, email it, or publish it on a web site.
• Image: You can edit an image and send it to a selected application
or folder, email it, or publish it on a web site.
•To use SmarThru Office, you have to install the program manually from
the supplied CD. Select Advanced Installation > Custom Installation
and choose SmarThru Office to install.
• You can use the OCR (Optical Character Reader) feature from SmarThru
Office program.
4. Special Features
248
Page 89
Scan features
Make sure that the machine is connected to your computer and
1
powered on.
Place a single document face down on the document glass, or load the
2
documents face up into the document feeder (see "Loading originals" on
page 49).
Double-click the SmarThru Office icon.
3
The SmarThru Office appears.
4
Click the Help or button from the window and click on any option you
want to know about.
Click the SmarThru Office icon ( ) in the tray area of the Windows
5
taskbar to activate the SmarThru Office launcher.
Click the scanning icon ( ) to open the scanning window.
6
The Scan Setting window opens.
7
Set scan settings and click Scan.
8
29
Macintosh scanning
Scanning from USB connected machine
Make sure that the machine is connected to your computer and
1
powered on.
Place a single document face down on the document glass, or load the
2
documents face up into the document feeder (see "Loading originals" on
page 49).
Start Applications and click Image Capture.
3
If No Image Capture device connected message appears, disconnect the
USB cable and reconnect it. If the problem continues, refer to the Image
Capture’s help.
Select the option you want.
4
Scan and save your scanned image.
5
If scanning does not operate in Image Capture, update Mac OS to the latest
version. Image Capture operates properly in Mac OS X 10.4.7 or higher.
4. Special Features
249
Page 90

Scan features
Scanning from network connected machine
Network or wireless model only (see "Features by models" on page 7).
Make sure that your machine is connected to a network.
1
Place a single document face down on the document glass, or load the
2
documents face up into the document feeder (see "Loading originals" on
page 49).
Start Applications and click Image Capture.
3
According to OS, follow steps below.
4
•For 10.4
-Click Devices > Browse Devices on Menu bar.
- Select your machine in Twain devices option. Make sure that Use
TWAIN software checkbox is checked.
- If you want to scan using TWAIN, refer to the Mac OS X10.4 steps
above.
• For 10.6 -10.7, select your device below SHARED.
Set the scan options on this program.
5
Scan and save your scanned image.
6
• If scanning does not operate in Image Capture, update Mac OS to the
latest version. Image Capture operates properly Mac OS X 10.4.7 or
higher.
• For more information, refer to the Image Capture’s help.
• You can also scan using TWAIN-compliant software, such as Adobe
Photoshop.
30
Linux scanning
- Click Connect.
If a warning message appears, click Change Port.. to select port,
or If TWAIN UI appears, click Change Port.. from the Preference
tab and select a new port.
•For 10.5
-Click Devices > Browse Devices on Menu bar.
- Make sure that Connected checkbox is checked beside your
machine in Bonjour Devices.
Scanning
Make sure that the machine is connected to your computer and
1
powered on.
Double-click the Unified Driver Configurator on your desktop.
2
Click the button to switch to Scanners Configuration.
3
4. Special Features
250
Page 91
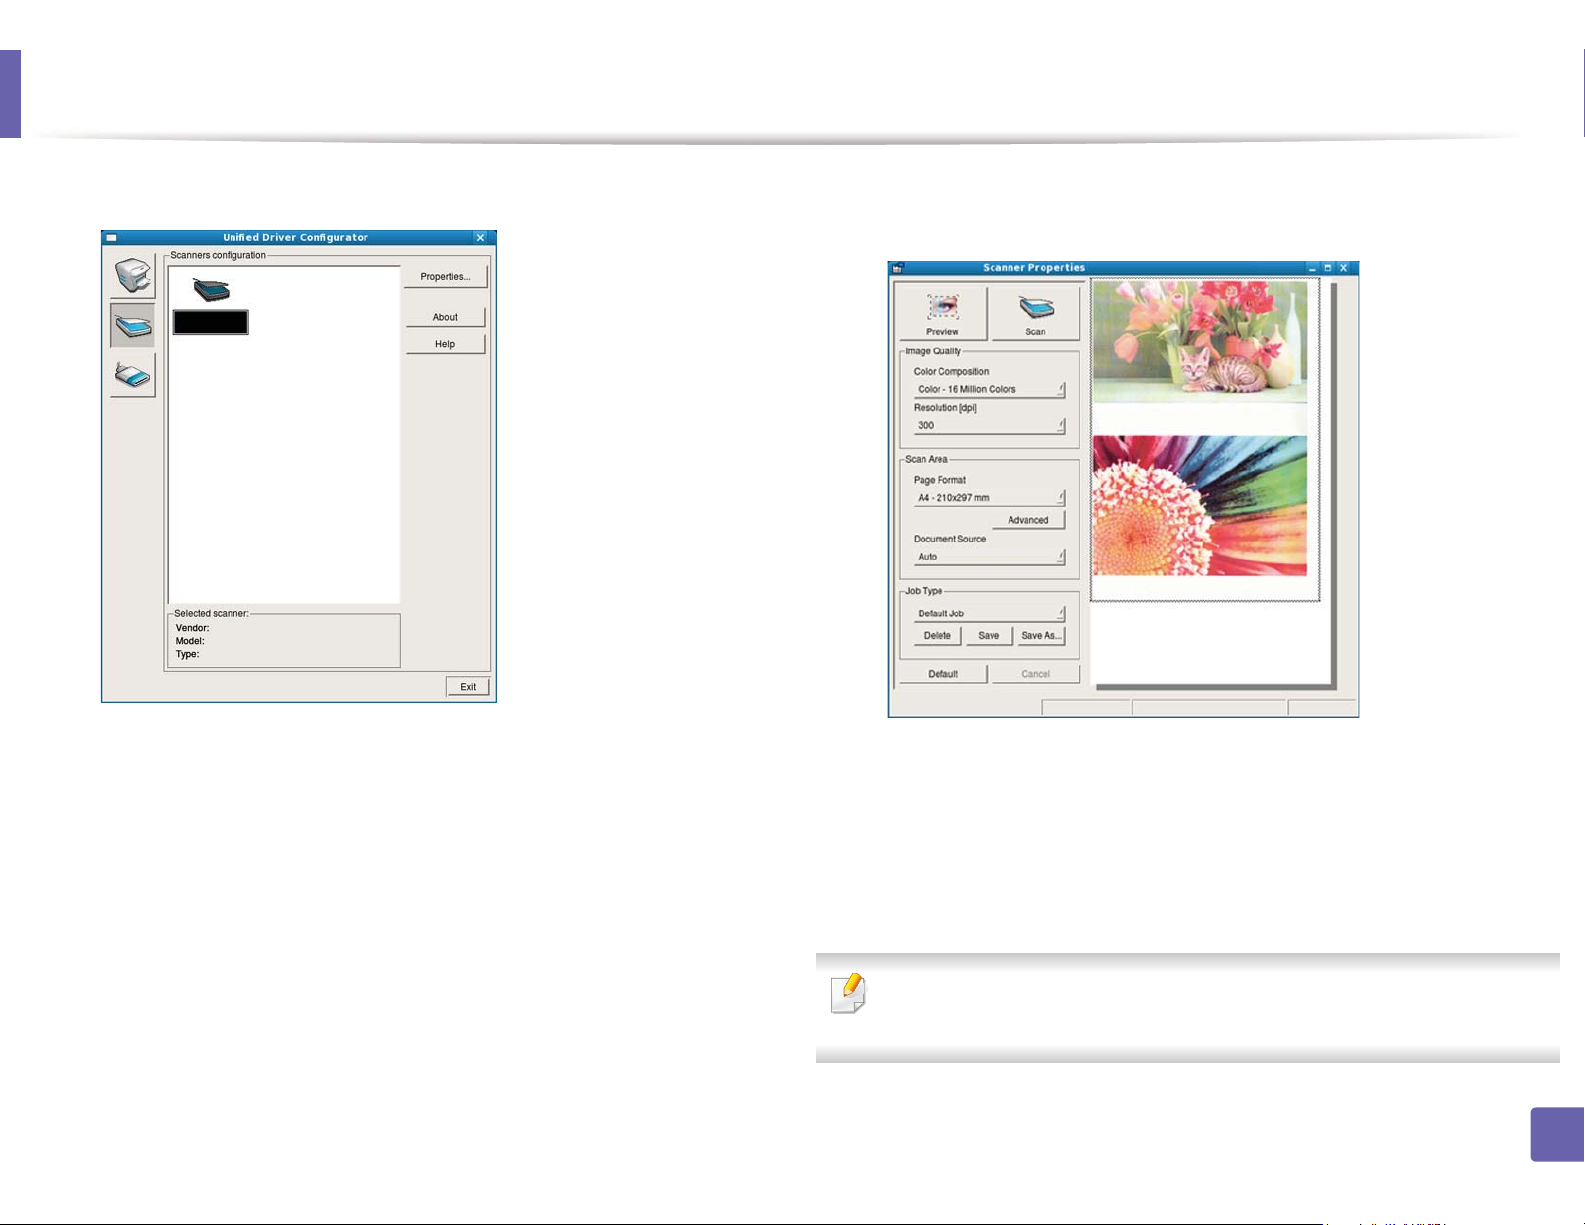
Scan features
Select the scanner on the list.
4
Click Properties.
5
Place a single document face down on the document glass, or load the
6
documents face up into the document feeder (see "Loading originals" on
page 49).
8
9
10
The document is scanned and the image preview appears in the
Preview Pane.
Drag the pointer to set the image area to be scanned in the Preview
Pane.
Select the option you want.
From the Scanner Properties window, click Preview.
7
11
Scan and save your scanned image.
For later use, you can save as your scan settings and add it to the Job Type
drop-down list.
4. Special Features
251
Page 92

Scan features
Editing an image with Image Manager
The Image Manager application provides you with menu commands and tools
to edit your scanned image.
4. Special Features
252
Page 93

Fax features
• For basic faxing features, refer to the Basic Guide (see "Basic faxing" on
page 64).
• This function is not supported for SCX-340x/SCX-340xW Series (see
"Control panel overview" on page 24).
31
Automatic redialing
When the number you have dialed is busy or there is no answer when you send
a fax, the machine automatically redials the number. The redial time depends on
the country's factory default setting.
When the display shows Retry Redial?, press (Start) button to redial the
number without waiting. To cancel the automatic redialing, press (Cancel
or Stop/Clear).
32
Redialing the fax number
Press (Redial/Pause) button on the control panel.
1
Select the fax number you want.
2
Ten recently sent fax numbers with ten received Caller IDs are shown.
When an original is loaded in the document feeder, the machine
3
automatically begins to send.
If an original is placed on the scanner glass, select Yes to add another
page. Load another original and press OK. When you have finished,
select No when Another Page? appears.
33
Confirming a transmission
To change the time interval between redials and the number of redial attempts.
Press (fax) > (Menu)> Fax Setup > Sending on the control
1
panel.
Select Redial Times or Redial Term you want.
2
Select the option you want.
3
When the last page of your original has been sent successfully, the machine
beeps and returns to ready mode.
When something goes wrong while sending your fax, an error message appears
on the display. If you receive an error message, press (Cancel or Stop/Clear)
to clear the message and try to send the fax again.
4. Special Features
253
Page 94
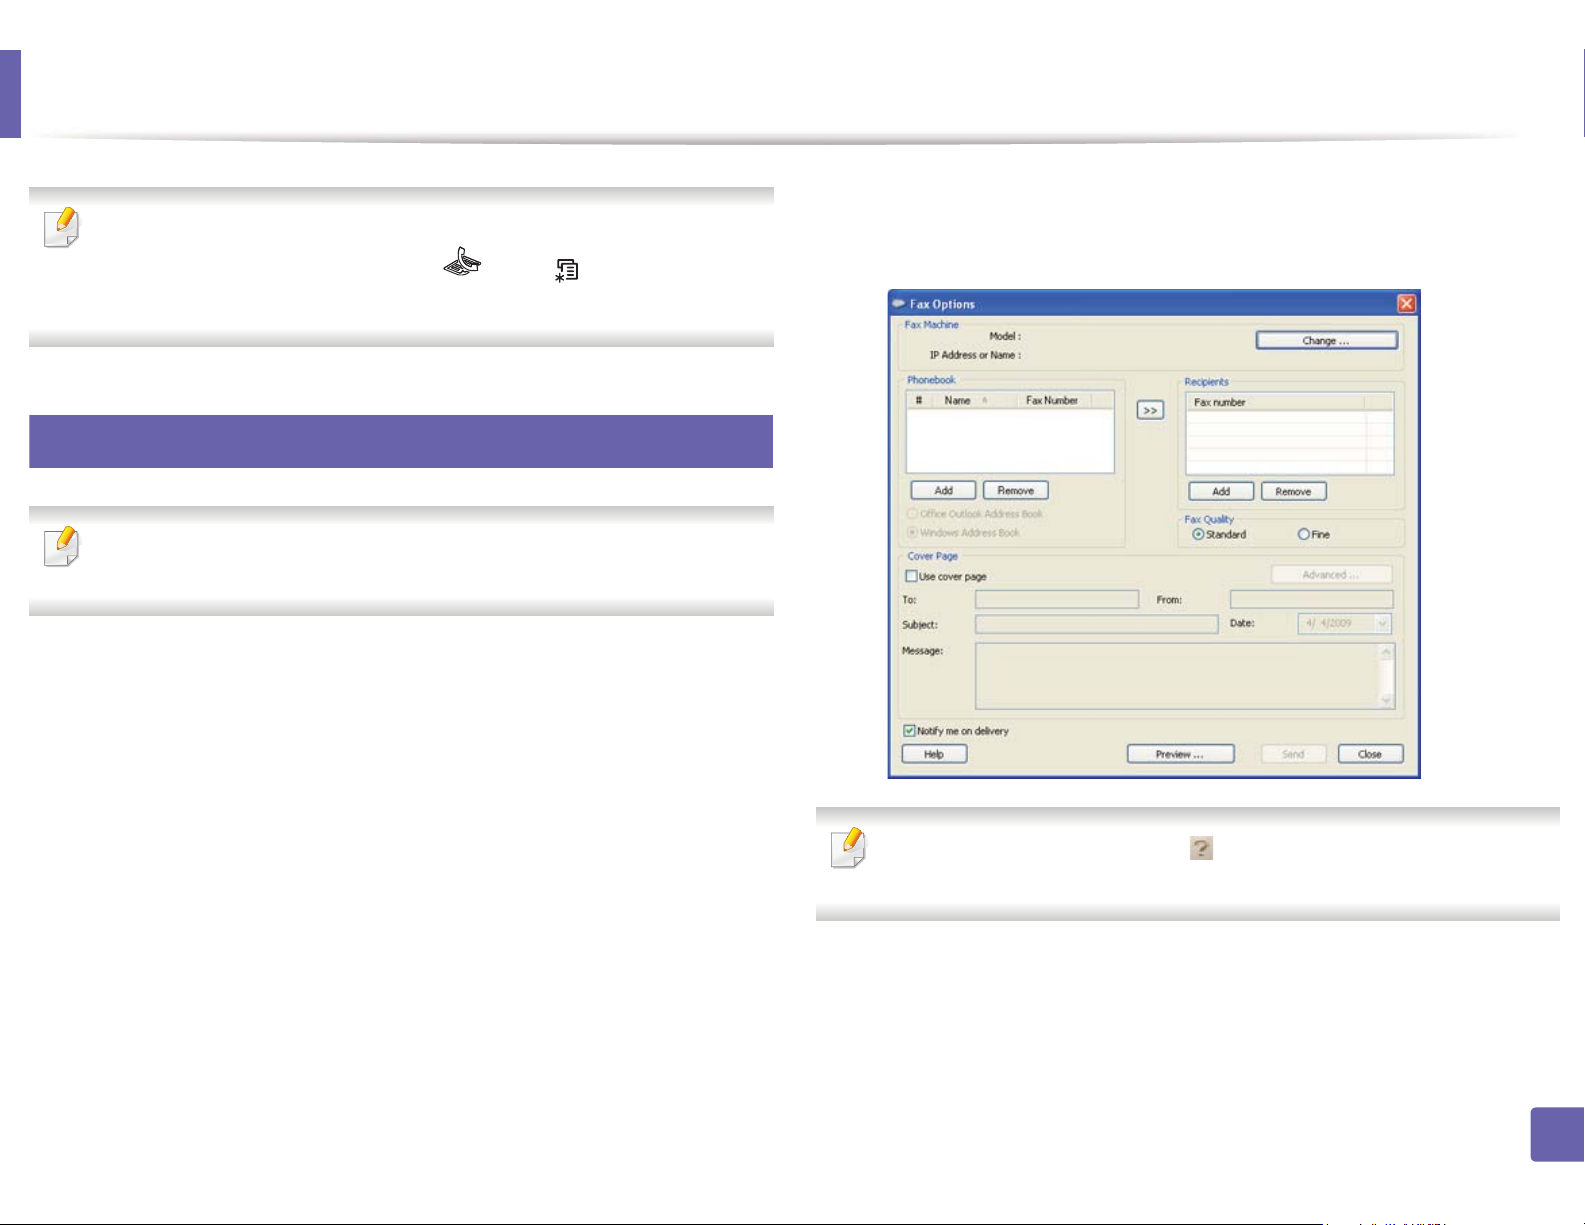
Fax features
You can set your machine to print a confirmation report automatically each
time sending a fax is completed. Press (fax) > (Menu) > Fax Setup
> Sending > Send Report on the control panel.
34
Sending a fax in the computer
This feature may not be available depending on model or optional goods
(see "Features by models" on page 7).
You can send a fax from your computer without going to the machine.
To send a fax from your computer, the Samsung Network PC Fax program
must be installed. This program will be installed when you installed the printer
driver.
Click Print or OK.
4
Enter the recipients’ numbers and select the option
5
Open the document to be sent.
1
Select Print from the File menu.
2
The Print window will be displayed. It may look slightly different
depending on your application.
Select Samsung Network PC Fax from the Print window
3
Select the Help menu or click the button from the window and click on
any option you want to know about.
Click Send.
6
4. Special Features
254
Page 95

Fax features
35
Delaying a fax transmission
You can set your machine to send a fax at a later time when you will not be
present. You cannot send a color fax using this feature.
Place a single document face down on the document glass, or load the
1
documents face up into the document feeder.
Press (fax) on the control panel.
2
Adjust the resolution and the darkness to suit your fax needs.
3
Press (Menu) > Fax Feature > Delay Send on the control panel.
4
Or select Fax > Delayed Send > To on the touch screen.
Enter the number of the receiving fax machine and press OK.
5
The display asks you to enter another fax number to send the document.
6
Enter the job name and the time.
8
If you set a time earlier than the current time, the fax will be sent at that time
on the following day.
The original is scanned into memory before transmission.
9
The machine returns to ready mode. The display reminds you that you
are in ready mode and that a delayed fax is set.
You can check the list of delayed fax jobs.
Press (Menu) > System Setup > Report > Schedule Jobs on the
control panel.
Adding documents to a reserved fax
To enter more fax numbers, press OK when Yes highlights and repeat
7
steps 5.
• You can add up to 10 destinations.
• Once you entered a group dial number, you cannot enter another group
dial numbers anymore.
Place a single document face down on the document glass, or load the
1
documents face up into the document feeder.
Press (fax) > (Menu) > Fax Feature > Add Page on the control
2
panel.
Select the fax job and press OK.
3
When you have finished, select No when Another Page? appears. The
machine scans the original into memory.
4. Special Features
255
Page 96

Fax features
Press (Cancel or Stop/Clear) to return to ready mode.
4
Canceling a reserved fax job
Press (fax) > (Menu) > Fax Feature > Cancel Job on the control
1
panel.
Select the fax job you want and press OK.
2
Press OK when Yes highlights.
3
The selected fax is deleted from memory.
Press (Stop/Clear) to return to ready mode.
4
36
Sending a priority fax
This function is used when a high priority fax need to be sent ahead of reserved
operations. The original is scanned into memory and immediately transmitted
when the current operation is finished.
Place a single document face down on the document glass, or load the
1
documents face up into the document feeder.
Press (Fax) > (Menu) > Fax Feature > Priority Send on the
2
control panel.
Or select Fax > Priority Send > To on the touch screen.
Enter the destination fax number and press OK.
3
Enter the job name and press OK.
4
If an original is placed on the scanner glass, select Yes to add another
5
pages. Load another original and press OK.
When you have finished, select No when Another Page? appears.
The machine starts to scan and send a fax to destinations.
37
Forwarding a sentGfax to another destination
You can set the machine to forward the received or sent fax to other destination
by a fax, an email or a server. If you are out of office but have to receive the fax,
this feature may be useful.
4. Special Features
256
Page 97

Fax features
• When you forward a fax by an email, you must first set the mail server and
IP address in SyncThru™ Web Service (seeG"Using SyncThru™ Web
Service" on page 270).
38
Forwarding a received fax
You can set the machine to forward the received or sent fax to other destination
• Though you sent or received a color fax, the data is forwarded in
grayscale.
by a fax, an email or a server. If you are out of office but have to receive the fax,
this feature may be useful.
Place a single document face down on the document glass, or load the
1
Though you sent or received a color fax, the data is forwarded in grayscale.
documents face up into the document feeder.
Press (fax) > (Menu) > Fax Feature > Forward > Fax > Send
2
Forward > On on the control panel.
Press (fax) > (Menu) > Fax Feature > Forward > Fax, E-mail, or
1
Server > Receive Forward or RCV Forward > Forward on the control
Or select Setup > Machine Setup > Fax Setup > Forward > Fax, Email,
panel.
or Server > Send Forward > On on the touch screen.
Or select Setup > Machine Setup > Fax Setup > Forward > Fax, Email,
Forward options may not be available depending on model or optional
goods (see "Variety feature" on page 10).
Enter the destination fax number, email address, or server address and
3
press OK.
or Server > Receive Forward or RCV Forward > On on the touch
screen.
• Forward options may not be available depending on model or optional
goods (see "Variety feature" on page 10).
• To set the machine to print out a fax when fax forwarding has been
completed, select Forward&Print.
Press (Cancel or Stop/Clear) to return to ready mode.
4
Subsequent sent faxes will be forwarded to the specified fax machine.
Enter the destination fax number, email address, or server address and
2
press OK.
Enter the starting tim and ending time, then press OK.
3
4. Special Features
257
Page 98

Fax features
Press (Cancel or Stop/Clear) to return to ready mode.
4
Subsequent sent faxes will be forwarded to the specified fax machine.
39
Sending faxes on both sides of paper
• This is available only when you load originals into the document feeder.
• Some menus may not appear on the display depending on options or
models. If so, it is not applicable to your machine.
• This feature may not be available depending on model or optional goods
(see "Features by models" on page 7).
Place a single document face down on the document glass, or load the
1
documents face up into the document feeder.
Press (fax) > Duplex on the control panel.
2
Or select Fax > Select the menu you want > Select Duplex from the submenus > on the touch screen.
Press OK.
3
40
Receiving a fax in the computer
• This feature may not be available depending on model or optional goods
(see "Features by models" on page 7).
• To use this feature, set the option on the control panel:
Press (fax) > (Menu) > Fax Feature > Forward > PC > On the
control panel.
Or select Setup > Machine Setup > Next > Fax Setup > Forward > PC
> On on the touch screen.
Open the Samsung Easy Printer Manager.
1
Select the appropriate machine from the Printer List.
2
Select Fax to PC Settings menu.
3
• Off: Send faxes in normal mode.
• 2 Side: Send faxes on both sides of the original.
• 2->1Side ROT2: Send faxes on both sides of the original and prints
each one on a separate sheet, but the information on the back side
of the printout is rotated 180°.
Use Enable Fax Receiving from Device to change the fax settings.
4
• Image Type: Convert the received faxes to PDF or TIFF.
• Save Location: Select location to save the converted faxes.
• Prefix: Select prefix.
4. Special Features
258
Page 99

Fax features
• Print received fax: After receiving the fax, set prints information for
the received fax.
• Notify me when complete: Set to show the popup window to
notify receiving a fax.
• Open with default application: After receiving the fax, open it with
default application.
• None: After receiving a fax, the machine does not notify the user or
opens the application.
Press Save > OK.
5
41
Changing the receive modes
Press (fax) > (Menu) > Fax Setup > Receiving > Receive Mode
1
on the control panel.
Or select Setup > Machine Setup > Next > Default Setting > Fax
Default > Common > Receive Mode on the touch screen.
• Ans/Fax: Is for when an answering machine attached to your
machine. Your machine answers an incoming call, and the caller can
leave a message on the answering machine. If the fax machine
senses a fax tone on the line, the machine automatically switches to
Fax mode to receive the fax.
To use the Ans/Fax mode, attach an answering machine to the EXT socket
on the back of your machine.
• DRPD: You can receive a call using the Distinctive Ring Pattern
Detection (DRPD) feature. Distinctive Ring is a telephone company
service which enables an user to use a single telephone line to
answer several different telephone numbers. For further details, see
"Receiving faxes using DRPD mode" on page 260.
This setting may not be available depending on your country.
Press OK.
3
Select the option you want.
2
• Fax: Answers an incoming fax call and immediately goes into the fax
reception mode.
• Tel: Receives a fax by pressing (On Hook Dial) and then
(Start) button.
Press (Cancel or Stop/Clear) to return to ready mode.
4
4. Special Features
259
Page 100
Fax features
42
Receiving manually in Tel mode
You can receive a fax call by pressing (On Hook Dial) button and then
pressing (Start) when you hear a fax tone. If your machine has a handset,
you can answer calls using the handset (see "Features by models" on page 7).
43
Receiving in Answering Machine/Fax mode
To use this mode, you must attach an answering machine to the EXT socket on
the back of your machine. If the caller leaves a message, the answering machine
stores the message. If your machine detects a fax tone on the line, it
automatically starts to receive the fax.
• If you have set your machine to this mode and your answering machine
is switched off, or no answering machine is connected to EXT socket,
your machine automatically goes into Fax mode after a predefined
number of rings.
44
Receiving faxes with an extension telephone
When you are using an extension telephone connected to the EXT socket, you
can receive a fax from someone you are talking to on the extension telephone,
without going to the fax machine.
When you receive a call on the extension phone and hear fax tones, press the
keys *9* on the extension phone. The machine receives the fax.
*9* is the remote receive code preset at the factory. The first and the last
asterisks are fixed, but you can change the middle number to whatever you
want.
While you are talking over the telephone connected to the EXT socket, copy
and scan features are not available.
45
Receiving faxes using DRPD mode
• If the answering machine has a user-selectable ring counter, set the
machine to answer incoming calls within 1 ring.
• If the machine is in Tel mode, disconnect or switch off the answering
machine with the fax machine. Otherwise, the outgoing message from
the answering machine will interrupt your phone conversation.
This setting may not be available depending on your country. Distinctive Ring is
a telephone company service which enables an user to use a single telephone
line to answer several different telephone numbers. This feature is often used by
answering services who answer telephones for many different clients and need
to know which number someone is calling in on to properly answer the phone.
4. Special Features
260
 Loading...