

Samsung NKAF030FNB User Manual

Recirculation Kit
Kit de Recyclage
Kit Recirculante
Installation Instructions Guide
Guide d’instructions d’installation
Guía de Instrucciones para Instalación
NK-AF030FNB/AA
LIB0147488
Important Safety Instructions
APPROVED FOR RESIDENTIAL APPLIANCES
FOR RESIDENTIAL USE ONLY
READ AND SAVE THESE INSTRUCTIONS
PLEASE READ ENTIRE INSTALLATION GUIDE BEFORE PROCEEDING.
INSTALLATION MUST COMPLY WITH ALL LOCAL CODES.
IMPORTANT: Save these Instructions for the Local Electrical
Inspector’s use.
INSTALLER: Please leave these Instructions with this unit for
the owner.
OWNER: Please retain these instructions for future
reference.
Installation
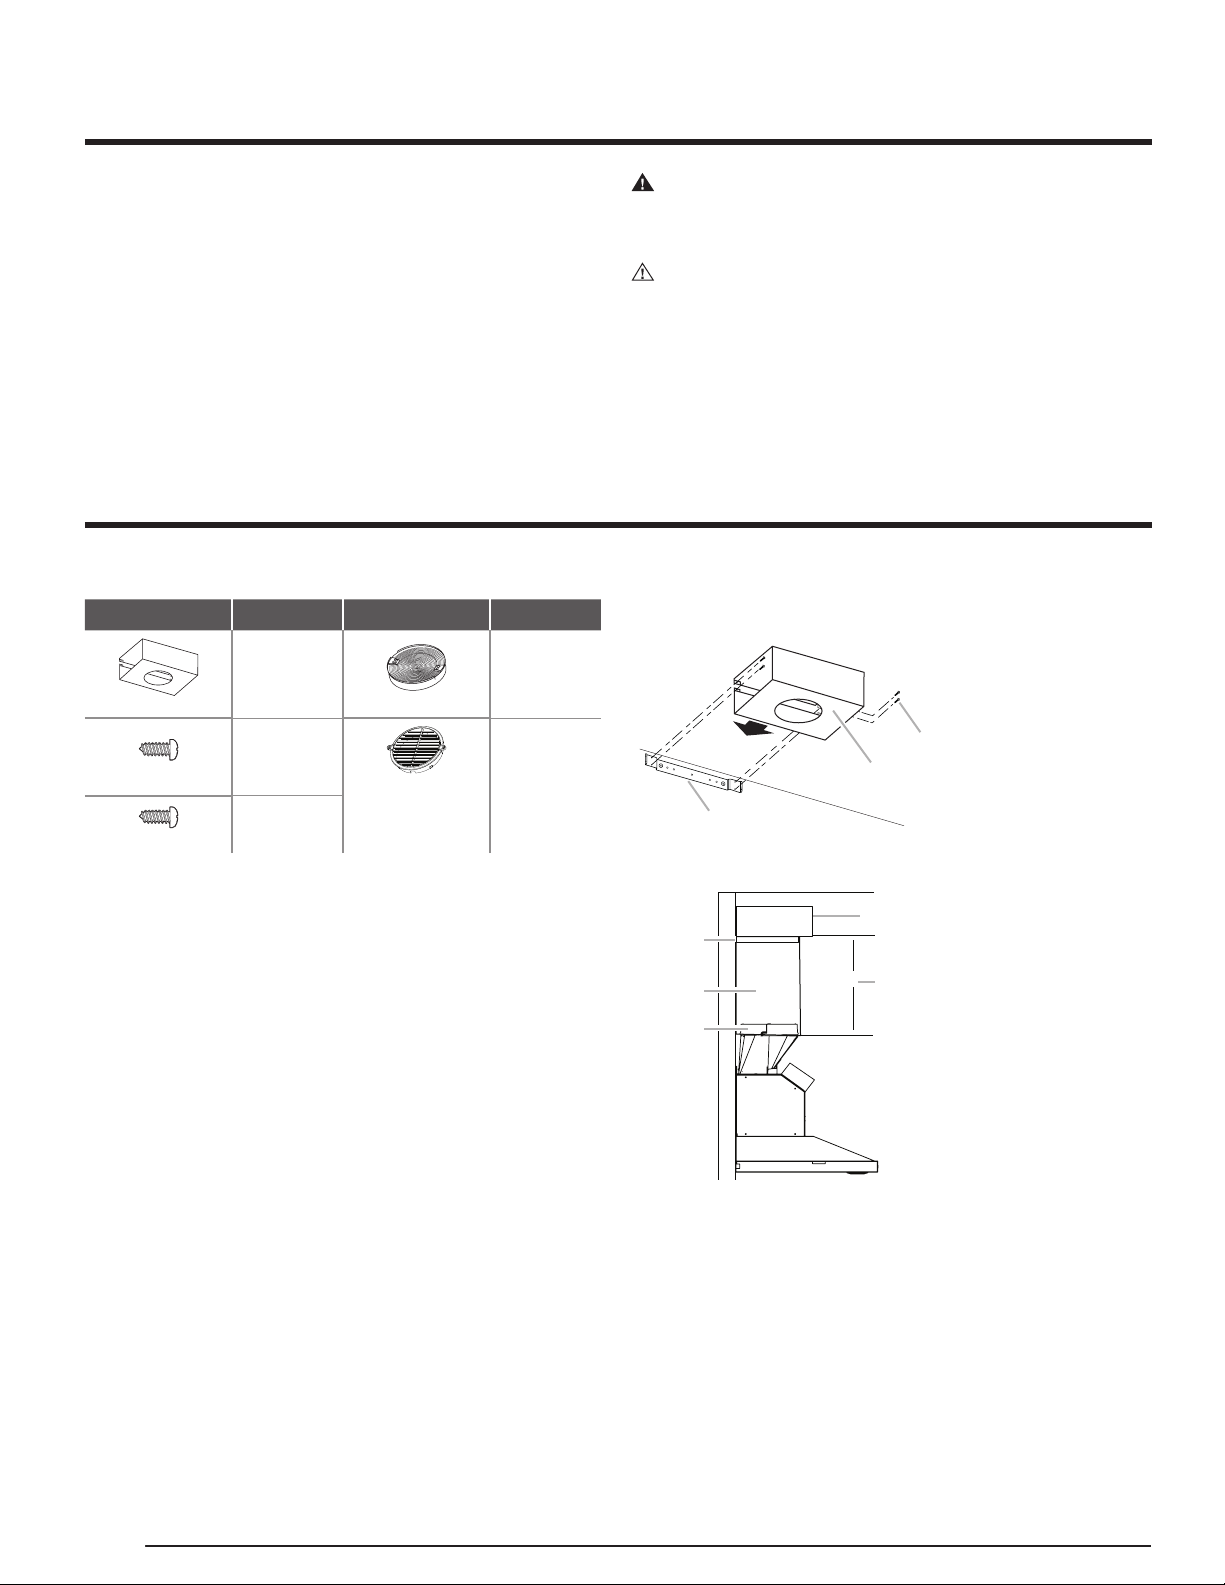
Tools and Parts
Part Qty Part Qty
1
Air deector
4.2x8 mm
4.5x13 mm
4
2
Charcoal Filter
Plastic grid
Recirculating Kit
If it is not possible to vent cooking fumes and vapors to the outside, the
range hood can be used in the non-vented (recirculating) version, using a
charcoal lter and an air deector for the Wall hoods or a charcoal lter and
a plastic grid for the Undercabinet hoods. Recirculation Kit is available from
the dealer or an authorized parts distributor.
2
1
WARNING
Turn off power circuit at service panel and lock out panel before installing
this kit to the appliance.
Installation must comply with all local codes.
CAUTION
Remove the carton carefully. Wear gloves to protect against sharp edges.
Air Deector Installation on Wall Hoods
• Assemble the air deector with the duct cover bracket using
(4) 4.2 x 8 mm screws.
A. Assembly screws
B. Air deector
A
B
C
• Measure from the bottom of the air deector to the bottom of the
hood outlet.
A
B
C
D
E
X
C. Duct cover bracket
A. Air deector
B. Vent clamp
C. X = length to cut vent duct
D. Vent duct
E. Exhaust outlet
2 English
• Cut the duct to the measured size “X.”
• Remove the air deector.
• Slide the duct onto the bottom of the air deector.
• Place the assembled air deector and duct over the exhaust outlet
from the hood.
• Reassemble the air deector to the duct cover bracket with the four
assembly screws.
• Use duct tape or vent clamps to seal the deector and the exhaust
outlet from the hood.
Installation
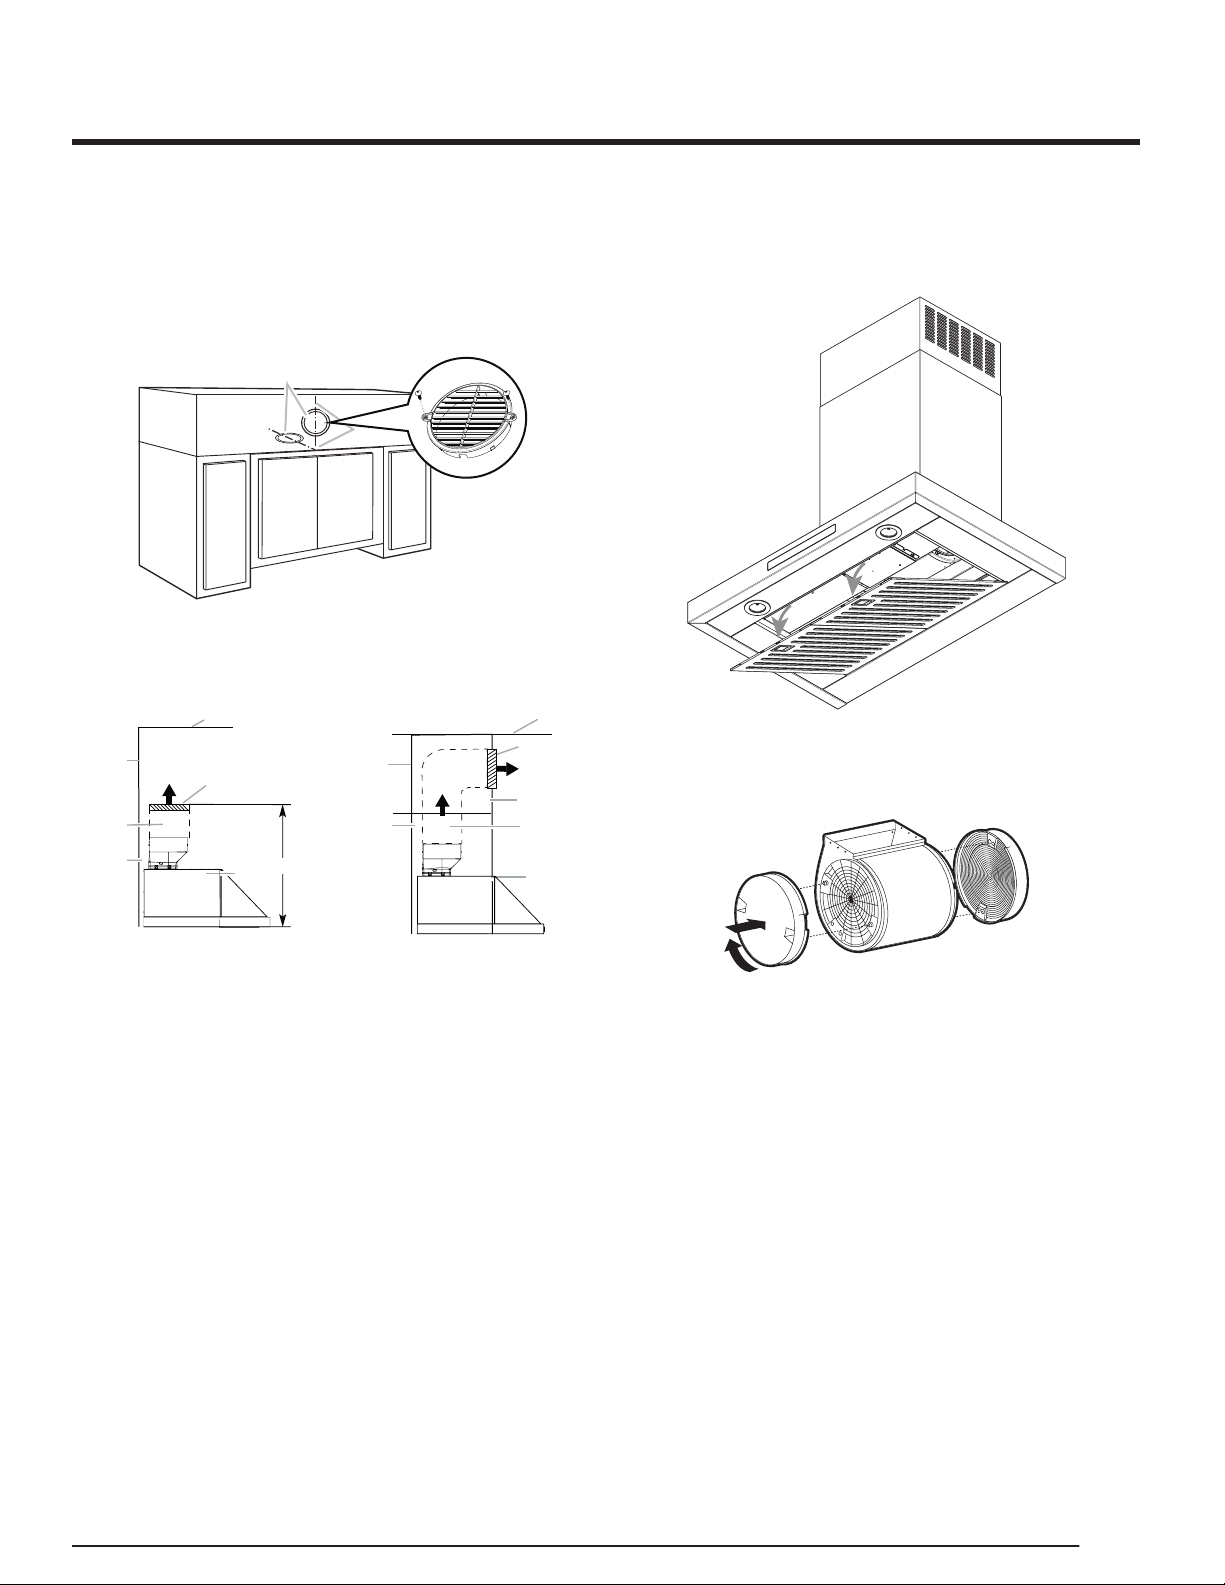
Plastic grid Installation on Undercabinet Hoods
1. Measure and mark the centerline of the cabinet to the soft above.
2. Measure from the bottom of the cabinet to the centerline of the where
the vent will come through the soft. Mark the location and use a saber
saw or keyhole saw to cut a 5¾” (14.6 cm) hole for the plastic grid.
3. Use 2 - 4.5 x 13 mm screws to attach the plastic grid to the cabinet
or soft.
A
B
A.Vent cover
B. Centerline
Plastic Grid Installation
on top of the cabinet
G
D
F
A
B
H
E
Plastic Grid Installation
on the front of the soft
G
F
A
B
C
D
E
Charcoal lter
In the reciruclating mode, the air will be recirculated through disposable
charcoal lters that help remove smoke and odors.
• Remove the grease lter of the hood.
• Cover the grill that protects the suction motor with the carbon lter so
that the slots on the lter correspond to the pins on the sides of the
motor protection grill.
• Turn the carbon lter clockwise to block them (bayonet xing).
A. Ceiling
B. Plastic grid
C. Soft
D. 6” (15.2 cm) vent
E. Range hood
F. Cabinet
G. Wall
H. 12” (30.5 cm) min. cabinet height
NOTE: The charcoal lters cannot be cleaned. It should be replaced
every 4-6 months (depending on hood usage).
English 3
 Loading...