User Manual
advanced record nq
Quick View
Using the Ouick View function, you can view the most recently recorded video and photo
images as soon as the recording is finished.
_RECH_:CK!
Select the record mode by pressing the MODE button. _page 23
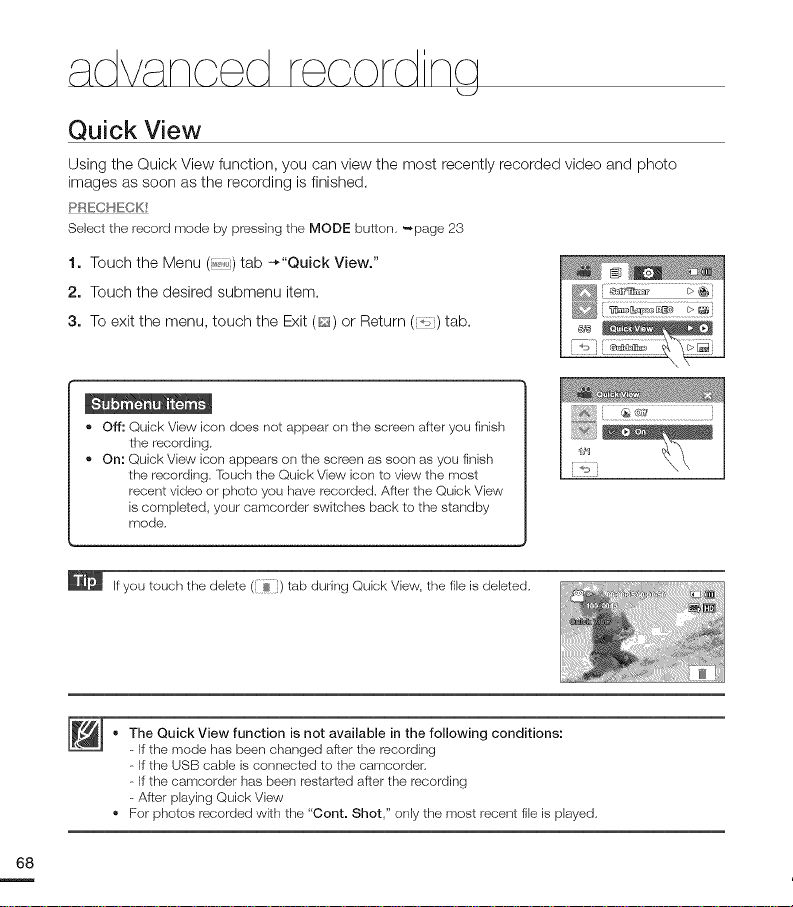
1. Touch the Menu (l_,, i ) tab -*"Quick View."
2. Touch the desired submenu item.
3. To exit the menu, touch the Exit (@) or Return (_) tab.
- Off: Quick View icon does not appear on the screen after you finish
the recording.
On: Quick View icon appears on the screen as seen as you finish
the recording. Touch the Quick Vk)w icon to view the most
recent video or photo you have recorded. After the Quick View
is completed, your camcorder switches back to the standby
mode.
If you touch the delete ([_) tab during Quick View, the file is deleted.
x\
• The Quick View function is not available in the following conditions:
- If the mode has been changed after the recording
- If the USB cable is connected to the camcorder,
- if the camcorder has been restarted after the recording
- After playing Quick View
• For photos recorded with the "Cont. Shot," only the most recent file is played.
Guideline
Guideline displays straight line patterns on the LCD screen that can help you set the image
composition when recording images. The camcorder provides 3 types of guidelines.
PRECHECK!
Select the record mode by pressing the MODE button, _page 23
1. Touch the Menu (i_) tab -*"Guideline."
2. Touch the desired guideline according to the subject.
• The selected guideline appears on the screen.
3. To exit the menu, touch the Exit (_) or Return ([!}) tab.
• off: Disables the function,
• [] : Placing the subject at the centre cross point puts the subject in
the middle of the frame,
• D : Poskioning subjects within the Safety Zone rectangle ensures
they will be recorded,
• [] : For recording multiple subjects, Putting subjects at or near the
grid cross points creates a balanced composition.
• Positioning a subject at the cross point of a guideline provides a balanced composition,
• Guidelines are not recorded,
69
dv nc ed
i _/
Play Option
You can set a specific playback style according to your preference.
PRFCHECK!
louch the Play ({)-* HD (_HD) or SD (_sD) tab on the LCD screen. _page 43
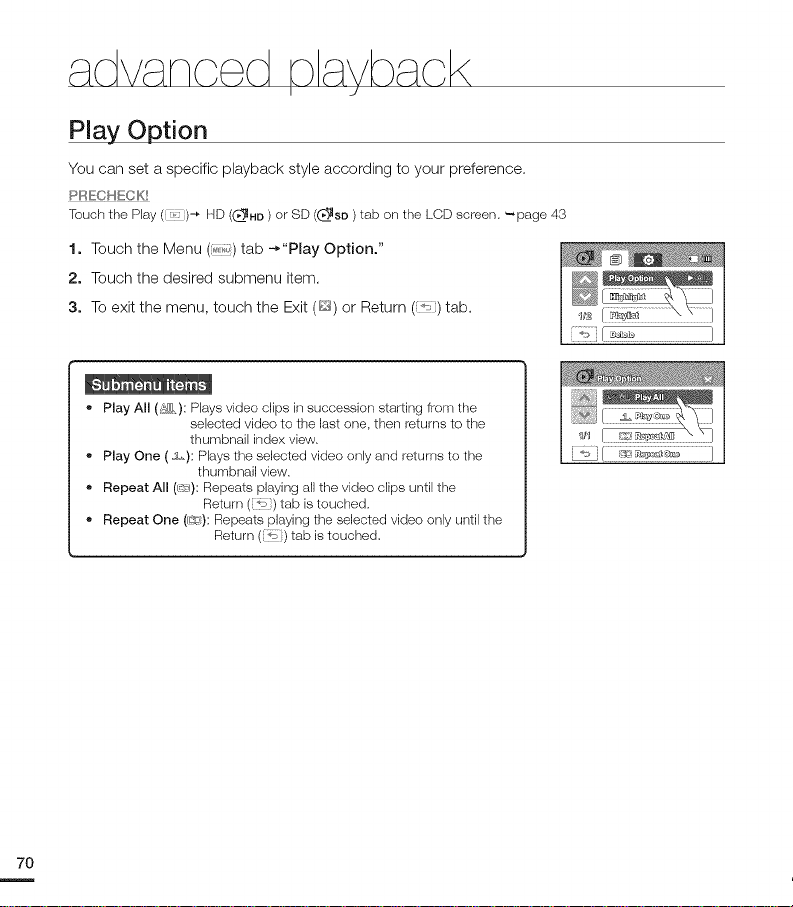
1. Touch the Menu (,i) tab -*"Play Option."
2. Touch the desired submenu item.
3. To exit the menu, touch the Exit (D) or Return ('_) tab.
• Play All (_Ij.): Plays video clips in succession starting from the
• Play One (,_.,): Plays the selected vide() only and returns to the
• Repeat All (q/): Repeats playing all the video clips until the
- Repeat One (1_): Repeats playing the selected video only until the
selected vide() to the last one, then returns to the
thumbnail index view.
thumbnail view.
Return([ i ) tab is touched.
Return ({:}) tab is touched.
This camcorder shows a section of the recorded video(s) at random.
PRECHECK
_Tbuch the Play (0)_ HD (_4HU) or SD (_lsu) tab on the LCD screen. _page 43
1. Touch the Menu (i:_Ti) tab. -* "Highlight."
2. Touch the desired submenu item.
3. To exit the menu, touch the Exit (_) or Return (o_) tab.
• When the highlight view is finished, the video thumbnail view
appears.
• In the highlight play mode, you can adjust the volume by
touching the screen and can also cancel the playback.
-I,_N
• Recent (_): Shows a section of the videos that were created within
All (_): Shows a section of all video files.
Highlight playback time to the recording time for a video
If you execute the Highlight function in the date thumbnail display, all the files in the selected date set
appear on the LCD screen.
the last 24 hours.
Less than 5 sec. Full playback
5 to 30 sec. Plays 5 seconds.
30 sec. to 5 min. Plays 5 seconds of each 30 second section.
5 min. to 10 min. Plays 11 seconds of each 2 minute section.
Over 10 rain. Plays 15 seconds of each 3 minute section.
71
dv n ed
I J
tNIEW
This function provides the preview of storyboard to be printed, which gives you digest of the
recorded video without viewing the whole sequence of it.
PRECHECK
_Tbuch the Play ({)-_ HD (_tHD) or SD (ass) tab on the LCD screen. ".*page 43
1. Press the _'VlEW button.
2. Touch the desired video.
• Sampling 16 i-Frame images appears on the LCD ................................
screen.
• The images from the selected video are selected
arbitrarily, and compose the preview of storyboard
to be printed,
• When a thumbnail is selected among 16 i-Frame
images, playback starts from the thumbnail.
3. To save the storyboard image on the storage media, touch the
Story-board print (it() tab -_ "Yes."
• You can find the saved storyboard image in the photo
thumbnail view.
{_::_
In the following case, it can not be extracted with all 16 i-Frame thumbnails:
- In case thumbnail is displayed by the date ( ' h;_ ).
- Recorded video is too short (to exlract 16 i-Frame thumbnails from a video, its recorded time
should be longer than 32 seconds.)
Story-Board Print
Using the storyboard printing, you can make the digest image of your video abridging its story.
This function captures 16 still images arbitrarily from the selected video and makes up one still
image of 16-splits to save it into the storage media. It presents a quick overview of your video,
helping you to understand the whole story of the video.
PR_:CHECK
Touch the Play ( )-* HD (_HD) or SD (_SD) tab on the LCD screen. '=_page 43
1. Touch the Menu (i_,_) tab -* "Story-Board Print."
2. Touch the desired video -* "Yes."
* Printed storyboard image file appears on the LCD screen for a
while.
* Images to be captured are selected arbitrarily, and composes
storyboard of one still image with 16-split still frames.
o You can also find the saved storyboard image in the photo
thumbnail view.
• The Story-Board Print function is not available in the
following conditions:
If free space available on the storage is insufficient.
• The storyboard printing may not show all 16 i-Frame
thumbnails in following case:
Recorded video is too short (to extract 16 i-Frame thumbnails
from a video, its recorded time should be longer than 32
seconds.)
File info
You can see the image information for all images.
PRECHECK!
Touch the Play (:) tab on the LCD screen to select the play mode. _page 23
1. Touch the Menu (,,,) tab -* "FiLe Info."
2. Select the desired file to view the file information.
• The information of the selected file appears.
3. To exit the menu, touch the Return (_,) tab.
D[
i _ I OOVlDE 0
Date : 01. JAN. 2010
Duration : 00:e0:lt5
Size : 9.56MB
e;# Resolution : 14D 108O 50i F
73
Storage Type (HMX-H203/H204/H205 only)
You can record videos and photos on the internal memory or a memory card, so you should
select the desired storage media before starting recording or playback. _page 27
Storage info (HMX-H203/H204/H205 only)
This function shows you the storage information of the selected storage media, such as used
and available memory space, etc.
PRECHECK!
Insert a memory card in the camcorder before viewing the storage information.
1. Touch the Menu (,_,,_) -_ Setting (@) tab -_ "Storage Info."
2. Touch the desired submenu item.
• Used memory space, available memory space for use,
and the recordable time depending on the selected video
resolution appears.
3. To exit the menu, touch the Return ( 0, ) tab.
• Internal Memory: Displays the storage information of the internal
memory.
,, Card: Displays the storage information of the memory card.
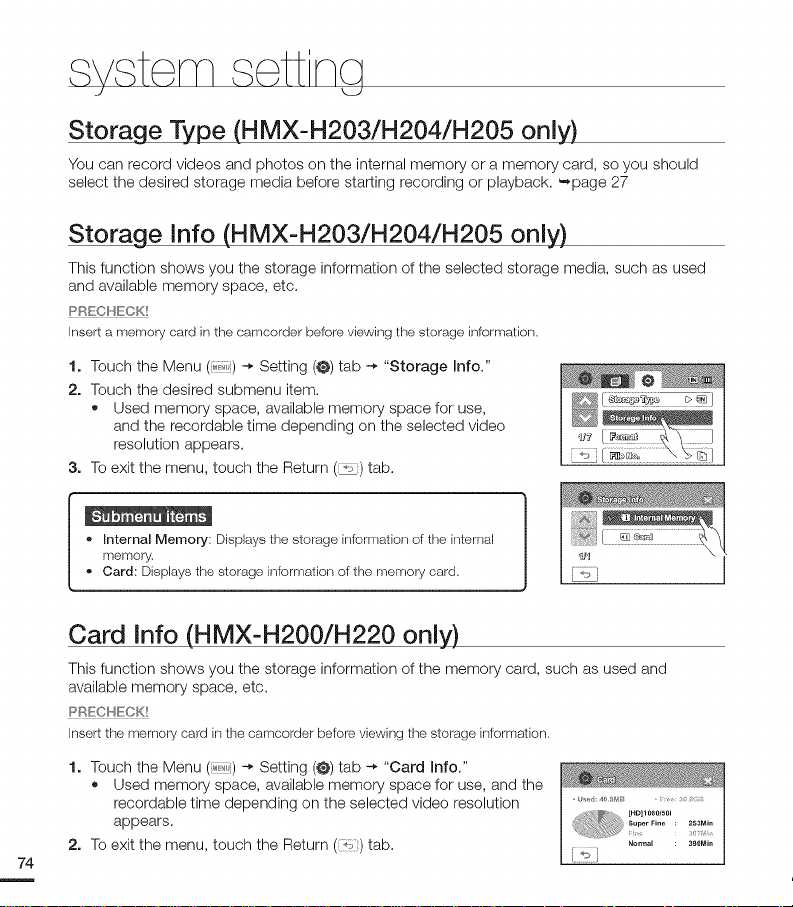
Card info (HMX-H200/H220 only)
This function shows you the storage information of the memory card, such as used and
available memory space, etc.
PRECHECK!
Insert the memory card in the camcorder before viewing the storage information.
1. Touch the Menu (_,,,,_.) -_ Setting (@) tab -_ "Card Info."
• Used memory space, available memory space for use, and the
recordable time depending on the selected video resolution
appears.
2. To exit the menu, touch the Return (_,) tab.
_ ,_ super Fin_ • 2_3Min
Normal : 3_0Min
Format
Use this function if you want to delete all files completely or to correct problems on the storage
media.
PRFCHECK!
You can completely delete all files and options on the storage media, including protected flies.
This enables stable speeds and operation when accessing the storage media,
Be aware that all files and data including protected files will be erased.
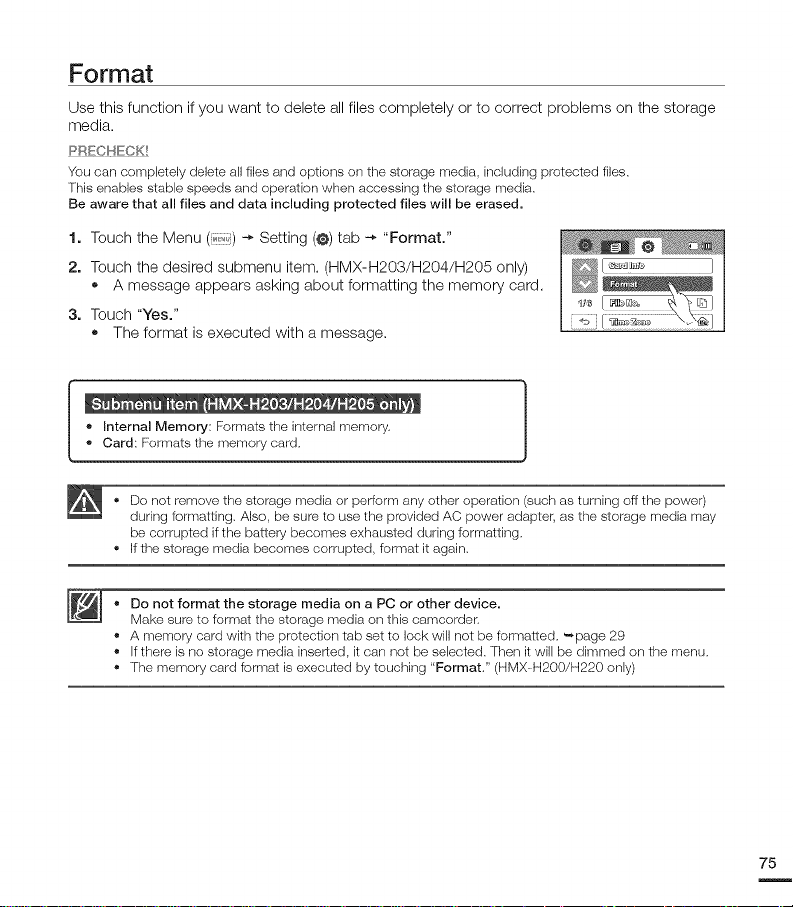
1. Touch the Menu (i_,,_) -* Setting (@) tab -* "Format."
2. Touch the desired submenu item. (HMX-H203/H204/H205 only)
• A message appears asking about formatting the memory card.
3. Touch "Yes."
• The format is executed with a message,
• Internal Memory: Formats the internal memory,
I o mn _ I _ H m _,J _ _ _ _ € o ! ,
• Card: Formats the memory card,
• De not remove the storage media or perform any other operation (such as turning off the power)
during formatting. Also, be sure to use the provided AC power adapter, as the storage media may
be corrupted if the battery becomes exhausted during lormatting.
• If the storage media becomes corrupted, format it again.
• Do not format the storage media on a PC or other device.
Make sure to format the storage media on this camcorder.
• A memory card with the protection tab set to lock wi, not be formatted. _page 29
• If there is no storage media inserted, it can net be selected. Then it will be dimmed on the menu.
• The memory card format is executed by touching "Format." (HMX H200/H220 only)
J
75
File No.
File names (numbers) are assigned to recorded images according to the selected numbering option.
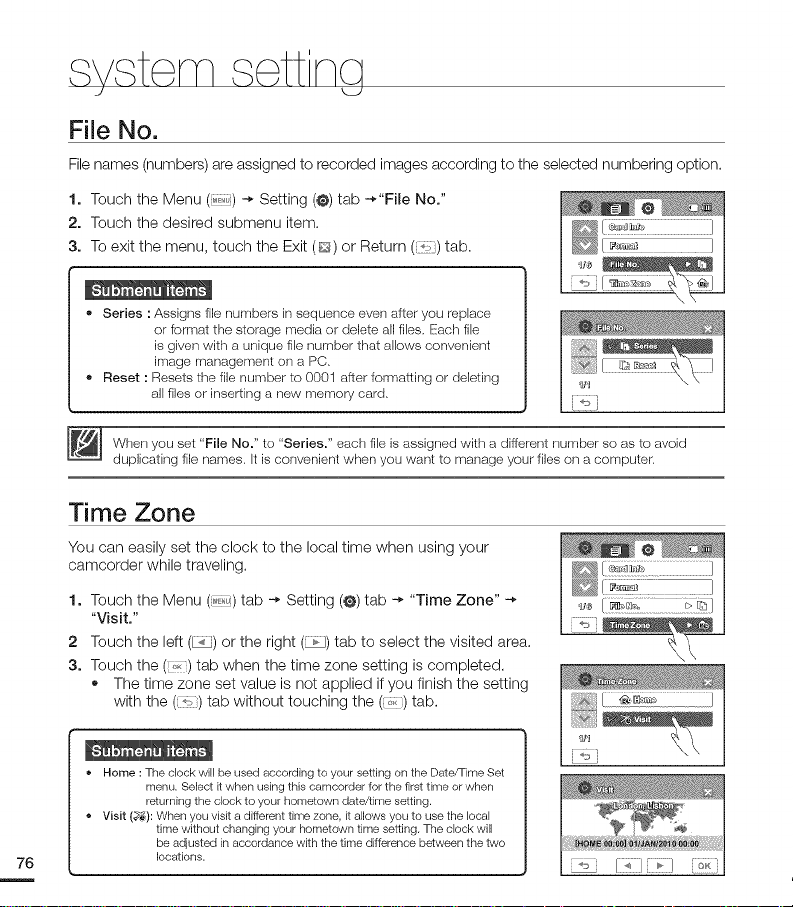
1. Touch the Menu (,_,,_) -_ Setting (@) tab -_"File No."
2. Touch the desired submenu item.
3. To exit the menu, touch the Exit (P;£_) or Return ([,:,) tab.
• Series : Assigns file numbers in sequence even after you replace
or format the storage media or delete all files. Each file
is given with a unique file number that allows convenient
• Reset : Resets the file number to 0001 after formatting or deleting
image management on a PC.
all files or inserting a new memory card.
When you set "File No." to "Series." each file is assigned with a different number se as to avoid
duplicating file names, It is convenient when you want to manage your files on a computer,
Time Zone
You can easily set the clock to the local time when using your
camcorder while traveling.
1. Touch the Menu (l,_,,,i) tab -_ Setting (@) tab -_ "Time Zone" -_
"Visit."
2 Touch the left (_) or the right (_) tab to select the visited area.
3. Touch the (_,,) tab when the time zone setting is completed.
• The time zone set value is not applied if you finish the setting
with the (o_) tab without touching the (_,_) tab.
Home : The clock will be used according to your setting on the Date/Time Set
menu. Select it when using this camcorder for the first time or when
returning the clock to your hometown date/time setting.
® Visit (._): When you visit a different time zone, it allows you to use the local
time without changing your hometown time setting. The clock wi,
be adjusted in accordance with the time difference between the two
locations.
ii_iiii!iii!ili_ti_ti_ti_ti_ti_ti_ti_ti_ti_ti_ti_ti_ti_ti_ti_tiiiii !iiiS_ _ _iiiiiiii_iiiiii!! !i! iiiiii!iiiiiii!iii!ii!ii!ii!ii!ii!ii!ii!ii!ii!ii!ii!ii i! i! i! i! i! i! i! i! i! i! i! i! i! i! i! i! i! i!i _ie_ ! _ iiiii_ii/iiiii_ti_ti_ti_ti_ti_ti_ti_ti_ti_ti_ti_ti_ti_ti_ti_tii
Rome, Paris, Berlin, Stockholm, Madrid,
Hong Keng, Beijing, Taipei, Singapore, Manila
London, Lisbon
Frankfurt
Athens, Helsinki, Cairo, Ankara
Moskva, Riyadh
Teheran
Abu Dhabi, Muscat
Kabul
Tashkent, Karachi
Calcutta, New Delhi
Kathmandu
Almaty, Dacca
Yangon
Bangkok
Seoul, Tokyo, Pyongyang
+00:00 Adelaide
+01:00 Guam, Sydney, Brisbane
+02:00 Solomon Islands
+03:00 Wellington, Fiji
+03:30 Samoa, Midway
+04:00 Honolulu, Hawaii, Tahiti
+04:30 Alaska
+05:00 LA, San Francisco, Vancouver, Seattle
+05:30 Denver, Phoenix, Salt Lake City
+05:45 Chicagol Dallas, Houston, Mexico City
+06:00 New York, Miami, Washington D.C., Montreal,
+06:30 Caracas, Santiago
+07:00 Buenos Aires, Brasilia, Sac Paulo
+08:00 Fernando de Noronha
+09:00 Azores, Cape Verde
Atlanta
+09:30
+10:00
+11:00
+12:00
-11:00
-10:00
-09:00
-08:00
-07:00
-06:00
-05:00
-04:00
-03:00
-02:00
-01:00
Date/Time Set
By setting the date and time, you can display the date and time of the recording during
playback. _-,page 25
Date Type
You can set the display type for the date set according to the selected option.
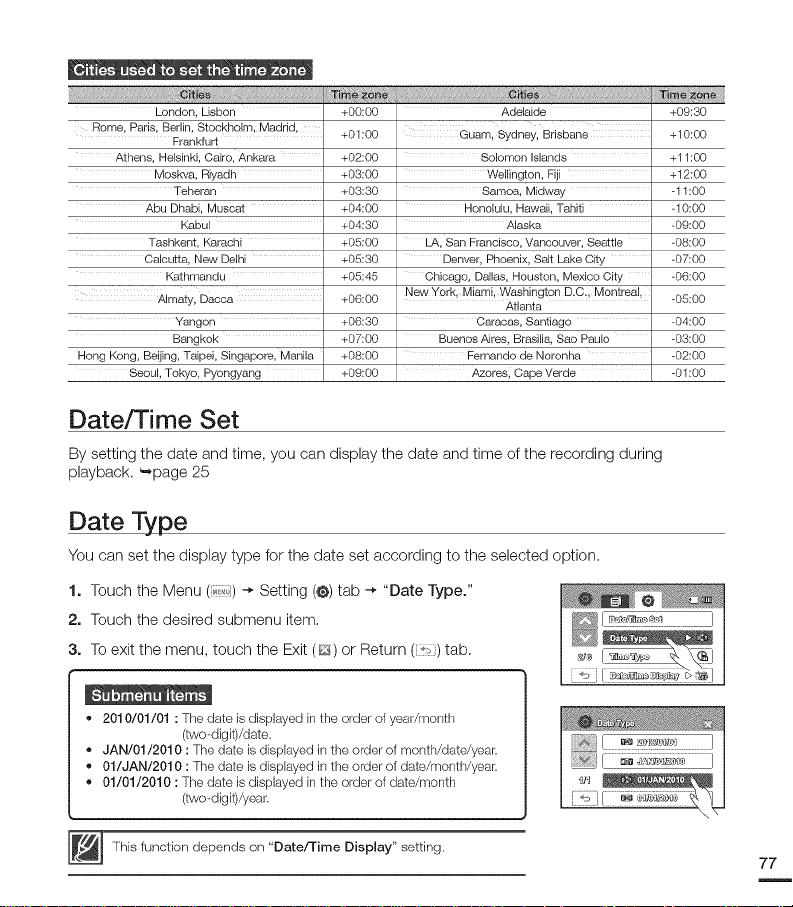
1. Touch the Menu (,) -* Setting (@) tab -* "Date Type."
2. Touch the desired submenu item.
3. To exit the menu, touch the Exit (_) or Return (_i) tab.
2010/01/01 : The date is displayed in the order of year/month
(two-digit)/date.
JAN/01/2010 : The date is displayed in the order of month/date/year.
01/JAN/2010 : The date is dispbyed in the order of date/month/year.
01/01/2010 : The date is displayed in the order of date/month
(two-digit)/year.
This function depends on "Date/Time Display" setting,
77
Time Type
You can set the display type for the time set according to the selected option.
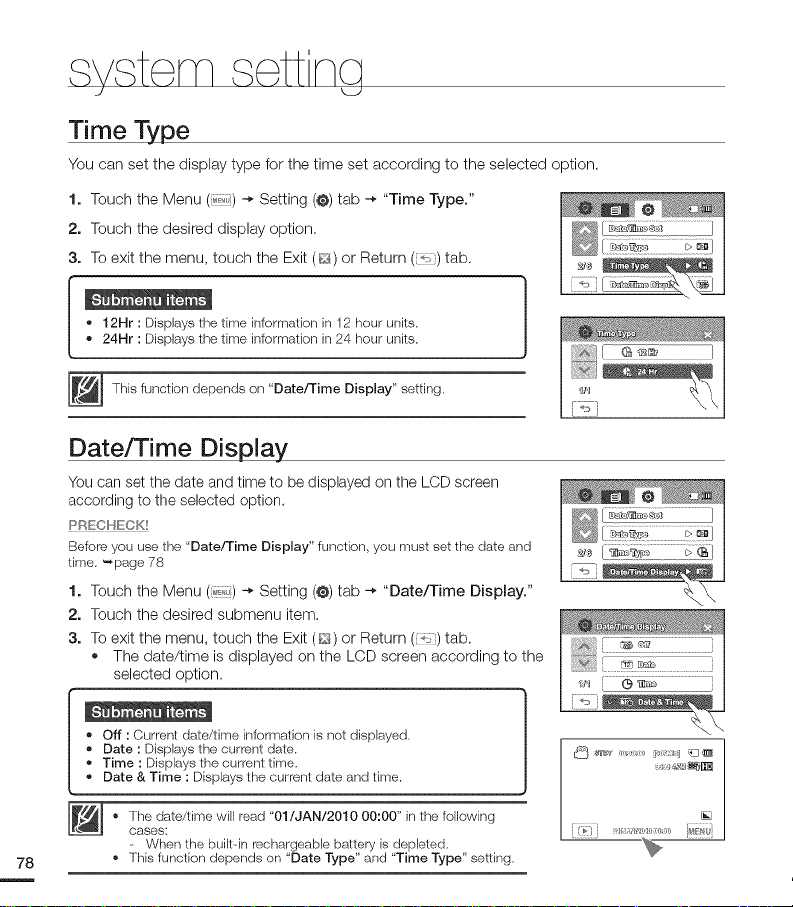
1, Touch the Menu (i_) -_ Setting (@) tab -_ "Time Type."
2, Touch the desired display option.
3, To exit the menu, touch the Exit (B) or Return (_) tab.
• 12Mr : Displays the time information in 12 hour units.
• 24Mr : Displays the time information in 24 hour units.
This function depends on "Date/Time Display" setting,
Date/Time Display
You can set the date and time to be displayed on the LCD screen
according to the selected option.
PRECHECK!
Before you use the "Date/Time Display" function, you must set the date and
time, _page 78
1, Touch the Menu (_'i ,;) -_ Setting (@) tab -_ "Date/Time DispLay."
2, Touch the desired submenu item.
3, To exit the menu, touch the Exit (F_) or Return ({,0) tab.
• The date/time is displayed on the LCD screen according to the
selected option.
• off : Current date/time inlormation is not displayed,
• Date : Displays the current date.
• Time : Displays the current time.
• Date & Time : Displays the current date and time.
• The date/time will read "01/JAN/2010 00:00" in the following
cases:
When the built-in rechargeable battery is depleted.
• This function depends on "Date Type" and "Time Type" setting,
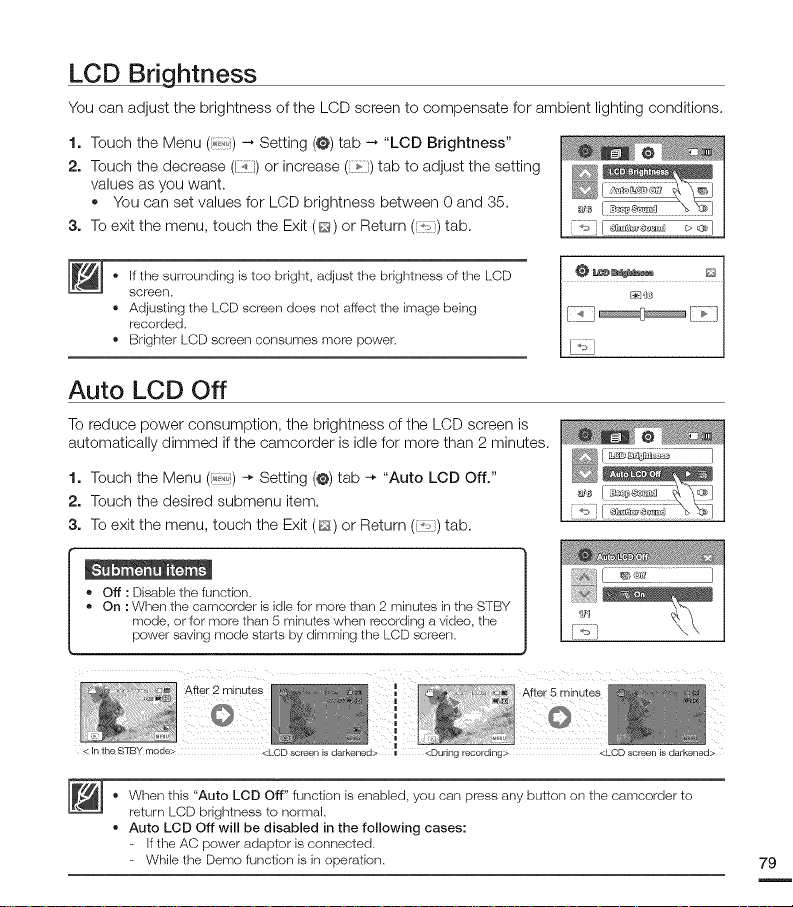
LCD Brightness
You can adjust the brightness of the LCD screen to compensate for ambient lighting conditions.
1. Touch the Menu (_,_,,,o) --. Setting (@) tab --* "LCD Brightness"
2. Touch the decrease ([],_ i) or increase (¢) tab to adjust the setting
values as you want.
• You can set values for LCD brightness between 0 and 35.
3. To exit the menu, touch the Exit (_-_) or Return (_() tab.
• If the surrounding is too bright, adjust the brightness of the LCD
screen.
• Adjusting the LCD screen does not afflict the image being
recorded.
• Brighter LCD screen consumes more power.
Auto LCD Off
To reduce power consumption, the brightness of the LCD screen is
automatically dimmed if the camcorder is idle for more than 2 minutes.
1. Touch the Menu (i_') -* Setting (@) tab -* "Auto LCD Off."
2. Touch the desired submenu item.
3. To exit the menu, touch the Exit (_) or Return (_) tab.
• off : Disable the function,
• On : When the camcorder is idle for more than 2 minutes in the STBY
mode, or for more than 5 minutes when recording a video, the
power saving mode starts by dimming the LCD screen,
I]I
After 2 minutes
< In the STB¥ mqde_ <LCD screen is darkened> <During recording> <LCD screen is darkened>
• When this "Auto LCD Off" function is enabled, you can press any button on the camcorder to
return LCD brightness to normal.
• Auto LCD Off will be disabled in the following cases:
If the AC power adaptor is connected.
While the Demo function is in operation.
79
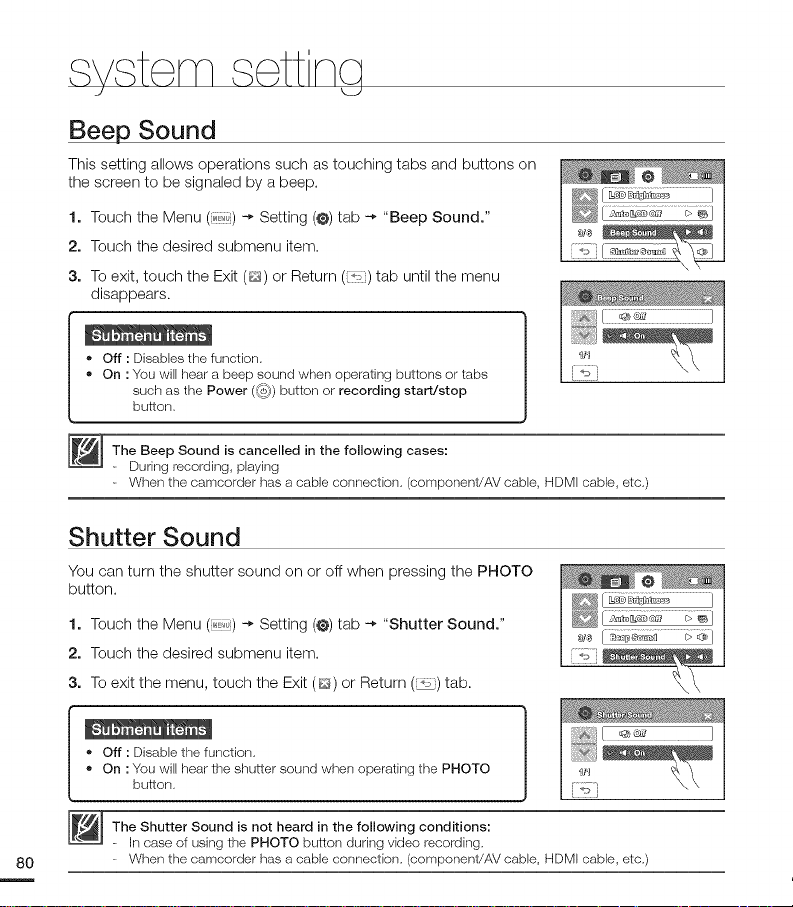
Beep Sound
This setting allows operations such as touching tabs and buttons on
the screen to be signaled by a beep.
1. Touch the Menu (i,,,,l) -* Setting (@) tab -* "Beep Sound."
2. Touch the desired submenu item.
3o To exit, touch the Exit (D) or Return (,,) tab until the menu
disappears.
• Off : Disables the function.
• On : You will hear a beep sound when operating buttons or tabs
such as the Power (_) button or recording start/stop
button.
The Beep Sound is cancelled in the following cases:
- During recordklg, playklg
- When the camcorder has a cable conrlection. (component/AV cable, HDMI cable, etc.)
Shutter Sound
You can turn the shutter sound on or off when pressing the PHOTO
button.
1o Touch the Menu (!) -* Setting (@) tab -* "Shutter Sound."
2. Touch the desired submenu item.
3o To exit the menu, touch the Exit (E_) or Return (_,) tab.
• Off : Disable the function.
• On : You will hear the shutter sound when operating the PHOTO
button.
The Shutter Sound is not heard in the following conditions:
- In case of using the PHOTO button during video recording.
- When the camcorder has a cable conrlection. (component/AV cable, HDMI cable, etc.)
Auto Power Off
You can set your camcorder to automatically turn off if it is idle for 5 minutes without an
operation. This function will prevent unnecessary power consumption.
1. Touch the Menu (i l) -* Setting (@) tab -* "Auto Power Off."
2. Touch the desired submenu item.
3. To exit the menu, touch the Exit (_) or Return ('il) tab.
• Off : Disable the function.
• 5 Min : The camcorder turns off if idle for 5 minutes without an
operation.
• Auto Power Off does not work in the following situations:
When the camcorder has a cable connection. (HDMI cable, component/AV cable, USB cable,
etc.)
While the Quick On STBY function is in operation.
While the Demo function is in operation.
While in recording, playing (except pause), photo slide show.
• lo operate the camcorder again, press the Power (<®_) button.
81
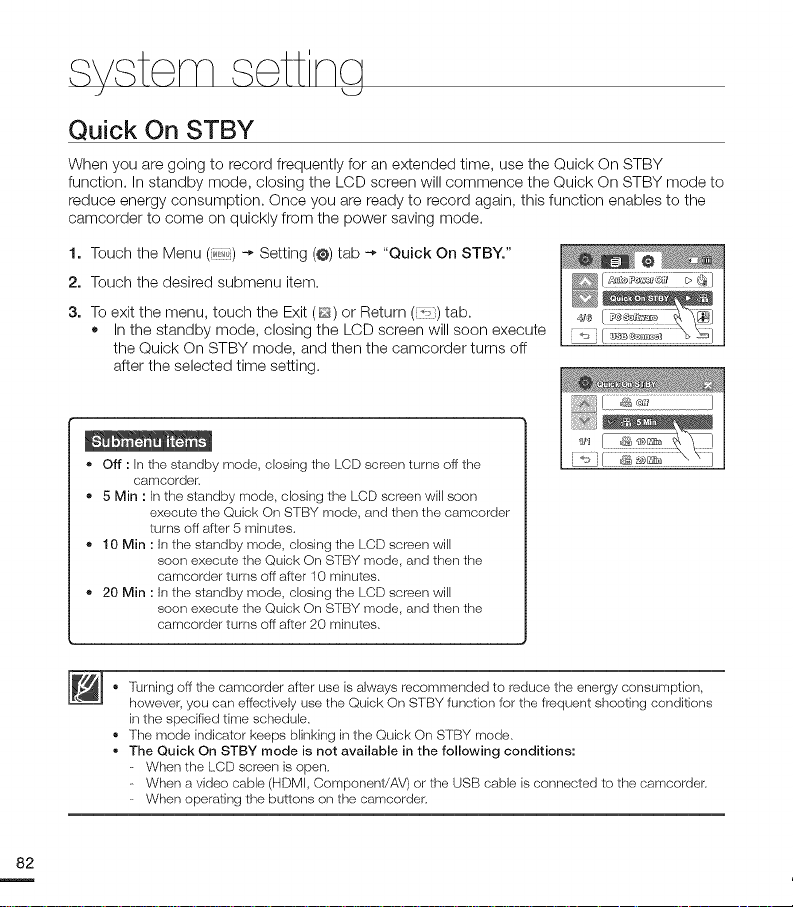
Quick On STBY
When you are going to record frequently for an extended time, use the Quick On STBY
function• In standby mode, closing the LCD screen will commence the Quick On STBY mode to
reduce energy consumption. Once you are ready to record again, this function enables to the
camcorder to come on quickly from the power saving mode.
1. Touch the Menu (5) -* Setting (@) tab -* "Quick On STBY."
2. Touch the desired submenu item.
3. To exit the menu, touch the Exit (D) or Return (_ ,]) tab.
• In the standby mode, closing the LCD screen will soon execute
the Quick On STBY mode, and then the camcorder turns off
after the selected time setting.
• Off : In the standby mode, closing the LCD screen turns off the
camcorden
• 5 Min : In the slandby mode, closing the L.CD screen will soon
• 10 Min : In the standby mode, closing the LCD screen will
• 20 Min : In the standby mode, closing the LCD screen will
execute the Quick On STBY mode, and then the camcerder
turns off alter 5 minutes.
seen execute the Quick On STBY mode, and then the
camcorder turns off after 10 minutes.
seen execute the Quick On STBY mode, and then the
camcorder turns off after 20 minutes,
• Turning off the camcorder after use is always recommended to reduce the energy consumption,
however, you can effectively use the Quick On STBY function for the frequent shooting conditions
in the specified time schedule,
• The mode indicator keeps blinking in the Quick On STBY mode,
• The Quick On STBY mode is not available in the following conditions:
When the LCD screen is open,
When a video cable (HDMI, Component/AV) or the USB cable is connected to the camcorder.
When operating the buttons on the camcorder,
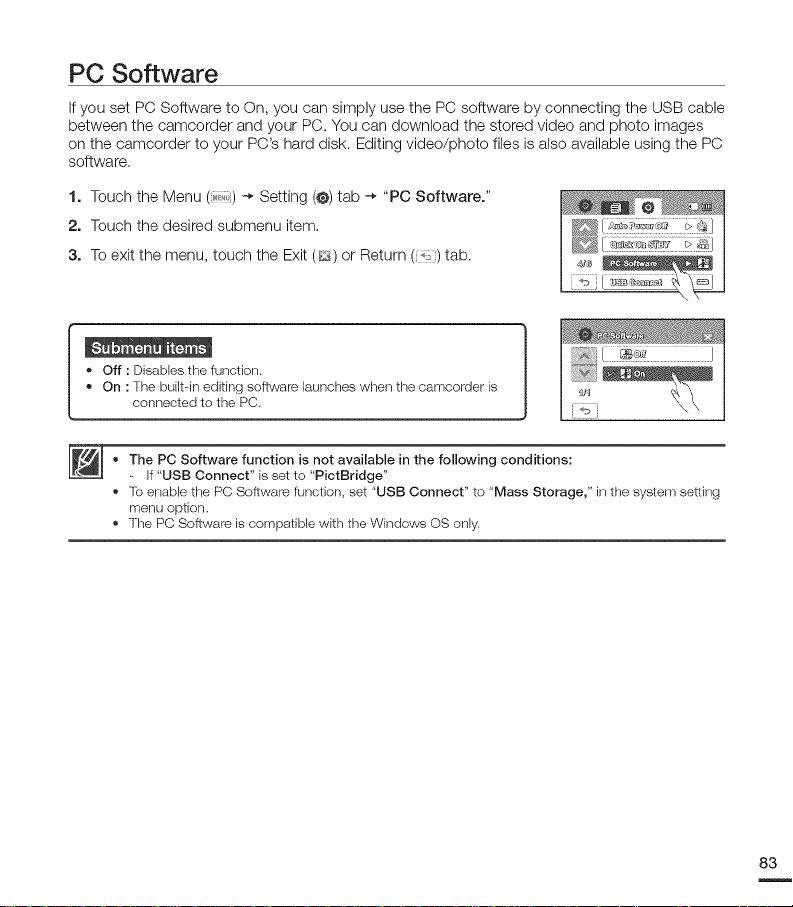
PC Software
If you set PC Software to On, you can simply use the PC software by connecting the USB cable
between the camcorder and your PC. You can download the stored video and photo images
on the camcorder to your PC's hard disk. Editing video/photo files is also available using the PC
software.
1. Touch the Menu (i l) -* Setting (@) tab -* "PC Software."
2. Touch the desired submenu item.
3. To exit the menu, touch the Exit (_) or Return (_il) tab.
• off : Disables the function,
On : The built--in editing software launches when the camcorder is
connected to the PC.
The PC Software function is not available in the following conditions:
If "USB Connect" is set to "PictBridge"
• lb enable the PC Software function, set "USB Connect" to "Mass Storage," in the system setting
menu option.
• The PC Software is compatible with the Windows OS only.
83
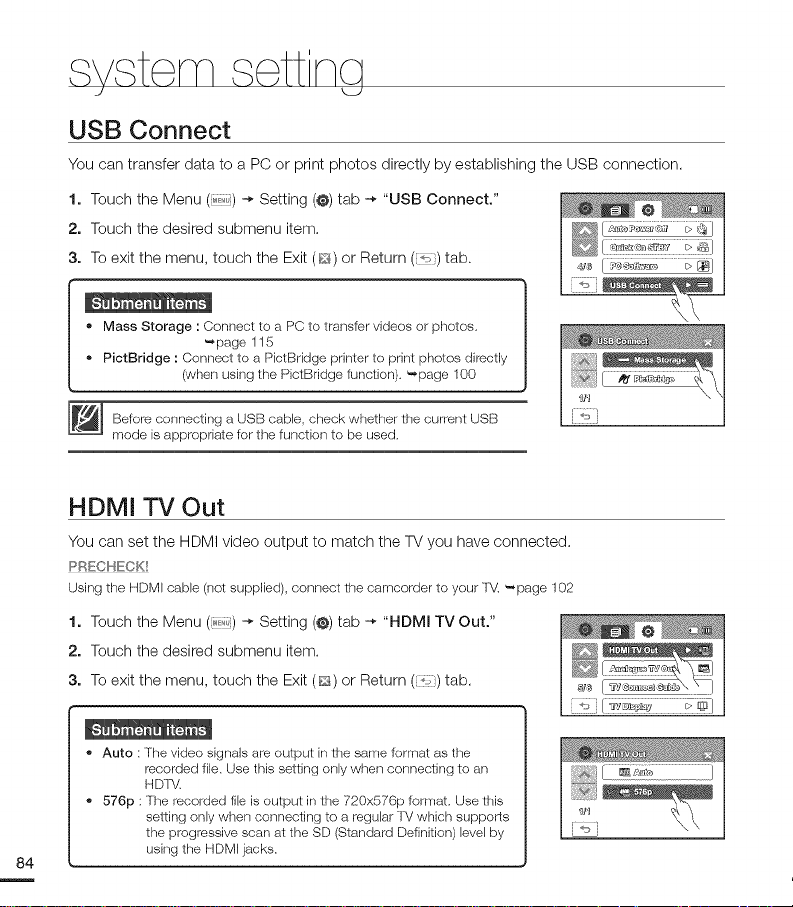
USB Connect
You can transfer data to a PC or print photos directly by establishing the USB connection.
1. Touch the Menu (i_) -* Setting (@) tab -* "USB Connect."
2. Touch the desired submenu item.
3. To exit the menu, touch the Exit (bz¢) or Return (_) tab.
• Mass Storage : Connect to a PC to transfer videes or photos,
• PictBridge : Connect to a PictBndge printer to print photos directly
Before connecting a USB cable, check whether the current USB
mode is appropriate for the function to be used,
page 115
(when using the PictBridge function). _page 100
HDMi TV Out
You can set the HDMI video output to match the TV you have connected.
PRECHECK!
Using the HDMI cable (not supplied), connect the camcorder to your lV. _page 102
1. Touch the Menu (i l) -* Setting (@) tab -* "HDMI TV Out."
2. Touch the desired submenu item.
3. To exit the menu, touch the Exit (_) or Return ('i) tab.
• Auto : The vide() signals are output in the same format as the
recorded file, Use this setting only when connecting to an
H DTV.
• 576p : The recorded file is output in the 720x576p fermat, Use this
setting only when connecting to a regular TV which supports
the pregressive scan at the SD (Standard Definition) level by
using the HDMI jacks.
i ¸ _, i
Analogue TV Out
You can set the component or composite video output to match the TV you have connected.
PRECHECK!
• Using the corrlponent/AV cable provided with your camcorder, connect the camcorder to your TV.
"-,page 103-_ 104
• This camcorder provides the two--in-one component/AV cable that fits the purpose of the component and
the AV cable. Therefore, when using the corrlponent/AV cable, you must check the right method for the TV
output by setting the "Analogue TV Out" menu.
1. Touch the Menu ( ) -* Setting (@) tab -* "Analogue TV Out."
2. Touch the desired submenu item.
• Check the TV type, connection jack, and the resolution of the
recorded video before you choose the desired submenu item.
3. To exit the menu, touch the Exit (_) or Return ('t,) tab.
• Component 1080i (_) : The recorded file is output in the 1920x1080i format. Use this setting only
when connecting to an HDTV by using the component (Y/PB/PR, Audio)
jacks.
" Component 576p(_): The recorded file is output in the 720x576p format. Use this setting only
when connecting to a regular TV which supports the progressive scan at
the SD (Standard Definition) level by using the component (Y/PB/PR, Audio)
jacks.
• Component 576i(1_): The recorded file is output in the 720x576i format. Use this setting only when
connecting to a regular TV which only supports the SD (Standard Definition)
resolution without the progressive scars by using the component (Y/PB/PR,
Audio) jacks.
• Composite(_]): The composite video signals are output via the corrlponent/AV cable (blue). Use this
setting only when connecting to a regular fV that has no component video jacks.
- The Analogue TV Out indicator is displayed only when the camcorder is connected to a TV.
- For details ors TV specification, refer to the user manual of the connected fV.
85
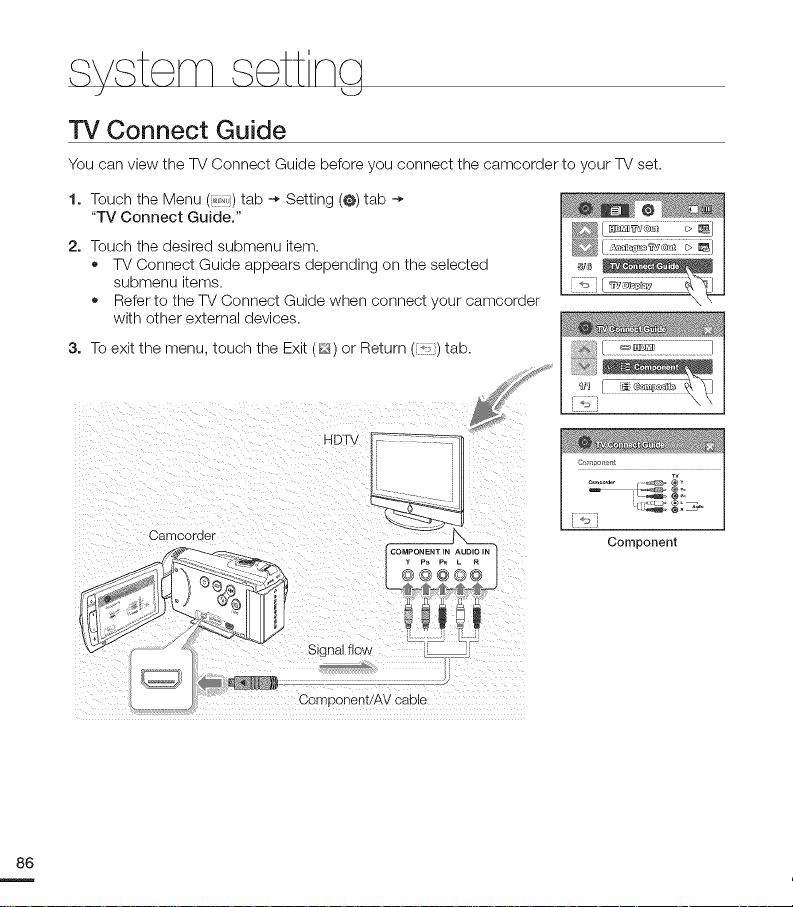
TV Connect Guide
You can view the TV Connect Guide before you connect the camcorder to your TV set.
1. Touch the Menu (,) tab -* Setting (@) tab -*
"TV Connect Guide."
2. Touch the desired submenu item.
• TV Connect Guide appears depending on the selected
submenu items.
Refer to the TV Connect Guide when connect your camcorder
with other external devices.
3. To exit the menu, touch the Exit (_) or Return (}) tab.
q/q
HDTV
Camoorder
Component
TV Display
You can enable or disable the On Screen Display (OSD) that appears on the TV screen when
connecting your camcorder to a TV.
1. Touch the Menu (i l) -* Setting (@) tab -* "TV DLspLay."
2. Touch the desired submenu item.
3. To exit the menu, touch the Exit (_) or Return (!i) tab.
• Off : The OSD (On Screen Display) menus are only shown on the
LCD screen,
• On : The OSD menus are shown on the LCD screen and the lV
screen as well,
The thumbnail display and demo screens are shown on the fV even if you set "TV Display" to "Off."
Default Set
You can restore all menu settings to the default conditions.
1. Touch the Menu (,_) -* Setting (@) tab -* "DefauLt Set."
• A message appears asking for your confirmation.
2. Touch "Yes" if you want all the settings return to the default.
• The Time Zone screen appears after all settings return to the
default.
3. Set the date and time again. _-,page 25
• Do not turn off the power while using this function,
• Initialising the camcorder settings to factory defaults does net affect recorded images.
87


 Loading...