

Samsung ML6100 User Manual

The Xerox
DocuPrint P14
Personal Laser Printer
User Guide

Copyright protection claimed includes all forms and
matters of copyrightable materials and information now
allowed by statutory or judicial law or hereinafter granted,
including without limitation, material generated from the
software programs which are displayed on the screen
such as styles, templates, icons, screen displays, looks, etc.
Printed in the United States of America.
XEROX® and all Xerox product names and product
numbers mentioned in this publication are registered
trademarks of the Xerox Corporation.
Other company trademarks are also acknowledged. PCL
and PCL 6 are trademarks of the Hewlett-Packard
Company. MS-DOS, Windows NT, Windows 95 and
Windows 98 are trademarks of Microsoft Corporation.
Adobe and PostScript are trademarks of Adobe Systems,
Inc. Macintosh, LocalTalk and TrueType are trademarks
of Apple Computer, Inc.
This printer contains an emulation of the Hewlett Packard
PCL 5e command language (recognized HP PCL 5e
commands) and processes these commands in a manner
compatible with Hewlett Packard LaserJet printer
products.
Changes are periodically made to this document.
Technical updates will be included in subsequent editions.
© 1998 by Xerox Corporation. All rights reserved.

Contents i
Chapter 1
Getting Started
Introduction ...................................................................... 1-2
Printer Components......................................................... 1-3
Printer Features................................................................ 1-5
Printer Documentation .................................................... 1-6
Using the CD-ROM ....................................................... 1-7
Note, Caution and Warning Symbols ......................... 1-8
Printer Setup .................................................................... 1-9
Selecting a Location ..................................................... 1-9
Unpacking the Printer................................................. 1-10
Installing the Laser Print Cartridge............................ 1-11
Loading Paper ............................................................. 1-13
Connecting to the Computer ..................................... 1-16
Powering On the Printer............................................. 1-21
Installing Software...................................................... 1-22
Installing the PCL Driver............................................. 1-23
Installing the PostScript Driver .................................. 1-27
Installing the Remote Control Panel and
Status Monitor ............................................................ 1-30
..................................................
1-1
DocuPrint P14 User Guide

Chapter 2
Loading Print Media
Selecting Print Media ...................................................... 2-2
Media Sizes and Capacities ......................................... 2-3
Basic Guidelines ........................................................... 2-4
Loading Print Media ........................................................ 2-6
Using Tray 1 or 2 .......................................................... 2-6
Using the MSF .............................................................. 2-9
Using the Rear Face Up Stacker................................ 2-13
Duplex Printing ........................................................... 2-14
.........................................
2-1
Chapter 3
Chapter 4
Printing
Printing a Document........................................................ 3-2
Configuring the PCL Driver ............................................. 3-3
Selecting Your Printer .................................................. 3-3
Setting Properties ......................................................... 3-4
Configuring the PostScript Driver .................................. 3-7
Using Printer Utilities ...................................................... 3-8
Status Monitor .............................................................. 3-8
Font Navigator .............................................................. 3-8
Remote Control Panel .................................................. 3-9
Using the Printer’s Control Panel ................................. 3-15
Indicator Lights ........................................................... 3-16
Control Panel Button .................................................. 3-21
Maintaining the Printer
Replacing the Laser Print Cartridge................................ 4-2
Cleaning the Printer ......................................................... 4-5
Cleaning the Outside .................................................... 4-5
Cleaning the Inside ....................................................... 4-6
................................................................
...................................
3-1
4-1
DocuPrint P14 User Guide

Chapter 5
Troubleshooting
Clearing Paper Jams........................................................ 5-2
Output Area................................................................... 5-4
Input Area...................................................................... 5-5
Inside the Printer........................................................... 5-6
In Optional Tray 2 ......................................................... 5-7
Solving Printing Problems .............................................. 5-9
Solving Print Quality Problems .................................... 5-14
Solving PostScript Problems ........................................ 5-17
Obtaining Service .......................................................... 5-18
................................................
5-1
Appendix A
Appendix B
Appendix C
Printer Specifications
.....................................
A-1
Environmental and Safety Considerations B-1
Introduction ......................................................................B-2
Laser Safety......................................................................B-3
Laser Safety for the United States and Canada .........B-4
Laser Safety for Finland and Sweden .........................B-5
Laser Statement (Laserturvallisuus) ...........................B-5
Ozone Safety ....................................................................B-6
Electrical Safety................................................................ B-7
Radio Frequency Emissions..........................................B-10
United States and Canada .........................................B-10
Europe .........................................................................B-12
Operational Safety ......................................................... B-14
Certifications
Quality Standards ............................................................ C-2
Energy Star.......................................................................C-3
.....................................................
C-1
DocuPrint P14 User Guide

Appendix D
Printer Options
Introduction ......................................................................D-2
Precautions.......................................................................D-3
Memory and PostScript SIMMs......................................D-4
Serial/LocalTalk Card .......................................................D-7
Paper Tray 2 ...................................................................D-10
.................................................
D-1
DocuPrint P14 User Guide

Getting Started Chapter1
Introduction .................................................................... 1-2
Printer Components ....................................................... 1-3
Printer Features .............................................................. 1-5
Printer Documentation .................................................. 1-6
Using the CD-ROM ..................................................... 1-7
Note, Caution and Warning Symbols ....................... 1-8
Printer Setup .................................................................. 1-9
Selecting a Location ................................................... 1-9
Unpacking the Printer ............................................... 1-10
Installing the Laser Print Cartridge .......................... 1-11
Loading Paper ........................................................... 1-13
Connecting to the Computer ................................... 1-16
Powering On the Printer ........................................... 1-21
Installing Software .................................................... 1-22
Installing the PCL Driver ........................................... 1-23
Installing the PostScript Driver ................................ 1-27
Chapter 1: Getting Started ❖ 1-1

Introduction
Introduction
In this chapter, you will become familiar with the features
of your printer and learn where to locate specific printer
parts.
Before you use your printer, make sure that you perform
all of the setup steps outlined in the Quick Reference Card
that came with your printer. For your convenience, the
installation instructions are also included in this chapter.
See the section “Printer Setup” (page 1-9).
Recognizing that you may have special needs, Xerox offers
several optional printer accessories to better meet your
requirements. These are explained in detail in
Appendix D: Printer Options.
Xerox, or your Xerox authorized reseller, may have
provided some or all of these options. First verify your
exact accessory options before proceeding further. If you
see features described in this section that are not available
with the printer and accessories you have, you can easily
add them yourself. For more information, refer to the
separate Supplies/Options Guide provided with your
printer.
1-2 ❖ DocuPrint P14 User Guide
Printer Components
Use Figures 1.1 through 1.3 to identify the main
components of your DocuPrint P14.
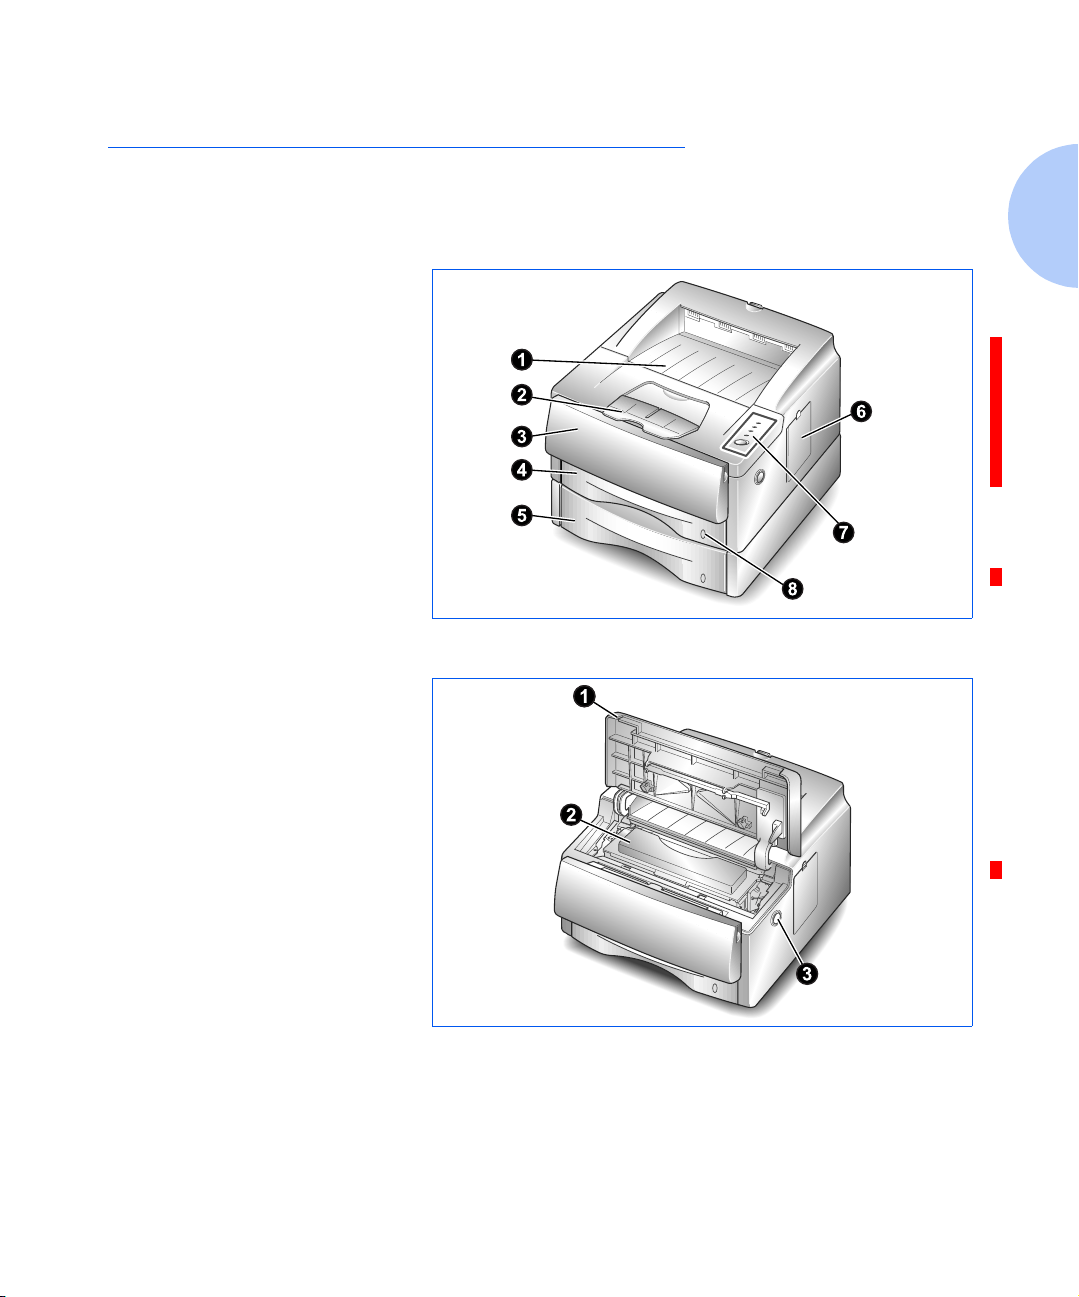
Figure 1.1 Printer Components, Front View
Front View
Face down stacker
➊
Paper lifter
➋
Multi-sheet feeder (MSF)
➌
Tray 1
➍
Tray 2 (optional)
➎
Control board cover
➏
Control panel
➐
Paper level indicator
➑
Printer Components
Inside Front View
Front cover
➊
Laser print cartridge
➋
Front cover release button
➌
Figure 1.2 Printer Components, Inside Front View
Chapter 1: Getting Started ❖ 1-3
Printer Components
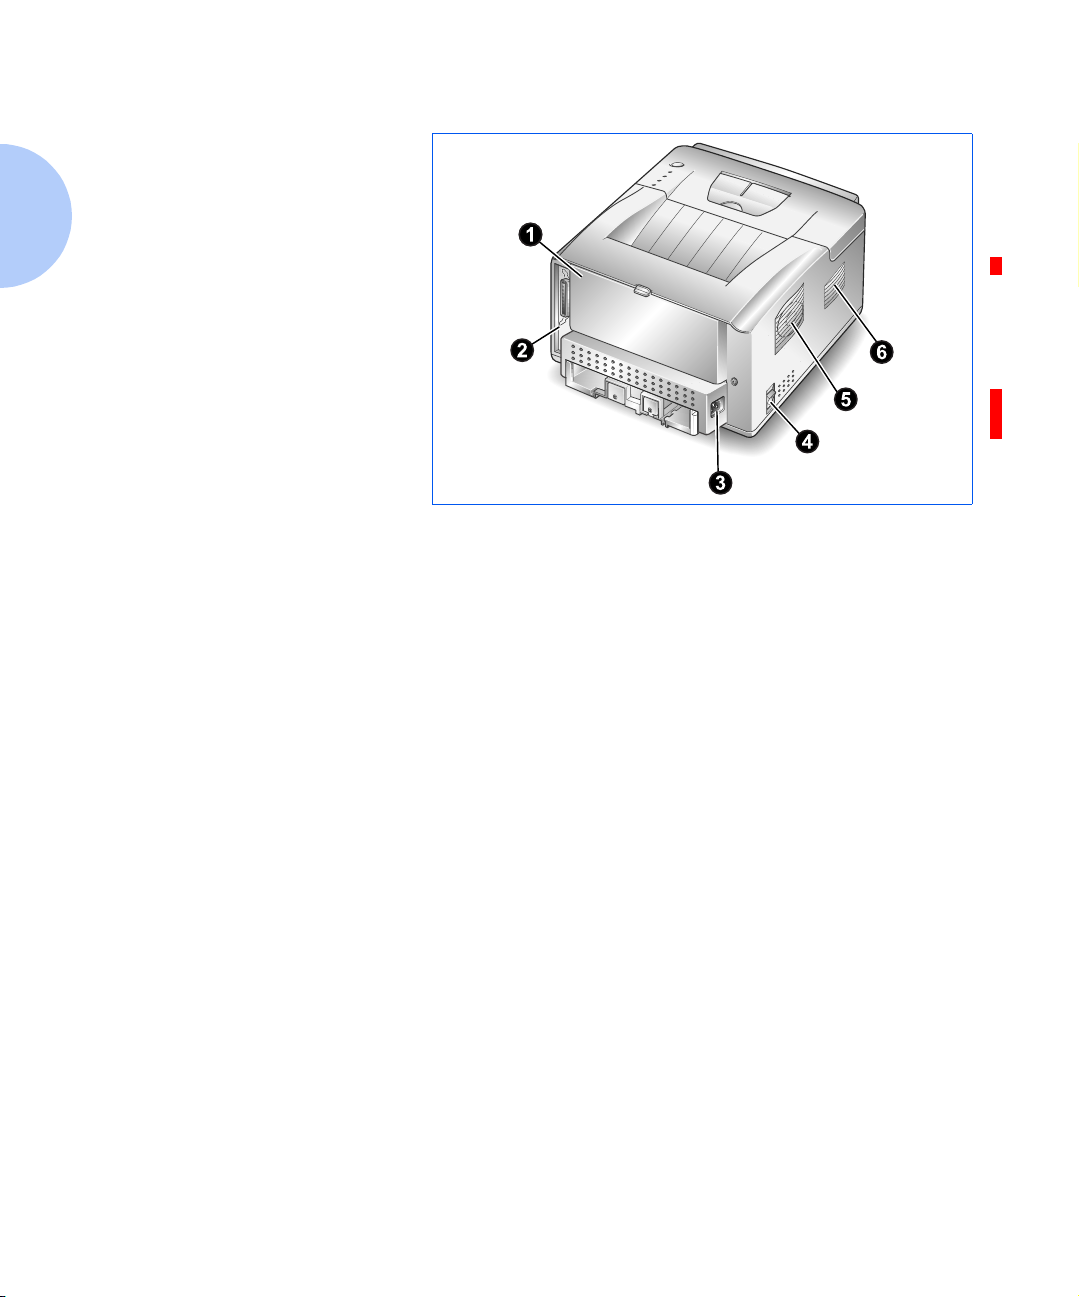
Rear View
Rear cover (with face-up
➊
stacker inside)
Printer cable connectors
➋
Power cord connector
➌
Power switch
➍
Exhaust fan
➎
Cooling vent
➏
Figure 1.3 Printer Components, Rear View
1-4 ❖ DocuPrint P14 User Guide

Printer Features
Printer Features
Your Xerox DocuPrint P14 is a compact, easy to use laser
printer designed for the small office environment. It is
designed to provide years of high quality, high
performance printing.
This manual tells you how to set up, operate and maintain
your new printer, and contains advice on how you can get
the best performance from it. Please use this manual
together with the documentation provi9ded with your
computer hardware and software.
The maximum print speed for the DocuPrint P14 is 12
pages per minute. It offers true 600 x 600 dpi print
resolution and 1200 x 1200 with resolution enhancement
technology. The printer features one 250 sheet paper tray
and multi-sheet feeder. The printer understands PCL 5e
and PCL 6 printer languages, and has an option for
PostScript Level 2. Other options include a second paper
tray, and a serial/LocalTalk interface board for Apple
Macintosh compatibility.
Chapter 1: Getting Started ❖ 1-5

Printer Documentation
Printer Documentation
Your DocuPrint P14 is packaged with the following
documentation and information:
• Quick Reference Card, which shows you how to get
your printer up and running, and provides the basic
information needed to use your printer.
•This User Guide, which provides you with all of the
detailed information you will need to use, maintain,
upgrade and troubleshoot your printer.
• Supplies/Options Guide, which gives you ordering
information for printer consumables and options, as
well as recommendations for supported print media
(i.e., paper, transparencies, labels, envelopes, etc.).
• Warranty Card, which you should fill out and return
in order to receive all of the benefits of owning a Xerox
laser printer.
•The DocuPrint P14 CD-ROM, which contains the
following:
1-6 ❖ DocuPrint P14 User Guide
— User Guide (electronic version of this book)
— Printer Drivers
— Xerox Font Manager
For the printer drivers contained on the CD- ROM, the
majority of documentation is provided via the on-line Help
files included with the drivers. Features and functionality of
the drivers are discussed in Chapter 3: Printing.
Since the CD-ROM contains so much information of
importance, please ensure that you save it and keep it in a safe
place.

Printer Documentation
Using the CD-ROM
The documentation on the CD-ROM is provided as a PDF
file, which is opened in Adobe Acrobat Reader (provided
on the CD-ROM if you do not already have it installed).
This file contains hypertext links that enable you to jump
from the Table of Contents or Index directly to the page
where you are looking for information, as well as from
page to page where information is cross-referenced.
Simply move the cursor over a hypertext link and it
changes to a pointing finger. Then click on the link to
jump to the link’s destination.
The PDF files also enable you to print the specific pages
you need, rather than printing an entire chapter or
manual.
The CD-ROM is provided with an installation booklet in
its jewel case. You can also refer to the ReadMe file on the
CD-ROM for more information.
Chapter 1: Getting Started ❖ 1-7
Printer Documentation
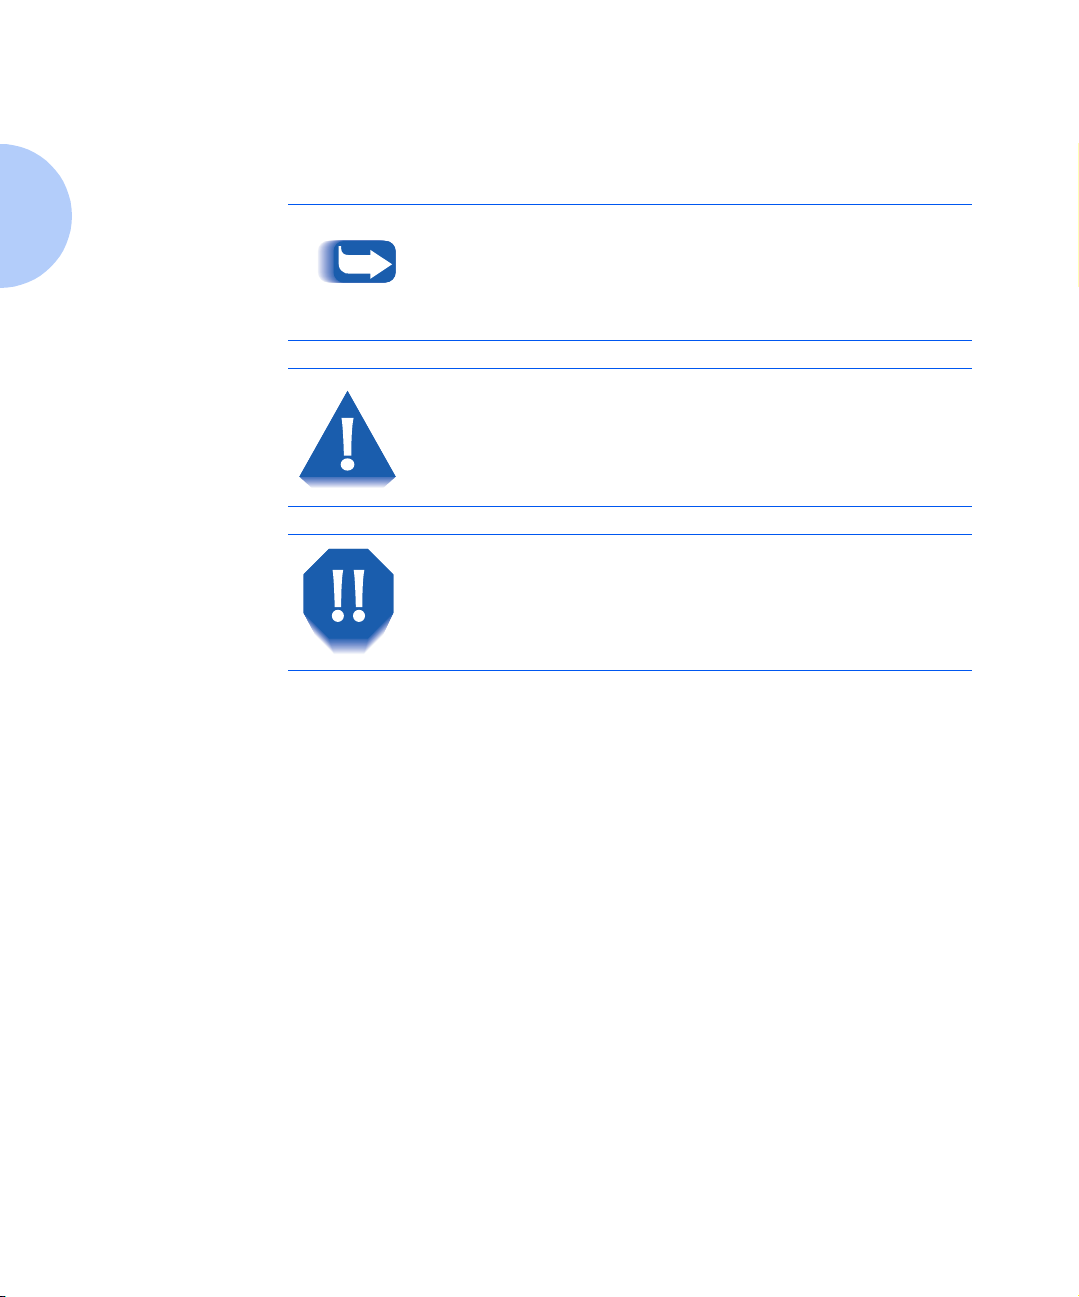
Note, Caution and
Warning Symbols
Throughout this User Guide, several symbols are used to
emphasize useful, important and critical information.
They are as follows:
This symbol indicates particularly useful or helpful
information about your printer.
This symbol indicates a caution against
performing any action that may damage your
printer or degrade performance.
This symbol indicates a warning against
performing any action that may lead to
physical injury.
1-8 ❖ DocuPrint P14 User Guide

Printer Setup
Printer Setup
Selecting a
Location
Place your printer on a flat, stable surface near your
workstation. Leave enough space around the printer, so
that you can easily:
• Open the printer cover.
• Open the rear cover to remove jammed paper, or
retrieve the paper when you use the rear face-up
stacker.
• Remove and install the paper tray(s) to load paper.
• Allow air circulation around the exhaust fan and vent
to prevent the printer from overheating.
Do not place the printer:
• In direct sunlight.
• Near heat sources or air conditioners. Place the printer
where the temperature is stable and set for comfort.
• In dusty or dirty environments. Dust accumulation
may prevent the printer from functioning properly.
• Near devices that contain magnets or generate
magnetic fields (such as loudspeakers or base units of
cordless telephones).
Chapter 1: Getting Started ❖ 1-9
Printer Setup
Unpacking the
Printer
Remove the printer and all accessories from the packing
1
carton.
Save the carton and packing materials in case you need to
repack the printer for service or storage.
Make sure that your printer came packed with the
2
following items:
•Laser print cartridge
•Power cord
• DocuPrint P14 CD-ROM
• Quick Reference Card
• Warranty Card
• IEEE 1284-compliant printer cable (may or may not be
supplied with your printer)
If any items are missing or damaged, notify your
dealer immediately.
In order to connect your DocuPrint P14 to your
computer, you have to purchase a printer cable
separately. The section “Connecting to the
Computer” (page 1-16) identifies the required cables.
1-10 ❖ DocuPrint P14 User Guide
Carefully remove the shipping tapes from the printer.
3
Instructions for setting up your printer follow, starting
with the section “Installing the Laser Print Cartridge”
(page 1-11). If you purchased an additional memory
SI MM, paper Tray 2, or other options, refer to
Appendix D: Printer Options for installation instructions
after completing the setup procedure.
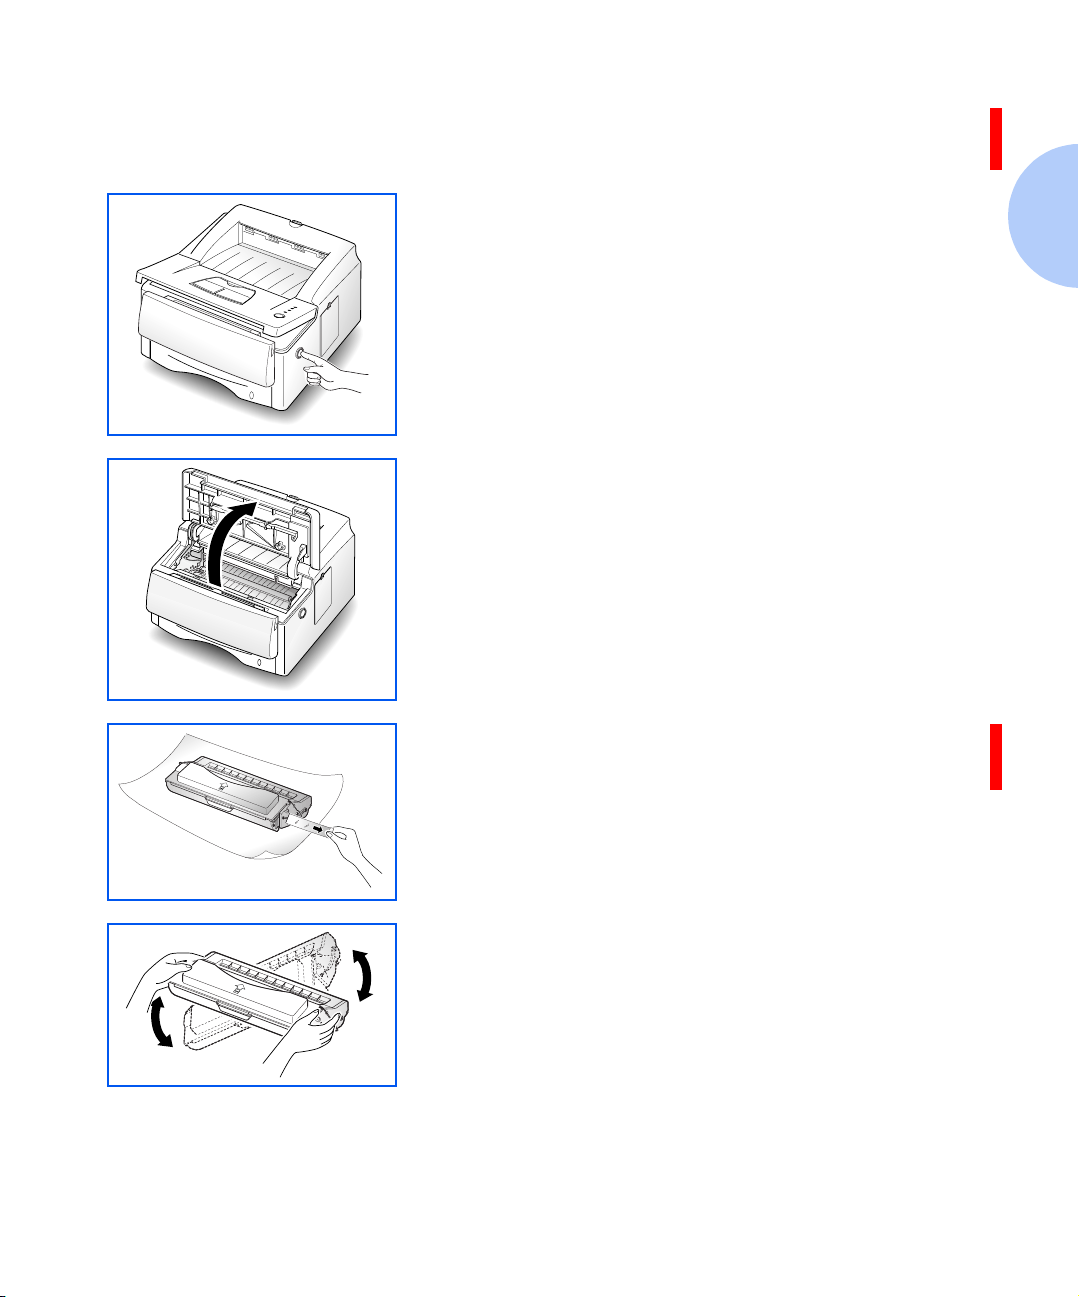
Installing the Laser
Print Cartridge
Open the printer cover by pressing the cover release
1
button.
Raise the printer cover.
2
Printer Setup
Unpack the laser print cartridge and place it on a clean
3
sheet of paper. Carefully remove the sealing tape and
discard it.
Shake the cartridge from side to side 5 or 6 times to
4
distribute the toner evenly inside the cartridge.
Chapter 1: Getting Started ❖ 1-11
Printer Setup
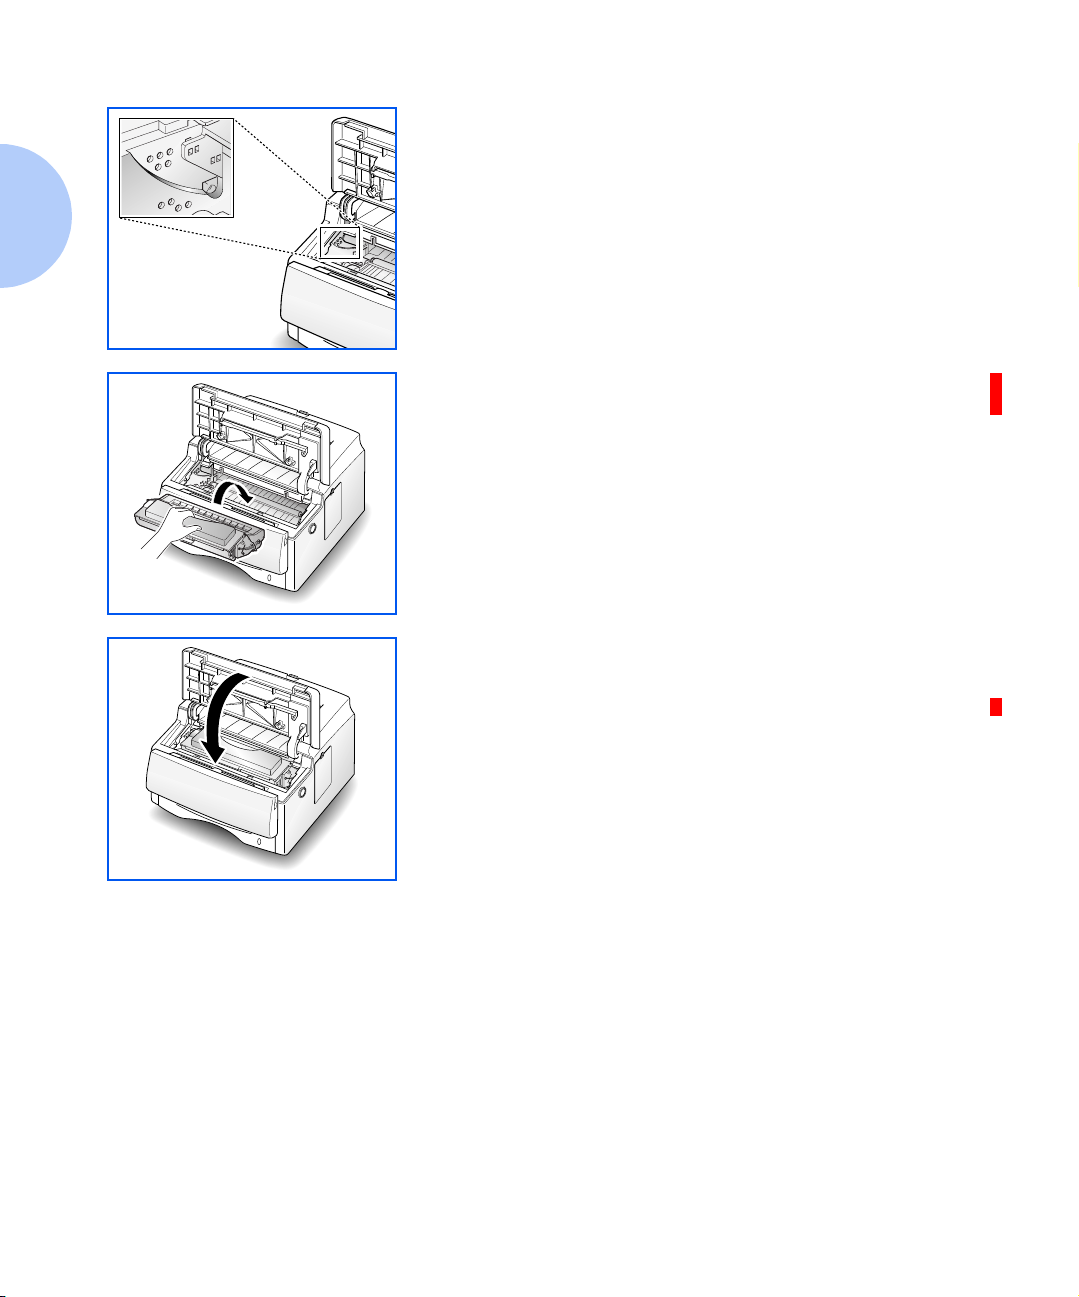
Find the cartridge slots inside the printer, one on each
5
side.
Grasp the handle and slide the cartridge down on top of
6
the cartridge slots, until it drops into place.
Close the printer cover. Make sure that the cover is
7
securely closed.
Proceed to the next section, “Loading Paper” (page 1-13).
1-12 ❖ DocuPrint P14 User Guide

Printer Setup
Loading Paper
You can load approximately 250 sheets of paper. For the
best print quality, use any high quality xerographic copier
paper (75 g/m
For more information on loading paper and other print
media, refer to Chapter 2: Loading Print Media.
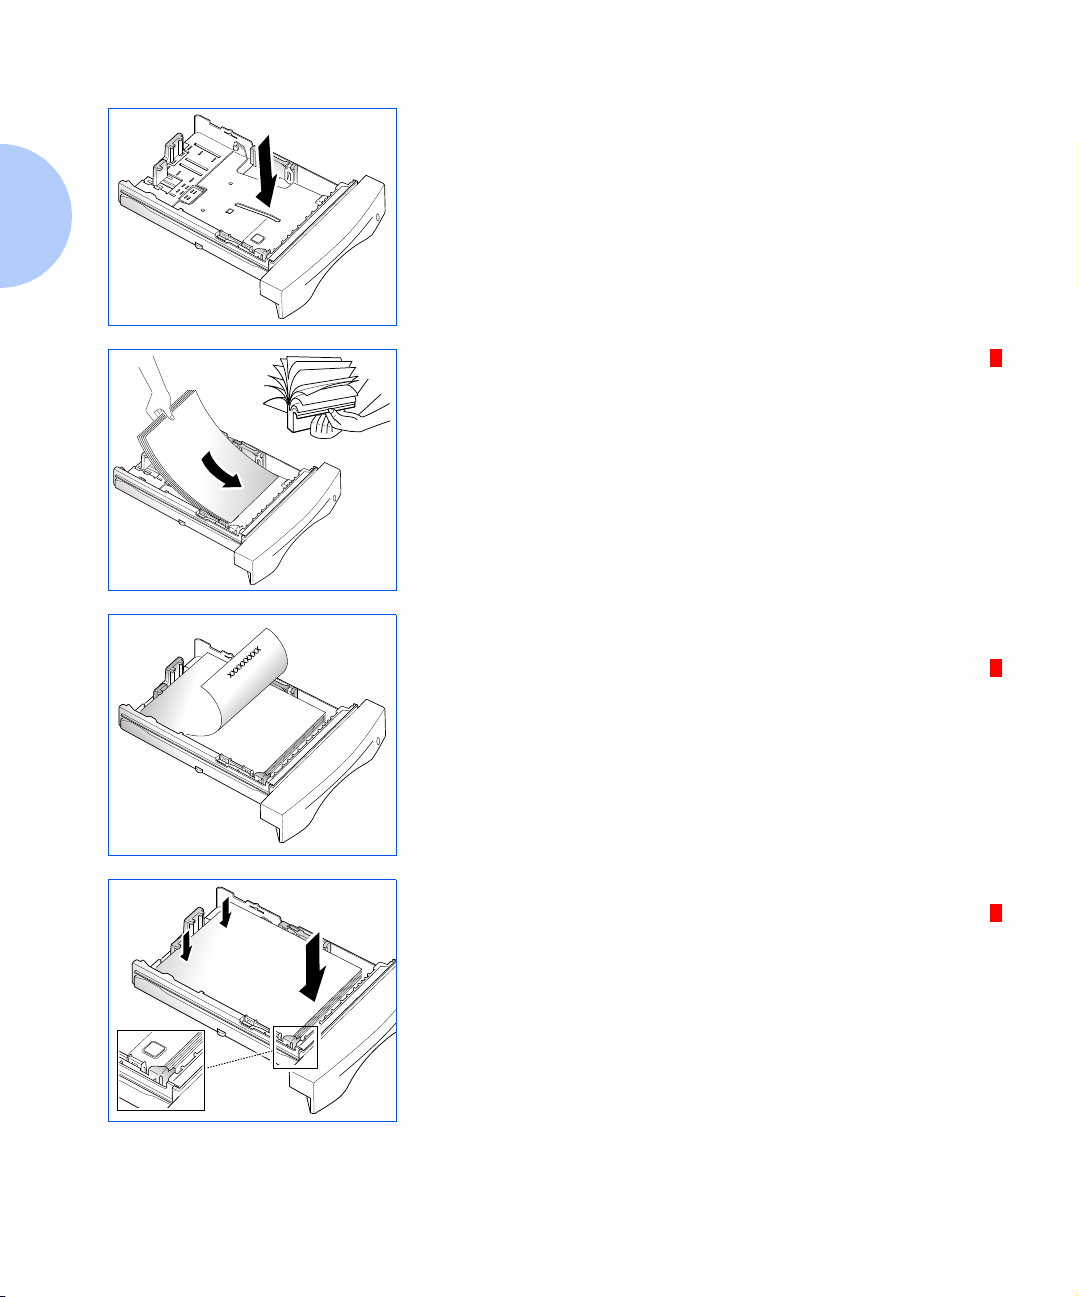
Remove Tray 1 by pulling it towards you. Remove the
1
packing material from the tray, if any.
Pull out the length guides ➊ and ➋ and the width guide ➌
2
(by squeezing the tab on each guide to slide the guide out).
2
or 20 lb.).
Chapter 1: Getting Started ❖ 1-13
Printer Setup
LETTERHEAD
Push down on metal plate.
3
Fan the paper and load it in the tray with the print side
4
facing down. The print side is usually indicated on the
paper package.
For preprinted stock, such as letterhead, place the printed
design side face down with the top edge of the page toward
the front of the tray.
1-14 ❖ DocuPrint P14 User Guide
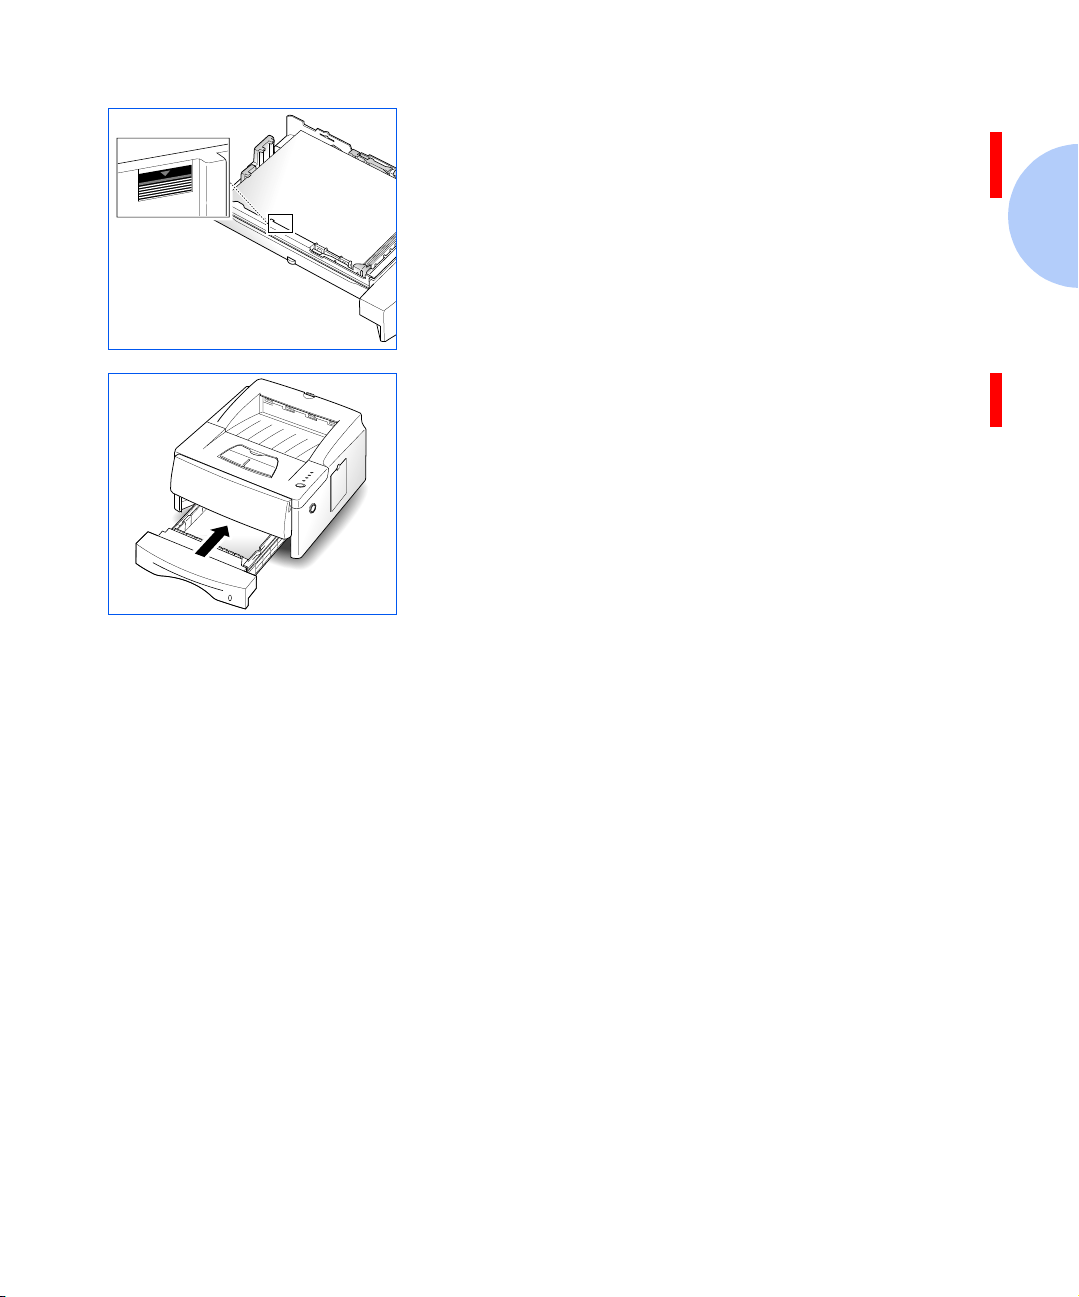
Gently press the upper corners of the paper down under
5
the tray tab as shown.
Printer Setup
Make sure that the stack of paper does not exceed the line
6
indicated by the mark on the left inside wall of the tray.
Slide the length and width guides against the edges of the
7
paper stack, if necessary.
Insert the tray back into the printer.
8
Proceed to the next section, “Connecting to the Computer”
(page 1-16).
Chapter 1: Getting Started ❖ 1-15
Printer Setup
Connecting to the
Computer
Your printer can be connected to a Windows-based PC or
to an Apple Macintosh computer (see the note, below).
Refer to Table 1.1 for your connection options and the
appropriate page in this manual for connection
instructions.
Table 1.1 Interface options
Interface Windows PC Macintosh
Parallel Yes (see page 1-17). Not available.
USB Yes (see page 1-18). Yes (see page 1-18).
*
Serial
LocalTalk
*
Requires installation of the optional Serial/LocalTalk interface board. Refer to the Supplies/Options Guide that
came with your printer, and to
*
Yes (see page 1-19). Yes (see page 1-19).
Not available. Yes (see page 1-20).
Appendix D: Printer Options
for installation instructions.
To print documents from a Macintosh computer, you must
install the following optional printer accessories:
•PostScript SIMM
• Additional memory SIM M (12MB is required)
• Serial/LocalTalk interface board (if your Macintosh
does not have a USB port)
1-16 ❖ DocuPrint P14 User Guide
If you do not have these accessories, refer to the Supplies/
Options Guide that came with your printer, or contact your
authorized Xerox dealer. Installation instructions for these
options can be found in Appendix D: Printer Options.
Once you have installed the required options and connected
your printer, you will need to install the PostScript printer
driver. This driver is provided on the CD-ROM that came
with your printer. Installation instructions are provided in
the section “Installing the PostScript Driver” (page 1-27).
Printer Setup
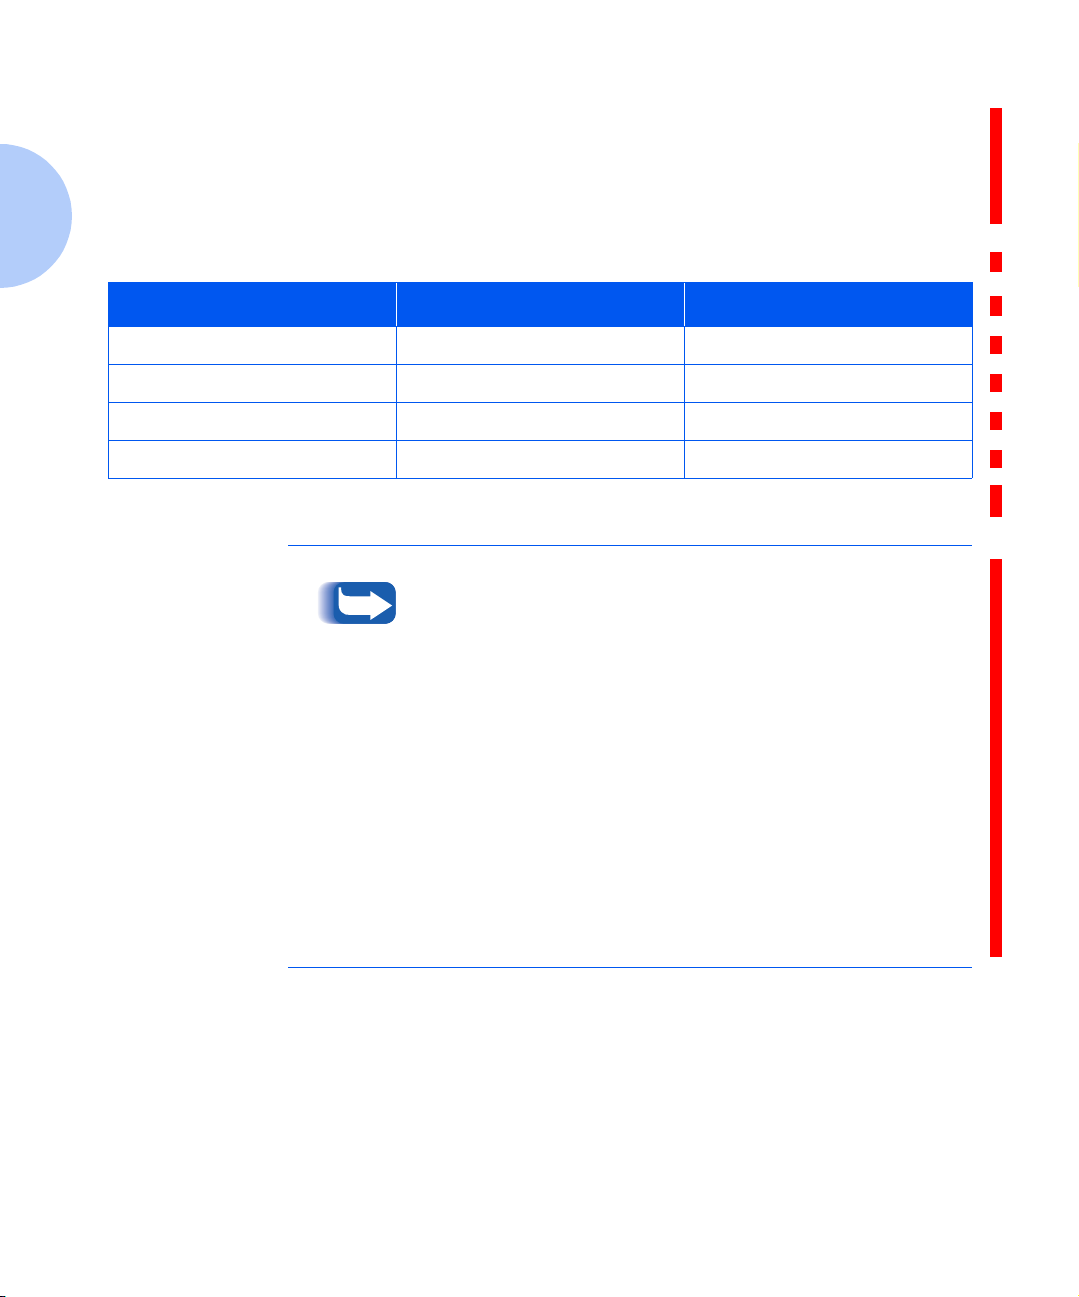
Using the Parallel Port
The parallel port requires a Centronics parallel interface
cable that supports bidirectional communications (IEEE
standard 1284). Ask your dealer for assistance if you need
help selecting the right cable.
To connect the printer to the computer, follow the steps
below:
Make sure that both the printer and computer are turned
1
off.
Plug the cable into the connector on the back of the
2
printer.
Push the metal clips down to fit inside the notches on the
3
cable plug.
Connect the other end of the cable to the parallel port on
4
your computer. See your computer documentation if you
need help.
Proceed to the section “Powering On the Printer”
(page 1-21)
Chapter 1: Getting Started ❖ 1-17

Printer Setup
Using the USB Port
The USB port requires a USB v1.0-compliant cable. Ask
your dealer for assistance if you need help selecting the
right cable.
To connect the printer to the computer, follow the steps
below:
Make sure that both the printer and computer are turned
1
off.
Plug the cable into the USB connector on the back of the
2
printer.
Connect the other end of the cable to the USB port on your
3
computer (or elsewhere in the USB chain). See your
computer documentation if you need help.
Proceed to the section “Powering On the Printer”
(page 1-21)
1-18 ❖ DocuPrint P14 User Guide

Printer Setup
Using the Serial Port
The optional serial port requires an RS-232C cable with a
DB-9 male connector. Ask your dealer for assistance if you
need help selecting the right cable.
To connect the printer to the computer, follow the steps
below:
Make sure that both the printer and computer are turned
1
off.
Plug the cable into the serial connector on the back of the
2
printer.
Connect the other end of the cable to the serial port on
3
your computer. See your computer documentation if you
need help.
Proceed to the section “Powering On the Printer”
(page 1-21)
Chapter 1: Getting Started ❖ 1-19

Printer Setup
Using the LocalTalk Port
The optional LocalTalk port requires a LocalTalk
PhoneNet cable with a DIN-8 connector. Ask your dealer
for assistance if you need help selecting the right cable.
To connect the printer to the computer, follow the steps
below:
Make sure that both the printer and computer are turned
1
off.
Plug the cable into the LocalTalk connector on the back of
2
the printer.
Connect the other end of the cable to the LocalTalk port on
3
your computer (or to another LocalTalk connector that is
part of the LocalTalk network). See your computer
documentation if you need help.
Proceed to the section “Powering On the Printer”
(page 1-21)
1-20 ❖ DocuPrint P14 User Guide
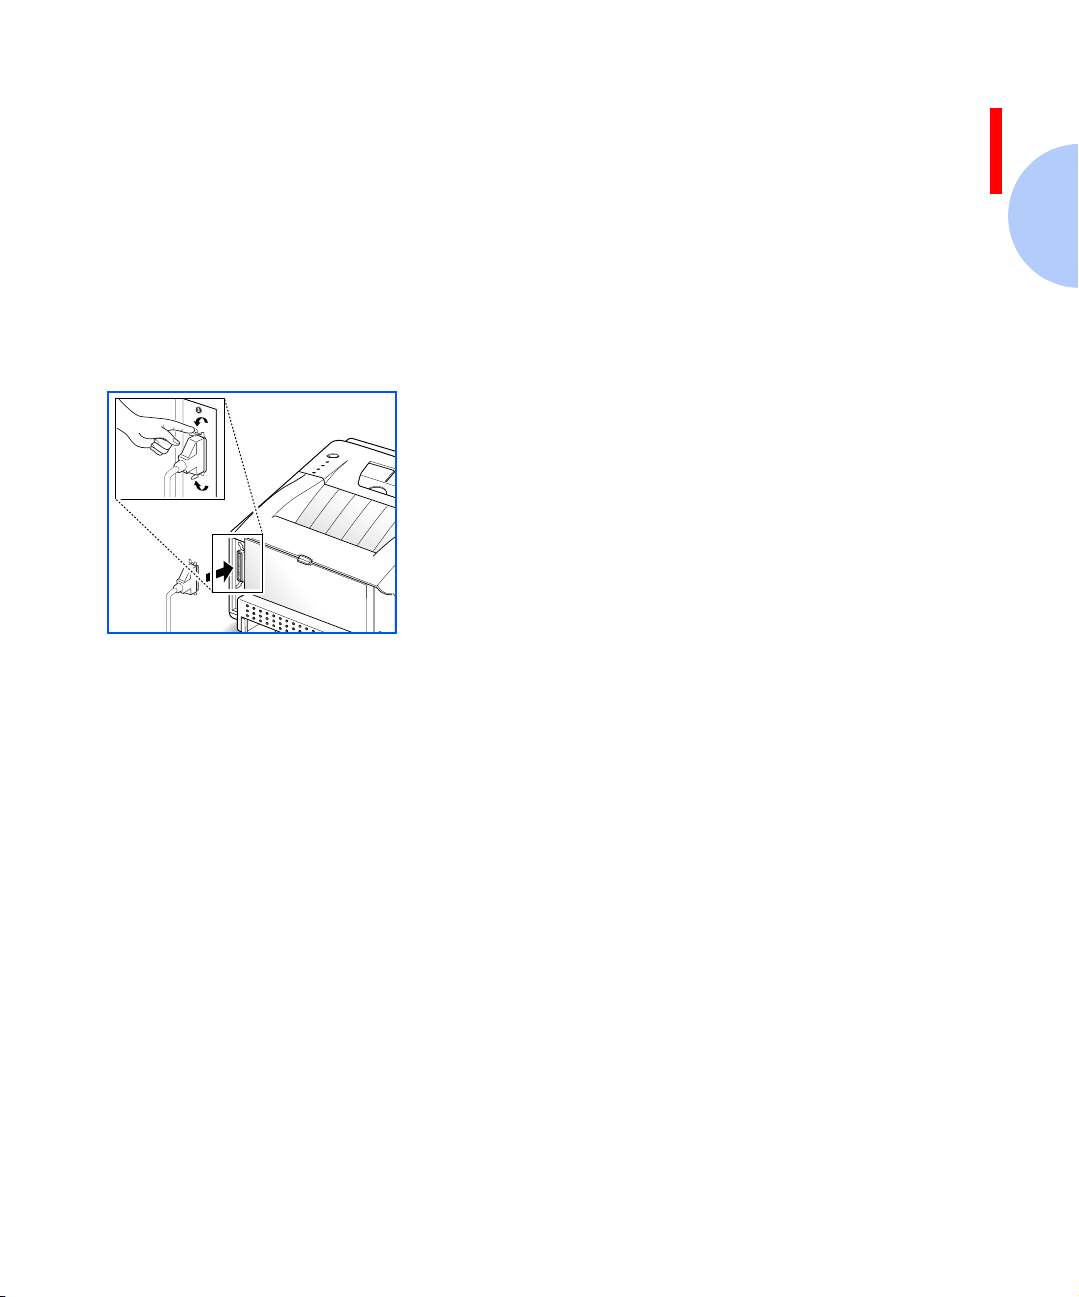
Powering On
the Printer
Printer Setup
Plug one end of the power cord into the connector on the
1
printer.
Plug the other end into a properly grounded AC outlet.
2
Turn the printer on.
3
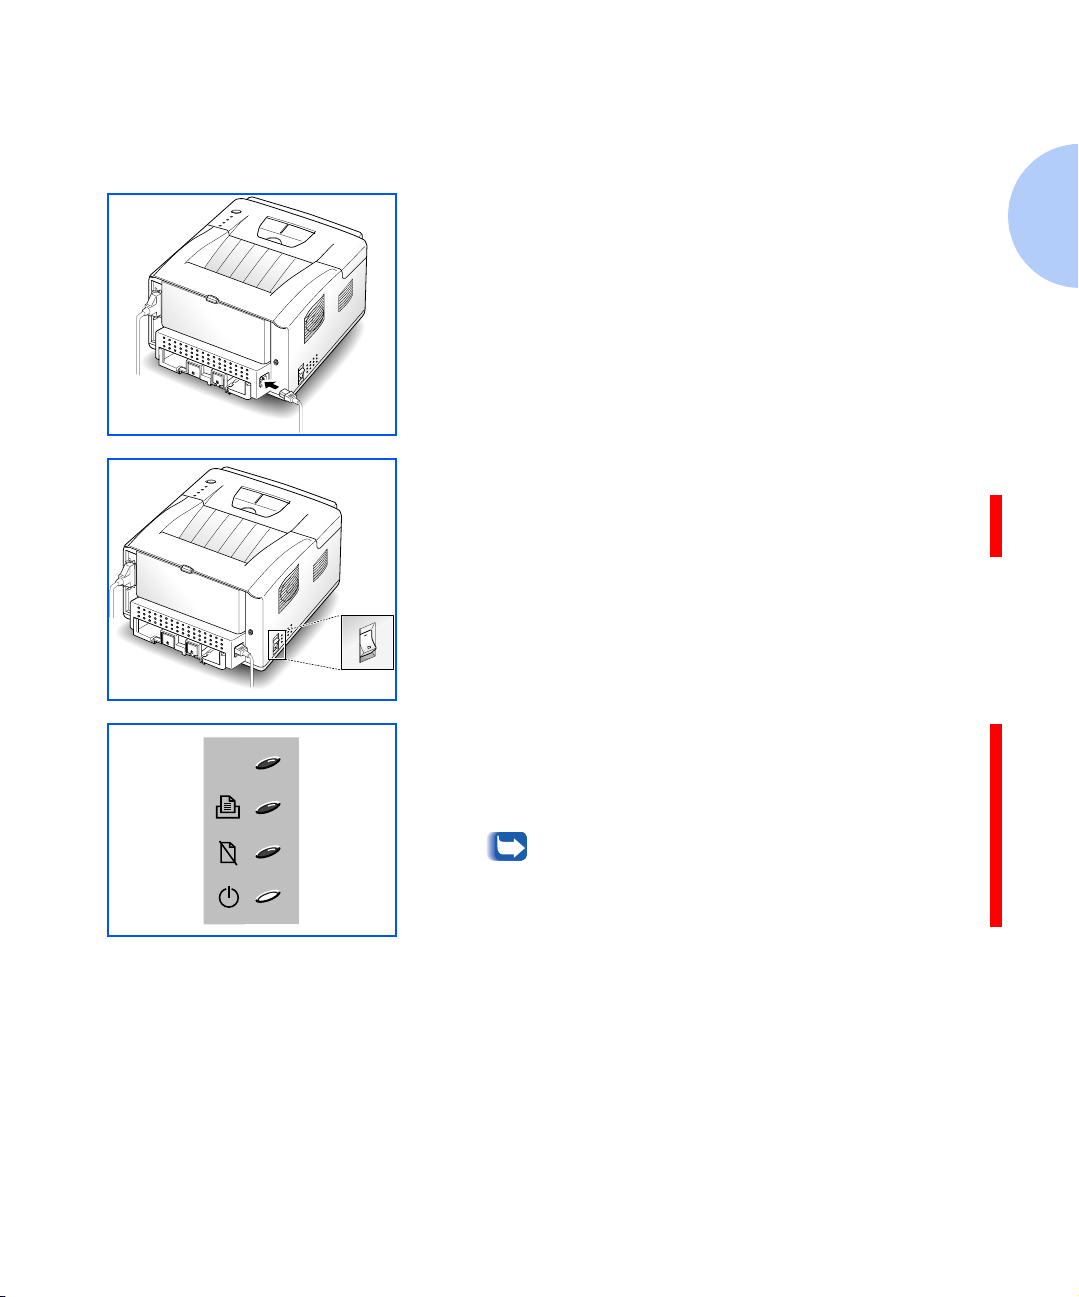
As the printer powers up, all control panel lights turn on
briefly. Then the lights scroll sequentially several times as
the printer goes through its internal diagnostics.
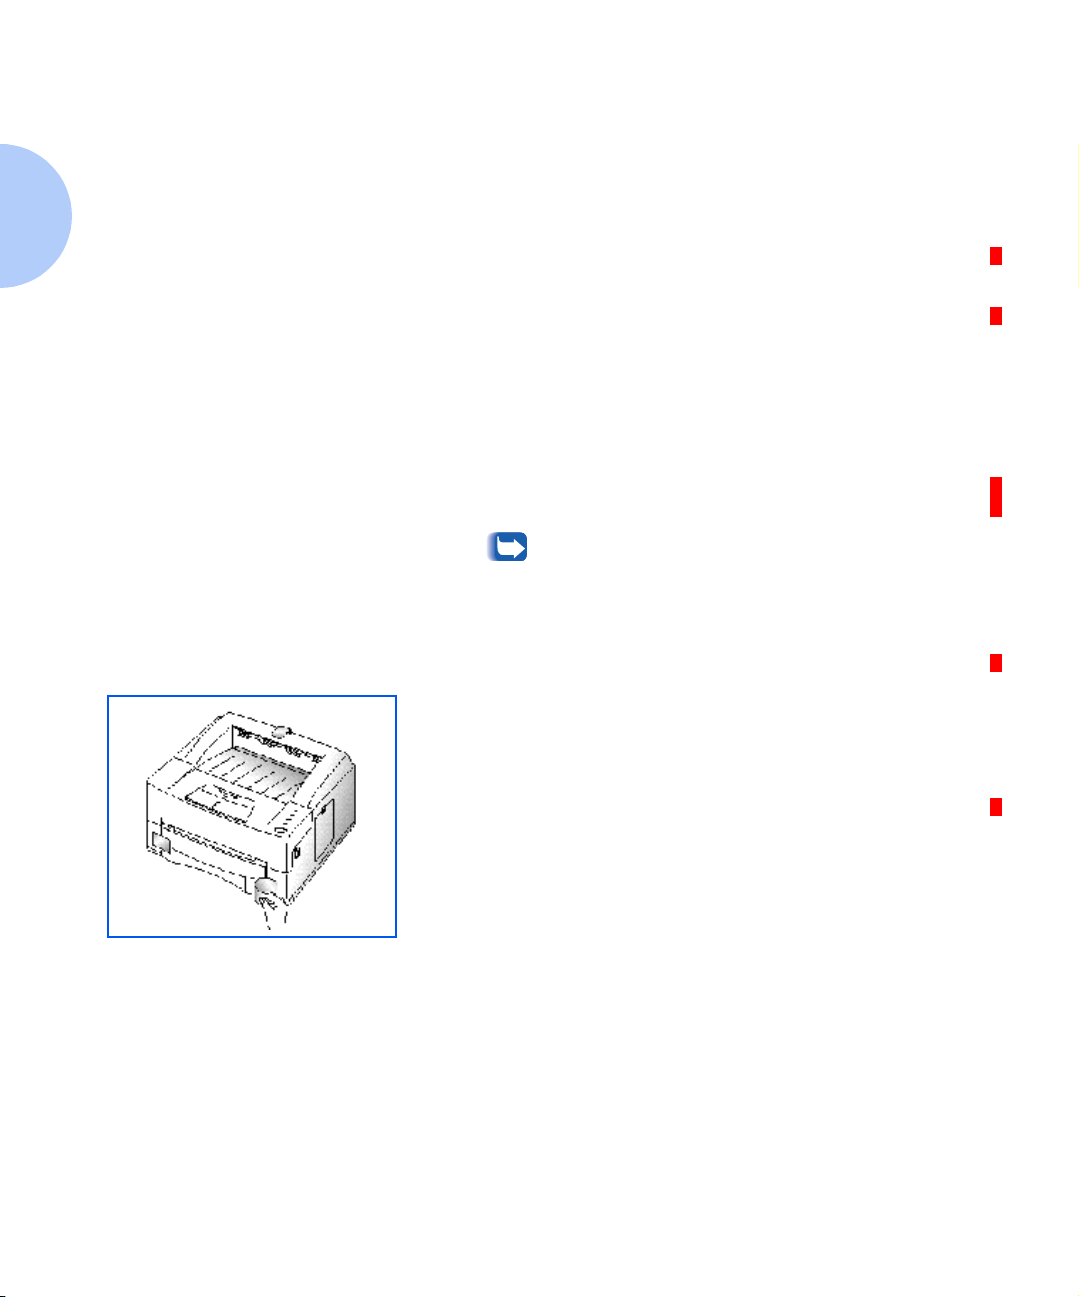
When only the READY light is steadily on (as shown at
4
left), press the control panel button for five seconds, then
let go. A configuration sheet should print out (if not,
recheck the installation).
The configuration sheet lists your printer model
and default settings along with the interface
ports available for your printer model.
Continue to the next section, “Installing Software”
(page 1-22).
Chapter 1: Getting Started ❖ 1-21

Printer Setup
Installing Software
Included with your printer is a CD-ROM containing
printer drivers for some of the most popular Windows
software applications. To operate your printer, you must
install a printer driver, which translates data from your
application into data the printer understands. (Installation
procedures follow this section.)
The CD-ROM shipped with your printer contains the
following printer drivers and utilities.
• PCL 5e printer driver for Windows 95/ 98, Wind ows
3.1x and Windows NT 4.0
• PCL 6 printer driver for Windows 95/98 and
Windows NT 4.0.
• Status Monitor enables you to monitor the status of
print jobs.
• Font Navigator is a font manager. It gives a quick and
easy way to find fonts, install the fonts, and print the
font samples. Select the FontNav folder from the
CD-ROM, and execute the setup file to install the Font
navigator.
• PostSc ript Printer Description (PPD) files for Windows
and Macintosh to allow installation of the PostScript
option.
1-22 ❖ DocuPrint P14 User Guide
• Remote Control Panel, which allows you to set up
your printer to work properly with DOS applications
run inside a Windows MS-DOS command prompt
window.
• Adobe Acrobat Reader v3.02, which allows your
computer to display the on-line Xerox DocuPrint P14
user manuals.

Printer Setup
Installing the
PCL Driver
Minimum Requirements
Before you start, make sure that you have the following
computer setup:
• IBM or compatible with a 486 or higher processor
• Microsoft Windows 95/98, Windows 3.1x, or Windows
NT 4.0
• 7 MB of available hard disk space
• 8 MB of RAM for Windows 3.1x
• 16 MB of RAM for Windows 95/98, Windows NT
•CD-ROM drive
• Centronics-compatible parallel cable (IEEE
1284-compliant)
If you do not have access to a CD-ROM drive, contact your
local dealer to have one installed.
Chapter 1: Getting Started ❖ 1-23

Printer Setup
Windows 95/98/NT 4.0 Installation
Turn on the computer and start Windows.
1
If Windows 95/98 recognizes the new printer, go to the
section “Windows 95/98 Plug and Play” (page 1-25).
Insert the Xerox DocuPrint P14 CD-ROM into your
2
CD-ROM drive.
If Windows does not automatically run the CD-ROM, go to
the section “If Windows Does Not Run the CD-ROM”
(page 1-25)
Type in your user name and company. Then click on the
3
Next button.
The driver will be installed in the directory c:\p14util. If
4
you want to change this, type in the directory you want.
Then click on the Next button.
Follow the instructions on the screen.
5
1-24 ❖ DocuPrint P14 User Guide
 Loading...