

Samsung LE32D400E1W, LE32D404E2W, LE40D504F7W User Manual

E-MANUAL
Contact SAMSUNG WORLDWIDE
If you have any questions or comments relating to Samsung products, please contact the SAMSUNG customer care centre.
Country
ALBANIA 42 27 5755 AUSTRIA 0810 - SAMSUNG (7267864, € 0.07/min) www.samsung.com
BELGIUM 02-201-24-18 www.samsung.com/be (Dutch)
BOSNIA 05 133 1999 BULGARIA 07001 33 11 www.samsung.com
CROATIA 062 SAMSUNG (062 726 7864) www.samsung.com
CZECH 800 - SAMSUNG (800-726786) www.samsung.com
DENMARK 70 70 19 70 www.samsung.com
FINLAND 030 - 6227 515 www.samsung.com
FRANCE 01 48 63 00 00 www.samsung.com
GERMANY 01805 - SAMSUNG(726-7864 € 0,14/Min) www.samsung.com
GREECE
HUNGARY 06-80-SAMSUNG(726-7864) www.samsung.com
ITALIA 800-SAMSUNG(726-7864) www.samsung.com
KOSOVO +381 0113216899 LUXEMBURG 261 03 710 www.samsung.com
MACEDONIA 023 207 777 MONTENEGRO 020 405 888 NETHERLANDS 0900-SAMSUNG (0900-7267864) (€ 0,10/Min) www.samsung.com
NORWAY 815-56 480 www.samsung.com
POLAND 0 801 1SAMSUNG(172678) / 022-607-93-33 www.samsung.com
PORTUGAL 80820-SAMSUNG(726-7864) www.samsung.com
RUMANIA "1. 08010 SAMSUNG (72678) – doar din reţeaua Romtelecom, tarif local;
SERBIA 0700 Samsung (0700 726 7864) www.samsung.com
SLOVAKIA 0800-SAMSUNG(726-7864) www.samsung.com
SPAIN 902 - 1 - SAMSUNG (902 172 678) www.samsung.com
SWEDEN 0771 726 7864 (SAMSUNG) www.samsung.com
SWITZERLAND 0848 - SAMSUNG(7267864, CHF 0.08/min) www.samsung.com/ch
U.K 0330 SAMSUNG (7267864) www.samsung.com
EIRE 0818 717100 www.samsung.com
LITHUANIA 8-800-77777 www.samsung.com
LATVIA 8000-7267 www.samsung.com
ESTONIA 800-7267 www.samsung.com
TURKEY 444 77 11 www.samsung.com
Customer Care Centre
Samsung Zrt., česká organizační složka, Oasis Florenc, Sokolovská394/17, 180 00, Praha 8
"1. Για προϊόντα πληροφορικής και κινητής τηλεφωνίας
Από σταθερό 80111-SAMSUNG (80111 7267864), αστική χρέωση
Από κινητό 210 6897691
2. Για φωτογραφικές μηχανές, βιντεοκάμερες, τηλεοράσεις & οικιακές
συσκευές
Από κινητό και σταθερό 2106293100"
2. 021.206.01.10 – din orice reţea, tarif normal "
Web Site
www.samsung.com/be_fr (French)
www.samsung.com
www.samsung.com
www.samsung.com/ch_fr/(French)
LCD TV
User Manual
imagine the possibilities
© 2011 Samsung Electronics Co., Ltd. All rights reserved.
Thank you for purchasing this Samsung product.
To receive more complete service, please register
your product at
www.samsung.com/register
Model _____________ Serial No. _____________
BN68-03717F-01

For more information on how to use the e-Manual (P.10)
Figures and illustrations in this User Manual are provided for reference only and may differ from actual product appearance.
Product design and specifications may be changed without notice.
Important Warranty Information Regarding Television Format Viewing
1. Functionalities related to Digital TV (DVB) are only available in countries/areas where DVB-T (MPEG2 and MPEG4 AVC) digital terrestrial
signals are broadcasted or where you are able to access to a compatible DVB-C (MPEG2 and MPEG4 AAC) cable-TV service. Please check
with your local dealer the possibility to receive DVB-T or DVB-C signal.
2. DVB-T is the DVB European consortium standard for the broadcast transmission of digital terrestrial television and DVB-C is that for the broadcast
transmission of digital TV over cable. However, some differentiated features like EPG (Electric Programme Guide), VOD (Video On Demand) and so
on, are not included in this specification. So, they cannot be workable at this moment.
3. Although this TV set meets the latest DVB-T and DVB-C standards, as of [August, 2008], the compatibility with future DVB-T digital terrestrial
and DVB-C digital cable broadcasts cannot be guaranteed.
4. Depending on the countries/areas where this TV set is used some cable-TV providers may charge an additional fee for such a service and
you may be required to agree to terms and conditions of their business.
5. Some Digital TV functions might be unavailable in some countries or regions and DVB-C might not work correctly with some cable service
providers.
6. For more information, please contact your local Samsung customer care centre.
The reception quality of TV may be affected due to differences in broadcasting method between the countries. Please check the TV
✎
performance in the local SAMSUNG Authorized Dealer, or the Samsung Call Centre whether it can be improved by reconfiguring TV
setting or not.
Still image warning
Avoid displaying still images (like jpeg picture files) or still image element (like TV programme logo, panorama or 4:3 image format, stock or news
bar at screen bottom etc.) on the screen. Constant displaying of still picture can cause ghosting of LCD screen, which will affect image quality. To
reduce risk of this effect, please follow below recommendations:
• Avoid displaying the same TV channel for long periods.
• Always try do display any image on full screen, use TV set picture format menu for best possible match.
• Reduce brightness and contrast values to minimum required to achieve desired picture quality, exceeded values may speed up the burnout
process.
• Frequently use all TV features designed to reduce image retention and screen burnout, refer to proper user manual section for details.
Securing the Installation Space
Keep the required distances between the product and other objects (e.g. walls) to ensure proper ventilation.
Failing to do so may result in fire or a problem with the product due to an increase in the internal temperature of the product.
When using a stand or wall-mount, use parts provided by Samsung Electronics only.
✎
• If you use parts provided by another manufacturer, it may result in a problem with the product or an injury due to the product falling.
The appearance may differ depending on the product.
✎
Be careful when you contact the TV because some parts can be somewhat hot.
✎
Installation with a stand. Installation with a wall-mount.
10 cm
10 cm10 cm
Correct Disposal of This Product (Waste Electrical & Electronic Equipment)
(Applicable in the European Union and other European countries with separate collection systems)
This marking on the product, accessories or literature indicates that the product and its electronic accessories (e.g. charger, headset,
USB cable) should not be disposed of with other household waste at the end of their working life. To prevent possible harm to
the environment or human health from uncontrolled waste disposal, please separate these items from other types of waste and
recycle them responsibly to promote the sustainable reuse of material resources. Household users should contact either the retailer
where they purchased this product, or their local government office, for details of where and how they can take these items for
environmentally safe recycling. Business users should contact their supplier and check the terms and conditions of the purchase
contract. This product and its electronic accessories should not be mixed with other commercial wastes for disposal.
Correct disposal of batteries in this product
(Applicable in the European Union and other European countries with separate battery return systems)
This marking on the battery, manual or packaging indicates that the batteries in this product should not be disposed of with other
household waste at the end of their working life. Where marked, the chemical symbols Hg, Cd or Pb indicate that the battery contains
mercury, cadmium or lead above the reference levels in EC Directive 2006/66. If batteries are not properly disposed of, these
substances can cause harm to human health or the environment. To protect natural resources and to promote material reuse, please
separate batteries from other types of waste and recycle them through your local, free battery return system.
10 cm
10 cm
10 cm
10 cm
English - 2
Accessories
✎
Please make sure the following items are included with your TV. If any items are missing, contact your dealer.
✎
The items’ colours and shapes may vary depending on the models.
y Remote Control & Batteries (AAA x 2)
y Owner’s Instructions
y Warranty Card / Safety Guide (Not available in some locations)
✎
An administration fee may be charged if either
(a) an engineer is called out at your request and there is no defect in the product
(i.e. where you have failed to read this user manual)
(b) you bring the unit to a repair centre and there is no defect in the product
(i.e. where you have failed to read this user manual).
✎
The amount of such administration charge will be advised to you before any work or home visit is carried out.
y Power Cord
y Cleaning Cloth
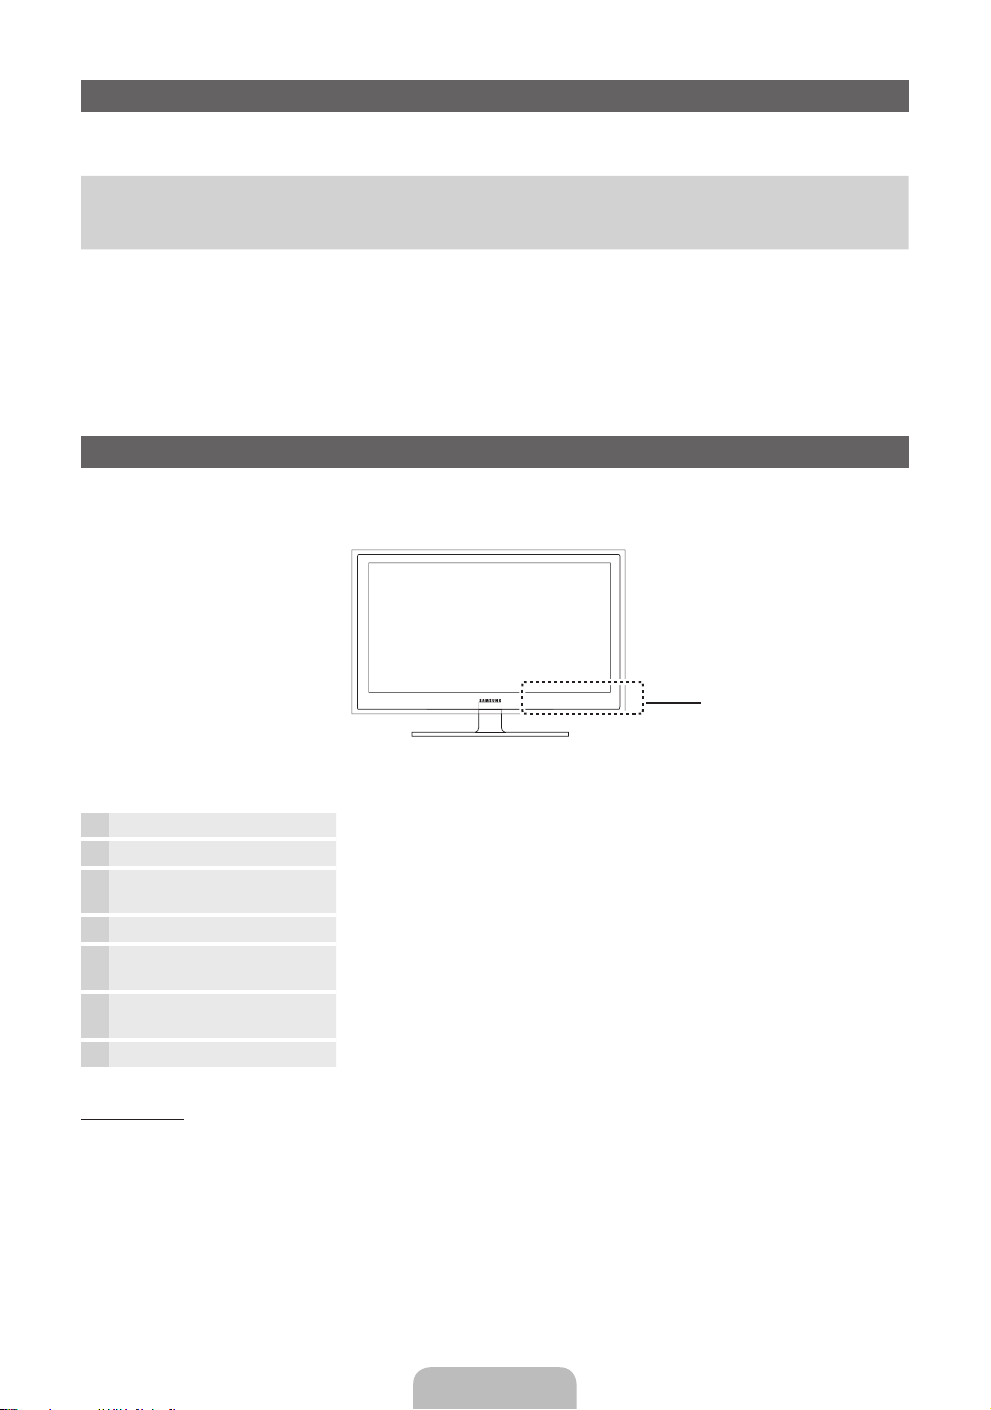
Viewing the Control Panel
✎
The product colour and shape may vary depending on the model.
Control Panel
Remote control sensor Aim the remote control towards this spot on the TV.
Power Indicator Blinks and turns off when the power is on and lights up in standby mode.
SOURCE
MENU Displays an on-screen menu, the OSD (on screen display) of your TV’s features.
Y
z
P
Standby mode
Do not leave your TV in standby mode for long periods of time (when you are away on a holiday, for example). A small amount
of electric power is still consumed even when the power button is turned off. It is best to unplug the power cord.
E
(Power)
Toggles between all the available input sources. In the on-screen menu, use this
button as you would use the ENTERE button on the remote control.
Adjusts the volume. In the OSD, use the
and ► buttons on the remote control.
Changes the channels. In the OSD, use the
▼ and ▲ buttons on the remote control.
Turns the TV on or off.
Y
buttons as you would use the ◄
z
buttons as you would use the
English - 3
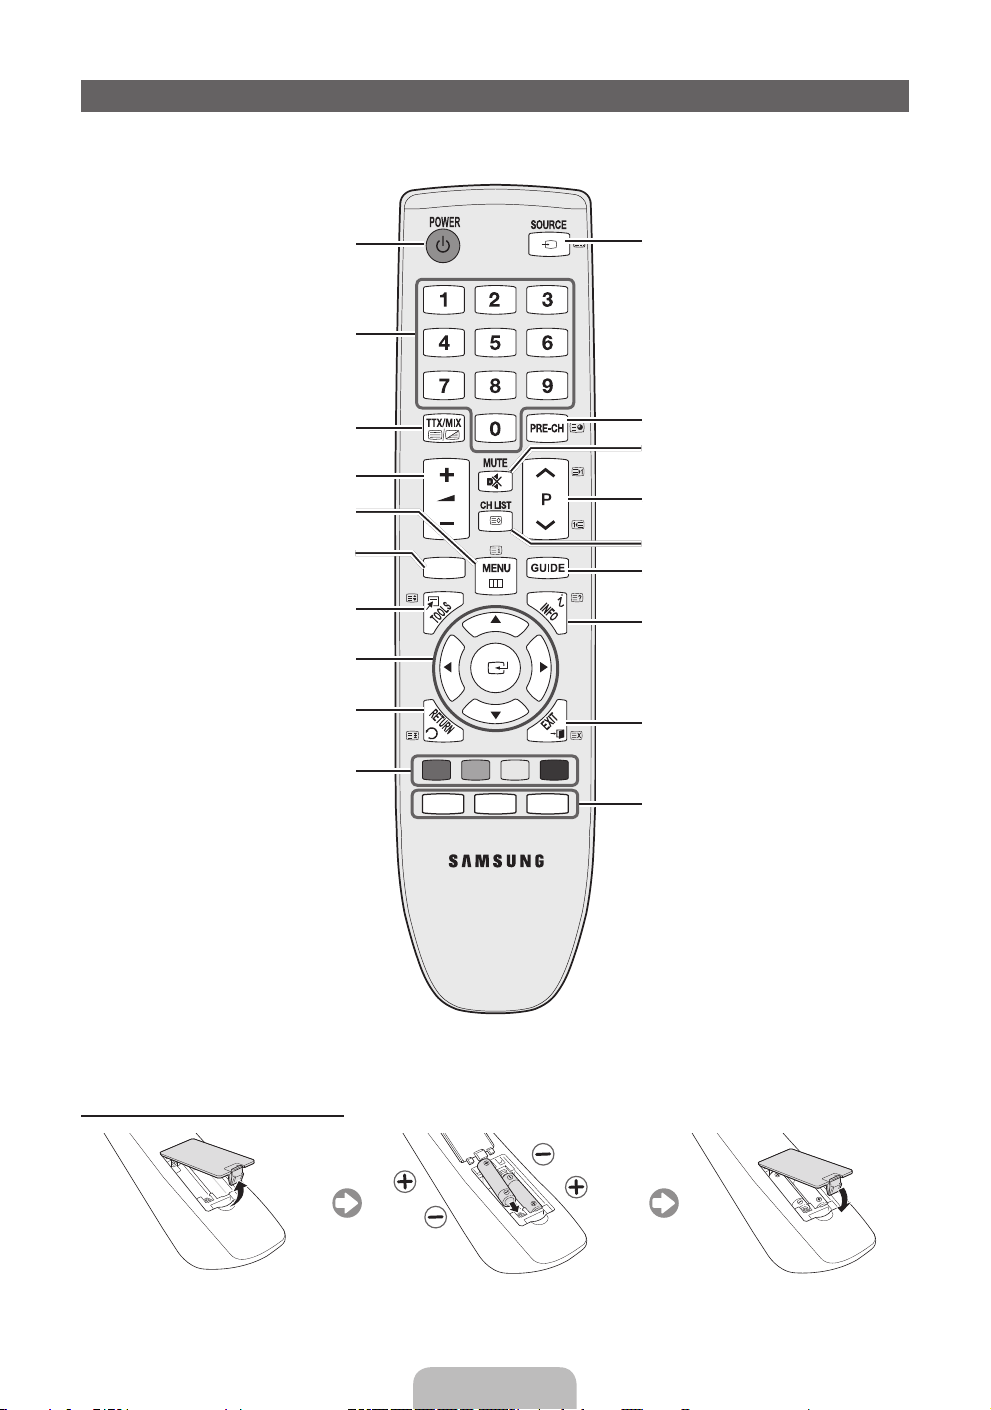
Viewing the Remote Control
Turns the TV on and off.
Press to directly access to channels.
Alternately select Teletext ON, Double,
Mix or OFF.
Adjusts the volume.
Displays the main on-screen menu.
Displays the My Downloads, Watch TV
and Source.
Quickly select frequently used functions.
Selects the on-screen menu items and
changes the values seen on the menu.
Returns to the previous menu.
Buttons used in the Channel List,
Channel Manager, My Downloads
menu, etc.
CONTENT
A B C D
P.SIZE
E-MANUAL
AD/SUBT.
Displays and selects the available video
sources.
Returns to the previous channel.
Cuts off the sound temporarily.
Changes channels.
Displays channel lists on the screen.
Displays the EPG (Electronic Programme
Guide).
Displays information on the TV screen.
Exits the menu.
E-MANUAL: Displays the e-Manual
guide.
P.SIZE: Selects the picture size.
AD/ SUBT.: Audio Description selection.
(Not available in some
locations) / Displays digital
subtitles.
Installing batteries (Battery size: AAA)
English - 4

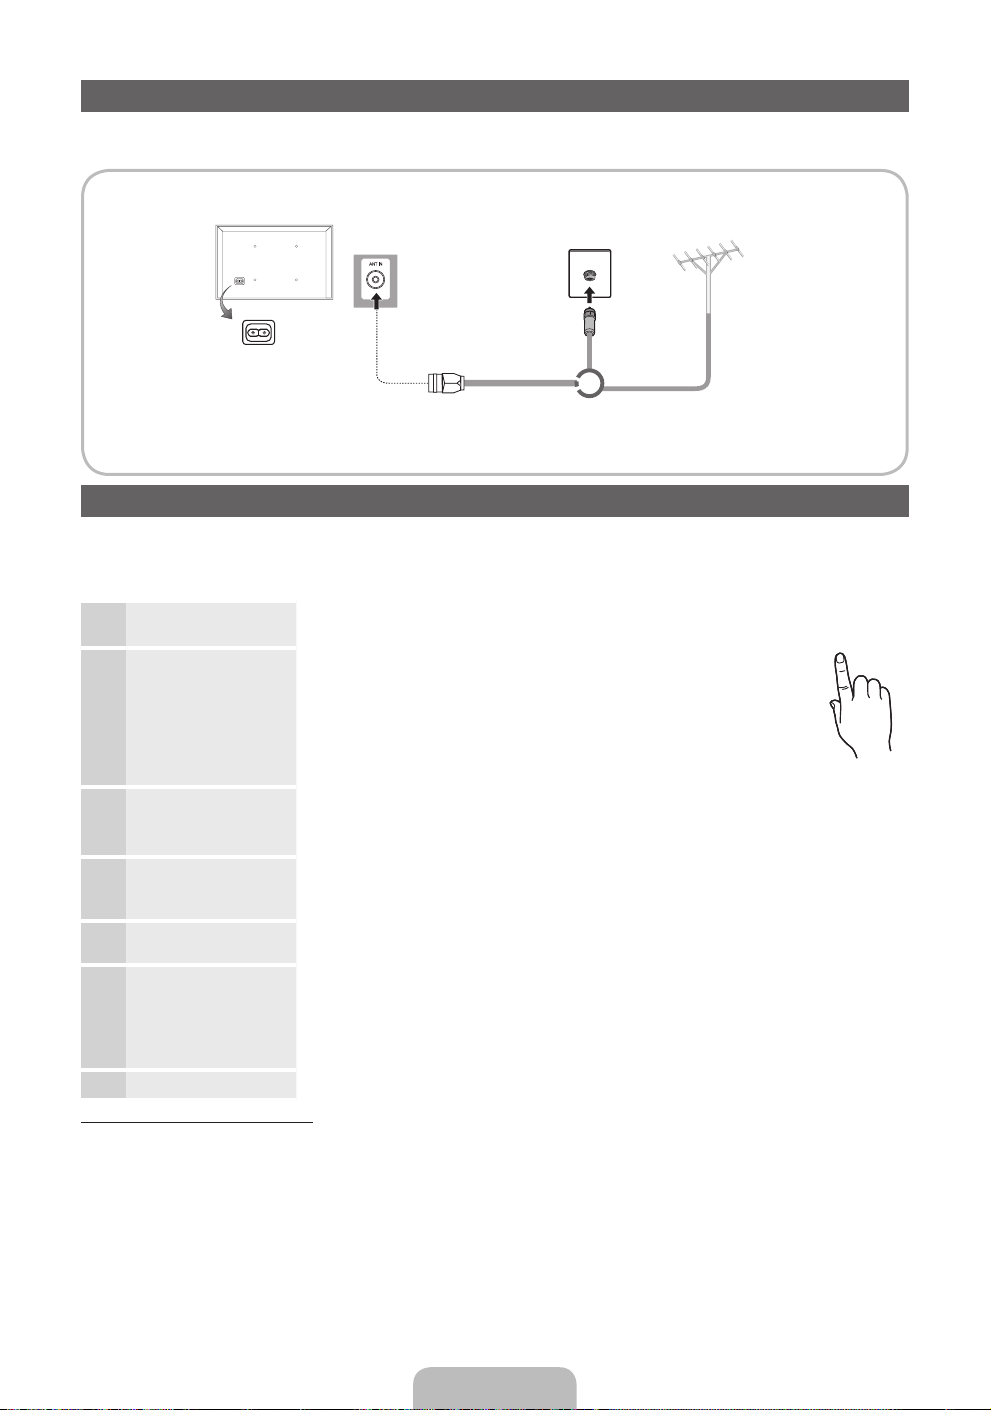
Connecting to an Antenna
When the TV is initially powered on, basic settings proceed automatically.
✎
Preset: Connecting the mains and antenna.
TV Rear Panel
✎
The position of power input port
may differ depending on the model.
Cable
or
VHF/UHF Antenna
Plug & Play (Initial Setup)
When the TV is initially powered on, a sequence of on-screen prompts will assist in configuring basic settings. Press the
POWERP button. Plug & Play is available only when the Input source is set to TV.
✎
To return to the previous step, press the Red button.
Selecting a language
1
Selecting Store Demo
2
or Home Use
Selecting a country
3
Setting the Clock
4
Mode
Selecting an antenna
5
Selecting a channel
6
Enjoy your TV.
7
If You Want to Reset This Feature...
Select System - Plug & Play (Initial Setup). Enter your 4 digit PIN number. The default PIN number is “0-0-0-0”. If you want to
change the PIN number, use the Change PIN function.
You should do Plug & Play (MENU → System) again at home although you did in shop.
✎
If you forget the PIN code, press the remote control buttons in the following sequence in Standby mode, which resets
the PIN to “0-0-0-0”: MUTE → 8 → 2 → 4 → POWER (on).
Press the ▲ or ▼ button, then press the ENTER
Select the desired OSD (On Screen Display) language.
Press the ◄ or ► button, then press the ENTER
Select the Home Use mode. Store Demo mode is for retail
environments.
To return the unit’s settings from Store Demo to Home Use (standard):
Press the volume button on the TV. When the OSD volume is displayed,
press and hold MENU for 5 sec.
Store Demo is only for shop display. If you select it, several functions
are not able to use. Please select Home Use when you watch at home.
Press the ▲ or ▼ button, then press the ENTERE button.
Select the appropriate country.
✎
The option may differ depending on country.
Set the Clock Mode automatically or manually.
Auto: Select the time zone where you are located. (depending on the country)
Manual: Allows you to manually set the current date and time.
Press the ▲ or ▼ button, then press the ENTER
Select the desired broadcasting signal.
Press the ▲ or ▼ button, then press the ENTER
Select the channel source to memorise. When setting the antenna source to Cable, a step
appears allowing you to assign numerical values (channel frequencies) to the channels. For
more information, refer to Channel → Auto Tuning.
✎
Press the ENTERE button at any time to interrupt the memorisation process.
Press the ENTER
E
button.
E
E
E
E
button.
button.
button.
button.
POWER
P
English - 5
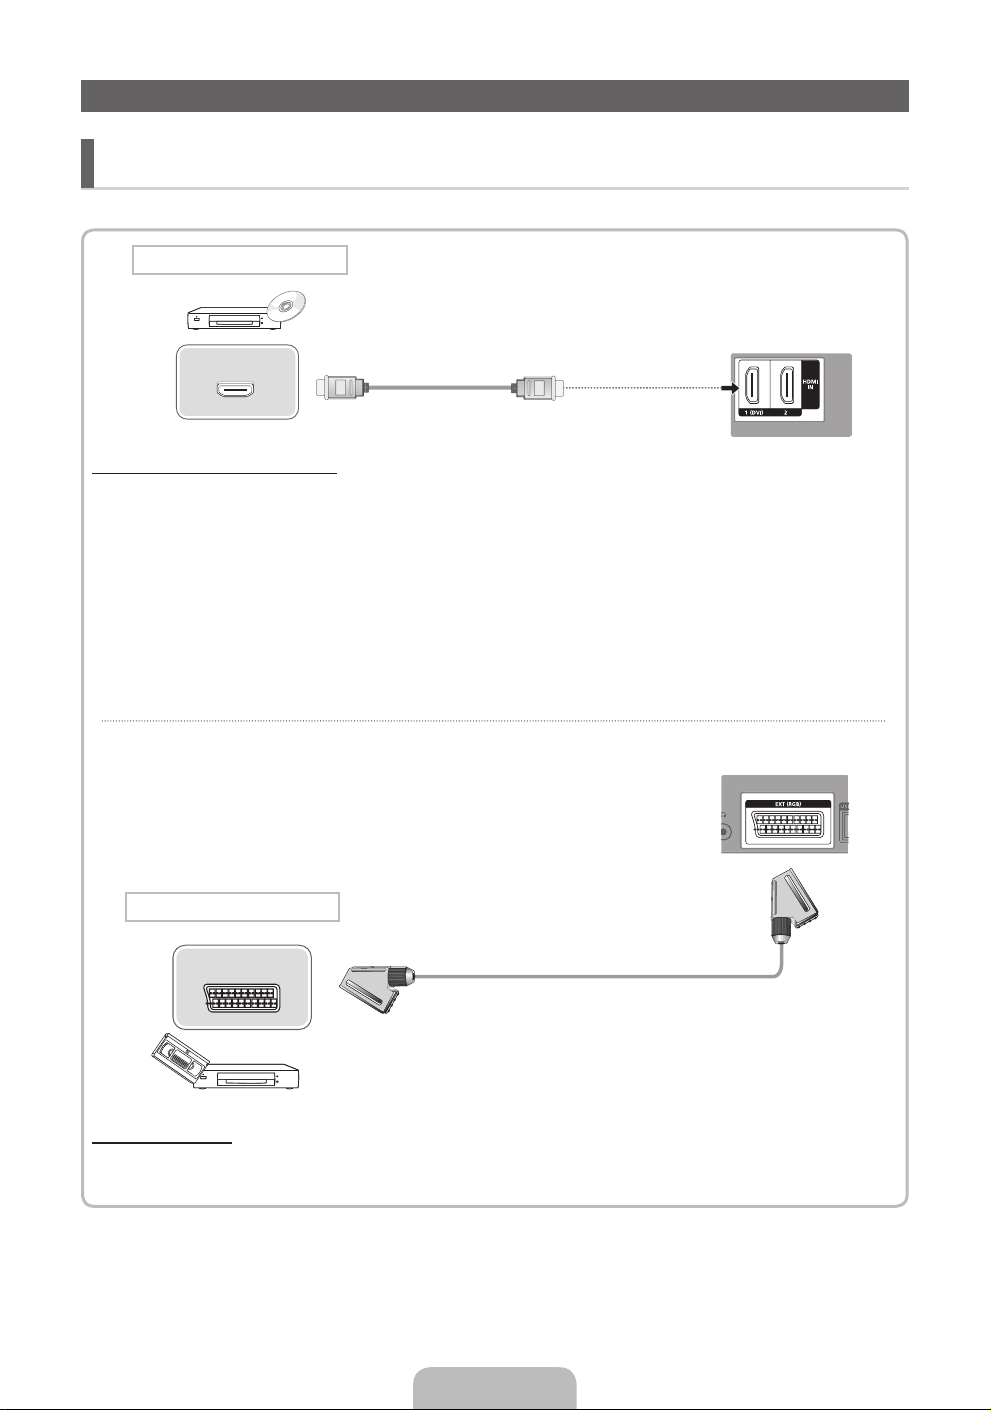
Connecting to an AV devices
¦ Available devices: DVD, Blu-ray player, HD cable box, HD STB (Set-Top-Box) satellite
receiver, VCR, Digital Audio System, Amplifier, DVD Home Theatre, PC
HDMI connection
TV Rear Panel
HDMI OUT
Using an HDMI cable (up to 1080p)
✎
HDMI IN 1(DVI), 2
If an HDMI to DVI cable is connected to the HDMI IN 1(DVI) port, the audio does not work.
x
The picture may not display normally (if at all) or the audio may not work if an external device that uses an older
x
version of HDMI mode is connected to the TV. If such a problem occurs, ask the manufacturer of the external
device about the HDMI version and, if out of date, request an upgrade.
Be sure to purchase a certified HDMI cable. Otherwise, the picture may not display or a connection error may
x
occur.
A basic high-speed HDMI cable or one with ethernet is recommended. This product does not support the
x
ethernet function via HDMI.
SCART connection
EXT
Using a Scart Cable
✎
In Ext. mode, DTV Out supports MPEG SD Video and Audio only.
TV Rear Panel
English - 6

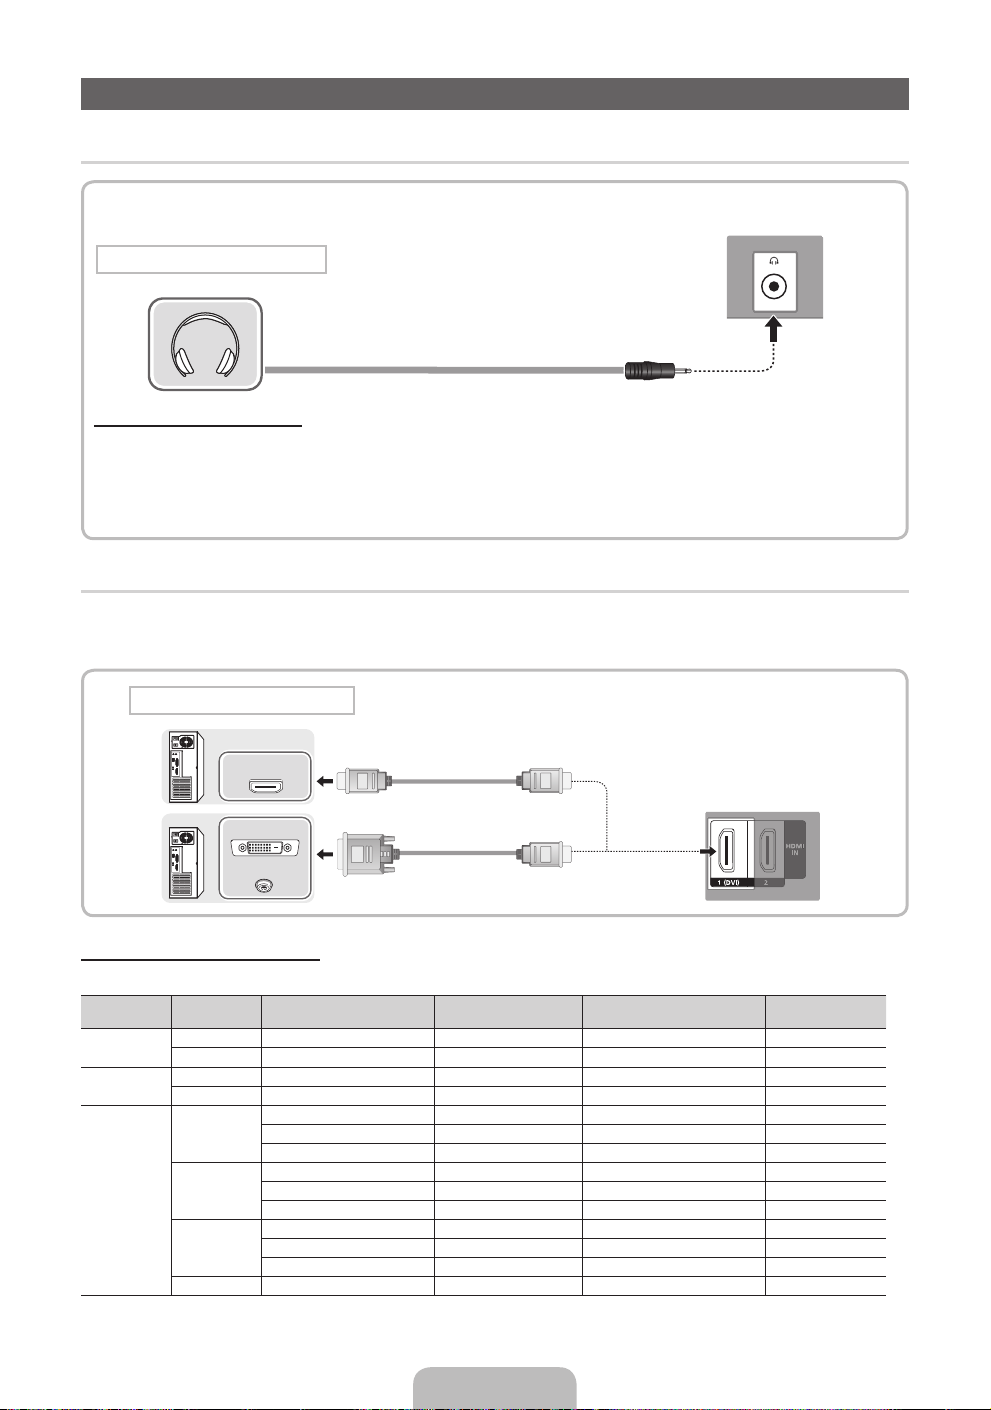
Connecting to a PC and Audio device
¦ Available devices: Headphone
TV Rear Panel
Headphones connection
Using an Headphone Connection
✎
Headphones H: You can connect your headphones to the headphones output on your set. While the headphones
are connected, the sound from the built-in speakers will be disabled.
Sound function may be restricted when connecting headphones to the TV.
x
Headphone volume and TV volume are adjusted separately.
x
¦ Using an HDMI cable or HDMI to DVI Cable
✎
Connecting through the HDMI cable may not be supported depending on the PC.
✎
An HDMI cable supports digital video and audio signals, and does not require an audio cable.
PC connection
HDMI OUT
DVI OUT
AUDIO OUT
Display Modes (HDMI/DVI Input)
LE32D400 / LE32D404 : Optimal resolution is 1360 x 768 @ 60Hz.
Mode Resolution
IBM
MAC
VESA DMT
640 x 350 31.469 70.086 25.175 + / 720 x 400 31.469 70.087 28.322 - / +
640 x 480 35.000 66.667 30.240 - / 832 x 624 49.726 74.551 57.284 - / -
640 x 480
800 x 600
1024 x 768
1360 x 768 47.712 60.015 85.500 + / +
Horizontal Frequency (KHz) Vertical Frequency (Hz) Pixel Clock Frequency (MHz) Sync Polarity (H / V)
31.469 59.940 25.175 - / -
37.861 72.809 31.500 - / -
37.500 75.000 31.500 - / -
37.879 60.317 40.000 + / +
48.077 72.188 50.000 + / +
46.875 75.000 49.500 + / +
48.363 60.004 65.000 - / -
56.476 70.069 75.000 - / -
60.023 75.029 78.750 + / +
TV Rear Panel
English - 7
LE40D504 : Optimal resolution is 1920 X 1080 @ 60 Hz.
Mode Resolution
IBM
MAC
VESA DMT
VESA DMT /
DTV CEA
✎✎
NOTE
For HDMI/DVI cable connection, you must use the HDMI IN 1(DVI) jack.
x
If an HDMI to DVI cable is connected to the HDMI IN 1(DVI) port, the audio does not work.
x
The interlace mode is not supported.
x
The set might operate abnormally if a non-standard video format is selected.
x
PC(D-Sub) input is not supported.
x
640 x 350 31.469 70.086 25.175 +/720 x 400 31.469 70.087 28.322 -/+
640 x 480 35.000 66.667 30.240 -/832 x 624 49.726 74.551 57.284 -/-
1152 x 870 68.681 75.062 100.000 -/-
640 x 480 31.469 59.940 25.175 -/640 x 480 37.861 72.809 31.500 -/640 x 480 37.500 75.000 31.500 -/800 x 600 37.879 60.317 40.000 +/+
800 x 600 48.077 72.188 50.000 +/+
800 x 600 46.875 75.000 49.500 +/+
1024 x 768 48.363 60.004 65.000 -/1024 x 768 56.476 70.069 75.000 -/1024 x 768 60.023 75.029 78.750 +/+
1152 x 864 67.500 75.000 108.000 +/+
1280 x 1024 63.981 60.020 108.000 +/+
1280 x 1024 79.976 75.025 135.000 +/+
1280 x 800 49.702 59.810 83.500 -/+
1280 x 800 62.795 74.934 106.500 -/+
1280 x 960 60.000 60.000 108.000 +/+
1360 x 768 47.712 60.015 85.500 +/+
1440 x 900 55.935 59.887 106.500 -/+
1440 x 900 70.635 74.984 136.750 -/+
1680 x 1050 65.290 59.954 146.250 -/+
1920 x 1080p 67.500 60.000 148.500 +/+
Horizontal Frequency (KHz) Vertical Frequency (Hz) Pixel Clock Frequency (MHz) Sync Polarity (H / V)
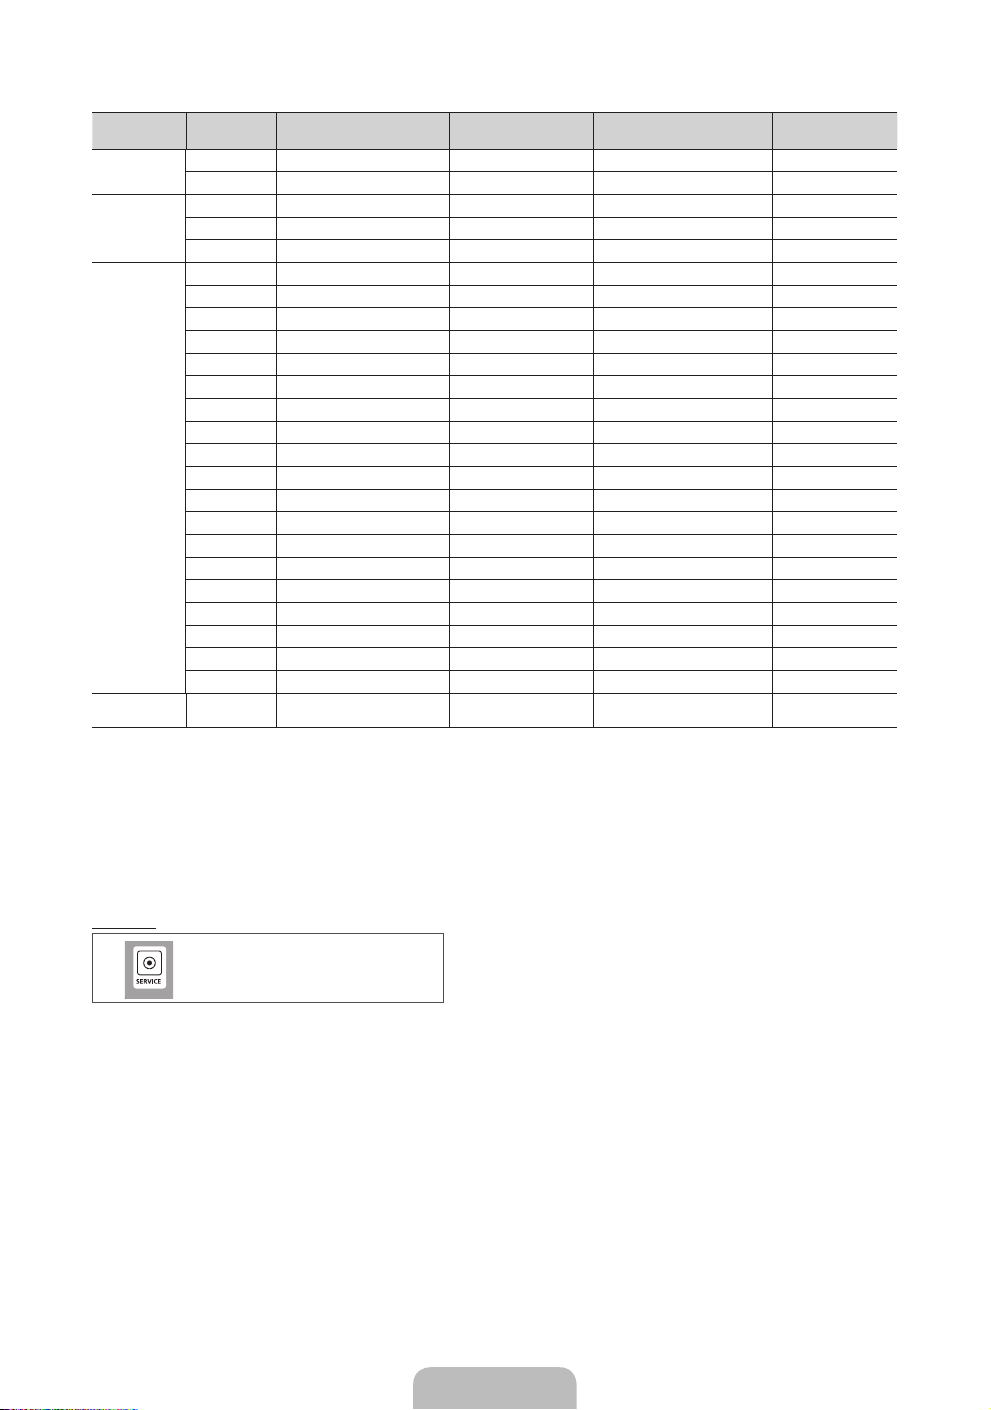
SERVICE
Connector for service only.
English - 8
Changing the Input Source
¦ Source List
Use to select TV or other external input sources such as DVD / Blu-ray players / cable box / STB satellite
receiver connected to the TV.
■ TV / Ext. / HDMI1/DVI / HDMI2 / USB
✎
In the Source List, connected inputs will be highlighted.
✎
PC(D-Sub) input is not supported. If you want to connect PC to the TV, use HDMI1/DVI input.
✎
If you want to see connected devices only, move to Connected using ◄ or ► button.
✎
Ext. always stay activated.
How to use Edit Name
In the Source, press the TOOLS button, and then you can set an external input sources name you want.
■ VCR / DVD / Cable STB / Satellite STB / PVR STB / AV Receiver / Game / Camcorder / PC / DVI PC / DVI Devices / TV /
IPTV / Blu-ray / HD DVD / DMA: Name the device connected to the input jacks to make your input source selection easier.
✎
When connecting a PC to the HDMI IN 1(DVI) port with HDMI cable, you should set the TV to PC mode under Edit
Name.
✎
When connecting a PC to the HDMI IN 1(DVI) port with HDMI to DVI cable, you should set the TV to DVI PC mode under
Edit Name.
✎
When connecting an AV devices to the HDMI IN 1(DVI) port with HDMI to DVI cable, you should set the TV to DVI
Devices mode under Edit Name.
Information
You can see detailed information about the selected external device.
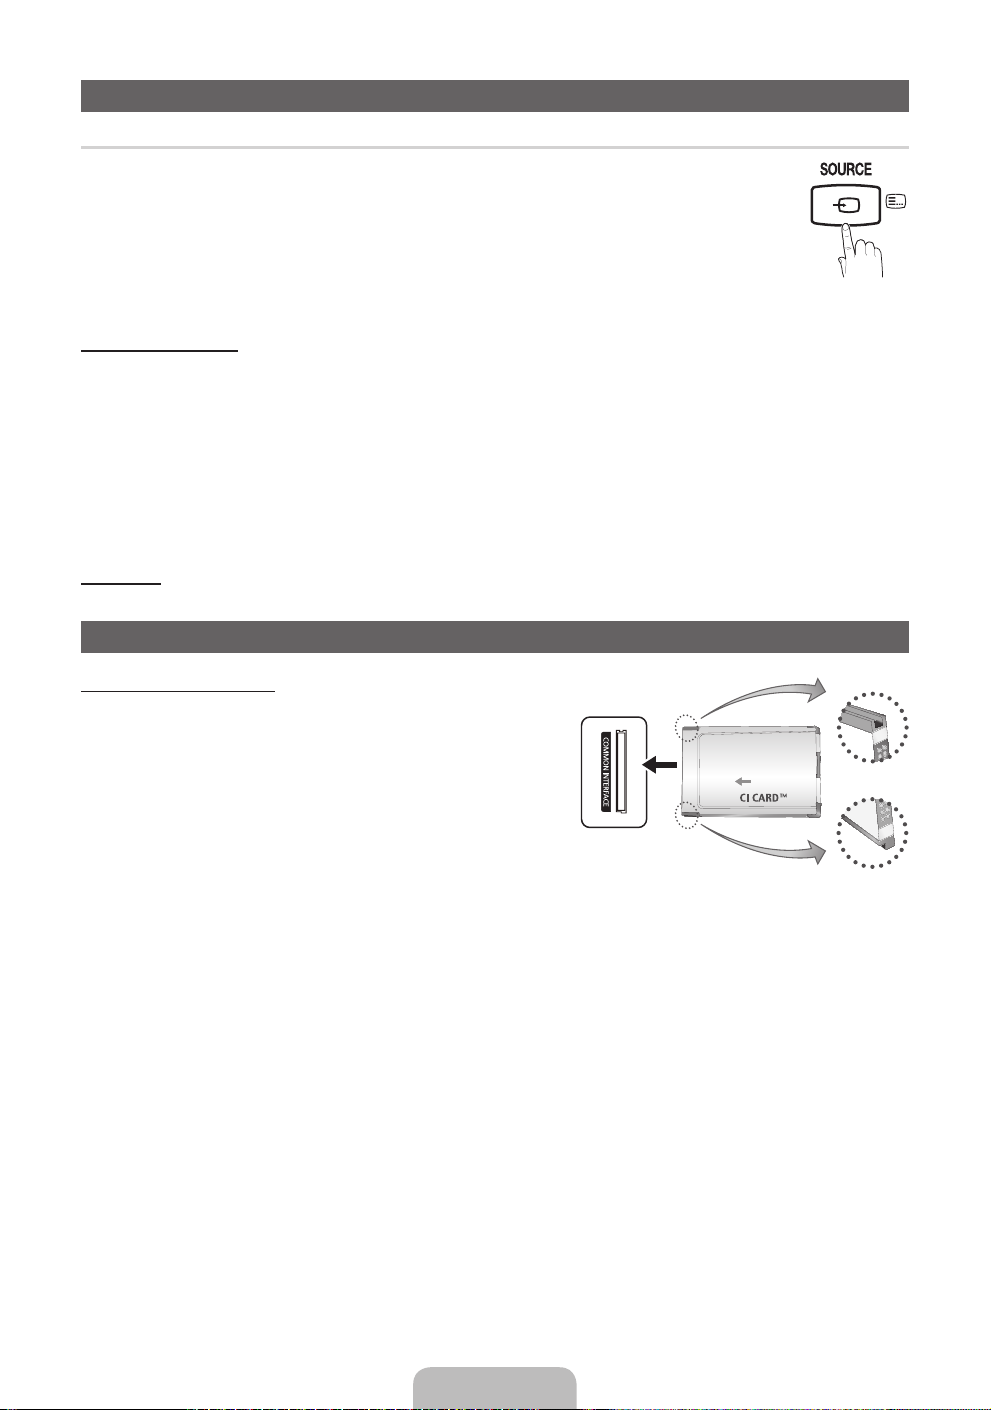
Connecting to a COMMON INTERFACE slot
Using the “CI or CI+ CARD”
To watch paid channels, the “CI or CI+ CARD” must be inserted.
y If you do not insert the “CI or CI+ CARD”, some channels will
display the message “Scrambled Signal”.
y The pairing information containing a telephone number, the “CI or
CI+ CARD” ID the Host ID and other information will be displayed in
about 2~3 minutes. If an error message is displayed, please contact
your service provider.
y When the configuration of channel information has finished, the
message “Updating Completed” is displayed, indicating the channel
list is updated.
✎
NOTE
You must obtain a “CI or CI+ CARD” from a local cable service
x
provider.
When removing the “CI or CI+ CARD”, carefully pull it out with your hands since dropping the “CI or CI+ CARD” may
x
cause damage to it.
Insert the “CI or CI+ CARD” in the direction marked on the card.
x
The location of the COMMON INTERFACE slot may be different depending on the model.
x
“CI or CI+ CARD” is not supported in some countries and regions; check with your authorized dealer.
x
If you have any problems, please contact a service provider.
x
Insert the “CI or CI+ CARD” that supports the current antenna settings. The screen will be distorted or will not be seen.
x
y The image may differ depending on the model.
English - 9

How to use the e-Manual
E-MANUAL
Screen Display
1
You can fi nd instructions about your TV’s features in the e-Manual in your TV. To
use, press the E-MANUAL button on your remote. Move the cursor using the up/
down/right/left buttons to highlight a category, then a topic, and then press the
ENTERE button. The e-Manual displays the page you want to see.
You can also access it through the menu:
MENUm → Support → e-Manual → ENTER
O
✎
To return to the e-Manual main menu, press the E-MANUAL button on the remote.
✎
You cannot use Try Now directly if the TV is set to an external input source.
1 Currently displayed video, TV programme, etc.
2 The category list. Press ◄ or ► button to select
Basic Features
Changing the Preset Picture Mode
Adjusting Picture Settings
Changing the Picture Options
Changing the Preset Sound Mode
Adjusting Sound Settings
}
Index E Enter e Exit
4 5 6
2
3
category you want.
3 Displays the sub-menu list. Use the arrow buttons on
your remote to move the cursor. Press ENTER
button to select the sub-menu you want.
4 } Blue (Index): Displays the index screen.
5 E Enter: Selects a category or sub-menu.
6 e Exit: Exit the e-Manual.
E
E
How to toggle between an e-Manual topic and the corresponding OSD menu(s).
Basic Features > Changing the Preset Picture Mode (1/1)
a Try Now
E-MANUAL
a
Try Now b Home { Zoom } Index L Page e Exit
✎
This function is not enabled in some menus.
Method 1 Method 2
1. If you want to use the menu that corresponds to an
e-Manual topic, press the red button to select Try Now.
2. To return to the e-Manual screen, press the E-MANUAL
button.
1. Press the ENTER
“Are you sure?” appears. Select Yes, and then press the
ENTERE button. The OSD window appears.
2. To return to the e-Manual screen, press the E-MANUAL
button.
English - 10
Picture
Picture Mode : Standard ►
Backlight : 7
Contrast : 95
Brightness : 45
Sharpness : 50
Colour : 50
Tint (G/R) : G50/R50
Screen Adjustment
E
button when a topic is displayed.

Viewing the Contents
Basic Features > Changing the Preset Picture Mode (1/1)
a
Try Now b Home { Zoom } Index L Page e Exit
2 3 4 5
Using the Zoom mode
U
Move
R
Return
1 Contents Area: Contains the topic contents, if you
selected a sub-menu. To move previous or next
page, press the ◄ / ► button.
2 Try Now: Displays the OSD menu that corresponds
1
to the topic. To return to the e-Manual screen, press
the E-MANUAL button.
3 Home: Moves to the e-Manual home screen.
4 Zoom: Magnifies a screen. You can scroll through the
magnified screen by using ▲ / ▼ buttons.
5 L (Page): Moves to previous or next page.
Select the Zoom, and then press ENTERE to magnify
the screen. You can scroll through the magnified screen
by using the ▲ or ▼ buttons.
✎
To return to the screen to normal size, press the
RETURN button.
How to search for a topic on the index page
✎
This function may not be supported depending on the language.
1. If you want to search a keyword, press the blue button to select Index.
2. Press the ◄ or ► button to select a character order you want.
3. Press the ▲ or ▼ button to select a keyword you want to see, and then press the ENTER
4. You can view the corresponding e-Manual instruction screen.
✎
To close the Index screen, press the RETURN button.
E
button.
English - 11

Installing the Wall Mount
The wall mount kit (sold separately) allows you to mount the TV on the wall.
For detailed information on installing the wall mount, see the instructions provided with the wall mount. Contact a technician for
assistance when installing the wall mount bracket.
Samsung Electronics is not responsible for any damage to the product or injury to yourself or others if you elect to install the
TV on your own.
Assembling the Guide Stand (32 inches or above)
When installing the TV onto a wall, attach the Guide Stand as
shown.
✎
Use only the Guide Stand provided as an accessory.
(The Guide Stand may differ depending on the model.)
Guide Stand
Wall Mount Kit Specifications (VESA)
✎
Wall mount kit is not supplied but sold separately.
Install your wall mount on a solid wall perpendicular to the floor. When attaching to other building materials, please contact
your nearest dealer. If installed on a ceiling or slanted wall, it may fall and result in severe personal injury.
✎
NOTE
Standard dimensions for wall mount kits are shown in the table below.
x
When purchasing our wall mount kit, a detailed installation manual and all parts necessary for assembly are provided.
x
Do not use screws that do not comply with the VESA standard screw specifications.
x
Do not use screws longer than the standard dimension, as they may cause damage to the inside of the TV set.
x
For wall mounts that do not comply with the VESA standard screw specifications, the length of the screws may differ
x
depending on their specifications.
Do not fasten the screws too strongly, this may damage the product or cause the product to fall, leading to personal
x
injury. Samsung is not liable for these kinds of accidents.
Samsung is not liable for product damage or personal injury when a non-VESA or non-specified wall mount is used or
x
the consumer fails to follow the product installation instructions.
Do not exceed 15 degrees tilt when mounting this TV.
x
Product
Family
LCD-TV
inches VESA Spec. (A * B)
19~22 75 X 75
26 200 X 100
32~40 200 X 200 M6
46 400 X 400 M8
Do not install your Wall Mount Kit while your TV is turned on. It may result in personal injury due to electric
shock.
Standard
Screw
M4
Quantity
4
English - 12

Troubleshooting
If the TV seems to have a problem, first try this list of possible problems and solutions. If none of these troubleshooting tips
apply, visit “www.samsung.com”, then click on Support, or call Samsung customer service centre.
Issues Solutions and Explanations
The TV will not turn on. • Make sure the AC power cord is securely plugged in to the wall outlet and the TV.
There is no picture/video. • Check cable connections (remove and reconnect all cables connected to the TV and
The remote control does not work. • Replace the remote control batteries with the poles (+/–) in the right direction.
The cable/set top box remote control
doesn’t turn the TV on or off, or
adjust the volume.
✎
You can keep your TV as optimum condition to upgrade the latest firmware on web site (samsung.com -> Support ->
Downloads) by USB.
✎
This TFT LCD panel uses a panel consisting of sub pixels which require sophisticated technology to produce. However,
there may be a few bright or dark pixels on the screen. These pixels will have no impact on the performance of the
product.
• Make sure the wall outlet is working.
• Try pressing the POWER button on the TV to make sure the problem is not the remote. If
the TV turns on, refer to “Remote control does not work” below.
external devices).
• Set your external device’s (Cable/Set top box, DVD, Blu-ray etc) video outputs to match
the connections to the TV input. For example, if an external device’s output is HDMI, it
should be connected to an HDMI input on the TV.
• Make sure your connected devices are powered on.
• Be sure to select the TV’s correct source by pressing the SOURCE button on the remote
control.
• Reboot the connected device by reconnecting the device’s power cable.
• Clean the sensor’s transmission window on the remote.
• Try pointing the remote directly at the TV from 5~6 feet away.
• Programme the Cable/Set top box remote control to operate the TV. Refer to the Cable/
Set top box user manual for the SAMSUNG TV code.
Licence
List of Features
Excellent Digital Interface & Networking: With a built-in HD digital tuner, nonsubscription HD broadcasts can be viewed without
a cable box / STB (Set-Top-Box) satellite receiver.
English - 13
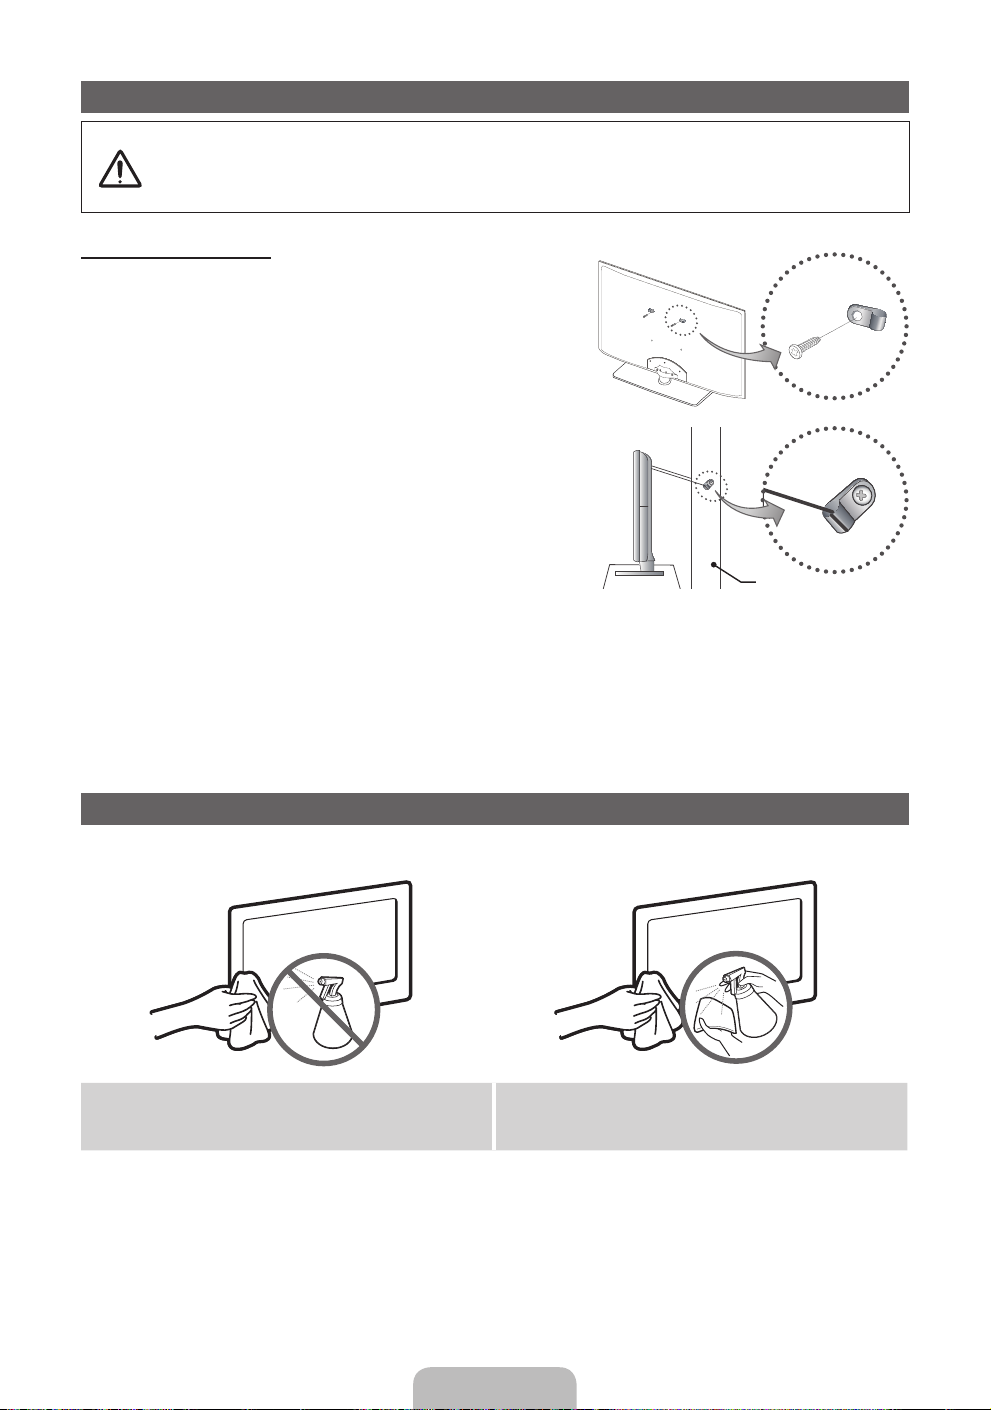
Securing the TV to the Wall
Caution: Pulling, pushing, or climbing onto the TV may cause the TV to fall. In particular, ensure that your
children do not hang over or destabilize the TV; doing so may cause the TV to tip over, resulting in serious
injuries or death. Follow all safety precautions provided on the included Safety Flyer. For added stability, install
the anti-fall device for safety purposes, as follows.
To avoid the TV from falling
1. Put the screws into the clamps and firmly fasten them onto the
wall. Confirm that the screws have been firmly installed onto the
wall.
✎
You may need additional material such as an anchor
depending on the type of wall.
✎
Since the necessary clamps, screws, and string are not
supplied, please purchase these additionally.
2. Remove the screws from the centre back of the TV, put the
screws into the clamps, and then fasten the screws onto the TV
again.
✎
Screws may not be supplied with the product. In this case,
please purchase the screws of the following specifications.
✎
Screw Specifications
For a 32 ~ 40 inch TV: M6
x
3. Connect the clamps fixed onto the TV and the clamps fixed onto
the wall with a strong string and then tie the string tightly.
✎
NOTE
Install the TV near to the wall so that it does not fall backwards.
x
It is safe to connect the string so that the clamps fixed on the wall are equal to or lower than the clamps fixed on
x
the TV.
Untie the string before moving the TV.
x
4. Verify all connections are properly secured. Periodically check connections for any sign of fatigue for failure. If you have any
doubt about the security of your connections, contact a professional installer.
Wall
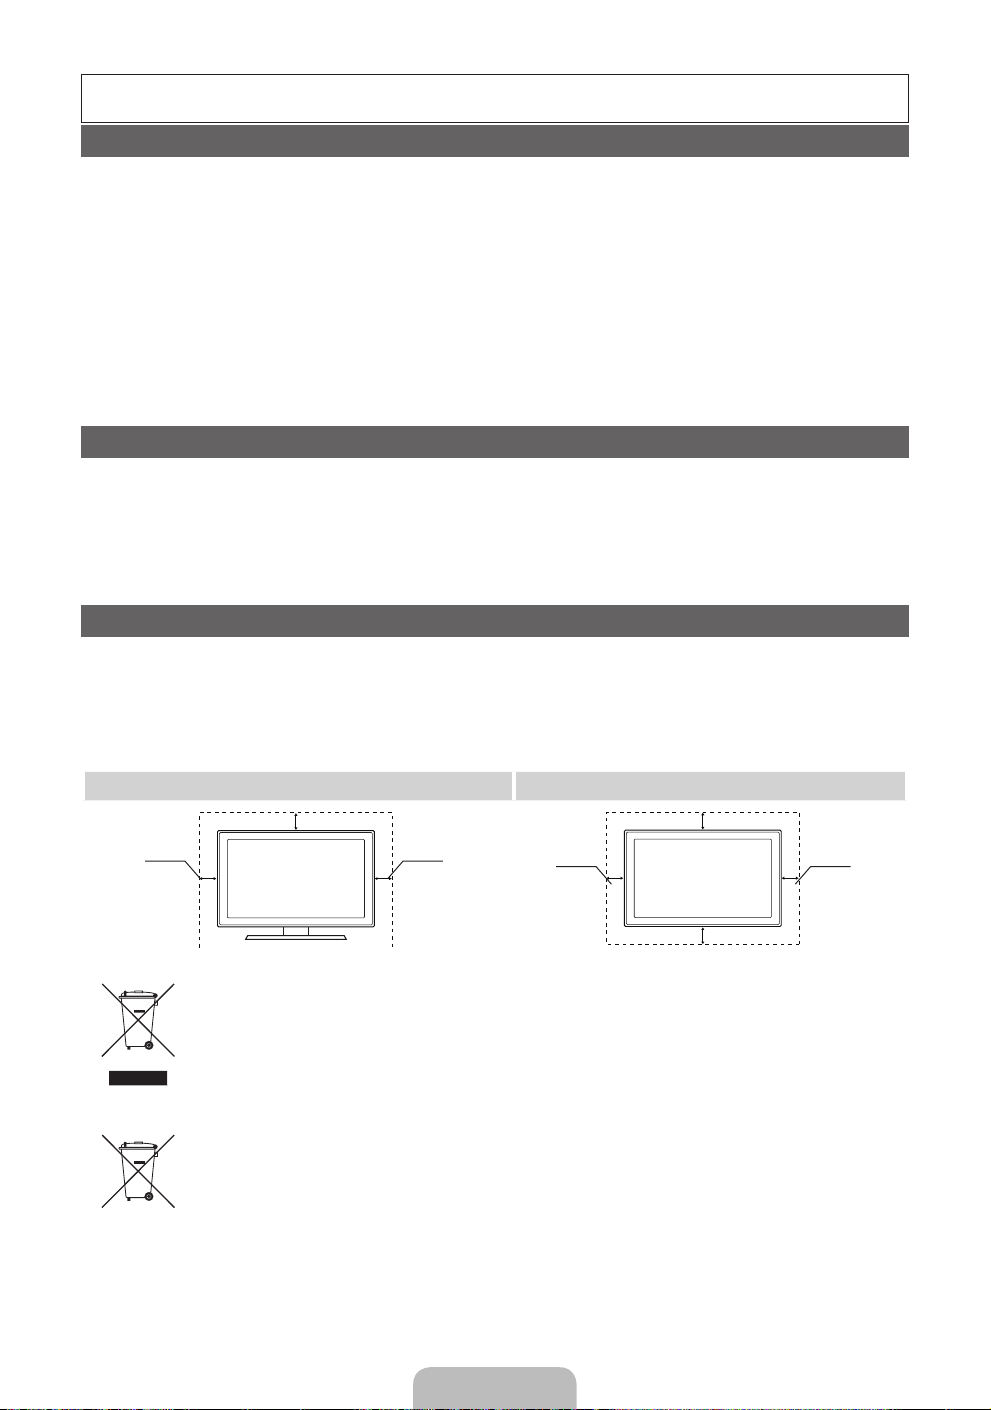
Storage and Maintenance
✎
If you remove the attached sticker on the TV screen, clean the residues and then watch TV.
Do not spray water or a cleaning agent directly onto the
product. Any liquid that goes into the product may cause a
failure, fire, or electric shock.
Clean the product with a soft cloth dapped in a small amount
of water.
English - 14

Specifications
Environmental Considerations
Operating Temperature
Operating Humidity
Storage Temperature
Storage Humidity
TV System
Colour/Video System
Sound System BG, DK, L, NICAM, MPEG1, DD, DD+, HEAAC
HDMI IN
Model Name LE32D400E1W LE32D404E2W
Display Resolution 1360 x 768
Screen Size 32 inches 32 inches
Sound
(Output) 10 W X 2
Dimensions (WxDxH)
Body
With stand
Weight
Without Stand
With Stand
Model Name LE40D504F7W
Display Resolution 1920 x 1080
Screen Size 40 inches
Sound
(Output) 10 W X 2
Dimensions (WxDxH)
Body
With stand
Weight
Without Stand
With Stand
Analogue: B/G, D/K, L, I (Depending on your country selection)
Analogue: PAL, SECAM, NTSC-4.43, NTSC-3.58, PAL60
Digital: MPEG-2 MP@ML, MPEG-4, H.264/AVC MP@L3, MP@L4.0, HP@L4.0
Video: 1080 24p, 1080p, 1080i, 720p, 576p, 480p
Audio: 2Ch Linear PCM 32/44.1/48kHz, 16/20/24bits.
784.4 X 88.8 X 502.9 (mm)
784.4 X 182.4 X 545.3 (mm)
8.1 kg
9.2 kg
10°C to 40°C (50°F to 104°F)
10% to 80%, non-condensing
-20°C to 45°C (-4°F to 113°F)
5% to 95%, non-condensing
Digital: DVB-T/DVB-C
784.4 X 98.1 X 502.9 (mm)
784.4 X 182.4 X 545.3 (mm)
7.7 kg
8.7 kg
970.0 X 98.1 X 586.6 (mm)
970.0 X 206.9 X 629.1 (mm)
11.6 kg
13.3 kg
✎
Design and specifications are subject to change without prior notice.
✎
For information about power supply, and more about power consumption, refer to the label attached to the product.
English - 15
Mer information om hur du använder e-Manual (sid.10)
Siffror och bilder i den här bruksanvisningen är endast för referens och kan skilja sig från den verkliga produkten.
Produktdesign och -specifikationer kan ändras utan föregående meddelande.
Viktig garantiinformation om visningsformat
1. Funktionalitet som är relaterat till Digital TV(DVB) är endast tillgängligt i länder/områden där DVB-T (MPEG2 och MPEG4 AVC) digitala
signaler sänds eller där du har åtkomst till en kompatibel DVB-C(MPEG2 och MPEG4 AAC) kabel-tv-tjänst. Kontakta din lokala återförsäljare
angående möjligheten att ta emot DVB-T- eller DVB-C-signal.
2. DVB-T är DVB EU-konsortiumstandard för sändningen av digital, satellit-tv och DVB-C är sändning av TV via kabel. Vissa differentierade funktioner
som EPG (Electric Programme Guide), VOD (Video On Demand) etc. är inte inkluderade i den här specifikationen. De fungerar inte just nu.
3. Även om den här TV:n uppfyller de senaste standarderna för DVB-T och DVB-C [augusti, 2008] kan inte framtida kompatibilitet med DVB-T
digital markbunden sändning och DVB-C digitalkabelsändning garanteras.
4. Beroende på vilket land/område som TV:n används i kan vissa kabel-tv-leverantörer ta extra avgifter för en sådan tjänst och du kanske måste
ingå ett avtal med företaget.
5. Vissa digital-TV-funktioner kanske inte är tillgängliga i vissa länder eller regioner och DVB-C kanske inte fungerar som de ska med alla kabeltv-leverantörer.
6. För ytterligare information, kontakta ditt lokala kundcenter för Samsung.
TV:ns mottagningskvalitet kan variera beroende på olika sändningssätt i olika länder. Kontrollera TV:ns prestanda hos din lokala
✎
SAMSUNG-auktoriserade återförsäljare eller hos Samsungs kundcenter för att se om den kan förbättras genom att omkonfigurera TVinställningarna.
Stillbildsvarning
Undvik att visa stillbilder (t.ex. jpeg-filer) eller andra objekt som ligger stilla på skärmen (t.ex. programlogotyper, bilformat med panorama eller
4:3, eller aktieinformation längst ner på skärmen). Om stillbilder visas för länge kan det orsaka spökbilder på LCD-skärmen och det kan påverka
bildkvaliteten. För att minska risken för detta ska du följa rekommendationerna nedan:
• Titta inte på samma TV-kanal under längre perioder.
• Försök alltid att visa en bild i helskärm, använd TV:ns inställning för bildformat för bästa möjliga matchning.
• Minska värdena för ljusstyrka och kontrast till minimikravet för att få önskad bildkvalitet, överdrivet höga värden kan skynda på
brännprocessen.
• Använd de TV-funktioner som utformade speciellt för att minska bild- och skärmbränning, mer information finns i bruksanvisningen.
Säkra installationsutrymmet
Se till att hålla angivet avstånd mellan produkten och andra föremål (t.ex. väggar) för att ventilationen ska vara tillräcklig.
Om detta inte följs kan det orsaka brand eller produktproblem på grund av för hög inre temperatur i produkten.
När du använder ett stativ eller ett väggstativ ska du endast använda delar som tillhandahålls av Samsung Electronics.
✎
• Om du använder delar från en annan tillverkare kan det orsaka problem med produkten eller skador på grund av att produkten faller.
Utseendet kan skilja sig beroende på produkt.
✎
Var försiktig när du tar i TV:n, eftersom vissa delar kan vara heta.
✎
Installation med stativ. Installation med väggfäste.
10 cm
10 cm10 cm
Korrekt avfallshantering av produkten (Elektriskt och elektroniskt avfall)
(Gäller i Europeiska unionen och andra länder i Europa med separata insamlingssystem)
Märkningen på produkten, tillbehören eller dokumentationen anger att produkten och dess elektroniska tillbehör (t.ex. laddare,
headset, USB-kabel) inte får slängas i hushållssoporna vid livsslut. För att förhindra skada på miljön eller den mänskliga hälsan
är det viktigt att sortera utrustningen från andra typer av avfall. Hemmaanvändare skall antingen kontakta sin återförsäljare, eller
den lokala renhållningsmyndigheten för att få information om hur och var de kan göra sig av med produkten på ett säkert sätt.
Företagsanvändare skall kontakta sina leverantörer och kontrollera vilka regler som anges på köpekontraktet. Den här produkten och
dess elektroniska tillbehör får inte blandas med andra kommersiella avfallstyper.
Korrekt avfallshantering av batterierna i produkten
(Gäller i Europeiska unionen och andra länder i Europa med separata batteriinsamlingssystem)
Märkningen på batteriet, bruksanvisningen eller förpackningen anger att batteriet i den här produkten inte får slängas bland
hushållssoporna vid livsslut. Om märkning med de kemiska symbolerna Hg, Cd eller Pb finns anger det att batteriet innehåller
kvicksilver, kadmium eller bly som överskrider referensnivåerna enligt EU-direktivet 2006/66. Om batterierna inte avfallshanteras på
rätt sätt kan de orsaka skador på miljön och på den mänskliga hälsan. För att skydda våra naturresurser och främja återvinning ska
batterierna lämnas till det lokala batteriinsamlingssystemet.
10 cm
10 cm
10 cm
10 cm
Svenska -2

Tillbehör
✎
Försäkra dig om att följande delar följer med din TV. Kontakta din återförsäljare om det saknas något.
✎
Produktens färg och form kan variera beroende på modell.
y Fjärrkontroll och batterier (AAA x 2)
y Bruksanvisning
y Garantibevis / Säkerhetsmanual (inte tillgänglig på alla platser)
✎
En administrationsavgift kan tillkomma om
(a) En tekniker tillkallas och det inte är något fel på produkten.
(t.ex. om du inte har läst den här bruksanvisningen).
(b) Du tar med produkten till ett reparationscenter och det inte finns något fel på produkten.
(t.ex. om du inte har läst den här bruksanvisningen).
✎
Beloppet på en sådan administrationsavgift informeras före arbetet sker eller hembesöket görs.
y Strömsladd
y Rengöringstrasa
Visa kontrollpanelen
✎
Produktens färg och form kan variera beroende på modell.
Kontrollpanelen
Mottagare för fjärrkontrollen Rikta fjärrkontrollen mot den här punkten på TV:n.
Strömindikator Blinkar och stängs av när strömmen är på och tänds i standbyläge.
SOURCE
MENU Visar skämmeny, OSD (on screen display=skärmspråk) med TV:ns funktioner.
Y
z
P
Standbyläge
Låt inte TV:n vara i standbyläget under en längre tid (t.ex. när du är på semester). Apparaten drar ström även när
strömknappen är avstängd. Det bästa är att dra ur strömsladden.
E
(Power)
Växlar mellan alla tillgängliga ingångskällor. På skärmmenyn används den här knappen
när du använder ENTERE på fjärrkontrollen.
Justerar volymen. I OSD använder du knapparna
knapparna ◄ och ► på fjärrkontrollen.
Byter kanal. I OSD använder du knapparna
▼ och ▲ på fjärrkontrollen.
Slår på och stänger av TV:n
Y
z
som du använder
som du använder knapparna
Svenska -3

Översikt över fjärrkontrollen
Slår på och stänger av TV:n
Tryck för direkt åtkomst till kanalerna.
Alternativt väljer du text-tv PÅ, dubbel,
mix eller AV.
Justerar volymen.
Visar skärmmenyn.
Visar Mitt innehåll, Titta på TV och Källa.
Välj enkelt funktioner som används ofta.
Väljer menyalternativ på skärmen och
ändrar de värden som visas på menyn.
Återgår till föregående meny.
Knappar som används i Kanallista,
Kanalhantering, Mitt innehåll etc.
CONTENT
A B C D
P.SIZE
E-MANUAL
AD/SUBT.
Visar och väljer tillgängliga videokällor.
Går tillbaka till föregående kanal.
Stänger av ljudet tillfälligt.
Byter kanal.
Visar kanallistan på skärmen.
Visar EPG-information (Elektronisk
programguide).
Visar information på TV-skärmen.
Stänger menyn.
E-MANUAL: Visar e-Manual-guiden.
P.SIZE: Väljer Bildstorlek.
AD/ SUBT.: Val av ljudbeskrivning. (Ej
tillgängligt överallt) / Visar
digital undertext.
Sätta i batterier (batteristorlek: AAA)
Svenska -4
Ansluta till en antenn
När TV:n slås på för första gången visas grundinställningar automatiskt.
✎
Förinställning: Ansluta ström och antenn.
TV-apparatens baksida
Kabel
✎
Positionen för ingående
strömporten kan variera beroende
på modell.
✎
Utrustning som är kopplad till skyddsjord via jordat vägguttag och/eller via annan utrustning och samtidigt är kopplad
till kabel-TV nät kan i vissa fall medfőra risk főr brand.
eller
VHF/UHF-antenn
Plug & Play (initial inställning)
När TV:n slås på första gången visas en sekvens med uppmaningar på skärmen som hjälper dig att konfigurera
grundinställningarna. Tryck på knappen POWERP. Plug & Play är endast tillgänglig när källan ingångar är inställd på TV:n.
✎
Tryck på den röda knappen för att återgå till föregående steg.
Välja språk
1
Välja Butiksdemo eller
2
Hemmabruk
Välja land
3
Ställa in Klockläge
4
Välja antenn
5
Välja kanal
6
Njut av TV-tittandet!
7
Om du vill återställa denna funktion ...
Välj System - Plug & Play (initial inställning). Ange din 4-siffriga PIN-kod. Standard-PIN-koden är ”0-0-0-0”. Om du vill ändra
PIN-koden använder du funktionen Ändra PIN.
Du ska göra Plug & Play ((MENU → System) igen hemma även om du gjorde det i butiken.
✎
Om du har glömt PIN-numret trycker du på fjärrkontrollens knappar i följande ordning, vilket återställer PIN-numret till
”0-0-0-0”: MUTE → 8 → 2 → 4 → POWER (på).
Tryck på knappen ▲ eller ▼ och sedan på knappen ENTERE.
Välj önskat skärmspråk (OSD-språk).
Tryck på knappen ◄ eller ► och sedan på knappen ENTERE.
Välj läget Hemmabruk. Läget Butiksdemo är avsett för återförsäljarmiljöer.
Återställ enhetens inställningar från Butiksdemo till Hemmabruk (standard):
Tryck på volymknappen på TV:n. När skärmmenyn för volym visas trycker du
och håller ned knappen MENU i 5 sekunder.
Butiksdemo är bara tillgängligt för butiksvisning. Om du väljer det går flera
av funktionerna inte att använda. Välj Hemmabruk när du tittar hemma.
Tryck på knappen ▲ eller ▼ och sedan på knappen ENTERE.
Välj land.
✎
Alternativet kan variera beroende på land.
Ställ in Klockläge automatiskt eller manuellt.
Auto: Välj tidszonen där du befinner dig. (landsberoende)
Manuellt: Gör det möjligt för dig att välja aktuellt datum och tid.
Tryck på knappen ▲ eller ▼ och sedan på knappen ENTERE.
Välj önskad sändningssignal.
Tryck på knappen ▲ eller ▼ och sedan på knappen ENTERE.
Välj kanalkälla för memorering. Om du ställer in antennkällan som Kabel visas ett steg där du
kan tilldela kanalerna numeriska värden (kanalfrekvenser). För mer information, se Kanal →
Autoinställning.
✎
Tryck på ENTERE när som helst för att avbryta lagringsprocessen.
Tryck på knappen ENTERE.
POWER
P
Svenska -5

Ansluta till en AV-enhet
¦ Tillgängliga enheter: DVD, Blu-ray-spelare, HD-kabelbox, HD STB (digital-TV-box)
satellitmottagare, video, digitalt ljudsystem, förstärkare, DVD-hemmabio, dator
HDMI-anslutning
TV-apparatens baksida
HDMI OUT
Använda en HDMI-kabel (upp till 1080p)
✎
HDMI IN 1(DVI), 2
Om en HDMI till DVI-kabel ansluts till porten HDMI IN 1 (DVI) kanske ljudet inte fungerar.
x
Bilden kanske inte visas normalt (om den visas alls) eller så kanske inte ljudet fungerar om en extern enhet med
x
en äldre version av HDMI-läget ansluts till TV:n. Om detta problem uppstår ska du kontakta den externa enhetens
tillverkare och höra om det går att uppgradera HDMI-versionen.
Se till att du köper en certifierad HDMI-kabel. Annars kanske inte bilden visas eller så kan det inträffa ett
x
anslutningsfel.
En grund-höghastighets HDMI-kabel eller en med ethernet rekommenderas. Den här produkten stöder inte
x
ethernet-funktion via HDMI.
SCART-anslutning
EXT
Använda en scartkabel
✎
Ext.-läge stöder DTV Out endast MPEG SD Video och Audio.
TV-apparatens baksida
Svenska -6
Ansluta till en dator- och ljudenhet
¦ Tillgängliga enheter: Hörlurar
TV-apparatens baksida
Hörlurarslutning
Använda en hörlursanslutning
✎
Hörlurar H: Du kan ansluta hörlurarna till hörlursuttaget på setet. När hörlurar är anslutna kopplas ljudet från de
inbyggda högtalarna bort.
Ljudfunktionen kan vara begränsad vid anslutning av hörlurar till TV:n.
x
Volymen i hörlurarna och TV-volymen justeras på olika sätt.
x
¦ Använda en HDMI- eller en HDMI- till DVI-kabel
✎
Anslutning genom HDMI-kabeln kanske inte stöds beroende på datorn.
✎
En HDMI-kabel stöder digitala video- och ljudsignaler, därför krävs ingen ljudkabel.
PC-anslutning
HDMI OUT
DVI OUT
AUDIO OUT
Visningslägen (HDMI-/DVI-ingång)
LE32D400 / LE32D404 : Optimal upplösning är 1360 X 768 @ 60Hz.
Läge Upplösning
IBM
MAC
VESA DMT
640 x 350 31,469 70,086 25,175 + / 720 x 400 31,469 70,087 28,322 - / +
640 x 480 35,000 66,667 30,240 - / 832 x 624 49,726 74,551 57,284 - / -
640 x 480
800 x 600
1024 x 768
1360 x 768 47,712 60,015 85,500 + / +
Horisontal frekvens (kHz) Vertikal frekvens (Hz) Pixlar, klockhastighet (MHz) Synkpolaritet (H/V)
31,469 59,940 25,175 - / 37,861 72,809 31,500 - / 37,500 75,000 31,500 - / 37,879 60,317 40,000 + / +
48,077 72,188 50,000 + / +
46,875 75,000 49,500 + / +
48,363 60,004 65,000 - / 56,476 70,069 75,000 - / 60,023 75,029 78,750 + / +
TV-apparatens baksida
Svenska -7

LE40D504 : Optimal upplösning är 1920 X 1080 @ 60 Hz.
Läge Upplösning
IBM
MAC
VESA DMT
VESA DMT/DTV
CEA
✎✎
OBS!
Vid en HDMI-/DVI-kabelanslutning måste du använda HDMI IN 1(DVI)-uttaget.
x
Om en HDMI till DVI-kabel ansluts till porten HDMI IN 1 (DVI) kanske ljudet inte fungerar.
x
Läget för radsprång kan inte användas.
x
Om ett videoformat som inte är standard väljs, kan det hända att enheten inte fungerar som den ska.
x
PC-ingång (D-Sub) stöds inte.
x
640 x 350 31,469 70,086 25,175 +/720 x 400 31,469 70,087 28,322 -/+
640 x 480 35,000 66,667 30,240 -/832 x 624 49,726 74,551 57,284 -/-
1152 x 870 68,681 75,062 100,000 -/-
640 x 480 31,469 59,940 25,175 -/640 x 480 37,861 72,809 31,500 -/640 x 480 37,500 75,000 31,500 -/800 x 600 37,879 60,317 40,000 +/+
800 x 600 48,077 72,188 50,000 +/+
800 x 600 46,875 75,000 49,500 +/+
1024 x 768 48,363 60,004 65,000 -/1024 x 768 56,476 70,069 75,000 -/1024 x 768 60,023 75,029 78,750 +/+
1152 x 864 67,500 75,000 108,000 +/+
1280 x 1024 63,981 60,020 108,000 +/+
1280 x 1024 79,976 75,025 135,000 +/+
1280 x 800 49,702 59,810 83,500 -/+
1280 x 800 62,795 74,934 106,500 -/+
1280 x 960 60,000 60,000 108,000 +/+
1360 x 768 47,712 60,015 85,500 +/+
1440 x 900 55,935 59,887 106,500 -/+
1440 x 900 70,635 74,984 136,750 -/+
1680 x 1050 65,290 59,954 146,250 -/+
1920 x 1080p 67,500 60,000 148,500 +/+
Horisontal frekvens (kHz) Vertikal frekvens (Hz) Pixlar, klockhastighet (MHz) Synkpolaritet (H/V)
SERVICE
Anslutning enbart för service
Svenska -8
 Loading...