

Samsung E1195 Disassembly Reassembly
Level
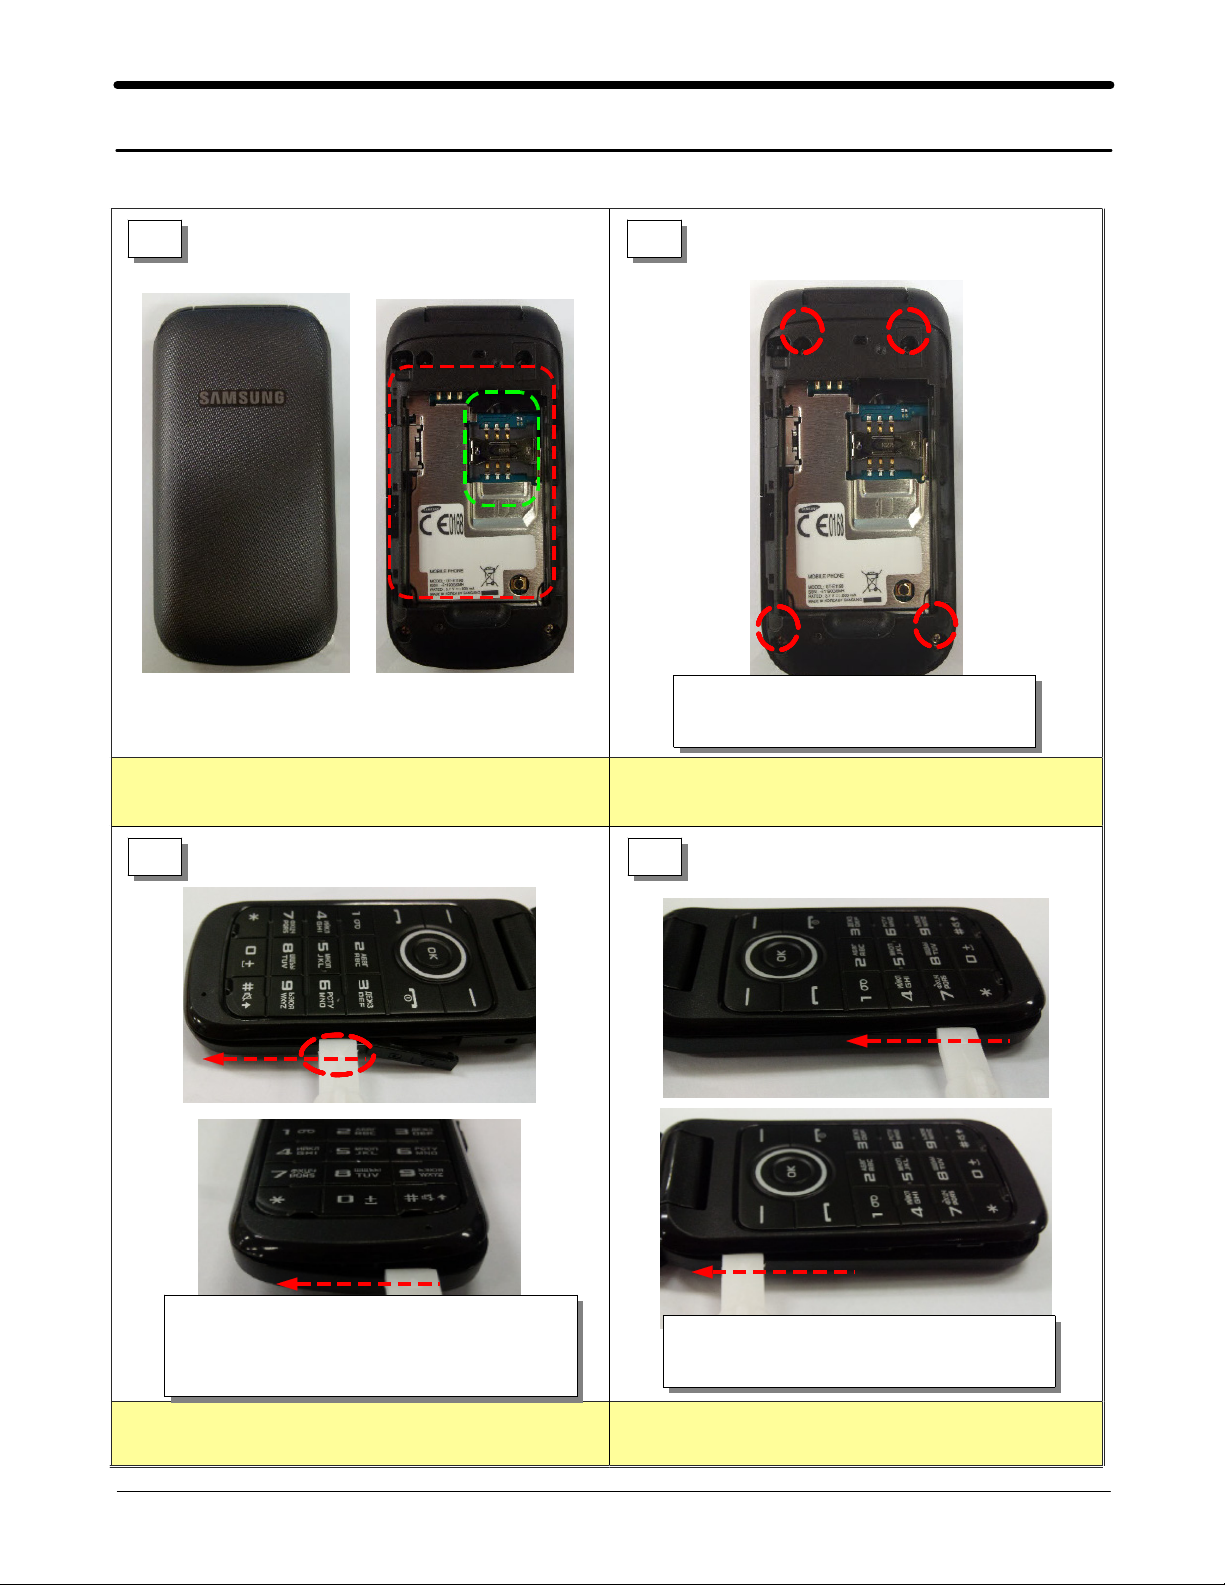
7.
Disassembly
7-1.
1 2
Repair
2
Disassemble rear screw4point
1)
Torque
(
:1.0~1.2
Kgf·cm
)
Remove SIM CARD, BATTERY.
1)
3 4
Put jig for dissolution from rear case if cover
1)
left side to clockwise and disassemble rear
hook.
Be careful of mold damage and scratch occurrence.
1)
Put jig for dissolution to rear case left
2)
side and disassemble rear hook.
Be careful of mold and locker damage.
1)
SAMSUNG Proprietary-Contents may change without notice
This Document can not be used without Samsung's authorization
Be careful of mold and locker damage.
1)
7-1

Level2Repair
7.
5 6
Tickle and lift and disjoint rear.
1)
Separate connector from PBA.
1)
Be careful of REAR damage.
1)
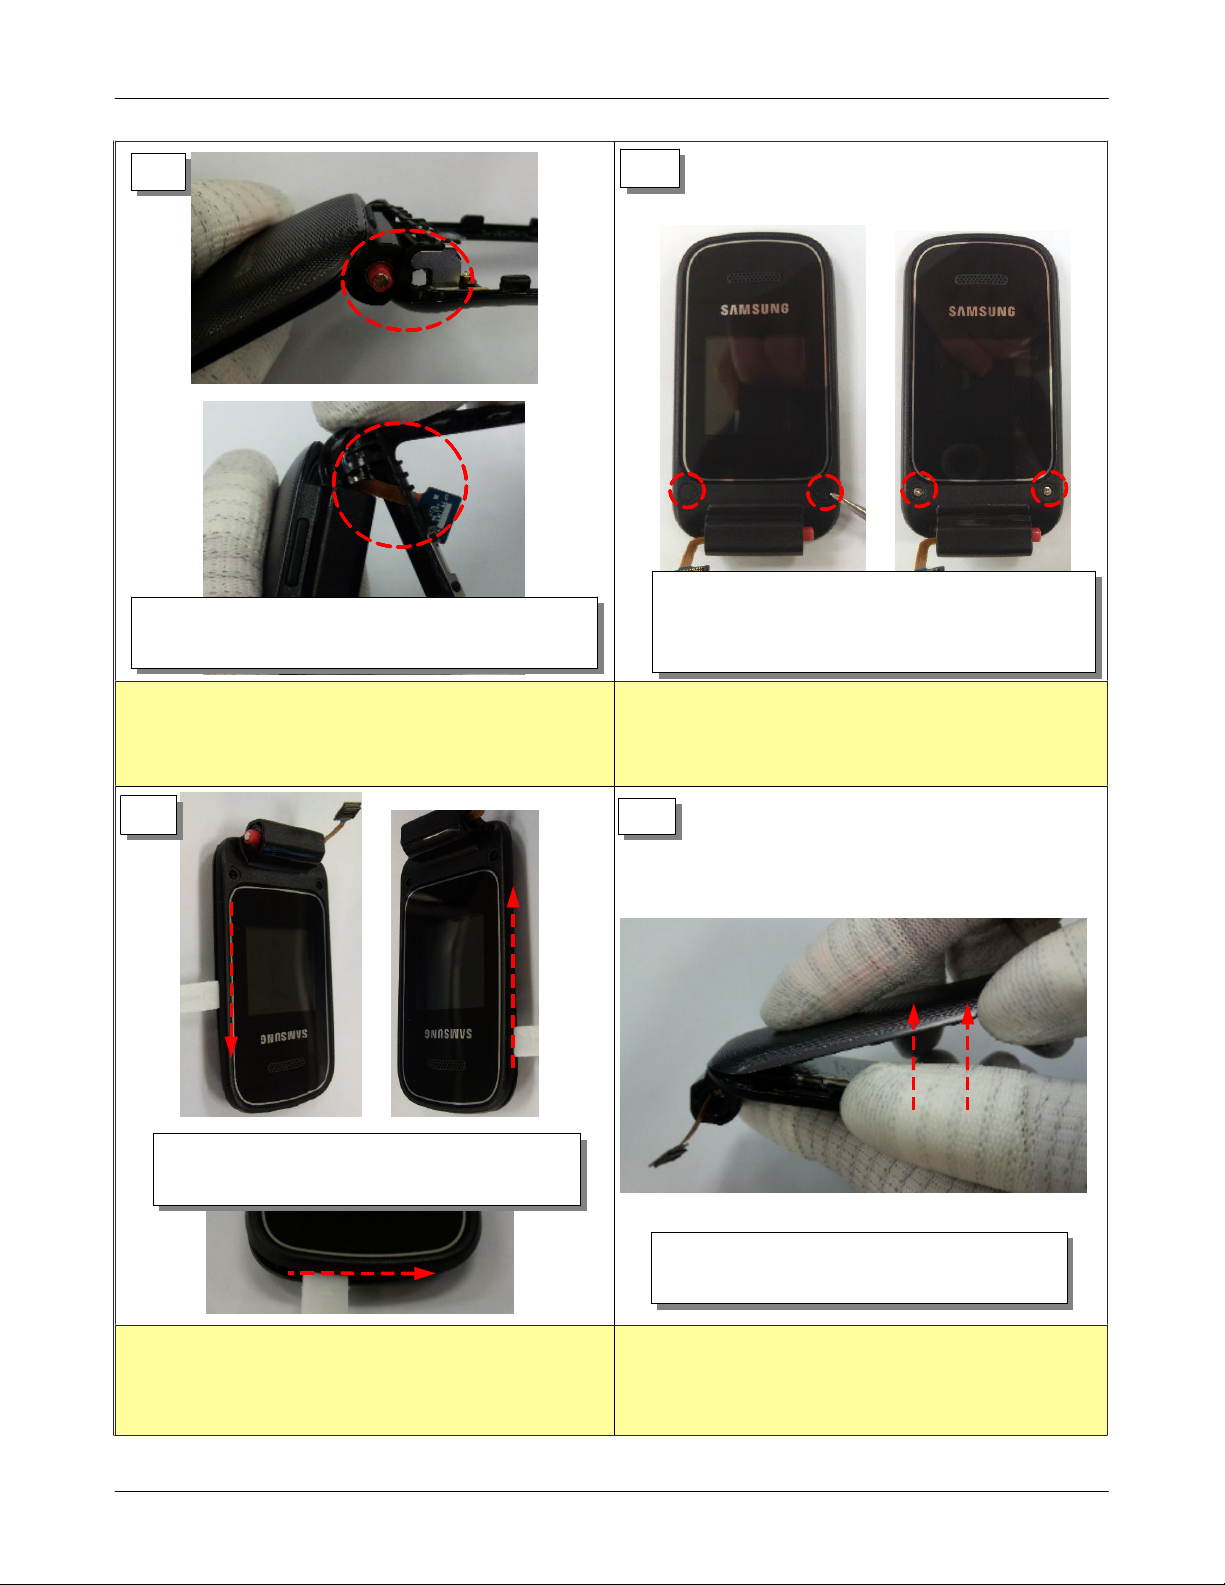
7 8
Separate PBA ASS'y from FRONT ASS'Y.
1)
Separate KEYPAD.
2)
Be careful of approximation Chip Crack/Chip out
1)
when disassembling connector.
Press upper front's hinge part to tweezers and
1)
disassemble in front with picture.
Be careful of mold and front locker damage.
1)
SAMSUNG Proprietary-Contents may change without notice
This Document can not be used without Samsung's authorization
Be careful of front mold, front SUS and hinge
1)
damage.
7-2
Level2Repair
7.
9
Disassemble con to con part after disassembling
1)
hinge part when disassembling front.
Be careful of LCD CON TO CON damage.
1)
10
Disassemble screw after removing screw sheet
1)
to part that folder screw is assembled.
Torque
(
Be careful of mold damage and scratch occurrence.
1)
:1.0~1.2
Kgf·cm
)
11
Disassemble locker position of upper and
1)
lower to clockwise using disassembly jig.
Be careful of mold and locker damage and scratch
1)
occurrence.
12
Tickle upper and lift to upper and is
1)
mortified with lower.
Be careful of upper mold damage and scratch
1)
occurrence.
7-3
SAMSUNG Proprietary-Contents may change without notice
This Document can not be used without Samsung's authorization
 Loading...