

Page 1
DS15AS* 3-1
3 Disassembly and Reassembly
This section of the service manual describes the disassembly and reassembly procedures for the
DS15AS* monitor.
WARNING: This monitor contains electrostatically sensitive devices. Use caution when handling
these components.
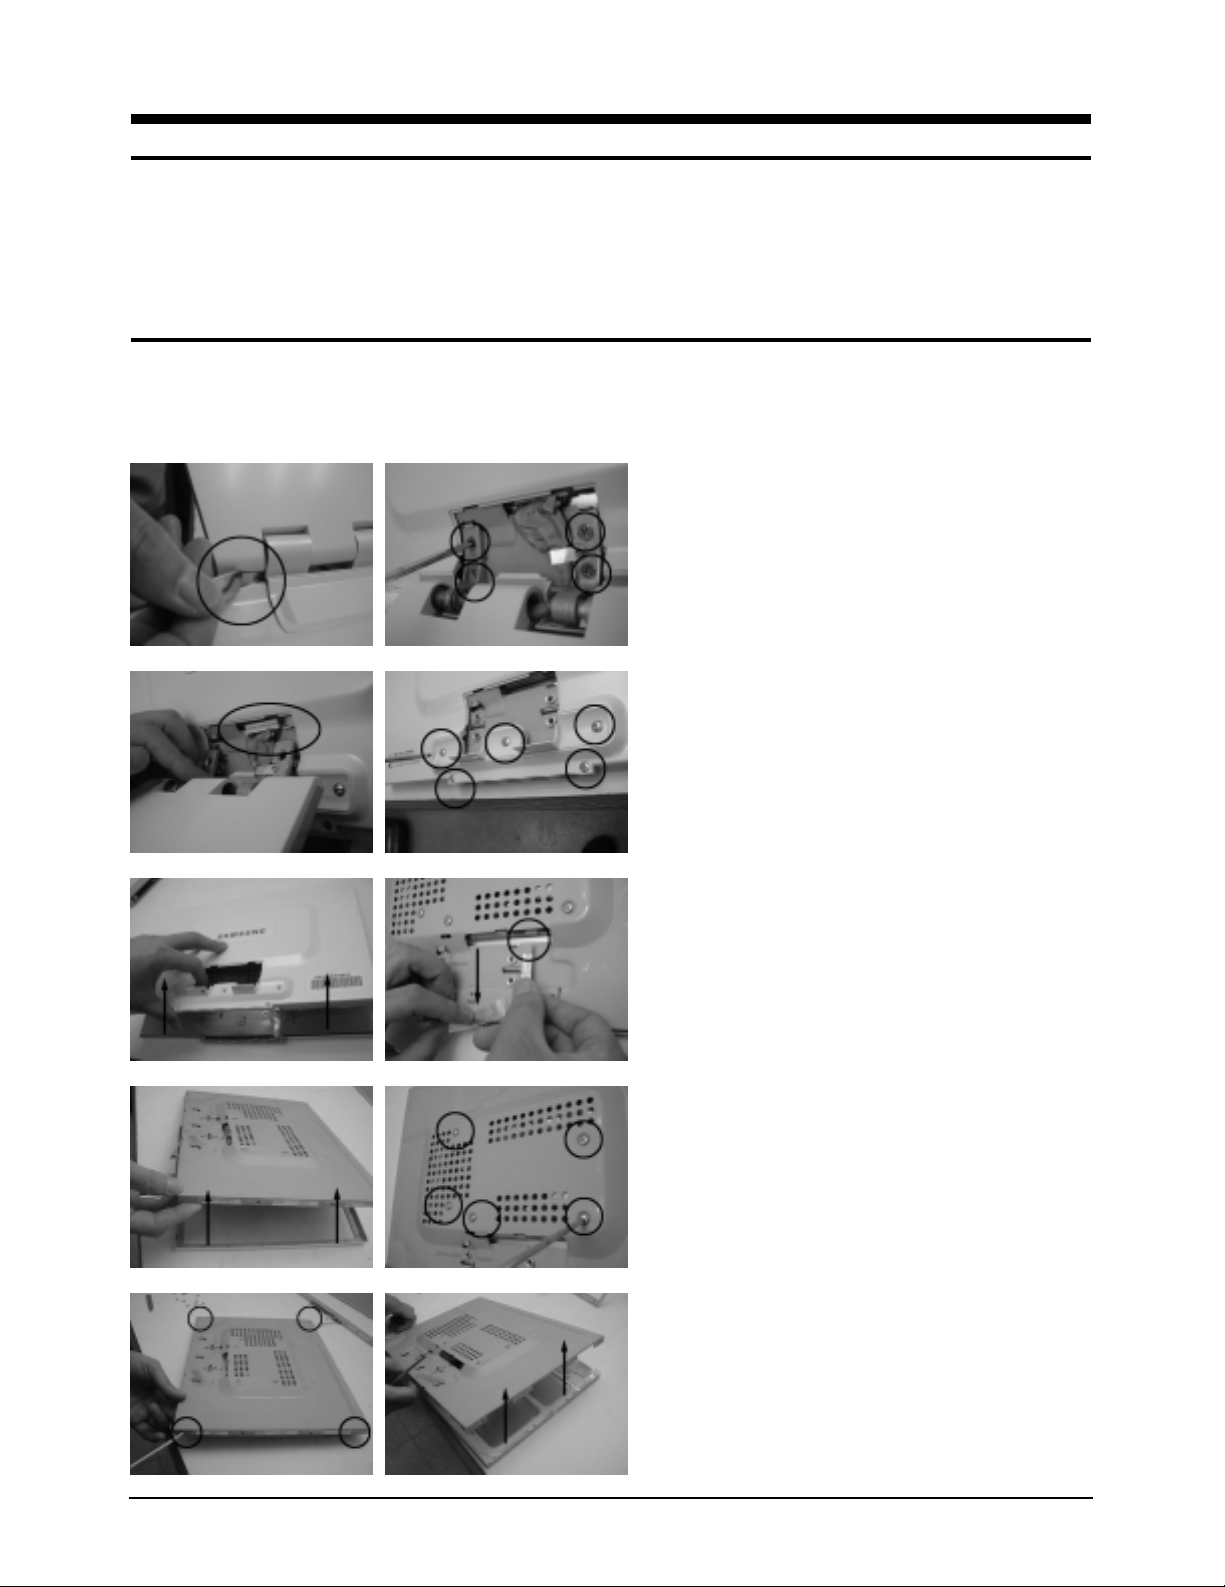
3-1 Disassembly
Cautions : 1. Disconnect the monitor from the power source before disassembly.
2. Follow these directions carefully; never use metal instruments to pry apart the cabinet.
3. R/Cover opening jig : BH81-00001A
1. Place monitor face down on cushioned table.
Remove rear cover from the monitor and
remove 4 screws from the mointor.
(CAUTION : Remove screw grip don’t on the
stand than fall the stand from the top side of
the foot)
2. Disconnect function cable and lift up the
stand. Remove 5 screws from the monitor.
3. Open the rear cover and disconnect power
cable from the shield.
4. Remove the cover front and remove 5 screws
from the shield.
5. Remove 4 screws from the shield paenl coners
and lift up the shield.
Page 2

3 Disassembly and Reassembly
3-2 DS15AS*
3-2 Replacement Order of Lamp Assemblies
Reason : Do not replace lamp for the L106-S4 panel. Lamp replacement requires disassembly of entire slip
mechanism for the narrow bezel monitors.
*Replacement of lamp unit should be done at the power off state and recomtion.
3-3 Reassembly
Reassembly procedures are in the reverse order of disassembly procedures.
6. Disconnect LVDS cable and inverter cable.
 Loading...