

Page 1
RSX18A
2000 Watt 18" Powered Subwoofer
OWNER'S MANUAL
Page 2
Important Safety Information
FCC Statement
This equipment has been tested and found to comply with the limits for a Class B digital device,
pursuant to Part 15 of the FCC Rules. These limits are designed to provide reasonable protection
against harmful interference in a residential installation.
This equipment generates uses and can radiate radio frequency energy and, if not installed
and used in accordance with the instructions, may cause harmful interference to radio
communications. However, there is no guarantee that interference will not occur in a particular
installation. If this equipment does cause harmful interference to radio or television reception,
which can be determined by turning the equipment off and on, the user is encouraged to try to
correct the interference by one or more of the following measures:
• Reorient or relocate the receiving antenna.
• Increase the separation between the equipment and receiver.
• Connect the equipment into an outlet on a circuit different from that to which the receiver
is connected.
• Consult the dealer or an experienced radio/TV technician for help.
CAUTION: Any changes or modifications not expressly approved by the grantee of this device
could void the user’s authority to operate the equipment.
Canada, Industry Canada (IC) Notices
This Class B digital apparatus complies with Canadian ICES-003.
Operation is subject to the following two conditions:
(1) this device may not cause interference, and
(2) this device must accept any interference, including interference that may cause
undesired operation of the device.
Canada, avis d’Industry Canada (IC)
Cet appareil numérique de classe B est conforme aux normes canadiennes ICES-003.
Son fonctionnement est soumis aux deux conditions suivantes :
(1) cet appareil ne doit pas causer d’interférence et
(2) cet appareil doit accepter toute interférence, notamment les interférences qui peuvent
affecter son fonctionnement.
If you want to dispose this product, do not mix it with general household waste.
There is a separate collection system for used electronic products in accordance with
legislation that requires proper treatment, recovery and recycling.
Private household in the 28 member states of the EU, in Switzerland and Norway may
return their used electronic products free of charge to designated collection facilities or to a
retailer (if you purchase a similar new one).
For Countries not mentioned above, please contact your local authorities for a correct method of
disposal.
By doing so you will ensure that your disposed product undergoes the necessary treatment,
recovery and recycling and thus prevent potential negative effects on the environment and
human health.
2
Page 3
Important Safety Information
1. Read these instructions.
2. Keep these instructions.
3. Heed all warnings.
4. Follow all instructions.
5. This apparatus shall not be exposed
to dripping or splashing liquid and no
object filled with liquid, such as a vase,
should be placed on the apparatus.
6. Clean only with a dry cloth.
7. Do not block any of the ventilation
openings. Install in accordance with the
manufacturer's instructions.
8. Do not install near any heat sources such
as radiators, heat registers, stoves, or
other apparatuses (including amplifiers)
that produce heat.
9. Only use attachments/accessories specified by the manufacturer.
10. Unplug this apparatus during lightning
storms or when not in use for long periods of time.
11. Do not override the intended purpose of
the polarized or grounding-type plug. A
polarized plug has two blades, with one
wider than the other. A grounding-type
plug has two blades and a third grounding prong. The wide blade, or third prong,
is provided for your safety. If the provided
plug does not fit your outlet, consult an
electrician to replace the obsolete outlet.
12. Protect the power cord from being walked
on or pinched, particularly at the prongs,
convenience receptacles, the point where
they exit from the apparatus.
13. Use only with the cart stand, tripod
bracket, or table specified by the
manufacture, or sold with the apparatus.
When a cart is used, utilize caution when
moving the cart/apparatus combination to
avoid injury from tip-over.
14. Refer all servicing to qualified service
personnel. Servicing is required if the
apparatus has been damaged in any way,
such as power-supply cord or plug breakage, damage due to liquid or objects falling onto the apparatus, exposure to rain
or moisture, or if the apparatus does not
operate normally, or has been dropped.
15. POWER ON/OFF SWITCH: For products
with a power switch, the power switch
DOES NOT break the connection from
the mains.
16. MAINS DISCONNECT: The plug should
remain readily operable. For rack-mount
or installation where plug is not accessible, an all-pole mains switch with a
contact separation of at least 3 mm in
each pole shall be incorporated into
the electrical installation of the rack or
building.
17. FOR UNITS EQUIPPED WITH EXTERNALLY ACCESSIBLE FUSE RECEPTACLE: Replace fuse with same type and
rating only.
18. MULTIPLE-INPUT VOLTAGE: This equipment may require the use of a different
line cord, attachment plug, or both,
depending on the available power source
at installation. Connect this equipment
only to the power source indicated on the
equipment rear panel. To reduce the risk
of fire or electric shock, refer servicing to
qualified service personnel or equivalent.
19. WARNING: The mains plug/appliance
coupler is used as disconnect device, the
disconnect device shall remain readily
operable.
ENGLISH
ESPAÑOLITALIANO FRANÇAISDEUTSCHE
RSX18A
3
Page 4
Important Safety Information
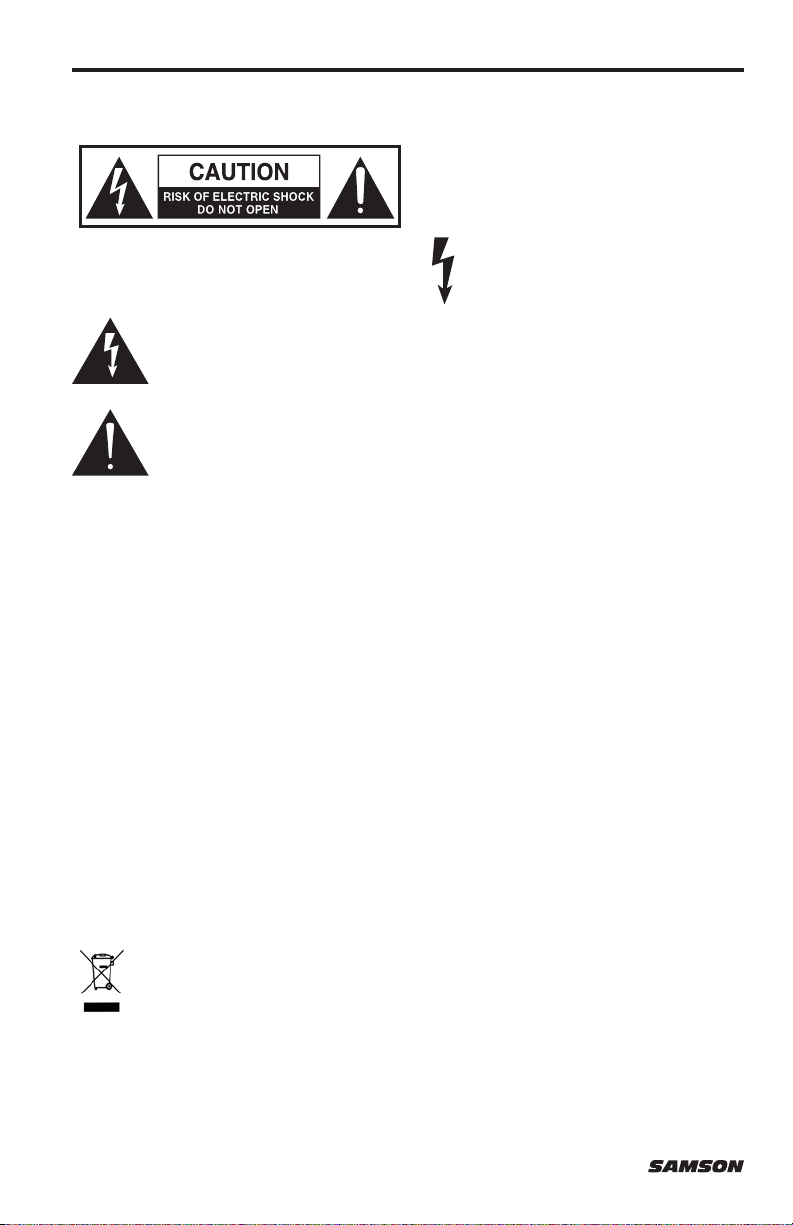
WARNING: To Reduce the risk of the electric
shock. Do not remove cover (or back) as
there are no user-serviceable parts inside.
Refer servicing to qualified service
personnel.
RISQUE DE CHOC ÉLECTRONIQUE -
ATTENTION
NE PAS OUVRIR
This lightning flash with arrowhead symbol within an equilateral triangle is intended
to alert the user to the presence of non-insulated “dangerous voltage” within the
product’s enclosure that may be of sufficient magnitude to constitute a risk of
electric shock.
The exclamation point within an equilateral triangle is intended to alert the user to
the presence of important operating and maintenance instructions in the literature
accompanying the appliance.
WARNING: Do Not Open! Rick of Electrical Shock. Voltages in this equipment are hazardous to
life. No user-serviceable parts inside. Refer all servicing to qualified service personnel.
Place the equipment near a main power supply outlet and make sure that you can easily access
the power breaker switch.
WARNING: This product is intended to be operated ONLY from the AC Voltages listed on the back
panel or included power supply of the product. Operation from other voltages other than those
indicated may cause irreversible damage to the product and void the products warranty. The use
of AC Plug Adapters is cautioned because it can allow the product to be plugged into voltages
in which the product was not designed to operate. If the product is equipped with a detachable power cord, use on the type provided with your product or by your local distributor and/or
retailer. If you are unsure of the correct operational voltage, please contact your local distributor
and/or retailer.
CAUTION: To prevent electric shock
hazard, do not connect to mains power
supply while grille is removed.
Copyright 2015 - Samson Technologies Corp.
Samson Technologies Corp.
45 Gilpin Avenue
Hauppauge, New York 11788-8816
Phone: 1-800-3-SAMSON (1-800-372-6766)
Fax: 631-784-2201
www.samsontech.com
V1.3
4
Page 5
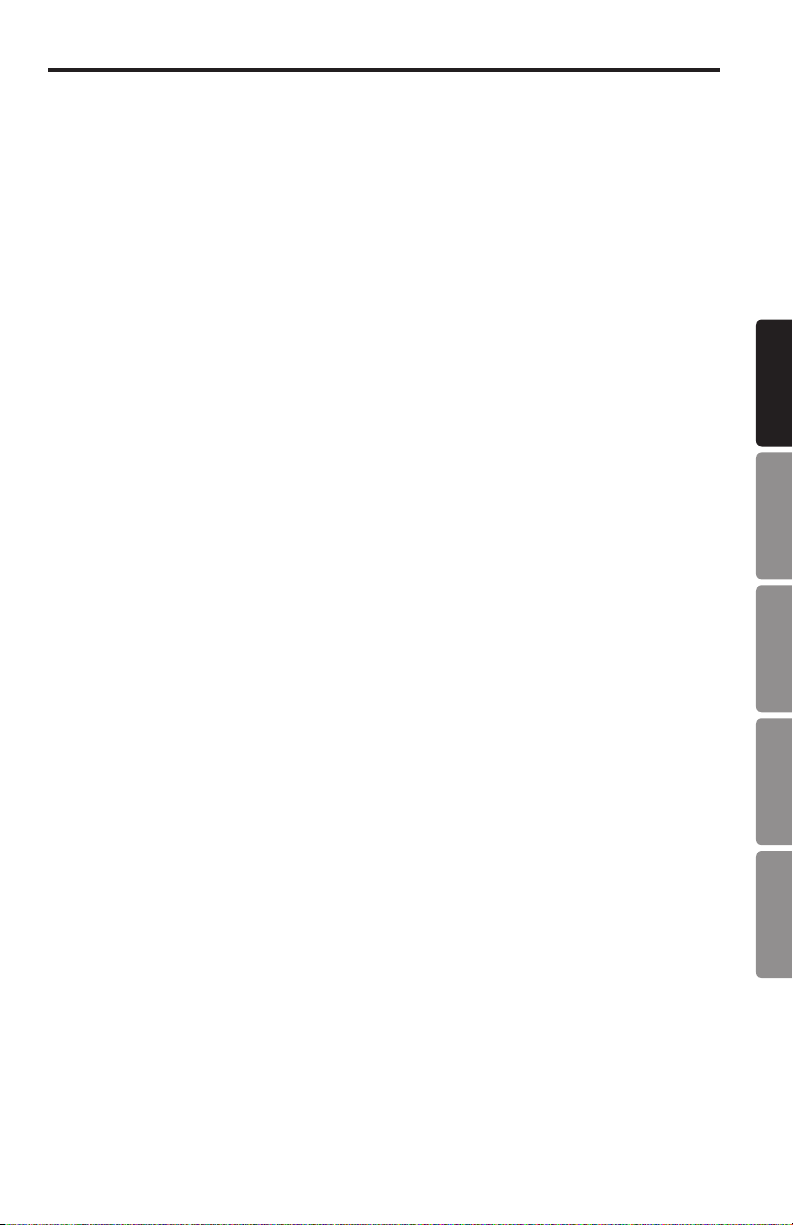
Table of Contents
Introduction . . . . . . . . . . . . . . . . . . . . . . . . . . . . . . 6
RSX18A Features . . . . . . . . . . . . . . . . . . . . . . . . . . . . 7
Quick Start . . . . . . . . . . . . . . . . . . . . . . . . . . . . . . . 8
Controls and Functions . . . . . . . . . . . . . . . . . . . . . . . . . 9
Configuring Your Speaker System . . . . . . . . . . . . . . . . . . . 11
Phase and Polarity . . . . . . . . . . . . . . . . . . . . . . . . . . 12
Connections . . . . . . . . . . . . . . . . . . . . . . . . . . . . . 13
Caster Installation. . . . . . . . . . . . . . . . . . . . . . . . . . . 13
Specifications. . . . . . . . . . . . . . . . . . . . . . . . . . . . . 14
ENGLISH
RSX18A
ESPAÑOLITALIANO FRANÇAISDEUTSCHE
5
Page 6

Introduction
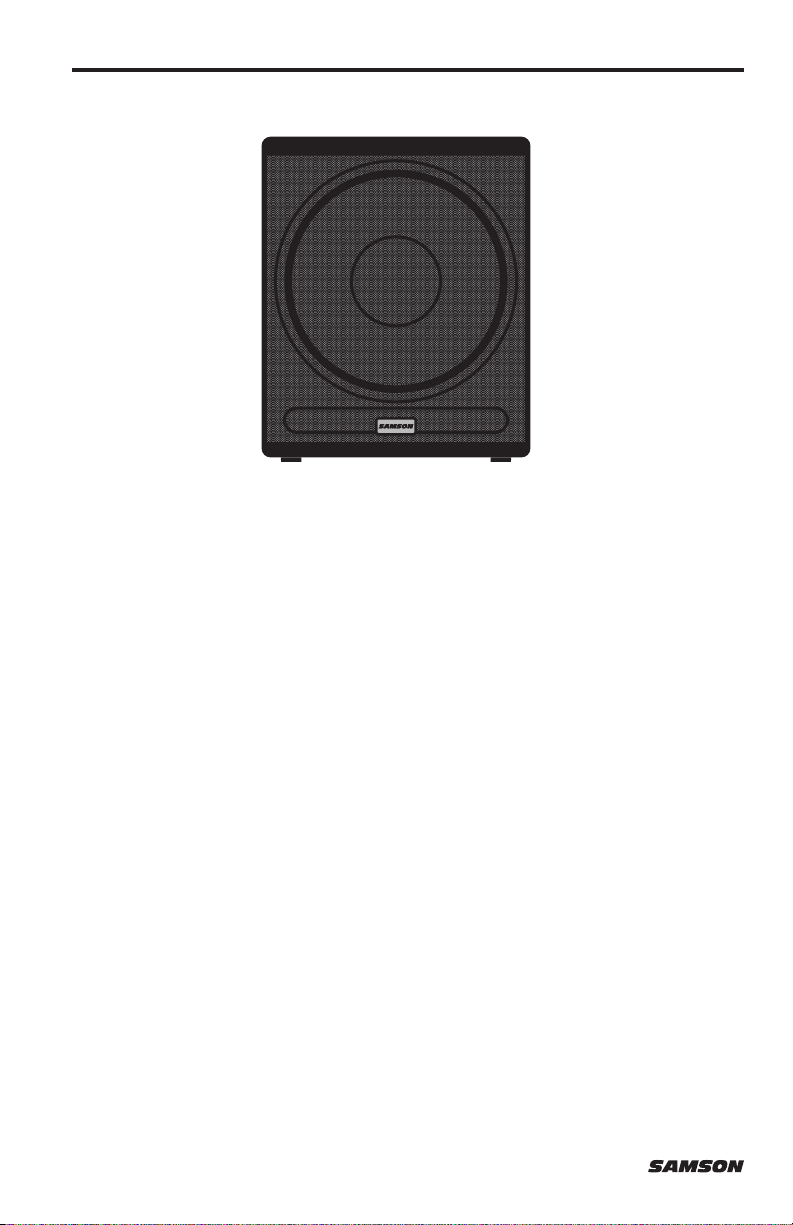
Thank you for purchasing the Samson RSX18A professional, powered subwoofer. The
RSX18A is a compact and powerful speaker cabinet featuring an 18" long excursion
driver, complemented by a 2000 Watt class-D power amplifier. The subwoofer offers
both stereo full-range and high-pass outputs for running your satellite speakers or
linking multiple RSX18A cabinets together to create larger sound reinforcement
systems.
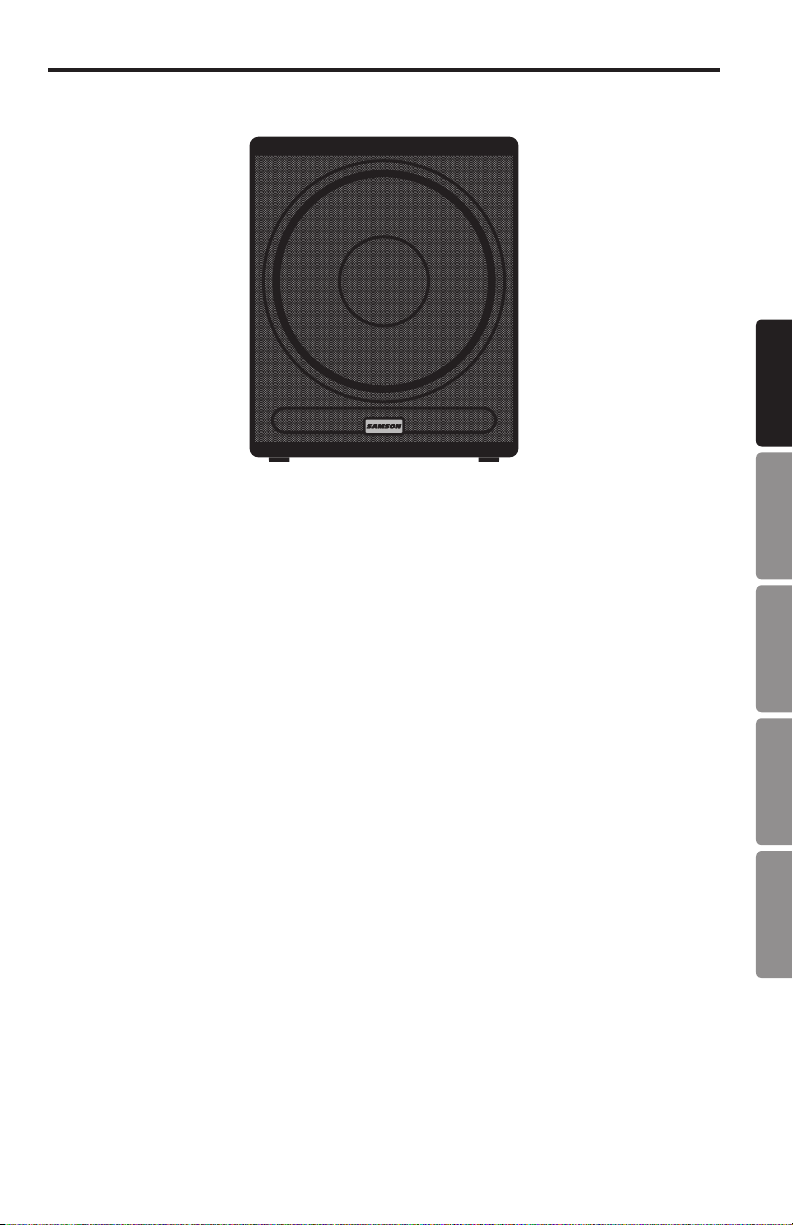
The subwoofer enclosure is constructed with 18 mm plywood, heavy-duty textured
black paint, oversized steel handles, and includes large casters, offering excellent
protection against wear and tear, for truly portable audio. The RSX18A active subwoofer
is ideal for live music, DJ, and installed sound applications, or anywhere serious power
and superior sound quality are desired.
In these pages, you’ll find a detailed itemization of the features of the RSX powered
subwoofer, as well as a description of its controls, step-by-step instructions for its
setup and use, and full specifications. You’ll also find a warranty card enclosed—
please don’t forget to fill it out and mail it in so that you can receive online technical
support, and so that we can send you updated information about this and other Samson
products. Also, be sure to check out our website (www.samsontech.com) for complete
information about our full product line.
With proper care and adequate air circulation, your RSX18A will operate trouble- free
for many years. We recommend you record your serial number in the space provided
below for future reference.
Serial number: _______________________________
Date of purchase: ____________________________
Should your unit ever require servicing, a Return Authorization (RA) number must be
obtained before shipping your unit to Samson. Without this number, the unit will not
be accepted. Please call Samson at 1-800-3SAMSON (1-800-372-6766) for an RA
number prior to shipping your unit. Please retain the original packing materials and, if
possible, return the unit in its original carton and packing materials. If you purchased
your Samson product outside the United States, please contact your local distributor
for warranty and service information.
6
Page 7
RSX18A Features
The Samson RSX18A powered subwoofer utilizes the latest technology in
loudspeaker and power amplifier design. Here are some of its main features:
• Heavy-duty, 18" low frequency transducer with Butyl rubber surround
• Built-in 2000 Watt, highly efficient class-D power amplifier
• Dual balanced XLR inputs for mono or stereo operation
• Stereo balanced XLR full range and high pass outputs
• Internal 126 Hz active crossover
• Selectable polarity and variable volume control
• Heavy-duty, rear mounted casters
• Two large, steel carry handles
• 35 mm pole mount receptacle
• Heavy-duty, steel grill
• 18 mm plywood construction, internally braced
• Durable textured black polyurethane paint
ENGLISH
ESPAÑOLITALIANO FRANÇAISDEUTSCHE
RSX18A
7
Page 8
Quick Start
The following steps will help you set up your RSX18A active subwoofer.
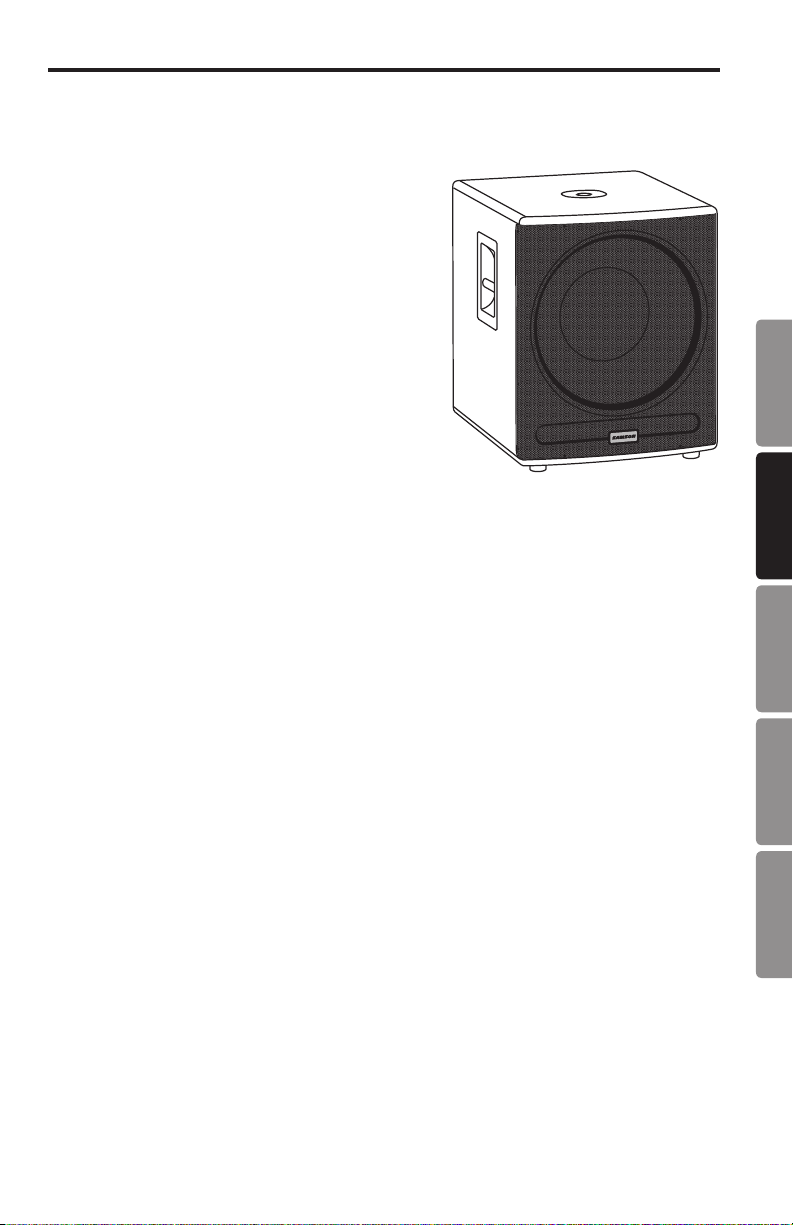
• Unpack the RSX18A and included
components. Be sure to save the packaging in
case you ever move, or need to send the unit
for service.
• Set the RSX18A subwoofer and satellite
speaker(s) appropriately for the performance
venue. The RSX18A has a 1 3/8" speaker
pole receptacle, so you can mount a satellite
speaker on top of the RSX18A using a satellite
mounting pole (such as the Samson TS20).
• Turn the Level control on all speakers fully
counterclockwise.
• Turn the Power switch to the OFF position on
all speakers.
• Connect a line-level signal from your mixer (or other source) to the XLR Input jack
on the RSX18A. If you are using a single subwoofer with stereo satellite speakers,
connect the left and right output of the mixer to the stereo XLR Input jacks on the
RSX18A.
• Connect an XLR cable from the High Pass output of the RSX18A to the line input
of your satellite speaker(s).
• Plug the supplied power cable into an AC outlet.
Note: Always make sure that the AC outlet used with this unit is configured with
the correct voltage, as indicated on the rear panel of the RSX loudspeaker.
• Turn the Power switch on your RSX18A and satellite speaker(s) to the ON position.
• Run an audio signal (like music from a CD) from your mixer, and check that you are
getting good level using the mixer's output meter.
• Slowly raise the satellite speaker(s) level control until you have reached a comfortable
level. Then raise the RSX18A Level control until you have reached a level that sits
well within the rest of the mix.
• If the volume from the RSX18A gets too loud, or you notice the Peak indicator
blinking frequently, turn down the Level control on the RSX18A a little until the
Peak indicator does not light, or only lights occasionally with signal peaks.
8
Page 9

Controls and Functions
1 6
4
1. MASTER LEVEL - This control adjusts the overall signal level at the input of the
RSX18A's power amplifier. This control does not affect the signal sent to the Full
Range and High Pass Outputs.
2. PHASE Switch - Use this switch to set the polarity of the amplified signal. In
the out (NORMAL) setting, there is no change to the signal. When the switch is
pressed to the in (INVERT) setting, the signal's polarity is changed by 180°. The
setting of the Polarity switch has no effect on the signal sent to the Full Range
and High Pass Outputs.
3. PEAK Indicator -This red LED lights when the amp is near the clipping point. If
the Peak indicator lights frequently, turn down the Level control on the RSX18A
subwoofer or turn down the signal at the source, until the indicator does not light
anymore, or lights only occasionally with signal peaks.
4. SIGNAL Indicator - The green SIGNAL LED lights whenever signal is present at the
RSX18A's inputs.
5. POWER Indicator - This LED lights RED when the amp is active.
6. INPUTS (L and R) - The RSX18A features electronically balanced female XLR
stereo line inputs. The left (L) and right (R) input signals are mixed together
before they are routed to the internal amplifier.
7. HIGH PASS Outputs (L and R) - Electronically balanced male XLR stereo line
outputs, for sending the signal present at the INPUTS to your full range main
loudspeakers. The signal is first processed by the internal 12dB per octave,
126Hz Linkwisz-Riley active crossover before reaching the outputs.
32
5
7 8
ENGLISH
ESPAÑOLITALIANO FRANÇAISDEUTSCHE
RSX18A
9
Page 10
7 8
Controls and Functions
8. FULL RANGE Outputs (L and R) - Electronically balanced full range male XLR stereo
line outputs. These outputs can be used to connect another subwoofer, or send
full range signal to your main PA loudspeakers.
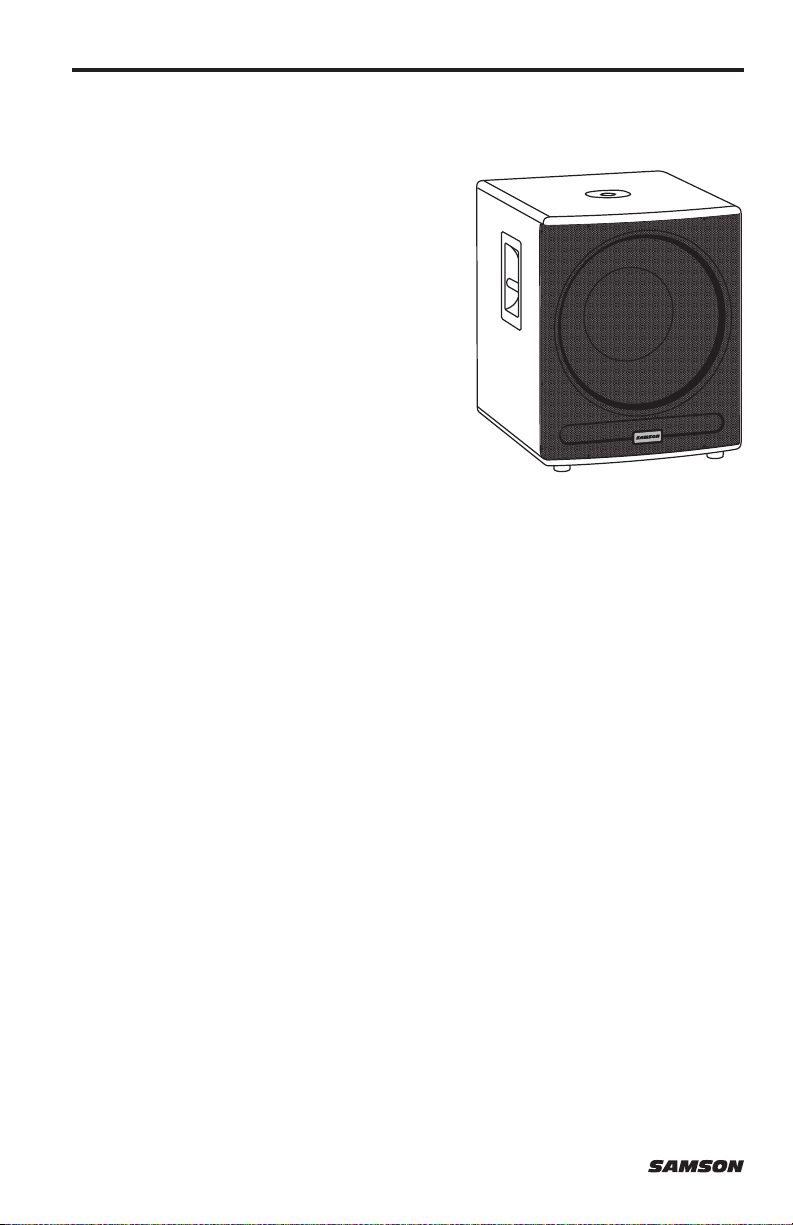
9. AC Power Inlet and Fuse
Sled - Connect the supplied
standard IEC AC power cable
here. Be sure to confirm and
install the properly rated
fuse when replacing the fuse
or changing the operating
voltage.
10. Voltage Switch - Slide to
change the operating voltage
from 115 to 230 volts.
11. POWER Switch - Switches on
the RSX18A’s main power.
9
10
11
10
Page 11
Configuring Your Speaker System
Before you start plugging in cables, you should take a minute to decide how you
want to interface your new RSX18A. Most system set-ups fall into one of two
categories: Stereo or Mono sub operation.
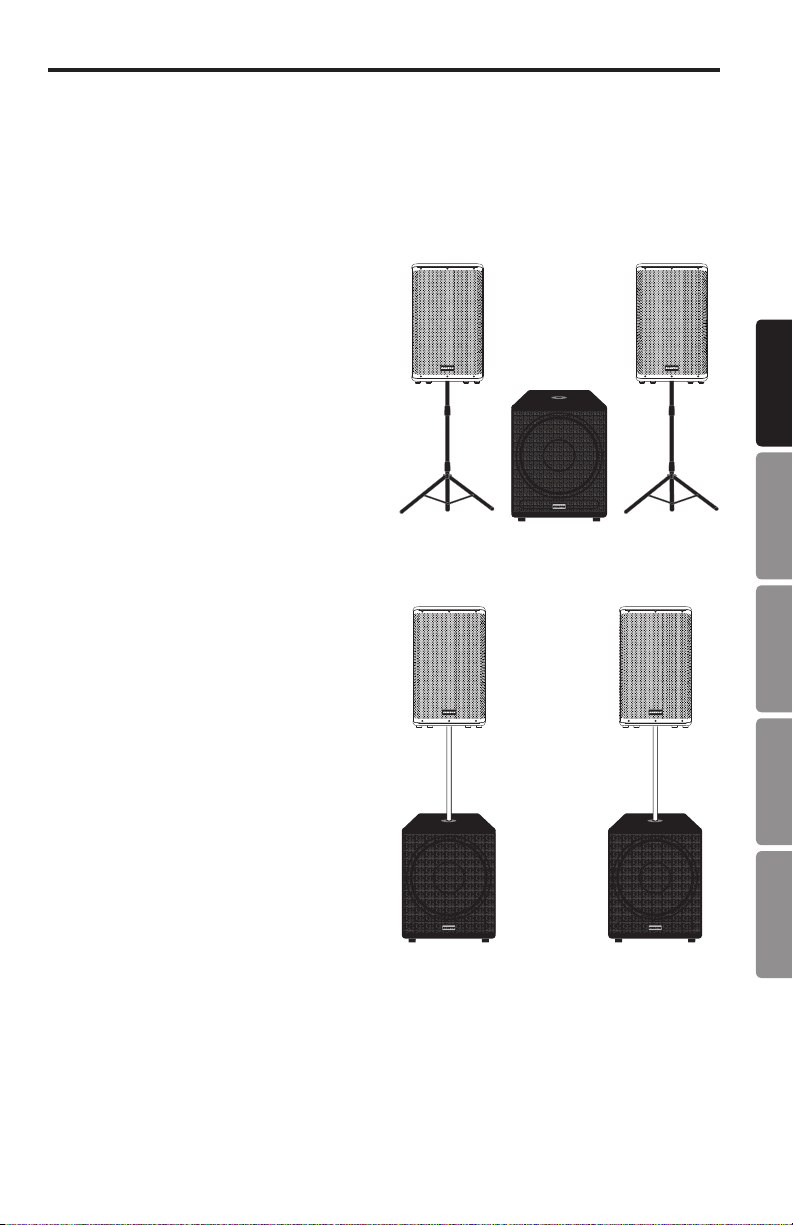
Mono Sub Operation
In most cases, a common sub (or mono)
bass setup is preferable. Low frequencies
produced by a subwoofer tend to be nondirectional. Since low frequency waves take
so much space to develop, it is difficult for
the ear to tell if sub bass is coming from
the left or right side (unless, of course
you’re in a very large room). Because of
this phenomenon, just about all sub bass
material is mixed in mono.
Stereo Sub Operation
In larger rooms, as well as in theatres
and theme park installations (for low
frequency special audio effects), two
RSX18A's can be used in stereo. For
additional low-end, you can daisy chain
a pair of RSX18A subwoofers to each side
of your speaker system.
ENGLISH
RSX18A
ESPAÑOLITALIANO FRANÇAISDEUTSCHE
11
Page 12
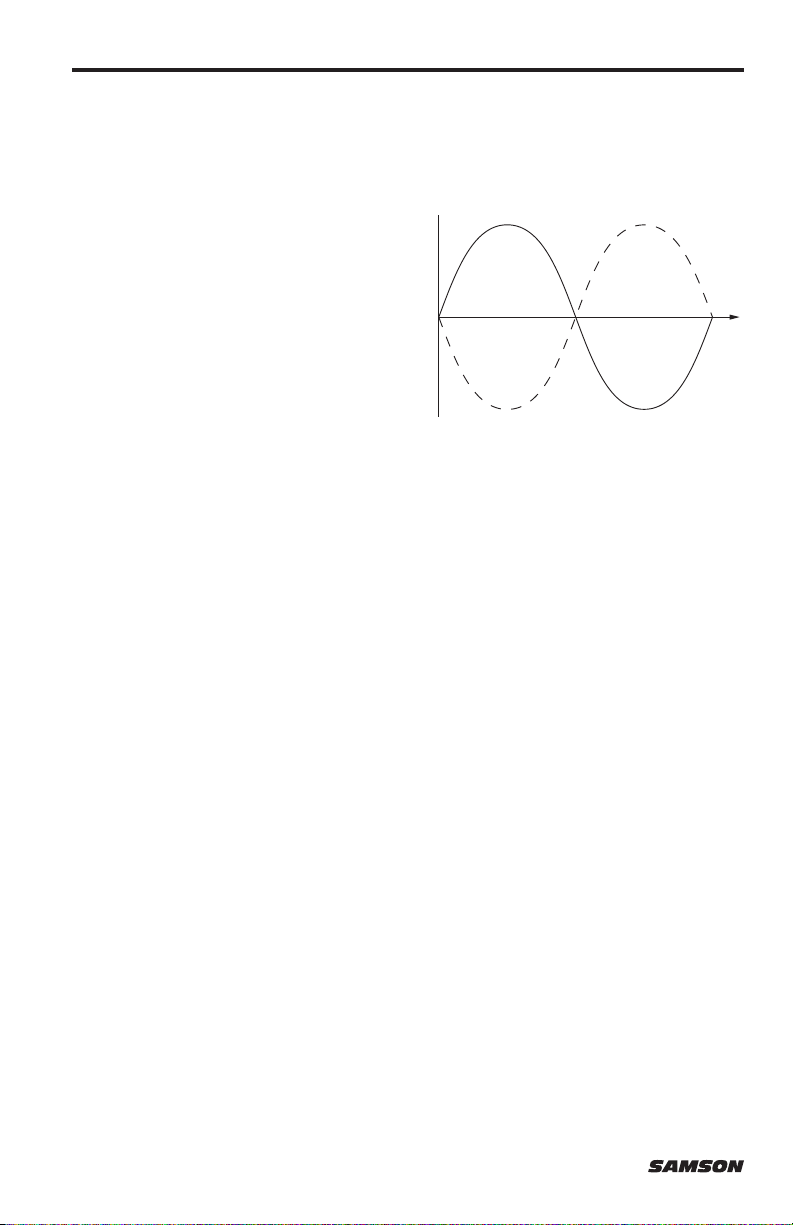
Phase and Polarity
A speaker reproduces sound by converting electrical signal into physical vibration. This
physical vibration, in turn, pushes air to create sound waves. When setting up your
speaker system, the goal is to have all speakers moving in phase, with the in and out
movement of the speakers synchronized.
This produces an even sound across all
audible frequencies. If the subwoofer is
out of phase with the full range front of
house speakers, you may notice decreased
bass response, or even bass frequency
cancellation where satellite and subwoofer
frequency responses overlap. Many times
this phenomenon is very subtle, but it can
produce the effect of “holes” in the music,
and diminished bass frequencies.
Ideally, your RSX18A subwoofer should be positioned on the same plane as your
satellite speakers. In reality, we know this is difficult, as there are restrictions when
setting up a PA system due to space limitations, speaker stand configuration, or even
speaker cabinet shape. To compensate for these obstacles, the RSX18A features a
Phase switch, which allows you to reverse the polarity of the subwoofer relative to the
source signal. This enables you to put the RSX18A in phase with the rest of your PA
system, or 180° out of phase.
To determine if the audio produced by your RSX18A is in phase with the rest of your PA
system, play an audio track containing a lot of bass frequencies through your speaker
system. Stand at a good listening distance, where you can clearly hear the audio from
the subwoofer(s) and mains speaker(s), and listen until you believe you have a good
gauge of the level of bass frequencies. Press the Phase switch on the RSX18A to reverse
the phase by 180°, and move back to your original listening position (if possible, have
someone else press the Phase switch so that you can stand in the exact same location).
Compare the overall level of the bass frequencies between the two settings. The correct
setting will result in more bass frequencies. If the situation allows, you can fine-tune
the phase of your RSX18A to your satellite speakers by moving the relative position of
the subwoofer closer or further away from the listening position.
0° 90° 180° 270° 360°
Phase SW = NORMAL
Time
Amplitude
Phase SW = INVERT
12
Page 13
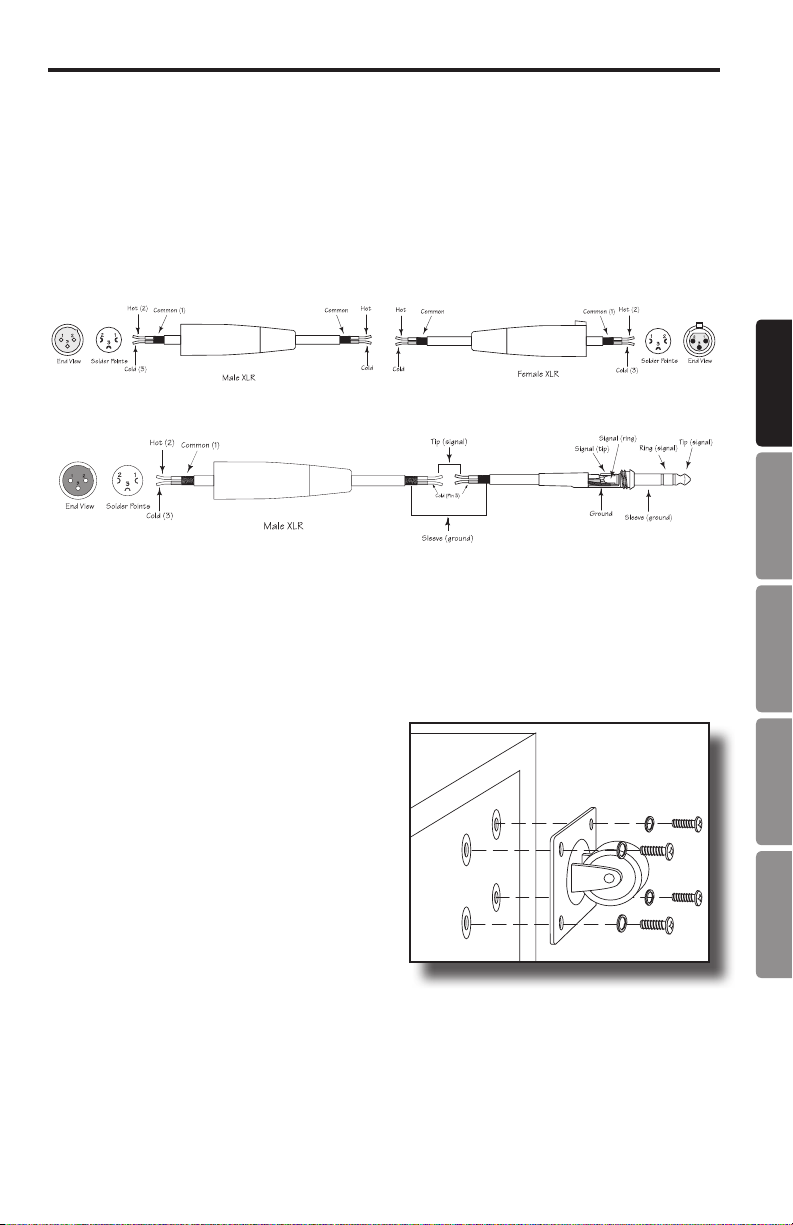
Connections
XLR to XLR Balanced
XLR to Balanced 1/4-Inch
The RSX18A features balanced inputs and outputs with industry standard XLR
connectors. Whenever possible, use high quality balanced connections to other
equipment to suppress interference. See the wiring diagram below for RSX18A
connectors.
Caster Installation
ENGLISH
• Locate one caster and four each of the
supplied screws and lock washers.
• Hold the caster in place and hand start
the screws. Be careful to ensure that
the screws are on the proper thread
chase. Do not push down on the screws,
as it could dislodge the internal threaded t-nuts.
• Use a screwdriver to tighten the four
screws.
• Repeat the steps above for the remaining three casters.
RSX18A
ESPAÑOLITALIANO FRANÇAISDEUTSCHE
13
Page 14

Specifications
Amplifier
Power 2000 watts
THD < 0.1%
Design Class-D
Transducer
Driver 18" paper cone, 3" voice coil diameter
Sensitivity 95dB SPL @ 1w/1m
Acoustic Performance
Frequency Response 30Hz- 135Hz (+/-3 dB)
Max. SPL 125 dB SPL @ 2000 watts
Electronic Crossover
Crossover Type 24 dB/oct Linkwitz-Riley
Crossover Frequency 126 Hz
Controls and Connectors
Inputs (L and R) Balanced Female XLR - Line Level
High Pass Outputs (L and R) Balanced Male XLR - Line Level
Full Range Outputs (L and R) Balanced Male XLR - Line Level
Controls Master Level Rotary, Phase Switch
Indicators Peak, Signal, Power
Power Supply
Power Consumption 645 W max.
AC Connector 3-pin IEC 250 VAC, 20 A male
Fuse 100 - 120 VAC T8AL / 250 V
220 - 240 VAC T4AL / 250 V
Enclosure
Construction 18 mm plywood
Finish Textured black polyurethane paint
Casters 4 x Three Inch.
Handles 2 x Steel
Grill Perforated steel
Mounting Method Integral 1 3/8" (35 mm) Pole Mount Receptacle,
Dimensions and Weight
Dimensions in 20.55" L x 27" W x 24.7" H
mm 686 mm L x 522 mm W x 629 mm H
Weight lbs 86
kg 39
Specifications are subject to change without notice.
14
Page 15

Consignes de sécurité importantes
Déclaration de la Federal Communications Commission (FCC)
Cet appareil a été testé et jugé conforme aux limites applicables à un appareil numérique de
ClasseB aux termes de la section 15 des Règles de la FCC. Ces limites sont conçues pour offrir
une protection raisonnable contre les interférences nocives rencontrées dans une installation
résidentielle.
Cet équipement génère, utilise et peut dégager une énergie radioélectrique et, s'il n'est pas installé ni utilisé conformément au présent manuel d'utilisation, risque de provoquer des interférences
dommageables pour les radiocommunications. Toutefois, il n'est pas garanti que des interférences ne se produiront pas dans une installation donnée. Si cet appareil provoque effectivement
des interférences dommageables pour la réception de la radio ou de la télévision, phénomène
pouvant être établi en éteignant, puis en rallumant l'appareil, l'utilisateur est invité à tenter de
corriger les interférences en prenant une ou plusieurs des mesures suivantes:
• réorienter ou déplacer l'antenne de réception,
• Augmentez la distance entre les équipements et le récepteur.
• Branchez l'appareil sur une prise murale, sur un circuit différent de celui sur lequel le
récepteur est branché,
• demander conseil au revendeur ou à un technicien radio/TV expérimenté.
ENGLISH
MISES EN GARDE : Les changements ou modifications non expressément validés par le bénéficiaire de cet appareil risquent d'annuler l'autorisation de l'utilisateur à faire fonctionner
l'appareil.
Canada, Industry Canada (IC) Notices
This Class B digital apparatus complies with Canadian ICES-003.
Operation is subject to the following two conditions:
(1) this device may not cause interference, and
(2) this device must accept any interference, including interference that may cause unde-
sired operation of the device.
Canada, avis d’Industry Canada (IC)
Cet appareil numérique de classe B est conforme aux normes canadiennes ICES-003.
Son fonctionnement est soumis aux deux conditions suivantes :
(1) cet appareil ne doit pas causer d’interférence et
(2) cet appareil doit accepter toute interférence, notamment les interférences qui peuvent
affecter son fonctionnement.
FRANÇAISDEUTSCHEESPAÑOLITALIANO
RSX18A
15
Page 16
Consignes de sécurité importantes
AVERTISSEMENT: pour réduire le risque d'électrocution, ne
pas retirer le cache (ou le panneau arrière), puisqu'il ne
renferme pas de pièces réparables par l'utilisateur. Confier
toutes les interventions d'entretien à un technicien de
S.A.V. qualifié.
RISQUE D'ÉLECTROCUTION -
ATTENTION
NE PAS OUVRIR
Le triangle équilatéral renfermant un éclair terminé par une flèche a pour but d’alerter
l’utilisateur sur la présence d’une "tension dangereuse" non isolée à l’intérieur du
boîtier de l’appareil qui peut être d’une valeur suffisante pour présenter un risque
d’électrocution.
Le triangle équilatéral renfermant un point d’exclamation a pour but d’alerter
l’utilisateur sur la présence de consignes d’utilisation et de maintenance importantes
dans la documentation jointe à l’appareil.
AVERTISSEMENT: Ne pas ouvrir ! Risque d'électrocution. Les tensions régnant à l'intérieur de
cet appareil présentent un danger de mort! Ce matériel ne comporte pas de pièces susceptibles
d'être réparées par l'utilisateur. Toutes les interventions d'entretien doivent être confiées à des
techniciens d'entretien qualifiés.
Disposer l'appareil à proximité d'une prise de secteur; s'assurer qu'on ait facilement accès au
disjoncteur.
AVERTISSEMENT: Cet appareil n'est destiné à fonctionner QU'AUX tensions de secteur figurant
au dos de l'appareil ou sur le bloc d'alimentation de l'appareil, joint à la livraison. Tenter de
faire fonctionner l'appareil sur des tensions autres que celles indiquées risque d'occasionner
des dégâts irréversibles à l'appareil, entraînant l'invalidation de la garantie. Attention à ne pas
employer d'autres adaptateurs secteur! Vous risquez de brancher l'appareil sur des tensions
pour lesquelles il n'a pas été conçu. Si l'appareil est muni d'un câble d'alimentation débranchable, l'utiliser sur le modèle fourni avec votre appareil ou par le concessionnaire et/ou revendeur le plus proche. Si vous n'êtes pas certain de la bonne tension de service, n'hésitez pas à
contacter le concessionnaire et/ou revendeur le plus proche.
MISES EN GARDE : Pour prévenir le risque
d'électrocution, ne pas se brancher sur
secteur pendant que la grille est retirée.
Si vous souhaitez éliminer ce produit, ne le mettez pas aux ordures ménagères.
Conformément à la législation, le ramassage des équipements électroniques se fait
séparément pour en assurer le recyclage dans les règles de l'art.
Les ménages résidant dans les 28 Etats membres de l’U.E., en Suisse et en Norvège
peuvent déposer gratuitement leurs appareils électroniques usagés dans les déchetteries
agréées ou chez un revendeur (en cas d’achat d’un appareil neuf similaire).
Pour les pays non cités, n'hésitez pas à contacter votre collectivité locale pour vous renseigner
sur le mode d'élimination en vigueur.
En agissant ainsi, vous serez assuré que votre appareil sera traité, récupéré et recyclé dans les
règles, prévenant ainsi les effets néfastes potentiels sur l’environnement et la santé humaine.
16
Page 17
Consignes de sécurité importantes
1. Lisez ces instructions.
2. Conservez ces instructions.
3. Respectez toutes les mises en garde.
4. Suivez toutes les instructions.
5. Évitez d’utiliser cet appareil à proximité
d’une source liquide.
6. Nettoyez à l’aide d’un tissu sec seulement.
7. Ne bouchez pas les orifices de ventilation. Effectuez l’installation selon les
instructions du fabricant.
8. N’installez pas l’appareil près d’une
source de chaleur comme un radiateur,
une cuisinière, ou tout autre appareil (y
compris les amplificateurs) qui dégage de
la chaleur.
9. Utilisez uniquement des équipements/
accessoires spécifiés par le fabricant.
10. Déconnectez cet appareil du secteur lors
des orages ou lorsqu’il n’est pas utilisé
pendant longtemps.
11. Ne supprimez pas le plot de terre de
la fiche secteur. Les fiches polarisées
utilisées au Canada sont dotées de deux
lames dont l’une est plus large que
l’autre. Les fiches avec terre sont dotées
de deux lames auxquelles s’ajoute une
troisième broche de mise à la terre. La
troisième broche assure votre sécurité. Si
la fiche fournie ne rentre pas dans votre
prise secteur, consultez un électricien.
12. Protégez le cordon d’alimentation pour
éviter que l’on marche dessus ou qu’il
soit plié, en particulier au niveau de la
fiche, des connexions, et à l’endroit où il
sort de l’appareil.
13. N’utilisez l’appareil qu’avec le chariot,
socle, trépied, support ou table, spécifié
par le fabricant ou vendu avec l’appareil.
Un appareil utilisé avec un chariot doit
être déplacé avec soin afin d’éviter les
risques de blessures occasionnées par le
renversement de l’appareil.
14. L’entretien ou la réparation de l’appareil
doit être effectué uniquement par un
personnel qualifié. Faites réparer l’appareil dès que celui-ci est endommagé
d’une façon quelconque, qu’il s’agisse
du cordon ou de la fiche secteur, si du
liquide a été renversé ou des objets sont
tombés dans l’appareil, s’il a été exposé
à la pluie ou à une humidité excessive,
s’il ne fonctionne pas normalement ou
s’il a subi un choc.
15. INTERRUPTEUR MARCHE/ARRÊT :
Attention, l'interrupteur NE DÉCOUPLE
PAS totalement l'appareil du secteur.
16. DÉCONNEXION DU SECTEUR : La fiche
secteur doit rester utilisable. Pour les
Racks ou les installations dans lesquelles
la fiche secteur n'est pas accessible, un
interrupteur bipolaire sur la phase ET sur
le neutre avec un espace d'au moins 3
mm entre chaque pôle doit être incorporé
à l'installation électrique du Rack ou du
bâtiment.
17. POUR LES APPAREILS ÉQUIPÉS D'UN
PORTE FUSIBLE ACCESSIBLE DE
L'EXTÉRIEUR : Remplacez le fusible par
un autre exactement identique.
18. ÉQUIPEMENTS MULTI-TENSION : Cet
appareil peut nécessiter un cordon, une
fiche secteur (ou les deux) différent
de celui fourni, selon la zone géographique de l'installation. Veillez à ce que
la tension et la fréquence du secteur
correspondent à la sérigraphie située en
face arrière de l'appareil. Pour réduire
les risques d'incendie et d'électrocution,
confiez toutes les réparations à un technicien qualifié et agréé.
ENGLISH
FRANÇAISDEUTSCHEESPAÑOLITALIANO
RSX18A
17
Page 18

Table des matières
Introduction . . . . . . . . . . . . . . . . . . . . . . . . . . . . . 19
RSX18A — Généralités . . . . . . . . . . . . . . . . . . . . . . . . 20
Mise en œuvre . . . . . . . . . . . . . . . . . . . . . . . . . . . . 21
Réglages . . . . . . . . . . . . . . . . . . . . . . . . . . . . . . . 22
Configuration des enceintes . . . . . . . . . . . . . . . . . . . . . . 24
Phase et polarité . . . . . . . . . . . . . . . . . . . . . . . . . . . 25
Connexions . . . . . . . . . . . . . . . . . . . . . . . . . . . . . . 26
Installation des roulettes . . . . . . . . . . . . . . . . . . . . . . . 26
Caractéristiques techniques . . . . . . . . . . . . . . . . . . . . . . 27
18
Page 19

Introduction
Merci d'avoir choisi ce Subwoofer professionnel actif RSX18A Samson. L'RSX18A
comprend un baffle compact avec un Woofer de 46 cm (18 pouces) à longue course,
alimenté par un amplificateur de 2000 Watts configuré en classe-D. Le Subwoofer
est équipé de sorties stéréo large bande et filtrées (filtre passe-haut) pour l'utilisation
d'enceintes satellites ou pour lreier plusieurs RSX18A et créer un système de
sonorisation de grande taille.
Le baffle de le RSX18A est en contre-plaqué de 18 mm, recouvert d'une peinture
texturée noire haute résistance. Il est équipé de poignées en acier de grande taille, et
de roulettes imposantes, offrant une excellente protection contre l'usure et facilitant
grandement le transport. Le Subwoofer actif RSX18A est idéal en sonorisation de
concerts, pour les DJ, les installations fixes, ou toute autre application exigeant une
puissance élevée et une qualité sonore supérieure.
Dans ces pages, vous trouverez le détail des fonctions du Subwoofer actif RSX18A, les
instructions pas-à-pas d'utilisation, et les caractéristiques techniques complètes. Vous
trouverez également la carte de garantie — pensez à nous la renvoyer pour bénéficier
de l’assistance technique, et pour recevoir toutes les mises à jour sur les produits
Samson à l’avenir. Également, consultez notre site Internet (www.samsontech.com)
pour de plus amples renseignements sur tous nos produits.
Avec un entretien adapté, ce Subwoofer RSX18A vous donnera satisfaction pendant
de très nombreuses années. Prenez le temps de noter le numéro de série et la date
d’achat ci-dessous pour toute référence ultérieure.
ENGLISH
FRANÇAISDEUTSCHEESPAÑOLITALIANO
Numéro de série : ____________________________________________
Date d’achat : __________________________________________
En cas de réparation, vous devez obtenir une autorisation de retour. Sans cette
autorisation, nous n’accepterons pas le produit. Appelez Samson au 1-800-3726766 pour obtenir cette autorisation. Renvoyez si possible, l’appareil dans son
emballage original. Si vous avez acheté votre Subwoofer hors des USA, contactez
votre distributeur pour toute information. N’oubliez pas de consulter notre site Internet
(www.samsontech.com) pour en savoir plus sur tous nos produits.
RSX18A
19
Page 20
RSX18A — Généralités
Le Subwoofer actif RSX18A Samson fait appel aux technologies de pointe en
termes de haut-parleurs et d'amplification de puissance. Voici quelques unes de ses
caractéristiques :
• Woofer haute résistance de 46 cm (18 pouces) avec suspension périphérique
cahoutchouc en Butyl
• Amplificateur haut rendement de 2.000 Watts, à architecture de classe-D
• Deux entrées symétriques en XLR pour utilisation en mono ou en stéréo
• Sorties stéréo symétriques en XLR pour signaux large bande et filtrés (par filtre
passe-haut)
• Filtre actif interne à 126 Hz
• Sélecteur de polarité et réglage variable du volume
• Roulettes haute résistance montées à l'arrière
• Deux poignées en acier de grande taille
• Embase pour pied d'enceinte de 35 mm
• Grille de protection en acier haute résistance
• Baffle construit en contre-plaqué de 18 mm, avec renforts internes
• Peinture noire durable et en relief.
20
Page 21
Mise en œuvre
Les étapes suivantes vous permettront d'installer votre Subwoofer actif RSX18A :
• Déballez l'RSX18A ainsi que les éléments
fournis. Conservez les éléments de l'emballage
au cas où vous auriez à faire réparer l'appareil.
• Placez le Subwoofer RSX18A et les enceintes
satellite en fonction de la scène ou de
l'application envisagée. Le RSX18A est équipé
d'une embase pour pied de 35 mm, vous
permettant de monter une enceinte satellite
avec pied sur le RSX18A (utilisez le pied
Samson TS20, par exemple).
• Baissez le niveau de toutes les enceintes au
minimum.
• Placez l’interrupteur secteur de toutes les
enceintes en position OFF.
• Utilisez un signal à niveau ligne en provenance de votre console de mixage (ou
toute autre source) à l'entrée XLR Input de l'RSX18A. Si vous utilisez un seul
Subwoofer avec deux enceintes satellites stéréo, connectez les sorties Left
(gauche) et Right (droite) de la console de mixage aux entrées stéréo XLR Input
de l'RSX18A.
• Connectez un cordon XLR entre les sorties High Pass de l'RSX18A et les entrées
ligne des enceintes satellites.
• Connectez le cordon d’alimentation au secteur.
Remarque : Vérifiez toujours que la tension d’utilisation de l’enceinte (indiquée en
face arrière) soit identique à la tension secteur de votre zone géographique.
• Placez l’interrupteur secteur du RSX18A et des satellites en position ON.
• Lancez la lecture d'un signal audio (lecteur de CD, par exemple) en entrée de la
console, et veillez à ce que le niveau de sortie de la console soit correct.
• Montez lentement le niveau des satellites jusqu'à obtenir un niveau d'écoute
confortable. Montez alors le niveau de l'RSX18A à l'aide du bouton Level jusqu'à
obtenir un résultat sonore équilibré avec les satellites.
• Si le volume du RSX18A est trop fort, ou si vous remarquez que la Led Peak
clignote trop souvent, baissez un peu le niveau à l'aide du bouton Level de
l'RSX18A, jusqu'à ce que le témoin Peak cesse de clignoter, ou uniquement sur
les pointes de signal.
ENGLISH
FRANÇAISDEUTSCHEESPAÑOLITALIANO
RSX18A
21
Page 22

Réglages
1 6
4
1. MASTER LEVEL - Ce bouton détermine le niveau global en entrée de l'amplificateur
de puissance du RSX18A. Ce bouton n'affecte pas le niveau du signal des sorties
Full Range et High Pass.
2. Touche PHASE - Utilisez cette touche pour inverser la polarité du signal amplifié. En
position relâchée (NORMAL), la phase du signal reste intacte. Lorsque la touche
est enfoncée (INVERT), le déphasage est de 180°. La position de la touche Phase
n'affecte pas le niveau du signal des sorties Full Range et High Pass.
3. Témoin PEAK - Ce témoin ROUGE s’allume lorsque l’amplificateur de sortie atteint
l’écrêtage. Si le témoin Peak s’allume souvent, baissez le bouton Level sur le
Subwoofer RSX18A ou réduisez le niveau à la source, jusqu’à ce que le témoin ne
s’allume que rarement, sur les pointes de signal.
4. Témoin SIGNAL - La Led verte SIGNAL s’allume en présence d'un signal en entrée
du RSX18A.
5. Témoin POWER - Cette Led s’allume en ROUGE lorsque l'amplificateur est actif.
6. Entrées INPUTS (L et R) - Le RSX18A est équipé d'entrées stéréo symétriques
ligne en XLR. Les signaux des entrées gauche (Left — L) et droite (Right — R) sont
mélangés avant d'être dirigés vers l'amplificateur interne.
7. Sorties HIGH PASS (L et R) - Sorties stéréo à symétrie électronique en XLR mâles
à niveau ligne, permettant la connexion de vos enceintes satellites large bande. Le
signal est tout d'abord traité de façon interne par le filtre actif interne LinkwitzRiley à 126 Hz et 12 dB par octave.
32
5
7 8
22
Page 23

Réglages
7 8
8. Sorties FULL RANGE (L et R) - Sorties stéréo à symétrie électronique en XLR mâles
à niveau ligne, permettant la connexion de vos enceintes satellites large bande,
d'un autre Subwoofer, ou à vos enceintes de façade.
9. Embase secteur et porte fusible
- Connectez le cordon secteur
fourni à cette embase. Vérifiez
que le fusible installé est celui
correspondant à la tension
secteur locale lorsque vous
changez le fusible ou lorsque
que vous changez la position
du sélecteur de tension
secteur.
10. Sélecteur de tension -
Sélectionnez la position 115
Vca ou 230 Vca.
11. Interrupteur POWER - Place
l'RSX18A sous/hors tension.
9
10
11
ENGLISH
FRANÇAISDEUTSCHEESPAÑOLITALIANO
RSX18A
23
Page 24

Configuration des enceintes
Avant de commencer à câbler les enceintes, prenez le temps de réfléchir au plan
général autour de l'RSX18A. La plupart des systèmes de sonorisation rentrent dans
l'une de ces 2 catégories : Sonorisation avec Subwoofer stéréo ou mono.
Subwoofer mono
Dans la plupart des cas, il est préférable d'utiliser les Subwoofers en mono.
Les basses fréquences générées par un
Subwoofer ne sont pas directionnelles.
Étant donné la grande longueur d'ondes
basses fréquences, il est difficile à l'oreille
de déterminer si les infra-basses viennent
de la gauche ou de la droite (sauf dans le
cas d'une très grande pièce). C'est pour
cette raison qu'en général les basses fréquences sont ramenées en mono.
Subwoofers stéréo
Dans les espaces acoustiques plus volumineux, comme dans les théâtres et les
parcs à thèmes (pour les effets spéciaux
basses fréquences), utilisez deux RSX18A
en stéréo. Pour accentuer encore plus la
réponse dans le bas du spectre, connectez deux Subwoofers RSX18A de chaque
côté.
24
Page 25

Phase et polarité
Les haut-parleurs reproduisent le son en convertissant un signal électrique en
vibrations physiques. Ces vibrations physiques déplacent l'air et créent des ondes
sonores. Lorsque vous installez vos enceintes, il est important que tous les hautparleurs se déplacent dans la même direction en même temps, avec un mouvement
avant/arrière parfaitement synchronisé.
Ceci permet d'obtenir un son homogène sur
toutes les fréquences du spectre audible. Si
le Subwoofer est déphasé par rapport aux
enceintes de façade large bande, la réponse
dans les basses est affaiblie, avec certaines
fréquences qui deviennent carrément annulées — celles où la réponse des satellites
et du Subwoofer se chevauchent. Souvent,
ce phénomène est très subtile, mais il peut
créer des “trous” dans la musique et réduire
le niveau des basses fréquences.
Les Subwoofers RSX18A doivent être installés sur le même plan vertical que les
satellites. En réalité, tout le monde sait que ceci est très difficile à obtenir, du fait
des conditions toujours changeantes des scènes et espaces à sonoriser, de la configuration des pieds d'enceintes, voire de la forme du baffle des enceintes. Pour compenser ces obstacles, les Subwoofers RSX18A sont équipés d'une touche Phase, vous
permettant d'inverser la polarité du signal du Subwoofer par rapport au signal source.
Ceci vous permet de placer le RSX18A en phase avec le reste de la sonorisation, ou
de le déphaser à 180°.
0° 90° 180° 270° 360°
Phase SW = NORMAL
Time
Amplitude
Phase SW = INVERT
ENGLISH
FRANÇAISDEUTSCHEESPAÑOLITALIANO
Pour déterminer si votre RSX18A est en phase avec le reste de la sonorisation,
diffusez dans les enceintes un morceau audio avec beaucoup de basses. Placez-vous
à distance, où vous pouvez clairement entendre les signaux audio restitués par le(s)
Subwoofer(s) et les satellites, et écoutez jusqu'à pouvoir juger et mémoriser l'intensité de la réponse dans les basses fréquences. Appuyez sur la touche Phase du
RSX18A pour le déphaser de 180°, et revenez à votre position d'écoute (si possible,
demandez à quelqu'un d'appuyer sur la touche Phase pour vous éviter d'avoir à vous
déplacer). Comparez l'intensité de la réponse dans le bas du spectre entre les deux
positions. La position correcte est celle qui génère le plus de basses fréquences.
Si la situation le permet, vous pouvez affiner la mise en phase entre les RSX18A et
les satellites en déplaçant les Subwoofers plus ou moins en arrière ou en avant par
rapport à la position d'écoute.
RSX18A
25
Page 26

Connexions
XLR to XLR Balanced
XLR to Balanced 1/4-Inch
Les RSX18A sont équipés d’entrées et de sorties symétriques en XLR. Lorsque cela
est possible, utilisez des liaisons symétriques pour éviter toute interférence. Voici la
façon dont sont câblés les RSX18A :
Installation des roulettes
• Prenez une roulette, quatre vis et quatre
rondelles.
• Placez la roulette en position et commencez à visser avec les doigts. Veillez à
ce que les vis soient correctement prises
dans le filetage. N'appuyez pas sur les
vis, car vous risquez de déloger le contreécrou interne.
• Utilisez un tournevis pour serrer les
quatre vis.
• Répétez la même opération pour les trois
roulettes restantes.
26
Page 27

Caractéristiques techniques
Amplificateur de puissance
Puissance 2.000 Watts
DHT < 0,1 %
Architecture Classe-D
Haut-parleur
Haut-parleur Membrane en papier de 46 cm (18 pouces), bobine
de 3 pouces (76 mm) de diamètre
Rendement 95 dB SPL à 1 W/1 m
Mesures acoustiques
Réponse en fréquence 30 Hz- 135 Hz (+/-3 dB)
Niveau SPL maximum 125 dB SPL à 2.000 Watts
Filtre actif
Type 24 dB/oct., filtre Linkwitz-Riley
Fréquence de coupure 126 Hz
ENGLISH
Réglages et connecteurs
Entrées (L et R) XLR femelle symétrique - niveau ligne
Sorties High Pass (L et R) XLR mâle symétrique - niveau ligne
Sorties Full Range (L et R) XLR mâle symétrique - niveau ligne
Réglages Bouton Master Level, touche Phase
Témoins Peak, Signal, Power
Alimentation
Consommation électrique 645 W max.
Embase secteur IEC mâle à 3 broches 250 Vca, 20 A
Fusible 100 - 120 Vca T8 AL / 250 V
220 - 240 Vca T4 AL / 250 V
Baffle
Construction Contre-plaqué de 18 mm
Finition Peinture polyuréthane texturée noire
Roulettes 4 roulettes de 46 mm
Poignées 2 poignées en acier
Grille Acier perforé
Méthode de montage Embase pour pied d'enceinte de 35 mm
Dimensions et poids
Dimensions 686 mm L x 522 mm l x 629 mm H
Poids 39 kg
Caractéristiques sujettes à modifications sans préavis.
FRANÇAISDEUTSCHEESPAÑOLITALIANO
RSX18A
27
Page 28

Wichtige Sicherheitshinweise
FCC Erklärung
Dieses Gerät wurde getestet und entsprechend der FCC Regelungen, Part 15, als mit den
Class B Digital Device Grenzen als konform eingestuft. Diese Grenzen wurden festgelegt, um
einen angemessenen Schutz gegen gefährliche Interferenzen in einer Haushalts-Umgebung zu
gewährleisten.
Dieses Gerät erzeugt, verwendet und kann Radiofrequenzen ausstrahlen und wenn es nicht
entsprechend der Anweisungen installiert wird, kann es schädliche Interferenzen bei Radio-Kommunikationsgeräten hervorrufen. Bei keiner Installation können Störungen jedoch völlig
ausgeschlossen werden. Wenn das Gerät starke Interferenzen bei Radio- und Fernsehgeräten
hervorruft, was durch Aus- und Einschalten des Geräts geprüft werden kann, wird dem Benutzer
empfohlen, die Störungen durch eine oder mehrere der folgenden Maßnahmen zu unterbinden:
• Die Position oder die Richtung der Empfängerantenne ändern.
• Den Abstand zwischen Gerät und Empfänger erhöhen.
• Das Gerät mit einer Steckdose eines anderen internen Kreises verbinden als den, mit dem
der Empfänger verbunden ist.
• Fragen Sie Ihren Händler oder bitten Sie einen erfahrenen Radio- und Fernsehtechniker
um Hilfe.
ACHTUNG: Alle Änderungen oder Modifikationen, die nicht ausdrücklich durch die Garantie des
Geräts genehmigt wurden, können zum Verlust der Betriebserlaubnis des Geräts führen.
Kanada, Industry Canada (IC) Hinweise
Dieses digitale Class B Gerät entspricht den Kanadischen Anforderungen nach ICES-003.
Der Betrieb unterliegt folgenden beiden Bedingungen:
(1) dieses Gerät darf keine schädlichen Störungen verursachen, und
(2) dieses Gerät muss alle Störungen vertragen, einschließlich Störungen, die unerwünsch-
te Funktionen verursachen können.
Canada, avis d’Industry Canada (IC)
Cet appareil numérique de classe B est conforme aux normes canadiennes ICES-003.
Son fonctionnement est soumis aux deux conditions suivantes :
(1) cet appareil ne doit pas causer d’interférence et
(2) cet appareil doit accepter toute interférence, notamment les interférences qui peuvent
affecter son fonctionnement.
28
Page 29

Wichtige Sicherheitshinweise
1. Lesen Sie diese Anweisungen.
2. Bewahren Sie diese Anweisungen auf.
3. Beachten Sie alle Warnungen.
4. Folgen Sie allen Anweisungen.
5. Dieses Gerät darf nicht Wasserspritzern oder
einem Wasserstrahl ausgesetzt werden und
es darf keine Vase oder ein mit Wasser gefülltes Objekt auf das Gerät gestellt werden.
6. Reinigen Sie es nur mit einem trockenen
Tuch.
7. Verschließen Sie keine Ventilationsöffnungen. Installieren Sie das Gerät gemäß den
Anweisungen des Herstellers.
8. Installieren Sie es nicht in der Nähe von
Wärmequellen wie Radiatoren, Heizkörpern,
Öfen oder anderen Geräten (einschließlich
Verstärker), die Hitze erzeugen.
9. Benutzen Sie nur die vom Hersteller spezifizierten Zubehörteile.
10. Ziehen Sie bei Gewittern oder wenn das
Gerät längere Zeit nicht benutzt wird den
Stecker aus der Steckdose.
11. Umgehen Sie nicht die Sicherheitsfunktion
des polarisierten oder geerdeten Steckers. Ein polarisierter Stecker besteht aus
zwei Flachkontakten, wobei einer breiter
ist als der andere. Ein Stecker mit Erdung
besteht aus zwei Flachkontakten und einem
dritten runden Erdungsstift. Der breite
Flachkontakt und der Erdungsstift wurden
aus Sicherheitsgründen integriert. Wenn der
mitgelieferte Stecker nicht in Ihre Steckdose passt, bitten Sie einen Elektriker, die
obsolete Steckdose auszutauschen.
12. Schützen Sie das Stromversorgungskabel
davor, dass man darauf tritt und dass es
geknickt wird, vor allem an den Steckern,
Buchsenteilen und an den Punkten, an
denen das Kabel aus dem Gerät kommt.
13. Benutzen Sie nur Wagen, Ständer, Stative,
Halter oder Tische, die vom Hersteller
angegeben werden oder passend zum Gerät
erhältlich sind. Wenn ein Wagen eingesetzt
wird, sollten Sie vorsichtig sein, wenn Sie
den Wagen und das Gerät bewegen, um Verletzungen durch Umkippen zu vermeiden.
14. Übergeben sie das Gerät zur Reparatur nur
qualifiziertem Personal. Wenn das Gerät in
irgendeiner Weise beschädigt wurde, wie
etwa ein gebrochenes Stromversorgungskabel oder ein defekter Stecker, Schäden
durch eingetretene Flüssigkeit oder dadurch, das ein Objekt in das Gerät gefallen ist,
wenn es Regen oder Feuchtigkeit ausgesetzt
wurde oder wenn das Gerät nicht normal
funktioniert oder es gefallen ist, muss es
von einem Techniker überprüft werden.
15. HAUPTSCHALTER EIN/AUS SCHALTER:
Bei Produkten mit einem Hauptschalter
unterbricht dieser Schalter NICHT die
Verbindung zum Stromnetz.
16. STROMKABEL ABKLEMMEN: Der Stecker
sollte immer betriebsbereit sein. Bei einer
Rack Montage oder bei Installationen,
bei denen der Stecker nicht erreichbar ist
muss ein Hauptschalter im Rack oder dem
Gebäude / Gerüst eingebaut werden, der
alle Phase unterbricht und einen Kontaktabstand von wenigstens 3 mm hat.
17. FÜR GERÄTE MIT EXTERN ZUGÄNGLICHEM SICHERUNGSKASTEN: Ersetzen Sie
die Sicherung nur mit einer desselben Typs
und denselben Werten.
18. MEHRFACH SPANNUNGSVERSORGUNG:
Bei diesem Equipment kann der Einsatz von
mehreren Stromversorgungskabeln, Steckern oder beiden erforderlich sein abhängig
von der am Aufstellungsort vorhandenen
Stromversorgung. Verbinden Sie dieses
Gerät nur an die Stromquelle, die an der
Rückseite des Geräts angegeben ist. Um die
Gefahr eines Brandes oder eines Stromschlags zu verringern, wenden Sie sich bitte
an einen qualifizierten Servicetechniker
oder eine ähnlich qualifizierte Person.
19. WARNUNG: Der Hauptstecker / Gerätekupplung ist als Abschalteinrichtung ausgelegt.
Die Abschalteinrichtung muss immer
betriebsbereit sein.
ENGLISH
FRANÇAISDEUTSCHEESPAÑOLITALIANO
RSX18A
29
Page 30

Wichtige Sicherheitshinweise
WARNUNG: Um die Gefahr eines elektrischen Schlages zu mindern,
Öffnen Sie nicht die Abdeckung (oder Rückseite), da sich im
Inneren keine vom Benutzer zu wartenden Teile befinden.
Übergeben Sie das Gerät zur Reparatur nur qualifiziertem Personal.
RISQUE DE CHOC ÉLECTRONIQUE -
ATTENTION
NE PAS OUVRIR
Dieser Blitz mit einem Pfeil als Symbol in einem gleichseitigen Dreieck soll den
Benutzer auf das Vorhandensein von "gefährlicher Spannung” im Gehäuse des
Produkts hinweisen. Diese Spannung ist unter Umständen groß genug, um ein Risiko
für einen elektrischen Schlag darzustellen.
Das Ausrufungszeichen in einem gleichseitigen Dreieck soll den Benutzer in der
mit dem Gerät mitgelieferten Dokumentation auf eine wichtige Betriebs- oder
Wartungsanweisung hinweisen.
WARNUNG: Nicht öffnen! Gefahr eines elektrischen Schlags. Die Spannungen in diesem Gerät
sind lebensgefährlich. Es enthält keine vom Benutzer zu wartenden Teile. Übergeben Sie das
Gerät zur Reparatur nur qualifiziertem Personal.
Stellen Sie das Gerät in der Nähe einer Steckdose auf und vergewissern Sie sich, dass Sie
leichten Zugriff auf den Stromunterbrecherschalter haben.
WARNUNG: Dieses Produkt soll NUR mit den Wechselspannungen betrieben werden, die an der
Rückwand aufgeführt sind, oder mit dem mitgelieferten Netzteil des Produktes. Der Betrieb von
anderen als den angegebenen Spannungen kann zu irreparablen Schäden am Produkt führen
und die Garantie des Produkts erlischt damit. Vor der Verwendung von AC Stecker-Adaptern
wird gewarnt, da das Produkt damit an Steckdosen mit Spannungen angeschlossen werden
kann, für die das Produkt nicht ausgelegt wurde. Wenn das Produkt mit einem abziehbaren
Netzkabel ausgestattet ist, verwenden Sie die Art, die mit Ihrem Produkt mitgeliefert wurde
oder von Ihrem lokalen Händler und / oder Vertrieb zur Verfügung gestellt wird. Wenn Sie Zweifel hinsichtlich der richtigen Betriebsspannung haben, wenden Sie sich an Ihren Händler und /
oder Vertrieb.
ACHTUNG: Um die Gefahr eines elektrischen Schlages zu vermeiden, schließen Sie das Gerät nicht
ans Stromnetz an, während ein Gitter entfernt ist.
Wenn Sie das Produkt entsorgen möchten, geben Sie es nicht in den Hausmüll. In
Übereinstimmung mit der Gesetzgebung existiert ein separates Sammelsystem für
elektrische und elektronische Produkte. Diese Gesetze fordern eine angemessene
Behandlung, Verwertung und Wiederaufbereitung solcher Geräte.
Private Haushalte in den 28 Mitgliedsstaaten der EU, in der Schweiz und Norwegen können
ihre elektronischen Produkte kostenlos an eine Sammelstelle oder den Händler abgeben (wenn
Sie ein ähnliches Produkt wieder erwerben).
Verbraucher in Ländern, die nicht oben genannt werden, kontaktieren bitte ihre lokalen
Behörden, um Informationen über eine korrekte Entsorgung zu erhalten.
Sie werden so sicherstellen, dass Ihr Produkt der notwendigen Behandlung, Verwertung und
Wiederaufbereitung unterzogen wird und eventuelle negative Auswirkungen auf die Umwelt und
die Gesundheit vermieden werden.
30
Page 31

Inhalt
Einleitung . . . . . . . . . . . . . . . . . . . . . . . . . . . . . . 32
RSX18A Features . . . . . . . . . . . . . . . . . . . . . . . . . . . 33
Schnellstart. . . . . . . . . . . . . . . . . . . . . . . . . . . . 34
Regler und Funktionen . . . . . . . . . . . . . . . . . . . . . . . . 35
Boxensystem konfigurieren. . . . . . . . . . . . . . . . . . . . . . . 37
Phase und Polarität . . . . . . . . . . . . . . . . . . . . . . . . . . 38
Rollen installieren. . . . . . . . . . . . . . . . . . . . . . . . . . . 39
Anschlüsse . . . . . . . . . . . . . . . . . . . . . . . . . . . . . . 39
Technische Daten . . . . . . . . . . . . . . . . . . . . . . . . . . . 40
ENGLISH
FRANÇAISDEUTSCHEESPAÑOLITALIANO
RSX18A
31
Page 32

Einleitung
Herzlichen Dank für den Kauf des professionellen Samson RSX18A Aktivsub woofers.
Der RSX18A ist eine kompakte, kraftvolle Bassbox mit weit auslenkendem 18" Treiber
und 2000 Watt Class-D Endstufe. Der Subwoofer bietet stereo Breitband- und Hochpass-Ausgänge zum Betreiben von Satellitenboxen oder Koppeln mehrerer RSX18A
Modelle, um ein größeres Beschallungssystem einzurichten.
Der RSX18A Sub ist aus 18 mm starkem Sperrholz gefertigt, mit strapazierfähigem
textur ier tem schwarzen Lack überzogen und mit ergonomischen Stahlgriffen sowie
großen Rollen bestückt. Diese Ausstattung schützt effektiv vor Abnutzung und ermöglicht einen einfachen Transport. Der RSX18A Aktivsubwoofer ist ideal geeignet
für Live-Musik, DJing und Festinstallationen sowie für alle Gelegenheiten, bei denen
Leistungs stärke und exzellente Klangqualität unverzichtbar sind.
Auf diesen Seiten finden Sie eine detaillierte Aufstellung der Funktionen des RSX18A
Aktivsubwoofers sowie eine Be schreibung seiner Regler, schrittweise Anleitungen für
die Einrichtung und Anwendung plus umfassende technische Daten. Bitte vergessen
Sie nicht, die beiliegende Garantiekarte ausgefüllt an uns zurückzusenden, damit Sie
online technischen Support erhalten und wir Ihnen zukünftig aktuelle Informationen
über dieses und andere Samson-Produkte zukommen lassen können. Besuchen Sie
auch unsere Website (www.samsontech.com), um Informationen über unsere komplette Produktpalette zu erhalten.
Bei sorgsamer Behandlung und angemessener Belüftung wird Ihr RSX18A viele Jahre
störungsfrei funktionieren. Die Seriennummer Ihres Geräts sollten Sie vorsorglich in
der Zeile unten eintragen.
Seriennummer: _______________________________
Kaufdatum: __________________________________
Falls Ihr Gerät einmal gewartet werden muss, benötigen Sie vor der Rücksendung an
Samson eine Return Authorization-Nummer (RA/Rücksendeberechtigungsnummer).
Ohne diese Nummer wird das Gerät nicht angenommen. Rufen Sie bitte Samson
unter 1-800-3SAMSON (1-800-372-6766) an, um vor der Rücksendung eine RANummer zu erhalten. Bewahren Sie das Verpackungsmaterial auf und schicken Sie
das Gerät möglichst im Originalkarton und der Originalverpackung zurück. Wenn Sie
Ihr Samson-Produkt nicht in den USA gekauft haben, setzen Sie sich bei Fragen zu
Garantie und Wartung bitte mit Ihrem lokalen Vertrieb in Verbindung
32
.
Page 33

RSX18A Features
Der Samson RSX18A Aktivsubwoofer arbeitet mit modernster Lautsprecher- und
Endstufentechnik. Seine wichtigsten Features sind:
• Hochbelastbarer 18” Basswandler mit Butylen-Gummirahmen
• Integrierte hocheffiziente 2000 Watt Class-D Endstufe
• Zwei symmetrische XLR-Eingänge für den Mono- oder Stereobetrieb
ENGLISH
FRANÇAISDEUTSCHEESPAÑOLITALIANO
• Symmetrische stereo XLR Breitband- und Hochpass-Ausgänge
• Internes aktives 126 Hz Crossover
• Wählbare Polarität und variable Pegelregelung
• Hochbelastbare, rückseitig montierte Rollen
• Zwei große Stahltragegriffe
• 35 mm Ständerhalterung
• Hochbelastbares Stahlschutzgitter
• 18 mm Sperrholzkonstruktion, intern verstrebt
• Strapazierfähige texturierte schwarze Polyurethan-Lackierung
RSX18A
33
Page 34

Schnellstart
Gehen Sie schrittweise wie folgt vor, um Ihren RSX18A Aktivsubwoofer einzurichten.
• Packen Sie den RSX18A und die mitgeliefer-
ten Bauteile aus. Bewahren Sie die Verpackung auf, falls Sie umziehen oder das Gerät
zur Wart ung zurückschicken müssen.
• Bauen Sie den RSX18A Subwoofer und die
Satellitenboxen an einer geeigneten Stelle
des Veranstaltungsorts auf. Sie können
eine Montagestange (z. B. Samson TS20)
in die 13/8" (35 mm) Ständerhalterung des
RSX18A stecken und darauf eine Satellitenbox montieren.
• Drehen Sie die Pegelregler aller Boxen ganz
nach links.
• Deaktivieren Sie die Netzschalter aller Boxen
(OFF).
• Verbinden Sie ein Line-Pegel-Signal Ihres Mischers (oder einer anderen Quelle)
mit der XLR Input-Buchse des RSX18A. Wenn Sie einen einzelnen Subwoofer mit
stereo Satellitenboxen betreiben, verbinden Sie die linken und rechten Ausgänge
des Mischers mit den stereo XLR Input-Buchsen des RSX18A.
• Führen Sie ein XLR-Kabel vom High Pass-Ausgang des RSX18A zum Line-Eingang
Ihrer Satellitenboxen.
• Schließen Sie das mitgelieferte Netzkabel an eine Netzsteckdose an.
Hinweis: Achten Sie immer darauf, dass die Netzsteckdose die Spannung liefert,
die auf dem rückseitigen Bedienfeld des RSX18A Sub angegeben ist.
• Aktivieren Sie den Netzschalter Ihres RSX18A und Ihrer Satellitenboxen (ON).
• Speisen Sie ein Audiosignal (z. B. Musik von CD) über Ihren Mischer ein und stel-
len Sie mit Hilfe der Pegelanzeigen einen guten Ausgangspegel ein.
• Drehen Sie den Pegelregler der Satellitenboxen langsam auf, bis ein angenehmer
Pegel erreicht ist. Drehen Sie dann den Pegelregler des RSX18A auf, bis ein Pegel
erreicht ist, der sich gut in die restliche Mischung integriert.
• Wenn der RSX18A zu laut wird oder die Peak-Anzeige häufig blinkt, drehen Sie
den Pegelregler des RSX18A etwas zurück, bis die Peak-Anzeige nicht mehr oder
nur noch bei Pegelspitzen leuchtet.
34
Page 35

Regler und Funktionen
1 6
4
1. MASTER LEVEL - Dieser Regler steuert den Gesamtsignalpegel am Eingang der
RSX18A Endstufe. Dieser Regler wirkt nicht auf das zu den Full Range- und High
Pass-Ausgängen geleitete Signal.
1. PHASE-Schalter - Mit dieser Taste wählen Sie die Polarität des verstärkten Signals.
Bei gelöster Taste (NORMAL) bleibt das Signal unverändert. Bei gedrückter Taste
(INVERT) wird die Polarität des Signals um 180° gedreht. Die Einstellung der
Polarity-Taste wirkt nicht auf das zu den Full Range- und High Pass-Ausgängen
geleitete Signal.
2. PEAK-Anzeige - Diese rote LED leuchtet, wenn sich der Verstärker der Clipping-
Grenze nähert. Wenn die Peak-Anzeige häufig leuchtet, drehen Sie den Pegelregler
des RSX18A subwoofers oder den Signalpegel an der Quelle zurück, bis die
Anzeige nicht mehr oder nur noch gelegentlich bei Pegelspitzen leuchtet.
3. SIGNAL-Anzeige - Die grüne SIGNAL LED leuchtet immer, wenn ein Signal an den
RSX18A Eingängen anliegt.
4. POWER-Anzeige - Die LED leuchtet bei aktiviertem Verstärker ROT.
5. INPUTS (L und R) - Der RSX18A verfügt über elektronisch symmetrische stereo
XLR Line-Eingangsbuchsen. Die linken (L) und rechten (R) Eingangssignale
werden zusammengemischt, bevor sie zum internen Verstärker geleitet werden.
6. HIGH PASS-Ausgänge (L und R) - Über diese elektronisch symmetrischen stereo
XLR Line-Ausgangsstecker wird das an den INPUTs anliegende Signal zu Ihren
Breitband-Hauptboxen geleitet. Vor Erreichen der Ausgänge wird das Signal mit
dem internen aktiven 12dB/Oktave 126 Hz Linkwitz-Riley Crossover bearbeitet.
RSX18A
32
5
7 8
35
ENGLISH
FRANÇAISDEUTSCHEESPAÑOLITALIANO
Page 36

Regler und Funktionen
7 8
7. FULL RANGE-Ausgänge (L und R) - Über diese elektronisch symmetrischen
breitbandigen stereo XLR Line-Ausgangsstecker kann man einen weiteren
Subwoofer anschließen oder ein Breitbandsignal zu den PA-Hauptboxen leiten.
8. Netzanschluss und Sicherungsfach - Schließen Sie hier das mitgelieferte standard
IEC Netzkabel an. Wenn
Sie die Betriebsspannung
ändern oder die Sicherung
wechseln, müssen Sie immer
eine Sicherung mit korrekten
Nennwerten installieren.
9. Spannungswahlschalter
- Schieben Sie diesen
Schalter auf die korrekte
Betriebsspannung (115 oder
230 Volt).
10. Netzschalter - Schaltet den
RSX18A ein/aus.
9
10
11
36
Page 37

Boxensystem konfigurieren
Bevor Sie Kabel einstecken, sollten Sie entscheiden, wie Sie Ihren neuen RSX18A in
die Anlage integrieren möchten. Die meisten System-Setups lassen sich in eine von
zwei Kategorien einordnen: Stereo- oder Mono-Betrieb.
Mono Sub-Betrieb
In den meisten Fällen ist der gemeinsame
(Mono) Subbass-Betrieb vorzuziehen. Die
von einem Subwoofer erzeugten Bässe sind
ungerichtet. Da tieffrequente Schall wellen
zu ihrer Entwicklung so viel Raum benötigen, lässt sich für das Gehör nur schwer
feststellen, ob der Subbass von links oder
rechts kommt, sofern man sich nicht in
einem sehr großen Saal befindet. Aufgrund
dieses Phänomens wird fast das gesamte
Subbass-Material in Mono gemischt.
Stereo Sub-Betrieb
In größeren Räumen sowie in Theaterund Freizeitpark-Installationen (für spezielle Basseffekte) kann man zwei RSX18A
in Stereo betreiben. Zur Erzeugung zusätzlicher Tiefbässe können Sie auf jeder
Seite des Boxensystems ein Paar RSX18A
Subwoofer verketten.
ENGLISH
FRANÇAISDEUTSCHEESPAÑOLITALIANO
RSX18A
37
Page 38

Phase und Polarität
Ein Lautsprecher erzeugt Schall, indem er elektrische Signale in physikalische
Schwing ungen umwandelt. Diese physikalische Schwingung wiederum bewegt Luft
und erzeugt Schallwellen. Beim Einrichten eines Boxensystems sollten sich alle
Lautsprecher phasensynchron bewegen, wobei die Vor- und Rückwärtsbewegungen der
Lautsprecher synchronisiert sind. Dadurch wird ein ausgewogener Klang über den gesamten hörbaren Frequenzbereich erzeugt.
Wenn der Subwoofer phasengedreht zu den
breitbandigen PA-Hauptboxen betrieben
wird, fällt im Überlappungsbereich der
Satelliten- und Subwooferfrequenzen der
Bassfrequenzgang ab und es treten eventuell sogar Frequenzauslöschungen auf. Häufig ist dieses Phänomen eher subtil, aber es
kann "Löcher" in der Musik erzeugen und
die tiefen Frequenzen abschwächen.
Idealerweise sollte Ihr RSX18A Subwoofer plan mit Ihren Satellitenboxen stehen. In
der Realität ist dies manchmal schwer umsetzbar, da beim Einrichten eines PA-Systems räumliche Einschränkungen, die Boxenständerkonfiguration oder auch die Form
der Boxengehäuse zu berücksichtigen sind. Um diese Hindernisse zu kompensieren,
wurde der RSX18A mit einem Phase-Schalter ausgerüstet, mit dem man die Polarität
des Subwoofers relativ zum Quellensignal umkehren kann. Dadurch können Sie den
RSX18A phasensynchron oder um 180° phasengedreht zum Rest des PA-Systems
schalten.
0° 90° 180° 270° 360°
Phase SW = NORMAL
Time
Amplitude
Phase SW = INVERT
Um zu bestimmen, ob das vom RSX18A erzeugte Audiomaterial phasensynchron zum
Rest des PA-Systems ist, spielen Sie einen Audiotrack mit hohem Bassanteil über
das Boxensystem ab. Hören Sie sich das Audio des Subwoofers und der Hauptboxen
aus ausreichend großer Entfernung an und konzentrieren Sie sich auf den Pegel der
Bassfrequenzen. Drücken Sie die Phase-Taste des RSX18A, um dessen Phase um 180°
zu drehen und kehren Sie an Ihre ursprüngliche Hörposition zurück. (Falls möglich,
lassen Sie eine andere Person die Phase-Taste drücken, damit Sie an genau der gleichen Stelle stehen bleiben können). Vergleichen Sie die Gesamtpegel der Bassfrequenzen beider Einstellungen. Bei der korrekten Einstellung hören Sie mehr Bassfrequenzen. Wenn es die Örtlichkeit erlaubt, können Sie die Phase des RSX18A relativ
zu Ihren Satellitenboxen feinabstimmen, indem Sie den Abstand zwischen Subwoofer
und Hörposition verkleinern oder vergrößern.
38
Page 39

Anschlüsse
XLR to XLR Balanced
XLR to Balanced 1/4-Inch
Der RSX18A verfügt über symmetrische Ein- und Ausgänge mit XLR-Anschlüssen
gemäß Branchenstandard. Verwenden Sie möglichst immer hochwertige symmetrische Verbindungen zu anderen Geräten, um Störungen zu unterdrücken. Ein
Verdrahtungsdiagramm der RSX18A-Anschlüsse finden Sie weiter unten.
Rollen installieren
ENGLISH
FRANÇAISDEUTSCHEESPAÑOLITALIANO
• Nehmen Sie eine Rolle und jeweils
vier der mitgelieferten Schrauben und
Unterlegscheiben.
• Richten Sie die Rolle aus und drehen
Sie die Schrauben mit der Hand an.
Achten Sie darauf, dass die Schrauben
richtig im Gewinde sitzen. Drücken
Sie nicht auf die Schrauben, da sich
da durch die internen T-Nuten des
Gewindes lösen könnten.
• Drehen Sie die vier Schrauben mit
einem Schraubenzieher fest.
• Wiederholen Sie die obigen Schritte bei
den restlichen drei Rollen.
RSX18A
39
Page 40

Technische Daten
Verstärker
Leistung 2000 Watt
Klirrfaktor < 0,1%
Technik Class-D
Wandler
Treiber 18" Papierkonus, 3" Schwingspulendurchmesser
Empfindlichkeit 95 dB Schalldruck @ 1 W / 1 m
Akustische Leistung
Frequenzgang 30 Hz - 135 Hz (+/-3 dB)
Max. Schalldruck 125 dB Schalldruck @ 2000 Watt
Elektronisches Crossover
Crossover-Typ 24 dB/Okt. Linkwitz-Riley
Crossover-Frequenz 126 Hz
Regler und Anschlüsse
Eingänge (L und R) symmetrische XLR-Buchse - Line-Pegel
Hochpass-Ausgänge (L und R) symmetrische XLR-Stecker - Line-Pegel
Breitband-Ausgänge (L und R) symmetrische XLR-Stecker - Line-Pegel
Regler Master Level-Drehregler, Phase-Schalter
Anzeigen Peak, Signal, Netz
Spannungsversorgung
Leistungsaufnahme 645 W max.
Netzanschluss 3-Pol IEC-Stecker 250 VAC, 20 A
Sicherung 100 - 120 VAC T8AL / 250 V
220 - 240 VAC T4AL / 250 V
Gehäuse
Bauweise 18 mm Sperrholz
Oberfläche texturierter schwarzer Polyurethan-Lack
Rollen 4 x 3" (7,6 cm)
Tragegriffe 2 x Stahl
Schutzgitter perforierter Stahl
Montage-Option integrierte 1 3/8" (35 mm) Boxenstangenhalterung
Abmessungen und Gewicht
Abmessungen Zoll 20,2" L x 25,3" B x 24,1" H
mm 686 mm L x 522 mm B x 629 mm H
Gewicht lbs 86
kg 39
Technische Daten können unangekündigt geändert werden.
40
Page 41

Instrucciones importantes de seguridad
Declaración FCC
Se ha verificado que este aparato cumple con los límites establecidos para un dispositivo digital
de Clase B, de acuerdo a lo establecido en la Sección 15 de las Normas de la FCC. Estos límites han sido diseñados para ofrecer una protección razonable contra las interferencias molestas
en instalaciones residenciales.
Este aparato genera, utiliza y puede emitir energía de radiofrecuencia y, si no se instala y utiliza
de acuerdo con las instrucciones, puede producir interferencias molestas en las comunicaciones de radio. No obstante, no está garantizado que estas interferencias no se produzcan en una
instalación concreta. Si este aparato produce interferencias molestas en la recepción de la radio
o la televisión, lo cual podrá comprobar fácilmente apagando y encendiendo este aparato, el
usuario será el responsable de tratar de corregir dichas interferencias por medio de una o más
de las siguientes medidas:
• Reoriente o reubique la antena receptora.
• Aumente la distancia de separación entre este aparato y el receptor.
• Conecte este aparato a una salida de corriente o regleta distinta a la que esté conectado el
receptor.
• Pida consejo a un técnico especialista en radio/TV o en el establecimiento en el que adquirió el producto.
ENGLISH
PRECAUCIÓN: Los cambios o modificaciones no aprobados expresamente por el cesionario de
este dispositivo podrían anular la autorización del usuario para utilizar el equipo.
Notificación de Industry Canada (IC) para los Usuarios Canadienses
Este aparato digital de la Clase B cumple la norma canadiense ICES-003.
Su funcionamiento está sujeto a las dos condiciones siguientes:
(1) este aparato no puede producir interferencias molestas, y
(2) este aparato debe aceptar cualquier interferencia recibida, incluyendo aquellas que
puedan producir un funcionamiento no deseado de la unidad..
Canada, avis d’Industry Canada (IC)
Cet appareil numérique de classe B est conforme aux normes canadiennes ICES-003.
Son fonctionnement est soumis aux deux conditions suivantes :
(1) cet appareil ne doit pas causer d’interférence et
(2) cet appareil doit accepter toute interférence, notamment les interférences qui peuvent
affecter son fonctionnement..
FRANÇAISDEUTSCHEESPAÑOLITALIANO
RSX18A
41
Page 42

Instrucciones importantes de seguridad
1. Lea cuidadosamente estas instrucciones.
2. Conserve estas instrucciones para cualquier
consulta en el futuro.
3. Siga cuidadosamente todas las advertencias.
4. Observe y siga todas las instrucciones del
fabricante.
5. Este aparato no debe exponerse al goteo o a
las salpicaduras de líquidos. Tampoco deben
colocarse sobre él objetos llenos de líquidos,
como por ejemplo jarrones.
6. Limpie el aparato solo con un trapo seco.
7. No bloquee las aperturas de ventilación.
Instale el aparato de acuerdo con las instrucciones del fabricante.
8. No instale el aparato cerca de fuentes de
calor como, por ejemplo, rejillas de calefacción, estufas u otros aparatos (incluyendo
amplificadores) que produzcan calor.
9. Utilice solo las conexiones/accesorios especificados por el fabricante.
10. Desenchufe este aparato durante las tormentas eléctricas o cuando no vaya a utilizarlo
durante un período de tiempo prolongado.
11. No anule el sistema de seguridad del enchufe de tipo polarizado o con toma de tierra.
Un enchufe polarizado tiene dos patillas,
una más ancha que la otra. Un enchufe con
toma de tierra tiene dos patillas normales
y una tercera para la conexión a tierra. La
patilla ancha o la tercera patilla se incluyen
como medida de seguridad. Si el enchufe
suministrado no encajara en su toma de
corriente, llame a un electricista para que le
cambie su toma anticuada.
12. Evite que el cable de corriente quede en
una posición en la que pueda ser pisado o
aplastado, especialmente en los enchufes,
receptáculos y en el punto en el que sale de
la unidad.
13. Utilice solo el soporte de carro, el soporte
de trípode o la mesa especificados por el
fabricante o vendidos junto con el aparato.
Si utiliza un carro, es necesario que proceda
con precaución a la hora de mover el conjunto del carro/aparato con el fin de evitar
que vuelque y las lesiones personales que
ello podría acarrearle.
42
14. Dirija cualquier posible reparación solo a
personal técnico debidamente cualificado.
Deberá hacer que su aparato sea reparado
cuando esté dañado de cualquier manera,
como por ejemplo si el cable de corriente
o el enchufe están dañados, o si se han
derramado líquidos, o se ha introducido
algún objeto dentro de la unidad, si ésta ha
quedado expuesta a la lluvia o la humedad,
si no funciona normalmente o si ha caído
al suelo.
15. INTERRUPTOR DE ENCENDIDO/APAGADO:
Para aquellos aparatos que dispongan de
interruptor, este NO INTERRUMPE la conexión a la corriente eléctrica.
16. DESCONEXIÓN DE LA CORRIENTE:
Coloque el aparato de forma que siempre
pueda acceder fácilmente al enchufe de
corriente. Para equipos montados en racks
o instalaciones en las que no pueda acceder
fácilmente al enchufe, incorpore un conmutador con una separación de contactos de al
menos 3 mm en cada polo en la regleta o el
sistema eléctrico.
17. PARA UNIDADES EQUIPADAS CON UN
RECEPTÁCULO DE FUSIBLE ACCESIBLE
DESDE EL EXTERIOR: Sustituya los fusibles
solo por otros de idénticas especificaciones.
18. VOLTAJE DE ENTRADA MÚLTIPLE: Este
aparato puede hacer necesario el uso de un
cable de alimentación o enchufe diferentes
(o ambos), dependiendo de la fuente de alimentación disponible. Conecte este aparato
solo a una salida de corriente del voltaje
y amperaje indicados en su panel trasero.
Para reducir el riesgo de incendio o de descarga eléctrica, consulte cualquier problema
con el personal de servicio cualificado u
otros profesionales equivalentes.
19. ADVERTENCIA: El adaptador de corriente/
enchufe de red se utilizan como sistema de
desconexión, por lo que debe colocarlos de
forma que pueda acceder fácilmente a ellos.
Page 43

Instrucciones importantes de seguridad
ADVERTENCIA: Para reducir el riesgo de electrocución. No retire
la tapa (o la parte posterior), ya que no hay piezas en el interior
cuya reparación pueda ser efectuada por el usuario. Encargue
las reparaciones a personal técnico debidamente cualificado.
PELIGRO DE SACUDIDA ELÉCTRICA -
ADVERTENCIA
NO ABRIR
Este símbolo de un relámpago con cabeza de flecha situado en el interior de un
triángulo equilátero tiene como objeto alertar al usuario de la presencia de “tensión
peligrosa” no aislada en el interior del alojamiento del producto que podría tener la
magnitud suficiente para presentar un riesgo de sacudida eléctrica.
El símbolo de un signo de exclamación situado en el interior de un triángulo equilátero
tiene como objeto alertar al usuario de la presencia de instrucciones de operación y
mantenimiento importantes en la documentación que acompaña al aparato.
ADVERTENCIA: ¡No abra la unidad! Riesgo de Electrocución. Las tensiones en el interior de la
unidad pueden poner la vida en peligro. No hay piezas cuya reparación pueda ser efectuada por
el usuario en el interior del aparato. Dirija cualquier posible reparación solo a personal técnico
debidamente cualificado.
Coloque el aparato cerca de una toma eléctrica y asegúrese de que pueda accederse fácilmente
al disyuntor.
ADVERTENCIA: Este producto SOLO debe ponerse en funcionamiento con las tensiones de CA
indicadas en el panel posterior o con la unidad de alimentación del producto incluida con el
mismo. La puesta en funcionamiento del aparato con otras tensiones distintas de las indicadas
puede provocar daños irreversibles en el producto y anularía su garantía. Si se utilizan Enchufes
Adaptadores de CA, es necesario extremar las precauciones puesto que existe la posibilidad de
que se enchufara el producto a tensiones para las que el aparato no está diseñado. Si se utiliza el
aparato con un cable de alimentación desmontable, asegúrese de que éste sea del tipo suministrado con el aparato o por su distribuidor/minorista. Si tiene alguna duda con respecto a la tensión
de funcionamiento correcta, póngase en contacto con su distribuidor/minorista.
PRECAUCIÓN: Con el fin de evitar el riesgo de
electrocución, no conecte la alimentación de la
red eléctrica mientras la rejilla no esté instalada.
ENGLISH
FRANÇAISDEUTSCHEESPAÑOLITALIANO
A la hora de deshacerse de este aparato al final de su vida de servicio, no lo elimine junto
con la basura doméstica general. Existe un procedimiento específico para la eliminación de los aparatos electrónicos usados de manera conforme a la legislación actual que
requiere el tratamiento, la recuperación y el reciclaje apropiados de los mismos.
Los usuarios no profesionales residentes en uno de los 28 estados miembro de la UE, en Suiza
y en Noruega pueden devolver sus aparatos electrónicos usados, sin coste alguno, al comercio
en el que fueron adquiridos (si se adquiere allí otro aparato similar) o a determinados centros
designados para la recogida de residuos eléctricos y electrónicos.
En el caso de los países no indicados arriba, póngase en contacto con las autoridades locales
para determinar el método de eliminación correcto.
Mediante la eliminación correcta de su aparato usado se asegurará de que éste se someta al
tratamiento, la recuperación y el reciclaje apropiados, evitándose así los efectos adversos sobre
el medio ambiente y la salud humana.
RSX18A
43
Page 44

Índice
Introducción . . . . . . . . . . . . . . . . . . . . . . . . . . . . . 45
Características del RSX18A . . . . . . . . . . . . . . . . . . . . . . 46
Puesta en marcha . . . . . . . . . . . . . . . . . . . . . . . . . . . 47
Controles y funciones . . . . . . . . . . . . . . . . . . . . . . . . . 48
Configuración de su sistema de altavoces. . . . . . . . . . . . . . . . 50
Fase y polaridad . . . . . . . . . . . . . . . . . . . . . . . . . . . 51
Conexiones . . . . . . . . . . . . . . . . . . . . . . . . . . . . . . 52
Instalación de las ruedas . . . . . . . . . . . . . . . . . . . . . . . 52
Especificaciones técnicas . . . . . . . . . . . . . . . . . . . . . . . 53
44
Page 45

Introducción
Felicidades y gracias por la compra del subwoofer autoamplificado profesional
Samson RSX18A. El RSX18A es un recinto acústico compacto y potente que dispone
de un cabezal de 18" y largo recorrido de excursión, complementado con una etapa
de potencia de clase D y 2.000 watios. Este subwoofer le ofrece tanto salidas de
rango completo stereo como de pasa-altos para dar señal a sus altavoces satélites
o para que pueda enlazar varios recintos RSX18A de cara a crear un sistema de
refuerzo de sonido mucho mayor.
El recinto acústico RSX18A está fabricado con un contrachapado de 18 mm, un
recubrimiento exterior a toda prueba, asas de acero de grandes dimensiones y unas
ruedas de gran tamaño para ofrecerle una protección total contra el desgaste del uso
diario, para ofrecerle un auténtico sonido portátil. El subwoofer activo RSX18A es la
solución perfecta para música en directo, DJ, conferencias y aplicaciones de sonido fijas,
o en cualquier otro lugar en la que necesite verdadera potencia y calidad de sonido.
En estas páginas encontrará una descripción detallada de las características del
subwoofer autoamplificado RSX18A, así como una descripción de su panel frontal y
posterior, instrucciones paso-a-paso para su configuración y manejo y una completa
tabla de especificaciones técnicas. También encontrará una tarjeta de garantía—
no se olvide de cumplimentarla y devolvérnosla por correo para que pueda recibir
soporte técnico online y para que podamos enviarle información actualizada acerca
de este y otros productos Samson en el futuro. Además, consulte nuestra página web
(www.samsontech.com) para ver la información de toda nuestra gama de productos.
Con unos cuidados mínimos y una correcta refrigeración, su RSX18A funcionará
sin darle ningún problema durante años. Para cualquier referencia futura, le
recomendamos que apunte aquí abajo el número de serie.
ENGLISH
FRANÇAISDEUTSCHEESPAÑOLITALIANO
Número de serie: _______________________________
Fecha de compra: ____________________________
En el improbable caso de que este aparato deba ser reparado en algún momento,
deberá conseguir un número de Autorización de devolución (RA) antes de enviar
este aparato a Samson. Sin este número, ninguna unidad será aceptada. Póngase
en contacto con Samson en el teléfono 1-800-3SAMSON (1-800-372-6766) para
solicitar su número de Autorización de devolución antes de devolvernos su unidad.
Conserve el embalaje original y las protecciones y, si es posible, devuélvanos la
unidad en ellos. Si adquirió este producto Samson fuera de los Estados Unidos,
póngase en contacto con su distribuidor local para que le facilite los detalles acerca
de la garantía y reparaciones.
RSX18A
45
Page 46

Características del RSX18A
El subwoofer autoamplificado Samson RSX18A utiliza la tecnología más moderna
en cuanto a diseño de etapas de potencia y altavoces. Estas son algunas de sus
características principales:
• Transductor de bajas frecuencias de 18" y alto rendimiento con recubrimiento de
goma butílica
• Etapa de potencia interna de clase D y alta eficiencia con 2.000 watios
• Doble entrada XLR balanceada para funcionamiento mono o stereo
• Salidas XLR balanceadas stereo de rango completo y pasa-altos
• Crossover interno activo de 126 Hz
• Polaridad conmutable y control de volumen variable
• Ruedas de gran resistencia montadas en el panel trasero
• Dos grandes asas de transporte fabricadas en acero
• Casquillo para montaje en barra de 35 mm
• Parrilla de acero de gran resistencia
• Fabricado en contrachapado de 18 mm con refuerzo interno
• Pintura negra de poliuretano de gran resistencia
46
Page 47

Puesta en marcha
Los pasos siguientes le ayudarán a configurar su subwoofer activo RSX18A.
• Desembale el RSX18A y todos los
componentes incluidos. Asegúrese de
conservar el embalaje por si tiene que
trasladar esta unidad en el futuro o enviarla al
servicio técnico.
• Configure su subwoofer RSX18A y los
altavoces satélites de la forma adecuada
para su actuación. El RSX18A dispone de un
casquillo para barras de montaje de 13/8",
por lo que puede colocar un altavoz satélite
encima del RSX18A por medio de una barra
de instalación de altavoces satélites (como la
Samson TS20).
• Gire el control de nivel de todos los altavoces
al mínimo (tope izquierdo).
• Asegúrese de que el interruptor POWER de todos los altavoces esté en la posición
OFF.
• Conecte una señal de nivel de línea desde su mezclador (u otra fuente) a la toma
Input XLR del RSX18A. Si está usando un único subwoofer con altavoces satélites
stereo, conecte la salida izquierda y derecha de su mezclador a las tomas Input
XLR stereo del RSX18A.
• Conecte un cable XLR desde la salida pasa-altos del RSX18A a la entrada de línea
de su altavoz(ces) satélite.
• Enchufe el cable de alimentación en una salida de corriente alterna.
Nota: Asegúrese siempre de que la salida de corriente alterna sea del voltaje y
amperaje que aparecen indicados en el panel trasero de su recinto RSX18A.
• Coloque el interruptor de encendido del RSX18A y de los altavoces satélites en la
posición ON.
• Haga pasar una señal audio (como la de un CD de música) desde su mezclador
y compruebe que tiene un buen nivel por medio del medidor de salida del
mezclador.
• Suba lentamente el control de nivel de los altavoces satélites hasta que consiga
un nivel adecuado. Suba después el control de nivel del RSX18A hasta que
obtenga un nivel que resulte adecuado con el resto de la mezcla.
• Si el volumen de la señal del RSX18A es excesivo, o si observa que el indicador
de picos parpadea con frecuencia, reduzca un poco el ajuste del control de nivel
del RSX18A hasta que el indicador de picos no se ilumine o lo haga solo en los
picos de señal.
ENGLISH
FRANÇAISDEUTSCHEESPAÑOLITALIANO
RSX18A
47
Page 48

Controles y funciones
1 6
4
1. MASTER LEVEL - Este control ajustar el nivel de señal global en la entrada de la
etapa de potencia del RSX18A. Este control no afecta a la señal enviada a las
salidas Full Range y High Pass.
2. Interruptor PHASE - Use este interruptor para ajustar la polaridad de la señal
amplificada. En su ajuste NORMAL (no pulsado) no habrá cambios en la señal.
Cuando pulse el interruptor (INVERT), la polaridad de la señal será modificada en
180°. El ajuste de este interruptor no tiene ningún efecto sobre la señal enviada a
las salidas Full Range y High Pass.
3. Indicador PEAK - Este piloto rojo se ilumina cuando el amplificador está cerca del
punto de saturación. Si se ilumina con frecuencia, reduzca el ajuste del control
LEVEL en el subwoofer RSX18A o reduzca el nivel de la señal en la fuente, hasta
que el piloto no se ilumine o solo lo haga ocasionalmente en los picos de señal.
4. Indicador SIGNAL - Este piloto VERDE se ilumina siempre que hay una señal
presente en las entradas del RSX18A.
5. Indicador POWER - Este piloto se ilumina en ROJO siempre que el RSX18A está
encendido.
6. INPUTS (L y R) - El RSX18A dispone de entradas de línea stereo en XLR hembra
balanceadas electrónicamente. Las señales de entrada izquierda (L) y derecha (R)
son mezcladas juntas antes de ser rutadas al amplificador interno.
32
5
7 8
48
Page 49

Controles y funciones
7 8
7. Salidas HIGH PASS (L y R) - Salidas de línea stereo en XLR macho balanceadas
electrónicamente que le permiten el envío de la señal presente en la entradas a sus
recintos acústicos principales de rango completo. La señal es procesada primero
por el crossover activo interno de 12 dB por octava, 126 Hz Linkwisz-Riley antes
de llegar a las salidas.
8. Salidas FULL RANGE (L y R) - Salidas de línea stereo en XLR macho balanceadas
electrónicamente que puede usar para conectar otro subwoofer o enviar una señal
de rango completo a sus recintos acústicos PA principales.
9. Entrada de corriente y receptáculo del fusible - Conecte aquí el cable de
alimentación IEC standard.
Compruebe e instale si es
necesario un fusible de las
características adecuadas
si es que debe sustituir el
fusible por rotura o cuando
cambie el voltaje operativo.
10. Interruptor de voltaje -
Deslícelo a la posición
adecuada para cambiar el
voltaje operativo entre 115 y
230 voltios.
11. Interruptor POWER - Le
permite encender y apagar el
RSX18A.
9
10
11
ENGLISH
FRANÇAISDEUTSCHEESPAÑOLITALIANO
RSX18A
49
Page 50

Configuración de su sistema de altavoces
Antes de conectar ningún cable, dedique unos minutos a decidir cómo quiere
interconectar su nuevo RSX18A. La mayoría de sistemas quedan dentro de estas dos
posibles categorías: Funcionamiento de sub stereo o mono.
Funcionamiento de sub mono
En la mayoría de los casos es preferible
una configuración de sub-graves común (o
mono). Las bajas frecuencias producidas
por un subwoofer tienden a ser no
direccionales. Dado que las ondas de baja
frecuencia se desarrollan en un espacio
muy largo, es difícil para el oído discernir
si los sub-graves vienen del lado izquierdo
o del derecho (salvo, evidentemente, que
esté dentro de un espacio enorme). Debido
a este fenómeno, prácticamente todo el
material de sub-graves es mezclado en
mono.
Funcionamiento de sub stereo
En instalaciones en grandes salas, así
como en teatros y/o parques temáticos
(para efectos especiales audio de bajas
frecuencias), puede usar dos RSX18A
en stereo. Para unos súper-graves
adicionales, puede conectar en cadena un
par de subwoofers RSX18A a cada lado de
su sistema de altavoces.
50
Page 51

Fase y polaridad
Amplitud
Un altavoz reproduce el sonido convirtiéndo una señal eléctrica en una vibración
física. Esta vibración física, a su vez, mueve el aire para crear ondas sonoras. A la
hora de configurar su sistema de altavoces, la clave está en conseguir que todos
los altavoces se muevan en fase, con los movimientos hacia dentro y hacia fuera
de los altavoces sincronizados. Esto produce un sonido estable a lo largo de todas
las frecuencias audibles. Si el subwoofer
esta fuera de fase con respecto a los
altavoces de rango completo FOH puede
que observe una reducción en la respuesta
en graves o incluso una cancelación de
los graves en aquellos puntos en los que
la respuesta de frecuencia del subwoofer
y de los satélites se solapen. La mayoría
de las veces este fenómeno es muy sutil,
pero puede llegar a producir el efecto de
"agujeros" en la música y reducción de las
frecuencias graves.
0° 90° 180° 270° 360°
Int. Phase = NORMAL
Int. Phase = INVERT
Tiempo
ENGLISH
De forma ideal, su subwoofer RSX18A debería ser colocado en el mismo plano
que sus altavoces satélites. En la realidad, sabemos que esto es muy complicado
dado que a la hora de configurar un sistema PA uno se encuentra con muchas
restricciones a causa de limitaciones de espacio, configuración de altavoces sobre
soportes o incluso por la propia forma física de los altavoces. Para compensar estos
obstáculos, el RSX18A dispone de un interruptor Phase que le permite invertir la
polaridad del subwoofer en relación a la señal fuente. Esto hace que pueda colocar el
RSX18A en fase con el resto de su sistema PA, o desfasado en 180°.
Para determinar si la señal audio producida por su RSX18A está en fase con el
resto de su sistema PA, reproduzca una pista audio que contenga gran cantidad de
frecuencias graves a través de su sistema de altavoces. Colóquese a una distancia
adecuada para escuchar bien el sonido, donde pueda oír claramente el audio del
subwoofer(s) y de los altavoces principales, y preste atención hasta que crea que
tiene un buen control sobre el nivel de los graves. Pulse entonces el interruptor
Phase en el RSX18A para invertir la fase en 180° y vuelva a la posición de escucha
anterior (si es posible, haga que alguien pulse por usted el interruptor para que
no tenga que moverse de la posición de escucha). Compare el nivel global de las
frecuencias graves entre los dos ajustes posibles. El ajuste correcto será el que le
ofrezca una mayor cantidad de bajas frecuencias. Si la situación se lo permite, ajuste
aun más la fase de su RSX18A con respecto a los altavoces satélites desplazando
la posición física relativa del subwoofer más cerca o más lejos de la posición de
escucha.
FRANÇAISDEUTSCHEESPAÑOLITALIANO
RSX18A
51
Page 52

XLR a XLR balanceado
Vista
frontal
Puntos de
soldadura
XLR macho
XLR hembra
Vista
frontal
Puntos de
soldadura
Activo (2)
Activo (2)
Activo Activo
Común (1)
Común (1)
Común
Común
Pasivo (3)Pasivo (3) Pasivo Pasivo
XLR a 6,3 mm balanceado
Punta (señal) Punta (señal)
Lateral (masa)
Lateral (masa)
Masa
Anillo (señal)
Anillo (señal)
Señal (punta)
Vista
frontal
Puntos de
soldadura
XLR macho
Activo (2) Común (1)
Pasivo (3)
Pasivo (punta 3)
Conexiones
El RSX18A dispone de entradas y salidas balanceadas con conectores XLR
standard. Siempre que sea posible, use conexiones balanceadas para evitar posibles
interferencias con el resto de equipos. Vea el diagrama de cableado de abajo para
saber cómo fabricar las conexiones para el RSX18A.
Instalación de las ruedas
• Localice cada rueda y el grupo
correspondiente de cuatro tornillos y
arandelas (incluidos).
• Coloque la rueda en su posición y
atornille los tornillos. Asegúrese de
colocarlos rectos y no los apriete
excesivamente para evitar dañar la
rosca.
• Use un destornillador para fijar los
tornillos.
• Repita los pasos anteriores con las tres
ruedas restantes.
52
Page 53

Especificaciones técnicas
Amplificador
Potencia 2.000 watios
THD < 0.1%
Diseño Clase D
Transductor
Cabezal 18" cono de papel, bobina de voz 3" diámetro
Sensibilidad 95 dB SPL @ 1 W/1 m
Rendimiento acústico
Respuesta de frecuencia 30 Hz- 135 Hz (+/-3 dB)
SPL máximo 125 dB SPL @ 2.000 watios
Crossover electrónico
Tipo de crossover 24 dB/octava Linkwitz-Riley
Frecuencia de crossover 126 Hz
Controles y conectores
Entradas (I y D) XLR hembra balanceado - nivel de línea
Salidas pasa-altos (I y D) XLR macho balanceado - nivel de línea
Salidas rango completo (I y D) XLR macho balanceado - nivel de línea
Controles Nivel master giratorio, Interruptor de fase
Indicadores Pico, Señal, Encendido
Fuente de alimentación
Consumo 645 W máximo
Conector de corriente IEC de 3 puntas 250 V CA, 20 A, macho
Fusible 100 - 120 V CA T8AL / 250 V
220 - 240 V CA T4AL / 250 V
ENGLISH
FRANÇAISDEUTSCHEESPAÑOLITALIANO
Recinto
Construcción Contrachapado de 18 mm
Acabado Pintura de poliuretano negro de gran resistencia
Ruedas 76 mm, 4x
Asas Acero, 2x
Parrilla Acero perforado
Sistema de montaje Casquillo para montaje en barra de 1 3/8” (35 mm)
Dimensiones y peso
Dimensiones in 20.55" L x 27" P x 24.7" A
mm 686 mm L x 522 mm P x 629 mm A
Peso lbs 86
kg 39
Estas especificaciones están sujetas a cambios sin previo aviso.
RSX18A
53
Page 54

Informazioni importanti sulla sicurezza
Dichiarazione di conformità alla norma FCC
L'apparecchio è stato testato e ritenuto confacente ai limiti applicabili ai dispositivi digitali di
Classe B, conformemente alla parte 15 delle norme FCC. Questi limiti hanno lo scopo di assicurare una protezione ragionevole dalle interferenze dannose negli impianti domestici.
L'apparecchio genera, usa e può irradiare energia in radiofrequenza e, se non installato e
utilizzato conformemente alle istruzioni, potrebbe causare delle interferenze dannose alle
comunicazioni radio. Tuttavia non ci sono garanzie che in impianti particolari non si producano
interferenze. Se questo apparecchio effettivamente dovesse causare interferenze dannose al
ricevimento di segnali radio o televisivi, che potrebbero essere determinate dal suo spegnimento
e dalla sua accensione, l'utente è invitato a cercare di correggere le interferenze mettendo in
atto una o più delle seguenti misure:
• Orientare o posizionare nuovamente l'antenna ricevente.
• Aumentare la separazione tra l'apparecchio e il ricevitore.
• Collegare l'apparecchio a una presa collocata su un circuito diverso da quello a cui il
ricevitore è collegato.
• Chiedere assistenza al rivenditore o a un tecnico radio/TV esperto.
ATTENZIONE: qualsiasi variazione o modifica non espressamente approvata dal concessionario
dell'apparecchio potrebbe rendere nulla l'autorizzazione al suo utilizzo da parte dell'utente.
Per il Canada, comunicazioni di Industry Canada (IC)
Il presente apparecchio digitale di classe B è conforme alla norma canadese ICES-003.
Il funzionamento è soggetto alle seguenti due condizioni:
(1) Il dispositivo non potrà causare interferenze e
(2) Il dispositivo deve accettare qualsiasi interferenza ricevuta, comprese quelle che po-
trebbero causarne il funzionamento indesiderato.
Canada, avis d’Industry Canada (IC)
Cet appareil numérique de classe B est conforme aux normes canadiennes ICES-003.
Son fonctionnement est soumis aux deux conditions suivantes :
(1) cet appareil ne doit pas causer d’interférence et
(2) cet appareil doit accepter toute interférence, notamment les interférences qui peuvent
affecter son fonctionnement.
54
Page 55

Informazioni importanti sulla sicurezza
AVVERTIMENTO: per ridurre il rischio di folgorazioni non
asportare il coperchio (o la parte posteriore) in quanto il
dispositivo non contiene componenti riparabili dall'utente.
Per le riparazioni rivolgersi a personale di assistenza
RISCHIO DI FOLGORAZIONE -
ATTENZIONE
NON APRIRE
Il simbolo del fulmine con la punta a forma di freccia all'interno di un triangolo
equilatero ha lo scopo di avvisare l'utente della presenza di "tensioni pericolose" non
isolate nella cassa del prodotto, di ampiezza sufficiente a costituire un rischio di
folgorazione.
Il punto esclamativo all'interno di un triangolo equilatero ha lo scopo di avvisare
l'utente della presenza di importanti istruzioni di funzionamento e manutenzione
nella documentazione a corollario dell'apparecchio.
AVVERTIMENTO: non aprire! Rischio di folgorazione. Le tensioni presenti nell'apparecchio
costituiscono un pericolo per la vita. Il dispositivo non contiene componenti riparabili
dall'utente. Per qualsiasi riparazione rivolgersi a personale di assistenza qualificato.
Posizionare l'apparecchio accanto a una presa elettrica e accertarsi di poter accedere
agevolmente all'interruttore.
AVVERTIMENTO: il prodotto è stato ideato per essere messo in funzione UNICAMENTE con
le tensioni CA elencate sul pannello posteriore o con l'alimentatore in dotazione. Metterlo
in funzione con tensioni diverse da quelle indicate potrebbe provocare danni irreversibili al
prodotto e renderne nulla la garanzia. Bisogna fare molta attenzione nell'usare adattatori per
spine CA in quanto ciò può permettere che il prodotto sia collegato a tensioni per le quali
non ne è stato previsto il funzionamento. Se il prodotto è dotato di un cavo di alimentazione
staccabile, usare il tipo fornito in dotazione o richiederne uno idoneo al distributore e/o
rivenditore locale. Se non si è certi di quale sia la corretta tensione di funzionamento,
contattare il distributore e/o rivenditore locale di riferimento.
qualificato.
ATTENZIONE: per evitare rischi di folgorazione non collegare alla rete elettrica fintanto che la griglia non è presente.
ENGLISH
FRANÇAISDEUTSCHEESPAÑOLITALIANO
Se si desidera smaltire il prodotto, non gettarlo con i rifiuti domestici generici. Esiste
un sistema di raccolta separato per i prodotti elettronici usati conformemente alla
normativa che richiede un trattamento, un recupero e un riciclo corretti.
Gli utenti privati residenti nei ventotto stati membri dell'UE, in Svizzera e in Norvegia
possono portare gratuitamente i propri prodotti elettronici usati presso strutture di raccolta a ciò
preposte o a un rivenditore (se si acquista un apparecchio nuovo analogo).
Per i Paesi non ricordati sopra, contattare le autorità locali per conoscere il metodo di
smaltimento corretto.
Facendo ciò si garantirà che il prodotto smaltito sia sottoposto al trattamento, al recupero e al
riciclo necessari, evitando così possibili conseguenze negative per l'ambiente e la salute umana.
RSX18A
55
Page 56

Informazioni importanti sulla sicurezza
1. Leggere le presenti istruzioni.
2. Conservare le presenti istruzioni.
3. Prestare attenzione a tutte le avvertenze.
4. Seguire tutte le istruzioni.
5. L'apparecchio non dovrà essere esposto
a sgocciolamento o schizzi di liquido e
su di esso non deve essere posato alcun
oggetto contenente liquido, come per
esempio un vaso.
6. Pulire unicamente con un panno asciutto.
7. Non bloccare alcuna delle aperture di
ventilazione. Eseguire l'installazione
conformemente con le istruzioni della
società produttrice.
8. Non installare nei pressi di sorgenti
di calore come termosifoni, registri di
calore, stufe o altri apparecchi (compresi
gli amplificatori) che producono calore.
9. Usare soltanto dispositivi/accessori
specificati dalla società produttrice.
10. Staccare la spina dell'apparecchio
durante i temporali o quando non è utilizzato per lunghi periodi di tempo.
11. Non ignorare lo scopo previsto per la
spina polarizzata o con messa a terra.
Una spina polarizzata ha due lame,
una più ampia dell'altra. Una spina con
messa a terra ha due lame e un terzo
connettore di messa a terra. La lama
larga, o il terzo polo, è inserita/o per la
sicurezza dell'utente. Se la spina in dotazione non è adatta per la propria presa,
consultare un elettricista per sostituire la
presa obsoleta.
12. Proteggere il cavo di alimentazione in
modo che non venga calpestato o schiacciato, soprattutto in corrispondenza dei
connettori, delle prese femmina e del
punto in cui esce dall'apparecchio.
13. Usare unicamente con il carrello,
basamento, treppiede, sostegno o tavolo
specificati dalla società produttrice o
venduti con l'apparecchio. Quando si
utilizza un carrello, fare attenzione nello spostamento
dell'insieme carrello/apparecchio per evitare lesioni da
ribaltamento.
56
14. Per qualsiasi riparazione rivolgersi a
personale di assistenza qualificato.
Eventuali riparazioni sono necessarie
se l'apparecchio è stato danneggiato in
qualche modo, come nel caso di guasti
al cavo di alimentazione o rottura della
spina, danni provocati dal rovesciamento di liquido o dalla caduta di oggetti
sull'apparecchio, esposizione alla pioggia
o all'umidità, o se l'apparecchio non
funziona in modo normale o è stato fatto
cadere.
15. INTERRUTTORE DI ACCENSIONE/
SPEGNIMENTO: per prodotti dotati di
interruttore di accensione, l'interruttore
di accensione NON interrompe il collegamento con la rete elettrica.
16. DISCONNESSIONE DALLA RETE
ELETTRICA: bisogna avere sempre un
facile accesso alla spina. Nel caso di
montaggi su rack o installazioni in cui la
spina non sia accessibile, nell'impianto
elettrico del rack o dell'edificio dovrà
essere inserito un interruttore omnipolare
con separazione tra i contatti di almeno 3
mm su ciascun polo.
17. PER UNITÀ DOTATE DI PORTAFUSIBILI
ACCESSIBILE ESTERNAMENTE: sostituire i fusibili solo con altri dello stesso
tipo e potenza.
18. TENSIONE DI INGRESSO MULTIPLO:
l'apparecchio potrebbe richiedere l'uso
di un cavo di alimentazione, di una spina
di collegamento, o di entrambi, diversi, a
seconda della sorgente di alimentazione
disponibile al momento dell'installazione.
Collegare l'apparecchio solo alla sorgente
di alimentazione indicata sul suo pannello posteriore. Per ridurre il rischio di
incendio o folgorazione rivolgersi a personale qualificato o dotato di preparazione
equivalente per le riparazioni.
19. AVVERTIMENTO: la spina elettrica/
l'accoppiatore dell'apparecchio viene
utilizzata/o come dispositivo di disconnessione, si dovrà sempre essere in
condizione di poter mettere prontamente
in funzione detto dispositivo di disconnessione.
Page 57

Indice
Introduzione . . . . . . . . . . . . . . . . . . . . . . . . . . . . . 58
RSX18A – Caratteristiche . . . . . . . . . . . . . . . . . . . . . . . 59
Guida rapida . . . . . . . . . . . . . . . . . . . . . . . . . . . . . 60
Controlli e funzioni . . . . . . . . . . . . . . . . . . . . . . . . . . 61
Configurazione del sistema . . . . . . . . . . . . . . . . . . . . . . 63
Fase e polarità . . . . . . . . . . . . . . . . . . . . . . . . . . . . 64
Collegamenti . . . . . . . . . . . . . . . . . . . . . . . . . . . . . 65
Montaggio delle ruote . . . . . . . . . . . . . . . . . . . . . . . . . 65
Specifiche . . . . . . . . . . . . . . . . . . . . . . . . . . . . . . 66
ENGLISH
FRANÇAISDEUTSCHEESPAÑOLITALIANO
RSX18A
57
Page 58

Introduzione
Grazie per aver acquistato il subwoofer professionale attivo RSX18A Samson.
RSX18A è una cassa compatta e potente che dispone di un altoparlante da 18" (46
cm) ad ampia escursione, abbinato a un amplificatore in classe D da 2000 watt. Il
subwoofer offre uscite stereo sia full-range sia passa-alto per collegare le tue casse
satellite o per connetterlo in link ad altri RSX18A nella realizzazione di sistemi più
potenti.
Lo chassis dell RSX18A è realizzato in compensato da 18 mm con finitura lavorata
“heavy-duty”, ampie maniglie in acciaio e ruote di dimensioni generose, per garantire
un’eccellente protezione dal logoramento e una reale portatilità. Il subwoofer attivo
RSX18A è ideale per la musica dal vivo, per i DJ, nell’ambito di installazioni sonore,
o per qualsiasi situazione in cui si vuole disporre di un livello superiore di potenza e
qualità sonora.
Queste pagine forniscono una panoramica dettagliata sulle caratteristiche dei subwoofer amplificati RSX18A, la descrizione dei controlli, istruzioni passo a passo per il
collegamento e l’uso, nonché le specifiche complete. Troverete anche la garanzia, da
compilare e inviare per posta per poter ricevere supporto tecnico online e informazioni aggiornate su questo e altri prodotti Samson. Vi invitiamo anche a visitare il nostro
sito web (www.samsontech.com) per informazioni complete sulla nostra intera linea
di prodotti.
Se trattato con cura e adeguatamente ventilato, il vostro RSX18A funzionerà senza
problemi per molti anni. Vi raccomandiamo di annotare qui sotto il numero di serie
come futuro riferimento.
Numero di serie: _______________________________
Data d’acquisto: ____________________________
Se l’unità necessitasse di riparazione, prima di spedirla a Samson dovrete ottenere
un numero di Autorizzazione Reso. In sua assenza, l’unità non verrà accettata. Vi
preghiamo di contattare Samson al numero 1-800-3SAMSON (1-800-372-6766) per
richiedere il numero di autorizzazione prima di procedere alla spedizione. Conservate
l’imballaggio originale e, se possibile, utilizzatelo per spedire l’unità. Se il prodotto
Samson è stato acquistato al di fuori degli Stati Uniti, contattate il vostro distributore
di zona per tutti i dettagli sulla garanzia e l’assistenza.
58
Page 59

RSX18A – Caratteristiche
Il subwoofer attivo Samson RSX18A utilizza le tecnologie più moderne in ambito di
altoparlanti e amplificazione. Alcune delle sue caratteristiche comprendono:
• trasduttore “heavy-duty” da 18" (45,5 cm) per basse frequenze con contorno in
gomma di butile;
• amplificatore incorporato da 2000 watt ad alta efficienza in classe D;
ENGLISH
FRANÇAISDEUTSCHEESPAÑOLITALIANO
• due ingressi bilanciati XLR per operatività mono o stereo;
• uscite stereo bilanciate XLR full range o passa-alto;
• crossover attivo interno a 126 Hz;
• polarità selezionabile e controllo del volume;
• ruote ad alta resistenza montate sul retro;
• due larghe maniglie in acciaio;
• alloggiamento per aste da 35 mm;
• robusta griglia in acciaio;
• struttura in compensato da 18 mm, rinforzata internamente;
• resistente finitura lavorata in poliuretano nero.
RSX18A
59
Page 60

Guida rapida
Le istruzioni qui di seguito vi aiuteranno a configurare il vostro subwoofer attivo
RSX18A.
• Disimballate l’RSX18A e i componenti inclusi.
Assicuratevi di conservare gli imballaggi per
eventuali spostamenti o spedizioni dell’unità
in assistenza.
• Posizionate il subwoofer RSX18A e la/e
cassa/e satellite in modo adeguato alla situazione live. Il RSX18A ha un alloggiamento per
aste da casse da 35 mm, così da poter montare una cassa satellite sopra al RSX18A con la
relativa asta (ad esempio la Samson TS20).
• Ruotate completamente in senso orario il controllo Level su tutte le casse.
• Mettete l’interruttore di accensione di tutte le
casse in posizione OFF.
• Collegate un segnale a livello di linea dal mixer (o altre sorgenti) al jack d’ingresso
XLR dell’RSX18A. Se state usando un solo subwoofer con una coppia di casse
satelliti, collegate le uscite left e right del mixer ai jack d’ingresso stereo XLR
dell’RSX18A.
• Collegate un cavo XLR dall’uscita High Pass dell’RSX18A all’ingresso line della/e
cassa/e satellite.
• Collegate il cavo di alimentazione fornito a una presa CA.
Nota: accertatevi sempre che la tensione della presa CA corrisponda a quanto
indicato sul pannello posteriore della cassa acustica RSX18A.
• Mettete l’interruttore di accensione del RSX18A e della/e cassa/e satellite in
posizione ON.
• Riproducete un segnale audio (ad esempio musica da un CD) attraverso il mixer,
e controllate tramite i suoi meter che il volume di uscita sia buono.
• Alzate lentamente il controllo Level della/e cassa/e satellite fino a raggiungere il
livello desiderato. Quindi alzate il controllo Level dell’RSX18A fino a raggiungere
il livello che suona meglio all’interno del mix.
• Se il volume del RSX18A diventa troppo elevato, o se l’indicatore di picco lampeggia di frequente, abbassate leggermente il controllo Level dell’RSX18A fino a
far spegnere l’indicatore, o fino a farlo accendere solo di tanto in tanto con segnali
di picco.
60
Page 61

Controlli e funzioni
1 6
4
1. MASTER LEVEL - Regola il livello globale del segnale all’ingresso dell’amplificatore
del RSX18A. Questo controllo non influisce sul segnale inviato alle uscite Full
Range e High Pass.
2. Interruttore PHASE - Usate questo interruttore per impostare la polarità del
segnale amplificato. Con l’interruttore in fuori (impostazione NORMAL), non
ci sono cambiamenti nel segnale. Quando l’interruttore è premuto (posizione
INVERT), la polarità del segnale viene cambiata di 180°. L’impostazione
dell’interruttore Phase non influisce sul segnale inviato alle uscite Full Range e
High Pass.
3. Indicatore PEAK - Questo LED rosso lampeggia quando l’amplificatore è
prossimo al clipping. Se l’indicatore Peak si accende di frequente, abbassate il
controllo Level del subwoofer RSX18A oppure abbassate il segnale dalla sorgente
finché l’indicatore non si accende più, o si accende solo occasionalmente con
picchi del segnale.
4. Indicatore SIGNAL - Il LED verde SIGNAL si accende ogni volta che un segnale è
presente agli ingressi del RSX18A.
5. Indicatore POWER - Questo LED si accende in rosso quando l’amplificatore è
attivo.
6. INPUTS (L e R) - Il RSX18A dispone di ingressi stereo XLR femmina bilanciati
elettronicamente. I segnali in ingresso sinistro (L) e destro (D) sono mixati
insieme prima di essere inviati all’amplificatore interno.
32
5
7 8
ENGLISH
FRANÇAISDEUTSCHEESPAÑOLITALIANO
RSX18A
61
Page 62

Controlli e funzioni
7 8
7. Uscite HIGH PASS (L e R) - Uscite stereo line su XLR maschio bilanciate
elettronicamente, per l’invio del segnale in ingresso alle vostre casse full range
principali. Il segnale è processato dal crossover attivo Linkwitz-Riley, a 126 Hz,
12 dB per ottava, prima di raggiungere le uscite.
8. Uscite FULL RANGE (L e R) - Uscite stereo line su XLR maschio bilanciate
elettronicamente. Queste uscite si possono usare per collegare un altro subwoofer
o per inviare il segnale full range alle casse PA principali.
9. Presa di corrente CA e
alloggiamento del fusibile
- Collegate qui il cavo
standard IEC fornito
per l’alimentazione CA.
Assicuratevi di installare un
fusibile di classe conforme
quando si rende necessaria
la sostituzione o quando si
cambia il voltaggio.
10. Interruttore voltaggio -
Spostatelo per cambiare il
voltaggio da 115 a 230 volt.
11. Interruttore di
accensione - Accende
l’alimentazione dell’RSX18A.
9
10
11
62
Page 63

Configurazione del sistema
Prima di effettuare i collegamenti, prendetevi un minuto per decidere come interfacciare il vostro nuovo RSX18A. La maggior parte dei sistemi appartiene a una di
queste due categorie: funzionamento del sub in mono o in stereo.
Funzionamento del sub in mono
In molti casi è preferibile una configurazione del sistema con un sub in comune (in
mono). Le basse frequenze prodotte da un
subwoofer tendono a essere non-direzionali.
Visto che le basse frequenze hanno bisogno di molto spazio per svilupparsi, per
l’orecchio è difficile capire se provengono
da destra o da sinistra (a meno che, naturalmente, non vi troviate in un ambiente
davvero ampio). Proprio a causa di questo
fenomeno, quasi tutto il materiale nell’ambito delle bassissime frequenze è mixato in
mono.
Funzionamento del sub in stereo
In ambienti più ampi, così come in teatri
e installazioni di parchi a tema (per effetti
sonori con basse frequenze), possono
essere utilizzati due RSX18A in stereo.
Per ulteriori bassi, potete collegare in
cascata una coppia di subwoofer RSX18A
a ogni lato del sistema.
ENGLISH
FRANÇAISDEUTSCHEESPAÑOLITALIANO
RSX18A
63
Page 64

Fase e polarità
Un altoparlante riproduce il suono tramite la conversione di un segnale elettrico in una
vibrazione fisica. A sua volta, la vibrazione spinge l’aria per creare onde sonore. Quando configurate un sistema, l’obiettivo è che tutti gli altoparlanti si muovano in fase, con
i movimenti verso l’interno e l’esterno sincronizzati. Così si ottiene un suono uniforme
attraverso tutte le frequenze udibili. Se il
subwoofer è fuori fase rispetto agli altoparlanti full range rivolti al pubblico, potreste
avvertire una risposta alle basse frequenze
più debole, o addirittura una cancellazione
quando le basse frequenze provenienti dagli altoparlanti full range e dal subwoofer si
sovrappongono. Spesso questo fenomeno è
molto leggero, ma può risultare in “buchi”
nella musica e nella diminuzione dei bassi.
Idealmente, il subwoofer RSX18A dovrebbe essere posizionato sullo stesso piano delle
casse satellite. In realtà, sappiamo che ciò è improbabile, visto che impostando un
impianto PA esistono limitazioni legate agli spazi disponibili, ai supporti per gli altoparlanti, o anche alla forma stessa delle casse. Per risolvere il problema, l’RSX18A
ha un interruttore Phase che permette di invertire la polarità del subwoofer rispetto al
segnale sorgente. Avete quindi la possibilità di utilizzare il RSX18A in fase con il resto
del sistema PA, oppure fuori fase di 180°.
Per capire se l’audio riprodotto tramite il RSX18A è in fase con il resto del sistema
PA, suonate una traccia audio contenente molte basse frequenze attraverso il sistema.
Posizionatevi a una giusta distanza d’ascolto, così da sentire chiaramente l’audio del/
dei subwoofer e delle casse principali, e ascoltate fino a farvi un’idea del livello delle
basse frequenze. Premete l’interruttore Phase sul RSX18A per invertire la fase di 180°
e tornate alla posizione di ascolto (se possibile, fate premere da qualcun altro l’interruttore Phase, così da poter rimanere esattamente nella stessa posizione). Confrontate
il livello generale delle basse frequenze tra le due impostazioni. Quella corretta si
riconosce dalla maggiore presenza di basse frequenze. Se la situazione lo consente,
potete affinare l’allineamento di fase tra il RSX18A e le casse satelliti, avvicinando o
allontanando il subwoofer dalla posizione di ascolto.
0° 90° 180° 270° 360°
Phase SW = NORMAL
Time
Amplitude
Phase SW = INVERT
64
Page 65

Collegamenti
XLR to XLR Balanced
XLR to Balanced 1/4-Inch
L’RSX18A ha ingressi e uscite che utilizzano connettori XLR standard. Quando
possibile, usate collegamenti bilanciati di qualità elevata verso gli altri apparecchi,
per eliminare potenziali interferenze. Per i connettori dell’RSX18A, consultate il
diagramma di cablaggio seguente.
Montaggio delle ruote
ENGLISH
FRANÇAISDEUTSCHEESPAÑOLITALIANO
• Preparate una ruota e le relative quattro
viti e rondelle.
• Tenete la ruota in posizione e iniziate ad
avvitare a mano. Assicuratevi che le viti
seguano la giusta filettatura. Non fate
pressione sulle viti, poiché potreste spostare i dadi interni filettati.
• Usate un cacciavite per stringere le
quattro viti.
• Ripetete i passi precedenti per le tre
ruote restanti.
RSX18A
65
Page 66

Specifiche
Amplificatore
Potenza 2000 watt
THD < 0,1%
Design Class-D
Trasduttore
Altoparlante Cono in carta da 18" (45,5 cm), bobina da 3" (7,5
cm)
Sensibilità 95 dB SPL @ 1w/1m
Prestazioni acustiche
Risposta in frequenza 30 Hz- 135 Hz (+/-3 dB)
Max SPL 125 dB SPL @ 2000 watt
Crossover elettronico
Tipo crossover Linkwitz-Riley 24 dB/ott
Frequenza crossover 126 Hz
Controlli e connessioni
Ingressi (L e R) XLR femmina bilanciati - Livello di linea
Uscite High Pass (L e R) XLR maschio bilanciati - Livello di linea
Uscite Full Range (L e R) XLR maschio bilanciati - Livello di linea
Controlli Manopola Master Level, Interruttore Phase
Indicatori Peak, Signal, Power
Alimentazione
Consumo elettrico 645 W max.
Connessione CA IEC a 3 pin maschio 250 VCA, 20 A
Fusibile 100 - 120 VCA T8AL / 250 V
220 - 240 VCA T4AL / 250 V
Involucro
Costruzione Compensato 18 mm
Finitura Lavorata in poliuretano nero
Ruote 4 da 7,5 cm (3")
Maniglie 2 in acciaio
Griglia Acciaio perforato
Metodo di installazione Alloggiamento integrato per asta da 35 mm
Dimensioni e peso
Dimensioni 686 mm L x 522 mm P x 629 mm A
Peso 39 kg
Le specifiche possono variare senza preavviso.
66
Page 67

Page 68

Samson Technologies Corp.
45 Gilpin Avenue
Hauppauge, New York 11788-8816
Phone: 1-800-3-SAMSON (1-800-372-6766)
Fax: 631-784-2201
samsontech.com
 Loading...