

Page 1
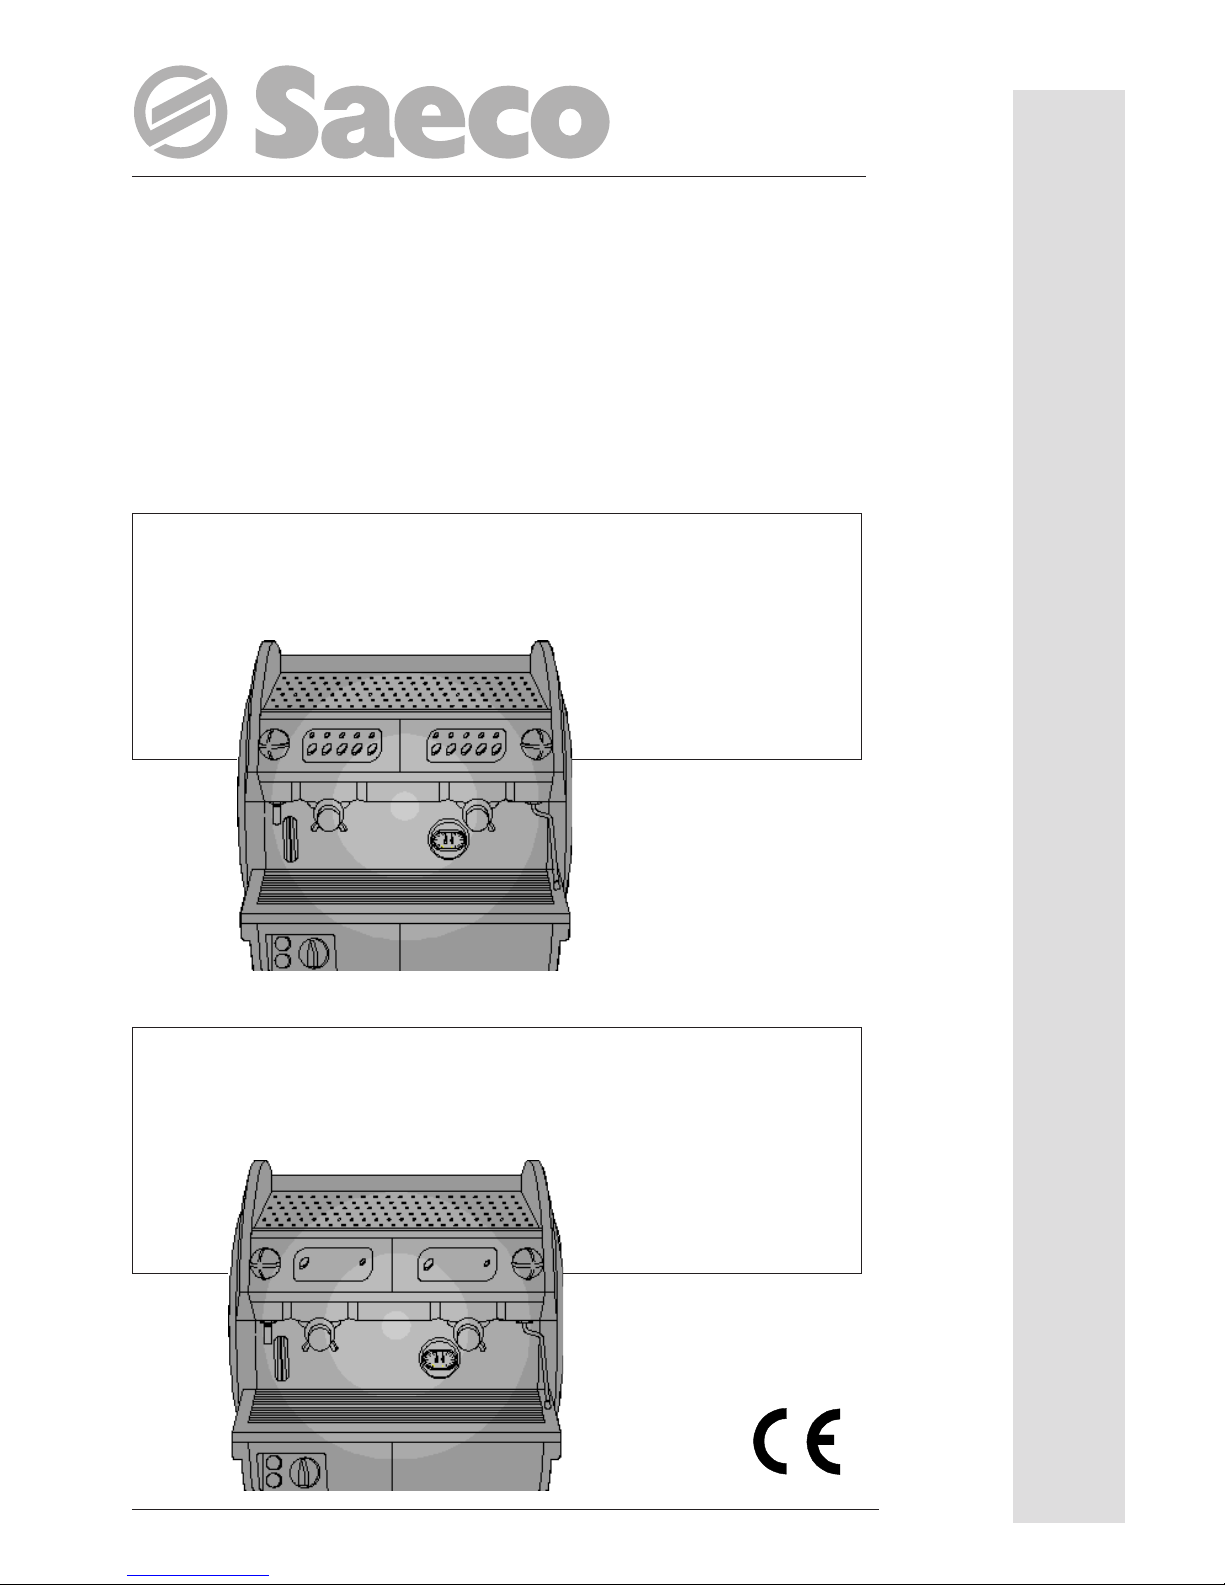
AROMA COMPACT SE
Macchina Professionale per Caffè Espresso
Professional Espresso Coffee Machine
Machina profesionnel à Cafè Expresso
Beruflich Espressomaschine
Máquina Profesional para Café Exprés
Professionele machine voor espressokoffie
Máquina profissional para café expresso
Modello * Model * Modèle * Modell * Modelo *
Modellen *
Modelos
AROMA COMPACT SM
USO E MANUTENZIONE
INSTRUCTION AND MAINTENANCE USO Y MANTENIMIENTO
MODE D’EMPLOI ET D’ENTRETIEN GEBRUIK EN ONDERHOUD
BETRIEB UND WARTUNG
USO E
MANUTENÇÃO
Page 2

DICHIARAZIONE DI CONFORMITA' CE / EC DECLARATION OF CONFORMITY
Noi / We
Saeco Vending S.p.A.
Loc. Casona n° 1066
40041 Gaggio Montano (BO) Italy
dichiariamo sotto la nostra responsabilità che i prodotti / declare under our responsibility that the products :
MACCHINA PER CAFFE' PROFESSIONALE / PROFESSIONAL COFFEE MACHINE
Type
: LC/E – LC/D – SE/SM 2, 3, 4 gr. – SE/SM 1, 2 gr. Compact
sono conformi alle seguenti norme : are in conformity with the following standards
• Sicurezza di elettrodomestici e apparecchi elettrici - Requisiti generali: EN 60335-1 1 (2002)
+A1(2004) + A11 (2004) + A12 (2006) + A2 (2006)
• Sicurezza di elettrodomestici e apparecchi elettrici - Parte 2^ Requisiti specifici per apparecchi per
riscaldare liquidi: EN 60335-2-15
• Apparecchi per uso domestico e similare – Campi elettromagnetici metodo per la valutazione e le
misure. : EN 62233
• Limiti e metodi di misurazione dei disturbi radio caratteristici di apparecchi con motore elettrico e
termici per uso domestico e simili scopi, strumenti elettrici e simili apparecchiature elettriche - EN
55014
• Compatibilità elettromagnetica (EMC) Parte 3^ Limiti - Sezione 2 : Limiti emissioni di corrente
armonica (corrente in ingresso dell'app. < 16A per fase) - EN 61000-3-2
• Compatibilità elettromagnetica (EMC) Parte 3^ Limiti - Sezione 3: Limitazione delle fluttuazioni e dei
picchi di tensione nei sistemi di alimentazione a bassa tensione con corrente < 16 A. : EN 61000-3-3
• Requisiti di immunità per elettrodomestici, strumenti e apparecchi similari. Norma per famiglia di
prodotti EN 55104
• Compatibilità elettromagnetica (EMC) Parte 4^ Tecniche di prova e misura - Sezione 2 : Prova di
immunità alle scariche elettrostatiche. Pubblicazione di base EMC - EN61000-4-2
• Compatibilità elettromagnetica (EMC). Parte 4^ Tecniche di prova e misura - Sezione 4 : Prova di
immunità ai transitori veloci/burst. Pubblicazione di base EMC - EN61000-4-4
• Compatibilità elettromagnetica (EMC). Parte 4^ Tecniche di prova e misura - Sezione 5 : Prova di
immunità a tensioni/correnti impulsive. EN61000-4-5
• Compatibilità elettromagnetica (EMC) Parte 4^ Tecniche di prova e misura - Sezione 6 : Immunità ai
disturbi condotti, indotti da campi a radiofrequenza. EN61000-4-6
• Compatibilità elettromagnetica (EMC) Parte 4^ Tecniche di prova e misura - Sezione 11:Prove di
immunità a cadute di tensione, microint. e variazioni di tensione. EN61000-4-11
• Safety of household and electrical appliances - General requirements : EN 60335-1 1 (2002)
+A1(2004) + A11 (2004) + A12 (2006) + A2 (2006)
• Safety of household and electrical appliances - Part 2^ Particular requirements for appliances for
heating liquids: EN 60335-2-15
• Household and similar electrical appliances – Electromagnetic fields – Methods for evaluation and
measurements. : EN 62233
• Limits and methods of measurements of radio disturbance characteristics of electrical motor-operated
and thermal appliances for households and similar purposes, electric tools and similar electric
apparatus - EN 55014
• Electromagnetic compatibility (EMC) Part. 3^ Limits - Section 2 : Limits for harmonic current
emissions (equipment input current < 16A per phase) - EN 61000-3-2
• Electromagnetic compatibility (EMC) Part 3^ : Limits - Section 3 : Limitation of voltage fluttuations
and flicker in low-voltage supply systems for equipment with rated current <16 A. : EN 61000-3-3
• Immunity requirements for household appliances, tools and similar apparatus. Product family standard
EN 55104
• Electromagnetic compatibility (EMC). Part 4^ : Testing and measurement technique.- Section 2 :
Elelctrostatic discharge immunity test Basic EMC publication - EN 61000-4-2
• Electromagnetic compatibility (EMC). Part 4^ : Testing and measurement.- Section 4 : Elelctrical fast
transient/burst immunity test. Basic EMC publication - EN 61000-4-4.
• Electromagnetic compatibility (EMC). Part 4^ : Testing and measurement technique.- Section 5 :
Surge immunity test. EN 61000-4-5.
• Electromagnetic compatibility (EMC) Part 4^ : Testing and measurement.- Section 6 : Immunity to
conduced disturbance, inducted by radio-frequency fields. EN 61000-4-6
• Electromagnetic compatibility (EMC) Part 4^ : Testing and measurement - Section 11 : Voltage dips,
short interrupt. and voltage variations immunity tests. EN 61000-4-11
secondo le disposizioni delle direttive / following the provisions of the Directives :
CE 2006/95, CE 2004/108, CE 93/68.
Gaggio Montano
CEO Saeco Vending
01/02/2010 Stefano FOLLI
Page 3
ONLY FOR ITALY
IMPORTANTE
Egregio Cliente, La informiamo tutte le nostre macchine prodotte sono commercializzate in
conformità alla Direttiva 97/23/CE, recepita con Decreto Legislativo n. 93 del 25 febbraio
2000.
Le disposizioni del Decreto sopra menzionato si applicano alla progettazione, alla
fabbricazione, alla valutazione di conformità della attrezzature a pressione degli insiemi
sottoposti ad una pressione massima ammissibile PS superiore a 0,5 bar.
Come specificato nell’articolo 19, comma 3 del suddetto Decreto Legislativo, è previsto
che l’utilizzatore deve comunicare la messa in servizio delle attrezzature a pressione e
degli insiemi all’ISPESL e all’azienda unità sanitaria locale competenti per il territorio.
LA INVITIAMO DI CONSEGUENZA A COMPILARE IL MODELLO ALLEGATO 1 (VEDI
ULTIME PAGINE DI QUESTO MANUALE), IN DUPLICE COPIA E A SPEDIRLO ALLE
SEDI DI COMPETENZA TERRITORIALE ASL E ISPESL.
N.B. La mancata comunicazione può comportare l’applicazione
dell’Art. 650 del codice penale.
Per l’indirizzo dei Dipartimenti e competenze territoriali ISPESL, può utilizzare l’allegato 2
(vediuItime pagine di questo manuale).
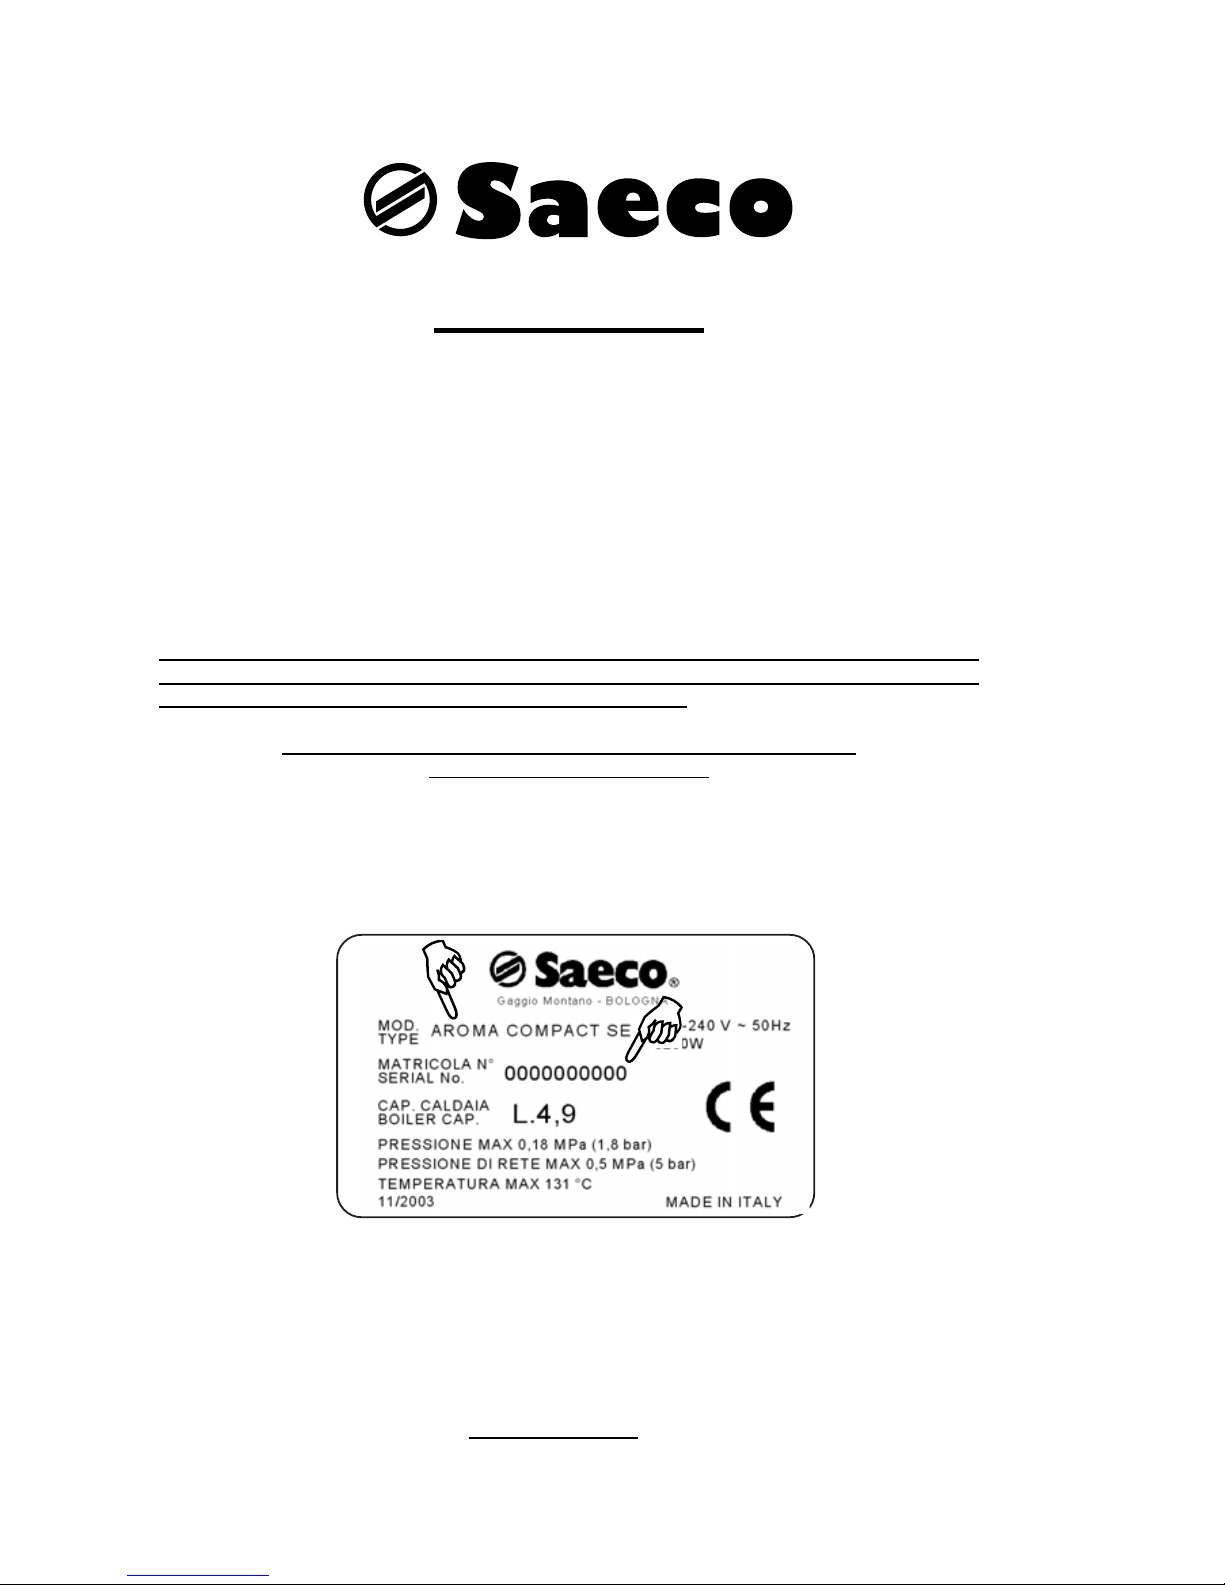
Per quanto riguarda il modello, ed il numero di fabbrica della macchina per caffè da
installare, li può rilevare dalla targhetta dati posta sull’apparecchiatura stessa.
Esempio:
Ci congraturiamo con lei per l’acquisto di questa macchina per caffè espresso e La
ringraziamo per la fiducia e disponibilità che ci ha dimostrato.
Prima di mettere in funzione la macchina, Le consigliamo di leggere attentamente le
istruzioni per l’uso che Le spiegano come utilizzarla, pulirla e mantenerla in perfetta
efficienza.
Rimaniamo a Sua disposizione per qualsiasi informazione.
Page 4

Gentile cliente,
la ringraziamo per la fiducia accordataci con l’acquisto di un nostro prodotto.
Se Lei avrà la costanza di seguire attentamente le indicazioni contenute nel presente manuale, siamo certi che potrà apprezzare nel tempo e con soddisfazione la qualità della
nostra macchina.
La preghiamo di leggere attentamente le indicazioni contenute nel manuale che riguardano
l’uso corretto del nostro prodotto, in conformità alle prescrizioni essenziali di sicurezza.
We thank you for your custom in the purchase of this product.
By carefully following the instructions contained in this manual you will be sure to appreciate
the quality of our machine.
Please therefore carefully read the instructions of use contained in this manual, which comply
with essential safety regulations.
Sehr geehrter Kunde,
wir danken Ihnen für das uns durch den Erwerb eines unserer Produkte entgegengebrachte
Vertrauen.
Wenn Sie die Ausdauer haben, aufmerksam die im vorliegenden Handbuch enthaltenen
Hinweise zu beachten, sind wir gewiß, daß Sie lange und mit Zufriedenheit die Qualität
unserer Maschine schätzen werden können. Wir bitten Sie, aufmerksam die im Handbuch
enthaltenen Hinweise bezüglich der richtigen Verwendung unseres Produktes in Übereinstimmung mit den wesentlichen Sicherheitsvorschriften zu lesen.
Cher client,
Nous vous remercions de la confiance que vous nous avez manifestée en achetant notre
produit.
Si vous suivez attentivement les indications contenues dans le présent manuel, nous sommes
certains que vous apprécierez la qualité de notre machine.
Nous vous prions de lire attentivement les indications contenues dans le manuel sur l’utilisation
correcte de notre produit, en conformité avec les prescriptions essentielles de sécurité.
Estimado cliente:
Le agradecemos por la confianza que nos otorga con la compra de nuestro producto.
Si Ud. tendrá la constancia de seguir atentamente las indicaciones contenidas en este
manual, estamos seguros de que podrá apreciar con satisfacción y a lo largo del tiempo
la calidad de nuestra máquina.
Le rogamos que lea atentamente las indicaciones que se refieren al empleo correcto de
nuestro producto contenidas en el manual, en conformidad con las prescripciones esenciales
de seguridad.
Estimado Cliente,
Agradecemos a sua preferência por um dos nossos produtos.
Seguindo atentamente as indicações contidas no presente manual, estamos certos de que
poderá apreciar no tempo, e com satisfação, a qualidade da nossa máquina.
Agradecemos que leia com atenção as instruções contidas no manual, relativas ao uso
correcto do nosso produto, em conformidade com as prescrições fundamentais de segu-
rança.
Beste Klant.
Wij bedanken u voor het vertrouwen dat u ons schenkt door één van onze producten te kopen.
Indien u zich zorgvuldig houdt aan de aanwijzingen die in deze handleiding gegeven worden,
zijn we ervan overtuigd dat u gedurende lange tijd tevreden zult zijn over de kwaliteit van onze
machine.
Wij verzoeken u de aanwijzingen in deze handleiding te lezen, die het juiste gebruik van ons
product betreffen in overeenstemming met de fundamentele veiligheidsvoorschriften.
IT
UK
DE
FR
ES
NL
PT
Page 5
Prima della messa in funzione, leggere attentamente il manuale di istruzioni
Carefully read the following instruction booklet before starting up the machine.
Lesen Sie vor der Inbetriebnahme aufmerksam die Bedienungsanleitung.
Avant la mise en service, lire attentivement le manuel d’instructions.
Antes de la puesta en funcionamiento, hay que leer atentamente el manual de instrucciones
Lees de handleiding aandachtig door, alvorens tot de inwerkingstelling over te gaan.
Antes de utilizar a máquina, leia com atenção o respectivo manual de instruções.
Attenzione! Togliere l’alimentazione elettrica prima di asportare le protezioni
Carefully turn off the electrical supply before removing the protections
Achtung! Schalten Sie vor dem Entfernen der Schutzabdeckungen die Stromzufuhr ab
Attention ! Débrancher l’alimentation électrique, avant d’enlever les protections.
¡Atención! Desconectar la alimentación eléctrica antes de extraer las protecciones
Let op! Schakel de elektriciteitsvoorziening uit, alvorens de beschermingen weg te nemen.
Atenção! Desligar a alimentação eléctrica antes de retirar as protecções.
Attenzione! Superfici calde
Important ! Hot surfaces.
Achtung! Oberfläche heiß
Attention ! Surfaces chaudes.
¡Atención! Superficies calientes
Let op! Warme oppervakken
Atenção! Superfícies quentes.
Attenzione! Operazioni particolarmente importanti e/o pericolose
Important! Particularly important and/or delicate operations
Achtung! Besonders wichtige und / oder gefährliche Arbeitsgänge.
Attention ! Opérations particulièrement importantes et/ou dangereuses.
¡Atención! Operaciones particularmente importantes y/o peligrosas
Let op! Bijzonder belangrijke en/of gevaarlijke werkzaamheden
Atenção! Operações particularmente importantes e/ou perigosas.
Importante! Interventi necessari al buon funzionamento.
Important ! Operations essential to guarantee efficient function
Wichtig! Für eine gute Funktionsweise erforderliche Maßnahmen.
Important ! Interventions nécessaires au bon fonctionnement.
¡Importante! Intervenciones necesarias para el buen funcionamiento.
Belangrijk! Werkzaamheden die noodzakelijk zijn voor de goede werking
Atenção! Operações importantes para o bom funcionamento da máquina.
Interventi che possono essere svolti a cura dell’utente
Operations which may be carried out by the user
Maßnahmen, die durch den Anwender vorgenommen werden können
Interventions pouvant être effectuées par l’utilisateur.
Intervenciones que pueden ser realizadas por el usuario
Werkzaamheden die door de gebruiker verricht kunnen worden
Operações que podem ser efectuadas pelo usuário.
Interventi che devono essere svolti esclusivamente da un installatore o un tecnico autorizzato.
Interventions to be carried out exclusively by an installer or authorized technician.
Eingriffe, die nur von einem Installateur oder von einem autorisierten Techniker vorgenommen
werden dürfen.
Interventions à effectuer uniquement par un installateur ou un technicien autorisé.
Intervenciones que tienen que ser efectuadas sólo por el instalador o el técnico Autorizado.
Werkzaamheden die uitsluitend door een erkende monteur of technicus verricht mogen worden
Operações que devem ser efectuadas exclusivamente por um técnico autorizado.
Page 6

25
English
INDEX
INDEX . ...............................................................................................................25
1- INSTRUCTIONS BOOKLET CONSERVATION AND
USE. ............................................................................................................26
2- ENVISAGED MACHINE USE. ...........................26
3 - SAFETY ADVICE. .............................................27
4 - TECHNICAL FEATURES. ...................................28
5 - INSTALLATION. ...............................................29
5.1 Water connection. ..................................29
5.2 Electrical connection. ..............................29
6 - START UP. .......................................................30
6.1 Long coffee gigleuri. ...............................30
6.2 Pressure switch adjustment. .......................31
6.3 Pump pressure calibration. ........................................31
6.4 Filters for coffee machine. .........................32
6.5 Replacement of the thermostat to reduce the
coffee dispensing group temperature..........32
6.6 With spouts .........................................32
7 - FUNCTION / USE AND PROGRAMMING. .....32
7.1 Coffee measure programming. ..................33
7.2 Coffee delivery. .....................................34
7.3 Continuous coffee measures. ....................35
7.4 Special functions. ...................................35
7.5 Alarm condition. .....................................36
8 - PURIFIER REGENERATION. ...............................37
9 - MAINTENANCE AND USEFUL ADVICE. .............38
10 - TROUBLE SHOOTING. ......................................39
11 - MACHINE DISMANTLING. ...............................39
Page 7

26
English
2 - ENVISAGED MACHINE
USE
The machine must be operated by a single operator only.
The authorized operator must have firstly read and fully understood all the instructions contained in the present booklet
to ensure correct machine function.
This machine is specifically intended for the professional
preparation of espresso coffee using blended coffee, as well
as the drawing and delivery of water and/or steam.
Its components are made of resilient non toxic materials,
and they are easily accessible for cleaning or maintenance
operations.
This machine is intended for internal use only.
Ambient temperature for the correct operation of the machine
5°C ÷ 25°C.
1 - INSTRUCTIONS BOOKLET
CONSERVATION
The present instructions booklet has been prepared for the
machine user, the owner and the installation technician and
must be always available for reference purposes.
The manual is destined for the user, the maintenance technician and machine installation technician.
The purpose of the instructions booklet is to indicate the envisaged uses of the machine for which it has been designed,
its technical features and in order to provide advice on correct use, cleaning and regulation. It also provides important
maintenance information, and details on any residual risks,
and all those operations which require particular care.
The present manual is to be considered as an integral part
of the machine and must be CONSERVED FOR FUTURE
REFERENCE until the final dismantling of the machine.
This instructions booklet must always be available for consultation and must be kept in a protected and dry place.
In the event of loss or damage to the same, the user may
ask the manufacturer or local dealer for a new manual, indicating the machine model and serial number of the same
as indicated on the identification plate.
The present manual reflects the state of the art, at the time of
its preparation, the manufacturer however reserves the right
to revise production and subsequent manuals without being
obliged to update previous versions.
The manufacturer declines all responsibility in the event of
:
- the improper or incorrect use of the coffee machine
- use that fails to comply with that specifically stated in the
present booklet
- serious lack of maintenance as envisaged or recommended
- machine modifications or any non-authorized intervention
- use of either non-original or non-specific spares
- total or partial failure to observe the instructions
Page 8

27
English
3 - SAFETY ADVICE
The machine is to be used solely by adults who have carefully read and fully understood this manual and all the safety
advice contained in the same.
The appliance is not to be used by persons (including children) with reduced physical, mental or sensory abilities or
with limited experience and/or expertise, unless they are
supervised by a person responsible for their safety, or they
are instructed by this person on how to properly use the
appliance.
- Children must be supervised to ensure they do not play
with the appliance.
- This appliance is to be used for household applications or
in similar areas like:
. for staff only cooking areas in shops, offices and other
professional environments;
. farms;
. for clients use in hotels, motels and other residential type
areas;
. environments like bed and breakfasts.
The user is responsible in relation to third parties in the
working area.
The installer, user and maintenance technician are obliged
to notify the constructor of any defects or faults which may
effect the original safety of the system.
Installation must be effected solely by authorized and qualified personnel.
Do not install the appliance in a location where water jets
may be used.
The appliance must only be installed in places where it can
be used and maintained only by qualified staff.
The machine is to be used solely in the presence of suitable
lighting.
For safety reasons, all worn or damaged parts must be
promptly replaced.
Regularly check that the power supply cable is in good
conditions. Damaged cables must never be repaired using
insulating tape or clamps.
Do not expose the machine to the elements (sun, rain ,
etc).
Prolonged machine standstill at temperatures of under 0°C
(zero degrees centigrade), may cause serious damage or
breakage to the boiler piping: it is therefore necessary to
completely empty the water circuit before every prolonged
standstill.
The removal of guard and/or safety elements fitted on the
machine is forbidden.
The packaging components must be consigned to special
disposal centres and must in any event never be left unguarded or within reach of children, animals or non-authorized
persons.
The constructor declines responsibility for any damage to
things, persons or animals caused by eventual interventions
on the machine by personnel not specifically authorized to
undertake such operations.
In the event of any non-authorized interventions or repairs
on the machine, or in the event of the use of non-original
spares all guarantee terms become void, and the company
reserves the right to reject validity.
The user must comply with the current safety laws in force
in the country of installation, as well as common sense
and ensure that all maintenance operations are regularly
carried out.
Never clean the inside of the machine with power supply
on and plug connected and in any event avoid the use of
water sprays or detergents.
The user must not touch the machine if his hands or feet are
wet or damp, neither must be use the machine in bare feet.
Although the machine is earthed it is advisable to use wooden platforms or a cut-out box complying with local laws in
order to prevent the risk of electrocution.
Page 9

28
English
4 - TECHNICAL FEATURES
fig. 1
B
L
H
1 group 2 groups
Dimensions
B
420 570
H
530 530
L
540 540
Weight
kg
37 43
Boiler capacity
L
4,9 4,9
Boiler resistance absorbed power
230 / 240 V ~
W
2730 2730
ECO Max boiler resistance absorbed power
230 / 240 V ~
W
1820 1820
Pump motor
W
165 165
Overall absorbed power
230 / 240 V ~
W
3200 3200
A-weighted sound pressur level is below 70 dB
Page 10

29
English
Important: The machine must be supplied with
water of over 8°F hardness.
The installation of a water softener is recommended for the
machine water supply.
Check that the water mains to which connection is to be
made supplies drinking water.
- Connect purifier (D) to the water mains (A).
NB: before connecting the purifier to the machine,
wash out thoroughly until the water becomes clear,
then proceed to connect the purifier to the machine.
- Connect the drain cup (E) to the drainage pipe (B)
- Should the mains pressure be higher than 0,5 MPa a
pressure reducer balanced for high pressure should be
installed (device in which any mains pressure increase
does not effect the output pressure).
Should the machine be moved to a different place, the fitting
unit must be replaced with a new one.
5.2 Electrical connection
Important ! Before proceeding with electrical
connection it is necessary to check to ensure that
the voltage rating corresponds with that indicated
on the CE plate and on the connection plate on the
power supply cable.
The appliance shall be placed so that the plug is easily
accessible.
Check to ensure that the electrical supply line is able to
support the machine load (see chap. 4 – technical features
table).
Connect to an earthing socket which complies with current
legislation.
Check that the power supply cable is efficient and that it
complies with national and European safety standards.
The user must undertake to power the machine protecting
the power line using a suitable safety switch (cut-out) that
complies with the legislation in force in the actual country
itself.
Connect the power cable (F) to the electric line using a
plug, or in the case of fixed installation, using a multi-polar
switch (C) for mains separation, with a contact distance of
at least 3 mm.
For voltage change refer to the diagram shown on the general mains switch box.
The yellow-green coloured cable MUST be connected to the
room’s earthing system.
5.1 Water connection
E
D
C
A
B
F
5 - INSTALLATION
A MAINS SUPPLY
B DISCHARGE DUCTS
C PROTECTION SWITCH
D PURIFIER
E DRIP BOWL
F POWER CABLE
fig. 2
Caution! The appliance is not suitable for installation
in areas where a water jet can be used.
Before proceeding with installation check that:
1 there are no bumps, signs of knocks or deformities.
2 there are no damp patches or marks which could lead
one to assume that the packaging has been exposed to
the elements
3 there are no signs of tampering
Once one is satisfied that transportation has been correctly
effected proceed with installation.
Proceed with installation following the instructions according
to the sequence as described below.
N.B. The least height of the support’s top must be 110cm.
(The higher surface of the appliance shall however be at
least 1,5 m from the ground level)
Page 11

30
English
6.1 Long coffee gigleur
The machine is fitted with a gigleur ( 1 per unit) with a clearance of 0.6 mm (Cod. WGA26G0074/01).
For greater coffee delivery speed, in the case of long
coffees, no.2 gigleurs are also included with the machine
(complete with seals) with a clearance of 0.8 mm (Cod.
WGA26G0073/01). The gigleur is located in the exchanger supply fitting (1 per group).
6 - START UP
Once the water and electrical connections have been made,
proceed to start up the machine.
Open the mains water supply tap (A) (fig 2).
Close the protection switch (C) (fig 2).
Position the machine main switch (9) to position the
machine on indicator will come on (7).
The auto-levelling device will come into operation so that the
water reaches a normal level in the boiler (5).
Position the main switch (9) to position for operation
at normal power or to position for operation at full
power, thereby powering the resistances.
Wait for the pressure to reach its operational pressure
1.1÷1.3 atm checking the boiler pressure on the gauge
(6).
Should the machine fail to stabilize on the indicated values
it is necessary to calibrate the pressure switch as described
in paragraph 6.2.
Then check the pressure on the pump gauge (6) putting a unit
into operation with filter holder engaged filled with ground,
dosed and pressed coffee in order to achieve an effective
working pressure of 8/9 atm.
Should re-calibration of the pump pressure be necessary this
operation should be undertaken as indicated in paragraph
6.3.
The machine is now ready for use.
fig. 3
1 Steam tap
2 Steam dispenser nozzle
3 Hot water tap
4 Hot water dispenser
5 Boiler level indicator
6 Two boilers/pump manometer
7 Coffee maker ON LED
8 Cup warmer ON/OFF switch
9 Power ON/OFF switch
10 Selection: 1 espresso coffee
11 Selection: 2 espresso coffees
12 Selection: 1 weak coffee
13 Selection: 2 weak coffees
14 Dispense/Stop button
15 Control coffee switch (SM)
15
3
3
4
6
2
1
mod.
SE
10 11 12 13 14
15
mod.
SM
8
7
9
5
7
9
fig. 4
mod. AROMA COMPACT SE
mod. AROMA COMPACT SM
Page 12

31
English
Warning !!
When the machine is new the filter-holder sump may
not be aligned (perpendicular to the machine itself)
as shown in the figure at the side, however this does
not effect the efficient function of the same.
After a short period of use the sump will gradually
settle into a correct position.
A = Position of closed filter-holder with new machine.
B = Position of closed filter holder with machine after a short
period of use.
6.2 Pressure switch adjustment
The pressure switch shown in the figure acts to keep the
boiler pressure constant by engaging or de-activating the
electrical heating resistance.
This pressure switch is already calibrated to 1.1-1.3 bar
during the initial machine testing stage, but should a different
working pressure be required, it is possible to vary the operational field of the pressure switch using the regulation screw
(U); pressure reduction results in a reduction in temperature,
whilst increasing the pressure will also increase the water
temperature. The regulation direction is shown in the figure
and on the pressure switch itself. The pressure varies by
0.1 atm for every complete screw turn.
Warning: Disconnect the electricity supply before
undertaking this operation.
fig. 5
fig. 6
fig. 7
6.3 Pump pressure calibration
Insert the filter holder into the unit filled with regularly ground,
dosed and pressed coffee.
Switch on the unit switch (AROMA COMPACT SM) or the
unit control keyboard (AROMA COMPACT SE) (15) and
read the pressure on the pump pressure gauge (6).
NB: The correct pressure is of 8-9 atm.
Should the pressure indicated on the pressure gauge be
incorrect, turn it clockwise to increase the pump pressure
and anti-clockwise to reduce the pressure.
Once adjustment is complete check pump calibration by
delivering one or more coffees.
Z= Pump pressure adjustment screw.
6.4 Filters for coffee machine
Depending on the quantity of coffee ground, the appropriate
filter must be used as shown below to avoid that, once the
coffee has dripped out, the leftover powder remains attached
to the nozzle.
WGANF08/002/B
1 Coffee cup of 5,5 gr. ÷
6,5 gr.
Pod for 1 coffee
Barley pod for 1 dose
WGANF08/004/B
1 Coffee cup of 6 gr. ÷ 7 gr.
WGANF08/005/B
2 Coffees cup of 12 gr. ÷
14 gr.
WGANF08/009/B
Double pod for 2 coffees
The filter may be recognised by
the letter “C” printed inside.
.
fig. 8
Note: Options include shower head gaskets that are thinner
(8.1 mm, part no. NG01/005) or thicker (9.0 mm, part
no. NG01/002) than the standard shower head gasket
(8.5 mm, part no. NG01/001/B).
Page 13

32
English
7- FUNCTION / USE AND
PROGRAMMING
INTRODUCTION
The programming software permits the checking of the
following operations:
- handling of 1 - 2 coffee units
- control of four different coffee doses for each unit
- simultaneous function of both coffee and tea units
- volumetric check on coffee measures
- simulated measure programming
- filling level check and control
- system supervision through alarms
- continuos, delivery time-out and further functions
- serial connection with accounting devices
6.5 Replacement of the thermostat to
reduce the coffee dispensing group
temperature.
Remove cup heating bowl (1). Disconnect group thermostat
(2) (Code WGADM1561 – T 103°C) and replace it with
the lower temperature thermostat (Code WGADM2067
- T 93°C), included in the machine equipment.
T1 – single espresso coffee
T2 – double espresso coffee
T3 – single long coffee
T4 – double long coffee
T5 – Programming/continuos
Keyboard symbols:
fig. 10
fig. 9
6.6 Spouts included in the
supply.
No. 4 spouts are supplied with the machine to dispense one or two coffees.
The figure (beside) shows the different
distances from the cup-holding tray (H),
depending on the different types of spouts
fitted on the filter holder.
Page 14

33
English
7.1 Coffee measure
programming
The measured amounts of coffee may be
modified (by means of volumetric checking) and memorized as follows:
- press key T5 (of keyboard relative
to group 1) and keep pressed for
over 5 seconds and check that all
the keyboard leds come on. In which
case, (by operating on the keyboard
relative to group 1) all the units will be
programmed, while by pressing key T5
of another unit, only the programming
of the unit on which one is operating
is possible.
IMPORTANT !! The settings made on
unit 1 (operating on the first keyboard)
will be automatically copied on to all the
other units.
Press the key corresponding to the measure
to be programmed (key T1 for example)
within 30 seconds (programming timeout).
The led relative to T5 will remain on, on
all keyboards and the led relative to the
measure being programmed will also
come on (on all the keyboards). During
this state and for the entire coffee measure
programming time duration, the solenoid
valve and pump are activated.
Note: If none of the keys are pressed
within 30 seconds, it will automatically
escape from programming mode.
On pressing key T1 coffee delivery begins, once the required amount of coffee is
obtained press key T1 again or any other
of the keys of the unit keyboard in order to
suspend coffee delivery. The new impulse
value of the measure is thereby memorized
on the EPROM. Both the solenoid valve
and the pump are de-activated thereby
suspending product delivery and all the
keyboard leds go out.
Page 15

34
English
7.2 Coffee delivery
On pressing the corresponding key T1T2-T3 or T4, the corresponding delivery
solenoid valves are activated for the time
necessary to obtain the required amount
of product as previously programmed
(volumetric check).
The LED relative to the selected measure
remains on for the entire coffee delivery
time.
The delivery in progress may be suspended before actually reaching the desired
programmed product quantity by pressing
any of the measure keys present on the
keyboard of the unit used for product
delivery.
It is also possible to obtain simultaneous
coffee delivery from all the machine
units.
To proceed with a new programming
operation of other coffee measures T2-T3T4 (providing that the programming time
out time of 30 sec is not exceeded) simply
repeat the same operations with the same
sequence as undertaken for key T1.
Press key T5 to immediately escape from
the programming stage.
IMPORTANT: Should the “PRE-INFUSION” function be active (see par.
7.5). Wait until the pre-infusion function
is complete before stopping delivery in
progress.
NOTE: During the programming of a unit
the function of the other units is deactivated
as well as tea dispensing.
To programme the other units, press the
specific programming key of each unit and
carry out the same operations as undertaken on unit 1. In this case any variations
in the measures are activated only on the
unit on which one is actually working.
Page 16

35
English
7.3 Continuous coffee
measures
For continuous coffee measure delivery
press key T5 from the keyboard corresponding to the unit on which one wishes
to operate.
The LED corresponding to key T5 will remain on for the entire delivery operation.
IMPORTANT ! Avoid keeping it pressed
for more than 5 seconds or it will enter the
programming mode.
Coffee delivery will continue until measure
stop by pressing key T5, or on obtaining
the maximum amount of product which
can be obtained through volumetric control
(6000 impulses) or by means of delivery
Time-out function.
IMPORTANT ! The start of the relative
“continuous” cycle occurs on the release
(within 5 seconds) of key T5 and not on
pressing of the same. While the STOP
function may be obtained by pressing it
a second time.
Engagement/deactivation
Start the machine by pressing the main
switch keeping key T5 of unit 1 pressed
and wait for the led relative to key T5 to
begin flashing.
Press key T1 in order to engage or deactivate the PRE-INFUSION.
To escape from this condition and return to
normal functions press key T5 again.
T1 KEY LED ON : PRE INFUSION: ON
7.4 Special functions
Pre-infusion
Our software permits measure configuration so that the relative delivery of the
COFFEE measures through volumetric control is preceded by pre-infusion. Delivery
of the coffee measure after time 1 (ON) is
suspended for a time 2 (OFF) and is then
resumed for the completion of selection.
On pressing one of the volumetric control
measure keys, the normal delivery cycle
is preceded by a short timed water jet in
order to dampen the coffee pellets before
actual delivery stage.
This function ensures the optimum use of
the coffee pellets.
Page 17

36
English
7.5 Alarm condition
Boiler (filling) level time out
This alarm condition occurs whenever the
water level is too low or the level probe
remains uncovered. In such a case the
keyboard leds flash.
The filling stage is automatically engaged
and to cancel the alarm conditions switch
the machine off and then on again.
Lack of volumetric counter impulses
On starting a volumetric control coffee
cycle, the correct function of the volumetric
counter is checked by the reading of the
number of impulses sent by the same to
the micro-controller.
Should no impulses by recorded for a period exceeding 5 seconds the LED relative
to the selected measure begins flashing (ie.
the led relative to key T4).
After one minute in which no impulses are
recorded (volumetric counter time out),
the measure underway is automatically
stopped.
Page 18

37
English
8 - PURIFIER
REGENERATION
A
B
E
F
C
D
G
C
D
C
G
D
F
A WATER INLET
B WATER OUTPUT
C INLET TAP LEVER
D OUTPUT TAP LEVER
E DEPRESSURIZER PIPE
F REGENERATION TUBE
G COVER KNOB
IMPORTANT : Regenerate the purifier at the intervals listed below:
- place the empty 2 litre container under pipe E.
- shift levers C and D from left to right as shown in fig.11.2
and remove the cover by loosening knob G, pour in 1.5
kg of sodium chloride (coarse cooking salt) into the 8-litre
purifier and 2 kg into the 12-litre type.
- Replace the lid and shift lever from right to left as shown
in fig.11.3 and allow the salted water to drain out of
pipe F until the water is fresh.
- Shift lever D from right to left as shown in fig.11.4
NB: These regeneration instructions are valid only
providing the purifier is as that indicated in the
figures. Should it fail to correspond proceed
as indicated in the instructions attached to the
purifier itself.
Fig. 11.01
Fig. 11.02
Fig. 11.03
Fig. 11.04
HARDNESS °F 8 LITRE PURIFIER 12 LITRE PURIFIER
From 00 to 20 regeneration after 1100 l. regeneration after 1600 l
From 21 to 30 regeneration after 850 l. regeneration after 1250 l.
From 31 to 40 regeneration after 650 l. regeneration after 950 l.
From 41 to 50 regeneration after 450 l. regeneration after 650 l.
Page 19

38
English
Weekly cleaning operations
Cleaning of the unit and spouts: place a teaspoon of specific
coffee machine washing powder into the blind filter supplied
with the machine and apply to the unit to be cleaned using
the filter-holder. Press the unit delivery control button as for a
normal coffee dispensing operation. Suspend delivery after
30 seconds and then repeat the operation 3-4 times. Rinse
out the unit using a normal filter and then undertake a few
dispensing operations using water only. Then prepare a
coffee in order to eliminate any unpleasant odours.
Below-cup seal replacement
Seal (E) needs to be replaced in the event that coffee
leakage is noted between unit (F) and filter-holder (G), or
in the event that on closing filter holder (D) the unit centre is
greatly exceeded.
Remove the spout (B) by loosening the central screw (G).
Remove the spout holder (A) by loosening the two Allen
screws (H).
Then proceed to remove seal (E) using a screw driver.
After removing the seal undertake to clean the slot and then
re-assemble the new seal taking care to insert it with the
chamfered part turned upwards towards the unit itself.
9 - MAINTENANCE AND
USEFUL ADVICE
fig. 12
In order to ensure that the spouts (B) are kept clean and
free of any coffee deposits which may jeopardize yield,
we advise that before starting work in the morning that you
put filter holder (D) in with empty filter (while machine is hot)
and operate the unit several times.
In this way any coffee dust which may have been deposited
between the metal filter (B) and the metal filter holder (A) are
removed. This operation must be repeated every day.
Frequently check the filter holes (C) and remove any deposits.
Should the water have been left in the ducts for a long time,
it is necessary to allow some water to flow through them in
order to remove any deposits.
A SPOUT HOLDER
B SPOUT
C FILTER
D FILTER HOLDER
E SEAL
F UNIT COFFEE
G CENTRAL SCREW
H ALLEN SCREWS
It is a good idea to rinse the filters (C) and filter holders
(D) every day in hot water, or even better, place them in
hot water and allow to soak for the whole night in order to
dissolve any greasy coffee deposits.
It is advisable to leave the filter-holder cups inserted with the
coffee dregs for the entire working day to ensure that the
filter-holder is always at optimum temperature.
Do not cover the cup-warmer level with any fabrics or cloths
etc.
Do not use any abrasive or corrosive products for cleaning
the bodywork.
The steam nozzles must be cleaned immediately after use in
order to prevent the risk of the formation of any scale which
may block the holes and to ensure that any drinks made
subsequently do not absorb any unpleasant odours.
Page 20

39
English
10 - TROUBLE SHOOTING
11 - MACHINE DISMANTLING
For a correct disposal of the machine, please follow the
instructions contained on the last pages of the manual.
PROBLEM CAUSE REMEDY
Machine switch off 1. Mains switch off
1. position the machine switch to position ON
2. Machine switch off
2. position the machine switch to position 1
3. Incorrect electrical mains connection 3. contact specialized personnel in order to check the connection
No water in boiler 1. Mains tap closed 1. open the mains tap
2. Clogged pump filter 2. replace the filter
3. Motor driven pump not in operation 3. contact specialized personnel
No unit delivery 1. mains tap closed 1. open the mains tap
2. motor driven pump out of order 2. contact specialized personnel
3. clogged gigleur 3. contact specialized personnel
4. burnt control box fuse 4. contact specialized personnel
5. unit solenoid valve out of order 5. contact specialized personnel
6. unit switch out of order 6. contact specialized personnel
Steam fails to come out of the nozzle 1. too much water in boiler 1. see specific problem
2. damaged resistance 2. contact specialized personnel
3. clogged sprayer element 3. clean the sprayer element
4. resistance saver engaged 4. reinsert the resistance
Too much water in the boiler 1. the motor driven pump remains engaged 1. contact specialized personnel
2. perforated exchanger 2. contact specialized personnel
3. automatic charge solenoid valve blocked
3. contact specialized personnel
Signs of water leakage on bench 1. dirty drain tray 1. clean the try
2. drainage pipe clogged or detached 2. replace the drainage pipe
3. other leakage 3. contact specialized personnel
Wet coffee dregs 1. Grinding regulated too fine 1. Adjust grinding value
2. Unit still cold 2. wait for the machine to reach the correct
temperature
3. Solenoid valve fails to discharge 3. contact specialized personnel
Coffee dispensing too slow
1. grinding element set too fine 1. Adjust the grinder
2. dirty filter-holder
2. replace the filter and undertake more frequent
filter-holder cleaning
3. clogged unit 3. contact specialized personnel
4. gigleur or solenoid valve partially clogged
4. contact specialized personnel
Coffee dispensing too fast
1. grinder is regulated too large 1. regulate the grinding
Coffee delivered cold
1. Lime scale present on the exchangers or the
resistances
1. contact specialized personnel
2. oxidized pressure switch contacts 2. contact specialized personnel
3. defective electrical connection 3. contact specialized personnel
4. partially burnt out resistance 4. replace the resistance element
Coffee delivered too hot 1. incorrect pressure switch calibration 1. regulate the pressure switch by means of the
relative screw (chap. 6.2)
Page 21

120
LEGENDA COMPONENTI - COMPONENTS LIST - LEGENDE BAUTEILE - LEGENDE DES COMPOSANTS
LEYENDA COMPONENTES - LEGENDA COMPONENTEN - LEGENDA DOS COMPONENTES
1 Cavo alimentazione pen-
tapolare
penta-polar power cable Fünfpoliges Stromversorgun-
gskabel
Câble d’alimentation
pentapolaire
Cable alimentación pen-
tapolar
Vijfpolig stroomsnoer Cabo de alimentação
pentapolar
2 Commutatore 4 posizioni 4-position commutator 4-stelliger Umschalter Commutateur à 4 positions Conmutador 4 posiciones 4-standen schakelaar Comutador de 4 posições
3 Pressostato tripolare three-pole pressure switch Dreipoliger Druckwächter Pressostat tripolaire Presóstato tripolar Driepolige drukregelaar Pressostato tripolar
4 Morsettiera di alimenta-
zione
alimentation terminal board Versorgungsklemmleiste Boîte de alimentation Tablero de bornes de
alimentación
Toevoerklem-menbord Bornes de alimentação
5 Resistenza caldaia boiler resistance Heizwiderstand Résistance de la chaudière Resistencia caldera Weerstand ketel Resistência da caldeira
6 Resistenza scaldatazze cup-warmer resistance Heizelement zur Tassene-
rwärmung
Résistance du chauffe-tasses Resistencia calienta-tazas Weerstand kopjesverwar-
mer
Resistência do escalda
chávenas
7 Termostato a riarmo
manuale
manual re-set thermostat Thermostat zur manuellen
Rücksetzung
Thermostat à réarmement
manuel
Termostato de rearme
manual
Thermostaat met handmati-
ge reset
Termostato de rearme
manual
8 Spia rossa macchina
accesa
machine on - red light
indicator
Rote Kontrolleuchte Maschi-
ne in Betrieb
Témoin rouge machine
allumée
Luz de aviso roja máquina
encendida
Rood controlelampje machi-
ne ingeschakeld
Sinal luminoso de máquina
acesa
9 Interruttore scaldatazze cup warmer switch Schalter Tassenwärmer Interrupteur du chauffe-
tasses
Interruptor calienta-tazas Schakelaar kopjesverwar-
mer
Interruptor de escalda
chávenas
10 Spia interruttore caffè light indicator coffee switch Kontrolleuchte Schalter
Kaffee
Témoin interrupteur du café Luz de aviso interruptor café Controlelampje schakelaar
koffie
Sinal luminoso interruptor
café
11 Interruttore caffè coffee switch Schalter Kaffee Interrupteur du café Interruptor café Schakelaar koffie Interruptor café
12 Elettrovalvola gruppo unit solenoid valve Magnetventil Gruppe Électrovanne du groupe Electroválvula grupo Magneetventiel groep Electroválvula do grupo
13 Elettrovalvola livello auto-
matico
automatic level solenoid
valve
Magnetventil automatischer
Füllstand
Électrovanne de niveau
automatique
Electroválvula nivel au-
tomático
Magneetventiel automatisch
peil
Electroválvula de nível
automático
14 Motopompa completa Complete motor driven
pump
Motorpumpe komplett Pompe complète Motobomba completa Complete motorpomp Bomba completa
15 Centralina controllo livello
automatico
automatic level control box Steuergehäuse automati-
sche Füllstandkontrolle
Centrale contrôle niveau
automatique
Central control nivel
automático
Regeleenheid automatische
peilcontrole
Central de controle do nível
automático
16 Sonda livello automatico automatic level probe Sonde automatischer
Füllstand
Sonde de niveau automa-
tique
Sonda nivel automático Sonde automatisch peil Sonda de nível automático
17 Interruttore prelievo acqua
calda
hot water collection switch Schalter Heißwasserent-
nahme
Interrupteur de prélèvement
d’eau chaude
Interruptor toma de agua
caliente
Schakelaar aftappen warm
water
Interruptor de extracção de
água quente
18 Resistenza a cartuccia cartridge resistance Kartuschenwiderstand Résistance à cartouche Resistencia de cartucho Weerstand Resistência de cartucho
19 Termostato gruppo unit thermostat Thermostat Gruppe Thermostat du groupe Termostato grupo Groepsthermostaat Termostato grupo
20 Tastiera dosatura volume-
trica
volumetric measuring
keyboard
Tastatur Volumendosierung Clavier de dosage volu-
métrique
Teclado dosificación
volumétrica
Toetsenbord volumetrische
dosering
Teclado de dosagem
volumétrica
21 Centralina elettronica dosa-
tura volumetrica
volumetric measuring
electronic control box
Elektronisches Steuergehäu-
se Volumendosierung
Centrale électronique du
dosage volumétrique
Central electrónica dosifica-
ción volumétrica
Elektronische regeleenheid
volumetrische dosering
Central electrónica de
dosagem volumétrica
22 Contatore volumetrico volumetric counter Volumenmesser Compteur volumétrique Contador volumétrico Volumetrische teller Contador volumétrico
Page 22

Istruzioni per il trattamento a fine vita
Instructions for end-of-life disposal treatment
Hinweise für die Behandlung bei Außerbetriebnahme
Instructions pour le traitement de fin de vie utile
Instrucciones para el tratamiento al final de vida útil
Instruções para o tratamento em fim de vida útil
Instructies voor de behandeling aan het einde van de levensduur
Questo prodotto è conforme alla Direttiva EU 2002/96/EC.
Il simbolo
apposto sull’ apparecchiatura o sulla confezione indica che l’ apparecchiatura, alla fine della propria vita utile, non
deve essere trattata come un rifiuto domestico generico ma deve essere portata in uno dei centri di raccolta differenziata per apparecchiature
elettriche ed elettroniche approntati dalla Pubblica Amministrazione. Oppure puo’ essere consegnata al rivenditore al momento dell’acquisto
di un’ apparecchiatura nuova equivalente. L’utente è responsabile del conferimento dell’apparecchio a fine vita alle appropriate strutture
di raccolta, pena le sanzioni previste dalla vigente legislazione sui rifiuti.
L’adeguata raccolta differenziata per l’avvio successivo dell’apparecchio dismesso al riciclaggio, al trattamento e allo smaltimento ambientalmente compatibile contribuisce ad evitare possibili effetti negativi sull’ambiente e sulla salute umana e favorisce il riciclo dei materiali
di cui è composto il prodotto.
Per informazioni più dettagliate inerenti i sistemi di raccolta disponibili, rivolgersi al servizio locale di smaltimento rifiuti, o al rivenditore
in cui è stato effettuato l’acquisto. Il produttore e/o l’importatore ottemperano alle proprie responsabilità per il riciclaggio, il trattamento
e lo smaltimento ambientalmente compatibile sia individualmente sia partecipando a sistemi collettivi.
This product complies with EU Directive 2002/96/EC.
The symbol
on the product or on its packaging indicates that this product may not be treated as household waste. Instead it shall be
handed over to the applicable collection point for the recycling of electrical and electronic equipment.
By ensuring this product is disposed of correctly, you will help prevent potential negative consequences for the environment and human health,
which could otherwise be caused by inappropriate waste handling of this product. For more detailed information about recycling of this product,
please contact your local city office, your household waste disposal service or the shop where you purchased the product.
Dieses Produkt entspricht der EU-Richtlinie 2002/96/EG
Das Symbol
auf dem Produkt oder seiner Verpackung weist darauf hin, dass das Produkt nicht als normaler Haushaltsabfall zu behandeln ist, sondern an einem Sammelpunkt für das Recycling von elektrischen und elektronischen Geräten abgegeben werden muss. Durch Ihren Beitrag zum korrekten Entsorgen dieses Produkts schützen Sie die Umwelt und die Gesundheit
Ihrer Mitmenschen. Umwelt und Gesundheit werden durch falsches Entsorgen gefährdet. Weitere Informationen über das Recycling
dieses Produkts erhalten Sie von Ihrer Gemeinde, der Müllabfuhr oder dem Geschäft, in dem Sie das Produkt gekauft haben.
L’ appareil est en conçu et fabriqué pour faciliter sa valorisation, son recyclage ou sa réutilisation conformément à la directive européenne 2002/96/CEE relative aux appareils électriques et électroniques usagés (waste electrical and electronic equipment - WEEE).
Le logo
ci-contre apposé sur l’appareil indique que ce produit ne peut pas être éliminé avec les déchets ménagers non triés. Lorsque
vous aurez décidé de vous en séparer définitivement, il convient de faire procéder à la collecte sélective de cet appareil en vous conformant au
mode de reprise mis en place dans votre commune (collecte ponctuelle des encombrants, déchèterie), ou en aisant appel au service de reprise
proposé par votre distributeur, ou bien, en le confiant à des organisations caritatives et des associations à but non lucratif. En vous assurant
que ce produit est éliminé correctement, vous favorisez la prévention des conséquences négatives pour l’environnement et la santé humaine.
IT
UK
DE
FR
Este producto cumple con la Directiva EU2002/96/EC.
El simbolo
en el producto o en su empaque indica que este producto no se puede tratar como desperdicios normales del hogar.
Este producto se debe entregar al punto de recolección de equipos eléctricos y electrónicos para reciclaje. Al asegurarse de que este
producto se deseche correctamente, usted ayudará a evitar posibles consecuencias negativas para el ambiente y la salud pública, lo cual
podria acurrir si este producto no se manipula de forma adecuada. Para abtener información más detallada sobre el reciclaje de este
producto, póngase en contacto con la administración de su ciudad, con su servicio de desechos del hogar o con la tienda donde compró
el producto.
ES
Page 23

Dit product voldoet aan de EU-richtlijn 2002/96/EG.
Het symbool
op het product of op verpakking wijst erop dat dit product niet als huishoudafval mag worden behandeld. Het moet
echter naar een plaats worden gebracht waar elektrische en elektronische apparatuur worden gerecycled.
Als u ervoor zorgt dat dit product op de correcte manier wordt verwijderd, voorkomt u mogelijk voor het milieu negatieve gevolgen die zich
zouden kunnen voordoen in geval van verkeerde afvalbehandeling. Voor meer details in verband met het recyclen van dit product, neemt u
het best contact op met de gemeentelijke instanties, het bedrijf of de dienst belast met de verwijdering van huishoudafval of de winkel waar
u het product hebt gekocht.
NL
Este produto está conforme a directiva EU 2002/96/EC.
O simbolo
impresso no produto ou na sua embalagem indica que este produto não se pode tratar como lixo doméstico normal.
Este produto deve ser entregue num ponto de recolha de equipamentos eléctricos e electrónicos para reciclagem. Ao assegurar-se que este
produto é eliminado correctamente, estará a ajudar a evitar possiveis consequências negativas para o ambiente e saúde pública que resultariam se este produto não fosse manipulado de forma adquada.
Para obter informações mais detalhadas sobre a reciclagem deste produto, por favor contacte o gabinete da câmara municipal da sua cidade
ou a loja onde comprou o produto.
PT
Page 24

Cod. Wga8011011000 - rev. 05
 Loading...