

Page 1
ISTRUZIONI PER L’USO
OPERATING INSTRUCTIONS
MODE D’EMPLOI
BEDIENUNGSANLEITUNG
INSTRUCCIONES PARA EL USO
INSTRUÇÕES DE UTILIZAÇÃO
GEBRUIKSAANWIJZING
LEGGERE ATTENTAMENTE
LE ISTRUZIONI
READ CAREFULLY
THE INSTRUCTIONS
LIRE ATTENTIVEMENT
LES INSTRUCTIONS
DIE BEDIENUNGSANLEITUNG
IST AUFMERKSAM ZU LESEN
LEER ATENTAMENTE
LAS INSTRUCCIONES
LER ATENTAMENTE
AS INSTRUÇÕES
LEES AANDACHTIG
DE INSTRUCTIES
Page 2

IT
Congratulazioni!
Gentile Cliente ci congratuliamo per aver scelto la macchina da caffè espresso
Saeco Lavazza A MODO MIO e la ringraziamo per la fiducia accordataci.
Prima di mettere in funzione la macchina, consigliamo di leggere attentamente
le istruzioni per l’uso che spiegano come utilizzarla, pulirla e mantenerla in
perfetta efficienza.
Non ci resta che augurarle la preparazione di tanti ottimi caffè grazie a Saeco
e Lavazza!
Page 3

IT
EXTRA PREMIUM
Interruttore
erogazione
d
ose libera
caffè
Spi
a
accensione
lsante
apore
ev
a
caricament
o
Vano
inserimento cia
lde
ancia vapore
/
acqua calda
rogator
e
caffè
Serbatoio
u
a
generale
Figura
B
avo alimentazion
e
anopola
erogazion
e
e
acqua calda
rigli
a
poggia tazze
ssett
o
ialde usat
e
COMPONENTI MACCHINA
lsante
rogazione
caffè dosato
Pulsante
erogazione
ose libera
affè
lsante
apore
res
a
er sollevament
o
operchi
o
erbatoio acqua
Figura A
Page 4
IT
PREDISPOSIZIONE MACCHINA
EXTRA: si accende la spia accensione
.
PREMIUM: tutti i pulsanti lampeggiano.
L’utilizzo di un filtro dell’acqua (accessorio opzionale) migliora la qualità dell’acqua e allunga la durata dell’apparecchio. Consigliamo di utilizzare il filtro
Intenza Brita per Saeco. Per inserire il filtro seguire il
foglio di istruzioni allegato all’accessorio.
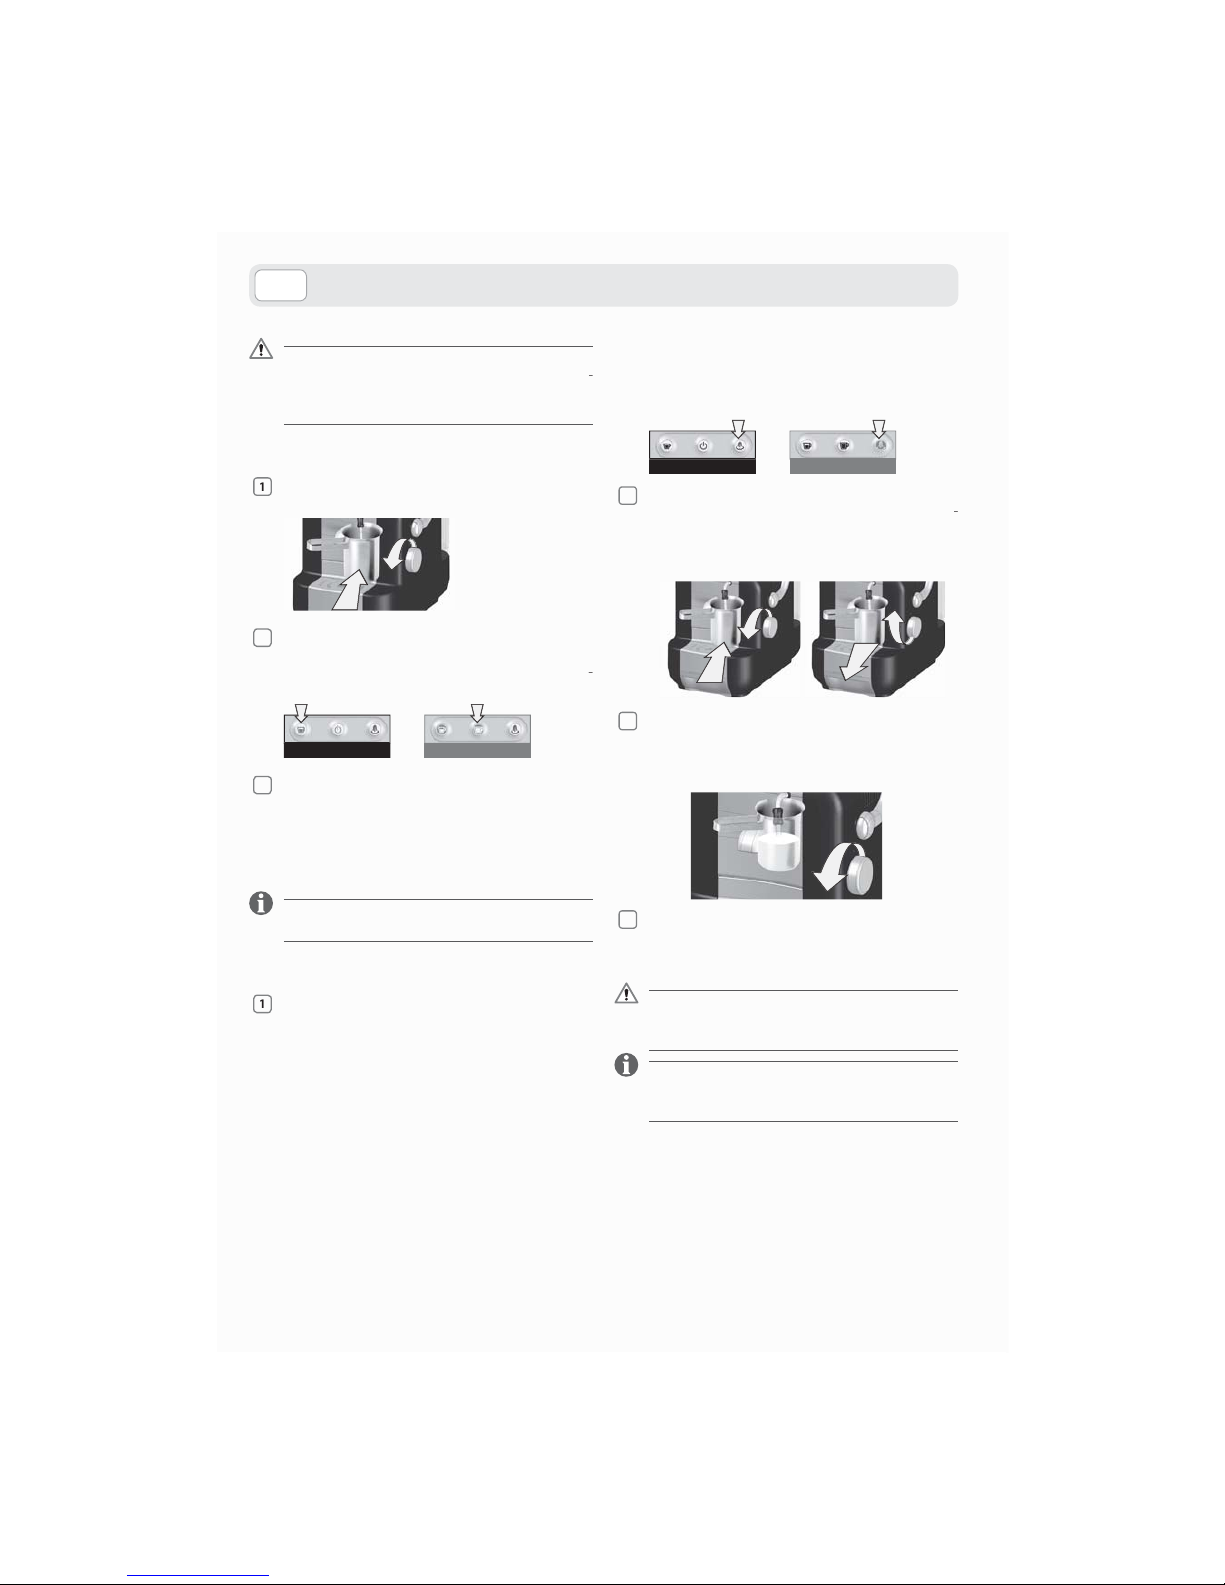
CARICAMENTO CIRCUITO IDRAULICO
Al primo avviamento della macchina, dopo un
prolungato inutilizzo o in caso di esaurimento
completo dell’acqua nel serbatoio, è necessario eseguire l’operazione di caricamento del
circuito idraulico come sotto riportato.
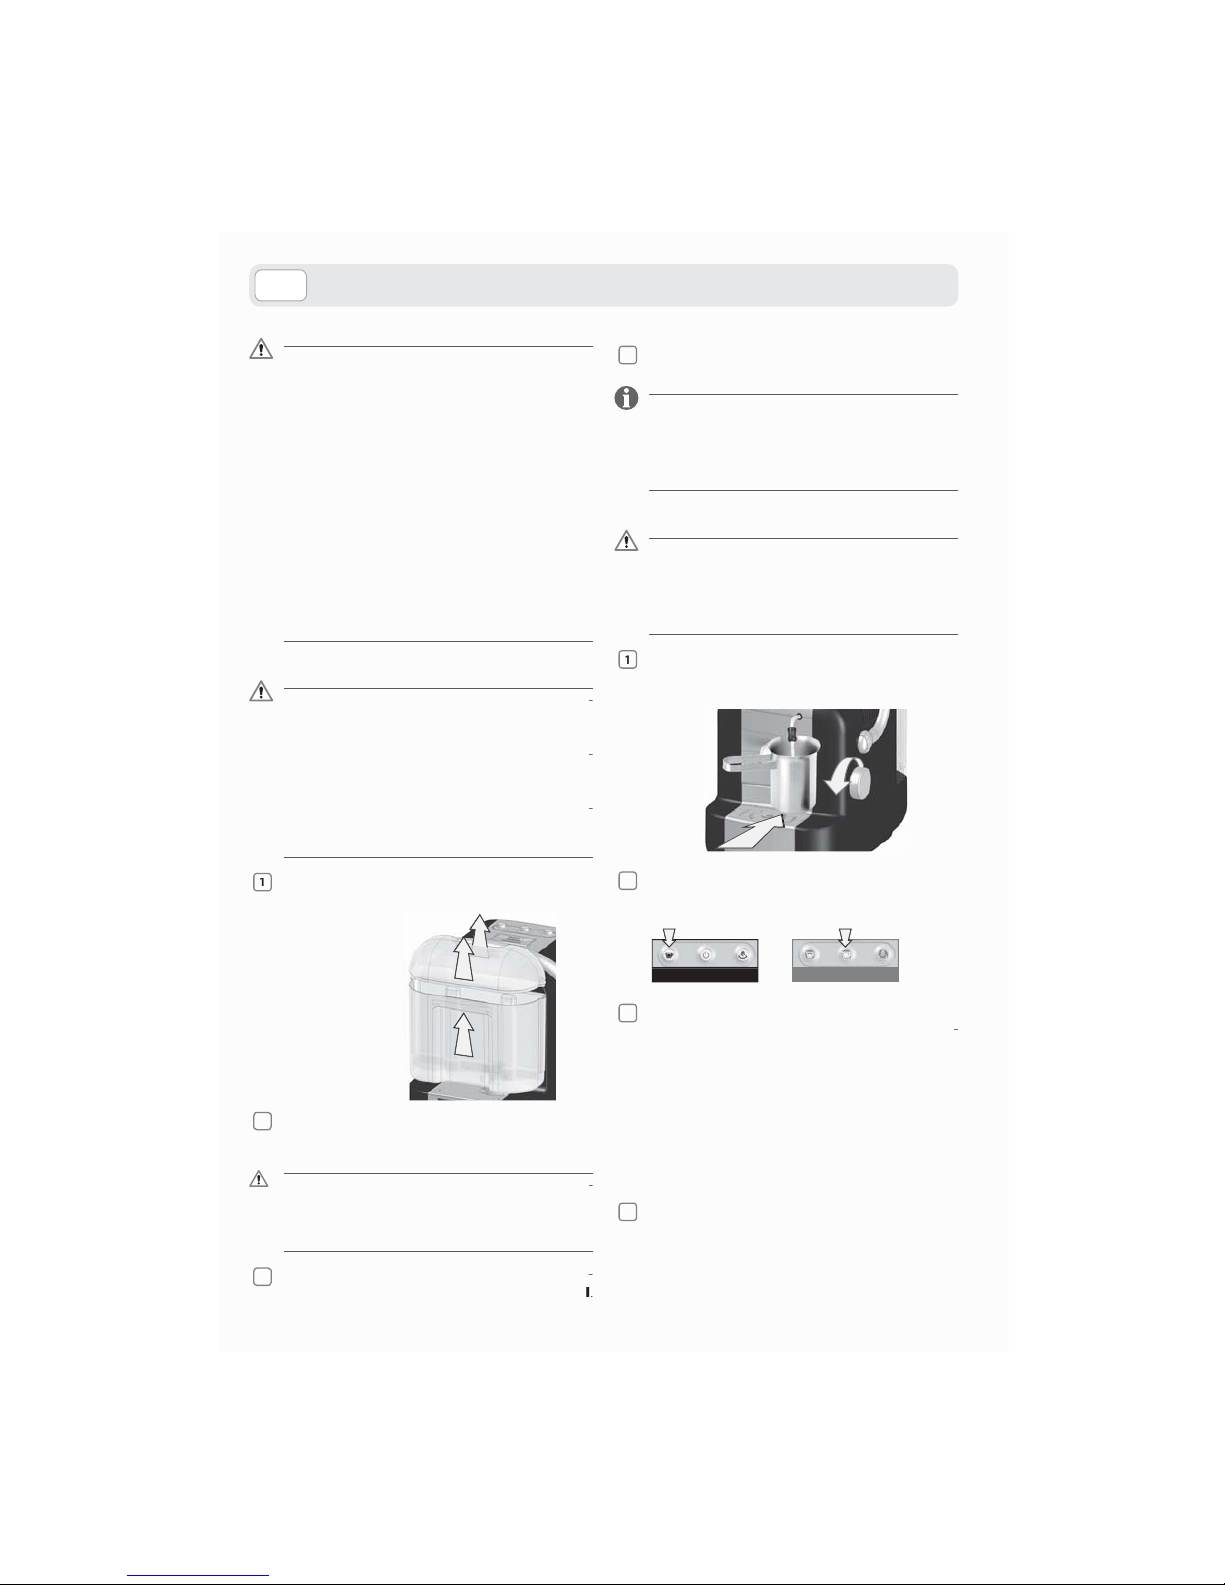
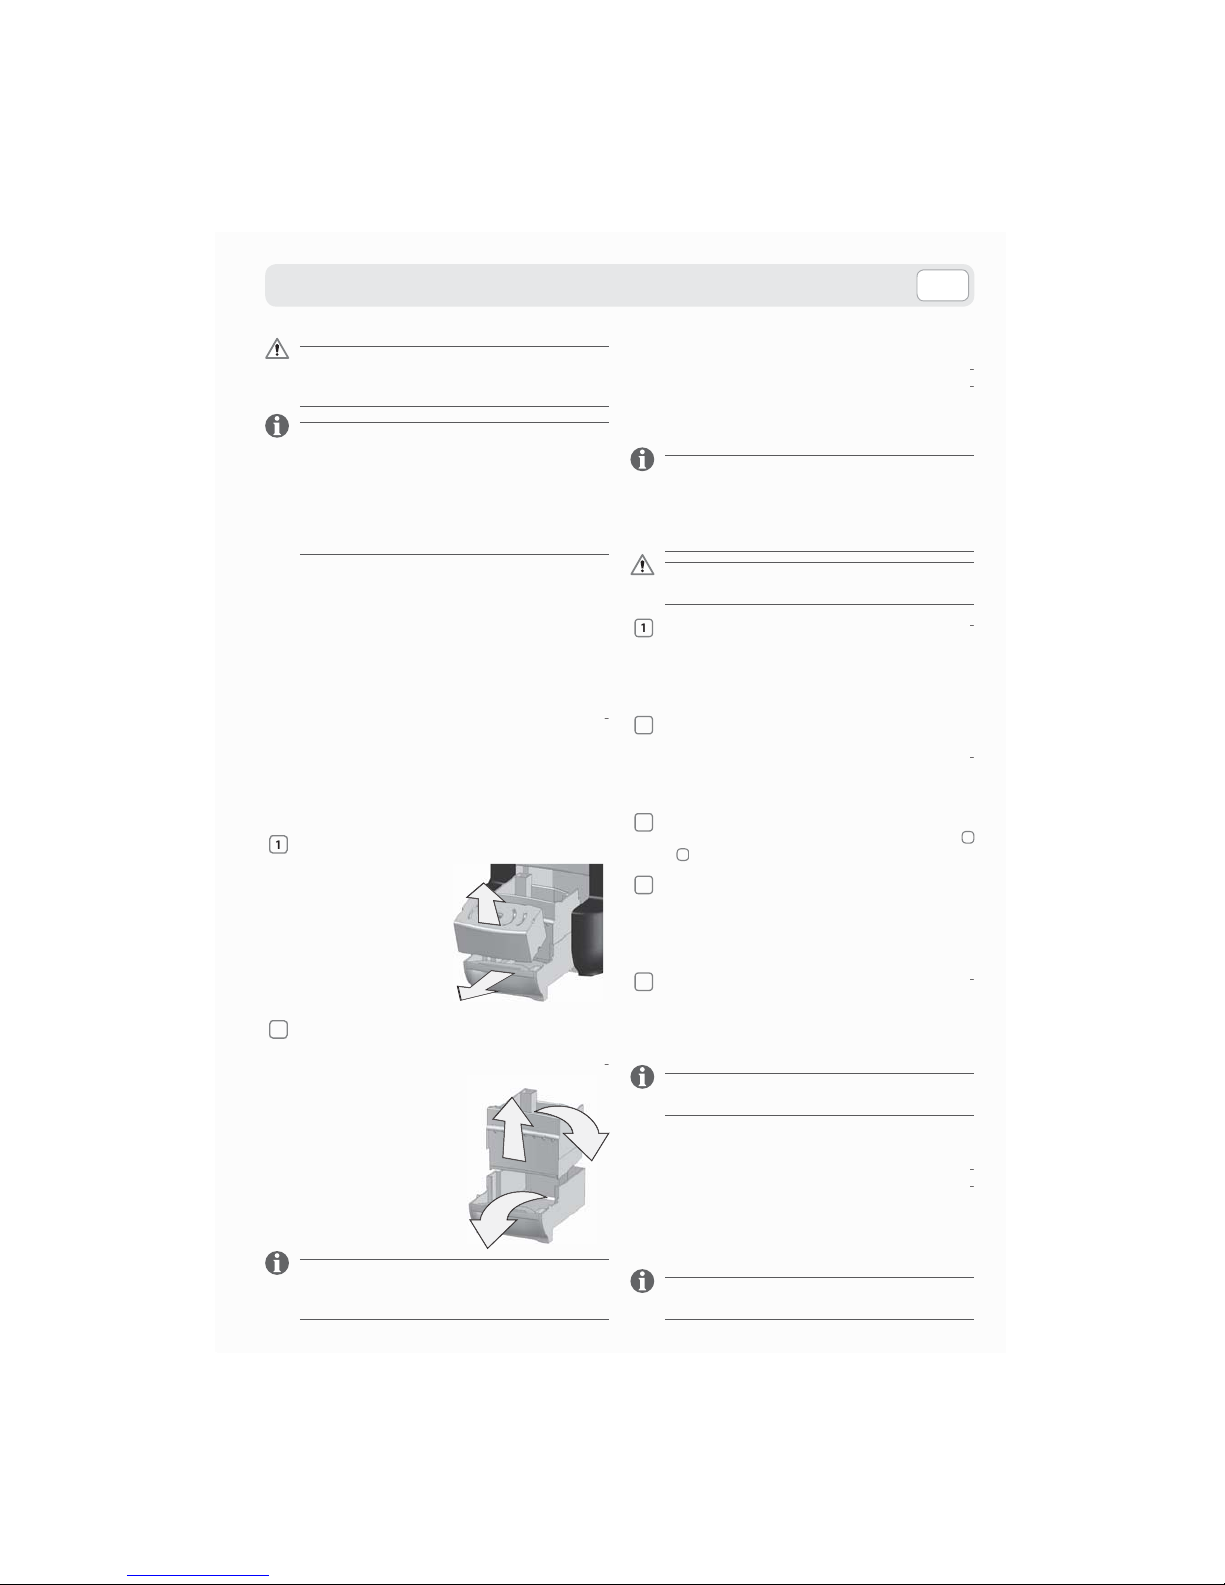
nserire un contenitore sotto la lancia vapore/
cqua calda e aprire la manopola ruotandola in
senso antiorario.
EXTRA: premere l’interruttore erogazione caffè
.
PREMIUM: premere il pulsante erogazione dose
ibera caffè
.
EXTRA PREMIUM
EXTRA: attendere che dalla lancia vapore/acqua
calda esca un getto regolare di acqua, prem
e
e nuovamente l’interruttore erogazione caffè e
chiudere la manopola. Quando l’interruttore è
lluminato con luce fissa la macchina è pronta.
PREMIUM:
attendere che dalla lancia vapore/
acqua calda esca un getto regolare di acqua.
L’erogazione termina automaticamente e inizia il
iscaldamento. Quando i due pulsanti caffè sono
accesi fissi la macchina è pronta.
imuovere il contenitore utilizzat
o.
Non si assumono responsabilità per eventuali
danni in caso di:
t JNQJFHPFSSBUPFOPODPOGPSNFBHMJTDPQJ
previsti;
t SJQBSB[JPOJOPOFTFHVJUFQSFTTPDFOUSJ
d’assistenza autorizzati;
t NBOPNJTTJPOFEFMDBWPEBMJNFOUB[JPOF
t NBOPNJTTJPOFEJRVBMTJBTJDPNQPOFOUF
della macchina;
t JNQJFHPEJQF[[JEJSJDBNCJPFBDDFTTPSJ
non originali;
t NBODBUBEFDBMDJmDB[JPOF
t TUPDDBHHJPJOMPDBMJBMEJTPUUPEJ¡$
t VUJMJ[[PEJDJBMEFEJõFSFOUJEBRVFMMF
indicate.
In questi casi viene a decadere la garanzia.
AVVIAMENTO MACCHINA
Posizionare la macchina su una superficie pia
na e stabile, lontano da acqua e fonti di calore.
Scollegare l’alimentazione elettrica se presente.
Sollevare la macchina utilizzando esclusivame
n
te l’apposita presa presente nella parte superiore
.
vedere COMPONENTI MACCHINA - Figura A).
I danni causati
alla macchina a causa della man
cata osservanza di queste indicazioni non sono
coperti da garanzia
.
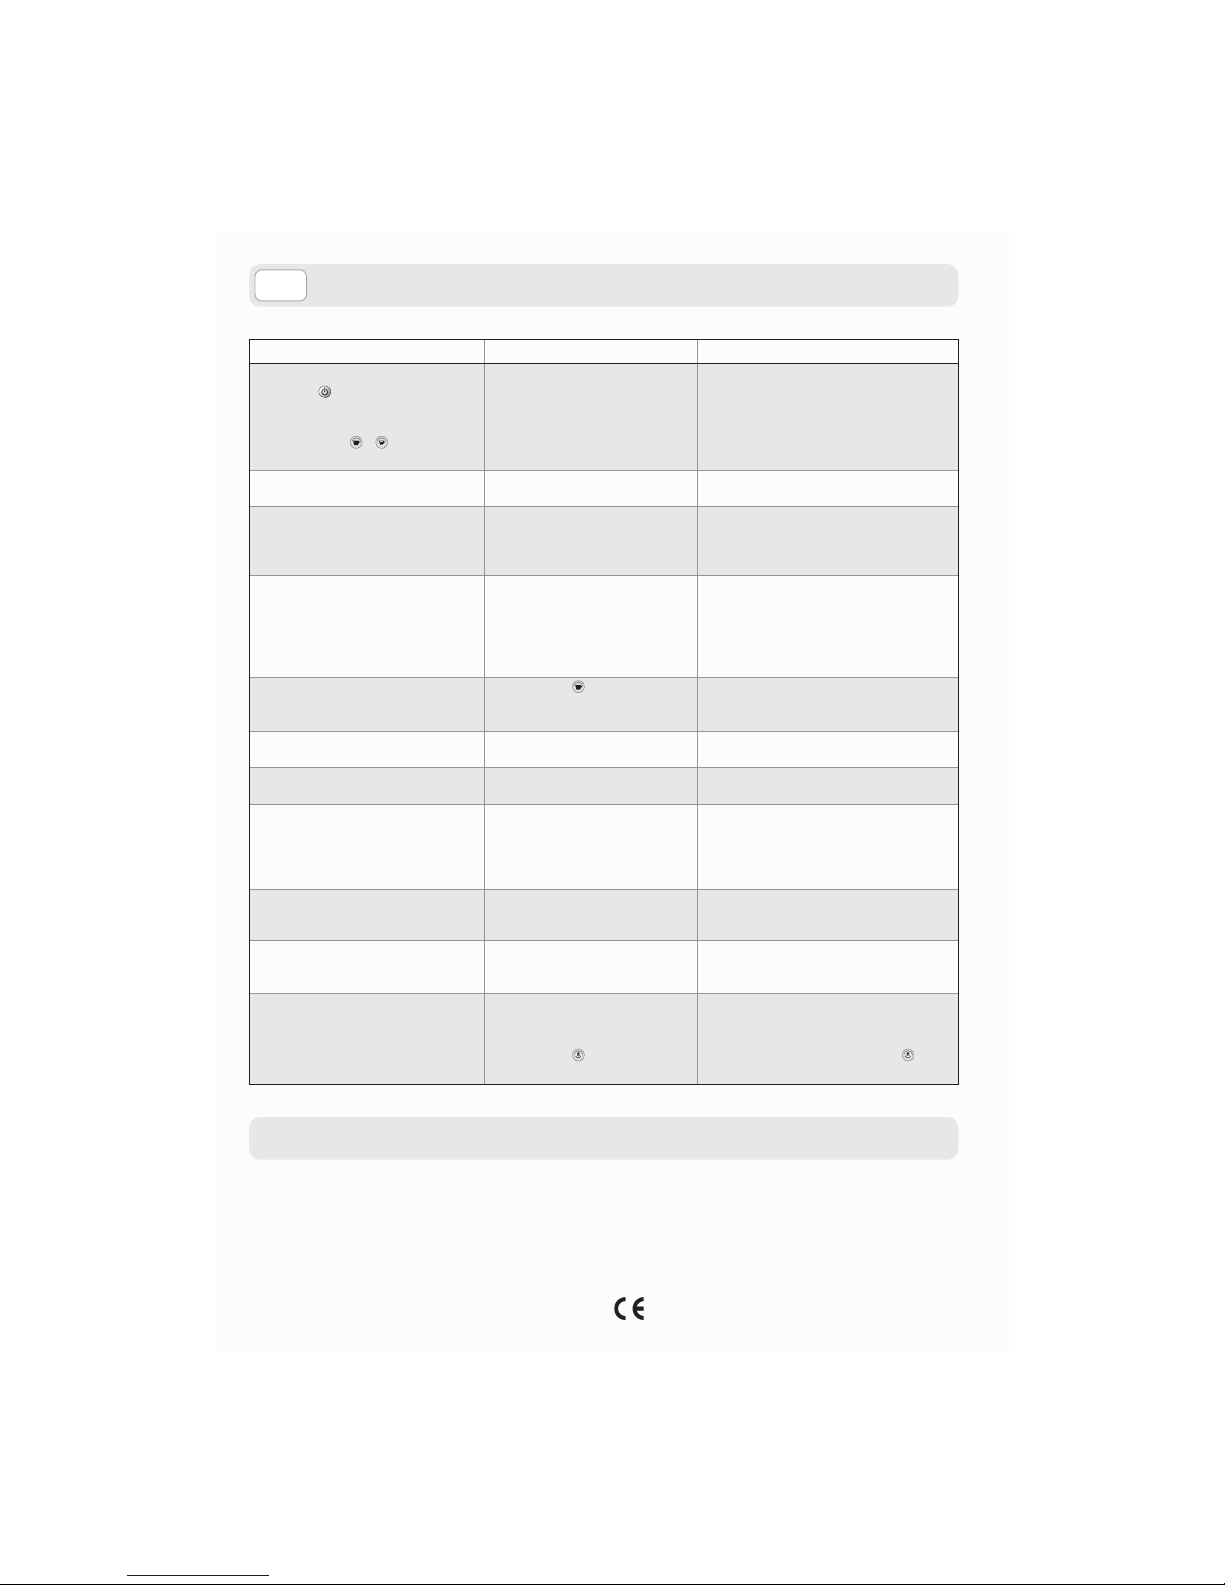
ollevare ed estrarre il coperchio del serbatoio
ell’acqua, quindi il serbatoio stesso.
iempire il serbatoio dell’acqua fino al livello
MAX indicato, usando soltanto acqua fresca potabile non gasata.
Acqua calda nonché altri liquidi possono dan
eggiare il serbatoio. Non mettere in funzione la
acchina senza acqua: accertarsi che ve ne sia a
ufficienza all’interno del serbatoio
.
nserire il cavo di alimentazione e premere l’in
terruttore generale portandolo in posizione
vedere COMPONENTI MACCHINA - Figura B).
Page 5
IT
PREPARAZIONE CAFFÈ
EROGAZIONE DOSE LIBERA CAFFÈ
La macchina è pronta
quando la leva è in p
o
sizione di riposo (posi
z
ione posteriore) e
:
EXTRA: l’interruttore er
o
azione caffè è acceso
sso.
PREMIUM:
i pulsanti caffè
sono accesi fissi.
Nel vano ci
alde devono
essere inserite esclusiv
a
mente cialde Lavazza A MODO MIO. Non inserirvi
le dita o qualsiasi altro oggetto
.
Le cialde monodose sono predisposte per erogare
un solo caffè/prodotto. NON riutilizzare le cialde
dopo il loro impiego. L’inserimento di 2 o più cialde
p
rovoca il malfunzionamento della macchina
.
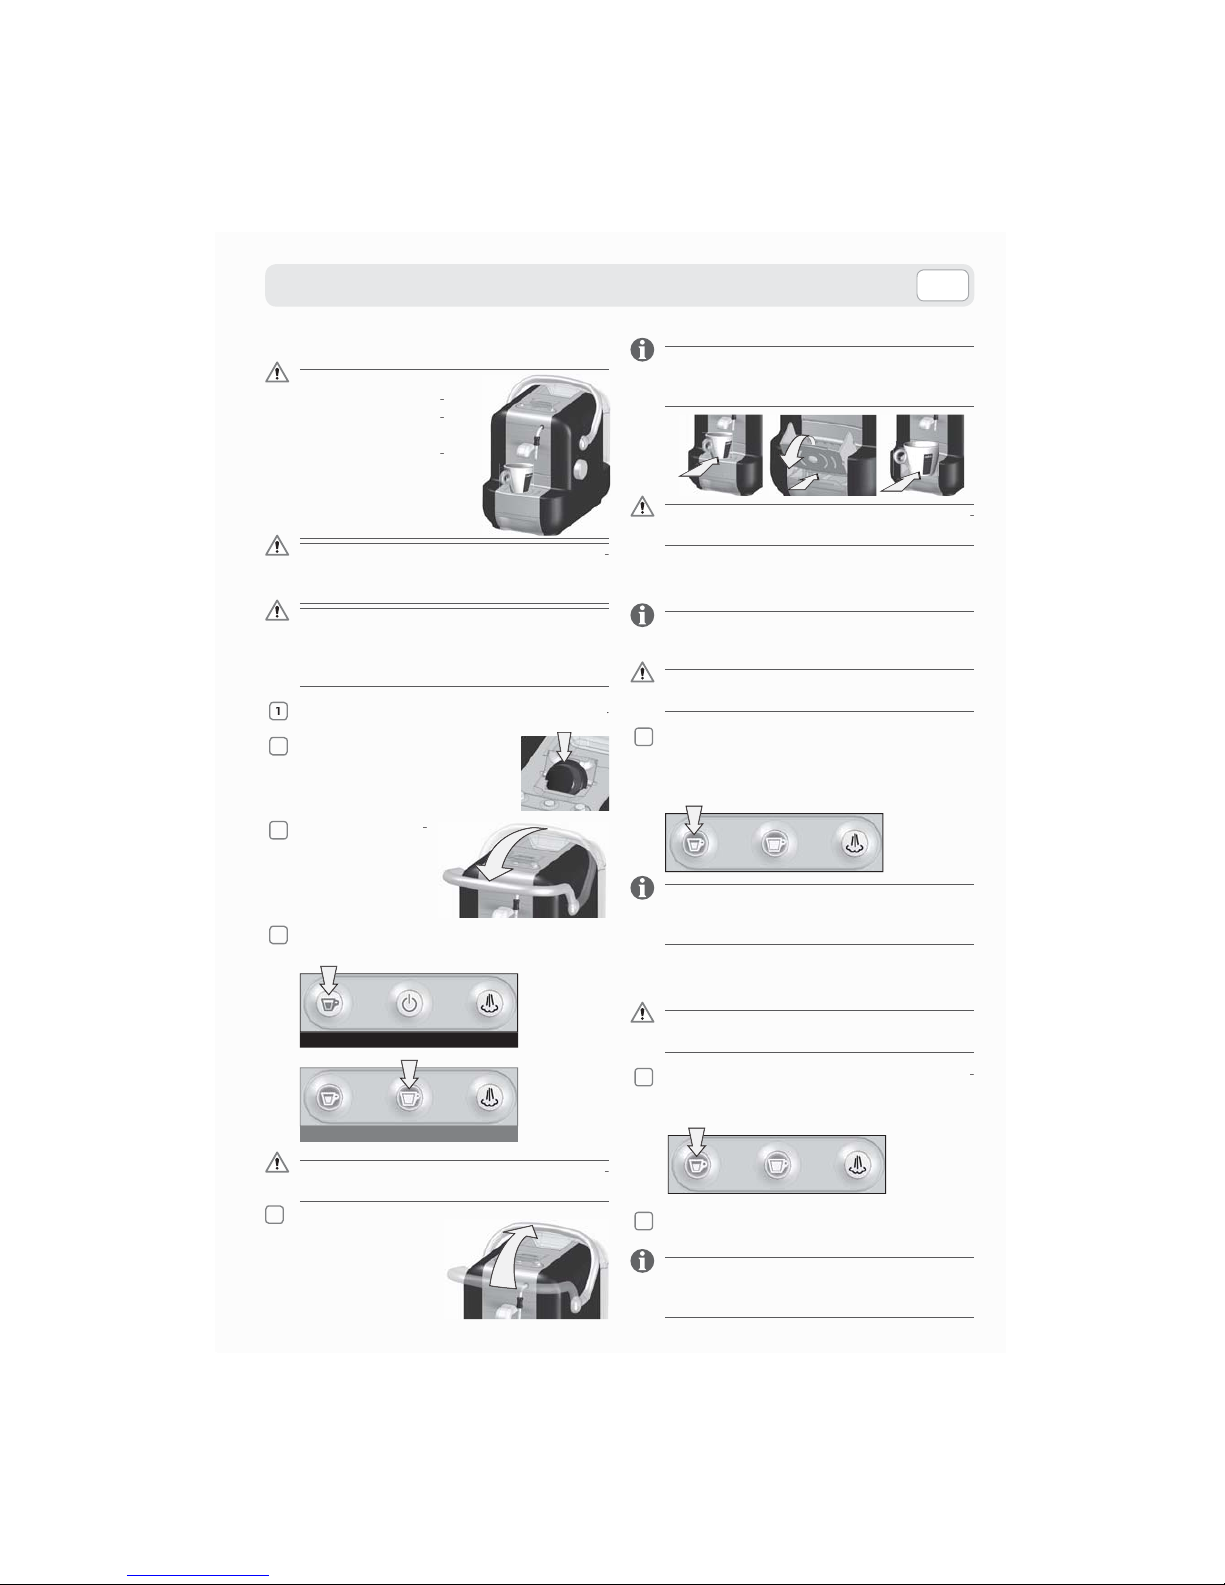
osizionare la tazza/tazzina sotto l’erogatore caffè
Sollevare lo sportellino del vano
inserimento cialde, inserire una
cialda e richiuderl
o.
Tirare la leva cari
amento in avanti,
no al punto in cui
si blocca
.
4
remere l’interruttore/pulsante erogazione caffè ed
attendere l’erogazione della quantità desiderata.
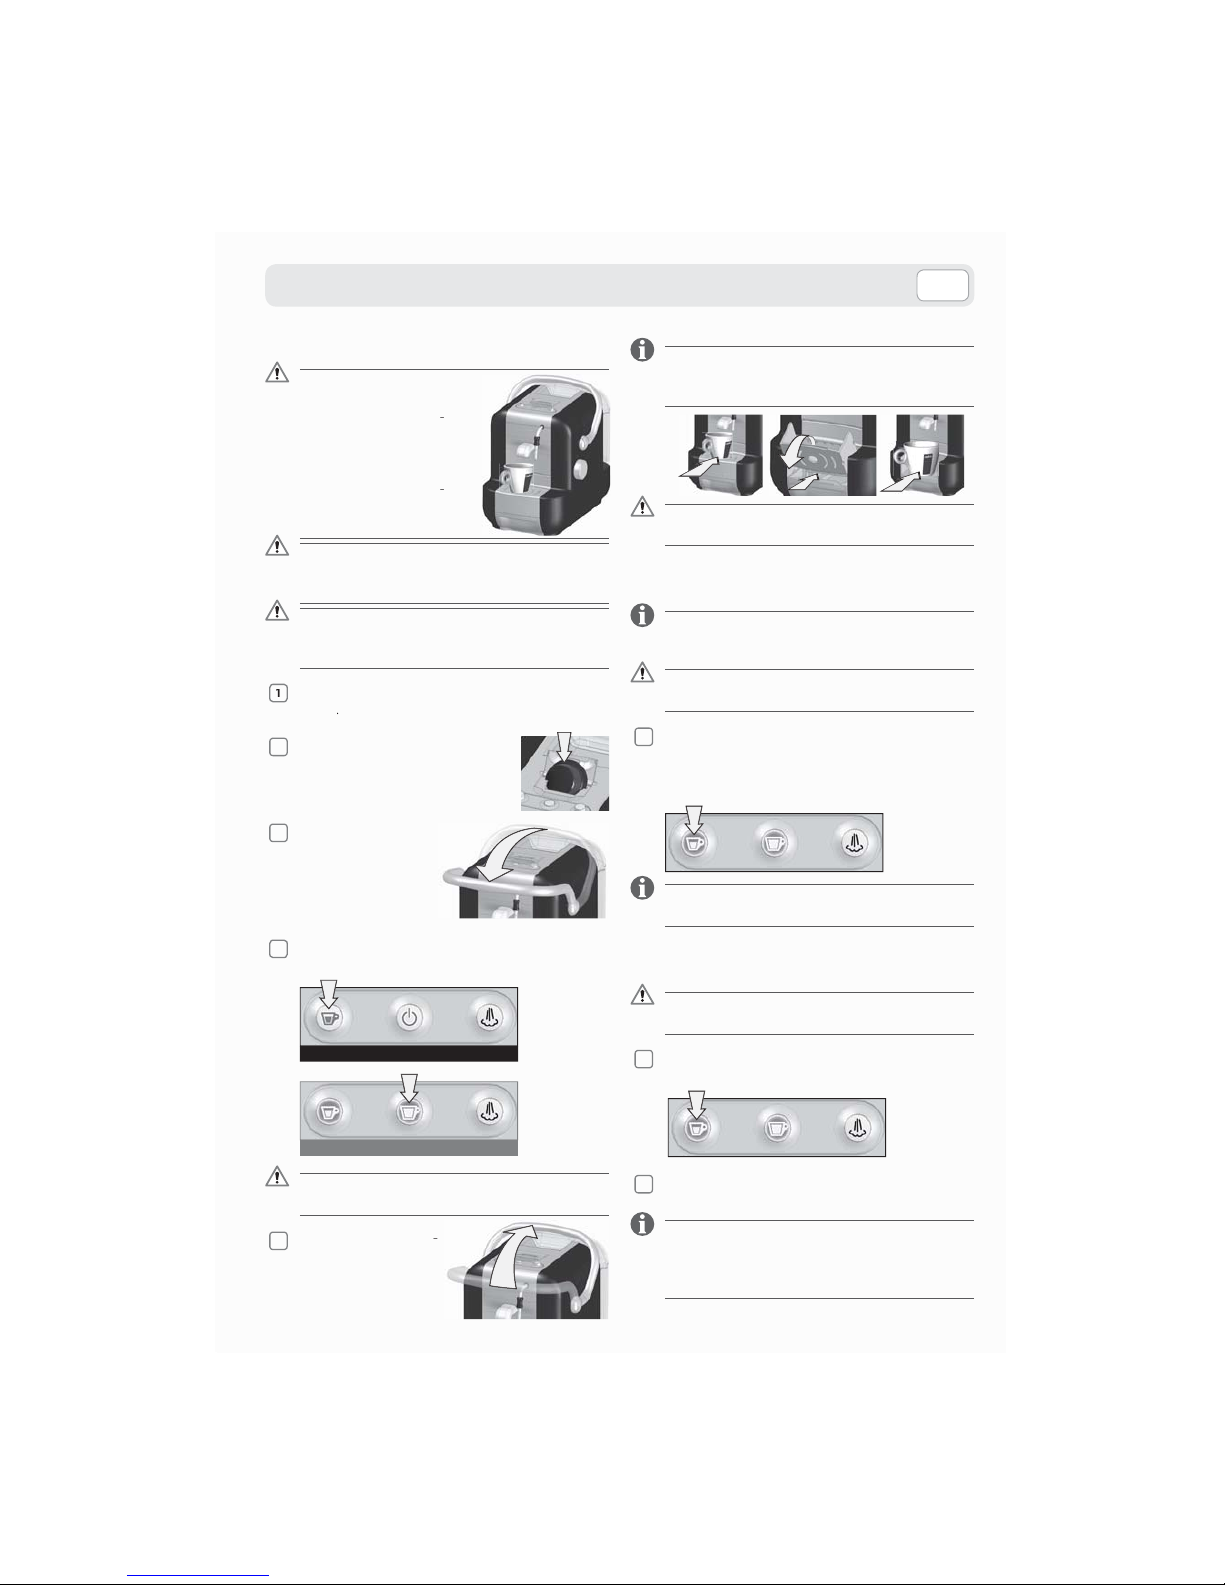
EXTRA
PREMIUM
Durante l’erogazione non portare la leva in posizio
ne di riposo.
remere nuov
a
mente l’interr
ut
ore/ pulsante per
ermare l’erogazione
riportare la leva in
osizione di riposo
.
La griglia poggia tazze può ruotare di 180° per
utilizzare tazze, tazzine e contenitori di diverse
dimensioni.
Per effettuare le operazioni sopra elencate la mano
pol
a vapore/acqua deve essere chiusa.
EROGAZIONE CAFFE’ DOSATO
SOLO PER MODELLO PREMIUM
La macchina è già preimpostata per erogare una
dose di caffè da 30 cc.
Eseguire passaggi 1, 2 , 3 del paragra
fo
EROGAZIONE DOSE LIBERA CAFFÈ
remere il pulsante erogazione caffè dosato. La
macchina terminerà automaticamente l’erogazio
ne una volta raggiunta la dose di caffè progra
m
mata. Riportare la leva in posizione di riposo.
L’erogazione del caffè può essere interrotta in qualunque momento premendo nuovamente il pulsante erogazione caffè dosato.
PROGRAMMAZIONE DOSE CAFFÈ
SOLO PER MODELLO PREMIUM
Eseguire passaggi 1, 2 , 3 del paragraf
o
EROGAZIONE DOSE LIBERA CAFFÈ
Premere e mantenere premuto il pulsante eroga
ione caffè dosato e attendere l’erogazione della
uantità desiderata di caffè da programmare
.
ilasciare il pulsante erogazione caffè dosato e
iportare la leva in posizione di riposo
.
La quantità programmata di caffè erogato (minimo 25 cc - massimo 200 cc) può essere modificata
ripetendo la programmazione.
Page 6
IT
UTILIZZI DELLA LANCIA VAPORE/ACQUA CALDA
Pericolo di scottature! All’inizio dell’erogazione po
s
sono verificarsi brevi spruzzi di acqua calda.
La lancia vapore/acqua calda può raggiungere
temperature elevate: evitare di toccarla dirett
a
mente con le mani. La lancia vapore/acqua calda
non deve essere orientata su persone o animali.
Assicurarsi sempre che ci sia acqua sufficiente nel
serbatoio
.
EROGAZIONE ACQUA CALDA
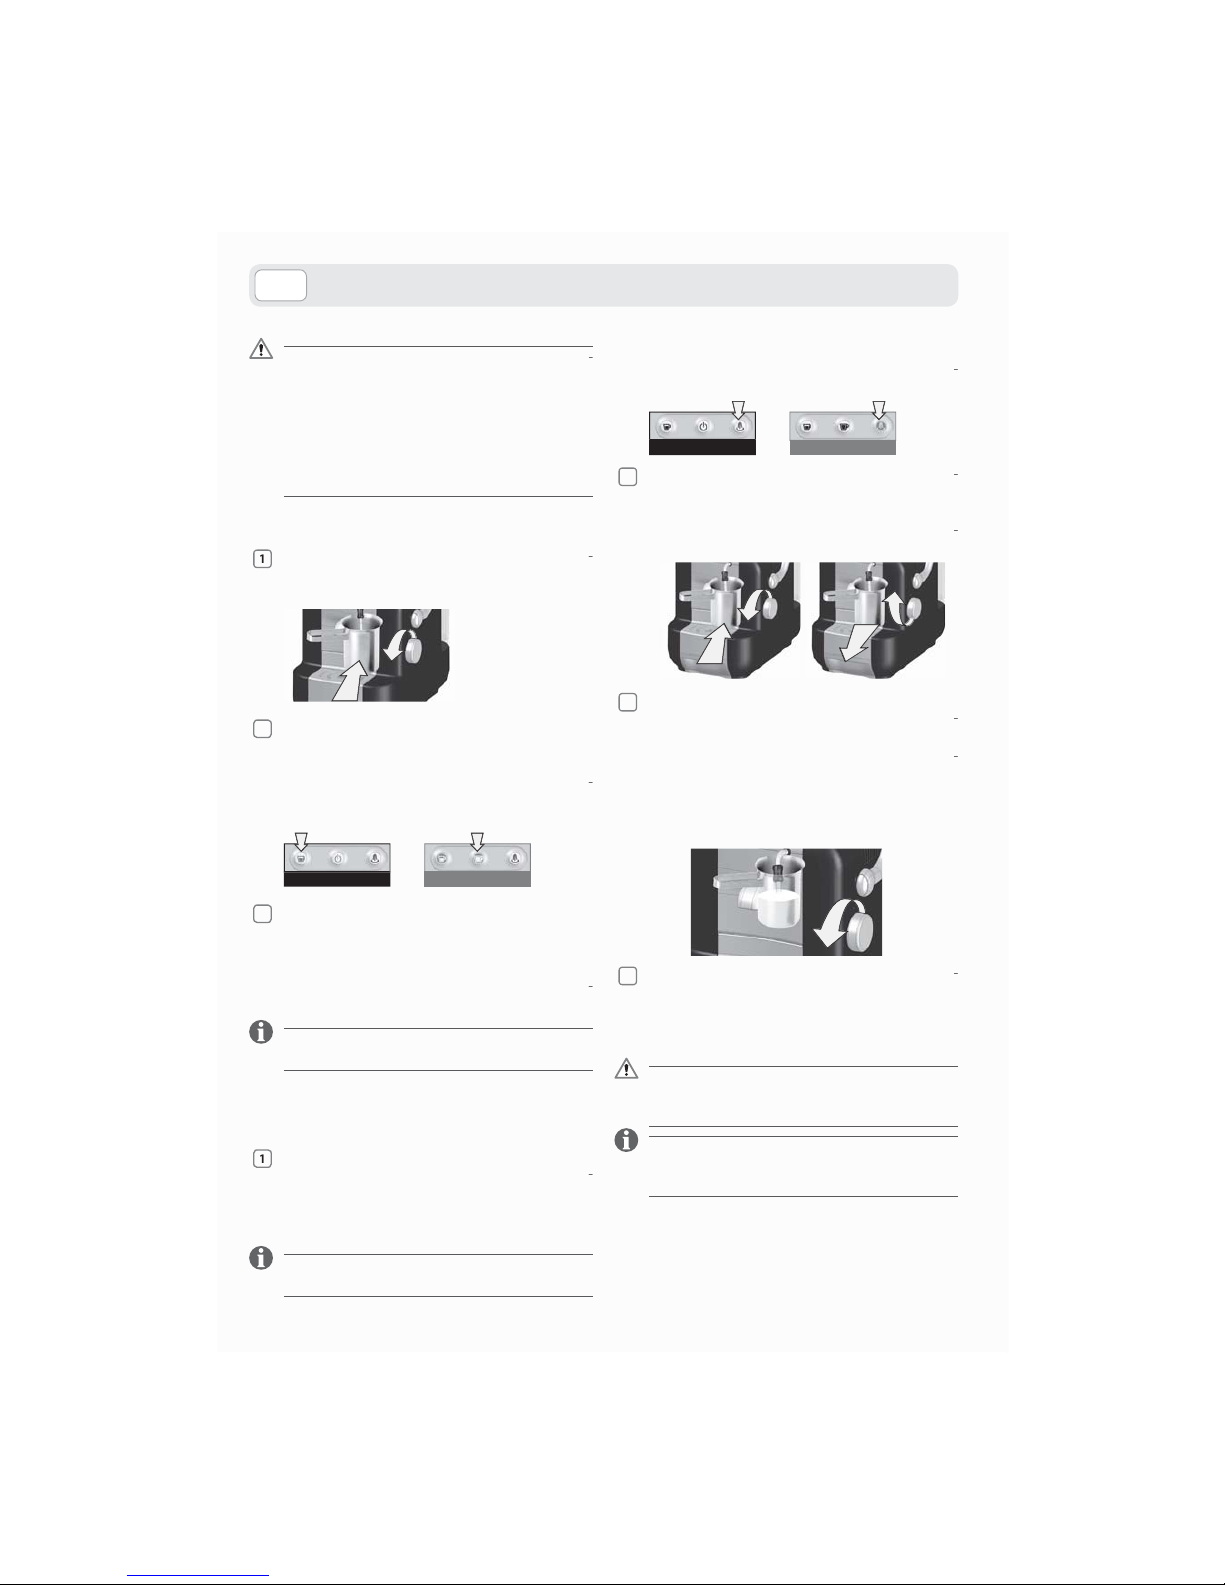
uando la macchina è pronta mettere un cont
e
nitore vuoto sotto la lancia vapore/acqua calda e
rire la manopola
.
EXTRA: premere l’interruttore erogazione caffè,
alla lancia vapore/acqua calda uscirà un get-
to d’acqua calda
.
PREMIUM: premere il pulsante erogazione dose li
era caffè, dalla lancia vapore/acqua calda uscirà
n getto d’acqua calda
.
EXTRA PREMIUM
EXTRA: premere nuovamente l’interruttore caffè
er terminare l’erogazione e chiudere la man
o
ola vapore/acqua calda
.
PREMIUM: premere nuovamente il pulsante dose
ibera caffè per terminare l’erogazione e chiude
e la manopola vapore/acqua calda.
PREMIUM: con questa procedura si possono erogare
al massimo 180 cc di acqua.
EROGAZIONE VAPORE E PREPARAZIONE
CAPPUCCINO
EXTRA:premere e mantenere premuto il pulsan-
te vapore. Si spengono tutte le segnalazioni l
u
inose. Quando il pulsante vapore è acceso in
odo fisso la macchina è pronta
.
Solo adesso rilasciare il pulsante
.
Se il vapore si esaurisce prima del risultato voluto
ripetere l’operazione sopra descritta.
PREMIUM: premere il pulsante vapore che inizierà
lampeggiare. Quando il pulsante vapore è ac
eso in modo fisso la macchina è pronta.
EXTRA PREMIUM
Inserire un contenitore vuoto sotto la lancia va
ore/acqua calda ed aprire per qualche istante
la manopola per far uscire l’acqua residua finché
scirà solo vapore. Chiudere la manopola e r
i
vere il contenitore
.
Posizionare il contenitore con il latte in m
odo
che la lancia vapore/acqua calda sia vicina al fon
o ed aprire la manopola. La macchina inizierà
ad erogare il vapore. Muovere lentamente il co
n
tenitore verso il basso per ottenere una schiuma
i latte compatta e cremosa.
È consigliabile che il latte non superi un terzo del
volume del contenitore
.
Raggiunto il risultato desiderato, chiudere la ma
opola e prelevare il contenitore.
Solo per il modello PREMIUM premere nuovamente
il pulsante vapore, la macchina avrà tre pulsanti
lampeggianti.
Prima di eseguire altre operazioni caricare il
circuito idraulico (vedere sezione caricamento
circuito idraulico).
Si consiglia di usare latte fresco parzialmente scremato ed a temperatura di frigorifero nella quantità
desiderata per ottenere una crema compatta.
Page 7
IT
MANUTENZIONE E PULIZIA
DECALCIFICAZIONE
La formazione di calcare è una normale cons
e
uenza dell’uso dell’apparecchio; la decalcific
a
zione è necessaria ogni 3-4 mesi di utilizzo della
macchina e/o quando si osserva una riduzione
ella portata dell’acqua
.
1FS FTFHVJSFMBEFDBMDJmDB[JPOF TJ QVÛ VUJMJ[[BSFVOQSPEPUUPEFDBMDJmDBOUFQFSNBDDIJOF
EBDBõÒ EJUJQPOPOUPTTJDPFP OPDJWPDPNV-
nemente reperibile in commercio. Si consiglia
EVUJMJ[[BSFJMEFDBMDJmDBOUF4BFDP
Non utilizzare in nessun caso l’aceto come decalci
cante
.
vuotare il serbatoio e riempirlo con una solu
zione di decalcificante e acqua come specificato
ulla confezione del prodotto decalcificante, ac
endere la macchina e mettere un contenitore
otto l’erogatore
.
EXTRA: premere l’interruttore caffè ed erogare
una tazza.
PREMIUM: attendere che i pulsanti caffè siano ac
esi fissi, premere il pulsante dose libera caffè ed
rogare una tazza
.
EXTRA e PREMIUM:
pegnere la macchina, lasciare
riposare 10-15 minuti e ripetere le operazioni
finchè il serbatoio è vuoto.
Lavare e riempire il serbatoio con acqua fresca
otabile, riposizionarlo e mettere un contenitore
sotto l’er ogatore. Aprire la manopola vapore, pre
ere l’interruttore/pulsante caffè fino a svuotare
2/3 del serbatoio, quindi richiudere la manopola
.
Attendere il riscaldamento della macchina , apr
i
re la manopola vapore e premere l’interruttore/
ulsante caffè fino a vuotare il serbatoio
.
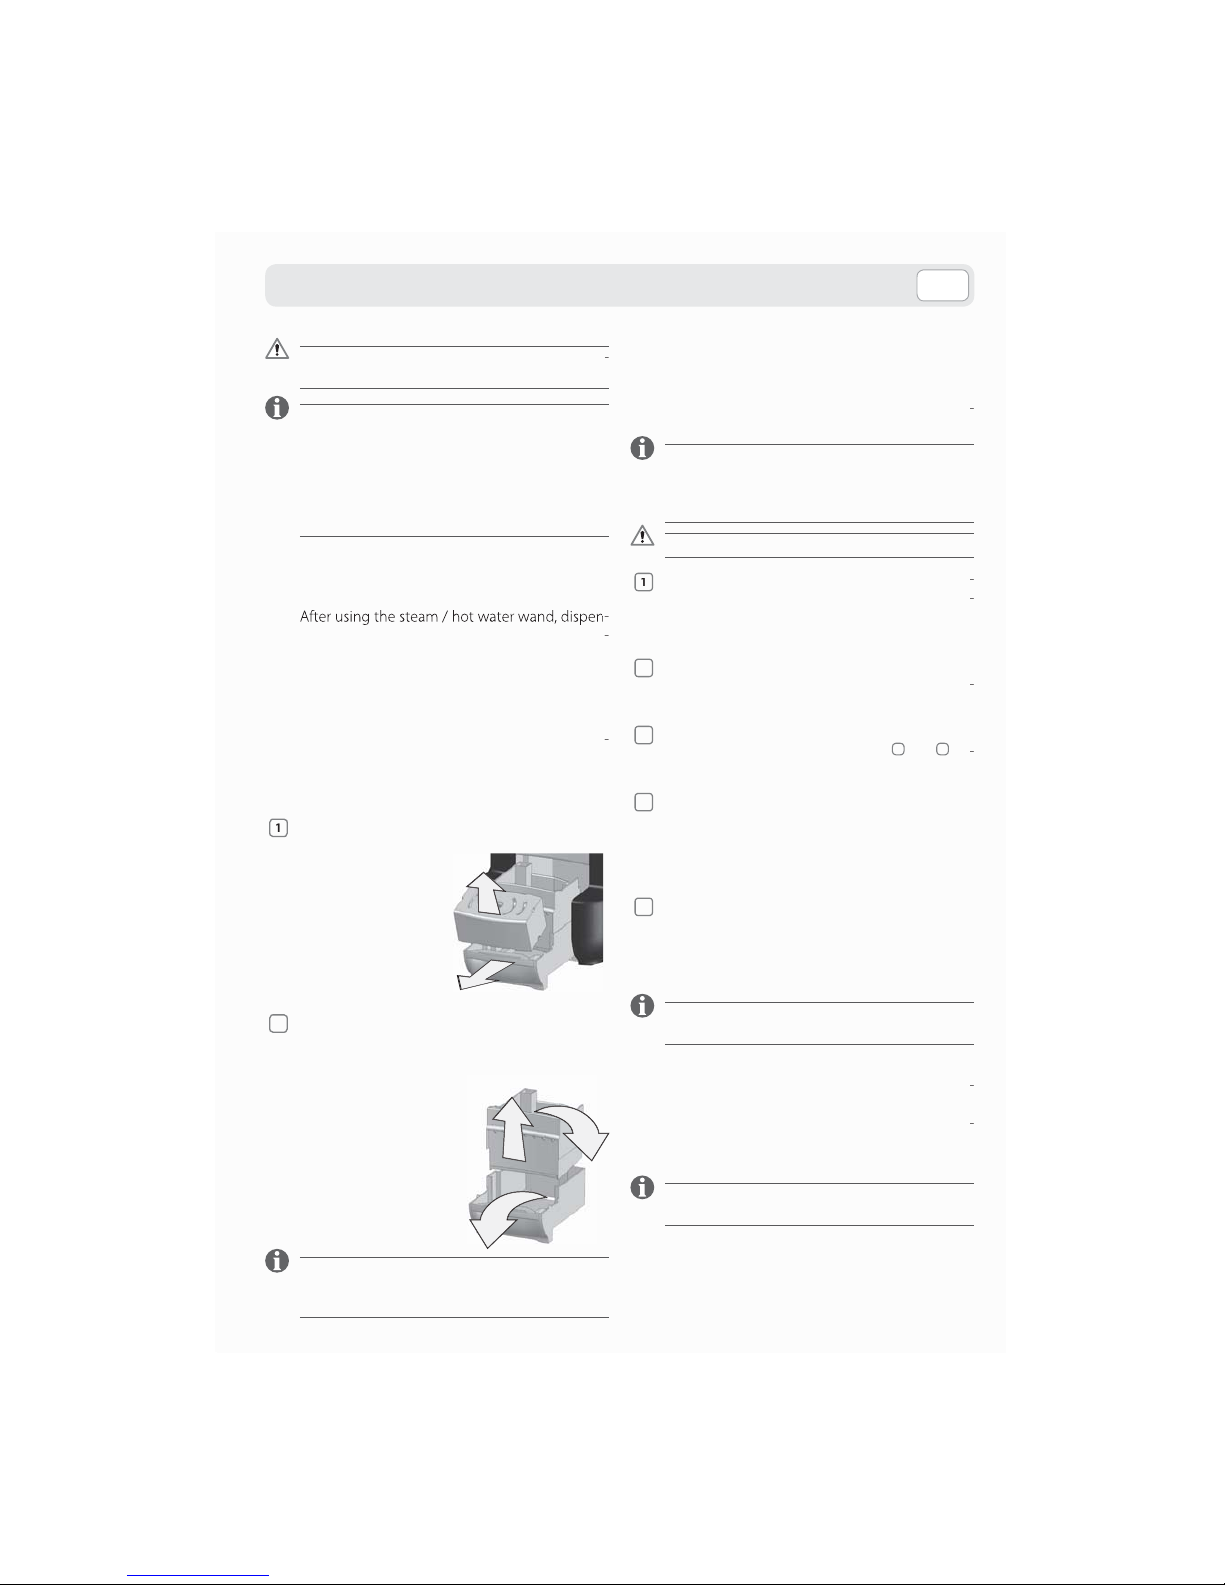
PANNARELLO (opzionale)
Il pannarello può essere acquistato separatamente
presso il rivenditore di fiducia.
l pannarello vi consente di preparare dei gustosi
appuccini. Per l’utilizzo del pannarello si deve
preparare la macchina per l’er ogazione dell’a
c
ua calda e del vapore come descritto nei relat
i
i paragrafi. Nel caso in cui si desideri preparare
un cappuccino, immergere il pannarello nel latte
compiere dei leggeri movimenti circolari per
rendere uniforme il riscaldamento del latte
.
Settimanalmente il pannarello deve essere smon-
tato e lavato completamente.
Assicurarsi sempre che l’alimentazione elettrica
sia scollegata ed attendere il raffreddamento della
macchina.
Si consiglia di risciacquare ogni giorno il serbatoio. Svuotare e pulire ogni due/tre giorni o dopo 10
caffè erogati il cassetto cialde usate. Mai utilizzare
solventi, alcool o sostanze aggressive o forni per
l’asciugatura dei componenti della macchina. Lavare i componenti (esclusi quelli elettrici) con acqua
fredda/tiepida e panni/spugne non abrasive.
PULIZIA LANCIA VAPORE/ACQUA CALDA
Dopo l’uso della lancia vapore/acqua calda,
are vapore a vuoto per qualche secondo. Pulire
esternamente la lancia con un panno umido.
PULIZIA EROGATORE CAFFÈ
Eseguire settimanalmente per entrambi i m
o
delli la procedura EROGAZIONE CAFFÈ / ERO-
GAZIONE DOSE LIBERA CAFFÈ
senza inserire
la cialda.
PULIZIA CASSETTO CIALDE
Estrarre il cassetto cialde usate e rimuovere l
a
griglia poggia tazze.
Rimuovere il cassetto superiore per togliere le
cialde usate e per svuotare il cassetto raccogli
gocce. Lavare e asciugare entrambe le parti pr
i
a di rimontarle
.
Verificare periodicamente che il cassetto cialde non
sia pieno al fine di evitare malfunzionamenti e danni alla macchina.
Page 8
IT
SOLUZIONI AI PROBLEMI PIÙ COMUNI
CARATTERISTICHE TECNICHE
Problema riscontrato Cause possibili Rimedio
La macchina non si accende.
EXTRA
: spia spenta dopo aver
premuto l’interruttore generale ed
atteso qualche minuto.
PREMIUM
: le spie e non
lampeggiano.
» Macchina non collegata alla rete
elettrica.
» Collegare la macchina alla rete elettrica.
» Rivolgersi al centro assistenza.
La macchina impiega molto tempo per
scaldarsi.
» L’apparecchio ha molto calcare. » Decalcificare l’apparecchio.
La pompa è molto rumorosa.
» Manca acqua nel serbatoio.
» Il serbatoio è stato riempito senza
eseguire il ciclo di caricamento del
circuito idraulico.
» Rabboccare con acqua fresca potabile.
» Eseguire il ciclo di caricamento del circuito
idraulico (vedere sezione caricamento
circuito idraulico).
La leva caricamento non raggiunge la
posizione di erogazione.
» Cassetto cialde usate pieno.
» Cialda inserita in modo errato.
» Vuotare il cassetto cialde usate.
» Ripetere la sequenza, leva in posizione di
riposo, leva in posizione di erogazione; se
non è sufficiente intervenire manualmente
per scaricare la cialda dal condotto con la
macchina scollegata dalla rete elettrica.
Il caffè è freddo.
»
EXTRA
: la spia era spenta
quando è stato premuto
l’interruttore erogazione caffè.
» Attendere che la spia si accenda.
Il caffè sgorga troppo velocemente,
non viene erogato un caffè cremoso.
» Cialda già usata. » Riportare la leva nella posizione di riposo
ed inserire una cialda nuova.
Il caffè non viene erogato ed esce
vapore dal vano inserimento cialde.
» La leva caricamento non è stata
portata in posizione di erogazione.
» Portare la leva caricamento in posizione di
erogazione.
Il caffè non sgorga o sgorga a gocce. » Erogatore intasato.
» Circuito idraulico scarico.
» Eseguire ciclo di lavaggio erogatore caffè
(vedi MANUTENZIONE E PULIZIA).
» Eseguire il ciclo di caricamento del circuito
idraulico (vedere sezione caricamento
circuito idraulico).
Le cialde, dopo l'utilizzo, risultano forate
solo sulla pellicola superiore.
» Circuito idraulico scarico. » Eseguire il ciclo di caricamento del circuito
idraulico (vedere sezione caricamento
circuito idraulico).
Nessuna erogazione di acqua calda o
vapore.
» Lancia vapore otturata. » Pulire il beccuccio con un ago (la macchina
deve essere spenta e la manopola
erogazione vapore/acqua calda chiusa).
Non si forma la schiuma del latte. » Latte non adatto.
» Latte troppo caldo.
»
EXTRA
: la spia era spenta
quando è stato erogato vapore.
» Utilizzare latte fresco, parzialmente
scremato.
» Usare latte a temperatura di frigorifero.
»
EXTRA
: tenere premuto il pulsante fino
all’accensione della spia.
· Tensione nominale - Potenza nominale - Alimentazione:
Vedere targhetta posta sull’apparecchio
· Dimensioni: Altezza Larghezza Profondità
305 mm 235 mm 330 mm
· Peso: circa 5 kg
· Serbatoio acqua: circa 1 litro - Estraibile
· Materiali impiegati per la carrozzeria: Termoplastico
· Lunghezza cavo 1,2 m
· Pannello di comando: Sulla parte superiore
· Caldaia: Acciaio inox
· Dispositivi di sicurezza: Valvola di sicurezza pressione caldaia
· Termofusibile (versione EXTRA e PREMIUM)
· Termostato di sicurezza (versione PREMIUM)
Per i guasti non contemplati dalla suddetta tabella o nel caso in cui i rimedi suggeriti non li risolvano, rivolgersi ad un centro assistenza Saeco.
2006/42 CE - 2004/108 CE - 2006/95 CE
Page 9

IT
SICUREZZA
Destinazione d’uso:
La macchina per caffè è prevista esclusivamente per l’impiego domestico. È vietato apportare modifiche tecniche. È vietato ogni
mpiego illecito, a causa dei rischi che essi comportano! L’apparecchio non è destinato ad essere utilizzato da persone (compresi
bambini) con ridotte capacità fisiche, mentali o sensoriali o con esperienza e/o competenze insufficienti, a meno che non siano
otto la supervisione di una persona responsabile della loro sicurezza o non vengano da essa istruite sull’uso dell’apparecchio
.
Ubicazione:
Sistemare la macchina per caffè in un posto sicuro, dove nessuno possa rovesciarla o venirne ferito. Non tenere la macchina
temperatura inferiore a 0° poiché il gelo potrebbe danneggiarla. Non usare la macchina per caffè all’aperto. Non posare la
macchina su superfici molto calde e/o nelle vicinanze di fiamme libere.
Alimentazione di corrente:
Collegare la macchina per caffè soltanto ad una presa di corrente adeguata. La tensione deve corrispondere a quella indicata
ulla targhetta della macchina
.
Cavo d’alimentazione:
Non usare la macchina per caffè se il cavo d’alimentazione è difettoso. Se il cavo d’alimentazione è danneggiato, deve essere
ostituito con uno idoneo avente le medesime caratteristiche di quello fornito con la macchina. Non far passare il cavo
d’alimentazione per angoli e su spigoli vivi, sopra oggetti molto caldi e proteggerlo dall’olio. Non portare o tirare la macchina
er caffè tenendola per il cavo. Non estrarre la spina tirandola per il cavo; non toccarla con le mani bagnate. Evitare che il cavo
d’alimentazione cada liberamente da tavoli o scaffali.
Pericolo di folgorazione:
Non mettere mai a contatto dell’acqua le parti sotto corrente.
Protezione d’altre persone:
Tenere i bambini sotto supervisione, per evitare che giochino con l’apparecchio. I bambini non si rendono conto del pericolo
connesso agli elettrodomestici. Non lasciare alla loro portata i materiali utilizzati per imballare la macchina
.
Pericolo d’ustioni:
vitare di dirigere contro se stessi e/o altri il getto di vapore e/o d’acqua calda. All’inizio dell’erogazione possono verificarsi brevi
pruzzi di acqua calda. La lancia vapore/acqua calda può raggiungere temperature elevate: evitare di toccarla direttamente
con le mani, utilizzare l’apposita manopola.
Pulizia:
rima di pulire la macchina, è indispensabile scollegare la spina dalla presa di corrente ed aspettare che la macchina si raffreddi.
Non immergere la macchina nell’acqua! È severamente vietato cercare d’intervenire all’interno della macchina. Non utilizzare
er scopi alimentari l’acqua presente nel serbatoio
.
Custodia della macchina:
Quando la macchina rimane inutilizzata per un periodo prolungato, staccare la spina dalla presa e custodirla in luogo asciutto
e non accessibile ai bambini. Proteggerla dalla polvere e dallo sporco.
Riparazioni / Manutenzione:
Nel caso di guasti, difetti o sospetto di difetto dopo una caduta, staccare subito la spina dalla presa. Non mettere in funzione
una macchina difettosa. Soltanto i Centri di Assistenza Autorizzati Saeco possono effettuare interventi e riparazioni. Nel caso
di interventi non eseguiti a regola d’arte, si declina ogni responsabilità per eventuali danni.
Serbatoio acqua:
mmettere nel serbatoio soltanto acqua fresca potabile non gasata. Non mettere in funzione la macchina se l’acqua non
upera almeno il livello minimo indicato sul serbatoio.
Vano cialde:
Nel vano cialde devono essere inserite solo cialde Lavazza A MODO MIO; non inserire le dita o qualsiasi altro oggetto. Le cialde
ono da usarsi una sola volta
.
Smaltimento della macchina a fine vita:
NFORMAZIONE AGLI UTENTI: ai sensi dell’art. 13 del Decreto Legislativo 25 luglio 2005, n. 151 “Attuazione delle Direttive
2002/95/CE, 2002/96/CE e 2003/108/CE, relative alla riduzione dell’uso di sostanze pericolose nelle apparecchiature elettriche
ed elettroniche, nonché allo smaltimento dei rifiuti”. Il simbolo del cassonetto barrato riportato sull’apparecchiatura o sulla sua
confezione indica che il prodotto alla fine della propria vita utile deve essere raccolto separatamente dagli altri rifiuti. L’utente
dovrà, pertanto, conferire l’apparecchiatura giunta a fine vita agli idonei centri di raccolta differenziata dei rifiuti elettronici ed
elettrotecnici, oppure riconsegnarla al rivenditore al momento dell’acquisto di una nuova apparecchiatura di tipo equivalente,
n ragione di uno a uno. L’adeguata raccolta differenziata per l’avvio successivo dell’apparecchiatura dismessa al riciclaggio, al
trattamento e allo smaltimento ambientalmente compatibile contribuisce ad evitare possibili effetti negativi sull’ambiente e
ulla salute e favorisce il reimpiego e/o riciclo dei materiali di cui è composta l’apparecchiatura. Lo smaltimento abusivo del
rodotto da parte dell’utente comporta l’applicazione delle sanzioni amministrative previste dalla normativa vigente
.
Page 10

EN
Congratulations!
Dear Customer thank you for purchasing the Saeco Lavazza A MODO MIO espresso coffee machine and for your confidence in our company.
Before operating the machine, we recommend carefully reading the operating
instructions that explain how to use, clean and maintain it in perfect working
order.
We hope you enjoy brewing excellent coffee, thanks to Saeco and Lavazza!
Page 11

EN
EXTRA PREMIUM
rew
utto
n
wer
ight
Steam
utto
n
oading leve
r
od compartmen
t
team / hot wat
wan
d
ispensing spo
u
Water tan
k
switch
icture B
Power cor
d
am / hot water
no
b
Drip tray + gri
ll
Dregdrawer
MACHINE COMPONENTS
Dose
d
rew
Manual
rew butto
n
Steam
utto
n
Lifting handle
ater tank cover
icture A
Page 12
EN
MACHINE SETTING
The use of a water filter (optional accessory) improves the quality of the water and increases the
operational life of the machine. We suggest using
the Intenza water filter for Saeco. To install the filter
follow the directions provided with the filter.
PRIMING THE WATER CIRCUIT
6QPOUIF NBDIJOFTmSTU TUBSUVQ BGUFSBMPOH
QFSJPEPGJOBDUJWJUZPSJO DBTFUIFXBUFSUBOL
IBTDPNQMFUFMZSVO PVUPG XBUFSZPV OFFEUP
QSJNFUIFXBUFSDJSDVJUBTFYQMBJOFECFMPX
lace a container under the steam / hot water
wand and open the knob by turning it counter
-
clockwise.
EXTRA: press the brew button.
PREMIUM:
press the manual brew button.
EXTRA PREMIUM
EXTRA: wait for a steady stream of water to come
out from the steam / hot water wand, press
the brew button again and close the knob.
When the button is illuminated the machine
is ready to brew
.
PREMIUM: wait for a steady stream of water to
come out from the steam / hot water wand. The
dispensing phase will automatically end and the
heating will start. When the two coffee buttons
are steadily illuminated the machine is ready to
rew
.emo
ve the container use
d.
/P MJBCJMJUZ JT IFME GPS EBNBHF DBVTFE CZ
t *ODPSSFDUVTFOPUJOBDDPSEBODFXJUIUIF
intended purposes;
t 3FQBJSTOPUDBSSJFEPVUCZBVUIPSJ[FE
service centers;
t 5BNQFSJOHXJUIUIFQPXFSDPSE
t 5BNQFSJOHXJUIBOZQBSUTPGUIF
machine;
t 5IFVTFPGOPOPSJHJOBMTQBSFQBSUTBOE
accessories;
t 'BJMVSFUPEFTDBMF
t 4UPSBHFBUUFNQFSBUVSFTCFMPX¡$¡'
t 6TFPGQPETPUIFSUIBOUIPTFJOEJDBUFE
*OUIFTFDBTFTUIFXBSSBOUZJTOPUWBMJE
STARTING THE MACHINE
way from water and heat sources. Disconnect
the power if connected. Lift the machine using
the lifting handle (picture A). Damages to the
achine resulting from the failure to follow
these instructions will not be not covered by the
warranty.
ift and remove the water tank cover, then the
water tank itsel
f.
ill the water tank up to the MAX level indicated,
sing only fresh drinking water.
ot water or any other liquid may damage the
tank. Do not turn on the machine when the tank
s empty. Make sure there is enough water in the
tan
k.
Connect the power cord and press the ON/OFF
switch to the ON position (picture B)
.
EXTRA: power light turns on.
PREMIUM: all buttons blink
.
Page 13
EN
PREPARING THE COFFEE
COFFEE BREWING
The machine is ready
when the lever is in the
off position (back posi
tion) and:
EXTRA: the brew button
is steadily illuminated.
PREMIUM:
the brew bu
t
tons are steadily illumi
nated.
nly suitable Lavazza “A MODO MIO” pods should
e placed in the pod compartment. Do not put your
ngers or any other object in the compartment
.
Single-dose pods brew a single coffee/product.
DO NOT use the pods more than once. Inserting 2 or
more pods can cause the machine to malfunction
.
osition a mug/small cup under the dispensing
spou
t
Lift the pod compartment door,
insert a pod and close it
.
ull the loading
ever forwards until
t stops
.
4
ress the brew button and wait for the brewing of
the desired quantity.
EXTRA
PREMIUM
Do not move the lever to the off position while
coffee is brewing.
ress the brew but
on again to stop
rewing and bring
he lever back to the
position
.
The drip tray grill can rotate up to 180° to allow
the use of mugs, small cups and containers of
various sizes.
In order to perform the above operation the steam
/
ater knob must be close
d.
MANUAL COFFEE BREWING
(FOR PREMIUM MODEL ONLY)
The machine is already programmed to brew 1 oz.
of coffee.
arry out steps 1, 2, 3 of the COFFEE BREWING
section
.
Press the dosed brew button. The machine will
automatically end the brewing once the pro
rammed coffee quantity has been reached.
Bring the lever back to the off position.
The coffee brewing can be interrupted at any
moment by pressing the dosed brew button again.
PROGRAMMING THE COFFEE DOSE
(FOR PREMIUM MODEL ONLY)
arry out steps 1, 2, 3 of the COFFEE BREWING
section
.
Press the dosed coffee brew button and hold it
ntil the desired quantity of coffee is reached
.
elease the dosed brew button and bring the
ever back to the off position
.
The quantity programmed (minimum 1 oz. maximum 7 oz.) is now memorized by the machine.
This quantity can be modified at any time by
repeating the above operation.
Page 14
EN
USING THE STEAM / HOT WATER WAND
Danger of scalding! Dispensing may be preceded
short spurts of hot water and scalding is po
s
sible. The steam/hot water wand may reach high
temperatures. Do not touch it with bare hands
.
DISPENSING HOT WATER
lace an empty container under the steam / hot
water wand and open the kno
b.
EXTRA:press the brew button. Hot water will be
dispensed
.
PREMIUM: press the manual brew button. Hot wa
ter will be dispensed.
EXTRA PREMIUM
EXTRA: press the brew button again to stop
dispensing and close the steam/hot water
no
b.
PREMIUM: press the manual brew button again to
stop dispensing and close the steam/hot water
no
b.
PREMIUM: with this procedure you can dispense up
to 6 oz. of water.
DISPENSING STEAM
EXTRA:press the steam button and keep it
ressed. The indicator lights turn off. When the
steam light is steadily illuminated, release the
tton
.
PREMIUM: press the steam button and keep it
pressed. The steam light will start blinking. When
e steam light is steadily illuminated, release
e button
.
EXTRA PREMIUM
Place an empty container under the steam/hot
ater wand. Open the steam knob for a few sec
onds to purge the wand of any residual water.
When steady steam comes out, close the knob
nd remove the container
.
Fill 1/3 of a container with cold milk. Immerse
the steam wand into the milk and open the
steam knob. Froth the milk by gently swirling
the container
.
Once the desired result has been achieved, close
the knob and remove the container
.
Only for the PREMIUM model, press the steam button
again. Three lights will blink on the machine.
.
#FGPSFDBSSZJOHPVUBOZPUIFSPQFSBUJPOQSJNF
UIFXBUFSDJSDVJUTFF4FDUJPOi1SJNJOHUIF8BUFS$JSDVJUw
We suggest using partially skimmed milk, at refrigerator temperature, in the desired quantity to obtain a thick froth.
Page 15
EN
MAINTENANCE AND CLEANING
DESCALING
Limescale normally builds up with the use of the
appliance; the machine needs descaling every 3
- 4 months and/or whenever a reduction in w
a
er flow is noticed.
5PEFTDBMF UIF NBDIJOF VTFBDPNNPO OPO
UPYJD BOEPS OPOIBSNGVM EFTDBMJOH TPMVUJPO
GPS DPõFFNBDIJOFT BWBJMBCMF PO UIFNBSLFU
8FTVHHFTUVTJOH4BFDPEFTDBMJOHTPMVUJPO
Never use vinegar as a descaling solution
.
Drain the water tank and fill it up with a desca
l
ng solution with water, as specified on the de
s
aling solution box. Power on the machine and
place a container under the dispensing spout
.
EXTRA:press the brew button.
PREMIUM: when the brew lights are steadily illu
minated, press the manual brew button.
EXTRA andPREMIUM: turn off the machine, let it sit
or 10-15 minutes and repeat steps
and un
il the tank is empty.
Clean and fill up the tank with fresh drinkin
g
ater, insert it back on the machine and place a
ontainer under the dispensing spout. Open the
team knob, press the brew button until the tank
s 2/3 empty, and then close the knob
.
5
Wait a few moments for the machine to heat up,
en the steam knob and press the brew button
o empty the water tank.
PANNARELLO (optional)
The Pannarello can be bought separately from
Saeco or an authorized service center.
The Pannarello attachment makes frothing milk
or cappuccinos or lattes even easier. Simply in
tall the Pannarello onto the steam/hot water
and. To use, follow the directions in the DI
PENSING HOT WATER or DISPENSING STEAM
ections
.
The Pannarello must be removed and completely
washed once a week.
Always ensure that the power supply is disconne
c
ted and wait for the machine to cool down
.
We suggest rinsing the water tank every day. Empty
out and clean the dregdrawer every two or three
days or after 10 brewed coffees. Never use solvents,
alcohol, harsh substances, and never place any
machine components in an oven. Wash the components (except the electrical ones) with cold/lukewarm water and non-abrasive cloths/sponges.
CLEANING THE STEAM / HOT WATER
WAND
se steam for a few seconds. Clean the wand ex
terna
lly
with a damp clot
h.
CLEANING THE BREW GROUP
Carry out the COFFEE BREWING / COFFEE
MANUAL BREWING
procedures wee
kly
wi
thout inserting the pod.
CLEANING THE DREGDRAWER
Remove the dregdrawer and the cup grill.
Remove the top drawer to take out the used
ods and to drain the drip tray. Clean and dry
oth parts before putting them back.
Check periodically that the dregdrawer is not full
so as to avoid malfunctioning and damages to the
machine.
Page 16
EN
TROUBLESHOOTING
TECHNICAL SPECIFICATIONS
Problems Causes Solutions
The machine does not turn on.
EXTRA
: power light is off after having
turned the machine ON and waited for
a few minutes.
PREMIUM
: the brew lights and are
not blinking.
» The machine is not connected to
the
power source.
»
Connect the machine to the power source.
» Contact Saeco customer service.
The machine requires a lot of time to
heat up.
» The machine has limescale
build-up.
» Descale the machine.
The pump is very noisy.
» No water in the tank.
» Circuit is not primed.
» The tank with fresh drinking water.
» Prime the water circuit.
The loading lever doesn’t reach the
brewing position.
» Dregdrawer full.
» Pod inserted incorrectly.
» Empty out the dregdrawer.
» Repeat the sequence, lever in the off posi-
tion, lever in the brewing position; if that
is not enough remove the pod manually
from the compartment after unplugging
the machine.
The coffee is cold.
»
EXTRA
: the brew light was
off when the brew button was
pressed.
» Wait until the indicator light turns on.
The coffee is brewed too fast, the
brewed coffee is not creamy.
» Pod already used. » Place the lever back in the off position and
insert a new pod.
The coffee is not brewed and some steam
comes out from the pod compartment.
» The loading lever was not set to
the brewing position.
» Set the loading lever to the brewing
position.
Coffee is not brewed or brewed in
drips only.
» Dispensing spout is clogged.
» Circuit is not primed.
» Clean the dispensing spout.
» Prime the water circuit.
The pods, after they have been used,
have holes only on the upper film.
» Circuit is not primed. » Prime the water circuit.
Hot water/steam not dispensed. » Hot water/steam wand is clogged. » Clean the wand with a needle (the
machine needs to be unplugged and the
steam/hot water knob needs to be closed).
The milk does not froth. » Not suitable milk.
» The milk is too hot.
»
EXTRA
: the steam light was off
when the steam was dispensed.
» Use fresh, partially skimmed milk.
» Use milk at refrigerator temperature.
»
EXTRA
: keep pressing the steam button
until the indicator light turns on.
· Nominal Voltage - Power Rating - Power Supply: See label on
the appliance
· Dimensions:
Height Width Depth
12” (305 mm) 9.25” (235 mm) 13” (330 mm)
· Weight: about 11 lbs. (5 kg)
· Water tank: 34 oz. (1 lt.) - Removable type
· Housing Material: ABS - Thermoplastic
· Power Cord Length:
47” (1.2 m)
· Control Panel: Top of machine
· Boiler: Stainless steel
· Safet y Devices: Boiler pressure safety valve
· Thermal fuse (EXTRA and PREMIUM versions)
· Safet y thermostat (PREMIUM version)
Please contact a Saeco authorized service center for any faults not covered in the above table or when the suggested solutions do not solve the
problem.
2006/42 CE - 2004/108 CE - 2006/95 CE
Page 17
EN
SAFETY
Intended Use of the Machine:
The coffee machine is intended for domestic use only. It is prohibited to make any technical changes to the machine.
Do not use the machine for unauthorized purposes since this would create serious hazards! The appliance is not to be
used by persons (including children) with reduced physical, mental or sensory abilities or with scarce experience and/or
expertise, unless they are supervised by a person responsible for their safety, or they are instructed by this person on how
to properly use the machine
.
Installation site:
Place the coffee machine in a safe place, where nobody may overturn it or be injured by it. Do not keep the machine at
temperature below 0°C (32°F) as freezing may damage it. Do not use the coffee machine outdoors. Do not place the
machine on very hot surfaces or close to flames
.
Power Supply:
Only connect the coffee machine to a suitable socket. The voltage must correspond to that indicated on the
chine’s label
.
Power Cord:
Do not use the coffee machine if the power cord is defective. If the power cord is damaged, it must be replaced with a
proper cord having the same features of the one provided with the machine. Do not pass the power cord around corners,
over sharp edges or over hot objects and keep it away from oil. Do not use the power cord to carry or pull the coffee
machine. Do not pull out the plug by pulling on the power cord or touch it with wet hands. Do not let the power cord
hang freely from tables or shelves
.
Danger of Electrocution:
Never allow water to come into contact with any of the electrical parts of the machine.
Protection for Other People:
Prevent children from playing with the machine. Children are not aware of the risks related to electric household
ppliances. Do not leave the machine packaging materials within the reach of children.
Danger of Burns:
Never direct the jet of hot steam and/or hot water towards yourself or others. Brewing may be preceded by small jets
of hot water. The steam / hot water wand can reach very high temperatures: Never touch it with bare hands. Use the
ppropriate handle only
.
Cleaning:
Before cleaning, unplug the machine and let it cool down. Do not immerse the machine in water! It is strictly forbidden to
tamper with the internal parts of the machine. Do not use the water in the tank for food use.
Storing the Machine:
If the machine is to remain inactive for a long time, unplug it and store it in a dry place out of reach of any children. Keep
it protected from dust and dirt
.
Servicing / Maintenance:
In case of failure, problems or a suspected fault resulting from the falling of the machine, immediately remove the plug
rom the socket. Do not attempt to operate a faulty machine. Servicing and repairs may only be carried out by Saeco
uthorized service centers.. All liability for damages resulting from work not carried out by professionals is declined
.
Water tank:
Fill the tank only with fresh, non-sparkling, drinking water. Do not operate the machine if the water is not at least above
the minimum level indicated on the tan
k.
Pod compartment:
This machine can only be used with Lavazza A MODO MIO pods; do not put your fingers or any other object in the pod
compartment. The pods can be used only once.
Machine disposal at the end of its operational life:
NFORMATION FOR THE USER: In compliance with art. 13 of the Italian Legislative Decree dated 25 July 2005, no. 151
“Implementation of the Directives 2002/95/EC, 2002/96/EC and 2003/108/EC on the restriction of the use of certain
azardous substances in electrical and electronic equipment, as well as waste disposal”. The symbol of the crossed-out
wheeled bin on the appliance or its packaging indicates that the product must be disposed of separately from other waste
at the end of its operational life. The user must therefore take the appliance to be disposed of to an appropriate separate
collection centre for electronic and electrotechnical equipment or take it to the dealer when buying a new appliance of the
equivalent kind (one by one). Appropriate separate collection for the dismantled appliance being subsequently sent out
or recycling, treatment and for environmentally friendly disposal, contribute to the prevention of possible negative effects
on the environment and on human health, and encourage recycling of the materials the appliance is made of. Specific
administrative sanctions provided for by current regulations will be applied for illicit disposal of the product by the user
.
Page 18

FR
Félicitations !
Cher Client, nous vous félicitons d’avoir choisi la machine à café expresso Saeco
Lavazza A MODO MIO et vous remercions de votre confiance.
Avant de mettre la machine en marche, nous vous recommandons de lire attentivement ce mode d’emploi qui vous explique comment utiliser, nettoyer et
conserver la machine en parfait état de fonctionnement.
Il ne nous reste que vous souhaiter de préparer bien d’excellents cafés grâce à
Saeco et Lavazza !
Page 19

FR
EXTRA PREMIUM
Interrupteur
istribution
de café
V
oyan
t
de mis
e
n marche
ton
vapeur
vier
e chargement
ogemen
t
’introduction dosettes
use vapeur
/
eau ch
aud
e
istributeur
e caf
é
Réservoir
e
au
général
Figure B
âble d’alimentation
Bouton de
ibution vapeur
et eau ch
aude
rille
gouttoi
r
Tiroi
r
dosettes
sagées
COMPOSANTS DE LA MACHINE
Touche pro-
rammable
e distribu
tion du ca
fé
nterrupteur
istribution
café
ton
apeur
ogement
our soulever
machine
Couvercle
réservoir à ea
u
igure
A
Page 20

FR
PRÉPARATION DE LA MACHINE
EXTRA: le voyant de mise en marche s’allume.
PREMIUM: tous les boutons clignotent.
L’utilisation d’un filtre à eau (accessoire en option)
améliore la qualité de l’eau et prolonge la durée de vie
de votre appareil. Nous recommandons d’utiliser le
filtre Intenza Brita pour Saeco. Pour introduire le filtre,
suivre la notice d’instruction annexée à l’accessoire.
AMORÇAGE DU CIRCUIT HYDRAULIQUE
Lors de la première mise en marche de la machine, après une longue période d’inutilisation
ou en cas d’épuisement complet de l’eau dans
MFSÏTFSWPJSJMGBVUFõFDUVFSMPQÏSBUJPOEBNPSÎBHFEVDJSDVJUIZESBVMJRVFDPNNFDJEFTTPVT
ntroduire un récipient sous la buse vapeur / eau
ch
aud
e et ouvrir le
bouto
n en le tournant dans
e sens inverse des aiguilles d’une montre.
EXTRA: appuyer sur l’interrupteur de distribution
café
.
PREMIUM: appuyer sur l’ interrupteur de distrib
u
ion café (non programmable).
EXTRA PREMIUM
EXTRA: attendre jusqu’à ce qu’un jet régulier d’eau
sorte de la buse vapeur / eau chaude, appuyer
à nouveau su l’interrupteur de distribution
café et fermer le bouton. Lorsque l’interrup
teur est allumé fixe, la machine est prête
.
PREMIUM: attendre jusqu’à ce qu’un jet d’eau
égulier sorte de la buse vapeur / eau chaude.
La distribution se termine automatiquement
et le réchauffage commence. Lorsque les deux
outons café sont allumés fixes, la machine est
rête.
Enlever le récipient utilisé.
La société décline toute responsabilité pour les
dommages éventuels se produisant en cas de :
t FNQMPJJOBQQSPQSJÏFUOPODPOGPSNFË
l’usage prévu ;
t SÏQBSBUJPOTOPOFõFDUVÏFTBVQSÒTEFT
centres d’assistance agréés ;
t BMUÏSBUJPOEVDÉCMFEBMJNFOUBUJPO
t
altération de tout composant de la machine ;
t VUJMJTBUJPOEFQJÒDFTEFSFDIBOHF
et d’accessoires non d’origine ;
t EÏGBVUEFEÏUBSUSBHF
t TUPDLBHFBVEFTTPVTEF¡$
t VUJMJTBUJPOEFEPTFUUFTEJõÏSFOUFTEFDFMMFT
qui sont indiquées.
Dans tous ces cas-là, la garantie cesse
EFYJTUFS
MISE EN MARCHE DE LA MACHINE
Placer la machine sur une surface plane et stable,
in d’eau et de sources de c
haleur.
Débrancher
’alimentation électrique si présente. Soulever la
machine uniquement à l’aide de la prise spécia
ement prévue dans la partie supérieure. (voir
COMPOSANTS DE LA MACHINE
- Figure A).
Les dommages provoqués à la machine par le non
respect de ces indications ne sont pas couverts par
la garantie.
ever et enlever le couvercle du réservoir à
au et ensuite le réservoir même
.
emplir le réservoir uniquement avec de l’eau
fraîche potable non gazeuse, jusqu’au niveau
MAX indiqué
.
’eau chaude ou tout autre liquide peuvent endo
m
ice, s’il n’y a pas d’eau : s’assurer que le réservoir est
uffisamment plein
.
nsérer le câble d’alimentation et appuyer sur l’i
n
terrupteur général en le mettant sur la position
voir COMPOSANTS DE LA MACHINE - Figure B
).
Page 21

FR
PRÉPARATION DU CAFÉ
DISTRIBUTION DOSE LIBRE CAFÉ
La machine est prête
lorsque le levier est en
position de repos (posi
tion arrière) et
:
EXTRA: l’interrupteur de
distribution du café est
allumé fixe
.
PREMIUM: les
bouto
ns
café sont allumés fixes.
Dans le logement à dosettes il ne faut mettre que
es dosettes Lavazza A MODO MIO. Ne pas y mettre
les doigts ou tout autre objet
.
Les dosettes unidoses sont conçues pour la distribution
d’un seul café/produit. NE PAS réutiliser les dosettes
après l’usage. L’introduction de 2 ou plusieurs dosettes
engendre le mauvais fonctionnement de la machine
.
Mettre la tasse/petite tasse sous le distributeur à café.
oulever le volet du logement
’introduction dosettes, intr
o
ire une dosette et le refermer
.
Tirer le levier de
hargement vers
’avant, jusqu’à ce
u’il se bloque.
4
Appuyer sur l’interrupteur/bouton de distr
i
bution de café et attendre la distribution de la
uantité souhaité
e
EXTRA
PREMIUM
Pendant la distribution ne pas mettre le levier en
p
osition de repos
.
5
Appuyer à nouveau s
u
’interrupteur/bouton
pour arrêter la distribu
ion et remettre le levi
e
n position de repos
.
La grille d’égouttoir peut tourner de 180° pour utiliser des tasses, des petites tasses et des récipients
aux dimensions différentes.
Pour effectuer les opérations ci-dessus, le bouton
vapeur/eau chaude doit être fermé.
DISTRIBUTION CAFÉ DOSÉ
POUR LE MODÈLE PREMIUM UNIQUEMENT
La machine est déjà programmée pour distribuer
une dose de café de 30 ml.
Effectuer les passages 1, 2 , 3 de la sectio
n
DISTRIBUTION DOSE LIBRE CAFÉ
ppuyer sur le bouton de distribution de café
osé. La machine terminera automatiquement la
istribution une fois la dose de café programmée
tteinte. Remettre le levier en position de repos.
La distribution de café peut être interrompue à tout
moment en appuyant à nouveau sur le bouton de
distribution café dosé.
PROGRAMMATION DOSE CAFÉ
POUR LE MODÈLE PREMIUM SEULEMENT
Effectuer les passages 1, 2 , 3 de la sectio
n
DISTRIBUTION DOSE LIBRE CAFÉ
ppuyer sur le bouton de distribution de café dosé
n le gardant enfoncé et attendre la distribution
e la quantité souhaitée de café à programmer.
Relâcher le bouton de distribution du café dosé selon
vos souhaits et remettre le levier en position de repos.
La quantité programmée de café distribué (minimum 25 ml - maximum 200 ml) peut être modifiée
en répétant la programmation.
Page 22

FR
EMPLOI DE LA BUSE VAPEUR / EAU CHAUDE
Danger de brûlures ! Il peut y avoir quelques écl
a
oussures d’eau chaude au début de la distribution.
La buse de vapeur / eau chaude peut atteindre des
températures élevées : éviter tout contact direct
vec les mains. La buse vapeur / eau chaude ne doit
p
as être orientée sur les personnes ou les animaux.
S’assurer qu’il y a toujours suffisamment d’eau dans
le réservoir.
DISTRIBUTION D’EAU CHAUDE
orsque la machine est prête, mettre un réc
i
pient sous la buse vapeur / eau chaude et ouvrir
e
bouton.
EXTRA: appuyer sur l’interrupteur de distribution
de café, un jet d’eau régulier sortira de la buse
vapeur / eau chaude
.
PREMIUM: appuyer sur le bouton de distribution
dose libre café, un jet d’eau régulier sortira de la
use vapeur / eau chaude
.
EXTRA PREMIUM
EXTRA: appuyer à nouveau sur l’interrupteur café
our terminer la distribution et fermer le bouton
vapeur / eau chaude
.
PREMIUM: appuyer à nouveau sur l’ interrupteur
de distribution dose libre café pour terminer la
distribution et fermer le bouton vapeur / eau
chaude
.
PREMIUM: par cette procédure il est possible de distri-
buer 180 ml d’eau au maximum.
DISTRIBUTION DE VAPEUR ET PRÉPARATION DU CAPPUCCINO
EXTRA: appuyer sur le bouton vapeur sans le
elâcher. Toutes les signalisations lumineuses
s’éteignent. Lorsque le bouton vapeur est a
llu
é fixe, la machine est prête.
Ne relâcher le bouton qu’à présent
.
Si la vapeur s’épuise avant le résultat souhaité répéter l’opération ci-dessus.
PREMIUM: appuyer sur le bouton vapeur qui com
mence à clignoter. Lorsque le bouton vapeur est
llumé fixe, la machine est prête.
EXTRA PREMIUM
Introduire un récipient vide sous la buse vapeur
/ eau chaude et ouvrir le bouton pendant que
l
ues instants pour que l’eau résiduelle coule
j
usqu’à ce que de la vapeur seulement ne sorte.
Fermer le bouton et retirer le récipient.
Mettre le récipient avec le lait de sorte que la
use vapeur / eau chaude soit près du fond et
ouvrir le bouton. La machine commence à distribuer de la vapeur. Faire des mouvements lents
vers le bas avec le récipient afin d’obtenir une
ousse de lait compacte et crémeuse. Il est recommandé que le lait ne dépasse pas un tiers
du volume du récipient.
Une fois le résultat souhaité atteint, fermer le
outon et retirer le récipient
.
Pour le modèle PREMIUM seulement, la machine aur
a
trois boutons clignotants.
"WBOUEFõFDUVFSUPVUFBVUSFPQÏSBUJPOBNPSDFS MF DJSDVJU IZESBVMJRVF WPJS TFDUJPO BNPSÎBHFEVDJSDVJUIZESBVMJRVF
Afin d’obtenir une mousse compacte, il est recommandé d’utiliser du lait frais demi-écrémé
et à la température du frigidaire dans la quantité
souhaitée.
Page 23

FR
ENTRETIEN ET NETTOYAGE
DÉTARTRAGE
La formation de calcaire est une conséquence
normale de l’emploi de l’appareil. Le cycle de
dé
artrage est nécessaire tous les 3 ou 4 mois d’ut
i
lisation de la machine et/ou en cas de réduction
e la quantité d’eau débitée.
1PVS FõFDUVFS MF EÏUBSUSBHF PO QFVU VUJMJTFS
VOQSPEVJUEÏUBSUSBOUQPVSNBDIJOFTËDBGÏOJ
UPYJRVFOJOPDJGRVFMPOUSPVWFOPSNBMFNFOU
dans le commerce. Nous recommandons l’emploi de la solution détartrante Saeco.
e jamais utiliser de vinaigre pour détartrer la
achine
.
V
ider le réservoir et le remplir de solution détar
rante et eau comme il est spécifié sur l’emba
l
lage du produit, mettre en marche la machine et
acer un récipient sous le distributeur
.
EXTRA: appuyer sur l’interrupteur café et distr
i
er une tasse
.
PREMIUM: attendre jusqu’à ce que les boutons
afé soient allumés fixes, appuyer sur le l’inter
rupteur de distribution café et distribuer une
sse
.
EXTRA et PREMIUM:
teindre la machine, laisser r
e
oser pendant 10-15 minutes et répéter les o
pé
ration
s
et
tant que le réservoir sera vide.
Laver et remplir le réservoir avec de l’eau fraîche
otable, le replacer et mettre un récipient sous
e distributeur. Ouvrir le bouton vapeur, appuyer
sur l’interrupteur/bouton café jusqu’à vider 2/3
u réservoir, refermer ensuite le bouton.
5
Attendre le réchauffage de la machine, ouvrir
le bouton vapeur et appuyer sur l’interrupteur /
bouton café jusqu’à vider le réservoir
.
PANNARELLO (en option)
Le pannarello peut s’acheter séparément chez votre
revendeur habituel.
e pannarello vous permet de préparer des cap
puccinos excellents. Pour utiliser le pannarello,
l faut préparer la machine pour la distribution
’eau chaude et de vapeur comme indiqué dans
es sections correspondantes. Si l’on veut pré
pa
rer un cappuccino, plonger le pannarello dans le
ait et faire de petits mouvements circulaires afin
’obtenir un réchauffage uniforme du lait
.
Le pannarello doit être démonté et lavé complète-
ment une fois par semaine.
S’assurer toujours que l’alimentation électrique est
débranchée et attendre que la machine se refroidisse
Il est recommandé de rincer le réservoir tous les jours.
Vider et nettoyer le tiroir à dosettes usagées tous les
deux/trois jours ou après la distribution de 10 cafés.
Ne jamais utiliser de solvants, d’alcool ou de substances agressives ou bien des fours pour sécher les
composants de la machine. Laver les composants (
sauf les composants électriques) à l’eau froide/tiède
et avec des chiffons/éponges non abrasifs.
NETTOYAGE DE LA BUSE VAPEUR / EAU
CHAUDE
de, distribuer de la vapeur à vide pendant quel
ques secondes. Nettoyer la partie externe de la
use avec un chiffon humide.
NETTOYAGE DU DISTRIBUTEUR CAFÉ
Effectuer une fois par semaine pour les deux mo
dèles la procédure DISTRIBUTION DE CAFÉ /
DISTRIBUTION DOSE LIBRE CAFÉ
sans intr
o
duire la dosette
.
NETTOYAGE DU TIROIR À DOSETTES
Retirer le tiroir à dose
t
tes usagées et enlever
la grille d’égouttoir.
Retirer le tiroir supérieur pour enlever les dose
t
tes usagées et vider le bac d’égouttement. Laver
Vérifier périodiquement que le tiroir à dosettes n’est
pas plein afin d’éviter le mauvais fonctionnement
ou des dommages à la machine.
Page 24

FR
SOLUTIONS AUX PROBLÈMES LES PLUS COMMUNS
CARACTÉRISTIQUES TECHNIQUES
Problème repéré Causes possibles Solution
La machine ne se met pas en marche.
EXTRA
: voyant éteint après avoir
appuyé sur l'interrupteur général et
attendu pendant quelques minutes.
PREMIUM
: les voyants et ne
clignotent pas.
» La machine n'est pas branchée sur
le réseau électrique.
» Brancher la machine sur le réseau élec-
trique.
» S’adresser au centre d’assistance.
La machine met beaucoup de temps à
se chauffer.
» L’appareil a beaucoup de calcaire. » Détartrer l’appareil.
La pompe émet beaucoup de bruit.
» Eau insuffisante dans le réservoir.
» Le réservoir a été rempli sans
effectuer le cycle d’amorçage du
circuit hydraulique.
» Remplir en eau fraîche potable.
» Amorcer le circuit hydraulique (voir section
amorçage du circuit hydraulique).
Le levier de chargement n'atteint pas la
position de distribution.
» Tiroir à dosettes usagées plein.
» Dosette introduite de manière
incorrecte.
» Vider le tiroir à dosettes usagées.
»
Répéter la séquence, levier en position de repos, levier en position de distribution ; si cela
ne suffit pas, intervenir manuellement pour
décharger la dosette de la conduite avec la
machine débranchée du réseau électrique.
Le café est froid.
»
EXTRA
: le voyant était éteint
lorsqu'on a appuyé sur l'interrupteur de distribution café.
» Attendre jusqu'à ce que le voyant s’allume.
Le café coule trop rapidement, le café
distribué n’est pas crémeux.
» Dosette déjà utilisée. » Remettre le levier en position de repos et
introduire une nouvelle dosette.
Le café n’est pas distribué et de la vapeur
sort du logement d’introduction dosettes.
» Le levier de chargement n’a pas été
amené à la position de distribution.
» Mettre le levier de chargement en position
de distribution.
La café ne coule pas ou bien il coule
goutte à goutte.
» Distributeur bouché.
» Circuit hydraulique désamorcé.
» Effectuer le cycle de lavage distributeur de
café (voir ENTRETIEN ET NETTOYAGE).
» Amorcer le circuit hydraulique
(voir section amorçage du circuit hydraulique).
Les dosettes, une fois utilisées, ne
sont trouées que dans la pellicule
supérieure.
» Circuit hydraulique désamorcé. » Amorcer le circuit hydraulique
(voir section amorçage du circuit hydraulique).
La machine ne distribue pas d’eau
chaude ni de vapeur.
» Buse vapeur bouchée. » Nettoyer la buse avec une aiguille (la
machine doit être éteinte et le bouton de
distribution vapeur / eau chaude fermé).
La mousse de lait ne se forme pas. » Lait inapproprié.
» Lait trop chaud.
»
EXTRA
: le voyant était éteint
lorsque la vapeur a été distribuée.
» Utiliser du lait entier, demi-écrémé.
» Utiliser du lait à température du frigi-
daire.
»
EXTRA
: garder enfoncé le bouton tant
que le voyant s’allume.
· Tension nominale - Puissance nominale – Alimentation :
Voir plaquette placée sur l’appareil
· Dimensions : Hauteur Largeur Profondeur
305 mm 235 mm 330 mm
· Poids : 5 kg environ
· Réser voir à eau : 1 litre environ - Amovible
· Matériaux utilisés pour le châssis : Thermoplastique
· Longueur du câble 1,2 m
· Bandeau de commande : Dans la par tie supérieure
· Chaudière : Acier inox
· Dispositifs de sécurité : Soupape de sécurité pression chaudière
· Coupe- circuit thermique (version EXTRA et PREMIUM)
· Thermostat de sécurité (version PREMIUM)
Pour toute panne non détaillée dans le tableau ci-dessus ou en cas de solutions insuffisantes, s’adresser à un centre d’assistance agréé Saeco.
2006/42 CE - 2004/108 CE - 2006/95 CE
Page 25

FR
SÉCURITÉ
Utilisation prévue :
Cette machine à café est destinée uniquement à un usage domestique. Il est interdit d’apporter des modifications techniques.
T
oute utilisation impropre est interdite puisqu’elle engendre des risques ! L’appareil ne doit pas être utilisé par des personnes (y
compris les enfants) ayant de faibles capacités physiques, mentales ou sensorielles, sans expérience et/ou aux compétences
nsuffisantes, à moins qu’elles ne soient sous la supervision d’une personne responsable de leur sécurité ou formées par cette
ersonne en ce qui concerne l’utilisation de l’appareil.
Emplacement :
anger la machine à café dans un endroit sûr pour éviter tout risque de renversement ou de blessures. Ne pas garder la
machine au-dessous de 0° puisque le gel pourrait l’endommager. Ne pas utiliser la machine à café en plein air. Ne pas placer
a machine sur des surfaces très chaudes et/ou à proximité d’une flamme nue
.
Alimentation du secteur :
Ne brancher la machine à café que sur une prise de courant appropriée. La tension doit correspondre à celle indiquée sur la
laquette de la machine.
Câble d’alimentation :
Ne pas utiliser la machine à café si le câble d’alimentation est défectueux. Si le câble d’alimentation est endommagé, il faut
e remplacer par un étant approprié ayant les mêmes caractéristiques de celui fourni de dotation. Ne pas faire passer le câble
’alimentation sur des arêtes (vives) ou sur des objets très chauds. Le protéger contre l’huile. Ne pas transporter ou tirer la
machine à café par son câble. Ne pas retirer la fiche en la tirant par le câble. Ne pas la toucher avec les mains mouillées. Éviter
que le câble d’alimentation ne pende librement des tables ou des étagères.
Danger d’électrocution :
Ne jamais mettre les parties sous tension au contact de l’eau.
Protection des autres personnes :
arder les enfants sous supervision, afin d’éviter qu’ils ne jouent avec l’appareil. Les enfants ne se rendent pas compte des risques
liés aux électroménagers. Les matériaux utilisés pour l’emballage de la machine doivent être gardés hors de la portée des enfants
.
Danger de brûlures :
Ne pas diriger le jet d’eau chaude ou de vapeur vers soi et/ou vers d’autres personnes. Il peut y avoir quelques éclaboussures
’eau chaude au début de la distribution. La buse de vapeur / eau chaude peut atteindre des températures élevées : éviter de
a toucher directement avec les mains, utiliser exclusivement le bouton prévu à cet effet.
Nettoyage :
Avant de nettoyer la machine, il faut débrancher la fiche de la prise et attendre qu’elle se refroidisse. Ne pas plonger la machine dans l’eau !
Il est strictement interdit d’essayer d’intervenir à l’intérieur de la machine. Ne pas utiliser l’eau dans le réservoir pour un usage alimentaire.
Rangement de la machine :
Si la machine reste inutilisée pendant longtemps, débrancher la fiche de la prise et la ranger dans un endroit sec non accessible
ux enfants. La protéger contre la poussière et les saletés
.
Réparations / Entretien :
n cas de pannes, de dommages ou de défauts présumés à la suite d’une chute, débrancher immédiatement la fiche de la prise. Ne
as mettre en marche une machine défectueuse. Seuls les centres d’assistance agréés Saeco peuvent effectuer des interventions et
es réparations. Nous déclinons toute responsabilité en cas de dommages pour toute opération non effectuée dans les règles de l’art.
Réservoir à eau :
Ne remplir le réservoir qu’avec de l’eau fraîche potable non pétillante. Ne pas mettre la machine en marche si l’eau ne dépasse
as le niveau minimum indiqué sur le réservoir.
Logement à dosettes :
ans le logement à dosettes il ne faut mettre que des dosettes Lavazza A MODO MIO ; ne pas mettre les doigts ou tout autre
objet. Il faut utiliser les dosettes une fois seulement.
Élimination de la machine à la fin de sa vie utile :
NFORMATIONS AUX UTILISATEURS : aux termes de l’art.13 du Décret Législatif Italien n° 151 du 25 juillet 2005, « Application des
irectives 2002/95/CE, 2002/96/CE et 2003/108/CE, relatives à la limitation de l’utilisation des substances dangereuses dans les
équipements électriques et électroniques et à l’élimination des déchets. Le symbole de la poubelle barrée sur l’appareil ou sur
on emballage indique qu’à la fin de son cycle de vie, ce produit doit être traité séparément des autres déchets. » Lors de la fin
de vie de l’appareil, l’utilisateur devra par conséquent le remettre à un centre de collecte spécialisé en déchets électroniques et
électriques, ou bien le confier au revendeur lorsqu’il achètera un nouvel appareil du même genre. La collecte sélective visant
l’envoi du vieil appareil dans un centre spécialisé en recyclage, traitement et élimination de ce type de déchets permet de
auvegarder l’environnement et contribue à éviter les effets négatifs sur l’environnement et sur la santé des personnes et à
avoriser le recyclage et la réutilisation des matériaux dont l’appareil est constitué. L’élimination abusive du produit de la part de
on utilisateur implique l’application des sanctions administratives prévues par la réglementation en vigueur.
Page 26

DE
Herzlichen Glückwunsch!
Sehr geehrter Kunde, wir gratulieren Ihnen zum Kauf dieser Espresso-Maschine
Saeco Lavazza A MODO MIO und wir danken Ihnen für das Vertrauen, das Sie
uns entgegenbringen.
Bevor Sie die Maschine in Betrieb nehmen, empfehlen wir Ihnen, die Gebrauchsanweisung aufmerksam zu lesen, in der der Gebrauch, die Reinigung und die
Pflege beschrieben werden.
Nun wünschen wir Ihnen viel Spaß bei der Zubereitung von vielen köstlichen
Kaffees mit Saeco und Lavazza !
Page 27

DE
EXTRA PREMIUM
Ausgab
e
schalter
Kaffe
e
ontrolllampe
inschaltung
Ausgabetaste
Dam
pf
ehebel
apseleinwurffac
h
ampf-/
eißwasserdüs
e
eeausl
auf
assertan
k
Abbildung B
Netzkabe
l
Drehknopf
ampf-/
asserausgab
e
T
assenabste
ll
äche
Behälter für
verbrauchte Ka
p
BESTANDTEILE DER MASCHINE
Ausgabetaste
vorpr
o
gramierte
Kaffeeportio
n
usgabetaste
reie Kaffee
ortion
Ausgabetaste
ampf
Tragegri
ff
Deckel
assertan
k
bbildung
A
Page 28

DE
VORBEREITUNG MASCHINE
EXTRA:
ie Kontrolllampe Einschaltung leuchtet au
f.
PREMIUM: alle Tasten blinken.
Die Verwendung eines Wasserfilters (optionales
Zubehör) erhöht die Qualität des Wassers und verlängert die Lebensdauer des Geräts. Wir empfehlen
die Verwendung des Filters Saeco Intenza. Um den
Filter einzusetzen, ist das Hinweisblatt des Zubehörs
zu beachten, das diesem beiliegt.
ENTLÜFTUNG DES WASSERSYSTEMS
Bei der ersten Inbetriebnahme der Maschine,
nach einer längeren Nichtbenutzung oder bei
WPMMTUÊOEJHFS &OUMFFSVOH EFT 8BTTFSUBOLT
NVTT EBT8BTTFSTZTUFN FOUMàGUFU XFSEFO XJF
nachstehend beschrieben.
1
inen Behälter unter die Dampf-/Heißwasserd
ü
se stellen und den Drehknopf gegen den Uh
r
eigersinn.
EXTRA: den Ausgabeschalter Kaffee drücken
.
PREMIUM: die Ausgabetaste freie Kaffeeportion
rücken
.
EXTRA PREMIUM
EXTRA: warten, bis aus der Dampf-/Heißwasserdü-
e ein regelmäßiger Wasserstrahl austritt. Dann
erneut den Ausgabeschalter Kaffee drücken und
den Drehknopf schließen. Leuchtet der Schalter
dauerhaft auf, ist die Maschine bereit.
PREMIUM:
warten, bis aus der Dampf-/Heißwa
s
erdüse ein regelmäßiger Wasserstrahl austritt.
Die Ausgabe wird automatisch beendet und
der Aufheizvorgang beginnt. Leuchten beide
usgabetasten Kaffee dauerhaft auf, ist die Ma
chine bereit.
Den verwendeten Behälter entfernen
.
*OGPMHFOEFO'ÊMMFOXJSEGàSFWFOUVFMMF4DIÊEFOLFJOF)BGUVOHàCFSOPNNFO
t GBMTDIFVOEOJDIUEFOWPSHFTFIFOFO7FSXFO
EVOHT[XFDLFOFOUTQSFDIFOEF7FSXFOEVOH
t 3FQBSBUVSFOEJFOJDIUJOBVUPSJTJFSUFO,VO
EFOEJFOTUTUFMMFOEVSDIHFGàISUXVSEFO
t 7FSÊOEFSVOHFOBN/FU[LBCFM
t 7FSÊOEFSVOHFOBOCFMJFCJHFO#FTUBOEUFJMFO
der Maschine;
t 7FSXFOEVOHWPOBOEFSFOBMTPSJHJOBMFO
Ersatz- und Zubehörteilen;
t VO[VSFJDIFOEF&OULBMLVOH
t -BHFSVOHJO3ÊVNFOCFJ5FNQFSBUVSFOVOUFS¡$
t 7FSXFOEVOHWPOBOEFSFOBMTEFO
BOHFHFCFOFO,BQTFMO
*OEJFTFO'ÊMMFOFSMJTDIUEJF(BSBOUJF
INBETRIEBNAHME DER MASCHINE
ie Maschine auf einer ebenen und stabilen Fläche
,
stellen. Die Stromversorgung abnehmen, soweit vo
r
nden. Die Maschine anheben. Dabei ausschlie
ß
ich den entsprechenden Griff im oberen Bereich
enutzen (siehe BESTANDTEILE DER MASCHINE
- Abbildung A). Schäden an der Maschine, die auf
ie Nichtbeachtung dieser Hinweise zurückzuführen
sind, werden nicht von der Garantie gedeckt.
en Deckel des Wassertanks anheben und
ab
nehmen. Dann den Tank selbst herausnehmen.
en Wassertank bis zum angegebenen Füllstan
d
MAX füllen. Dabei darf ausschließlich frisches Trink
wasser ohne Kohlensäure verwendet werden
.
eißes Wasser oder andere Flüssigkeiten können den
Tank beschädigen. Die Maschine darf ohne Wasser kei
esfalls in Betrieb gesetzt werden: sicherstellen, dass im
Tank eine ausreichende Menge Wasser vorhanden ist.
as Netzkabel einstecken und den Hauptschalter
durch Drücken in die Position I stellen. (siehe BE-
STANDTEILE DER MASCHINE - Abbildung B)
.
Page 29

DE
ZUBEREITUNG VON KAFFEE
AUSGABE KAFFEE
Die Maschine ist bereit, wenn
sich der Hebel in der Ruh
e
p
osition befindet (hint
e
re Position), un
d:
EXTRA: der Ausgabeschalter
Kaffee dauerhaft aufleuchtet
.
PREMIUM: die Ausgabetasten
Kaffee
dau
erhaft
aufleu
ch
ten.
In das Kapselfach dürfen ausschließlich Kaffeeka
p
seln Lavazza A MODO MIO eingelegt werden. Keine
egenstände oder die Finger einführen.
it den Portionkapseln kann lediglich ein einziger
Kaffee/ein einziges Produkt ausgegeben werden. Diese
Kapseln dürfen nach dem Gebrauch NICHT wieder ve
r
wendet werden. Das Einlegen von 2 oder mehr Kapseln
verursacht Betriebsstörungen der Maschine.
ine Kaffeetasse unter den Kaffeeausl
auf
stellen
.
Die Klappe des Kapseleinwurffachs anheben, einen
Pad einwerfen und die Klappe wieder schließen
.
en Ladehebel
ach vorne ziehen,
is dieser blockiert
.
en Ausgabeschalter/die Ausgabetaste Kaffee
rücken und abwarten, bis die gewünschte
enge ausgegeben wurde
EXTRA
PREMIUM
ährend der Ausgabe darf der Hebel nicht in die
Ruheposition zurückgestellt werden
.
Erneut den Ausgab
e
schalter/die Ausgabet
a
rücken, um die Ausg
a
zu stoppen, und anschließend den Hebel
i
Der Tassenabstell fläche kann um 180° gedreht werden,
damit große und kleine Tassen und Behälter mit unterschiedlichen Abmessungen benutzt werden können.
Um die oben aufgeführten Vorgänge auszuführen, muss
der Drehknopf Dampf/Heißwasser geschlossen sein.
AUSGABE VORPROGRAMMIERTE KAFFEE
PORTION NUR FÜR MODELL PREMIUM
Die Maschine ist bereits auf die Ausgabe einer Kaffeeportion von 30 ml voreingestellt.
Die Schritte 1, 2 und 3 des folgenden Abschnitts
sführen: AUSGABE KAFFEE
Die Ausgabetaste vorprogrammierter Kaffee drücken.
Die Maschine beendet automatisch die Ausgabe,
achdem die programmierte Kaffeemenge erreicht
urde. Den Hebel in die Ruheposition zurückstellen.
Die Kaffeeausgabe kann jederzeit durch erneutes
Drücken der Ausgabetaste vorprogrammierter Kaffee unterbrochen werden.
PROGRAMMIERUNG KAFFEEMENGE
NUR FÜR MODELL PREMIUM
ie Schritte 1, 2 und 3 des folgenden Abschnitts
sführen: AUSGABE KAFFEE
ie Ausgabetaste dosierter Kaffee gedrückt hal-
ten
und abwarten, bis die zu programmierende
ewünschte Kaffeemenge ausgegeben wurde
.
Die Ausgabetaste vorprogrammierter Kaffee loslassen
und den Hebel in die Ruheposition stellen
.
Die programmierte Menge des ausgegebenen Kaffees
(Mindestmenge 25 ml - Höchstmenge 200 ml) kann geändert werden, indem die Programmierung wiederholt wird.
Page 30

DE
VERWENDUNG DER DAMPF-/HEISSWASSERDÜSE
Verbrennungsgefahr! Zu Beginn der Ausgabe
können Spritzer mit heißem Wasser auftreten. Die
Dampf-/Heißwasserdüse kann hohe Temperat
u
ren erreichen: direkte Berührung vermeiden. Die
sonen oder Tiere gerichtet werden. Es sollte stets
sichergestellt werden, dass sich eine ausreichende
assermenge im Tank befindet
.
HEISSWASSERAUSGABE
enn die Maschine bereit ist, einen leeren B
e
älter unter die Dampf-/Heißwasserdüse stellen
und den Drehknopf öffnen
.
EXTRA: Den Ausgabeschalter Kaffee drücken, aus
der Dampf-/Heißwasserdüse tritt ein regelmäßi
er Wasserstrahl aus
.
PREMIUM: Die Ausgabetaste Kaffee drücken, aus
der Dampf-/Heißwasserdüse tritt ein regelmäßi
er Wasserstrahl aus
.
EXTRA PREMIUM
EXTRA: Erneut die Ausgabetaste Kaffee drücken,
m die Ausgabe zu beenden. Den Drehknopf
ampf-/Heißwasser schließen
.
PREMIUM:
rneut die Ausgabetaste Kaffee drücken,
m die Ausgabe zu beenden. Den Drehknopf
Dampf-/Heißwasser schließe
n
PREMIUM: Auf diese Weise kann eine Menge von ma-
ximal 180 ml Wasser ausgegeben werden.
DAMPFAUSGABE UND ZUBEREITUNG
VON CAPPUCCINO
EXTRA: Die Ausgabetaste Dampf gedrückt halten. Alle
Leuchtanzeigen werden ausgeschaltet. Leuchtet die
usgabetaste Dampf dauerhaft auf, ist die Maschine
ereit. Erst jetzt kann die Taste losgelassen werden
.
Ist die Dampfmenge für das Erreichen des gewünschten Resultats nicht ausreichend, so muss
der oben beschriebene Vorgang wiederholt werden.
PREMIUM: Die Ausgabetaste Dampf drücken, di
e
e beginnt zu blinken. Leuchtet die Ausgabeta
s
e Dampf dauerhaft auf, ist die Maschine bereit
.
EXTRA PREMIUM
Einen leeren Behälter unter die Dampf-/Heiß
asserdüse stellen und den Drehknopf kurz
öffnen, um das Restwasser abzulassen, bis nur
ehr Dampf austritt. Den Drehknopf schließen
nd den Behälter entfernen
.
Den mit Milch gefüllten Behälter so positioni
e
en, dass die Dampf-/Heißwasserdüse bis in die
Nähe des Behälterbodens reicht, und den Drehknopf öffnen. Die Maschine beginnt mit der
Dampfausgabe. Den Behälter langsam nach un
ten bewegen, um einen kompakten und cremi-
en Milchschaum herzustellen. Es wird empfoh
len, den Behälter nicht um mehr als ein Drittel
it Milch zu füllen.
Nach Erreichen des gewünschten Resultats den
Drehknopf schließen und den Behälter en
t
ehmen
.
Lediglich beim das Modell PREMIUM muss erneut die
usgabetaste Dampf gedrückt werden. An der
Maschine blinken dann drei Tasten
.
7PS EFS "VTGàISVOH BOEFSFS 7PSHÊOHFNVTT
EBT8BTTFSTZTUFNFOUMàGUFUXFSEFOTJFIF"CTDIOJUU&OUMàGUVOH8BTTFSTZTUFN
Es wird empfohlen, frische teilentrahmte Milch
auf Kühlschrank-Temperatur in der gewünschten Menge zu verwenden, um einen kompakten
und cremigen Schaum herzustellen.
Page 31

DE
PFLEGE UND REINIGUNG
ENTKALKUNG
eim Gebrauch der Maschine bildet sich K
alk.
Die Ent
alkung ist nach jeweils 3-4 Betriebsmonaten der Maschine und/oder dann erforderlich, wenn eine Redu
zierung der Wasserdurchlaufmenge beobachtet wird.
'àS EJF &OULBMLVOH LBOOFJOIBOEFMTàCMJDIFS&OULBMLFSGàS,BõFFNBTDIJOFOCFOVU[UXFSEFO%JFTFT
1SPEVLUTPMMUFXFEFS HJGUJHOPDITDIÊEMJDI TFJO &T
XJSEFNQGPIMFOEFO4BFDP&OULBMLFS[VCFOVU[FO
Keinesfalls darf Essig als Entkalker verwendet werden
.
1
Den Tank leeren und mit einer Entkalkerlösung un
d
asser füllen. Dabei sind die Hinweise auf der Verpa
ckung des Entkalkers zu beachten. Dann die Maschi
e einschalten und einen Behälter unter den Ausl
auf
tellen
.
EXTRA: Den Ausgabeschalter Kaffee drücken und
eine Tassenmenge ausgeben.
PREMIUM: Abwarten, bis die Ausgabetasten Kaffee da
u
erhaft aufleuchten, die Ausgabetaste Kaffee drücken
nd eine Tassenmenge ausgeben.
EXTRA und PREMIUM:
ie Maschine ausschalten, die L
ö
ung 10-15 Minuten einwirken lassen. Die Vorgänge
und
wiederholen, bis der Tank leer ist.
Den Tank spülen und mit frischem Trinkwasser auffü
l
len, diesen wieder einsetzen und einen Behälter unter
den Auslauf stellen. Den Drehknopf Dampf öffnen
nd den Ausgabeschalter/die Ausgabetaste Kaffee
rücken, bis der Tank zu 2/3 geleert ist. Dann den
Drehknopf wieder schließen
.
Abwarten, bis die Maschine wieder aufheizt, den Dre
h
nopf Dampf öffnen und den Ausgabeschalter/die
Ausgabetaste Kaffee drücken, bis der Tank geleert ist.
PANNARELLO (optional)
Der Pannarello kann separat beim Händler Ihres Vertrau-
ens gekauft werden.
it dem Pannarello können köstliche Cappuccinos
zubereitet werden. Auf die Benutzung des Pannarel
lo muss die Maschine gemäß der Beschreibungen in
en entsprechenden Abschnitten für die Ausgabe
von heißem Wasser und Dampf vorbereitet werden.
Für die Zubereitung eines Cappuccino wird der Pan
arello in die Milch getaucht und es werden leicht
kreisende Bewegungen ausgeführt, um die Milch
leichmäßig zu erwärmen
.
Der Pannarello sollte einmal wöchentlich auseinander
gebaut und vollständig gereinigt werden.
s sollte stets sichergestellt werden, dass die Stro
m
versorgung abgenommen wurde und die Maschine
abgekühlt ist
.
Es wird empfohlen, den Tank täglich zu spülen.
Der Behälter für die verbrauchten Pads sollte alle
zwei bis drei Tage oder nach der Ausgabe von 10
Tassen Kaffee geleert und gereinigt werden. Für
die Reinigung sollten keine Lösungsmittel, Alkohol
oder aggressive Substanzen verwendet werden. Die
Bestandteile der Maschine dürfen nicht im Ofen
getrocknet werden. Die Bestandteile (mit Ausnahme der elektrischen Teile) mit kaltem/lauwarmem
Wasser und nicht scheuernden Tüchern/Schwämmen reinigen.
REINIGUNG DAMPF-/HEISSWASSERDÜSE
Nach der Benutzung der Dampf-/Heißwasse
r
düse für einige Sekunden Dampf ausströmen
lassen. Die Düse nach jeder Benutzung von a
u
en mit einem feuchten Tuch reinigen.
REINIGUNG KAFFEEAUSLAUF
Für beide Modelle einmal wöchentlich den Vor-
angAUSGABE KAFFEE
usführen, ohne einen
Pad einzulegen
.
REINIGUNG PAD-BEHÄLTER
Den Behälter für
verbrauchte Pads h
e
ausnehmen und den
T
assenabstellrost en
t
ernen
.
Den oberen Behälter
erausnehmen, um die
verbrauchten Pads zu
entnehmen und um
die Abtropfschale zu
entleeren. Beide Teile
waschen und trocknen,
evor sie wieder eing
e
setzt werden
.
Es sollte regelmäßig überprüft werden, ob der PadBehälter voll ist, um Betriebsstörungen und Schäden an der Maschine zu vermeiden.
Page 32

DE
LÖSUNGEN FÜR DIE HÄUFIGSTEN PROBLEME
TECHNISCHE EIGENSCHAFTEN
Aufgetretenes Problem Mögliche Ursachen Abhilfe
Die Maschine schaltet sich nicht ein .
EXTRA:
Kontrolllampe aus, nachdem
der Hauptschalter gedrückt und einige
Minuten abgewartet wurde.
PREMIUM:
Die Kontrolllampen und
blinken nicht.
» Die Maschine ist nicht an das
Stromnetz angeschlossen.
» Die Maschine an das Stromnetz anschließen.
» Wenden Sie sich an eine Kundendienststelle
Die Maschine braucht sehr viel Zeit zum
Aufheizen.
» Das Gerät weist umfassende
Kalkablagerungen auf
» Das Gerät entkalken.
Die Pumpe ist sehr laut.
» Wasser im Tank fehlt.
» Der Tank wurde gefüllt, ohne
die Entlüftung des Wassersystem vorzunehmen.
» Mit frischem Trinkwasser auffüllen.
» Die Entlüftung des Wassersystems vorneh-
men (siehe Abschnitt Entlüftung Wassersystem).
Der Ladehebel erreicht die Ausgabeposition nicht.
» Behälter für verbrauchte
kapseln voll.
» Kaffeekapseln falsch eingelegt.
» Den Behälter für verbrauchte Kapseln leeren.
» Die Vorgänge wiederholen: Hebel in Ruhepositi-
on, Hebel in Ausgabeposition. Ist dies nicht ausreichend, so muss die Kaffeekapsel von Hand aus
dem Rohr genommen werden. Dabei muss die
Maschine vom Stromnetz abgenommen werden.
Der Kaffee ist kalt.
» EXTRA: Die Kontrolllampe war
nicht eingeschaltet, als der Ausgabeschalter Kaffee gedrückt wurde.
» Abwarten, bis die Kontrolllampe aufleuchtet.
Der Kaffee sprudelt zu schnell heraus, es
wird kein cremiger Kaffee ausgegeben.
» Kaffeekapsel wurde bereits
verwendet.
» Den Hebel in die Ruheposition zurückstellen
und eine neue Kaffeekapsel einlegen.
Der Kaffee wird nicht ausgegeben und aus
dem Kapseleinwurffach tritt Dampf aus.
» Der Ladehebel wurde nicht in
die Ausgabeposition gestellt.
» Den Ladehebel in die Ausgabeposition
stellen.
Der Kaffee läuft nicht oder tropfenweise
heraus.
» Auslauf verstopft.
» Wassersystem leer
» Den Reinigungszyklus des Kaffeeauslaufs
vornehmen (siehe PFLEGE UND REINIGUNG).
» Die Entlüftung des Wassersystems vorneh-
men (siehe Abschnitt Entlüftung Wassersystem).
Die Kaffeekapseln sind nach der Benutzung nur auf der oberen Folie perforiert.
» Wassersystem leer. » Die Entlüftung des Wassersystems vorneh-
men (siehe Abschnitt Entlüftung Wassersystem).
Keine Ausgabe von heißem Wasser oder
Dampf.
» Dampfdüse verstopft.
» Die Auslaufdüse mit einer Nadel reinigen (die Ma-
schine muss ausgeschaltet und der Drehknopf für
die Dampf-/Heißwasserausgabe geschlossen sein).
Es bildet sich kein Schaum auf der Milch. » Die Milch ist nicht geeignet.
» Die Milch ist zu heiß.
»
EXTRA:
Die Kontrolllampe
war nicht eingeschaltet, als
Dampf ausgegeben wurde.
» Frische, teilentrahmte Milch verwenden.
» Milch mit Kühlschrank-Temperatur verwen-
den.
»
EXTRA:
Die Taste gedrückt halten, bis die
Kontrolllampe aufleuchtet.
· Nennspannung - Nennleistung - Stromversorgung:
Siehe Typenschild auf dem Gerät
· Abmessungen: Höhe 305 mm Breite 235 mm Tiefe 330 mm
· Gewicht: ca. 5 kg
· Wassertank: ca. 1 Liter - herausnehmbar
· Für das Gehäuse verwendete Materialien: Thermoplastisches Material
· Länge Kabel: 1,2 m
· Bedienfeld: Auf der Oberseite
· Durchlauferhitzer: Rostfreier Edelstahl
· Sicherheitsvorrichtungen: Sicherheitsventil Durchlauferhitzerdruck
· Thermosicherung (Version EXTRA und PREMIUM)
· Sicherheitsthermostat ( Version PREMIUM)
Bei Störungen, die nicht in der oben aufgeführten Tabelle behandelt werden, oder in Fällen, in denen die empfohlenen Vorgangsweisen das
Problem nicht beheben, wenden Sie sich bitte an eine Kundendienststelle von Saeco.
2006/42 CE - 2004/108 CE - 2006/95 CE
Page 33

DE
SICHERHEIT
Sachgemäßer Gebrauch:
ie Kaffeemaschine ist ausschließlich für den Betrieb in Haushalten vorgesehen. Die Anbringung technischer Änderungen ist unter
sagt. Jeder unsachgemäßer Gebrauch ist wegen der damit verbundenen Risiken verboten! Die Maschine ist nicht dazu bestimmt,
on Personen (einschließlich Kindern) mit eingeschränkten körperlichen oder geistigen Fähigkeiten oder einer Beeinträchtigung
er Sinnesorgane bzw. von Personen ohne ausreichende Erfahrung oder Kompetenz verwendet zu werden, es sei denn, sie werden
on einer Person überwacht, die für ihre Sicherheit verantwortlich ist oder sie werden im Gebrauch der Maschine geschult.
Standort:
ie Kaffeemaschine sollte an einem sicheren Ort aufgestellt werden, an dem nicht die Gefahr des Umkippens oder der Verletzung
von Personen besteht. Die Maschine sollte Temperaturen von unter 0° nicht ausgesetzt werden, da die Maschine durch gefriere
n
es Wasser beschädigt werden könnte. Die Kaffeemaschine darf nicht im Freien betrieben werden. Die Aufstellung der Maschine
uf heißen Oberflächen und/oder in der Nähe von offenem Feuer vermeiden
.
Stromversorgung:
ie Kaffeemaschine darf ausschließlich an eine geeignete Steckdose angeschlossen werden. Die Spannung muss mit derjenigen
bereinstimmen, die auf dem Typenschild der Maschine angegeben ist
.
Netzkabel:
Die Kaffeemaschine darf keinesfalls mit defektem Netzkabel betrieben werden. Bei Schäden am Netzkabel muss dieses durch ein geei
g
netes und gleichwertiges Kabel mit den gleichen Eigenschaften, wie das mit der Maschine gelieferte Kabel ersetzt werden. Das Netzkabel
eemaschine darf nicht am Kabel getragen oder gezogen werden. Der Stecker darf nicht durch Ziehen am Kabel herausgezogen werden.
Er sollte nicht mit nassen Händen berührt werden. Der freie Fall des Netzkabels von Tischen oder Regalen sollte vermieden werden.
Gefahr des Stromschlags:
ie unter Strom stehenden Teile dürfen keinesfalls mit Wasser in Berührung kommen.
Schutz anderer Personen:
inder beaufsichtigen, damit sie nicht mit dem Gerät spielen. Kinder können die Gefahrensituationen, die durch Haushaltsgeräte
ntstehen können, nicht abschätzen. Die für die Verpackung der Maschine benutzten Materialien sollten nicht in Reichweite von
indern aufbewahrt werden
.
Verbrennungsgefahr:
en Heißwasser- oder Dampfstrahl keinesfalls auf sich selbst oder auf andere Personen richten. Zu Beginn der Ausgabe können
Spritzer mit heißem Wasser auftreten. Die Dampf-/Heißwasserdüse kann hohe Temperaturen erreichen: Direkte Berührung ver
eiden. Nur am entsprechenden Griff anfassen
.
Reinigung:
evor die Maschine gereinigt wird, muss der Stecker von der Steckdose abgenommen werden. Darüber hinaus muss abgewartet
erden, bis die Maschine abgekühlt ist. Die Maschine keinesfalls in Wasser tauchen! Der Versuch von Eingriffen im Inneren der
aschine ist strengstens verboten. Das im Tank enthaltene Wasser nicht für Lebensmittelzwecke verwenden
.
Aufbewahrung der Maschine:
Wird die Maschine für längere Zeit nicht benutzt, so ist der Stecker aus der Steckdose zu ziehen und die Maschine sollte an einem
rockenen Ort für Kinder unzugänglich aufbewahrt werden. Vor Staub und Schmutz schützen
.
Reparaturen/Pflege:
Die Maschine bei Störungen, Defekten oder dem Verdacht auf Defekte nach einem Sturz nicht verwenden und unverzüglich
den Netzstecker ziehen. Eine defekte Maschine keinesfalls in Betrieb setzen. Eingriffe und Reparaturen dürfen ausschließlich von
utorisierten Kundendienststellen Saeco vorgenommen werden. Im Falle von nicht fachgerecht ausgeführten Eingriffen wird jede
Haftung für eventuelle Schäden abgelehnt
.
Wassertank:
Den Wassertank ausschließlich mit frischem Trinkwasser ohne Kohlensäure füllen. Die Maschine darf nicht in Betrieb gesetzt we
r
den, wenn das Wasser nicht mindestens den im Tank gekennzeichneten Mindestfüllstand übersteigt
.
Kapselfach:
In das Padfach dürfen ausschließlich Kaffeekapseln der Marke Lavazza A MODO MIO eingelegt werden. Keine Gegenstände oder
die Finger einführen. Die Kapseln dürfen nur ein Mal verwendet werden
.
Entsorgung der Maschine am Ende des Betriebslebens:
BENUTZERINFORMATIONEN: Gemäß Art. 13 der ital. Gesetzesverordnung Nr. 151 vom 25. Juli 2005 “Umsetzung der Richtlinien 2002/95
/
EG, 2002/96/EG und 2003/108/EG, hinsichtlich der Verringerung des Einsatzes von Gefahrenstoffen in elektrischen und elektronischen
Geräten sowie zur Abfallentsorgung”. Das Symbol mit dem durchgestrichenen Mülleimer auf dem Gerät oder auf seiner Verpackung
gibt an, dass das Produkt zum Ende seines Betriebslebens getrennt vom Hausmüll entsorgt werden muss. Der Benutzer muss das au
er Betrieb genommene Gerät aus diesem Grunde entsprechenden Entsorgungsstellen für Elektro- und Elektronikmüll zuführen oder
eim Kauf einer neuen, gleichwertigen Vorrichtung zurückgeben. Die geeignete Entsorgung über die Wertstofftrennung und die
uführung der außer Betrieb genommenen Maschine in das Recycling, die Aufbereitung und die umweltgerechte Entsorgung tragen
zur Vermeidung von möglichen negativen Auswirkungen auf die Umwelt und die menschliche Gesundheit bei und ermöglichen die
iederverwendung der Materialien, aus denen die Maschine besteht. Die ungesetzliche Entsorgung des Produkts durch den Besitzer
zieht die Verhängung von Verwaltungsstrafen gemäß der geltenden Gesetzgebung nach sich.
Page 34

ES
¡Enhorabuena!
Estimado cliente, le felicitamos por haber comprado esta máquina de café exprés Saeco Lavazza A MODO MIO y le agradecemos por la confianza depositada en nosotros.
Antes de poner en funcionamiento la máquina se aconseja leer atentamente
las instrucciones de uso que explican cómo utilizarla, limpiarla y mantenerla
en perfectas condiciones de eficiencia.
¡Le deseamos que pueda preparar excelentes cafés gracias a Saeco y a Lavazza!
Page 35

ES
EXTRA PREMIUM
nterruptor
e sum
i
nistro dosis
ibre de caf
é
Piloto
minoso de
ncendido
tón
de vapor
lanca
de carga
Compartimento
e introducción
de pastillas de ca
fé
Tubo de vapor/
agua calient
e
lida de c
afé
epósito
e agu
a
general
Figura
B
able de alimentación
Mando
e suministro
e vapor
agua calient
e
Rejilla
poyatazas
ajón pastillas
e café us
ada
s
COMPONENTES DE LA MÁQUINA
Botón de
suministr
o
e café dosi
ficad
o
tón de
ministro
dosis libre
e café
tón
de vapo
r
sa para transportar
la máquina
Tapa
el depósito
e agua
igura
A
Page 36

ES
PREDISPOSICIÓN DE LA MÁQUINA
EXTRA: se enciende el piloto luminoso de encen
ido
.
PREMIUM: todos los botones parpadean
.
El uso de un filtro de agua (accesorio opcional) mejora la calidad del agua y prolonga la vida útil del
aparato. Aconsejamos utilizar el filtro Intenza Brita
de Saeco. Para colocar el filtro seguir las instrucciones que encontrará junto al accesorio.
CARGA DEL CIRCUITO HÍDRICO
Al realizar la primera puesta en marcha de la
máquina, después de un período de inactividad prolongado o en caso de agotamiento
total del agua en el depósito, se debe realizar
la operación de carga del circuito hídrico como
se indica a continuación.
1
olocar un recipiente debajo del tubo de vapor
/
agua caliente y abrir el mando girándolo en el
sentido contrario a las agujas del reloj
.
EXTRA: pulsar el interruptor de suministro de café.
PREMIUM:
pulsar el botón de suministro dosis li
re de café
.
EXTRA PREMIUM
EXTRA: esperar a que desde el tubo de vapor /agua
caliente salga un chorro de agua regular, pulsar
uevamente el interruptor de suministro de café
cerrar el mando. Cuando el interruptor se ilu-
ine con una luz fija, la máquina estará lista
.
PREMIUM: esperar a que desde el tubo de vapor/
agua caliente salga un chorro de agua regular.
El suministro finalizará automáticamente y se
niciará el calentamiento.
Cuando los dos botones de suministro de café
permanezcan iluminados, la máquina estará lista.
etirar el recipiente utilizado.
Se declina toda responsabilidad por posibles
daños en caso de:
t VTPJOEFCJEPZOPDPOGPSNFDPOMBT
instrucciones de uso;
t SFQBSBDJPOFTSFBMJ[BEBTFODFOUSPTEF
asistencia no autorizados;
t BMUFSBDJØOEFMDBCMFEFBMJNFOUBDJØO
t BMUFSBDJØOEFDVBMRVJFSDPNQPOFOUFEFMB
máquina;
t VUJMJ[BDJØOEFSFQVFTUPTZBDDFTPSJPTOP
originales;
t EFTDBMDJmDBDJØOEFMBNÈRVJOBOPSFBMJ[BEB
t BMNBDFOBNJFOUPFOMPDBMFTDPO
UFNQFSBUVSBTQPSEFCBKPEF¡$
t VUJMJ[BDJØOEFQBTUJMMBTEFDBGÏEJGFSFOUFTB
aquellas indicadas.
En dichos casos la garantía pierde su validez.
PUESTA EN FUNCIONAMIENTO DE LA MÁQUINA
Colocar la máquina sobre una superficie pl
a
na y estable, lejos del agua y de las fuentes de
calor. Desconectar el enchufe de la toma de al
i
mentación, si está conectado. Levantar la m
á
uina cogiéndola, siempre, por el asa situada
n la parte superior de la misma. (Véase COM -
PONENTES DE LA MÁQUINA
- Figura A).
La garantía no cubre los daños ocasionados a la
máquina por inobservancia de estas instrucciones
.
evantar y extraer la tapa del depósito de agua,
espués quitar el depósito.
lenar el depósito de agua hasta el nivel MÁX. i
n
dicado, usando sólo agua fresca potable sin gas
.
l agua caliente y otros líquidos pueden estropear el
epósito. No poner en funcionamiento la máquina
in agua: asegurarse de que haya suficiente agua
n el depósito
.
Conectar el cable de alimentación y pulsar el inte
rruptor general llevándolo hacia la posición
. (Vé
a
e COMPONENTES DE LA MÁQUINA - Figura B)
.
Page 37

ES
PREPARACIÓN DEL CAFÉ
SUMINISTRO DE DOSIS LIBRE DE CAFÉ
La máquina está preparada
cuando la palanca está en
p
osición de reposo (posición
acia atrás)
y:
EXTRA: el botón de suministr
o
e café
permanece iluminado
PREMIUM: los botones de s
u
ministro de café perman
e
cen, ambos, iluminados.
En el compartimento pastillas de café, deben ha
erse colocado exclusivamente pastillas Lavazza A
MODO MIO. No introducir los dedos u otro objeto.
Las pastillas de café monodosis suministran un solo
afé/producto. NO volver a utilizar las pastillas de café
ras su utilización. La introducción de 2 o más pastillas
e café causa el malfuncionamiento de la máquina.
olocar la taza de café debajo de la salida de café.
evantar la tapa del comparti
ento de introducción de las
pastillas de café y colocar una
pastilla y después volver a cerrarla
.
Tirar de la palanca
e carga hacia de
ante hasta que se
bloquee
.
4
ulsar el interruptor/botón de suministro de café
y esperar el suministro de la cantidad deseada.
EXTRA
PREMIUM
Durante el suministro la palanca no debe estar en
a posición de reposo
.
5
sar nuevamente
interruptor/botón
para detener el sum
i
istro y volver a llevar
a palanca a la pos
i
ión de reposo.
La rejilla apoyatazas puede girar 180º para permitir
el uso de tazas y recipientes de distintos tamaños.
Para realizar las operaciones enunciadas anterior
mente, el mando de vapor/agua debe estar cerrado.
SUMINISTRO DE CAFÉ DOSIFICADO
SÓLO PARA EL MODELO PREMIUM
La máquina ya está programada para suministrar
una dosis de café de 30 cc.
Realizar los pasos 1, 2, 3 del aparta
do
SUMINISTRO DE DOSIS LIBRE DE CAFÉ
Pulsar el botón de suministro de café dosific
a
o. La máquina terminará automáticamente e
l
uministro cuando se haya alcanzado la dosis
programada de café. Volver a llevar la palanca
acia la posición de reposo.
El suministro de café se puede interrumpir cada vez
que se desee volviendo a pulsar el botón de suministro de café dosificado.
PROGRAMACIÓN DE LA DOSIS DE CAFÉ
SÓLO PARA EL MODELO PREMIUM
Realizar los pasos 1, 2, 3 del apartad
o
SUMINISTRO DE DOSIS LIBRE DE CAFÉ
Pulsar y mantener pulsado el botón de sumini
s
ro de café dosificado y esperar a que se sumini
s
re la cantidad deseada de café a programar.
5
Soltar el botón de suministro de café dosific
ado
volver a llevar la palanca hacia la posición de
La cantidad programada de café suministrado (mínimo 25 cc – máximo 200 cc) puede modificarse repitiendo la programación.
Page 38

ES
USOS DEL TUBO DE VAPOR/AGUA CALIENTE
¡Riesgo de quemaduras! Al empezar el suminis
tro se pueden producir pequeñas salpicaduras
e agua caliente. El tubo de vapor/agua caliente
puede alcanzar temperaturas elevadas: no tocar
o directamente con las manos. El tubo de vapor
/
ua caliente no debe estar dirigido hacia perso
nas o animales. Asegurarse siempre de que haya
suficiente agua en el depósito
.
SUMINISTRO DE AGUA CALIENTE
uando la máquina está lista, colocar un rec
i
piente vacío debajo del tubo de vapor/agua c
a
iente y abrir el mando.
EXTRA:pulsar el interruptor de suministro de café,
el tubo vapor/agua caliente saldrá un chorro
de agua caliente
.
PREMIUM: pulsar el botón de suministro dosis li
re de café, del tubo vapor/agua caliente saldrá
n chorro de agua caliente
.
EXTRA PREMIUM
EXTRA: volver a pulsar el interruptor de café para
terminar el suministro y cerrar el mando de va
or/agua caliente.
PREMIUM: volver a pulsar el botón dosis libre de
café para terminar el suministro y cerrar el man
o de vapor/agua caliente
.
PREMIUM: con este procedimiento se pueden sumi-
nistrar como máximo 180 cc de agua.
SUMINISTRO DE VAPOR Y PREPARACIÓN
DEL CAPUCHINO
EXTRA: pulsar y mantener pulsado el botón de
vapor. Se apagan todos los pilotos luminosos.
Cuando el botón de vapor permanece ilumina
o, la máquina está lista. Sólo ahora se puede
soltar el botón
.
Si el vapor se agota antes de obtener el resultado
deseado, repetir la operación arriba descrita.
PREMIUM: pulsar el botón de vapor y soltarlo. El
botón iniciará un parpadeo. Cuando se manten
a encendido, la máquina estará lista
.
EXTRA PREMIUM
Colocar un recipiente vacío debajo del tubo de
vapor/agua caliente y abrir durante algunos ins
tantes el mando para dejar salir el agua residua
l
hasta obtener sólo vapor. Cerrar el mando y qu
i
tar el recipiente
.
Colocar el recipiente con leche de manera que
el tubo de vapor/agua esté cerca del fondo
y
abrir el mando. La máquina empezará a sum
i
istrar el vapor. Mover lentamente el recipiente
acia abajo para obtener una espuma de leche
compacta y cremosa. Se aconseja que la leche
o supere un tercio del volumen del recipiente
.
Logrado el resultado deseado, cerrar el mando
retirar el recipiente.
Sólo para el modelo PREMIUM,pulsar nuevamente e
l
otón de vapor, los tres botones de la máquina
empezarán a parpadear
.
Antes de realizar otras operaciones, cargar el
circuito hídrico (véase la sección de carga del
circuito hídrico).
Se aconseja usar leche fresca parcialmente desnatada y a temperatura de nevera en la cantidad
deseada para obtener una crema compacta.
Page 39

ES
MANTENIMIENTO Y LIMPIEZA
DESCALCIFICACIÓN
La formación de cal se produce con el uso del
aparato; el ciclo de descalcificación debe efec
uarse regularmente cada 3-4 meses y/o cuando
e observa una reducción del volumen de agua
.
1BSBSFBMJ[BSMBEFTDBMDJmDBDJØOTFQVFEFVTBS
VOQSPEVDUPEFTDBMDJmDBEPSQBSBNÈRVJOBTEF
DBGÏ RVF OP TFBOJUØYJDPOJ OPDJWP HFOFSBM-
mente de venta en los comercios. Se aconseja
FMVTPEFMQSPEVDUPEFTDBMDJmDBEPS4BFDP
No utilizar bajo ningún concepto vinagre como
p
roducto descalcificador.
V
aciar el depósito y llenarlo con una solución
escalcificante y agua como se especifica en el
nvase del producto descalcificador, encender
la máquina y poner un recipiente debajo de la
alida de café.
EXTRA: pulsar el interruptor de café y suministrar
una taza
.
PREMIUM: esperar a que los botones de café per
manezcan iluminados para pulsar el botón de
osis libre de café y suministrar una taza.
EXTRA y PREMIUM:
pagar la máquina, dejar repo
ar 10-15 minutos y repetir las operaciones
h
asta que el depósito esté vacío.
avar y llenar el depósito con agua fresca potable,
colocarlo de nuevo y poner un recipiente deb
a
j
o de la salida de café. Abrir el mando de vapor,
ulsar el interruptor / botón café hasta vaciar 2/3
el depósito, después volver a cerrar el mando.
5
Esperar a que se caliente la máquina, abrir e
l
mando de vapor y pulsar el interruptor/botón
afé hasta vaciar el depósito
.
PANNARELLO (opcional)
El pannarello puede comprarse por separado en un
establecimiento habitual.
pannarello permite preparar cremosos capu
hinos. Para usar el pannarello se debe preparar
a máquina para el suministro de agua caliente
y vapor como se ha descrito en los apartados
orrespondientes. Si se desea preparar un capu
hino, sumergir el pannarello en la leche y re
a
izar ligeros movimientos circulares para que el
lentamiento de la leche sea más uniforme
.
Desmontar y lavar completamente el pannarello
una vez a la semana.
Asegurarse siempre de que la alimentación eléctrica
esté conectada y esperar a que se enfríe la máquina.
Se aconseja enjuagar todos los días el depósito. Vaciar
y limpiar cada dos / tres días o después de 10 cafés suministrados el cajón de pastillas de café usadas. No utilizar disolventes, alcohol o sustancias agresivas u hornos para el secado de los componentes de la máquina.
Lavar los componentes (excluidos aquellos eléctricos)
con agua fría/tibia y paños/esponjas no abrasivas.
LIMPIEZA DEL TUBO DE VAPOR/AGUA CALIENTE
te, hacer vapor en vacío durante algunos se
gundos. Limpiar externamente el tubo con un
año húmedo.
LIMPIEZA DE LA SALIDA DE CAFÉ
Realizar semanalmente, para ambos modelos, e
l
rocedimiento SUMINISTRO DE CAFÉ / SUMI-
NISTRO DE DOSIS LIBRE DE CAFÉ
sin haber
colocado ninguna pastilla de café.
LIMPIEZA DEL CAJÓN DE PASTILLAS DE CAFÉ
Extraer el cajón de pastillas de café usadas y qu
i
tar la rejilla apoyatazas
.
Quitar el cajón superior para extraer las pastillas
de café usadas y para vaciar la bandeja de g
o
teo. Lavar y secar ambas partes antes de volver a
ntarlas
.
Inspeccionar periódicamente que el cajón de pastillas de café no esté lleno para evitar malfuncionamientos y daños a la máquina.
Page 40

ES
SOLUCIONES A LOS PROBLEMAS MÁS COMUNES
CARACTERÍSTICAS TÉCNICAS
Problema detectado Posibles causas Solución
La máquina no se enciende.
EXTRA
: piloto luminoso apagado después de haber pulsado el interruptor
general y esperado algunos minutos.
PREMIUM
: los pilotos luminosos y
no parpadean.
» Máquina no conectada a la red
eléctrica.
» Conectar la máquina a la red eléctrica.
» Dirigirse al centro de asistencia.
La máquina emplea mucho tiempo
para calentarse.
» El aparato tiene mucha cal. » Descalcificar el aparato.
La bomba es muy ruidosa. » Falta agua en el depósito.
» El depósito
se ha llenado sin rea-
lizar el ciclo de carga del circuito
hídrico.
» Llenar con agua fresca potable.
» Realizar el ciclo de carga del circuito hídri-
co (véase sección CARGA DEL CIRCUITO
HÍDRICO).
La palanca de carga no alcanza la
posición de suministro.
» El cajón de pastillas de café usadas
está lleno.
» Pastilla de café colocada de forma
incorrecta.
» Vaciar el cajón de pastillas de café usadas.
»
Repetir la secuencia, palanca en posición de
reposo, palanca en posición de suministro; si
no es suficiente, intervenir manualmente para
descargar la pastilla de café del conducto con
la máquina desconectada de la red eléctrica
.
El café sale frío.
»
EXTRA
: el piloto luminoso estaba
apagado cuando ha sido pulsado
el interruptor de suministro de café.
» Esperar a que el piloto luminoso se
encienda.
El café sale muy rápido y no es
cremoso.
» Pastilla de café ya usada. » Volver a colocar la palanca en la posición de
reposo y colocar una pastilla de café nueva.
No se suministra café y sale vapor del compartimento de introducción pastillas de café.
» La palanca de carga no ha sido co-
locada en posición de suministro
.
» Llevar la palanca de carga hacia la posición
de suministro.
El café no sale o sale en gotas. » Salida de café obstruida.
» El circuito hídrico está vacío.
» Realizar el ciclo de lavado salida de café
(véase MANTENIMIENTO Y LIMPIEZA).
» Realizar el ciclo de carga del circuito
hídrico (véase sección carga del circuito
hídrico).
Las pastillas de café, después del uso,
están perforadas sólo en la película
superior.
» El circuito hídrico está vacío. » Realizar el ciclo de carga del circuito
hídrico (véase sección carga del circuito
hídrico).
Ningún suministro de agua caliente o
vapor.
» Tubo de vapor obstruido. » Limpiar la boquilla con una aguja (la má-
quina debe estar apagada y el mando de
suministro de vapor/agua caliente cerrado).
No se forma la crema de la leche. » Leche no adecuada.
» Leche demasiado caliente.
»
EXTRA
: el piloto luminoso estaba
apagado cuando se ha suministrado el vapor.
» Utilizar leche fresca, parcialmente desnatada.
» Usar leche a temperatura de nevera.
»
EXTRA
: mantener pulsado el botón hasta
que se encienda el piloto luminoso.
· Tensión nominal - Potencia nominal – Alimentación:
véase la placa en el aparato
· Dimensiones:
Altura Anchura Profundidad
305 mm 235 mm 330 mm
· Peso: aprox. 5 kg
· Depósito de agua: aprox. 1 litro - Extraíble
· Materiales empleados para la carrocería: termoplástica
· Longitud del cable 1,2 m
· Panel de mandos: en la parte superior
· Caldera: acero inoxidable
· Dispositivos de seguridad: válvulas de seguridad presión caldera
· Termofusible (versión EXTRA y PREMIUM)
· Termostato de seguridad (versión PREMIUM)
Para las averías no mencionadas en la tabla o en caso de que las soluciones indicadas no funcionen, contactar con un centro de asistencia Saeco.
2006/42 CE - 2004/108 CE - 2006/95 CE
Page 41

ES
SEGURIDAD
Destino de uso:
Esta máquina de café ha sido diseñada sólo para uso doméstico. Se prohíbe aportar modificaciones técnicas. ¡Se prohíbe el uso
lícito por los riesgos que éstos conllevan! El aparato no está diseñado para que lo usen personas (incluidos los niños) con reducidas
apacidades físicas, mentales o sensoriales o con experiencia y/o competencias insuficientes, a no ser que lo utilicen bajo la superisión de una persona responsable de su seguridad o que ésta les enseñe a usarlo
.
Ubicación:
Colocar la máquina de café en un lugar seguro, donde nadie pueda volcarla o quedar herido. No colocar la máquina en un
ugar con temperatura inferior a 0 °C porque el hielo podría dañarla. No usar la máquina de café en lugares abiertos. No apoyar
a máquina sobre superficies muy calientes ni cerca de las llamas
.
Alimentación de corriente:
Conectar la máquina de café sólo a una toma de corriente adecuada. La tensión debe corresponder con la indicada en la placa
de la máquina.
Cable de alimentación:
Nunca usar la máquina de café si el cable de alimentación es defectuoso. Si el cable de alimentación está dañado, debe su
s
tituirse por otro idóneo que tenga las mismas características de aquel suministrado con la máquina. Procurar que el cable de
limentación no pase por esquinas o cantos agudos ni por encima de objetos muy calientes. Protegerlo del aceite. No llevar ni
tirar de la máquina agarrándola por el cable. No desenchufar la máquina tirando del cable ni tocar el enchufe con las manos
mojadas. Procurar que el cable de alimentación no cuelgue libremente de mesas o estanterías.
Peligro de electrocución:
No dejar nunca que las partes bajo tensión entren en contacto con el agua.
Protección de otras personas:
antener fuera del alcance de los niños para evitar que jueguen con el aparato. Los niños no se dan cuenta de los peligros relacionados
con el uso indebido de un electrodoméstico. No dejar al alcance de los niños los materiales usados para embalar la máquina.
Peligro de quemaduras:
No dirigir contra sí mismo ni contra los demás el chorro de vapor o de agua caliente. Al empezar el suministro se pueden pr
o
ucir pequeñas salpicaduras de agua caliente. El tubo de vapor/agua caliente puede alcanzar temperaturas elevadas: evitar el
contacto directo con las manos, usar sólo y exclusivamente el mando.
Limpieza:
ntes de limpiar la máquina es indispensable desconectar el enchufe de la toma de alimentación y esperar a que la máquina
e enfríe. ¡No sumergir la máquina en agua! Se prohíbe terminantemente tratar de intervenir en la estructura interna de la
máquina. No utilizar para fines alimenticios el agua presente en el depósito
.
Almacenamiento de la máquina:
Cuando la máquina permanece inutilizada por un período prolongado, desconectar el enchufe de la toma de alimentación
y
lmacenarla en un lugar seco y fuera del alcance de los niños. Protegerla del polvo y de la suciedad.
Reparaciones / Mantenimiento:
En caso de averías, desperfectos o sospecha de desperfectos tras una caída, se recomienda desconectar en seguida la máquina de la toma
de corriente. No poner en funcionamiento una máquina defectuosa. Sólo los Centros de Asistencia Autorizados Saeco pueden realizar
eparaciones a la máquina. En caso de reparaciones realizadas de forma incorrecta, se declina toda responsabilidad por posibles daños.
Depósito de agua:
ntroducir en el depósito sólo agua potable fresca sin gas. No poner en funcionamiento la máquina si el agua no supera por
o menos el nivel mínimo indicado en el depósito
.
Compartimento pastillas de café:
n el compartimento de pastillas de café deben colocarse sólo pastillas de café Lavazza A MODO MIO; no introducir los dedos
o cualquier otro objeto. Las pastillas de café deben usarse una sola vez
.
Eliminación de la máquina al final de su vida útil:
NFORMACIÓN PARA LOS USUARIOS: con arreglo al art. 13 del Decreto Legislativo italiano del 25 de julio de 2005, nº 151 “Apli
cación de las Directivas 2002/95/CE, 2002/96/CE y 2003/108/CE relativas a la reducción del uso de sustancias peligrosas en
paratos eléctricos y electrónicos y a la eliminación de sus residuos”. El símbolo del contenedor tachado presente en el aparato
o en el embalaje indica que este producto, al finalizar su vida útil, debe eliminarse de forma separada de los demás desechos.
or lo tanto, cuando finalice su vida útil el usuario deberá entregar este aparato a un punto de recogida selectiva de residuos
eléctricos y electrónicos para el reciclaje o bien al revendedor en el momento en que se compre un nuevo aparato equivale
n
te, a razón de uno por uno. Una adecuada recogida selectiva y el siguiente envío del aparato para el reciclaje, el tratamiento
la eliminación medioambientalmente compatible contribuyen a evitar posibles consecuencias negativas para el medio
mbiente y la salud pública y favorecen el reciclaje de los materiales que componen el aparato. La eliminación abusiva del
roducto por parte del usuario comporta la aplicación de las sanciones administrativas previstas por la normativa vigente.
Page 42

PT
Parabéns!
Caro Cliente damos-lhe os parabéns por ter escolhido a máquina de café expresso Saeco Lavazza “A MODO MIO” (à minha maneira) e agradecemos-lhe a
confiança que nos deposita.
Antes de colocar a máquina a funcionar, aconselhamos a ler atentamente as
instruções de utilização, onde é explicado o modo de a utilizar, limpar e mantê-la em perfeita eficiência.
Não nos resta mais nada, a não ser desejar-lhe a preparação de vários e óptimos cafés, graças a Saeco e Lavazza!
Page 43

PT
EXTRA PREMIUM
nterruptor
e distribui
ão de dose
livre de ca
fé
Indic
ado
r
uminoso
e Ligaçã
o
tão
e vapo
r
lavanca
e Carregamen
t
Compartimento
e inserção
das pastilha
s
anç
a
de vapor/água
uente
istribuidor
e Café
eservatório
e águ
a
geral
Figura
B
abo de alimentaçã
o
otão
e distribuição
e vapor
água quent
e
rade de apoio
para chávena
s
vet
a
e pastilhas usa
COMPONENTES DA MÁQUINA
tão de
distribuição
e café
oseado
Botão de
istribuição
e dose livre
de ca
fé
t
ão
e vapor
ega
para elevaçã
o
Tampa
o reservatório
e água
Figura A
Page 44

PT
PREDISPOSIÇÃO DA MÁQUINA
EXTRA:acende-se o indic
ado
r luminoso de l
i
gação.
PREMIUM: todos os botões piscam
.
A utilização de um filtro de água (acessório opcional) melhora a qualidade da água e prolonga a
duração do aparelho. Aconselha-se a utilizar o filtro Intenza Brita para Saeco. Para introduzir o filtro
siga a folha de instruções anexa ao acessório.
CARREGAMENTO DO CIRCUITO HIDRÁULICO
Na primeira ligação da máquina, após uma
inutilização prolongada ou em caso de esgotamento completo da água no reservatório,
ÏOFDFTTÈSJP FYFDVUBSBPQFSBÎÍPEFDBSSFHBmento do circuito hidráulico como indicado
BCBJYP
1
ntroduza um recipiente debaixo da lança de va
or/ água quente e abra o botão, rodando-a no
sentido contrário aos ponteiros do relógio.
EXTRA: pressione o interruptor de distribuição
de café.
PREMIUM: pressione o botão de distribuição de
dose livre de café
.
EXTRA PREMIUM
EXTRA: aguarde que saia um jacto regular de água
da lança de vapor/água quente, pressione nov
a
ente o interruptor de distribuição de café e fe
che o botão. Quando o interruptor se encontra ilu
inado com a luz fixa, a máquina está pronta.
PREMIUM:
aguarde que saia um jacto regular de
água da lança de vapor/água quente. A distribuição termina automaticamente e inicia o aqu
e
cimento. Quando os dois botões de café estão
acesos no modo fixo, a máquina está pronta
.
Remova o recipiente utilizado
Não se assume qualquer tipo de responsabilidade por eventuais danos, no caso de:
t VUJMJ[BÎÍPFSSBEBFOÍPDPOGPSNJEBEFDPN
PGVODJPOBNFOUPQSFWJTUP
t SFQBSBÎÜFTOÍPSFBMJ[BEBTFNDFOUSPT
de assistência autorizados;
t BMUFSBÎÍPEPDBCPEFBMJNFOUBÎÍP
t EFUFSJPSBÎÍPEFRVBMRVFSPVUSPDPNQPOFOUF
da máquina;
t VUJMJ[BÎÍPEFQFÎBTTPCSFTTFMFOUFT
e acessórios não originais;
t GBMUBEFEFTDBMDJmDBÎÍP
t BSNB[FOBHFNFNMPDBJTBCBJYPEPT$
t VUJMJ[BÎÍPEFQBTUJMIBTEJGFSFOUFTEBT
indicadas.
Estes casos não estão incluídos na garantia.
ARRANQUE DA MÁQUINA
oloque a máquina sob uma superfície plana e
estável, longe da água e fontes de calor. Desligue a
alimentação eléctrica, se presente. Eleve a máqui
na, utilizando exclusivamente a pega adequada
presente na parte superior. (veja COMPONEN-
TES DA MÁQUINA
– Figura A). Os danos cau
ados na máquina devido ao não cumprimento
estas indicações, não se encontram cobertos
pela garantia
.
eve e retire a tampa do reservatório de água e
próprio reservatório.
ncha o reservatório de água até ao nível MÁX.
indicado, utilizando apenas água fresca potável
sem gás
.
Água quente e também outros líquidos podem da
ificar o reservatório. Não coloque a máquina em
uncionamento sem água: assegure-se de que há
ua suficiente no interior do reservatório
.
ntroduza o cabo de alimentação e pressione
o interruptor geral, colocando-o na posição
vejaCOMPONENTES DA MÁQUINA - Figura B
).
Page 45

PT
PREPARAÇÃO DE CAFÉ
DISTRIBUIÇÃO DE DOSE LIVRE DE CAFÉ
A máquina está pronta
quando a alavanca se e
n
contra na posição de repo
u
so (posição posterior) e
:
EXTRA: o interruptor de distr
i
uição de café está ligado
no modo fixo
.
PREMIUM:os botões de café
estão ligados no modo fixo
.
No compartimento das pastilhas devem ser coloc
a
as exclusivamente pastilhas Lavazza “A MODO MIO”.
Não introduza os dedos ou qualquer outro objecto
.
As p
astilhas monodose estão preparadas para di
s
ribuir um só café/produto. NÃO reutilize as pastilhas
depois de terem sido usadas. A introdução de 2 ou mais
p
astilhas provoca o mau funcionamento da máquina.
sicione a chávena debaixo do distribuidor de café
.
eve a portinhola do comparti
ento de inserção das pastilhas,
introduza uma pastilha e feche-a
vamente
.
oloque a alavanca
e carregamento
ara a frente, até ao
onto de bloqueio
.
Pressione o interruptor/botão de distribuição de café
aguarde a distribuição da quantidade desejada
.
EXTRA
PREMIUM
Durante a distribuição não coloque a alavanca na
p
osição de repouso.
ressione novamente
interruptor/ botão
para parar a distribu
i
ão e coloque nov
a
ente a alavanca na
posição de repouso
.
A grade de apoios para chávenas pode rodar 180º
para utilizar chávenas e recipientes de várias dimensões.
Para efectuar as operações acima indicadas, o bo
ão de vapor/água deve estar fechado
.
DISTRIBUIÇÃO DE CAFÉ DOSEADO
APENAS PARA O MODELO PREMIUM
A máquina já se encontra preparada para distribuir
uma dose de café de 30 cc.
Efectue os passos 1, 2 e 3 do parágrafo
DISTRIBUIÇÃO DE DOSE LIVRE DE CAFÉ
ressione o botão de distribuição de café doseado.
máquina termina automaticamente a distribuição
ssim que atingir a dose de café programada. Colo
ue novamente a alavanca na posição de repouso.
É possível interromper a distribuição de café a qualquer momento pressionando de novo o botão de
distribuição de café doseado.
PROGRAMAÇÃO DA DOSE DE CAFÉ
APENAS PARA O MODELO PREMIUM
Efectue os passos 1, 2 e 3 do parágrafo
DISTRIBUIÇÃO DE DOSE LIVRE DE CAFÉ
ressione e mantenha pressionado o botão de dis
tribuição de café doseado e aguarde a distribuição
da quantidade desejada de café a ser programada.
Liberte o botão de distribuição de café doseado e co
loque novamente a alavanca na posição de repouso
.
A quantidade programada de café distribuído (mínimo 25 cc – máximo 200 cc) pode ser modificada,
repetindo a programação.
Page 46

PT
UTILIZAÇÃO DA LANÇA DE VAPOR/ÁGUA QUENTE
Perigo de queimaduras! Durante o início da distr
i
uição podem-se verificar breves salpicos de água
uente. A lança de vapor/água quente pode atingir
temperaturas elevadas: evite tocá-la directamente
com as mãos. A lança de vapor/água quente não
eve estar direccionada a pessoas ou animais.
Certifique-se de que haja água suficiente no reser
tóri
o.
DISTRIBUIÇÃO DE ÁGUA QUENTE
uando a máquina estiver pronta coloque um
recipiente vazio debaixo da lança de vapor/água
uente e abra o botão
.
EXTRA:pressione o interruptor de distribuição de
café, da lança de vapor/água quente irá sair um
j
acto de água quente
.
PREMIUM: pressione o botão de distribuição de
dose livre de café, da lança de vapor/água quente irá sair um jacto de água quente.
EXTRA PREMIUM
EXTRA: pressione novamente o interruptor de café
ara terminar a distribuição e fechar o botão de
vapor/água quente
.
PREMIUM: pressione novamente o botão de dose
ivre de café para terminar a distribuição e feche
o botão de vapor/água quente
.
PREMIUM: através deste procedimento pode-se dis-
tribuir no máximo 180 cc de água.
DISTRIBUIÇÃO DE VAPOR E PREPARAÇÃO
DE CAPPUCCINO
EXTRA: pressione e mantenha pressionado o
bo
tão de vapor. Desligam-se todas as sinalizações
uminosas. Quando o botão de vapor se enco
n
tra ligado no modo fixo a máquina está pronta.
Só agora é que deve libertar o botão
Se o vapor se esgota antes do resultado desejado,
repita a operação descrita acima.
PREMIUM: pressione o botão de vapor que iniciará
piscar. Quando o botão de vapor se encontra
ligado no modo fixo a máquina está pronta
.
EXTRA PREMIUM
Introduza um recipiente vazio debaixo da lança
de vapor/água quente e abra durante alguns
instantes o botão para que a restante água saia,
até que saia apenas vapor. Feche o botão e retire
o recipiente
.
Posicione o recipiente com o leite de modo a
que a lança de vapor/água quente esteja per
to do fundo e abra o botão. A máquina inicia a
distribuir o vapor. Mova lentamente o recipiente
ara baixo, de modo a obter uma espuma de
eite compacta e cremosa. Recomenda-se que
o leite não ultrapasse um terço do volume do
ecipiente.
lcançado o resultado desejado, feche o
otão e retire o recipiente.
Apenas para o modelo PREMIUM
pressione novamen
te o botão de vapor, piscam três botões na má
quina
.
"OUFT EF FGFDUVBSPVUSBTPQFSBÎÜFT DBSSFHVF
o circuito hidráulico (veja secção de carregamento do circuito hidráulico).
Aconselha-se a utilização de leite fresco parcialmente desnatado e à temperatura de frigorífico
na quantidade desejada para obter uma espuma
compacta.
Page 47

PT
MANUTENÇÃO E LIMPEZA
DESCALCIFICAÇÃO
A formação de calcário é uma consequência no
r
mal da utilização do aparelho; é preciso realizar
a descalcificação a cada 3-4 meses de utilização
a máquina e/ou quando houver uma redução
a capacidade da água.
1BSBFGFDUVBS BEFTDBMDJmDBÎÍPQPEFTFVUJMJ[BSVNQSPEVUPEFTDBMDJmDBOUFQBSBNÈRVJOBT
EFDBGÏ OÍPUØYJDP FPVOPDJWPOPSNBMNFOUF
disponível no comércio. Aconselha-se a utili-
[BSPEFTDBMDJmDBOUFEB4BFDP
Nunca utilize o vinagre como descalcificante.
1
Esvazie o reservatório e encha-o novamente
om uma solução de descalcificante e água,
omo indicado na embalagem do produto de
s
alcificante, ligue a máquina e coloque um rec
i
iente debaixo do distribuidor.
EXTRA:pressione o interruptor de café e distribua
ma cháven
a.
PREMIUM: aguarde que os botões de café estejam
ligados no modo fixo, pressione o botão de dose
livre de café e distri
bua uma
cháven
a.
EXTRA e PREMIUM:
esligue a máquina, deixe r
e
pousar durante 10-15 minutos e repita as op
e
rações até que o reservatório esteja vazio.
Lave e encha novamente o reservatório com água
resca potável, posicione-o no local adequado e
oloque um recipiente debaixo do distribuidor.
Abra o botão de vapor, pressione o interruptor/
otão de café até esvaziar 2/3 do reservatório e
eche novamente o bot
ão.
Aguarde o aquecimento da máquina, abra o bo
ão de vapor e pressione o interruptor/botão de
é até esvaziar o reservatóri
o.
PANNARELLO (opcional)
O pannarello pode ser adquirido em separado no
revendedor de confiança.
pannarello permite-lhe preparar saborosos
appuccinos. Para a utilização do pannarello d
e
e-se preparar a máquina para a distribuição de
ua quente e vapor, como descrito nos respec
ivos parágrafos. Nos casos em que deseja pre
parar um cappuccino, mergulhe o pannarello
no leite e efectue ligeiros movimentos circulares
para que o aquecimento do leite seja uniforme.
O pannarello deve ser desmontado e lavado com-
pletamente semanalmente.
ertifique-se de que a alimentação eléctrica está
desligada e aguarde que a máquina arrefeça.
Recomenda-se enxaguar o reservatório todos os dias.
Esvazie e limpe a gaveta de pastilhas usadas a cada
dois/três dias ou após a distribuição de 10 cafés. Nunca utilize solventes, álcool ou substâncias agressivas
ou fornos para a secagem dos componentes da máquina. Lave os componentes (excluindo os eléctricos)
com água fria/tépida e panos/esponjas não abrasivas.
LIMPEZA DA LANÇA DE VAPOR/ÁGUA QUENTE
pós a utilização da lança de vapor/água
quente, deixe sair vapor a vazio durante alguns
segundos. Limpe o exterior da lança com um
ano húmido
.
LIMPEZA DO DISTRIBUIDOR DE CAFÉ
Efectue semanalmente para ambos os modelos
o procedimento DISTRIBUIÇÃO DE CAFÉ /
DISTRIBUIÇÃO DE DOSE LIVRE DE CAFÉ
sem
introduzir a pastilha
.
LIMPEZA DA GAVETA DE PASTILHAS
Retire a gaveta de pastilhas usadas e remova a
rade de apoio para chávenas
.
emova a gaveta superior para retirar as past
i
as usadas e para esvaziar a bandeja de limpeza.
vamente
.
Verifique periodicamente se a gaveta de pastilhas
não está cheia, de modo a evitar o mau funcionamento e danos na máquina.
Page 48

PT
SOLUÇÕES PARA OS PROBLEMAS MAIS COMUNS
CARACTERÍSTICAS TÉCNICAS
Problema encontrado Causas possíveis Solução
A máquina não se liga.
EXTRA: o indicador luminoso está desli-
gado após ter pressionado o interruptor
geral e aguardado alguns minutos.
PREMIUM
: os indicadores luminosos e
não piscam.
» Máquina não ligada à rede
eléctrica
.
» Ligue a máquina à rede eléctrica.
» Dirija-se ao centro de assistência.
A máquina demora muito tempo para
aquecer.
» O aparelho está bloqueado com
calcário.
» Descalcifique o aparelho.
A bomba é muito ruidosa.
» Falta água no reservatório.
» O reservatório foi enchido sem
executar o ciclo de carregamento
do circuito hidráulico.
» Complete com água fresca potável.
» Efectue o ciclo de carregamento do circui-
to hidráulico (veja a secção de carregamento do circuito hidráulico).
A alavanca de carregamento não
atinge a posição de distribuição.
» Gaveta de pastilhas usadas cheia.
» Pastilha introduzida de modo
errado.
» Esvazie a gaveta de pastilhas usadas.
» Repita a sequência, alavanca na posição de
repouso, alavanca na posição de distribuição;
se não for o suficiente proceda manualmente para descarregar a pastilha da conduta
com a máquina desligada da rede eléctrica.
O café está frio.
» EXTRA: o indicador luminoso esta-
va desligado quando se pressionou
o interruptor de distribuição de café.
» Aguarde que o indicador luminoso se
acenda.
O café sai demasiado rápido, não é
distribuído um café cremoso.
» Pastilha já usada. » Coloque a alavanca na posição de repouso
e introduza uma pastilha nova.
O café não é distribuído e sai vapor do
compartimento de inserção das pastilhas.
» A alavanca de carregamento não foi
colocada na posição de distribuição.
» Coloque a alavanca de carregamento na
posição de distribuição.
O café não sai ou sai às pingas. » Distribuidor bloqueado.
» Circuito hidráulico descarregado.
» Efectue o ciclo de lavagem do distribuidor
de café (veja MANUTENÇÃO E LIMPEZA).
» Efectue o ciclo de carregamento do circui-
to hidráulico (veja a secção de carregamento do circuito hidráulico).
Após a utilização, as pastilhas ficam
furadas apenas na película superior.
» Circuito hidráulico descarregado. » Efectue o ciclo de carregamento do circuito
hidráulico (veja a secção de carregamento
do circuito hidráulico).
Nenhuma distribuição de água quente
ou vapor.
» Obstrução da lança de vapor. » Limpe o bico com uma agulha (a máquina
deve estar desligada e o botão de distribuição de vapor/água quente fechado).
Não é possível obter a espuma do leite. » Leite não apropriado.
» Leite demasiado quente.
»
EXTRA
: o indicador luminoso
estava desligado quando se
distribuiu vapor.
» Utilize leite fresco, parcialmente desnatado.
» Utilize leite à temperatura de frigorífico.
»
EXTRA
: mantenha pressionado o botão até
que o indicador luminoso se acenda.
· Tensão nominal – Potência nominal – Alimentação:
Veja plaqueta posicionada no aparelho
· Dimensões:
Altura Largura Profundidade
305 mm 235 mm 330 mm
· Peso: cerca de 5 kg
· Reser vatório de água: cerca de 1 litro - Extraível
· Materiais utilizados na carroçaria: Termoplástico
· Comprimento do cabo 1,2 m
· Painel de comando: Na parte superior
· Caldeira: Aço inox
· Dispositivos de segurança: Válvula de segurança de pressão da caldeira
· Termofusível (versão EXTRA e PREMIUM)
· Termóstato de segurança (versão PREMIUM)
Para as avarias não incluídas na tabela acima indicada ou problemas não resolvidos, contacte um centro de assistência Saeco.
2006/42 CE - 2004/108 CE - 2006/95 CE
Page 49

PT
SEGURANÇA
Finalidade da utilização:
máquina de café é indicada exclusivamente para utilização doméstica. É proibido efectuar modificações técnicas. É proibida qualquer
tilização ilícita, devido aos riscos que pode causar! O aparelho não se destina a ser utilizado por pessoas (incluindo crianças) com
eduzidas capacidades físicas, mentais ou sensoriais ou com experiência e/ou competências insuficientes, a não ser que estejam sob
a supervisão de uma pessoa responsável pela sua segurança ou que sejam ensinados por essa mesma pessoa a utilizar o aparelho
.
Local:
Coloque a máquina de café num lugar seguro, onde ninguém possa virá-la ou ferir-se por causa da própria máquina. Não
manter a máquina a temperaturas inferiores a 0º, pois o gelo poderia danificá-la. Não utilize a máquina de café ao ar livre. Não
ouse a máquina em superfícies muito quentes e/ou perto de chamas vivas.
Alimentação de corrente:
igue a máquina de café só numa tomada de corrente adequada. A tensão deve corresponder à indicada na plaqueta da
máquina
.
Cabo de alimentação:
Não utilize a máquina de café se o cabo de alimentação estiver defeituoso. Se o cabo de alimentação apresentar danos, deve
er substituído por um produto adequado com as mesmas características do fornecido com a máquina. Não passe o cabo
de alimentação por ângulos e sob arestas vivas, por cima de objectos muito quentes e proteja-o do óleo. Não ande com a
máquina de café nem a puxe pelo cabo. Não tire a ficha puxando pelo cabo; não toque nela com as mãos molhadas. Evite que
o cabo de alimentação caia livremente de mesas ou estantes.
Perigo de electrocussão:
Nunca coloque em contacto com água as peças que estão ligadas à corrente.
Protecção de outras pessoas:
Mantenha as crianças sob supervisão, para evitar que brinquem com o aparelho. As crianças não se apercebem do perigo
ssociado aos electrodomésticos. Não deixe ao seu alcance os materiais utilizados para embalar a máquina
.
Perigo de queimaduras:
vite dirigir contra si mesmo e/ou outros o jacto de vapor e/ou água quente. Durante o início da distribuição podem-se veri
fi
car breves salpicos de água quente. A lança de vapor/água quente pode atingir temperaturas elevadas: evite tocar na mesma
irectamente com as mãos, utilize o botão apropriado.
Limpeza:
ntes de limpar a máquina, é indispensável desligar a ficha da tomada de corrente e esperar que a máquina arrefeça. Não
mergulhe a máquina em água! É rigorosamente proibido tentar modificar de algum modo o interior da máquina. Não utilize
água presente no reservatório para fins alimentares
.
Armazenagem da máquina:
Quando a máquina for inutilizada durante um período prolongado, desligue a ficha da tomada e armazene-a num local seco
e fora do alcance das crianças. Proteja a máquina do pó e sujidade
.
Reparações / Manutenção:
No caso de avarias, defeitos ou suspeita de defeito após uma queda, desligue imediatamente a ficha da tomada. Não coloque em
uncionamento uma máquina defeituosa. Só os Centros de Assistência Autorizados Saeco podem efectuar intervenções e repar
a
ções. No caso de intervenções não realizadas segundo as normas, rejeita-se qualquer tipo de responsabilidade por eventuais danos.
Reservatório de água:
ntroduza no reservatório apenas água fresca potável sem gás. Não coloque a máquina em funcionamento se a água não
ultrapassar pelo menos o nível mínimo indicado no reservatório
.
Compartimento das pastilhas:
No compartimento das pastilhas devem ser introduzidas apenas pastilhas Lavazza “A MODO MIO”; não introduza os dedos ou
qualquer outro objecto. As pastilhas só se devem utilizar uma vez.
Desmantelamento da máquina no fim da vida útil:
INFORMAÇÕES PARA OS UTILIZADORES: nos termos do art. 13 do Decreto Legislativo italiano de 25 de Julho de 2005, nº 151
“Execução das Directivas 2002/95/CE, 2002/96/CE e 2003/108/CE, relativas à redução da utilização de substâncias perigosas nos
arelhos eléctricos e electrónicos, assim como ao desmantelamento dos resíduos. O símbolo do contentor de lixo riscado, enco
n
trado no aparelho ou na sua embalagem indica que o produto no final da sua própria vida útil deve ser recolhido separadamente
dos outros resíduos”. O utilizador deverá, por isso, entregar o aparelho no final da sua vida útil nos apropriados centros de recolha
electiva dos resíduos eléctricos ou electrónicos, ou então devolver ao revendedor no momento de compra de um novo aparelho
emelhante, em razão de um a um. A adequada recolha selectiva para uma utilização sucessiva do aparelho desactivado para rec
i
clagem, tratamento e desmantelamento ambientalmente compatível contribui para evitar possíveis efeitos negativos no ambie
n
te e na saúde, e possibilita a reutilização e/ou reciclagem dos materiais, dos quais é constituído o aparelho. O desmantelamento
busivo do produto por parte do utilizador comporta a aplicação das sanções administrativas previstas pela normativa vigente.
Page 50

NL
Gefeliciteerd!
Geachte klant, wij feliciteren u met de keuze van de espressokoffiemachine
Saeco Lavazza A MODO MIO en danken u voor het getoonde vertrouwen in
ons.
Wij adviseren u om, voordat u het apparaat in gebruik neemt, deze instructies
aandachtig te lezen. In deze gebruiksaanwijzing wordt namelijk uitgelegd hoe
u het apparaat het beste kunt gebruiken, schoonmaken en onderhouden.
Tot slot wensen wij dat u nog vele heerlijke koffies zult bereiden dankzij Saeco
en Lavazza!
Page 51

NL
EXTRA PREMIUM
Schakelaar
voor afgifte
vrije koffie
sis
ontrole
ampje voor
inschakelin
g
T
oets voor
stoomafgift
e
ende
l
oor het lade
n
uimte
oor het plaatsen
an de koffiepad
s
toom-/heet
waterpijpj
e
ffieschenki
n
ichting
Waterreservoi
r
iguur B
Voedingskabel
Draaiknop
voor afgifte
van stoom
n heet water
Rooster
voor het plaats
e
van kopje
s
L
ade
voor gebruikte
offiepad
s
MACHINEONDERDELEN
T
oets voor
gedoseerde
offieafgifte
Toets voor
fgifte vrije
koffiedosis
T
oets voor
stoomafgift
e
ndvat
voor het optillen
eksel
waterreservoir
Figuur A
Page 52

NL
VOORBEREIDING VAN DE MACHINE
EXTRA:het controlelampje voor de inschakeling
aat branden.
PREMIUM: alle toetsen knipperen.
Het gebruik van een waterfilter (optionele accessoires) verbetert de kwaliteit van het water en verlengt
de levensduur van het apparaat. Wij raden aan de
Intenza Brita filter voor Saeco te gebruiken. Volg de
aanwijzingen op het instructieblad dat bijgeleverd
wordt met de accessoires voor het plaatsen van de
filter.
HET VULLEN VAN HET WATERCIRCUIT
Bij het eerste opstarten van de machine, na een
MBOHFUJKEWBOTUJMTUBOEPGJOIFUHFWBMWBOIFU
HFIFFMPOUCSFLFOWBOXBUFSJOIFUSFTFSWPJSJT
IFUOPEJHPNIFUXBUFSDJSDVJUUFWVMMFOPQEF
hierna beschreven manier.
1
aats een kannetje onder het stoom/ heet wa
erpijpje en open de draaiknop door deze tegen
e klok in te draaien
.
EXTRA:
ruk op de schakelaar voor de koffieafgift
e
PREMIUM:
druk op de toets voor afgifte vrije kof
edosis
.
EXTRA PREMIUM
EXTRA: wacht totdat uit het stoom/ heet water-
ijpje een gelijkmatige waterstraal stroomt,
druk opnieuw op de schakelaar voor de
koffieafgifte en sluit de draaiknop. Wan
eer het lampje van de schakelaar continu
randt, is de machine klaar voor gebruik.
PREMIUM:
wacht totdat uit het stoom/heet w
a
terpijpje een gelijkmatige waterstraal stroomt.
De afgifte stopt automatisch en het opwarmen
egint. Wanneer de twee koffietoetsen continu
randen, is de machine klaar voor gebrui
k.
Verwijder het gebruikte kannetje
.
.FOBBOWBBSEUHFFOBBOTQSBLFMJKLIFJEWPPS
eventuele schade in geval van:
t WFSLFFSEHFCSVJLEBUOJFUJOPWFSFFOTUFN
ming is met de beoogde doelen;
t SFQBSBUJFTEJFOJFU[JKOVJUHFWPFSEEPPS
FSLFOEFTFSWJDFDFOUSB
t IFUPOLMBBSNBLFOWBOEFWPFEJOHTLBCFM
t POLMBBSHFNBBLUFPOEFSEFMFOWBO
de machine;
t HFCSVJLWBOOJFUPSJHJOFMFSFTFSWFPOEFSEF
len en accessoires;
t IFUOJFUPOULBMLFO
t PQTMBHJOSVJNUFONFUUFNQFSBUVSFOPOEFSEF¡$
t HFCSVJLWBOBOEFSFLPöFQBETEBOEJF[JKO
aangegeven.
*OEF[FHFWBMMFOLPNUEFHBSBOUJFUFWFSWBMMFO
HET STARTEN VAN DE MACHINE
rond, ver verwijderd van water en hete bronnen.
Haal de stroom eraf indien aanwezig. Til de mach
i
ne alleen op aan het daarvoor bestemde handvat
at zich aan de bovenkant van de machine be
indt. (zie MACHINEONDERDELEN – Figuur A).
Schade aan de machine, veroorzaakt door het niet
in acht nemen van deze aanwijzingen, wordt niet
oor de garantie gedekt
.
Til de deksel van het waterreservoir op en neem het
eg en neem vervolgens ook het reservoir eruit
.
Vul het reservoir tot aan het aangegeven MAX
iveau met uitsluitend vers drinkwater zonder
lzuur
.
arm water of andere vloeistoffen kunnen het re
ervoir beschadigen. Zet het apparaat nooit aan
zonder dat er water in zit: controleer of er voldoe
n
e water in het reservoir zit
.
Steek de voedingskabel erin en druk op
de hoofdschakelaar zodat deze op stand
staat. (zie MACHINEONDERDELEN – Figuur B
).
Page 53

NL
KOFFIEBEREIDING
AFGIFTE VRIJE KOFFIEDOSIS
e machine is klaar voor
ebruik wanneer de hen
el in de ruststand staat
achterste positie) en
EXTRA: de schakel
aar
voor de koffieafgifte
continu brandt
.
PREMIUM: de koffietoet
en continu branden.
In de ruimte voor de koffiepads dienen enkel koffie
p
ads van Lavazza A MODO MIO geplaatst te worden.
teek geen vingers of andere objecten in de ruimte
.
De monodosis koffiepads zijn gemaakt om alleen één
offie/product te verstrekken. Gebruik de koffiepads
NIET opnieuw. Het plaatsen van 2 of meer koffiepads
eroorzaakt het slecht functioneren van de machine.
aats de beker/het kopje onder de schenki
n
richting.
Til het klepje van de ruimte voor
epad en sluit het weer
.
Trek de hendel voor
et laden naar v
o
ren, totdat deze
stop
t.
ruk op de schakelaar/toets voor koffieafgifte en
acht op de afgifte van de gewenste hoeveelheid.
EXTRA
PREMIUM
Zet de hendel tijdens de afgifte niet terug in de
ruststan
d.
5
ruk opnieuw op de
schakelaar/toets om
e afgifte te stoppen
n zet de hendel t
e
rug in de ruststan
d.
Het rooster voor het plaatsen van de kopjes kan
180° draaien om bekers, kopjes en kannetjes van
verschillende afmetingen te gebruiken.
m de bovenstaande handelingen uit te voeren,
dient de stoom-/heetwaterknop gesloten te zijn
.
GEDOSEERDE KOFFIEAFGIFTE
ALLEEN VOOR HET MODEL PREMIUM
De machine is al ingesteld om een koffiedosis van
30 cc. te verstrekken.
AFGIFTE VRIJE KOFFIEDOSIS
ruk op de toets voor gedoseerde koffieafgifte.
e machine beëindigd automatisch de afgifte
wanneer de geprogrammeerde koffiedosis be
eikt is. Zet de hendel terug in de ruststand.
De koffieafgifte kan ieder moment gestopt worden
door opnieuw op de toets voor gedoseerde koffieafgifte te drukken.
PROGRAMMERING KOFFIEDOSIS
ALLEEN VOOR HET MODEL PREMIUM
AFGIFTE VRIJE KOFFIEDOSIS
ruk op de toets voor gedoseerde koffieafgifte
en houd deze ingedrukt en wacht totdat de ge
wenste hoeveelheid koffie die men wil progra
m
eren, bereikt is.
aat de toets voor gedoseerde koffieafgifte los
en zet de hendel terug in de ruststand.
De geprogrammeerde hoeveelheid te verstrekken koffie
(minimaal 25 cc - maximaal 200 cc) kan gewijzigd worden door de programmering opnieuw uit te voeren.
Page 54

NL
GEBRUIK VAN HET STOOM/HEET WATERPIJPJE
evaar voor brandwonden! Aan het begin van de
fgifte kan wat heet water vrijkomen. Het stoom/
heet waterpijpje kan zeer hoge temperaturen berei
ken: voorkom directe aanraking met uw handen.
Het stoom/ heet waterpijpje mag niet op personen
of dieren gericht worden. Verzeker u er altijd van dat
r genoeg water in het reservoir zit.
AFGIFTE VAN HEET WATER
anneer de machine klaar is voor gebruik, zet
en leeg kannetje onder het stoom/heet wate
r
pijpje en open de draaiknop
.
EXTRA: druk op de schakelaar voor koffieafgifte, uit
et stoom/ heet waterpijpje zal een regelmatige
str
aal h
eet water stromen
.
PREMIUM: druk op de toets voor de afgifte van een
vrije koffiedosis, uit het stoom/ heet waterpijpje
zal een regelmatige straal heet water stromen.
EXTRA PREMIUM
EXTRA:
druk opnieuw op de schakelaar voor kof
fieafgifte om de afgifte te stoppen en sluit de
stoom-/heetwaterknop.
PREMIUM: druk opnieuw op de toets voor de vrije
offiedosis om de afgifte te stoppen en sluit de
stoom-/heetwaterknop.
PREMIUM: met deze procedure kan men maximaal
180 cc water verstrekken.
STOOMAFGIFTE EN BEREIDING VAN EEN
CAPPUCCINO
EXTRA: druk op de toets voor stoomafgifte en
oud deze ingedrukt. Alle lampjes gaan uit.
Wanneer de toets voor stoomafgifte continu
randt, is de machine klaar voor gebruik. Pas nu
n men de toets loslaten
.
Indien de stoom eerder op is dan het gewilde resultaat, herhaal de bovenbeschreven handelingen.
PREMIUM: druk op de toets voor stoomafgifte.
Deze zal beginnen te knipperen. Wanneer de
oets voor stoomafgifte continu brandt, is de
machine klaar voor gebruik.
EXTRA PREMIUM
Plaats een leeg kannetje onder het stoom/ heet
aterpijpje en open gedurende enkele secon
en de draaiknop om het restwater eruit te laten
lopen totdat er alleen stoom uitkomt. Sluit de
draaiknop en verwijder het kannetje.
Plaats het kannetje met de melk zo dat het
stoom/ heet waterpijpje bijna de bodem raakt
en open de draaiknop. De machine zal begin
en met de stoom te verstrekken. Beweeg het
annetje langzaam naar beneden om een com
acte en crèmige schuimlaag van melk te ver
krijgen. Het wordt aangeraden om het kannetje
iet met meer dan een derde melk te vullen
.
Wanneer het gewenste resultaat bereikt is, sluit
e draaiknop en neem het kannetje we
g.
Alleen voor het model PREMIUM: druk opnieuw toets
voor stoomafgifte, de machine zal nu drie knip
erende toetsen hebben
.
7PPSEBUNFOFFOBOEFSF IBOEFMJOH VJUWPFSU
WVMIFUXBUFSDJSDVJU[JFHFEFFMUFPWFSIFUWVMMFOWBOIFUXBUFSDJSDVJU
Het wordt aangeraden om verse halfvolle melk
te gebruiken en op koelkasttemperatuur in de gewenste hoeveelheid om een compacte schuimlaag
te verkrijgen.
Page 55

NL
ONDERHOUD EN REINIGING
ONTKALKING
Een normaal gevolg bij het gebruik van het ap
paraat is dat er kalk gevormd wordt; de machine
moet om de 3-4 maanden ontkalkt worden en/
als er minder water uit de machine stroomt
.
7PPSIFUVJUWPFSFOWBOEFPOULBMLJOHLBOFFO
OJFUHJGUJH FOPG POTDIBEFMJKL POULBMLJOHTQSPEVDU WPPS LPöF[FUBQQBSBUFO XPSEFO HFCSVJLUEBUHFXPPO JOEF IBOEFMWFSLSJKHCBBS
JT8JKSBEFOVBBOIFUPOULBMLJOHTNJEEFMWBO
4BFDPUFHFCSVJLFO
ebruik in geen geval azijn als ontkalkingsmiddel.
Leeg het reservoir en vul het met een oplossin
g
van ontkalkingsmiddel en water zoals aangeg
e
ven op de verpakking van het ontkalkingspro
uct, zet de machine aan en plaats een kannetje
nder de schenkinrichting.
EXTRA: druk op de schakelaar voor koffie en vul
en beker
.
PREMIUM: wacht totdat de koffietoetsen continu
branden, druk op de toets voor vrije koffiedosis
n vul een beker
.
EXTRA en PREMIUM: zet de machine uit, laat het
0-15 minuten rusten en herhaal de handelin
en
n
otdat het reservoir leeg is
.
as het reservoir en vul het met vers drinkwater,
aats deze weer terug en zet een kannetje onder
e schenkinrichting. Open de stoomknop, druk
p de schakelaar/toets voor koffieafgifte totdat
2/3 van het reservoir geleegd is, sluit vervolgens
eer de draaikno
p.
Wacht totdat de machine opgewarmd is, open
e stoomknop en druk op de schakelaar/toets
voor koffieafgifte totdat het reservoir leeg is.
PANNARELLO (optioneel)
De pannarello kan apart gekocht worden bij uw
leverancier.
Met de pannarello kan men smakelijke cappuccino’s
ereiden. Om de pannarello te kunnen gebruiken,
gifte van heet water en stoom zoals beschreven in
de bijbehorende paragrafen. In het geval men een
cappuccino wenst te maken, dompel de pannarello
n de melk en maak lichte ronddraaiende bewegin
gen om de melk gelijkmatig te verwarmen
.
De pannarello dient wekelijks te worden gedemon-
teerd en geheel afgewassen te worden.
Verzeker u er altijd van dat er geen elektrische toe
oer is en wacht totdat de machine afgekoeld is.
Het wordt aangeraden om elke dag het reservoir om te
spoelen. Leeg en reinig elke twee/drie dagen of na 10 verstrekte koffie de lade met de gebruikte koffiepads. Gebruik
nooit oplosmiddelen, alcohol of aggressieve middelen of
ovens voor het drogen van de onderdelen van de machine. Was de onderdelen (uitgezonderd de elektrische) met
koud/lauw water en niet schurende doeken/sponsen.
REINIGING VAN HET STOOM-/HEET WATERPIJPJE
en vrij stomen na het gebruik ervan. Reinig het
ijpje aan de buitenkant met een vochtige doe
k.
REINIGING VAN DE KOFFIESCHENKINRICHTING
Voer wekelijks voor beide modellen de procedu
e uit voor de KOFFIEAFGIFTE / AFGIFTE VRIJE
KOFFIEDOSIS
zonder een koffiepad te plaatsen.
REINIGING VAN DE LADE VOOR KOFFIEPADS
Haal de lade voor de gebruikte koffiepads eruit
en verwijder het rooster voor het plaatsen van
kopjes
.
Verwijder de bovenste lade om de gebruikte
koffiepads te verwijderen en leeg het lekbakje.
Was en droog beide delen alvorens ze weer te
onteren
.
Controleer regelmatig dat de lade met koffiepads niet vol
is om storingen en schade aan de machine te vermijden.
Page 56

NL
OPLOSSINGEN VOOR DE MEEST VOORKOMENDE PROBLEMEN
TECHNISCHE EIGENSCHAPPEN
Geconstateerd probleem Mogelijke oorzaken Oplossing
De machine kan niet worden ingeschakeld
.
EXTRA
: het controlelampje is uit nadat de hoofdschakelaar is ingedrukt en
men enkele minuten gewacht heeft.
PREMIUM
: de controlelampjes en
knipperen niet.
» Machine niet aangesloten op het
elektriciteitsnet.
» Sluit de machine op het elektriciteitsnet
aan.
» Wendt u tot een servicecentrum.
De machine heeft veel tijd nodig om
op te warmen.
» Het apparaat bevat veel kalk. » Ontkalk het apparaat.
De pomp maakt veel lawaai.
» Geen water in het reservoir.
» Het reservoir is gevuld zonder de
laadcyclus van het watercircuit uit
te voeren.
» Vul het reservoir bij met vers drinkwater.
» Voer de laadcyclus uit van het watercir-
cuit (zie gedeelte over het vullen van het
watercircuit).
De hendel voor het laden bereikt niet
de afgiftestand.
»
Lade voor gebruikte koffiepads is vol
.
» Koffiepad onjuist geplaatst.
» Leeg de lade voor gebruikte koffiepads.
» Herhaal in volgorde: hendel in de ruststand,
hendel in de afgiftestand; indien dit niet
genoeg is, probeer handmatig de koffiepad
uit de leiding te halen zonder dat de machine is aangesloten op het elektriciteitsnet.
De koffie is koud.
»
EXTRA
: het controlelampje was
uit toen op de schakelaar voor de
koffieagifte werd gedrukt.
» Wacht tot het controlelampje gaat
branden.
De koffie loopt te snel, er wordt geen
crèmige koffie verstrekt.
» De koffiepad is al gebruikt. » Zet de hendel in de ruststand en plaats
een nieuwe koffiepad.
Er komt geen koffie uit en er komt stoom uit
de ruimte voor het plaatsen van de koffiepads.
» De hendel voor het laden is niet in
de afgiftestand gezet.
» Zet de hendel voor het laden in de afgif-
testand.
De koffie komt niet of slechts druppelsgewijs eruit.
» De schenkinrichting is verstopt.
» Het watercircuit is leeg.
» Voer een reinigingscyclus uit van de kof-
fieschenkinrichting (zie ONDERHOUD EN
REINIGING).
» Voer de laadcyclus uit van het watercircuit (zie
gedeelte over het vullen van het watercircuit).
De koffiepads blijken na gebruik alleen
gaatjes te hebben in de bovenste laag.
» Het watercircuit is leeg. »
Voer de laadcyclus uit van het watercircuit (zie
gedeelte over het vullen van het watercircuit).
Er komt helemaal geen heet water of
stoom uit.
» Het stoompijpje is verstopt. » Reinig het uitlooppijpje met behulp van
een naald (de machine dient uitgeschakeld
te zijn en de draaiknop voor de afgifte van
stoom/heet water gesloten).
Er komt geen schuim.
» De melk is niet geschikt.
» De melk is te koud.
»
EXTRA
: het controlelampje was
uit toen de stoom verstrekt werd.
» Gebruik verse halfvolle melk.
» Gebruik melk op koelkasttemperatuur.
»
EXTRA
: houd de toets ingedrukt totdat
het controlelampje gaat branden.
· Nominaal spanning - Nominaal vermogen - Voeding:
Zie het plaatje op het apparaat
· Afmetingen:
Hoogte Breedte Diepte
305 mm 235 mm 330 mm
· Gewicht: circa 5 kg
· Waterreservoir: circa 1 liter - Uitneembaar
· Gebruikt materiaal voor de behuizing: Thermoplastic
· Lengte voedingskabel 1,2 m
· Bedieningspaneel: Op de bovenkant
· Waterketel: Roestvrij staal
· Veiligheidsinrichtingen: Veiligheidsventiel waterketeldruk
· Thermozekering (uitvoering EXTRA en PREMIUM)
· Veiligheids thermostaat (uitvoering PREMIUM)
Bij niet in deze tabel voorkomende storingen of als de gesuggereerde oplossingen de storingen niet hebben verholpen, dient men contact
op te nemen met een servicecentrum van Saeco.
2006/42 CE - 2004/108 CE - 2006/95 CE
Page 57

NL
VEILIGHEID
Gebruiksbestemming:
e koffiemachine is uitsluitend bestemd voor huishoudelijk gebruik. Het aanbrengen van technische wijzigingen is niet
toegestaan. Elk ongeoorloofd gebruik is verboden, in verband met de risico’s die dit met zich meebrengt! Het apparaat is
niet bestemd om gebruikt te worden door personen (inclusief kinderen) met verminderde fysieke, mentale of gevoelige
capaciteiten of met onvoldoende ervaring en/of bekwaamheid, tenzij ze onder het toezicht staan van een persoon die
erantwoordelijk is voor hun veiligheid en van wie ze instructies verkrijgen aangaande het gebruik van het apparaat
.
Plaatsing:
et de koffiemachine op een veilige plek waar niemand het zou kunnen omstoten of zich eraan zou kunnen verwonden.
ewaar de machine niet op een temperatuur onder de 0°, aangezien de vorst deze zou kunnen beschadigen. Gebruik de
offiemachine niet buiten. Plaats de machine niet op erg warme oppervlakken en/of in de buurt van open vuur
.
Stroomtoevoer:
Sluit de koffiemachine alleen aan op een geschikt stopcontact. De spanning moet overeenstemmen met de spanning die op
et plaatje van de machine staat verme
ld.
Voedingskabel:
ebruik de koffiemachine nooit als de voedingskabel defect is. Indien de voedingskabel defect is, dient deze vervangen te
worden met een nieuwe die dezelfde eigenschappen bezit als die bij de machine geleverd is. Laat de voedingskabel niet
over hoeken en scherpe randen of hete voorwerpen lopen, en bescherm het tegen olie. Draag de koffiemachine niet aan de
abel en trek er niet aan. Haal de stekker niet uit het stopcontact door aan de kabel te trekken; raak het niet met natte handen
aan. Voorkom dat de voedingskabel los van tafels of planken afhangt.
Elektrocutiegevaar:
reng de onder stroom staande delen nooit in contact met water.
Bescherming van andere personen:
oud kinderen onder toezicht om te vermijden dat ze met het apparaat spelen. Kinderen realiseren zich de gevaren die aan
elektrische apparaten verbonden zijn niet. Laat het verpakkingsmateriaal van de machine niet binnen bereik van kinderen
.
Verbrandingsgevaar:
icht de hete stoom- en/of waterstraal nooit op uzelf en/of op anderen. Aan het begin van de afgifte kan wat heet water
rijkomen. Het stoom/ heet waterpijpje kan zeer hoge temperaturen bereiken: voorkom directe aanraking met uw handen,
gebruik de daarvoor bestemde handgreep
.
Reiniging:
lvorens de machine te reinigen, is het noodzakelijk de stekker uit het stopcontact halen e te wachten tot de machine is
ekoeld. Dompel de machine niet onder in water! Pogingen tot reparaties aan de binnenkant van de machine zijn ten
trengste verboden. Gebruik het water in het waterreservoir niet voor voedingsdoeleinden
.
Opslag van de machine:
anneer de machine langere tijd niet wordt gebruikt, haal de stekker uit het stopcontact en sla deze op in een droge plaats
niet toegankelijk voor kinderen. Bescherm de machine tegen stof en vuil
.
Reparaties / Onderhoud:
aal de stekker meteen uit het stopcontact bij storingen, defecten of vermoedelijke defecten na een val. Zet de machine nooit
n werking als deze defect is. Alleen de erkende servicecentra van Saeco mogen werkzaamheden en reparaties uitvoeren. Bi
j
ondeskundig uitgevoerde werkzaamheden wordt iedere vorm van aansprakelijkheid van de hand gewezen.
Waterreservoir:
Vul het reservoir altijd en alleen met vers drinkwater zonder koolzuur. Zet de machine niet aan indien het water niet minstens
et minimumniveau dat op de reservoir aangegeven is, overschri
jd.
Ruimte voor de koffiepads:
n de ruimte voor de koffiepads dienen enkel koffiepads Lavazza A MODO MIO geplaatst te worden; steek geen vingers of
ndere objecten in de ruimte. De koffiepads dienen eenmalig gebruikt te worden
.
Afdanking van de machine aan het einde van de levensduur:
NFORMATIE VOOR DE GEBRUIKERS: conform art. 13 van het Italiaanse Wetsbesluit nr. 151 van 25 juli 2005, ”Uitvoering van
de richtlijnen 2002/95/CE, 2002/96/CE en 2003/108/CE, betreffende het reduceren van het gebruik van gevaarlijke stoffen
n elektrische en elektronische apparatuur, en de afvalverwerking”. Het symbool van de doorgekruiste afvalbak dat op de
pparatuur of op de verpakking is weergegeven, geeft aan dat het product aan het einde van zijn nuttige levensduur
gescheiden van ander afval ingezameld dient te worden. De gebruiker moet het apparaat dus, op het einde van zijn
evensduur, bij de speciale gescheiden inzamelingscentra voor elektrisch en elektronisch afval inleveren, ofwel het bij de
winkel inleveren bij de aankoop van een gelijksoortig apparaat, in de verhouding één op één. De adequate gescheiden
nzameling om de afgedankte apparatuur vervolgens voor te bereiden voor recycling, milieuverantwoorde verwerking en
erwijdering, draagt bij aan het vermijden van mogelijke negatieve gevolgen op het milieu en de gezondheid van de mens
en bevordert het hergebruik van het materiaal waaruit de apparatuur bestaat. De illegale afdanking van het product door de
gebruiker zal de oplegging van administratieve sancties tot gevolg hebben die worden bepaald door de geldende norm.
Page 58

Saeco
International Group S.p.A.
Via Torretta, 240
I-40041 Gaggio Montano, Bologna
Tel: + 39 0534 771111
Fax: + 39 0534 31025
www.saeco.com
Il produttore si riserva il diritto d`apportare qualsiasi modifica senza preavviso.
The manufacturer reserves the right to make changes without prior notice.
Le producteur se réserve le droit d’apporter des modifications sans aucun préavis.
Der Hersteller behält sich das Recht vor, Änderungen jeder Art ohne Vorankündigung vorzunehmen.
El fabricante se reserva el derecho de modificar el producto sin aviso previo.
O fabricante reserva-se o direito de efectuar qualquer alteração sem aviso prévio.
De fabrikant behoudt zich het recht voor wijzigingen aan te brengen zonder daar melding van te maken.
© Saeco International Group S.p.A.
Page 59

Type Sin029 - Sin029H Cod. 15001501 Rev. 00 del 30-06-08
Page 60

We : Saeco International Group S.p.A.
Via Torretta , 240
40041 GAGGIO MONTANO (BO)
declare under our responsibility that the product :
to which this declaration relates is in conformity with the following standards
or other normative documents :
v Safety of household and electrical appliances - General requirements
EN 60335-1(2002 ) + A1(2004) + A2(2006) + A11(2004) + A12(2006)
vSafety of household and electrical appliances - Part 2-15
Particular requirements for appliances for heating liquids
EN 60335-2-15(2002) + A1(2005)
vHousehold and similar electrical appliances - Electromagnetic fields - methods
for evaluation and measurement EN 50366 (2003) + A1 (2006).
vElectromagnetic compatibility (EMC) - Requirements for household appliances , electric
tools and similar apparatus - Part 1
Emission EN 55014-1 (2006).
vElectromagnetic compatibility (EMC)
Part. 3^ Limits - Section 2 : Limits for harmonic current emissions (equipment input
current
b16A for phase) - EN 61000-3-2 (2006).
vElectromagnetic compatibility (EMC)
Part 3^ : Limits - Section 3 : Limitation of voltage changes , voltage fluctuations and flicker
in public low - voltage supply systems , for equipment with rated current
b 16 A for phase
and not subject to conditional connection EN 61000-3-3 (1995) + A1 (2001) + A2 (2005).
vElectromagnetic compatibility - Requirements for household appliances , electric tools
and similar apparatus - Part 2.
Immunity - Product family standard EN 55014-2 (1997) + A1 (2001)
following the provisions of the Directives :
EC 73/23, EC 89/336, EC 92/31, EC 93/68.
Gaggio Montano R&D
21/07/2008 Mr. Andrea Castellani
COFFEE MAKER
TYPE : SIN 029 ( LM 1100 ).
TYPE : SIN 029 H ( LM 1200 ).
EC DECLARATION OF CONFORMITY
EC 2006/95, EC 2004/118,
EC 1992/31, EC 1993/68
 Loading...