

Page 1

Ruckus Wireless™
SmartZone™ 100
Administrator Guide for RuckOS 3.1
Part Number 800-70827-001 Rev B
Published April 2015
www.ruckuswireless.com
Page 2

Copyright Notice and Proprietary Information
Copyright 2015. Ruckus Wireless, Inc. All rights reserved.
No part of this documentation may be reproduced, transmitted, or translated, in any form or by any means, electronic,
mechanical, manual, optical, or otherwise, without prior written permission of Ruckus Wireless, Inc. (“Ruckus”), or as
expressly provided by under license from Ruckus.
Destination Control Statement
Technical data contained in this publication may be subject to the export control laws of the United States of America.
Disclosure to nationals of other countries contrary to United States law is prohibited. It is the reader’s responsibility to
determine the applicable regulations and to comply with them.
Disclaimer
THIS DOCUMENTATION AND ALL INFORMATION CONTAINED HEREIN (“MATERIAL”) IS PROVIDED FOR GENERAL
INFORMATION PURPOSES ONLY. RUCKUS AND ITS LICENSORS MAKE NO WARRANTY OF ANY KIND, EXPRESS
OR IMPLIED, WITH REGARD TO THE MATERIAL, INCLUDING, BUT NOT LIMITED TO, THE IMPLIED WARRANTIES
OF MERCHANTABILITY, NON-INFRINGEMENT AND FITNESS FOR A PARTICULAR PURPOSE, OR THAT THE
MATERIAL IS ERROR-FREE, ACCURATE OR RELIABLE. RUCKUS RESERVES THE RIGHT TO MAKE CHANGES OR
UPDATES TO THE MATERIAL AT ANY TIME.
Limitation of Liability
IN NO EVENT SHALL RUCKUS BE LIABLE FOR ANY DIRECT, INDIRECT, INCIDENTAL, SPECIAL OR CONSEQUENTIAL DAMAGES, OR DAMAGES FOR LOSS OF PROFITS, REVENUE, DATA OR USE, INCURRED BY YOU OR ANY
THIRD PARTY, WHETHER IN AN ACTION IN CONTRACT OR TORT, ARISING FROM YOUR ACCESS TO, OR USE
OF, THE MATERIAL.
Trademarks
Ruckus Wireless, Ruckus, the bark logo, ZoneFlex, FlexMaster, ZoneDirector, SmartMesh, Channelfly, Smartcell,
SmartZone, Dynamic PSK, and Simply Better Wireless are trademarks of Ruckus Wireless, Inc. in the United States
and other countries. All other product or company names may be trademarks of their respective owners.
SmartZone 100 Administrator Guide for RuckOS 3.1, 800-70827-001 Rev B 2
Page 3

Third Party and Open Source Licenses Used in This Product
This product includes software developed by the Apache Software Foundation (http://www.apache.org/).
This product includes software developed by the OpenSymphony Group (http://www.opensymphony.com/).
This product includes software developed by the Visigoth Software Society (http://www.visigoths.org/).
This product includes software developed by the OpenSSL Project for use in the OpenSSL Toolkit
(http://www.openssl.org/).
This product includes software written by Tim Hudson (tjh@cryptsoft.com).
This product includes cryptographic software written by Eric Young (eay@cryptsoft.com).
Copyright © 1999-2003 The Apache Software Foundation. All rights reserved.
Copyright © 2001-2004 The OpenSymphony Group. All rights reserved.
Copyright © 2003 The Visigoth Software Society. All rights reserved.
Copyright © 2011 John Resig, http://jquery.com/
Copyright © 1998-2011 The OpenSSL Project. All rights reserved.
Copyright © 1995-1998 Eric Young (eay@cryptsoft.com). All rights reserved.
Apache 2.0
Apache License
Version 2.0, January 2004
http://www.apache.org/licenses/
TERMS AND CONDITIONS FOR USE, REPRODUCTION, AND DISTRIBUTION
1. Definitions.
"License" shall mean the terms and conditions for use, reproduction, and distribution as defined by Sections 1 through
9 of this document.
"Licensor" shall mean the copyright owner or entity authorized by the copyright owner that is granting the License.
"Legal Entity" shall mean the union of the acting entity and all other entities that control, are controlled by, or are under
common control with that entity. For the purposes of this definition, "control" means (i) the power, direct or indirect, to
cause the direction or management of such entity, whether by contract or
otherwise, or (ii) ownership of fifty percent (50%) or more of the outstanding shares, or (iii) beneficial ownership of such
entity.
"You" (or "Your") shall mean an individual or Legal Entity exercising permissions granted by this License.
"Source" form shall mean the preferred form for making modifications, including but not limited to software source code,
documentation source, and configuration files.
"Object" form shall mean any form resulting from mechanical transformation or translation of a Source form, including
but not limited to compiled object code, generated documentation, and conversions to other media types.
"Work" shall mean the work of authorship, whether in Source or Object form, made available under the License, as
indicated by a copyright notice that is included in or attached to the work (an example is provided in the Appendix below).
"Derivative Works" shall mean any work, whether in Source or Object form, that is based on (or derived from) the Work
and for which the editorial revisions, annotations, elaborations, or other modifications represent, as a whole, an original
work of authorship. For the purposes of this License, Derivative Works shall not include works that remain separable
from, or merely link (or bind by name) to the interfaces of, the Work and Derivative Works thereof. "Contribution" shall
mean any work of authorship, including the original version of the Work and any modifications or additions to that Work
or Derivative Works thereof, that is intentionally submitted to Licensor for inclusion in the Work by the copyright owner
or by an individual or Legal Entity authorized to submit on behalf of the copyright owner. For the purposes of this
definition, "submitted" means any form of electronic, verbal, or written communication sent to the Licensor or its
representatives, including but not limited to communication on electronic mailing lists, source code control systems,
and issue tracking systems that are managed by, or on behalf of, the Licensor for the purpose of discussing and
improving the Work, but excluding communication that is conspicuously marked or otherwise designated in writing by
the copyright owner as "Not a Contribution."
"Contributor" shall mean Licensor and any individual or Legal Entity on behalf of whom a Contribution has been received
by Licensor and subsequently incorporated within the Work.
SmartZone 100 Administrator Guide for RuckOS 3.1, 800-70827-001 Rev B 2
Page 4

2. Grant of Copyright License. Subject to the terms and conditions of this License, each Contributor hereby grants to
You a perpetual, worldwide, non-exclusive, no-charge, royalty-free, irrevocable copyright license to reproduce, prepare
Derivative Works of, publicly display, publicly perform, sublicense, and distribute the Work and such Derivative Works
in Source or Object form.
3. Grant of Patent License. Subject to the terms and conditions of this License, each Contributor hereby grants to You
a perpetual, worldwide, non-exclusive, no-charge, royalty-free, irrevocable (except as stated in this section) patent
license to make, have made, use, offer to sell, sell, import, and otherwise transfer the Work, where such license applies
only to those patent claims licensable by such Contributor that are necessarily infringed by their Contribution(s) alone
or by combination of their Contribution(s) with the Work to which such Contribution(s) was submitted. If You institute
patent litigation against any entity (including a cross-claim or counterclaim in a lawsuit) alleging that the Work or a
Contribution incorporated within the Work constitutes direct or contributory patent infringement, then any patent licenses
granted to You under this License for that Work shall terminate as of the date such litigation is filed.
4. Redistribution. You may reproduce and distribute copies of the Work or Derivative Works thereof in any medium, with
or without modifications, and in Source or Object form, provided that You meet the following conditions:
(a) You must give any other recipients of the Work or Derivative Works a copy of this License; and
(b) You must cause any modified files to carry prominent notices stating that You changed the files; and
(c) You must retain, in the Source form of any Derivative Works that You distribute, all copyright, patent, trademark, and
attribution notices from the Source form of the Work, excluding those notices that do not pertain to any part of the
Derivative Works; and
(d) I f t he Work in clud es a "NO TICE " tex t fil e as p art o f its distribution, then any Derivative Works that You distribute must
include a readable copy of the attribution notices contained within such NOTICE file, excluding those notices that do not
pertain to any part of the Derivative Works, in at least one of the following places: within a NOTICE text file distributed
as part of the Derivative Works; within the Source form or documentation, if provided along with the Derivative Works; or,
within a display generated by the Derivative Works, if and wherever such third-party notices normally appear. The
contents of the NOTICE file are for informational purposes only and do not modify the License. You may add Your own
attribution notices within Derivative Works that You distribute, alongside or as an addendum to the NOTICE text from
the Work, provided that such additional attribution notices cannot be construed as modifying the License.
You may add Your own copyright statement to Your modifications and may provide additional or different license terms
and conditions for use, reproduction, or distribution of Your modifications, or for any such Derivative Works as a whole,
provided Your use, reproduction, and distribution of the Work otherwise complies with the conditions stated in this
License.
5. Submission of Contributions. Unless You explicitly state otherwise, any Contribution intentionally submitted for
inclusion in the Work by You to the Licensor shall be under the terms and conditions of this License , without any additional
terms or conditions.
Notwithstanding the above, nothing herein shall supersede or modify the terms of any separate license agreement you
may have executed with Licensor regarding such Contributions.
6. Trademarks. This License does not grant permission to use the trade names, trademarks, service marks, or product
names of the Licensor, except as required for reasonable and customary use in describing the origin of the Work and
reproducing the content of the NOTICE file.
7. Disclaimer of Warranty. Unless required by applicable law or agreed to in writing, Licensor provides the Work (and each
Contributor provides its Contributions) on an "AS IS" BASIS, WITHOUT WARRANTIES OR CONDITIONS OF ANY KIND,
either express or implied, including, without limitation, any warranties or conditions of TITLE, NON-INFRINGEMENT,
MERCHANTABILITY, or FITNESS FOR A PARTICULAR PURPOSE. You are solely responsible for determining the
appropriateness of using or redistributing the Work and assume any risks associated with Your exercise of permissions
under this License.
8. Limitation of Liability. In no event and under no legal theory, whether in tort (including negligence), contract, or
otherwise, unless required by applicable law (such as deliberate and grossly negligent acts) or agreed to in writing, shall
any Contributor be liable to You for damages, including any direct, indirect, special, inci dental, or consequential damages
of any character arising as a result of this License or out of the use or inability to use the Work (including but not limited
to damages for loss of goodwill, work stoppage, computer failure or malfunction, or any and all other commercial
damages or losses), even if such Contributor has been advised of the possibility of such damages.
9. Accepting Warranty or Additional Liability. While redistributing the Work or Derivative Works thereof, You may choose
to offer, and charge a fee for, acceptance of support, warranty, indemnity, or other liability obligations and/or rights
consistent with this License. However, in accepting such obligations, You may act only on Your own behalf and on Your
sole responsibility, not on behalf of any other Contributor, and only if You agree to indemnify, defend, and hold each
Contributor harmless for any liability incurred by, or claims asserted against, such Contributor by reason of your acc epting
any such warranty or additional liability.
END OF TERMS AND CONDITIONS
SmartZone 100 Administrator Guide for RuckOS 3.1, 800-70827-001 Rev B 3
Page 5

APPENDIX: How to apply the Apache License to your work.
To apply the Apache License to your work, attach the following boilerplate notice, with the fields enclosed by brackets
"[]" replaced with your own identifying information. (Don't include the brackets!) The text should be enclosed in the
appropriate comment syntax for the file format. We also recommend that a file or class name and description of purpose
be included on the same "printed page" as the copyright notice for easier identification within third-party archives.
Copyright [yyyy] [name of copyright owner]
Licensed under the Apache License, Version 2.0 (the "License"); you may not use this file except in compliance with
the License. You may obtain a copy of the License at
http://www.apache.org/licenses/LICENSE-2.0
Unless required by applicable law or agreed to in writing, software distributed under the License is distributed on an
"AS IS" BASIS, WITHOUT WARRANTIES OR CONDITIONS OF ANY KIND, either express or implied.
See the License for the specific language governing permissions and limitations under the License.
Apache 1.1
/* ====================================================================
* The Apache Software License, Version 1.1
*
* Copyright (c) 2000 The Apache Software Foundation. All rights
* reserved.
*
* Redistribution and use in source and binary forms, with or without
* modification, are permitted provided that the following conditions
* are met:
*
* 1. Redistributions of source code must retain the above copyright
* notice, this list of conditions and the following disclaimer.
*
* 2. Redistributions in binary form must reproduce the above copyright
* notice, this list of conditions and the following disclaimer in
* the documentation and/or other materials provided with the
* distribution.
*
* 3. The end-user documentation included with the redistribution,
* if any, must include the following acknowledgment:
* "This product includes software developed by the
* Apache Software Foundation (http://www.apache.org/)."
* Alternately, this acknowledgment may appear in the software itself,
* if and wherever such third-party acknowledgments normally appear.
*
* 4. The names "Apache" and "Apache Software Foundation" must
* not be used to endorse or promote products derived from this
* software without prior written permission. For written
* permission, please contact apache@apache.org.
*
* 5. Products derived from this software may not be called "Apache",
* nor may "Apache" appear in their name, without prior written
* permission of the Apache Software Foundation.
*
* THIS SOFTWARE IS PROVIDED ``AS IS'' AND ANY EXPRESSED OR IMPLIED
* WARRANTIES, INCLUDING, BUT NOT LIMITED TO, THE IMPLIED WARRANTIES
* OF MERCHANTABILITY AND FITNESS FOR A PARTICULAR PURPOSE ARE
SmartZone 100 Administrator Guide for RuckOS 3.1, 800-70827-001 Rev B 4
Page 6

* DISCLAIMED. IN NO EVENT SHALL THE APACHE SOFTWARE FOUNDATION OR
* ITS CONTRIBUTORS BE LIABLE FOR ANY DIRECT, INDIRECT, INCIDENTAL,
* SPECIAL, EXEMPLARY, OR CONSEQUENTIAL DAMAGES (INCLUDING, BUT NOT
* LIMITED TO, PROCUREMENT OF SUBSTITUTE GOODS OR SERVICES; LOSS OF
* USE, DATA, OR PROFITS; OR BUSINESS INTERRUPTION) HOWEVER CAUSED AND
* ON ANY THEORY OF LIABILITY, WHETHER IN CONTRACT, STRICT LIABILITY, OR TORT (INCLUDING NEGLIGENCE
OR OTHERWISE) ARISING IN ANY WAY OUT
* OF THE USE OF THIS SOFTWARE, EVEN IF ADVISED OF THE POSSIBILITY OF
* SUCH DAMAGE.
* ====================================================================
*
* This software consists of voluntary contributions made by many
* individuals on behalf of the Apache Software Foundation. For more
* information on the Apache Software Foundation, please see
* <http://www.apache.org/>.
*
* Portions of this software are based upon public domain software
* originally written at the National Center for Supercomputing Applications,
* University of Illinois, Urbana-Champaign.
*/
Object-Graph Navigation Language (OGNL)
OpenSymphony Apache Software License Version 1.1
General information:
Copyright (c) 2001-2004 The OpenSymphony Group. All rights reserved.
The OpenSymphony Software License, Version 1.1
(this license is derived and fully compatible with the Apache S oftware License - see http://www.apache.org/LICENSE.txt)
Copyright (c) 2001-2004 The OpenSymphony Group. All rights reserved.
Redistribution and use in source and binary forms, with or without modification, are permitted provided that the following
conditions are met:
1. Redistributions of source code must retain the above copyright notice, this list of conditions and the following
disclaimer.
2. Redistributions in binary form must reproduce the above copyright notice, this list of conditions and the following
disclaimer in the documentation and/or other materials provided with the distribution.
3. The end-user documentation included with the redistribution, if any, must include the following acknowledgment:
'This product includes software developed by the OpenSymphony Group (http://www.opensymphony.com/).' Alternately, this acknowledgment may appear in the software itself, if and wherever such third-party acknowledgments
normally appear.
4. The names 'OpenSymphony' and 'The OpenSymphony Group' must not be used to endorse or promote products
derived from this software without prior written permission. For written permission, please contact license@opensymphony.com.
5. Products derived from this software may not be called 'OpenSymphony' or 'WebWork', nor may 'OpenSymphony'
or 'WebWork' appear in their name, without prior written permission of the OpenSymphony Group.
THIS SOFTWARE IS PROVIDED 'AS IS' AND ANY EXPRESSED OR IMPLIED WARRANTIES, INCLUDING, BUT NOT
LIMITED TO, THE IMPLIED WARRANTIES OF MERCHANTABILITY AND FITNESS FOR A PARTICULAR PURPOSE
ARE DISCLAIMED. IN NO EVENT SHALL THE APACHE SOFTWARE FOUNDATION OR ITS CONTRIBUTORS BE
LIABLE FOR ANY DIRECT, INDIRECT, INCIDENTAL, SPECIAL, EXEMPLARY, OR CONSEQUENTIAL DAMAGES
(INCLUDING, BUT NOT LIMITED TO, PROCUREMENT OF SUBSTITUTE GOODS OR SERVICES; LOSS OF USE, DATA,
OR PROFITS; OR BUSINESS INTERRUPTION) HOWEVER CAUSED AND ON ANY THEORY OF LIABILITY, WHETHER
IN CONTRACT, STRICT LIABILITY, OR TORT (INCLUDING NEGLIGENCE OR OTHERWISE) ARISING IN ANY WAY
OUT OF THE USE OF THIS SOFTWARE, EVEN IF ADVISED OF THE POSSIBILITY OF SUCH DAMAGE.
SmartZone 100 Administrator Guide for RuckOS 3.1, 800-70827-001 Rev B 5
Page 7

Freemarker
Copyright (c) 2003 The Visigoth Software Society. All rights reserved.
Redistribution and use in source and binary forms, with or without
modification, are permitted provided that the following conditions are met:
1. Redistributions of source code must retain the above copyright notice, this list of conditions and the following
disclaimer.
2. The end-user documentation included with the redistribution, if any, must include the following acknowlegement:
"This product includes software developed by the Visigoth Software Society (http://www.visigoths.org/)." Alternately,
this acknowlegement may appear in the software itself, if and wherever such third-party acknowlegements normally
appear.
3. Neither the name "FreeMarker", "Visigoth", nor any of the names of the project contributors may be used to endorse
or promote products derived from this software without prior written permission. For written permission, please contact
visigoths@visigoths.org.
4. Products derived from this software may not be called "FreeMarker" or "Visigoth" nor may "FreeMarker" or "Visigoth"
appear in their names without prior written permission of the Visigoth Software Society.
THIS SOFTWARE IS PROVIDED ``AS IS'' AND ANY EXPRESSED OR IMPLIED WARRANTIES, INCLUDING, BUT NOT
LIMITED TO, THE IMPLIED WARRANTIES OF MERCHANTABILITY AND FITNESS FOR A PARTICULAR PURPOSE
ARE DISCLAIMED. IN NO EVENT SHALL THE VISIGOTH SOFTWARE SOCIETY OR ITS CONTRIBUTORS BE LIABLE
FOR ANY DIRECT, INDIRECT, INCIDENTAL, SPECIAL, EXEMPLARY, OR CONSEQUENTIAL DAMAGES
(INCLUDING,BUT NOT LIMITED TO, PROCUREMENT OF SUBSTITUTE GOODS OR SERVICES; LOSS OF USE,DATA,
OR PROFITS; OR BUSINESS INTERRUPTION) HOWEVER CAUSED AND ON ANY THEORY OF LIABILITY, WHETHER
IN CONTRACT, STRICT LIABILITY, OR TORT (INCLUDING NEGLIGENCE OR OTHERWISE) ARISING IN ANY WAY
OUT OF THE USE OF THIS SOFTWARE, EVEN IF ADVISED OF THE POSSIBILITY OF SUCH DAMAGE.
----------------------------------------------------------------------------This software consists of voluntary contributions made by many individuals on
behalf of the Visigoth Software Society. For more information on the Visigoth
Software Society, please see http://www.visigoths.org/
Java Beans Activation Framework
COMMON DEVELOPMENT AND DISTRIBUTION LICENSE (CDDL) Version 1.0
1. Definitions.
1.1. Contributor. means each individual or entity that creates or contributes to the creation of Modifications.
1.2. Contributor Version. means the combination of the Original Software, prior Modifications used by a Contributor (if
any), and the Modifications made by that particular Contributor.
1.3. Covered Software. means (a) the Original Software, or (b) Modifications, or (c) the combination of files containing
Original Software with files containing Modifications, in each case including portions thereof.
1.4. Executable. means the Covered Software in any form other than Source Code.
1.5. Initial Developer. means the individual or entity that first makes Original Software available under this License.
1.6. Larger Work. means a work which combines Covered Software or portions thereof with code not governed by the
terms of this License.
1.7. License. means this document.
1.8. Licensable. means having the right to grant, to the maximum extent possible, whether at the time of the initial grant or
subsequently acquired, any and all of the rights conveyed herein.
1.9. Modifications. means the Source Code and Executable form of any of the following:
A. Any file that results from an addition to, deletion from or modification of the contents of a file containing Original
Software or previous Modifications;
B. Any new file that contains any part of the Original Software or previous Modification; or
C. Any new file that is contributed or otherwise made available under the terms of this License.
1.10. Original Software. means the Source Code and Executable form of computer software code that is originally
released under this License.
1.11. Patent Claims. means any patent claim(s), now owned or hereafter acquired, including without limitation, method,
process, and apparatus claims, in any patent Licensable by grantor.
1.12. Source Code. means (a) the common form of computer software code in which modifications are made and (b)
associated documentation included in or with such code.
SmartZone 100 Administrator Guide for RuckOS 3.1, 800-70827-001 Rev B 6
Page 8

1.13. You. (or .Your.) means an individual or a legal entity exercising rights under, and complying with all of the terms
of, this License. For legal entities, .You. includes any entity which controls, is controlled by, or is under common control
with You. For purposes of this definition, .control. means (a) the power, direct or indirect, to cause the direction or
management of such entity, whether by contract or otherwise, or (b) ownership of more than fifty percent (50%) of the
outstanding shares or beneficial ownership of such entity.
2. License Grants.
2.1. The Initial Developer Grant.
Conditioned upon Your compliance with Section 3.1 below and subject to third party intellectual property claims, the
Initial Developer hereby grants You a world-wide, royalty-free, non-exclusive license:
(a) under intellectual property rights (other than patent or trademark) Licensable by Initial Developer, to use, reproduce,
modify, display, perform, sublicense and distribute the Original Software (or portions thereof), with or without Modifications, and/or as part of a Larger Work; and
(b) under Patent Claims infringed by the making, using or selling of Original Software, to ma ke, have made, use, practice,
sell, and offer for sale, and/or otherwise dispose of the Original Software (or portions thereof).
(c) The licenses granted in Sections 2.1(a) and (b) are effective on the date Initial Developer first distributes or otherwise
makes the Original Software available to a third party under the terms of this License.
(d) Notwithstanding Section 2.1(b) above, no patent license is granted: (1) for code that You delete from the Original
Software, or (2) for infringements caused by: (i) the modification of the Original Software, or (ii) the combination of the
Original Software with other software or devices.
2.2. Contributor Grant.
Conditioned upon Your compliance with Section 3.1 below and subject to third party intellectual property claims, each
Contributor hereby grants You a world-wide, royalty-free, non-exclusive license:
a) under intellectual property rights (other than patent or trademark) Licensable by Contributor to use, reproduce, modify,
display, perform, sublicense and distribute the Modifications created by such Contributor (or portions thereof), either
on an unmodified basis, with other Modifications, as Covered Software and/or as part of a Larger Work;
and
(b) under Patent Claims infringed by the making, using, or selling of Modifications made by that Contributor either alone
and/or in combination with its Contributor Version (or portions of such combination), to make, use, sell, offer for sale,
have made, and/or otherwise dispose of: (1) Modifications made by that Contributor (or portions thereof); and (2) the
combination of Modifications made by that Contributor with its Contributor Version (or portions of such
combination).
(c) The licenses granted in Sections 2.2(a) and 2.2(b) are effective on the date Contributor first distributes or otherwise
makes the Modifications available to a third party.
(d) Notwithstanding Section 2.2(b) above, no patent license is granted: (1) for any code that Contributor has deleted
from the Contributor Version; (2) for infringements caused by: (i) third party modifications of Contributor Version, or (ii)
the combination of Modifications made by that Contributor with other software (except as part of the Contributor Version)
or other devices; or (3) under Patent Claims infringed by Covered Software in the absence of Modifications made by
that Contributor.
3. Distribution Obligations.
3.1. Availability of Source Code.
Any Covered Software that You distribute or otherwise make available in Executable form must also be made available
in Source Code form and that Source Code form must be distributed only under the terms of this License. You must
include a copy of this License with every copy of the Source Code form of the Covered Software You distribute or
otherwise make available. You must inform recipients of any such Covered Software in Executable form as to how they
can obtain such Covered Software in Source Code form in a reasonable manner on or through a medium customarily
used for software exchange.
3.2. Modifications.
The Modifications that You create or to which You contribute are governed by the terms of this License. You represent
that You believe Your Modifications are Your original creation(s) and/or You have sufficient rights to grant the rights
conveyed by this License.
3.3. Required Notices.
You must include a notice in each of Your Modifications that identifies You as the Contributor of the Modification. You
may not remove or alter any copyright, patent or trademark notices contained within the Covered Software, or any
notices of licensing or any descriptive text giving attribution to any Contributor or the Initial Developer.
3.4. Application of Additional Terms.
SmartZone 100 Administrator Guide for RuckOS 3.1, 800-70827-001 Rev B 7
Page 9

You may not offer or impose any terms on any Covered Software in Source Code form that alters or restricts the
applicable version of this License or the recipients. rights hereunder. You may choose to offer, and to charge a fee for,
warranty, support, indemnity or liability obligations to one or more recipients of Covered Software. However, you may
do so only on Your own behalf, and not on behalf of the Initial Developer or any Contributor. You must make it absolutely
clear that any such warranty, support, indemnity or liability obligation is offered by You alone, and You hereby agree to
indemnify the Initial Developer and every Contributor for any liability incurred by the Initial Developer or such Contributor
as a result of warranty, support, indemnity or liability terms You offer.
3.5. Distribution of Executable Versions.
You may distribute the Executable form of the Covered Software under the terms of this License or under the terms of
a license of Your choice, which may contain terms different from this License, provided that You are in compliance with
the terms of this License and that the license for the Executable form does not attempt to limit or alter the recipient.s
rights in the Source Code form from the rights set forth in this License. If You distribute the Covered Software in
Executable form under a different license, You must make it absolutely clear that any terms which differ from this License
are offered by You alone, not by the Initial Developer or Contributor. You hereby agree to indemnify the Initial Developer
and every Contributor for any liability incurred by the Initial Developer or such Contributor as a result of any such terms
You o ffe r.
3.6. Larger Works.
You may create a Larger Work by combining Covered Software with other code not governed by the terms of this
License and distribute the Larger Work as a single product. In such a case, You must make sure the requirements of
this License are fulfilled for the Covered Software.
4. Versions of the License.
4.1. New Versions.
Sun Microsystems, Inc. is the initial license steward and may publish revised and/or new versions of this License from
time to time. Each version will be given a distinguishing version number. Except as provided in Section 4.3, no one other
than the license steward has the right to modify this License.
4.2. Effect of New Versions.
You may always continue to use, distribute or otherwise make the Covered Software available under the terms of the
version of the License under which You originally received the Covered Software. If the Initial Developer includes a notice
in the Original Software prohibiting it from being distributed or otherwise made available under any subsequent version
of the License, You must distribute and make the Covered Software available under the terms of the version of the
License under which You originally received the Covered Software. Otherwise, You may also choose to use, distribute
or otherwise make the Covered Software available under the terms of any subsequent version of the License published
by the license steward.
4.3. Modified Versions.
When You are an Initial Developer and You want to create a new license for Your Original Software, You may create and
use a modified version of this License if You: (a) rename the license and remove any references to the name of the
license steward (except to note that the license differs from this License); and (b) otherwise make it clear that the license
contains terms which differ from this License.
5. DISCLAIMER OF WARRANTY.
COVERED SOFTWARE IS PROVIDED UNDER THIS LICENSE ON AN .AS IS. BASIS, WITHOUT WARRANTY OF ANY
KIND, EITHER EXPRESSED OR IMPLIED, INCLUDING, WITHOUT LIMITATION, WARRANTIES THAT THE COVERED
SOFTWARE IS FREE OF DEFECTS, MERCHANTABLE, FIT FOR A PARTICULAR PURPOSE OR NON-INFRINGING.
THE ENTIRE RISK AS TO THE QUALITY AND PERFORMANCE OF THE COVERED SOFTWARE IS WITH YOU. SHOULD
ANY COVERED SOFTWARE PROVE DEFECTIVE IN ANY RESPECT, YOU (NOT THE INITIAL DEVELOPER OR ANY
OTHER CONTRIBUTOR) ASSUME THE COST OF ANY NECESSARY SERVICING, REPAIR OR CORRECTION. THIS
DISCLAIMER OF WARRANTY CONSTITUTES AN ESSENTIAL PART OF THIS LICENSE. NO USE OF ANY COVERED
SOFTWARE IS AUTHORIZED HEREUNDER EXCEPT UNDER THIS DISCLAIMER.
6. TERMINATION.
6.1. This License and the rights granted hereunder will terminate automatically if You fail to comply with terms herein
and fail to cure such breach within 30 days of becoming aware of the breach. Provisions which, by their nature, must
remain in effect beyond the termination of this License shall survive.
6.2. If You assert a patent infringement claim (excluding declaratory judgment actions) against Initial Developer or a
Contributor (the Initial Developer or Contributor against whom You assert such claim is referred to as .Participant.)
alleging that the Participant Software (meaning the Contributor Version where the Participant is a Contributor or the
Original Software where the Participant is the Initial Developer) directly or indirectly infringes any patent, then any and
all rights granted directly or indirectly to You by such Participant, the Initial Developer (if the Initial Developer is not the
SmartZone 100 Administrator Guide for RuckOS 3.1, 800-70827-001 Rev B 8
Page 10

Participant) and all Contributors under Sections 2.1 and/or 2.2 of this License shall, upon 60 days notice from Participant
terminate prospectively and automatically at the expiration of such 60 day notice period, unless if within such 60 day
period You withdraw Your claim with respect to the Participant Software against such Participant either unilaterally or
pursuant to a written agreement with Participant.
6.3. In the event of termination under Sections 6.1 or 6.2 above, all end user licenses that have been validly granted by
You or any distributor hereunder prior to termination (excluding licenses granted to You by any distributor) shall survive
termination.
7. LIMITATION OF LIABILITY.
UNDER NO CIRCUMSTANCES AND UNDER NO LEGAL THEORY, WHETHER TORT (INCLUDING NEGLIGENCE),
CONTRACT, OR OTHERWISE, SHALL YOU, THE INITIAL DEVELOPER, ANY OTHER CONTRIBUTOR, OR ANY
DISTRIBUTOR OF COVERED SOFTWARE, OR ANY SUPPLIER OF ANY OF SUCH PARTIES, BE LIABLE TO ANY
PERSON FOR ANY INDIRECT, SPECIAL, INCIDENTAL, OR CONSEQUENTIAL DAMAGES OF ANY CHARACTER
INCLUDING, WITHOUT LIMITATION, DAMAGES FOR LOST PROFITS, LOSS OF GOODWILL, WORK STOPPAGE,
COMPUTER FAILURE OR MALFUNCTION, OR ANY AND ALL OTHER COMMERCIAL DAMAGES OR LOSSES, EVEN
IF SUCH PARTY SHALL HAVE BEEN INFORMED OF THE POSSIBILITY OF SUCH DAMAGES. THIS LIMITATION OF
LIABILITY SHALL NOT APPLY TO LIABILITY FOR DEATH OR PERSONAL INJURY RESULTING FROM SUCH PARTY.S
NEGLIGENCE TO THE EXTENT APPLICABLE LAW PROHIBITS SUCH LIMITATION. SOME JURISDICTIONS DO NOT
ALLOW THE EXCLUSION OR LIMITATION OF INCIDENTAL OR CONSEQUENTIAL DAMAGES, SO THIS EXCLUSION
AND LIMITATION MAY NOT APPLY TO YOU.
8. U.S. GOVERNMENT END USERS.
The Covered Software is a .commercial item,. as that term is defined in 48 C.F.R. 2.101 (Oct. 1995), consisting of
.commercial computer software. (as that term is defined at 48 C.F.R. º 252.227-7014(a)(1)) and commercial computer
software documentation. as such terms are used in 48 C.F.R. 12.212 (Sept. 1995). Consistent with 48 C.F.R. 12.212 and
48 C.F.R. 227.7202-1 through 227.7202-4 (June 1995), all U.S. Government End Users acquire Covered Software with
only those rights set forth herein. This U.S. Government Rights clause is in lieu of, and supersedes, any other FAR,
DFAR, or other clause or provision that addresses Government rights in computer software under this License.
9. MISCELLANEOUS.
This License represents the complete agreement concerning subject matter hereof. If any provision of this License is
held to be unenforceable, such provision shall be reformed only to the extent necessary to make it enforceable. This
License shall be governed by the law of the jurisdiction specified in a notice contained within the Original Software
(except to the extent applicable law, if any, provides otherwise), excluding such jurisdiction.s conflict-of-law provisions.
Any litigation relating to this License shall be subject to the jurisdiction of the courts located in the jurisdiction and venue
specified in a notice contained within the Original Software, with the losing party responsible for costs, including, without
limitation, court costs and reasonable attorneys. fees and expenses. The application of the United Nations Convention
on Contracts for the International Sale of Goods is expressly excluded. Any law or regulation which provides that the
language of a contract shall be construed against the drafter shall not apply to this License. You agree that You alone
are responsible for compliance with the United States export administration regulations (and the export control laws
and regulation of any other countries) when You use, distribute or otherwise make available any Covered Software.
10. RESPONSIBILITY FOR CLAIMS.
As between Initial Developer and the Contributors, each party is responsible for claims and damages arising, directly
or indirectly, out of its utilization of rights unde r this License and You agree to work with Initial Developer and Co ntributors
to distribute such responsibility on an equitable basis. Nothing herein is intended or shall be deemed to constitute any
admission of liability.
NOTICE PURSUANT TO SECTION 9 OF THE COMMON DEVELOPMENT AND DISTRIBUTION LICENSE (CDDL)
The code released under the CDDL shall be governed by the laws of the State of California (excluding conflict-of-law
provisions). Any litigation relating to this License shall be subject to the jurisdiction of the Federal Courts of the Northern
District of California and the state courts of the State of California, with venue lying in Santa Clara County, California.
JQuery
Copyright (c) 2011 John Resig, http://jquery.com/
Permission is hereby granted, free of charge, to any person obtaining a copy of this software and associated
documentation files (the "Software"), to deal in the Software without restriction, including without limitation the rights to
use, copy, modify, merge, publish, distribute, sublicense, and/or sell copies of the Software, and to permit persons to
whom the Software is furnished to do so, subject to the following conditions:
The above copyright notice and this permission notice shall be included in all copies or substantial portions of the
Software.
SmartZone 100 Administrator Guide for RuckOS 3.1, 800-70827-001 Rev B 9
Page 11

THE SOFTWARE IS PROVIDED "AS IS", WITHOUT WARRANTY OF ANY KIND, EXPRESS OR IMPLIED, INCLUDING
BUT NOT LIMITED TO THE WARRANTIES OF MERCHANTABILITY, FITNESS FOR A PARTICULAR PURPOSE AND
NONINFRINGEMENT. IN NO EVENT SHALL THE AUTHORS OR COPYRIGHT HOLDERS BE LIABLE FOR ANY CLAIM,
DAMAGES OR OTHER LIABILITY, WHETHER IN AN ACTION OF CONTRACT, TOR T OR OTHERWISE, ARISING FROM,
OUT OF OR IN CONNECTION WITH THE SOFTWARE OR THE USE OR OTHER DEALINGS IN THE SOFTWARE.
OpenSSL
LICENSE ISSUES
==============
The OpenSSL toolkit stays under a dual license, i. e. both the conditions of the OpenSSL License and the original SSLeay
license apply to the toolkit. See below for the actual license texts. Actually both licenses are BSD-style Open Source
licenses. In case of any license issues related to OpenSSL please contact openssl-core@openssl.org.
OpenSSL License
--------------/* ====================================================================
* Copyright (c) 1998-2011 The OpenSSL Project. All rights reserved.
*
* Redistribution and use in source and binary forms, with or without
* modification, are permitted provided that the following conditions
* are met:
*
* 1. Redistributions of source code must retain the above copyright
* notice, this list of conditions and the following disclaimer.
*
* 2. Redistributions in binary form must reproduce the above copyright
* notice, this list of conditions and the following disclaimer in
* the documentation and/or other materials provided with the
* distribution.
*
* 3. All advertising materials mentioning features or use of this
* software must display the following acknowledgment:
* "This product includes software developed by the OpenSSL Project
* for use in the OpenSSL Toolkit. (http://www.openssl.org/)"
*
* 4. The names "OpenSSL Toolkit" and "OpenSSL Project" must not be used to
* endorse or promote products derived from this software without
* prior written permission. For written permission, please contact
* openssl-core@openssl.org.
*
* 5. Products derived from this software may not be called "OpenSSL"
* nor may "OpenSSL" appear in their names without prior written
* permission of the OpenSSL Project.
*
* 6. Redistributions of any form whatsoever must retain the following
* acknowledgment:
* "This product includes software developed by the OpenSSL Project
* for use in the OpenSSL Toolkit (http://www.openssl.org/)"
*
* THIS SOFTWARE IS PROVIDED BY THE OpenSSL PROJECT ``AS IS'' AND ANY
* EXPRESSED OR IMPLIED WARRANTIES, INCLUDING, BUT NOT LIMITED TO, THE
* IMPLIED WARRANTIES OF MERCHANTABILITY AND FITNESS FOR A PARTICULAR
SmartZone 100 Administrator Guide for RuckOS 3.1, 800-70827-001 Rev B 10
Page 12

* PURPOSE ARE DISCLAIMED. IN NO EVENT SHALL THE OpenSSL PROJECT OR
* ITS CONTRIBUTORS BE LIABLE FOR ANY DIRECT, INDIRECT, INCIDENTAL,
* SPECIAL, EXEMPLARY, OR CONSEQUENTIAL DAMAGES (INCLUDING, BUT
* NOT LIMITED TO, PROCUREMENT OF SUBSTITUTE GOODS OR SERVICES;
* LOSS OF USE, DATA, OR PROFITS; OR BUSINESS INTERRUPTION)
* HOWEVER CAUSED AND ON ANY THEORY OF LIABILITY, WHETHER IN CONTRACT,
* STRICT LIABILITY, OR TORT (INCLUDING NEGLIGENCE OR OTHERWISE)
* ARISING IN ANY WAY OUT OF THE USE OF THIS SOFTWARE, EVEN IF ADVISED
* OF THE POSSIBILITY OF SUCH DAMAGE.
* ====================================================================
*
* This product includes cryptographic software written by Eric Young
* (eay@cryptsoft.com). This product includes software written by Tim
* Hudson (tjh@cryptsoft.com).
*
*/
Original SSLeay License
----------------------/* Copyright (C) 1995-1998 Eric Young (eay@cryptsoft.com)
* All rights reserved.
*
* This package is an SSL implementation written
* by Eric Young (eay@cryptsoft.com).
* The implementation was written so as to conform with Netscapes SSL.
*
* This library is free for commercial and non-commercial use as long as
* the following conditions are aheared to. The following conditions
* apply to all code found in this distribution, be it the RC4, RSA,
* lhash, DES, etc., code; not just the SSL code. The SSL documentation
* included with this distribution is covered by the same copyright terms
* except that the holder is Tim Hudson (tjh@cryptsoft.com).
*
* Copyright remains Eric Young's, and as such any Copyright notices in
* the code are not to be removed.
* If this package is used in a product, Eric Young should be given attribution
* as the author of the parts of the library used.
* This can be in the form of a textual message at program startup or
* in documentation (online or textual) provided with the package.
** Redistribution and use in source and binary forms, with or without
* modification, are permitted provided that the following conditions
* are met:
* 1. Redistributions of source code must retain the copyright
* notice, this list of conditions and the following disclaimer.
* 2. Redistributions in binary form must reproduce the above copyright
* notice, this list of conditions and the following disclaimer in the
* documentation and/or other materials provided with the distribution.
* 3. All advertising materials mentioning features or use of this software
* must display the following acknowledgement:
* "This product includes cryptographic software written by
* Eric Young (eay@cryptsoft.com)"
SmartZone 100 Administrator Guide for RuckOS 3.1, 800-70827-001 Rev B 11
Page 13

* The word 'cryptographic' can be left out if the rouines from the library
* being used are not cryptographic related :-).
* 4. If you include any Windows specific code (or a derivative thereof) from
* the apps directory (application code) you must include an acknowledgement:
* "This product includes software written by Tim Hudson (tjh@cryptsoft.com)"
*
* THIS SOFTWARE IS PROVIDED BY ERIC YOUNG ``AS IS'' AND
* ANY EXPRESS OR IMPLIED WARRANTIES, INCLUDING, BUT NOT LIMITED TO, THE
* IMPLIED WARRANTIES OF MERCHANTABILITY AND FITNESS FOR A PARTICULAR PURPOSE
* ARE DISCLAIMED. IN NO EVENT SHALL THE AUTHOR OR CONTRIBUTORS BE LIABLE
* FOR ANY DIRECT, INDIRECT, INCIDENTAL, SPECIAL, EXEMPLARY, OR CONSEQUENTIAL
* DAMAGES (INCLUDING, BUT NOT LIMITED TO, PROCUREMENT OF SUBSTITUTE GOODS
* OR SERVICES; LOSS OF USE, DATA, OR PROFITS; OR BUSINESS INTERRUPTION)
* HOWEVER CAUSED AND ON ANY THEORY OF LIABILITY, WHETHER IN CONTRACT, STRICT
* LIABILITY, OR TORT (INCLUDING NEGLIGENCE OR OTHERWISE) ARISING IN ANY WAY
* OUT OF THE USE OF THIS SOFTWARE, EVEN IF ADVISED OF THE POSSIBILITY OF
* SUCH DAMAGE.
*
* The licence and distribution terms for any publically available version or
* derivative of this code cannot be changed. i.e. this code cannot simply be
* copied and put under another distribution licence
* [including the GNU Public Licence.]
*/
SmartZone 100 Administrator Guide for RuckOS 3.1, 800-70827-001 Rev B 12
Page 14

Contents
About This Guide
Document Conventions . . . . . . . . . . . . . . . . . . . . . . . . . . . . . . . . . . . . . . . . . . . . . . . . . 12
Related Documentation . . . . . . . . . . . . . . . . . . . . . . . . . . . . . . . . . . . . . . . . . . . . . . . . . 12
Documentation Feedback. . . . . . . . . . . . . . . . . . . . . . . . . . . . . . . . . . . . . . . . . . . . . . . . 13
1 Navigating the Web Interface
Setting Up the Controller for the First Time . . . . . . . . . . . . . . . . . . . . . . . . . . . . . . . . . . . 14
Logging On to the Web Interface . . . . . . . . . . . . . . . . . . . . . . . . . . . . . . . . . . . . . . . . . . 14
Web Interface Features. . . . . . . . . . . . . . . . . . . . . . . . . . . . . . . . . . . . . . . . . . . . . . . . . . 16
Main Menu. . . . . . . . . . . . . . . . . . . . . . . . . . . . . . . . . . . . . . . . . . . . . . . . . . . . . . . . . . 18
Sidebar . . . . . . . . . . . . . . . . . . . . . . . . . . . . . . . . . . . . . . . . . . . . . . . . . . . . . . . . . . . . 18
Content Area . . . . . . . . . . . . . . . . . . . . . . . . . . . . . . . . . . . . . . . . . . . . . . . . . . . . . . . . 18
Miscellaneous Bar . . . . . . . . . . . . . . . . . . . . . . . . . . . . . . . . . . . . . . . . . . . . . . . . . . . . 19
Using Widgets on the Dashboard . . . . . . . . . . . . . . . . . . . . . . . . . . . . . . . . . . . . . . . . . . 20
Widgets That You Can Display. . . . . . . . . . . . . . . . . . . . . . . . . . . . . . . . . . . . . . . . . . . 20
Client Count Summary Widget . . . . . . . . . . . . . . . . . . . . . . . . . . . . . . . . . . . . . . . . . 20
AP Summary Widget. . . . . . . . . . . . . . . . . . . . . . . . . . . . . . . . . . . . . . . . . . . . . . . . . 21
SmartZone System Summary Widget . . . . . . . . . . . . . . . . . . . . . . . . . . . . . . . . . . . . 21
Traffic Summary Widget . . . . . . . . . . . . . . . . . . . . . . . . . . . . . . . . . . . . . . . . . . . . . . 22
Client Type Summary Widget . . . . . . . . . . . . . . . . . . . . . . . . . . . . . . . . . . . . . . . . . . 22
Wireless Network Summary Widget . . . . . . . . . . . . . . . . . . . . . . . . . . . . . . . . . . . . . 23
Top 10 APs by Client Count . . . . . . . . . . . . . . . . . . . . . . . . . . . . . . . . . . . . . . . . . . . 23
Top 10 Clients by Traffic Count. . . . . . . . . . . . . . . . . . . . . . . . . . . . . . . . . . . . . . . . . 24
Widget Slots . . . . . . . . . . . . . . . . . . . . . . . . . . . . . . . . . . . . . . . . . . . . . . . . . . . . . . . . 24
Adding a Widget . . . . . . . . . . . . . . . . . . . . . . . . . . . . . . . . . . . . . . . . . . . . . . . . . . . . . 24
Adding a Widget to a Widget Slot . . . . . . . . . . . . . . . . . . . . . . . . . . . . . . . . . . . . . . . . 25
Displaying a Widget in a Widget Slot . . . . . . . . . . . . . . . . . . . . . . . . . . . . . . . . . . . . . . 26
Moving a Widget . . . . . . . . . . . . . . . . . . . . . . . . . . . . . . . . . . . . . . . . . . . . . . . . . . . . . 26
Deleting a Widget. . . . . . . . . . . . . . . . . . . . . . . . . . . . . . . . . . . . . . . . . . . . . . . . . . . . . 27
Changing the Administrator Password . . . . . . . . . . . . . . . . . . . . . . . . . . . . . . . . . . . . . . 27
Logging Off the Web Interface . . . . . . . . . . . . . . . . . . . . . . . . . . . . . . . . . . . . . . . . . . . . 27
SmartZone 100 Administrator Guide for RuckOS 3.1, 800-70827-001 Rev B 3
Page 15

2 Working with User Accounts, Guest Passes, and User Roles
Working with User Accounts. . . . . . . . . . . . . . . . . . . . . . . . . . . . . . . . . . . . . . . . . . . . . . 29
Creating a User Account . . . . . . . . . . . . . . . . . . . . . . . . . . . . . . . . . . . . . . . . . . . . . . . 29
Editing a User Account . . . . . . . . . . . . . . . . . . . . . . . . . . . . . . . . . . . . . . . . . . . . . . . . 30
Working with Guest Passes . . . . . . . . . . . . . . . . . . . . . . . . . . . . . . . . . . . . . . . . . . . . . . 31
Generating Guest Passes. . . . . . . . . . . . . . . . . . . . . . . . . . . . . . . . . . . . . . . . . . . . . . . 31
Step 1: Create a Guest Access Service. . . . . . . . . . . . . . . . . . . . . . . . . . . . . . . . . . . 32
Step 2: Create a Guest Access WLAN . . . . . . . . . . . . . . . . . . . . . . . . . . . . . . . . . . . 32
Step 3: Generate a Guest Pass. . . . . . . . . . . . . . . . . . . . . . . . . . . . . . . . . . . . . . . . . 33
Step 4: Send Guest Passes to Guest Users . . . . . . . . . . . . . . . . . . . . . . . . . . . . . . . 35
Printing the Guest Pass . . . . . . . . . . . . . . . . . . . . . . . . . . . . . . . . . . . . . . . . . . . . . 36
Exporting the Guest Pass to CSV. . . . . . . . . . . . . . . . . . . . . . . . . . . . . . . . . . . . . . 37
Sending the Guest Pass via Email . . . . . . . . . . . . . . . . . . . . . . . . . . . . . . . . . . . . . 38
Sending the Guest Pass via SMS. . . . . . . . . . . . . . . . . . . . . . . . . . . . . . . . . . . . . . 39
Generating Guest Passes from an Imported CSV. . . . . . . . . . . . . . . . . . . . . . . . . . . . . 40
Viewing the List of Guest Users . . . . . . . . . . . . . . . . . . . . . . . . . . . . . . . . . . . . . . . . . . 43
Deleting Guest Users . . . . . . . . . . . . . . . . . . . . . . . . . . . . . . . . . . . . . . . . . . . . . . . . . . 43
Creating a Guest Pass Printout Template. . . . . . . . . . . . . . . . . . . . . . . . . . . . . . . . . . . 44
Working with User Roles. . . . . . . . . . . . . . . . . . . . . . . . . . . . . . . . . . . . . . . . . . . . . . . . . 45
Creating a User Role . . . . . . . . . . . . . . . . . . . . . . . . . . . . . . . . . . . . . . . . . . . . . . . . . . 45
3 Configuring the Wireless Network
Configuring WLANs . . . . . . . . . . . . . . . . . . . . . . . . . . . . . . . . . . . . . . . . . . . . . . . . . . . . 48
Creating a WLAN . . . . . . . . . . . . . . . . . . . . . . . . . . . . . . . . . . . . . . . . . . . . . . . . . . . . . 48
Client Load Balancing . . . . . . . . . . . . . . . . . . . . . . . . . . . . . . . . . . . . . . . . . . . . . . . . 56
Key Points About Client Load Balancing. . . . . . . . . . . . . . . . . . . . . . . . . . . . . . . . . 57
Band Balancing. . . . . . . . . . . . . . . . . . . . . . . . . . . . . . . . . . . . . . . . . . . . . . . . . . . . . 57
Client Admission Control. . . . . . . . . . . . . . . . . . . . . . . . . . . . . . . . . . . . . . . . . . . . . . 58
Bypassing Apple CNA. . . . . . . . . . . . . . . . . . . . . . . . . . . . . . . . . . . . . . . . . . . . . . . . 58
Viewing Existing WLANs . . . . . . . . . . . . . . . . . . . . . . . . . . . . . . . . . . . . . . . . . . . . . . . 58
Deleting WLANs. . . . . . . . . . . . . . . . . . . . . . . . . . . . . . . . . . . . . . . . . . . . . . . . . . . . . . 59
Configuring WLAN Groups . . . . . . . . . . . . . . . . . . . . . . . . . . . . . . . . . . . . . . . . . . . . . . . 59
Notes About WLAN Groups. . . . . . . . . . . . . . . . . . . . . . . . . . . . . . . . . . . . . . . . . . . . . 60
Creating a WLAN Group . . . . . . . . . . . . . . . . . . . . . . . . . . . . . . . . . . . . . . . . . . . . . . . 61
Viewing Existing WLAN Groups . . . . . . . . . . . . . . . . . . . . . . . . . . . . . . . . . . . . . . . . . . 61
Deleting WLAN Groups . . . . . . . . . . . . . . . . . . . . . . . . . . . . . . . . . . . . . . . . . . . . . . . . 62
Working with WLAN Schedule Profiles . . . . . . . . . . . . . . . . . . . . . . . . . . . . . . . . . . . . . 62
Creating a WLAN Schedule Profile . . . . . . . . . . . . . . . . . . . . . . . . . . . . . . . . . . . . . . 63
Viewing WLAN Schedule Profiles . . . . . . . . . . . . . . . . . . . . . . . . . . . . . . . . . . . . . . . 64
SmartZone 100 Administrator Guide for RuckOS 3.1, 800-70827-001 Rev B 4
Page 16

Deleting WLAN Schedule Profiles . . . . . . . . . . . . . . . . . . . . . . . . . . . . . . . . . . . . . . . 65
Configuring Access Points . . . . . . . . . . . . . . . . . . . . . . . . . . . . . . . . . . . . . . . . . . . . . . . 65
Configuring Common AP Settings . . . . . . . . . . . . . . . . . . . . . . . . . . . . . . . . . . . . . . . . 65
Channel Mode . . . . . . . . . . . . . . . . . . . . . . . . . . . . . . . . . . . . . . . . . . . . . . . . . . . . . 70
Client Load Balancing . . . . . . . . . . . . . . . . . . . . . . . . . . . . . . . . . . . . . . . . . . . . . . . . 71
Key Points About Load Balancing . . . . . . . . . . . . . . . . . . . . . . . . . . . . . . . . . . . . . 71
Band Balancing. . . . . . . . . . . . . . . . . . . . . . . . . . . . . . . . . . . . . . . . . . . . . . . . . . . . . 72
VLAN Pooling . . . . . . . . . . . . . . . . . . . . . . . . . . . . . . . . . . . . . . . . . . . . . . . . . . . . . . 72
Creating a VLAN Pooling Profile . . . . . . . . . . . . . . . . . . . . . . . . . . . . . . . . . . . . . . . 73
Assigning the VLAN Pooling Profile to a WLAN. . . . . . . . . . . . . . . . . . . . . . . . . . . . 73
Using a VLAN Pooling Profile to Override the VLAN Settings of a WLAN Group . . . 74
Configuring Model-Based Settings. . . . . . . . . . . . . . . . . . . . . . . . . . . . . . . . . . . . . . . . 76
Configuring AP Ethernet Ports. . . . . . . . . . . . . . . . . . . . . . . . . . . . . . . . . . . . . . . . . . 76
Designating an Ethernet Port Type . . . . . . . . . . . . . . . . . . . . . . . . . . . . . . . . . . . . . . 78
Trunk Ports . . . . . . . . . . . . . . . . . . . . . . . . . . . . . . . . . . . . . . . . . . . . . . . . . . . . . . 78
Access Ports . . . . . . . . . . . . . . . . . . . . . . . . . . . . . . . . . . . . . . . . . . . . . . . . . . . . . 78
General Ports . . . . . . . . . . . . . . . . . . . . . . . . . . . . . . . . . . . . . . . . . . . . . . . . . . . . . 79
Configuring AP Tunnel Settings . . . . . . . . . . . . . . . . . . . . . . . . . . . . . . . . . . . . . . . . . . 79
Tagging Critical APs. . . . . . . . . . . . . . . . . . . . . . . . . . . . . . . . . . . . . . . . . . . . . . . . . . . 81
Managing Access Points . . . . . . . . . . . . . . . . . . . . . . . . . . . . . . . . . . . . . . . . . . . . . . . 82
Viewing a List of Managed Access Points . . . . . . . . . . . . . . . . . . . . . . . . . . . . . . . . . 82
Provisioning and Swapping Access Points . . . . . . . . . . . . . . . . . . . . . . . . . . . . . . . . 83
Options for Provisioning and Swapping APs. . . . . . . . . . . . . . . . . . . . . . . . . . . . . . 84
Understanding How Swapping Works . . . . . . . . . . . . . . . . . . . . . . . . . . . . . . . . . . 85
Editing AP Configuration . . . . . . . . . . . . . . . . . . . . . . . . . . . . . . . . . . . . . . . . . . . . . . 86
Editing Swap Configuration . . . . . . . . . . . . . . . . . . . . . . . . . . . . . . . . . . . . . . . . . . . . 87
Deleting an Access Point. . . . . . . . . . . . . . . . . . . . . . . . . . . . . . . . . . . . . . . . . . . . . . 88
Controlling Access to the Wireless Network . . . . . . . . . . . . . . . . . . . . . . . . . . . . . . . . . . 89
Working with User Traffic Profiles. . . . . . . . . . . . . . . . . . . . . . . . . . . . . . . . . . . . . . . . . 89
Creating a User Traffic Profile . . . . . . . . . . . . . . . . . . . . . . . . . . . . . . . . . . . . . . . . . . 89
Viewing User Traffic Profiles . . . . . . . . . . . . . . . . . . . . . . . . . . . . . . . . . . . . . . . . . . . 91
Assigning Priorities to Traffic Profile Rules . . . . . . . . . . . . . . . . . . . . . . . . . . . . . . . . . 91
Deleting Traffic Profiles . . . . . . . . . . . . . . . . . . . . . . . . . . . . . . . . . . . . . . . . . . . . . . . 91
Controlling L2 Access . . . . . . . . . . . . . . . . . . . . . . . . . . . . . . . . . . . . . . . . . . . . . . . . . 92
Creating an L2 Access Policy . . . . . . . . . . . . . . . . . . . . . . . . . . . . . . . . . . . . . . . . . . 92
Viewing L2 Access Policies . . . . . . . . . . . . . . . . . . . . . . . . . . . . . . . . . . . . . . . . . . . . 92
Deleting L2 Access Policies. . . . . . . . . . . . . . . . . . . . . . . . . . . . . . . . . . . . . . . . . . . . 93
Controlling Device Access . . . . . . . . . . . . . . . . . . . . . . . . . . . . . . . . . . . . . . . . . . . . . . 94
Creating a Device Access Policy . . . . . . . . . . . . . . . . . . . . . . . . . . . . . . . . . . . . . . . . 94
SmartZone 100 Administrator Guide for RuckOS 3.1, 800-70827-001 Rev B 5
Page 17

Viewing Device Access Policies. . . . . . . . . . . . . . . . . . . . . . . . . . . . . . . . . . . . . . . . . 95
Deleting Device Access Policies . . . . . . . . . . . . . . . . . . . . . . . . . . . . . . . . . . . . . . . . 95
Managing Guest Access . . . . . . . . . . . . . . . . . . . . . . . . . . . . . . . . . . . . . . . . . . . . . . . . . 96
Creating a Guest Access Service . . . . . . . . . . . . . . . . . . . . . . . . . . . . . . . . . . . . . . . . . 96
Viewing Guest Access Services . . . . . . . . . . . . . . . . . . . . . . . . . . . . . . . . . . . . . . . . . . 98
Deleting Guest Access Services. . . . . . . . . . . . . . . . . . . . . . . . . . . . . . . . . . . . . . . . . . 99
Working with Hotspot (WISPr) Services. . . . . . . . . . . . . . . . . . . . . . . . . . . . . . . . . . . . . 100
Creating a Hotspot (WISPr) Service . . . . . . . . . . . . . . . . . . . . . . . . . . . . . . . . . . . . . . 101
Configuring Smart Client Support . . . . . . . . . . . . . . . . . . . . . . . . . . . . . . . . . . . . . . 103
Configuring the Logon URL. . . . . . . . . . . . . . . . . . . . . . . . . . . . . . . . . . . . . . . . . . . 104
Assigning a WLAN to Provide Hotspot Service. . . . . . . . . . . . . . . . . . . . . . . . . . . . . . 105
Working with Hotspot 2.0 Services . . . . . . . . . . . . . . . . . . . . . . . . . . . . . . . . . . . . . . . . 106
Working with Web Authentication Services . . . . . . . . . . . . . . . . . . . . . . . . . . . . . . . . . . 107
Adding an AAA Server for the Web Authentication Service. . . . . . . . . . . . . . . . . . . . . 107
Creating a Web Authentication Service . . . . . . . . . . . . . . . . . . . . . . . . . . . . . . . . . . . 107
Creating a WLAN for the Web Authentication Service. . . . . . . . . . . . . . . . . . . . . . . . . 109
Working with AAA Servers . . . . . . . . . . . . . . . . . . . . . . . . . . . . . . . . . . . . . . . . . . . . . . 111
Working with Proxy AAA Servers . . . . . . . . . . . . . . . . . . . . . . . . . . . . . . . . . . . . . . . . 111
Adding a Proxy AAA Authentication Server . . . . . . . . . . . . . . . . . . . . . . . . . . . . . . . 111
RADIUS Service Options . . . . . . . . . . . . . . . . . . . . . . . . . . . . . . . . . . . . . . . . . . . 112
Adding a Proxy AAA Accounting Server . . . . . . . . . . . . . . . . . . . . . . . . . . . . . . . . . 115
Deleting Proxy AAA Servers . . . . . . . . . . . . . . . . . . . . . . . . . . . . . . . . . . . . . . . . . . 116
Working with Non-Proxy AAA Servers . . . . . . . . . . . . . . . . . . . . . . . . . . . . . . . . . . . . 116
Adding a Non-Proxy AAA Authentication Server . . . . . . . . . . . . . . . . . . . . . . . . . . . 116
Adding a Non-Proxy AAA Accounting Server . . . . . . . . . . . . . . . . . . . . . . . . . . . . . 118
Deleting Non-Proxy AAA Servers. . . . . . . . . . . . . . . . . . . . . . . . . . . . . . . . . . . . . . . 120
Configuring Location Services. . . . . . . . . . . . . . . . . . . . . . . . . . . . . . . . . . . . . . . . . . . . 121
Configuring Bonjour Gateway Policies. . . . . . . . . . . . . . . . . . . . . . . . . . . . . . . . . . . . . . 123
Creating a Bonjour Gateway Rule on the AP . . . . . . . . . . . . . . . . . . . . . . . . . . . . . . . 123
Applying a Bonjour Policy to an AP . . . . . . . . . . . . . . . . . . . . . . . . . . . . . . . . . . . . . . 125
4 Configuring System Settings
Configuring Network Settings . . . . . . . . . . . . . . . . . . . . . . . . . . . . . . . . . . . . . . . . . . . . 128
Setting the System IP Mode. . . . . . . . . . . . . . . . . . . . . . . . . . . . . . . . . . . . . . . . . . . . 128
Configuring the Physical Interface Settings. . . . . . . . . . . . . . . . . . . . . . . . . . . . . . . . . 129
Configuring the User Defined Interface Settings . . . . . . . . . . . . . . . . . . . . . . . . . . . . . 131
Creating and Configuring Static Routes . . . . . . . . . . . . . . . . . . . . . . . . . . . . . . . . . . . 132
Configuring Log Settings. . . . . . . . . . . . . . . . . . . . . . . . . . . . . . . . . . . . . . . . . . . . . . . . 134
Event Severity Levels . . . . . . . . . . . . . . . . . . . . . . . . . . . . . . . . . . . . . . . . . . . . . . . . . 136
SmartZone 100 Administrator Guide for RuckOS 3.1, 800-70827-001 Rev B 6
Page 18

Default Event Severity to Syslog Priority Mapping. . . . . . . . . . . . . . . . . . . . . . . . . . . . 136
Configuring Event Management . . . . . . . . . . . . . . . . . . . . . . . . . . . . . . . . . . . . . . . . . . 137
Enabling or Disabling Notifications for a Single Event . . . . . . . . . . . . . . . . . . . . . . . . . 138
Viewing Enabled Notifications for Events . . . . . . . . . . . . . . . . . . . . . . . . . . . . . . . . . . 139
Configuring Event Thresholds . . . . . . . . . . . . . . . . . . . . . . . . . . . . . . . . . . . . . . . . . . . . 141
Events with Configurable Thresholds . . . . . . . . . . . . . . . . . . . . . . . . . . . . . . . . . . . . . 142
Configuring the Northbound Portal Interface . . . . . . . . . . . . . . . . . . . . . . . . . . . . . . . . . 143
Configuring the System Time . . . . . . . . . . . . . . . . . . . . . . . . . . . . . . . . . . . . . . . . . . . . 143
How APs Synchronize Time with the Controller . . . . . . . . . . . . . . . . . . . . . . . . . . . . . 144
Configuring an External Email Server. . . . . . . . . . . . . . . . . . . . . . . . . . . . . . . . . . . . . . . 144
Configuring External FTP Servers . . . . . . . . . . . . . . . . . . . . . . . . . . . . . . . . . . . . . . . . . 145
Managing the Certificate Store . . . . . . . . . . . . . . . . . . . . . . . . . . . . . . . . . . . . . . . . . . . 146
Generating a Certificate Signing Request . . . . . . . . . . . . . . . . . . . . . . . . . . . . . . . . . . 147
Importing an SSL Certificate. . . . . . . . . . . . . . . . . . . . . . . . . . . . . . . . . . . . . . . . . . . . 150
Assigning Certificates to Services. . . . . . . . . . . . . . . . . . . . . . . . . . . . . . . . . . . . . . . . 152
Configuring the External SMS Gateway. . . . . . . . . . . . . . . . . . . . . . . . . . . . . . . . . . . . . 154
Configuring SNMP Settings. . . . . . . . . . . . . . . . . . . . . . . . . . . . . . . . . . . . . . . . . . . . . . 155
Enabling Global SNMP Traps. . . . . . . . . . . . . . . . . . . . . . . . . . . . . . . . . . . . . . . . . . . 156
Configuring the SNMPv2 Agent . . . . . . . . . . . . . . . . . . . . . . . . . . . . . . . . . . . . . . . . . 156
Configuring the SNMPv3 Agent . . . . . . . . . . . . . . . . . . . . . . . . . . . . . . . . . . . . . . . . . 157
Managing the User Agent Blacklist . . . . . . . . . . . . . . . . . . . . . . . . . . . . . . . . . . . . . . . . 158
Adding a User Agent to the Blacklist . . . . . . . . . . . . . . . . . . . . . . . . . . . . . . . . . . . . . 159
Deleting User Agents from the Blacklist . . . . . . . . . . . . . . . . . . . . . . . . . . . . . . . . . . . 161
Controlling Access to the Management Interfaces. . . . . . . . . . . . . . . . . . . . . . . . . . . . . 162
5 Managing Administrators, Administrator Roles, and Administrator
Authentication
Managing Administrator Accounts . . . . . . . . . . . . . . . . . . . . . . . . . . . . . . . . . . . . . . . . 164
Creating an Administrator Account. . . . . . . . . . . . . . . . . . . . . . . . . . . . . . . . . . . . . . . 164
Managing Administrator Roles . . . . . . . . . . . . . . . . . . . . . . . . . . . . . . . . . . . . . . . . . . . 165
Creating an Administrator Role. . . . . . . . . . . . . . . . . . . . . . . . . . . . . . . . . . . . . . . . . . 165
Editing an Administrator Role . . . . . . . . . . . . . . . . . . . . . . . . . . . . . . . . . . . . . . . . . . . 166
Cloning an Existing Administrator Role. . . . . . . . . . . . . . . . . . . . . . . . . . . . . . . . . . . . 167
Managing RADIUS Servers for Administrator Authentication . . . . . . . . . . . . . . . . . . . . . 168
Adding a RADIUS Server for Administrator Authentication . . . . . . . . . . . . . . . . . . . . . 168
Using a Backup RADIUS Server. . . . . . . . . . . . . . . . . . . . . . . . . . . . . . . . . . . . . . . . . 169
Testing an AAA Server . . . . . . . . . . . . . . . . . . . . . . . . . . . . . . . . . . . . . . . . . . . . . . . . 171
Authenticating an Administrator Using an External AAA Server. . . . . . . . . . . . . . . . . . 172
SmartZone 100 Administrator Guide for RuckOS 3.1, 800-70827-001 Rev B 7
Page 19

6 Monitoring the Wireless Network
Monitoring Managed Access Points . . . . . . . . . . . . . . . . . . . . . . . . . . . . . . . . . . . . . . . 176
Viewing a Summary of Access Points . . . . . . . . . . . . . . . . . . . . . . . . . . . . . . . . . . . . 176
Exporting the Access Point List to CSV . . . . . . . . . . . . . . . . . . . . . . . . . . . . . . . . . . . 179
Viewing the Configuration of an Access Point. . . . . . . . . . . . . . . . . . . . . . . . . . . . . . . 180
Downloading the Support Log from an Access Point . . . . . . . . . . . . . . . . . . . . . . . . . 180
Restarting an Access Point Remotely. . . . . . . . . . . . . . . . . . . . . . . . . . . . . . . . . . . . . 181
Running Ping and Traceroute on an Access Point . . . . . . . . . . . . . . . . . . . . . . . . . . . 181
Viewing Managed APs on Google Maps™ . . . . . . . . . . . . . . . . . . . . . . . . . . . . . . . . . . 183
Monitoring the Mesh Network. . . . . . . . . . . . . . . . . . . . . . . . . . . . . . . . . . . . . . . . . . . . 184
Monitoring Wireless Clients . . . . . . . . . . . . . . . . . . . . . . . . . . . . . . . . . . . . . . . . . . . . . . 184
Viewing a Summary of Wireless Clients . . . . . . . . . . . . . . . . . . . . . . . . . . . . . . . . . . . 185
Exporting the Wireless Client List to CSV . . . . . . . . . . . . . . . . . . . . . . . . . . . . . . . . . . 186
Viewing Information About a Wireless Client. . . . . . . . . . . . . . . . . . . . . . . . . . . . . . . . 186
Measuring Wireless Network Throughput with SpeedFlex . . . . . . . . . . . . . . . . . . . . . 188
Monitoring Managed Devices . . . . . . . . . . . . . . . . . . . . . . . . . . . . . . . . . . . . . . . . . . . . 189
Monitoring the SmartZone System . . . . . . . . . . . . . . . . . . . . . . . . . . . . . . . . . . . . . . . . 191
Viewing the System Cluster Overview . . . . . . . . . . . . . . . . . . . . . . . . . . . . . . . . . . . . 191
Displaying the Chassis View of Cluster Nodes . . . . . . . . . . . . . . . . . . . . . . . . . . . . . . 193
Starting the Node Real-time Monitor . . . . . . . . . . . . . . . . . . . . . . . . . . . . . . . . . . . . . 193
Monitoring Rogue Access Points . . . . . . . . . . . . . . . . . . . . . . . . . . . . . . . . . . . . . . . . . 195
Monitoring Location Services . . . . . . . . . . . . . . . . . . . . . . . . . . . . . . . . . . . . . . . . . . . . 197
Viewing All Alarms. . . . . . . . . . . . . . . . . . . . . . . . . . . . . . . . . . . . . . . . . . . . . . . . . . . . . 197
Exporting the Alarm List to CSV . . . . . . . . . . . . . . . . . . . . . . . . . . . . . . . . . . . . . . . . . 199
Clearing Alarms . . . . . . . . . . . . . . . . . . . . . . . . . . . . . . . . . . . . . . . . . . . . . . . . . . . . . 200
Acknowledging Alarms. . . . . . . . . . . . . . . . . . . . . . . . . . . . . . . . . . . . . . . . . . . . . . . . 200
Viewing All Events. . . . . . . . . . . . . . . . . . . . . . . . . . . . . . . . . . . . . . . . . . . . . . . . . . . . . 200
Exporting the Event List to CSV . . . . . . . . . . . . . . . . . . . . . . . . . . . . . . . . . . . . . . . . . 202
Monitoring Administrator Activities . . . . . . . . . . . . . . . . . . . . . . . . . . . . . . . . . . . . . . . . 203
Exporting the Administrator Activity List to CSV . . . . . . . . . . . . . . . . . . . . . . . . . . . . . 204
7Working with Reports
Types of Reports . . . . . . . . . . . . . . . . . . . . . . . . . . . . . . . . . . . . . . . . . . . . . . . . . . . . . 205
Client Number Report . . . . . . . . . . . . . . . . . . . . . . . . . . . . . . . . . . . . . . . . . . . . . . . . 205
Client Number vs Airtime Report . . . . . . . . . . . . . . . . . . . . . . . . . . . . . . . . . . . . . . . . 205
Continuously Disconnected APs Report. . . . . . . . . . . . . . . . . . . . . . . . . . . . . . . . . . . 206
Failed Client Associations Report . . . . . . . . . . . . . . . . . . . . . . . . . . . . . . . . . . . . . . . . 206
New Client Associations Report . . . . . . . . . . . . . . . . . . . . . . . . . . . . . . . . . . . . . . . . . 206
System Resource Utilization Report . . . . . . . . . . . . . . . . . . . . . . . . . . . . . . . . . . . . . . 206
SmartZone 100 Administrator Guide for RuckOS 3.1, 800-70827-001 Rev B 8
Page 20

TX/RX Bytes Report . . . . . . . . . . . . . . . . . . . . . . . . . . . . . . . . . . . . . . . . . . . . . . . . . . 206
Creating a New Report . . . . . . . . . . . . . . . . . . . . . . . . . . . . . . . . . . . . . . . . . . . . . . . . . 207
Step 1: Define the General Report Details . . . . . . . . . . . . . . . . . . . . . . . . . . . . . . . . . 207
Step 2: Define the Resource Filter Criteria . . . . . . . . . . . . . . . . . . . . . . . . . . . . . . . . . 208
Step 3: Define the Time Filter . . . . . . . . . . . . . . . . . . . . . . . . . . . . . . . . . . . . . . . . . . . 209
Step 4: Define the Report Generation Schedule . . . . . . . . . . . . . . . . . . . . . . . . . . . . . 210
Step 5: Enable Email Notifications (Optional) . . . . . . . . . . . . . . . . . . . . . . . . . . . . . . . 211
Step 6: Export the Report to an FTP Server (Optional) . . . . . . . . . . . . . . . . . . . . . . . . 212
Step 7: Save the Report. . . . . . . . . . . . . . . . . . . . . . . . . . . . . . . . . . . . . . . . . . . . . . . 213
Viewing a List of Existing Reports . . . . . . . . . . . . . . . . . . . . . . . . . . . . . . . . . . . . . . . . . 213
Deleting a Report . . . . . . . . . . . . . . . . . . . . . . . . . . . . . . . . . . . . . . . . . . . . . . . . . . . . . 213
8 Performing Administrative Tasks
Backing Up and Restoring Clusters. . . . . . . . . . . . . . . . . . . . . . . . . . . . . . . . . . . . . . . . 215
Creating a Cluster Backup . . . . . . . . . . . . . . . . . . . . . . . . . . . . . . . . . . . . . . . . . . . . . 216
Restoring a Cluster Backup . . . . . . . . . . . . . . . . . . . . . . . . . . . . . . . . . . . . . . . . . . . . 217
Deleting a Cluster Backup . . . . . . . . . . . . . . . . . . . . . . . . . . . . . . . . . . . . . . . . . . . . . 219
Backing Up and Restoring the Controller’s Network Configuration from an FTP Server. 219
Requirements . . . . . . . . . . . . . . . . . . . . . . . . . . . . . . . . . . . . . . . . . . . . . . . . . . . . . . 219
Backing Up to an FTP Server. . . . . . . . . . . . . . . . . . . . . . . . . . . . . . . . . . . . . . . . . . . 219
Restoring from an FTP Server . . . . . . . . . . . . . . . . . . . . . . . . . . . . . . . . . . . . . . . . . . 225
Backing Up and Restoring System Configuration . . . . . . . . . . . . . . . . . . . . . . . . . . . . . 230
Creating a System Configuration Backup. . . . . . . . . . . . . . . . . . . . . . . . . . . . . . . . . . 231
Exporting the Configuration Backup to an FTP Server Automatically . . . . . . . . . . . . . 231
Scheduling a Configuration Backup . . . . . . . . . . . . . . . . . . . . . . . . . . . . . . . . . . . . . . 232
Downloading a Copy of the Configuration Backup . . . . . . . . . . . . . . . . . . . . . . . . . . . 233
Restoring a System Configuration Backup . . . . . . . . . . . . . . . . . . . . . . . . . . . . . . . . . 234
Deleting a Configuration Backup . . . . . . . . . . . . . . . . . . . . . . . . . . . . . . . . . . . . . . . . 234
Resetting a Node to Factory Settings . . . . . . . . . . . . . . . . . . . . . . . . . . . . . . . . . . . . . . 235
What Happens After Reset to Factory Settings . . . . . . . . . . . . . . . . . . . . . . . . . . . . . 235
Using the Web Interface. . . . . . . . . . . . . . . . . . . . . . . . . . . . . . . . . . . . . . . . . . . . . . . 235
Using the CLI . . . . . . . . . . . . . . . . . . . . . . . . . . . . . . . . . . . . . . . . . . . . . . . . . . . . . . . 236
Upgrading the Controller. . . . . . . . . . . . . . . . . . . . . . . . . . . . . . . . . . . . . . . . . . . . . . . . 237
Performing the Upgrade. . . . . . . . . . . . . . . . . . . . . . . . . . . . . . . . . . . . . . . . . . . . . . . 237
Verifying the Upgrade. . . . . . . . . . . . . . . . . . . . . . . . . . . . . . . . . . . . . . . . . . . . . . . . . 239
Rolling Back to a Previous Software Version . . . . . . . . . . . . . . . . . . . . . . . . . . . . . . . 239
Recovering a Cluster from an Unsuccessful Upgrade. . . . . . . . . . . . . . . . . . . . . . . . . 240
If the Controller Has Local Configuration Backup . . . . . . . . . . . . . . . . . . . . . . . . . . 240
If the Controller Has an FTP Backup . . . . . . . . . . . . . . . . . . . . . . . . . . . . . . . . . . . . 240
SmartZone 100 Administrator Guide for RuckOS 3.1, 800-70827-001 Rev B 9
Page 21

Working with Logs . . . . . . . . . . . . . . . . . . . . . . . . . . . . . . . . . . . . . . . . . . . . . . . . . . . . 242
Available System Log Types. . . . . . . . . . . . . . . . . . . . . . . . . . . . . . . . . . . . . . . . . . . . 242
Downloading All Logs . . . . . . . . . . . . . . . . . . . . . . . . . . . . . . . . . . . . . . . . . . . . . . . . 243
Downloading Snapshot Logs Generated from the CLI . . . . . . . . . . . . . . . . . . . . . . . . 244
Managing Licenses. . . . . . . . . . . . . . . . . . . . . . . . . . . . . . . . . . . . . . . . . . . . . . . . . . . . 246
Default Licenses in the SmartZone 100 . . . . . . . . . . . . . . . . . . . . . . . . . . . . . . . . . . . 246
Supported License Types . . . . . . . . . . . . . . . . . . . . . . . . . . . . . . . . . . . . . . . . . . . . . 247
AP Capacity License . . . . . . . . . . . . . . . . . . . . . . . . . . . . . . . . . . . . . . . . . . . . . . . . 247
Default AP Capacity License . . . . . . . . . . . . . . . . . . . . . . . . . . . . . . . . . . . . . . . . . . 248
AP Tunneling Capacity License . . . . . . . . . . . . . . . . . . . . . . . . . . . . . . . . . . . . . . . . 248
Default AP Tunneling Capacity License . . . . . . . . . . . . . . . . . . . . . . . . . . . . . . . . . . 248
Support License . . . . . . . . . . . . . . . . . . . . . . . . . . . . . . . . . . . . . . . . . . . . . . . . . . . 248
Default Support License . . . . . . . . . . . . . . . . . . . . . . . . . . . . . . . . . . . . . . . . . . . . . 248
Viewing Installed Licenses . . . . . . . . . . . . . . . . . . . . . . . . . . . . . . . . . . . . . . . . . . . . . 249
Viewing the License Summary . . . . . . . . . . . . . . . . . . . . . . . . . . . . . . . . . . . . . . . . . . 250
Configuring the License Server to Use . . . . . . . . . . . . . . . . . . . . . . . . . . . . . . . . . . . . 251
Importing a License File . . . . . . . . . . . . . . . . . . . . . . . . . . . . . . . . . . . . . . . . . . . . . . . 252
Downloading a Copy of the Licenses . . . . . . . . . . . . . . . . . . . . . . . . . . . . . . . . . . . . . 253
Synchronizing the Controller with the License Server . . . . . . . . . . . . . . . . . . . . . . . . . 254
A Ports to Open for AP-Controller Communication
AP-SCG/SZ/vSCG Communication . . . . . . . . . . . . . . . . . . . . . . . . . . . . . . . . . . . . . . . 256
AP-ZD Communication . . . . . . . . . . . . . . . . . . . . . . . . . . . . . . . . . . . . . . . . . . . . . . . . . 258
Index
SmartZone 100 Administrator Guide for RuckOS 3.1, 800-70827-001 Rev B 10
Page 22

About This Guide
This Administrator Guide describes how to configure the
Ruckus Wireless™ SmartZone™ (SZ or the controller) 100 and how to use the web
interface to manage access points that are reporting to the SZ. This guide is written
for those responsible for installing and managing network equipment. Consequently,
it assumes that the reader has basic working knowledge of local area networking,
wireless networking, and wireless devices.
NOTE: If release notes are shipped with your product and the information there
differs from the information in this guide, follow the instructions in the release notes.
Most user guides and release notes are available in Adobe Acrobat Reader Portable
Document Format (PDF) or HTML on the Ruckus Wireless Support website at
https://support.ruckuswireless.com/documents.
SmartZone 100 Administrator Guide for RuckOS 3.1, 800-70827-001 Rev B 11
Page 23

Document Conventions
Document Conventions
Ta bl e 1 and Ta bl e 2 list the text and notice conventions that are used throughout
this guide.
Table 1. Text conventions
Convention Description Example
monospace
monospace bold
default font bold
italics
Table 2. Notice conventions
Notice Type Description
NOTE
Caution!
Warning
Represents information as it
appears on screen
Represents information that
you enter
Keyboard keys, software
buttons, and field names
Screen or page names Click Advanced Settings.
Information that describes important features or instructions
Information that alerts you to potential loss of data or potential
damage to an application, system, or device
Information that alerts you to potential personal injury
[Device name]>
[Device name]> set
ipaddr 10.0.0.12
On the Start menu, click All
Programs
The Advanced Settings page
appears.
.
Related Documentation
In addition to this Administrator Guide, each SZ 100 documentation set includes
the following:
• Getting Started Guide: Provides step-by-step instructions on how to set up and
configure the SZ out of the box.
• Online Help: Provides instructions for performing tasks using the SZ web
interface. The online help is accessible from the web interface and is searchable.
• Release Notes: Provide information about the current software release, including
new features, enhancements, and known issues.
SmartZone 100 Administrator Guide for RuckOS 3.1, 800-70827-001 Rev B 12
Page 24

Documentation Feedback
Documentation Feedback
Ruckus Wireless is interested in improving its documentation and welcomes your
comments and suggestions. You can email your comments to Ruckus Wireless at:
docs@ruckuswireless.com
When contacting us, please include the following information:
• Document title
• Document part number (on the cover page)
• Page number (if appropriate)
For example:
• SmartZone 100 Administrator Guide for RuckOS 3.1
• Part number: 800-70827-001
• Page 88
SmartZone 100 Administrator Guide for RuckOS 3.1, 800-70827-001 Rev B 13
Page 25

Navigating the Web Interface
In this chapter:
• Setting Up the Controller for the First Time
• Logging On to the Web Interface
• Web Interface Features
• Using Widgets on the Dashboard
• Changing the Administrator Password
• Logging Off the Web Interface
NOTE: Before continuing, make sure that you have already set up the SmartZone
100 on the network as described in the SmartZone 100 Getting Started Guide for
this release.
Setting Up the Controller for the First Time
For information on how to set up the controller for the first time, including instructions
for running and completing the controller’s Setup Wizard, see the SmartZone 100
Getting Started Guide.
1
Logging On to the Web Interface
Before you can log on to the controller web interface, you must have the IP address
that you assigned to the Management (Web) interface when you set up the controller
on the network using the Setup Wizard. Once you have this IP address, you can
access the web interface on any computer that can reach the Management (Web)
interface on the IP network.
NOTE: The SmartZone 100 Getting Started Guide describes how to use the
controller Setup Wizard to set up the controller on the network.
Follow these steps to log on to the controller web interface.
1 On a computer that is on the same subnet as the Management (Web) interface,
start a web browser. Supported web browsers include:
• Google Chrome 30 and later (recommended)
SmartZone 100 Administrator Guide for RuckOS 3.1, 800-70827-001 Rev B 14
Page 26
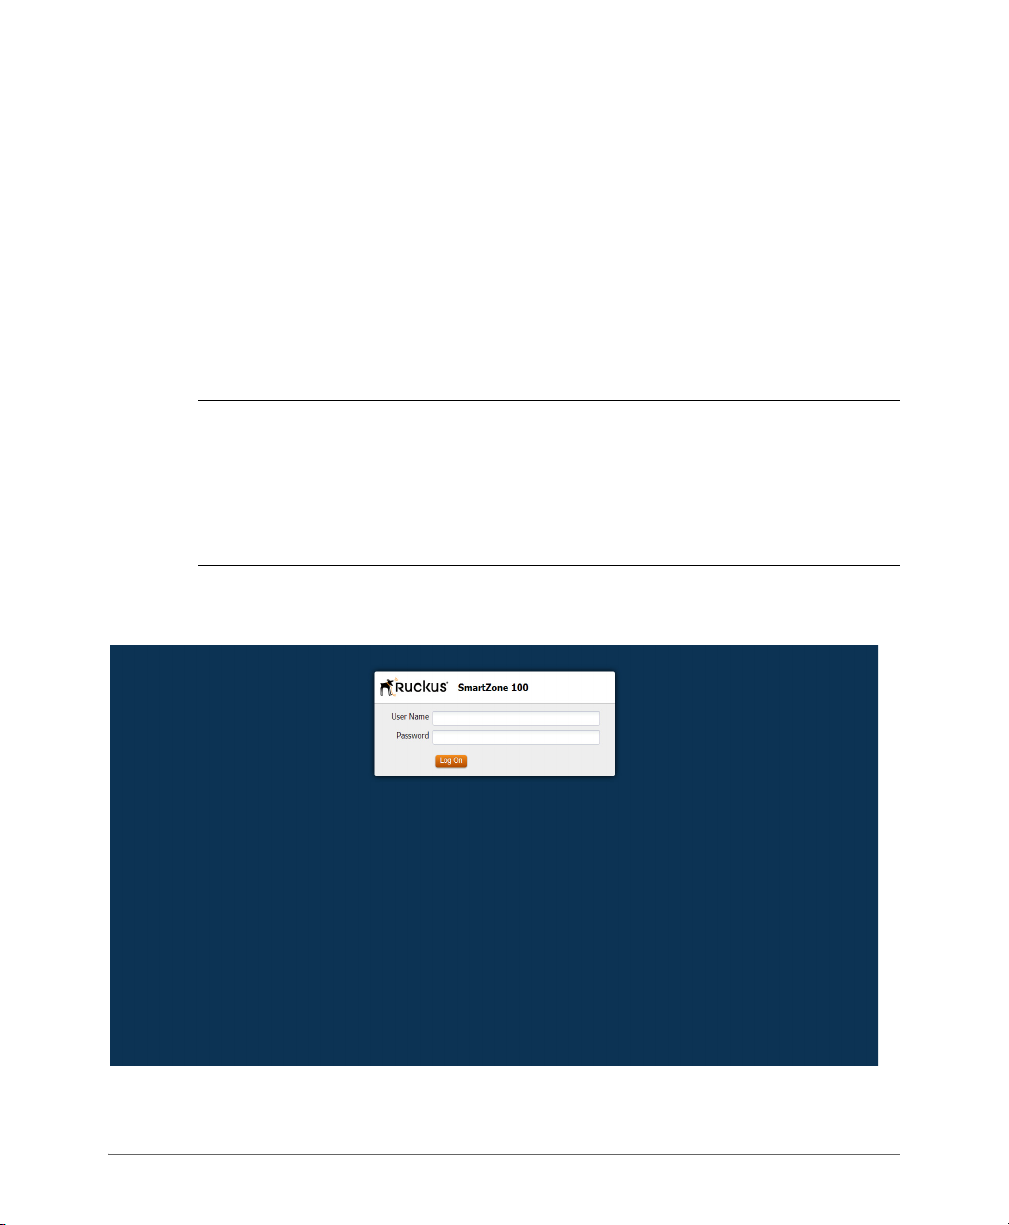
Logging On to the Web Interface
• Safari 6 and later (Mac OS)
• Safari 5.1.7 and later (Windows)
• Mozilla Firefox 28 and later
• Internet Explorer 10 and later
2 In the address bar, type the IP address that you assigned to the Management
(Web) interface, and then append a colon and 8443 (the controller’s
management port number) at the end of the address.
For example, if the IP address that you assigned to the Management (Web)
interface is 10.10.101.1, then you should enter:
https://10.10.101.1:8443
NOTE: The controller web interface requires an HTTPS connection. You must
append https (not http) to the Management interface IP address to connect to
the web interface. If a browser security warning appears, this is because the default
SSL certificate (or security certificate) that the controller is using for HTTPS
communication is signed by Ruckus Wireless and is not recognized by most web
browsers.
The controller web interface logon page appears.
Figure 1. The controller logon page
SmartZone 100 Administrator Guide for RuckOS 3.1, 800-70827-001 Rev B 15
Page 27

Web Interface Features
3 Log on to the controller web interface using the following logon details:
• User Name: admin
• Password: {the password that you set when you ran the Setup Wizard}
4 Click Log On.
The web interface refreshes, and then displays the Dashboard, which indicates that
you have logged on successfully.
Web Interface Features
The web interface (shown in Figure 2) is the primary interface that you will use to:
• Manage access points and WLANs
• Create and manage users and roles
• Monitor wireless clients, managed devices, and rogue access points
• View alarms, events, and administrator activity
• Generate reports
• Perform administrative tasks, including backing up and restoring system configuration, upgrading the cluster upgrade, downloading support , performing
system diagnostic tests, viewing the statuses of controller processes, and
uploading additional licenses (among others)
SmartZone 100 Administrator Guide for RuckOS 3.1, 800-70827-001 Rev B 16
Page 28
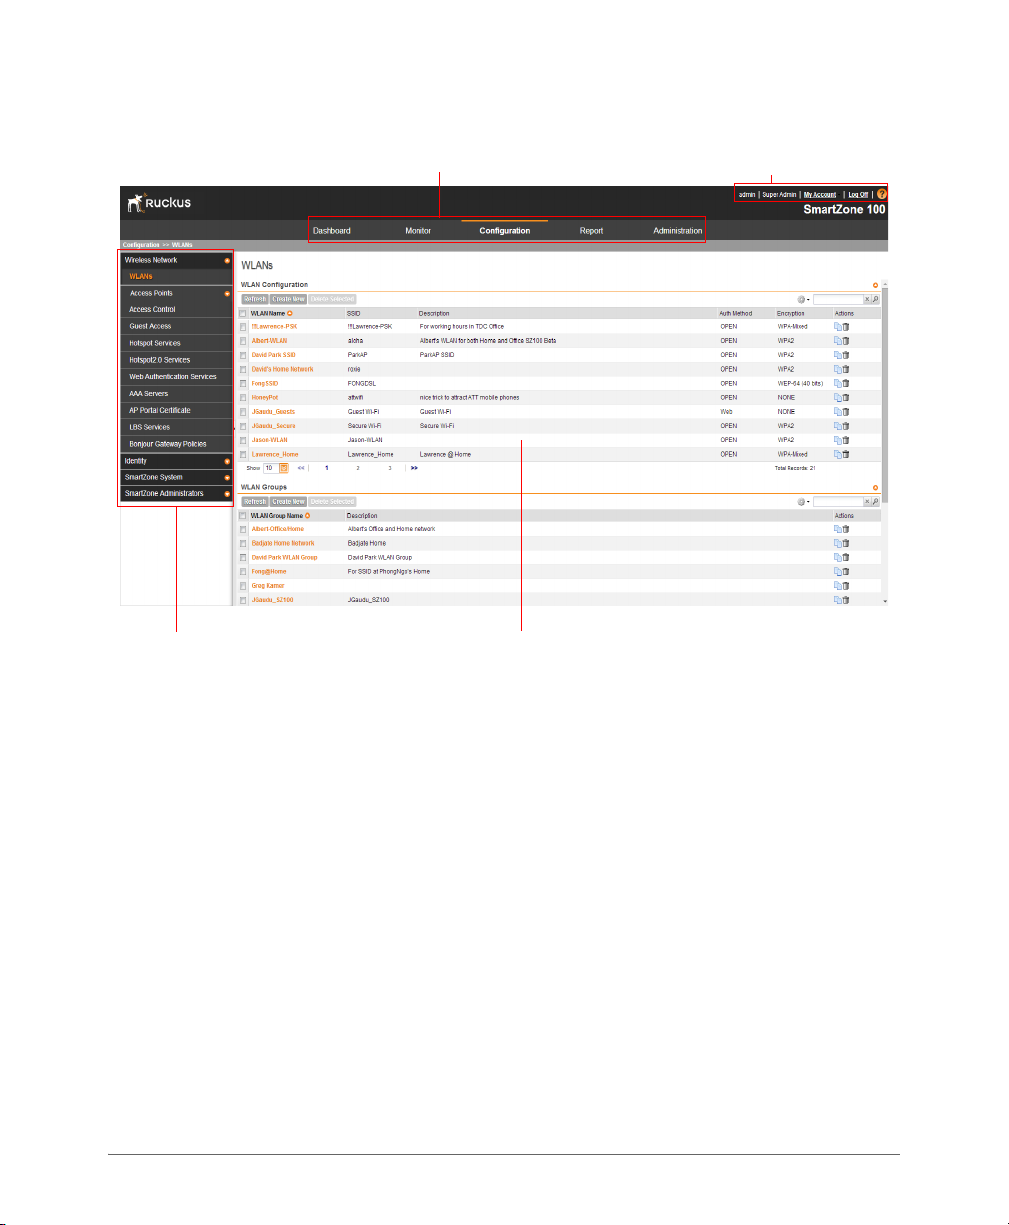
Figure 2. The controller web interface features
Main menu
Miscellaneous bar
Sidebar
Content area
Web Interface Features
The following sections describe the web interface features that are called out in
Figure 2:
• Main Menu
• Sidebar
• Content Area
• Miscellaneous Bar
SmartZone 100 Administrator Guide for RuckOS 3.1, 800-70827-001 Rev B 17
Page 29

Web Interface Features
Main Menu
Main Menu
This is the primary navigation menu. The main menu contains the following items:
• Dashboard: The page that loads after you log on, it provides graphical summary
of what is happening on the controller and its managed access points. The
Dashboard uses widgets to display graphical summaries of system statuses,
access point statuses, client count, etc. For more information on the Dashboard
widgets, see Using Widgets on the Dashboard.
• Monitor: Contains options for viewing information about WLANs, access points,
wireless clients, system information, alarms, events, and administrator activity.
For more information, see Monitoring the Wireless Network.
• Configuration: Contains options for managing WLANs, access points, and
system settings. For more information, see Configuring the Wireless Network.
• Report: Contains options for generating various types of reports, including
network tunnel statistics and historical client statistics. For more information, see
Working with Reports.
• Administration: Contains options for performing administrative tasks, such as
backing up and restoring the database, upgrading the system, downloading log
files, performing diagnostic tests, and managing administrator accounts. For
more information, see Performing Administrative Tasks.
Sidebar
The sidebar, located on the left side of the Content Area, provides additional options
related to the submenu that you clicked. For example, sidebar items under
Configuration > Access Points include common AP settings and AP tunnel settings.
On some pages, the sidebar also includes a tree that you can use to filter the
information you want to show in the Content Area.
Content Area
This large area displays tables, forms, and information that are relevant to submenu
and sidebar items that you clicked.
SmartZone 100 Administrator Guide for RuckOS 3.1, 800-70827-001 Rev B 18
Page 30

Web Interface Features
Miscellaneous Bar
Miscellaneous Bar
This shows the following information (from left to right):
• System date and time: Displays the current system date and time. This is
obtained by the controller from the NTP time server that has been configured.
• Administrator user name: Displays the user name of the administrator that is
currently logged on.
• Administrator role: Displays the administrator role (for example, Super Admin) of
the user that is currently logged on.
• My Account link: Clicking this link displays the following links:
• Change Password: Click this link to change your administrator password.
For more information, see Changing the Administrator Password.
• Preference: Click this link to configure the session timeout settings. In Session
Timeout Settings, type the number of minutes (1 to 1440 minutes) of inactivity
after which the administrator will be logged off of the web interface automatically.
• Log Off: Click this to log off the controller web interface. For more information,
see Logging Off the Web Interface.
• : Click this icon to launch the Online Help, which provides information on how
to perform management tasks using the web interface.
SmartZone 100 Administrator Guide for RuckOS 3.1, 800-70827-001 Rev B 19
Page 31

Using Widgets on the Dashboard
Widgets That You Can Display
Using Widgets on the Dashboard
The dashboard provides a quick summary of what is happening on the controller
and its managed access points. It uses widgets to display at-a-glance information
about managed access points, associated clients, and system summary, among
others.
This section describes the widgets that you can display and how to add, move, and
delete widgets from the dashboard.
NOTE: To refresh the information on each widget, click (refresh button) on the
upper-right corner of the widget.
Widgets That You Can Display
The controller supports the following dashboard widgets:
• Client Count Summary Widget
• AP Summary Widget
• SmartZone System Summary Widget
• Traffic Summary Widget
• Client Type Summary Widget
• Wireless Network Summary Widget
• Top 10 APs by Client Count
• Top 10 Clients by Traffic Count
Client Count Summary Widget
The client count (all APs, all WLANs) widget displays a graph of the number of
wireless clients that are associated with access points that the controller is
managing. You can display client count by AP or WLAN.
The client count summary widget requires two widget slots.
Figure 3. The client count summary widget
SmartZone 100 Administrator Guide for RuckOS 3.1, 800-70827-001 Rev B 20
Page 32

Using Widgets on the Dashboard
Widgets That You Can Display
AP Summary Widget
The AP summary widget includes a pie chart that shows the connection status of
managed APs. You can configure the pie chart to show access point data based
on their connection status, model, and mesh role.
This widget requires one widget slot.
Figure 4. The AP summary widget
SmartZone System Summary Widget
The system summary widget displays information about the controller system,
including the name and version of the cluster, system uptime, serial number, and
the Wi-Fi controller licenses (consumed versus total).
This widget requires one widget slot.
Figure 5. The system summary widget
SmartZone 100 Administrator Guide for RuckOS 3.1, 800-70827-001 Rev B 21
Page 33

Using Widgets on the Dashboard
Widgets That You Can Display
Traffic Summary Widget
The traffic summary widget displays a graph of TX and RX throughputs (in bytes).
This widget requires two widget slots.
Figure 6. The traffic summary widget
Client Type Summary Widget
The client type summary widget displays a pie chart that shows the types of OS
that associated wireless clients are using.
This widget requires one widget slot.
NOTE: The default refresh interval for the client type summary widget is 15 minutes.
When you add the widget, you can configure this refresh interval to any value
between 1 and 30 minutes.
Figure 7. The client type summary widget
SmartZone 100 Administrator Guide for RuckOS 3.1, 800-70827-001 Rev B 22
Page 34

Using Widgets on the Dashboard
Widgets That You Can Display
Wireless Network Summary Widget
The wireless network summary widget displays details about the APs, WLANs, and
clients that the controller is managing. It also displays the number of alarms and
events that the controller has generated.
This widget requires one widget slot.
Figure 8. The wireless network summary widget
Top 10 APs by Client Count
The top 10 APs by client count widget displays the ten APs with the most number
of clients associated with them. This widget requires one widget slot.
Figure 9. The top 10 APs by client count widget
SmartZone 100 Administrator Guide for RuckOS 3.1, 800-70827-001 Rev B 23
Page 35

Using Widgets on the Dashboard
Widget Slots
Top 10 Clients by Traffic Count
The top 10 clients by traffic count widget displays the ten clients with the highest
traffic volume. This widget requires one widget slot.
Figure 10. The top 10 clients by traffic count widget
Widget Slots
The controller provides nine slots on the dashboard for placing widgets. Note that
some widgets are wider (for example, the client count summary and traffic widgets)
and require two widget slots. Make sure that there are enough empty slots on the
dashboard before you add or move a widget.
Adding a Widget
Follow these steps to add a widget to the dashboard.
1 Click the icon in the upper-left corner of the page (below the Ruckus Wireless
icon). The icons for adding widgets appear (see Ta b l e 1).
Table 1. Icons for adding widgets
Icon Widget Name
Client count summary widget
AP summary widget
System summary widget
Traffic summary widget
Client type summary widget
SmartZone 100 Administrator Guide for RuckOS 3.1, 800-70827-001 Rev B 24
Page 36

Using Widgets on the Dashboard
Adding a Widget to a Widget Slot
Table 1. Icons for adding widgets
Icon Widget Name
Wireless network summary widget
Top 10 APs by Client Count
Top 10 Clients by Traffic Count
2 Click the icon for the widget that you want to add. A configuration form, which
contains widget settings that you can configure, appears.
3 Configure the widget settings.
4 Click
OK. The page refreshes, and then the widget that you added appears on
the dashboard.
You have completed adding a widget. To add another widget, repeat the same
procedure.
Adding a Widget to a Widget Slot
A single widget slot can contain multiple widgets of the same size (one-slot widgets
versus two-slot widgets). For example, you can add the client count summary
widget and traffic summary widget (both are two-slot widgets) to the same widget
slot.
Follow these steps to add a widget to a widget slot.
1 Locate an existing widget slot to which you want to add a widget.
2 Click the icon that is on the upper-right hand corner of the widget slot. A
submenu appears and displays the widgets that you can add to the widget slot.
3 Click the name of the widget that you want to add to the widget slot. The widget
configuration window appears.
NOTE: You can only add a widget once. If a widget already exists in a different
widget slot, you will be unable to add it to another widget slot.
4 Configure the information that you want the widget to display and the interval at
which to refresh the information on the widget.
NOTE: The refresh intervals for the client count summary and traffic summary
widgets are non-configurable.
SmartZone 100 Administrator Guide for RuckOS 3.1, 800-70827-001 Rev B 25
Page 37

Using Widgets on the Dashboard
Displaying a Widget in a Widget Slot
5 Click OK. The widget slot refreshes, and then the widget that you added appears.
You have completed adding a widget to a widget slot.
Displaying a Widget in a Widget Slot
A widget slot that contains multiple widgets automatically cycles through the
different widgets that have been added to it at one-minute intervals. If you want to
view a specific widget in a widget slot, you can manually display it.
Follow these steps to display a widget that belongs to a widget slot manually.
1 Locate the widget slot that contains the widget that you want to display.
2 Click the icon that is on the upper-right hand corner of the widget slot. A
submenu appears and displays the widgets that have been added to the widget
slot.
3 Click the name of the widget that you want to display. The widget slot refreshes,
and the widget that you clicked appears.
You have completed displaying a widget in a widget slot.
Moving a Widget
Follow these steps to move a widget from one widget slot to another.
1 Make sure that there are sufficient slots for the widget that you want to move.
2 Hover your mouse pointer on the title bar of the widget. The pointer changes
into a four-way arrow.
3 Click-and-hold the widget, and then drag it to the empty slot to which you want
to move it.
4 Release the widget.
You have completed moving a widget to another slot.
SmartZone 100 Administrator Guide for RuckOS 3.1, 800-70827-001 Rev B 26
Page 38

Changing the Administrator Password
Deleting a Widget
Deleting a Widget
Follow these steps to delete a widget.
1 Locate the widget that you want to delete.
2 Click the icon that is in the upper-right hand corner of the widget. A
confirmation message appears.
3 Click
The dashboard refreshes, and then the widget that you deleted disappears from
the page.
Yes to confirm.
Changing the Administrator Password
Follow these steps to change the administrator password.
1 On the Miscellaneous Bar, click
appears.
2 In Old Password, type your current password.
3 In New Password, type the new password that you want to use.
4 In Confirm Password, retype the new password above.
5 Click
You have completed changing your administrator password. The next time you log
on to the controller, remember to use your new administrator password.
Change.
Change Password. The Change Password form
Figure 11. The Change Password form
Logging Off the Web Interface
Follow these steps to log off the web interface.
1 On the Miscellaneous Bar, click Log Off. A confirmation message appears.
2 Click Yes. The controller you off the web interface. The logon page appears with
the following message above the Ruckus Wireless logo:
Log off successful
SmartZone 100 Administrator Guide for RuckOS 3.1, 800-70827-001 Rev B 27
Page 39

Logging Off the Web Interface
Deleting a Widget
You have completed logging off the web interface.
Figure 12. The message “Log off successful” indicates that you have successfully logged off
the web interface
SmartZone 100 Administrator Guide for RuckOS 3.1, 800-70827-001 Rev B 28
Page 40

Working with User Accounts, Guest Passes, and User Roles
In this chapter:
• Working with User Accounts
• Working with Guest Passes
• Working with User Roles
Working with User Accounts
A user in the SmartZone is a registered user account that may be given access to
the controller hotspot. A user account contains a user’s personal information, logon
information, and the subscription package that he or she has been assigned.
This section describes the following tasks:
• Creating a User Account
• Editing a User Account
Creating a User Account
Follow these steps to create a user account.
1 Go to Configuration > Identity > Users.
2 Click Create New.
3 In the Contact Details section, fill out the following boxes:
•First Name
•Last Name
•Email
• Phone
•Country
•City
• Street
•Zip Code
2
SmartZone 100 Administrator Guide for RuckOS 3.1, 800-70827-001 Rev B 29
Page 41

Working with User Accounts
Editing a User Account
• State: Select Enabled to enable this user profile or select Disabled.
•Remark
4 In the Login Details section, fill out the following boxes to create the logon
credentials of this user:
• User Name: Type a name for this user. The user name is not case-sensitive
and will always be displayed in lowercase characters.
• Password: Type a password for this user. The password must be at least
eight characters in length.
• Confirm Password: Retype the password above.
5 Click OK.
You have completed creating a user account.
Figure 13. Creating a user account
Editing a User Account
Follow these steps to edit an existing user account.
1 Go to Configuration > Identity > Users.
SmartZone 100 Administrator Guide for RuckOS 3.1, 800-70827-001 Rev B 30
Page 42

Working with Guest Passes
Generating Guest Passes
2 Locate the user account that you want to edit, and then click the user name.
The Edit User: [{User Name}] form appears.
3 Edit the user account by updating the fields in the Contact Details and Login
Details sections.
4 Click OK.
Figure 14. Editing a user account
Working with Guest Passes
Similar to user accounts, guest passes in the controller allow users to gain access
to the controller hotspots. However, unlike user accounts, guest pass users are not
required to provide personal information to access the controller hotspots and can
therefore remain anonymous.
Guest passes are generated for specific WLANs only – guest pass users will only
be able to gain access to the WLANs for which the guest pass was generated.
Generating Guest Passes
Generating guest passes involves four steps:
Step 1: Create a Guest Access Service
Step 2: Create a Guest Access WLAN
Step 3: Generate a Guest Pass
Step 4: Send Guest Passes to Guest Users
SmartZone 100 Administrator Guide for RuckOS 3.1, 800-70827-001 Rev B 31
Page 43

Working with Guest Passes
Generating Guest Passes
Step 1: Create a Guest Access Service
Follow the instructions in Creating a Guest Access Service to create at least one
guest access service. When you finish creating a guest access service, continue to
Step 2: Create a Guest Access WLAN
Step 2: Create a Guest Access WLAN
Follow these steps to create a WLAN that will be used for guest access only.
1 Go to Configuration > Wireless Network > WLANs.
2 In the WLAN Configuration section, click Create New.
3 In General Options, configure the following:
•Name
• SSID
• Description
4 In WLAN Usage, configure the following:
•In Access Network, select the Tunnel WLAN traffic through Ruckus GRE
check box if you want to tunnel the traffic from this WLAN back to the
controller.
•In Authentication Type, click Guest Access.
5 Configure the rest of the WLAN settings. For details on each setting, see Creating
a WLAN.
6 When you finish creating a guest access WLAN, continue to Step 3: Generate
a Guest Pass.
SmartZone 100 Administrator Guide for RuckOS 3.1, 800-70827-001 Rev B 32
Page 44

Figure 15. Creating a WLAN for guest access only
Working with Guest Passes
Generating Guest Passes
Step 3: Generate a Guest Pass
Follow these steps to generate a guest pass.
1 Click Configuration > Identity > Users. The Users page appears.
2 Click Guest Pass > Guest Pass Service. The Guest Pass page appears.
3 Click Generate Guest Pass, and then click Next.
4 Configure the following options:
• Guest Name: Type a name that you want to assign to the guest user.
• Guest WLAN: Select the guest WLAN that you created in Step 2: Create a
Guest Access WLAN.
• Number of Passes: Type the number of guest passes that you want to
generate.
SmartZone 100 Administrator Guide for RuckOS 3.1, 800-70827-001 Rev B 33
Page 45

Working with Guest Passes
Generating Guest Passes
• Pass Valid For: Set the validity period for the guest pass by filling in the two
boxes. For example, if you want the guest pass to be valid for seven days,
type 7 in the first box, and then select Days in the second box.
5 Configure the advanced options:
• Pass Generation: Select the Auto Generate check box if you want the
controller to generate the guest pass key automatically. If you want to
generate the guest pass manually, clear the Auto Generate check box.
NOTE: If you are generating more than one guest pass, the Auto Generate check
box is selected automatically and is not configurable.
• Pass Effective Since: Set the guest pass validity period by selecting one of
the following options:
- Effective from the creation time: This type of guest pass is valid from
the time it is first created to the specified expiration time, even if it is not
being used by any end user.
- Effective from first use: This type of guest pass is valid from the time
the user uses it to authenticate with the controller until the specified
expiration time. An additional parameter (Guest Pass will expire in X days)
can be configured to specify when an unused guest pass will expire
regardless of use. The default is 7 days.
- Expire guest pass if not used within [ ] days: If you want this guest
pass to expire if it is unused after you generated it, type the number of
days in the box (maximum value is 365 days).
• Max Devices Allowed: Set the number of users that can share this guest pass.
- Limited to [ ]: If you want a limited number of users to share this guest
pass, click this option, and then type the number in the box.
- Unlimited: If you want an unlimited number of users to share this guest
pass, click this option.
- Session Duration: If you clicked Unlimited, this option appears. If you
want require users to log on again after their sessions expire, select the
Require guest re-login after [ ] check box, and then select a time
increment. If this feature is disabled, connected users will not be required
to re-log in until the guest pass expires.
•In Remarks (optional), type your notes about this guest pass, if any.
6 Click Generate. The page refreshes, and then the guest pass you generated
appears in a table, along with other guest passes that exist on the controller.
SmartZone 100 Administrator Guide for RuckOS 3.1, 800-70827-001 Rev B 34
Page 46

Working with Guest Passes
Generating Guest Passes
7 Click OK to close the pop-up message.
You have completed generating a guest pass. You are now ready to send the guest
pass to guest users. See Step 4: Send Guest Passes to Guest Users for information.
Figure 16. Generating a guest pass
Step 4: Send Guest Passes to Guest Users
On the page that appears after you generate a guest pass are options for delivering
the guest pass to guest users (see Figure 17). These delivery options include:
• Print Selected: See Printing the Guest Pass.
• Export CSV: See Exporting the Guest Pass to CSV.
• Email: See Sending the Guest Pass via Email.
•SMS: See Sending the Guest Pass via SMS.
SmartZone 100 Administrator Guide for RuckOS 3.1, 800-70827-001 Rev B 35
Page 47

Figure 17. Options for delivering guest passes to guest users
Printing the Guest Pass
Working with Guest Passes
Generating Guest Passes
NOTE: If your browser is blocking pop-ups, make you temporarily disable the pop-
up blocker so you can view and print the guest pass.
After you generate the guest pass, you can print the guest pass information, which
contains the guest user information and instructions on how to connect to the
hotspot, and give it to the guest user.
Follow these steps to print a guest pass.
1 Select the guest passes that you want to print by selecting the check boxes
before them.
2 In Guest Instruction HTML Template, select a printout template to use. The
default printout template (default.html) is selected by default. If you created
custom printout templates (see Creating a Guest Pass Printout Template), they
will appear in the drop-down menu.
3 Click Print Selected. A new browser page appears, which displays the guest
pass and available printing options.
4 Configure your printer settings, and then print the guest passes.
You have completed printing the guest passes.
SmartZone 100 Administrator Guide for RuckOS 3.1, 800-70827-001 Rev B 36
Page 48

Working with Guest Passes
Generating Guest Passes
Figure 18. What a guest pass printout looks like
Exporting the Guest Pass to CSV
Follow these steps to export the last generated guest passes to a comma-separated
value (CSV) file.
1 Select the guest passes that you want to export to CSV by selecting the check
boxes before them.
2 Click Export CSV. Your web browser downloads the CSV file to its default
download location.
3 Go to your web browser’s default download location and look for a file named
guestpass[number].csv.
4 Using Microsoft Excel or a similar application, open the CSV file. The CSV file
displays the details of the guest passes, including:
•Guest Name
•Remarks
•Key
• Expiration Date
You have completed exporting the last generated guest passes to CSV.
SmartZone 100 Administrator Guide for RuckOS 3.1, 800-70827-001 Rev B 37
Page 49

Working with Guest Passes
Generating Guest Passes
Figure 19. A sample CSV of generated guest passes when opened in Excel
Sending the Guest Pass via Email
NOTE: To send guest passes via email, you must have added an external email
server to the controller. See Configuring an External Email Server for more
information.
Follow these steps to send the guest pass via email.
1 Select the guest passes that you want to send via email by selecting the check
boxes before them.
2 Click Email. The Recipient Email form appears on the right side of the page (see
Figure 20).
3 Click Add New.
4 In the box that appears below, type the email address to which you want to send
the guest passes.
5 To add another recipient, click Add New again, and then type another email
address.
6 When you have finished adding all the email recipients, click Send Email. A
dialog box appears and informs you that the emails have been sent to the
message queue successfully
7 Click OK to close the dialog box.
You have completed sending guest passes via email.
SmartZone 100 Administrator Guide for RuckOS 3.1, 800-70827-001 Rev B 38
Page 50

Working with Guest Passes
Generating Guest Passes
Figure 20. Use the Recipient Email form to specify who will receive the guest passes via email
Sending the Guest Pass via SMS
NOTE: To send guest passes via email, you must have added an external SMS
gateway to the controller. See Configuring the External SMS Gateway for more
information.
Follow these steps to send the guest pass via email.
1 Select the guest passes that you want to send via SMS by selecting the check
boxes before them.
2 Click SMS. SMS options appears on the right side of the page (see Figure 21).
3 In Guest Instruction SMS Template, select the SMS template that you want to
use.
4 Click Add New.
5 In the box that appears below, type the phone number to which you want to
send the guest passes via SMS.
6 To add another SMS recipient, click Add New again, and then type another
phone number.
7 When you have finished adding all the SMS recipients, click Send SMS. A dialog
box appears and informs you that the SMS messages have been sent to the
message queue successfully
8 Click OK to close the dialog box.
You have completed sending guest passes via SMS.
SmartZone 100 Administrator Guide for RuckOS 3.1, 800-70827-001 Rev B 39
Page 51

Working with Guest Passes
Generating Guest Passes from an Imported CSV
Figure 21. Options for sending guest passes via SMS
Generating Guest Passes from an Imported CSV
You can also manually define the guest passes that you want to generate in a
comma-separated value (CSV) file (a sample of which is available for download from
the Guest Pass page).
Follow these steps to generate guest passes from an imported CSV file.
1 Click Configuration > Identity > Users.
2 Click Guest Pass > Guest Pass Service. The Guest Pass page appears.
3 Click Import Guest Pass, and then click Next.
4 Look for the following text under Browse:
To download a sample guest pass, click here.
5 Click the here link to download the sample CSV file.
6 Using Microsoft Excel or a similar application, open the CSV file.
7 In the CSV file, fill out the following columns:
• #Guest Name (Must): Assign a user name to the guest pass user.
• Remarks (Optional): Add some notes or comments about this guest pass.
• Key: Enter a guest pass key or leave it blank so the controller can generate
the key automatically.
SmartZone 100 Administrator Guide for RuckOS 3.1, 800-70827-001 Rev B 40
Page 52

Working with Guest Passes
Generating Guest Passes from an Imported CSV
Figure 22. The sample CSV file when opened in Excel
8 Save the CSV file.
9 Go back to the Guest Pass page, and then configure the following settings on
the Common Guest Pass Settings:
• Guest WLAN: Select the guest WLAN that you created in Step 2: Create a
Guest Access WLAN.
• Pass Valid For: Set the validity period for the guest pass by filling in the two
boxes. For example, if you want the guest pass to be valid for seven days,
type 7 in the first box, and then select Days in the second box.
10 Configure the advanced options:
• Pass Effective Since: Set the guest pass validity period by selecting one of
the following options:
- Effective from the creation time: This type of guest pass is valid from
the time it is first created to the specified expiration time, even if it is not
being used by any end user.
- Effective from first use: This type of guest pass is valid from the time
the user uses it to authenticate with the controller until the specified
expiration time. An additional parameter (Guest Pass will expire in X days)
can be configured to specify when an unused guest pass will expire
regardless of use. The default is 7 days.
- Expire guest pass if not used within [ ] days: If you want this guest
pass to expire if it is unused after you generated it, type the number of
days in the box (maximum value is 365 days).
SmartZone 100 Administrator Guide for RuckOS 3.1, 800-70827-001 Rev B 41
Page 53

Working with Guest Passes
Generating Guest Passes from an Imported CSV
• Max Devices Allowed: Set the number of users that can share this guest pass.
- Limited to [ ]: If you want a limited number of users to share this guest
pass, click this option, and then type the number in the box.
- Unlimited: If you want an unlimited number of users to share this guest
pass, click this option.
- Session Duration: If you clicked Unlimited, this option appears. If you
want require users to log on again after their sessions expire, select the
Require guest re-login after [ ] check box, and then select a time
increment. If this feature is disabled, connected users will not be required
to re-log in until the guest pass expires.
11 In Guest List CSV File (at the top of the page), click Browse, and then select the
CSV file you edited earlier. The page refreshes, and the number of guest passes
that the controller has identified in the CSV file appears below the Browse button.
12 Click Generate. The page refreshes, and then the guest pass you generated
appears in a table, along with other guest passes that exist on the controller.
You have completed generating a guest pass. You are now ready to send the guest
pass to guest users. See Step 4: Send Guest Passes to Guest Users for information.
Figure 23. The Guest Pass page for importing a CSV file
SmartZone 100 Administrator Guide for RuckOS 3.1, 800-70827-001 Rev B 42
Page 54

Working with Guest Passes
Viewing the List of Guest Users
Viewing the List of Guest Users
Follow these steps to view guest users that currently exist on the controller.
1 Click Configuration > Identity > Users.
2 Click the User Type column to sort all existing user accounts by user type.
All users of the user type “Guest” are guest users.
You have completed view the list of guest users.
Deleting Guest Users
Follow these steps to delete guest users.
1 Click Configuration > Identity > Users.
2 Select the check boxes before the guest user accounts that you want to delete.
Click Delete Selected. A confirmation message appears.
3 Click Yes to confirm. The page refreshes, and the guest user accounts that you
deleted disappears from the list.
NOTE: To delete a single guest pass, click the (delete) icon that is in the same
row as the guest pass name.
You have completed deleting a guest pass or guest passes.
Figure 24. Deleting a single guest pass or multiple guest passes
SmartZone 100 Administrator Guide for RuckOS 3.1, 800-70827-001 Rev B 43
Page 55

Working with Guest Passes
Creating a Guest Pass Printout Template
Creating a Guest Pass Printout Template
A guest pass printout template contains variables for the information that guest
users need to connect to the controller hotspots (for example, guest name, key,
and WLAN name), as well as the actual instructions for connecting to the WLAN.
A default printout template exists in the controller. If you want to create your own
printout template, follow these steps.
1 Go to Configuration > Identity > Users.
2 Click Guest Pass > Manage Templates. The Manage Guest Instruction
Temp la te s page appears.
3 Using an HTML editor, create a new HTML or text file.
4 Add content to the file. Typically, a printout template contains instructions for
connecting to the controller hotspot. See Figure 25 for the content of the default
printout template.
Figure 25. Content of the default printout template
5 Insert the following variables into the content of your template:
• {GP_GUEST_NAME}: This is the guest pass user name.
• {GP_GUEST_KEY}: This is the guest pass key.
• {GP_VALID_TIME}: This is the expiration date and time of the guest pass.
• {GP_GUEST_WLAN}: This is the WLAN with which the guest user can
associate using the guest name and guest key.
6 Save the file.
7 On the Manage Guest Instruction Templates page, click the appropriate Upload
button for the template that you are creating. The Upload a Template File form
appears on the right side of the page.
8 Configure the Upload a Template File options:
SmartZone 100 Administrator Guide for RuckOS 3.1, 800-70827-001 Rev B 44
Page 56

Working with User Roles
Creating a User Role
• Template Name: Type a name for the template that you are uploading.
• Template File: Click Browse, and select the template file you created.
9 Click Upload. An information message box appears and informs you that the
template file has been uploaded successfully.
10 Click OK. The template file you uploaded now appears in the list of templates.
Figure 26. The Upload a Template File form
Working with User Roles
The controller provides a default role (named “Default) that is automatically applied
to all new user accounts. This role links all users to the internal WLAN and permits
access to all WLANs by default. As an alternative, you can create additional roles
that you can assign to selected wireless network users, to limit their access to certain
WLANs, to allow them to log on with non-standard client devices, or to grant
permission to generate guest passes. (You can then edit the “default” role to disable
the guest pass generation option.)
Creating a User Role
Follow these steps to create a user role.
1 Go to Configuration > Identity > Roles.
2 Click Create New. The Create User Role form appears.
3 Configure the options in the Create User Role form.
• Name: Type a name for this user role.
• Description: Type a description for this user role.
• Default Group Attribute Value: (Fill in this field only if you are creating a user
role based on group attributes extracted from an Active Directory or LDAP
server.) Enter the User Group name here. Active Directory/LDAP users with
the same group attributes are automatically mapped to this user role.
• WLANS: Specify whether this role will have access to all WLAN or to specific
WLANs only.
SmartZone 100 Administrator Guide for RuckOS 3.1, 800-70827-001 Rev B 45
Page 57

Working with User Roles
Creating a User Role
- Allow Zero IT Access to All WLANs: Click this to allow this user role access
to all WLANs.
- Allow Zero IT Access to Selected WLANs Only. Click to allow this user
role access to specific WLANs only. You must select the WLAN to which
this user role will have access.
• Max Devices Allowed: Set the number of users that can share this role.
- Limited to [ ]: If you want a limited number of users to share this role pass,
click this option, and then type the number in the box.
- Unlimited: If you want an unlimited number of users to share this role, click
this option.
4 Click OK.
You have completed creating a user role.
Figure 27. Creating a user role
SmartZone 100 Administrator Guide for RuckOS 3.1, 800-70827-001 Rev B 46
Page 58

Configuring the Wireless Network
In this chapter:
• Configuring WLANs
• Configuring WLAN Groups
• Configuring Access Points
• Controlling Access to the Wireless Network
• Managing Guest Access
• Working with Hotspot (WISPr) Services
• Working with Hotspot 2.0 Services
• Working with Web Authentication Services
• Working with AAA Servers
• Configuring Location Services
• Configuring Bonjour Gateway Policies
3
SmartZone 100 Administrator Guide for RuckOS 3.1, 800-70827-001 Rev B 47
Page 59

Configuring WLANs
Creating a WLAN
Configuring WLANs
• Creating a WLAN
• Viewing Existing WLANs
• Deleting WLANs
Creating a WLAN
Follow these steps to create a WLAN.
1 Go to Configuration > Wireless Network > WLANs.
2 In the WLAN Configuration section, click Create New.
3 In General Options, configure the following:
• Name: Type a name for this WLAN.
• SSID: Type a short name for the WLAN. The SSID is the WLAN name that is
broadcast on the wireless network.
• HESSID: Type the homogenous extended service set identifier (HESSID). The
HESSID is a 6-octet MAC address that identifies the homogeneous ESS. The
HESSID value must be identical to one of the BSSIDs in the homogeneous
ESS.
• Description: Type a brief description of the qualifications/purpose for this
WLAN (for example, Engineering or Voice).
4 In WLAN Usage, configure the following:
•In Access Network, select the Tunnel WLAN traffic through Ruckus GRE
check box if you want to tunnel the traffic from this WLAN back to the
controller. Tunnel mode enables wireless clients to roam across different APs
on different subnets. If the WLAN has clients that require uninterrupted
wireless connection (for example, VoIP devices), Ruckus Wireless recommends enabling tunnel mode. When you enable this option, you need to
select core network for tunneling WLAN traffic back to the controller.
•In Authentication Type, click one of the following options.
- Standard usage (For most regular wireless networks): This is a regular
WLAN suitable for most wireless networks.
- Hotspot service (WISPr): Click this option if want to use a hotspot service
that you previously created.
SmartZone 100 Administrator Guide for RuckOS 3.1, 800-70827-001 Rev B 48
Page 60

Configuring WLANs
Creating a WLAN
- Guest Access and Hotspot 2.0 Onboarding: Click this option if you
want guest users to use this WLAN and offer Hotspot 2.0 service to guest
users. After you complete creating this WLAN for guest access, you can
start generating guest passes (see Working with Guest Passes).
NOTE: For more information about Hotspot 2.0 online signup, see the Hotspot 2.0
Reference Guide for RuckOS 3.1.
- Web Authentication: Click this option if you want to require all WLAN
users to complete a web-based logon to this network every time they
attempt to connect (see Working with Web Authentication Services).
- Hotspot 2.0: Click this option if you want a Hotspot 2.0 operator profile
that you previously created to use this WLAN. See the Hotspot 2.0
Reference Guide for RuckOS 3.1.
- Hotspot 2.0 Secure Online Signup (OSEN): Click this option if you want
to use this WLAN for Hotspot 2.0 OSEN. See the Hotspot 2.0 Reference
Guide for RuckOS 3.1 for more information.
5 in Authentication Options, click the authentication method by which users will
be authenticated prior to gaining access to the WLAN. The level of security
should be determined by the purpose of the WLAN you are creating.
• Open (Default): No authentication mechanism is applied to connections. If
WPA or WPA2 encryption is used, this implies WPA-PSK authentication.
NOTE: If you clicked Web Authentication in Authentication Type, Open is the only
available authentication option.
• 802.1x EAP: A very secure authentication/encryption method that requires
a back-end authentication server, such as a RADIUS server. Your choice
mostly depends on the types of authentication the client devices support and
your local network authentication environment.
• MAC Address: Authenticate clients by MAC address. MAC address authentication requires a RADIUS server and uses the MAC address as the user
logon name and password. You have two options for the MAC address format
to use for authenticating clients:
- Use user defined text as authentication password (default is device MAC
address)
- Set device MAC address in 802.1x format 00-10-A4-23-19-C0. (The
default is 0010a42319c0).
SmartZone 100 Administrator Guide for RuckOS 3.1, 800-70827-001 Rev B 49
Page 61

Configuring WLANs
Creating a WLAN
6 In Encryption Options, select an encryption method to use. WPA and WPA2 are
both encryption methods certified by the Wi-Fi Alliance and are the
recommended encryption methods. The Wi-Fi Alliance will be mandating the
removal of WEP due to its security vulnerabilities, and Ruckus Wireless
recommends against using WEP if possible.
• WPA2: Enhanced WPA encryption using stronger TKIP or AES encryption
algorithm.
• WPA-Mixed: Allows mixed networks of WPA and WPA2 compliant devices.
Use this setting if your network has a mixture of older clients that only support
WPA and TKIP, and newer client devices that support WPA2 and AES.
• WEP-64 (40 bits): Provides a lower level of encryption, and is less secure,
using 40-bit WEP encryption.
• WEP-128 (104 bits): Provides a higher level of encryption than WEP-64,
using a 104-bit key for WEP encryption. However, WEP is inherently less
secure than WPA.
• None: No encryption; traffic is sent in clear text.
CAUTION! If you set the encryption method to WEP-64 (40 bit) or WEP-128 (104
bit) and you are using an 802.11n or 802.11ac AP for the WLAN, the AP will operate
in 802.11g mode.
7 In Hotspot Portal, configure the following options.
NOTE: This section only appears if you clicked Hotspot (WISPr) in WLAN Usage
> Authentication Type.
• Hotspot (WISPr) Portal: Select the hotspot that you want this WLAN to use.
This option appears only when Hotspot service (WISPr) is selected as the
WLAN usage type. This hotspot service may be the hotspot that you created
in Creating a Hotspot (WISPr) Service.
• Bypass CNA: Select the Enable check box if you want to bypass the Apple
CNA feature on iOS and OS X devices that connect to this WLAN. See
Bypassing Apple CNA for more information.
• Authentication Service: Select the authentication server that you want to use
for this WLAN. Options include Local DB, Always Accept, and any AAA
servers that you previously added (see Working with AAA Servers). Addition-
ally, if you want the controller to proxy authentication messages to the AAA
server, select the Use SmartZone as Proxy check box.
SmartZone 100 Administrator Guide for RuckOS 3.1, 800-70827-001 Rev B 50
Page 62

Configuring WLANs
Creating a WLAN
• Accounting Service: Select the RADIUS Accounting server that you want to
use for this WLAN. You must have added a RADIUS Accounting server
previously (see Working with AAA Servers). Additionally, if you want the
controller to proxy accounting messages to the AAA server, select the Use
SmartZone as Proxy check box.
8 In Guest Access Portal, configure the following options:
NOTE: This section only appears if you clicked Guest Access + Hotspot 2.0
Online Signup in WLAN Usage > Authentication Type.
• Guest Portal Service: Select the guest access portal that you created earlier
for this onboarding WLAN.
• Bypass CNA: Select the Enable check box if you want to bypass the Apple
CNA feature on iOS and OS X devices that connect to this WLAN. See
Bypassing Apple CNA for more information.
• Guest Authentication: Select Guest to require users to enter their guest
credentials, or select Always Accept to allow users without guest credentials
to authentication.
• Guest Accounting: Select the RADIUS Accounting server that you want to
use for this WLAN. You must have added a RADIUS Accounting server
previously (see Working with AAA Servers). Additionally, if you want the
controller to proxy accounting messages to the AAA server, select the Use
SCG as Proxy check box.
9 In the Online Signup/Onboarding Service section, configure the following
options:
NOTE: This section only appears if you clicked Guest Access + Hotspot 2.0
Online Signup in WLAN Usage > Authentication Type.
• Hotspot 2.0 Signup: Select the Hotspot 2.0 devices check box to enable
support for Hotspot 2.0 devices. See the Hotspot 2.0 Reference Guide for
RuckOS 3.1 for more information.
• Zero-IT Onboarding: Select the Non-Hotspot 2.0 devices (i.e., legacy
devices) and Hotspot Rel 1 devices check box. See Working with Remote
Users for more information.
• Onboarding Portal: Select the portal signup profile that you want this guest
WLAN to use.
SmartZone 100 Administrator Guide for RuckOS 3.1, 800-70827-001 Rev B 51
Page 63

Configuring WLANs
Creating a WLAN
• Authentication Services: Select the authentication server that you previously
added to the controller.
10 In the Authentication & Accounting Service section, configure the following
options:
• Web Authentication Portal: Select the web authentication portal that you
created previously. See Working with Web Authentication Services for more
information.
• Bypass CNA: Select the Enable check box if you want to bypass the Apple
CNA feature on iOS and OS X devices that connect to this WLAN. See
Bypassing Apple CNA for more information.
• Authentication Service: Select the authentication server that you want to use
for this WLAN. Options include Local DB, Always Accept, and any AAA
servers that you previously added (see Working with AAA Servers). Addition-
ally, if you want the controller to proxy authentication messages to the AAA
server, select the Use SCG as Proxy check box.
• Accounting Service: Select the RADIUS Accounting server that you want to
use for this WLAN. You must have added a RADIUS Accounting server
previously (see Working with AAA Servers). Additionally, if you want the
controller to proxy accounting messages to the AAA server, select the Use
SCG as Proxy check box.
11 In Options, configure the following options:
• Wireless Client Isolation: Wireless client isolation enables subnet restrictions
for connected clients. Click Enable if you want to prevent wireless clients
associated with the same AP from communicating with each other locally.
The default value is Disable.
• Priority: Set the priority of this WLAN to Low if you would prefer that other
WLAN traffic takes priority. For example, if you want to prioritize internal traffic
over guest WLAN traffic, you can set the priority in the guest WLAN configuration settings to “Low.” By default, all WLANs are set to high priority.
12 In RADIUS Options, click + (plus sign) to display the options, and then configure
the following:
• NAS ID: Select how to the RADIUS server will identify the AP. Options include:
- WLAN BSSID
- AP MAC
- User-defined
SmartZone 100 Administrator Guide for RuckOS 3.1, 800-70827-001 Rev B 52
Page 64

Configuring WLANs
Creating a WLAN
• NAS Request Timeout: Type the timeout period (in seconds) after, which an
expected RADIUS response message is considered to have failed.
• NAS Max Number of Retries: Type the number of failed connection attempts
after which the controller will fail over to the backup RADIUS server.
• NAS Reconnect Primary: If the controller fails over to the backup RADIUS
server, this is the interval (in minutes) at which the controller will recheck the
primary RADIUS server if it is available. The default interval is 5 minutes.
• Call STA ID: Use either WLAN BSSID or AP MAC as the station calling ID.
Select one.
13 In Advanced Options, configure the following options:
• User Traffic Profile: If you want this WLAN to use a user traffic profile that you
previously created, select it from the drop-down menu. Otherwise, select
System Default. For more information, see Creating a User Traffic Profile.
• L2 Access Control: If you want this WLAN to use an L2 access control policy
that you previously created, select it from the drop-down menu. Otherwise,
select Disable. For more information, see Creating an L2 Access Policy.
• Device Policy: If you want this WLAN to use a device policy that you previously
created, select it from the drop-down menu. Otherwise, select Disable. For
more information, see Controlling Device Access.
• Access VLAN: By default, all wireless clients associated with APs that the
controller is managing are segmented into a single VLAN (with VLAN ID 1). If
you want to tag this WLAN traffic with a different VLAN ID, enter a valid VLAN
ID (2-4094) in the box.
• Hide SSID: Select this check box if you do not want the ID of this WLAN
advertised at any time. This will not affect performance or force the WLAN
user to perform any unnecessary tasks.
• Client Load Balancing: To disable client load balancing on this WLAN, select
the Do not perform client load balancing for this WLAN service check
box. For more information, see Client Load Balancing.
• Proxy ARP: Select this check box to enable proxy ARP. When proxy ARP is
enabled on a WLAN, the AP provides proxy service for stations when
receiving neighbor discovery packets (for example, ARP request and ICMPv6
Neighbor Solicit messages), and acts on behalf of the station in delivering
ARP replies. When the AP receives a broadcast ARP/Neighbor Solicit request
for a known host, the AP replies on behalf of the host. If the AP receives a
request for an unknown host, it forwards the request at the rate limit specified.
SmartZone 100 Administrator Guide for RuckOS 3.1, 800-70827-001 Rev B 53
Page 65

Configuring WLANs
Creating a WLAN
• Max Clients: This option limits the number of clients that can associate with
this WLAN per AP (default is 100). You can also limit the total number of
clients that a specific AP (or radio, on dual radio APs) will manage.
• 802.11d: Select this check box to enable this standard on this WLAN.
802.11d provides specifications for compliance with additional regulatory
domains (countries or regions) that were not defined in the original 802.11
standard. Click this option if you are operating in one of these additional
regulatory domains.
• Force DHCP: Enable this option to force clients to obtain a valid IP address
from DHCP within the specified number of seconds. This prevents clients
configured with a static IP address from connecting to the WLAN. Additionally, if a client performs Layer 3 roaming between different subnets, in some
cases the client sticks to the former IP address. This mechanism optimizes
the roaming experience by forcing clients to request a new IP address.
• DHCP Option 82: Select the Enable DHCP Option 82 check box to enable
this feature. When this feature is enabled and an AP receives a DHCP request
from a wireless client, the AP will encapsulate additional information (such as
VLAN ID, AP name, SSID and MAC address) into the DHCP request packets
before forwarding them to the DHCP server. The DHCP server can then use
this information to allocate an IP address to the client from a particular DHCP
pool based on these parameters.
• Client TX/RX Statistics: Select the Ignore statistics from unauthorized
clients check box if you do not want the controller to monitor traffic statistics
for unauthorized clients.
• Inactivity Timeout: Select this check box and enter a value in seconds (60 to
600) after which idle clients will be disconnected.
• Client Fingerprinting: By selecting this check box, the controller will attempt
to identify client devices by their operating system, device type and host
name, if available. This makes identifying client devices easier on the Dashboard, Monitor and Client Details pages.
• OFDM Only: Select the check box to force clients associated with this WLAN
to use only Orthogonal Frequency Division Multiplexing (OFDM) to transmit
data. OFDM-only allows the client to increase management frame transmission speed from CCK rates to OFDM rates. This feature is implemented per
WLAN and only affects the 2.4GHz radio.
SmartZone 100 Administrator Guide for RuckOS 3.1, 800-70827-001 Rev B 54
Page 66

Configuring WLANs
Creating a WLAN
• BSS Min Rate: Select this check box to set the bss rates of management
frames from default rates (CCK rates for 2.4G or OFDM rate – 6Mbps for 5G]
to the desired rates. By default, BSS Min Rate is disabled.
NOTE: OFDM-only takes higher priority than BSS-minrate. However, OFDM-only
relies on BSS-minrate to adjust its rate for management frames.
• Mgmt Tx Rate: To set the maximum transmit rate for management frame,
select a value (in Mbps) from the drop-down list.
• Service Schedule: Use the Service Schedule tool to control which hours of
the day, or days of the week to enable/disable WLAN service. Options
include:
- Always On: Click this enable this WLAN at all times.
- Always Off: Click this option to disable the WLAN service at all times.
- Specific: Click this to set specific hours during which this WLAN will be
enabled. For example, a WLAN for student use at a school can be
configured to provide wireless access only during school hours. Click on
a day of the week to enable/disable this WLAN for the entire day. Colored
cells indicate WLAN enabled. Click and drag to select specific times of
day. You can also disable a WLAN temporarily for testing purposes, for
example.
NOTE: The service schedule feature will not work properly if the controller does not
have the correct time. To ensure that the controller always maintains the correct
time, point the controller to an NTP server’s IP address, as described in Configuring
the System Time.
• Band Balancing: Client band balancing between the 2.4GHz and 5GHz radio
bands is disabled by default on all WLANs. To disable band balancing for this
WLAN only (when enabled globally), select the Do not perform band
balancing for this WLAN service check box. For more information, see
Band Balancing.
14 Click OK at the bottom of the form.
You have completed creating and configuring a WLAN service of the AP zone.
SmartZone 100 Administrator Guide for RuckOS 3.1, 800-70827-001 Rev B 55
Page 67

Figure 28. The Create New WLAN Configuration form
Configuring WLANs
Creating a WLAN
Client Load Balancing
Enabling load balancing can improve WLAN performance by helping to spread the
wireless client load between nearby access points, so that one AP does not get
overloaded while another sits idle. The load balancing feature can be controlled from
within the controller web interface to balance the number of clients per radio on
adjacent APs.
“Adjacent APs” are determined by the controller at startup by measuring the RSSI
during channel scans. After startup, the controller uses subsequent scans to update
the list of adjacent radios periodically and when a new AP sends its first scan report.
When an AP leaves, the controller immediately updates the list of adjacent radios
and refreshes the client limits at each affected AP.
SmartZone 100 Administrator Guide for RuckOS 3.1, 800-70827-001 Rev B 56
Page 68

Configuring WLANs
Creating a WLAN
Once the controller is aware of which APs are adjacent to each other, it begins
managing the client load by sending the configured client limits to the APs. These
limits are “soft values” that can be exceeded in several scenarios, including:
1 When a client’s signal is so weak that it may not be able to support a link with
another AP
2 When a client’s signal is so strong that it really belongs on this AP.
The APs maintain these configured client limits and enforce them once they reach
the limits by withholding probe responses and authentication responses on any
radio that has reached its limit.
Key Points About Client Load Balancing
Before you enable load balancing, keep the following considerations in mind:
• The load balancing rules apply only to client devices; the AP always responds
to another AP that is attempting to set up or maintain a mesh network.
• Load balancing does not disassociate clients already connected.
• Load balancing takes action before a client association request, reducing the
chance of client misbehavior.
• The process does not require any time-critical interaction between APs and the
controller.
• Provides control of adjacent AP distance with safeguards against abandoning
clients.
• Can be disabled on a per-WLAN basis. For instance, on a voice WLAN, load
balancing may not be desired due to voice roaming considerations.
• Background scanning must be enabled on the WLAN for load balancing to work.
Band Balancing
Band balancing balances the client load on radios by distributing clients between
the 2.4 GHz and 5 GHz radios. This feature is enabled by default and set to a target
of 25% of clients connecting to the 2.4 GHz band. To balance the load on a radio,
the AP encourages dual-band clients to connect to the 5 GHz band when the
configured percentage threshold is reached.
SmartZone 100 Administrator Guide for RuckOS 3.1, 800-70827-001 Rev B 57
Page 69

Configuring WLANs
Viewing Existing WLANs
Client Admission Control
Client admission control allows APs to adaptively allow or deny the association of
clients based on the potential throughput of the currently associated clients. This
helps prevent APs from becoming overloaded with clients and improves user
experience for wireless users.
As an administrator, you can help maintain a positive user experience for wireless
users on the network by configuring the following client admission control settings:
• Minimum client count
• Maximum radio load
• Minimum client throughput
Client admission control is implemented on a per radio basis and is currently only
supported on 802.11n APs.
Bypassing Apple CNA
Some Apple iOS and OS X clients include a feature called Captive Network Assistant
(CNA), which allows clients to connect to an open captive portal WLAN without
displaying the logon page.
When a client connects to a wireless network, the CNA feature launches a prebrowser login utility and it sends a request to a success page on the Apple website.
If the success page is returned, the device assumes it has network connectivity and
no action is taken. However, this login utility is not a fully functional browser, and
does not support HTML, HTML5, PHP or other embedded video. In some situations,
the ability to skip the login page for open WLANs is a benefit. However, for other
guest or public access designs, the lack of ability to control the entire web
authentication process is not desirable.
The controller provides an option to work around the Apple CNA feature if it is not
desirable for your specific deployment. With CNA bypass enabled, captive portal
(web-based authentication) logon must be performed by opening a browser to any
unauthenticated page (HTTP) to get redirected to the logon page.
Viewing Existing WLANs
Follow these steps to view a list of existing WLANs.
1 Click Configuration > Wireless Network > WLAN. The WLANs page appears.
2 Look for the WLAN Configuration section. All existing WLANs are listed in the
section and their basic settings, including the:
SmartZone 100 Administrator Guide for RuckOS 3.1, 800-70827-001 Rev B 58
Page 70

Configuring WLAN Groups
Deleting WLANs
• WLAN name
• SSID
• Description
• Auth Method (authentication method)
•Encryptions
• Actions (that you can perform)
You have completed viewing a list of existing WLANs.
Deleting WLANs
Follow these steps to delete WLANs.
1 Go to Configuration > WLAN. The WLANs page appears.
2 Look for the WLAN Configuration section.
3 Locate the WLAN or WLANs that you want to delete.
4 Select the check boxes (first column) for the WLANs that you want to delete.
5 Click Delete Selected.
The WLANs that you selected disappear from the list. You have completed deleting
WLANs.
NOTE: If you are deleting a single WLAN, you can also click the icon (under the
Actions column) that is in the same row as the WLAN that you want to delete.
Configuring WLAN Groups
A WLAN group is a way of specifying which APs or AP groups provide which WLAN
services. If your wireless network covers a large physical environment (for example,
multi-floor or multi-building office) and you want to provide different WLAN services
to different areas of your environment, you can use WLAN groups to do this.
For example, if your wireless network covers three building floors (1st floor to 3rd
floor) and you need to provide wireless access to visitors on the 1st floor, you can
do the following:
1 Create a WLAN service (for example, “Guest Only Service”) that provides guest-
level access only.
2 Create a WLAN group (for example, “Guest Only Group”), and then assign “Guest
Only Service” (WLAN service) to “Guest Only Group” (WLAN group).
SmartZone 100 Administrator Guide for RuckOS 3.1, 800-70827-001 Rev B 59
Page 71

Configuring WLAN Groups
Notes About WLAN Groups
3 Assign APs on the 1st Floor (where visitors need wireless access) to your “Guest
Only Group”.
Any wireless client that associates with APs assigned to the “Guest Only Group” will
get the guest-level access privileges defined in your “Guest Only Service.” APs on
the 2nd and 3rd floors can remain assigned to the default WLAN Group and provide
normal-level access.
Notes About WLAN Groups
Before you start using WLAN groups to provision WLAN settings to APs or AP
groups, take note of the following important notes:
• Creating WLAN groups is optional. If you do not need to provide different WLAN
services to different areas in your environment, you do not need to create a WLAN
group.
• A default WLAN group called “default” exists. The first 27 WLANs that you create
are automatically assigned to this default WLAN group.
• A WLAN group can include a maximum of 27 member WLANs. For dual radio
APs, each radio can be assigned to only one WLAN group (single radio APs can
be assigned to only one WLAN group).
SmartZone 100 Administrator Guide for RuckOS 3.1, 800-70827-001 Rev B 60
Page 72

Configuring WLAN Groups
Creating a WLAN Group
Creating a WLAN Group
Follow these steps to create a WLAN group.
1 Go to Configuration > WLAN. The WLANs page appears.
2 Look for the WLAN Groups section.
3 Click Create New.
4 In Group Name, type a descriptive name that you want to assign to this WLAN
group. For example, if this WLAN will contain WLANs that are designated for
guest users, you can name this as Guest WLAN Group.
5 In Description (optional), type some notes or comments about this group.
6 Under WLAN List, select the check boxes for the WLANs that you want to be
part of this WLAN group. The VLAN Override and NAS-ID columns for the
selected WLANs become active.
7 In the VLAN override settings, choose whether to override the VLAN configured
for each member WLAN. Available options include:
• No Change: Click this option if you want the WLAN to keep the same VLAN
tag (default: 1).
• Tag: Click this option to override the VLAN configured for the WLAN service.
8 In the NAS-ID settings, choose whether to override the NAS-ID configured for
each member WLAN. Available options include:
• No Change: Click this option if you want the WLAN to keep the same NAS-
ID tag.
• User-defined: Click this option to override the NAS-ID that has been assigned
to this WLAN service.
9 Click Create New. The Create New form disappears and the WLAN group that
you created appears in the table under WLAN Groups.
You may now assign this WLAN group to an AP or AP group.
Viewing Existing WLAN Groups
Follow these steps to view a list of existing WLAN groups.
1 Go to Configuration > WLAN. The WLANs page appears.
2 Look for the WLAN Groups section. All existing WLAN groups and their basic
settings are shown, including the:
• WLAN group name
• Description
SmartZone 100 Administrator Guide for RuckOS 3.1, 800-70827-001 Rev B 61
Page 73

Configuring WLAN Groups
Deleting WLAN Groups
• Actions (that you can perform)
3 To view WLANs that belong to a particular WLAN group, click the WLAN group
name.
You have completed viewing existing WLAN groups.
Deleting WLAN Groups
Follow these steps to delete WLAN groups.
1 Go to Configuration > WLAN. The WLANs page appears.
2 Scroll down to the WLAN Group section.
3 Locate the WLAN group or groups that you want to delete.
4 Select the check boxes (first column) for the WLAN groups that you want to
delete.
5 Click Delete Selected.
The WLAN groups that you selected disappear from the list. You have completed
deleting WLAN groups.
NOTE: If you are deleting a single WLAN group, you can also click the icon
(under the Actions column) that is in the same row as the WLAN group that you
want to delete.
Working with WLAN Schedule Profiles
A WLAN schedule profile specifies the hours of the day or week during which a
WLAN service will be enabled or disabled. For example, a WLAN for student use at
a school can be configured to provide wireless access only during school hours.
Create a WLAN schedule profile, and then when you configure a WLAN, select the
schedule profile to enable or disable the WLAN service during those hours/days.
NOTE: This feature will not work properly if the system does not have the correct
time. To ensure that the system always maintains the correct time, configure an NTP
server and point the system to the NTP server’s IP address, as described in
Configuring the System Time.
NOTE: WLAN service schedule times should be configured based on your
browser’s current timezone. If your browser and the target AP/WLAN are in different
timezones, configure the on/off times according to the desired schedule according
to your local browser. For example if you wanted a WLAN in Los Angeles to turn on
SmartZone 100 Administrator Guide for RuckOS 3.1, 800-70827-001 Rev B 62
Page 74

Configuring WLAN Groups
Working with WLAN Schedule Profiles
at 9 AM and your browser was set to New York time, please configure the WLAN
service schedule to enable the WLAN at noon. When configuring the service
schedule, all times are based on your browser's timezone setting.
Creating a WLAN Schedule Profile
Follow these steps to create a WLAN schedule profile.
1 Go to Configuration > WLAN. The WLANs page appears.
2 Scroll down to the WLAN Schedule Profiles section.
3 Click Create New. The Create New WLAN Schedule Table form appears.
4 Set a WLAN schedule.
• To enable or disable the WLAN for an entire day, click the day of the week
under the Time column.
• To enable or disable the WLAN for specific hour of a specific day, click the
squares in the table. A single square represents 30 minutes (two-15 minute
blocks).
Blue-colored cells indicate the hours when the WLAN is enabled. Clear (or white)
cells indicate the hours when the WLAN is disabled.
5 Click Create New. The page refreshes, and then the schedule you created
appears in the WLAN Scheduler Profiles section.
You have completed creating a WLAN schedule profile. This WLAN schedule profile
will now appear as an option
Figure 29. Creating a schedule profile
SmartZone 100 Administrator Guide for RuckOS 3.1, 800-70827-001 Rev B 63
Page 75

Working with WLAN Schedule Profiles
Figure 30. Selecting the schedule profile when creating or editing a WLAN
Configuring WLAN Groups
Viewing WLAN Schedule Profiles
Follow these steps to view a list of existing WLAN schedule profiles.
1 Go to Configuration > WLAN. The WLANs page appears.
2 Look for the WLAN Schedule Profiles section. All existing WLAN schedule
profiles and their basic settings are shown, including the:
• WLAN schedule name
• Description
• Actions (that you can perform)
3 To view the schedule that has been defined in a particular schedule profile, click
the schedule profile name.
You have completed viewing existing WLAN schedule profiles.
SmartZone 100 Administrator Guide for RuckOS 3.1, 800-70827-001 Rev B 64
Page 76

Configuring Access Points
Configuring Common AP Settings
Deleting WLAN Schedule Profiles
Follow these steps to delete WLAN schedule profiles.
1 Go to Configuration > WLAN. The WLANs page appears.
2 Scroll down to the WLAN Schedule Profiles section.
3 Locate the profile or profiles that you want to delete.
4 Select the check boxes (first column) for the profiles that you want to delete.
5 Click Delete Selected.
The profiles that you selected disappear from the list. You have completed deleting
WLAN schedule profiles.
NOTE: If you are deleting a single profile, you can also click the icon (under the
Actions column) that is in the same row as the profile that you want to delete.
Configuring Access Points
This section describes how to configure the settings of access points that are
managed by the controller.
• Configuring Common AP Settings
• Configuring Model-Based Settings
• Configuring AP Tunnel Settings
• Tagging Critical APs
• Managing Access Points
Configuring Common AP Settings
Follow these steps to configure the settings that are common to all APs, such as
the country code, mesh options, and radio options.
1 Go to Configuration > Access Points > Common Settings.
2 In the General Options section, configure the following:
• AP Firmware: This field shows the current RuckOS AP firmware version on
controller. This is not configurable.
• Country Code: Select the country in which you are operating the access
points. Different countries and regions maintain different rules that govern
which channels can be used for wireless communications. Set the country
code to the proper regulatory region ensuring that the controller network does
not violate local and national regulatory restrictions.
SmartZone 100 Administrator Guide for RuckOS 3.1, 800-70827-001 Rev B 65
Page 77

Configuring Access Points
Configuring Common AP Settings
• Location: Type a location name (for example, Ruckus Wireless HQ) for this AP.
• Location Additional Information: Type additional information about the AP
location (for example, 350 W Java Dr, Sunnyvale, CA 94089, United States).
• GPS Coordinates: Type the longitude and latitude coordinates for the AP’s
location.
• AP Admin Logon: Specify the user name and password that administrators
can use to log on directly to the managed access point’s native web interface.
The following boxes are provided:
- Logon ID: Type the admin user name.
- Password: Type the admin password.
• AP Time Zone: Set the time zone that you want APs to use by selecting one
of the following options:
- Follow the System Zone: Select this option if you want managed APs
to use the same time zone as the controller, which the controller obtains
from the NTP server you configured in Configuring the System Time.
- User Defined: Select this option if you want to set the time zone used by
the APs manually, and then configure the time zone abbreviation (for
example, CST, GMT, etc.), GMT offset, and daylight saving time (DST)
support.
• AP IP Mode: This field shows the IP addressing mode (either IPv4 only or
IPv6 only) that managed APs use. This is the device IP mode that you
selected when you completed the Setup Wizard. This field is not configurable.
3 In the Mesh Options section, configure the following:
• Enable mesh networking: Select this check box if you want managed APs
to automatically form a wireless mesh network, in which participant nodes
(APs) cooperate to route packets.
NOTE: Dual band APs can only mesh with other dual band APs, while single band
APs can only mesh with other single band APs.
• Mesh Name (ESSID): Type a name for the mesh network. Alternatively, do
nothing to accept the default mesh name that the controller has generated.
• Mesh Passphrase: Type a passphrase that contains at least 12 characters.
This passphrase will be used by the controller to secure the traffic between
Mesh APs. Alternatively, click Generate to generate a random passphrase
with 32 characters or more.
SmartZone 100 Administrator Guide for RuckOS 3.1, 800-70827-001 Rev B 66
Page 78

Configuring Access Points
Configuring Common AP Settings
4 In Radio Options, configure the following:
• Configure the following options under Radio Options b/g/n (2.4GHz):
- Channelization: Set the channel width used during transmission to either
20 or 40 (MHz), or select Auto to set it automatically.
- Channel: Select the channel to use for the b/g/n (2.4GHz) radio, or select
Auto to set it automatically.
- TX Power Adjustment: Select the preferred TX power, if you want to
manually configure the transmit power on the 2.4GHz radio. By default,
TX power is set to Full on the 2.4GHz radio
• Configure the following options under Radio Options a/n/c (5GHz):
- Channelization: Set the channel width used during transmission to either
20, 40, or 80 (MHz), or select Auto to set it automatically.
- Channel (Indoor): Select the indoor channel to use for the a/n/c (5GHz)
radio, or select Auto to set it automatically.
- Channel (Outdoor): Select the outdoor channel to use for the a/n/c (5GHz)
radio, or select Auto to set it automatically.
- TX Power Adjustment: Select the preferred TX power, if you want to
manually configure the transmit power on the 5GHz radio. By default, TX
power is set to Full on the 5GHz radio.
5 In Syslog Options, select the Enable external syslog server for APs check box
if you want to send sys to a remote syslog server. Configure the following options
that appear after you select the check box.
• Server Address: Type the IP address (IPv4 or IPv6) or host name of the syslog
server on the network.
• Port: Type the syslog port number on the server. The default port number is
514.
• Facility for Event: Select the facility level that will be used by the syslog
message. Options include Keep Original (default), Local0, Local1, Local2,
Local3, Local4, Local5, Local6, and Local7.
• Priority: Accept or change the default severity to priority mapping. See Default
Event Severity to Syslog Priority Mapping.
6 In Advanced Options, configure the following:
•
Channel Mode: If you want to allow outdoor APs to use wireless channels
that are regulated as indoor-use only, select the Allow indoor channels check
box. For more information, see Channel Mode.
SmartZone 100 Administrator Guide for RuckOS 3.1, 800-70827-001 Rev B 67
Page 79

Configuring Access Points
Configuring Common AP Settings
• Background Scanning: If you want APs to evaluate radio channel usage
automatically, enable and configure the background scanning settings on
both the 2.4GHz and 5GHz radios. By default, background scanning is
enabled on both radios and is configured to run every 20 seconds.
• Smart Monitor: To disable the WLANs of an AP whenever the AP uplink or
Internet connection becomes unavailable, select the Enable check box. And
then, configure the following options:
- Health Check Interval: Set the interval (between 5 and 60 seconds) at
which the controller will check the AP’s uplink connection. The default
value is 10 seconds.
- Health Check Retry Threshold: Set the number of times (between 1 and
10 times) that the controller will check the AP’s uplink connection. If the
controller is unable to detect the uplink after the configured number of
retries, the controller will disable the AP’s WLANs. The default value is 3
retries.
NOTE: When the controller disables the AP’s WLANs, the AP creates a log for the
event. When the AP’s uplink is restored, the AP sends the event log (which contains
the timestamp when the WLANs were disabled, and then enabled) to the controller.
• VLAN Pooling: To automatically segment large groups of clients (that may or
may not be connected to the same SSID) into multiple smaller subgroups
using multiple VLANs, select the Allow VLAN pooling overlapping check
box. Refer to VLAN Pooling for the additional settings that you need to
configure to get VLAN pooling to work on the wireless network.
• Rogue AP Detection: Select the Report rogue access points check box to
enable rogue device detection in logs and email alarm event notifications.
- Report all rogue devices: Send alerts for all rogue AP events.
- Report only malicious rogue devices of type: Select which event types
to report. Events include SSID spoofing, same network, and MAC
spoofing.
- Protect the network from malicious rogue access points: Select this
check box to automatically protect your network from network connected
rogue APs, SSID-spoofing APs and MAC-spoofing APs. When one of
these rogue APs is detected (and this check box is enabled), the Ruckus
Wireless AP automatically begins sending broadcast de-authentication
SmartZone 100 Administrator Guide for RuckOS 3.1, 800-70827-001 Rev B 68
Page 80

Configuring Access Points
Configuring Common AP Settings
messages spoofing the rogue’s BSSID (MAC) to prevent wireless clients
from connecting to the malicious rogue AP. This option is disabled by
default.
• Client Load Balancing: Improve WLAN performance by enabling load
balancing. Load balancing spreads the wireless client load between nearby
access points, so that one AP does not get overloaded while another sits idle.
Load balancing must be enabled on a per-radio basis. To enable load
balancing, select the Enable loading balancing on [2.4GHz or 5GHz] check
box, and then set or accept the default Adjacent Radio Threshold values
(50dB for the 2.4GHz radio and 43dB for the 5GHz radio).
NOTE: For more information about load balancing, see Client Load Balancing.
• Band Balancing: Client band balancing between the 2.4 GHz and 5 GHz
radio bands is enabled by default on all WLANs. For more information, see
Band Balancing.
• Location Based Service: If you have an LBS server on the network, select
the Enable LBS Server check box, and then select the server from the list.
NOTE: For more information about location based services, see Configuring
Location Services.
• Hotspot 2.0 Venue Profile: If managed APs are providing Hotspot 2.0
services, select the name of the venue profile that you previously created.
See the Hotspot 2.0 Reference Guide for RuckOS 3.1 for more information.
• Client Admission Control: To enable client admission control on a specific
wireless radio, select the Enable check box, and then set the load thresholds
on the AP at which it will stop accepting new clients by setting values for the
following:
- Min Client Count
- Max Radio Load (%)
- Min Client Throughput (Mbps)
NOTE: For more information about client admission control, see Client Admission
Control.
• AP Reboot Timeout: Set the time after which the AP will reboot automatically
when it is unable to reach the default gateway or the control interface.
SmartZone 100 Administrator Guide for RuckOS 3.1, 800-70827-001 Rev B 69
Page 81

Configuring Access Points
Configuring Common AP Settings
- Reboot AP if it cannot reach default gateway after [ ] minutes: The default
timeout is 30 minutes.
- Reboot AP if it cannot reach SCG after [ ]: The default timeout is 2 hours.
7 Click Apply.
You have completed configuring the common AP settings.
Figure 31. The Common Settings page
Channel Mode
Some countries restrict certain 5GHz channels to indoor use only. For instance,
Germany restricts channels in the 5.15 GHz to 5.25 GHz band to indoor use. When
ZoneFlex Outdoor APs and bridges with 5 GHz radios (ZoneFlex 7762, 7782, 7761CM and 7731) are set to a country code where these restrictions apply, the AP or
bridge can no longer be set to an indoor-only channel and will no longer select from
amongst a channel set that includes these indoor-only channels when SmartSelect
or auto channel selection is used, unless the administrator configures the AP to
allow use of these channels.
SmartZone 100 Administrator Guide for RuckOS 3.1, 800-70827-001 Rev B 70
Page 82

Configuring Access Points
Configuring Common AP Settings
For instance, if the AP is installed in a challenging indoor environment (such as a
warehouse), the administrator may want to allow the AP to use an indoor-only
channel. These channels can be enabled for use through the AP CLI or controller
web interface by configuring Configuration > Access Points > Common Settings >
Advanced Options > Channel Mode and selecting the Allow indoor channels
(allow ZoneFlex Outdoor APs to use channels regulated as indoor use-only)
check box.
If you have a dual-band ZoneFlex Indoor AP functioning as a RAP with dual-band
ZoneFlex Outdoor APs functioning as MAPs, the mesh backhaul link must initially
use a non-indoor-only channel. Your ZoneFlex Outdoor MAPs may fail to join if the
mesh backhaul link is using a restricted indoor-only channel.
Client Load Balancing
Enabling load balancing can improve WLAN performance by helping to spread the
wireless client load between nearby access points, so that one AP does not get
overloaded while another sits idle. The load balancing feature can be controlled from
within the controller web interface to balance the number of clients per radio on
adjacent APs.
“Adjacent APs” are determined by the controller at startup by measuring the RSSI
during channel scans. After startup, the controller uses subsequent scans to update
the list of adjacent radios periodically and when a new AP sends its first scan report.
When an AP leaves, the controller immediately updates the list of adjacent radios
and refreshes the client limits at each affected AP.
Once the controller is aware of which APs are adjacent to each other, it begins
managing the client load by sending the configured client limits to the APs. These
limits are “soft values” that can be exceeded in several scenarios, including:
• When a client’s signal is so weak that it may not be able to support a link with
another AP
• When a client’s signal is so strong that it really belongs on this AP.
The APs maintain these configured client limits and enforce them once they reach
the limits by withholding probe responses and authentication responses on any
radio that has reached its limit.
Key Points About Load Balancing
Before you enable load balancing, keep the following considerations in mind:
• The load balancing rules apply only to client devices; the AP always responds
to another AP that is attempting to set up or maintain a mesh network.
SmartZone 100 Administrator Guide for RuckOS 3.1, 800-70827-001 Rev B 71
Page 83

Configuring Access Points
Configuring Common AP Settings
• Load balancing does not disassociate clients already connected.
• Load balancing takes action before a client association request, reducing the
chance of client misbehavior.
• The process does not require any time-critical interaction between APs and the
controller.
• Provides control of adjacent AP distance with safeguards against abandoning
clients.
• Can be disabled on a per-WLAN basis. For instance, on a voice WLAN, load
balancing may not be desired due to voice roaming considerations.
• Background scanning must be enabled on the WLAN for load balancing to work.
Band Balancing
Band balancing balances the client load on radios by distributing clients between
the 2.4 GHz and 5 GHz radios. This feature is enabled by default and set to a target
of 25% of clients connecting to the 2.4 GHz band. To balance the load on a radio,
the AP encourages dual-band clients to connect to the 5 GHz band when the
configured percentage threshold is reached.
VLAN Pooling
When Wi-Fi is deployed in a high density environment such as a stadium or a
university campus, the number of IP addresses required for client devices can easily
run into the thousands. Placing thousands of clients into a single large subnet or
VLAN can result in degraded performance due to factors like broadcast and
multicast traffic.
To address this problem, VLAN pooling allows administrators to a deploy pool of
multiple VLANs to which clients are assigned, thereby automatically segmenting
large groups of clients into multiple smaller subgroups, even when connected to
the same SSID. As the client device joins the WLAN, the VLAN is assigned to one
of the VLANs in the pool based on a hash of the client’s MAC address.
To use the VLAN pooling feature, you first need to create a VLAN pooling profile,
and then you can assign the profile to a specific WLAN or override the VLAN settings
of a WLAN group.
SmartZone 100 Administrator Guide for RuckOS 3.1, 800-70827-001 Rev B 72
Page 84

Configuring Access Points
Configuring Common AP Settings
Creating a VLAN Pooling Profile
Follow these steps to create a VLAN pooling.
1 Go to Configuration > WLANs.
2 In the VLAN Pooling Profiles section, click Create New. The Create New VLAN
Pooling Profile form appears.
3 In Name, type a name for the profile.
4 In Description (optional), type a short description for this profile.
5 In VLANs, type the VLAN IDs to be assigned to this pool. VLAN IDs can be
separated by hyphens, commas, or a combination (for example, 7-10, 13, 17,
20-28).
6 Click OK.
Each VLAN pool can contain up to 16 VLANs, and a maximum of 64 VLAN pools
can be created. Each WLAN can be configured with a single VLAN pool.
You have completed creating a VLAN pooling profile.
Figure 32. The Create New VLAN Pooling Profile form
Assigning the VLAN Pooling Profile to a WLAN
Follow these steps to assign the VLAN pooling profile to a specific WLAN.
1 Go to Configuration > WLANs.
2 In the WLAN Configuration section, click Create New to create a new WLAN or
click a WLAN name to edit it.
3 Expand the Advanced Options section, and locate the Access VLAN entry.
4 Select the Enable VLAN Pooling check box, and then select the VLAN pooling
profile that you created earlier.
5 Click OK.
SmartZone 100 Administrator Guide for RuckOS 3.1, 800-70827-001 Rev B 73
Page 85

Configuring Access Points
Configuring Common AP Settings
You have completed assigning a VLAN pooling profile to a WLAN. Clients connecting
to this WLAN will now be automatically assigned to a VLAN from the specified VLAN
pool.
Figure 33. Under the Advanced Options section, locate the Access VLAN entry
Using a VLAN Pooling Profile to Override the VLAN Settings of a WLAN Group
If you want to override the original VLAN settings of a WLAN with the VLAN pool
that you created earlier, follow these steps.
1 Go to Configuration > WLANs.
2 In the WLAN Groups section, click Create New to create a new WLAN group
or click a WLAN group name to edit it.
3 Expand the WLAN List section, and then select the check boxes for the member
WLANs for which you want to override the VLAN settings.
SmartZone 100 Administrator Guide for RuckOS 3.1, 800-70827-001 Rev B 74
Page 86

Configuring Access Points
Configuring Common AP Settings
4 In the VLAN Override column, select Pooling, and then select the VLAN pooling
profile that you want to apply to each of the selected member WLANs.
5 Click Apply.
You have completed overriding the VLAN settings of a WLAN group using a VLAN
pooling profile.
Figure 34. In the VLAN Override column, select the VLAN pooling profile to apply each of the
selected WLANs
SmartZone 100 Administrator Guide for RuckOS 3.1, 800-70827-001 Rev B 75
Page 87

Configuring Access Points
Configuring Model-Based Settings
Configuring Model-Based Settings
The following AP settings can be applied to all APs of a particular model:
• Internal Heater: Enable internal heaters (specific AP models only).
NOTE: For the internal heater to be operational, ZoneFlex 7762 APs must be
powered by the supplied PoE injector and its associated power adapter or a
standard 802.3at PSE. For the PoE Out port to be operational, ZoneFlex 7762 APs
must be powered by the supplied PoE injector and its associated power adapter.
• PoE Out Ports: Enable PoE out ports (specific ZoneFlex AP models only).
NOTE: If the controller country code is set to United Kingdom, an additional “Enable
5.8 GHz Channels” option will be available for outdoor 11n/11ac APs. Enabling this
option allows the use of restricted C-band channels. These channels are disabled
by default and should only be enabled by customers with a valid license to operate
on these restricted channels.
• Disable Status LEDs: When managed by the controller, you can disable the
external LEDs on certain ZoneFlex models, such as the 7300 series APs. This
can be useful if your APs are installed in a public location and you don’t want to
draw attention to them.
• External Antenna: External antenna configuration is available for the 5 GHz radio
on the ZoneFlex 7762, and for the 2.4 and 5 GHz radios on the 7782-E APs.
Once enabled, enter a gain value in the range of 0 to 90dBi.
• Radio Band: (ZoneFlex 7321 only) Select 2.4 GHz or 5 GHz radio band for the
7321 APs.
• Port Settings: See Configuring AP Ethernet Ports.
Configuring AP Ethernet Ports
You can use AP groups to control Ethernet ports on all APs of a certain model. Then,
if you want to override the port settings for a specific AP, you can do so by editing
the AP configuration, enabling the Override check box in the Model Specific Control
section, and then configuring the AP settings that you want to override.
Follow these steps to configure the Ethernet ports for all APs of the same model.
1 Go to Configuration > Access Points > Model Based Settings.
2 In Select an AP model, select the AP model that you want to configure from the
list.
SmartZone 100 Administrator Guide for RuckOS 3.1, 800-70827-001 Rev B 76
Page 88

Configuring Access Points
Configuring Model-Based Settings
3 In Port Setting, for any enabled ports, you can choose whether the port will be
used as a Trunk Port, an Access Port or a General Port. The following restrictions
apply:
• All APs must be configured with at least one Trunk Port.
• For single port APs (for example, ZoneFlex R300), the single LAN port must
be a trunk port and is therefore not configurable.
• For ZoneFlex 7055, the LAN5/Uplink port on the rear of the AP is defined as
a Trunk Port and is not configurable. The four front-facing LAN ports are
configurable.
• For all other APs, you can configure each port individually as either a Trunk
Port, Access Port or General Port (see Designating an Ethernet Port Type for
more information.)
4 Click Apply.
You have completed configuring AP model specific settings.
Figure 35. Configuring AP model specific settings
NOTE: To disable a LAN port entirely, clear the Enable check box.
SmartZone 100 Administrator Guide for RuckOS 3.1, 800-70827-001 Rev B 77
Page 89

Configuring Access Points
Configuring Model-Based Settings
Designating an Ethernet Port Type
Ethernet ports can be configured as one of the following port types:
• Trunk Ports
• Access Ports
• General Ports
Trunk links are required to pass VLAN information between switches. Access ports
provide access to the network and can be configured as members of specific
VLANs, thereby separating the traffic on these ports from traffic on other VLANs.
General ports are user-defined ports that can have any combination of up to 20
VLAN IDs assigned.
For most ZoneFlex APs, you can set which ports you want to be your Access, Trunk
and General Ports from the controller web interface, as long as at least one port on
each AP is designated as a Trunk Port.
By default, all ports are enabled as Trunk Ports with Untag VLAN set as 1 (except
for ZoneFlex 7025, whose front ports are enabled as Access Ports by default). If
configured as an Access Port, all untagged ingress traffic is the configured Untag
VLAN, and all egress traffic is untagged. If configured as a Trunk Port, all untagged
ingress traffic is the configured Untag VLAN (by default, 1), and all VLAN-tagged
traffic on VLANs 1-4094 will be seen when present on the network.
The default Untag VLAN for each port is VLAN 1. Change the Untag VLAN to:
• Segment all ingress traffic on this Access Port to a specific VLAN.
• Redefine the native VLAN on this Trunk Port to match your network configuration.
Trunk Ports
Trunking is a function that must be enabled on both sides of a link. If two switches
are connected together, for example, both switch ports must be configured as trunk
ports. The Trunk Port is a member of all the VLANs that exist on the AP/switch and
carries traffic for all those VLANs between switches.
Access Ports
All Access Ports are set to Untag VLAN 1 by default. This means that all Access
Ports belong to the native VLAN and are all part of a single broadcast domain. To
remove ports from the native VLAN and assign them to specific VLANs, select
Access Port and enter any valid VLAN ID in the VLAN ID field (valid VLAN IDs are
2-4094).
SmartZone 100 Administrator Guide for RuckOS 3.1, 800-70827-001 Rev B 78
Page 90

Configuring Access Points
Configuring AP Tunnel Settings
The following table describes the behavior of incoming and outgoing traffic for
Access Ports with VLANs configured.
Table 2. Access Ports with VLANs configured
VLAN Settings Incoming Traffic (from Client) Outgoing Traffic (to Client)
Access Port, Untag
VLAN 1
Access Port, Untag
VLAN [2-4094]
All incoming traffic is native
VLAN (VLAN 1).
All incoming traffic is sent to the
VLANs specified.
All outgoing traffic on the port
is sent untagged.
Only traffic belonging to the
specified VLAN is forwarded.
All other VLAN traffic is
dropped.
General Ports
General ports are user-specified ports that can have any combination of up to 20
VLAN IDs assigned. Enter multiple valid VLAN IDs separated by commas or a range
separated by a hyphen.
Configuring AP Tunnel Settings
Follow these steps to configure the AP tunnel settings.
1 Go to Configuration > Wireless Network > Access Point > AP Tunnel Settings.
2 In Tunne l Typ e, select the tunneling protocol that you want the controller to use
for AP traffic. Option include:
• Ruckus GRE
•SoftGRE
3 Configure the setting for the tunneling protocol that you selected.
If you selected Ruckus GRE, configure the following settings:
• Ruckus Tunnel Mode: Select a protocol to use for tunneling WLAN traffic
back to the controller.
- GRE + UDP: Select this option to allow APs behind a NAT server to tunnel
WLAN traffic back to the controller.
- GRE: Select this option to tunnel regular WLAN traffic only.
SmartZone 100 Administrator Guide for RuckOS 3.1, 800-70827-001 Rev B 79
Page 91

Configuring Access Points
Configuring AP Tunnel Settings
• Tunnel Encryption: Select the Enable tunnel encryption check box if you
want managed APs to decrypt 802.11 packets, and then use an AES
encrypted tunnel to send them to the controller. By default, when WLAN
traffic is tunneled to the controller, only the management traffic is encrypted;
data traffic is unencrypted.
• WAN Interface MTU: Set the maximum transmission unit (MTU) for the tunnel
to either Auto (default) or a specific size (850 to 1500 bytes). MTU is the size
of the largest protocol data unit that can be passed on the controller network.
If you selected Soft GRE, configure the following settings:
• Name: Type a name for the profile that you are creating.
• Description: Type a short description of the profile.
• Primary Gateway Address: Type the IP address or fully-qualified domain
name (FQDN) of the primary gateway server.
• Secondary Gateway Address: If you have a secondary gateway server on
the network, type its IP address or FQDN in the box provided. If the controller
is unable to reach the primary gateway server, it will automatically attempt to
reach the secondary gateway address that you specify here.
• Gateway Path MTU: Set the maximum transmission unit (MTU) for the
gateway path. Options include Auto (default) and Manual (range is 850 to
1500 bytes).
• ICMP Keep Alive Period: Type the time interval (in seconds) at which APs
send a keepalive message to the active third party WLAN gateway. The range
is 1 to 180 seconds and the default value is 10 seconds.
• ICMP Keep Alive Retry: Type the number of keepalive attempts that APs wait
for a response from the active third party WLAN gateway before failing over
to the standby WLAN gateway. The range is 2 to 10 retries and the default
value is 5 retries.
4 Click Apply.
You have completed configuring the AP tunnel settings.
SmartZone 100 Administrator Guide for RuckOS 3.1, 800-70827-001 Rev B 80
Page 92

Configuring Access Points
Tagging Critical APs
Figure 36. Configuring the AP tunnel settings
Tagging Critical APs
A critical AP is an AP that exceeds the daily traffic threshold (sum of uplink and
downlink) data bytes configured on the controller web interface. Follow these steps
to tag critical APs automatically.
1 Go to Configuration > Wireless Network > Access Points > Critical AP Rules.
2 Select the Enable Auto Tagging Critical APs check box.
3 Under Auto Tagging Rules, select Daily Traffic Bytes Exceeds Threshold.
4 Under Rule Threshold, specify the threshold.
• In the first box, type a value that you want to set as the traffic threshold. This
value will be applied in conjunction with the data unit that you will select in
the second box.
• In the second box, select the data unit for the threshold – M for megabytes
or G for gigabytes.
5 Click Apply.
APs that exceed the daily traffic threshold that you specified will appear highlighted
on the Access Points page and the Access Point details page. Additionally, the
controller will send an SNMP trap to notify that an AP has been disconnected.
Figure 37. Configuring critical AP tagging rules
SmartZone 100 Administrator Guide for RuckOS 3.1, 800-70827-001 Rev B 81
Page 93

Configuring Access Points
Managing Access Points
Managing Access Points
Once you set up the controller, access points will be able to join or register with the
controller automatically. After an access point registers successfully with the
controller, you can update its configuration by following the steps described in this
section.
Viewing a List of Managed Access Points
After an access point registers successfully with the controller, it appears on the
Access Points page, along with other managed access points. Follow these steps
to view a list of managed access points.
1 Go to Configuration > Wireless Network > Access Points. A list of access points
that are being managed by the controller appears on the Access Points page.
These are all the access points that belong to all management domains.
2 The list of managed access points displays details about each access point,
including its:
• AP MAC address
• AP name
• Model (AP model)
• AP firmware
• IP address (internal IP address)
• External IP address
• Provision Method
• Provision State
• Administrative Status
• Status
• Configuration Status
• Registered On (date the access point joined the controller network)
• Registration State
• Actions (actions that you can perform)
SmartZone 100 Administrator Guide for RuckOS 3.1, 800-70827-001 Rev B 82
Page 94

Configuring Access Points
Managing Access Points
NOTE: By default, the Access Points page displays 10 access points per page
(although you have the option to display up to 250 access points per page). If the
controller is managing more than 10 access points, the pagination links at the
bottom of the page are active. Click these pagination links to view the succeeding
pages on which the remaining access points are listed.
Figure 38. Viewing a list of managed access points
Provisioning and Swapping Access Points
The controller supports the provisioning and swapping of access points. As an
administrator you can:
• Upload a file containing list of AP and the pre-provisioned configuration data for
each AP. The controller processes the file and provides details on regarding the
import results (including a list of failed APs and failure reasons).
• Modify or delete pre-provisioning data if AP does not connect to the controller
• Monitor the status and stage of the pre-provisioned APs
• Manually lock or unlock APs
• Upload a file containing list of AP pairs for swapping. The controller processes
the file and provide the detailed import result (including a list of failed APs and
failure reasons).
• Manually enter the AP swap pair
• Delete the swap configuration if AP fails to contact the controller
• Monitor the status and stage of the swapping AP pairs
• Manually swap the APs
SmartZone 100 Administrator Guide for RuckOS 3.1, 800-70827-001 Rev B 83
Page 95

Configuring Access Points
Managing Access Points
Options for Provisioning and Swapping APs
Use the following buttons on the Access Points page to perform the AP provisioning
and swapping.
• Import Batch Provisioning APs: Click this button to import the provisioning file.
The controller displays the import results. Any errors that occur during the import
process will be listed by the controller.
• Export All Batch Provisioning APs: Click this button to download a CSV file
that lists all APs that have been provisioned. The exported CSV contains the
following information:
• AP MAC Address
•Model
• AP Name
• Description
•Location
• GPS Coordinates
• Logon ID
• Password
• Administrative State
• IP Address
•Network Mask
• Gateway
• Primary DNS
• Secondary DNS
• Provision Checklist
• Serial Number
NOTE: The exported CSV file for all batch provisioned APs only contains pre-
provisioned APs. It does not contain swapping APs or auto discovered APs.
NOTE: If no APs have been pre-provisioned, you will still be able to export the CSV
file but it will be empty (except for the column titles).
SmartZone 100 Administrator Guide for RuckOS 3.1, 800-70827-001 Rev B 84
Page 96

Configuring Access Points
Managing Access Points
• Import Swapping APs: Manually trigger the swapping of two APs by clicking
the swap action in the row. You can also edit the pre-provision configuration only
if the AP does not connect to the controller. Click the AP MAC address to bring
up the configuration edit form, and then select Pre-provision Configuration.
• Export All Batch Swapping APs: Click this button to download a CSV file that
lists all APs that have been swapped. The exported CSV contains the following
information:
• Swap In AP MAC
• Swap In AP Model
• Swap Out AP MAC
NOTE: The exported CSV file for batch swapping APs only contains swapping APs.
It does not contain pre-provisioned APs or auto discovered APs.
• Delete Selected: To delete multiple pre-provisioned APs simultaneously, select
the check boxes before the AP MAC addresses, and then click Delete Selected.
To delete a single pre-provisioned AP, click the icon that is in the same row
as the AP MAC address. If the AP has not contacted the controller, the AP record
disappears from the table. If the AP comes up later, the controller treats it as a
discovered AP. If the AP is connected to the controller, the delete operation is
similar to the AP delete operation.
Figure 39. Options for provisioning and swapping APs
Understanding How Swapping Works
The following table lists how the controller handles swapping by detailing each stage.
For example, you have entered swap configuration as Swap In: A and Swap out: B.
Table 3. AP swapping stages
Stage State A Stage A State B Stage B
SmartZone 100 Administrator Guide for RuckOS 3.1, 800-70827-001 Rev B 85
Page 97

Configuring Access Points
Managing Access Points
Table 3. AP swapping stages
1. Enter data Swapping Not Registered Approved Waiting for swap in AP
registration
2. AP register Swapping Waiting for
swapping in
3. User swap Approved Swapped in Swapping Swapped out
4: Second
swap
Swapping Swapped out
and waiting for
swapping in
Approved Waiting for swapping
out
Approved Swapped in and
waiting for swapping
out
Editing AP Configuration
Follow these steps to update the configuration of a managed access point.
1 Go to the Configuration > Wireless Network > Access Points.
2 On the APs page, locate the access point whose configuration you want to
update.
3 Click the MAC address of the access point. The Edit AP configuration form
appears.
4 Update the access point configuration by modifying the options in the form.
5 Click OK.
You have completed editing the AP configuration.
NOTE: The loc parameter (which holds the Location attribute in the AP
configuration) in the controller's Captive Portal redirection to the configured hotspot
login portal is encoded using the Hex encoder from the
org.apache.commons.codec.binary library. If you have hotspots on the network and
you are using an external portal, take note of the encoding mechanism for the loc
parameter so your external portal can decode it.
SmartZone 100 Administrator Guide for RuckOS 3.1, 800-70827-001 Rev B 86
Page 98

Figure 40. The Edit AP configuration form
Configuring Access Points
Managing Access Points
Editing Swap Configuration
The controller supports the swapping or replacement of a managed AP with a new
AP of the same model. This feature is useful when you want to avoid service
interruption because you need to replace an AP in the field.
By configuring the swap settings, you can easily and automatically export and apply
the settings of the old AP to the new AP.
Follow these steps to configure the swap settings of an AP.
1 Go to the Configuration > Wireless Network > Access Points.
2 On the APs page, locate the access point whose swap configuration you want
to update.
3 Click the AP MAC address of the access point.
4 Click the Swap Configuration tab.
5 Update the access point configuration by modifying the options in the form.
SmartZone 100 Administrator Guide for RuckOS 3.1, 800-70827-001 Rev B 87
Page 99

Configuring Access Points
Managing Access Points
6 Click OK.
You have completed editing the swap configuration.
Figure 41. The Edit AP > Swap Configuration form
Deleting an Access Point
Follow these steps to delete an access point that is currently registered with the
controller.
1 Go to the Configuration > Wireless Network > Access Points.
2 On the APs page, locate the access point that you want to delete.
3 Once you locate the access point, click the icon that is under the Actions
column. A confirmation message appears.
4 Click OK.
The list of managed access points refreshes, and then the access point that you
deleted disappears from the list.
NOTE: Wireless clients that are associated with the access point that you deleted
will still be able to connect to the network until the next time the access point
attempts to rejoin the controller.
NOTE: After you delete an access point, it could take approximately two minutes
before it appears on the Configuration > Wireless Network > APs page again.
SmartZone 100 Administrator Guide for RuckOS 3.1, 800-70827-001 Rev B 88
Page 100

Controlling Access to the Wireless Network
Working with User Traffic Profiles
Controlling Access to the Wireless Network
• Working with User Traffic Profiles
• Controlling L2 Access
• Controlling Device Access
Working with User Traffic Profiles
A traffic profile defines whether the system will allow or block a particular type of
traffic based on a number of attributes, including:
• Source IP address (specific IP address or IP address range)
• Source port number (specific port or port range)
• Destination IP address (specific IP address or IP address range)
• Destination port number (specific port or port range)
• Network protocol (TCP, UDP, etc.)
• Traffic direction
Creating a User Traffic Profile
Follow these steps to create a user traffic profile.
1 Go to Configuration > Wireless Network > Access Control.
2 In the User Traffic Profiles section, click Create New.
3 In Name, type a name for this profile.
4 In Description, type a short description for this profile.
5 In Default Access, select whether you want the controller to allow or block users
using this profile if the user traffic does not match any of the rules you defined.
6 In the Rules section, click Create New.
NOTE: By default, two default rules exist (Allow DNS and Allow DHCP) when you
create a new profile. You can modify these rules or even delete them.
7 In Source IP, specify the source IP address to which this rule will apply.
• To apply this rule to an IP address range, type the network address and the
subnet mask.
• To apply this rule to a single IP, clear the Subnet check box, and then enter
the IP address.
8 In Source Port, specify the source port to which this rule will apply.
SmartZone 100 Administrator Guide for RuckOS 3.1, 800-70827-001 Rev B 89
 Loading...