

Supplementary Manual
For users of VS-1680/1880/1824/1824CD
Thank you and congratulations on your purchase of the VS8F-3 Plug-In
Effect Expansion Board.
You can only use your VS8F-3 after updating the system program of
your VS-1680/1880/1824/1824CD.
Before updating this unit, carefully read the sections entitled:
“Supplementary Manual (this manual)” and “VS8F-3 Owner’s Manual.”
Contents
Limitations on VS-1680/1880/1824/1824CD...............2
Before you use the VS8F-3 .........................................3
Checking the system version of your V Studio........................3
Using the SETUP DISC to update the system version ............4
Rules for installing effect expansion boards.............................6
Where to install the VS8F-3 (Checking slot A) .........................6
Use your VS8F-3 (VS8F-3 Use Sw Parameter)..........................6
Installing plug-in effects in the V Studio ...................7
Installation procedure..................................................................7
Backing up your VS plug-in programs .....................................7
Re-installing your plug-ins .........................................................8
Uninstalling a plug-in ..................................................................8
Using the effects..........................................................9
Selecting and editing a plug-in...................................................9
Troubleshooting ........................................................11
202
Copyright © 2004 ROLAND CORPORATION
All rights reserved. No part of this publication may be reproduced in any form
without the written permission of ROLAND CORPORATION.
Roland Web site http://www.roland.com/
Important
VS-1680/1880/1824/1824CD
There are functional limitations for the VS-1680/1880/1824/1824CD when a VS8F-3 is installed. These are the
limitations of the systems, not a malfunction of your V Studio.
■
It is necessary to turn the VS8F-3 Use Sw Parameter (p. 6) On when you use a VS8F-3.
It is also necessary to shutdown and reboot your V Studio after turning the VS8F-3 Use Sw (p. 6) On. When you turn
it Off, it is necessary to shutdown and reboot your V Studio again.
■
When VS8F-3 Use Sw Parameter is turned On, your V Studio cannot record or play back track 15 and 16.
However, it is possible to edit track 15 and 16 even while the VS8F-3 Use Sw is turned On. If you need to record to
or play back sound on track 15/16, turn the VS8F-3 Use Sw Off.
■
Do not install VS8F-3 to slot A of your V Studio while VS8F-3 Use Sw is turned Off.
Both of slot A and slot B will not function if VS8F-3 is installed to slot A while VS8F-3 Use Sw is turned Off.
Turn VS8F-3 Use Sw On when you use VS8F-3.
Please see below illustration regarding the setup.
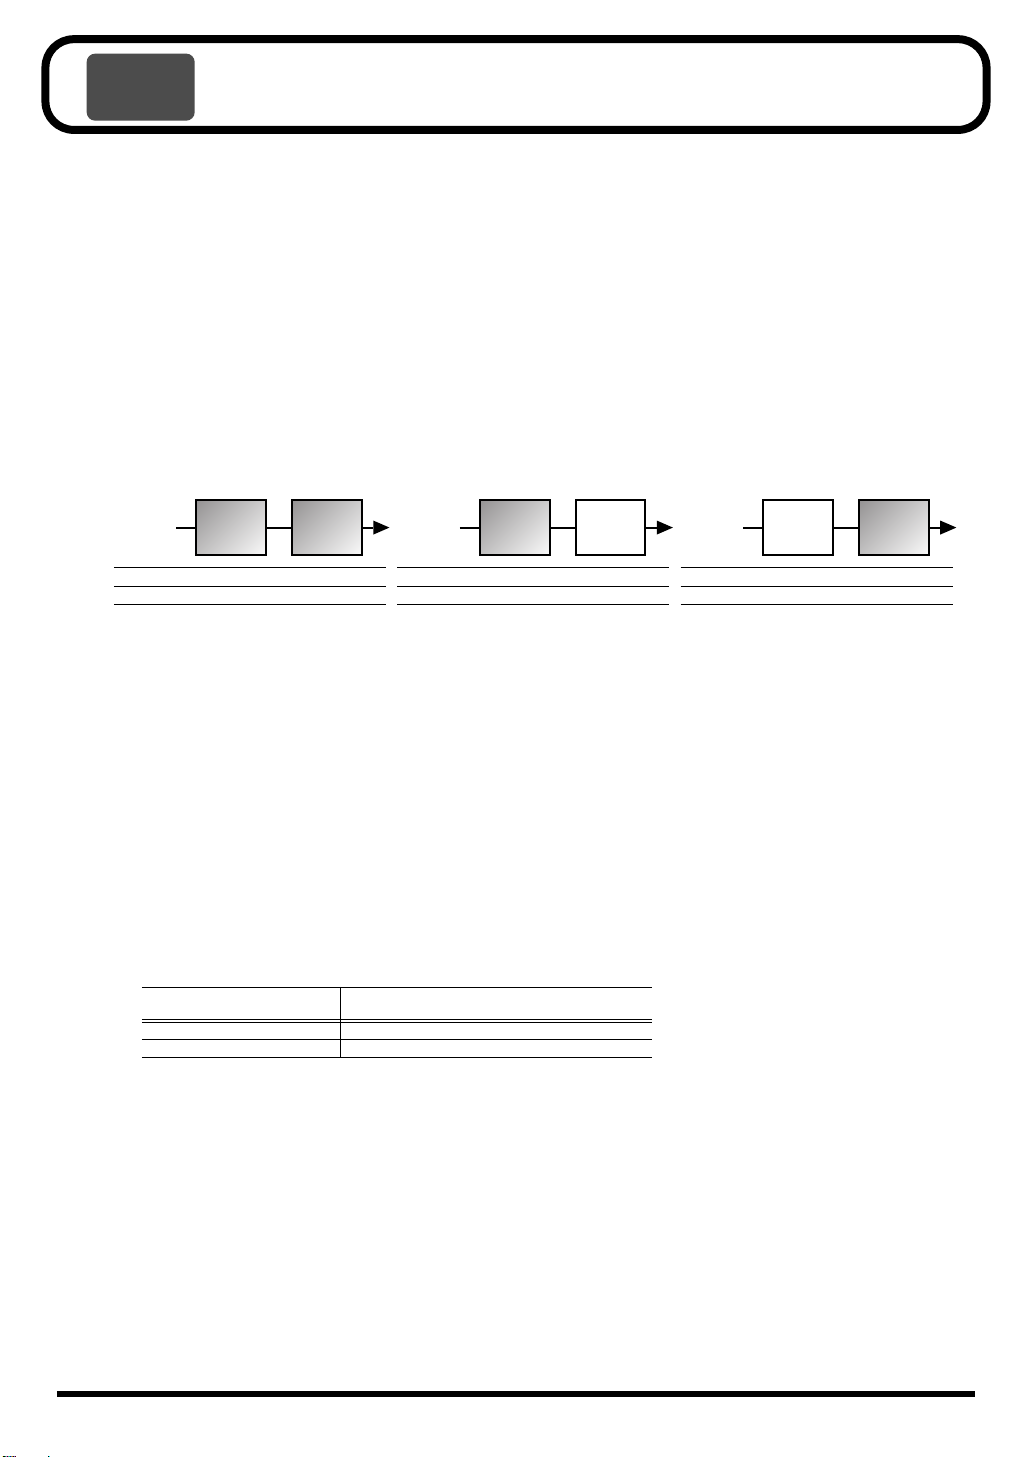
Limitations on
Slot A Slot B
VS8F-3
Use Sw
Off
On
■
Sound may not come out from your V Studio if you insert an effect into a channel or the
VS8F-3
Not work
Work
VS8F-3 VS8F-3
Not work
Work
VS8F-3
Use Sw
Off
On
Slot A Slot B
Not work
Work
Not work
Slot A Slot B
VS8F-2 VS8F-2
Work
VS8F-3
Use Sw
Off
On
Work
Work
master block without selecting a Plug-In patch.
If no Plug-In patch is selected, a message “NO PLUG-IN” will be displayed on Effect Menu Screen. In this case, select
a Plug-In patch (p. 9) or turn the insert effect off.
■
Screen display will slow down if a tracks is being played while the Plug-In Edit screen is
displayed.
During playback of tracks, the display speed of the level meter or EQ graph will be slow. So there may be a gap
between the sound coming out from your V Studio and the movement of the level meter on the screen. Also, it may
take time to change screens after editing parameters.
During playback of tracks, the system will display a message “Serial Rx Buffer Full” on the Plug-In Information
screen after switching from the Plug-In Edit screen. This means the V Studio screen drawing capacity is full. Press
[ENTER/YES] to go back to the Plug-In Edit screen. If [EXIT/NO] is pressed, the message will disappear.
■
The capacity of the event memory will be decreased when the V studio is updated.
If the system compatible with VS8F-3 is installed, the capacity of the event memory will be decreased as follows. The
event data (phrases, auto mix or markers) created on the system before update may not be loaded perfectly.
Capacity of Event Memory
VS-1680 Approx 18,000
VS-1880/1824/1824CD Approx 14,000
The system will cut down the events that cannot be loaded automatically.
Please check the number of events on your songs before doing a system update.
Before Update ➔ After Update
→
Approx 13,000
→
Approx 12,000
VS8F-3
Not work
Work
How to check the number of events.
1.
Set Remain Display parameter (in System Parameter 2 screen) to “Event.”
2.
Press [SHIFT] + [PLAY(DISPLAY)] buttons several times on the PLAY screen.
You can then check the remaining capacity of current song events.
3.
Subtract the remaining capacity from 18,000 for a VS-1680, from 14,000 for a VS-1880/1824/1824CD.
You will find the number of events used on for the current song. Check that capacity of the event memory will not
be shorted after system update.
2
Before you use the VS8F-3
To use a VS8F-3 in a V Studio, the system program version of the V Studio must be
compatible with the VS8F-3.
recorder before installing the VS8F-3. If you find the version is not compatible with the
VS8F-3, please update the software using the SETUP DISC contained in this package. The
update should be executed once prior to the installation of the VS8F-3. If you find the
system program version is compatible with the VS8F-3, the update is not necessary.
In this chapter, the notes and cautions regarding installation of VS8F-3 are stated. Please
read them carefully and install the board correctly.
Checking the system version of your V Studio
1.
Power up your V Studio while holding down TRACK SELECT/CH EDIT [1]+
TRACK STATUS [1].
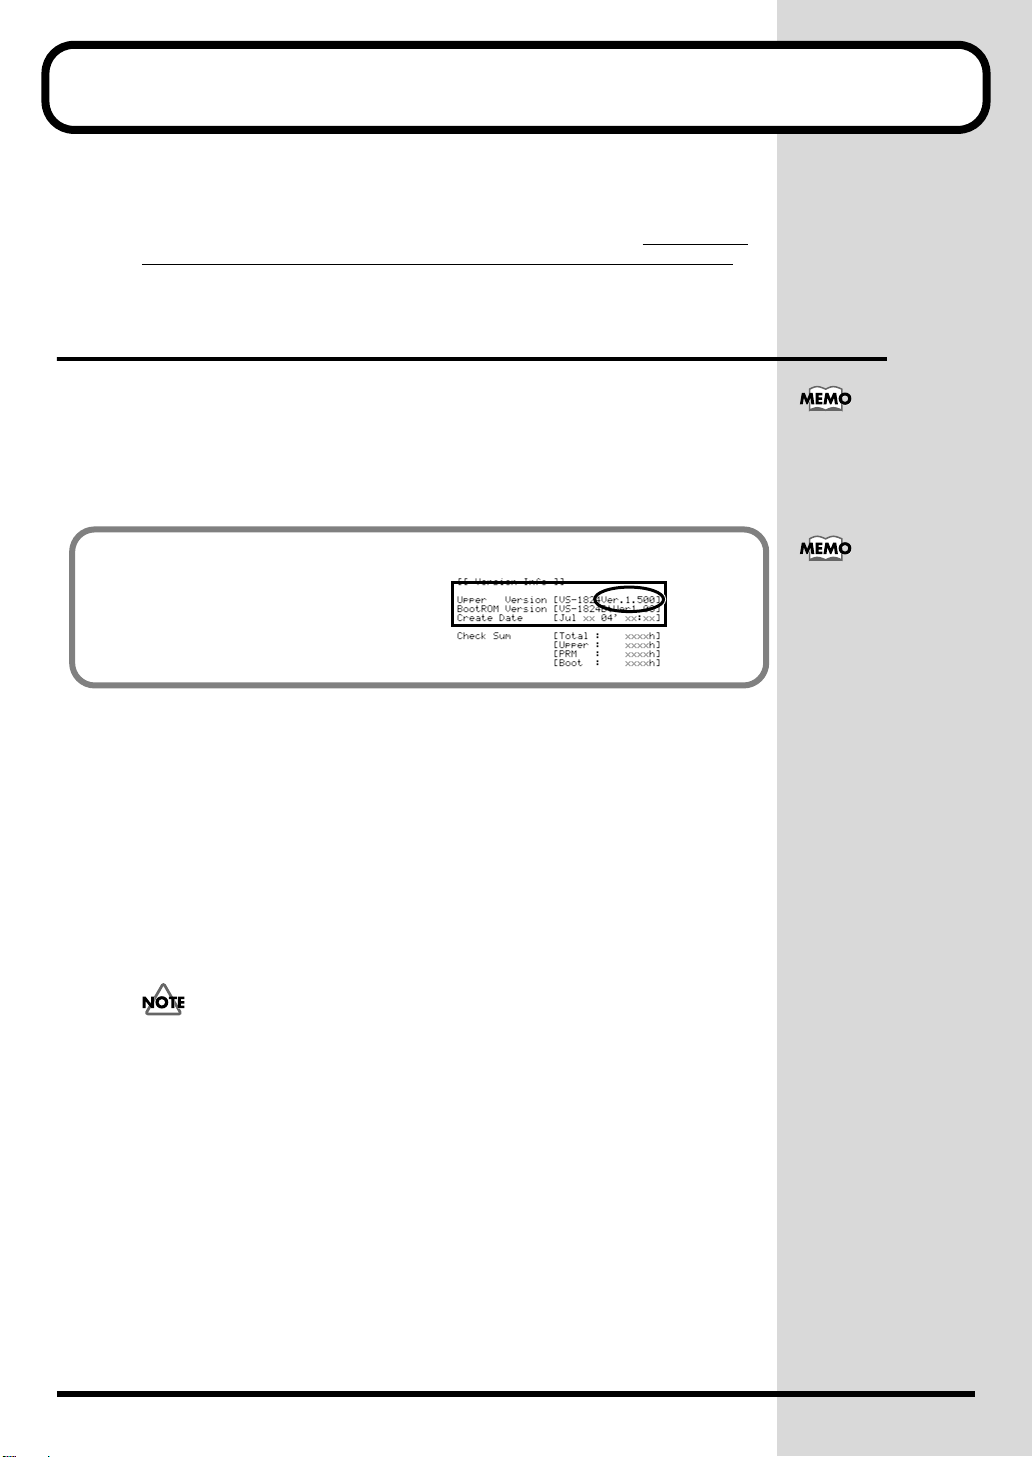
Continue holding down these buttons until “Version Info” appears in the display.
2.
Checking the system version of your V Studio.
If the version is lower than the version numbers given below, you must update the
system of your V Studio. Update the system as described below.
Please check the system program version of your V Studio
When starting up in Step 1,
you must continue holding
down the buttons until the
lowest line of the screen
shows “Version Info.”
• VS-1680: Version 2.500 or later
• VS-1880: Version 1.500 or later
• VS-1824/1824CD: Version 1.500 or later
■
Backing up your songs
To ensure the safety of your data, we recommend that you back up the songs saved on
your hard disk to CD-R/RW disc, and then initialize your hard disk before updating the
system program. You can restore the backed-up songs to your internal hard disk using
the CD-R RECOVER command.
1.
Back up songs (performance data) saved on the hard disk to CD-R/RW discs.
As described in the owner's manual, back up all songs that you want to keep. When doing
so, back up not only the songs in the current drive (partition), but also any songs that are
saved in other partitions.
2.
Initialize the hard disk (Drive Initialize).
Songs saved on the hard disk will be completely erased, and the disk will be free of data.
Initialize the hard disk as described in the owner's manual of your V Studio.
When you execute the Drive Initialize command, all songs saved on the hard disk will
be erased. It will not be possible to use the Undo function to recover the erased
songs. If you accidentally erase a song you wanted to keep, there is no way to
recover the song. Roland Corporation can assume no responsibility whatsoever
concerning the recovery of any lost content. Before you execute the Drive Initialize
command, you must back up any song you want to keep.
3.
Perform the Shutdown procedure (Owner’s Manual of V Studio “Turning Off the
Power”) and turn off the power of all equipment connected to the V Studio.
Version number of
the current system appears here.
The explanations in this
manual include
illustrations that depict
what should typically be
shown by the display.
Note, however, that your
unit may use a newer,
enhanced version of the
system (e.g., including
newer features), so what
you actually see in the
display may not always
match what appears in the
manual.
3

Before you use the VS8F-3
Using the SETUP DISC to update the system version
Here's how to update the system program of your V Studio so that it will support the
VS8F-3. You'll need to perform this step just once for V Studios whose system does not
yet support the VS8F-3. To update the system program of your V Studio, use the “SETUP
DISC” included in the package. This SETUP DISC contains the system program that
makes a VS-1680/1880/1824/1824CD compatible with a VS8F-3.
If you're using the VS-1824CD, you can update your system using the internal
CD-R/RW drive. If you're using the VS-1680/1880/1824 (the model without an internal
CD-R/RW drive), you will need an external SCSI CD-RW drive for the update, such as
the VS-CDR-II/III or a compatible Plextor CD drive. The VS-CDR-I can not be used for
this update.
■
Updating the system program of your V Studio
Please read “Backing up your songs” (p. 3).
We recommend that you back up the songs saved on your hard disk, and then initialize
the hard disk.
1.
Turn on the power of the V Studio, and eject the disc tray.
If you use the VS-CDR-II/III or a compatible Plextor CD drive, turn on the power of CD
drive.
2.
Place the SETUP DISC on the disc tray.
3.
Close the disc tray.
4.
Perform the Shutdown procedure (Owner’s Manual of V Studio “Turning Off the
Power”).
5.
Turn on the power of the V Studio.
The opening title screen and the “Setup Drives” message will appear. The CD-R/RW
drive will be checked. Please wait. When the checking process is complete, the system
will ask “Update System Program?”
If you have already
downloaded the most
recent system program
from the Roland website,
or already performed the
update using the SETUP
DISC (so that your unit
supports the VS8F-3), you
don't need to update
again.
Check the Roland website
http://www.roland.com/
for the latest system
upgrade for your product.
Songs and backup data
you created before
updating the system will
still be usable in their
existing form. (Data
compatibility is
preserved.) However, the
system may not load full of
event data because of
difference in remaining
capacity of event memory.
If the message “Update System Program?” is not displayed on step 5, it is not necessary
to update the system of your V Studio. If you would like to overwrite the system by
force, please read “Updating the system program of V Studio by force” (p. 5).
6.
If you want to update the system to the displayed version, press [ENTER/YES].
A message will ask “Keep User Setting?”
7.
Specify whether you want to preserve your user routing, system setting and user
effect patch settings when the update is performed, or whether all of these
settings are to be initialized. Press [ENTER/YES] or [EXIT/NO] to make your
selection.
• [ENTER/YES]➔ settings will be preserved
• [EXIT/NO]➔ settings will be initialized
The display will indicate “Now Working..,” and the system update will begin.
When the system update is completed, “Please Reboot OK” message will appear.
Never turn off the power while the update is in progress. Doing so will destroy
the operating program of the V Studio itself, and it will no longer be possible to
start it up.
If you press [ENTER/YES] in response to “Init User Setting Sure?,” all settings will be
initialized to their factory defaults.
8.
Remove the SETUP DISC.
If you decide not to
update, press [EXIT/NO].
The update process will be
halted, and the V Studio
will start up as usual.
If you pressed [EXIT/NO]
in Step 7, the display will
ask “Init User Setting
Sure?” If you are sure you
want to initialize the
settings, press
[ENTER/YES].
If you decide you don't
want to proceed with the
initialization, press
[EXIT/NO]. In this case,
you are returned to Step 7.
4

9.
b
Confirm that the “Please Reboot OK” message is displayed, then turn off the
power of the V Studio.
10.
Turn on the power of the V Studio once again.
11.
Check the version number that is displayed at start-up.
■
Recovering your songs
Restore the data that you had backed up in “Backing up your songs” (p. 3) back onto the
hard disk. Refer to the owner's manual of your V Studio, and restore your songs back onto
the hard disk.
■
Updating the system program of V Studio by force
The procedure for “Updating the system program of your V Studio” (p. 4), V Studio
compares the current version and the version contained in Setup Disc in CD-R/RW drive.
If your V Studio finds that update is necessary, a system update will be executed. Using
the following process, you can overwrite the system by force without comparing version
numbers.
1.
Turn on the power of the V Studio, and eject the disc tray.
If you use the VS-CDR-II/III or a compatible Plextor CD drive, turn on the power of CD
drive.
2.
Place the SETUP DISC on the disc tray.
3.
Close the disc tray, then perform the Shutdown procedure (Owner’s Manual of V
Studio “Turning Off the Power”).
4.
Turn on the power of your V Studio while holding down [MASTER EDIT] +
[FADER/MUTE].
The opening title screen and the “Setup Drives” message will appear. The CD-R/RW
drive will be checked. Please wait. When the checking process is complete, the display
will indicate “Now Working..” and the system update will begin.
When the system update is completed, “Please Reboot OK” message will appear.
Before you use the VS8F-3
Please don’t forget to
remove the SETUP DISC.
If V Studio is rebooted
without removing SETUP
DISC, you cannot execute
recording operation etc. In
such case, please read “If
you cannot execute
recording operations”.
When the system update is
completed, all settings will
e initialized to their
factory defaults.
Never turn off the power while the update is in progress. Doing so will destroy the
operating program of the V Studio itself, and it will no longer be possible to start it up.
5.
Confirm that the “Please Reboot OK” message is displayed, remove the SETUP
DISC from CD-R/RW drive.
6.
Turn off the power of the V Studio.
7.
Check that Setup Disc is removed from CD-R/RW drive and turn on the power of V
Studio again.
8.
Check the version number that is displayed at start-up.
■ If you cannot execute recording operations
If you reboot your V Studio after updating without removing your SETUP DISC from
CD-R/RW drive, the CD-R/RW drive will be selected as the current drive. In this
status, you cannot execute operations like recording. Using the following steps, you can
re-select the IDE drive as the current drive.
1. Remove the SETUP DISC from CD-R/RW drive.
2. Perform the Shutdown procedure (Owner’s Manual of V Studio “Turning Off the
Power”).
A message “Illegal Request” may appear on screen. But this is not a malfunction.
3. Check that the SETUP DISC is removed from the CD-R/RW drive and perform the
restart procedure ([SHIFT] + [PLAY (RESTART)]) or turn on the power of V Studio
again.
Partition 0 of IDE drive will be selected as the current drive.
Please don’t forget to
remove the Setup Disc. If a
V Studio is rebooted
without removing the
SETUP DISC, you cannot
execute any recording
operations etc. In such a
case, please read “If you
cannot execute recording
operations”
5

Before you use the VS8F-3
Rules for installing effect expansion boards
Refer to the Quick Start manual for your V Studio and to “Rules for installing effect
expansion boards” (p. 6), and install the VS8F-3 as directed.
■
Rule 1
Effect expansion boards must be installed in order starting from slot A (the first one).
You must not leave the first effect slot vacant, or skip any slots when you install boards.
■
Rule 2
When installing the VS8F-3, you must install it as follows in conformity with Rule 1.
When the VS8F-3 in the first slot (the Key Card, shown here in bold type) is authorized,
Key Card data is written to the hard disk together with the VS plug-in program.
VS8F-3: x1
VS8F-2: not installed
VS8F-3: x1
VS8F-2: x1
VS8F-3: x2
VS8F-2: not installed
Slot A
VS8F-3
VS8F-3
VS8F-3
Slot B
VS8F-2
VS8F-3
VS8F-3
VS8F-3=not Key Card
Where to install the VS8F-3 (Checking slot A)
=Key Card
For details, refer to
“Where to install the
VS8F-3 (Checking slot A)”
If you affix the included
Key Card sticker to the
authorized VS8F-3
installed in the first slot,
you'll be able to
distinguish it from other
VS8F-3 boards.
AC Cord
Rear panel
Unplug the power
before installing
an effect expansion board.
VS-1680/1880/
1824/1824CD bottom
BA
Effect expansion board
installation opening
Use your VS8F-3 (VS8F-3 Use Sw Parameter)
To use a VS8F-3 on VS-1680/1880/1824/1824CD, you need to turn the VS8F-3 Use Sw
Parameter On.
1.
Show System Parameter2 on screen.
2.
Turn On the VS8F-3 Use Sw.
“You need to SHUTDOWN and RESTART for making this change valid.” message will appear.
3.
Press [ENTER].
4.
Perform the Shutdown procedure (Owner’s Manual of V Studio “Turning Off the Power”).
5.
Confirm that the “PowerOff/RESTART” message is displayed, then perform the
restart procedure ([SHIFT] + [PLAY (RESTART)]) or turn off the power of the V
Studio.
Install the VS8F-3
in Slot A.
Example of the installation
is shown on p. 12 of the
VS8F-3 owner’s manual.
Please refer to that page.
During the Authorization
process, a VS8F-3 must be
installed in slot A. During
ordinary use, there is no
slot limitation.
The VS8F-3 cannot use
effects created for the
VS8F-2. Nor can the
VS8F-2 use plug-in effects
created for the VS8F-3.
• It is necessary to turn the VS8F-3 Use Sw (p. 6) On when you use a VS8F-3.
• It is also necessary to shutdown and reboot your V Studio after changing the VS8F-3
Use Sw Parameter (p. 6) On. When you turn it Off, you must again shutdown and
reboot your V Studio.
• When the VS8F-3 Use Sw Parameter is turned On, your V Studio cannot record or
playback track 15 and 16. However, it is possible to edit track 15 and 16 even while
VS8F-3 Use Sw is turned On.
• Do not install VS8F-3 to slot A of your V Studio while VS8F-3 Use Sw is turned Off.
Both of slot A and slot B will not function if VS8F-3 is installed to slot A while VS8F-3
Use Sw is turned Off.
6

Installing plug-in effects in the V Studio
b
The installed VS plug-in programs come in two forms: an Authorized version and a Trial
version. For details, refer to the owner's manual of the VS8F-3 (p. 11).
Installation procedure
1.
Carefully read the included leaflet “License agreement for Roland software” and
verify that you accept the conditions.
2.
Insert the SETUP DISC into the CD-R/RW drive.
3.
Show PLUG-IN INSTALL screen on following steps.
VS-1680
1. Press [SHIFT]+[F6 (UTIL)].
The Utility Menu screen will appear.
2. Press [PAGE] several times until “PIIns”
will be appeared at the F1 (function 1).
The Utility Menu screen page 3 will appear.
4.
Press [F1 (PIIns)].
The PLUG-IN INSTALL screen will appear. This shows product information about the
VS plug-in program (manufacturer, product name, plug-in version, and size).
The drive (partition) in which the plug-in program is to be installed will be decided by
the V Studio. The drive information is shown at “DESTINATION” on “PLUG-IN
INSTALL” screen. Check that the remaining capacity of the disk is bigger than the size of
VS plug-in program to be installed. For installation, a remaining capacity of twice or
more than the VS plug-in program size is required.
5.
Press [F5 (INSTL)].
The “Install?” popup will appear.
6.
To begin the installation, press [ENTER/YES].
The “AUTHORIZE?” popup will appear.
7.
If you want to install the authorized version, press [ENTER/YES]. If you want to
install the trial version, press [EXIT/NO].
If you press [ENTER/YES], authorization data will be written to the SETUP DISC and the
hard disk, and the program will be installed. If you press [ENTER/NO], a trial version
will be installed but authorization data will not be written.
The “Really, Sure?” popup will appear.
8.
To confirm the installation, press [ENTER/YES].
9.
When installation is completed, remove the SETUP DISC.
The CD-RW menu screen will appear.
Backing up your VS plug-in programs
If the SETUP DISC becomes lost or damaged after you have used it to install the authorized
version of a plug-in program, you will be unable to re-install (p. 8) the plug-in. As a
safeguard against such problems, we strongly recommend that you back up your VS
plug-in programs on a commercially available CD-R/RW disc after authorization using the
following steps.
Backing up also lets you save the user patches of the plug-in effect to the CD-R/RW disc.
1.
Insert a blank CD-R/RW disc into the CD-R/RW drive.
VS-1880/1824/1824CD
1. Press [CD-RW].
The CD-RW/Mastering Menu screen will
appear.
2. Press [PAGE] several times until “PIIns”
will be appeared at the F1 (function 1).
The CD-RW/Mastering Menu screen page 2
will appear.
If you're using the
VS-1824CD, you can install
your system using the
internal CD-R/RW drive.
If you're using the
VS-1680/1880/1824 (the
model without an installed
CD-R/RW drive), you will
need an external SCSI
CD-RW drive for the
installation, such as the
VS-CDR-II/III or a
compatible Plextor CD
drive. The VS-CDR-I can
not be used for this
installation.
If the SETUP DISC is not
yet inserted after Step 4, a
message of “Please Insert
Plug-in CD” will appear,
and the CD-RW drive tray
will open.
The plug-in programs will
e installed in the drive
(partition) that precedes
the last drive. For example
if you have drives
IDE0~IDE3, the programs
will be installed in the
IDE2 drive.
If you are unable to install
successfully even when
using a not-yet-authorized
SETUP DISC, please
contact your dealer or a
Roland service center
listed in the “Information”
section of the manual.
The contents of the SETUP
DISC are recorded in VS
format (the dedicated data
format of the V Studio).
Therefore, it is impossible to
make a backup disc on a PC.
7

Installing plug-in effects in the V Studio
b
2.
Show PLUG-IN BACKUP screen on following steps.
VS-1680
1. Press [SHIFT]+[F6 (UTIL)].
The Utility Menu screen will appear.
2. Press [PAGE] several times until “PIBck”
will be appeared at the F3 (function 3).
The Utility Menu screen page 3 will appear.
3.
Press [F3 (PIBck)].
The PLUG-IN BACKUP screen will appear. This lists the VS plug-in programs that are
installed on the hard disk.
4.
Use the cursor to select the plug-in that you want to back up, and press [F5 (Bckup)].
The “Backup?” popup will appear.
5.
To begin the backing up, press [ENTER/YES].
The “Really, Sure?” popup will appear.
6.
To confirm the backing up, press [ENTER/YES].
If you press [ENTER/YES], VS plug-in programs will be backed up to CD-R/RW disc.
The PLUG-IN BACKUP screen will appear.
Re-installing your plug-ins
If you initialize (format) the hard disk of your V Studio, the VS plug-in programs on the
hard disk will be lost, leaving you unable to use the VS plug-in programs even if the VS8F-3
is installed. By re-installing the VS plug-in programs you will again be able to use them.
1.
Perform Steps 1~5 of Installation procedure (p. 7).
The “Re-Install?” popup will appear.
2.
To begin the re-installation process, press [ENTER/YES].
The “Really, Sure?” popup will appear.
3.
To confirm the re-installation process, press [ENTER/YES].
If you press [ENTER/YES], VS plug-in programs will be installed to the hard disk.
4.
When installation is completed, remove the CD.
The CD-RW menu screen will appear.
VS-1880/1824/1824CD
1. Press [CD-RW].
The CD-RW/Mastering Menu screen will
appear.
2. Press [PAGE] several times until “PIBck”
will be appeared at the F3 (function 3).
The CD-RW/Mastering Menu screen page 2
will appear.
If you lose or damage the
SETUP DISC after
authorization, a fee will be
charged for a correctly
functioning replacement
disc. Be sure to back up
your VS plug-in programs
in order to avoid such an
inconvenience.
It is able to use the
ackuped plug-in program
as authorized version if
installed to V Studio with
Key Card.
Uninstalling a plug-in
Here's how to delete an installed VS plug-in program. This lets you delete a trial version
of a VS plug-in program, or obtain more free space on your hard disk if it becomes full.
1.
Show PLUG-IN INSTALL screen on following steps.
VS-1680
1. Press [SHIFT]+[F6 (UTIL)].
The Utility Menu screen will appear.
2. Press [PAGE] several times until “PIUni”
will be appeared at the F2 (function 2).
The Utility Menu screen page 3 will appear.
2.
Press [F2 (PIUni)].
The PLUG-IN UNINSTALL screen will appear. This lists the VS plug-in programs that
are installed on the hard disk.
3.
Use the cursor to select the plug-in that you want to delete, and press [F5 (UNINS)].
The “Uninstall?” popup will appear.
4.
To start the uninstall process, press [ENTER/YES].
The “Really, Sure?” popup will appear.
5.
To confirm the uninstallation process, press [ENTER/YES].
If you press [ENTER/YES], the selected VS plug-in program(s) will be deleted.
8
VS-1880/1824/1824CD
1. Press [CD-RW].
The CD-RW/Mastering Menu screen will
appear.
2. Press [PAGE] several times until “PIUni”
will be appeared at the F2 (function 2).
The CD-RW/Mastering Menu screen page 2
will appear.
If you uninstall an
authorized version of a VS
plug-in program, the user
patches will also be
deleted. The deleted data
cannot be recovered.
In Step 3, if you execute
uninstall of the Plug-In
program during the
program is used, a
message “This PLUG-IN is
used at FX *. Continue?”
will appear on screen. (* is
the Effect number.)

Using the VS Plug-In effects
b
b
b
prog
Now that you've installed the VS8F-3 in your V Studio unit, let's try out the effects.
A VS8F-3 effect can be used as an insert effect or loop effect in the same way as an effect
on the VS8F-2. For details, refer to the owner's manual of your V Studio.
Selecting and editing a plug-in
■
Selecting a plug-in
Before using an effect for the VS8F-3, you'll need to load a VS plug-in program into the
VS8F-3.
1.
Select Effect Board and Effect number you like to use VS Plug-In program.
Effect Board
Slot A
Slot B
The PLUG-IN INFORMATION screen will appear. Information about the selected
plug-in will appear. When no Plug-In is loaded “No PLUG-IN Selected” will be
displayed.
2.
Press [F1 (PlugI)].
The PLUG-IN LIST screen will appear. This lists the VS plug-in programs that are
installed on the hard disk.
3.
Use the cursor to select the plug-in that you want to use, and press [F5 (Sel)].
The plug-in is now loaded, then the PLUG-IN INFORMATION screen will appear.
■
Selecting a plug-in’s patch
Here's how to load a patch (a set of effect settings) for the selected VS plug-in program.
• Sound may not come out from your V Studio if you insert an effect on a channel or the
master block without selecting a Plug-In patch. In such a case, select Plug-In patch or
turn the insert effect off.
Effect Number Operations
EFFECT1
EFFECT2
EFFECT3
EFFECT4
1. [SHIFT]+[F3 (FX A)]
2. [F1 (FX1)]
1. [SHIFT]+[F3 (FX A)]
2. [F2 (FX2)]
1. [SHIFT]+[F4 (FX B)]
2. [F1 (FX3)]
1. [SHIFT]+[F4 (FX B)]
2. [F2 (FX4)]
“EFX A” or “EFX 1” will
e displayed on function
screen when [SHIFT] is
pressed on VS-1680. This is
the same as “FX A” or
“FX 1” as used in this
manual.
You can't use a “Single”
type effect as an
even-numbered effect. The
patch names of single
effects will be shown as
hyphens on the screen.
1.
Load a plug-in as described in “Selecting a plug-in’s patch”.
2.
Press [F3 (PATCH)].
The PLUG-IN PATCH SELECT screen will appear. This lists the patches for the selected
VS plug-in program.
3.
If you wish to use a preset patch, press [F1 (Prest)], and if you wish to use a user
patch, press [F2 (User)].
The PATCH LIST will change to show preset patches or user patches.
4.
Use the cursor to select a patch that you want to use, and press [F5 (Sel)].
The PLUG-IN INFORMATION screen will appear. Information about the selected
plug-in will appear. The patch is now loaded.
Depending on the plug-in
patch, it may take some
time after you press
[F5 (SELECT)] until the
screen appears.
While recording or playing
ack on a V Studio, you
cannot switch a plug-in’s
program or patch.
The current position of the
cursor in the patch list will
e at P000 (the first one of
preset patches) if a song
with Plug-In effect is
selected or a Plug-In
ram is re-loaded.
9

Using the VS Plug-In effects
■
Editing the effect parameters
Here's how to edit the effect parameters of the selected patch.
1.
Select a patch as described in Selecting a plug-in’s patch (p. 9).
2.
Press [F4 (Edit)].
The PLUG-IN screen will appear. The controllers operate as follows.
Controller
(Off)
(On)
(value 1)
(value 2)
How to use (Top panel)
Move the cursor to the value, and edit it using one of the following methods.
The index markings around the knob will change to reflect the current value.
Move the cursor to the switch, and edit it using one of the following methods.
Use [F1 (PREV)] [F2 (NEXT)] to move between pages. If additional screens
are available, a triangle symbol is displayed at both sides.
Move the cursor to the slide-switch, and edit it using one of the following
methods.
• Turn the TIME/VALUE dial
• Turn the TIME/VALUE dial
• Press the [ENTER/YES] button
• Turn the TIME/VALUE dial
• Press the [ENTER/YES] button
Depending on the VS
plug-in program, it may
take some time after you
press [F4 (EDIT)] until the
screen appears.
While recording on a V
Studio, the PLUG-IN
screen cannot be
displayed.
When displaying the
PLUG-IN screen, the
metronome may sound
unstable. This is not a
malfunction or problem of
the system.
• During playback of tracks, the display speed of the level meters or an EQ graph will be
slow. There may be a gap between the sound from the V Studio and the movement of
level meter on screen. Also, it may take time to change a screen after editing
parameters.
• During playback of tracks, the system may display the message “Serial Rx Buffer
Full!” on Plug-In Information screen after switching from the Plug-In Edit screen. This
means the V Studio screen drawing capacity is full. Press [ENTER/YES] to go back to
the Plug-In Edit screen. If [EXIT/NO] is pressed, the message will disappear.
■
Saving an edited patch
Here's how to save your user patches so that you'll be able to reuse your edited effect
settings when desired.
1.
Edit a patch as described in “Editing the effect parameters”.
2.
Press [F4 (SAVE)].
The PLUG-IN PATCH SAVE screen will appear.
3.
Use the cursor to select the location in which you want to save the patch, and
press [F5 (SAVE)].
You can save up to one hundred patches; U000~U099.
In Step 3, move the cursor to the saved user patch in the PATCH LIST, and then press
[F1 (NAME)] –the PLUG-IN NAME EDIT screen will appear. After changing the patch
name on this screen, you can press [F5 (SAVE)] to store the patch with its new name on
your hard disk. For details on inputting names, refer to owner’s manual of V Studios
“Naming.”
For details on all of the
parameters and values of
the Plug-In effects, refer to
the VS8F-3 Owner’s
Manual.
10

Troubleshooting
If the VS8F-3 does not function correctly or as expected even after following the
installation procedure shown in the owner’s manual, please check the following as well
as things written on the Trouble Shooting Page on VS8F-3 owner’s manual.
■
Installation
Can't install
• There is not enough free space in the installation destination for the
plug-in programs.
• The VS8F-3 Use Sw parameter (p. 6) is Off.
■
Operation
The sound may not come out
• The VS8F-3 Use Sw parameter (p. 6) is Off.
• The Plug-In program is not loaded.(➔p. 9)
• Effect is inserted to any channel or mastering room without selecting
Plug-In patch (“NO PLUG-IN” message is displayed on Effect Menu
screen).(➔p. 9)
Cannot record to or playback track 15/16.
• When VS8F-3 Use Sw is turned On, you cannot record to or playback
track 15/16. If you need to use track 15/16, turn VS8F-3 Use Sw Off
and reboot V Studio. (
➔
p. 6)
Cannot record to any track
• It is possible the CD-R/RW drive is selected as current drive. (➔p. 5)
Can't select a single-type algorithm effect
• You can’t use a single-type effect on an even-numbered effect.
11

40568334 1KS
 Loading...