

Owner’s Manual
Thank you for purchasing the UA-700 USB Audio Interface.
Before using this unit, carefully read the sections entitled: “USING THE
UNIT SAFELY” and “IMPORTANT NOTES” (Owner’s manual pp. 2--5).
These sections provide important information concerning the proper
operation of the unit. Additionally, in order to feel assured that you have
gained a good grasp of every feature provided by your new unit, Owner’s
manual should be read in its entirety. The manual should be saved and kept
on hand as a convenient reference.
Copyright © 2002 ROLAND CORPORATION
All rights reserved. No part of this publication may be reproduced in any
form without the written permission of ROLAND CORPORATION.
USING THE UNIT SAFELY
Used for instructions intended to alert
the user to the risk of death or severe
injury should the unit be used
improperly.
Used for instructions intended to alert
the user to the risk of injury or material
damage should the unit be used
improperly.
* Material damage refers to damage or
other adverse effects caused with
respect to the home and all its
furnishings, as well to domestic
animals or pets.
001
• Before using this unit, make sure to read the
instructions below, and the Owner’s Manual.
................................................................................................
002c
• Do not open (or modify in any way) the unit
or its AC adaptor.
................................................................................................
003
• Do not attempt to repair the unit, or replace
parts within it (except when this manual
provides specific instructions directing you
to do so). Refer all servicing to your retailer,
the nearest EDIROL/Roland Service Center,
or an authorized EDIROL/Roland
distributor, as listed on the "Information"
page.
................................................................................................
004
• Never use or store the unit in places that are:
• Subject to temperature extremes (e.g.,
direct sunlight in an enclosed vehicle, near
a heating duct, on top of heat-generating
equipment); or are
• Damp (e.g., baths, washrooms, on wet
floors); or are
• Humid; or are
• Exposed to rain; or are
• Dusty; or are
• Subject to high levels of vibration.
................................................................................................
007
• Make sure you always have the unit placed
so it is level and sure to remain stable. Never
place it on stands that could wobble, or on
inclined surfaces.
................................................................................................
The symbol alerts the user to important instructions
or warnings.The specific meaning of the symbol is
determined by the design contained within the
triangle. In the case of the symbol at left, it is used for
general cautions, warnings, or alerts to danger.
The symbol alerts the user to items that must never
be carried out (are forbidden). The specific thing that
must not be done is indicated by the design contained
within the circle. In the case of the symbol at left, it
means that the unit must never be disassembled.
The ● symbol alerts the user to things that must be
carried out. The specific thing that must be done is
indicated by the design contained within the circle. In
the case of the symbol at left, it means that the powercord plug must be unplugged from the outlet.
008c
• Be sure to use only the AC adaptor supplied
with the unit. Also, make sure the line
voltage at the installation matches the input
voltage specified on the AC adaptor’s body.
Other AC adaptors may use a different
polarity, or be designed for a different
voltage, so their use could result in damage,
malfunction, or electric shock.
................................................................................................
009
• Do not excessively twist or bend the power
cord, nor place heavy objects on it. Doing so
can damage the cord, producing severed
elements and short circuits. Damaged cords
are fire and shock hazards!
................................................................................................
010
• This unit, either alone or in combination with
an amplifier and headphones or speakers,
may be capable of producing sound levels
that could cause permanent hearing loss. Do
not operate for a long period of time at a high
volume level, or at a level that is uncomfortable. If you experience any hearing loss or
ringing in the ears, you should immediately
stop using the unit, and consult an audiologist.
................................................................................................
011
• Do not allow any objects (e.g., flammable
material, coins, pins); or liquids of any kind
(water, soft drinks, etc.) to penetrate the unit.
................................................................................................
2
012c
• Immediately turn the power off, remove the
AC adaptor from the outlet, and request
servicing by your retailer, the nearest Roland
Service Center, or an authorized Roland
distributor, as listed on the “Information”
page when:
• The AC adaptor or the power-supply cord
has been damaged; or
• Objects have fallen into, or liquid has been
spilled onto the unit; or
• The unit has been exposed to rain (or
otherwise has become wet); or
• The unit does not appear to operate
normally or exhibits a marked change in
performance.
................................................................................................
013
• In households with small children, an adult
should provide supervision until the child is
capable of following all the rules essential for
the safe operation of the unit.
................................................................................................
014
• Protect the unit from strong impact.
(Do not drop it!)
................................................................................................
015
• Do not force the unit’s power-supply cord to
share an outlet with an unreasonable number
of other devices. Be especially careful when
using extension cords—the total power used
by all devices you have connected to the
extension cord’s outlet must never exceed the
power rating (watts/amperes) for the
extension cord. Excessive loads can cause the
insulation on the cord to heat up and
eventually melt through.
................................................................................................
016
• Before using the unit in a foreign country,
consult with your retailer, the nearest Roland
Service Center, or an authorized Roland
distributor, as listed on the "Information"
page.
................................................................................................
023
• DO NOT play a CD-ROM disc on a conventional audio CD player. The resulting sound
may be of a level that could cause permanent
hearing loss. Damage to speakers or other
system components may result.
................................................................................................
101b
• The unit and the AC adaptor should be
located so their location or position does not
interfere with their proper ventilation.
................................................................................................
102d
• Always grasp only the output plug or the
body of the AC adaptor when plugging into,
or unplugging from, this unit or an outlet.
................................................................................................
103b
• Whenever the unit is to remain unused for an
extended period of time, disconnect the AC
adaptor.
................................................................................................
104
• Try to prevent cords and cables from
becoming entangled. Also, all cords and
cables should be placed so they are out of the
reach of children.
................................................................................................
106
• Never climb on top of, nor place heavy
objects on the unit.
................................................................................................
107d
• Never handle the AC adaptor body, or its
output plugs, with wet hands when plugging
into, or unplugging from, an outlet or this
unit.
................................................................................................
108b
• Before moving the unit, disconnect the AC
adaptor and all cords coming from external
devices.
................................................................................................
109b
• Before cleaning the unit, turn off the power
and unplug the AC adaptor from the outlet.
................................................................................................
110b
• Whenever you suspect the possibility of
lightning in your area, disconnect the AC
adaptor from the outlet.
................................................................................................
118
• Should you remove the optical connector
caps, make sure to put them in a safe place
out of children's reach, so there is no chance
of them being swallowed accidentally.
................................................................................................
3

IMPORTANT NOTES
291a
In addition to the items listed under “USING THE
UNIT SAFELY” on page 2 and 3, please read and
observe the following:
Power Supply
301
• Do not use this unit on the same power circuit with
any device that will generate line noise (such as an
electric motor or variable lighting system).
302
• The AC adaptor will begin to generate heat after
long hours of consecutive use. This is normal, and is
not a cause for concern.
307
• Before connecting this unit to other devices, turn off
the power to all units. This will help prevent
malfunctions and/or damage to speakers or other
devices.
Placement
351
• Using the unit near power amplifiers (or other
equipment containing large power transformers)
may induce hum. To alleviate the problem, change
the orientation of this unit; or move it farther away
from the source of interference.
352a
• This device may interfere with radio and television
reception. Do not use this device in the vicinity of
such receivers.
352b
• Noise may be produced if wireless communications
devices, such as cell phones, are operated in the
vicinity of this unit. Such noise could occur when
receiving or initiating a call, or while conversing.
Should you experience such problems, you should
relocate such wireless devices so they are at a greater
distance from this unit, or switch them off.
355
• To avoid possible breakdown, do not use the unit in
a wet area, such as an area exposed to rain or other
moisture.
Maintenance
401a
• For everyday cleaning wipe the unit with a soft, dry
cloth or one that has been slightly dampened with
water. To remove stubborn dirt, use a cloth impregnated with a mild, non-abrasive detergent. Afterwards, be sure to wipe the unit thoroughly with a
soft, dry cloth.
402
• Never use benzine, thinners, alcohol or solvents of
any kind, to avoid the possibility of discoloration
and/or deformation.
Additional Precautions
551
• Please be aware that the contents of memory can be
irretrievably lost as a result of a malfunction, or the
improper operation of the unit. To protect yourself
against the risk of loosing important data, we
recommend that you periodically save a backup
copy of important data you have stored in the unit’s
memory in another MIDI device (e.g., a sequencer).
552
• Unfortunately, it may be impossible to restore the
contents of data that was stored in another MIDI
device (e.g., a sequencer) once it has been lost.
Roland Corporation assumes no liability concerning
such loss of data.
553
• Use a reasonable amount of care when using the
unit’s buttons, sliders, or other controls; and when
using its jacks and connectors. Rough handling can
lead to malfunctions.
556
• When connecting / disconnecting all cables, grasp
the connector itself—never pull on the cable. This
way you will avoid causing shorts, or damage to the
cable’s internal elements.
558a
• To avoid disturbing your neighbors, try to keep the
unit’s volume at reasonable levels. You may prefer
to use headphones, so you do not need to be
concerned about those around you (especially when
it is late at night).
559a
• When you need to transport the unit, package it in
the box (including padding) that it came in, if
possible. Otherwise, you will need to use equivalent
packaging materials.
4

562
• Use a cable from Roland to make the connection. If
using some other make of connection cable, please
note the following precautions.
• Some connection cables contain resistors. Do not
use cables that incorporate resistors for
connecting to this unit. The use of such cables can
cause the sound level to be extremely low, or
impossible to hear. For information on cable
specifications, contact the manufacturer of the
cable.
Handling CD-ROMs
801
• Avoid touching or scratching the shiny underside
(encoded surface) of the disc. Damaged or dirty
CD-ROM discs may not be read properly. Keep
your discs clean using a commercially available
CD cleaner.
Copyright
851
• Unauthorized recording, distribution, sale, lending,
public performance, broadcasting, or the like, in
whole or in part, of a work (musical composition,
video, broadcast, public performance, or the like)
whose copyright is held by a third party is
prohibited by law.
852a
• When exchanging audio signals through a digital
connection with an external instrument, this unit can
perform recording without being subject to the
restrictions of the Serial Copy Management System
(SCMS). This is because the unit is intended solely
for musical production, and is designed not to be
subject to restrictions as long as it is used to record
works (such as your own compositions) that do not
infringe on the copyrights of others. (SCMS is a
feature that prohibits second-generation and later
copying through a digital connection. It is built into
MD recorders and other consumer digital-audio
equipment as a copyright-protection feature.)
853
• Do not use this unit for purposes that could infringe
on a copyright held by a third party. We assume no
responsibility whatsoever with regard to any
infringements of third-party copyrights arising
through your use of this unit.
204
* Microsoft and Windows are registered trademarks of Microsoft Corporation.
206e
* Screen shots in this documents are reprinted with permission from Microsoft Corporation.
ADD
* Windows® XP is known officially as: “Microsoft® Windows® XP operating system”.
206f
* Windows® 2000 is known officially as: “Microsoft® Windows® 2000 operating system”.
206g
* Windows® Me is known officially as: “Microsoft® Windows® Millennium Edition operating system”.
206c
* Windows® 98 is known officially as: “Microsoft® Windows® 98 operating system”.
207
* Apple and Macintosh are registered trademark of Apple Computer, Inc.
209
* MacOS is a trademark of Apple Computer, Inc.
231
* OMS is a registered trademark of Opcode Systems, Inc.
232
* FreeMIDI is a trademark of Mark of the Unicorn, Inc.
ADD
* ASIO is trademark of Steinberg Media Technologies AG.
220
* All product names mentioned in this document are trademarks or registered trademarks of their respective
owners.
5

Contents
IMPORTANT NOTES ................................................................ 4
Contents ...................................................................................6
Features of the UA-700..........................................................10
Built-in COSM effects........................................................................................................10
24-bit/96 kHz data for pristine audio quality ...............................................................10
Wide variety of input/output jacks ................................................................................10
Direct Monitor function ....................................................................................................10
WDM/ASIO 2.0 drivers included ...................................................................................10
Contents of the package ....................................................... 12
Setup...............................................13
Getting Connected and Installing Drivers (Windows)........ 14
What is a driver? ................................................................................................................14
Advanced mode and Standard driver mode .................................................................14
Installing the special driver ..............................................................................................15
Installing the OS-standard driver....................................................................................28
Settings and checking........................................................................................................33
Check whether there is sound.......................................................................................... 38
Getting Connected and Installing Drivers
(Macintosh).............................................................................39
What is a driver? ................................................................................................................39
Advanced mode and Standard driver mode .................................................................39
Installing the special driver ..............................................................................................40
Installing the ASIO driver.................................................................................................47
Installing the OS-standard driver....................................................................................48
Einstellungen und Überprüfung .....................................................................................60
Überprüfung, ob Sound zu hören ist ..............................................................................61
Installation des speziellen Treibers .................................................................................63
Installation des ASIO-Treibers.........................................................................................70
Configuration et contrôle..................................................................................................81
Vérifiez la présence de son ...............................................................................................82
Installation du pilote spécial ............................................................................................84
Installation du pilote ASIO...............................................................................................92
Configurazione e verifica................................................................................................ 102
Verificare se l’audio viene riprodotto. ..........................................................................103
Installazione del driver speciale ....................................................................................105
Installazione del driver ASIO......................................................................................... 113
6

Contents
Operation........................................114
Names of things and what they do..................................... 115
Panel...................................................................................................................................115
Rear panel..........................................................................................................................127
Application guide................................................................. 129
Basic use ............................................................................................................................129
Recording a guitar or bass ..............................................................................................130
Recording from mics .......................................................................................................131
Recording a keyboard .....................................................................................................132
Analog recording from an audio device.......................................................................133
Input audio from a CD/MD/DAT to your computer................................................134
Digitally recording the UA-700’s output to an MD ....................................................135
Adjusting the audio latency ...........................................................................................135
Using ASIO Direct Monitor............................................................................................136
Advanced applications........................................................ 138
Customizing the effects...................................................................................................138
Adjusting the volume of the effects...............................................................................141
Switching patches from an external device..................................................................142
Sequencer control switch settings..................................................................................143
Send/Return mode.......................................................................................................... 144
Restoring the factory settings.........................................................................................145
Limitations at 96 kHz ......................................................................................................145
Block diagram................................................................................................................... 145
Bezeichnungen und Funktionen ........................................146
Bedienfeld .........................................................................................................................146
Rückseite ...........................................................................................................................160
Anleitungen für die Verwendung........................................ 162
Grundlegende Verwendung ..........................................................................................162
Aufnahme von Gitarre oder Bass ..................................................................................163
Aufnahme mit Mikrofon................................................................................................. 164
Aufnahme von einem Keyboard ...................................................................................165
Analogaufnahme von einem Audiogerät.....................................................................166
Eingabe von Audio von einem CD/MD/DAT an Ihren Computer ........................167
Digitale Aufnahme der Ausgabe des UA-700 auf einem MD-Gerät........................ 169
Regelung der Audiolatenz..............................................................................................170
Verwendung des ASIO Direct Monitor........................................................................ 171
Erweiterte Verwendung....................................................... 173
Anpassen der Effekte.......................................................................................................173
Regelung der Lautstärke der Effekte ............................................................................176
Send/Return-Modus .......................................................................................................177
Wiederherstellen der werkseitigen Einstellungen......................................................178
Einschränkungen bei 96 kHz..........................................................................................178
Block diagram................................................................................................................... 178
7

Contents
Définitions ............................................................................179
Face avant..........................................................................................................................179
Face arrière........................................................................................................................192
Guide des applications........................................................ 194
Utilisation de base............................................................................................................ 194
Enregistrement d’une guitare ou d’une basse .............................................................195
Enregistrement avec des micros ....................................................................................196
Enregistrement avec un clavier...................................................................................... 197
Enregistrement analogique d'un appareil audio.........................................................198
Entrée d'audio d'un CD/MD/DAT sur votre ordinateur .........................................199
Enregistrement numérique de l'UA-700 sur un MD...................................................201
Réglage de la latence audio ............................................................................................201
Utilisation d’ASIO Direct Monitor ................................................................................202
Applications avancées ........................................................ 204
Personnalisation des effets .............................................................................................204
Réglage du volume des effets.........................................................................................207
Send/Return AFX............................................................................................................208
Restauration des paramètres d’usine............................................................................209
Limitations à 96 kHz........................................................................................................209
Block diagram................................................................................................................... 209
Parti e relative funzioni........................................................ 210
Panello ...............................................................................................................................210
Pannello posteriore..........................................................................................................223
Guida all’uso ........................................................................ 225
Nozioni fondamentali .....................................................................................................225
Registrazione di una chitarra o di un basso................................................................. 226
Registrazione da microfoni.............................................................................................227
Registrazione di una tastiera.......................................................................................... 228
Registrazione analogica da un dispositivo audio .......................................................229
Trasmettere i dati audio da un CD/MD/DAT al computer .....................................230
Registrazione digitale dell’output dell’UA-700 su un MD........................................231
Regolazione della latenza audio ....................................................................................232
Uso di ASIO Direct Monitor...........................................................................................232
Applicazioni avanzate.......................................................... 234
Personalizzazione degli effetti .......................................................................................234
Regolare il volume degli effetti.....................................................................................237
Modo Send/Return .........................................................................................................238
Ripristino delle impostazioni di fabbrica .....................................................................239
Limiti a 96 kHz .................................................................................................................239
Block diagram................................................................................................................... 239
8

Troubleshooting................................................................... 240
Problems related to the USB driver...............................................................................241
Problems when using the UA-700................................................................................. 243
Deleting the special driver..............................................................................................251
MIDI implementation............................................................ 254
Specifications....................................................................... 261
Index...................................................................................... 263
Contents
9

Features of the UA-700
Thank you, and congratulations on your choice of the UA-700. The UA-700 is an audio interface
that can be connected to your computer via a USB cable, allowing you to digitally record and play
back high-quality audio data.
Built-in COSM effects
The UA-700 features the same COSM engine that has won acclaim with the BOSS GP-20 and GT-6.
From the heavy distortion of a tube amp, to a lightly distorted crunch sound, or the clean sound
typical of a JC-120, these effects deliver the powerful tones of a guitar amp, faithfully simulating
even the subtle impact of picking and volume.
24-bit/96 kHz data for pristine audio quality
You can enjoy high-quality digital recording/playback on your computer using 24-bit/96 kHz*
data.
* Your application must support 24-bit/96 kHz data.
* Simultaneous recording and playback at 96 kHz is not possible.
Wide variety of input/output jacks
Two combo-type jacks, which provide both XLR balanced (with phantom power) and TRS
balanced inputs, are provided. One input provides a high-impedance (Hi-Z) connection for
directly connecting your guitar or bass. The UA-700 also provides RCA phono-type inputs and
outputs, phone outputs, and digital input/output jacks (coaxial and optical), making it possible for
you to readily connect almost any kind of device.
Direct Monitor function
The Direct Monitor function lets you monitor the input signal directly from headphones or the
analog outputs without passing the audio through your computer application. You can also switch
the monitor function on/off from an ASIO™ 2.0 compatible application.
WDM/ASIO 2.0 drivers included
You can enjoy high performance with WDM compatible applications such as SONAR™, and ASIO
compatible applications such as Cubase™ and Logic™. Of course you can also use applications
that support MME (Windows®) or Sound Manager (Mac OS®).
* Roland provides no guarantee or support regarding the operation of sequencer software or audio
editing software made by other companies. Please contact the manufacturer of the software you are
using.
10
What is USB?
USB stands for Universal Serial Bus. It is a new interface used to connect various peripheral devices
to a computer.
USB allows more than one peripheral device to be connected via a single USB cable, and also allows
data to be transmitted more rapidly than conventional serial ports.
Peripherals can also be connected or disconnected with the power turned on, and the computer will
automatically recognize the peripheral that has been plugged in. (Some peripherals may require
settings or other operations to be performed.)
About SCMS
SCMS (Serial Copy Management System) is a function that protects the rights of the copyright
owner by prohibiting second-generation or later copying via a digital connection to a consumer
digital audio device such as a DAT recorder or MD recorder. When a recording is made via a digital
connection on a digital recorder that has this function, SCMS data will be recorded along with the
digital audio signal. A digital audio signal containing this SCMS data cannot be recorded again via
a digital connection.
Features of the UA-700
11
Italiano Français Deutsch English
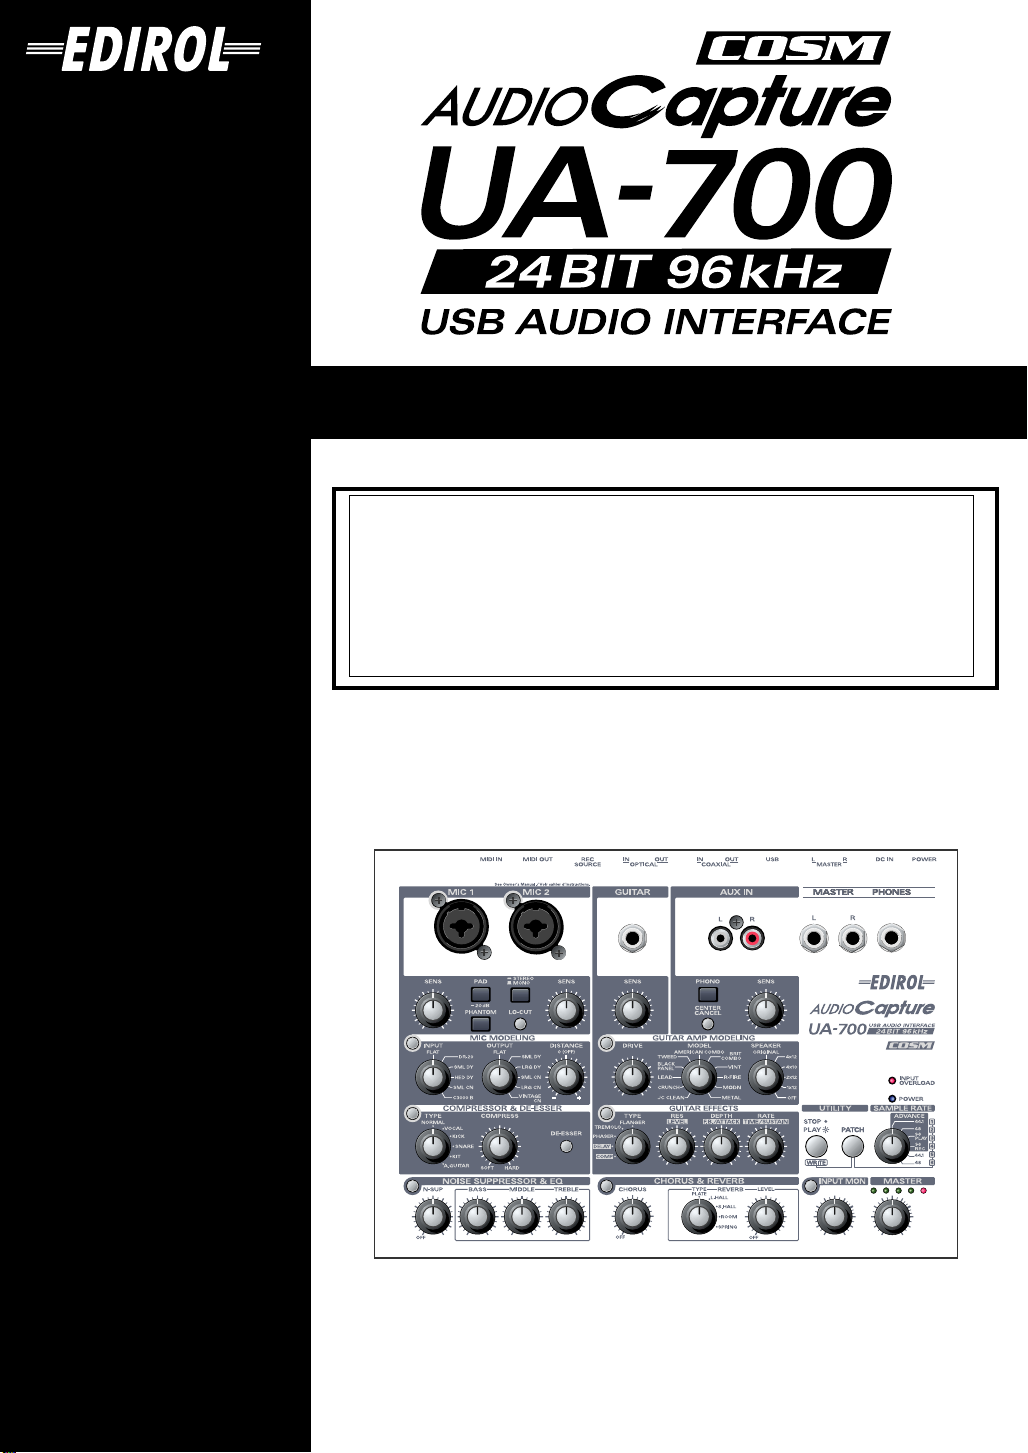
Contents of the package
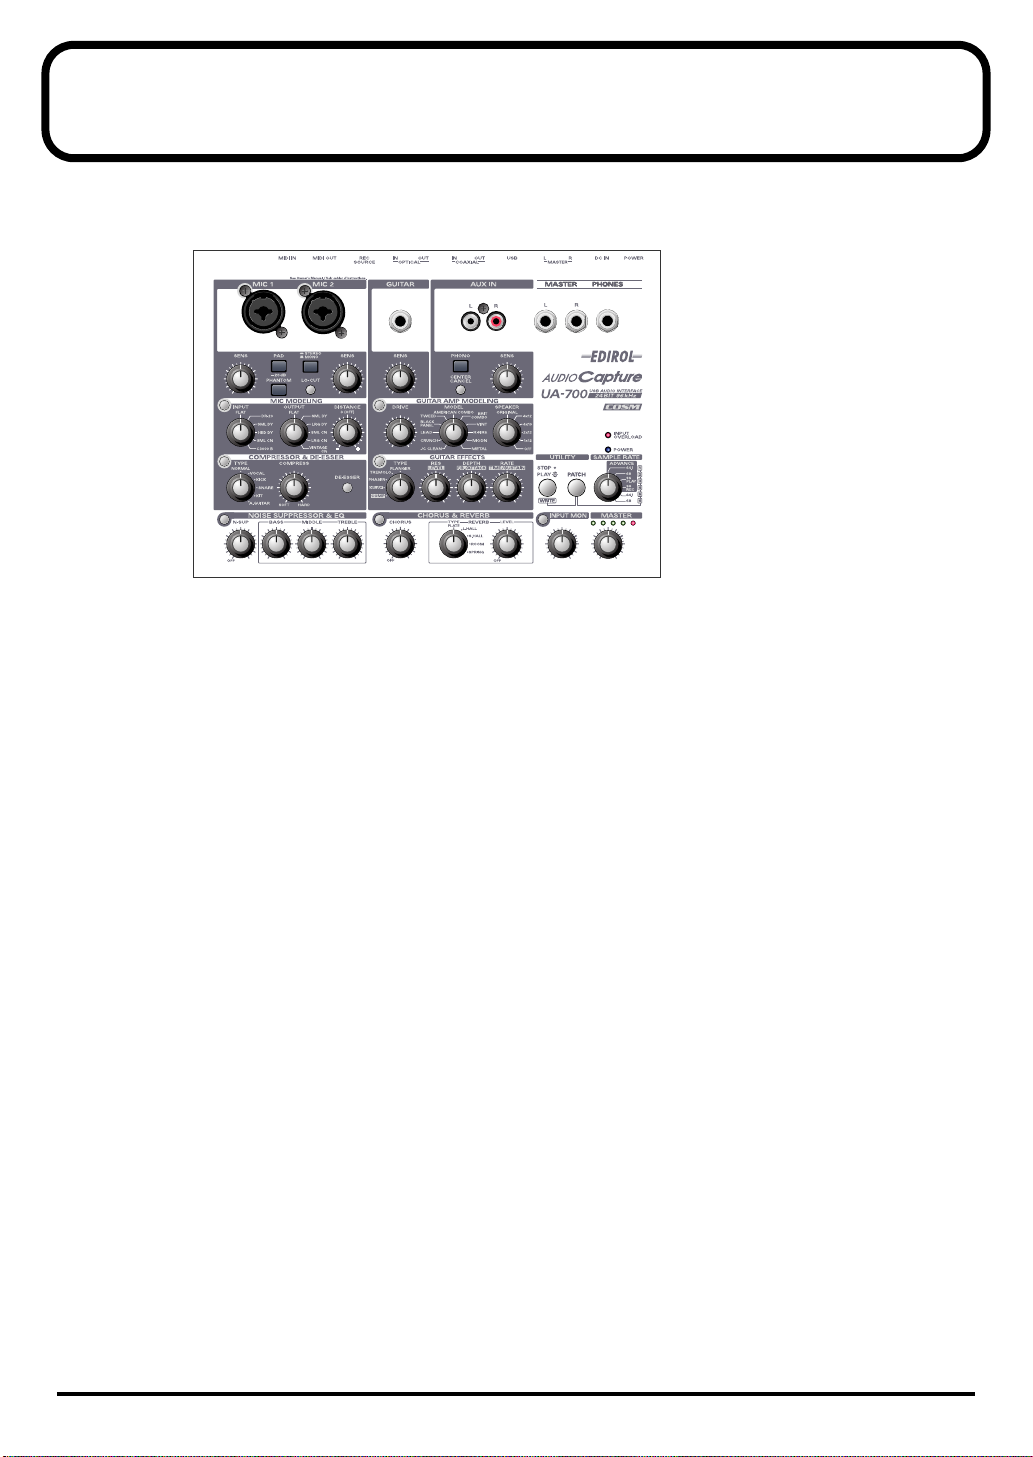
● UA-700
fig.ua700
● AC adaptor
This is the only AC adaptor you should use with the UA-700. Do not use any AC adaptor other than
the supplied one, since doing so may cause malfunction.
The ferrite core attached to the cable of the AC adaptor is for the purpose of preventing
electromagnetic interference. Do not remove it. (However, the ACI-120C AC adaptor does not
come with a ferrite core, since it is unnecessary.)
* If you require a replacement due to loss or damage, please contact a “EDIROL/Roland Service Center” listed
in the “Information” section at the end of this manual. If you purchase a new AC adaptor, please specify the
special AC adaptor with ferrite core designed for the UA-700.
● USB cable
Use this to connect the USB connector of your computer with the USB connector of the UA-700. For
details on connections and driver installation, refer to Getting Connected and Installing Drivers
(Windows ➝ p. 14 or Macintosh ➝ p. 39).
* Please use only the included USB cable. If you require a replacement due to loss or damage, please contact a
“EDIROL/Roland Service Center” listed in the “Information” section at the end of this manual.
● CD-ROM
This contains the driver required in order to use the UA-700.
● Owner’s Manual
This is the manual you are reading. Please keep it on hand for reference.
12

Setup
This section explains how to install the drivers needed for connecting the
UA-700 to a computer, and make the necessary settings.
Getting Connected and Installing Drivers (Windows)............ (p. 14)
Getting Connected and Installing Drivers (Macintosh).......... (p. 39)
Italiano Français Deutsch English
13
Getting Connected and Installing
Advance mode is
ON
Advance mode is
OFF
Drivers (Windows)
If you are using a Macintosh computer, please proceed to Getting Connected and Installing
Drivers (Macintosh) (p. 39).
What is a driver?
fig.05-1e_50
A “driver” is software that transfers data
between the UA-700 and application software
running on your computer, when your
computer and the UA-700 are connected by a
USB cable. The driver sends data from your
application to the UA-700, and from the UA-700
to your application.
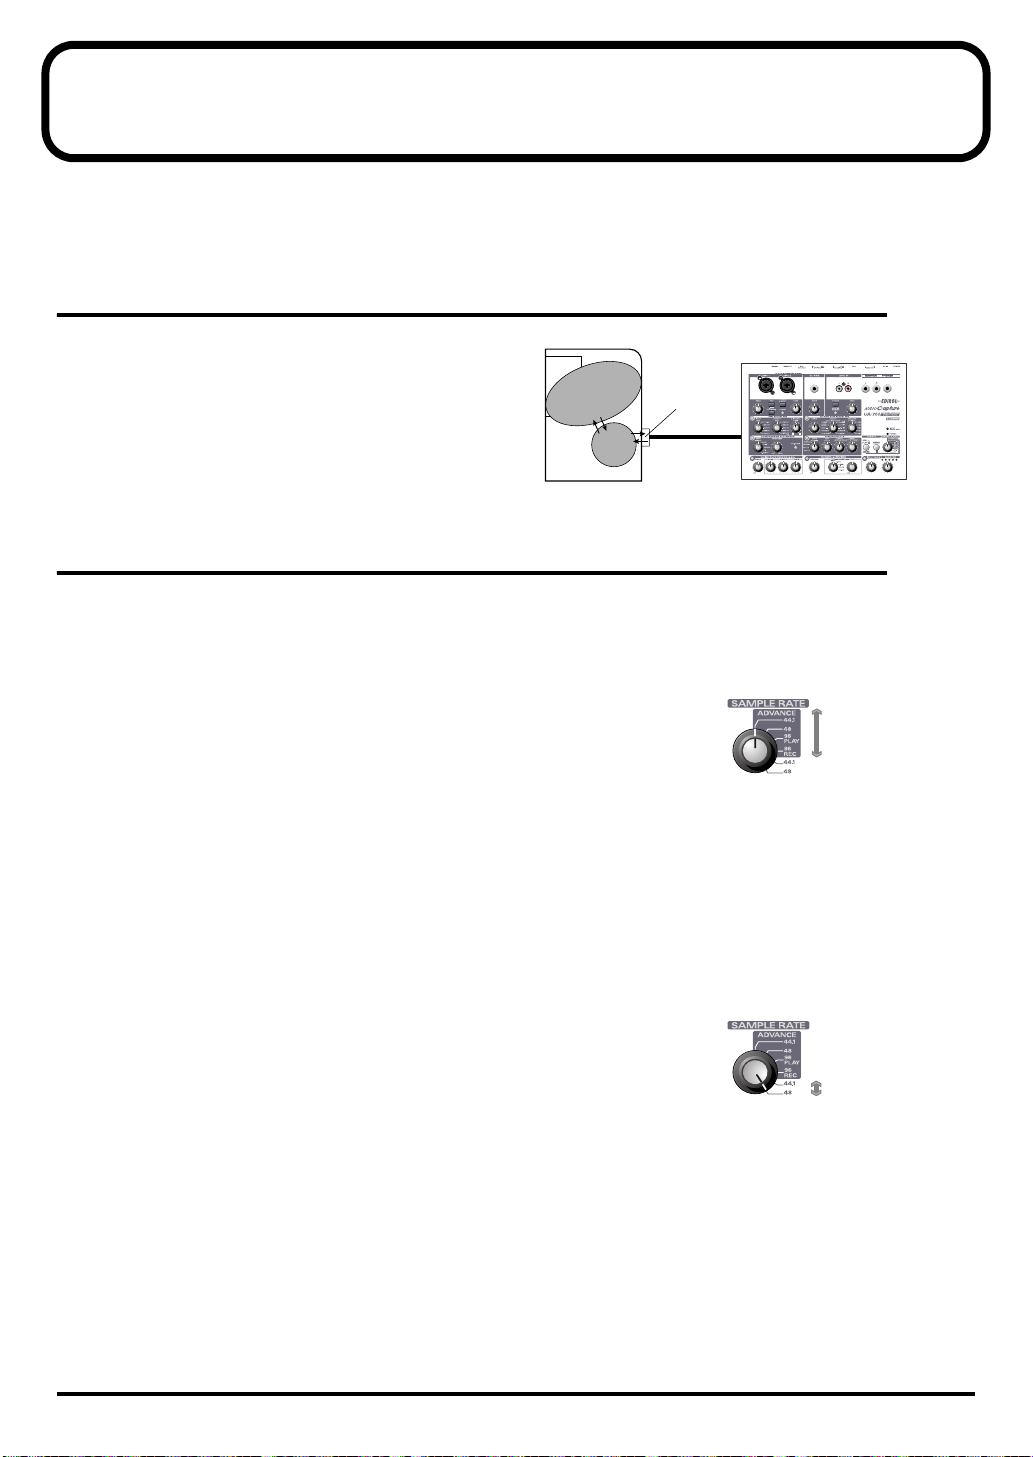
Advanced mode and Standard driver mode
The UA-700 has two operating modes, Advanced mode and Standard driver mode, and a
different driver is used by each mode.
■ Advanced mode
fig.advance-on
The UA-700 will operate in this mode when the ADVANCE mode is
turned ON. (➝Refer to ADVANCE (mode select) switch (p. 125))
The special driver included on the CD-ROM will be used, allowing
audio to be recorded/played/edited with high quality and stable
timing.
In Advanced mode, audio signals can be transferred between the UA-700 and the computer at a
resolution of 24 bits and sampling frequencies of 44.1 / 48 / 96 kHz. Select this mode if you are
using an application that allows high-quality audio recording/playback/editing, such as an
application that supports 24 bit audio (e.g., the Cakewalk series or Cool Edit) or an
ASIO-compatible application (e.g., Cubase VST or Logic Audio).
(➝ Installing the special driver (p. 15))
Application
Computer
Driver
USB port
USB cable
UA-700
■ Standard driver mode
fig.advance-off
The UA-700 will operate in this mode when the ADVANCE mode is
turned OFF. (➝Refer to ADVANCE (mode select) switch (p. 125))
The standard USB audio driver included with Windows will be used. In
standard driver mode, audio signals are transferred between the
UA-700 and the computer at a resolution of 16 bits and sampling
frequencies of 44.1 kHz. Select this mode if you are using an application that uses Window’s own
functionality, such as an application that uses the computer’s CD-ROM drive to play back
CD-audio, or an application that uses the software synthesizer included with Windows.
The standard driver that is included with Windows does not support ASIO.
(➝ Installing the OS-standard driver (p. 28))
* If you want to use MIDI, use Advanced mode.
* The standard driver included with Windows does not support ASIO.
14
Switching between Advanced mode and Standard driver mode
If you first install both the special driver and the standard driver, you will be able to switch
between Advance and Standard driver modes by operating the UA-700's ADVANCE (mode
select) switch.
* In order for the setting of the ADVANCE (mode select) switch to take effect, you must exit all sequencer
software and other applications that use the UA-700, switch off the UA-700, then turn it back on again.
Installing the special driver
The installation procedure will differ depending on your system.
Please proceed to one of the following sections, depending on the system you use.
• Windows XP/2000 users .................................(p. 15)
• Windows Me/98 users.....................................(p. 26)
■ Windows XP/2000 users
The CD-ROM contains two types of driver for Windows XP/2000 (WDM driver and MME driver).
Normally, you should use the WDM driver.
Getting Connected and Installing Drivers (Windows)
WDM driver
You should use this driver if you have specified WDM driver mode for SONAR or a similar
application. This will provide the highest-quality audio performance.
* If you are using Windows 2000, it is not possible to use 24-bit audio with applications that do not support a
WDM driver mode, such as Cool Edit or Media Player.
MME driver
This driver allows you to use 24-bit audio even from applications that do not have a WDM driver
mode, such as Cool Edit. It is not possible to use the MME driver from WDM driver mode of an
application such as SONAR.
It is not possible to install both the WDM driver and the MME driver. You must select one
beforehand, and install only that driver. If after installing one of these drivers you decide to change
drivers, you must first delete the already-installed driver and then install the new driver.
(➝ Deleting the special driver (p. 251))
* The WDM driver and the MME driver can be installed using the same procedure.
Italiano Français Deutsch English
15
Getting Connected and Installing Drivers (Windows)
Windows XP users
1
With the UA-700 disconnected, start up Windows.
Disconnect all USB cables except for a USB keyboard and USB mouse
(if used).
2
Open the System Properties dialog box.
1. Click the Windows start menu, and from the menu, select Control
Panel.
2. In “Pick a category”, click “Performance and Maintenance”.
3. In “or pick a Control Panel icon”, click the System icon.
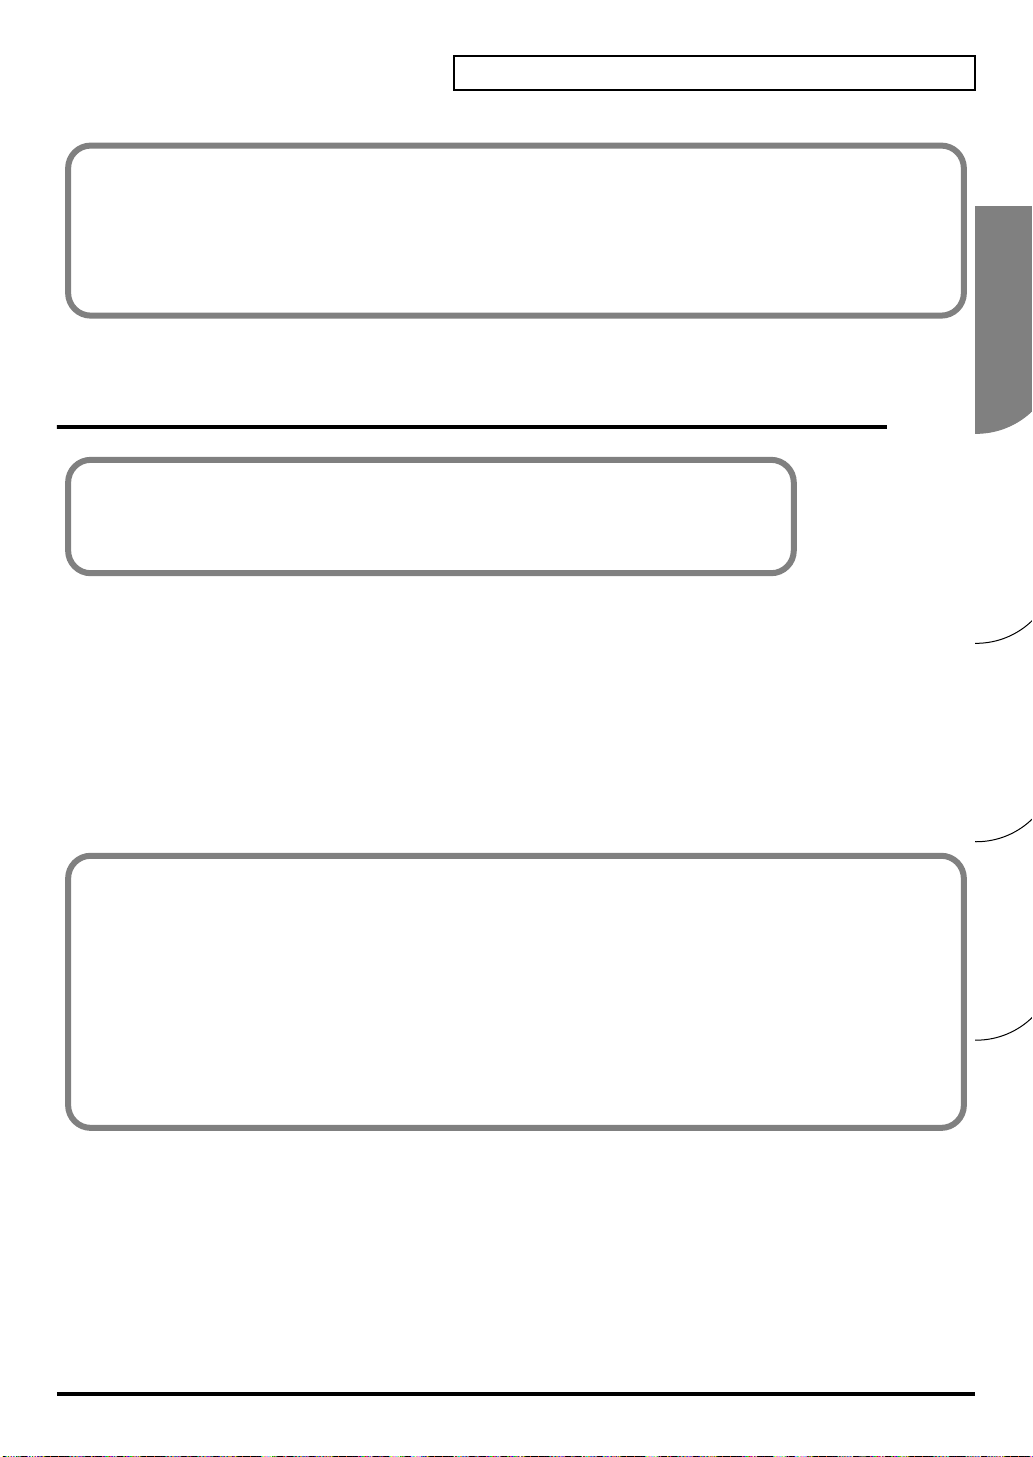
fig.2-1
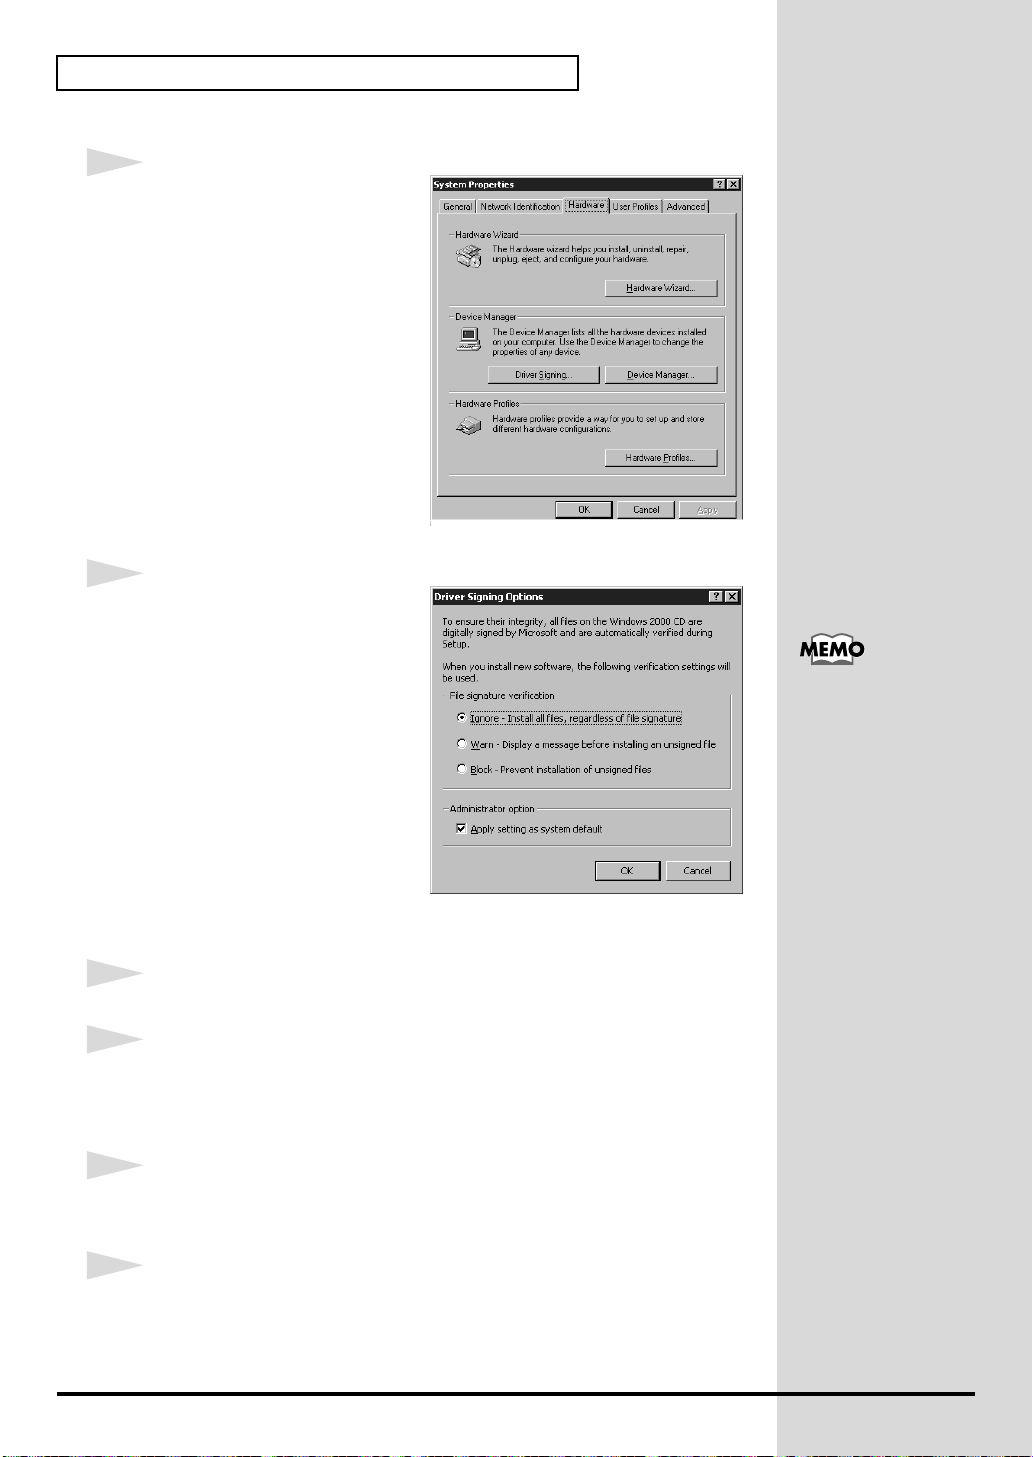
4
Click the Hardware tab, and then
click [Driver Signing].
Open the Driver Signing Options
dialog box.
If you are using
Windows XP
Professional, you must
log on using a user name
with an administrative
account type (e.g.,
Administrator). For
details on user accounts,
please consult the system
administrator of your
computer.
Depending on how your
system is set up, the
System icon may be
displayed directly in the
Control Panel (the
Classic view). In this case,
double-click the System
icon.
16
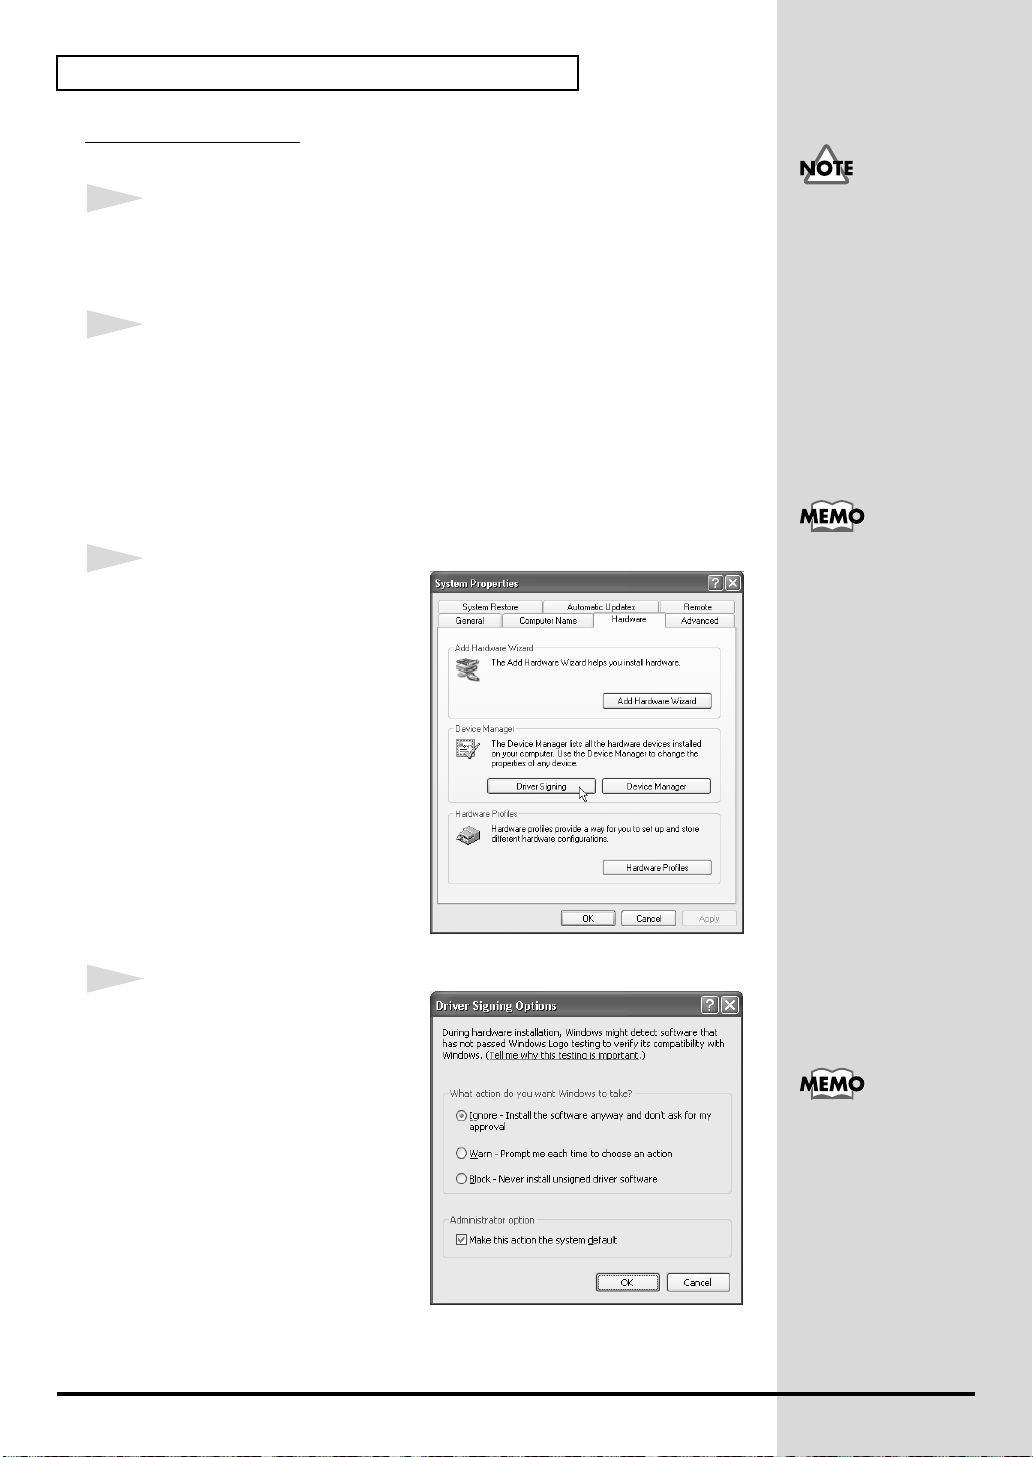
fig.2-2
5
Make sure that “What action do
you want Windows to take?” is
set to “Ignore”.
If it is set to “Ignore”, simply click
[OK].
If it is not set to “Ignore”, make a
note of the current setting
(“Warn” or “Block”). Then change
the setting to “Ignore” and click
[OK].
After installing the driver, restore
the original setting.
(➝ If you changed “What action
do you want Windows to take?” (p. 21))
If you changed “What
action do you want
Windows to take?” in
step 4, you must restore
the previous setting after
you have installed the
driver. (➝ If you changed
“What action do you
want Windows to take?”
(p. 21))
6
Click [OK] to close the System Properties dialog box.
7
Exit all currently running software (applications).
Also close any open windows. If you are using virus checking or similar
software, be sure to exit it as well.
8
Prepare the CD-ROM.
Insert the CD-ROM into the CD-ROM drive of your computer.
9
Click the Windows start button. From the menu that appears, select
“Run...”.
Open the “Run...” dialog box.
fig.2-3_30
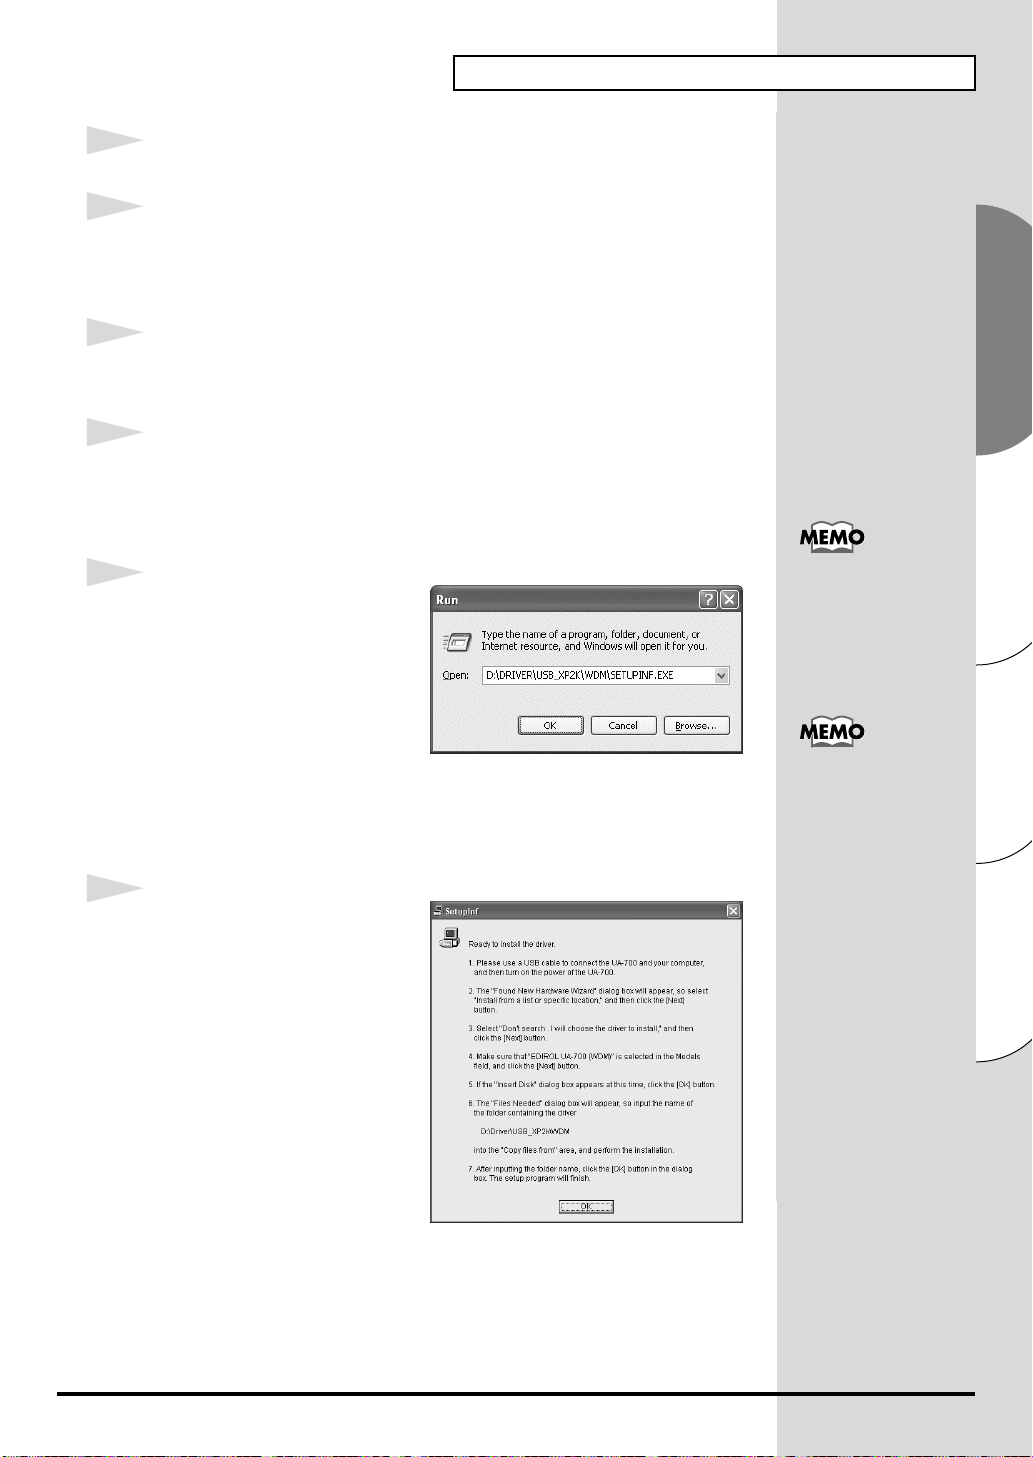
10
In the dialog box that appears,
input the following into the
“Open” field, and click [OK].
Getting Connected and Installing Drivers (Windows)
If you are using the MME
driver, input MME
instead of WDM.
D:\Driver\USB_XP2K\WDM\SETUPINF.EXE
The drive name “D:” may be different for your system. Specify the drive
name of your CD-ROM drive.
fig.2-4_30
11
The SetupInf dialog box will
appear.
You are now ready to install the
driver.
In this manual, the
location of folders and
files is given in terms of
the file path, using \ as the
delimiter.
For example,
USB_XP2K\SETUPINF.
EXE indicates the
SETUPINF.EXE file
found in the USB_XP2K
folder.
Italiano Français Deutsch English
17
Getting Connected and Installing Drivers (Windows)
b
b
12
Use the USB cable to connect the UA-700 to your computer.
1. With the power switch turned OFF, connect the AC adaptor to the
UA-700.
2. Connect the AC adaptor to an electrical outlet.
3. Use the USB cable to connect the UA-700 to your computer.
fig.advance-on
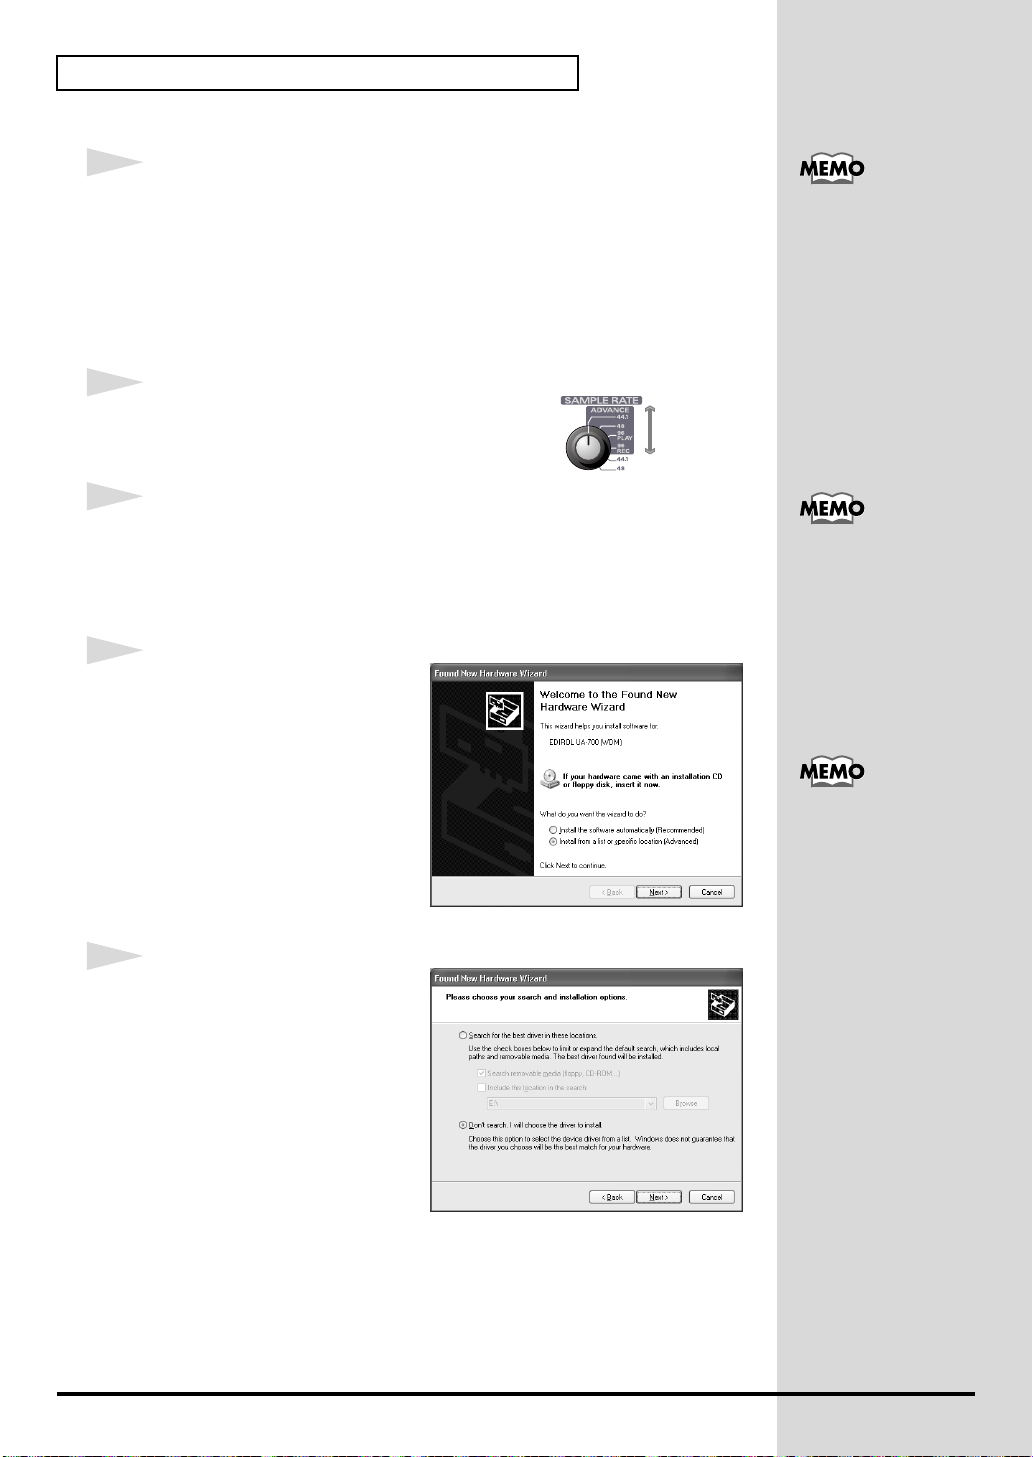
13
Set the UA-700’s ADVANCE (mode select)
switch to the ON position.
14
Set the UA-700’s power switch to the ON position.
Near the task bar, your computer will indicate “Found New Hardware”.
Please wait.
fig.2-6
15
The Found New Hardware
Wizard will appear.
Advance mode is
ON
Once the connections have
een completed, turn on
power to your various
devices in the order
specified. By turning on
devices in the wrong
order, you risk causing
malfunction and/or
damage to speakers and
other devices.
This unit is equipped with
a protection circuit. A brief
interval (a few seconds)
after power up is required
efore the unit will operate
normally.
Make sure that the screen
indicates “EDIROL UA-700
(WDM)”, select “Install from a
list or specific location
(Advanced)”, and click [Next].
fig.2-7
16
The screen will indicate “Please
choose your search and
installation options”.
Select “Don’t search. I will
choose the driver to install”, and
click [Next].
In the case of the MME
driver, make sure that
“EDIROL UA-700 (MME)”
is displayed.
18
Getting Connected and Installing Drivers (Windows)
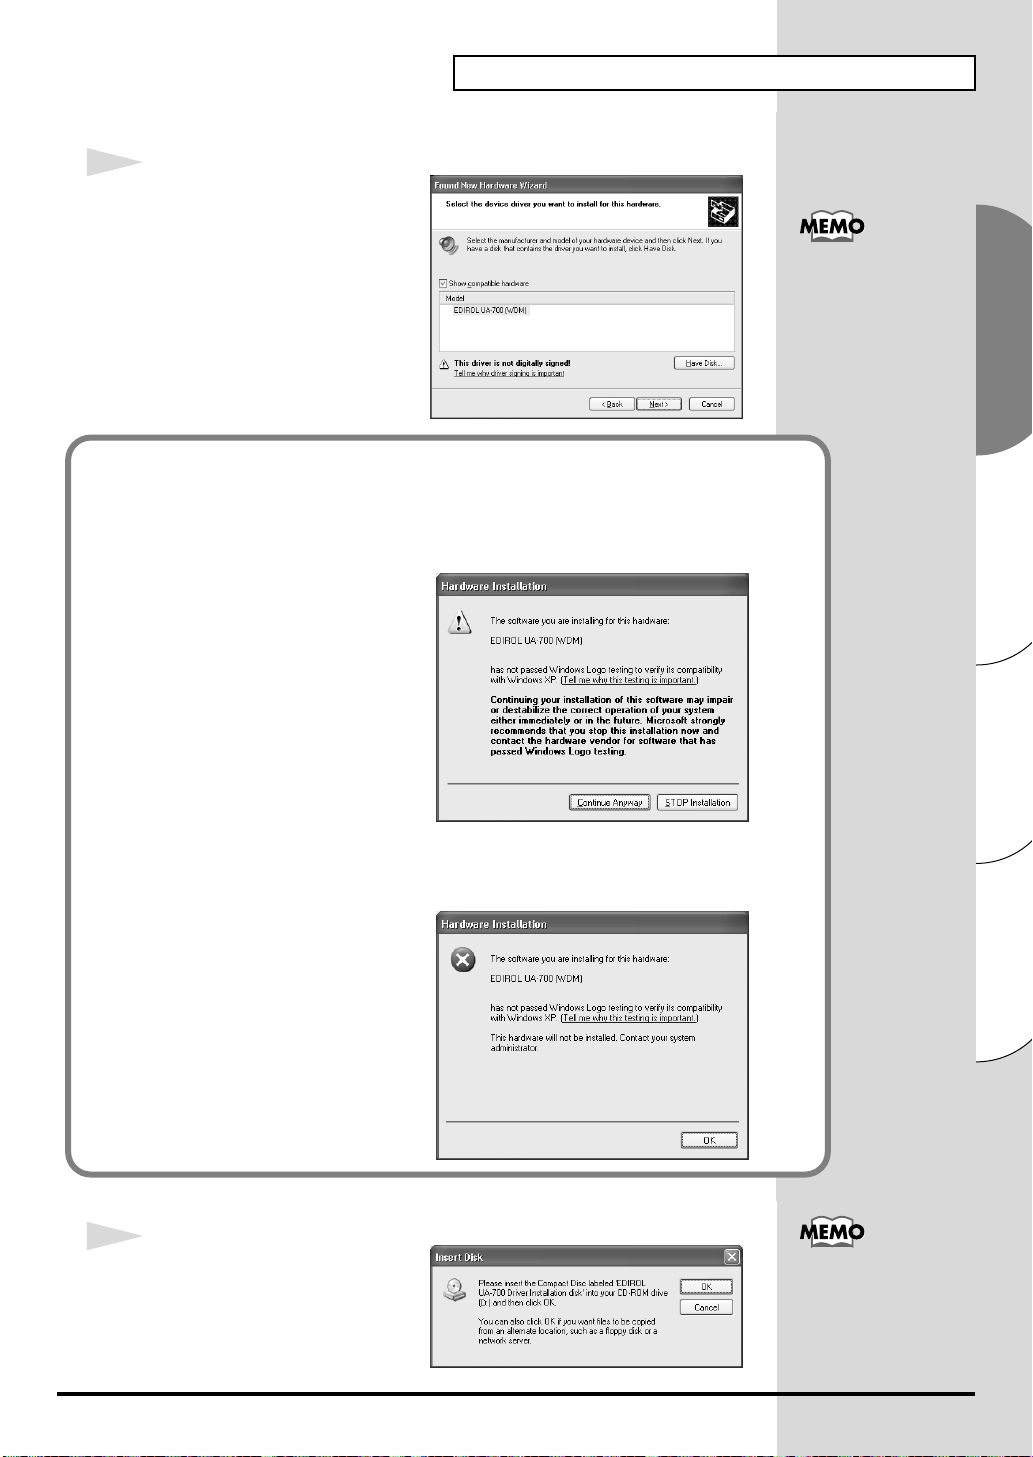
fig.2-8_20
17
Make sure that the “Model” field
indicates “EDIROL UA-700
(WDM)”, and click [Next]. Driver
installation will begin.
If the “What action do you want Windows to take?” setting was not set to
“Ignore”, a “Hardware Installation” dialog box will appear.
If “What action do you want Windows to take?” is set to “Warn”,
1. Click [Continue Anyway].
2. Continue the installation.
In the case of the MME
driver, make sure that
“EDIROL UA-700
(MME)” is displayed.
If “What action do you want Windows to take?” is set to “Block”
1. Click [OK].
2. When the “Found New
Hardware Wizard” appears,
click [Finish].
3. Perform the installation as
described in the
“Troubleshooting” section on
Device Manager shows “?”,
“!”, or “USB Composite
Device” (p. 242).
fig.2-9_30
18
The Insert Disk dialog box will
appear.
Click [OK].
Italiano Français Deutsch English
The Insert Disk dialog
may not appear. In that
case, proceed to step 17.
19
Getting Connected and Installing Drivers (Windows)
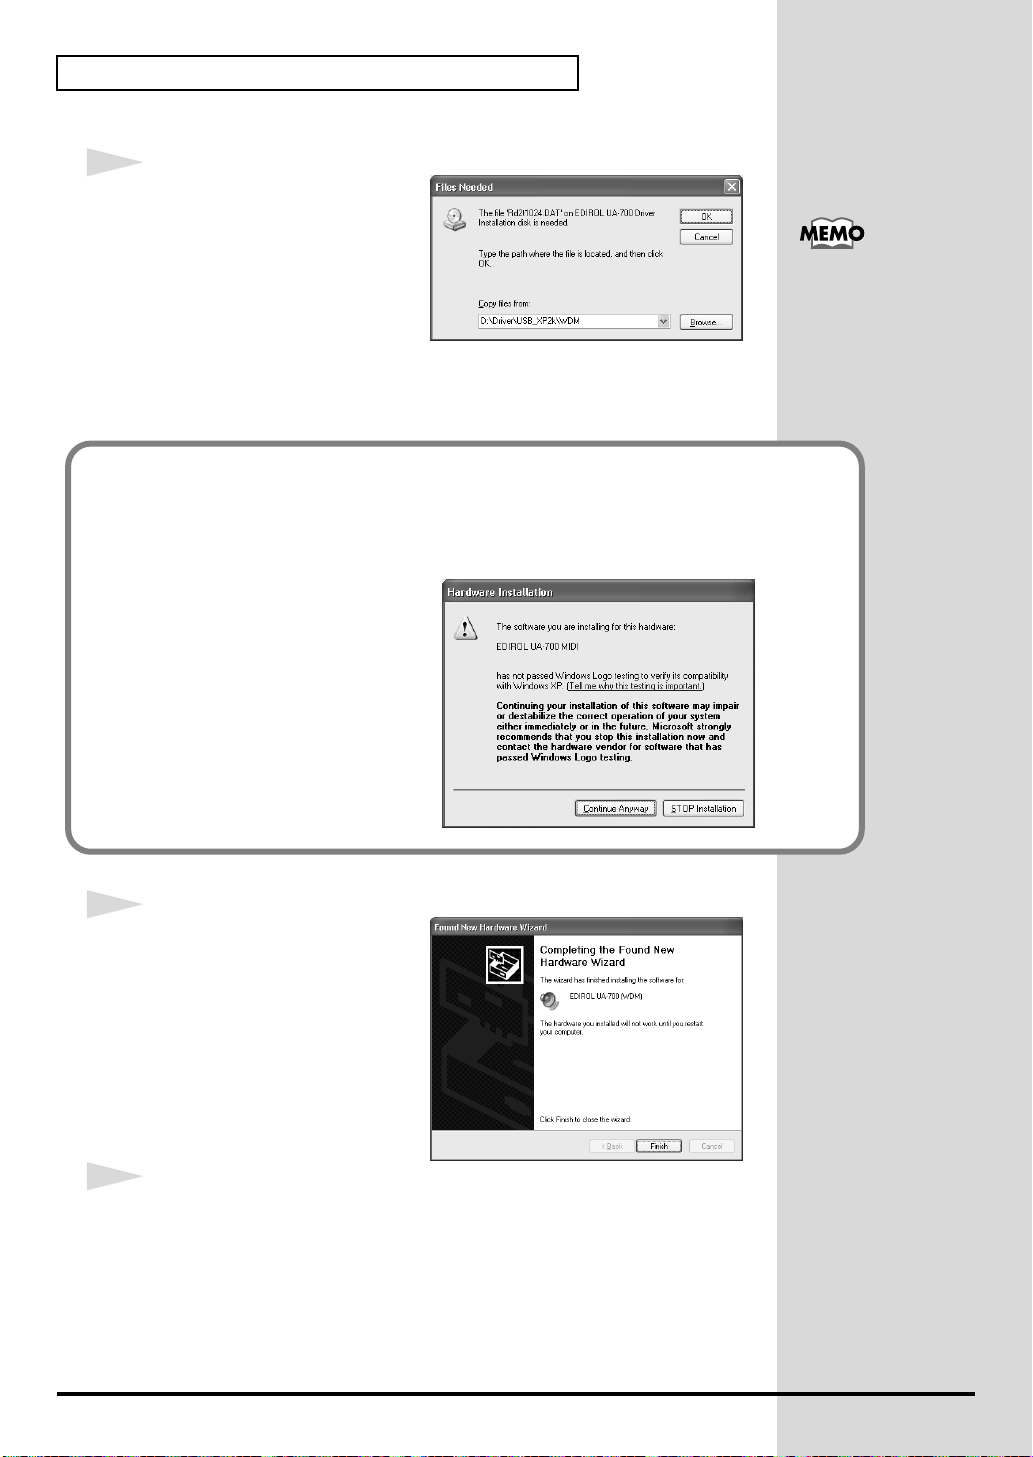
fig.2-10_30
19
The Files Needed dialog box will
appear. Input the following into
the “Copy files from” field, and
click [OK].
D:\Driver\USB_XP2K\WDM
* The drive name “D:” may be different for your system. Specify the drive name of your
CD-ROM drive.
If the “What action do you want Windows to take?” setting was not set to
“Ignore”, a “Hardware Installation” dialog box will appear.
If “What action do you want Windows to take?” is set to “Warn”,
1. Click [Continue Anyway].
2. Continue the installation.
If you are using the MME
driver, input MME instead
of WDM.
20
fig.2-11_20
20
The Found New Hardware
Wizard will appear.
Verify that “EDIROL UA-700 (WDM)”
or “EDIROL UA-700 (MME)” is
displayed, and click [Finish].
Wait until “Found New
Hardware” appears near the
taskbar.
21
When driver installation has been completed, the System Settings Change
dialog box will appear.
Click [Yes]. Windows will restart automatically.

Getting Connected and Installing Drivers (Windows)
If you changed “What action do you want Windows to take?”
If you changed the What action do you want Windows to take? setting,
restore the original setting after Windows restarts.
1. If you are using Windows XP Professional, log on to Windows using
the user name of an administrative account (e.g., Administrator).
2. Click the Windows start menu, and from the menu, select Control Panel.
3. In “Pick a category”, click “Performance and Maintenance”.
* Depending on how your system is set up, the System icon may be displayed directly
in the Control Panel (classic view). In this case, double-click the System icon.
4. In “or pick a Control Panel icon”, click the System icon. The System Properties
dialog box will appear.
5. Click the Hardware tab, and then click [Driver Signing]. The Driver Signing
Options dialog box will appear.
6. Return the What action do you want Windows to take? setting to the original
setting (either “Warn” or “Block”), and click [OK].
7. Click [OK]. The System properties dialog box will close.
Next, you need to make the driver settings.
(➝ Settings and checking (p. 33))
Windows 2000 users
1
With the UA-700 disconnected, start up Windows.
Disconnect all USB cables except for a USB keyboard and USB mouse
(if used).
2
Log on to Windows as a user with administrative privileges (such as
Administrator).
3
Open the System Properties dialog box.
Click the Windows Start button, and from the menu that appears, select
Settings | Control Panel. In Control Panel, double-click the System icon.
If the UA-700 is already
connected to your
computer and a message of
“Add New Hardware
Wizard” is displayed, go to
the included CD-ROM
folder named
DRIVER\USB_XP2K\WDM
or
DRIVER\USB_XP2K\MME,
open the file
Readme_e.htm, and read
the “Troubleshooting”
section entitled “You
attempted to install using
the above procedure, but
were not able to”.
Italiano Français Deutsch English
21
Getting Connected and Installing Drivers (Windows)
fig.05-2e_30
4
Click the Hardware tab, and then
click [Driver Signature].
Open the Driver Signing Options
dialog box.
fig.05-3e_30
5
Make sure that “File signature
verification” is set to “Ignore”.
If it is set to “Ignore”, simply click
[OK].
If it is not set to “Ignore”, make a
note of the current setting
(“Warn” or “Block”). Then change
the setting to “Ignore” and click
[OK].
After installing the driver, restore
the original setting.
(➝ If you changed “File
signature verification” (p. 26))
6
Click [OK] to close the System Properties dialog box.
7
Exit all currently running software (applications).
Also close any open windows. If you are using virus checking or similar
software, be sure to exit it as well.
8
Insert the CD-ROM.
Insert the CD-ROM into the CD-ROM drive of your computer.
If you changed “File
signature verification” in
step 5, you must restore
the previous setting after
you have installed the
driver. (–> If you changed
“File signature
verification” (p. 26))
22
9
Click the Windows Start button. From the menu that appears, select
“Run...”.
Open the “Run...” dialog box.
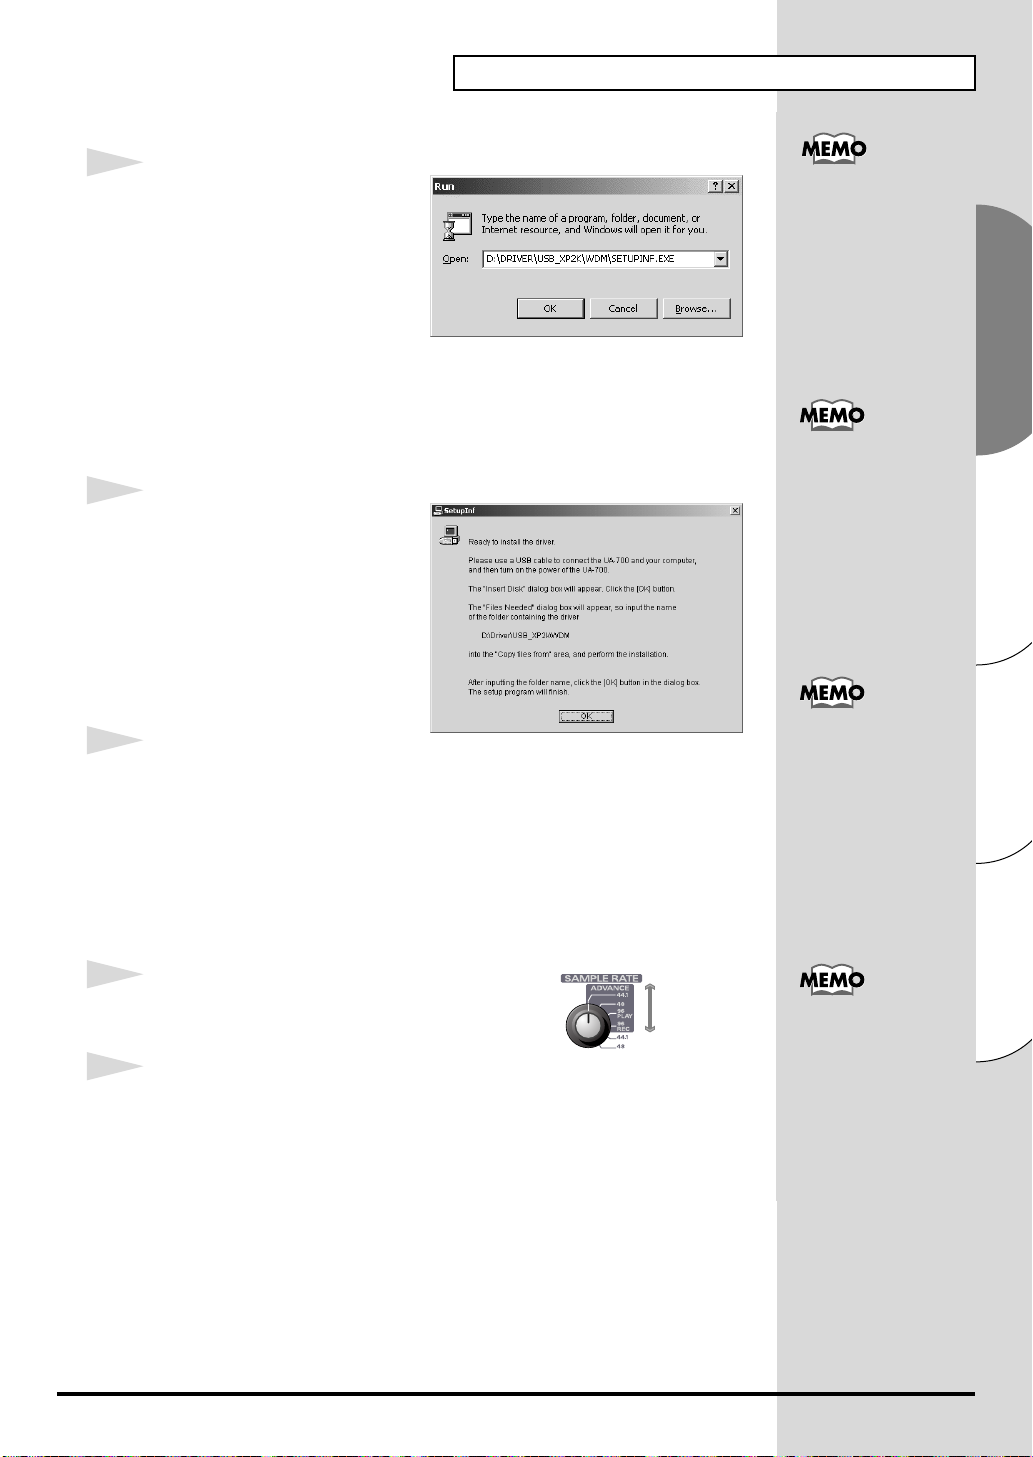
fig.05-5e_30
Getting Connected and Installing Drivers (Windows)
10
In the dialog box that appears,
input the following into the
“Open” field, and click [OK].
D:\DRIVER\USB_XP2K\WDM\SETUPINF.EXE
* The drive name “D:” may be different for your system. Specify the drive name of your
CD-ROM drive.
fig.05-6e_30
11
The SetupInf dialog box will
appear.
You are now ready to install the
driver.
12
Use the USB cable to connect the UA-700 to your computer.
1. With the power switch turned OFF, connect the AC adaptor to the
UA-700.
2. Connect the AC adaptor to an electrical outlet.
3. Use the USB cable to connect the UA-700 to your computer.
fig.advance-on
In this manual, the location
of folders and files is given
in terms of the file path,
using \ as the delimiter.
For example,
WDM\SETUPINF.EXE
indicates the
SETUPINF.EXE file found
in the WDM folder.
If you are using the MME
driver, input MME
instead of WDM.
Once the connections
have been completed,
turn on power to your
various devices in the
order specified. By
turning on devices in the
wrong order, you risk
causing malfunction and/
or damage to speakers
and other devices.
13
Set the UA-700’s ADVANCE (mode select)
switch to the ON position.
14
Set the UA-700’s power switch to the ON position.
Near the task bar, your computer will indicate “Found New Hardware”.
Please wait.
Advance mode is
ON
Italiano Français Deutsch English
This unit is equipped
with a protection circuit.
A brief interval (a few
seconds) after power up
is required before the unit
will operate normally.
23
Getting Connected and Installing Drivers (Windows)
b
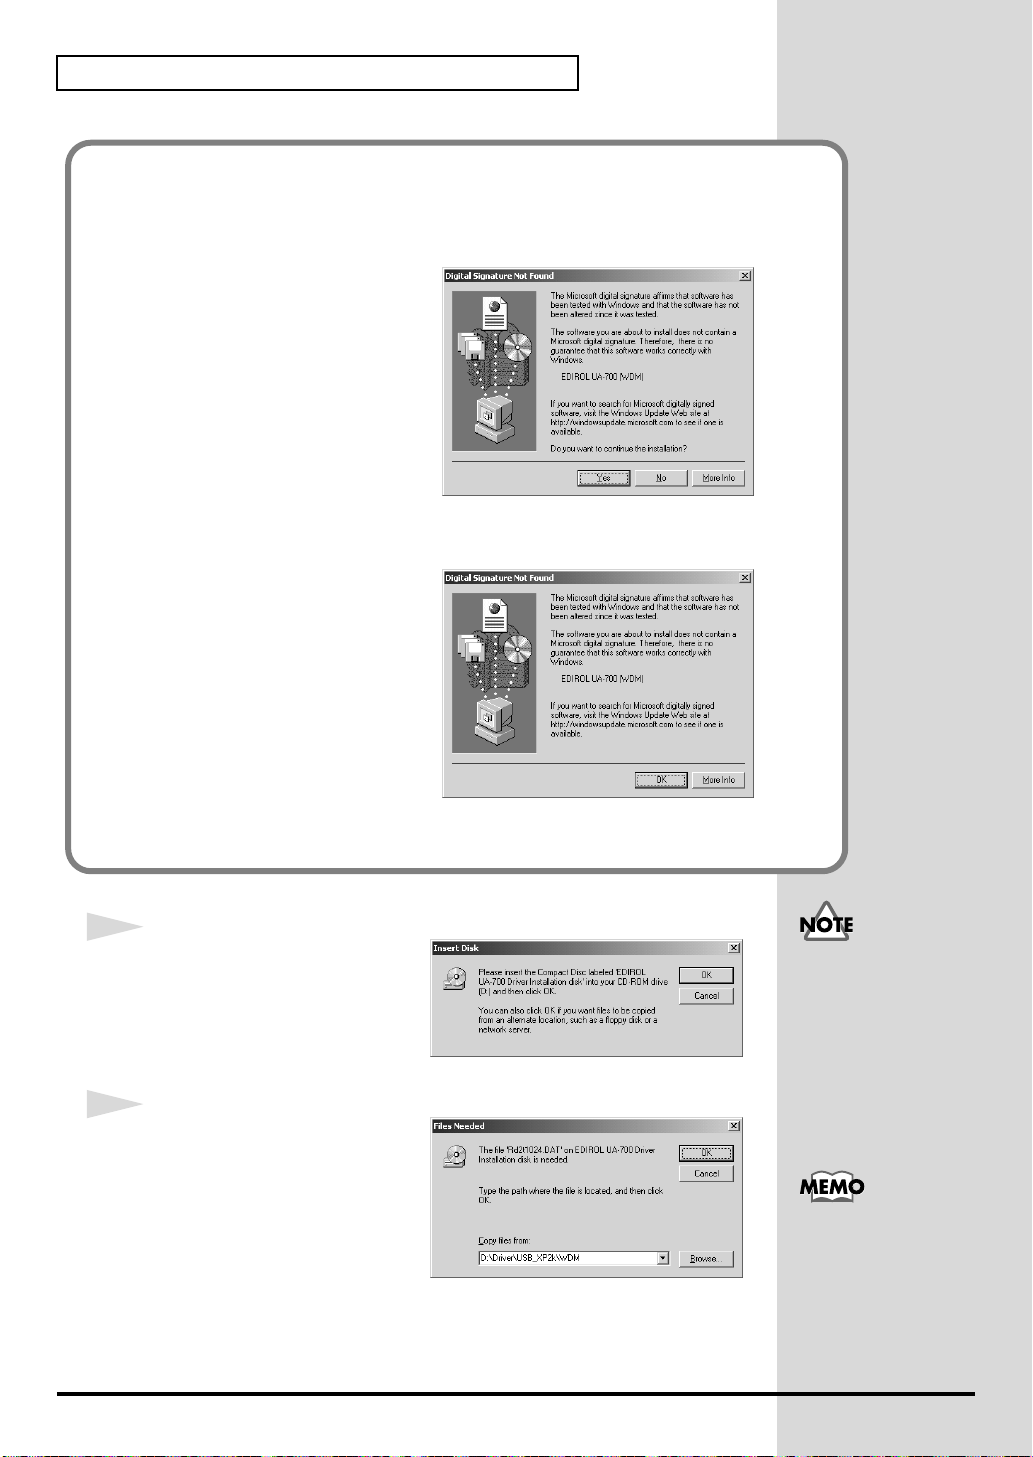
If the “File signature verification” setting was not set to “Ignore”, a “Digital
Signature Not Found” dialog box will appear.
If “File signature verification” is set to “Warn”,
1. Click [Yes].
2. Continue the installation.
If “File signature verification” is set to “Block”
1. Click [OK].
2. When the “Found New
Hardware Wizard” appears,
click [Finish].
3. Perform the installation as
described in the
“Troubleshooting” section on
Device Manager shows “?”,
“!”, or “USB Composite
Device” (p. 242).
fig.05-8e_30
15
The Insert Disk dialog box will
appear.
Click [OK].
fig.05-9e_30
16
The Files Needed dialog box will
appear.
In the Copy files from field, type
the folder name that is shown in
the dialog box, and click [OK].
D:\DRIVER\USB_XP2K\WDM
If the Insert Disk dialog
ox does not appear,
please read The “Insert
Disk” dialog box does
not appear (p. 242)
If you are using the MME
driver, input MME
instead of WDM.
* The drive name “D:” may be different for your system. Specify the drive name of your
CD-ROM drive.
24
Getting Connected and Installing Drivers (Windows)
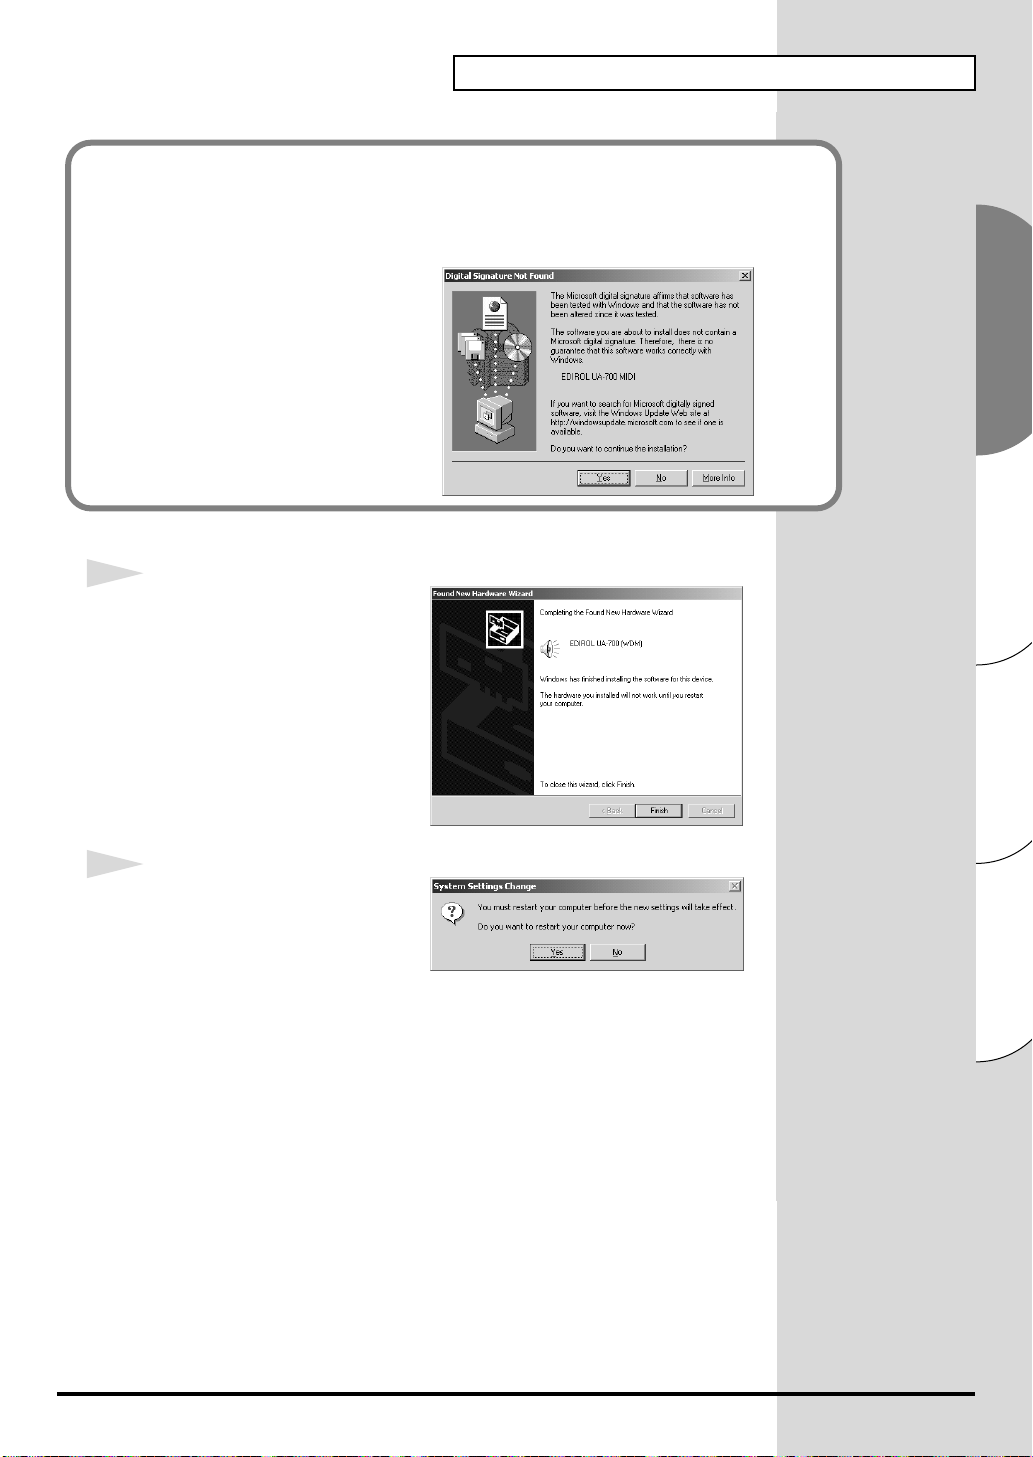
If the “File signature verification” setting was not set to “Ignore”, a “Digital
Signature Not Found” dialog box will appear.
If “File signature verification” is set to “Warn”,
1. Click [Yes].
2. Continue the installation.
fig.05-10e_30
17
The “Find New Hardware
Wizard” may be displayed.
Verify that “EDIROL UA-700
(WDM)” or “EDIROL UA-700
(MME)” is displayed, and click
[Finish].
If the “Find New Hardware Wizard”
dialog box is not displayed, proceed to
step 18.
fig.05-11e_30
18
The System Settings Change
dialog box may appear.
Click [Yes]. Windows will restart
automatically.
If the System Settings Change
dialog box does not appear, restart Windows from the Start menu.
Italiano Français Deutsch English
25
Getting Connected and Installing Drivers (Windows)
If you changed “File signature verification”
If you changed the “File signature verification” setting in step 5, restore the
original setting after Windows restarts.
1. After Windows restarts, log in to Windows as a user with administrative
privileges, (such as Administrator).
2. In the Windows desktop, right-click the My Computer icon, and from the menu
that appears, select Properties. The System Properties dialog box will appear.
3. Click the Hardware tab, and then click [Driver signature]. The Driver Signing
Options dialog box will appear.
4. Return the “File signature verification” setting to the original setting (either
“Warn” or “Block”), and click [OK].
5. Click [OK]. The System Properties dialog box will close.
Next, you need to make the driver settings.
(➝ Settings and checking (p. 33))
■ Windows Me/98 users
1
With the UA-700 disconnected, start up Windows.
Disconnect all USB cables other than those for a USB keyboard or USB mouse.
2
Exit all currently running software (applications).
Also, close any open windows. If you are using a virus checker or similar
software, be sure to exit this as well.
3
Prepare the CD-ROM.
Insert the CD-ROM into the CD-ROM drive of your computer.
4
Click the Windows Start button. From the menu that appears, select Run....
Open the Run... dialog box.
If the UA-700 is already
connected to your
computer and a message of
“Add New Hardware
Wizard” is displayed, go to
the CD-ROM folder named
DRIVER\USB_ME98, open
the file Readme_e.htm, and
read the
“Troubleshooting”
section entitled “You
attempted to install using
the above procedure, but
were not able to”.
26
Getting Connected and Installing Drivers (Windows)
fig.05-13e_30
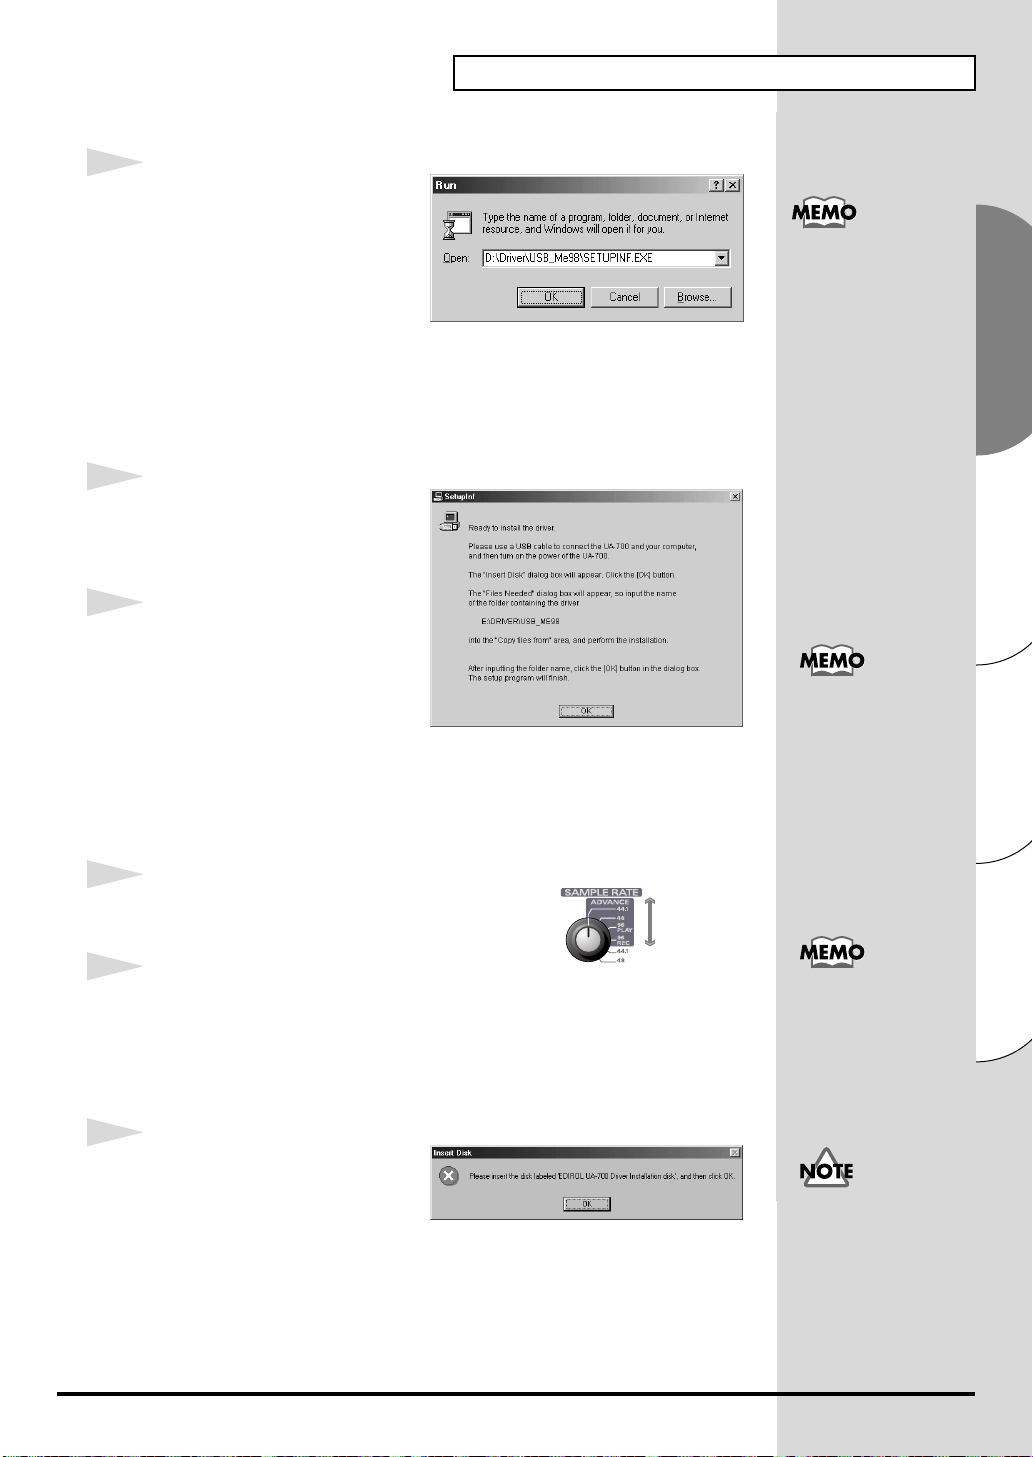
5
In the dialog box that appears,
input the following into the
“Open” field, and click [OK].
D:\DRIVER\USB_ME98\SETUPINF.EXE
* The drive name “D:” may be different depending on your system. Type the name of
your CD-ROM drive.
fig.05-14e_30
6
Open the SetupInf dialog box.
You are now ready to install the
driver.
7
Use the USB cable to connect the
UA-700 to your computer.
In this manual, the
location of folders and
files is given in terms of
the file path, using \ as the
delimiter.
For example,
USB_ME98\SETUPINF.
EXE indicates that the
SETUPINF.EXE file is
located in the USB_ME98
folder.
1. With the power switch
turned OFF, connect the AC
adaptor to the UA-700.
2. Connect the AC adaptor to an electrical outlet.
3. Use the USB cable to connect the UA-700 to your computer.
fig.advance-on
8
Set the UA-700’s ADVANCE (mode select)
switch to the ON position.
9
Set the UA-700’s power switch to the ON
position.
Near the task bar, your computer will indicate “Found New Hardware”.
Please wait.
fig.05-15e_30
10
If you are using Windows 98, an
Insert disk dialog box will
appear.
Click [OK].
Advance mode is
ON
Once the connections
have been completed,
turn on power to your
various devices in the
order specified. By
turning on devices in the
wrong order, you risk
causing malfunction and/
or damage to speakers
and other devices.
This unit is equipped
with a protection circuit.
A brief interval (a few
seconds) after power up
is required before the unit
will operate normally.
If you are using
Windows 98 and the
Insert disk dialog box
dose not appear, please
read The “Insert Disk”
dialog box does not
appear (p. 242).
Italiano Français Deutsch English
27
Getting Connected and Installing Drivers (Windows)
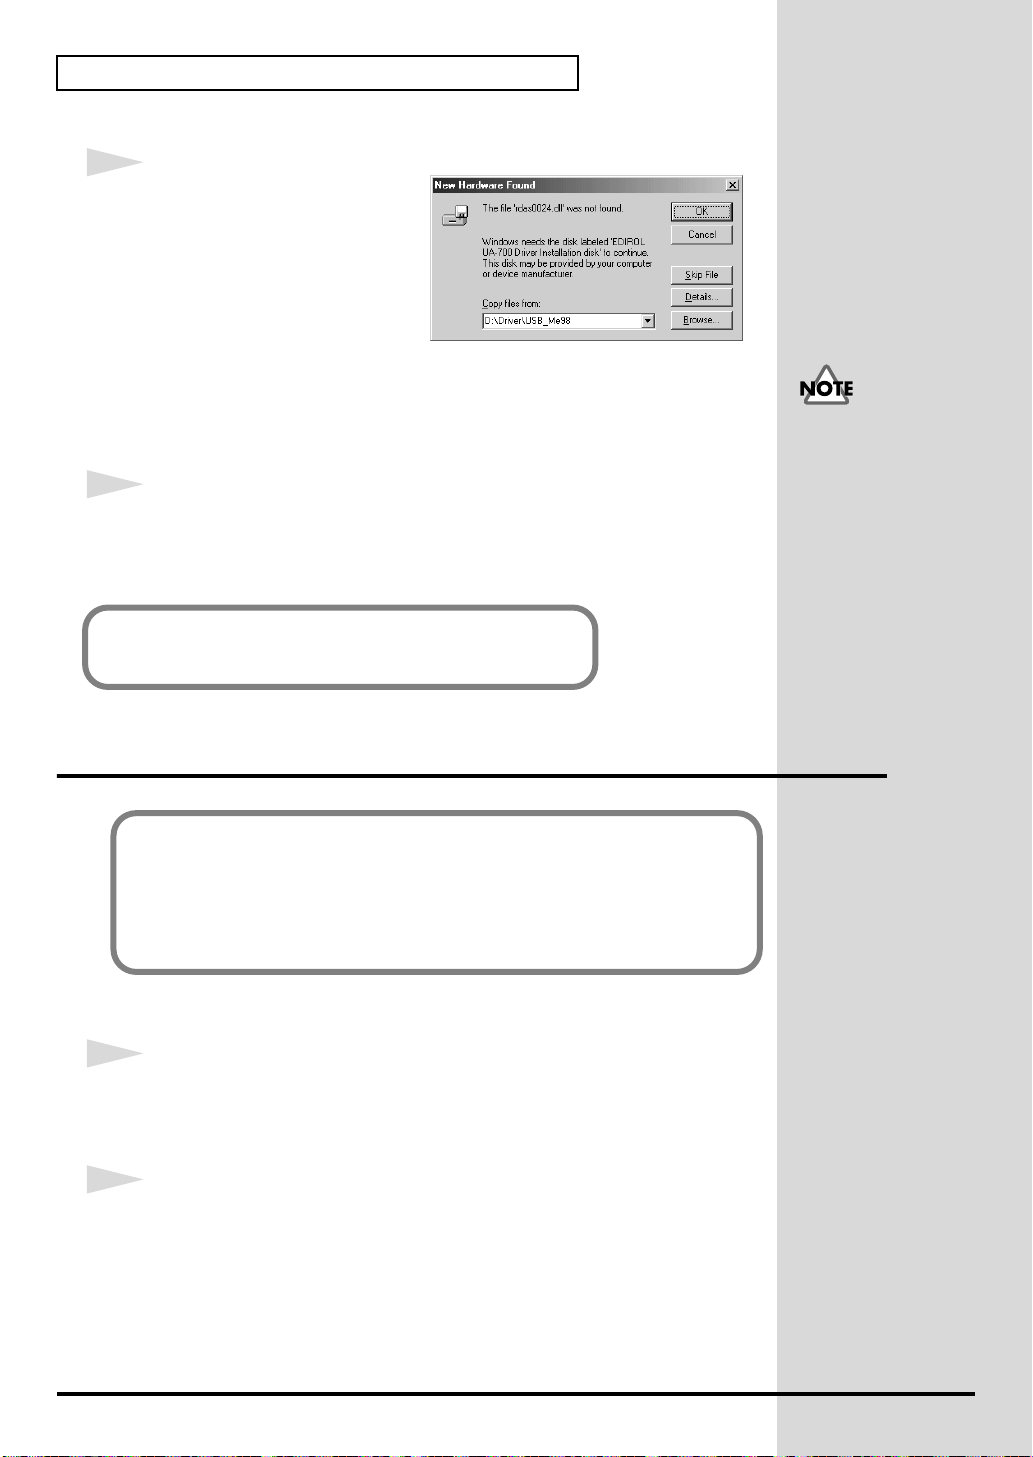
fig.05-16e_30
11
The New Hardware Found
dialog box will appear.
In the Copy files from field, type
the folder name that is shown in
the SetupInf dialog box, and
click [OK].
D:\DRIVER\USB_ME98
* The drive name “D:” may be different depending on your system. Type the name of
your CD-ROM drive.
12
Once the driver has been installed, the New Hardware Found dialog box
will close.
In the SetupInf dialog box, click [OK]. The SetupInf dialog box will close.
Next, you need to make the driver settings.
(➝ Settings and checking (p. 33))
If the New Hardware
Found dialog box does not
appear, re-install the
driver using the same
procedure as described in
The “Insert Disk” dialog
box does not appear
(p. 242).
Installing the OS-standard driver
The procedure for installation and settings will depend on your system.
Proceed to the appropriate section as follows.
• Windows XP/2000 users..................................... (p. 28)
• Windows Me users...............................................(p. 29)
• Windows 98 users.................................................(p. 30)
■ Windows XP/2000 users
1
With the UA-700 disconnected, start up Windows.
Disconnect all USB cables except for a USB keyboard and USB mouse
(if used).
2
Exit all currently running software (applications).
If you are using a virus checker or similar software, be sure to exit it as well.
28
3
b
Use the USB cable to connect the UA-700 to your computer.
1. With the power switch turned OFF, connect the AC adaptor to the
UA-700.
2. Connect the AC adaptor to an electrical outlet.
3. Use the USB cable to connect the UA-700 to your computer.
fig.advance-off
4
Place the UA-700’s ADVANCE (mode select)
switch in the OFF position.
Getting Connected and Installing Drivers (Windows)
Once the connections
have been completed,
turn on power to your
various devices in the
order specified. By
turning on devices in the
wrong order, you risk
causing malfunction
and/or damage to
speakers and other
Advance mode is
OFF
devices.
5
Set the UA-700’s power switch to the ON position.
The UA-700 will be detected automatically, and the driver will be installed.
6
When installation is complete, restart Windows.
Next, you will need to make the driver settings.
(➝ Settings and checking (p. 33))
■ Windows Me users
1
With the UA-700 disconnected, start up Windows.
Disconnect all USB cables except for a USB keyboard and USB mouse
(if used).
2
Exit all currently running software (applications).
If you are using a virus checker or similar software, be sure to exit it as well.
3
Use the USB cable to connect the UA-700 to your computer.
1. With the power switch turned OFF, connect the AC adaptor to the
UA-700.
2. Connect the AC adaptor to an electrical outlet.
3. Use the USB cable to connect the UA-700 to your computer.
fig.advance-off
If you are using Windows
XP, the installation has
een completed when the
message near the taskbar
saying that “Found New
Hardware” has
disappeared.
This unit is equipped
with a protection circuit.
A brief interval (a few
seconds) after power up is
required before the unit
will operate normally.
Once the connections
have been completed,
turn on power to your
various devices in the
order specified. By
turning on devices in the
wrong order, you risk
causing malfunction and/
or damage to speakers
and other devices.
Italiano Français Deutsch English
4
Place the UA-700’s ADVANCE (mode select)
switch in the OFF position.
Advance mode is
OFF
29

Getting Connected and Installing Drivers (Windows)
5
Set the UA-700’s power switch to the ON position.
fig.05-23e_30
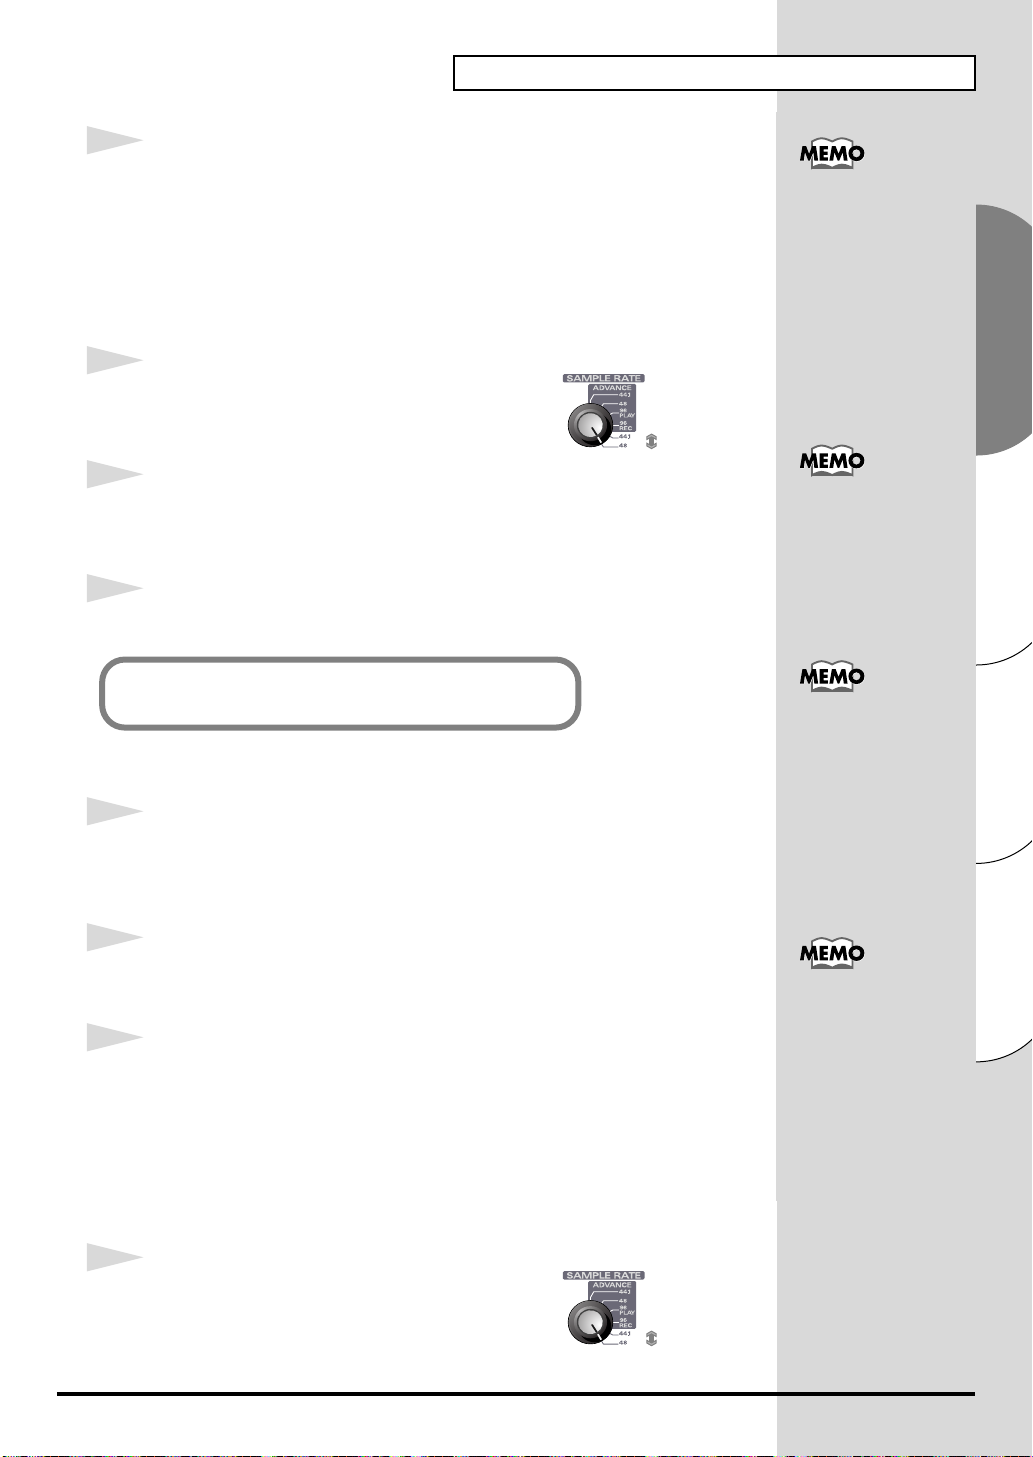
6
Windows will detect the UA-700,
and the “Add New Hardware
Wizard” dialog box will appear.
Make sure that Automatic search
for a better driver
(Recommended) is selected, and
click [Next].
7
Driver detection will begin.
8
When the driver has been found, driver installation will begin.
fig.05-24e_30
This unit is equipped
with a protection circuit.
A brief interval (a few
seconds) after power up
is required before the
unit will operate
normally.
9
Once the driver has been
installed, a dialog box will inform
you of this.
Click [Finish].
10
Restart Windows.
Next, you will need to make the driver settings.
(➝ Settings and checking (p. 33))
■ Windows 98 users
The USB composite device driver is installed first, then the USB audio
device driver is installed. Use the following procedure to install the drivers.
1
With the UA-700 disconnected, start up Windows.
Disconnect all USB cables except for a USB keyboard and USB mouse
(if used).
Depending on your
system, a certain amount
of time may be required
for the device to be
detected after the driver
has been installed.
30
2
Exit all currently running software (applications).
If you are using a virus checker or similar software, be sure to exit it as well.
 Loading...