

Page 1

Owner’s Manual
Before using this unit, carefully read “IMPORTANT SAFETY INSTRUCTIONS” (inside front cover), “USING THE UNIT SAFELY” (p. 2), and “IMPORTANT NOTES”
(p. 3). After reading, keep the document(s) where it will be available for immediate reference.
Copyright © 2016 ROLAND CORPORATION
Page 2
USING THE UNIT SAFELY
About WARNING and CAUTION Notices
Used for instructions intended to alert the
user to the risk of death or severe injury
should the unit be used improperly.
Used for instructions intended to alert the
user to the risk of injury or material
damage should the unit be used
improperly.
* Material damage refers to damage or
other adverse effects caused with
respect to the home and all its
furnishings, as well to domestic animals
or pets.
ALWAYS OBSERVE THE FOLLOWING
WARNING
To completely turn o power to the unit, pull
out the plug from the outlet
Even with the power/strobe knob
turned o, this unit is not completely
separated from its main source of
power. When the power needs to
be completely turned o, turn o the power
switch on the unit, then pull out the plug from
the outlet. For this reason, the outlet into which
you choose to connect the power cord’s plug
should be one that is within easy reach and
readily accessible.
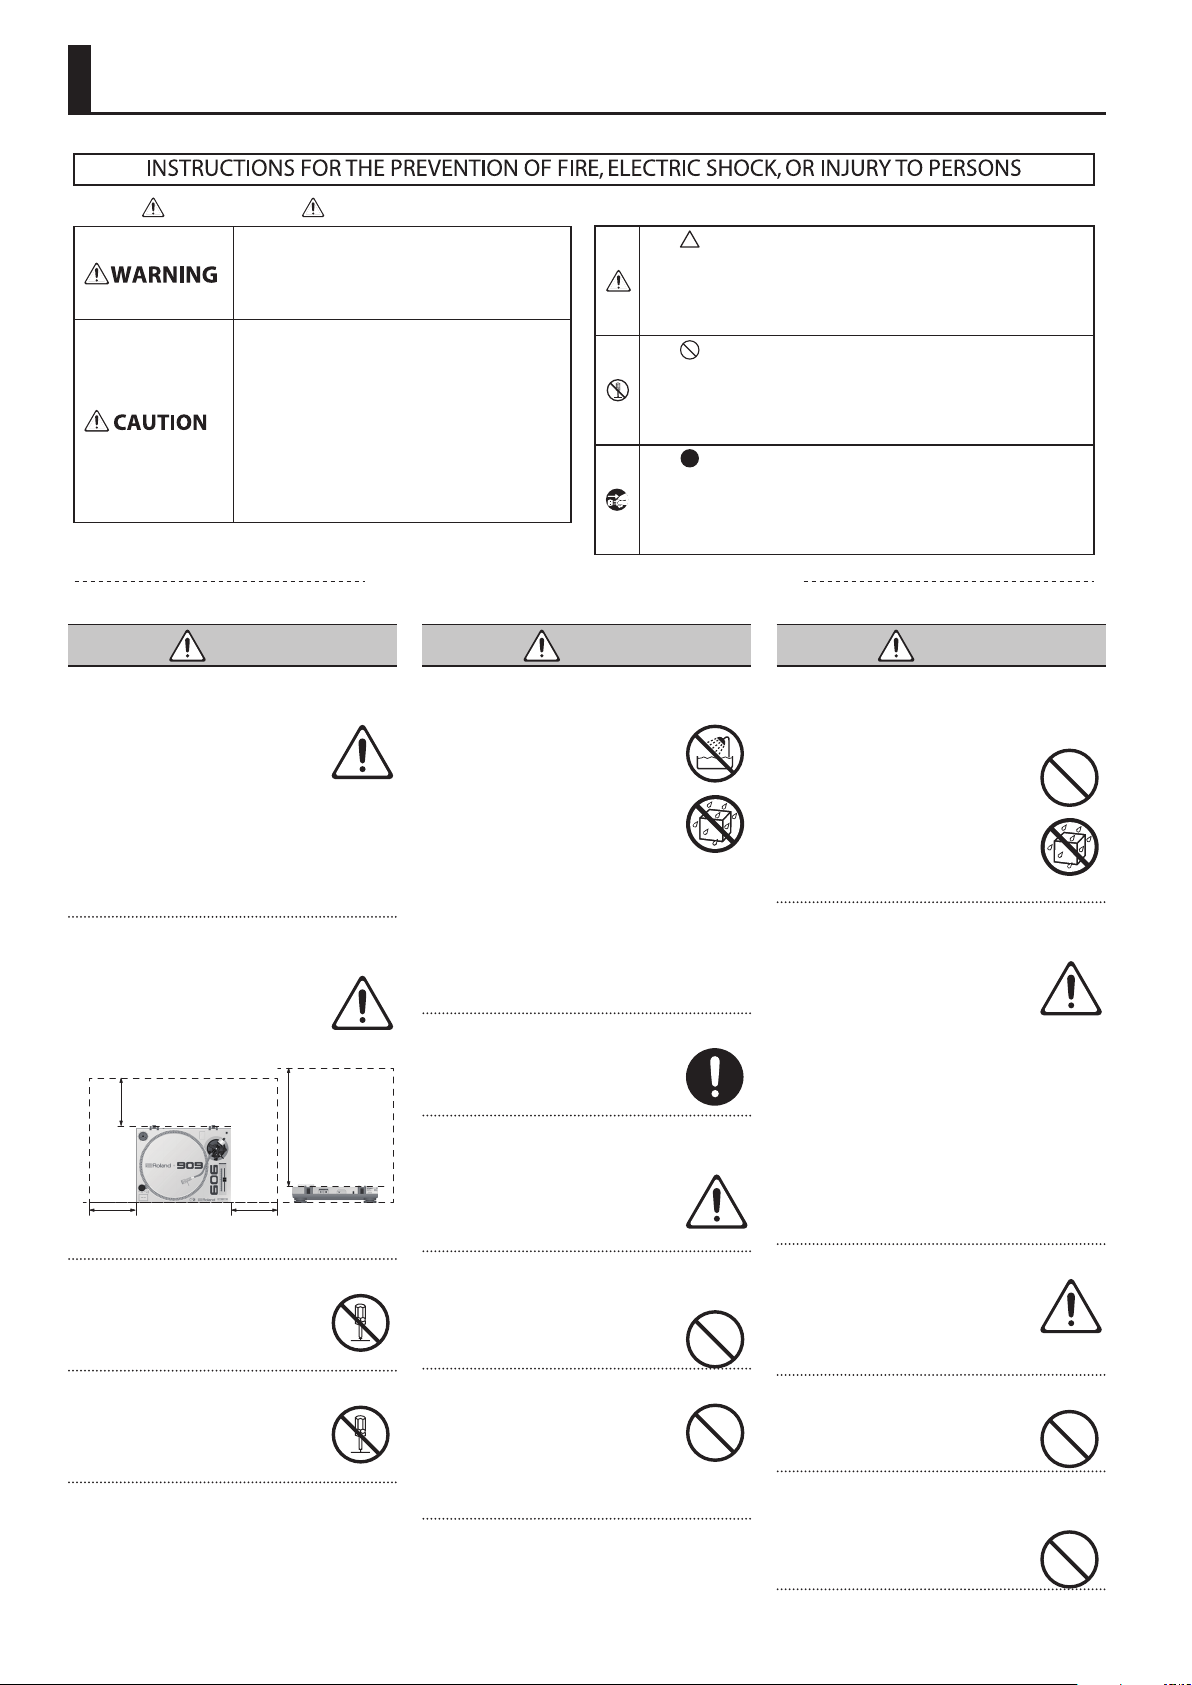
Secure a sucient amount of space at the
setup location
Since this unit normally emits a slight
amount of heat, make sure to secure
sucient space around it, as shown
below.
Rear
5 cm (2 in.) or
greater
Side
5 cm (2 in.)
or greater
Side
5 cm (2 in.)
or greater
Top
15 cm (6 in.)
or greater
Do not disassemble or modify by yourself
Do not carry out anything unless you
are instructed to do so in the owner’s
manual. Otherwise, you risk causing
malfunction.
Do not repair or replace parts by yourself
Refer all servicing to your retailer,
the nearest Roland Service Center, or
an authorized Roland distributor, as
listed on the “Information.”
Do not use or store in the following types of
locations
• Subject to temperature extremes
• Damp (e.g., baths, washrooms, on
• Exposed to steam or smoke; or are
• Subject to salt exposure; or are
• Exposed to rain; or are
• Dusty or sandy; or are
• Subject to high levels of vibration and
• Placed in a poorly ventilated location.
Do not place in an unstable location
Otherwise, you risk injury as the
result of the unit toppling over or
dropping down.
Connect the power cord to an outlet of the
correct voltage
The unit should be connected to
a power supply only of the type
described as marked on the rear side
of unit.
Do not bend the power cord or place heavy
objects on it
Otherwise, re or electric shock may
result.
Avoid extended use at high volume
Use of the unit at high volume for
extended periods of time may cause
hearing loss. If you ever experience
any hearing loss or ringing in the
ears, you should immediately stop using the
unit and consult a specialized physician.
About the Symbols
The symbol alerts the user to important instructions or
warnings.The specific meaning of the symbol is
determined by the design contained within the triangle. In
the case of the symbol at left, it is used for general
cautions, warnings, or alerts to danger.
The symbol alerts the user to items that must never be
carried out (are forbidden). The specific thing that must
not be done is indicated by the design contained within
the circle. In the case of the symbol at left, it means that
the unit must never be disassembled.
The symbol alerts the user to things that must be
carried out. The specific thing that must be done is
indicated by the design contained within the circle. In the
case of the symbol at left, it means that the power-cord
plug must be unplugged from the outlet.
WARNING
(e.g., direct sunlight in an enclosed
vehicle, near a heating duct, on top
of heat-generating equipment);
or are
wet oors); or are
shakiness; or are
WARNING
Do not allow foreign objects or liquids to
enter unit; never place containers with liquid
on unit
Do not place containers containing
liquid (e.g., ower vases) on this
product. Never allow foreign objects
(e.g., ammable objects, coins, wires)
or liquids (e.g., water or juice) to enter
this product. Doing so may cause
short circuits, faulty operation, or
other malfunctions.
Turn o the unit if an abnormality or
malfunction occurs
Immediately turn the unit o, remove
the power cord from the outlet, and
request servicing by your retailer, the
nearest Roland Service Center, or an
authorized Roland distributor, as listed on the
“Information” when:
• The power cord has been damaged; or
• If smoke or unusual odor occurs; or
• Objects have fallen into, or liquid has been
spilled onto the unit; or
• The unit has been exposed to rain (or
otherwise has become wet); or
• The unit does not appear to operate normally
or exhibits a marked change in performance.
Be cautious to protect children from injury
Always make sure that an adult is
on hand to provide supervision and
guidance when using the unit in
places where children are present, or
when a child will be using the unit.
Do not drop or subject to strong impact
Otherwise, you risk causing damage
or malfunction.
Do not share an outlet with an unreasonable
number of other devices
Otherwise, you risk overheating or
re.
2
Page 3
USING THE UNIT SAFELY
WARNING
Do not use overseas
Before using the unit in overseas,
consult with your retailer, the
nearest Roland Service Center, or
an authorized Roland distributor, as
listed on the “Information.”
CAUTION
When disconnecting the power cord, grasp it
by the plug
To prevent conductor damage,
always grasp the power cord by its
plug when disconnecting it.
Periodically clean the power plug
An accumulation of dust or foreign
objects between the power plug and
the power outlet can lead to re or
electric shock.
At regular intervals, be sure to pull out the
power plug, and using a dry cloth, wipe away
any dust or foreign objects that may have
accumulated.
Disconnect the power plug whenever the unit
will not be used for an extended period of
time
Fire may result in the unlikely event
that a breakdown occurs.
CAUTION
Route all power cords and cables in such a way
as to prevent them from getting entangled
Injury could result if someone were to
trip on a cable and cause the unit to
fall or topple.
Avoid climbing on top of the unit, or placing
heavy objects on it
Otherwise, you risk injury as the
result of the unit toppling over or
dropping down.
Never connect/disconnect a power plug if your
hands are wet
Otherwise, you could receive an
electric shock.
Disconnect all cords/cables before moving the
unit
Before moving the unit, disconnect
the power plug from the outlet,
and pull out all cords from external
devices.
Before cleaning the unit, disconnect the
power plug from the outlet
If the power plug is not removed
from the outlet, you risk receiving an
electric shock.
CAUTION
Whenever there is a threat of lightning,
disconnect the power plug from the outlet
If the power plug is not removed
from the outlet, you risk causing
malfunction or receiving an electric
shock.
Take care so as not to get ngers pinched
When handling the following
moving parts, take care so as not
to get ngers, toes, etc., pinched.
Whenever a child uses the unit, an
adult should be on hand to provide supervision
and guidance.
• Dust cover
• Turntable platter
Keep small items out of the reach of children
To prevent accidental ingestion of the
parts listed below, always keep them
out of the reach of small children.
• Included Parts
Headshell/Cartridge
45-rpm adaptor
Counterweight
IMPORTANT NOTES
Power Supply
• Do not connect this unit to same electrical
outlet that is being used by an electrical
appliance that is controlled by an inverter
or a motor (such as a refrigerator, washing
machine, microwave oven, or air conditioner).
Depending on the way in which the electrical
appliance is used, power supply noise may
cause this unit to malfunction or may produce
audible noise. If it is not practical to use a
separate electrical outlet, connect a power
supply noise lter between this unit and the
electrical outlet.
Placement
• Using the unit near power ampliers (or
other equipment containing large power
transformers) may induce hum. To alleviate
the problem, change the orientation of this
unit; or move it farther away from the source
of interference.
• This unit may interfere with radio and
television reception. Do not use this unit in
the vicinity of such receivers.
• Noise may be produced if wireless
communications devices, such as cell phones,
are operated in the vicinity of this unit.
Such noise could occur when receiving or
initiating a call, or while conversing. Should
you experience such problems, you should
relocate such wireless devices so they are at
a greater distance from this unit, or switch
them o.
• When moved from one location to another
where the temperature and/or humidity is
very dierent, water droplets (condensation)
may form inside the unit. Damage or
malfunction may result if you attempt to use
the unit in this condition. Therefore, before
using the unit, you must allow it to stand for
several hours, until the condensation has
completely evaporated.
• Depending on the material and temperature
of the surface on which you place the unit, its
rubber feet may discolor or mar the surface.
• Do not place containers or anything else
containing liquid on top of this unit. Also,
whenever any liquid has been spilled on the
surface of this unit, be sure to promptly wipe
it away using a soft, dry cloth.
Maintenance
• Never use benzine, thinners, alcohol or
solvents of any kind, to avoid the possibility of
discoloration and/or deformation.
Additional Precautions
• Use a reasonable amount of care when using
the unit’s buttons, sliders, or other controls;
and when using its jacks and connectors.
Rough handling can lead to malfunctions.
• When disconnecting all cables, grasp the
connector itself—never pull on the cable. This
way you will avoid causing shorts, or damage
to the cable’s internal elements.
• A small amount of heat will radiate from the
unit during normal operation.
• To avoid disturbing others nearby, try to keep
the unit’s volume at reasonable levels.
• Please note the following points when
moving this unit.
• Remove the turntable platter, and wrap
it in packing material so that it does not
become scratched.
• Secure the tonearm to the arm clamper so
that it does not move.
• Detach the counterweight and headshell
from the tonearm, and wrap them in
packing material so that they do not
become scratched.
• Do not touch the needle while the unit
is powered-on. Doing so may cause
malfunctions.
Intellectual Property Right
• Roland is a registered trademark or
trademark of Roland Corporation in the
United States and/or other countries.
• Company names and product names
appearing in this document are registered
trademarks or trademarks of their respective
owners.
3
Page 4

Name of Parts
1
2
3
4
5
6
19 20
18
17
16
15
14
13
7
21 22 23
1
45-rpm adaptor
2
Turntable platter
3
Slipmat
4
Center spindle
5
Strobe dots
6
Power/Strobe knob
7
[START/STOP] button
8
Headshell
9
[TARGET LIGHT]
10
Tonearm
11
[SPEED] select buttons
For 33 1/3 rpm record, press the [33] button
For 45 rpm record, press the [45] button
For 78 rpm record, press both the [33] button and [45] button
8 9 10 11
12
Pitch indicator
Green LED: The [PITCH ADJ.] slider is in center click position
Red LED: The speed was changed with the [PITCH ADJ.]
13
[PITCH ADJ.] slider
14
Arm rest
15
Arm clamper
16
Lifter lever
17
Anti-skating knob
18
Headshell stand
19
Counterweight
20
Hinge for dust cover
21
RCA output jacks
22
GND terminal
12
To AC Outlet
and the speed is quartz-controlled.
slider.
23
[PHONO/LINE] switch
4
Page 5

Getting Ready
Assembly
1. Remove the main unit with the packing from the
box and take o the packing.
2. Set the 45-rpm adaptor on the main unit.
3. Insert the turntable platter onto the center spindle.
4. Set the slip mat on the turntable platter.
5. Installation of cartridge:
When installing a cartridge, refer to the operating instructions of
that cartridge.
6. Insert the headshell into the front end of the
tonearm, then turn the lock nut clockwise with the
headshell rmly held horizontally.
7. Slide counterweight onto tonearm.
Twist it lightly and it will screw onto the rear shaft of the tonearm.
8. Adjustment of horizontal zero (0) balance and
stylus pressure:
a. Remove the stylus protector of the cartridge. Do not touch the
stylus tip during the adjustment.
b. Set the lifter lever to the lower position.
c. Release the arm clamper and lift the tonearm from the arm rest
to free it.
d. Rotate the counterweight until the tonearm is approximately
balanced horizontally (oats freely).
e. Refasten the tonearm with the arm clamper.
f. Hold the counterweight stationary with one hand and rotate
only the stylus-pressure ring to bring the number “0” of the
ring into alignment with the center line on the tonearm rear
shaft.
g. Rotate the counterweight clockwise until the scale shows
the value corresponding to the pressure of the used stylus.
The stylus pressure of the installed cartridge is 3–4 g. If you
use a separate cartridge, please follow the manufacturer’s
instructions.
9. Set the anti-skating control knob to the same value
as the stylus pressure.
10. Install the dust cover to the main unit.
* When opening/closing the dust cover, please be careful not to
get your ngers pinched between the movable part and the
panel. In places where small children are present, make sure that
an adult provides supervision and guidance.
Contents of the Package
Check following parts included in the package with the main unit:
A
Turntable platter
B
Slipmat
C
Dust cover
D
45-rpm adaptor
E
Counterweight
F
Headshell/Cartridge
G
RCA/GND cable
H
Owner’s Manual
Notes:
5 Do not connect the AC power plug before assembly has been
completed.
5 Read this manual carefully before using the unit and be sure
to store the manual in a safe place for future reference.
PLACEMENT
5 Do not place the unit in a location where it will be exposed to
direct sunlight or near a heating appliance.
5 Do not place the unit in a location where there is high
humidity or a lot of dust.
5 Cartridge may pick up slight sound pressures or vibrations
from the speakers coming along the oor or through the air
resulting in feedback. Find a location which is very stable and
vibration free.
5 The legs have functions for adjusting the height of the unit
itself. Adjust the legs to stabilize the main body horizontally.
Connections
* To prevent malfunction and equipment failure, always turn
down the volume, and turn o all the units before making any
connections.
1. Connect the RCA output jacks to the PHONO jack of
your amplier and connect the GND terminal to the
GND terminal of your amplier when you set the
[PHONO/LINE] switch to PHONO position.
You can also use a line input without connecting GND terminal by
setting the [PHONO/LINE] switch to LINE position.
2. Connect the power cord to a household AC outlet.
* If you need to turn o the power completely, rst turn o the
unit, then unplug the power cord from the power outlet. Refer to
“To completely turn o power to the unit, pull out the plug
from the outlet” (p. 2).
5
Page 6

Performing
Operation
1. Rotate the power/strobe knob clockwise to turn
on the power, the [SPEED] select buttons and the
strobe-illuminator will light up.
2. Place a record on the slip mat, when playing a
45rpm record with a large center hole, place the 45rpm adaptor on the center spindle.
3. Specify the [SPEED] select buttons to match the
record.
4. Remove the stylus protector from the cartridge,
release the arm clamper.
5. Set the lifter lever to the upper position.
6. Press the [START/STOP] button, the turntable
platter will start to rotate.
7. Move the tonearm over the desired groove.
8. Set the lifter lever to the lower position, the
tonearm will descend slowly onto the record and
play begins.
9. When play is nished, raise the lifter lever, move the
tonearm to the arm rest, secure the tonearm with
the arm clamper.
10. Press the [START/STOP] button to stop the
platter rotating, rotate the power/strobe knob
counterclockwise to turn o the power.
Suspend Play
Set the lifter lever to the upper position during play, the stylus tip
of the cartridge will be lifted from the record.
Detecting the Speed
You can check the speed by watching the strobe dots.
Power supply rpm Dots looks stopped
50 Hz
60 Hz
33 1/3 Upper line
45 Second line
33 1/3 Third line
45 Lowest line
Maintenance
5 Clean the stylus periodically with a soft brush to prevent the
accumulation of dust.
5 When the sound becomes distorted or noisy, check the stylus. If
worn out, replace it with a new one.
5 From time to time, the dust cover and turntable cabinet should
be wiped with a soft,dry cloth.
5 Any volatile materials such as alcohol, thinner, benzine, ect., may
remove the paint or damage the lustre and should not be used.
Specications
Roland TT-99: Turntable
Power Supply
Power
Consumption
Dimensions
Weight
Accessories
Displayed on the nameplate (* 1) of the rear side
of this unit
450 (W) x 350 (D) x 150 (H) mm
17-3/4 (W) x 13-13/16 (D) x 5-15/16 (H) inches
9.8 kg
21 lbs 10 oz
Owner’s manual, Headshell/Cartridge, 45 rpm
adaptor, Counterweight, Dust cover, Turntable
platter, Slipmat, RCA/GND cable
Target Light
This unit is provided with a target light for illuminating the stylus
tip during play.
Push the target light button, the target light will be raised into
position for illuminating the stylus tip. When not in use, keep the
target light lowered through depression.
Changing the Pitch
As long as the [PITCH ADJ.] slider is in center click position, the
turntable is operated witch quartz-controlled rated speed. The
pitch indicator will then be lit in green.
The speed can be increased or decreased by 10% via the [PITCH
ADJ.] slider. The pitch indicator will then be lit in red.
6
*1 Location of the nameplate
* This document explains the specications of the product at the
time that the document was issued. For the latest information,
refer to the Roland website.
Page 7

For the USA
FEDERAL COMMUNICATIONS COMMISSION
RADIO FREQUENCY INTERFERENCE STATEMENT
This equipment has been tested and found to comply with the limits for a Class B digital device, pursuant to Part 15 of the
FCC Rules. These limits are designed to provide reasonable protection against harmful interference in a residential
installation. This equipment generates, uses, and can radiate radio frequency energy and, if not installed and used in
accordance with the instructions, may cause harmful interference to radio communications. However, there is no guarantee
that interference will not occur in a particular installation. If this equipment does cause harmful interference to radio or
television reception, which can be determined by turning the equipment off and on, the user is encouraged to try to correct the
interference by one or more of the following measures:
– Reorient or relocate the receiving antenna.
– Increase the separation between the equipment and receiver.
– Connect the equipment into an outlet on a circuit different from that to which the receiver is connected.
– Consult the dealer or an experienced radio/TV technician for help.
This device complies with Part 15 of the FCC Rules. Operation is subject to the following two conditions:
(1) this device may not cause harmful interference, and
(2) this device must accept any interference received, including interference that may cause undesired operation.
This equipment requires shielded interface cables in order to meet FCC class B limit.
Any unauthorized changes or modifications not expressly approved by the party responsible for compliance could void the user’s
authority to operate the equipment.
For Canada
CAN ICES-3 (B)/NMB-3 (B)
For C.A. US (Proposition 65
WARNING
This product contains chemicals known to cause cancer, birth defects and other reproductive harm, including lead.
2036-1 Nakagawa, Hosoe-cho, Kita-ku, Hamamatsu, Shizuoka 431-1304, Japan
For Korea
)
Page 8

For EU Countries
Page 9

お問い合わせの窓口
製品に関するお問い合わせ先
ローランドお客様相談センター
電話受付時間: 月曜日~金曜日 10:00~17:00(弊社規定の休日を除く)
※IP電話からおかけになって繋がらない場合には、お手数ですが、電話番号の前に“0000”
(ゼロ4回)をつけてNTTの一般回線からおかけいただくか、携帯電話をご利用ください。
※上記窓口の名称、電話番号等は、予告なく変更することがありますのでご了承ください。
050-3101-2555
最新サポート情報
製品情報、イベント/キャンペーン情報、サポートに関する情報など
ローランド・ホームページ
ボス・ホームページ
http://www.roland.co.jp/
http://jp.boss.info/
'16. 04. 01 現在(Roland)
Page 10

 Loading...