

Page 1

Supplemental Manual
Read This First
Due to the additions of new ink types to those that can be used by the machine and due to changes to the test pattern used
to correct printing, there are a number of items that have been changed in the supplied instruction manuals. This document
explains these changes. Be sure to read this document before using the machine.
Changes to the “Setup Guide” (“First Step Guide” for the LEF-12)
Model Change
LEC-300/300A/330/540, LEJ-640 Installing the Ink Cartridges
LEF-12
Changes to the “User’s Manual” (“Master Guide” for the LEF-12)
Model Change
LEC-300
LEC-300A
LEC-330
LEC-540 Performing the Initial
LEJ-640
LEF-12
Correcting for Misalignment
in Bidirectional Printing More
Precisely
Adjustment (Correcting for
Misalignment in Bidirectional
Printing More Precisely)
STEP 5: Switch On/Make the initial settings
STEP 6: Installing the Ink Cartridges
Some of the procedures in
“Setup of Media ([MEDIA
SETTING] menu)”
Correcting for Misalignment
in Bidirectional Printing
(5-14) Switching the Ink Type
R3-140704
Page 2

Firmware versions covered by this document
• The machine comes with the following rmware version when it is purchased as a new product.
• If you are already using the machine, check the rmware version.
• For the method to follow in checking the rmware version, see the "User's Manual" (the "Master Guide" for the LEF-12).
Model Firmware version Roland VersaWorks version
LEC-300/300A/330/540 Ver. 6.30 or later
Ver. 5.22 or laterLEJ-640 Ver. 2.10 or later
LEF-12 Ver. 2.10 or later
Page 3

Contents
Contents ...................................................................................1
1. Changes to the Setup Guide (First Step Guide for the LEF-12) 3
Installing the Ink Cartridges .................................................................4
Selecting the Ink Mode ......................................................................4
Axing the Cartridge-slot Labels ............................................................7
Installing the Ink Cartridges. . . . . . . . . . . . . . . . . . . . . . . . . . . . . . . . . . . . . . . . . . . . . . . . . . . . . . . . . . . . . . . . . . 8
2. Changes to the User’s Manual (Master Guide for the LEF-12) 15
Correcting for Misalignment in Bidirectional Printing ....................................... 16
Performing the Initial Adjustment (Correcting for Misalignment in Bidirectional Printing More
Precisely) ...................................................................................16
Corrections Performed from the [MEDIA SETTING] Menu ....................................19
Correcting for Misalignment in Bidirectional Printing ........................................20
Switching the Ink Type .................................................................... 22
Restrictions on Switching Ink Type ..........................................................22
Method for Switching the Ink Type ..........................................................23
3. Supplemental 27
To Customers Who Upgraded the Firmware of the Machine ................................. 28
Precautions Regarding Saved Settings ......................................................28
About Handling of EUVS/EUV3 Ink ......................................................... 29
Company names and product names are trademarks or registered trademarks of their respective holders.
Copyright ©2013-14 Roland DG Corporation
No part of this publication may be reproduced in any form without the written permission of ROLAND DG CORPORATION.
1
Page 4

2
Page 5

1.
Changes to
the Setup Guide
(First Step Guide for the LEF-12)
Installing the Ink Cartridges .................................................................4
Selecting the Ink Mode ......................................................................4
Axing the Cartridge-slot Labels ............................................................7
Installing the Ink Cartridges. . . . . . . . . . . . . . . . . . . . . . . . . . . . . . . . . . . . . . . . . . . . . . . . . . . . . . . . . . . . . . . . . . 8
3
Page 6

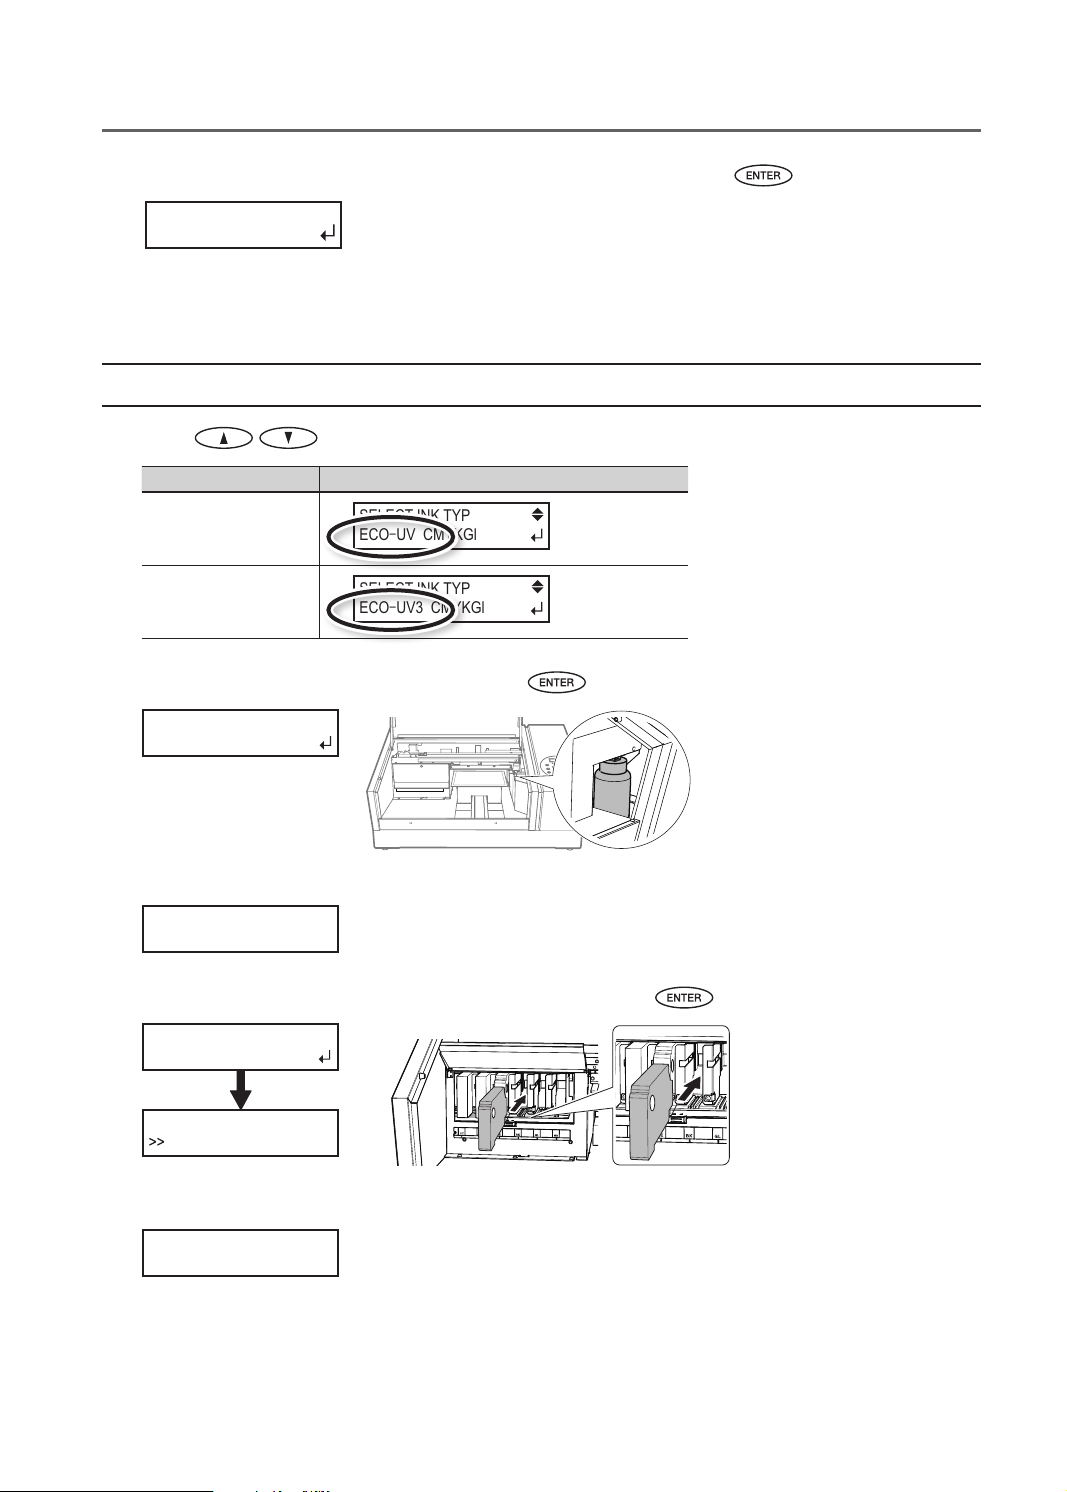
Installing the Ink Cartridges
SET INK MODE
GLOSS INK
Models : LEC-300/300A/330/540, LEJ-640
Articles in the Setup Guide * Pages in the First Step Guide for the LEF-12
Replace the information on the following articles of the table of contents with the information found in this document.
LEC-300
LEC-300A
LEC-330
LEC-540
LEJ-640
LEF-12
Selecting the Ink Mode
When you use the printer for the rst time, you need to select a proper combination (ink mode) according to the usage.
In the case of LEF-12, this operation is not required. Go on to “Installing the Ink Cartridges” (p. 8).
Ink mode Ink cartridges Ink cartridge type
“Installing the Ink Cartridges”
“STEP 5: Switch On/Make the initial settings”
“STEP 6: Installing the Ink Cartridges”
Gloss mode
White mode
Gloss/White mode 1 cartridge each of cyan, magenta, yellow, black, gloss, and white
EUVS ink mode
1 cartridge each of cyan, magenta, yellow, and black
2 cartridges of gloss
1 cartridge each of cyan, magenta, yellow, and black
2 cartridges of white
1 cartridge each of cyan, magenta, yellow, and black
2 cartridges of white
The EUV ink or EUV3 ink
The EUVS ink
Procedure
1. Close the front cover.
2. If the main power switch is on, then switch it o.
3. Select the ink mode with the procedure given below.
<Gloss mode>
3-1. Hold down and , switch on the main power switch.
3-2. When the message shown below appears on the display screen, release the operation-panel buttons.
4
1. Changes to the Setup Guide
Page 7

Installing the Ink Cartridges
SET INK MODE
WHITE INK
SET INK MODE
CMYKGlW
<White mode>
3-1. Hold down and , switch on the main power switch.
3-2. When the message shown below appears on the display screen, release the operation-panel buttons.
<Gloss/White mode>
3-1. Hold down and , switch on the main power switch.
3-2. When the message shown below appears on the display screen, release the operation-panel buttons.
Continued on the next page
1. Changes to the Setup Guide1. Changes to the Setup Guide
5
Page 8

Installing the Ink Cartridges
SET INK MODE
ECO-UVS WW
<EUVS ink mode>
3-1. Hold down and , switch on the main power switch.
3-2. When the message shown below appears on the display screen, release the operation-panel buttons.
Hold down until the message
appears.
Main power switch
Display screen
Press at the
same time
Press at the
same time
4. Press .
The sub power switches o automatically.
White modeGloss mode
Press at the
same time
Gloss/White mode EUVS ink mode
Press at the
same time
6
This completes selection of the ink mode. Go on to the next step, “Axing the Cartridge-slot Labels” (p. 7) .
Page 9

Installing the Ink Cartridges
Afxing the Cartridge-slot Labels
* In the case of LEF-12, this operation is not required. Go on to “Installing the Ink Cartridges” (p. 8)
Procedure
1. Open the ink cartridge cover.
Knob
Hold the knob
2. Ax the cartridge-slot labels (supplied parts) appropriate for the selected ink mode to the location shown
in the gure.
Ink cartridge cover
Ink mode Cartridge-slot label
Gloss mode
White mode
EUVS ink mode
Locations where the cartridge-slot
labels are axed
Cartridge-slot labels (supplied parts)
Back of the machine
Gloss/White mode
* When the gloss/white mode is selected, there is no need to ax the cartridge-slot labels.
1. Changes to the Setup Guide1. Changes to the Setup Guide
7
Page 10

Installing the Ink Cartridges
Installing the Ink Cartridges
When installing ink cartridges for the rst time, clean the print heads with the cleaning solution, and then ll with ink of each
color. This operation requires four SOL INK cleaning cartridges (two cartridges for LEF-12).
* Be sure to use fresh SOL INK cleaning cartridges and ink cartridges.
* Never under any circumstances use anything other than the specied type of ink or cleaning uid.
Be sure to follow the on-screen instructions for
insertion and removal.
Arrow
Slot number
- Insert and remove slowly, one at a time.
- Insert rmly, as far as it will go.
- Insert rmly until you hear a beep.
* This gure indicates LEC-330.
During cleaning, you need to insert and remove cartridges several times. The on-screen messages tell you when or which
cartridge to be inserted or removed. The SOL INK cleaning cartridges are not dierentiated by color.
Important
Insert each color ink cartridge into the slot labeled with the matching color. If you insert the wrong cartridges, the color inks
may be mixed. Be careful not to insert the wrong cartridges. Contact your authorized Roland DG Corp. dealer or us, if you
inserted the wrong cartridges and the color inks were mixed.
1. Make the initial settings
1.
Hold down and press the sub power switch.
2. Use to select the language you want.
8
Page 11

Installing the Ink Cartridges
SELECT INK TYPE
ECOUV CMYKGlW
SELECT INK TYPE
ECOUV CMYKGlW
SELECT INK TYPE
ECOUV3 CMYKGlW
3. Press .
4. Use to select the unit of measurement you want (for length).
LENGTH UNIT
mm
mm
5. Press .
6. Use to select the unit of measurement you want (for temperature).
TEMP. UNIT
C
C
7. Press .
2. Clean the print heads using the SOL INK cleaning cartridge
(LEC- 330/540,LEJ-640)
* In the case of LEF-12, go on to “2.Clean the print heads using the SOL INK cleaning cartridge (LEF-12)” (p. 11)
1. Check the selected ink mode.
Ink mode Ink mode display
Gloss mode
White mode
Gloss/White mode
EUVS ink mode ECO-UVS CMYKWW
MEMO
When an incorrect ink mode is selected, switch o the sub power once.
Again carry out the procedure “Selecting the Ink Mode” (p. 4).
Ink mode display
ECO-UV CMYKGlGl
ECO-UV3 CMYKGG
ECO-UV CMYKWW
ECO-UV3 CMYKWW
ECO-UV CMYKGlW
ECO-UV3 CMYKGlW
2. Press to select the ink type.
Ink type Display screen
EUV ink
EUV3 ink
MEMO
When the EUVS ink mode is selected, the ink type is xed to “ECO-UVS.” (It cannot be changed.)
1. Changes to the Setup Guide1. Changes to the Setup Guide
9
Page 12

Installing the Ink Cartridges
INSTALL
DRAIN BOTTLE
SET CL-LIQUID
1 2 3 4
FILLING INK...
>>
REMOVE CL-LIQUID
1 2 3 4
SET CL-LIQUID
5 6
FILLING INK...
>>>>
REMOVE CL-LIQUID
5 6
FILLING INK...
>>>>>>>>
3. Press .
4. Make sure the drain bottle is installed.
5. Press .
6. Insert the SOL INK cleaning cartridges into slots 1, 2, 3, and 4.
7. When this screen appears, pull out the SOL INK cleaning cartridges.
8. Insert the SOL INK cleaning cartridges you pulled out into slots 5 and 6.
9. When this screen appears, pull out the SOL INK cleaning cartridges.
10
Page 13
Installing the Ink Cartridges
CHECK
ẅDRAIN BOTTLE
SELECT INK TYPE
ECOUV CMYKGlW
SELECT INK TYPE
ECOUV3 CMYKGlW
INSTALL
DRAIN BOTTLE
1 2
SET CL-LIQUID
SET DUMMY CRT.
SLOT: 3,4
FILLING INK...
REMOVE CL-LIQUID
1 2
10. When this screen appears, make sure the drain bottle is installed, and press .
Cleaning is nished.
Go on to “3. Insert the ink cartridges for the respective colors.” (p. 12)
2.Clean the print heads using the SOL INK cleaning cartridge (LEF-12)
1.
Press to select the ink type.
Ink type Display screen
EUV ink
EUV3 ink
2. Make sure the drain bottle is installed, and press .
3. Insert cleaning cartridges into displayed slots numbers.
4. Insert dummy cartridges into displayed slots numbers, and press .
5. When this screen appears, pull out the cleaning cartridges.
1. Changes to the Setup Guide1. Changes to the Setup Guide
11
Page 14

Installing the Ink Cartridges
REMOVE DUMMY CRT.
SLOT: 3,4
SET CL-LIQUID
3 4
CHECK
ẅDRAIN BOTTLE
6.
When this screen appears, pull out the dummy cartridges
, and press .
7. When a new slot number is displayed, repeat the procedure from Steps 3to 6 using the cleaning cartridge
you just pulled out.
Repeat until the following menu is displayed.
8. Make sure the drain bottle is installed, and press .
Cleaning is nished.
3. Insert the ink cartridges for the respective colors.
1.
Before inserting ink cartridges, shake each of them 50 times (about 15 seconds).
The precipitation of the ingredients in the ink disables printing in normal color. To allow the ingredients to be mixed well,
shake each ink cartridge horizontally from side to side by 5 cm (2 inches) from each end of the ink cartridge.
12
Page 15

2. Insert the ink cartridge for each color.
SET CARTRIDGE
1 2 3 4 5 6
FILLING INK...
>>>>>>>>>>
LEC-330/540,LEJ-640
Installing the Ink Cartridges
Insert into the slot of the matching color.
* This gure indicates LEC-330.
Ink mode Ink cartridges
Gloss mode
White mode
EUVS ink mode
Gloss/White mode 1 cartridge each of cyan, magenta, yellow, black, gloss, and white
LEF-12
・1 cartridge each of cyan, magenta, yellow, black, gloss, and white
* Selection in ink mode cannot be performed.
1 cartridge each of cyan, magenta, yellow, and black
2 cartridges of gloss
1 cartridge each of cyan, magenta, yellow, and black
2 cartridges of white
3. Close the ink cartridge cover.
1. Changes to the Setup Guide1. Changes to the Setup Guide
13
Page 16

Installing the Ink Cartridges
CHECK
ẅDRAIN BOTTLE
SETUP SHEET
ROLL
4. Make sure the drain bottle is installed, and press .
When this screen appears, lling with ink is nished.
Be Sure to Keep the Ink Cartridge Cover Closed at All Times.
The ink cartridge cover prevents the ink cartridges from being exposed to direct sunlight or strong illumination. If the
ink cartridges are exposed to them, the ink inside the cartridges will become hardened, and it may cause the printer to
malfunction. Make sure that the ink cartridge cover is always closed except when absolutely necessary, such as when you are
replacing ink cartridges.
14
1. Changes to the Setup Guide
Page 17

2.
Changes to
the User’s Manual
(Master Guide for the LEF-12)
Correcting for Misalignment in Bidirectional Printing ....................................... 16
Performing the Initial Adjustment (Correcting for Misalignment in Bidirectional Printing More
Precisely) ...................................................................................16
Corrections Performed from the [MEDIA SETTING] Menu ....................................19
Correcting for Misalignment in Bidirectional Printing ........................................20
Switching the Ink Type .................................................................... 22
Restrictions on Switching Ink Type ..........................................................22
Method for Switching the Ink Type ..........................................................23
15
Page 18
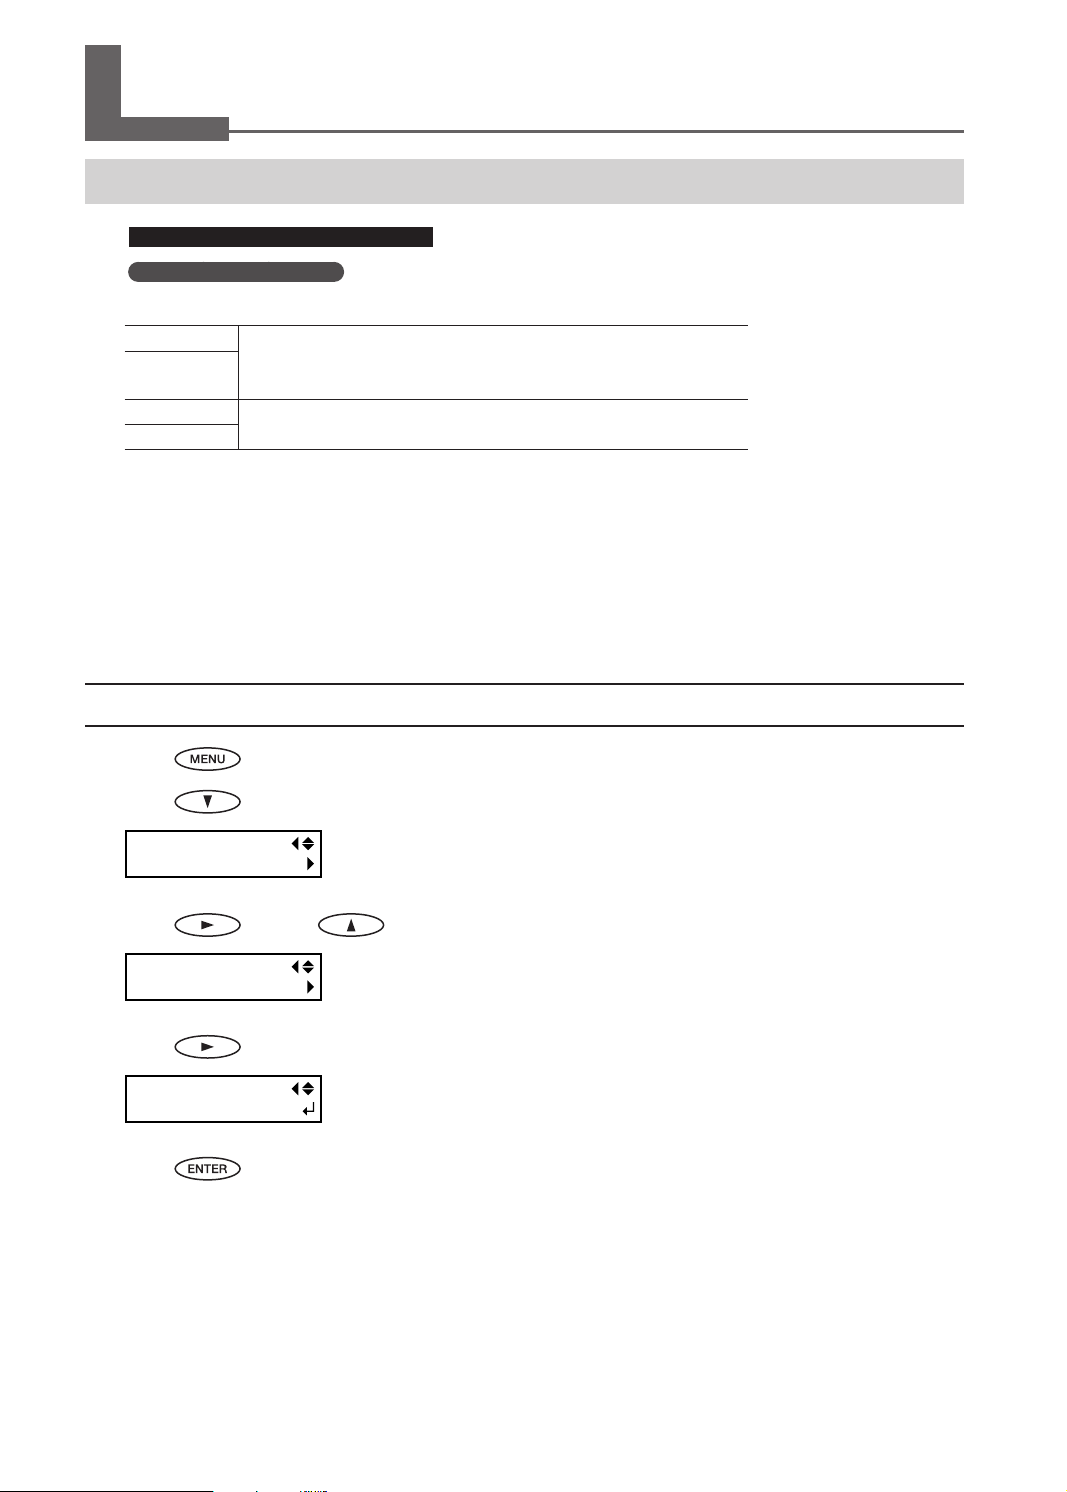
Correcting for Misalignment in Bidirectional Printing
Performing the Initial Adjustment (Correcting for Misalignment in Bidirectional Printing More Precisely)
Models : LEC-300/300A/330/540, LEJ-640
Articles in the User’s Manual
* Replace the information on the following articles of the table of contents with the information found in this document.
LEC-300
LEC-300A
LEC-330
LEC-540
LEJ-640
Perform the initial adjustment of this machine. This adjustment is necessary in the following cases.
• When using this machine for the rst time
• When changing the media to use
• When further correction is required to improve printing, such as when simple correction is performed for misalignment in
bidirectional printing (”Correcting for Misalignment in Bidirectional Printing” (p. 20)).
If you will change the print head height, do so before performing this adjustment.
" Included User’s Manual “Adjusting Head Height to Match Media Thickness”
“Correcting for Misalignment in Bidirectional Printing More Precisely”
“Performing the Initial Adjustment (Correcting for Misalignment in Bidirectional
Printing More Precisely)”
1. Output a test pattern.
1.
Press .
2. Press several times to display the gure on the below.
MENU
ADJUST BI-DIR
3. Press and then to display the gure on the below.
ADJUST BI-DIR
DETAIL SETTING
4. Press to display the gure on the below.
DETAIL SETING
TEST PRINT
5. Press .
A test pattern is output.
16
2. Changes to the User’s Manual
Page 19

Correcting for Misalignment in Bidirectional Printing
LEC-300/300A/330/540
6. When printing ends, press to display the gure on the below.
DETAIL SETTING
SETTING NO.1
7. Press .
Go to ”2. Enter the adjustment value.”
LEJ-640
6. When printing ends, press and then .
7. Remove the front cover 2.
8. Press and feed the media forward to a position where you can clearly see the condition of the test
print.
This operation is not necessary when using roll media or sheet media. Proceed to step 9.
9. Repeat steps 1 to 4 until the screen shown on the left appears.
DETAIL SETING
TEST PRINT
10. Press to display the gure on the below.
DETAIL SETTING
SETTING NO.1
11. Press .
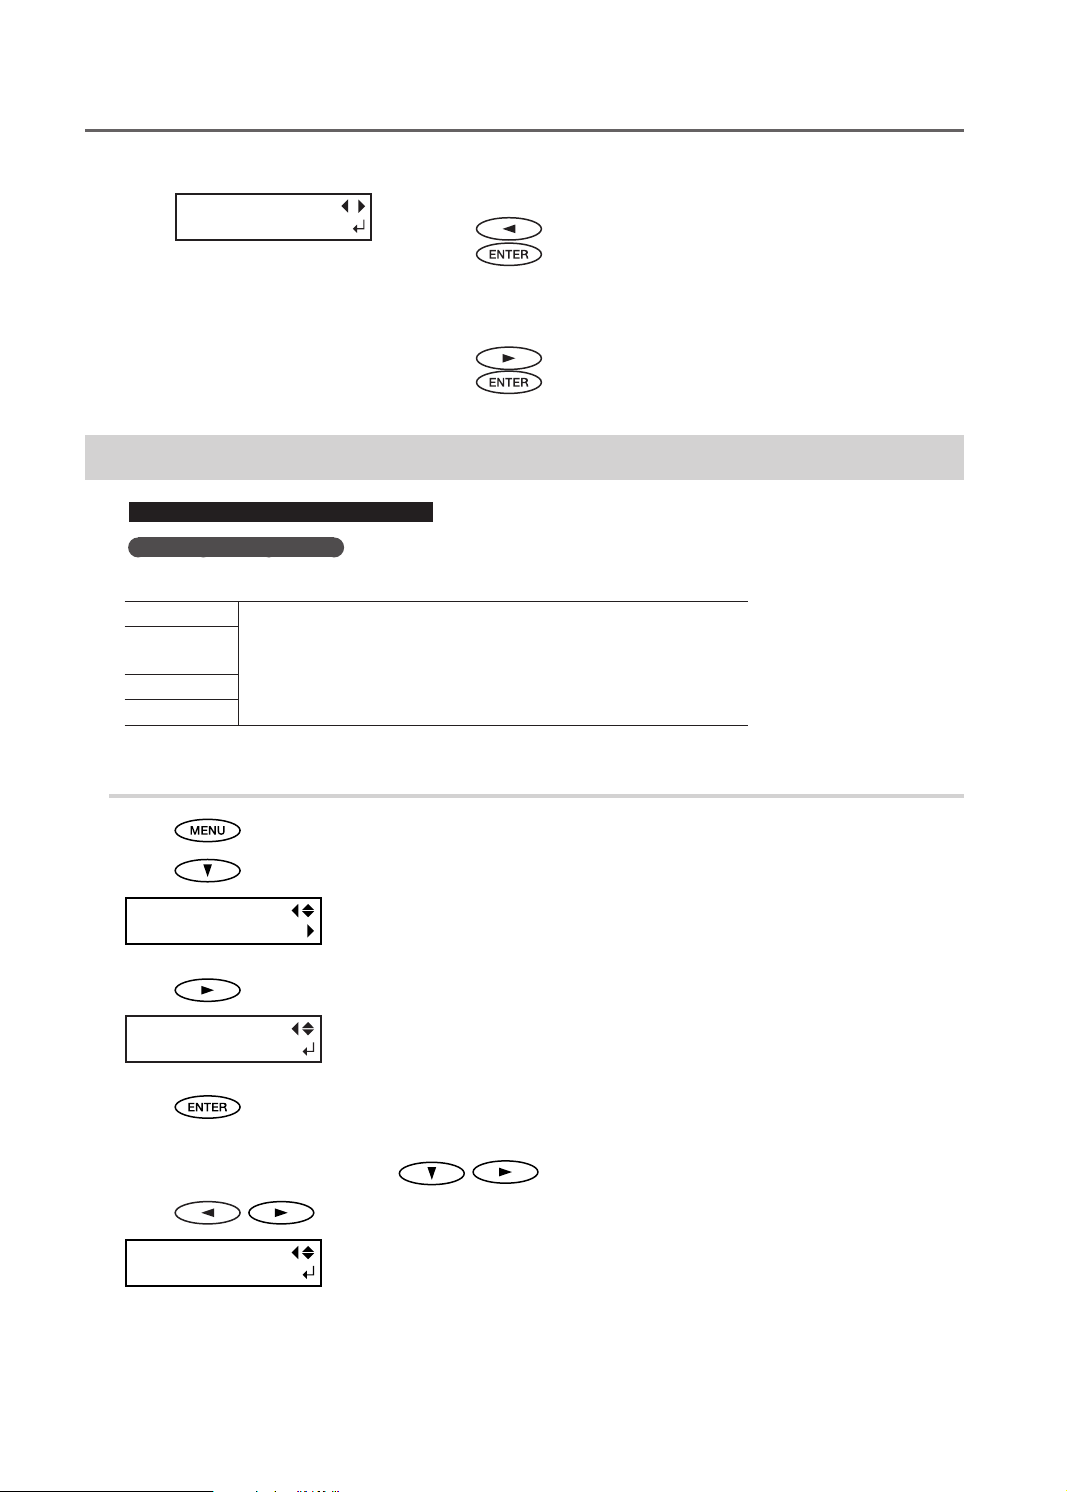
2. Enter the adjustment value.
1.
Press to select one from H1 to H6 (from H1 to H3 for the LEC-300/300A)
H1 H2 H3
000
H4 H5 H6
00 0
2. Changes to the User’s Manual2. Changes to the User’s Manual
17
Page 20

Correcting for Misalignment in Bidirectional Printing
2. Press to decide a correction value for the selected item from H1 to H6 (from H1 to H3 for
the LEC-300/300A).
To decide a Correction Value
Choose the value that produces the least misalignment of 2 lines. When wavering between two numbers, select half value.
H1
NO.1
If the Printing-test Results Are Dicult to Interpret
Examine the results from dierent angles in a well-lighted location. Take advantage of reected light to enable
visual checking.
If you cannot see "H5" or "H6" (“H3”) (such as when using white media with no shine)
You may not be able to see “H5” or “H6” (“H3” for the LEC-300/300A) when using certain media, such as white
media with no luster. In this case, set “H5” and “H6” (“H3” for the LEC-300/300A) to the same value as “H4” (“H2”
for the LEC-300/300A).
3. Press .
This completes the conguration of [SETTING NO.1].
H3
H2
H1
NO.3
H6
H5
H4
H3
H2
H1
NO.2
H6
H5
H4
H3
H2
H1
NO.1
Choose the value that produces the least misalignment.
= Current correction value
4. Press .
5. In the same manner as performed for [SETTING NO.1], repeat steps 1 to 4 to set the correction values for
[SETTING NO.2] to [SETTING NO.8].
LEJ-640
After you have congured up to [SETTING NO.8], attach front cover 2. If you are using rigid media, press
back the media to the appropriate position.
and pull
6. Press in this order to go back to the original screen.
18
Page 21

Correcting for Misalignment in Bidirectional Printing
Corrections Performed from the [MEDIA SETTING] Menu
Models : LEC-540, LEJ-640
Articles in the User’s Manual
* This section only discusses the procedure for setting [ADJUST BI-DIR] on the [MEDIA SETTING] menu. For other setting
items, follow the instructions in the User’s Manual.
LEC-540
LEJ-640
Procedure 4. “Performing the correction for misalignment in bidirectional printing” in
“Setup of Media ([MEDIA SETTING] menu)”
Procedure 3. “Performing the correction for misalignment in bidirectional printing” in
“Setup of Media ([MEDIA SETTING] menu)”
Performing the correction for misalignment in bidirectional printing
This machine prints by the bidirectional mode (in which the print heads perform printing during
both their outbound pass and return pass). This printing method is called "Bidirectional Printing."
This method oers the advantage of being able to shorten output times, but subtle misalignment
occurs during the outbound and return passes. The procedure to correct this and eliminate
misalignment is "Bidirectional Correction."
ADJUST BI-DIR
[SET] NEXT
INPUT
ADJ. VALUES
ADJUST BI-DIR
1 : 0 2 : 0
Press to select [SET].
Press
The test pattern of bidirectional correction is output.
to enable the setting.
When the left gure is displayed, press .
Press to select [1] or [2].
Use
Select a correction value for “Simple No.1” in 1 and a correction value for
“Simple No.2” in 2.
to set the correction value.
Press to enable the setting.
To decide a Correction Value
Choose the value that produces the least misalignment of 2 lines.
When wavering between two numbers, select half value.
Simple No.2
Simple No.1
The least misalignment
Current correction value
Current correction value
2. Changes to the User’s Manual2. Changes to the User’s Manual
19
Page 22
Correcting for Misalignment in Bidirectional Printing
MENU
ADJUST BI-DIR
ADJUST BI-DIR
TEST PRINT
REDO ADJ. ?
YES [DONE]
[To conrm again / adjust again]
Press
Press
The test pattern of bidirectional correction is output again. Go back to
the procedure
[To go to the next after correction is completed]
Press
Press
to select [YES].
to enable the setting.
and set again.
to select [DONE].
to enable the setting.
Correcting for Misalignment in Bidirectional Printing
Models : LEC-300/300A/330/540, LEJ-640
Articles in the User’s Manual
* Replace the information on the following articles of the table of contents with the information found in this document.
LEC-300
LEC-300A
LEC-330
LEC-540
LEJ-640
Procedure
“Correcting for Misalignment in Bidirectional Printing”
1. Press .
2. Press several times to display the gure on the below.
3. Press .
4. Press .
A test pattern is printed.
5. When printing is completed, press in this order.
6. Press to select 1 or 2.
SIMPLE SETTING
1: 0
2: 0
20
Page 23

Correcting for Misalignment in Bidirectional Printing
7. Press to select a correction value.
Select a correction value for “Simple No.1” in 1 and a correction value for “Simple No.2” in 2.
To decide a Correction Value
Choose the value that produces the least misalignment of 2 lines.
When wavering between two numbers, select half value.
Simple No.2
Simple No.1
Current correction value
The least misalignment
Current correction value
8. Press to enable the setting.
9. Press in this order to go back to the original screen.
Description
This machine prints by the bidirectional mode (in which the print heads perform printing during both their outbound pass
and return pass). This printing method is called "Bidirectional Printing." This method oers the advantage of being able to
shorten output times, but subtle misalignment occurs during the outbound and return passes. The procedure to correct this
and eliminate misalignment is "Bidirectional Correction." This misalignment varies according to the print-head height and the
thickness of the media, so we recommend performing correction to match the media you're using.
LEC-300/300A/330/540
This settings also serves to correct for misalignment of the printing and cutting positions. In such cases, check or adjust this
setting.
" “Correcting Misalignment of the Printing and Cutting Positions,” and “Correcting Misalignment for Printing and Cutting
When Using Crop Marks” on included User’s Manul.
2. Changes to the User’s Manual2. Changes to the User’s Manual
21
Page 24

Switching the Ink Type
Models : LEC-300/300A/330/540, LEJ-640
Articles in the User’s Manual * Master Guide for the LEF-12
* Replace the information on the following articles of the table of contents with the information found in this document.
LEC-300
(No corresponding page; new information added)
LEC-300A
LEC-330
LEC-540
LEJ-640
LEF-12
(No corresponding page; new information added)
The ink types can be switched between EUV ink and EUV3 ink on this machine.
To switch the ink type, open the [PUMP UP] menu and change the ink type setting (p. 24).
INK CONTROL
PUMP UP
“(5-14) Switching the Ink Type”
Restrictions on Switching Ink Type
The available ink types are shown below.
Available ink types Switching the ink type Switching the ink mode (p. 4)
EUVfgEUV3
EUVfgEUVS
EUV3fgEUVS
However, there are the restrictions given below:
• Once ink is lled, the ink mode cannot be changed (
• If the machine which supports the EUVS ink comes to support the EUV3 ink by upgrading the rmware, switching of
the ink type between the EUV ink and EUVS ink, which was available before the upgrade, becomes unavailable. Replace
“Restrictions on Switching Ink Type” in User’s Manual, which was supplied with the machine, with those given in this page.
OK
The ink type cannot be
switched.
The ink type cannot be
switched.
p. 4). Therefore, the color combination cannot be changed either.
The ink type cannot be switched.
22
2. Changes to the User’s Manual
Page 25

Switching the Ink Type
MENU
SUB MENU
SUB MENU
INK CONTROL
Method for Switching the Ink Type
1. Draining Ink Remaining Inside the Unit
Important
Insert each color ink cartridge into the slot labeled with the matching color. If you insert the wrong cartridges, the color inks
may be mixed. Be careful not to insert the wrong cartridges. Contact your authorized Roland DG Corp. dealer or us, if you
inserted the wrong cartridges and the color inks were mixed.
1. Press .
2. Press several times until the screen shown below appears.
3. Press .
4. Press several times until the screen shown below appears.
5. Press in this order until the screen shown below appears.
INK CONTROL
PUMP UP
6. Press .
7. Thereafter, follow the on-screen instructions to carry out the operations.
After cleaning has nished, the sub power is automatically switched o.
memo
The error message “CANCELED FOR MOTOR PROTECTION” may display to prevent damage to the machine due to the
overheating of pump motor.
In this case, allow the machine to stand for approximately 10 minutes before resuming operation.
Press any key other than the sub power switch to cancel the error message.
2. Changes to the User’s Manual2. Changes to the User’s Manual
23
Page 26

Switching the Ink Type
SELECT INK TYPE
ECOUV CMYKGlW
SELECT INK TYPE
ECOUV3 CMYKGlW
2. Fill with ink
1.
Press the sub power button.
2. Select the ink type.
<When switching to EUV ink>
2-1. Press to select “ECO-UV.”
2-2. Press .
<When switching to EUV3 ink>
2-1. Press to select “ECO-UV3”.
2-2. Press .
3. Thereafter, follow the on-screen instructions to carry out the operations.
After nishing the operation, close the ink cartridge cover.
WARNING
Never place discharged uid and ink near open ame.
Doing so may cause re.
CAUTION
To store discharged uid temporarily, keep it in the provided drain bottle or in a durable container such as a metal can
or polyethylene tank, and close the cap tightly.
Any spillage or vapor leakage may cause re, odor, physical distress.
Store discharged uid in a location not exposed to direct sunlight.
When temporarily storing discharged uid in the included drain bottle, keep the drain bottle out of direct sunlight. Otherwise
the discharged uid may harden, making the drain bottle unusable.
Dispose of discharged uid properly, in accordance with the laws in effect in your
locale.
Discharged uid is ammable and contains toxic ingredients. Never attempt to incinerate discharged uid or discard it with
ordinary trash. Also, do not dispose of it in sewer systems, rivers, or streams. Doing so may have an adverse impact on the
environment.
24
Page 27

Switching the Ink Type
Important When you use VersaWorks
Be sure to perform the following operation after lling with ink. Otherwise, you cannot use VersaWorks.
Procedure
1. From the [Start] menu, click [All programs (or Programs) ] - [Roland VersaWorks] - [Initialize Application].
2. Click [ Yes ] when a conrmation message for initialization of the application appears.
3. Click [ OK ] when a completion message for initialization of the application appears.
4. Start VersaWorks.
The [ Printer Settings ] window is displayed. This is because the connection with the printer is initialized by performing
Initialize Application.
5. Make the settings of the printer.
• “Printer Connection and Settings” in ”Roland VersaWorks Quick Start Guide”
• ”Making the Settings for Roland@NET” in ”Roland VersaWorks Quick Start Guide”
MEMO
• When you initialize the application, the settings of Roland@NET are initialized as well. Please make the settings again.
2. Changes to the User’s Manual2. Changes to the User’s Manual
25
Page 28

26
Page 29

3. Supplemental
To Customers Who Upgraded the Firmware of the Machine ................................. 28
Precautions Regarding Saved Settings ......................................................28
About Handling of EUVS/EUV3 Ink ......................................................... 29
27
Page 30

To Customers Who Upgraded the Firmware of the Machine
Precautions Regarding Saved Settings
Model
LEC-300/300A/330/540
LEJ-640
LEF-12
If you upgrade the rmware of your machine to the above versions or higher, the bidirectional printing adjustment
specications will be changed.
Therefore, you have to exercise caution when using the [MEDIA SETTING] and [PRESET ] menus, which can be used to save
settings related to bidirectional printing as preset patterns. If you continue to use a preset pattern that was set prior to the
version upgrade, defects such as print position misalignment may occur.
We ask that you recongure the settings in the following menus and save a new preset pattern before printing.
Menu Setting item
[MEDIA SETTING]
[PRESET]
* If you have purchased a new machine, ignore this section.
Firmware version
Ver. 6.30 or later
Ver. 2.10 or later
Ver. 2.10 or later
“ADJUST BI-DIR”
“ADJUST BI-DIR SIMPLE SETTING”
“ADJUST BI-DIR DETAIL SETTING”
28
Page 31

About Handling of EUVS/EUV3 Ink
Handling of the EUVS ink and EUV3 ink are the same as that of the EUV ink. Please read ”Setup Guide” and ”User’s Manual.”
3. Supplemental3. Supplemental
29
Page 32

Page 33

Page 34

 Loading...