

Owner’s Manual
° Practice Songs
˙
Sound a metronome
You can sound a metronome.
˙
Practice along with the built-in songs
This piano contains numerous built-in songs.
For the song titles, refer to “Internal Song List” at the end of this manual.
° Play the Piano
˙
Play various sounds
This piano contains a wide variety of tones (sounds). You can freely select and perform using these
tones.
For a list of the sounds, refer to “Tone List” at the end of this manual.
˙
Play two layered tones (Dual Play)
You can layer two tones on a single key.
˙
Play dierent tones with your left and right hands (Split Play)
You can divide the keyboard into left and right zones, and select a dierent tone for each zone.
˙
Save your performance settings (Registration)
You can save tone settings and settings for Dual Play or Split Play, and recall them easily.
page
8
page
9
page
page
page
page
6
7
7
14
˙
Recording the Song You’re Practicing
You can record your own playing.
page
10
° Adjust Your Piano
˙
Adjust the keyboard touch
You can adjust the touch sensitivity of the keyboard to match your own playing style.
˙
Match the pitch to other instruments
When playing together with other instruments, you can match the piano’s reference pitch to that of the
other instruments (Master Tuning).
˙
Create your own piano (Piano Designer)
You can customize the sound to your own taste by adjusting the sonic elements of the grand piano
sound.
Provision of Bluetooth functionality
Please be aware that depending on the country in which you purchased the piano, Bluetooth functionality might not be included.
page
page
page
6
22
13
If Bluetooth functionality is included
The Bluetooth logo appears
when you turn on the power.
Before using this unit, carefully read “USING THE UNIT SAFELY” and “IMPORTANT NOTES” (leaet “USING THE UNIT SAFELY” and Owner’s Manual (p. 26)). After reading, keep the
document(s) including those sections where it will be available for immediate reference.
Copyright © 2017 ROLAND CORPORATION
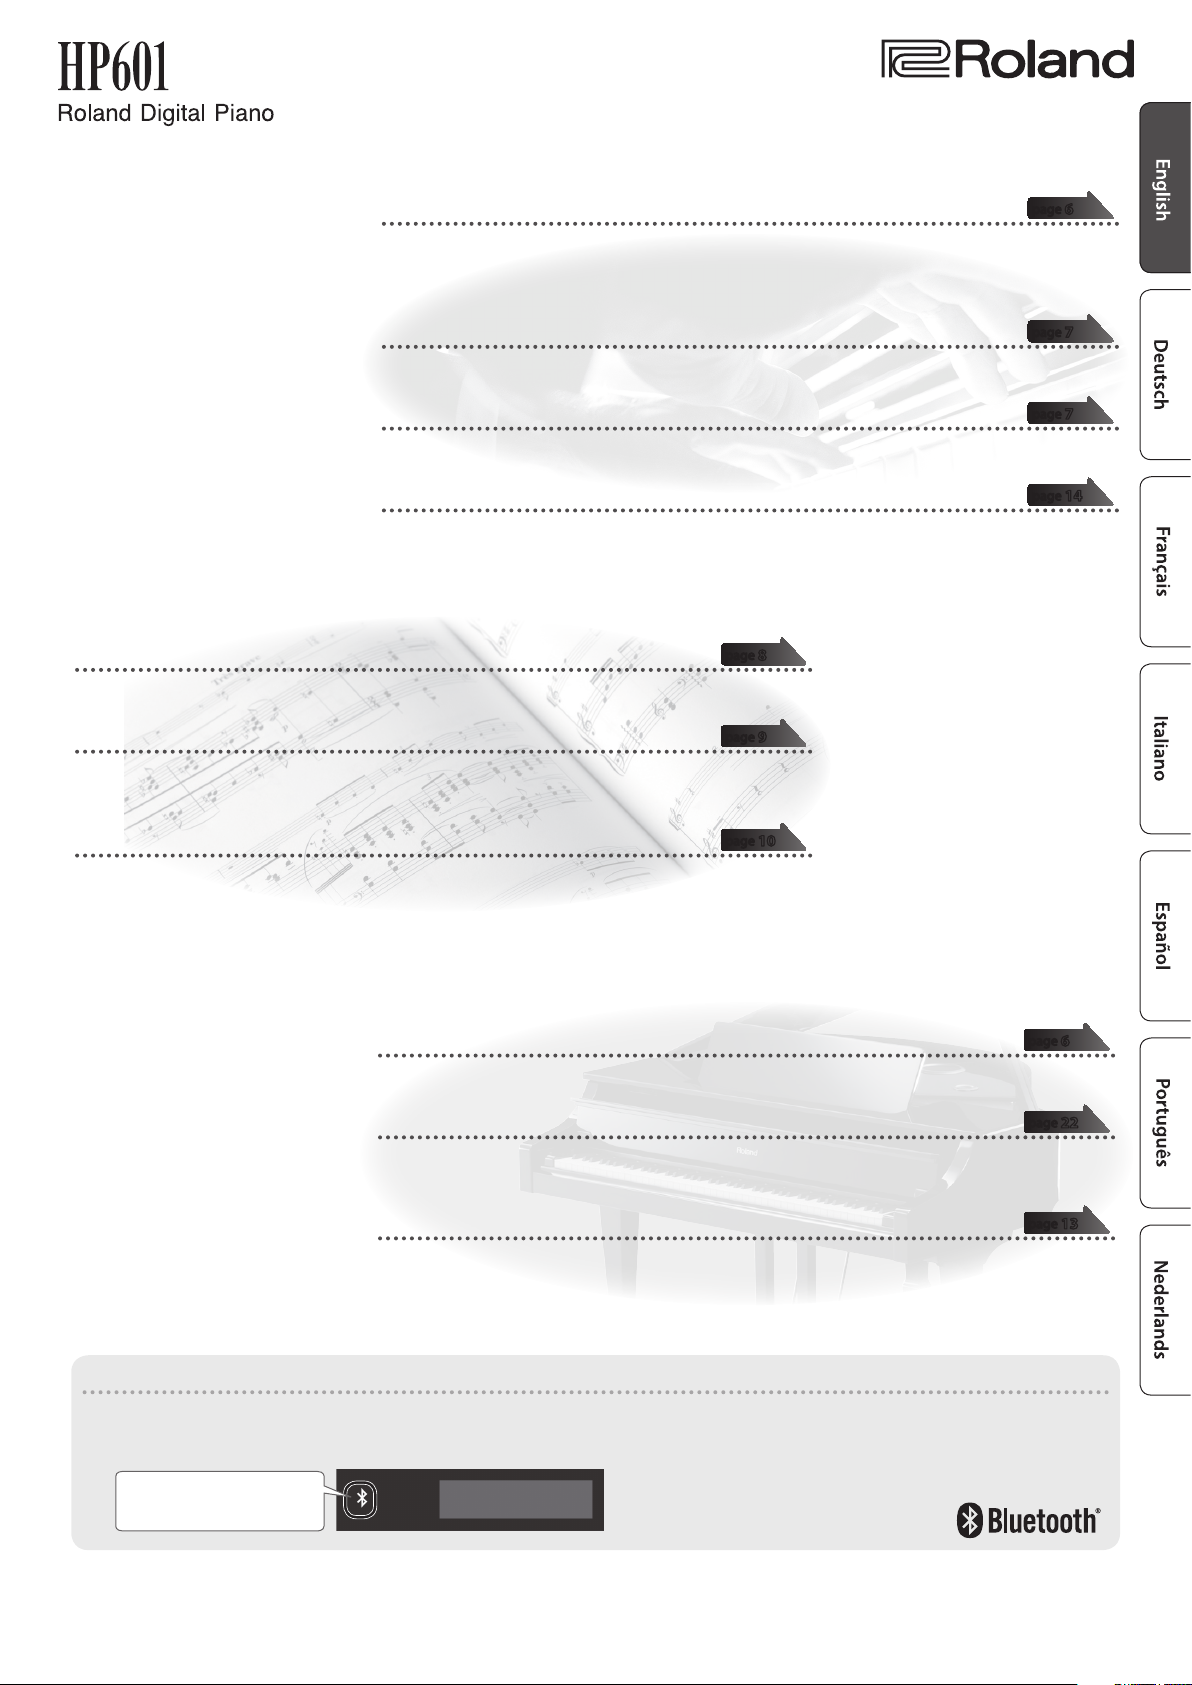
Read This First
°
CAUTION
5 You must provide adult supervision
and guidance to ensure that a child
does not climb on top of the piano
or hang on it. Such behavior could
make the piano fall over, injuring
the child.
5 Take care that foreign objects,
such as sheet music or other
papers, do not enter the piano
through openings in the
keyboard cover. Also, do not open
the cover while papers are placed
on the cover. Doing so might
make the papers impossible to
remove, causing malfunctions.
Basic Operations
On this piano, you can use the buttons of the operating panel to make various function settings.
The “
” “J,” “-” “+,” “
K
Upper line: shows the category to specify
(you can use the [K] [J] buttons to change
this)
Lower line: shows the value within the
category
(you can use the [-] [+] buttons to change
this)
Enter s
,” and “
” indications shown in the screen indicate the buttons used to operate the various functions.
u Exit
Screen display
Selecting the category to set
Use the [K] [J] buttons to select the category that you want to set.
Selecting values within a category
Use the [-] [+] buttons to change a value within the category.
“Enter” and “Exit”
Use the [s] (Enter) button to conrm the selected category or value.
Use the [
u] (Exit) button to go back to the previous operation.
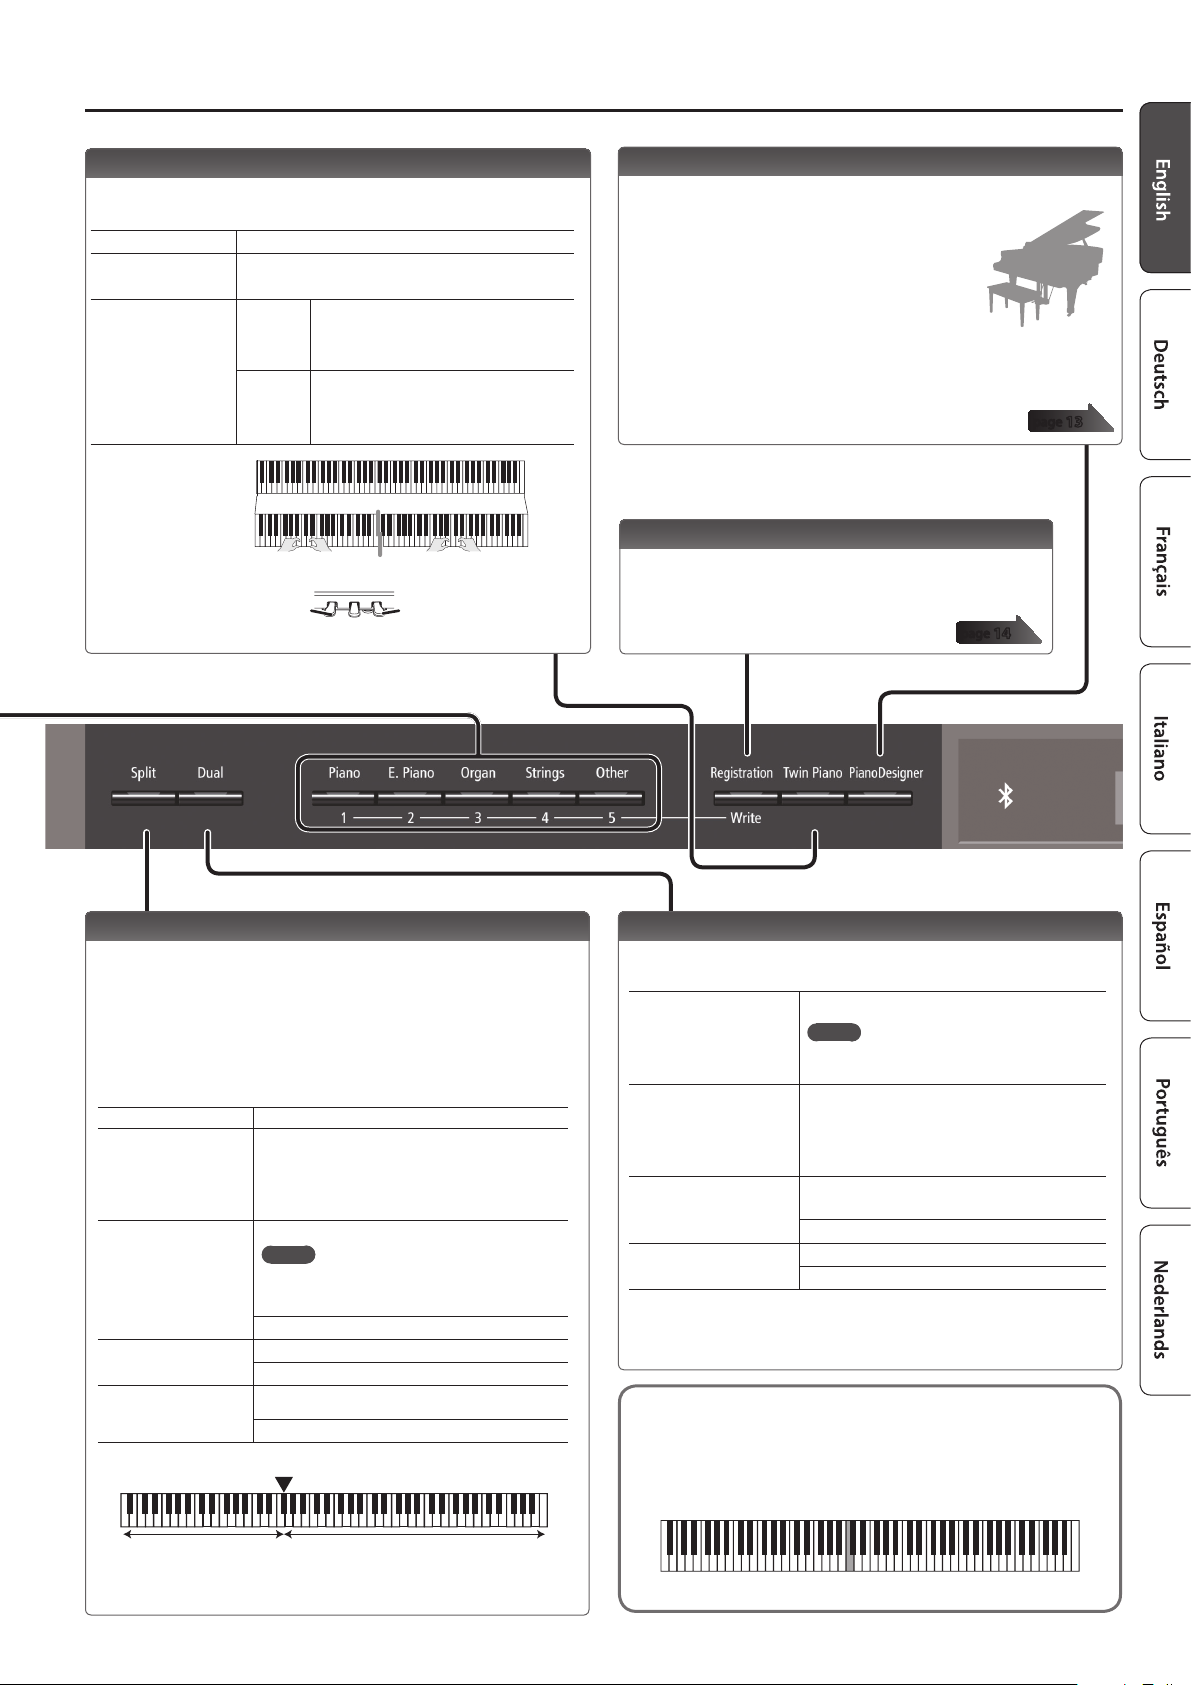
Using the keyboard cover to conceal the panel (Classic Position)
If you open the cover slowly, it stops at a position that hides the
operation panel. If you use the cover to hide the operation panel,
you’ll be able to concentrate on your playing as though you were
playing an acoustic piano. When you push the cover further inward
and up, it stops in a position where the operation panel is visible.
* When opening or closing the keyboard cover, take care not to pinch
your ngers between the moving part and the body of the unit.
Pay special attention to this when using the unit where children are
present.
Keyboard
cover
2
Contents
°
Read This First . . . . . . . . . . . . . . . . . . . . . . . . . . . . . . . . . . . . . . . . . . . . 2
Basic Operations . . . . . . . . . . . . . . . . . . . . . . . . . . . . . . . . . . . 2
CAUTION . . . . . . . . . . . . . . . . . . . . . . . . . . . . . . . . . . . . . . . . . . 2
Main Specications . . . . . . . . . . . . . . . . . . . . . . . . . . . . . . . . . . . . . . . 3
Easy Quick Guide . . . . . . . . . . . . . . . . . . . . . . . . . . . . . . . . . . . . . . . . . 4
Turning the Power On/O . . . . . . . . . . . . . . . . . . . . . . . . . . . 4
Selecting a Tone . . . . . . . . . . . . . . . . . . . . . . . . . . . . . . . . . . . 4
Using the Metronome . . . . . . . . . . . . . . . . . . . . . . . . . . . . . . 4
Selecting and Playing Songs . . . . . . . . . . . . . . . . . . . . . . . . . 4
Panel Descriptions . . . . . . . . . . . . . . . . . . . . . . . . . . . . . . . . . . . . . . . . 5
Operation Guide . . . . . . . . . . . . . . . . . . . . . . . . . . . . . . . . . . . . . . . . . . 6
Selecting a Tone . . . . . . . . . . . . . . . . . . . . . . . . . . . . . . . . . . . 6
Adjusting the Overall Volume . . . . . . . . . . . . . . . . . . . . . . . . 6
Adding Reverberation to the Sound (Ambience) . . . . . . . 6
Adjusting the Brightness of the Sound (Brilliance) . . . . . . 6
Making Various Settings (Function Mode) . . . . . . . . . . . . . 6
Transposing the Pitch (Transpose) . . . . . . . . . . . . . . . . . . . . 6
Changing the Playing Feel of the Keyboard (Key Touch) . 6
Dividing the Keyboard for Two People (Twin Piano) . . . . 7
Playing Dierent Tones with the Left and Right Hand
(Split Play) . . . . . . . . . . . . . . . . . . . . . . . . . . . . . . . . . . . . . . . . . 7
Creating Your Own Piano Tone (Piano Designer) . . . . . . . . 7
Saving Your Performance Settings (Registration) . . . . . . . 7
Layering Two Sounds (Dual Play) . . . . . . . . . . . . . . . . . . . . . 7
Display . . . . . . . . . . . . . . . . . . . . . . . . . . . . . . . . . . . . . . . . . . . 8
Using the Bluetooth Function . . . . . . . . . . . . . . . . . . . . . . . . 8
Selecting an Item/Editing a Value . . . . . . . . . . . . . . . . . . . . 8
Sounding the Metronome . . . . . . . . . . . . . . . . . . . . . . . . . . . 8
Selecting a song . . . . . . . . . . . . . . . . . . . . . . . . . . . . . . . . . . . 9
Playing Back or Recording . . . . . . . . . . . . . . . . . . . . . . . . . . . 9
Disabling the Buttons (Panel Lock) . . . . . . . . . . . . . . . . . . . 9
Selecting the Part(s) to Play (Part Mute) . . . . . . . . . . . . . . . 9
Advanced Operation . . . . . . . . . . . . . . . . . . . . . . . . . . . . . . . . . . . . . 10
Recording Your Performance . . . . . . . . . . . . . . . . . . . . . . . . . . . . . . 10
Recording . . . . . . . . . . . . . . . . . . . . . . . . . . . . . . . . . . . . . . . . . 10
Recording a New Song . . . . . . . . . . . . . . . . . . . . . . . . . . . . . . 10
Overdubbing a Recorded Performance . . . . . . . . . . . . . . . 10
Recording Audio to USB Flash Drive . . . . . . . . . . . . . . . . . . 11
Deleting a Saved Song (Delete Song) . . . . . . . . . . . . . . . . . 11
Copying a Saved Song (Copy Song) . . . . . . . . . . . . . . . . . . 12
Renaming a Song (Rename Song) . . . . . . . . . . . . . . . . . . . . 12
Creating Your Own Piano Tone (Piano Designer) . . . . . . . . . . . . . 13
Saving Your Performance Settings (Registration) . . . . . . . . . . . . 14
Recalling a Registration . . . . . . . . . . . . . . . . . . . . . . . . . . . . . 14
Saving Current Settings into a Registration . . . . . . . . . . . . 14
Saving a Registration Set (Registration Export) . . . . . . . . . 15
Loading a Saved Registration Set (Registration Import) . 15
Loading/Saving Piano Setups . . . . . . . . . . . . . . . . . . . . . . . . . . . . . 16
Saving Piano Settings (Piano Setup Export) . . . . . . . . . . . . 16
Loading Piano Settings (Piano Setup Import) . . . . . . . . . . 16
Convenient Functions . . . . . . . . . . . . . . . . . . . . . . . . . . . . . . . . . . . . 17
Initializing the Memory (Format Media) . . . . . . . . . . . . . . . 17
Restoring the Factory Settings (Factory Reset) . . . . . . . . . 17
Using the Bluetooth® Functionality . . . . . . . . . . . . . . . . . . . . . . . . 18
Here’s What You Can Do . . . . . . . . . . . . . . . . . . . . . . . . . . . . . 18
Listening to Music Through the Piano’s Speakers . . . . . . . 19
Making Initial Settings (Pairing) . . . . . . . . . . . . . . . . . . . . . . 19
Connecting an Already-Paired Mobile Device . . . . . . . . . . 19
Playing Back Audio . . . . . . . . . . . . . . . . . . . . . . . . . . . . . . . . . 19
Using the Piano with an App . . . . . . . . . . . . . . . . . . . . . . . . 20
Example Apps That Can Be Used with the Piano . . . . . . . . 20
Making Settings (Pairing) . . . . . . . . . . . . . . . . . . . . . . . . . . . 20
Using the Pedals to Turn Pages on a Music Score App . . . 21
Making Initial Settings (Pairing) . . . . . . . . . . . . . . . . . . . . . . 21
Connecting an Already-Paired Mobile Device . . . . . . . . . . 21
Turning Pages . . . . . . . . . . . . . . . . . . . . . . . . . . . . . . . . . . . . . 21
Various Settings . . . . . . . . . . . . . . . . . . . . . . . . . . . . . . . . . . . . . . . . . . 22
Making Various Settings (Function Mode) . . . . . . . . . . . . . . . . . . 22
Basic Operations in Function Mode . . . . . . . . . . . . . . . . . . . 22
Matching the Pitch with Other Instruments
(Master Tuning) . . . . . . . . . . . . . . . . . . . . . . . . . . . . . . . . . . . . 22
Changing the Tuning Method (Temperament) . . . . . . . . . 22
Specifying the Tonic Note (Temperament Key) . . . . . . . . . 22
Adjusting the Song (SMF) Volume (Song Volume SMF) . . 22
Adjusting the Song (Audio) Volume
(Song Volume Audio) . . . . . . . . . . . . . . . . . . . . . . . . . . . . . . . 22
Adjusting the Volume of an Audio Playback Device or
Bluetooth Audio (Input/Bluetooth Vol.) . . . . . . . . . . . . . . . 22
Specifying the Keyboard’s Tone When Playing Back a
Song (SMF Play Mode) . . . . . . . . . . . . . . . . . . . . . . . . . . . . . . 23
Selecting the Format for Recording (Recording Mode) . . 23
Changing How the Pedal Eects Are Applied
(Damper Pedal Part) . . . . . . . . . . . . . . . . . . . . . . . . . . . . . . . . 23
Changing How the Pedals Work (Center Pedal) . . . . . . . . . 23
Changing the Eect of the Pedal (Left Pedal) . . . . . . . . . . 23
Using a Pedal to Switch Registrations (Reg. Pedal Shift) . 23
Adjusting the Brightness of the Display
(Display Contrast) . . . . . . . . . . . . . . . . . . . . . . . . . . . . . . . . . . 23
Specifying a Maximum Volume (Volume Limit) . . . . . . . . 24
Outputting Sound from Both an External Speaker and
the Internal Speakers (Speaker Auto Mute) . . . . . . . . . . . . 24
Preventing Doubled Notes When Connected to a
Sequencer (Local Control) . . . . . . . . . . . . . . . . . . . . . . . . . . . 24
MIDI Transmit Channel Settings (MIDI Transmit Ch) . . . . . 24
Changing the Language Displayed in the Screen
(Language) . . . . . . . . . . . . . . . . . . . . . . . . . . . . . . . . . . . . . . . . 24
Making the Power Automatically Turn O After a Time
(Auto O) . . . . . . . . . . . . . . . . . . . . . . . . . . . . . . . . . . . . . . . . . 24
Saving Settings Automatically (Auto Memory Backup) . . 24
Connecting Your Equipment . . . . . . . . . . . . . . . . . . . . . . . . . . . . . . 25
USING THE UNIT SAFELY . . . . . . . . . . . . . . . . . . . . . . . . . . . . . . . . . . 26
IMPORTANT NOTES . . . . . . . . . . . . . . . . . . . . . . . . . . . . . . . . . . . . . . . 26
Troubleshooting . . . . . . . . . . . . . . . . . . . . . . . . . . . . . . . . . . . . . . . . . . 27
Error Messages . . . . . . . . . . . . . . . . . . . . . . . . . . . . . . . . . . . . . . . . . . . 29
Main Specications
HP601
Sound Generator
Keyboard
Bluetooth
Power Supply
Power Consumption
Dimensions
(including piano
stand)
Piano Sound: SuperNATURAL Piano
PHA-50 Keyboard: Wood and Plastic Hybrid Structure, with Escapement and
Ebony/Ivory Feel (88 keys)
Audio Bluetooth Ver 3.0 (Supports SCMS-T content protection)
MIDI, Turning
music sheet
AC Adaptor
5 W (4 W–22 W)
With music rest:
1,379 (W) x 430 (D) x 1,014 (H) mm
54-5/16 (W) x 16-15/16 (D) x 39-15/16 (H) inches
Bluetooth Ver 4.0
Roland HP601: Digital Piano
Weight
(including piano
stand)
Accessories
Options
* This document explains the specications of the product at the time that the document was
issued. For the latest information, refer to the Roland website.
HP601
50.0 kg
110 lbs 4 oz
Owner’s Manual, Leaet “USING THE UNIT SAFELY,” AC Adaptor, Power Cord,
Roland Classical Piano Masterpieces, Roland Piano Arrange Collections “Let’s
Enjoy Piano,” Headphone Hook
USB Flash Memory (*1)
*1: Use a commercially available USB ash drive or a USB ash drive sold by
Roland. However, we cannot guarantee that all commercially available USB
ash drives will work with this unit.
3

Easy Quick Guide
°
Turning the Power On/O
Turning the power on
1.
Press the [L] (power) button.
After a few seconds, you can play the keyboard to
produce sound.
* To protect the circuitry, there is a brief interval
after the power is turned on before the piano
starts operating.
2. Use the [Volume] buttons to adjust the volume.
Turning the Power O
1.
Long-press the [L] (power) button.
The power turns o.
Selecting a Tone
This piano lets you enjoy performing with a variety of piano
tones and other tones.
1 2
1. Press a tone button.
Select a tone group.
Button Explanation
[Piano] button Grand piano tones
[E. Piano] button Electric piano tones
[Organ] button Organ tones
[Strings] button
[Other] button
2. Use the [–] [+] buttons to select a tone.
MEMO
For more about the sounds, refer to “Tone List” at the end of this
manual.
The tones of string instruments such as
violins, as well as other instruments used
in orchestras.
Selects a variety of sounds such as bass
or accompaniment sounds.
page
Selecting and Playing Songs
You can perform along with a song.
Selecting a song
12 3
1.
Press the [Song] button.
Category
Tempo Time signature Measure
2. Use the [K] [J] buttons to select a category.
Category Explanation
USB Memory Songs saved on a USB ash drive
Internal Memory Songs saved in internal memory
Listening
Masterpieces
Easy Piano
Scales
Hanon The Virtuoso Pianist No.1–20
Beyer
Burgmüller 25 Études faciles et progressives Op.100
Czerny100
This piano’s
internal
songs
3. Use the [-] [+] buttons to select a song within the
category.
MEMO
For details on the internal songs, refer to “Internal Song List” at the
end of this manual.
Playing a song
6
Song name
Piano songs recommended for listening
Piano Masterpieces
Songs corresponding to the included
collection of scores, “Roland Classical
Piano Masterpieces.”
Famous popular songs and classical
compositions
Songs corresponding to the included
collection of scores, “Let’s Enjoy Piano.”
Scales in all keys
(major scales, minor scales)
Songs corresponding to the included
collection of scores, “Let’s Enjoy Piano.”
Vorschule im Klavierspiel Op.101 No.1–106
100 Übungsstücke Op.139
Using the Metronome
You can perform while hearing a metronome.
1 2
1. Press the [Metronome] button.
2. Press the [Slow] [Fast] buttons.
The metronome tempo changes.
4
page
1 2
1.
Press the [s] button.
The song plays.
2. Press the [s] button once again.
The song stops.
Song operations
Return to the beginning of the song
Play/stop
Rewind
Fast-forward
Play all songs in the selected
8
category (All Song Play)
Change the song tempo Press the [Slow] [Fast] buttons.
Press the [u] button.
Press the [s] button.
Press the [x] button.
Press the [y] button.
Hold down the [Song] button and
press the [s] button.
page
9
Panel Descriptions
↑これは使わないでOKだとおも
います。
°
[L] button
To turn the power on, press the [L]
button.
To turn the power o, long-press the [L]
button.
* Never disconnect the power cord while the screen
indicates “Don’t disconnect the power.”
* Before turning the piano on/o, always be sure to turn the volume down.
Even with the volume turned down, you might hear some sound when
switching the piano on/o. However, this is normal and does not indicate
a malfunction.
Concerning the Auto O function
The power to this unit will be turned o automatically after
a predetermined amount of time has passed since it was last
used for playing music, or its buttons or controls were operated
(Auto O function).
If you do not want the power to be turned o automatically,
disengage the “Auto O” function (p. 24).
5 Any settings that you are in the process of editing will be lost
when the power is turned o. If you have any settings that you
want to keep, you should save them beforehand.
5 To restore power, turn the power on again.
Front Panel
To operate the piano, use the buttons to select an
item shown in the screen.
page
6
Headphone Hook
Whenever you are not using the headphones, you can
hang them on the headphone hook.
* Don’t hang anything other than headphones on this hook, and don’t
apply excessive force to it. Doing so may damage the headphone hook.
Pedal
Adjusting the adjuster
Depending on the conditions of use or the environment in
which the piano is placed, the adjuster might move upward
over time, causing an abnormal sound to be heard when you
press the pedal. If this occurs, adjust the adjuster.
Adjustment method
Lower the adjuster located below
the pedal board, adjusting it so that
it contacts the oor. If the piano
is placed on carpet, lower the adjuster a little more so that it
pushes slightly against the oor.
Bottom Panel
Connect headphones or an audio player to these jacks (left side).
You can use a USB cable to connect the piano to a computer, or
connect a USB ash drive (rear).
page
25
Damper Pedal
Use this pedal to sustain the sound. While this pedal is held down, notes will be sustained for an
extended time even if you release your ngers from the keyboard.
This reproduces the following features of an acoustic piano’s damper pedal.
5 A change in feel as you press the pedal, initially light but becoming heavier as you continue
pressing
5 Richness and spaciousness added by other strings sympathetically resonating with the sound
of the notes you play
5 The distinctive decay added by “half-pedaling,” in which the core of the sound ends quickly
while leaving only a rich spaciousness and resonance
Sostenuto Pedal
The notes you are pressing when this pedal is depressed will be sustained.
Soft Pedal
This pedal is used to make the sound softer. Playing with the soft pedal depressed produces a
sound that is not as strong as when otherwise played with the equivalent strength. This is the
same function as the left pedal of a grand piano. The softness of the tone can be varied subtly by
the depth to which you press the pedal.
* When operating the pedal, take care not to pinch your ngers between the moving part and the
body of the unit. Pay special attention to this when using the unit where children are present.
5
Operation Guide
°
Selecting a Tone
In addition to piano sounds, the piano lets you enjoy
performing with many other sounds. There are ve groups of
tones; each tone button selects a group.
MEMO
For more about the sounds, refer to “Tone List” at the end of this manual.
Selecting a Tone
1. Press a tone button (e.g., [Piano]).
2. Use the [–] [+] buttons.
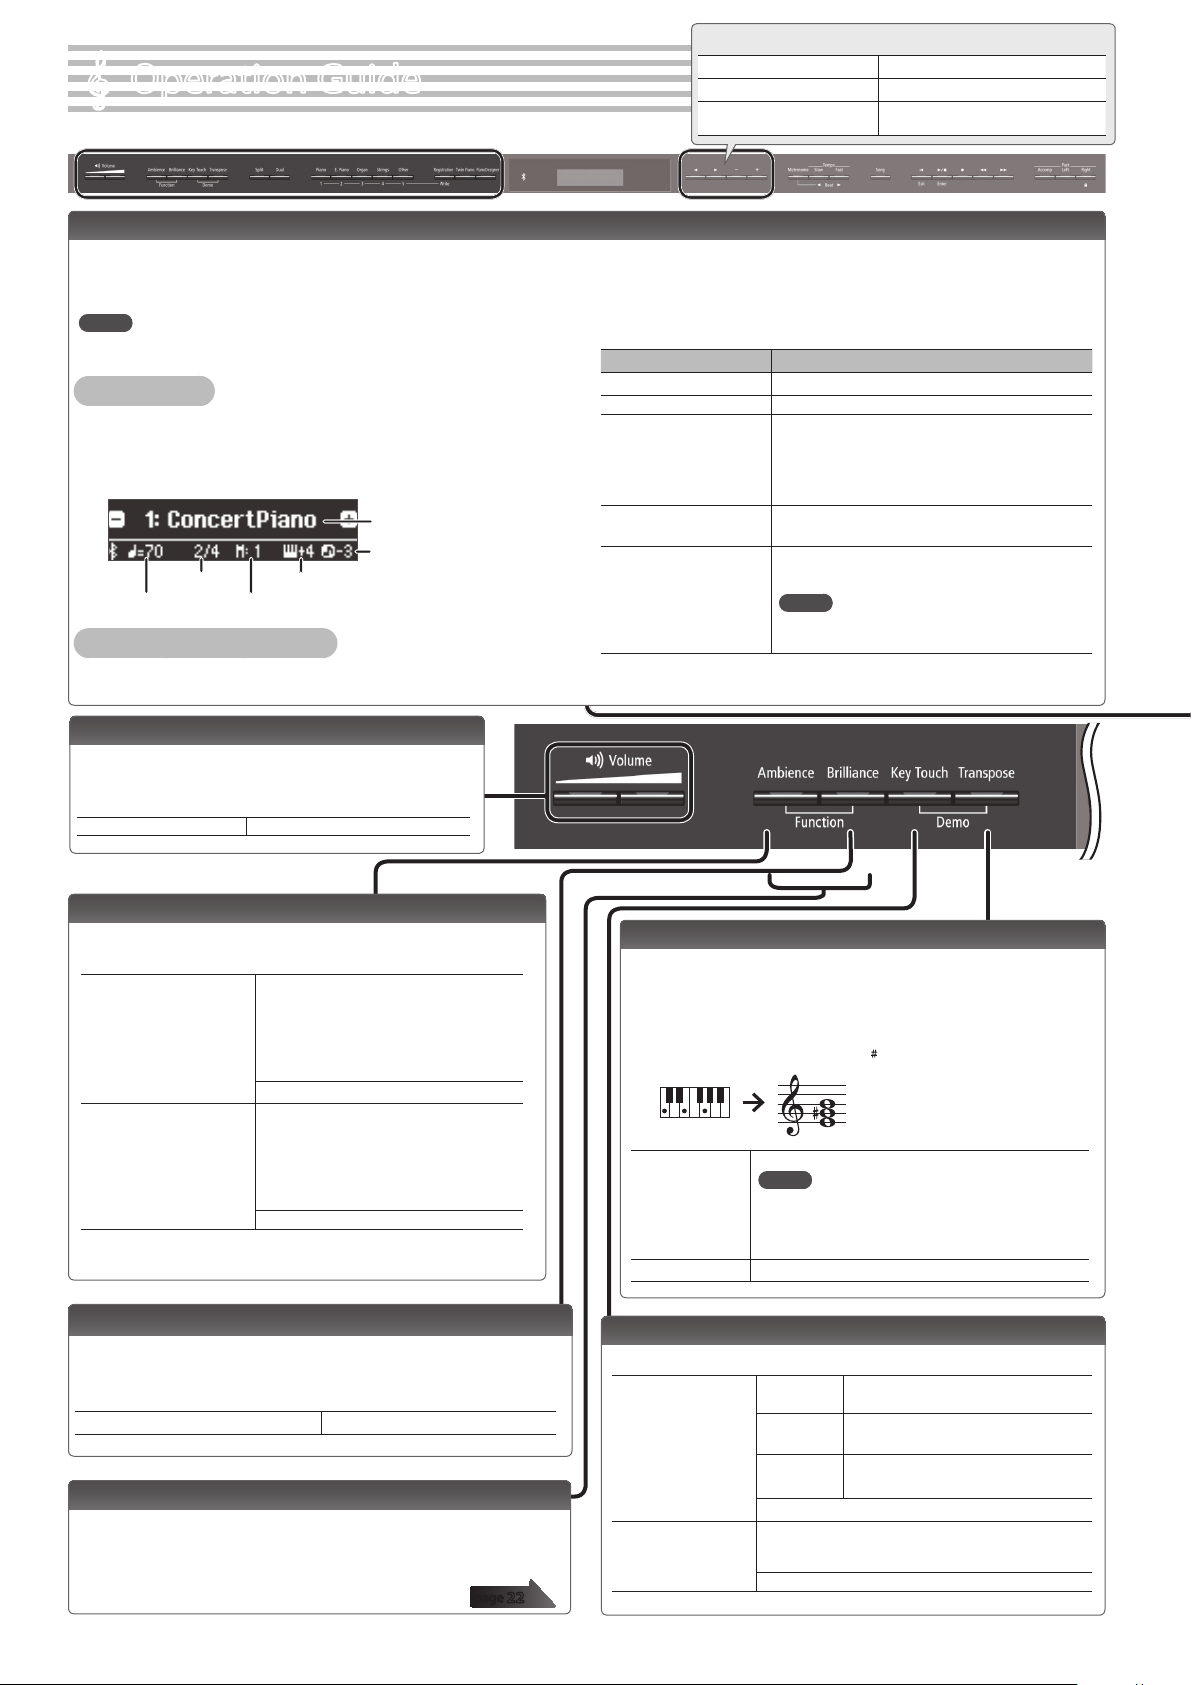
Viewing the display
Tone name
Song transposition
Time signature
Tempo
Auditioning the tones (Tone Demo)
1. Hold down the [Key Touch] button and press the [Transpose] button.
Keyboard transposition
Measure
Basic operations
Select a setting item
Edit the value of an item Use the [–] [+] buttons.
Return to the default value
Use the [K] [J] buttons.
Press the [–] [+] buttons
simultaneously.
2. Select a tone.
You can hear a tone demo in each tone group.
3. To end the tone demo, press the [u] (Exit) button.
Tone groups
Button Explanation
[Piano] button Grand piano tones
[E. Piano] button Electric piano tones
[Organ] button
[Strings] button
[Other] button
*1 Rotary is an eect which simulates the sound of rotating speakers. There is a
choice of two settings: Fast and Slow.
Organ tones
* If you’ve selected an organ sound that provides
a rotary eect (*1), such as a Combo Jz. Org or a
Ballad Organ, pressing the [Organ] button will
switch the speed of the rotary eect.
The tones of string instruments such as violins, as well
as other instruments used in orchestras.
Selects a variety of sounds such as bass or
accompaniment sounds.
MEMO
You can use the [K] [J] buttons to select sounds
of the next category.
Adjusting the Overall Volume
You can adjust the speaker volume when using
the internal speakers, or the headphone volume
when headphones are connected.
Adjusting the volume 0–100 (default value: 50)
Adding Reverberation to the Sound (Ambience)
The reverberation that is characteristic of a performance in
a concert hall can be added to the sound.
Higher values produce deeper ambience;
lower values produce shallower ambience.
Adjusting the reverberation
(Ambience)
Headphones 3D Ambience
(when using headphones)
* The reverberation eect is not applied to audio les.
* If you’re using headphones, the ambience
of the sound heard through headphones
can be adjusted only if the “Headphones
3D Ambience” function is “On.”
0–10 (default value: 2)
Applies an eect producing the impression
that the sound is emanating from the piano
itself, even when you’re using headphones.
* The Headphones 3D Ambience eect
applies only to piano sounds; it does not
apply to other sounds.
O, On (default value: On)
Transposing the Pitch (Transpose)
The keyboard or song can be transposed in semitone steps.
For example if a song is in the key of E major but you want
to play it using the ngering of the C major scale, you
would set the keyboard transpose setting to “4.”
If you play C E G0It will sound E G B
-6–0–5 (default value: 0)
MEMO
Kbd Transpose
Song Transpose -12–0–12 (default value: 0)
You can also change the keyboard transpose setting
by holding down the [Transpose] button and
pressing the note that will be the tonic (root note) of
the transposed key.
Adjusting the Brightness of the Sound (Brilliance)
You can adjust the brightness of the sound when you play the
keyboard or when you play back a song.
Higher values produce brighter sounds.
Adjusting the brightness of the sound -10–0–10 (default value: 0)
Making Various Settings (Function Mode)
You can make detailed settings for the piano.
1. Simultaneously press the [Ambience] button and [Brilliance] button.
2. Use the [K] [J] buttons to select the item that you want to set.
3. Use the [–] [+] buttons to edit the setting.
6
page
22
Changing the Playing Feel of the Keyboard (Key Touch)
You can change the playing feel (touch) of the keyboard.
Adjusting the key
touch
Hammer Response
Default value
(50)
1–100
Fixed (Fix)
Fix, 1–100 (default value: 50)
Adjusts the time from when you play the key until the
piano sound is heard. Higher values produce a greater
delay.
O, 1–10 (default value: 1)
This setting is closest to the key touch of
an acoustic piano.
Higher values make the keyboard feel
heavier.
Notes sound at a xed volume regardless
of your playing dynamics.
Operation Guide
Dividing the Keyboard for Two People (Twin Piano)
You can divide the keyboard into left and right areas so that
two people can play the same range of pitches.
Turning Twin Piano on Turn the [Twin Piano] button on.
Changing the Twin
Piano tone
Changing the way the
sound is heard (Mode)
Conventional
keyboard
Twin Piano
1. Press a tone button.
2. Use the [–] [+] buttons.
Pair
Individual
The damper pedal
for the left area
Notes of the right-hand region are heard
more loudly from the right speaker, and
notes of the left-hand region are heard
more loudly from the left speaker.
Notes of the right-hand region are heard
only from the right speaker, and notes of
the left-hand region are heard only from the
left speaker.
C4 C5 C6 C7 C8C3C2C1
C4 C5 C6C3C4 C5C3 C6
divide point
The damper pedal
for the right area
Creating Your Own Piano Tone (Piano Designer)
You can create your own piano tone by customizing the
elements of the grand piano sound to your
taste.
1. Press the [Piano Designer] button.
2. Use the [K] [J] buttons to select the item that
you want to edit.
3. Use the [–] [+] buttons to edit the value.
* Piano Designer can be used to customize the sound only for [Piano] button tones.
page
13
Saving Your Performance Settings (Registration)
You can save tone settings and performance
settings such as Dual Play or Split Play, and easily
recall them when you wish.
page
14
Playing Dierent Tones with the Left and Right Hand (Split Play)
You can play dierent tones in the areas at the left and right of
a specied key.
For example, you can use your left hand to play a bass tone
and use your right hand to play a piano tone.
This feature is called “Split Play,” and the point at which the
keyboard is divided is called the “Split Point.”
Turning Split on Turn the [Split] button on.
1. Use the [K] [J] buttons to select “right-hand tone”
Changing the right-hand
tone and left-hand tone
Split Point
Balance
Left Shift
or “left-hand tone.”
2. Press a tone button.
3. Use the [–] [+] buttons.
Changes the split point.
MEMO
You can also specify the split point by holding
down the [Split] button and pressing the key
where you want to split the keyboard.
B1–B6 (default value: F#3)
Changes the volume balance of Split Play.
9:1–9:9–1:9 (default value: 9:9)
Changes the pitch of the left-hand tone in units of
one octave.
-2–0–2 (default value: 0)
F#3
Layering Two Sounds (Dual Play)
You can play two tones simultaneously from a single key. This
function is called “Dual Play.”
Turn the [Dual] button on.
Turning Dual on
Changing tone 1 and
tone 2
Balance
Tone 2 Shift
* Depending on the combination of tones, the eect might not apply to tone 2,
causing the sound to appear dierently than usual.
Reading the note name (e.g., C4)
The alphabetical indication for settings such as Split Point
shows the name of the note.
For example, the indication “C4” means “the fourth ’C’ from
the left edge of the keyboard.”
MEMO
You can also use Dual Play by pressing two tone
buttons simultaneously.
1. Use the [K] [J] buttons to select “tone 1” or
“tone 2.”
2. Press a tone button.
3. Use the [–] [+] buttons.
Adjusts the volume balance (tone 1: tone 2) for
Dual Play.
9:1–9:9–1:9 (default value: 9:4)
Changes the pitch of tone 2 in units of one octave.
-2–0–2 (default value: 0)
Left-hand tone Right-hand tone
Split point (Power-up default): F#3
C4 C5 C6 C7 C8C3C2C1
7
Operation Guide
Display
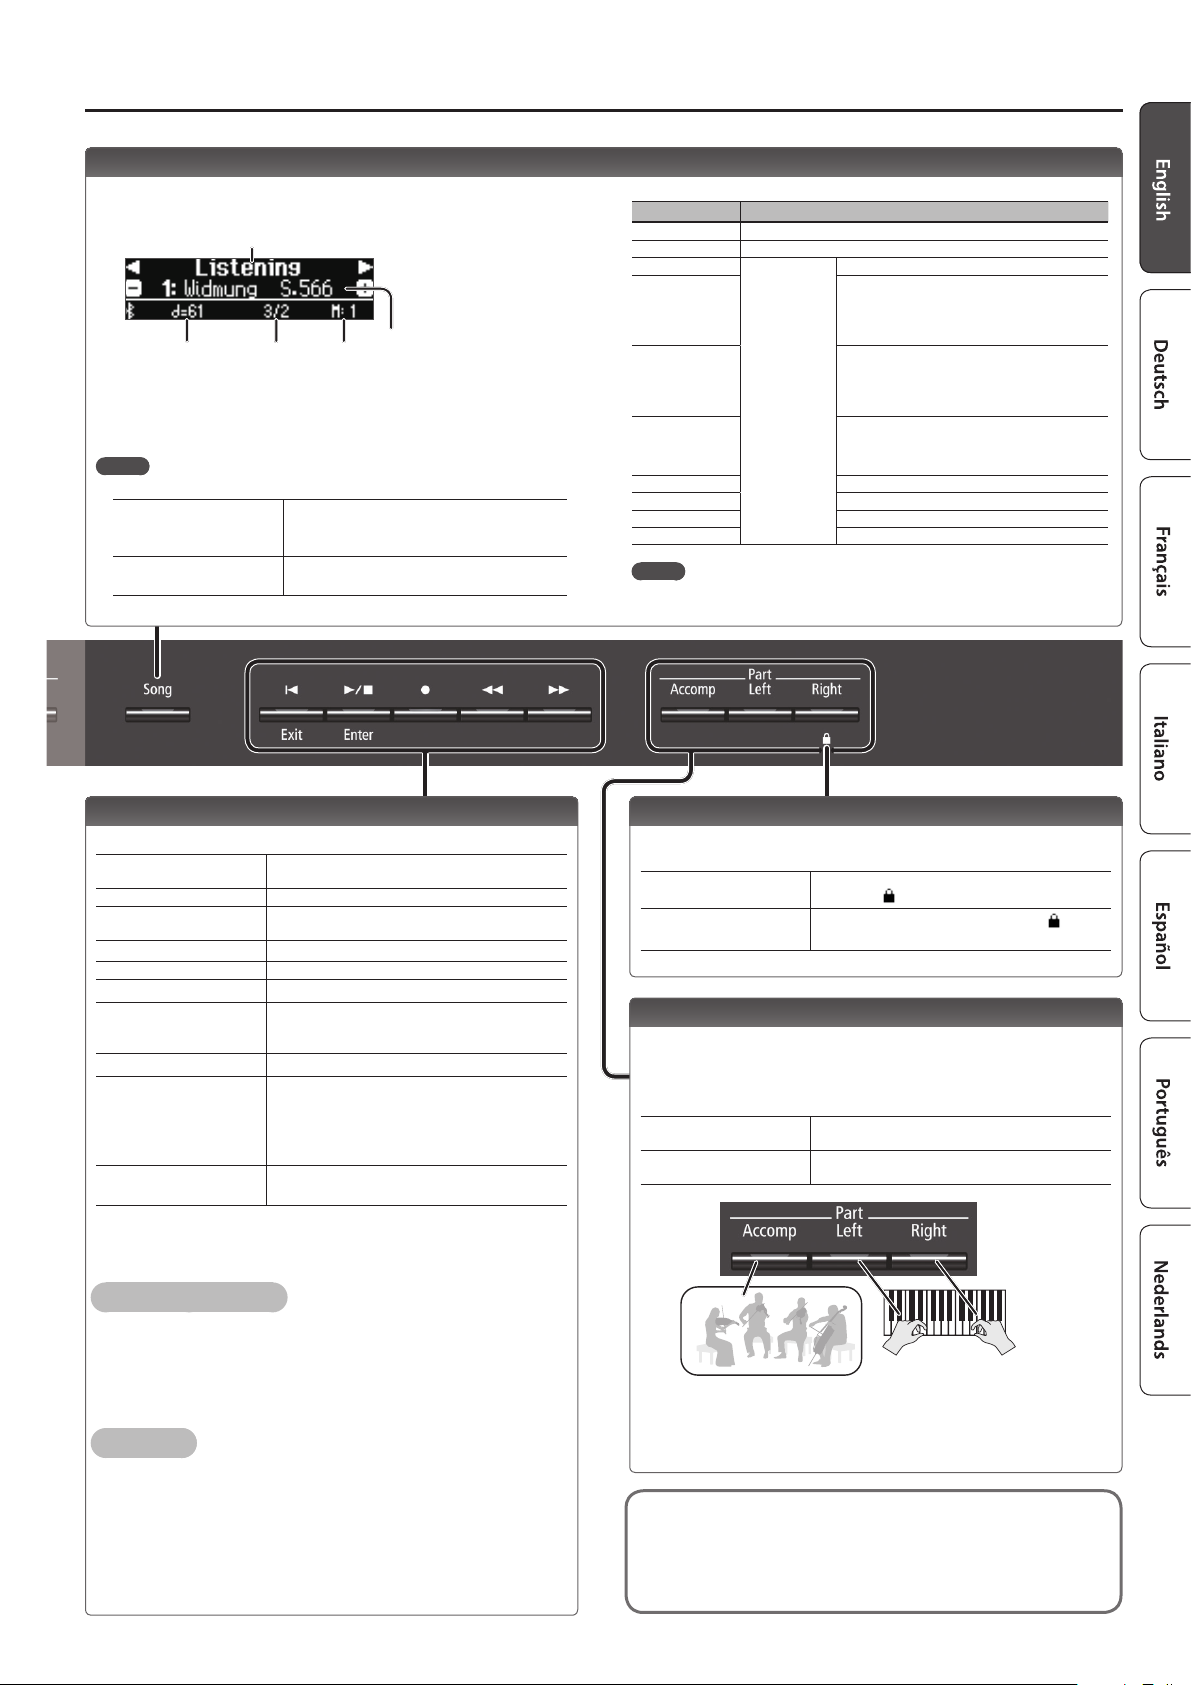
This shows information such as the tone name, song name,
tempo, and time signature.
The “K” “ J,” and “-,” “+” indications shown in the screen indicate
the buttons used to operate the various functions.
Bluetooth
connection
status
Tempo
Time signature
Measure
Keyboard
transposition
Song
transposition
Tone name or
song name
Using the Bluetooth Function
Sound from a Bluetooth-equipped audio player can be
played through the piano, or you can use the piano in
conjunction with an app that you’ve installed on your mobile
device.
When you turn on the power of this instrument, the
Bluetooth indicator lights.
When pairing is taking place, or when connected or
disconnected, the Bluetooth indicator blinks.
page
18
Selecting an Item/Editing a Value
Use the [K] [J] [-] [+] buttons to select items and values
shown in the screen.
Select a setting item
Edit the value of an item Use the [–] [+] buttons.
Change a value
consecutively
Return to the default value
Use the [K] [J] buttons.
Hold down the [–] button or [+] button.
Hold down the [–] button and [+] button
simultaneously.
Sounding the Metronome
You can sound a metronome while you perform. You
can also change the tempo and time signature of the
metronome.
If a song is playing, the metronome sounds at the
tempo and time signature of that song.
MEMO
Use the [K] [J] buttons to select the item that you want to set.
Use the [-] [+] buttons to change the value of an item.
Sounding the Metronome Turn the [Metronome] button on.
Change the tempo
Beat
Down beat
Pattern
Volume
Tone
Press the [Slow] [Fast] buttons.
10–500
Changes the time signature of the metronome.
MEMO
You can also change the time signature by
holding down the [Metronome] button and
use the [Slow] [Fast] buttons.
2/2, 3/2, 2/4, 3/4, 4/4, 5/4, 6/4, 7/4, 3/8, 6/8, 8/8,
9/8, 12/8 (default value: 4/4)
Sounds a strong note (strong beat) on the rst
beat.
O, On (default value: On)
Changes the pattern of the metronome.
O, Eighth note, Eighth-note triplet, Shue,
Sixteenth note, Quarter-note triplet, Quarter
note, Dotted eighth (default value: O)
Changes the volume of the metronome.
O, 1–10 (default value: 5)
Changes the tone of the metronome.
Click, Electronic, Voice (Japanese), Voice (English)
(default value: Click)
8
Selecting a song
You can select songs in the screen.
1. Press the [Song] button to access the Song screen.
Category
Tempo Time signature Measure
2. Use the [K] [J] buttons to select a category.
3. Use the [–] [+] buttons to select a song.
4. Press the [s] button to play the song.
MEMO
To select a song from a folder on a USB ash drive, proceed as follows.
Enter the folder
Exit the folder
Use the [–] [+] buttons to select the
folder, and press the [s] (Enter)
button.
Use the [–] button to select “(up)” and
then press the [s] (Enter) button.
Song name
Operation Guide
Category list
Category Explanation
USB Memory Songs saved on a USB ash drive
Internal Memory Songs saved in internal memory
Listening
Masterpieces
Easy Piano
Scales
Hanon The Virtuoso Pianist No.1–20
Beyer Vorschule im Klavierspiel Op.101 No.1–106
Burgmüller 25 Études faciles et progressives Op.100
Czerny100
MEMO
This unit’s
internal songs
For details on the internal songs, refer to “Internal Song List” at the
end of this manual.
Piano songs recommended for listening
Piano Masterpieces
Songs corresponding to the included
collection of scores, “Roland Classical Piano
Masterpieces.”
Famous popular songs and classical
compositions
Songs corresponding to the included
collection of scores, “Let’s Enjoy Piano.”
Scales in all keys (major scales, minor scales)
Songs corresponding to the included
collection of scores, “Let’s Enjoy Piano.”
100 Übungsstücke Op.139
Playing Back or Recording
Here’s how to play back or record a song.
Return to the beginning of
the song
Play/stop
Enter record-standby
mode
Record
Rewind
Fast-forward
Play all songs in the
selected category
(All Song Play)
Change the song tempo Press the [Slow] [Fast] buttons.
Play back the song
at a constant tempo
(Tempo Mute)
Sound a count-in (*1)
*1 A series of sounds rhythmically played to indicate the tempo before a song
starts is called a “count-in.” If you sound a count-in, it will be easier for you to
synchronize your own performance to the tempo of the playback.
To make a new recording
1. Select the tone that you want to play.
2. Press the [t] button.
3. Press the [s] (Play/Stop) button to start recording.
4. Press the [s] (Play/Stop) button to stop recording.
To overdub
1. Select the song to be dubbed.
2. Press the [t] button.
3. Press the cursor [J] (right) button.
4. Press the button of the part that you want to record, making it
blink.
5. Press the [s] (Play/Stop) button to start recording.
6. Press the [s] (Play/Stop) button to stop recording.
Press the [u] button.
Press the [s] button.
While stopped, press the [t] button.
In record-standby mode, press the [s] button.
Press the [x] button.
Press the [y] button.
Hold down the [Song] button and press the [s]
button.
Hold down the [s] button and press the [Slow]
button or [Fast] button.
To clear the tempo mute function, hold down the
[s] button once again and press the [Slow]
button or [Fast] button.
Hold down the [Metronome] button and press the
[s] button.
page
10
Disabling the Buttons (Panel Lock)
By disabling the buttons other than the [L] button and the [Volume]
buttons, you can prevent unintended operation.
Lock the panel
Unlock the panel
Hold down the [Right] button until the screen
shows the “
Hold down the [Right] button until the “
symbol disappears, or turn o the power.
” symbol.
”
Selecting the Part(s) to Play (Part Mute)
This piano’s songs consist of three parts: accompaniment, left hand,
and right hand.
You can mute a specic part so that it will not sound; only the parts
that you want to hear will play.
Let a part play
Mute a part
Accompaniment part
* Some songs don’t contain a left-hand part or an accompaniment part. If so,
pressing the corresponding part button does not make it light.
* The Part Mute function is not available when playing an audio le.
Song formats that can be played by the piano
The piano can play back data in the following formats.
5 SMF formats 0/1
5 Audio les: WAV format, 44.1 kHz, 16-bit linear
Make the button light for parts that you want to
play.
Make the button go dark for parts that you want
to mute.
Left-hand part Right-hand part
9
Advanced Operation
°
Recording Your Performance
˙
This piano lets you play back a recorded song so that you can check
your own performance or practice along with a recorded song.
Recording
Recording a New Song
Here’s how to record your performance and play it back on the piano.
SMF recording
2. Press the [s] button.
Recording stops, and your performance is automatically saved.
MEMO
5 You can delete the song that you recorded (p. 11).
5 You can rename the song that you recorded (p. 12).
NOTE
Never turn o the power while “Saving...” is shown in the display.
You can also record each hand separately, and then listen to the
combined performance of both hands.
Getting ready to record
1.
Select the tone that you want to play (p. 6).
2. You can sound the metronome if you like (p. 8).
You can specify the tempo and time signature of the metronome.
MEMO
The metronome tempo and time signature are stored in the song,
so that the song can play back with the same tempo and time
signature.
3. Press the [t] button.
The [t] button lights, the [s] button blinks, and the piano enters
record-standby mode.
If you decide to cancel recording, press the [t] button once again.
MEMO
If you want to record the left hand and right hand separately,
press the part button of the part that you want to record (lefthand or right-hand), making it blink.
* If you don’t select a part at this time, your performance is
recorded to the following buttons.
When playing a single tone [Right] button
When playing dierent tones with
the left and right hands (Split Play)
When dividing the keyboard into
left and right regions that play the
same range of pitches (Twin Piano)
When playing two tones layered
(Dual Play)
[Right] button and [Left] button
[Right] button and [Accomp] button
Starting your recording and saving it
Listening to the recorded performance
After you record, the newly recorded song is selected.
1. Press the [s] button.
Playback starts from the beginning of your recorded performance.
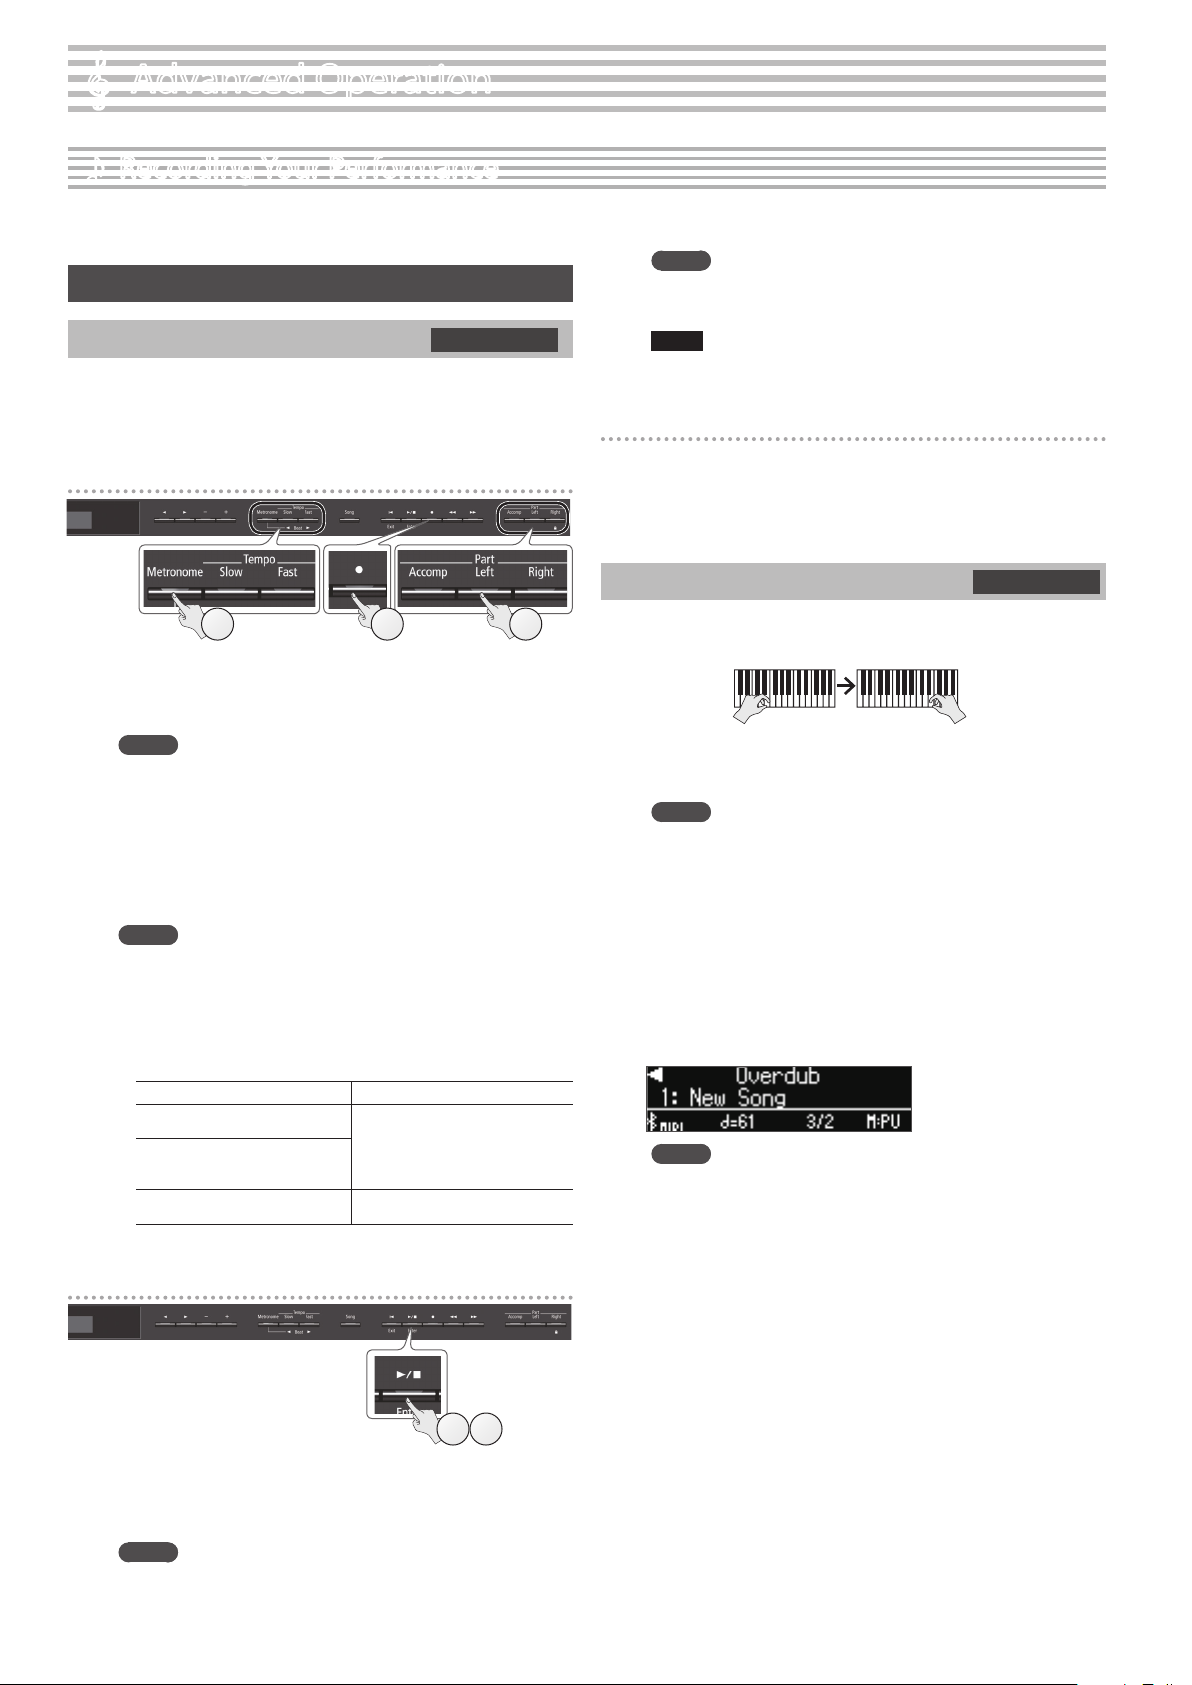
Overdubbing a Recorded Performance
332
You can record your right-hand (or left-hand) performance by
overdubbing it onto the previously recorded left-hand (or right-hand)
performance.
Left-hand part Right-hand part
SMF recording
1. Select the recorded data of the performance that you want
to overdub (p. 9).
MEMO
If you want to rerecord only a portion of the song, use the [x]
[y] buttons to move to the measure at which you want to start
recording.
2. Press the [t] button.
The [t] button lights, the [s] button blinks, and the piano enters
record-standby mode.
In this case, New Song is selected.
If you decide to cancel recording, press the [t] button once again.
3. Press the [J] (right) button.
The recorded data of step 1 is selected.
MEMO
The tempo and time signature of the overdubbed performance
will be the same as the settings of the recorded data you selected.
4. Press the part button of the part that you want to record
(left-hand or right-hand), making it blink.
Parts whose button is lit will play back during recording.
5. Start recording as described in “Starting your recording
and saving it” (p. 10).
1. Press the [s] button.
After a two-measure count is sounded (the measure number in the
lower right of the display indicates “-2” and then “-1”), recording
starts.
When the count begins, the [t] button and [s] button are lit.
MEMO
If you play the keyboard without pressing the [s] button,
recording starts immediately. In this case, a count is not sounded.
1 2
10
 Loading...