

Page 1
r
Owner’s Manual
Thank you for choosing a Roland EXR-40 OR Interactive Arranger, a novel keyboard with a superior Roland sound source, an intuitive user interface, a USB port, V-LINK
compatibility and a host of other useful functions.
To get the most out of the EXR-40 OR and to ensure many years of trouble-free service, we urge you to read through this Owner’s Manual thoroughly.
To avoid confusion, let’s agree to use the word “button” for all keys on the front panel, and use “key” only when referring to the EXR-40 OR’s keyboard.
Before using this instrument, carefully read the “Important notes” (p. 7). They provide information concerning the proper operation of the EXR-40 OR. Be sure to keep this
manual in a safe place for future reference.
Copyright © 2005 ROLAND EUROPE. All rights reserved. No part of this publication may be reproduced in any form without the written permission of Roland Europe S.p.a.
Page 2

r
EXR-40 OR
1. Features
Superior sound source
The EXR-40 OR’s sounds are based on full-length (uncompressed) waveforms, which is unique in this price range. This
produces vibrant, realistic sounds quite unlike anything you
would expect from a budget-friendly arranger keyboard. The
EXR-40 OR’s tone generator is 64-voice polyphonic.
Combined with the new amplification system and Digital
Bass Enhancer function, the EXR-40 OR sounds truly amazing, with a clear high end and a powerful low range.
Lock functions
The EXR-40 OR is equipped with five buttons that allow you
to filter various settings from the User Programs you recall.
This allows for a more flexible and efficient use of your registrations, because settings you do not need in a given situation can be ignored.
Flash memory and USB
The EXR-40 OR comes with 99 Music Styles in ROM (73 oriental, 26 western), 99 additional Music Styles and several
Standard MIDI Files. The additional Styles and SMFs reside in
the EXR-40 OR’s Flash memory area, whose contents can be
expanded and managed via a USB connection with your PC
or Macintosh computer.
New concept
The EXR-40 OR is 19-part multitimbral, with 3 parts that can
be played via the keyboard (Main, Split and Dual). The Main
part can be used to play melodies or for drumming, while
the Split and Dual parts allow you to quickly add a second
sound to your solo playing.
Furthermore, the EXR-40 OR provides a new selection routine for Music Styles, Tones, songs, and User Programs: the
FAMILY
[√][®]
buttons can be used for selecting specific
groups, while the SELECT
a setting within the selected group.
[√][®]
buttons allow you to choose
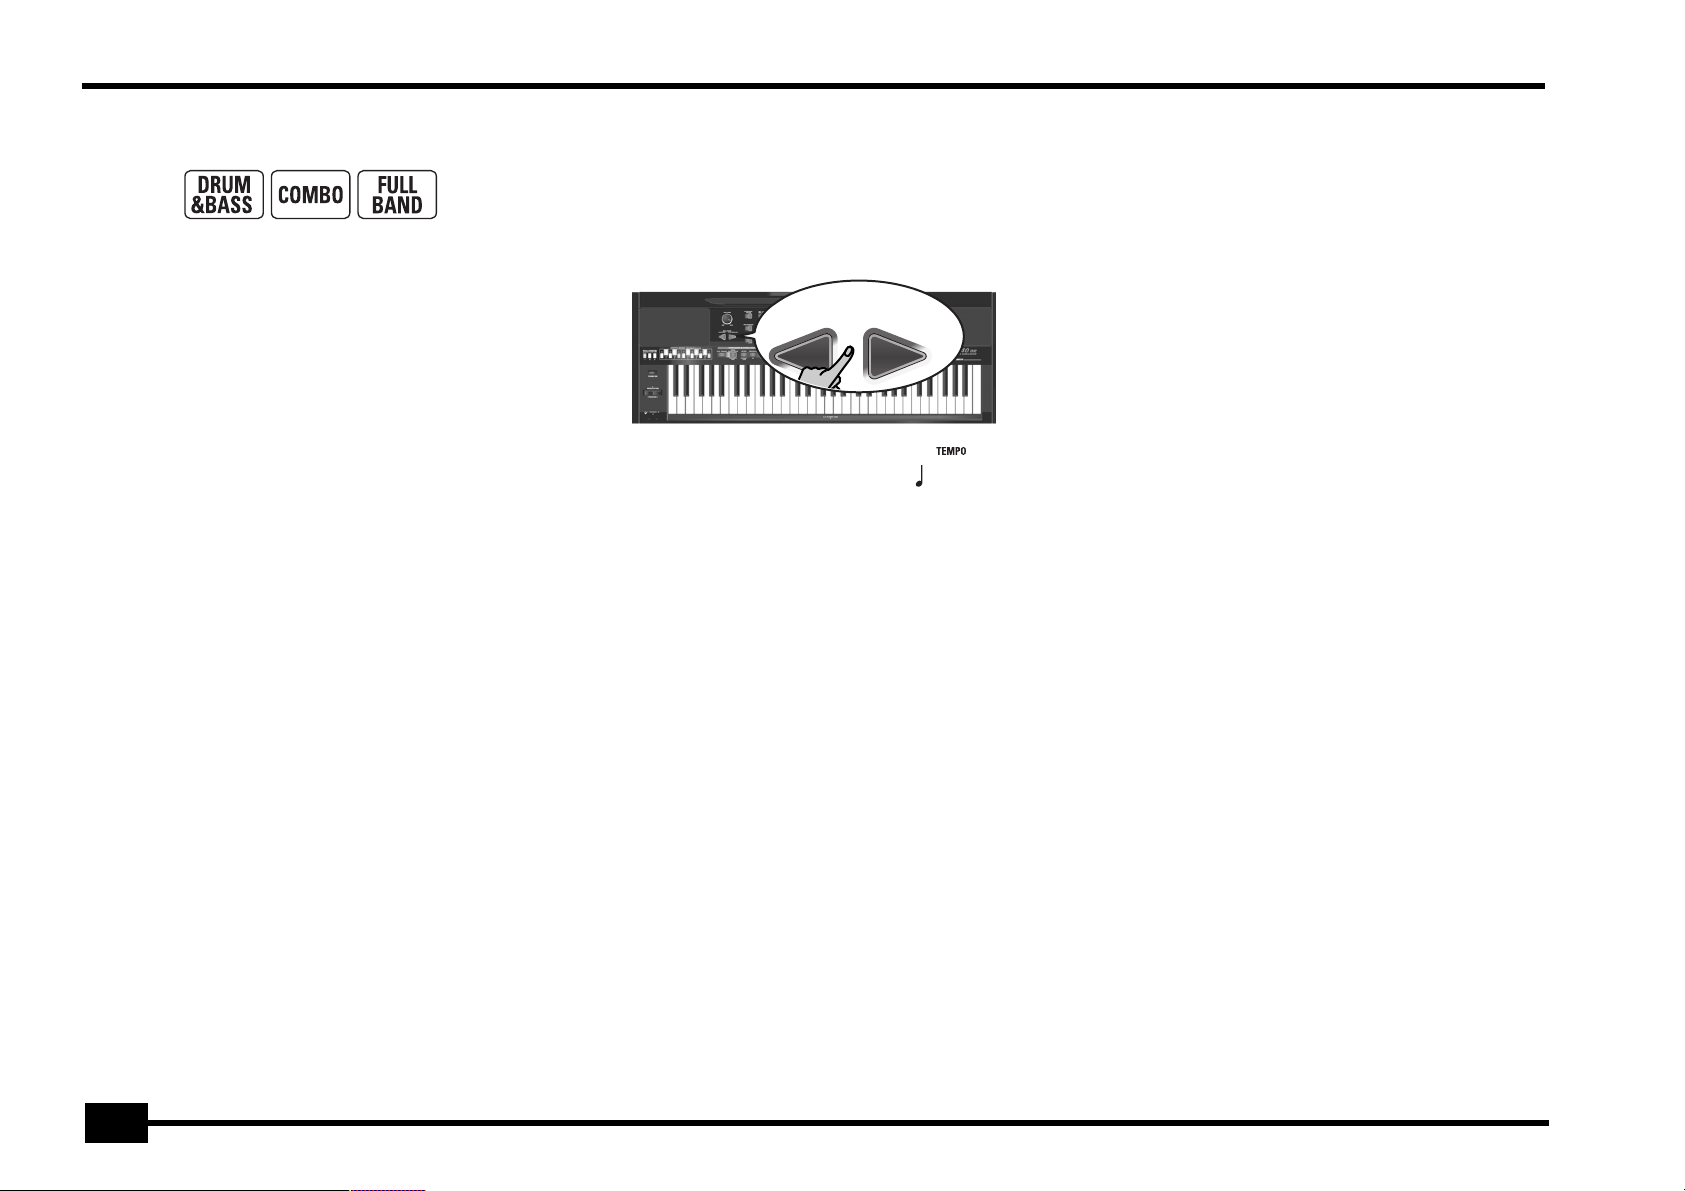
Excellent Arranger
The EXR-40 OR comes loaded with 198 Music Styles prepared by Roland’s legendary Style foundry. As usual, several
patterns are available (INTRO, ORIGINAL, VARIATION, FILL
and ENDING), with additional options via the BAND
ORCHESTRATOR buttons.
3 scale memories plus User Program-dependent
scale settings
The EXR-40 OR is Roland’s first arranger keyboard to provide
3 scale memories (for oriental tunings) and the possibility to
save the currently used tuning settings in a User Program.
That way, each of the 200 User Program memories could use
a different tuning system.
And much, much more…
A metronome and several educational functions are provided, while three digital effects processors (Reverb, Chorus
and MFX) can be used to further enhance the already amazing sound quality.
The EXR-40 OR can play back GM, GM2, GS and XG song
data, so that you can virtually use any Standard MIDI File
available at your Roland dealer or on the Internet.
Note: The EXR-40 OR supports XG Light and therefore only pro-
vides the basic set of compatible functions.
The EXR-40 OR is also equipped with a floppy disk drive
(2DD/2HD) for data management and importing Music
Styles prepared for older Roland arranger instruments.
Have fun!
Microsoft and Windows are registered trademarks of Microsoft Corporation
USA in the United States and other countries.
Apple and Macintosh are registered trademarks of Apple Computer Corporation USA in the United states and other countries.
Mac OS is a registered trademark of Apple Computer Corporation.
Other names of companies, products, or standards are the trademarks or reg-
istered trademarks of their respective owners.
2
Page 3
Using the unit safely
EXR-40 OR
Used for instructions intended to alert
the user to the risk of death or severe
injury should the unit be used
improperly.
Used for instructions intended to alert
the user to the risk of injury or material
damage should the unit be used
improperly.
* Material damage refers to damage or
other adverse effects caused with
respect to the home and all its
furnishings, as well to domestic
animals or pets.
The symbol alerts the user to important instructions
or warnings.The specific meaning of the symbol is
determined by the design contained within the
triangle. In the case of the symbol at left, it is used for
general cautions, warnings, or alerts to danger.
The symbol alerts the user to items that must never
be carried out (are forbidden). The specific thing that
must not be done is indicated by the design contained
within the circle. In the case of the symbol at left, it
means that the unit must never be disassembled.
The ● symbol alerts the user to things that must be
carried out. The specific thing that must be done is
indicated by the design contained within the circle. In
the case of the symbol at left, it means that the powercord plug must be unplugged from the outlet.
• Before using this instrument, make sure to read the instructions
below, and the Owner’s Manual.
......................................................................................................................................
• Do not open or perform any internal modifications on the unit.
......................................................................................................................................
• Do not attempt to repair the EXR-40 OR, or replace parts within it
(except when this manual provides specific instructions directing
you to do so). Refer all servicing to your retailer, the nearest Roland
Service Center, or an authorized Roland distributor, as listed on the
“Information” page.
......................................................................................................................................
• Never use or store the EXR-40 OR in places that are:
• Subject to temperature extremes (e.g., direct sunlight in an
enclosed vehicle, near a heating duct, on top of heat-generating
equipment); or are
• Damp (e.g., baths, washrooms, on wet floors); or are
• Humid; or are
• Exposed to rain; or are
• Dusty; or are
• Subject to high levels of vibration.
......................................................................................................................................
• This unit should be used only with a rack or stand that is recommended by Roland.
......................................................................................................................................
007
• Make sure you always have the unit placed in such a way that it is
level and sure to remain stable. Never place it on stands that could
wobble, or on inclined surfaces.
......................................................................................................................................
• The instrument should only be connected to a power supply of the
type described in the operating instructions, or as marked on the
adapter supplied with the EXR-40 OR.
......................................................................................................................................
• Do not excessively twist or bend the adapter’s power cord, nor place
heavy objects on it. Doing so can damage the cord, producing severed elements and short circuits. Damaged cords are fire and shock
hazards!
......................................................................................................................................
• This instrument, either alone or in combination with an amplifier
and headphones or speakers, may be capable of producing sound
levels that could cause permanent hearing loss. Do not operate for
a long period of time at a high volume level, or at a level that is
uncomfortable. If you experience any hearing loss or ringing in the
ears, you should immediately stop using the unit, and consult an
audiologist.
......................................................................................................................................
• Do not allow any objects (e.g., flammable material, coins, pins); or
liquids of any kind (water, soft drinks, etc.) to penetrate the unit.
......................................................................................................................................
• In households with small children, an adult should provide supervision until the child is capable of following all rules essential for the
safe operation of the EXR-40 OR.
......................................................................................................................................
• Protect the unit from strong impact.
(Do not drop it!)
......................................................................................................................................
3
Page 4
r
EXR-40 OR
• Do not force the EXR-40 OR’s adapter to share an outlet with an
unreasonable number of other devices. Be especially careful when
using extension cords—the total power used by all devices you have
connected to the extension cord’s outlet must never exceed the
power rating (watts/amperes) for the extension cord. Excessive
loads can cause the insulation on the cord to heat up and eventually melt through.
......................................................................................................................................
• Before using the EXR-40 OR in a foreign country, consult with your
retailer, the nearest Roland Service Center, or an authorized Roland
distributor, as listed on the “Information” page.
......................................................................................................................................
• The EXR-40 OR should be located so that its location or position
does not interfere with its proper ventilation.
......................................................................................................................................
• This unit for use only with Roland keyboard stand KS-12. Use with
other stands is capable of resulting in instability causing possible
injury.
......................................................................................................................................
• Always grasp only the plug on the adapter when plugging into, or
unplugging from, an outlet or this unit.
......................................................................................................................................
• Try to prevent cords and cables from becoming entangled. Also, all
cords and cables should be placed out of the reach of children.
......................................................................................................................................
• Never climb on top of, nor place heavy objects on the unit.
• Whenever you suspect the possibility of lightning in your area, disconnect the adapter from the outlet.
.....................................................................................................................................
• Should you remove screws, make sure to put them in a safe place
out of children’s reach, so there is no chance of them being swallowed accidentally.
.....................................................................................................................................
......................................................................................................................................
• Never handle the adapter’s power cord or its plugs with wet hands
when plugging into, or unplugging from, an outlet or this unit.
......................................................................................................................................
• If you need to move the instrument, take note of the precautions
listed below. Make sure to have a firm grip, to protect yourself from
injury and the instrument from damage.
• Disconnect the adapter.
• Disconnect all cords coming from external devices.
• Remove the music stand.
......................................................................................................................................
• Before cleaning the unit, turn off the power and unplug the
adapter from the outlet.
......................................................................................................................................
4
Page 5

Contents
EXR-40 OR
1. Features . . . . . . . . . . . . . . . . . . . . . . . . . . . . . . . . . . . . . . . . . .2
2. Important notes . . . . . . . . . . . . . . . . . . . . . . . . . . . . . . . . . . .7
3. Panel descriptions. . . . . . . . . . . . . . . . . . . . . . . . . . . . . . . . . . 9
Front panel . . . . . . . . . . . . . . . . . . . . . . . . . . . . . . . . . . . . . . . . . . . 9
Rear panel . . . . . . . . . . . . . . . . . . . . . . . . . . . . . . . . . . . . . . . . . . . 11
4. First steps. . . . . . . . . . . . . . . . . . . . . . . . . . . . . . . . . . . . . . . .12
Setting up . . . . . . . . . . . . . . . . . . . . . . . . . . . . . . . . . . . . . . . . . . .12
Demo songs . . . . . . . . . . . . . . . . . . . . . . . . . . . . . . . . . . . . . . . . . 12
Playing back a Tone demo song . . . . . . . . . . . . . . . . . . . . . . . . . . . . 12
Playback of a Style demo song . . . . . . . . . . . . . . . . . . . . . . . . . . . . . 12
Leaving the Demo mode. . . . . . . . . . . . . . . . . . . . . . . . . . . . . . . . . . . 12
Playing without accompaniment . . . . . . . . . . . . . . . . . . . . . . . 13
Using the Main part . . . . . . . . . . . . . . . . . . . . . . . . . . . . . . . . . . . . . . 13
Using the Main and Split parts . . . . . . . . . . . . . . . . . . . . . . . . . . . . . 13
Using the Main and Dual parts . . . . . . . . . . . . . . . . . . . . . . . . . . . . . 14
Using the metronome. . . . . . . . . . . . . . . . . . . . . . . . . . . . . . . . . . . . . 14
5. Playing with accompaniment (Arranger) . . . . . . . . . . . . . . 15
Starting/using the Arranger. . . . . . . . . . . . . . . . . . . . . . . . . . . . 15
Changing the tempo . . . . . . . . . . . . . . . . . . . . . . . . . . . . . . . . . . . . . . 16
Automatic playback start (Sync Start & Stop) . . . . . . . . . . . . . . . . 16
Stopping Arranger playback . . . . . . . . . . . . . . . . . . . . . . . . . . . . . . . 16
Selecting Music Styles. . . . . . . . . . . . . . . . . . . . . . . . . . . . . . . . . 16
Using the Band Orchestrator function. . . . . . . . . . . . . . . . . . . 17
Balance . . . . . . . . . . . . . . . . . . . . . . . . . . . . . . . . . . . . . . . . . . . . . 18
6. Playing back songs . . . . . . . . . . . . . . . . . . . . . . . . . . . . . . . .19
Basic song playback. . . . . . . . . . . . . . . . . . . . . . . . . . . . . . . . . . . 19
Additional playback functions. . . . . . . . . . . . . . . . . . . . . . . . . . 20
Selecting Song mode . . . . . . . . . . . . . . . . . . . . . . . . . . . . . . . . . . . . . 20
Fast Forward, Rewind, and Reset . . . . . . . . . . . . . . . . . . . . . . . . . . . 20
Loop playback (Repeat). . . . . . . . . . . . . . . . . . . . . . . . . . . . . . . . . . . . 21
Live performance with song backing (Minus One). . . . . . . . . . . . . 21
Changing the track assignments. . . . . . . . . . . . . . . . . . . . . . . . . . . . 22
7. Recording your music. . . . . . . . . . . . . . . . . . . . . . . . . . . . . .23
Basic song recording . . . . . . . . . . . . . . . . . . . . . . . . . . . . . . . . . . 23
Listening to your song . . . . . . . . . . . . . . . . . . . . . . . . . . . . . . . . . . . . 23
Other recording functions . . . . . . . . . . . . . . . . . . . . . . . . . . . . . 24
About the recording modes . . . . . . . . . . . . . . . . . . . . . . . . . . . . . . . . 24
More about ALL mode . . . . . . . . . . . . . . . . . . . . . . . . . . . . . . . . . . . . .24
Keyboard recording mode . . . . . . . . . . . . . . . . . . . . . . . . . . . . . . . . . .24
Single recording mode . . . . . . . . . . . . . . . . . . . . . . . . . . . . . . . . . . . . .24
Punch I/O . . . . . . . . . . . . . . . . . . . . . . . . . . . . . . . . . . . . . . . . . . . . . . . . 25
8. Additional Music Style functions. . . . . . . . . . . . . . . . . . . . 26
One Touch . . . . . . . . . . . . . . . . . . . . . . . . . . . . . . . . . . . . . . . . . . . 26
Using the Music Assistant . . . . . . . . . . . . . . . . . . . . . . . . . . . . . 26
Melody Intelligence. . . . . . . . . . . . . . . . . . . . . . . . . . . . . . . . . . . 27
Changing the Melody Intelligence harmony type . . . . . . . . . . . . . .27
PIANIST Mode. . . . . . . . . . . . . . . . . . . . . . . . . . . . . . . . . . . . . . . . 27
Bass Inversion (Bass Inv). . . . . . . . . . . . . . . . . . . . . . . . . . . . . . . 28
More Music Style functions . . . . . . . . . . . . . . . . . . . . . . . . . . . . 28
9. Using oriental tunings . . . . . . . . . . . . . . . . . . . . . . . . . . . . 29
Tuning individual notes a quarter tone down . . . . . . . . . . . . . . . . .29
Using other tuning values . . . . . . . . . . . . . . . . . . . . . . . . . . . . . . . . . .29
Saving and loading your tunings (SCALE MEMORY). . . . . . . . . . . .29
10. Keyboard part functions. . . . . . . . . . . . . . . . . . . . . . . . . . . 30
Selecting sounds for the Main, Split and Dual parts . . . . . . . 30
Selecting any of the available sounds . . . . . . . . . . . . . . . . . . . . . . . .30
Using the USER TONES buttons . . . . . . . . . . . . . . . . . . . . . . . . . . . . .30
Assigning another Tone to a USER TONES button . . . . . . . . . . . . .30
Drum sounds and sound effects (“SFX”) . . . . . . . . . . . . . . . . . 31
Drum Sets. . . . . . . . . . . . . . . . . . . . . . . . . . . . . . . . . . . . . . . . . . . . . . . .31
Sound effects (“SFX”) . . . . . . . . . . . . . . . . . . . . . . . . . . . . . . . . . . . . . . 31
Transpose . . . . . . . . . . . . . . . . . . . . . . . . . . . . . . . . . . . . . . . . . . . 32
Global transpose function (“GLB”) . . . . . . . . . . . . . . . . . . . . . . . . . . .32
Octave settings. . . . . . . . . . . . . . . . . . . . . . . . . . . . . . . . . . . . . . . 33
Other Keyboard part functions . . . . . . . . . . . . . . . . . . . . . . . . . 33
11. Performance functions and effects. . . . . . . . . . . . . . . . . . 34
Performance functions . . . . . . . . . . . . . . . . . . . . . . . . . . . . . . . . 34
Keyboard Touch (velocity sensitivity) . . . . . . . . . . . . . . . . . . . . . . . . . .34
Pitch Bend and Modulation . . . . . . . . . . . . . . . . . . . . . . . . . . . . . . . .34
Footswitch . . . . . . . . . . . . . . . . . . . . . . . . . . . . . . . . . . . . . . . . . . . . . . . 34
Using effects. . . . . . . . . . . . . . . . . . . . . . . . . . . . . . . . . . . . . . . . . 35
Using the multi-effects processor (MFX) . . . . . . . . . . . . . . . . . . . . .35
Reverb . . . . . . . . . . . . . . . . . . . . . . . . . . . . . . . . . . . . . . . . . . . . . . . . . . . 36
Chorus. . . . . . . . . . . . . . . . . . . . . . . . . . . . . . . . . . . . . . . . . . . . . . . . . . .37
V-LINK function . . . . . . . . . . . . . . . . . . . . . . . . . . . . . . . . . . . . . . 38
V-LINK functions that the EXR-40 OR can control (and
corresponding MIDI messages) . . . . . . . . . . . . . . . . . . . . . . . . . . . . . 38
12. Function menu . . . . . . . . . . . . . . . . . . . . . . . . . . . . . . . . . . . 39
Editing parameters (general procedure) . . . . . . . . . . . . . . . . . 39
KB SET parameters . . . . . . . . . . . . . . . . . . . . . . . . . . . . . . . . . . . . . . . . 39
METRONOM parameters . . . . . . . . . . . . . . . . . . . . . . . . . . . . . . . . . . . 41
OCTAVE parameters . . . . . . . . . . . . . . . . . . . . . . . . . . . . . . . . . . . . . . . 41
VOLUME parameters . . . . . . . . . . . . . . . . . . . . . . . . . . . . . . . . . . . . . . 41
ARR SET parameters. . . . . . . . . . . . . . . . . . . . . . . . . . . . . . . . . . . . . . . 42
EFFECTS parameters . . . . . . . . . . . . . . . . . . . . . . . . . . . . . . . . . . . . . . . 42
KB SCALE parameters. . . . . . . . . . . . . . . . . . . . . . . . . . . . . . . . . . . . . . 43
MIDI parameters . . . . . . . . . . . . . . . . . . . . . . . . . . . . . . . . . . . . . . . . . . 43
UTILITY parameters. . . . . . . . . . . . . . . . . . . . . . . . . . . . . . . . . . . . . . . . 43
13. Working with User Programs . . . . . . . . . . . . . . . . . . . . . . . 44
Writing your settings to a User Program. . . . . . . . . . . . . . . . . 44
Notes about writing User Programs . . . . . . . . . . . . . . . . . . . . . . . . . 44
Selecting a User Program. . . . . . . . . . . . . . . . . . . . . . . . . . . . . . 44
Lock: filtering certain User Program settings . . . . . . . . . . . . . 45
14. MIDI functions . . . . . . . . . . . . . . . . . . . . . . . . . . . . . . . . . . . 46
Channels . . . . . . . . . . . . . . . . . . . . . . . . . . . . . . . . . . . . . . . . . . . . . . . . 46
MIDI Function parameters . . . . . . . . . . . . . . . . . . . . . . . . . . . . . . . . . 46
15. Data management . . . . . . . . . . . . . . . . . . . . . . . . . . . . . . . . 48
Working with the Flash memory. . . . . . . . . . . . . . . . . . . . . . . . 48
Saving songs to a Flash memory . . . . . . . . . . . . . . . . . . . . . . . . . . . . 48
Archiving User Programs in the Flash area . . . . . . . . . . . . . . . . . . . 48
Saving Styles to a Flash memory . . . . . . . . . . . . . . . . . . . . . . . . . . . .49
Loading a User Program set from the Flash memory. . . . . . . . . . . 49
Removing songs from the Flash memory. . . . . . . . . . . . . . . . . . . . . 49
Removing Styles from the Flash memory . . . . . . . . . . . . . . . . . . . . 50
Removing a User Program set from the Flash memory . . . . . . . . . 50
Archiving data using a computer (USB) . . . . . . . . . . . . . . . . .51
Disk functions. . . . . . . . . . . . . . . . . . . . . . . . . . . . . . . . . . . . . . . . 52
Loading User Programs from disk . . . . . . . . . . . . . . . . . . . . . . . . . . . 52
Loading songs from disk . . . . . . . . . . . . . . . . . . . . . . . . . . . . . . . . . . . 53
Loading Music Styles from disk . . . . . . . . . . . . . . . . . . . . . . . . . . . . . 53
Saving files to disk . . . . . . . . . . . . . . . . . . . . . . . . . . . . . . . . . . . . . . . . 53
Deleting files on disk . . . . . . . . . . . . . . . . . . . . . . . . . . . . . . . . . . . . . . 54
5
Page 6

r
EXR-40 OR
Format . . . . . . . . . . . . . . . . . . . . . . . . . . . . . . . . . . . . . . . . . . . . . . . . . . 55
16. Using the outputs and an optional footswitch. . . . . . . . . 56
17. Miscellaneous . . . . . . . . . . . . . . . . . . . . . . . . . . . . . . . . . . . .57
Functions for educational purposes . . . . . . . . . . . . . . . . . . . . 57
Deactivating or activating the Demo function . . . . . . . . . . . . . . . . 57
Deactivating or activating the Arranger . . . . . . . . . . . . . . . . . . . . . 57
Deactivating or activating the Arranger and Demo functions. . . 57
Initializing your EXR-40 OR (Factory) . . . . . . . . . . . . . . . . . . . 57
18. Specifications . . . . . . . . . . . . . . . . . . . . . . . . . . . . . . . . . . . .58
Thanks . . . . . . . . . . . . . . . . . . . . . . . . . . . . . . . . . . . . . . . . . . . . . . . . . . 58
19. Lists . . . . . . . . . . . . . . . . . . . . . . . . . . . . . . . . . . . . . . . . . . . 117
Tones selectable via the front panel . . . . . . . . . . . . . . . . . . . 117
Drum Kits . . . . . . . . . . . . . . . . . . . . . . . . . . . . . . . . . . . . . . . . . . 120
Music Styles. . . . . . . . . . . . . . . . . . . . . . . . . . . . . . . . . . . . . . . . 125
Chord Intelligence (“Md1” setting) . . . . . . . . . . . . . . . . . . . . 126
MIDI Implementation Chart . . . . . . . . . . . . . . . . . . . . . . . . . . 128
6
Page 7

]
2. Important notes
In addition to the items listed under “Using the unit safely” (p. 3), please read and observe the following:
EXR-40 OR
Power supply
• Do not use this instrument on the same power circuit with any
device that will generate line noise (such as an electric motor or
variable lighting system).
• Before connecting the EXR-40 OR to other devices, turn off the
power to all units. This will help prevent malfunctions and/or damage to speakers or other devices.
Placement
• Using the EXR-40 OR near power amplifiers (or other equipment
containing large power transformers) may induce hum. To alleviate
the problem, change the orientation of this instrument or move it
further away from the source of interference.
• This instrument may interfere with radio and television reception.
Do not use it in the vicinity of such receivers.
• Observe the following when using the unit’s floppy disk drive. For
further details, refer to “Before using floppy disks (handling the
floppy disk drive)”.
• Do not place the unit near devices that produce a strong mag-
netic field (e.g., loudspeakers).
• Install the EXR-40 OR on a solid, level surface.
• Do not move the unit or subject it to vibration while the drive is
operating.
• Do not expose the EXR-40 OR to direct sunlight, place it near
devices that radiate heat, leave it inside an enclosed vehicle, or otherwise subject it to temperature extremes. Excessive heat can
deform or discolor the instrument.
• To avoid possible breakdown, do not use the unit in a wet area, such
as an area exposed to rain or other moisture.
• Do not allow objects to remain on top of the EXR-40 OR. This can be
the cause of malfunction.
Maintenance
• For everyday cleaning wipe the EXR-40 OR with a soft, dry cloth or
one that has been slightly dampened with water. To remove stubborn dirt, use a mild, non-abrasive detergent. Afterwards, be sure to
wipe the instrument thoroughly with a soft, dry cloth.
• Never use benzene, thinner, alcohol or solvents of any kind, to avoid
the possibility of discoloration and/or deformation.
Repairs and data
• Please be aware that all data contained in the instrument’s memory
may be lost when it is sent for repairs. In certain cases (such as when
circuitry related to memory itself is out of order), we regret that it
may not be possible to restore the data. Roland assumes no liability
concerning such loss of data.
Additional precautions
• Please be aware that the memory contents can be irretrievably lost
as a result of a malfunction, or the improper operation of the
instrument.
• Use a reasonable amount of care when using the instrument’s buttons, other controls, and jacks/connectors. Rough handling can lead
to malfunctions.
• Never strike or apply strong pressure to the display.
• When connecting/disconnecting cables, grasp the connector itself—
never pull on the cable. This way you will avoid causing shorts, or
damage to the cable’s internal elements.
• A small amount of heat will radiate from the instrument during normal operation. This is perfectly normal.
• To avoid disturbing your neighbors, try to keep the instrument’s volume at reasonable levels. You may prefer to use headphones, so you
do not need to be concerned about those around you (especially late
at night).
• When you need to transport the instrument, package it in the box
(including padding) that it came in. Otherwise, you will need to use
equivalent packaging materials, or a flightcase.
• Use only a recommended footswitch (DP-2, DP-6, sold separately).
By connecting any other footswitch, you risk causing malfunction
and/or damage to the EXR-40 OR.
• When the EXR-40 OR is used at excessive volumes, the protection
system of its power amplifier stage may come on and mute the
speakers. In that case, reduce the volume setting and wait a few
seconds.
Before using floppy disks (handling the floppy disk
drive)
• Install the unit on a solid, level surface in an area free from vibration. If the unit must be installed at an angle, be sure the installation
does not exceed the permissible range: upward, 2°; downward, 18°.
• Avoid using the EXR-40 OR immediately after it has been moved to
a location with a level of humidity that is greatly different than its
former location. Rapid changes in the environment can cause condensation to form inside the drive, which will adversely affect the
operation of the drive and/or damage floppy disks. When the
EXR-40 OR has been moved, allow it to become accustomed to the
new environment (allow a few hours) before operating it.
• To insert a disk, push it gently but firmly into the drive—it will click
into place. To remove a disk, press the EJECT button firmly. Do not
use excessive force to remove a disk which is lodged in the drive.
• Never attempt to remove a floppy disk from the drive while the
drive is operating (the indicator is lit); damage could result to both
the disk and the drive.
• Remove any disk from the drive before switching the instrument on
or off.
• To prevent damage to the disk drive’s heads, always try to hold the
floppy disk in a level position (not tilted in any direction) while
inserting it into the drive. Push it in firmly, but gently. Never use
excessive force.
• To avoid the risk of malfunction and/or damage, insert only floppy
disks into the disk drive. Never insert any other type of disk. Avoid
getting paper clips, coins, or any other foreign objects inside the
drive.
7
Page 8
r
EXR-40 OR
Handling floppy disks
• Floppy disks contain a plastic disk with a thin magnetic coating.
Microscopic precision is required to enable storage of large amounts
of data on such a small surface area. To preserve their integrity,
please observe the following when handling floppy disks:
• Never touch the magnetic medium inside the disk.
• Do not use or store floppy disks in dirty or dusty areas.
• Do not subject floppy disks to temperature extremes (e.g., direct
sunlight in an enclosed vehicle). Recommended temperature
range: 10°~50°C (50°~122°F).
• Do not expose floppy disks to strong magnetic fields, such as
those generated by loudspeakers.
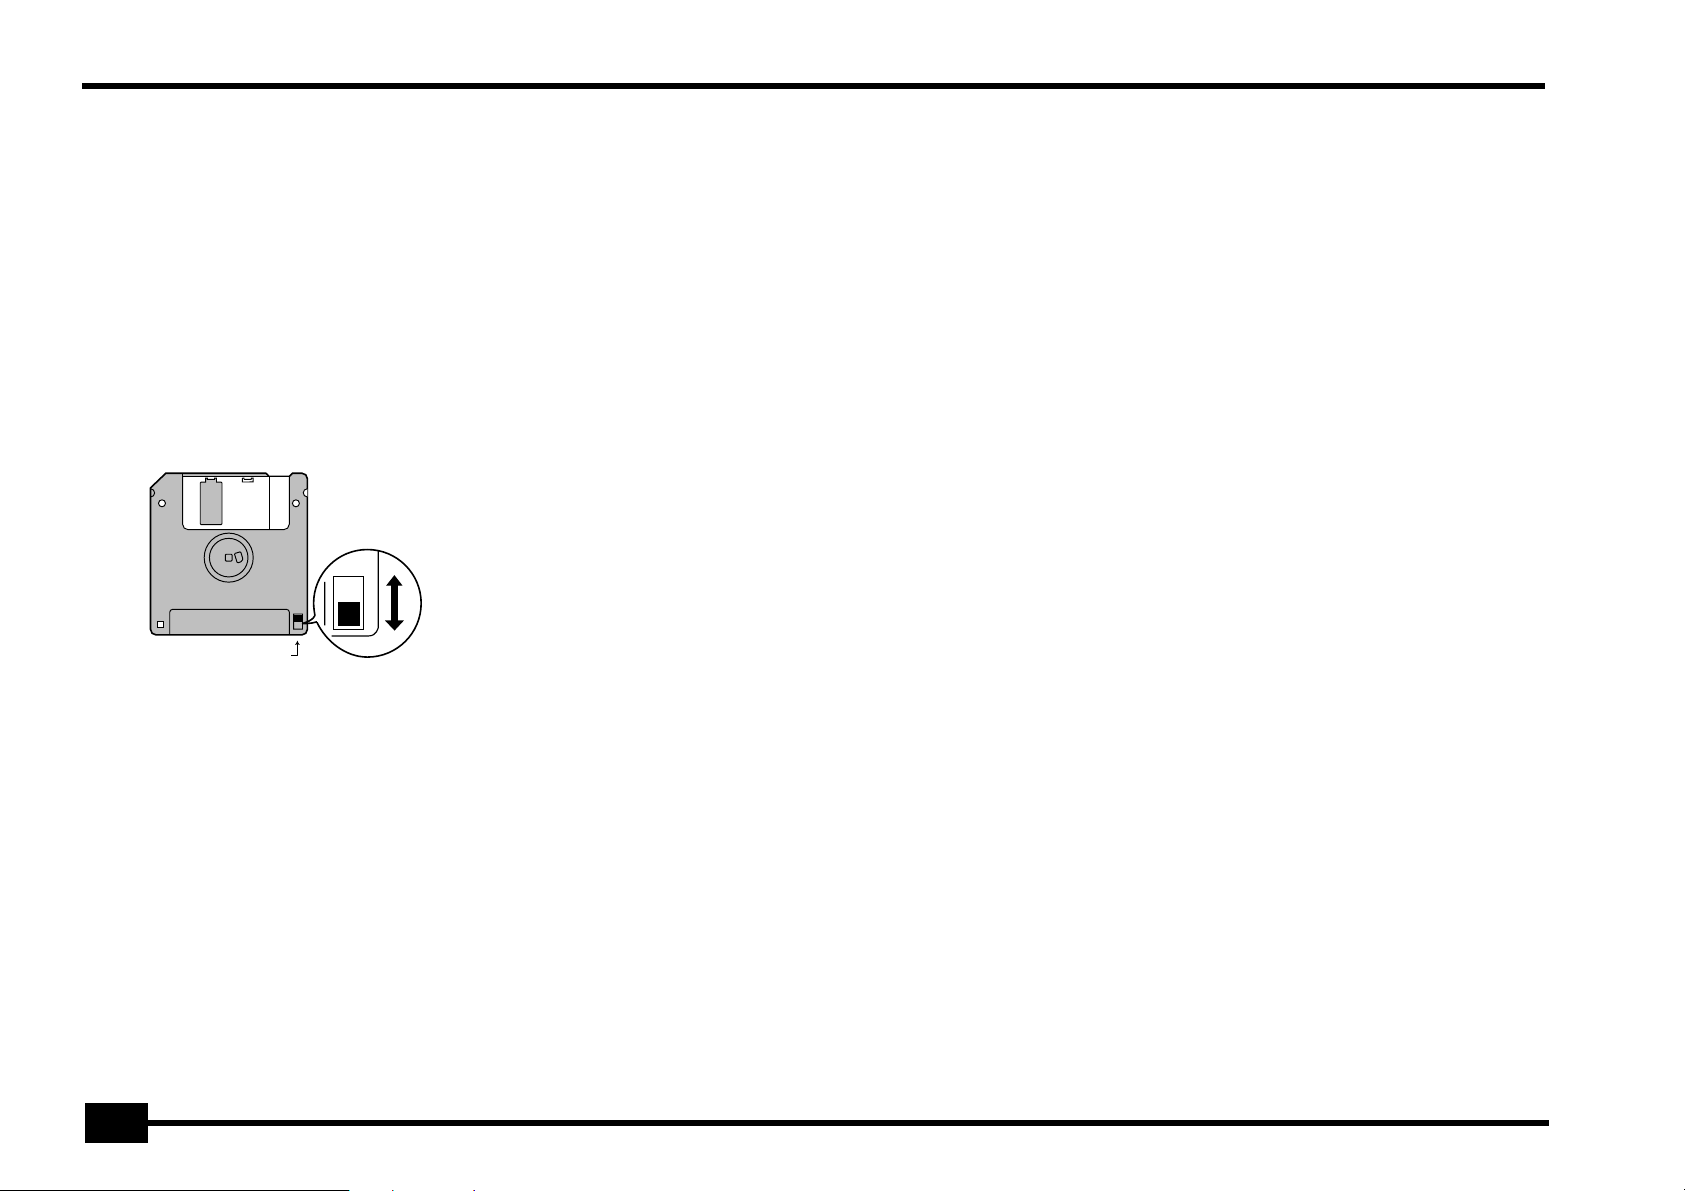
• Floppy disks have a “WRITE” tab which can protect the disk from
accidental erasure. It is recommended that the tab be kept in the
PROTECT position, and moved to the WRITE position only when
you wish to write new data onto the disk.
Rear side of the disk
WRITE
(you can save data to the disk)
Protect tab
PROTECT
(you cannot save data)
• Do not use this unit for purposes that could infringe on a copyright
held by a third party. Roland assumes no responsibility whatsoever
with regard to any infringements of third-party copyrights arising
through your use of this unit.
• Disks containing important performance data for this instrument
should always be locked (have their write protect tab slid to the
PROTECT position) before you insert them into the drive of
another instrument.
• The identification label should be firmly affixed to the disk. If the
label comes loose while the disk is in the drive, it may be difficult
to remove the disk.
• Put the disk back into its case for storage.
Liability and copyright
• Should data contained and stored on a floppy disk be lost, it is
unfortunately impossible to restore them. Roland Europe S.p.a.
assumes no liability concerning such loss of data.
• Unauthorized recording, distribution, sale, lending, public performance, broadcasting, or the like in whole or in part, of a work (musical composition, video, broadcast, public performance, or the like)
whose copyright is held by a third party is prohibited by law.
8
Page 9
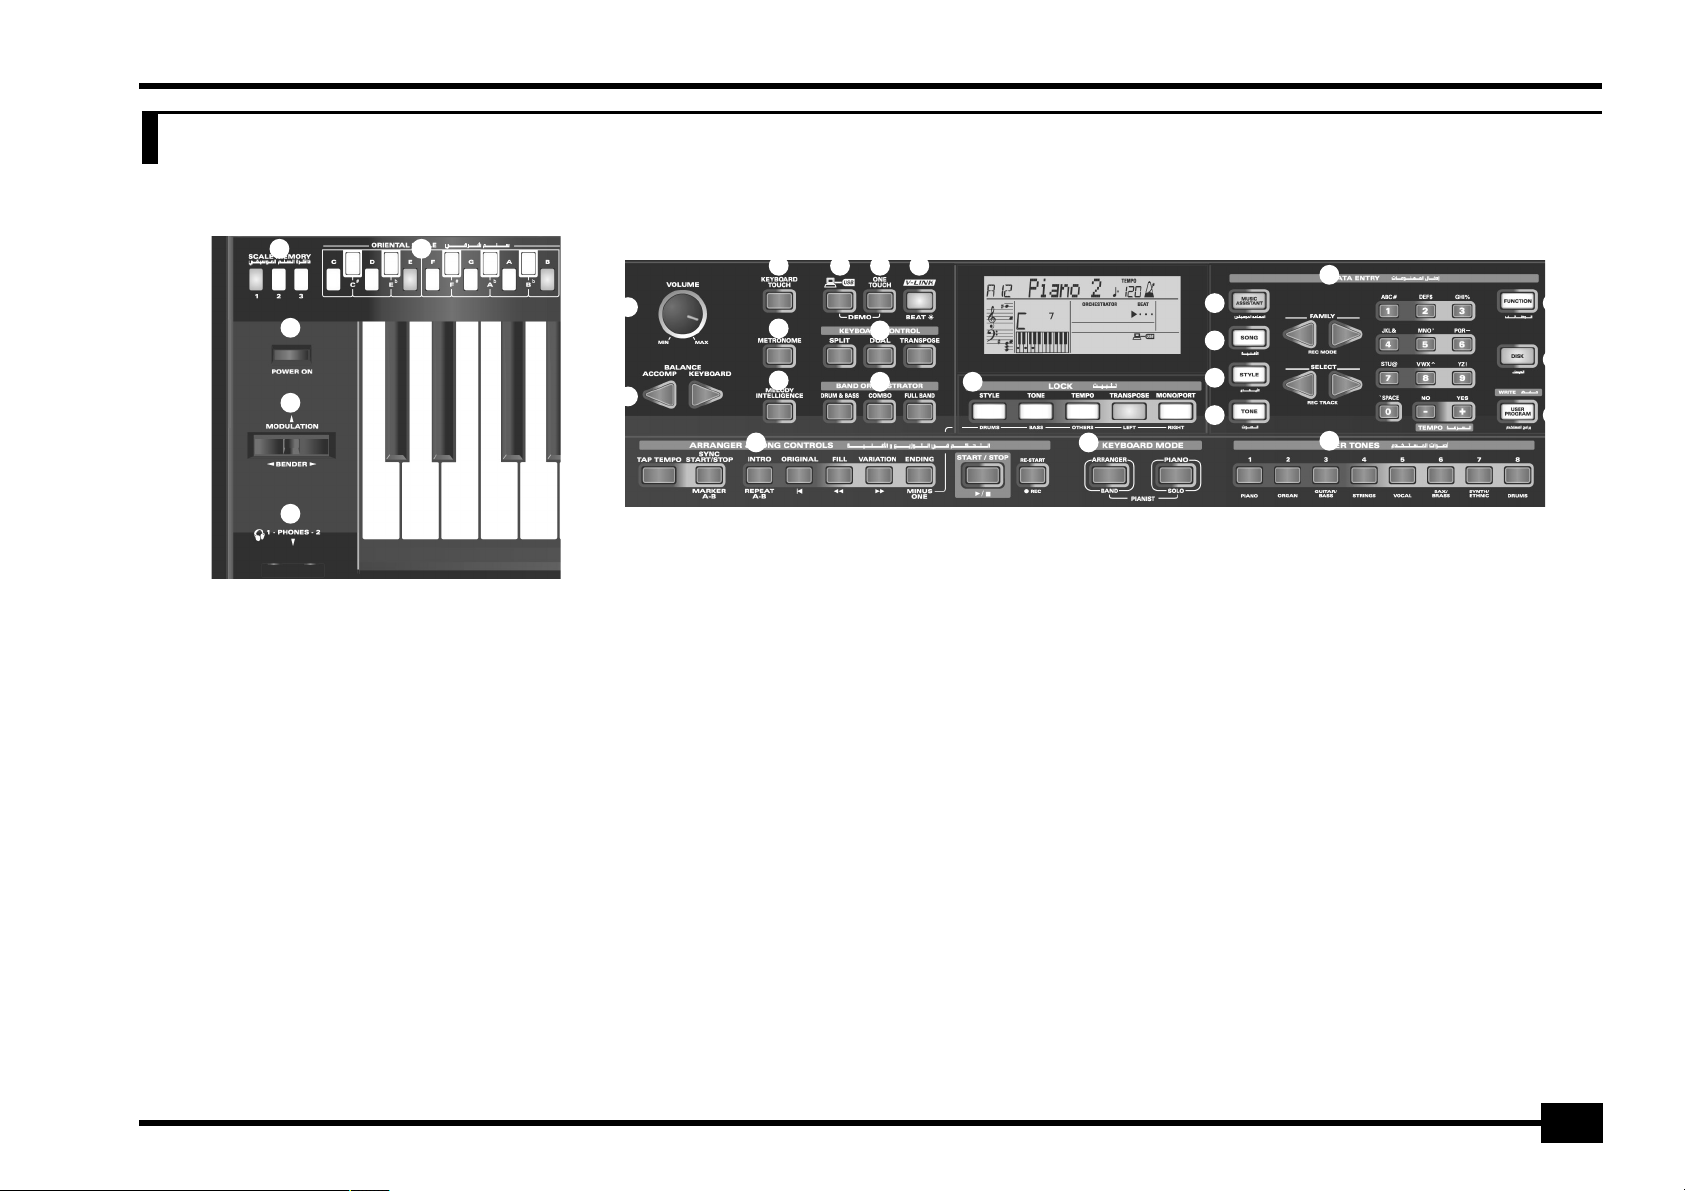
3. Panel descriptions
Front panel
H
I
J
EXR-40 OR
A B
C
D
E
SCALE MEMORY buttons
A
These three buttons allow you to save and recall the tuning
settings carried out with the ORIENTAL SCALE buttons. When
the EXR-40 OR is shipped, these memories already contain
useful settings (that will be recalled whenever you initialize
your EXR-40 OR).
Note: The settings of the ORIENTAL SCALE buttons are also
saved to a User Program, so that you can use these three memories for more “general” settings.
B
ORIENTAL SCALE buttons
These buttons allow you to change the tuning of each note
of the scale. By default, pressing one of these buttons will
lower the corresponding notes in all octaves by a quarter
tone (–50 cents). Other tunings can also be selected and
saved to one of the three scale memories (see above) or a
User Program.
C
[POWER¥ON]
Press this button to switch the EXR-40 OR on and off.
button
F
G
BENDER/MODULATION lever
D
By performing left/right movements, you can bend your solo
notes down (left) or up (right). Press this lever towards the
rear of the instrument to add modulation (usually vibrato) to
the notes you are playing.
E PHONES 1/2 sockets
This is where you can connect two pairs of optional headphones (Roland RH-25, RH-50 or RH-120). By doing so, you
switch off the EXR-40 OR’s speakers.
F
[VOLUME]
Use this knob to set the global volume of your EXR-40 OR.
BALANCE
G
Use the BALANCE buttons to change the volume of the corresponding section (accompaniment/song, or the parts you
play on the keyboard).
[KEYBOARD¥TOUCH]
Press this button to switch the keyboard’s velocity sensitivity
on or off. When it is switched off, you can specify the fixed
velocity value that should be used for all notes you play.
H K L
I
J
M
N
O Q
P R
b
knob
[ACCOMP] [KEYBOARD]
button
buttons
W
S
X
T
Y
U
V
Z
a
[METRONOME]
This button allows you switch the metronome on and off.
Holding it for more than one second calls up a FUNCTION
parameter you can set.
[MELODY¥INTELLIGENCE]
This button allows you to switch the Melody Intelligence
function on/off. This function adds a harmony part to your
melody playing. See p. 27. Holding it for more than one second calls up a FUNCTION parameter you can set for selecting
the harmony type.
K
[USB]
button
This button allows you to select the function of the USB port
should perform: (i) mass storage (archiving and retrieving
settings to/from a computer) or (ii) USB/MIDI (whereby the
USB port has the same function as the MIDI IN and MIDI OUT
connectors). See pages 46 and 51 for details.
Press it together with
EXR-40 OR’s demo function (see p. 12).
button
button
[ONE¥TOUCH]
to select the
9
Page 10

r
EXR-40 OR
L
T
U
Y
[ONE¥TOUCH] button
Press this button to select the desired One Touch settings.
One Touch memories contain a number of settings that
complement the currently selected Music Style. There are
two One Touch memories per Music Style. See p. 26.
M
[V-LINK]
button
Press this button to take advantage of the EXR-40 OR’s
V-LINK functionality for controlling video material via certain performance functions and the right-most keys on the
EXR-40 OR’s keyboard. By using V-LINK-compatible video
equipment, visual effects can be easily linked to, and made
part of the expressive elements of a performance. By connecting the EXR-40 OR to an optional Edirol DV-7PR or V-4,
you can switch images in synchronization with music, or use
the EXR-40 OR’s performance functions or right-most keys
to switch clips, control playback speed, etc.
During song and Music Style playback, this button flashes to
indicate the tempo and beats (BEAT function).
N
KEYBOARD CONTROL section
Press the [SPLIT] button to play different sounds with your
left and right hands. Press the [DUAL] button to play two
sounds simultaneously.
Use the [TRANSPOSE] button to transpose the keyboard (see
p. 32).
O
BAND ORCHESTRATOR section
Press one of these buttons to choose the desired orchestration for the selected Music Style. See page 17.
P
ARRANGER & SONG -CONTROLS section
[TAP¥TEMPO] button: Press this button at least twice to set
the Arranger’s or Recorder’s playback tempo.
[SYNC¥START/STOP] button: This button performs two func-
tions: In Arranger mode (while using the automatic accompaniment), it allows you to switch the SYNC START and SYNC
STOP function on and off.
In Song mode, it can be used to specify the beginning (“A”)
and end (“B”) of the passage that should be repeated.
The remaining buttons in this section allow you to control
Arranger or Recorder playback. See pages 15 and 19.
Q
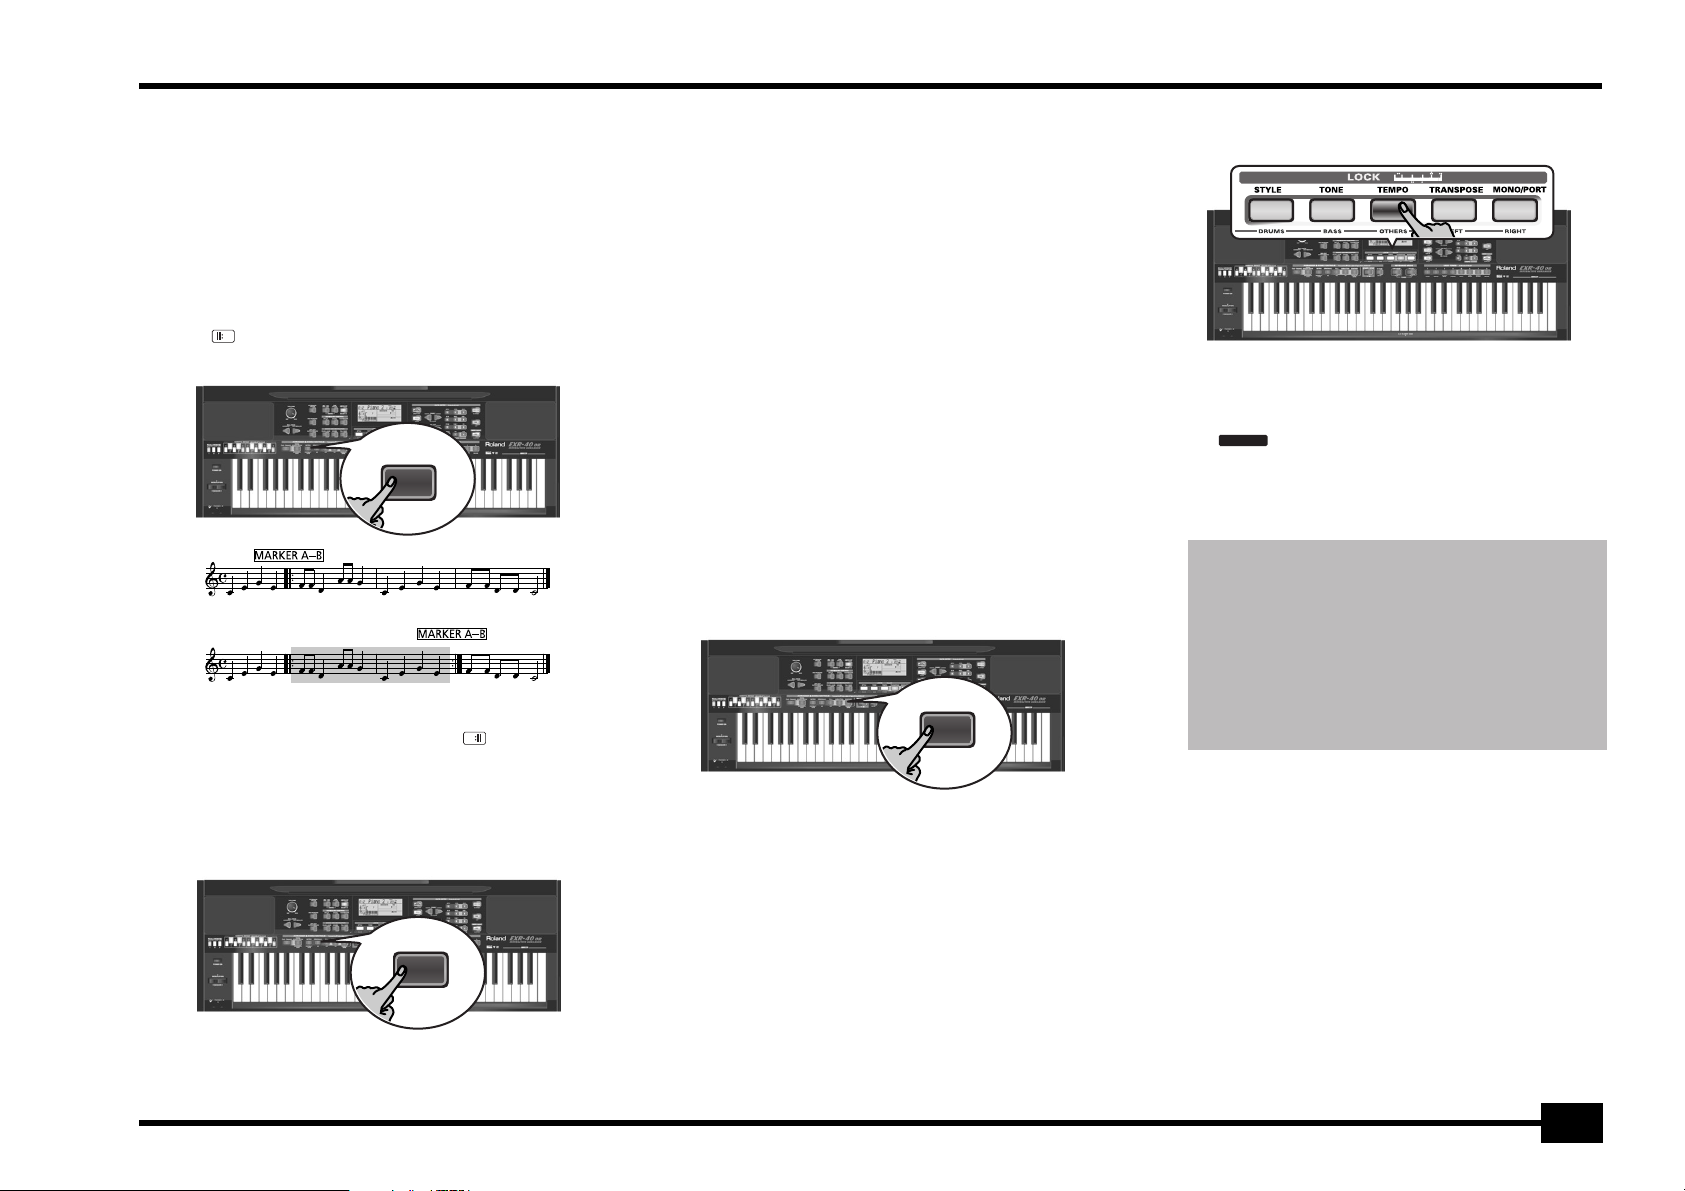
LOCK section
The buttons in this section allow you to filter (ignore) certain
settings that are usually recalled when you select a User Program. This allows for a more flexible use of your registrations. See page 45.
When the Minus One function is on, these buttons allow you
to quickly mute several Standard MIDI File parts (these mute
functions are not available while you are using the Arranger
function).
R
KEYBOARD MODE section
These two buttons allow you to quickly configure the
EXR-40 OR for use with (
(
[PIANO÷SOLO]
) automatic accompaniment. At power-on,
[ARRANGER¥BAND]
) or without
the EXR-40 OR selects the PIANO SOLO mode.
Press them simultaneously to activate the PIANO MODE,
which allows you to use the EXR-40 OR’s Arranger (automatic accompaniment) without splitting the keyboard (see
p. 27).
S
[MUSIC¥ASSISTANT]
button
This button allows you to work with pre-programmed registrations (additional User Programs). See p. 26.
[SONG]
button
This button allows you to select the EXR-40 OR’s Song mode
and to specify that the [INTRO] , [ORIGINAL] , etc., buttons
should be used to operate the on-board Recorder.
button
[STYLE]
Press this button if you want to select Music Styles. By activating this button, you also specify that the [INTRO] ,
[ORIGINAL] , etc., buttons are used for selecting a Style Divi-
sion, while the numeric buttons can be used to select the
desired Style memory.
V
[TONE]
button
Press this button if you want to use the [FAMILY] and
numeric buttons for assigning a sound (“Tone”) or Drum Set
to the Main, Split or Dual part. See p. 30.
W
DATA ENTRY buttons
FAMILY and SELECT [√][®] buttons: The FAMILY and SELECT
[√][®] buttons are used to select Tones, Styles, Music Assis-
tant memories, Songs, and Function parameters. The FAMILY
[√][®] buttons allow you to select a group. You can press
them, hold them, or press one while holding the other to
change the scrolling speed.
The SELECT
[√][®]
buttons allow you to choose items within
the selected group or family. You can press them, hold them,
or press one while holding the other to change the scrolling
speed. After selecting the last item of the currently selected
group, pressing
following group. Conversely, pressing
[®]
again takes you to the first entry of the
[√]
again after selecting the first entry of a group takes you to the last entry of
the preceding group.
Numeric
key pad: These buttons allow you to enter numbers
(for Tone, Style, Music Assistant memory, song, track selection), values and characters (for entering names).
The TEMPO/DATA
[–][+]
buttons allow you to set the arranger
or Song tempo and the value of the selected FUNCTION
parameter.
X
[FUNCTION]
button
This button provides access to the FUNCTION menu. You can
use the FAMILY and SELECT [√][®] buttons to select the
desired function.
button
[DISK]
Press this button to access the Disk functions. They are used
for loading data from floppy, saving data to disk, and managing floppy disks. See p. 52.
Note: You can also save and load data via USB.
Z [USER¥PROGRAM÷WRITE]
button
Press this button whenever you want to select a User Program (a set of registrations). Press and hold it to save the
current panel and parameter settings to a User Program. See
page 44.
a
USER TONES section
These buttons allow you to select the “best” sound of the
indicated family (i.e. the “best” piano, organ, guitar/bass, etc.
sound). After pressing one of these buttons, you can use
FAMILY [√][®] and SELECT [√][®] to select other families and
other Tones within the active family. (At a later stage, these
can be recalled by “double-clicking” these buttons.) You can
also assign your favorite sounds to these buttons. See “Using
the USER TONES buttons” (p. 30) for details.
b
Disk drive, in the middle below the keyboard (not pictured)
This is where you insert floppy disks with Standard MIDI Files
or Music Styles you may already own. The drive accepts 2DD
(720k) and 2HD (1.44MB) floppy disks.
10
Page 11
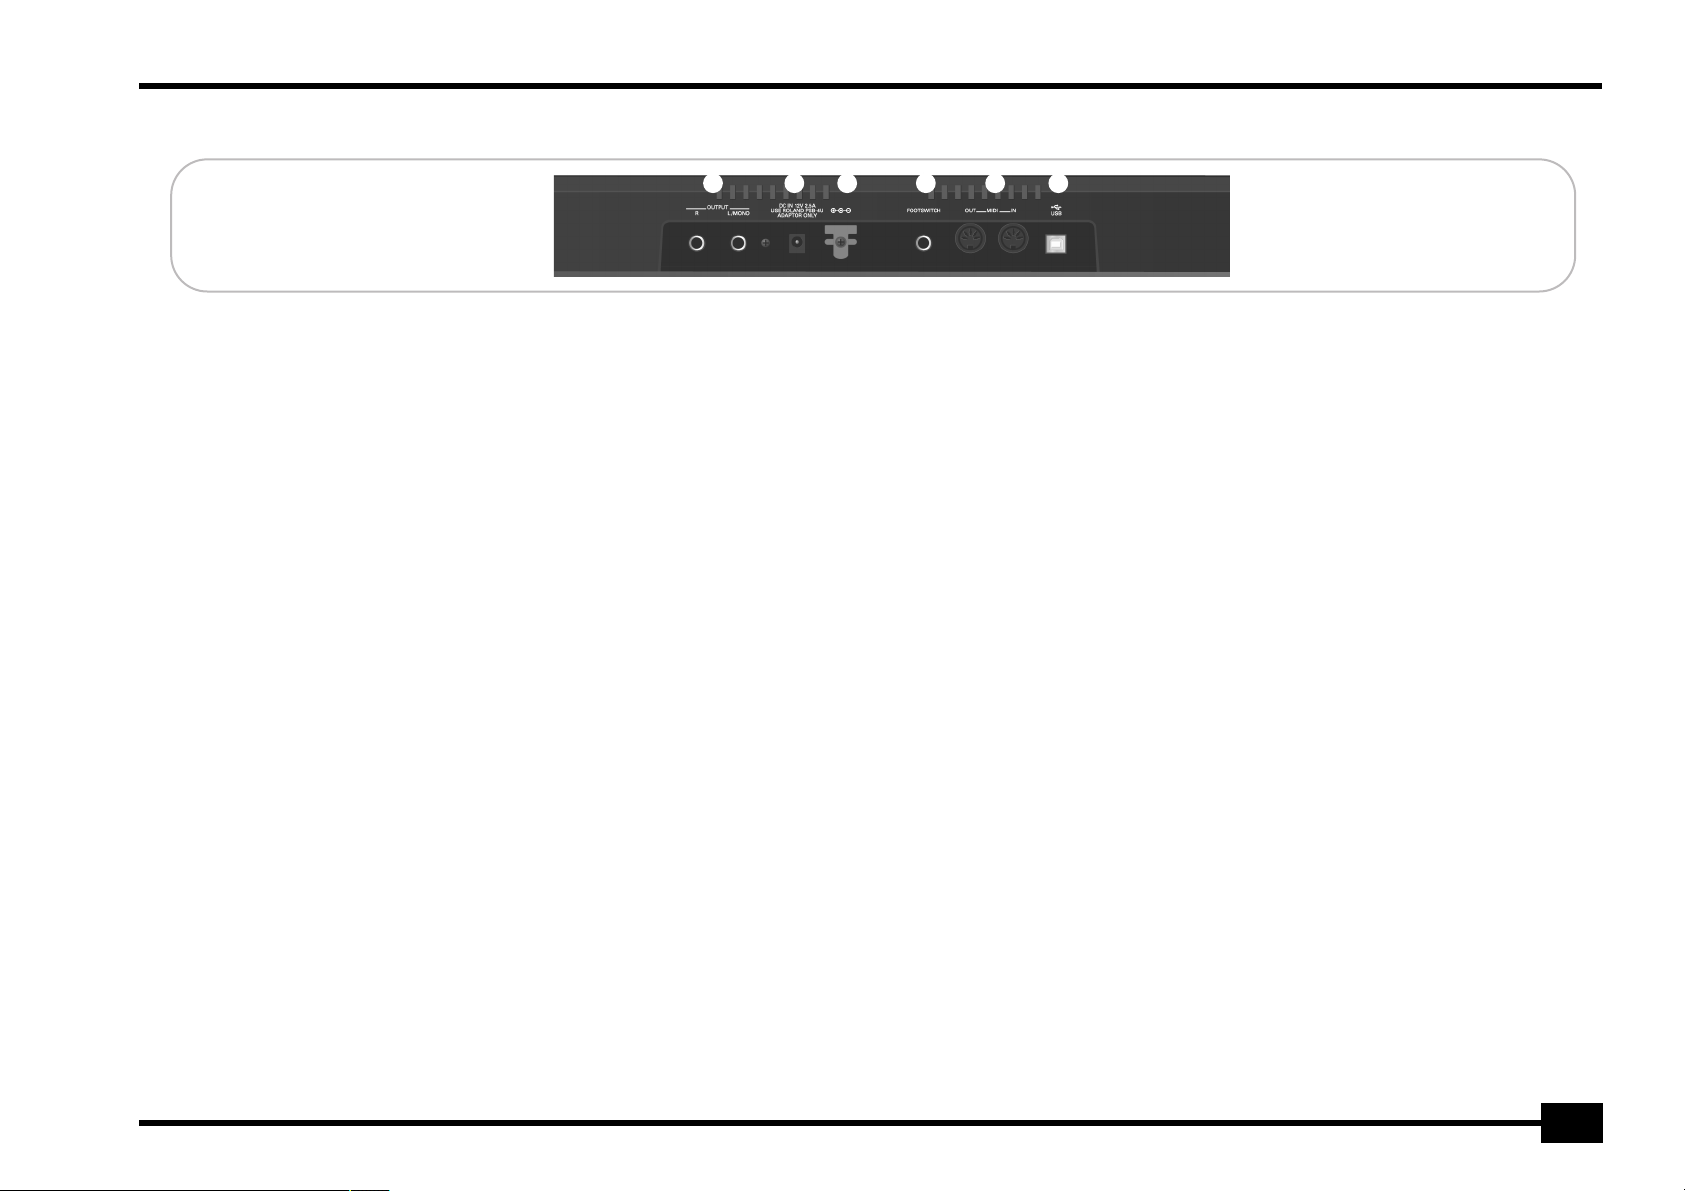
Rear panel
EXR-40 OR
A B C D E F
A
OUTPUT R, L/MONO sockets
These sockets allow you to connect the EXR-40 OR to your
HiFi amplifier, a mixer, a cassette deck, a keyboard amplifier,
etc. If the external amplifier is mono, be sure to connect it to
the OUTPUT L/MONO socket.
B
DC IN socket
This is where you need to connect the supplied adapter
(PSB-4U).
Note: Be sure to only use the adapter supplied with your
EXR-40 OR. Other adapters may damage your Interactive
Arranger.
C
Cord hook
After connecting the adapter cable, wind it around the cord
hook to the socket’s right to prevent accidental power failures.
D
FOOTSWITCH socket
This is where you can connect an optional DP-2, DP-6, or
BOSS FS-5U footswitch that allows you to hold (“sustain”)
the notes you play with your right hand. It can also be used
for controlling other parameters (see “FSW° (Footswitch
Assign)” (p. 40)).
E
MIDI OUT/IN sockets
Connect the MIDI OUT socket to the MIDI IN jack of your
computer (or MIDI instrument) to transfer MIDI data from
the EXR-40 OR to the computer or external MIDI instrument.
Connect the MIDI IN socket of the EXR-40 OR to the computer’s MIDI OUT jack to receive data from the computer.
Note: The EXR-40 OR can also transmit/receive MIDI data via its
USB port. To do so, you need to install the appropriate USB drivers from the supplied CD-ROM.
F
USB port
The USB port can be used for transmitting/receiving MIDI
messages or for archiving purposes with a computer.
11
Page 12
r
EXR-40 OR
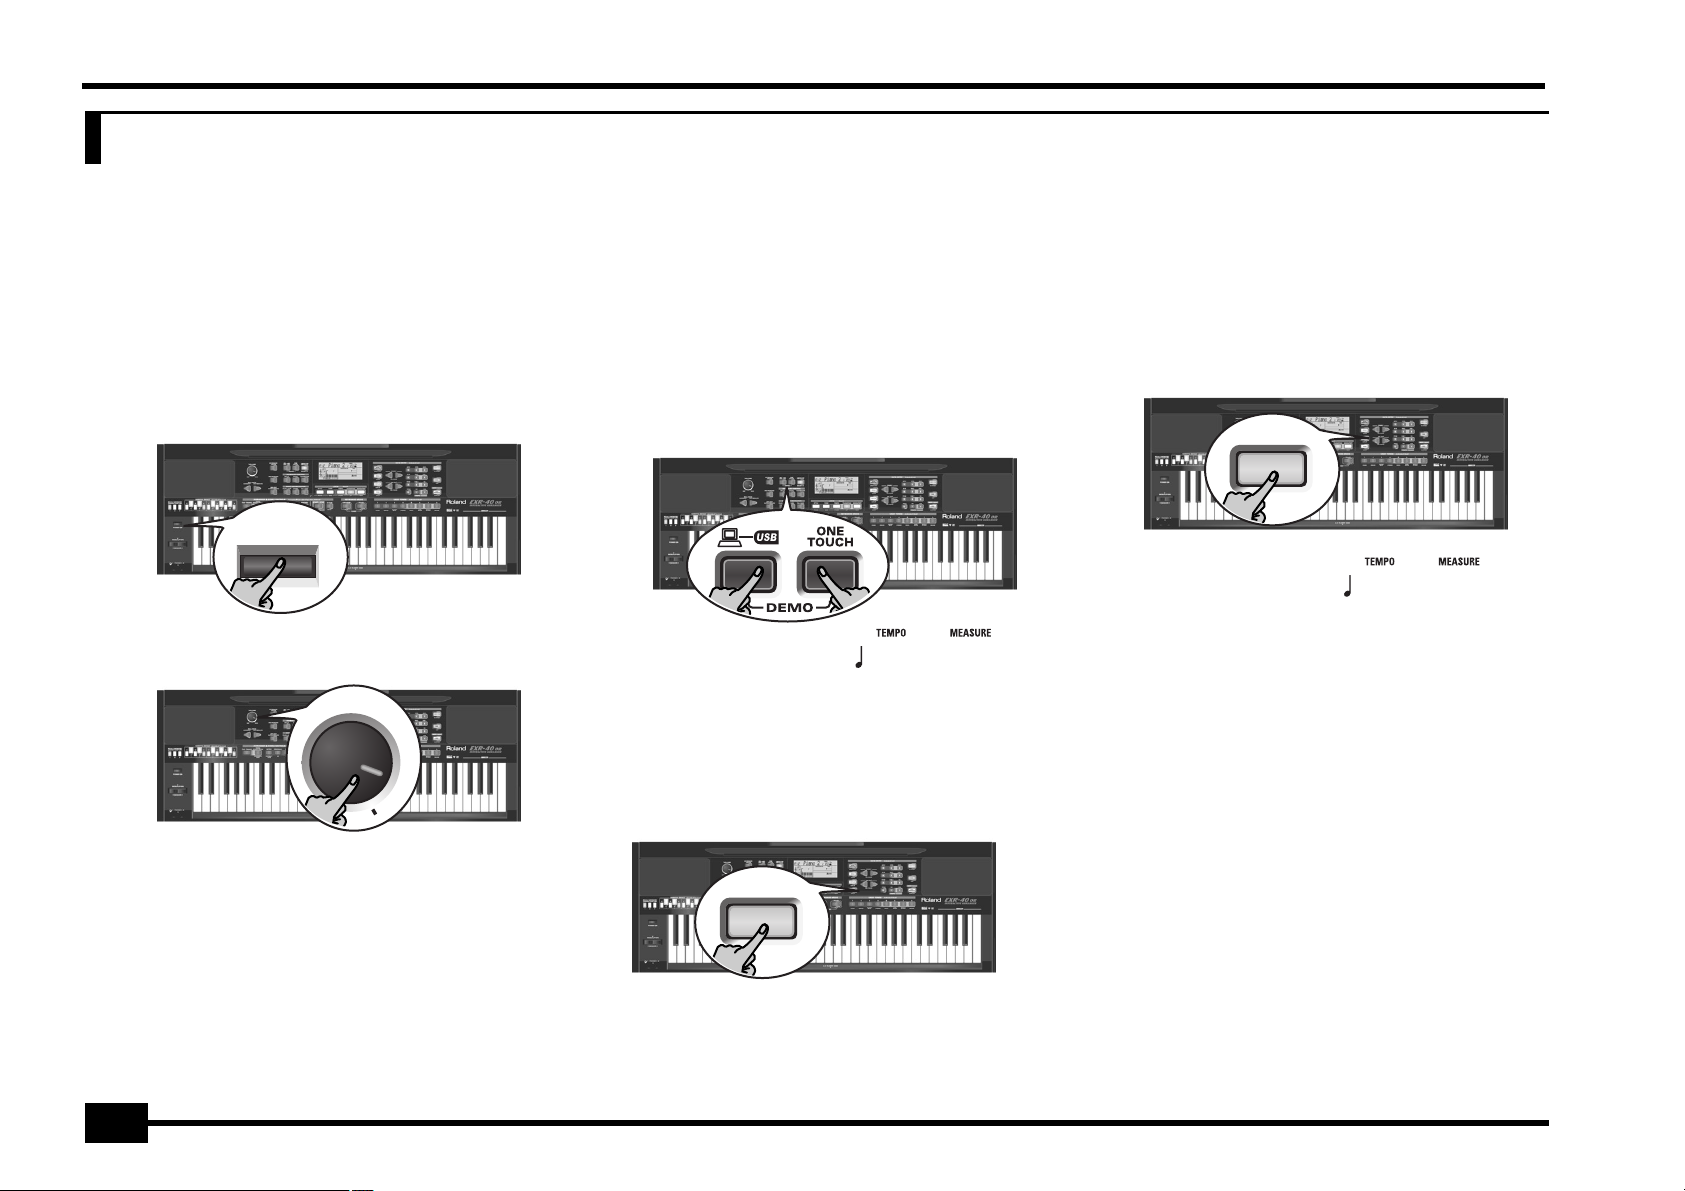
4. First steps
Setting up
The first thing you need to do is connect the supplied PSB-4U
adapter to a suitable wall outlet.
(1) Unpack the EXR-40 OR and place it on a stable surface.
(2) Connect the small end of the adapter cable to the
EXR-40 OR’s DC IN jack, and the other end to a suitable
wall outlet.
(3) Press the [POWER¥ON] button to switch on the
EXR-40 OR.
POWER ON
(4) Use the [VOLUME] knob to set the EXR-40 OR’s output
volume.
VOLUME
Demo songs
Your EXR-40 OR comes with 1 song demo, 8 Tone demos, and
various Style demos.
• The song demo illustrates the possibilities of the EXR-40 OR
as a whole.
• Tone demos show off the EXR-40 OR’s amazing sound
quality.
• Style demos give you an impression of the quality of the
on-board Music Styles.
(1) Hold down the [USB] button while pressing [ONE¥TOUCH].
DemoSong
(2) If necessary, use the [VOLUME] knob to change the play-
back volume.
(3) Press [START÷STOP] to stop playback.
Playing back a Tone demo song
(1) Press the [TONE] button.
=
120 001
You can now press [START÷STOP] to stop playback of the
currently selected Tone song. If you press this button again,
the next Tone demo song will be played back.
(2) Press [START÷STOP] to stop Tone demo song playback.
Playback of a Style demo song
(1) Press the [STYLE] button.
STYLE
DemStyle
Playback of the Style demo song starts automatically.
You can now press [START÷STOP] to stop playback of the
currently selected Style demo song. If you press this button
again, the next Style demo song will be played back.
(2) Press [START÷STOP] to stop Style demo song playback.
=
146
Leaving the Demo mode
(1) Hold down the [USB] button while pressing [ONE¥TOUCH]
to leave the Demo mode.
Note: When the EXR-40 OR is used at excessive volumes, the
protection system of its power amplifier stage may come on and
mute the speakers. In that case, reduce the volume setting and
wait a few seconds.
(5) Press [POWER¥ON] again to switch the EXR-40 OR back
off again.
If you wish to connect the EXR-40 OR to a keyboard or HiFi
amplifier, do so before performing step (3) and switch on the
amp before performing step (4).
12
TONE
Playback of the Tone demo song starts automatically.
Page 13
EXR-40 OR
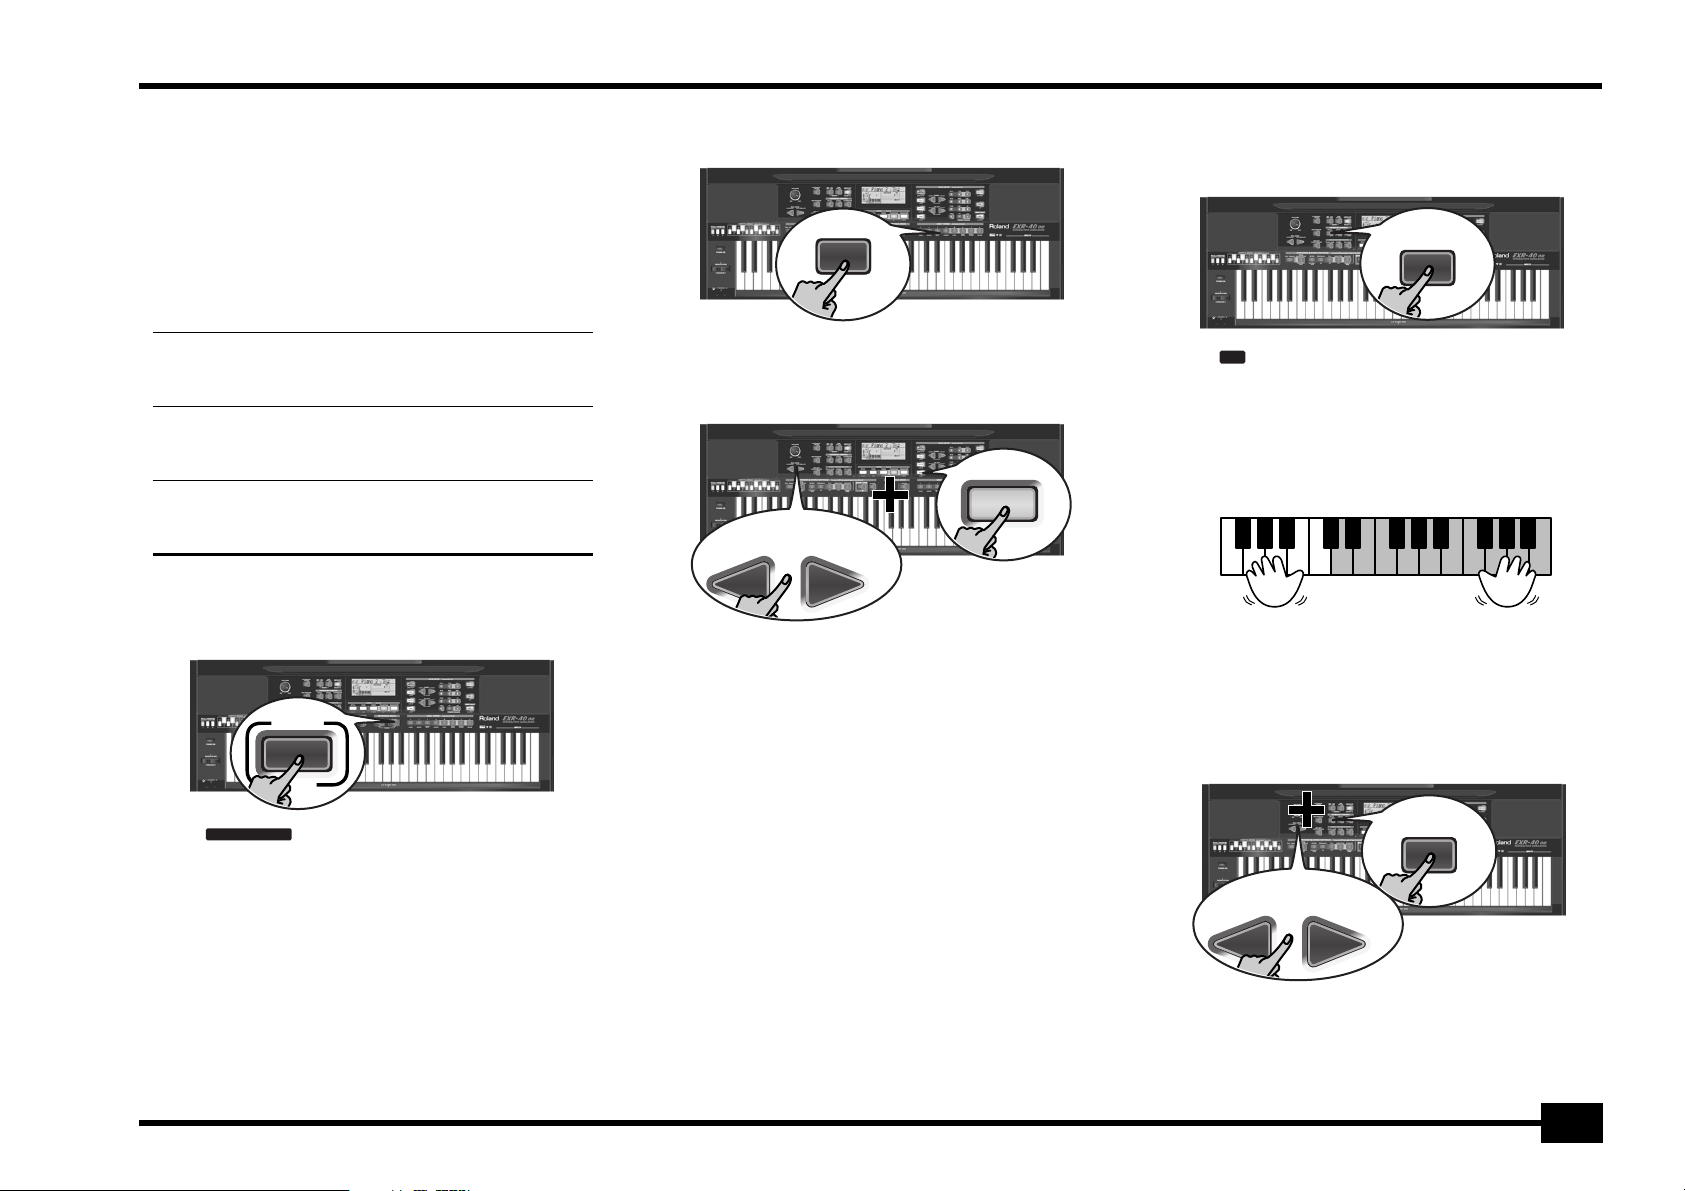
Playing without accompaniment
When you switch on the EXR-40 OR, it selects the PIANO SOLO
mode. This means that you can use the EXR-40 OR like a digital
piano, or a synthesizer.
The accompaniment function (called “Arranger”) and
[ONE¥TOUCH] button are not available in PIANO SOLO mode,
while only the Main part is active.
The EXR-40 OR provides three parts for your live playing (and
many more for Arranger backing and Song playback):
Main As its name suggests, this is the most important
part. As long as the Split part is off, the Main part is
assigned to the entire keyboard.
Split When you switch on this part, it is assigned to the
left half of the keyboard, while the Main part can
be played with your right hand.
Dual This part can be added to the Main part and is also
assigned to the entire keyboard. This allows you to
play two sounds simultaneously.
Using the Main part
(1) To activate the Main part and assign it to the entire key-
board, press the [PIANO¥SOLO] button.
PIANO
SOLO
ARRANGER
The icon disappears, the Arranger stops (if it
was playing), and the EXR-40 OR automatically selects a
piano sound for you.
(2) Play a few notes on the keyboard.
(3) If necessary, select another sound by pressing one of the 8
USER TONES buttons. See p. 30 for details.
3
GUITAR/
BASS
(4) If necessary, you can hold down the [TONE] button and
use BALANCE [ACCOMP] (softer) or [KEYBOARD] (louder)
to change the Main part’s volume.
TONE
BALANCE
ACCOMP KEYBOARD
Note: Unlike previous Roland arranger instruments, the
EXR-40 OR no longer distinguishes between “melodic” parts and
a Manual Drums part. You can therefore also play a Drum Set
with the Main part.
Note: You can also press the [START÷STOP] button to add a
rhythm accompaniment to your playing. This is based on the
currently selected Music Style. See p. 16 for how to select a different one.
Note: See p. 15 and “Automatic playback start (Sync Start &
Stop)” (p. 16) for other ways to start Music Style playback (the
drums, that is).
Using the Main and Split parts
(1) If you wish to play different sounds with your left and
right hands, press the [SPLIT] button.
SPLIT
SPLIT
The icon appears and the EXR-40 OR now automatically selects a sound for the Split part that complements the
sound assigned to the Main part.
(2) Play a few notes on the keyboard.
At first, the keyboard is split at the G3 (note number “55”). If
necessary, you can select a different split point. See
“KeySplit* (Split point)” (p. 40).
Split Main
To change the balance between the Main and Split sounds,
proceed as follows:
(3) Hold down the [SPLIT] button and use BALANCE [ACCOMP]
(decrease) or [KEYBOARD] (increase) to change the Split
part’s volume.
SPLIT
BALANCE
ACCOMP KEYBOARD
(4) To assign another sound to the Split part, hold down the
[SPLIT] button and proceed like for the Main part
(page 13).
13
Page 14
r
EXR-40 OR
Alternatively, press and hold one of the eight USER TONES
buttons (Main part) while pressing another USER TONES
button (Split part).
Note: You cannot assign Drum Sets to the Split part.
Note: You can also add a monophonic bass part (“Auto Bass”) to
the Split part. See “Auto Bass*: status and volume” (p. 41).
Using the Main and Dual parts
(1) To play two sounds simultaneously, press the [DUAL] but-
ton.
DUAL
DUAL
The icon appears and the EXR-40 OR now automatically selects a sound for the Dual part that complements the
sound assigned to the Main part.
You can also activate the Dual mode by holding down one of
the eight USER TONES buttons while pressing another. The
first USER TONES button’s sound is then assigned to the
Main part, while the second sound is assigned to the Dual
part.
(2) Play a few notes on the keyboard.
To change the balance between the Main and Dual sounds,
proceed as follows:
(3) Hold down the [DUAL] button and use BALANCE
[ACCOMP] (decrease) or [KEYBOARD] (increase) to change
the Dual part’s volume.
(4) To assign another sound to the Dual part, hold down the
[DUAL] button and proceed like for the Main part
(page 13).
Note: You cannot assign Drum Sets to the Dual part.
Using the metronome
You can switch on the metronome when practising a new song.
(1) Press the [METRONOME] button.
METRONOME
The icon appears in the display and you hear the metronome sound.
(2) Press and hold [METRONOME] to select the Metro TS
function.
(3) Use the [–][+] buttons to set another time signature.
The possibilities are: 1/4~9/4, 1/8~9/8.
(4) Press another “big” button in the DATA ENTRY section to
leave this function.
(5) Press the [METRONOME] button again to switch the met-
ronome off.
14
Page 15
5. Playing with accompaniment (Arranger)
Let us now take advantage of the EXR-40 OR’s accompaniment function. This function is called “Arranger”.
Starting/using the Arranger
(1) Press the [ARRANGER¥BAND] button.
ARRANGER
BAND
ARRANGER
The icon appears in the display and the keyboard is split into two halves. The keys you press in the left
half are used to specify the key of the accompaniment. The
right half of the keyboard allows you to play a tune to the
accompaniment.
(2) Press the [START÷STOP] button to start Arranger playback.
START / STOP
(3) Play a chord (or just one note) with your left hand.
(4) Play another chord (or note) to change the Arranger’s key.
(5) To quickly return to the beginning of the accompaniment
pattern (RE-START function), press the [REC¥∏] button
while the accompaniment is running.
RE-START
● REC
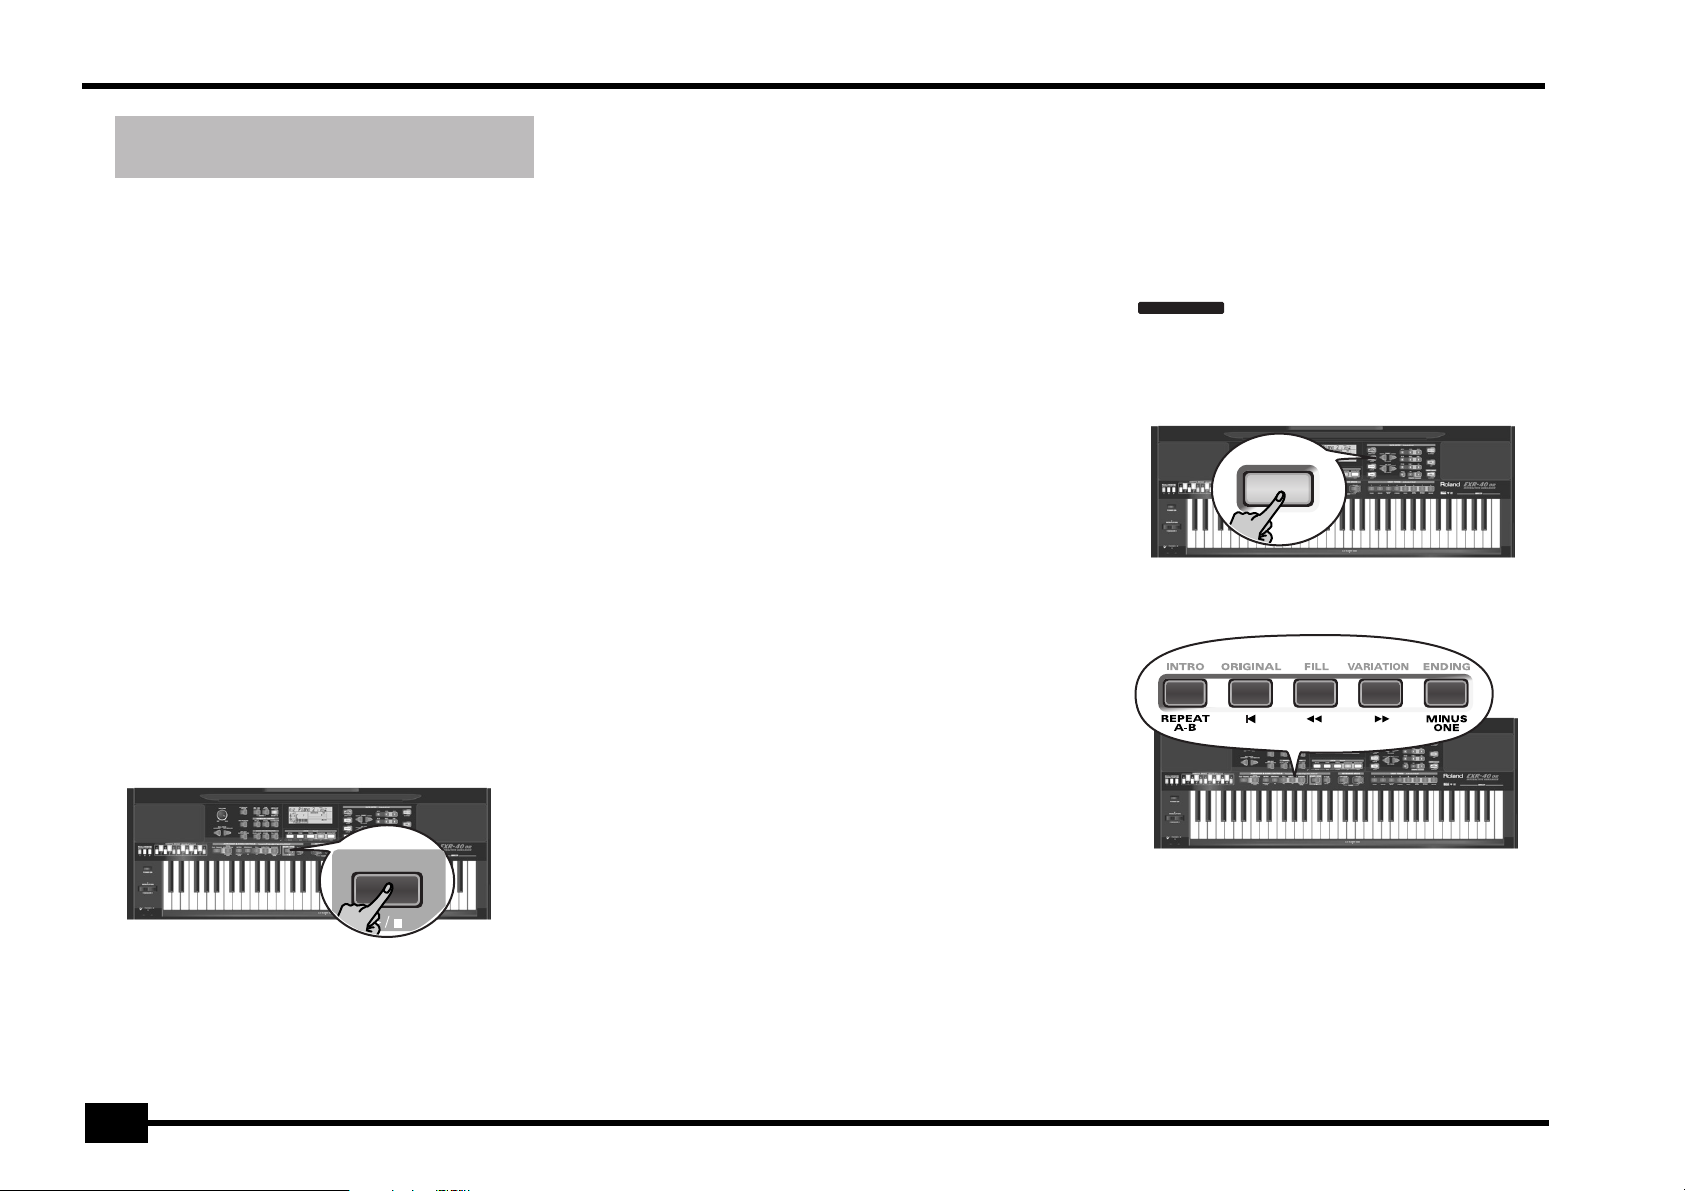
(6) Press the following buttons to use other patterns of the
currently selected Music Style:
EXR-40 OR
Button Function
INTRO Selects an introduction. Press this button
before activating [START÷STOP].
ORIGINAL Simple accompaniment version.
FILL Transition (“Fill In”) to VARIATION or ORIGI-
NAL.
VARIATION Slightly more complex accompaniment ver-
sion.
ENDING Phrase that indicates the end of the song. Use
this button instead of [START÷STOP] to stop
playback.
These buttons select Music Style “patterns”. The icon corresponding to the button you press appears in the display.
Also, the ARRANGER chord field in the display indicates the
name of the chord you played last. This chord is used by the
accompaniment.
ARRANGER
M
The [V-LINK] button now flashes to indicate the tempo and
beats (BEAT function).
Note: If the icon is displayed, playing in the left
half of the keyboard while the Arranger is stopped, will sound a
stereo string sound (to which you can add a monophonic bass
sound, see “Auto Bass*: status and volume” (p. 41)). The left half
of the keyboard is thus not muted (like on previous Roland
arranger instruments). This “EP Chord” function can be switched
off, however (page 42).
ARRANGER
As soon as you feel comfortable with the Arranger, you
should try to play a melody with your right hand while using
your left for specifying Arranger chords.
15
Page 16
r
EXR-40 OR
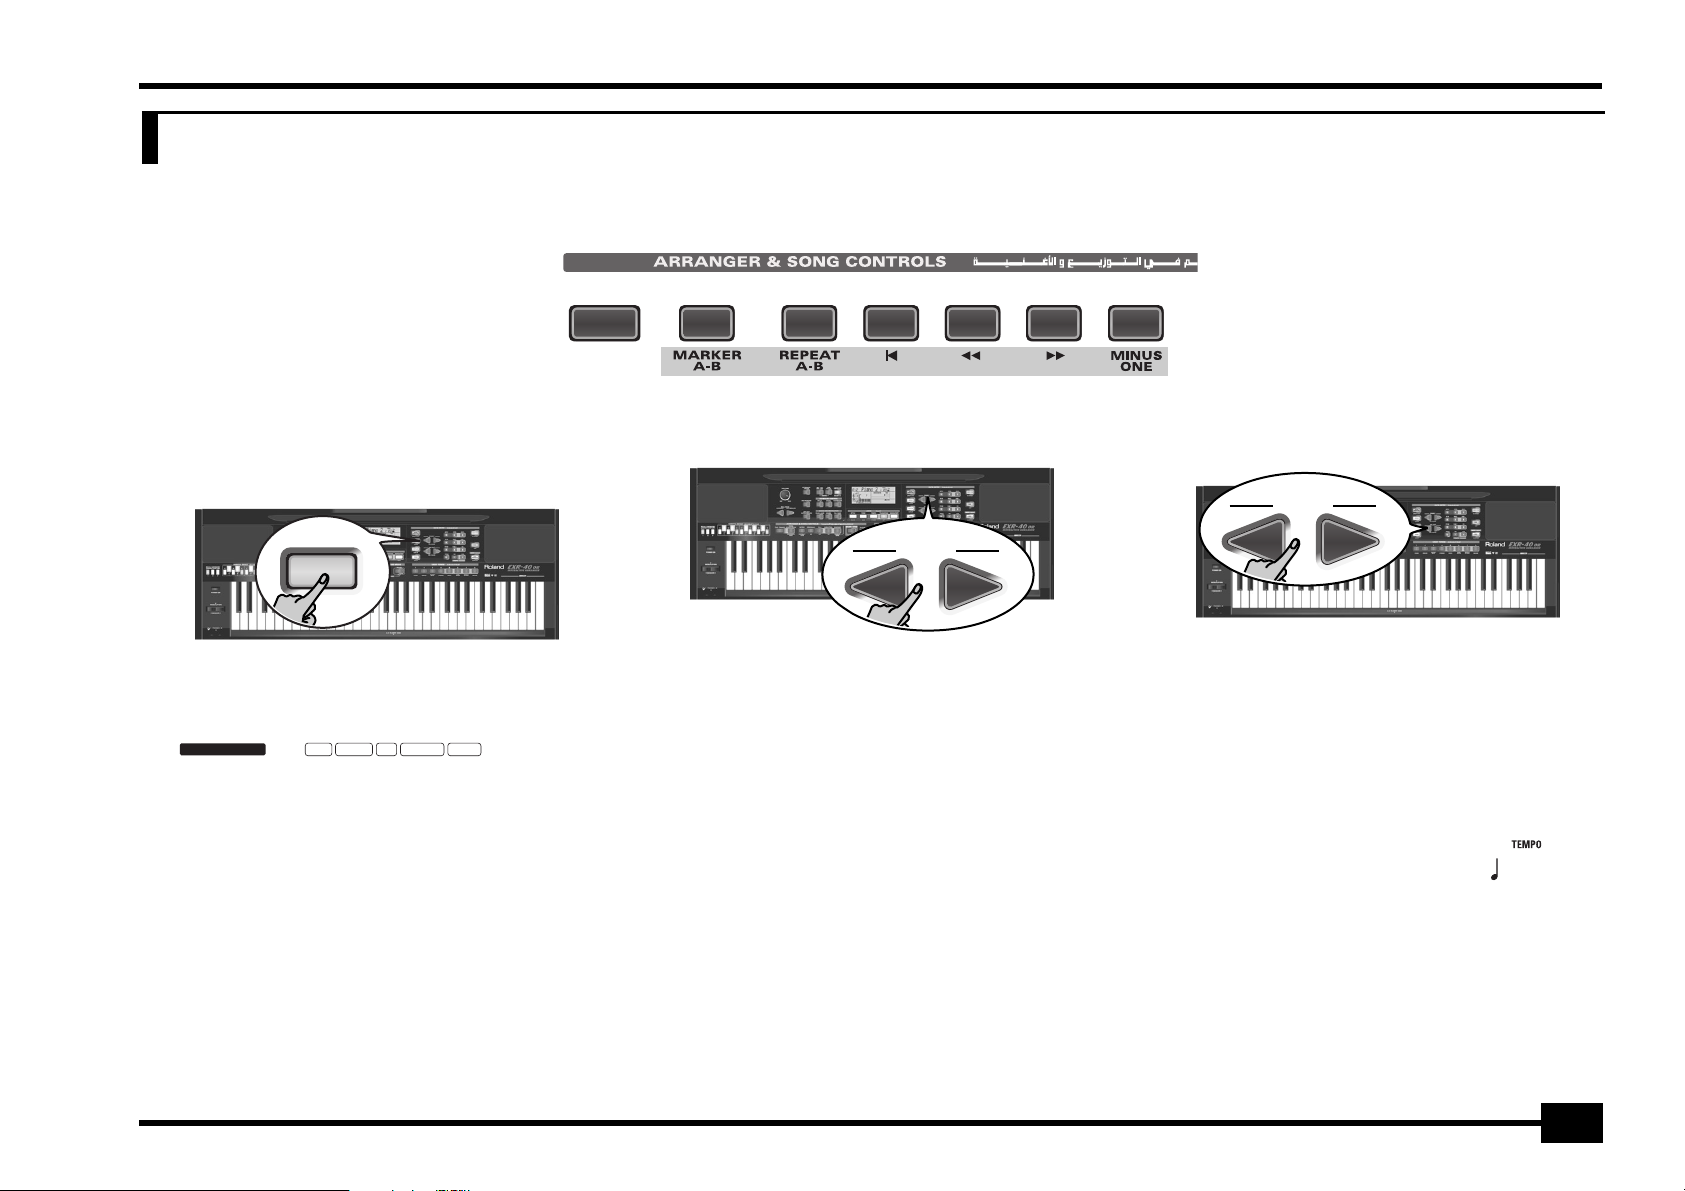
Changing the tempo
(7) Use the TEMPO/DATA buttons to decrease ([–]) or increase
([+]) the tempo (if necessary).
NO YES
To return to the Music Style’s default tempo, simultaneously
press [–] and [+].
You can also press the [TAP¥TEMPO] button several times at
the desired tempo.
TAP TEMPO
Automatic playback start (Sync Start & Stop)
Press [SYNC¥START÷STOP] (the icon appears).
“Sync Start” means that the Arranger starts playing back the
selected Music Style as you play a note or a chord with your
left hand (to the left of the split point).
SYNC START
stop as soon as you release all keys in the chord recognition
area. This is great for songs where you need breaks (i.e. one
or several beats of silence).
Note: The behavior of the SYNC STOP function can be changed
(see p. 42) by pressing and holding the [SYNC¥START÷STOP] but-
ton.
Stopping Arranger playback
(8) Press [START÷STOP] again to stop playback.
You can also press [ENDING]. In that case, you first hear an
ending phrase. When it is finished, Arranger playback stops
automatically.
Alternatively, you can press the [SYNC¥START÷STOP] button
twice in succession to activate the SYNC STOP function. If
you then release all keys in the left half of the keyboard,
playback stops at the same time.
Selecting Music Styles
The EXR-40 OR provides three memory areas for Music Styles:
USER STL: (Memory 000) This is where a Music Style loaded
from the Flash memory or floppy disk (MSA, MSD and MSE
series, optional) is temporarily stored. The data in this RAM
memory are erased when you switch off the EXR-40 OR.
LAIKA (001~028), PARADOSI (029~054), ARABIKA
(055~075), WESTERN (076~099): These are the Style families
in the EXR-40 OR’s internal ROM memory. These Styles cannot
be erased (but you can modify them in realtime using the Band
Orchestrator function, see page 17).
FLASH: (Memories 101~199) This is a Flash area inside the
EXR-40 OR that already contains 81 Styles when the EXR-40 OR
is shipped. You can expand the number of Styles in this area by
copying more Styles from your computer (via USB) or by saving
the Styles loaded from disk. There are 99 Flash memory slots in
all, but the actual number of Styles you can save there depends
on the data size of the Styles.
DISK: (Memories 201~…) This area refers to a floppy disk you
inserted into the EXR-40 OR’s drive. The number of available
Styles depends on the floppy disk, of course. The Style you select
is transferred to the EXR-40 OR’s USER STL memory (see
above), which is why it takes a little longer before you can use
it. (You could, however, save it to a Flash memory, see p. 48.)
(1) Press the [ARRANGER¥BAND] button.
Check whether the and a
INTRO ORIGINAL FILL VARIATION ENDING
(2) Press the [STYLE] button.
ARRANGER
icon are displayed.
SYNC
START/STOP
In PIANIST mode, Arranger playback will start when you
press any note.
The EXR-40 OR also provides a SYNC STOP option: quickly
press [SYNC¥START÷STOP] twice (“double-click”) so that the
SYNC START
icon starts to flash. This will cause the Arranger to
16
STYLE
(3) If you want to use a style on floppy disk, insert the disk
into the drive.
Page 17
EXR-40 OR
DRUM & BASS COMBO FULL BAND
(4) Use FAMILY [√][®] to select the memory area that contains
the desired Music Style (see above).
FAMILY
The FAMILY buttons allow you to jump to the desired “family” (which also include the Flash and USER STL areas).
The display now shows the name of the selected family.
MALFOUF
FLASH
(5) Use SELECT [√][®] to specify the desired Style within the
selected group.
SELECT
=
73
=
132
Note: If you forgot to insert a floppy disk into the drive, the display shows “No Disk” when you attempt to select the “disk
family”.
(6) If necessary, confirm your selection by pressing the [+/YES]
button.
The display briefly shows “LOADING” (only after selecting
a Style from the inserted floppy disk).
If you selected a Music Style on floppy disk, the icon
now flashes, and the EXR-40 OR automatically selects the
USER STL memory that now contains the Music Style
you loaded from floppy disk.
If you press [+/YES] during Arranger playback, the new Style
is used at the next downbeat (1st beat of the next measure).
Otherwise, the EXR-40 OR displays its name and uses that
Style when you press [START÷STOP].
Note: See page 49 for how to save the Music Style in the
USER STL memory to the Flash memory.
Using the Band Orchestrator
function
The Band Orchestrator function allows you to vary the accompaniment patterns played by the Arranger. You can leave out
parts, thin out the drum part, etc. – in real-time (i.e. while you
are playing).
(1) Press the [ARRANGER¥BAND] button to select the Arranger
mode.
(2) Select the Music Style you wish to use for playing (or use
the one that is currently selected).
See page 16.
(3) Press one of the following buttons to select the desired
level of musical “complexity” (the corresponding icon is
displayed):
The first press of SELECT [®] (or [√]) shows the name of the
first Music Style within the selected group. It is already
selected, so if you need the first Style, there is actually no
need to press SELECT [®]. You must use SELECT [√] or [®],
however, to select another Style within the same group. You
can also use the numeric buttons to select Styles. See also
“Working with the FAMILY, SELECT and numeric buttons”
(p. 20).
After selecting memory 101 (Flash) or 201 (first disk memory), the display shows a flashing Yes message.
Obviously, these buttons should be used during Arranger
playback.
DRUM & BASS
COMBO
FULL BAND
The simplest accompaniment that only contains the drum and bass lines.
Accompaniment pattern with only a few
instruments (i.e. a band).
Accompaniment pattern with a lush
arrangement (several melodic instrument
lines).
17
Page 18
r
EXR-40 OR
The corresponding icon appears in the display (only
one of them can be displayed at any one time).
Note: Immediately after switching on the EXR-40 OR, the
Orchestrator selects the “FULL BAND” level.
Note: The effect of these three levels also depends on whether
the [VARIATION] or [ORIGINAL] button was pressed. In effect, the
combination of the [ORIGINAL]/[VARIATION] and [DRUM&BASS]/
[COMBO]/[FULL¥BAND] buttons provides 6 accompaniment patterns per Music Style (3 x 2).
The last selection you make can be saved to a User Program.
See p. 44.
Balance
The BALANCE [√][®] buttons allow you to change the volume
balance between the Arranger (or Song) parts and the Keyboard
parts (the ones you can play yourself).
(1) Press BALANCE [ACCOMP] if the Arranger (or Song parts)
are too soft.
BALANCE
ACCOMP KEYBOARD
Balance
(2) Press BALANCE [KEYBOARD] if you think your solo playing
should be louder.
By holding down [SPLIT] (or [DUAL]) while pressing these
buttons, you can modify the volume of those Keyboard
parts.
Note: See p. 41 for setting the volume of individual parts.
=
80a10
18
Page 19
EXR-40 OR
6. Playing back songs
The EXR-40 OR allows you to play back commercially available music data files (called Standard MIDI Files) or your own songs you saved to disk or to the EXR-40 OR’s Flash memory. Your own songs are saved as
Standard MIDI Format 0 files and can also be played back using any other SMF compatible sequencer (or software).
Basic song playback
(1) Press the [SONG] button (it lights) to switch to Song
mode.
SONG
This is necessary because, otherwise, pressing the
[START÷STOP] button will start Arranger playback. So be sure
to check whether the [SONG] button lights and whether the
ARRANGER
longer displayed. Only then will the ARRANGER & SONG
CONTROLS buttons allow you to control song playback (see
above).
(2) If you want to play back a song from floppy disk, insert
the disk into the drive (front right).
INTRO ORIGINAL FILL VARIATION ENDING
and icons are no
TAP TEMPO ENDING
SYNC
START/STOP
FILLORIGINALINTRO
VARIATION
(3) Use FAMILY [√][®] to select the memory area that contains
the song you wish to play back.
FAMILY
The EXR-40 OR provides three memory areas for songs:
USERSONG: (Memory 000) This where the song data you
record are temporarily stored. The data in this RAM memory
are erased when you switch off the EXR-40 OR.
FLASH: (Memories 101~199) This is the Flash area inside
the EXR-40 OR that already contains several songs when the
EXR-40 OR is shipped. You can expand the number of songs
in this area by copying more songs from your computer (via
USB). There are 99 Flash memory slots in all, but the actual
number of songs you can save there depends on the data
size of the songs.
DISK: (Memories 201~…) This area refers to a floppy disk
you insert into the EXR-40 OR’s drive. The number of available songs depends on the floppy disk, of course.
(4) Use SELECT [√][®] or the numeric buttons to specify the
desired song within the selected group.
SELECT
This is only necessary for the Flash memory or a floppy disk
(there is only one USERSONG memory).
The first press of SELECT [®] (or [√]) shows the name of the
first song within the selected group. It is already selected, so
if you need the first song, there is actually no need to press
SELECT [®]. You must use SELECT [√] or [®], however, to select
another song within the same group. After selecting memory 101 (the first Flash memory), the display looks as follows.
101
SongName
=
You can also use numeric buttons to select songs.
19
Page 20
r
EXR-40 OR
Working with the FAMILY, SELECT and numeric
buttons
You can press FAMILY [√] or [®] either repeatedly (brief
presses) to go back or advance, or hold down [√] or [®] to
quickly select another family. The fastest way to scroll
through the available families is by holding down [√] while
pressing [®] (go backwards), or by holding down [®] while
pressing [√] (advance). The same methods are available for
the SELECT [√][®] buttons. As a reminder: the FAMILY buttons
are used for selecting groups, while the SELECT buttons
allow you to select items within a group.
If you prefer to use the numeric buttons, enter three figures (e.g. “001” for entry “1”). If you only enter two figures
(or only one), the EXR-40 OR takes slightly longer to accept
your entry.
Note: If the number you enter lies beyond the last available
entry, the EXR-40 OR does not change.
Note: Enter “000” (or “0”) to select the USERSONG memory.
After selecting memory 101 (Flash) or 201 (first disk memory), the display shows a flashing Yes message. You can
ignore this if you like, and proceed with the next step (or you
can press [YES/+] and then proceed).
Note: If you forgot to insert a floppy disk into the drive, the display shows “No Disk” when you attempt to select a file on
disk.
(5) After making sure that the correct song has been
selected, you can press [START÷STOP] (now called [®÷ª]) to
load it and immediately start playback.
[START÷STOP], then press that button again. Otherwise, wait
until the current song is finished, then press the
[START÷STOP] button to start playback of the new song.
Note: Please bear in mind that starting playback of the selected
song on disk will erase the song in the USERSONG memory.
Be sure to save it to disk before proceeding (see p. 53).
(6) You can change the song tempo with the [–][+] buttons or
[TAP¥TEMPO].
Doing so, however, means that the tempo will still change if
the song you are playing back contains tempo change messages. Furthermore, every time you jump back to the beginning or another position of the song using [|√], [º] or [‰], the
programmed song tempo is reset.
Note: In Song mode, the EXR-40 OR automatically selects the
PIANO SOLO keyboard mode. If you like, you can play along with
the song (and even use the Split or Dual part).
Note: In certain cases, the display may show the message XG
Light or GM2 rather than a Tone name. Such a message
means that the EXR-40 OR is using a Tone that cannot be
selected via the front panel. There are 798 such “hidden” Tones
whose sole purpose is to ensure XG/GM2 playback compatibility.
Additional playback functions
The [INTRO], [ORIGINAL], etc. buttons have two functions: one in
Style mode (printed above the buttons), and another one in
Song mode (printed below the buttons).
Selecting Song mode
The ARRANGER & SONG CONTROLS buttons have two functions: they can be used for selecting Music Style patterns (when
ARRANGER
the icon is displayed), or for Song navigation
(when the [SONG] button lights).
To select the Song mode (and the SONG CONTROL functions),
you need to press the [SONG] button. Only then will the following functions be available.
SONG
Fast Forward, Rewind, and Reset
START / STOP
The [V-LINK] button now flashes to indicate the tempo and
beats (BEAT function).
You can already select a new song while the current one is
still playing back. If you want to listen to it before the current song is finished, stop playback by pressing
20
• To fast forward (jump to a measure later in the song), press
[‰].
• To rewind (return to a measure that lies before the current
position), press [º].
The measure indication in the upper right corner of the display will help you locate the measure you need.
• Press [|√] (Reset) to jump back to the first measure of the
song. You need to stop playback before using the [|√] button.
Page 21
EXR-40 OR
Note: In certain cases, [‰] and [º] may not be available. This is
only the case for very large songs, however.
Note: By pressing [|√], [º] or [‰], you also recall the song’s pre-
programmed tempo value.
Loop playback (Repeat)
Another clever feature of the EXR-40 OR’s Recorder is that you
can program playback loops. You can do so during playback or
while the Recorder is stopped.
(1) Press [MARKER¥A–B] where you want the loop to begin
A
(the icon appears in the bottom right corner of the
display).
SYNC
START/STOP
MARKER
A–B
(2) Fast forward to the measure where you want the loop to
end and press [MARKER¥A–B] again (the icon appears).
You can also program loops on the fly. Remember, however,
that the Recorder always memorizes the beginning (downbeat) of the next measure.
(3) If the icon isn’t already displayed, press the [REPEAT¥A–B]
button to activate the loop you have just programmed.
INTRO
REPEAT
A–B
B
This button allows you to switch the EXR-40 OR’s Repeat
function on and off.
(4) To play back the loop, press the [START÷STOP] button (now
called [®÷ª]).
The Recorder jumps to measure “A” and starts playing. At the
end of measure “B”, the Recorder immediately jumps back to
the beginning of measure “A” and continues playing back
the passage.
If necessary, repeat steps (1) and (2) to set other marker
positions.
Note: The playback tempo is reset every time the Recorder
reaches the “A” measure.
Note: In certain cases, the Marker function may not be available. This only happens with very large songs, however.
Live performance with song backing (Minus One)
Your EXR-40 OR allows you to mute parts you wish to play
yourself or don’t need in a given situation. This is called “Minus
One” playback.
(1) Press the [SONG] button if it doesn’t light.
You can now select a Song, if you like (see p. 19).
(2) Press the [MINUS¥ONE] button (the “MinusOne” mes-
sage appears in the display).
ENDING
MINUS
ONE
The 5 LOCK buttons light to indicate that all tracks will be
played back.
(3) Press one of the LOCK buttons to switch off the corre-
sponding track(s). The assigned track icon flashes.
(Example: if you switch off the [DRUMS] button, the [10] icon
starts flashing.)
When a button lights, the corresponding track(s) is/are audible (i.e. not muted). You can also mute several tracks by
switching off the corresponding LOCK buttons.
MINUS ONE
The icon appears and the selected part is muted.
Note: The Main part does not automatically adopt the Tone and
related settings of the melody part.
If you like, you can also mute several parts.
What are tracks?
The term “track” is used only for your convenience. We borrowed it from tape recorders that allow for recording several musical parts by the same person (one part after the
other).
In the case of the EXR-40 OR, the term is only used to indicate that we are dealing with separate musical parts. Here
indeed (like with computer-based sequencers) what really
counts are the MIDI channels.
Songs you record with the EXR-40 OR, and the Standard
MIDI Files you play back can consist of up to 16 tracks (i.e.
MIDI channels). In many instances, only certain tracks are
used, but the following are almost certainly present in every
Standard MIDI File:
Track 2: bass
Track 4: melody
Track 10: drums
The LOCK buttons allow you to mute the following tracks:
[RIGHT]–Refers to track “4” of the selected Standard MIDI
File. Music data for educational purposes (especially piano
music) use this track for the right-hand part. Mute this track
21
Page 22
r
EXR-40 OR
to play the right hand yourself while listening to the lefthand part of the Standard MIDI File. The EXR-40 OR contains
an excellent stereo piano Tone you could use.
[LEFT]–Refers to track “3” of the selected Standard MIDI File.
Music data for educational purposes (especially piano music)
use this track for the left-hand part. See also above.
[OTHERS]–Mutes all tracks that cannot be muted with the
remaining LOCK buttons, more specifically: 1, 3, 6~9, 12~16.
[BASS]–Mutes track “2”, which is assigned to the bass part of
a Standard MIDI File.
[DRUMS]–Mutes track “10”, which is assigned to the drum
part of a Standard MIDI File.
Note: You also switch off several buttons simultaneously.
(4) Press [|√] and [®÷ª] to start playback.
(5) Press [®÷ª] again to stop playback.
(6) Press [MINUS¥ONE] again (or one of the “big” DATA ENTRY
buttons) to switch the function of the same name back
off again.
Note: The Minus One setting can be saved along with the
selected song. See page 48.
Changing the track assignments
If the song files you are using do not conform to the GM system
(and therefore do not correspond to the RIGHT, LEFT, BASS or
DRUM assignments of the Minus One function), you can proceed as follows to assign other tracks (MIDI channels) to the
LOCK [RIGHT], [LEFT], [BASS] and [DRUMS] buttons:
(1) Press the [MINUS¥ONE] button to activate the function of
the same name.
(2) Press and hold the [RIGHT], [LEFT], [BASS] or [DRUM] button.
(3) While holding that button, use the [–][+] buttons to assign
the desired MIDI channel to the button you are holding.
Example: To assign MIDI channel “10” to the [RIGHT] button,
press DATA ENTRY [+] until the display looks as follows:
RIGHT
(4) Press [MINUS¥ONE] again (or one of the “big” DATA ENTRY
buttons) to switch the function of the same name back
off again.
Note: The Minus One setting can be saved along with the
selected song. See page 48.
22
Page 23
7. Recording your music
START / STOP
MINUS
ONE
ENDING
Your EXR-40 OR contains a 16-track Recorder you can use for recording your own songs.
Basic song recording
Let us first look at the most straight-forward way of recording
your renditions with Arranger backing.
(1) Press the [ARRANGER¥BAND] button.
The display should look as shown above (if it doesn’t, use the
FAMILY [√][®] buttons (“REC MODE”) to select REC ALL):
(The [RECORD≈∏] and [1]~[16] icons flash.) You are now in ALL
mode, which means that everything you and the
EXR-40 OR’s Arranger play will be recorded.
EXR-40 OR
• Press [START÷STOP].
ARRANGER
BAND
ARRANGER
The icon appears. You can now use your left
hand for transposing the Arranger’s key in realtime.
(2) Press the [STYLE] button and select a Music Style (or select
a Music Assistant memory).
(3) Select the desired Arranger division by pressing [INTRO],
[ORIGINAL] or [VARIATION].
(4) Press the [START÷STOP] button.
(5) Use [TAP¥TEMPO] or the [–][+] buttons to set desired tempo.
(6) Press [START÷STOP] again to stop Arranger playback.
(7) Assign the desired Tone to the right half of the keyboard.
Press [TONE] and use the FAMILY & SELECT [√][®] buttons, the
numeric buttons or the buttons in the USER TONES section.
See also page 30.
(8) Press the [REC¥∏] button.
RE-START
● REC
=
ALL
INTRO
1
9210
120 001
ORCHESTRATOR BEAT
FULL
BAND
5
6
3
11
7
4
15
13
14
12
8
16
Note: If you select “REC ALL” with the FAMILY buttons, the song
in the EXR-40 OR’s USERSONG memory is erased. You may
want to save the current song first (see p. 48). If you only
pressed [REC¥∏], the EXR-40 OR selects the Single mode if the
USERSONG memory already contains data. See page 24 for
details about that mode.
(9) Start recording in one of the following ways:
• Press the [START÷STOP] button to start Arranger playback
with the selected Division.
The [V-LINK] button now flashes to indicate the tempo and
beats (BEAT function).
Note: If you start recording without the Arranger and want to
bring it in at a later stage, it would be a good idea to switch on
the metronome by pressing the [METRONOME] button.
• Activate the [SYNC¥START] function and press one or several
keys to the left of the Split point.
Note: It is also possible to record in PIANO SOLO mode (after
pressing the button of the same name). In that case, you should
definitely use the metronome. The song’s time signature can be
set with the MetroTS function. See page 14.
(10) Stop recording in one of the following ways:
• Press the [ENDING] button to start the Ending phrase. As
soon as it ends, Arranger playback and song recording stop.
Listening to your song
(1) Press the [SONG] button.
(2) Press [START÷STOP] to start playback.
(3) Press [START÷STOP] once again to stop playback.
(4) Press [|√] to return to the beginning of the song.
23
Page 24
r
EXR-40 OR
Other recording functions
The EXR-40 OR’s 16-track Recorder can be used in several ways.
Let us therefore have a look at the other recording modes.
About the recording modes
●
Modes
The EXR-40 OR provides two modes for recording new
music, and two for adding parts or correcting passages of
existing music:
Recording a new song
ALL In this mode, you can record everything you
and the EXR-40 OR can play simultaneously:
• Arranger (accompaniment).
• Keyboard parts (Main and Split or Dual).
Keyboard In this mode, you can record using the Key-
board parts. The track can be freely selected.
• Main and Split or Dual
Adding parts to an existing song
Single In this mode you can record onto one track at a
time. The track can be freely selected.
Punch I/O This mode allows you to re-record a short sec-
tion of an otherwise perfect part.
Note: Each time you select ALL or Keyboard mode, the data in
the USERSONG memory are erased.
●
Recorder memory
The EXR-40 OR provides one “live” song memory, which can
contain one song at a time. After completing a song, you
should save it (see p. 53).
To keep you from accidentally erasing the song in the
EXR-40 OR’s internal memory, the EXR-40 OR automatically
selects Single after your first recording. Bear in mind
that selecting “ALL” or “Keyboard” will erase the song in
the USERSONG memory. Do not select “ALL” or “Keyboard” for adding parts to an existing song – use “Single” or
“Punch I/O” instead.
Conversely, you cannot select “Single” or “Punch I/O” if the
USERSONG memory doesn’t yet contain data.
And finally: playing back a Standard MIDI File erases the
song in the EXR-40 OR’s memory. In return, the SMF data
will be available (and can be supplemented with your own
renditions in “Single” or “Punch I/O” mode).
More about ALL mode
In addition to what you learned on p. 23, here are a few considerations:
After pressing the [REC¥∏] button, the 16 track and [RECORD∏]
icons start flashing, signalling that all 16 tracks are available for
recording.
=
ALL
INTRO
1
9210
120 001
ORCHESTRATOR BEAT
FULL
BAND
5
6
3
11
7
4
15
13
14
12
8
16
Here is what the tracks correspond to (after recording a song
with Arranger backing):
Accomp 1
1
Arranger bass
2
Accomp 2
3
k
Main
4
Accomp 3
5
k
Dual*
6
Accomp 4
7
Accomp 5
8
(*) Only one of these can be used alongside the Main part.
(**) If you assign a Drum Set to the Main part. In that case, track 4 is
not used.
Accomp 6
9
Arranger drums
10
k
Split*
11
k
Auto Bass* (see p. 41)
12
13
14
Melody Intell. (see p. 27)
15
k
Main**)
(
16
For your convenience, the Keyboard parts are flagged with a
“k” symbol in the above graphic.
Parts you do not hear during recording are not recorded. The
track icons [1]~[16] thus do not show you what will be
recorded, but rather what can be recorded.
Keyboard recording mode
In Keyboard mode, you can record the Keyboard parts. The
Arranger is not available. Essentially, this mode allows you to
record either one layered part using up to two sounds (Main +
Dual) or two parts (Split to the left, Main to the right). If you
select a Drum Set for the Main part, you can only record a drum
part.
Note: When you select the Keyboard mode, song data in the
EXR-40 OR’s internal memory will be overwritten by your new
recording.
(1) Press the [REC¥∏] button.
(2) Press FAMILY [√][®] to make the display look as follows:
=
Keyboard
INTRO
1
9210
RECORD
The and track icons flash.
120 001
ORCHESTRATOR BEAT
FULL
BAND
5
6
3
11
7
4
15
13
14
12
8
16
(3) To create a split, press the [SPLIT] button.
(4) Activate the metronome (if necessary), and set the desired
tempo with the [TAP¥TEMPO] button or [–][+].
You can also record without metronome if you like.
Note: If you assign a Drum Set to the Main part, your drum performance is recorded onto track 16.
Single recording mode
This mode is only available if the EXR-40 OR’s song memory
already contains data. When you press [REC¥∏], the
icon and the icon of the first empty track flash. You could
therefore record a new part straight away. (If all tracks already
contain data, Track 1 will be selected.)
You can, however, also substitute an already recorded part with
a new version.
(1) Press the [REC¥∏] button.
(2) Press FAMILY [√][®] to select “Single”.
(3) Use the SELECT [√][®] or numeric buttons to select the
track you wish to record to.
You can only select one track at a time (hence the name
“Single”). If you select a track that already contains data,
your new version will overwrite the existing one.
(4) If necessary, assign the desired Tone to the part you are
about to record (see p. 30).
RECORD
24
Page 25
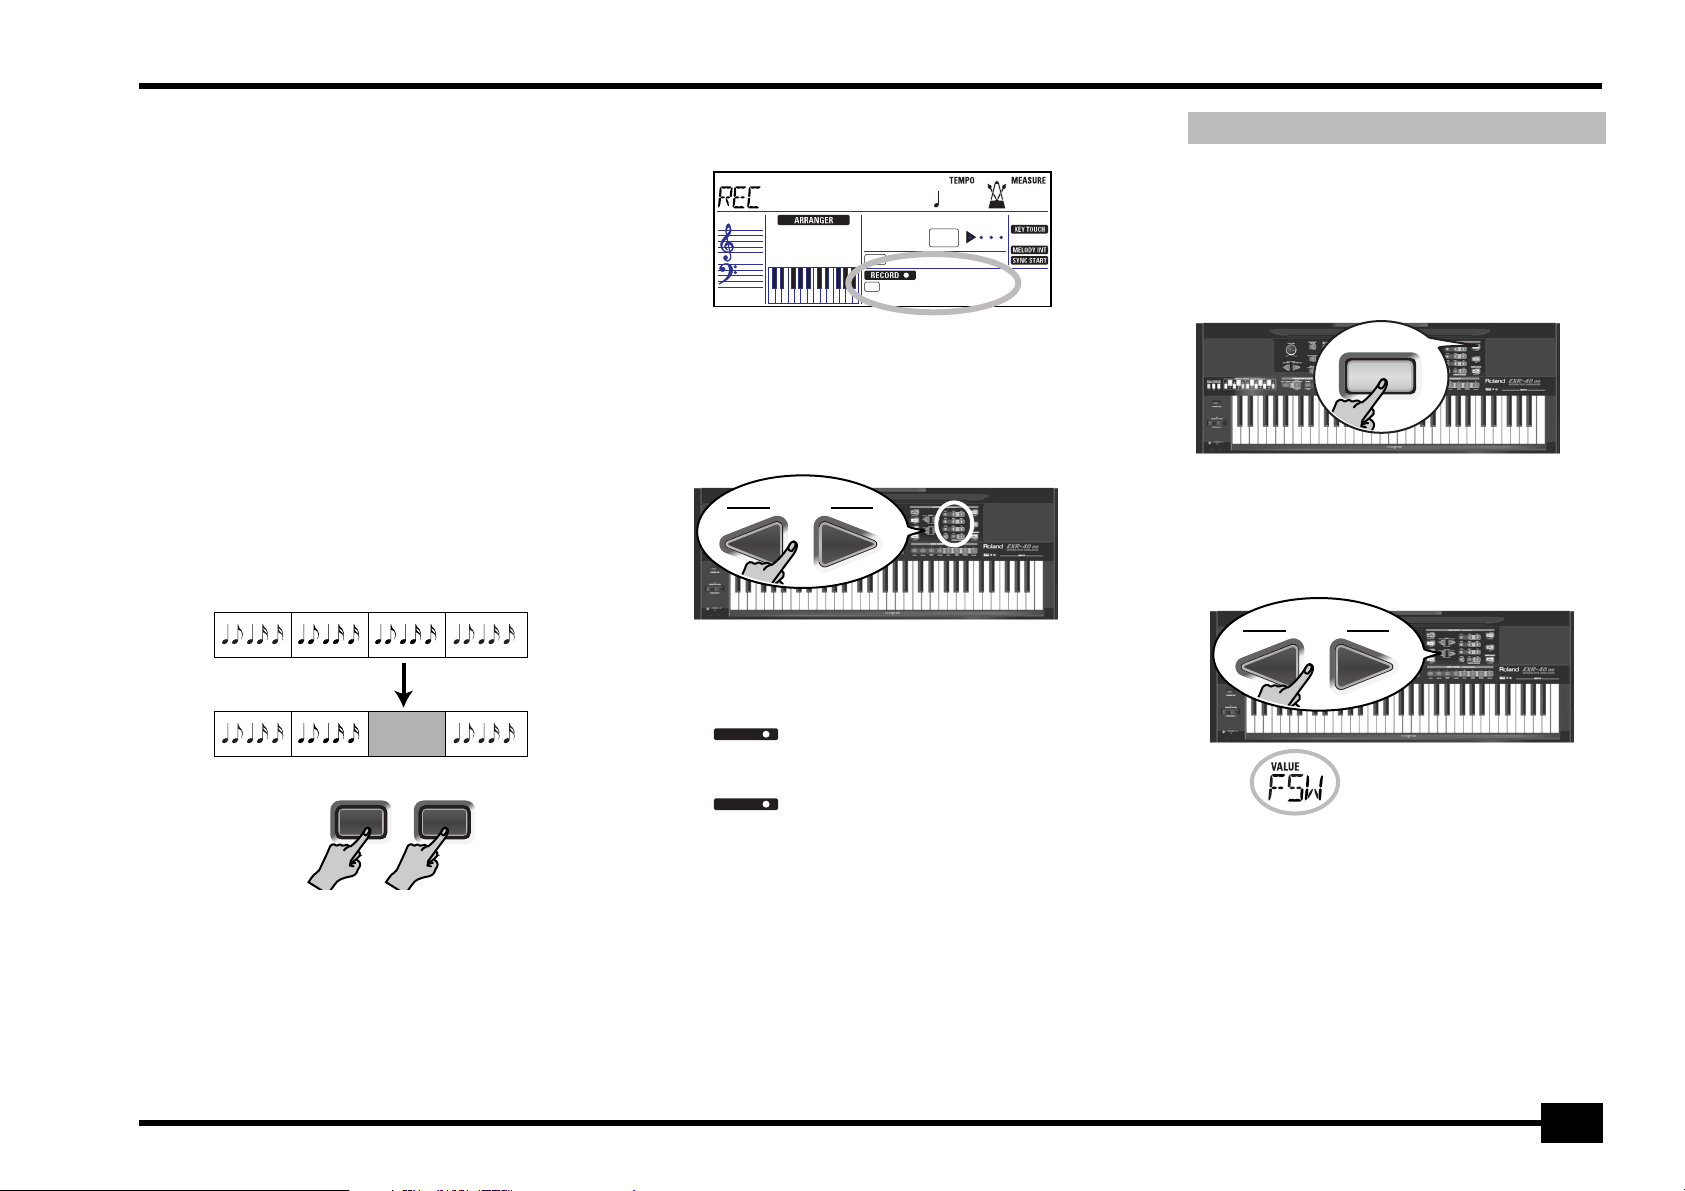
EXR-40 OR
SELECT
Sustain
If you select track [10], you can select Drum Sets rather than
Tones. Track 10 is reserved for drum parts.
Note: If you use the Single recording mode for adding parts to a
Standard MIDI File recorded with another instrument or
sequencer, track 16 (or any other track defined as “second drum
track”) may also use a Drum Set that can be changed.
Note: Even though the Main part can be used for recording all
tracks in Single mode, the MFX only applies to track/MIDI chan-
nel 4.
(5) Press [START÷STOP] to start recording.
After a two-measure count-in (see p. 41), you will hear all
parts that have already been recorded. Start playing (and
recording) your new part.
(6) Press [START÷STOP] to stop recording.
(7) Return to step (3) to record additional parts.
Punch I/O
In this mode, you can re-record part of a track (the second
chorus, for example). The important aspect of this mode is
that newly recorded material does not erase the material
before or after the passage you redo.
Original track
This passage is redone
RE-START RE-START
● REC● REC
By contrast, in Single mode, the entire track you record is
replaced by your new material. (So if you don’t play anything
during recording, the entire track will be empty afterwards.)
Like the Single mode, Punch I/O can only be selected if the
EXR-40 OR’s memory already contains song data.
(1) Press the [REC¥∏] button.
(2) Press FAMILY [√][®] to make the display look as follows:
=
PunchI/O
INTRO
1
120 001
ORCHESTRATOR BEAT
FULL
BAND
The flashing track icon (only one) depends on the first track
that already contains data. In the above example, track 1
contains data, which is why its icon flashes.
(3) Use the SELECT [√][®] or numeric buttons to select the
track you wish to record to.
SELECT
You can only select one track at a time.
(4) Press [START÷STOP] to start playback of the (old) song
data.
RECORD
The icon and the icon of the selected track flash.
(5) When the Recorder reaches the measure where you wish
to start recording, press [REC¥∏] again.
RECORD
The icon now lights steadily.
(6) Play the passage you want to redo.
(7) Press [REC¥∏] again to deactivate recording.
Song playback still continues, so…
(8) Press [START÷STOP] to stop playback.
(9) Press [START÷STOP] to listen to the new version.
If you are not satisfied, return to step (3) above.
Return to step (3) to correct another track.
Using a footswitch for punching in/out
You can also use an optional footswitch for starting and
stopping recording. Doing so has the advantage that you can
use both hands for playing (or the left hand for Pitch Bend/
Modulation effects and the right for playing the melody.)
• Connect an optional DP-2, DP-6, or BOSS FS-5U footswitch
to the FOOTSWITCH socket on the EXR-40 OR’s rear panel.
• Press the [FUNCTION] button (it must light).
FUNCTION
• Use FAMILY [√][®] to select “KB SET”.
The EXR-40 OR’s Function parameters are divided into 9 logical “families”. For the following, we need to select the group
that contains the global keyboard settings.
• Use SELECT [√][®] to select the “FSW” parameter.
Note: See also “Working with the FAMILY, SELECT and numeric
buttons” (p. 20).
• Use the [–][+] buttons to select “Punch I/O”.
• Press [SONG] to return to the recording function.
• Continue with step (1) under “Punch I/O”.
In steps (5) and (7), press the footswitch (rather than the
[REC¥∏] button).
25
Page 26
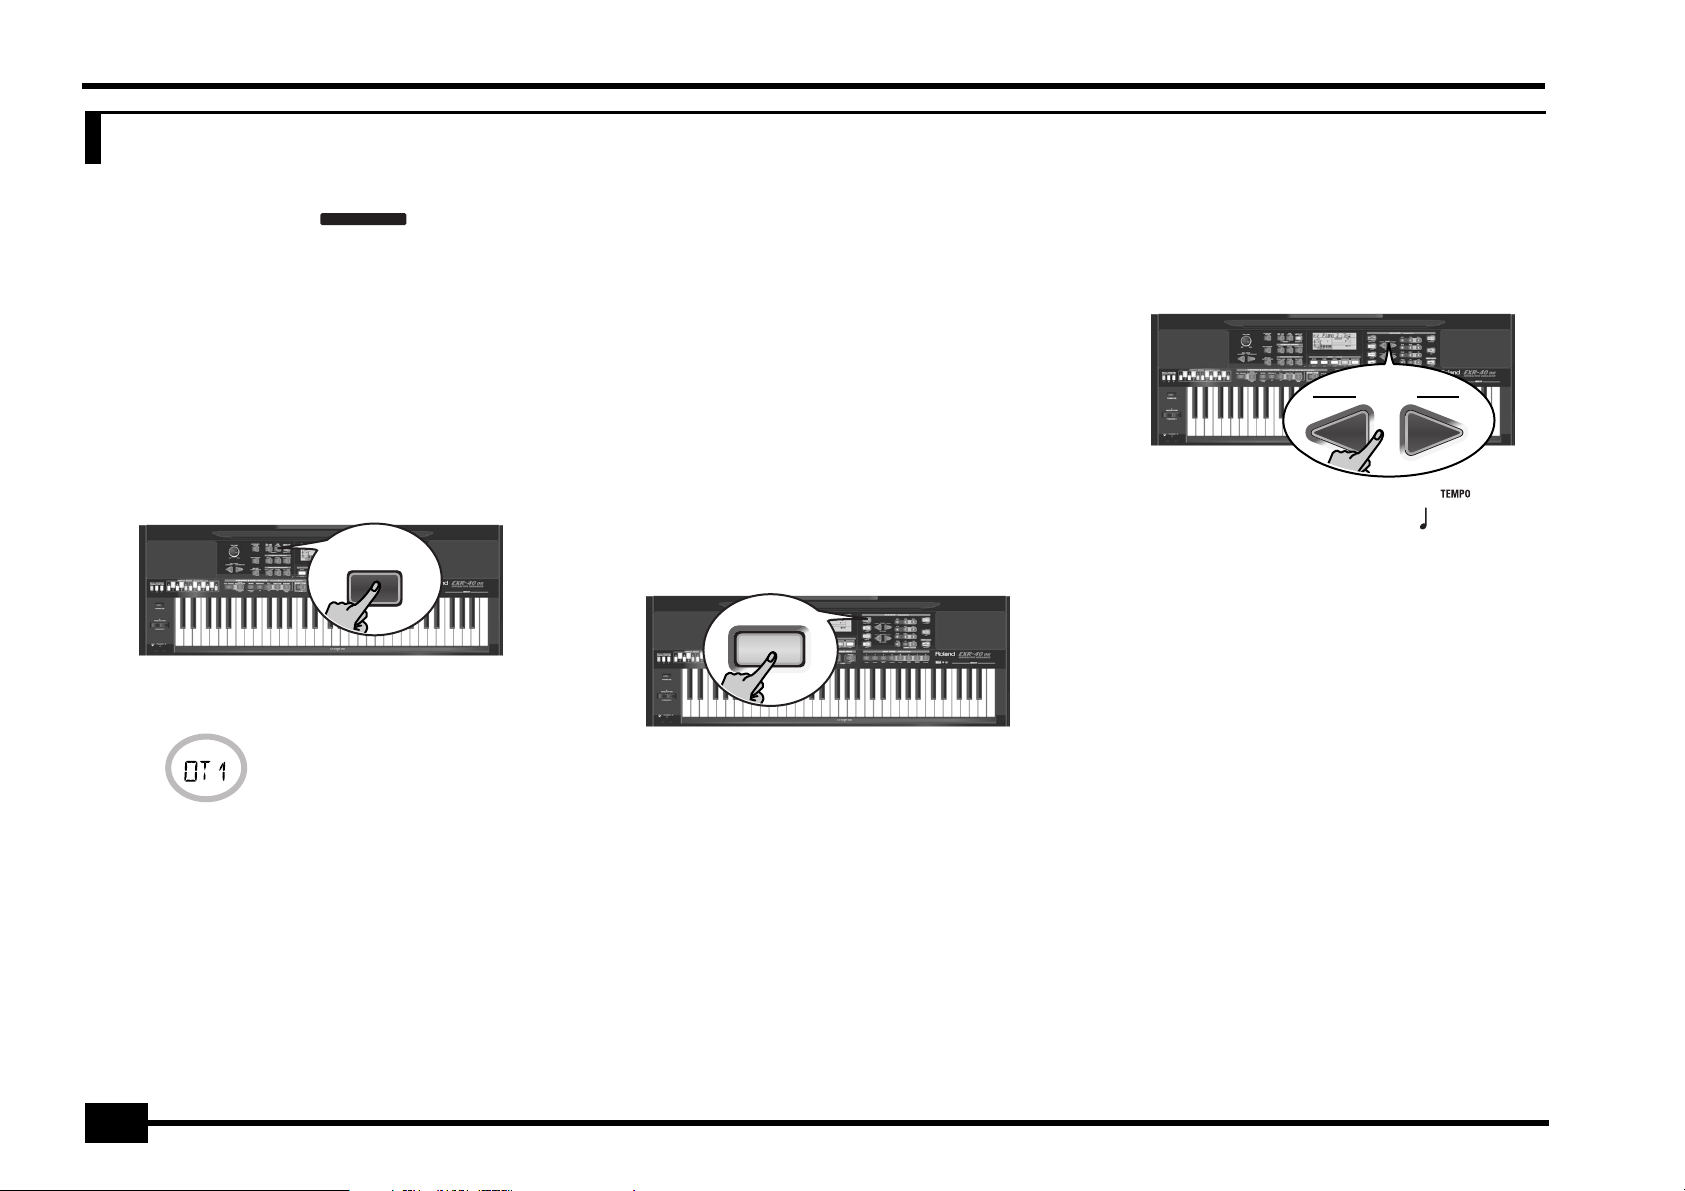
r
EXR-40 OR
8. Additional Music Style functions
Apart from the basic Music Style functions covered on page 15 and following, your EXR-40 OR also provides the following functions. Most of the following functions are only available after pressing the
[ARRANGER¥BAND] button (the icon must be displayed).
ARRANGER
One Touch
The One Touch function automates quite a few tasks:
• The Arranger selects the preset Style tempo.
• Suitable Reverb and Chorus settings.
• The EXR-40 OR selects sounds for the Main, Split and Dual
parts that are is suitable for the selected Style.
There are 2 One Touch memories per Style with different
settings for the above parameters. Here is how to select one:
(1) Select the desired Music Style (see p. 16).
(2) Press the [ONE¥TOUCH] button.
ONE
TOUCH
The number field in the upper left corner reads “OT”, followed by the number of the selected One Touch memory.
Piano 2
If the DATA ENTRY [TONE] button lights, the display now
shows a Tone name (“Piano 2” in the example above).
(3) Press the [ONE¥TOUCH] button again if you need “OT2”.
One Touch needs to be activated again every time you select
a new Music Style.
Note: One Touch is also available for USB and disk Styles, but it
is less meaningful.
Using the Music Assistant
Another practical function for quickly making the right settings
for a song you want to play is to take advantage of the
EXR-40 OR’s novel MUSIC ASSISTANT function. It prepares
everything for working with the Arranger (Style, Tones, effects,
etc.). The Music Assistant is not available for song playback.
The following parameters are changed automatically when you
select a Music Assistant memory:
• Music Style
• Tempo
• Sounds for the Main, Split
and Dual parts
(1) Press the [MUSIC¥ASSISTANT] button.
MUSIC
ASSISTANT
It lights and the display shows the name of the last Music
Assistant setting you selected (or of the first Music Assistant
memory).
• Effect settings
• Band Orchestrator
• Keyboard Touch
(2) Use FAMILY [√][®] to select the “family” (i.e. genre) that
contains the desired Music Assistant settings.
FAMILY
ARABIC
The following families are available: Arabic, Greek and World.
(3) Use SELECT [√][®] to specify the desired Music Assistant
memory within the selected family.
The first press of SELECT [®] (or [√]) shows the name of the
first Music Assistant setting within the selected group. It is
already selected, so if you need the first setting, there is
actually no need to press SELECT [®]. You must use SELECT [√]
or [®], however, to select another Music Assistant setting
within the same group. You can also use the numeric buttons. See also “Working with the FAMILY, SELECT and
numeric buttons” (p. 20).
Note: If necessary, you can now change the settings you do not
like (e.g. select another sound for the Main part, etc.) and then
save your new version to a User Program (see p. 44).
=
102
26
Page 27
EXR-40 OR
Melody Intelligence
The Melody Intelligence function adds a second voice (harmony
notes) to the melodies you play with your right hand. In fact,
the Melody Intelligence function uses both halves of the keyboard to determine which notes to play:
• It looks at the melody notes in the right half; and…
• It analyzes the chords you play in the left half to see which
notes it must add to your melody.
Press the [MELODY¥INTELLIGENCE] button so that the corresponding icon appears in the display.
MELODY
INTELLIGENCE
=
Traditnl
M
INTRO
12000 001
ORCHESTRATOR BEAT
FULL
BAND
Changing the Melody Intelligence harmony type
The EXR-40 OR contains 18 different voicings (harmony
types) for the MELODY INTELLIGENCE function. These voicings specify the number of harmony notes and the way in
which they are added to your melody.
To select a different harmony type, press an hold the
[MELODY¥INTELLIGENCE] button until the “MI” message
appears in the upper left corner of the display. Then use the
[–][+] buttons to select the desired voicing. The available
types are:
1 Duet
2 Organ
3 Combo
4 Strings
5 Choir
Note: The [MELODY¥INTELLIGENCE] setting can be saved to a
User Program memory.
6 Block
7 BigBand
8 Country
9 Traditnl
10 Broadway
11 Gospel
12 Romance
13 Latin
14 CntrGuit
15 CntrBald
16 WltzOrg
17 OctvTpe1
18 OctvTpe2
PIANIST Mode
In PIANO mode, the Main part is assigned to the entire keyboard. Though the EXR-40 OR initially assigns a piano sound to
the Main part, you can select any other one and save your setting to a User Program.
The main difference between PIANO SOLO and PIANIST mode is
that the Arranger’s melodic parts are available here, which is
not the case in PIANO SOLO mode.
But there is no split for chord recognition (you may remember
that the EXR-40 OR’s keyboard is split when you switch on the
[ARRANGER¥BAND] button): the Arranger decodes every chord
you play – no matter where you play it. Causing the Arranger to
play another chord requires that you play at least a triad (i.e. the
three notes that make up a chord). Feel free to play more than
three chord notes but remember that two notes won’t cause the
Arranger to play another chord.
When you use an optional sustain pedal, all notes you play
simultaneously are recognized as a chord – irrespective of
whether you play them with you left or right hand.
(1) Simultaneously press the [ARRANGER¥BAND] and
[PIANO¥SOLO] buttons (both buttons light).
The display briefly shows "PianoMod" and the
ARRANGER
icon flashes.
(2) Press [STYLE] and use the SELECT [√][®] buttons to select a
Music Style. See also p. 16.
(3) Press [TONE] and use FAMILY [√][®] and SELECT [√][®] (or the
USER TONES buttons) to assign a different sound to the
Main part.
You can also add the DUAL part (page 14). Even the SPLIT
part could be used, yet chord recognition remains active for
the entire keyboard.
(4) Press [ARRANGER¥BAND] or [PIANO¥SOLO] to leave PIANIST
mode.
27
Page 28
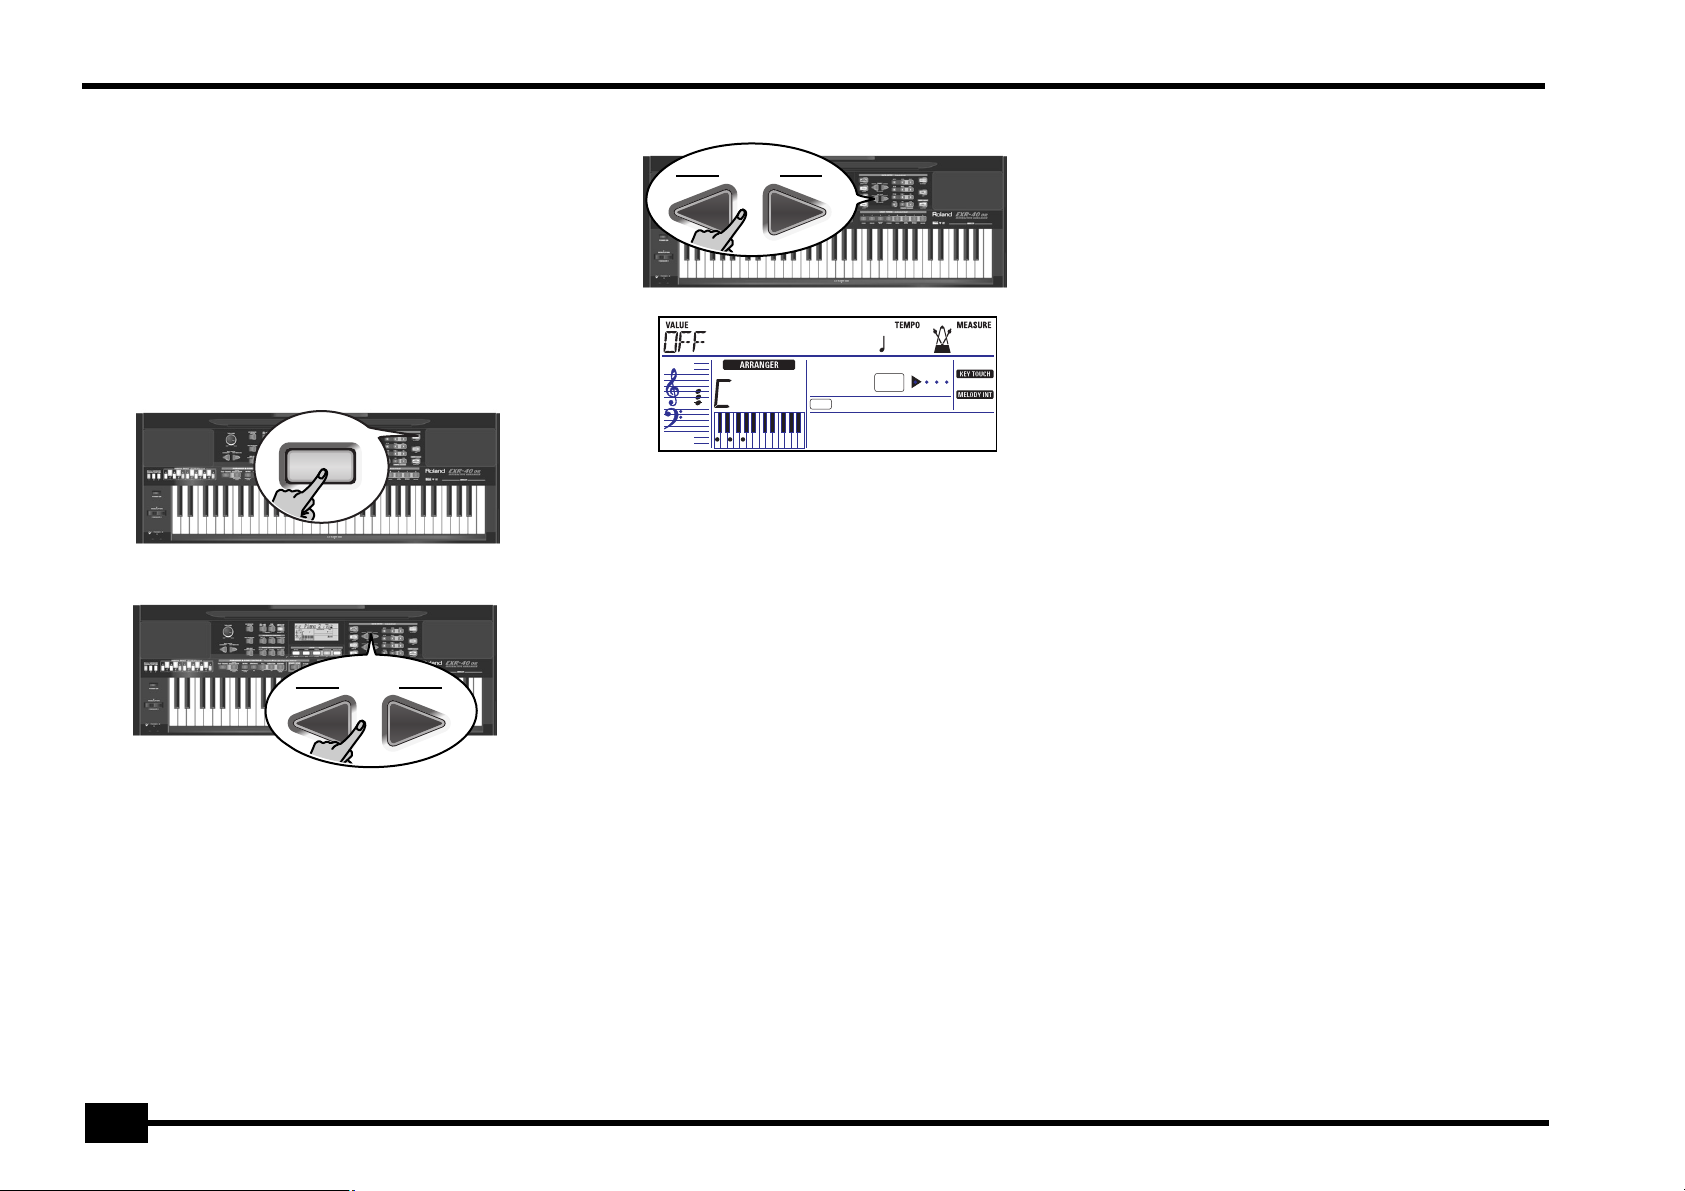
r
EXR-40 OR
Bass Inversion (Bass Inv)
Use this function to change the way in which the Arranger
reads the chords you play.
When this function is off (default), the Acc Bass part plays the
root of the chords that feed the Arranger. If you play a “C” (or C
chord), the bass sounds a “C”; if you play an A minor chord (or if
you press “A” and the “C” to its right), the bass sounds an A, etc.
By activating Bass Inversion, you can specify the note played by
the A. Bass part (the lowest note of your chords). Switch on Bass
Inversion for songs that rely on bass rather than on chord patterns (for example C – C/B – C/Bb, etc.).
(1) Press the [FUNCTION] button.
FUNCTION
(2) Use FAMILY [√][®] to select “ARR SET”.
FAMILY
(3) Use SELECT [√][®] to select the “BassInv” parameter.
SELECT
=
BassInv
M
INTRO
12000 001
ORCHESTRATOR BEAT
FULL
BAND
(4) Press the [+] button to select “ON” for “VALUE”.
Note: See also “Working with the FAMILY, SELECT and numeric
buttons” (p. 20).
(5) Press another “big” button in the DATA ENTRY section to
leave this function.
Note: This setting can be saved to a User Program (see p. 44).
More Music Style functions
Here are yet other functions related to Music Styles. These can
be set via the FUNCTION menu, or are covered elsewhere:
• Balance between the Keyboard parts and the Music Style
parts (see p. 18)
• Volume of certain Music Style parts (see p. 41)
• Arranger split point (see p. 40)
• Hold function for the Arranger notes (see p. 42).
The EXR-40 OR’s Function parameters are divided into 9 logical “families”. As the Bass Inversion parameter is an
Arranger function, you need to select the Arranger settings
(hence ARR SET).
28
Page 29
EXR-40 OR
E
E
E
9. Using oriental tunings
Your EXR-40 OR allows you to change the tuning of the keys, which then applies to all notes of the same name. Here’s an example: If you press the ORIENTAL SCALE [Bƒ] button (indicator lights), that note’s tuning
is lowered by a quarter tone (–50 cents). This setting applies to all B-flat keys on the keyboard.
Tuning individual notes a quarter tone down
(1) Press an ORIENTAL SCALE button to tune the correspond-
ing notes a quarter tone down (the button must light).
E
(2) If you also want to tune down other notes, press the cor-
responding button(s).
If you pressed the wrong button (indicator lights), press it
again so that its indicator goes dark again. The pitch of the
corresponding notes returns to normal.
Using other tuning values
Pressing an ORIENTAL SCALE button toggles between the western tuning of the corresponding notes and a setting that is a
quarter tone below western tuning (–50 cents).
However, you can also select other tuning values.
(1) Press and hold the ORIENTAL SCALE button of the note
whose tuning you wish to change until the display reads
Scale, followed by the note name.
You can also select this page and parameter via the Function
menu. See page 43.
(2) Use the DATA ENTRY [–][+] buttons to modify the tuning of
the selected note.
Setting range: –64~63 cents.
NO YES
Note: To return to the default value, press [+] and [–] simulta-
neously.
Saving and loading your tunings (SCALE MEMORY)
After setting the desired tunings, you can save them to one of
the three Scale Memories and recall them whenever you need
them. Here’s what you need to do:
(1) Tune the notes to your liking (see above).
(2) Press and hold the SCALE MEMORY button ([1]~[3]) that
corresponds to the memory where you wish to save your
tuning settings.
(3) Wait until all three SCALE MEMORY indicators briefly
light, and release the button you pressed.
If necessary, you can select another, scale memory by briefly
pressing the SCALE MEMORY button assigned to the settings
you wish to use.
To return to the western tuning, press the SCALE MEMORY
button in question again so that its indicator goes dark, and/
or switch off all ORIENTAL SCALE buttons whose indicators
light.
In the second case, the SCALE MEMORY indicator of the last
memory you selected starts flashing to signal that the current ORIENTAL SCALE settings no longer correspond to the
ones contained in the currently selected memory.
The ORIENTAL SCALE settings are also saved to a User Program and therefore do not need to be saved to one of the
SCALE MEMORY areas. Whenever you select a User Program
whose scale settings differ from the ones of the last memory
you selected, the corresponding button ([1]~[3]) starts flashing.
Note: When shipped, the EXR-40 OR already contains frequently used Scale Memory settings (see above).
Note: See also “Scl Mode*” (p. 43) for deciding which sections
should be affected by the Scale Tune settings.
29
Page 30
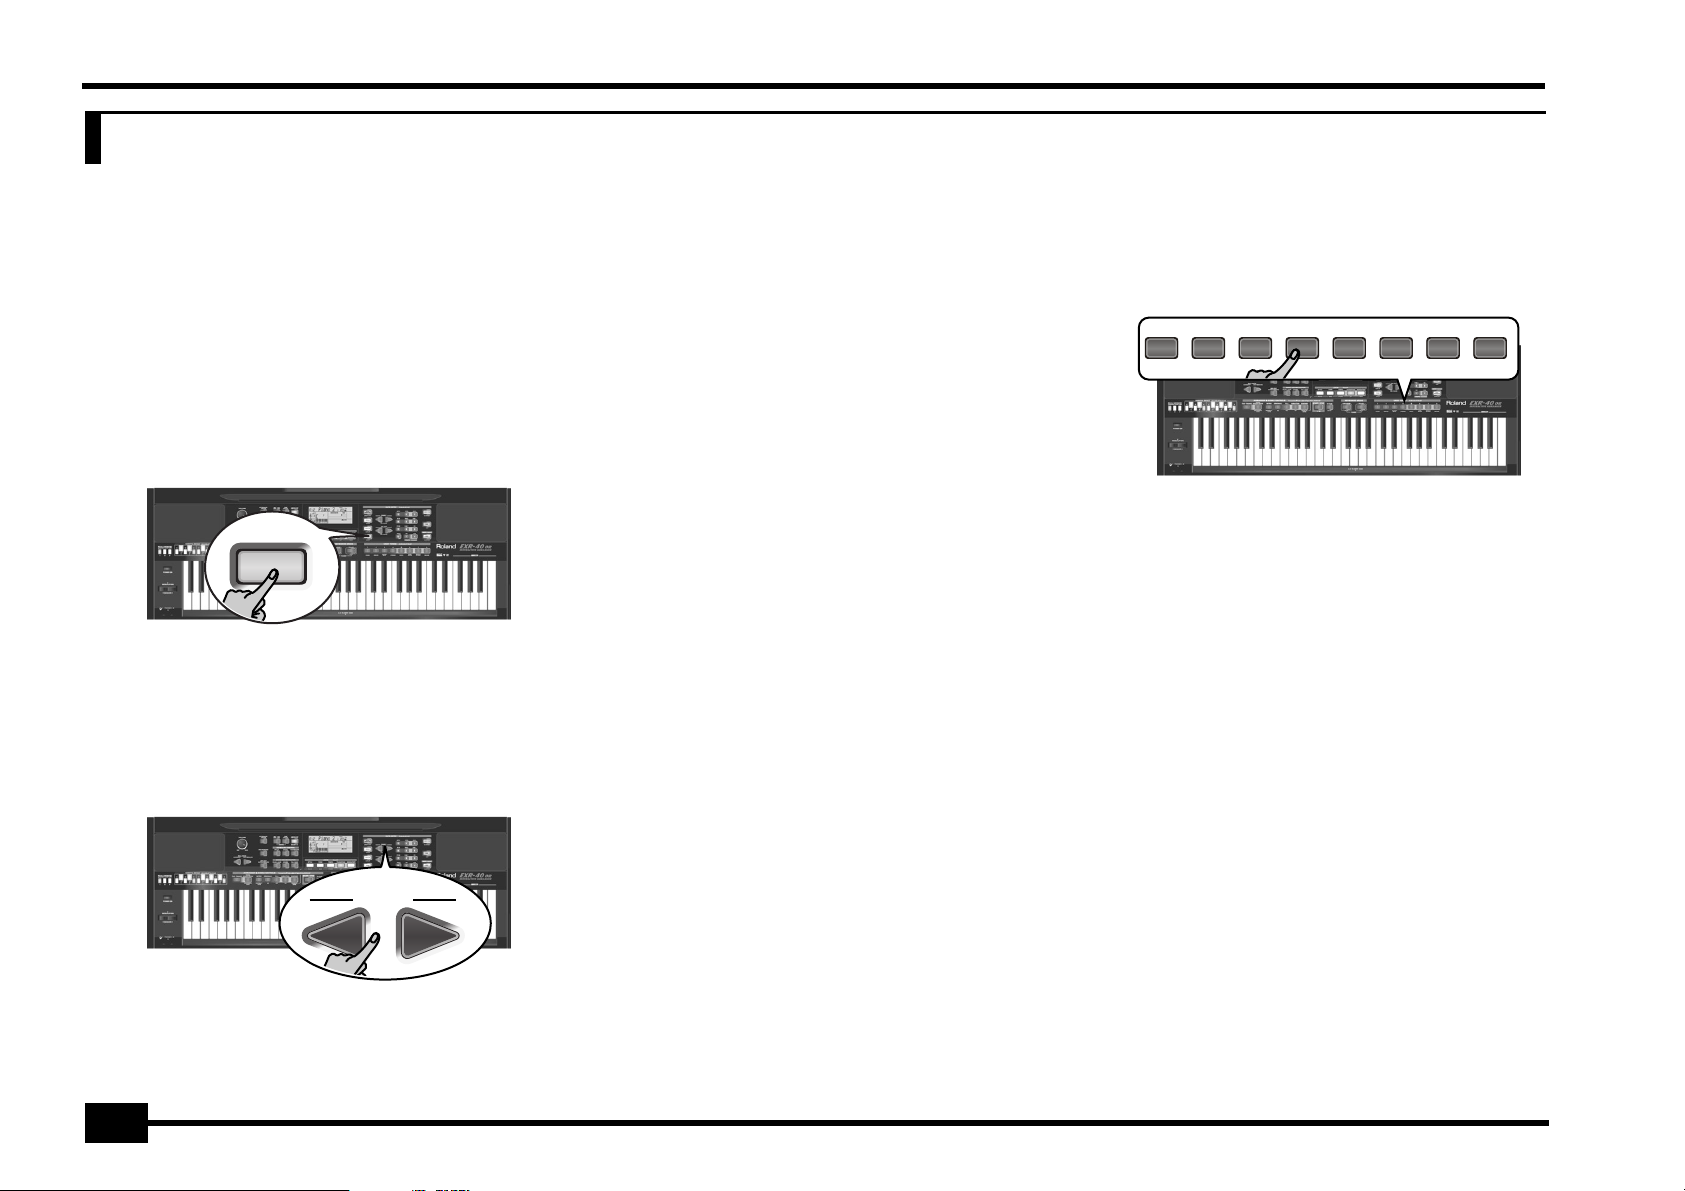
r
EXR-40 OR
10. Keyboard part functions
Selecting sounds for the Main, Split and
Dual parts
The EXR-40 OR contains about 524 melodic sounds you can use
for playing melodies (others are more like sound effects). Those
sounds need to be assigned to a Keyboard part, of which there
are three: Main, Split and Dual (see also p. 13).
Selecting any of the available sounds
Unlike previous arranger-type instruments, the EXR-40 OR no
longer works with banks, numbers and variations: all available
sounds can be selected via the same streamlined procedure.
(1) Press the DATA ENTRY [TONE] button (it must light).
TONE
(2) To assign another sound to the Split or Dual part, hold
down the [SPLIT] or [DUAL] button while performing the
following steps.
Note: Now skip to step (5) if you prefer to enter the Tone number using the numeric key pad ([0]~[9]). That is indeed the only
way to select any available Tone.
(3) Use FAMILY [√][®] to select the desired Tone family.
FAMILY
See below for the available families. By selecting another
family, you immediately jump to the first sound of that
group.
• PIANO (001~011)
• E.PIANO (012~026)
• KEYBOARD (027~033)
• CHR PERC (034~063)
• ORGAN (064~097)
• ACCORDN (098~111)
• GUITAR (112~129)
• E.GUITAR (130~163)
• BASS (164~217)
• STRINGS (218~263)
• VOCAL (264~275)
• SAX (276~287)
• WIND (288~301)
• AC BRASS (302~329)
• SYNBRASS (330~343)
• SYNLEAD (344~380)
• POLY SYN (381~391)
• PAD (392~426)
• ETHNIC (427~499)
• PERCUSSION (500~524)
• SFX (525~566)
• DRUM KIT (567~592)
Note: See page 117 for a list of the available sounds.
(4) Use SELECT [√][®] to specify a sound within the selected
family.
The first press of SELECT [®] (or [√]) shows the name of the
first Tone within the selected group. It is already selected, so
if you need the first sound, there is actually no need to press
SELECT [®]. You must use SELECT [√] or [®], however, to select
another Tone within the same group.
(5) Use the numeric buttons [0]~[9] to select other sounds
within the current family that are skipped by the SELECT
buttons.
Note: This setting can be saved to a User Program (see p. 44).
You can also use the numeric buttons. See also “Working
with the FAMILY, SELECT and numeric buttons” (p. 20) and
replace “song” with “sound” in the explanations.
Using the USER TONES buttons
The USER TONES buttons allow you to select 8 melodic sounds
or Drum Sets directly (without using [TONE], the FAMILY, SELECT
and/or numeric buttons). At first, these buttons recall sounds
assigned to them at the factory (but you can change that).
2
1
PIANO
345678
GUITAR/ SAX/ SYNTH/
ORGAN STRINGS
BASS BRASS ETHNIC
VOCAL
DRUMS
These buttons are assigned to our “favorite” sounds for the indicated categories, thus allowing you to quickly select “a piano”,
“a string sound”, etc. The assignments to these buttons can be
changed.
Note: The TONE [DRUMS] button is only available for the Main part.
Assigning another Tone to a USER TONES button
To assign another sound to one of the 8 USER TONES buttons:
(1) Select the sound you want to assign using the procedure
described above.
(2) Press and hold the desired USER TONES button. The dis-
play briefly shows the message “Memrized”.
You can assign whichever sound (or Drum Set) you like to
any of the USER TONES buttons and select it by pressing that
button once.
Note: The assignments can be saved to a User Program (see
p. 44). This allows to work with up to 1600 different assignments (because there are 200 User Programs).
To select the sound, which has been assigned to a USER
TONES button at the factory, press the corresponding button
twice in rapid succession (“double-click”).
30
Page 31

EXR-40 OR
Split part (sound effect/percussion
sound)
Main part (melodic sound)
Drum sounds and sound effects
(“SFX”)
Drum Sets
The last 25 “sounds” (567~592) are so-called “Drum Sets”. When
you select such a Kit, each key is assigned to a different sound.
With the left-most key, you can play a bass drum sound (also
called “kick”). The white key next to it triggers a snare drum
sound, etc. Try it out by pressing several keys, either in succession or simultaneously.
IPopKik36
IPopCStk37st
IPopSn38st
IPopGstS39st
IPopSn40st
IPopTomLFl41
IPopHat1_42
IPopTomL43
IPopHat2_44
IPopTomMFl45
IPopHat3_46
IPopTomM47
IPopTomHFl48
IPopCyml2_52
IPopTomH50
C2
Drum Sets are collections of over 90 sounds, each assigned to a
different key.
C3
Note: Drum Sets can only be assigned to the Main part (so neither
to the Split, nor the Dual part).
Note: One Kit (592) is actually a sound effects (SFX) kit that cannot
be used for “drumming” but rather for triggering various sound
effects.
Note: This setting can be saved to a User Program (see p. 44).
Sound effects (“SFX”)
The EXR-40 OR also contains individual sound effects (like
“Train, “Kitty”, “HrseGllp”, etc.) and individual drum and percussion sounds (500~566) that are assigned to the entire range of
the part you select them for (Main, Split or Dual).
Note that those sounds do not work like the Drum Sets: only
one sound is assigned to the keyboard – and can be played
melodically (though “Train” melodies are probably “interesting”
at best).
It might therefore be a good idea to proceed as follows:
(1) Press the [SPLIT] button.
(2) Decide whether you want to play the sound effect or per-
cussion sound with your left or right hand.
If you want to use your left hand, assign a sound between
“500” and “566” to the Split part. To play the effect with your
right hand, assign it to the Main part.
(3) Change the split point (page 40) in such a way that only a
few keys are assigned to the percussion sound/sound
effect (“C6” for right-hand effect playing, “C3” for lefthand effect playing).
(4) To obtain a meaningful effect, you may also have to
change the MAIN Oct or SPLT Oct setting
(page 41).
If you assign a sound effect/percussion sound to the Split
part, the key ranges could be set as shown below.
31
Page 32

r
EXR-40 OR
Transpose
The Transpose function changes the pitch of the notes and
chords you play. Instead of figuring out what other keys you
need to press to accommodate the singer or an instrumentalist,
you can set the required Transpose value and go on playing the
song the way you practised it, while sounding in a different key.
There are two transpose functions: one (“USRTrnsp”) whose setting can be saved to a User Program, and a second one
(“GLBTrnsp”) that applies to all sections and whose setting is
added to (or subtracted from) the “USR Transp”) value. Its setting is never saved.
Let us begin with the “USRTrnsp” function, which is assigned to
the [TRANSPOSE] button:
(1) Press the [TRANSPOSE] button.
TRANSPOSE
The display now looks as follows:
=
USRTrnsp
M
INTRO
(2) Use the [–][+] and/or numeric buttons ([0]~[9]) to set the
desired transposition interval.
NO YES
12000 001
ORCHESTRATOR BEAT
FULL
BAND
The setting range is –12~12 semitones. A “semitone” is one
step between a white and a black key (or two adjacent white
keys, i.e. between “E”/“F” and “B”/“C”).
Press [+] or [–] repeatedly to transpose the keyboard up or
down. You can also directly enter the desired interval by
pressing the corresponding numeric key.
To transpose the keyboard down, hold down [–] while pressing [0]~[9] (in that case, you can transpose the pitch down by
up to 9 semitones)
Here’s an example: to hear an “E” each time you play a “C”,
select “4”. All other notes will be shifted by the same
amount, so that you end up sounding in E major when you
actually play in C major, etc.
No transposition (C major)
Transpos= 4 (E major)
The corresponding value and the icon appear in the
TRANSPOSE
display.
(3) To switch the Transpose function back off, repeat steps (1)
and (2), this time entering the value “0” (no transposition).
Note: This setting can be saved to a User Program (see p. 44).
Note: There is also a function that allows you to specify which
section(s) the Transpose function should apply to. See “TransMod*” (p. 40).
(4) Press another “big” button in the DATA ENTRY section to
leave this function.
Global transpose function (“GLB”)
There is also a “master transpose control” that alters the pitch of
all sections of the EXR-40 OR. Its value is added to the current
transposition interval until you reset it to “0” or until you switch
off your EXR-40 OR.
(1) Press the [TRANSPOSE] button.
The display now shows the “USR Trnsp” message.
(2) Press the SELECT [®] button once to select the following
parameter:
GLBTrnsp
(3) Use the [–][+] and/or numeric buttons ([0]~[9]) to set the
desired transposition interval.
The setting range is –6~0~5 semitones. This setting is added
to (or subtracted from) the “USRTrnsp” value of all sections
and all User Programs.
Press [+] or [–] repeatedly to transpose the keyboard up or
down. You can also directly enter the desired interval by
pressing the corresponding numeric key.
To transpose the keyboard down, hold down [–] while pressing [0]~[6] (in that case, you can transpose the pitch down by
up to 6 semitones).
As soon a you select a value other than “0”, the icon
starts flashing to signal that the EXR-40 OR is applying global transposition to all sections.
(4) To switch the global transposition back off, repeat step
(3), this time entering the value “0” (no transposition).
TRANSPOSE
The icon stops flashing (and disappears if the
“USRTrnsp” function is off).
Note: This setting is not saved to a User Program and will be
cancelled when you switch off the EXR-40 OR.
(5) Press another “big” button in the DATA ENTRY section to
leave this function.
TRANSPOSE
32
Page 33

EXR-40 OR
Octave settings
The EXR-40 OR allows you to transpose the Keyboard parts
(Main, Split, Dual) up or down by 4 octaves.
To change the octave transposition of a part, hold down [TONE]
(Main part), [SPLIT] (Split part) or [DUAL] (Dual part), while pressing [–] (down) or [+] (up).
NO YES
Other Keyboard part functions
Here are yet other functions related to the Keyboard parts.
These can be set via the FUNCTION menu, or are covered elsewhere:
• Keyboard velocity (see p. 34)
• Master Tune (see p. 39)
• Volume of the Keyboard parts (see p. 41)
• Intelligence function for the Split part (see p. 40)
• Hold function for the Split part (see p. 40).
33
Page 34

r
EXR-40 OR
11. Performance functions and effects
Performance functions
Keyboard Touch (velocity sensitivity)
The EXR-40 OR is velocity sensitive, which means that the volume and brightness of the Main, Split and Dual notes depend
on the force/speed with which you strike the keys.
All acoustic instruments (piano, violin, flute, drums, etc.) are
velocity sensitive. The harder you play, the louder and brighter
the resulting notes will be, which creates a perfectly natural
effect. (That explains why the KEYBOARD TOUCH function is on
when you power on the EXR-40 OR.)
If the EXR-40 OR is your first musical instrument ever, you may
feel distracted by the volume and timbre variations of the notes
you play.
(1) If the icon is not displayed, press the
(2) Press the button again to switch the KEYBOARD TOUCH
(3) To set a fixed velocity value, press and hold the
KEY TOUCH
[KEYBOARD¥TOUCH] button to activate the EXR-40 OR’s
velocity sensitivity.
KEYBOARD
TOUCH
function off, if you don’t need it.
[KEYBOARD¥TOUCH] button until the “KbdTouch” mes-
sage is displayed.
“1” is very low (usually inaudible), while “127” corresponds to
maximum striking force (loud, bright notes). The value is
only used when the icon is not displayed (otherwise,
all notes use the velocity values that correspond to the force
with which you strike the keys).
(5) Press another “big” button in the DATA ENTRY section to
leave this function.
Note: Some sounds use “velocity switching”. This means that by
hitting the keys harder and softer, you alternate between two
sounds. So only switch off this parameter if doing so makes you
feel more comfortable.
Note: This setting can be saved to a User Program (see p. 44).
Note: Keyboard Touch applies to all parts you can play yourself
(the “Keyboard parts”): Main, Split, and Dual.
Pitch Bend and Modulation
The BENDER/MODULATION lever to the left of the keyboard can
be used to add two kinds of effects to the Keyboard-part notes.
You can even use these effects simultaneously if you like.
(1) Press the lever towards the rear of the EXR-40 OR to add
a vibrato effect (“wobble”) to the notes you are playing.
Lowers the pitch
KEY TOUCH
MODULATION
Raises the pitch
(3) In either case, you can release the lever if you no longer
need the effect.
Note: If necessary, you can change the Pitch Bend interval. See
“PB Range° (Pitch Bend Range)” (p. 40).
Note: Modulation is not avalaible when the MFX type=
“Rotary”. In that case, the modulation axis of the lever is used
for switching between the fast and slow speeds.
Footswitch
The EXR-40 OR’s FOOTSWITCH socket (rear panel) allows you to
connect optional DP-2, DP-6, or BOSS FS-5U footswitch.
The footswitch can be used for sustaining the notes you are
playing (default), as Soft or Sostenuto pedal, to change the
Rotary effect speed (MFX), and more. See “FSW° (Footswitch
Assign)” (p. 40) and “Using the outputs and an optional footswitch” (p. 56).
To use it for holding the notes you are playing, proceed as follows:
(1) Connect a DP-2, DP-6, or BOSS FS-5U footswitch to the
FOOTSWITCH jack.
(2) Play a note with your right hand.
(3) Press the footswitch.
(4) Release the key.
The note(s) you played keep on sounding after you release
the corresponding keys.
(5) To stop the note(s) from sounding, release the footswitch.
KbdTouch
(4) Use the numeric buttons and/or [–][+] to set the velocity
value that should be used for all notes you play (1~127).
34
BENDER
The Modulation axis can also be used for switching between
the slow and fast Rotary speeds (if the “Rotary” effect is
assigned to the MFX).
(2) Turn the lever to the left to temporarily lower the pitch of
the notes you are playing. Turn it to the right to raise the
pitch of your notes.
Page 35

EXR-40 OR
Using effects
The EXR-40 OR contains digital Reverb and Chorus effects processors. You can switch them on/off and select other types. You
can also set the Send level (the amount of reverb or chorus) to
be applied to the various Keyboard parts. Please bear in mind
that the chorus effect cannot be combined with the MFX (so
you need to choose between chorus or MFX for the Main part).
Using the multi-effects processor (MFX)
The multi-effects (MFX) processor can be used for processing
the Main part. It can generate various effects (47), some of
which are combinations of two effects, while the Reverb and
Chorus processors only generate effects that are somehow
related to ambiance (REV) or modulation (CHR).
(1) Press the [FUNCTION] button (it must light).
FUNCTION
(2) Use FAMILY [√][®] to select “EFFECTS”.
The EXR-40 OR’s function parameters are divided into 9 logical “families”. For the following, we need to select the
effects group.
(3) Use SELECT [√][®] to select the “MFX” parameter.
00
Off
Note: See also “Working with the FAMILY, SELECT and numeric
buttons” (p. 20).
The “Off” message means that the MFX is not being used.
(4) To switch on the MFX, select one of the remaining 47
types using the [–][+] buttons.
Off: The MFX is off.
Enhancer: An Enhancer controls the overtone structure of
the high frequencies, adding sparkle and tightness to the
sound.
Overdrv1~4: Overdrive creates a soft distortion similar to
that produced by tube amplifiers. Several types of overdrive
are available: (1) Small combo amp, (2) Combo amp, (3) Large
double-stack amp (2 cabinets), (4) Large double-stack amp (3
cabinets).
Distort1~4: This effect produces a more intense distortion
than Overdrive. The numbers refer to different kinds of distortion.
Phaser: Adds a phase-shifted sound to the original sound,
producing a twisting modulation that creates spaciousness
and depth.
AutoWah: The Auto Wah cyclically controls a filter to create
cyclic change in timbre.
Rotary: Simulates the sound of a classic rotary speaker. This
effect is most suitable for electric organ. If you select this
type, you can use the MODULATION axis of the BENDER/
MODULATION lever for switching between the slow and fast
modulation speeds: press the lever towards the back of the
EXR-40 OR to alternate between slow and fast undulations.
StFlangr: This is a stereo Flanger. It produces a metallic resonance that rises and falls like a jet airplane taking off or
landing.
SpFlangr: A Step Flanger is a Flanger effect with clearly
noticeable steps rather than continuous pitch changes.
Compress: A compressor reduces signal peaks and boosts
low levels, smoothing out unevenness in volume.
Limiter: A limiter prevents the volume from exceeding a certain level without boosting low levels.
HexaCho: Hexa Chorus uses six layers of chorused sound to
give richness and spatial spread to the sound.
Trem Cho: Tremolo Chorus is a chorus effect with added
Tremolo (cyclic modulation of the volume).
StChorus: This is a stereo chorus.
Space-D: A multiple Chorus that gives no impression of
modulation, but produces a transparent Chorus effect (the
perfect “stereo maker”).
StDelay: Delay is an effect that allows you repeat the input
signal, thus creating echoes (repetition).
Mod Dly: This effect adds modulation to the delayed sound,
producing an effect similar to a Flanger.
3Tap Dly: The Triple Tap Delay produces three delay sounds;
center, left and right.
4Tap Dly: Delay with four repetition lines.
TmCtrDly: This effect controls the delay time in realtime.
Reverb: A nice Reverb effect.
GteRevNr: Gate Reverb is a special type of Reverb in which
the reverberant sound is suddenly cut off (and does not
gradually decrease).
GteRevRv: A gated Reverb effect that sounds “backwards”.
GteRevS1: The reverberant sound moves from right to left.
GteRevS2: The reverberant sound moves from left to right.
2PtchShf: A Pitch Shifter changes the pitch of the original
sound. This 2-voice effect has two pitch shifters, and adds
two transposed copies to the original sound.
FbPtchShf: Pitch Shifter with several echoes.
OD®Chors: This effect connects an Overdrive and a Chorus
in series. (“Series” means that the first effect is also processed by the second.)
OD®Flger: This effect connects an Overdrive and a Flanger
in series.
OD®Delay: This effect connects an Overdrive and a Delay in
series.
DS®Chors: This effect connects distortion and a Chorus in
series.
DS®Flger: This effect connects distortion and a Flanger in
series.
DS®Delay: This effect connects distortion and a Delay in
series.
EH®Chors: This effect connects an Enhancer and a Chorus
in series.
EH®Flger: This effect connects an Enhancer and a Flanger
in series.
EH®Delay: This effect connects an Enhancer and a Delay in
series.
Cho®Dly: This effect connects a Chorus and a Delay in
series.
FL®Delay: This effect connects a Flanger and a Delay in
series.
Cho®Flgr: This effect connects a Chorus and a Flanger in
series.
Cho/Dly: This effect connects a Chorus and a Delay in parallel. (“Parallel” means that the input signal is processed by
two effects that do not interact.)
35
Page 36

r
EXR-40 OR
FL/Delay: This effect connects a Flanger and a Delay in parallel.
Cho/Flgr: This effect connects a Chorus and a Flanger in
parallel.
Note: This setting can be saved to a User Program (see p. 44).
Note: By default, MFX type selection is linked to Tone selection
for the Main part. This can be switched off, however, see “Tone
MFX°” (p. 42). Note that this does not apply to all Tones.
(5) While selecting an MFX type, play a few notes on the key-
board to audition the effect.
(6) Press another “big” button in the DATA ENTRY section to
leave this function.
Note: If the MFX is on, the Main part is no longer processed by
the Chorus effect. But the MFX also contains Chorus algorithms
(either in isolation or in combination with other effects).
Reverb
Reverb is an effect that gives you the impression of playing in a
concert hall, a room or another acoustic environment that
reflects the sounds that are being produced.
When you switch on the EXR-40 OR, all three Keyboard parts
(Main, Dual, Split) as well as the Arranger and Song parts are
processed by the internal Reverb effect.
If you don’t need that, you can either switch off the Reverb processor (in which case none of the EXR-40 OR’s 19 parts are processed) or prevent just one Keyboard part from being processed.
You cannot change the amount of reverb that is added to the
Arranger or pre-recorded Song parts.
●
Switching the Reverb on/off
Use the following procedure if you want no reverb at all (for
none of the EXR-40 OR’s parts), or to select another Reverb
type.
(1) Press the [FUNCTION] button (it must light).
FUNCTION
(2) Use FAMILY [√][®] to select “EFFECTS”.
The EXR-40 OR’s function parameters are divided into 9 logical “families”. For the following, we need to select the
effects group.
(3) Use SELECT [√][®] to select the “REV” parameter.
(4) Use the [–][+] buttons to select “Off” if you don’t need
the Reverb processor. Otherwise, select one of the eight
available types:
Type Explanation
Room 1~3 These types simulate the Reverb characteris-
tics of a room. The higher the number (1, 2, or
3), the “bigger” the room becomes.
Hall 1, 2 These types simulate the Reverb of a small (1)
or large (2) concert hall and thus sound far
“bigger” than the Room types above.
Plate Digital simulation of a metal plate that is
sometimes used for creating Reverb effects.
Works well for percussive sounds.
Delay A Delay effect (no Reverb). Works a lot like an
echo effect and thus repeats the sounds.
Pan Delay This is a stereo version of the preceding Delay
effect. It creates repetitions that alternate
between the left and right channels.
(5) Play a few notes on the keyboard to audition the effect.
●
Changing the amount of reverb processing for
the Keyboard parts
To change the reverb depth (i.e. how much reverb is added to
a part), proceed as follows:
(6) If the [FUNCTION] button still lights, use SELECT [√][®] to
select one of the following parameters.
Rev MAIN
Reverb depth of the Main part.
36
00
Hall 2
Note: See also “Working with the FAMILY, SELECT and numeric
buttons” (p. 20).
Rev DUAL
Rev SPLIT
(If [FUNCTION] doesn’t light, first perform steps (1) and (2)
above.)
(7) Use [–][+] to select “0” if you don’t want the selected Key-
board part to be processed by the reverb effect. Otherwise, set the desired value.
Reverb depth of the Dual part.
Reverb depth of the Split part.
Page 37

EXR-40 OR
Chr MAIN
Chr DUAL
Chr SPLIT
Chorus depth of the Main part*.
Chorus depth of the Dual part.
Chorus depth of the Split part.
(*) Though this parameter is displayed even when MFX is set to something
else than “Off”, the Main part is not processed by the Chorus effect.
Main
Reverb
Chorus
Reverb
Chorus
MFX
“Off”
Main
MFX
When the MFX is set to “Off”
When the MFX is set to any other type
If you selected an MFX type (see p. 35), the Rev MAIN
parameter no longer affects the Main part directly, but
rather the MFX signal.
When the MFX is set to “Off”
Main Reverb
Rev MAIN
MFX
When the MFX is set to any other type
Main Reverb
MFX
“Rev Main= 100” then means: Reverb depth of the processed Main signal coming out of the MFX. This can be used
for a variety of interesting applications: Distortion (MFX) +
Reverb (REV), Rotary (MFX) + Plate (REV), etc.
(8) Play a few notes on the keyboard to audition the effect.
Do not forget to activate the Split or Dual part if you wish to
audition its Reverb depth.
Note: This setting can be saved to a User Program (see p. 44).
(9) Press another “big” button in the DATA ENTRY section to
leave this function.
Reverb for Main
“Off”
Rev MAIN
Reverb for Main + MFX
=
=
Chorus
Chorus broadens the spatial image of the sound and creates a
stereo impression. You can choose from 8 types.
When you switch on the EXR-40 OR, none of the Keyboard parts
(Main, Dual, Split) are processed by the internal chorus effect.
Note also that the Chorus effect doesn’t affect the Main part
if the MFX is set to anything but “Off”.
If you don’t need Chorus, you can either switch off the Chorus
processor (in which case none of the EXR-40 OR’s 19 parts are
processed) or prevent just one Keyboard part from being processed. You cannot change the amount of Chorus that is added
to the Arranger or pre-recorded Song parts.
●
Switching the Chorus effect on/off
Use the following procedure if you want no Chorus at all (for
none of the EXR-40 OR’s parts), or to select another Chorus
type.
(1) Press the [FUNCTION] button (it must light).
FUNCTION
(2) Use FAMILY [√][®] to select “EFFECTS”.
(3) Use SELECT [√][®] to select the “CHR” parameter:
●
Changing the amount of Chorus processing for
the Keyboard parts
To change the Chorus depth (i.e. how much Chorus is added
to a part), proceed as follows:
(6) If the [FUNCTION] button still lights, use SELECT [√][®] to
select one of the following parameters.
(If [FUNCTION] doesn’t light, first perform steps (1) and (2)
above.)
(7) Use [–][+] to select “0” if you don’t want the selected Key-
board part to be processed by the Chorus effect. Otherwise, set the desired value.
If you selected an MFX type (see p. 35), the Chr MAIN
parameter has no effect (even though it is displayed).
00
Chorus 3
Note: See also “Working with the FAMILY, SELECT and numeric
buttons” (p. 20).
(4) Use the [–][+] buttons to select “Off” if you don’t need
the Chorus processor. Otherwise, select one of the eight
available types (see the list below).
Chorus 1
Chorus 2
Chorus 3
(5) Play a few notes on the keyboard to audition the effect.
Chorus 4
FB Chorus
Flanger
S-Delay
SDelayFb
(8) Play a few notes on the keyboard to audition the effect.
Do not forget to activate the Split or Dual part if you wish to
audition its Chorus depth.
Note: This setting can be saved to a User Program (see p. 44).
37
Page 38

r
EXR-40 OR
(9) Press another “big” button in the DATA ENTRY section to
leave this function.
V-LINK function
V-LINK is a function that provides for the integration of music
and visual material. By using V-LINK-compatible video devices
(i.e. an Edirol DV-7PR), visual effects can be easily linked to, and
made part of the expressive elements of a performance.
By using the EXR-40 OR with an Edirol DV-7PR, you can:
• Use the EXR-40 OR’s keyboard (highest octave) to switch
images (clips). Press and hold a key for longer transition
(“fade”). Briefly press a key for fast transitions.
• The numeric buttons [0]~[9] are used for switching palettes
(only if the [USER¥PROGRAM] button lights).
• Use the BENDER axis of the BENDER/MODULATION lever to
change the playback speed of the picture material or to
select a different color.
• Use the LOCK buttons to change the effect (VFX1~4).
V-Link signals can be transmitted via MIDI OUT.
(1) Connect the EXR-40 OR’s MIDI OUT socket to the MIDI IN
socket of the external video processor (or to a UM-1
interface).
REMOTE
Edirol UM-1
MIDI OUT
Edirol DV-7PR
(2) Press the [V-LINK] button (it lights blue).
BEAT
(3) Use the BENDER, the assigned buttons or “V-LINK” keys
(highest octave) to manipulate the video pictures in sync
with your music (see below).
(4) Press [V-LINK] again to switch off this function (the button
goes dark).
V-LINK functions that the EXR-40 OR can control
(and corresponding MIDI messages)
The EXR-40 OR provides the following functions for controlling
V-LINK compatible video equipment.
• Keyboard: Clip 1~8→ Program Change: 00H~08H
Press the keys in the highest octave to switch clips.
• Keyboard velocity: Dissolve Time→ CC23
The velocity of the keys in the highest octave controls the
speed of transition between images.
• [1]~[0] buttons (if the [USER¥PROGRAM] button lights): Palette 1~10→ CC00 (Bank Select)/00H~09H
While the [V-LINK] button lights, press buttons [1]~[0] to
switch palettes 1~10. (The numeric buttons also perform
their “normal” functions.)
• BENDER axis of the BENDER/MODULATION lever: Playback
Speed→ Pitch Bend
Moving the lever toward the right will speed up playback,
and moving it toward the left will slow down playback. At
the center position, playback speed will be normal.
• MODULATION axis of the BENDER/MODULATION lever: Clip
color→ CC24 (Color CB), CC25 (Color CR)
Press the lever towards the rear of the EXR-40 OR to change
the color. There are five steps that can be selected by pressing the lever several times: green, violet, blue, red, original
clip color.
• LOCK buttons: VFX1~4, None (ACOUSTIC= None,
POP= V-FX 1, ROCK= V-FX 2, DANCE= V-F1h
• X 3, ETHNIC= V-FX 4)
Use these buttons to change the video effects. This function
is not available if the receiving video processor is already set
to “Off”.
Note: VFX2 is not supported by the DV-7.
Note: All V-LINK messages are transmitted on MIDI channels 13
and 14.
38
Page 39

EXR-40 OR
12. Function menu
The EXR-40 OR’s Function mode contains more advanced settings you may not need every day. They allow you to fine-tune your instrument’s response. It would therefore be a good idea to familiarize yourself
with these parameters. Most settings (“*”) can be written to a User Program (see p. 44). Other parameters (“°”) are saved to the Flash memory when you leave the Function mode.
Editing parameters (general
procedure)
You can edit the EXR-40 OR’s Function parameters via the display. Here is a general outline of the procedure for all parameters discussed below:
(1) Press [FUNCTION].
FUNCTION
(2) Use FAMILY [√][®] to select the Function group that con-
tains the desired parameter:
FAMILY
■ KB SET: KbdTouch, MsterTune, USRTrnsp, GLB Trnsp,
TransMod, PB Range, KeySplit, SpltHold, SpltInt, FSW, Port
Main, Port Dual, Mode Main, Mode Dual
■ METRONOM: Mtro TS, MetroVol, Count-In
■ OCTAVE: MAIN Oct, DUAL Oct, SPLT Oct
■ VOLUME: Main Vol, Dual Vol, SplitVol, Auto Bass,
AccDrums, AccBass, Accomp1~Accomp6, Song1~Song16
■ ARR SET: ArrChord, Arr Hold, EP Chord, Bass Inv, MI (Mel-
ody Intelligence), InEnCHRD, Sync Stop
■ EFFECTS: REV (Reverb), CHR (Chorus), MFX, Tone MFX, Rev
MAIN, Chr MAIN, Pan MAIN, Rev DUAL, Chr DUAL, Pan DUAL,
RevSPLIT, ChrSPLIT, PanSPLIT
■ KB SCALE: Scale C/C#/D/Eb/E/F/F#/G/Ab/A/Bb/B, Scale
Mode
■ MIDI: Local, MidiTxRx, Sync Rx, Style PC, LyricsTx,
NTARx14, PitchBnd, Modulatn, ProgChng, Velo Rx, Clock Tx,
StartStp, SongPosP
■ UTILITY: LockInit, InitFLASH, Resume
■ WriteSNG (see p. 48)
■ WriteSTL (see p. 49)
■ RemoveSNG (see p. 49)
■ Remove STL (see p. 50)
■ WriteUPG (see p. 49)
■ ReadUPG (see p. 49)
■ RemovUPG (see p. 50)
(3) Use SELECT [√][®] to select the parameter you wish to edit
(see below).
SELECT
Note: In FUNCTION mode, SELECT [√][®] do not allow you to
jump from one family to the next.
The “VALUE” message and a setting appear to signal that you
can change (“edit”) the selected parameter.
(4) Use the DATA ENTRY [–][+] or numeric buttons (only for
values) to modify the setting of the selected parameter.
Note: See also page 20.
Note: To return to the default value of the currently selected
parameter, press [+] and [–] simultaneously.
(5) Use FAMILY [√][®] to select another Function parameter.
(6) Continue with step (3).
(7) Press another “big” button in the DATA ENTRY section to
leave this function.
KB SET parameters
■
Kbd Touch*
(1~127, Default setting: 110) Use this parameter to set the
EXR-40 OR’s fixed velocity value that will be used when the
KEY TOUCH
icon is not displayed. See p. 34.
Note: This parameter can also be selected by pressing and holding
[KEYBOARD¥TOUCH].
■
MstrTune° (Master Tune)
(427.4~452.6, Default setting: 440.0) This parameter allows you
to change the EXR-40 OR’s overall tuning, which may be necessary when you accompany a singer, an acoustic instrument,
or when you play to a recording on CD or cassette.
■
USRTrnsp*
(–12~12, Default setting: 0) Use this parameter to transpose
the EXR-40 OR in semitones. If you’re not sure what transposition is, see p. 32. This parameter can also be selected by pressing the [TRANSPOSE] button.
■
GLBTrnsp
(–6~5, Default setting: 0) Use this parameter to temporarily
transpose the EXR-40 OR in semitones. If you’re not sure what
transposition is, see (see p. 32). This parameter can also be
selected by pressing the [TRANSPOSE] button and pressing
SELECT [®] once.
39
Page 40

r
EXR-40 OR
■
TransMod*
(Default setting: Int+Song) This parameter allows you to specify which parts should be affected by the Transpose setting:
Int: The Keyboard and Arranger parts will be transposed. Notes
received via MIDI, however, will be played without change.
Song: Only the Song parts will be transposed. This is only
meaningful when you play back a Standard MIDI File or one of
your own songs with the EXR-40 OR’s Recorder.
MIDI: Only the notes received via MIDI will be transposed.
Int+Sng, Int+MIDI, Sng+MIDI, All: These are combinations of
the above. Int could be useful to transpose only the Keyboard
parts so that you can play to a Recorder song in “your” key but
sound in the song’s key.
■
PB Range° (Pitch Bend Range)
(0~24, Default setting: 2) This parameter allows you to set the
interval that will be used when you push the BENDER/MODULATION lever fully to the left or to the right (Pitch Bend effect).
You can set this parameter in semitone steps, with a maximum
of 24 semitones (2 octaves), the default value being “2”, which
should be OK in most situations.
Note: Pitch Bend is only available for the Main, Dual and Split
parts. See also p. 34.
■
KeySplit* (Split point)
(48~84, Default setting: 60) Use this parameter to set the split
point for the Arranger mode and the Split part. The note you
set here is the lowest note you can play with the Main part. The
number refers to a note. “60” corresponds to the note “C4”.
Note: You can also select this parameter by pressing and holding
the [ARRANGER¥BAND] button.
■
SpltHold* (Hold function for the Split part)
(On/Off, Default setting: Off) The SpltHold function memorizes
the chords you play while the Split part is on and holds the
corresponding notes until you play another chord.
■
SpltInt* (Split Chord Intelligence)
(On/Off, Default setting: Off) When you activate the [SPLIT]
button, the EXR-40 OR’s Split Chord Intelligence function
allows you to play major chords by pressing just one key, minor
chords by pressing two keys, and more complex chords by
pressing three keys. This system thus follows Arranger control,
which is why it would be a good idea to select “On” whenever
you are using the Split part while the icon is displayed.
■
FSW° (Footswitch Assign)
ARRANGER
Sustain
(Default setting: Sustain) After connecting an optional DP-2,
DP-6, or BOSS FS-5U to the FOOTSWITCH socket on the rear
panel, you can use this parameter for assigning a function to
the footswitch.
Sustain: Also called “Hold” or “Damper”, this function allows
you to use the footswitch to hold the notes you play on the
keyboard in much the same way as on an acoustic piano.
Sostenut: In this case, the footswitch functions as Sostenuto
pedal (another pedal found on grand and digital pianos that
allows you to sustain only those notes you played at the time
you pressed the pedal).
Note: This function only applies to the Keyboard parts.
Soft: In this case, the footswitch functions as Soft pedal (a
pedal found on grand and digital pianos that reduces the volume).
Note: This function only applies to the Keyboard parts.
Rotary S/F: Allows you to select the slow or fast speed of the
Rotary effect. This only works, if the “Rotary” type is assigned
to the MFX (see p. 35).
UsrPrgUp: Selects the next User Program (i.e. “10” if “9” is currently active).
UsrPrgDw: Selects the previous User Program (i.e. “1” if “10” is
currently active).
Start/Stop: Starts and stops Arranger or Song playback. Same
function as the [START÷STOP] button.
Bass Inv: Switches the Bass Inversion function on and off (see
p. 28).
Punch I/O: The footswitch can be used to activate and switch
off punch in/out recording (see p. 25).
■
Port Main
(Off, 1~127, Default setting: 0ff) Portamento is an effect that
produces gradual pitch changes between the notes you play.
The higher the value, the longer it takes before the pitch of the
newly played note is reached.
This parameter allows you to set two parameters simultaneously for the Main part (there is a second parameter for the
Dual part): the Portamento switch and the Portamento time.
When you select a value between “1” and “127”, the Portamento switch is automatically set to “on” (127).
■
Port Dual
(Off, 1~127, Default setting: 0ff) This parameter allows you to
set two parameters simultaneously for the Dual part: the Portamento switch and the Portamento time. See above for an
explanation.
■
Mode Main
Mode Main
(Mon/Pol, Default setting: Pol) This parameter allows you to
specify whether the Main part can be played polyphonically
(“Pol”) or monophonically (“Mon”). “Polyphonic” means that
you can play chords, while “monophonic” means that you can
only play one note at a time. This may be useful for violin,
woodwind and similar sounds, because the acoustic instrument
in question cannot (or usualy doesn’t) play chords. If you press
two keys after selecting “Mon”, only the note of the last key
you pressed sounds (nobody actually presses two keys at
exactly the same time).
■
Mode Dual
(Mon/Pol, Default setting: Pol) This parameter allows you to
specify whether the Dual part can be played polyphonically
(“Pol”) or monophonically (“Mon”). See also above.
40
Page 41

METRONOM parameters
■
Metro TS° (metronome time signature)
(1/4~9/4, 1/8~9/8, Default setting: 4/4) This parameter allows
you to set the metronome’s time signature (number of beats
per bar). Please bear in mind that this setting changes whenever you select a Music Style with a different time signature.
See also p. 14 for how to use the metronome. This parameter
can also be selected by holding down the [METRONOME] button.
■
Metro Vol° (metronome volume)
(0~127, Default setting: 100) Use this parameter whenever you
think the metronome is too loud/soft with respect to the
music. The default value is usually an appropriate setting.
■
Count-In
(On/Off, Default setting: Off) This parameter allows you to
switch the count-in function for punch-in and normal recording (see p. 25) on or off. When on, the metronome will count
down two measures (8 beats for a song with a 4/4 time signature).
OCTAVE parameters
■
MAIN Oct*, DUAL Oct*, SPLIT Oct* (octave transposition)
(–4~0~4, Default setting: 0) These three parameters allow you
to shift the octave of the part in question (Main, Split, or Dual)
up or down by up to four octaves. This can be useful for
Techno/Dance songs where you need a piano sound that plays
in two different octaves.
To achieve this, assign two different (or the same) piano sounds
to Main and Dual, activate the [DUAL] button, and set DUAL
Octv to “–1” (or “1”).
Note: When a Drum Set is assigned to the Main part, the pitch of
the drum/percussion sounds is not transposed. Instead, the keys are
assigned to other drum/percussion sounds (“shifted”). Example:
after setting “MAIN Oct” to “–1”, the bass drum can be played with
the C3 key (rather than the C2), while other sounds are available to
the left of the C3.
VOLUME parameters
■
Main Vol*, Dual Vol*, SpltVol*: volume
Main Vol
(0~127, Default setting: 127 Main/110 Dual/100 Split) These
three parameters allow you to set the volume of the Main,
Dual, and Split parts respectively. Please note that the settings
you make here have no effect if you used BALANCE [ACCOMP]
to set the maximum volume for the Arranger/Song parts.
Note: The volume of the Dual part can also be set by holding down
[DUAL] while pressing [ACCOMP] or [KEYBOARD]. The same is true
of the Split part, except that you need to press and hold [SPLIT].
■
Auto Bass*: status and volume
(OFF, 0~127, Default setting: OFF) Whenever the Split part is
active, this parameter allows you to set the volume of the Auto
Bass part (in which case the Auto Bass part is switched on). This
part sounds monophonic bass notes based on the chords you
play. If the Bass Inversion function (see p. 28) is off, the Auto
Bass part sounds the root notes (fundamentals) of the chords
you play with your left hand (using the Split part).
The Auto Bass part can also be added to the EP Chord part (see
below), and then follows the same rules as that part. The Auto
Bass’ volume and status can be set independently for “Split
use” and “EP Chord use”.
In either case, select off if you don’t need the Auto Bass part.
■
AccDrums*, AccBass*, Accomp1*~Accomp6*: volume
(0~127, Default setting: 100 AccDrums/100 AccBass/
100 Accomp1~6) These three parameters allow you to set the
volume of three Music Style sections: the drums, the bass and
the Accomp parts (1~6). You can use these parameters if you
think the original “mix” of the selected Music Style is not quite
right.
EXR-40 OR
■
Song1~Song16: volume
(–64~0~63) These volume parameters apply to the respective
tracks of the song you are currently playing back. In most
cases, you may want to change the volume of track 4 (melody),
2 (bass) or 10 (drums). Finding another track (1, 5~9, 11~16)
that’s too loud or too soft may take some time, because their
usage is more or less free. Be aware, however, that not all Standard MIDI Files use all 16 tracks that are available (so that
changing the volume of track 16 may produce no audible
change at all, for example).
These are relative parameters: the value you set here is subtracted from (negative values) or added to (positive values) the
song parts’ volume. Note that the upper limit (defined by the
MIDI standard) is “127”. It may thus be impossible to increase
the volume of a track (because it already uses “127”). Select “0”
if you like a track’s volume the way it is.
Be aware that the changes you make here must be saved
along with the song data. They are not written to a User Program. See pages 48 and 53 for how to save songs.
41
Page 42

r
EXR-40 OR
ARR SET parameters
■
ChordInt* (Arranger Chord intelligence)
(Md1, Md2, Off, Default setting: Md1) This parameter allows
you to select the chord intelligence system to be used by the
EXR-40 OR: the Roland system (“Md1”, which makes more
sense from an educational point of view, see page 126), or the
“Md2” system, which can be used in the following way:
Major chords Press the key that corresponds to the chord’s
fundamental.
Minor chords Fundamental + any black key to the left of the
fundamental.
Seventh
chords
Minor seventh chords
In either case, pressing just a few keys is therefore enough for
obtaining full chords. If you are used to playing full chords, you
can switch this function off.
■
ArrHold* (Arranger Hold)
(On/Off, Default setting: On) The Arranger Hold function memorizes the chords you play with your left hand and keeps playing the corresponding notes until you play another chord.
If you switch off ArrHold, the melodic Arranger parts (A.Bass,
Accomp) stop playing as soon as you release the key(s) in the
left half of the keyboard, leaving you only with the drum
accompaniment.
For your convenience, this function is switched on every time
you power on the EXR-40 OR.
■
EP Chord° (left-hand St. Strings + bass)
(On/Off, Default setting: On) The EP Chord function (for “Educational Purposes”) activates a stereo string sound and monophonic bass (if Auto Bass is set to “on”) whenever (a) the
ARRANGER
This allows you to play chords (and a bass line) with your left
hand in Arranger mode – without using the EXR-40 OR’s
accompaniment function.
If you select “Off”, however, the left half of the keyboard will be
muted when conditions (a) and (b) are met and if the icon
is not displayed.
Fundamental + any white key to the left of the
fundamental.
Fundamental + any black key to the left + any
white key to the left.
icon is displayed and (b) the Arranger is stopped.
SPLIT
■
Bass Inv*
(On/Off) Use this parameter to change the way in which the
Arranger reads the chords you play. See p. 28.
■
MI* (Melody Intelligence harmony type)
(Default setting: Traditnl) This parameter allows you to select
the desired harmony type for the Melody Intelligence function.
Note: This parameter can also be selected by pressing and holding
the [MELODY¥INTELLIGENCE] button. See p. 27.
■
InEnCHRD* (Intro/Ending chord recognition)
(On/Off, Default setting: Off) This parameter allows you to
block chord recognition during playback of the Intro or Ending
pattern of the selected Music Style in PIANIST mode. Unlike the
“normal” patterns (Original, Variation), Intro and Ending patterns usually contain chord changes. If you select “Off”,
chord recognition is active during Intro/Ending playback, so
that the accompaniment may jump from one key to another.
To avoid this, select “On”.
■
Sync Stop* (system used for automatic stops)
(Int/Nor, Default setting: Nor) This parameter allows you to
specify how the SYNC STOP function (see p. 16) should work.
Select “Nor” if you want the Arranger to stop as soon as you
release all keys in the chord recognition area (left side in
ARRANGER mode, entire keyboard in PIANIST mode). When you
play another chord, Arranger playback resumes from the
beginning of the selected Style pattern.
If you select “Int”, switch on the SYNC STOP (see p. 16) function
and then release all keys in the chord recognition area, the
Arranger stops on the next downbeat – and all notes that are
on at that time keep sounding (only if the “ArrHold” function is
on). When you play another chord, Arranger playback resumes
from the point it had reached when you released all keys in the
chord recognition area.
Note: This parameter can also be selected by pressing and holding
the [SYNC¥START/STOP] button.
EFFECTS parameters
■
Rev* (Reverb Type)
(Default setting: Hall 2) Use this parameter to select the kind of
Reverb that best suits your musical purposes, or to switch the
Reverb processor “Off”. See p. 36.
■
Chr* (Chorus Type)
(Default setting: Chorus 3) This parameter allows you to specify
the type of Chorus effect, or to switch the Chorus processor
“Off”. See p. 37.
■
MFX* (MFX type)
(Default setting: Rotary) This parameter allows you to select
the desired MFX type and to switch the MFX processor off. See
p. 35 for details about the MFX. Selecting “Off” means that the
MFX is off.
Note: MFX type selection can also be linked to Tone selection for
the Main part.
■
Tone MFX°
(On/Off, Default setting: On) This parameter allows you to link
the selection of an MFX type to the Tone you assign to the
Main part. That way, a Distortion/Overdrive effect will be
selected for a rock guitar sound, Rotary for an organ, etc.
■
Rev MAIN*
(0~127, Default setting: 100) This parameter allows you to set
the Reverb Send Level for the Main part (i.e. how much Reverb
should be added to the Main notes). Select “0” if the Main part
may not be processed by this effect.
■
Chr MAIN*
(0~127, Default setting: 0) This parameter allows you to set the
Chorus Send Level for the Main part (i.e. how much Chorus
should be added to the Main notes). If you want this part to be
processed by the Chorus effect, you need to select a value different from “0”. This parameter is only used when the MFX
parameter is set to “Off”.
■
Pan MAIN*
(Rnd, R63~0~L63, Default setting: 0) This parameter allows you
to set the stereo position of the Main part (i.e. its placement
between the left and right speakers). “Rnd” means that the stereo position changes randomly for each note you play. Values
starting with “L” correspond to the left speaker. “0” refers to
the center, and values starting with “R” correspond to the right
speaker.
42
Page 43

■
Rev DUAL*
(0~127, Default setting: 100) This parameter allows you to set
the Reverb Send Level for Dual part (i.e. how much Reverb
should be added to the Dual notes). Select “0” if the Dual part
may not be processed by this effect.
■
Chr DUAL*
(0~127, Default setting: 0) This parameter allows you to set the
Chorus Send Level for the Dual part (i.e. how much Chorus
should be added to the Dual notes). If you want this part to be
processed by the Chorus effect, you need to select a value different from “0”.
■
Pan DUAL*
(Rnd, R63~0~L63, Default setting: 0) This parameter allows you
to set the stereo position of the Dual part (i.e. its placement
between the left and right speakers). “Rnd” means that the stereo position changes randomly for each note you play. Values
starting with “L” correspond to the left speaker. “0” refers to
the center, and values starting with “R” correspond to the right
speaker.
■
Rev SPLIT*
(0~127, Default setting: 100) This parameter allows you to set
the Reverb Send Level for the Split part. Select “0” if the Split
part may not be processed by this effect.
■
Chr SPLIT*
(0~127, Default setting: 0) This parameter allows you to set the
Chorus Send Level for the Split part. If you want this part to be
processed by the Chorus effect, you need to select a value different from “0”.
■
Pan SPLIT*
(Rnd, R63~0~L63, Default setting: 0) This parameter allows you
to set the stereo position of the Split part (i.e. its placement
between the left and right speakers). “Rnd” means that the stereo position changes randomly for each note you play. Values
starting with “L” correspond to the left speaker. “0” refers to
the center, and values starting with “R” correspond to the right
speaker.
KB SCALE parameters
■
Scale C*~Scale B* (Scale Tune)
(–64~63, Default setting: 0 for all notes) These parameters
allow you to stray away from the usual semitone-interval scale
(used in western music) by changing the pitch of the notes so
as to accommodate other musical cultures or tuning methods
(oriental, baroque music, etc.). These settings are assigned to
the ORIENTAL SCALE buttons.
As you will notice, you can change the pitch of every note of
one octave (C, C#, D, Eb, E…). The settings you make here apply
to all notes of the same name (i.e. to every “C”, every “C#”, etc.).
Most of the time, you will probably select the value “50” or “–
50” as they correspond exactly to half a semitone up or down
(quarter tone). Other settings may also be interesting, though.
■
Scl Mode*
(MN, ALL, Default setting: MN) This parameter allows you to
specify which parts the Scale settings (see above) should apply
to: only the Main part (“MN”) or all parts (“ALL”). In some cases,
choosing “ALL” may produce a more satisfactory result.
MIDI parameters
See page 46.
EXR-40 OR
UTILITY parameters
■
LockInit
(On/Off, Default setting: On) This function allows you to protect the EXR-40 OR’s Flash area from accidentally initializing it
(see the next parameter). Select “Off” only before using the
“InitFLSH” parameter. For safety reasons, this parameter is reset
to “On” when you switch off the EXR-40 OR.
If you want to initialize the Flash area without first selecting
this FUNCTION parameter, hold down the [KEYBOARD¥TOUCH]
button while switching the EXR-40 OR on. The display then
briefly shows the “UNLCKFLS” message.
■
InitFLSH (Flash initialization)
This function initializes (formats) the EXR-40 OR’s Flash memory, which is only necessary if the data in the Flash memory
become unreadable.
Note: Executing this function erases all Standard MIDI Files and
Music Styles in the EXR-40 OR’s Flash area.
Press [YES/+] in response to the flashing Yes message. The
“Sure?” message appears and the Yes message starts flashing. Press [YES÷+] to initialize the Flash area (or [NO/–] if you
changed you mind).
After showing the “Complete” message, the EXR-40 OR
leaves this function.
■
Resume
Select this function to recall the EXR-40 OR’s factory Function
settings.
Note: Resume does not reset the MIDI parameters of the FUNCTION mode (see p. 46).
Press [YES/+] in response to the flashing Yes message. After
showing the “Complete” message, the EXR-40 OR leaves
this function.
Note: There is no “Sure?” question that gives you time to think.
Only press [YES/+] if you are certain you want to recall ALL factory
Function settings.
43
Page 44

r
EXR-40 OR
13. Working with User Programs
The EXR-40 OR is equipped with 200 User Program memories that allow you to store almost all settings (or registrations) you make on the front panel and via the Function menu (see p. 39).
Note: MIDI settings (see p. 46) are not saved to a User Program
because the EXR-40 OR memorizes them automatically.
Writing your settings to a User
Program
It is a good idea to write your settings frequently, even if you
still need to do some editing afterwards. Those intermediary
saves allow you to return to the previous stage whenever you
do not like your last modifications.
(1) Press and hold the [USER¥PROGRAM÷WRITE] button.
USER
PROGRAM
The EXR-40 OR now displays “-Write ?”.
(2) Enter the number of the memory where you wish to save
your settings using the numeric buttons [0]~[9].
The “Yes” message starts flashing.
(3) Press [YES÷+] to confirm the number.
(4) Now use the numeric buttons [0]~[9] to name your User
Program.
The available characters are:
_ ! # $ % & ’ - @ ^ ‘
0 1 2 3 4 5 6 7 8 9
A B C D E F G H I J K L M
N O P Q R S T U V W X Y Z
Note: Each time you press another numeric button (for entering
characters), the cursor advances automatically to the next position. This works like a mobile phone.
(5) Press the [YES/+] button to save your settings to the
selected memory. (Press [NO/–] if you don’t want to save
them after all.)
The display now responds with the “Complete” message.
Notes about writing User Programs
Leaving the User Program environment
Press any other “big” DATA ENTRY button to leave the User
Program environment.
Meaning of the flashing number
At some stage, you may notice that the User Program number flashes.
It means that the last User Program you selected is still in
effect but that the current settings no longer correspond to
the ones in that memory. Such changes may include the status of the Reverb or Chorus effect, a changed volume value,
etc.
Before selecting another User Program or switching off the
EXR-40 OR, you should therefore write these settings to the
same (or a different) User Program if you want to keep them.
Otherwise, you lose these changes.
Mode selection
The mode (Arranger, p. 15, Piano Solo, p. 13, Pianist, p. 27) is
also memorized when you write a User Program.
User Programs and the USER STL memory
The last Music Style you selected before writing a User Program is also memorized. This even applies to the USER
STL memory that may contain a Style loaded from floppy
disk or the Flash memory (see p. 19).
The 200 User Programs can be saved the Flash memory (see
p. 48) or a floppy disk as a set (see p. 53).
Selecting a User Program
Though the User Program memory you specified above is
already selected, there will be times when you need to select
another memory. In that case, here is what you need to do:
(1) Briefly press [USER¥PROGRAM÷WRITE] (it lights). Do not
hold this button down because doing so will start the
Write procedure (see above).
USER
PROGRAM
The display now shows the number of the User Program you
selected last, or “1” if you have not yet selected a User Program since switching on the EXR-40 OR.
The flashing number indicates that the EXR-40 OR is still
using the last manual changes you may have made before
selecting the User Program function. It only means “this is
the last memory you selected”.
None of its settings are being used for the time being. By
pressing another “big” button in the DATA ENTRY section,
you can leave the User Program mode without changing
your manual settings. This may be important to remember if
44
Page 45

EXR-40 OR
you were about to write your settings and accidentally
pressed the wrong button (or didn’t press it long enough).
To actually select a User Program…
(2) Use the numeric buttons [0]~[9] to select the memory
(00~199).
The settings of the selected User Program will be recalled.
Note: You can also use the FAMILY and SELECT [√][®] buttons to
select User Programs.
Note: As soon as you modify any setting (on the front panel or
in the Function menu), the User Program number starts flashing.
(3) Press any other “big” button in the DATA ENTRY section to
leave this mode.
Lock: filtering certain User Program
settings
Your EXR-40 OR provides five LOCK buttons with two functions
each that allow you to filter certain settings of the User Programs you recall.
These filters (or “locks”) will help you use your User Program settings more efficiently, because you can leave out settings that
may be fine for one song (the one you prepared the User Program for) but not for another.
Here is an example: suppose you saved a User Program for song
“A” with the Main part’s “Mode” function set to “Mon”. All other
settings are just perfect for song “B”. Without the LOCK parameter, you would have to use a second User Program (where the
“Main Mode” parameter is set to “Pol”). On the EXR-40 OR, however, you just need to switch on the [MONO÷PORT] button to be
able to use User Program originally prepared for song “A”.
(1) Press the LOCK button that corresponds to the settings
you want to ignore.
Button Function
TEMPO (x1) The current tempo value remains unchanged.
TEMPO (x2) The current tempo value and the status of the
SYNC START function remain as they are.
TRANSPOSE
(x1)
TRANSPOSE
(x2)
MONO/PORT
(x1)
MONO/PORT
(x2)
(*) The assignments of the USER TONES buttons (see p. 30)
are also saved to a User Program.
You can also activate several buttons at once.
(2) Select the User Program whose registration (with the
exception of the unnecessary settings) settings you want
to use.
(3) Switch the LOCK buttons off again before recalling yet
another User Program if you need all of its settings.
Note: The status of the LOCK buttons is not saved to a User Program.
The “USRTrnsp” setting remains as it is.
The “USRTrnsp” setting and the status of the
ORIENTAL SCALE buttons remain unchanged.
The “Mode” and “Port” settings of the Main
part (see p. 40) remain unchanged.
The “Mode” and “Port” settings of the Main
and Dual parts (see p. 40) remain unchanged.
Each button has two functions. Press it either once (it lights)
or twice in rapid succession (it flashes) to activate the
desired filter:
Button Function
STYLE (x1) The Music Style does not change when you
select a different User Program.
STYLE (x2) The Music Style and BAND ORCHESTRATOR
setting remain as they are.
TONE (x1) The Main and Dual parts do not select the
sounds stored in the User Program you select.
TONE (x2) The Main and Dual parts as well as the USER
TONES assignments remain unchanged.*
45
Page 46

r
EXR-40 OR
14. MIDI functions
MIDI is short for “Musical Instrument Digital Interface”. The word refers to many things, the most obvious being a connector type that is used by musical instruments and other devices to exchange messages
relating to the act of making music.
Each time you play on the EXR-40 OR’s keyboard or start the
Arranger (or Song), your instrument transmits MIDI data to its
MIDI OUT. If you connect the MIDI OUT socket to the MIDI IN
socket of another instrument, that instrument may play the
same notes as one of the EXR-40 OR’s parts, select sounds, etc.
MIDI is a universal standard, which means that musical data can
be sent to and received by instruments of different types and
manufacturers. Furthermore, MIDI allows you to connect your
EXR-40 OR to a computer or hardware sequencer.
Connect your EXR-40 OR as shown below.
Note: All EXR-40 OR parts are set to receive MIDI messages. If
they do not seem to respond to the messages you send from the
external controller, you should check whether the external controller’s MIDI OUT is connected to the MIDI INput of your
EXR-40 OR.
The EXR-40 OR’s transmit and receive channels of all parts
have been set in keeping with a tacit Roland standard and
are therefore shared by all recent EM, E, G, and RA series
instruments. You cannot change them. They also correspond
to the track assignments of the 16-track Recorder:
ing MIDI messages are no longer sent to the internal tone generator – but they are still transmitted to the MIDI OUT or USB
port and hence to external MIDI instruments.
Sound source Sound source
The EXR-40 OR receives data
EXR-40 OR
The EXR-40 OR transmits data
External MIDI instrument/computer
—OR—
EXR-40 OR
The EXR-40 OR transmits and receives data
(*) If you connect the EXR-40 OR’s USB port to a computer, etc., the
(using the supplied USB cable)
MIDI IN and OUT ports are no longer used. This only works when
the icon is NOT displayed.
Computer
Channels
MIDI can simultaneously transmit and receive messages on 16
channels, so that up to 16 instruments can be controlled. Nowadays, most instruments –like your EXR-40 OR– are multitimbral, which means that they can play several musical parts with
different sounds.
Accomp 1
1
Arranger bass
2
Accomp 2
3
k
Main
4
Accomp 3
5
k
Dual
6
Accomp 4
7
Accomp 5
8
(*) If you assign a Drum Set to the Main part.
Accomp 6
9
Arranger drums
10
k
Split
11
k
Auto Bass
12
V-Link
13
V-Link
14
Melody Intell. (see p. 27)
15
k
Main*)
(
16
MIDI Function parameters
See “Editing parameters (general procedure)” (p. 39) for how to
select and set these Function parameters (they belong to the
“MIDI” family).
Note: With the exception of “Local”, all MIDI parameter settings are
saved as soon as you leave the Function mode.
■
Local
(On/Off, Default setting: On) The Local parameter allows you to
establish or remove the connection between the EXR-40 OR’s
keyboard/Recorder and the internal tone generator.
When set to “ON” (default), playing on the EXR-40 OR’s keyboard or playing back a Recorder song will cause the corresponding notes to sound. If you select “OFF”, the correspond-
Note: The setting of this parameter is not memorized when you
switch off the EXR-40 OR.
■
MIDI TxRx° (MIDI transmission and reception)
This parameter allows you to specify which EXR-40 OR parts
should transmit and receive MIDI messages:
Option Meaning
ALL All parts.
KBD Only the Keyboard parts (see k in the table above).
STL Only the Arranger parts (AccDrums~Accomp 6).
SNG Only the Song parts (1~16).
OFF None of the EXR-40 OR’s parts transmits/receives
MIDI messages.
■
Sync Rx° (MIDI synchronization)
Use this parameter to specify how the EXR-40 OR should be
synchronized (as slave) to an external MIDI sequencer, computer, drum machine, etc.
“Synchronization” is a learned term for the fact that one device
(or function) is set to start and stop at the same time as
another device (or function), and to run at the same tempo
(BPM).
46
Page 47

EXR-40 OR
Please note that synchronization is only possible when you
connect the external device’s MIDI OUT socket to the
EXR-40 OR’s MIDI IN socket (though you can also work the
other way around; in that case, see the sequencer’s manual for
details).
Off In this case, the EXR-40 OR is not synchronized with
other MIDI devices. It is thus impossible to start/stop it
via MIDI.
On Arranger playback and Song recording/playback are
synchronized if the EXR-40 OR receives MIDI Start and
Stop messages followed by MIDI Clock signals. If the
EXR-40 OR receives only a Start message, it will wait a
moment to see if there are also MIDI Clock messages
coming.
If there are, it will synchronize to them. If there are no
MIDI Clock messages, it will follow its own tempo. In
either case, you can stop playback or recording with a
MIDI Stop message.
■
Style PC° (Style Select TxRx Channel)
(OFF, 1~16, Default setting: 10) As its name implies, the Style
Select channel is used to receive and transmit program
changes that cause the EXR-40 OR or the external instrument
to select another Music Style.
■
Lyrics Tx° (Transmit Lyrics messages)
(On/Off, Default setting: Off) The EXR-40 OR can transmit Lyrics messages contained in Format 0 Standard MIDI Files you
play back. It cannot display them, but it allows you to transmit
them to a device capable of displaying Lyrics messages (such as
the Roland LVC-1). This filter allows you to enable (On) or disable (Off) the transmission of Lyrics data.
■
NTA Rx14° (Note-to-Arranger reception on/off)
(On/Off, Default setting: On) NTA is short for “Note-toArranger”, or the notes you play in the left half of the keyboard
to feed the Arranger with chord information. These notes can
also be received via MIDI (from an accordion, a digital piano, an
organ, for example). If you want to use the Arranger without
playing on the EXR-40 OR’s keyboard, you must transmit these
notes on MIDI channel 14 (from your computer or external
MIDI instrument to the EXR-40 OR) and select “On” here.
NTA notes can only be received (they are not transmitted). The
notes you play on the EXR-40 OR’s keyboard are indeed transmitted to the Arranger, from there to the Arranger parts, and
used to play the accompaniment in the right key. Since all
Music Style notes are transmitted via MIDI, there is no need to
send the NTA notes separately.
■
PitchBnd° (Pitch Bend)
(On/Off, Default setting: On) This filter allows you to enable
(On) or disable (Off) the transmission and reception of Pitch
Bend messages. These messages are used to temporarily
increase or decrease the pitch of the Keyboard-part notes
(Main, Dual, Split).
■
Modulatn° (Modulation)
(On/Off, Default setting: On) This filter allows you to enable
(On) or disable (Off) the transmission and reception of Modulation messages. These messages are used to add vibrato to the
notes you play (control change CC01).
■
ProgChng° (Program Change)
(On/Off, Default setting: On) This filter allows you to enable
(On) or disable (Off) the transmission and reception of Program
Change messages. These messages are used to select Tones,
Styles, or User Programs.
■
Velo Rx° (Receive Velocity)
(On, 1~127, Default setting: On) This filter allows you to enable
(On) or disable the reception of velocity messages. This only
applies to note messages received via MIDI. Choose the velocity
value to be substituted for the actual values the EXR-40 OR
receives (1~127), or select “On” to use the velocity values as is.
■
Clock Tx° (synchronization)
(On/Off, Default setting: On) This parameter allows you to
determine whether (On) or not (Off) the Arranger and Recorder
send MIDI Clock messages when you start them. These messages are necessary for synchronizing external MIDI instruments/sequencers/software to the EXR-40 OR.
■
StartStp° (Start/Stop/Continue)
(On/Off, Default setting: On) This option allows you to specify
whether or not the Arranger and Recorder send Start/Stop/
Continue messages when you start or stop them. Select “Off”
when you wish to control the tone generator of a MIDI organ,
etc., without starting or stopping its automatic accompaniment.
■
Song PosP° (Song Position Pointer)
(On/Off, Default setting: On) The EXR-40 OR’s Recorder also
sends and receives Song Position Pointer messages that indicate the exact location of the notes that are being played back.
Select “OFF” if you don’t want the Recorder to send or receive
these messages.
47
Page 48

r
EXR-40 OR
15. Data management
Working with the Flash memory
Let us first have a look at the remaining Function parameters. They allow you to save newly recorded songs and Styles loaded from a floppy disk to the EXR-40 OR’s Flash memory, and to remove such files.
Saving songs to a Flash memory
Songs you record or edit with the EXR-40 OR’s Recorder can be
saved to its Flash memory or floppy disk. See page 53 for how to
save them to floppy and page 19 for how to select songs in the
Flash memory.
(1) Press [FUNCTION].
FUNCTION
(2) Use FAMILY [√][®] to select the “WriteSNG” parameter.
Wait until the display looks as shown below, then proceed
with the following step.
SONG 001
The EXR-40 OR automatically selects a Flash memory that
doesn’t yet contain data. (The first character, “S”, flashes.)
Note: If no vacant Flash memory remains or if the memory
capacity is exhausted, the display shows the “Mem Full”
message when you select this function. In that case, it will be
impossible to save your song. You can, however, delete another
song (“Remove”) and repeat step (2) and following.
Note: The “No Song” message means that there are no song
data that could be saved.
(3) If necessary, use the SELECT [√][®] buttons to move the
cursor to another character position (that character
flashes).
=
yes
(4) Use the numeric buttons to assign a character to that
position.
The available characters are:
_ ! # $ % & ’ - @ ^ ‘
0 1 2 3 4 5 6 7 8 9
A B C D E F G H I J K L M
N O P Q R S T U V W X Y Z
Note: Each time you press another numeric button (for entering
characters), the cursor advances automatically to the next position. This works like a mobile phone.
(5) Repeat steps (3) and (4) to assign the desired characters to
the remaining positions.
(6) After entering the name, press the [YES/+] button to save
the song to the EXR-40 OR’s Flash memory.
The display now counts down:
Writing
At the end of the saving operation, the display briefly shows
the “Complete” message.
Note: Press [NO/–] if you do not wish to save the song after all.
(7) Press another “big” button in the DATA ENTRY section to
leave this function.
Archiving User Programs in the Flash area
This function allows you to save the contents of the internal
User Programs (all 200 of them) to the Flash area. User Programs are always archived as a set.
Use this function if all 200 User Programs contain settings you
don’t want to overwrite (by saving other registrations) or lose
(in the unlikely event of a memory failure). There is also a function that allows you to load archived User Programs (page 49).
Note: The User Program set data also contain the TONE button
assignments (page 30).
(1) Press [FUNCTION].
(2) Use FAMILY [√][®] to select the “WriteUPG” parameter.
Wait until the display looks as follows, then proceed with the
next step:
USPR_000
Though you could save the file with the current default
name (“USPR_000”), a proper name will help you identify
the file at all times. We therefore suggest you take the time
to specify a meaningful name.
The first character of the default name (“UserPrg”) flashes.
Note: If the memory capacity is exhausted, the display shows
the “Mem Full” message when you select this function. In
that case, it will be impossible to archive the User Program set.
You can, however, delete another set (“Remove”) and repeat
steps (2) and following.
(3) If necessary, use the SELECT [√][®] buttons to move the
cursor to another character position (that character
flashes).
(4) Use the numeric buttons to assign a character to that
position.
=
yes
48
Page 49

EXR-40 OR
The available characters are:
_ ! # $ % & ’ - @ ^ ‘
0 1 2 3 4 5 6 7 8 9
A B C D E F G H I J K L M
N O P Q R S T U V W X Y Z
(5) Repeat steps (3) and (4) to assign the desired characters to
the remaining positions.
Note: Each time you press another numeric button (for entering
characters), the cursor advances automatically to the next position. This works like a mobile phone.
(6) After entering the name, press the [YES/+] button to save
the User Program set to the EXR-40 OR’s Flash memory.
The display first shows the “Writing” message. At the
end of the saving operation, the display briefly shows the
“Complete” message.
Note: Press [NO/–] if you do not wish to archive the User Pro-
gram Set after all.
(7) Press another “big” button in the DATA ENTRY section to
leave this function.
Saving Styles to a Flash memory
Music Styles you load from floppy disk (and which are copied to
the USER STL memory at that time) can be saved to a Flash
memory.
(1) Press [FUNCTION].
(2) Use FAMILY [√][®] to select the “WriteSTL” parameter.
Wait until the display looks as follows, then proceed with the
next step:
TANGO
The EXR-40 OR automatically selects a Flash destination
memory that doesn’t yet contain data. (The first character
flashes.)
Note: If no vacant Flash memory remains or if the memory
capacity is exhausted, the display shows the “Mem Full”
message when you select this function. In that case, it will be
impossible to save the Music Style. You can, however, delete
another Style (“Remove”) and repeat step (2) and following.
Note: The “No Style” message means that there are no
Style data that could be saved.
=
yes
(3) If necessary, use the SELECT [√][®] buttons to move the
cursor to another character position (that character
flashes).
(4) Use the numeric buttons to assign a character to that
position.
The available characters are:
_ ! # $ % & ’ - @ ^ ‘
0 1 2 3 4 5 6 7 8 9
A B C D E F G H I J K L M
N O P Q R S T U V W X Y Z
(5) Repeat steps (3) and (4) to assign the desired characters to
the remaining positions.
Note: Each time you press another numeric button (for entering
characters), the cursor advances automatically to the next position. This works like a mobile phone.
(6) After entering the name, press the [YES/+] button to save
the Style to the EXR-40 OR’s Flash memory.
The display now counts down:
Writing
At the end of the saving operation, the display briefly shows
the “Complete” message.
Note: Press [NO/–] if you do not wish to save the Music Style
after all.
(7) Press another “big” button in the DATA ENTRY section to
leave this function.
Loading a User Program set from the Flash memory
This “ReadUPG” function allows you to transfer a set of 200
User Programs (i.e. for all memories) to the EXR-40 OR’s internal
memory. This will overwrite the User Programs that currently
reside in the internal memories. You cannot load individual User
Programs from an archived set.
Note: If you wish to use the User Programs in the internal memory
at a later stage, first archive them (page 48) or save them to disk
before proceeding. See p. 53.
(1) Press [FUNCTION].
(2) Use FAMILY [√][®] to select the “ReadUPG” parameter.
(3) Wait until the display shows the name of the first User
Program set, then proceed with the following step.
(4) Use the SELECT [√][®] buttons to select the set you wish to
load.
(5) Press the [YES/+] button.
The display now shows the “Sure?” message, while Yes
starts flashing.
(6) Press the [YES/+] button again to load the User Program
set (or [NO÷–] if you do not want to load it after all).
While the data are being loaded, the display shows the
“Reading” message. Once the file has been loaded, the
display briefly shows the “Complete” message.
(7) Press another “big” button in the DATA ENTRY section to
leave this function.
Removing songs from the Flash memory
Songs you no longer need can be deleted (which is called
“Remov” here) to make room for new songs.
(1) Press [FUNCTION].
FUNCTION
(2) Use FAMILY [√][®] to select the “RemovSNG” parameter.
FAMILY
Wait until the display shows the name of the first song
memory (101), then proceed with the following step.
Note: The “No Song” message means that there are no song
data that could be deleted.
49
Page 50

r
EXR-40 OR
(3) Use the SELECT [√][®] buttons to select the song you wish
to delete.
SELECT
(4) Press the [YES/+] button.
The display now shows the “Sure?” message, while Yes
starts flashing.
(5) Press the [YES/+] button again to delete the song (or
[NO÷–] if you do not want to delete it after all).
The display now shows the following message:
Removing
Once the file has been deleted, the display briefly shows the
“Complete” message.
(6) Press another “big” button in the DATA ENTRY section to
leave this function.
Removing Styles from the Flash memory
Styles you no longer need can be deleted (which is called
“Remov” here) to make room for new Styles.
(1) Press [FUNCTION].
(2) Use FAMILY [√][®] to select the “RemovSTL” parameter.
Wait until the display shows the name of the first Style
memory (101), then proceed with the following step.
Note: The “No Style” message means that there are no
Music Style data that could be deleted.
(3) Use the SELECT [√][®] buttons to select the Music Style you
wish to delete.
(4) Press the [YES/+] button.
The display now shows the “Sure?” message, while Yes
starts flashing.
(5) Press the [YES/+] button again to delete the Style (or
[NO÷–] if you do not want to delete it after all).
The display now shows the following message:
Removing
Once the file has been deleted, the display briefly shows the
“Complete” message.
(6) Press another “big” button in the DATA ENTRY section to
leave this function.
Removing a User Program set from the Flash memory
The “RemovUPG” function allows you to erase User Program
sets from the EXR-40 OR’s Flash memory. This may be necessary
to make room for new files (e.g. when the “Memory Full” message appears). Be careful, though, to only delete files you are
absolutely (positively) sure you will never need again. Once a file
has been deleted, it is gone forever.
Note: As a rule, you should first make a backup copy of your disk on
your computer. After all, most files really only become indispensable
once they are no longer available…
(1) Press [FUNCTION].
FUNCTION
(2) Use FAMILY [√][®] to select the “RemovUPG” parameter.
Wait until the display shows the name of the first User Program set, then proceed with the following step.
Note: The “No Files” message means that there are no set
data that could be deleted.
(3) Use the SELECT [√][®] buttons to select the User Program
set you wish to delete.
50
SELECT
(4) Press the [YES/+] button.
The display now shows the “Sure?” message, while Yes
starts flashing.
(5) Press the [YES/+] button again to delete the User Program
(or [NO÷–] if you do not want to delete it after all).
Page 51

EXR-40 OR
The display now shows the following message:
Removing
Once the file has been deleted, the display briefly shows the
“Complete” message.
(6) Press another “big” button in the DATA ENTRY section to
leave this function.
Archiving data using a
computer (USB)
The EXR-40 OR’s USB port can be used for two purposes: (a) for
transmitting/receiving MIDI data or (b) for exchanging files
with a computer.
As long as the icon is not displayed, the USB port
transmits and receives MIDI data (the MIDI IN and OUT sockets
are bypassed if you connect a USB cable to this port).
If the icon is displayed, however, your EXR-40 OR will appear as
an external drive on your PC’s or Mac’s desktop:
The drive letter (“F:” in the above illustration) depends on the
number of drives recognized by Windows (and is of no importance for MacOS).
Note: USB communication (i.e. for MIDI applications) is possible
between the EXR-40 OR and Windows Me/XP or later (for Windows
users), or between the EXR-40 OR and Mac OS 9.0.4 or later (for
Macintosh users). This requires that you install the appropriate drivers from the supplied CD-ROM.
Data transfer, on the other hand, is possible with Windows 2000/
Me/XP or later/Mac OS 9.04 or later. If you encounter problems with
your system, please contact your nearest Roland service center for
details.
Once recognized, you can copy files to the “Song”, “UserPrg” or
“Style” folder by dragging and dropping them using the usual
routines. The “Style”, “UserPrg” and “Song” folders cannot
be deleted and must not be renamed. You can empty them
by dragging all files they contain to the trash, though.
Proceed as follows (Windows XP):
(1) Restart your PC.
(2) Switch on your EXR-40 OR.
(3) Press the EXR-40 OR’s [USB] button.
The display shows the error message “No Cable” to signal that USB communication is impossible.
(4) Connect the EXR-40 OR’s USB port to a free USB port of
your computer using the supplied cable.
EXR-40 OR Computer
The icon appears and the display shows
“PC<->EXR”.
If you prefer to use another cable, choose one with the correct USB jack types: a “square” one (“type B”) for the
EXR-40 OR and probably a “flat” one (type “A”) for your computer)
Note: If you do not connect a USB cable within 15 seconds, the
EXR-40 OR returns to its normal mode.
Note: Never switch off the EXR-40 OR while the “
message is displayed, because doing so would damage all data in
the EXR-40 OR’s Flash area. (See “InitFLSH (Flash initialization)”
(p. 43) if you need to repair the Flash area after an erroneous
operation.)
Note: The “Wait… Connection Proceding” mes-
sage may appear when you press the [USB] button. This only
happens after using the USB port for MIDI communication. It
means that Windows XP is reconfiguring the USB port for data
transfer use. This may take a while, so please be patient.
Proceed as follows (other operating systems):
(1) Switch on your Mac or PC if it isn’t on already.
(2) Switch on your EXR-40 OR if it isn’t on already.
(3) Press the EXR-40 OR’s [USB] button.
Writing”
51
Page 52

r
EXR-40 OR
The display shows the error message “No Cable” to signal that USB communication is impossible.
Note: If you do not connect a USB cable within 15 seconds, the
EXR-40 OR returns to its normal mode.
(4) Connect the EXR-40 OR’s USB port to a free USB port of
your computer using the supplied cable.
The icon appears and the display shows
“PC<->EXR”.
If you prefer to use another cable, choose one with the correct USB jack types: a “square” one (“type B”) for the
EXR-40 OR and probably a “flat” one (type “A”) for your
computer).
Note: Do not connect the EXR-40 OR to a USB hub. Always
connect it directly to your computer.
Note: Never switch off the EXR-40 OR while the “Writing”
message is displayed, because doing so would damage all data in
the EXR-40 OR’s Flash area. (See “InitFLSH (Flash initialization)”
(p. 43) if you need to repair the Flash area after an erroneous
operation.)
For all operating systems:
Note: If you press the [USB] button without connecting the USB
cable, the display shows the error message “No Cable” to
signal that USB communication is impossible. Connect a cable to
cause this message to disappear.
(5) Open the “My Computer” window (Windows) and check
whether your computer has found an “EXR_DRV” (or just
“Removable Disk”).
(6) Open that drive by double-clicking on its icon.
(7) Open either the “Style”, “UserPrg” or “Song” folder.
This depends on whether you want to delete/rename/add
Music Styles or Standard MIDI Files.
(8) Do one of the following:
• Copy the desired Music Styles from the “Style” folder to your
computer’s hard disk using drag & drop.
• Copy the desired songs from the “Song” folder to your computer’s hard disk using drag & drop.
• Copy the desired User Program sets from the “UserPrg”
folder to your computer’s hard disk using drag & drop.
• Copy the desired Music Styles from your computer’s hard
disk to the “Style” folder using drag & drop. (See also the
explanation below step (10).)
• Copy the desired songs from your computer’s hard disk to
the “Song” folder using drag & drop.
• Copy the desired User Program sets from your computer’s
hard disk to the “UserPrg” folder using drag & drop.
• Rename the desired files in the “Style”, “UserPrg” or “Song”
folder.
• Delete the files you no longer need.
Note: While the “PC<->EXR” message is displayed, all of the
EXR-40 OR’s buttons and keys are blocked.
(9) To disconnect the EXR-40 OR from your computer:
• Macintosh: Drag the “EXR_DRV” (or “Removable Disk”) icon
to the trash.
—OR—
• Windows: Click on the removal icon on the task bar. Wait
until a drop-down menu appears and select the entry that
says something to the effect of “Stop USB disk EXR_DRV”.
You should now see a window that says something to the
effect of “The USB device XX can now be safely removed
from the system”. Click on the [OK] button.
—THEN—
• Disconnect the USB cable from your computer and the
EXR-40 OR.
(10) Press the [USB] button again.
The display shows the “Sure?” message.
(11) Press [YES/+] (the icon disappears).
(Press [NO/–] to remain in USB mode.)
If you copied Music Styles from your computer to the Flash
area, the display now shows “Wait… Converting
Styles” to indicate that files with the extension “.STL”
are converted to the EXR-40 OR’s Music Style format
(“.STH”).
Note that this conversion is only necessary for Music Styles
in the EXR-40 OR’s Flash area that do not yet have the “.STH”
extension.
Note: This operation adds a few bytes to every converted Music
Style. In rare circumstances (when the Flash area is nearly full),
this may lead to the impossibility to convert all Styles that still
have the extension “.STL”. The EXR-40 OR then displays the
“MemFull” message to signal that the conversion was
aborted before reaching the last “.STL” file. All Styles up to that
point have been converted, though, and can be used.
Disk functions
The EXR-40 OR’s Disk functions allow you to save the Recorder
Song in the USER SNG memory to disk, to save and load
your files to and from disk, to delete files on a floppy disk, and
to format disks.
Though you can use 2DD or 2HD floppies, 2HD disks have twice
the capacity of 2DD disks, so use 2HDs whenever you can.
Whenever the disk drive writes data to or reads data from disk,
the Disk icon ( ) flashes in the display. Do not remove
the floppy disk while this icon is displayed as that may
damage both the disk drive and the disk (so that it becomes
unreadable).
Loading User Programs from disk
This load function is called LOAD Upr. It allows you to transfer a set of 200 User Programs (i.e. for all memories) to the
EXR-40 OR’s internal memory. This will overwrite the User Programs that currently reside in the internal memories.
Note: If you wish to use the User Programs in the internal memory
at a later stage, first save them to disk before proceeding. See p. 53.
Note: The User Program set data also contain the TONE button
assignments (page 30). After loading a User Program set, the eight
TONE buttons may therefore select other sounds than before.
(1) Insert a disk into the drive.
(2) Press [DISK] to select the Disk mode.
DISK
The “LOAD Upr” function is already selected, so there is
nothing else you need to do. (Otherwise, use FAMILY [√][®] to
select this parameter.)
52
Page 53

EXR-40 OR
(3) Use SELECT [√][®] to select the User Program Set you wish
to load.
SELECT
The Yes message next to it starts flashing.
(4) Press the [YES÷+] button to load the selected file.
YES
Note: Press [NO÷–] if you do not want to load the selected file
after all.
If you pressed [YES÷+], the display now shows the message
“Loading”. Once the data have been loaded, the
“Complete” message briefly appears.
(5) Press another “big” button in the DATA ENTRY section to
leave this function.
Possible error messages
No Disk You forgot to insert a floppy disk into the drive.
No Files The disk you inserted contains no User Program
data.
NoFormat The floppy disk is either not formatted or uses a
format the EXR-40 OR doesn’t recognize. Press
[YES÷+] to format it now (careful: this will erase
all data on disk).
Disk Err The disk is probably damaged and cannot be
used.
File Err The file you selected is damaged and cannot be
loaded.
Loading songs from disk
LOAD Sng allows you to load a song on floppy disk into the
EXR-40 OR’s User memory.
(1) Insert a disk into the drive.
(2) Press [DISK] to select the Disk mode.
(3) Select the “LOAD Sng” function using FAMILY [√][®].
(4) Use SELECT [√][®] to select the song you wish to load.
The Yes message next to it starts flashing.
(5) Press the [YES÷+] button to load the selected file.
Note: Press [NO÷–] if you do not want to load the selected file
after all.
If you pressed [YES÷+], the display now shows the message
“Loading”. Once the data have been loaded, the
“Complete” message briefly appears.
(6) Press another “big” button in the DATA ENTRY section to
leave this function.
Note: See also “Possible error messages” above.
Loading Music Styles from disk
LOAD Stl allows you to load a Music Style on floppy disk
into the EXR-40 OR’s User memory.
(1) Insert a disk into the drive.
(2) Press [DISK] to select the Disk mode.
(3) Select the “LOAD Stl” function using FAMILY [√][®].
(4) Use SELECT [√][®] to select the Music Style you wish to
load.
The Yes message next to it starts flashing.
(5) Press the [YES÷+] button to load the selected file.
Note: Press [NO÷–] if you do not want to load the selected file
after all.
If you pressed [YES÷+], the display now shows the message
“Loading”. Once the data have been loaded, the
“Complete” message briefly appears.
(6) Press another “big” button in the DATA ENTRY section to
leave this function.
Note: See also “Possible error messages” (p. 53).
Saving files to disk
The EXR-40 OR provides the following Save functions:
SAVE Upr: Use this function to save the contents of the
internal User Program memories (all 200 of them) to a floppy
disk.
Note: The User Program set data also contain the USER TONES button assignments (page 30).
SAVE Sng: This allows you to save the song in the
USERSONG memory to a floppy disk. A song saved to disk
becomes a Standard MIDI File.
(1) Insert a disk into the drive.
Every floppy contains a square tab that allows you to “close”
a little window. With the tab in that position, you can save
data to the disk. Do not forget to write-enable the disk by
closing this little window prior to inserting the floppy disk.
(2) Press [DISK] and use SELECT [√][®] to select “SAVE Upr”
or “SAVE Sng”.
(3) If necessary, use the SELECT [√][®] buttons to move the
cursor to another character position (that character
flashes).
53
Page 54

r
EXR-40 OR
Note: Each time you press another numeric button (for entering
characters), the cursor advances automatically to the next position.
(4) Use the numeric buttons to assign a character to that
position.
The available characters are:
_ ! # $ % & ’ - @ ^ ‘
0 1 2 3 4 5 6 7 8 9
A B C D E F G H I J K L M
N O P Q R S T U V W X Y Z
(5) Repeat steps (3) and (4) to assign the desired characters to
the remaining positions.
Though you could save the file with the current default
name (“SONG_001”, or “USPR_000”), a proper name
will help you identify the file at all times. We therefore suggest you take the time to specify a meaningful name.
Note: If you select “SPACE” ([0] button), the display will insert a
“_”. That’s because MS-DOS® does not allow you to use spaces.
(6) After entering the name, press the [YES/+] button to save
the data to floppy disk.
YES
The display now counts down (“Saving”).
Saving
At the end of the saving operation, the display briefly shows
the “Complete” message.
Note: If the message “Protect” appears, you forgot to
switch off the disk’s Write protection. Press the EJECT button of
the disk drive, remove the floppy and close the tab, insert the
disk again and press [YES÷+].
Note: Press [NO/–] if you do not want to save the selected file
after all.
(7) Press another “big” button in the DATA ENTRY section to
leave this function.
Possible error messages
No Disk You forgot to insert a floppy disk into the drive.
Protect See above.
Disk Full The remaining disk capacity does not allow to
save your data to this disk.
NoFormat The floppy disk is either not formatted or uses
a format the EXR-40 OR doesn’t recognize.
Press [YES÷+] to format it now (careful: this will
erase all data on disk).
Disk Err The disk is probably damaged and cannot be
used.
OverWrt? The name you assigned to the data already
exists on the floppy disk you inserted. If you
press [YES÷+] to continue, the file on disk will
be overwritten (and the corresponding data
will be erased). Either insert another floppy
disk, or press [DISK] and enter another name for
the data you want to save.
Deleting files on disk
The Delete functions allow you to erase files from the inserted
floppy disk. This may be necessary to make room for new files
(e.g. when the “Disk Full” message appears). Be careful, though,
to only delete files you are absolutely (positively) sure you will
never need again. Once a file has been deleted, it is gone forever.
Note: As a rule, you should first make a backup copy of your disk on
your computer. After all, most files really only become indispensable
once they are no longer available…
DEL Upr: Use this function to delete a User Program Set
from disk. Be aware that by doing so, you actually erase 200
User Program settings.
DEL Sng: This allows you to delete a song file on disk.
(1) Insert the disk with the file you want to delete into the
drive.
(2) Press [DISK] to select the Disk mode.
(3) Use FAMILY [√][®] to select “DEL Upr” or “DEL Sng”.
(4) Use SELECT [√][®] to select the file you wish to delete
(example: “USPR_005”). The Yes message starts flashing.
(5) Press the [YES÷+] button.
To be on the safe side, the EXR-40 OR now asks you whether
you really want to delete the file (“Sure?”).
(6) Press [YES÷+] to delete the file, or [NO÷–] to abort the oper-
ation.
If you pressed [YES÷+], the display now shows the message
“Deleting”. Once the data have been deleted, the
“Complete” message briefly appears.
(7) Press another “big” button in the DATA ENTRY section to
leave this function.
54
Page 55

EXR-40 OR
Possible error messages
No Disk You forgot to insert a floppy disk into the drive.
Protect You forgot to switch off the disk’s Write pro-
tection. Press the EJECT button of the disk
drive, remove the floppy and close the tab,
insert the disk again and press [YES÷+].
NoFormat The floppy disk is either not formatted or uses a
format the EXR-40 OR doesn’t recognize. Press
[YES÷+] to format it now (careful: this will erase
all data on disk).
Disk Err The disk is probably damaged and cannot be
used.
No Files The disk contains no files of the selected type.
Insert another disk.
Format
Before being able to save files to a disk, you need to prepare a
floppy disk. This is called “formatting”. If the floppy you are
about to use is IBM PC formatted, there is no need to format it,
though disk access is faster with disks formatted on the
EXR-40 OR. Otherwise proceed as follows:
(1) Insert a disk into the drive.
Every floppy contains a square tab that allows you to “close”
a little window. With the tab in that position, you can format
the disk. Do not forget to write-enable the disk by closing
this little window prior to inserting the floppy disk.
(2) Press [DISK] to select the Disk mode.
(3) Use FAMILY [√][®] to select “FORMAT”. The “Sure?”
message appears and the Yes message starts flashing.
(4) Press [YES÷+] to format the disk.
Note: If you do not want to format your floppy, press [NO÷–].
Note: By formatting a disk, you erase all files it contains. It
would be a good idea to first check what it contains (e.g. on your
PC).
The value to the left of the “Formatng” message now
counts from “1” to “100” while the disk icon flashes to indicate that the disk is being accessed. When the disk is formatted, the message “Complete” is briefly displayed.
55
Page 56

r
EXR-40 OR
16. Using the outputs and an optional footswitch
If you like, you can also record your performance (or a Recorder songs) to cassette, MD, etc. To this end, you need to connect the EXR-40 OR’s OUTPUT sockets to the external device’s REC IN jacks.
Use a standard 1/4” phone cable for doing so. Another use for
these outputs is to connect the EXR-40 OR to your HiFi or keyboard amplifier (such as the Roland KC-550/350/150). Using a
HiFi amplifier requires the use of an adapter plug (RCA/phono→
1/4” jack). If you like, you can also purchase two Roland PJ-1M
cables.
Note: By connecting the OUTPUT jacks, you do not switch off the
EXR-40 OR’s amplification system.
You can connect an optional DP-2, DP-6, or BOSS FS-5U foot
switch to the FOOTSWITCH jack in order to hold the notes even
after releasing the keys, or to perform other functions (see
p. 40).
Cassette deck, power amplifier, HiFi amplifier, MA series active
speakers, etc.
56
DP-2, DP-6, or BOSS FS-5U footswitch
Page 57

17. Miscellaneous
EXR-40 OR
Functions for educational purposes
The EXR-40 OR provides two functions that may come in handy
for music teachers or for those who use the EXR-40 OR in class:
Deactivating or activating the Demo function
The EXR-40 OR’s Demo function can be switched off so that
pressing [USB]+[ONE¥TOUCH] will have no effect at all. This may
be useful in situations where the EXR-40 OR is used in class.
Here is how to deactivate the Demo function:
(1) Switch off the EXR-40 OR.
(2) Hold down the [USB], [ONE¥TOUCH] and [ACOUSTIC] but-
tons while switching the EXR-40 OR back on again.
The display briefly shows “DISABLED”.
This setting is remembered, so that next time you want to
listen to a demo song, you have to repeat the above procedure.
Deactivating or activating the Arranger
Use the following procedure to ensure that the Arranger cannot
be started or stopped:
(1) Switch off the EXR-40 OR.
(2) Hold down the [ACOUSTIC] and [ARRANGER¥BAND] but-
tons while you switch the EXR-40 OR back on again.
The display briefly shows “DISABLED”. It is now impossible to start/stop the Arranger using the [START÷STOP] button.
Repeat the above procedure when you want to use the
Arranger again.
Deactivating or activating the Arranger and Demo
functions
A third “educational” option is to switch off both the Demo and
the Arranger functions in one go:
(1) Switch off the EXR-40 OR.
(2) Hold down the [ACOUSTIC] and [START÷STOP] buttons
while you switch the EXR-40 OR back on again.
The display briefly shows “DISABLED”. It is now impossible to start/stop the Arranger or demo song playback.
Repeat the above procedure when you want to use the
Arranger and Demo function again.
Initializing your EXR-40 OR (Factory)
After working extensively with your EXR-40 OR, you may want
to recall the original factory settings. Note that the Recorder
song will be empty and that the User Programs contain the
factory settings after initializing your EXR-40 OR.
Here is how to initialize your EXR-40 OR:
(1) Power off your EXR-40 OR.
(2) Hold down the [USER¥PROGRAM÷WRITE] button while
turning your EXR-40 OR back on again.
The message “Factory” informs you that the EXR-40 OR
has been initialized.
Note: This does not affect the data in the EXR-40 OR’s Flash
memory. See page 43 for how to initialize that area.
57
Page 58

r
EXR-40 OR
18. Specifications
EXR-40 OR Interactive Arranger
Keyboard: 61 keys, velocity sensitive
Sound source: PCM samples
Max polyphony: 64 voices
Tones: 592 panel sounds (542 XG compatible voices/256 GM2 com-
patible sounds)
Drum Sets: 26 Drum Sets (11 XG compatible + 9 GM2 compatible)
Multitimbral parts: 19
Compatibility: GM2, GS, XG Lite
Display type: New large backlit custom display
Panel controls: VOLUME knob, ACCOMP/KEYBOARD BALANCE but-
tons, TEMPO/DATA buttons, BENDER/MODULATION lever, FAMILY
buttons, SELECT buttons, numeric buttons [0]~[9], 8 assignable TONE
buttons, 12 ORIENTAL SCALE buttons, 3 SCALE MEMORY buttons
Music Styles: 198 Styles in Flash memory (99 factory + 99 changeable)
One Touch: 2 x 99
Orchestrator: 3 levels: Drum&Bass, Combo, Full Band
LOCK functions (setting filters x10): STYLE, TONE, TEMPO,
TRANSPOSE, MONO/PORTAMENTO
Songs: Realtime SMF player
16-track Recorder: 4 easy modes (ALL, Keyboard, Single, Punch In/
Out)
Flash Memory: For Music Styles, User Program sets and songs
User Programs: 200
LOCK functions: (Setting filters x10) STYLE, TONE, TEMPO, TRANS-
POSE, MONO/PORT
Effects: Reverb: 8 types, Chorus: 8 types, Multi-FX: 47 types
Data storage: FDD 3.5” 2HD/2DD (Styles, Songs/SMF,
User Programs), File save & load from PC via USB (Styles, Songs,
User Programs)
Metronome: Time Signature setting (1/4~9/4, 1/8~9/8), Volume
setting
Other functions: 3 easy modes: Piano/Solo, Arranger/Band, Pianist,
Music Assistant: 126 settings, Split (2 Tones: Split [L] + Main [R]),
Dual (2 Tones: Main + Dual), Melody Intelligence: 18 types, Octave
(–4~4), User Transpose (–12~12)/Glbl Transpose (–6~5), V-Link
System updates: Yes
Connections: USB: MIDI communication and file transfer, MIDI IN,
OUT
Outputs: L/Mono, Right (1/4” phone jacks), Phones 1/2, DC IN
(adapter)
Others: Output Power: 10W+10W with “Digital Bass Enhancer”,
Stereo Speakers: x ø13cm, Bass Reflex
Power supply: 12V/3.5A
Dimensions: 1020 x 355 x 132 mm
Weight: 8kg
Supplied accessories: Owner’s Manual, PSB-4U adapter, music
rest, USB cable, CD-ROM with USB driver files
Note: Specifications are subject to change without prior notice.
Thanks
Roland Corporation wishes to express gratitude and thanks to
all persons who have been involved in the preparation of the
Oriental Drum Sets, Oriental Music Styles and Demo Songs for
the EXR-40 OR Interactive Arranger.
Special thanks go to:
Mr. Emmanuel G. Chnarakis
for his important and valuable co-operation and enthusiasm for
the development of the EXR-40 OR
Mr. Abdallah George and Mr. Cherif Cotta
for their precious advice and support
Mr. Mohamed Raheem
for authorizing Roland Corporation to use his famous composition “Leh Bey Dari” as demo song in the EXR-40 OR
58
Page 59

r
Mode d’emploi
Merci d’avoir porté votre choix sur l’EXR-40 OR Interactive Arranger Roland. Ce clavier arrangeur réunit un générateur de sons Roland de qualité exceptionnelle, une interface utilisateur intuitive, un port USB, la compatibilité V-LINK et bien d’autres atouts.
Pour tirer parti de toutes les fonctions de votre EXR-40 OR et lui assurer de nombreuses années de bons et loyaux services, lisez entièrement le présent Mode d’emploi.
Pour éviter toute confusion, convenons d’utiliser le mot “bouton” pour désigner les commandes en face avant et de réserver le mot “touche” au clavier de l’EXR-40 OR.
Avant d’utiliser cet instrument, lisez attentivement la section “Remarques importantes” (p. 65). Elle contient des informations importantes pour une utilisation correcte de
l’EXR-40 OR. Rangez ce mode d’emploi en lieu sûr car il vous sera utile pour toute référence ultérieure.
Copyright ©2005 ROLAND EUROPE. Tous droits réservés. Toute reproduction intégrale ou partielle de cette publication est interdite sous quelque forme que ce soit sans l’autorisation écrite de Roland Europe S.p.a.
Page 60

r
EXR-40 OR
1. Caractéristiques
Générateur de sons exceptionnel
L’EXR-40 OR propose des sons basés sur des formes d’onde
non comprimées, ce qui est inédit pour un instrument de
cette gamme de prix. Ses sonorités sont vivantes, réalistes et
dépassent largement tout ce que vous pourriez attendre
d’un clavier arrangeur abordable. Le générateur de sons de
l’EXR-40 OR est polyphonique à 64 voix.
Combiné au nouveau système d’amplification et à la fonction Digital Bass Enhancer, le générateur de l’EXR-40 OR
produit des sonorités superbes aux aigus limpides et aux
graves puissants.
Fonctions de filtrage (Lock)
L’EXR-40 OR est doté de cinq boutons vous permettant de
filtrer divers réglages des programmes utilisateur que vous
chargez. L’utilisation des réglages devient ainsi plus souple et
plus efficace car vous pouvez ignorer les paramètres dont
vous n’avez pas besoin dans une situation donnée.
Mémoire Flash et USB
L’EXR-40 OR est livré avec 99 styles musicaux en mémoire
ROM (73 styles orientaux, 26 styles occidentaux), 99 styles
musicaux supplémentaires ainsi que plusieurs fichiers Standard MIDI. Ces styles et fichiers SMF supplémentaires
résident dans la mémoire Flash de l’EXR-40 OR. Vous pouvez
étendre la capacité de cette mémoire et en gérer le contenu
avec un PC ou Macintosh via une connexion USB.
Nouveau concept
L’EXR-40 OR est multitimbral à 19 parties, dont 3 (Main,
Split et Dual) peuvent être jouées sur le clavier. Vous pouvez
utiliser la partie Main pour jouer des mélodies ou de la batterie et les parties Split et Dual pour ajouter rapidement un
deuxième son à votre jeu solo.
De plus, l’EXR-40 OR propose une nouvelle méthode de
sélection des styles musicaux, des sons, des morceaux et des
programmes utilisateur: les boutons FAMILY
sélectionner des groupes, tandis que les boutons SELECT
[√][®]
permettent de choisir une entrée au sein d’un groupe.
[√][®]
servent à
Arrangeur hors pair
L’EXR-40 OR contient 198 styles musicaux flambant neufs,
issus du célèbre atelier de styles de Roland. Comme d’habitude, vous disposez de plusieurs motifs (INTRO, ORIGINAL,
VARIATION, FILL et ENDING) et d’options supplémentaires
accessibles via les boutons BAND ORCHESTRATOR.
3 mémoires de gamme et des réglages d’accord propres aux programmes utilisateur
L’EXR-40 OR est le premier clavier arrangeur Roland à proposer 3 mémoires de gammes (orientales) et la possibilité de
sauvegarder le système d’accord utilisé dans un programme
utilisateur. De cette manière, chacun des 200 programmes
utilisateur peut utiliser un système d’accord différent.
Et ce n’est pas tout…
L’instrument propose un métronome et plusieurs fonctions
pédagogiques; trois processeurs d’effets numériques (réverb,
chorus et MFX) permettent d’affiner la qualité sonore exceptionnelle.
L’EXR-40 OR peut lire les morceaux GM, GM2, GS et XG.
Vous pouvez donc utiliser n’importe quel fichier Standard
MIDI disponible chez votre revendeur Roland ou sur internet.
Remarque: Compatible XG Light, l’EXR-40 OR n’exécute que les
fonctions de base.
L’EXR-40 OR est également équipé d’un lecteur de disquettes (2DD/2HD) permettant de gérer les données et d’importer
des styles musicaux conçus pour d’anciens instruments
Roland disposant d’un arrangeur.
Bon amusement!
Microsoft et Windows sont des marques déposées de Microsoft Corporation
USA aux Etats-Unis et dans d’autres pays.
Apple et Macintosh sont des marques déposées de Apple Computer Corporation USA aux Etats-Unis et dans d’autres pays.
MacOS est une marque déposée de Apple Computer Corporation.
Les autres noms de sociétés, de produits ou de formats sont des marques
commerciales ou déposées des détenteurs respectifs.
60
Page 61

EXR-40 OR
CONSIGNES DE SECURITÉ
INSTRUCTIONS POUR LA PREVENTION D'INCENDIE, CHOC ÉLECTRIQUE OU BLESSURE
Consignes de sécurité
A propos des symboles Avertissement et Précaution
AVERTISSEMENT
PRUDENCE
AVERTISSEMENT
• Avant d’utiliser cet instrument, lisez les instructions données cidessous et dans le mode d’emploi.
......................................................................................................................................
• N’ouvrez (et ne modifiez) pas le produit.
......................................................................................................................................
• N’essayez pas de réparer l’EXR-40 OR ou d’en remplacer des éléments (sauf si ce manuel vous donne des instructions spécifiques
pour le faire). Confiez tout entretien ou réparation à votre revendeur, au service de maintenance Roland le plus proche ou à un distributeur Roland agréé (vous en trouverez la liste à la page “Information”).
......................................................................................................................................
• N’utilisez et ne rangez jamais l’EXR-40 OR dans des endroits:
• soumis à des températures extrêmes (en plein soleil dans un
véhicule fermé, à proximité d’une conduite de chauffage, audessus de matériel générateur de chaleur),
• humides (salles de bain, toilettes, sur des sols ou supports
mouillés),
• à l’humidité ambiante élevée,
• exposés aux précipitations,
• poussiéreux,
• soumis à de fortes vibrations.
......................................................................................................................................
Sert aux instructions destinées à alerter
l'utilisateur d'un risque mortel ou de
blessure grave en cas d'utilisation
incorrecte de l'unité.
Sert aux instructions destinées à alerter
l'utilisateur d'un risque de blessure ou
de dommage matériel en cas d'emploi
incorrect de l'unité.
* Les dommages matériels se réfèrent
aux dommages ou autres effets
négatifs causés au lieu d'utilisation et
à tous ses éléments, ainsi qu'aux
animaux domestiques.
OBSERVEZ TOUJOURS CE QUI SUIT
• Utilisez ce produit uniquement avec un support ou un stand
recommandé par Roland.
......................................................................................................................................
007
• Veillez à placer l’instrument sur une surface horizontale plane pour
lui assurer une stabilité optimale. Évitez les supports qui vacillent
ou les surfaces inclinées.
......................................................................................................................................
• Branchez l’instrument à un adaptateur secteur répondant aux spécifications énoncées dans le mode d’emploi ou imprimées sur
l’adaptateur fourni avec l’EXR-40 OR.
......................................................................................................................................
AVERTISSEMENT
• Evitez de tordre le cordon de l’adaptateur et de placer des objets
lourds dessus. Vous risquez de l’endommager, ce qui provoquerait
des courts-circuits et couperait l’alimentation de certains éléments.
Un cordon endommagé peut provoquer une électrocution ou un
incendie!
......................................................................................................................................
• Cet instrument, utilisé seul ou avec un amplificateur/des enceintes
ou un casque, peut produire des signaux à des niveaux qui pourraient endommager l’ouïe de façon irréversible. Ne l’utilisez donc
pas trop longtemps à volume élevé ou inconfortable. Si vous pensez
avoir endommagé votre ouïe ou si vos oreilles bourdonnent, arrêtez
immédiatement l’écoute et consultez un spécialiste.
......................................................................................................................................
A propos des symboles
Le symbole alerte l'utilisateur d'instructions importantes
ou de mise en garde. La signification du symbole est
déterminée par ce que contient le triangle. Dans le cas du
symbole de gauche, il sert pour des précautions générales,
des mises en garde ou alertes vis-à-vis d'un danger.
Le symbole prévient l'utilisateur des interdits. Ce
qui ne doit spécifiquement pas être fait est indiqué
dans le cercle. Dans le cas du symbole de gauche, cela
signifie que l'unité ne doit jamais être démontée.
Le symbole ● alerte l'utilisateur de ce qui doit être
fait. Ce qui doit être fait est indiqué par l'icône
contenue dans le cercle. Dans le cas du symbole de
gauche, cela signifie que le cordon d'alimentation doit
être débranché de la prise murale.
• Évitez que des objets (du matériel inflammable, de la monnaie, des
trombones) ou des liquides (eau, limonades, etc.) ne pénètrent à
l’intérieur de ce produit.
......................................................................................................................................
• En présence de jeunes enfants, un adulte doit être présent jusqu’à
ce que l’enfant puisse respecter les précautions nécessaires au
maniement de l’EXR-40 OR.
......................................................................................................................................
• Protégez ce produit contre tout coup ou impact important.
(Ne le laissez pas tomber!)
......................................................................................................................................
• Ne faites pas partager à l’adaptateur de l’EXR-40 OR une prise
murale avec un nombre excessif d’autres appareils. Soyez
particulièrement vigilant avec des multiprises. La puissance totale
utilisée par tous les appareils connectés ne doit jamais excéder la
puissance (watts/ampères) de la rallonge. Une charge excessive
peut augmenter la température du câble et, éventuellement, entraîner une fusion.
......................................................................................................................................
61
Page 62

r
EXR-40 OR
AVERTISSEMENT
• Avant d’utiliser l’EXR-40 OR dans un pays étranger, contactez votre
revendeur, le service de maintenance Roland le plus proche ou un
distributeur Roland agréé (vous en trouverez la liste à la page
“Information”).
......................................................................................................................................
PRUDENCE
• Placez l’EXR-40 OR de sorte à lui assurer une ventilation appropriée.
......................................................................................................................................
• Cet instrument ne peut être utilisé qu’avec le support pour clavier
KS-12 de Roland. L’utilisation de tout autre support pourrait entraîner une instabilité et provoquer d’éventuelles blessures en cas de
chute.
......................................................................................................................................
• Saisissez toujours la fiche de l’adaptateur lors du branchement ou
débranchement au secteur ou au produit.
......................................................................................................................................
• Évitez que les cordons d’alimentation et les câbles ne s’emmêlent.
De plus, tous les cordons et câbles doivent être placés hors de portée des enfants.
......................................................................................................................................
• Ne montez jamais sur ce produit et évitez d’y déposer des objets
lourds.
......................................................................................................................................
• Ne saisissez jamais le cordon de l’adaptateur ni ses fiches avec des
mains humides lorsque vous le branchez ou débranchez d’une prise
murale ou de l’instrument.
• S’il y a risque d’orage, débranchez l’adaptateur de la prise murale.
.....................................................................................................................................
• Si vous devez retirer des vis, gardez-les en lieu sûr et hors de portée
des enfants, pour éviter que ces derniers ne les avalent accidentellement.
.....................................................................................................................................
......................................................................................................................................
• Lorsque vous déplacez l’instrument, veuillez observer les précautions suivantes. Veillez à saisir fermement l’instrument afin d’éviter
tout risque de blessures et d’endommagement de l’instrument en
cas de chute.
• Débranchez l’adaptateur secteur.
• Débranchez tous les câbles reliant l’instrument à des appareils
périphériques.
• Enlevez le pupitre.
......................................................................................................................................
• Avant de nettoyer l’instrument, éteignez-le et débranchez l’adaptateur secteur de la prise murale.
......................................................................................................................................
62
Page 63

Sommaire
EXR-40 OR
1. Caractéristiques . . . . . . . . . . . . . . . . . . . . . . . . . . . . . . . . . .60
2. Remarques importantes . . . . . . . . . . . . . . . . . . . . . . . . . . . .65
3. Présentation . . . . . . . . . . . . . . . . . . . . . . . . . . . . . . . . . . . . .67
Façade . . . . . . . . . . . . . . . . . . . . . . . . . . . . . . . . . . . . . . . . . . . . . . 67
Face arrière . . . . . . . . . . . . . . . . . . . . . . . . . . . . . . . . . . . . . . . . . .69
4. Prise en main. . . . . . . . . . . . . . . . . . . . . . . . . . . . . . . . . . . . .70
Prise en main . . . . . . . . . . . . . . . . . . . . . . . . . . . . . . . . . . . . . . . . 70
Morceaux de démonstration . . . . . . . . . . . . . . . . . . . . . . . . . . .70
Ecouter une démonstration de sons. . . . . . . . . . . . . . . . . . . . . . . . . 70
Reproduire une démo de styles. . . . . . . . . . . . . . . . . . . . . . . . . . . . . 70
Quitter le mode de démonstration . . . . . . . . . . . . . . . . . . . . . . . . . . 70
Jouer sans accompagnement . . . . . . . . . . . . . . . . . . . . . . . . . .71
Utiliser la partie Main . . . . . . . . . . . . . . . . . . . . . . . . . . . . . . . . . . . . . 71
Utiliser les parties Main et Split . . . . . . . . . . . . . . . . . . . . . . . . . . . . 71
Utiliser les parties Main et Dual . . . . . . . . . . . . . . . . . . . . . . . . . . . . 72
Utilisation du métronome . . . . . . . . . . . . . . . . . . . . . . . . . . . . . . . . . 72
5. Jeu avec accompagnement (arrangeur) . . . . . . . . . . . . . . .73
Activation/utilisation de l’arrangeur. . . . . . . . . . . . . . . . . . . . . 73
Changer le tempo . . . . . . . . . . . . . . . . . . . . . . . . . . . . . . . . . . . . . . . . 74
Démarrage automatique de la reproduction (Sync Start & Stop) 74
Arrêter l’arrangeur. . . . . . . . . . . . . . . . . . . . . . . . . . . . . . . . . . . . . . . . 74
Sélection de styles musicaux . . . . . . . . . . . . . . . . . . . . . . . . . . .74
Utiliser la fonction Band Orchestrator. . . . . . . . . . . . . . . . . . . 75
Balance . . . . . . . . . . . . . . . . . . . . . . . . . . . . . . . . . . . . . . . . . . . . . 76
6. Reproduire des morceaux . . . . . . . . . . . . . . . . . . . . . . . . . . 77
Fonctions élémentaires de reproduction . . . . . . . . . . . . . . . . . 77
Fonctions supplémentaires de reproduction. . . . . . . . . . . . . . 78
Activer le mode Song . . . . . . . . . . . . . . . . . . . . . . . . . . . . . . . . . . . . . 78
Avance, recul et retour au début . . . . . . . . . . . . . . . . . . . . . . . . . . . 78
Reproduction en boucle (Repeat) . . . . . . . . . . . . . . . . . . . . . . . . . . . 79
Jeu “live” avec accompagnement de morceau (Minus One). . . . . 79
Changer les assignations de pistes . . . . . . . . . . . . . . . . . . . . . . . . . . 80
7. Enregistrer votre jeu. . . . . . . . . . . . . . . . . . . . . . . . . . . . . . .81
Fonctions de base d’enregistrement. . . . . . . . . . . . . . . . . . . . . 81
Ecouter votre morceau . . . . . . . . . . . . . . . . . . . . . . . . . . . . . . . . . . . . 81
Autres fonctions d’enregistrement. . . . . . . . . . . . . . . . . . . . . . 82
A propos des modes d’enregistrement. . . . . . . . . . . . . . . . . . . . . . . 82
Toujours à propos du mode ALL . . . . . . . . . . . . . . . . . . . . . . . . . . . . .82
Mode d’enregistrement Keyboard . . . . . . . . . . . . . . . . . . . . . . . . . . .82
Mode d’enregistrement Single . . . . . . . . . . . . . . . . . . . . . . . . . . . . . .82
Punch I/O . . . . . . . . . . . . . . . . . . . . . . . . . . . . . . . . . . . . . . . . . . . . . . . .83
8. Fonctions arrangeur supplémentaires. . . . . . . . . . . . . . . . 84
One Touch. . . . . . . . . . . . . . . . . . . . . . . . . . . . . . . . . . . . . . . . . . . 84
Utiliser le Music Assistant . . . . . . . . . . . . . . . . . . . . . . . . . . . . .84
Melody Intelligence. . . . . . . . . . . . . . . . . . . . . . . . . . . . . . . . . . . 85
Changer le type d’harmonie Melody Intelligence . . . . . . . . . . . . . .85
Mode PIANIST. . . . . . . . . . . . . . . . . . . . . . . . . . . . . . . . . . . . . . . . 85
Bass Inversion (Bass Inv). . . . . . . . . . . . . . . . . . . . . . . . . . . . . . . 86
Autres fonctions pour styles musicaux . . . . . . . . . . . . . . . . . . 86
9. Travailler avec des gammes orientales . . . . . . . . . . . . . . . 87
Diminuer la hauteur de certaines notes d’un quart de ton . . . . . .87
Travailler avec d’autres accords . . . . . . . . . . . . . . . . . . . . . . . . . . . . .87
Sauvegarder et charger les réglages d’accord (SCALE MEMORY) .87
10. Fonctions des parties clavier . . . . . . . . . . . . . . . . . . . . . . . 88
Choix des sons pour les parties Main, Split et Dual. . . . . . . . 88
Sélection d’un des sons disponibles. . . . . . . . . . . . . . . . . . . . . . . . . .88
Utiliser les boutons USER TONES . . . . . . . . . . . . . . . . . . . . . . . . . . . .88
Assigner un autre son à un bouton USER TONES . . . . . . . . . . . . . .88
Sons de batterie et effets sonores (“SFX”) . . . . . . . . . . . . . . . .89
Kits de batterie . . . . . . . . . . . . . . . . . . . . . . . . . . . . . . . . . . . . . . . . . . .89
Effets sonores (“SFX”) . . . . . . . . . . . . . . . . . . . . . . . . . . . . . . . . . . . . . .89
Transpose . . . . . . . . . . . . . . . . . . . . . . . . . . . . . . . . . . . . . . . . . . . 90
Transposition globale (“GLB”) . . . . . . . . . . . . . . . . . . . . . . . . . . . . . . .90
Réglages d’octave . . . . . . . . . . . . . . . . . . . . . . . . . . . . . . . . . . . . 91
Autres fonctions liées aux parties clavier . . . . . . . . . . . . . . . . 91
11. Fonctions de jeu et effets. . . . . . . . . . . . . . . . . . . . . . . . . . 92
Fonctions de jeu. . . . . . . . . . . . . . . . . . . . . . . . . . . . . . . . . . . . . . 92
Sensibilité au toucher (Keyboard Touch) . . . . . . . . . . . . . . . . . . . . . . .92
Pitch Bend et Modulation . . . . . . . . . . . . . . . . . . . . . . . . . . . . . . . . . .92
Commutateur au pied . . . . . . . . . . . . . . . . . . . . . . . . . . . . . . . . . . . . .92
Utilisation des effets . . . . . . . . . . . . . . . . . . . . . . . . . . . . . . . . . .93
Utiliser le processeur multi-effet (MFX) . . . . . . . . . . . . . . . . . . . . . .93
Reverb. . . . . . . . . . . . . . . . . . . . . . . . . . . . . . . . . . . . . . . . . . . . . . . . . . .94
Chorus. . . . . . . . . . . . . . . . . . . . . . . . . . . . . . . . . . . . . . . . . . . . . . . . . . .95
Fonction V-LINK. . . . . . . . . . . . . . . . . . . . . . . . . . . . . . . . . . . . . . 96
Fonctions V-LINK pilotables par l’EXR-40 OR (et messages MIDI
correspondants) . . . . . . . . . . . . . . . . . . . . . . . . . . . . . . . . . . . . . . . . . . 96
12. Menu Function . . . . . . . . . . . . . . . . . . . . . . . . . . . . . . . . . . . 97
Edition de paramètres (procédure générale). . . . . . . . . . . . . . 97
Paramètres KB SET . . . . . . . . . . . . . . . . . . . . . . . . . . . . . . . . . . . . . . . . 97
Paramètres METRONOM . . . . . . . . . . . . . . . . . . . . . . . . . . . . . . . . . . . 99
Paramètres OCTAVE . . . . . . . . . . . . . . . . . . . . . . . . . . . . . . . . . . . . . . . 99
Paramètres VOLUME . . . . . . . . . . . . . . . . . . . . . . . . . . . . . . . . . . . . . . 99
Paramètres ARR SET. . . . . . . . . . . . . . . . . . . . . . . . . . . . . . . . . . . . . . 100
Paramètres EFFECTS . . . . . . . . . . . . . . . . . . . . . . . . . . . . . . . . . . . . . .100
Paramètres KB SCALE. . . . . . . . . . . . . . . . . . . . . . . . . . . . . . . . . . . . . 101
Paramètres MIDI. . . . . . . . . . . . . . . . . . . . . . . . . . . . . . . . . . . . . . . . . 101
Paramètres UTILITY. . . . . . . . . . . . . . . . . . . . . . . . . . . . . . . . . . . . . . . 101
13. Tirer parti des programmes utilisateur. . . . . . . . . . . . . . . 102
Enregistrer les réglages dans un programme utilisateur . . 102
Remarques sur la sauvegarde des programmes utilisateur. . . . .102
Sélection d’un programme utilisateur . . . . . . . . . . . . . . . . . .102
Lock: filtrer certains réglages des programmes utilisateur. 103
14. Fonctions MIDI . . . . . . . . . . . . . . . . . . . . . . . . . . . . . . . . . . 104
Canaux . . . . . . . . . . . . . . . . . . . . . . . . . . . . . . . . . . . . . . . . . . . . . . . . .104
Paramètres Function MIDI . . . . . . . . . . . . . . . . . . . . . . . . . . . . . . . .104
15. Gestion des données . . . . . . . . . . . . . . . . . . . . . . . . . . . . . 106
Utilisation de la mémoire Flash. . . . . . . . . . . . . . . . . . . . . . . .106
Sauvegarder un morceau en mémoire Flash . . . . . . . . . . . . . . . . .106
Archiver des programmes utilisateur dans la mémoire Flash . . .106
Sauvegarder des styles en mémoire Flash . . . . . . . . . . . . . . . . . . .107
Charger un set de programmes utilisateur de la mémoire Flash107
Supprimer des morceaux de la mémoire Flash . . . . . . . . . . . . . . . 107
Supprimer des styles de la mémoire Flash . . . . . . . . . . . . . . . . . . .108
Effacer un set de programmes utilisateur de la mémoire Flash .108
Archiver des données avec un ordinateur (USB) . . . . . . . . .109
Fonctions Disk . . . . . . . . . . . . . . . . . . . . . . . . . . . . . . . . . . . . . .110
Charger des programmes utilisateur de la disquette . . . . . . . . . .110
Charger des morceaux d’une disquette . . . . . . . . . . . . . . . . . . . . . 111
Charger des styles musicaux d’une disquette . . . . . . . . . . . . . . . . 111
Sauvegarde de fichiers sur disquette . . . . . . . . . . . . . . . . . . . . . . . 111
Effacer des fichiers sur disquette. . . . . . . . . . . . . . . . . . . . . . . . . . . 112
63
Page 64

r
EXR-40 OR
Formater une disquette. . . . . . . . . . . . . . . . . . . . . . . . . . . . . . . . . . . 113
16. Utiliser les sorties et un commutateur au pied. . . . . . . . 114
17. Divers. . . . . . . . . . . . . . . . . . . . . . . . . . . . . . . . . . . . . . . . . . 115
Fonctions à caractère pédagogique. . . . . . . . . . . . . . . . . . . . 115
Couper ou activer la fonction de démonstration . . . . . . . . . . . . .115
Couper ou activer l’arrangeur . . . . . . . . . . . . . . . . . . . . . . . . . . . . . 115
Couper ou activer l’arrangeur et la fonction Demo . . . . . . . . . . . 115
Initialiser l’EXR-40 OR (Factory). . . . . . . . . . . . . . . . . . . . . . . 115
18. Fiche technique . . . . . . . . . . . . . . . . . . . . . . . . . . . . . . . . . 116
Remerciements. . . . . . . . . . . . . . . . . . . . . . . . . . . . . . . . . . . . . . . . . . 116
19. Lists . . . . . . . . . . . . . . . . . . . . . . . . . . . . . . . . . . . . . . . . . . . 117
Tones selectable via the front panel . . . . . . . . . . . . . . . . . . . 117
Drum Kits . . . . . . . . . . . . . . . . . . . . . . . . . . . . . . . . . . . . . . . . . . 120
Music Styles. . . . . . . . . . . . . . . . . . . . . . . . . . . . . . . . . . . . . . . . 125
Chord Intelligence (“Md1” setting) . . . . . . . . . . . . . . . . . . . . 126
MIDI Implementation Chart . . . . . . . . . . . . . . . . . . . . . . . . . . 128
64
Page 65

2. Remarques importantes
Outre les informations de la section “Using the unit safely” (p. 3), veuillez lire et suivre les conseils suivants:
EXR-40 OR
Alimentation
• Ne vous servez pas de cet instrument sur le même circuit qu’un
appareil générateur de parasites (tel qu’un moteur électrique ou un
système d’éclairage avec variateur).
• Avant de brancher l’EXR-40 OR à d’autres appareils, coupez l’alimentation de tous les appareils. Le non-respect de cette précaution
pourrait entraîner des dysfonctionnements et/ou l’endommagement
de vos enceintes ou d’autres appareils.
Emplacement
• L’usage de l’EXR-40 OR à proximité d’amplificateurs (ou de tout
autre matériel contenant de grands transformateurs électriques)
peut être source de bruit. Pour résoudre le problème, changez
l’orientation de l’instrument ou éloignez-le de la source d’interférence.
• Cet instrument peut causer des interférences lors de la réception
radio ou télévisée. Ne vous en servez pas à proximité de tels
récepteurs.
• Observez les consignes suivantes quand vous utilisez le lecteur de
disquettes de l’instrument. Pour en savoir plus, voyez “Avant d’utiliser des disquettes (maniement du lecteur de disquettes)”.
• Ne placez pas l’instrument à proximité d’appareils générant un
puissant champ magnétique (comme des enceintes, par exemple).
• Installez l’EXR-40 OR sur une surface stable et plane.
• Ne déplacez pas l’instrument et évitez toute vibration pendant
l’utilisation du lecteur de disquettes.
• N’exposez pas l’EXR-40 OR directement au soleil, ne le laissez pas
près d’appareils irradiant de la chaleur, dans un véhicule fermé ou
dans un endroit le soumettant à des températures excessives. Une
chaleur excessive peut déformer ou décolorer l’instrument.
• Pour éviter les risques de dysfonctionnement, n’utilisez pas l’instrument dans des endroits exposés à la pluie ou à d’autres sources
d’humidité.
• Ne posez jamais d’objet sur l’EXR-40 OR. Cela pourrait provoquer
des dysfonctionnements.
Entretien
• Pour nettoyer l’EXR-40 OR, utilisez un chiffon sec et doux ou à la
rigueur légèrement humidifié avec de l’eau. Pour enlever des taches
plus tenaces, servez-vous d’un détergent doux et non abrasif.
Ensuite, essuyez soigneusement l’instrument avec un chiffon doux
et sec.
• N’utilisez jamais de benzène, de diluant, de solvant ou d’alcool
d’aucune sorte pour éviter le risque de décoloration et/ou de déformation.
Réparations et données
• Songez que toutes les données contenues dans l’instrument sont
perdues s’il doit subir une réparation. Il peut être impossible de
récupérer des données dans certains cas (notamment lorsque les circuits touchant à la mémoire elle-même sont endommagés). Roland
rejette toute responsabilité concernant la perte de ces données.
Précautions supplémentaires
• N’oubliez jamais que le contenu de la mémoire peut être irrémédiablement perdu suite à un mauvais fonctionnement ou un mauvais
maniement de l’instrument.
• Maniez les boutons, les autres commandes et les prises avec un
minimum d’attention. Un maniement trop brutal peut entraîner des
dysfonctionnements.
• Evitez les coups ou les pressions trop fortes sur l’écran.
• Lorsque vous branchez/débranchez des câbles, prenez la fiche en
main, jamais le câble. Vous éviterez ainsi d’endommager le câble ou
de provoquer des court-circuits.
• Cet instrument dégage une faible quantité de chaleur durant son
fonctionnement. C’est tout à fait normal.
• Pour ne pas déranger vos voisins, maintenez le volume à un niveau
raisonnable. Il peut parfois être préférable d’utiliser un casque (surtout quand vous jouez la nuit).
• Si vous devez transporter l’instrument, emballez-le dans son emballage d’origine (avec les protections). A défaut, utilisez un emballage
équivalent ou un flightcase.
• Utilisez uniquement un commutateur au pied du type recommandé
(DP-2, DP-6, disponible en option). En branchant un autre commutateur au pied, vous risquez de provoquer un dysfonctionnement et/
ou d’endommager l’EXR-40 OR.
• Quand vous jouez sur l’EXR-40 OR à un volume excessif, le système
de protection de son amplificateur de puissance peut entrer en
action, coupant le son des enceintes. Dans ce cas, diminuez le
volume et attendez quelques secondes.
Avant d’utiliser des disquettes (maniement du lecteur de
disquettes)
• Placez le produit sur une surface stable et plane, à l’abri de toute
vibration. Si vous devez incliner le produit, veillez à respecter les
limites de la plage d’inclinaison suivante: 2° vers le haut; 18° vers le
bas.
• N’utilisez pas l’EXR-40 OR directement lorsque vous le déplacez
dans un lieu dont le degré d’humidité diffère considérablement de
l’endroit où il se trouvait précédemment. Ces brusques changements
d’humidité ambiante pourraient être source de condensation à
l’intérieur du lecteur et compromettre son bon fonctionnement et/
ou endommager les disquettes. Après avoir déplacé l’EXR-40 OR,
attendez (quelques heures) qu’il s’accoutume aux nouvelles conditions ambiantes avant de l’utiliser.
• Pour insérer une disquette, poussez-la doucement mais fermement
dans le lecteur, jusqu’à ce qu’un déclic indique qu’elle est en place.
Pour l’éjecter, appuyez fermement sur le bouton d’éjection. N’utilisez jamais de force excessive pour retirer une disquette qui se trouve
dans le lecteur.
• N’essayez jamais d’éjecter une disquette quand le lecteur fonctionne
(tant que son témoin clignote). Cela risquerait d’endommager la disquette et le lecteur.
• Avant de mettre l’instrument sous tension/hors tension, veillez toujours à éjecter la disquette du lecteur.
• Pour éviter d’endommager les têtes du lecteur de disquette, maintenez toujours la disquette de la façon la plus droite possible pour
l’insérer dans le lecteur. Poussez-la fermement mais en douceur.
N’utilisez jamais de force excessive.
65
Page 66

r
EXR-40 OR
• Pour éviter tout dysfonctionnement et/ou endommagement, insérez
uniquement des disquettes dans le lecteur de disquettes. N’insérez
jamais d’autre type de disque. Evitez que des trombones, de la monnaie ou tout autre objet ne pénètre dans le lecteur.
Maniement des disquettes
• Les disquettes sont constituées d’un disque plastic recouvert d’une
fine couche magnétique. Une précision microscopique est nécessaire pour pouvoir sauvegarder de larges quantités de données sur
une surface si petite. Pour les garder en bon état, veuillez suivre les
conseils suivants de manipulation:
• Ne touchez jamais le support magnétique de la disquette.
• N’utilisez et ne conservez pas les disquettes dans des endroits
sales ou poussiéreux.
• Ne soumettez jamais vos disquettes à des températures extrêmes
(dans un véhicule fermé en plein soleil, par exemple). Plage de
températures recommandée: 10°~50°C (50°~122°F).
• N’exposez pas vos disquettes à de forts champs magnétiques tels
que ceux générés par des haut-parleurs.
• Les disquettes sont pourvues d’un volet de protection “WRITE”
contre tout effacement accidentel. Nous vous conseillons de laisser ce volet en position PROTECT et de ne le placer en position
WRITE que lorsque vous souhaitez sauvegarder de nouvelles données sur la disquette.
Face arrière de la disquette
WRITE
(permet la sauvegarde de données)
Responsabilités et droits d’auteur
• Il est malheureusement impossible de récupérer des données que
vous avez effacées d’une disquette. Roland Europe S.p.a. décline
toute responsabilité en cas de perte de données.
• Tout enregistrement, distribution, vente, location, interprétation en
public, diffusion, etc. d’une œuvre (entière ou partielle) protégée par
des droits d’auteur (composition musicale, vidéo, diffusion, interprétation en public, etc.) est illégal sans l’accord du détenteur des droits
d’auteur.
• N’utilisez jamais cet instrument à des fins qui risqueraient d’enfreindre les législations relatives aux droits d’auteur. Roland décline
toute responsabilité pour toute violation de droits d’auteur
résultant de l’utilisation de cet instrument.
Volet de protection
• Les disquettes contenant d’importantes données pour cet instrument doivent toujours être verrouillées (en glissant leur volet de
protection sur PROTECT) avant d’être insérées dans le lecteur d’un
autre instrument.
• L’étiquette doit être collée convenablement sur la disquette. Si
elle se décolle lorsque la disquette est dans le lecteur, l’extraction
de la disquette risque d’être difficile.
• Remettez la disquette dans sa boîte pour la conserver.
PROTECT
(empêche la sauvegarde de données)
66
Page 67

3. Présentation
Façade
EXR-40 OR
A B
C
D
E
Boutons SCALE MEMORY
A
Ces trois boutons permettent de mémoriser et de rappeler les
réglages d’accord définis avec les boutons ORIENTAL SCALE. A la
sortie d’usine, l’EXR-40 OR propose déjà des réglages utiles dans
ces trois mémoires (que vous pouvez rappeler en initialisant
votre EXR-40 OR).
Remarque: Les réglages des boutons ORIENTAL SCALE sont éga-
lement sauvegardés dans le programme utilisateur; vous pouvez
donc utiliser ces mémoires pour effectuer des réglages “globaux”
supplémentaires.
B
Boutons ORIENTAL SCALE
Ces boutons permettent de définir la hauteur de chaque note de
la gamme (Scale). Par défaut, quand vous appuyez sur un de ces
boutons, la hauteur des notes correspondantes diminue d’un
quart de ton (–50 cents) sur toutes les octaves. Vous pouvez
aussi définir d’autres systèmes d’accord et les sauvegarder dans
une des trois mémoires de gamme (voyez ci-dessus) ou dans un
programme utilisateur.
C
[POWER¥ON]
Bouton
Appuyez sur ce bouton pour mettre l’EXR-40 OR sous/hors tension.
F
G
H K L
I
J
M
N
O Q
P R
Levier BENDER/MODULATION
D
En actionnant le levier à gauche/droite, vous pouvez diminuer
(gauche) ou augmenter (droite) la hauteur des notes de vos
solos. Pour appliquer de la modulation (généralement un
vibrato) aux notes jouées, enfoncez ce levier vers l’arrière de
l’instrument.
E
Prises PHONES 1/2
Vous pouvez brancher deux casques d’écoute en option (Roland
RH-25, RH-50 ou RH-120). En branchant un casque, vous coupez les enceintes de l’EXR-40 OR.
F
Commande
Cette commande sert à régler le volume général de votre
EXR-40 OR.
G
Boutons BALANCE
Servez-vous des boutons BALANCE pour changer le volume de la
section correspondante (accompagnement/morceau ou les parties que vous jouez sur le clavier).
[VOLUME]
[ACCOMP][KEYBOARD]
b
W
S
X
T
Y
U
V
Z
a
Bouton
H
I Bouton [METRONOME]
J
K
[KEYBOARD¥TOUCH]
Appuyez sur ce bouton pour activer/couper la fonction de sensibilité au toucher du clavier. Quand cette fonction est désactivée,
vous pouvez définir une valeur de toucher fixe qui est appliquée
à toutes les notes que vous jouez.
Ce bouton permet d’activer et de couper le métronome. Vous
pouvez l’enfoncer pendant plus d’une seconde pour activer un
paramètre FUNCTION réglable.
[MELODY¥INTELLIGENCE]
Bouton
Ce bouton permet d’activer/de couper la fonction Melody Intelligence. Cette dernière sert à ajouter une partie d’harmonie à la
mélodie que vous jouez. Voyez p. 85. En maintenant ce bouton
enfoncé pendant plus d’une seconde, vous activez un paramètre
FUNCTION permettant de choisir le type d’harmonie.
Bouton
[USB]
Ce bouton permet de sélectionner la fonction du port USB: (i)
sauvegarde (archivage et chargement de réglages sur/depuis un
ordinateur) ou (ii) USB/MIDI (dans ce cas, le port USB a la même
fonction que les prises MIDI IN et MIDI OUT). Voyez aussi pages
104 et 109.
67
Page 68

r
EXR-40 OR
Appuyez simultanément sur ce bouton et sur [ONE¥TOUCH]
pour sélectionner la fonction de démonstration de l’EXR-40 OR
(voyez p. 70).
Bouton
L
[ONE¥TOUCH]
Appuyez sur ce bouton pour choisir la mémoire One Touch voulue. Les mémoires One Touch contiennent un nombre de réglages qui sont complémentaires au style musical en question. Vous
disposez de deux mémoires One Touch par style musical. Voyez
p. 84.
M
Bouton
[V-LINK]
Appuyez sur ce bouton pour exploiter la fonction V-LINK de
l’EXR-40 OR. Elle permet de piloter du matériel vidéo avec certaines fonctions de jeu et les touches les plus hautes du clavier
de l’EXR-40 OR. Si vous utilisez du matériel vidéo compatible VLINK, vous pouvez facilement lier des effets visuels aux effets
sonores et conférer plus d’expression encore à votre exécution.
En branchant l’EXR-40 OR au DV-7PR ou V-4 Edirol, vous pouvez synchroniser le changement d’images avec la musique ou
vous servir des fonctions de jeu ou des touches les plus hautes
du clavier de l’EXR-40 OR pour changer de clips, contrôler la
vitesse de défilement des images, etc.
Pendant la reproduction de morceaux et de styles musicaux, ce
bouton clignote pour indiquer le tempo et les battements (fonction BEAT).
N
Section KEYBOARD CONTROL
Appuyez sur le bouton
[SPLIT]
pour jouer des sons différents de
la main droite et de la main gauche. Appuyez sur le bouton
pour jouer deux sons superposés.
[DUAL]
Utilisez le bouton
[TRANSPOSE]
pour transposer le clavier
(voyez p. 90).
Section BAND ORCHESTRATOR
O
Appuyez sur un de ces boutons afin de choisir le type d’orchestration voulue pour le style musical en question. Voyez page 75.
Section ARRANGER & SONG -CONTROLS
P
Bouton
[TAP¥TEMPO]
: Appuyez au moins deux fois sur ce bouton pour régler le tempo de reproduction de l’arrangeur ou de
l’enregistreur.
Bouton
[SYNC¥START/STOP]
: Ce bouton a deux fonctions: en
mode Arranger (quand vous utilisez l’accompagnement automatique), il permet d’activer/de couper les fonctions SYNC START et
SYNC STOP.
En mode Song, il sert à définir le début (“A”) et la fin (“B”) du
passage à répéter.
Les autres boutons de cette section servent à piloter la reproduction de l’arrangeur ou de l’enregistreur. Voyez pages 73 et
77.
Q
Section LOCK
Les boutons de cette section vous permettent de filtrer (d’ignorer) certains réglages généralement chargés lorsque vous sélectionnez un programme utilisateur. Vous bénéficiez ainsi d’une
flexibilité accrue pour exploiter vos réglages. Voyez page 103.
Quand la fonction Minus One est active, ces boutons permettent
de couper rapidement plusieurs parties d’un fichier Standard
MIDI (cette fonction n’est pas disponible quand vous utilisez la
fonction arrangeur).
Section KEYBOARD MODE
R
Ces deux boutons permettent de configurer rapidement
l’EXR-40 OR en vue de l’utiliser avec ( [ARRANGER¥BAND]
[PIANO÷SOLO]
sans (
) accompagnement automatique. A la mise
) ou
sous tension, l’EXR-40 OR passe en mode PIANO SOLO.
Enfoncez simultanément ces boutons pour activer la fonction
PIANO MODE. Elle permet d’utiliser l’arrangeur (accompagnement automatique) de l’EXR-40 OR sans partager le clavier
(voyez p. 85).
S
[MUSIC¥ASSISTANT]
Bouton
Ce bouton permet de travailler avec des réglages préprogrammés (des programmes utilisateur supplémentaires). Voyez p. 84.
T Bouton [SONG]
Ce bouton sert à choisir le mode Song de l’EXR-40 OR et à affec-
[INTRO]
ter les boutons
[ORIGINAL]
,
etc. au pilotage de l’enre-
gistreur (Recorder) incorporé.
U
Bouton
[STYLE]
Sert à choisir les styles musicaux (Music Styles). En activant ce
[INTRO]
bouton, vous affectez les boutons
[ORIGINAL]
,
, etc. au
choix d’une division de style, tandis que les boutons numériques
permettent de sélectionner la mémoire de style voulue.
V
[TONE]
Bouton
Appuyez sur ce bouton afin d’utiliser les boutons
[FAMILY]
et les
boutons numériques pour assigner un son (“Tone”) ou un kit de
batterie à la partie Main, Split ou Dual. Voyez p. 88.
W Boutons DATA ENTRY
Boutons FAMILY et SELECT
[√][®]
servent au choix des sons, styles, mémoires Music Assis-
[√][®]
: Les boutons FAMILY et SELECT
tant, morceaux et paramètres Function. Les boutons FAMILY
permettent de choisir un groupe. Vous pouvez les presser,
[√][®]
les maintenir enfoncés ou en maintenir un enfoncé tout en
appuyant sur l’autre pour changer la vitesse de défilement.
Les boutons SELECT
servent à sélectionner les éléments
[√][®]
voulus au sein de la famille ou du groupe choisi. Vous pouvez les
actionner, les maintenir enfoncés ou en maintenir un enfoncé
tout en appuyant sur l’autre pour changer la vitesse de
défilement. Quand vous êtes arrivé à la dernière entrée du
groupe actuel, une nouvelle pression sur
active la première
[®]
entrée du groupe suivant. D’autre part, si vous appuyez sur
lorsque vous vous trouvez à la première entrée d’un groupe,
vous activez la dernière entrée du groupe précédent.
Pavé
numérique : Ces boutons servent à entrer des numéros
(pour le choix des sons, styles, de la mémoire Music Assistant,
des morceaux, pistes), des valeurs et des caractères (pour
l’entrée de noms).
Les boutons TEMPO/DATA
servent à régler le tempo de
[–][+]
l’arrangeur ou du morceau et la valeur du paramètre FUNCTION
choisi.
Bouton
X
[FUNCTION]
Ce bouton vous permet d’accéder au menu FUNCTION. Servezvous des boutons FAMILY et SELECT
[√][®]
pour choisir le para-
mètre voulu.
Y
Bouton
[DISK]
Appuyez sur ce bouton pour accéder aux fonctions Disk. Elles
servent à charger des données d’une disquette, à sauvegarder
des données et à gérer les données d’une disquette. Voyez
p. 110.
Remarque: Vous pouvez aussi archiver et charger des données
via USB.
Z
Bouton
[USER¥PROGRAM÷WRITE]
Ce bouton sert à choisir un programme utilisateur (alias User,
désignant un ensemble de réglages). Maintenez-le enfoncé pour
mémoriser les réglages en face avant et les réglages de paramètres dans un programme utilisateur. Voyez page 102.
[√]
68
Page 69

EXR-40 OR
a
Section USER TONES
Ces boutons permettent de choisir le “meilleur” son de la famille
en question (c.-à-d. le “meilleur” son de piano, d’orgue, de guitare/basse, etc.). Après avoir actionné un de ces boutons, vous
pouvez utiliser les boutons FAMILY
choisir d’autres familles et d’autres sons au sein de la famille
[√][®]
et SELECT
[√][®]
pour
Face arrière
A
Prises OUTPUT R, L/MONO
Ces prises servent à brancher l’EXR-40 OR à un ampli HiFi, un
mélangeur, une platine à cassette, un ampli clavier etc. Dans le
cas d’un ampli mono, veillez à le brancher à la prise OUTPUT L/
MONO.
B
Prise DC IN
C’est ici que vous branchez l’adaptateur secteur fourni (PSB-4U).
Remarque: Utilisez exclusivement l’adaptateur secteur fourni
avec votre EXR-40 OR. D’autres adaptateurs risquent d’endommager votre Interactive Arranger.
C
Crochet pour cordon
Après avoir branché le câble de l’adaptateur, enroulez-le autour
de la pince pour câble à droite de la prise pour éviter tout
débranchement accidentel.
D
Prise FOOTSWITCH
Cette prise permet de brancher un commutateur au pied DP-2,
DP-6 ou BOSS FS-5U en option afin de maintenir les notes
jouées de la main droite (“pédale forte”). Il peut aussi piloter
d’autres paramètres (voyez “FSW° (Footswitch Assign)” (p. 98)).
active. (A un stade ultérieur, ceux-ci peuvent être rappelés en
“double-cliquant” sur ces boutons.) Vous pouvez assigner vos
sons favoris à ces boutons. Voyez “Utiliser les boutons USER
TONES” (p. 88) pour en savoir plus.
A B C D E F
E
Prises MIDI OUT/IN
Branchez la prise MIDI OUT à la prise MIDI IN de votre ordinateur
(ou instrument MIDI) pour transférer des données MIDI de
l’EXR-40 OR à l’ordinateur ou à l’instrument MIDI externe. Pour
recevoir des données de l’ordinateur, branchez la prise MIDI IN
de l’EXR-40 OR à la prise MIDI OUT de l’ordinateur.
Remarque: L’EXR-40 OR peut aussi transmettre/recevoir des
données MIDI via son port USB. Pour cela, il faut installer les
pilotes USB appropriés (voyez le CD-ROM fourni).
F
Prise USB
Le port USB peut transmettre/recevoir des messages MIDI ou
être utilisé pour archiver des données sur un ordinateur.
b
Lecteur de disquette, au centre et en dessous du clavier (n’est
pas repris sur l’illustration)
Ce lecteur permet de charger une disquette contenant des
fichiers Standard MIDI ou des styles musicaux (que vous possédez peut-être déjà). Ce lecteur accepte les disquettes de formats
2DD (720k) et 2HD (1.44Mo).
69
Page 70

r
EXR-40 OR
4. Prise en main
Prise en main
Avant tout, il faut brancher l’adaptateur PSB-4U fourni à une
prise de courant adéquate.
(1) Déballez l’EXR-40 OR et posez-le sur une surface stable.
(2) Branchez la petite fiche de l’adaptateur à la prise DC IN de
l’EXR-40 OR et l’autre extrémité à une prise de courant de
tension appropriée.
(3) Appuyez sur le bouton
sous tension.
(4) Réglez le volume de sortie de l’EXR-40 OR avec sa commande
[VOLUME]
Remarque: Quand vous jouez sur l’EXR-40 OR à un volume
excessif, le système de protection de son amplificateur de puissance peut entrer en action, coupant le son des enceintes. Dans
ce cas, diminuez le volume et attendez quelques secondes.
(5) Appuyez de nouveau sur
l’EXR-40 OR hors tension.
Si vous branchez l’EXR-40 OR à une chaîne HiFi ou un amplificateur clavier, faites-le avant d’effectuer l’étape (3) et mettez
l’amplificateur sous tension avant d’effectuer l’étape (4).
.
[POWER¥ON]
POWER ON
[POWER¥ON]
pour mettre l’EXR-40 OR
VOLUME
pour mettre
Morceaux de démonstration
Votre EXR-40 OR contient 1 morceau de démonstration, 8
démos de sons et une série de démos de styles.
• Le morceau de démonstration général illustre l’ensemble
des possibilités offertes par l’EXR-40 OR.
• Les démonstrations de sons mettent en exergue la qualité
sonore de l’EXR-40 OR.
• Les démos de styles donnent une idée de l’extraordinaire
qualité des styles musicaux de l’instrument.
(1) Maintenez le bouton
[ONE¥TOUCH]
DemoSong
(2) Si nécessaire, servez-vous de la commande
régler le volume de reproduction.
(3) Appuyez sur
Ecouter une démonstration de sons
(1) Appuyez sur le bouton
La reproduction du morceau de démo de sons démarre aussitôt.
[USB]
.
[START÷STOP]
[TONE]
TONE
enfoncé et appuyez sur
=
120 001
[VOLUME]
pour arrêter la reproduction.
.
pour
Appuyez sur le bouton
tion de la démo de sons actuelle. Appuyez à nouveau sur ce bouton pour lancer la reproduction de la démo de sons suivante.
(2) Appuyez sur
sons.
[START÷STOP]
[START÷STOP]
pour arrêter la démonstration de
pour arrêter la reproduc-
Reproduire une démo de styles
(1) Appuyez sur le bouton
DemStyle
La reproduction du morceau de démonstration de styles
démarre automatiquement.
Appuyez sur le bouton
tration de styles en cours. Appuyez à nouveau sur ce bouton
pour lancer la reproduction de la démonstration de styles suivante.
(2) Appuyez sur
styles.
[START÷STOP]
[STYLE]
.
STYLE
=
146
[START÷STOP]
pour arrêter la démonstration de
pour arrêter la démons-
Quitter le mode de démonstration
(1) Maintenez le bouton
[ONE¥TOUCH]
[USB]
enfoncé tout en appuyant sur
pour quitter le mode de démonstration.
70
Page 71

EXR-40 OR
Jouer sans accompagnement
A la mise sous tension, l’EXR-40 OR passe en mode PIANO SOLO.
Vous pouvez alors utiliser l’EXR-40 OR comme piano numérique
ou synthétiseur.
La fonction d’accompagnement (“Arranger”) et le bouton
[ONE¥TOUCH]
outre, seule la partie Main est active.
L’EXR-40 OR propose trois parties pour jouer en direct (et de nom-
breuses autres pour l’accompagnement de l’arrangeur ou d’un morceau):
Main Il s’agit de la partie principale. Tant que la partie
Split Quand vous l’activez, la partie Split est assignée à la
Dual Vous pouvez superposer cette partie à la partie
Utiliser la partie Main
(1) Pour activer la partie Main et l’assigner au clavier entier,
appuyez sur le bouton
L’icône disparaît, l’arrangeur s’arrête (s’il était
activé) et l’EXR-40 OR choisit un son de piano.
(2) Jouez quelques notes sur le clavier.
ne sont pas disponibles en mode PIANO SOLO. En
Split est désactivée, la partie Main est assignée au
clavier entier.
moitié gauche du clavier, tandis que la partie Main
reste disponible pour votre main droite.
Main et l’assigner également au clavier entier. Cela
permet de jouer simultanément deux sons superposés.
[PIANO¥SOLO]
PIANO
SOLO
ARRANGER
.
(3) Si nécessaire, choisissez un autre son en appuyant sur un des
8 boutons USER TONES. Voyez p. 88 pour en savoir plus.
3
GUITAR/
BASS
(4) En cas de besoin, maintenez le bouton
vez-vous du bouton BALANCE
[KEYBOARD]
(plus fort) pour changer le volume de la partie
[TONE]
[ACCOMP]
enfoncé et ser-
(moins fort) ou
Main.
TONE
BALANCE
ACCOMP KEYBOARD
Remarque: Contrairement aux instruments arrangeurs Roland
plus anciens, l’EXR-40 OR ne distingue plus entre les parties
“mélodiques” et une partie Manual Drums. Vous pouvez aussi
jouer un kit de batterie avec la partie Main.
Remarque: Si vous le voulez, vous pouvez appuyer sur
[START÷STOP] pour ajouter un accompagnement rythmique à
votre jeu. Cet accompagnement est basé sur le style musical en
vigueur. Voyez p. 74 pour savoir comment choisir un autre style
musical.
Remarque: D’autres méthodes de lancement de la reproduction
du style musical (à savoir la batterie) sont décrites à la p. 73 et
sous “Démarrage automatique de la reproduction (Sync Start &
Stop)” (p. 74).
Utiliser les parties Main et Split
(1) Appuyez sur le bouton [SPLIT] pour jouer des sons diffé-
rents de la main droite et de la main gauche.
SPLIT
SPLIT
L’icône s’affiche et l’EXR-40 OR affecte automatiquement
un son (adapté à celui de la partie Main) à la partie Split.
(2) Jouez quelques notes sur le clavier.
Au départ, la touche G3 (numéro de note “55”) constitue le point
de partage du clavier. Vous pouvez changer le point de partage.
Voyez “KeySplit* (Point de partage)” (p. 98).
Split Main
Pour changer la balance entre les parties Main et Split, procédez
comme suit:
(3) Maintenez le bouton
ton BALANCE
fort) pour changer le volume de la partie Split.
BALANCE
ACCOMP KEYBOARD
[SPLIT]
[ACCOMP]
enfoncé et servez-vous du bou-
(moins fort) ou
[KEYBOARD]
SPLIT
(plus
(4) Pour assigner un autre son à la partie Split, maintenez le bou-
ton
[SPLIT]
enfoncé et procédez comme pour la partie Main
(page 71).
71
Page 72

r
EXR-40 OR
Vous pouvez aussi maintenir un des huit boutons USER TONES
enfoncé (partie Main) tout en appuyant sur un autre bouton
USER TONES (partie Split).
Remarque: Vous ne pouvez pas assigner de kit de batterie à la
partie Split.
Remarque: Vous pouvez aussi ajouter une partie de basse
monophonique (“Auto Bass”) à la partie Split. Voyez “Auto Bass*:
statut et volume” (p. 99).
Utiliser les parties Main et Dual
(1) Appuyez sur le bouton [DUAL] pour jouer deux sons super-
posés.
DUAL
DUAL
L’icône s’affiche et l’EXR-40 OR affecte automatiquement
un son à la partie Dual (adapté à celui de la partie Main).
Vous pouvez aussi activer le mode Dual en maintenant un des
huit boutons USER TONES enfoncé tout en appuyant sur un
autre. Le son du premier bouton USER TONES est alors assigné à
la partie Main et celui de l’autre bouton à la partie Dual.
(2) Jouez quelques notes sur le clavier.
Procédez comme suit pour changer la balance entre les sons des
parties Main et Dual:
(3) Maintenez le bouton
ton BALANCE
fort) pour changer le volume de la partie Dual.
(4) Pour assigner un autre son à la partie Dual, maintenez le bou-
ton
[DUAL]
enfoncé et procédez comme pour la partie Main
(page 71).
Remarque: Vous ne pouvez pas assigner de kit de batterie à la
partie Dual.
[DUAL]
[ACCOMP]
enfoncé et servez-vous du bou-
(moins fort) ou
[KEYBOARD]
(plus
Utilisation du métronome
Vous pouvez utiliser le métronome quand vous répétez un morceau.
(1) Appuyez sur le bouton
L’icône s’affiche et le métronome se met à compter.
(2) Maintenez
“
Metro TS
[METRONOME]
(3) Servez-vous des boutons
lue.
Voici les possibilités: 1/4~9/4, 1/8~9/8.
(4) Appuyez sur un autre “grand” bouton de la section DATA
ENTRY pour quitter cette fonction.
(5) Appuyez de nouveau sur le bouton
désactiver le métronome.
”.
[METRONOME]
METRONOME
.
enfoncé pour choisir la fonction
[–][+]
pour choisir la métrique vou-
[METRONOME]
pour
72
Page 73

5. Jeu avec accompagnement (arrangeur)
Voyons à présent comment exploiter la fonction d’accompagnement de l’EXR-40 OR. Cette fonction s’appelle “Arranger”.
Activation/utilisation de l’arrangeur
(1) Appuyez sur le bouton
ARRANGER
BAND
L’icône s’affiche et le clavier est partagé en deux
ARRANGER
moitiés. Les touches de la moitié gauche permettent de spécifier
la tonalité de l’accompagnement. La moitié droite du clavier
permet de jouer une mélodie sur l’accompagnement.
(2) Appuyez sur le bouton
Le bouton
[V-LINK]
battements (fonction BEAT).
Remarque: Quand l’icône est affichée, tandis que
l’arrangeur est à l’arrêt, vous entendrez un son de cordes stéréo
(auquel vous pouvez ajouter une basse monophonique) lorsque
vous jouez dans la moitié gauche du clavier. Voyez “Auto Bass*:
statut et volume” (p. 99). La moitié gauche n’est donc pas coupée (comme c’était le cas sur les anciens instruments Roland disposant d’un arrangeur. Vous pouvez toutefois désactiver cette
fonction “EP Chord” (page 100).
[ARRANGER¥BAND]
[START÷STOP]
START / STOP
.
pour lancer l’arrangeur.
clignote alors pour indiquer le tempo et les
ARRANGER
(3) Jouez un accord (ou juste une note) de la main gauche.
(4) Jouez un autre accord (ou une autre note) pour changer la
tonalité de l’arrangeur.
(5) Pour retourner au début du motif d’accompagnement (fonc-
tion “RE-START”), appuyez sur le bouton
reproduction de l’accompagnement.
RE-START
● REC
(6) Appuyez sur les boutons suivants pour choisir d’autres motifs
(“pattern”) du style musical en cours:
[REC¥∏]
pendant la
EXR-40 OR
Bouton Fonction
INTRO Choisit une introduction. Appuyez sur ce bou-
ton avant d’activer [START÷STOP].
ORIGINAL Version simple d’accompagnement.
FILL Transition (“Fill In”) pour passer à VARIATION
ou ORIGINAL.
VARIATION Version d’accompagnement un peu plus
sophistiquée.
ENDING Phrase indiquant la fin du morceau. Vous pou-
vez utiliser ce bouton au lieu de [START÷STOP]
pour arrêter le jeu.
Ces boutons servent à choisir les “motifs” de style musical.
L’écran affiche l’icône correspondant au bouton enfoncé.
En outre, la zone d’accord ARRANGER de l’écran indique le nom
du dernier accord joué. C’est là l’accord utilisé par l’accompagnement.
ARRANGER
M
Dès que vous maîtrisez l’arrangeur, essayez de jouer une mélodie
de la main droite en y ajoutant les accords pour l’arrangeur de la
main gauche.
73
Page 74

r
EXR-40 OR
Changer le tempo
(7) Les boutons TEMPO/DATA permettent de diminuer (
d’augmenter (
[+]
) le tempo (si nécessaire).
NO YES
Pour retourner au tempo par défaut du style musical, enfoncez
simultanément les boutons
[–]
et
[+]
.
Vous pouvez aussi appuyer plusieurs fois sur le bouton
[TAP¥TEMPO]
au tempo voulu.
TAP TEMPO
[–]
) ou
Démarrage automatique de la reproduction (Sync
Start & Stop)
Appuyez sur
[SYNC¥START÷STOP]
“Sync Start” signifie que l’arrangeur fait démarrer le style musical choisi dès que vous jouez une note ou un accord de la main
gauche (à gauche du point de partage).
SYNC START
(l’icône s’affiche).
ce cas, l’arrangeur s’arrête dès que vous relâchez toutes les touches de la zone de reconnaissance d’accords du clavier. Cette
fonction permet d’insérer un “arrêt” (c.-à-d. un silence d’un ou
plusieurs temps).
Remarque: Vous pouvez changer le comportement de la fonction SYNC STOP (voyez p. 100) en maintenant le bouton
[SYNC¥START÷STOP] enfoncé.
Arrêter l’arrangeur
(8) Appuyez à nouveau sur
duction.
Vous pouvez aussi appuyer sur
entendez d’abord la phrase finale. Quand elle est terminée,
l’arrangeur s’arrête automatiquement.
Vous pouvez aussi appuyer deux fois sur le bouton
[SYNC¥START÷STOP]
ce cas, la reproduction s’arrête dès que vous relâchez les touches
dans la moitié gauche du clavier.
[START÷STOP]
pour arrêter la repro-
[ENDING]
. Dans ce cas, vous
afin d’activer la fonction SYNC STOP. Dans
Sélection de styles musicaux
L’EXR-40 OR a trois zones de mémoire pour les styles musicaux:
USER STL
ment le style musical chargé de la mémoire Flash ou d’une disquette
(séries MSA, MSD et MSE en option ). Les données de cette mémoire
RAM sont effacées quand vous mettez l’EXR-40 OR hors tension.
LAIKA
(055~075),
résidant en mémoire ROM interne de l’EXR-40 OR. Ces styles ne
peuvent pas être supprimés (en revanche, vous pouvez les modifier
en temps réel avec la fonction Band Orchestrator; voyez page 75).
FLASH
l’EXR-40 OR contient déjà 81 styles quand l’EXR-40 OR sort d’usine.
Vous pouvez accroître le nombre de styles de cette zone en copiant
d’autres styles depuis votre ordinateur (via USB) ou en sauvegardant des styles chargés d’une disquette. Bien que la mémoire Flash
offre un total de 99 emplacements, le nombre de styles que vous
pouvez y sauvegarder dépend du volume des styles musicaux.
DISK
chargée dans le lecteur de l’EXR-40 OR. Le nombre de styles disponibles dépend bien entendu de la disquette. Le style choisi est transféré dans la mémoire
l’EXR-40 OR. Il faut donc attendre un peu plus longtemps avant que
le style soit prêt à l’emploi. (Vous pouvez cependant le sauvegarder
en mémoire Flash; voyez p. 106.)
(1) Appuyez sur le bouton
Vérifiez que l’écran affiche l’icône et une icône
INTRO ORIGINAL FILL VARIATION ENDING
(2) Appuyez sur le bouton
: (Mémoire 000) Cette mémoire accueille temporaire-
(001~028),
WESTERN
PARADOSI
(029~054),
ARABIKA
(076~099): Voici les familles de styles
: (Mémoires 101~199) Cette zone de mémoire Flash de
: (Mémoires 201~…) Cette zone correspond à la disquette
USER STL
(voyez ci-dessus) de
[ARRANGER¥BAND]
ARRANGER
.
.
[STYLE]
.
SYNC
START/STOP
En mode PIANIST, l’arrangeur commence à jouer dès que vous
enfoncez une touche.
L’EXR-40 OR propose aussi une fonction SYNC STOP: appuyez
deux fois rapidement (“double-cliquez”) sur
[SYNC¥START÷STOP]
pour que l’icône clignote. Dans
SYNC START
74
STYLE
(3) Si vous voulez utiliser un style d’une disquette, insérez cette
dernière dans le lecteur.
Page 75

EXR-40 OR
DRUM & BASS COMBO FULL BAND
(4) Utilisez les boutons FAMILY
mémoire contenant le style musical voulu (voyez ci-dessus).
Les boutons FAMILY permettent de passer à la “famille” voulue
(englobant aussi les zones Flash et
L’écran affiche le nom de la famille sélectionnée.
MALFOUF
FLASH
(5) Utilisez SELECT
groupe sélectionné.
[√][®]
SELECT
[√][®]
pour choisir la zone de
FAMILY
USER STL
=
=
132
pour définir le style voulu au sein du
).
73
Remarque: Si vous avez oublié d’insérer une disquette dans le
lecteur, l’écran affiche le message “No Disk” quand vous
tentez de choisir la “famille disquette”.
(6) Si nécessaire, confirmez votre choix en appuyant sur le bou-
ton
[+/YES]
.
L’écran affiche brièvement le message “
ment après le choix d’un style de la disquette chargée).
Si vous avez choisi un style musical de la disquette, l’icône
clignote et l’EXR-40 OR sélectionne automatiquement la
mémoire
disquette.
Si vous appuyez sur
geur, le nouveau style est activé au temps fort suivant (le 1er
temps de la mesure suivante). Sinon, l’EXR-40 OR affiche le nom
du style et active ce dernier quand vous appuyez sur
[START÷STOP]
Remarque: Pour savoir comment sauvegarder le style musical
résidant en mémoire USER STL dans la mémoire Flash, voyez
page 107.
USER STL
[+/YES]
.
contenant le style musical chargé de la
pendant la reproduction de l’arran-
LOADING
” (unique-
Utiliser la fonction Band
Orchestrator
La fonction Band Orchestrator permet de varier les motifs
d’accompagnement joués par l’arrangeur. Vous pouvez omettre
des parties, élaguer la partie de batterie, etc. – en temps réel (c.à-d. pendant que vous jouez).
(1) Appuyez sur le bouton
mode Arrangeur.
(2) Sélectionnez le style musical que vous souhaitez utiliser pour
jouer (ou utilisez le style actuellement choisi).
Voyez page 74.
(3) Appuyez sur un des boutons suivants (l’icône correspondante
s’affiche) pour choisir le degré souhaité de “sophistication”
musicale:
[ARRANGER¥BAND]
pour choisir le
La première pression sur SELECT
premier style musical du groupe sélectionné. Comme le premier
style est déjà choisi, si vous comptez l’utiliser, vous ne devez pas
appuyer sur le bouton SELECT
liser le bouton SELECT
même groupe. Vous pouvez aussi vous servir des boutons numériques pour choisir les styles. Voyez aussi “Utiliser les boutons
FAMILY, SELECT et les boutons numériques” (p. 78).
Lorsque vous avez choisi la mémoire 101 (Flash) ou 201 (la première de la disquette), l’écran affiche le message clignotant Yes.
[®]
(ou
[√]
) affiche le nom du
[®]
. En revanche, il faut devez uti-
[√]
ou
[®]
pour choisir un autre style du
Il va de soi que vous utiliserez ces boutons pendant le jeu de
l’arrangeur.
DRUM & BASS
COMBO
FULL BAND
La forme d’accompagnement la plus simple
ne comprenant que la batterie et la basse.
Motif d’accompagnement comprenant seulement quelques instruments (un groupe).
Motif d’accompagnement avec un arrangement étoffé (plusieurs lignes mélodiques
d’instruments).
75
Page 76

r
EXR-40 OR
L’icône correspondante apparaît à l’écran (l’écran
n’affiche qu’une icône à la fois).
Remarque: A la mise sous tension, l’EXR-40 OR choisit le niveau
d’orchestration “FULL BAND”.
Remarque: L’effet de ces trois niveaux dépend aussi du bouton
actionné: [VARIATION] ou [ORIGINAL]. La combinaison des boutons [ORIGINAL]/[VARIATION] et [DRUM&BASS]/[COMBO]/
[FULL¥BAND] offre en réalité 6 motifs d’accompagnement par
style musical (3 x 2).
Vous pouvez mémoriser la dernière sélection effectuée dans un
programme utilisateur. Voyez p. 102.
Balance
Les boutons BALANCE [√][®] permettent de changer la balance
de volume entre les parties de l’arrangeur (ou parties du morceau) et les parties Keyboard (celles que vous jouez vousmême).
(1) Appuyez sur le bouton BALANCE [ACCOMP] si le volume
de l’arrangeur (ou des parties du morceau) est trop bas.
BALANCE
ACCOMP KEYBOARD
Balance
(2) Appuyez sur BALANCE
menter le niveau de votre jeu solo.
Maintenez
boutons pour modifier la balance entre ces parties Keyboard.
Remarque: Pour en savoir plus sur le réglage de volume des
parties individuelles, voyez p. 99.
[SPLIT]
(ou
[DUAL]
[KEYBOARD]
) enfoncé tout en appuyant sur ces
=
80a10
si vous souhaitez aug-
76
Page 77

EXR-40 OR
6. Reproduire des morceaux
L’EXR-40 OR peut reproduire des données musicales disponibles dans le commerce (les fichiers Standard MIDI) ou vos morceaux sauvegardés sur disquette ou dans la mémoire Flash de l’EXR-40 OR. Vos morceaux
sont sauvegardés sous forme de fichiers Standard MIDI de format 0 et peuvent être joués par tout séquenceur (ou logiciel) compatible SMF.
TAP TEMPO ENDING
Fonctions élémentaires de reproduction
(1) Appuyez sur le bouton
mode Song.
Effectuez cette étape car sinon, quand vous appuyez sur
[START÷STOP]
rez-vous dès lors que le bouton
nes et ne sont plus
affichées. Ce n’est qu’alors que les boutons ARRANGER & SONG
CONTROLS permettent de piloter la reproduction (voyez ci-dessus).
(2) Si vous voulez reproduire un morceau d’une disquette, insérez
cette dernière dans le lecteur (côté avant droit).
, vous lancez la reproduction de l’arrangeur. Assu-
ARRANGER
[SONG]
(il s’allume) pour passer en
SONG
[SONG]
s’allume et que les icô-
INTRO ORIGINAL FILL VARIATION ENDING
SYNC
START/STOP
(3) Utilisez les boutons FAMILY
mémoire contenant le morceau voulu.
L’EXR-40 OR comporte trois zones de mémoire pour morceaux:
USERSONG
ment les données de morceau que vous enregistrez. Les données
de cette mémoire RAM sont effacées quand vous mettez
l’EXR-40 OR hors tension.
FLASH
l’EXR-40 OR contient déjà plusieurs morceaux à la livraison de
l’EXR-40 OR. Vous pouvez accroître le nombre de morceaux de
cette zone en copiant d’autres morceaux depuis votre ordinateur
(via USB). Bien que la mémoire Flash offre 99 emplacements, la
capacité réelle dépend du volume des fichiers musicaux.
DISK
quette insérée dans le lecteur de l’EXR-40 OR. Le total de morceaux disponibles dépend bien entendu de la disquette.
: (Mémoire 000) Cette zone héberge temporaire-
: (Mémoires 101~199) Cette zone de mémoire Flash de
: (Mémoires 201~…) Cette zone correspond à la dis-
[√][®]
pour choisir la zone de
FAMILY
FILLORIGINALINTRO
VARIATION
(4) Utilisez SELECT
le morceau voulu au sein du groupe sélectionné.
Cette étape est uniquement nécessaire pour les morceaux de la
mémoire Flash ou de la disquette (il n’y a qu’une mémoire
USERSONG
La première pression sur SELECT
premier morceau du groupe choisi. Le premier morceau étant
déjà choisi, si vous comptez l’utiliser, vous ne devez pas appuyer
sur le bouton SELECT
[√]
ou
[®]
fois que vous avez choisi la mémoire 101 (la première de la zone
Flash), l’écran se présente comme suit.
101
Vous pouvez aussi vous servir des boutons numériques pour
choisir les morceaux.
[√][®]
ou les boutons numériques pour choisir
SELECT
).
[®]
(ou
[√]
) affiche le nom du
[®]
. En revanche, utilisez le bouton SELECT
pour choisir un autre morceau du même groupe. Une
SongName
=
77
Page 78

r
EXR-40 OR
Utiliser les boutons FAMILY, SELECT et les boutons
numériques
Procédez soit en appuyant plusieurs fois (par pressions brèves)
sur le bouton FAMILY
ou suivante, soit en maintenant
une autre famille. La manière la plus rapide de parcourir les
familles disponibles consiste à maintenir
appuyez sur
avancer. Ces méthodes sont aussi disponibles pour les boutons
SELECT
[√][®]
à sélectionner des groupes, tandis que les boutons SELECT permettent de choisir une entrée d’un groupe.
Si vous préférez utiliser les boutons numériques, entrez trois
chiffres: par exemple, “001” pour l’entrée “1”). Si vous n’entrez
que deux chiffres (voire un seul), l’EXR-40 OR met plus de temps
à “digérer” votre entrée.
Remarque: Si le nombre défini dépasse la dernière entrée disponible, l’EXR-40 OR ne change pas le réglage.
Remarque: Entrez “000” (ou “0”) pour choisir la mémoire
USERSONG.
Lorsque vous avez choisi la mémoire 101 (Flash) ou 201 (la première de la disquette), l’écran affiche le message clignotant
Yes. Vous pouvez l’ignorer et passer à l’étape suivante (ou
appuyer sur
Remarque: Si vous avez oublié d’insérer une disquette dans le
lecteur, l’écran affiche le message “No Disk” quand vous
tentez de choisir un fichier de la disquette.
(5) Après avoir vérifié que le morceau voulu est choisi, appuyez
sur
[START÷STOP]
ger le morceau et lancer directement la reproduction.
[√]
ou
[®]
pour passer à l’entrée précédente
[√]
ou
[®]
enfoncé pour choisir
[√]
pendant que vous
[®]
(reculer); maintenez
. Comme vous le savez, les boutons FAMILY servent
[YES/+]
avant de continuer).
(qui s’appelle maintenant
[®]
et appuyez sur
[®÷ª]
[√]
pour
) pour char-
Vous pouvez déjà choisir le morceau suivant pendant la reproduction du morceau actuel. Pour écouter le nouveau morceau
sans attendre la fin du précédent, arrêtez la reproduction en
appuyant sur
bouton. Sinon, attendez la fin du morceau en cours puis
appuyez sur le bouton
tion du nouveau morceau.
Remarque: N’oubliez pas que le fait de lancer la reproduction
d’un morceau sur disquette efface le morceau dans la mémoire
USERSONG. Veillez donc à le sauvegarder sur disquette avant
de poursuivre (voyez p. 111).
(6) Vous pouvez changer le tempo du morceau avec les boutons
[–][+]
Si vous modifiez le tempo et si le morceau contient des changements de tempo, le tempo change toujours pendant la reproduction. En outre, chaque fois que vous retournez au début du
morceau ou à une autre position avec
préprogrammé est rétabli.
Remarque: En mode Song, l’EXR-40 OR choisit automatiquement le mode de clavier PIANO SOLO. Vous pouvez utiliser le
morceau comme accompagnement (et même faire appel à la
partie Split ou Dual).
Remarque: Dans certains cas, l’écran peut afficher le message
XG Light ou GM2 au lieu d’un nom de son. Ce message
signifie que l’EXR-40 OR utilise un son que vous ne pouvez pas
choisir avec les commandes en face avant. L’instrument comporte 798 de ces sons “cachés” dont le seul but est d’assurer la
compatibilité de reproduction XG/GM2.
ou
[TAP¥TEMPO]
[START÷STOP]
[START÷STOP]
.
, puis appuyez de nouveau sur ce
pour lancer la reproduc-
[|√], [º]
ou
[‰]
, le tempo
Fonctions supplémentaires de
reproduction
Les boutons [INTRO], [ORIGINAL], etc. ont deux fonctions: une en
mode Style (imprimée au-dessus des boutons) et une autre en
mode Song (imprimée en dessous des boutons).
Activer le mode Song
Les boutons ARRANGER & SONG CONTROLS ont deux fonctions: le
choix de motifs des styles musicaux (quand l’icône
est affichée) ou la navigation au sein d’un morceau (quand le bouton
[SONG]
est allumé).
Pour choisir le mode Song (et les fonctions SONG CONTROL), vous
devez appuyer sur le bouton
tions suivantes sont disponibles.
SONG
[SONG]
. Ce n’est qu’alors que les fonc-
Avance, recul et retour au début
ARRANGER
Le bouton
battements (fonction BEAT).
[V-LINK]
clignote alors pour indiquer le tempo et les
78
START / STOP
• Pour avancer (sauter à une mesure ultérieure du morceau),
appuyez sur [‰].
• Pour reculer (retourner à une mesure antérieure), appuyez
sur [º].
L’affichage de mesure dans le coin supérieur droit de l’écran
vous aidera à trouver la mesure voulue.
Page 79

EXR-40 OR
MINUS
ONE
ENDING
• Appuyez sur [|√] (Reset) pour retourner à la première
mesure du morceau. Il faut arrêter la reproduction pour
pouvoir utiliser le bouton [|√].
Remarque: Dans certains cas, [‰] et [º] ne sont pas disponibles.
Cela ne se produit cependant que pour de très longs morceaux.
Remarque: L’utilisation du bouton [|√], [º] ou [‰] rappelle aussi
le tempo préprogrammé du morceau.
Reproduction en boucle (Repeat)
L’enregistreur de l’EXR-40 OR propose une autre fonction intéressante: la programmation de boucles de reproduction. Vous pouvez
programmer ces boucles pendant la reproduction ou quand l’enregistreur est à l’arrêt.
(1) Appuyez sur
démarrer la boucle (l’icône s’affiche dans le coin inférieur droit de l’écran).
(2) Avancez jusqu’à l’endroit où doit s’arrêter la boucle et
appuyez à nouveau sur
Vous pouvez aussi programmer des boucles sur le vif. Songez
cependant que l’enregistreur mémorise toujours le début (temps
fort) de la mesure suivante.
[MARKER¥A–B]
[MARKER¥A–B]
à l’endroit où vous voulez
A
SYNC
START/STOP
MARKER
A–B
(l’icône s’affiche).
B
(3) Si l’icône n’est pas déjà affichée, appuyez sur le bouton
[REPEAT¥A–B]
pour activer la boucle que vous venez de pro-
grammer.
INTRO
REPEAT
A–B
Ce bouton permet d’activer et de couper la fonction “Repeat” de
l’EXR-40 OR.
(4) Pour reproduire la boucle, appuyez sur le bouton
[START÷STOP]
(qui s’appelle maintenant
[®÷ª]
).
L’enregistreur passe à la mesure “A” et lance la reproduction. A la
fin de la mesure “B”, l’enregistreur retourne immédiatement au
début de la mesure “A” et continue la reproduction du passage
en boucle.
Si nécessaire, définissez d’autres repères en effectuant à nouveau les étapes (1) et (2).
Remarque: Le tempo est initialisé chaque fois que l’enregistreur
retourne à la mesure “A”.
Remarque: Dans certains cas, la fonction Marker peut être
indisponible. Cela ne se produit cependant que pour de très
longs morceaux.
Jeu “live” avec accompagnement de morceau
(Minus One)
L’EXR-40 OR permet de couper la partie que vous voulez jouer vousmême ou qui ne vous sert pas dans un contexte donné. C’est ce
qu’on appelle la reproduction “Minus One”.
[SONG]
(1) S’il n’est pas allumé, appuyez sur le bouton
Si vous le voulez, vous pouvez alors choisir un morceau (voyez
p. 77).
.
(2) Appuyez sur le bouton
“
MinusOne
[MINUS¥ONE]
” s’affiche).
(le message
Les 5 boutons LOCK s’allument pour indiquer que toutes les pistes seront reproduites.
(3) Appuyez sur un des boutons LOCK pour couper la ou les pistes
correspondantes. L’icône de la piste en question clignote.
(Exemple: si vous éteignez le bouton
[DRUMS]
, l’icône
[10]
se
met à clignoter.)
Un bouton allumé indique que la ou les pistes en question sont
audibles (et ne sont donc pas coupées). Vous pouvez aussi couper plusieurs pistes en éteignant les boutons LOCK correspondants.
MINUS ONE
L’icône apparaît et la partie choisie est coupée.
Remarque: La partie Main n’adopte pas automatiquement le
son et les réglages liés de la partie mélodique.
Vous pouvez aussi étouffer plusieurs parties.
79
Page 80

r
EXR-40 OR
Que sont les pistes?
Nous avons choisi d’utiliser le terme “piste” pour plus de
facilité. Nous l’avons emprunté aux enregistreurs multipiste,
qui permettent d’enregistrer plusieurs parties jouées par un
même musicien (une partie après l’autre).
Dans le cas de l’EXR-40 OR, ce terme sert uniquement à
indiquer que vous avez affaire à des parties musicales distinctes. Ce qui compte ici (comme sur les logiciels de
séquenceur), ce sont les canaux MIDI.
Les morceaux que vous enregistrez avec l’EXR-40 OR et les
fichiers Standard MIDI que vous reproduisez peuvent contenir
jusqu’à 16 pistes (c.-à-d. des canaux MIDI). Très souvent, seules
certaines pistes sont utilisées. Toutefois, les pistes suivantes
figurent dans pratiquement chaque fichier Standard MIDI:
Piste 2: Basse
Piste 4: Mélodie
Piste 10: Batterie
Les boutons LOCK permettent de couper les pistes suivantes:
[RIGHT]
–Correspond à la piste “4” du fichier Standard MIDI
choisi. Les données musicales à vocation pédagogique (surtout
pour le piano) utilisent cette piste pour la partie de main droite.
Coupez cette piste pour jouer vous-même la partie de main
droite, tout en écoutant la partie de main gauche du fichier
Standard MIDI. L’EXR-40 OR propose un superbe son de piano
stéréo que vous pourriez utiliser.
[LEFT]
–Correspond à la piste “3” du fichier Standard MIDI choisi.
Les données musicales à vocation pédagogique (surtout pour le
piano) utilisent cette piste pour la partie de main gauche. Lisez
aussi ci-dessus.
[OTHERS]
per avec les boutons LOCK restants, à savoir: 1, 3, 6~9, 12~16.
[BASS]
fichier Standard MIDI.
[DRUMS]
fichier Standard MIDI.
Remarque: Vous pouvez aussi éteindre plusieurs boutons
simultanément.
(4) Utilisez
(5) Appuyez à nouveau sur
–Etouffe toutes les pistes que vous ne pouvez pas cou-
–Coupe la piste “2”, assignée à la partie de basse du
–Coupe la piste “10”, assignée à la partie de batterie du
[|√]
et
[®÷ª]
pour lancer la reproduction.
[®÷ª]
pour arrêter la reproduction.
(6) Appuyez de nouveau sur
“grands” boutons DATA ENTRY) pour désactiver la fonction du
même nom.
Remarque: Vous pouvez sauvegarder le réglage Minus One avec
le morceau sélectionné. Voyez page 106.
[MINUS¥ONE]
(ou sur un des
Changer les assignations de pistes
Si les fichiers de morceau n’utilisent pas le système GM (et ne correspondent donc pas aux assignations RIGHT, LEFT, BASS ou DRUM
de la fonction Minus One), vous pouvez procéder comme suit pour
assigner d’autres pistes (canaux MIDI) aux boutons LOCK
[LEFT], [BASS]
(1) Appuyez sur le bouton
du même nom.
(2) Maintenez le bouton
enfoncé.
(3) Gardez ce bouton enfoncé et utilisez les boutons
lui assigner le canal MIDI voulu.
Exemple: Pour assigner le canal MIDI “10” au bouton
appuyez sur DATA ENTRY
comme ceci:
et
[DRUMS]
:
[MINUS¥ONE]
[RIGHT], [LEFT], [BASS]
[+]
jusqu’à ce que l’écran se présente
pour activer la fonction
ou
[RIGHT]
[DRUM]
[–][+]
[RIGHT]
,
pour
,
RIGHT
(4) Appuyez de nouveau sur
boutons DATA ENTRY) pour désactiver la fonction du même
nom.
Remarque: Vous pouvez sauvegarder le réglage Minus One avec
le morceau sélectionné. Voyez page 106.
[MINUS¥ONE]
(ou sur un des “grand”
80
Page 81

7. Enregistrer votre jeu
START / STOP
MINUS
ONE
ENDING
L’EXR-40 OR comporte une fonction Recorder 16 pistes qui vous permet d’enregistrer vos propres morceaux.
Fonctions de base d’enregistrement
Voyons d’abord la méthode la plus directe pour enregistrer
votre jeu avec l’accompagnement de l’arrangeur.
(1) Appuyez sur le bouton
ARRANGER
L’icône apparaît. Vous pouvez à présent transpo-
ARRANGER
BAND
[ARRANGER¥BAND]
.
ser la tonalité de l’arrangeur en temps réel avec votre main gauche.
(2) Appuyez sur le bouton
[STYLE]
et choisissez un style musical
(ou sélectionnez une mémoire Music Assistant).
(3) Choisissez la division voulue de l’arrangeur en appuyant sur
[INTRO], [ORIGINAL]
(4) Appuyez sur le bouton
(5) Utilisez
[TAP¥TEMPO]
ou
[VARIATION]
[START÷STOP]
ou les boutons
.
.
[–][+]
pour régler le
tempo voulu.
(6) Appuyez à nouveau sur
[START÷STOP]
pour arrêter la repro-
duction de l’arrangeur.
(7) Assignez le son voulu à la moitié droite du clavier.
Appuyez sur
[√][®]
[TONE]
et utilisez les boutons FAMILY & SELECT
, les boutons numériques ou les boutons de la section USER
TONES. Voyez aussi page 88.
(8) Appuyez sur le bouton
RE-START
● REC
[REC¥∏]
Voici à quoi devrait ressembler l’écran (si ce n’est pas le cas, utilisez les boutons FAMILY
ALL
):
(Les icônes
[RECORD≈∏]
[√][®]
et
[1]~[16]
mode ALL: l’EXR-40 OR enregistre tout ce que vous et son arrangeur jouez.
ALL
INTRO
Remarque: Si vous choisissez “REC ALL” avec les boutons
FAMILY, le morceau dans la mémoire USERSONG de
l’EXR-40 OR est effacé. Sauvegardez d’abord ce morceau si vous
y tenez (voyez p. 106). Si vous avez appuyé uniquement sur
[REC¥∏], l’EXR-40 OR choisit le mode Single (si la mémoire
USERSONG contient déjà des données). Pour en savoir plus
sur ce mode, voyez page 82.
(9) Lancez l’enregistrement avec une des méthodes suivantes:
• Appuyez sur [START÷STOP] pour déclencher le jeu de l’arrangeur avec la division spécifiée.
Le bouton
battements (fonction BEAT).
[V-LINK]
clignote alors pour indiquer le tempo et les
.
(“REC MODE”) pour choisir REC
clignotent.) Vous voilà en
=
120 001
ORCHESTRATOR BEAT
FULL
BAND
5
6
1
9210
3
4
11
12
8
7
15
13
16
14
EXR-40 OR
Remarque: Si vous lancez l’enregistrement sans l’arrangeur et si
vous comptez lancer ce dernier plus tard, il vaut mieux activer le
métronome en appuyant sur le bouton [METRONOME].
• Activez la fonction [SYNC¥START] et enfoncez une ou plusieurs touches à gauche du point de partage.
Remarque: Vous pouvez aussi enregistrer en mode PIANO SOLO
(après avoir enfoncé le bouton du même nom). Il est alors impératif d’utiliser le métronome. Vous pouvez régler la métrique du
morceau avec la fonction MetroTS. Voyez page 72.
(10) Arrêtez l’enregistrement en suivant une des méthodes ci-des-
sous:
• Appuyez sur [START÷STOP].
• Appuyez sur le bouton [ENDING] pour lancer la phrase de fin
(Ending). Le jeu de l’arrangeur et l’enregistrement s’arrêtent
dès que la phrase finale se termine.
Ecouter votre morceau
(1) Appuyez sur le bouton
(2) Appuyez sur
[START÷STOP]
[SONG]
.
pour lancer la reproduction.
81
Page 82

r
EXR-40 OR
(3) Appuyez à nouveau sur
[START÷STOP]
pour arrêter la repro-
duction.
(4) Appuyez sur
[|√]
pour retourner au début du morceau.
Autres fonctions d’enregistrement
Vous pouvez exploiter l’enregistreur 16 pistes de l’EXR-40 OR de
diverses manières. Voyons à présent les autres méthodes
d’enregistrement.
A propos des modes d’enregistrement
●
Modes
L’EXR-40 OR propose deux modes pour enregistrer de nouveaux
morceaux et deux autres modes pour ajouter des parties ou corriger des passages existants.
Enregistrer un nouveau morceau
ALL Ici, vous pouvez enregistrer simultanément
tout ce que vous et l’EXR-40 OR jouez:
• Arrangeur (accompagnement).
• Parties clavier (Main et Split ou Dual).
Keyboard Ce mode permet d’enregistrer avec les parties
clavier. Vous pouvez choisir la piste voulue.
• Main et Split ou Dual
Ajout de parties à un morceau existant
Single Ce mode permet d’enregistrer sur une seule
piste à la fois. Vous pouvez choisir la piste voulue.
Punch I/O Ce mode sert à corriger une partie d’un passage
parfait pour le reste.
Remarque: Chaque fois que vous choisissez le mode ALL ou
Keyboard, la mémoire USERSONG est effacée.
●
Mémoire de l’enregistreur
L’EXR-40 OR offre une mémoire de morceau qui peut contenir
un morceau à la fois. Une fois votre morceau terminé, n’oubliez
pas de le sauvegarder (voyez p. 111).
Pour éviter l’effacement accidentel du Song contenu dans sa
mémoire interne, l’EXR-40 OR choisit automatiquement le mode
Single
fait de choisir “ALL” ou “Keyboard” efface le morceau dans la
après votre premier enregistrement. Songez que le
mémoire
USERSONG
. Ne sélectionnez jamais “ALL” ni “Keyboard” pour ajouter des parties à un morceau existant – utilisez
plutôt “Single” ou “Punch I/O”.
D’autre part, vous ne pouvez pas choisir “Single” ni “Punch I/O”
si la mémoire
USERSONG
ne contient pas encore de don-
nées.
Une dernière chose: la reproduction d’un fichier Standard MIDI
efface le morceau contenu dans la mémoire de l’EXR-40 OR.
Une fois le fichier SMF lu, ses données sont cependant disponibles (et peuvent être complétées en mode “Single” ou “Punch I/
O”).
Toujours à propos du mode ALL
Voici quelques remarques en complément à ce que nous avons vu à
la p. 81:
Quand vous appuyez sur
[RECORD∏]
se mettent à clignoter, signalant que les 16 pistes sont
disponibles pour l’enregistrement.
Voici à quoi correspondent les pistes (après l’enregistrement
d’un morceau avec accompagnement de l’arrangeur):
Accomp 1
1
Basse de l’arrangeur
2
Accomp 2
3
k
Main
4
Accomp 3
5
k
Dual*
6
Accomp 4
7
Accomp 5
8
(*) Une seule de ces parties peut être utilisée avec la partie Main.
(**) Si vous assignez un kit de batterie à la partie Main. Dans ce cas, la
piste 4 n’est pas utilisée.
Par souci de facilité, nous avons indiqué les parties clavier avec
le symbole “
k
Les parties inaudibles pendant l’enregistrement ne sont pas
enregistrées. Les icônes de pistes
ce qui est enregistré mais ce que vous pouvez enregistrer.
[REC¥∏]
, les 16 icônes de pistes et
ALL
ORCHESTRATOR BEAT
INTRO
3
1
9210
11
Accomp 6
9
Batterie de l’arrangeur
10
k
11
k
12
13
14
Melody Intell. (voyez p. 85)
15
k
(
16
” dans la liste ci-dessus.
[1]~[16]
=
120 001
FULL
BAND
5
6
8
7
4
15
13
16
14
12
Split*
Auto Bass* (voyez p. 99)
Main**)
n’indiquent donc pas
Mode d’enregistrement Keyboard
Le mode Keyboard permet d’enregistrer les parties clavier. L’arrangeur n’est pas disponible. Ce mode est surtout utile pour enregistrer
une partie superposée et composée de maximum deux sons (Main +
Dual) ou deux parties (Split à gauche, Main à droite). Si vous assignez un kit de batterie à la partie Main, vous pouvez enregistrer une
partie de batterie.
Remarque: Le choix du mode Keyboard signifie que les données de
morceau dans la mémoire interne de l’EXR-40 OR sont écrasées par
votre nouvel enregistrement.
(1) Appuyez sur le bouton
(2) Appuyez sur FAMILY
L’icône et les icônes de pistes clignotent.
RECORD
(3) Pour créer un partage, appuyez sur le bouton
[REC¥∏]
.
[√][®]
pour obtenir l’affichage suivant:
Keyboard
ORCHESTRATOR BEAT
FULL
INTRO
1
9210
BAND
3
4
11
12
=
120 001
5
6
8
7
15
13
16
14
[SPLIT]
.
(4) Activez le métronome (si nécessaire) et réglez le tempo comme
bon vous semble avec le bouton
[TAP¥TEMPO]
ou
[–][+]
.
Si vous le voulez, vous pouvez aussi enregistrer sans métronome.
Remarque: Si vous assignez un kit de batterie à la partie Main,
votre partie de batterie est enregistrée sur la piste 16.
Mode d’enregistrement Single
Ce mode n’est disponible que si la mémoire de morceau de
l’EXR-40 OR contient déjà des données. Quand vous appuyez sur
[REC¥∏]
, l’icône et l’icône de la première piste vide se
mettent à clignoter. Vous pouvez donc enregistrer directement une
nouvelle partie. (Si toutes les pistes contiennent déjà des données,
la piste 1 est choisie.)
Toutefois, vous pouvez aussi remplacer une partie déjà enregistrée
par une nouvelle version:
(1) Appuyez sur le bouton
(2) Appuyez sur FAMILY
(3) Utilisez les boutons SELECT
pour choisir la piste où vous voulez enregistrer.
RECORD
[REC¥∏]
.
[√][®]
pour sélectionner “
[√][®]
ou les boutons numériques
Single
”.
82
Page 83

EXR-40 OR
Sustain
Vous ne pouvez choisir qu’une seule piste à la fois (d’où le nom
“Single”). Si vous choisissez une piste contenant déjà des données, la nouvelle version écrase l’ancienne.
(4) Si nécessaire, assignez le son voulu à la partie que vous comp-
tez enregistrer (voyez p. 88).
Si vous choisissez la piste
[10]
, vous pourrez sélectionner des kits
de batterie plutôt que des sons. La piste 10 est en effet réservée
aux parties de batterie.
Remarque: Si vous utilisez le mode d’enregistrement Single
pour ajouter des parties à un fichier Standard MIDI enregistré
sur un autre instrument ou séquenceur, la piste 16 (ou toute
autre piste définie comme “deuxième piste de batterie”) peut
aussi utiliser un kit de batterie que vous pouvez changer.
Remarque: Bien que la partie Main puisse être utilisée pour
enregistrer toutes les pistes en mode Single, le MFX s’applique
uniquement à la piste/au canal MIDI 4.
(5) Appuyez sur
[START÷STOP]
pour lancer l’enregistrement.
Après un décompte de deux mesures (voyez p. 99), vous entendez toutes les parties que vous avez déjà enregistrées. Jouez (et
enregistrez) votre nouvelle partie.
(6) Appuyez sur
[START÷STOP]
pour arrêter l’enregistrement.
(7) Retournez à l’étape (3) pour enregistrer des parties supplé-
mentaires.
Punch I/O
Ce mode permet de recommencer l’enregistrement d’un extrait
de piste (le deuxième refrain, par exemple). L’aspect important
de ce mode est que les nouvelles données enregistrées n’effacent pas les données situées avant et après l’extrait réenregistré:
Partie originale
Passage réenregistré
RE-START RE-START
● REC● REC
En revanche, en mode Single, toutes les données contenues dans
la piste enregistrée sont remplacées par le nouvel extrait. (Si
vous ne jouez rien pendant l’enregistrement, vous obtenez à la
fin une piste entièrement vide.)
Comme pour le mode Single, il faut que la mémoire de
l’EXR-40 OR contienne des données de morceau pour pouvoir
activer le mode Punch I/O.
(1) Appuyez sur le bouton
(2) Appuyez sur FAMILY
[REC¥∏]
.
[√][®]
pour obtenir l’affichage suivant:
PunchI/O
ORCHESTRATOR BEAT
FULL
INTRO
1
BAND
=
120 001
L’icône de piste clignotante (une seule) est celle de la première
piste contenant déjà des données. Dans l’exemple ci-dessus,
l’icône de la piste 1 clignote car celle-ci contient des données.
(3) Utilisez les boutons SELECT
[√][®]
ou les boutons numériques
pour choisir la piste où vous voulez enregistrer.
SELECT
Vous ne pouvez choisir qu’une seule piste à la fois.
(4) Appuyez sur le bouton
[START÷STOP]
pour lancer la reproduc-
tion des (vieilles) données de morceau.
L’icône et l’icône de la piste choisie clignotent alors.
RECORD
(5) Quand l’enregistreur atteint la mesure où vous voulez lancer
l’enregistrement, appuyez de nouveau sur
L’icône cesse de clignoter et reste affichée.
RECORD
[REC¥∏]
.
(6) Jouez l’extrait à recommencer.
(7) Appuyez de nouveau sur
[REC¥∏]
pour couper l’enregistre-
ment.
La reproduction du morceau continue, donc…
(8) Appuyez sur
(9) Appuyez sur
[START÷STOP]
[START÷STOP]
pour arrêter la reproduction.
pour écouter la nouvelle version.
Si vous n’êtes pas satisfait, recommencez à partir de l’étape (3)
ci-dessus.
Pour corriger une autre piste, retournez à l’étape (3).
Enregistrement Punch I/O avec un commutateur au
pied
Vous pouvez aussi utiliser un commutateur au pied en option
pour lancer et arrêter l’enregistrement. Cette méthode est avantageuse car elle vous permet de garder les deux mains libres
pour jouer sur le clavier (ou de piloter les effets Pitch Bend/
Modulation de la main gauche tout en jouant la mélodie de la
main droite.)
• Branchez un commutateur au pied DP-2, DP-6 ou BOSS
FS-5U. en option à la prise FOOTSWITCH en face arrière de
l’EXR-40 OR.
• Appuyez sur le bouton [FUNCTION] (il doit s’allumer).
FUNCTION
• Utilisez FAMILY [√][®] pour sélectionner “KB SET”.
Les paramètres Function de l’EXR-40 OR sont divisés en 9
“familles” selon une répartition logique. Dans le cas présent, il
suffit de choisir le groupe contenant les réglages d’ensemble du
clavier.
• Utilisez SELECT [√][®] pour choisir le paramètre “FSW”.
Remarque: Voyez aussi “Utiliser les boutons FAMILY, SELECT et
les boutons numériques” (p. 78).
• Utilisez les boutons [–][+] pour choisir “Punch I/O”.
• Appuyez sur [SONG] pour retourner au mode d’enregistrement.
• Reprenez l’étape (1) sous “Punch I/O”.
Aux étapes (5) et (7), actionnez le commutateur au pied (au lieu
d’enfoncer le bouton
[REC¥∏]
).
83
Page 84

r
EXR-40 OR
8. Fonctions arrangeur supplémentaires
Outre les fonctions Music Style élémentaires présentées aux pages page 73 et suivantes, l’EXR-40 OR propose les fonctions décrites dans cette section. La plupart de ces fonctions ne sont disponibles que si vous
appuyez sur le bouton [ARRANGER¥BAND] (l’icône doit être affichée).
ARRANGER
One Touch
La fonction One Touch automatise plusieurs tâches:
• L’arrangeur choisit le tempo préprogrammé du style musical.
• Les effets Reverb et Chorus sont réglés de façon appropriée.
• L’EXR-40 OR choisit des sons pour les parties Main, Split et
Dual appropriés au style en vigueur.
Chaque style comporte 2 mémoires One Touch offrant des
réglages différents pour les paramètres ci-dessus. Voici comment choisir une de ces mémoires:
(1) Choisissez le style musical voulu (voyez p. 74).
(2) Appuyez sur le bouton
La plage numérique dans le coin supérieur gauche de l’écran
indique “OT”, suivi du numéro de la mémoire One Touch choisie.
[ONE¥TOUCH]
TOUCH
.
ONE
Piano 2
Si le bouton DATA ENTRY
nom de son (“Piano 2” dans l’exemple ci-dessus).
(3) Appuyez à nouveau sur le bouton
“OT2”.
La fonction One Touch doit être activée après chaque sélection
d’un nouveau style musical.
Remarque: Vous pouvez aussi utiliser la fonction One Touch
pour les styles sur disquette et disponibles via USB mais elle a
moins d’utilité.
[TONE]
s’allume, l’écran affiche un
[ONE¥TOUCH]
pour choisir
Utiliser le Music Assistant
L’EXR-40 OR propose une fonction pratique baptisée MUSIC
ASSISTANT. Elle permet d’effectuer rapidement les réglages
appropriés du morceau que vous voulez jouer. Elle prépare tout
pour le travail avec l’arrangeur (style, sons, effets, etc.). La fonction Music Assistant n’est pas disponible pour la reproduction
de morceau.
Les paramètres suivants sont automatiquement modifiés quand
vous choisissez une mémoire Music Assistant:
• Style musical
• Tempo
• Sons des parties Main, Split
et Dual
(1) Appuyez sur le bouton
Il s’allume et l’écran affiche le nom du dernier réglage Music
Assistant que vous avez sélectionné (ou de la première mémoire
Music Assistant).
[MUSIC¥ASSISTANT]
MUSIC
ASSISTANT
• Réglages d’effets
• Band Orchestrator
• Dynamique
.
(2) Utilisez FAMILY
genre) contenant les réglages Music Assistant voulus.
Voici les familles disponibles: Arabic, Greek et World.
(3) Utilisez SELECT
Assistant voulue dans la famille choisie.
La première pression sur SELECT
premier paramètre Music Assistant du groupe sélectionné.
Comme le premier paramètre est déjà choisi, si vous comptez
l’utiliser, vous ne devez pas appuyer sur le bouton SELECT
revanche, vous devez utiliser le bouton SELECT
choisir un autre paramètre Music Assistant du même groupe.
Vous pouvez aussi utiliser les boutons numériques. Voyez aussi
(p. 78).
Remarque: Si nécessaire, vous pouvez alors modifier les réglages qui ne vous plaisent pas (choisir un autre son pour la partie
Main, par exemple) et sauvegarder votre nouvelle version dans
un programme utilisateur (voyez p. 102).
[√][®]
pour choisir la “famille” (c.-à-d. le
FAMILY
ARABIC
[√][®]
pour sélectionner la mémoire Music
[®]
(ou
=
102
[√]
) affiche le nom du
[√]
ou
[®]
[®]
pour
. En
84
Page 85

EXR-40 OR
Melody Intelligence
Melody Intelligence est une fonction qui ajoute une deuxième
voix (des notes d’harmonie) aux mélodies que vous jouez de la
main droite. En fait, la fonction Melody Intelligence se base sur
les deux moitiés du clavier pour déterminer les notes à jouer:
• Elle examine les notes de la mélodie dans la moitié droite
et…
• Elle analyse les accords que vous jouez dans la moitié gauche
pour déterminer quelles notes elle doit ajouter à votre
mélodie.
Appuyez sur le bouton
l’icône correspondante à l’écran.
[MELODY¥INTELLIGENCE]
MELODY
INTELLIGENCE
Traditnl
M
ORCHESTRATOR BEAT
FULL
INTRO
BAND
pour afficher
=
12000 001
Changer le type d’harmonie Melody Intelligence
L’EXR-40 OR propose 18 types d’harmonie différents pour la
fonction MELODY INTELLIGENCE. Ces voix spécifient le nombre
de notes d’harmonie et la manière dont ces notes sont ajoutées
à votre mélodie.
Pour choisir un autre type d’harmonie, maintenez enfoncé le
bouton
[MELODY¥INTELLIGENCE]
“
MI
” s’affiche dans le coin supérieur gauche de l’écran. Utilisez
ensuite les boutons
[–][+]
pour choisir les voix désirées. Vous avez
jusqu’à ce que le message
le choix entre les types suivants:
1 Duet
2 Organ
3 Combo
4 Strings
5 Choir
Remarque: Vous pouvez sauvegarder les réglages
[MELODY¥INTELLIGENCE] dans un programme utilisateur.
6 Block
7 BigBand
8 Country
9 Traditnl
10 Broadway
11 Gospel
12 Romance
13 Latin
14 CntrGuit
15 CntrBald
16 WltzOrg
17 OctvTpe1
18 OctvTpe2
Mode PIANIST
En mode PIANO, la partie Main est assignée au clavier entier.
Bien qu’au départ, l’EXR-40 OR affecte un son de piano à la
partie Main, vous pouvez choisir un autre son et sauvegarder
votre réglage dans un programme utilisateur.
Voici la principale différence entre PIANO SOLO et PIANIST: dans ce
dernier, les parties mélodiques de l’arrangeur sont disponibles, ce
qui n’est pas le cas en mode PIANO SOLO.
Toutefois, il n’y a pas de partage pour la reconnaissance d’accords
dans ce mode (vous vous souvenez peut-être que le clavier de
l’EXR-40 OR est partagé quand vous activez le bouton
[ARRANGER¥BAND]
importe l’endroit où vous le jouez. Pour que l’arrangeur joue un
autre accord, il faut que vous jouiez au moins les trois notes qui
constituent l’accord. Vous pouvez jouer plus de trois notes d’accord
mais n’oubliez pas que deux notes ne suffiront pas pour que l’arrangeur change d’accord.
Lorsque vous utilisez une pédale de maintien optionnelle, toutes les
notes que vous jouez simultanément sont considérées comme notes
d’accord, peu importe si vous les jouez de la main gauche ou droite.
): l’arrangeur décode chaque accord joué – peu
(1) Appuyez simultanément sur les boutons
et
[PIANO¥SOLO]
L’écran affiche brièvement “
ARRANGER
(2) Appuyez sur
(ils s’allument tous les deux).
PianoMod
clignote.
[STYLE]
et servez-vous des boutons SELECT
[ARRANGER¥BAND]
” et l’icône
pour sélectionner un style musical. Voyez aussi p. 74.
(3) Appuyez sur
et SELECT
[TONE]
et servez-vous des boutons FAMILY
[√][®]
(ou des boutons USER TONES) pour assigner
un autre son à la partie Main.
Vous pouvez aussi ajouter la partie DUAL (page 72). Même la
partie SPLIT est disponible (bien que la reconnaissance d’accords
soit active sur le clavier entier).
(4) Appuyez sur
[ARRANGER¥BAND]
ou
[PIANO¥SOLO]
ter le mode PIANIST.
[√][®]
[√][®]
pour quit-
85
Page 86

r
EXR-40 OR
Bass Inversion (Bass Inv)
Cette fonction permet de changer la manière dont l’arrangeur
interprète les accords que vous jouez.
Quand cette fonction est coupée (réglage par défaut), la partie Acc
Bass joue la tonique des accords pilotant l’arrangeur. Si vous jouez
un Do (C; ou un accord de Do), la basse joue un Do (C); si vous jouez
un accord La mineur (ou si vous appuyez sur le La et le Do à sa
droite), la basse joue un La, etc.
En activant la fonction Bass Inversion, vous pouvez spécifier la note
jouée par la note La. Partie de basse (la note la plus basse de vos
accords). Activez Bass Inversion pour des morceaux reposant plus
sur la basse que sur des motifs d’accord (exemple: C – C/B – C/Bb,
etc.).
(1) Appuyez sur le bouton [FUNCTION].
(3) Utilisez SELECT
[√][®]
pour choisir le paramètre “
SELECT
BassInv
M
ORCHESTRATOR BEAT
INTRO
BassInv
=
12000 001
FULL
BAND
”.
Autres fonctions pour styles
musicaux
Vous disposez d’autres fonctions liées aux styles musicaux.
Vous pouvez les régler avec le menu FUNCTION; certaines sont
décrites ailleurs:
• Balance entre les parties Keyboard et les parties Music Style
(voyez p. 76)
• Volume de certaines parties Music Style (voyez p. 99)
• Point de partage de l’arrangeur (voyez p. 98)
• Fonction Hold pour les notes de l’arrangeur (voyez p. 100).
FUNCTION
(2) Utilisez FAMILY
[√][®]
pour sélectionner “
ARR SET
FAMILY
Les paramètres Function de l’EXR-40 OR sont divisés en 9
“familles” selon une répartition logique. Comme le paramètre
Bass Inversion est une fonction de l’arrangeur, vous devez choisir les réglages de l’arrangeur (et donc
ARR SET
).
(4) Appuyez sur le bouton
Remarque: Voyez aussi (p. 78).
[+]
afin de choisir “ON” pour “VALUE”.
(5) Appuyez sur un autre “grand” bouton de la section DATA
ENTRY pour quitter cette fonction.
Remarque: Vous pouvez sauvegarder ce réglage dans un programme utilisateur (voyez p. 102).
”.
86
Page 87

EXR-40 OR
E
E
E
9. Travailler avec des gammes orientales
L’EXR-40 OR permet de changer la façon dont toutes les notes du même nom sont accordées. Exemple: Si vous appuyez sur le bouton ORIENTAL SCALE [Bƒ] (son témoin s’allume), l’accord de cette note diminue
d’un quart de ton (–50 cents). Cette modification vaut alors pour tous les Si bémol du clavier.
Diminuer la hauteur de certaines notes d’un quart
de ton
(1) Appuyez sur un bouton ORIENTAL SCALE pour diminuer la
hauteur des notes correspondantes d’un quart de ton (le
témoin du bouton doit s’allumer).
E
(2) Si vous souhaitez diminuer la hauteur d’autres notes, appuyez
sur le ou les boutons ad hoc.
Si vous vous êtes trompé de bouton (que son témoin est allumé),
appuyez de nouveau sur le bouton en question de sorte que son
témoin s’éteigne. Les notes correspondantes retrouvent alors
leur hauteur normale.
Travailler avec d’autres accords
Les boutons ORIENTAL SCALE permettent d’alterner la hauteur des
notes correspondantes entre l’accord occidental et un réglage un
quart de ton (–50 cents) plus bas.
Vous disposez toutefois d’autres valeurs d’accord.
(1) Maintenez enfoncé le bouton ORIENTAL SCALE de la note
dont vous voulez modifier l’accord, jusqu’à ce que l’écran
indique
Scale
Vous pouvez aussi choisir cette page et ce paramètre avec le
menu Function. Voyez page 101.
, suivi du nom de la note.
(2) Modifiez l’accord de la note choisie avec les boutons DATA
ENTRY
[–][+]
.
NO YES
Plage de réglage: –64~63 cents.
Remarque: Pour retrouver la valeur par défaut, appuyez simultanément sur [+] et [–].
Sauvegarder et charger les réglages d’accord (SCALE
MEMORY)
Une fois que vous avez trouvé des réglages d’accord qui vous plaisent, vous pouvez les sauvegarder dans une des trois mémoires
Scale Memories. Cela vous permettra de les charger dès que vous en
avez besoin. Voici la marche à suivre:
(1) Accordez les notes comme bon vous semble (voyez ci-dessus).
(2) Maintenez enfoncé le bouton SCALE MEMORY (
respondant à la mémoire où vous voulez sauvegarder vos
réglages.
[1]~[3]
) cor-
Si nécessaire, vous pouvez choisir une autre mémoire Scale en
appuyant brièvement sur le bouton SCALE MEMORY de la
mémoire contenant les réglages voulus.
Pour retourner à l’accord occidental, appuyez de nouveau sur le
bouton SCALE MEMORY pour éteindre son témoin et/ou désactivez tous les boutons ORIENTAL SCALE dont le témoin est
allumé.
Dans le second cas, le témoin SCALE MEMORY de la dernière
mémoire choisie se met à clignoter pour indiquer que les réglages ORIENTAL SCALE actuels ne correspondent plus à ceux contenus dans la mémoire actuellement sélectionnée.
Les réglages ORIENTAL SCALE sont également sauvegardés dans
le programme utilisateur et ne doivent pas nécessairement être
sauvegardés dans une des mémoires SCALE MEMORY. Quand
vous sélectionnez un programme utilisateur dont les réglages
d’accord sont différents de ceux de la dernière mémoire sélectionnée, le bouton correspondant (
[1]~[3]
) se met à clignoter.
(3) Attendez que les trois témoins SCALE MEMORY s’allument
brièvement, puis relâchez le bouton enfoncé.
Remarque: A la sortie d’usine, les mémoires Scale Memory de
l’EXR-40 OR contiennent déjà des réglages courants (voyez cidessus).
Remarque: Pour savoir comment définir les sections touchées
par les réglages Scale Tune, voyez “Scl Mode*” (p. 101).
87
Page 88

r
EXR-40 OR
10. Fonctions des parties clavier
Choix des sons pour les parties Main, Split
et Dual
L’EXR-40 OR offre environ 524 sons pour le jeu de mélodies (les
autres correspondent plus à des effets sonores). Ces sons doivent être assignés à une partie clavier (qui sont au nombre de
trois): Main, Split et Dual (voyez aussi p. 71).
Sélection d’un des sons disponibles
Contrairement aux instruments de type arrangeur plus anciens,
l’EXR-40 OR n’utilise plus de banques, numéros et variations: une
seule et même procédure logique permet de sélectionner tous les
sons disponibles.
(1) Appuyez sur le bouton DATA ENTRY
TONE
(2) Pour assigner un autre son à la partie Split ou Dual, mainte-
nez le bouton
[SPLIT]
ou
[DUAL]
rations suivantes.
Remarque: Passez à l’étape (5) si vous préférez entrer le
numéro du son avec le pavé numérique ([0]~[9]). C’est en fait la
seule méthode pour choisir un des sons disponibles.
(3) Utilisez FAMILY
[√][®]
pour choisir la famille de sons.
[TONE]
(il doit s’allumer).
enfoncé et effectuez les opé-
FAMILY
Voyez les familles disponibles ci-dessous. Quand vous sélectionnez une autre famille, le premier son du groupe en question
est automatiquement choisi.
• PIANO (001~011)
• E.PIANO (012~026)
• KEYBOARD (027~033)
• CHR PERC (034~063)
• ORGAN (064~097)
• ACCORDN (098~111)
• GUITAR (112~129)
• E.GUITAR (130~163)
• BASS (164~217)
• STRINGS (218~263)
• VOCAL (264~275)
Remarque: La liste des sons disponibles figure à la page 117.
(4) Utilisez SELECT
[√][®]
pour choisir un son dans la famille sélec-
• SAX (276~287)
• WIND (288~301)
• AC BRASS (302~329)
• SYNBRASS (330~343)
• SYNLEAD (344~380)
• POLY SYN (381~391)
• PAD (392~426)
• ETHNIC (427~499)
• PERCUSSION (500~524)
• SFX (525~566)
• DRUM KIT (567~592)
tionnée.
La première pression sur SELECT
[®]
(ou
[√]
) affiche le nom du
premier son du groupe choisi. Le premier son étant déjà choisi, si
vous comptez l’utiliser, vous ne devez pas appuyer sur le bouton
SELECT
[®]
. En revanche, utilisez le bouton SELECT
[√]
ou
choisir un autre son du même groupe.
(5) Utilisez les boutons numériques
[0]~[9]
pour choisir d’autres
sons de la famille actuelle qui sont “sautés” par les boutons
SELECT.
Remarque: Vous pouvez sauvegarder ce réglage dans un programme utilisateur (voyez p. 102).
Vous pouvez aussi utiliser les boutons numériques. Voyez aussi
“Utiliser les boutons FAMILY, SELECT et les boutons numériques”
(p. 78) et remplacez “morceau” par “son” dans les explications.
[®]
pour
Utiliser les boutons USER TONES
Les boutons USER TONES permettent de choisir directement 8 sons
mélodiques ou kits de batterie (sans utiliser les boutons
[TONE]
,
FAMILY, SELECT et/ou les boutons numériques). Ces boutons commencent par charger les sons qui leur sont assignés à l’usine (mais
vous pouvez le changer).
2
1
PIANO
345678
GUITAR/ SAX/ SYNTH/
ORGAN STRINGS
BASS BRASS ETHNIC
VOCAL
DRUMS
Nos sons “favoris” sont assignés aux catégories en question, ce qui
vous permet de choisir rapidement un son de piano, de cordes, etc.
Vous pouvez toutefois changer les assignations de ces boutons.
Remarque: Le bouton TONE [DRUMS] est uniquement disponible
pour la partie Main.
Assigner un autre son à un bouton USER TONES
Pour changer le son assigné à un des 8 boutons USER TONES:
(1) Sélectionnez le son à assigner en suivant la procédure décrite
ci-dessus.
(2) Maintenez le bouton USER TONES voulu enfoncé. L’écran
affiche brièvement le message “
Vous pouvez assigner le son (ou kit de batterie) de votre choix à
n’importe quel bouton USER TONES pour le sélectionner ultérieurement d’une simple pression sur ce bouton.
Remarque: Vous pouvez sauvegarder les assignations dans un
programme utilisateur (voyez p. 102). Ce bouton permet d’effectuer jusqu’à 1600 assignations différentes (car il y a 200 programmes utilisateur).
Pour sélectionner le son assigné en usine à un des boutons USER
TONES, appuyez deux fois rapidement (“double-cliquez”) sur ce
bouton.
Memrized
”.
88
Page 89

EXR-40 OR
Partie Split (effet sonore/son de
percussion)
Partie Main (son mélodique)
Sons de batterie et effets sonores
(“SFX”)
Kits de batterie
Les 25 derniers “sons” (567~592) sont des kits de batterie (“Drum
Sets”). Quand vous choisissez un de ces kits, un son différent est
assigné à chaque touche du clavier. La dernière touche à gauche
pilote un son de grosse caisse (alias “Kick”). La touche blanche juste
à côté pilote un son de caisse claire, etc. Essayez de jouer un rythme
de batterie en actionnant plusieurs touches simultanément ou tour
à tour.
IPopKik36
IPopCStk37st
IPopSn38st
IPopGstS39st
IPopSn40st
IPopTomLFl41
IPopHat1_42
IPopTomL43
IPopHat2_44
IPopTomMFl45
IPopHat3_46
IPopTomM47
IPopTomHFl48
IPopCyml2_52
IPopTomH50
C2 C3
Les kits de batterie sont des ensembles comprenant plus de 90 sons
affectés chacun à une note du clavier.
Remarque: Vous ne pouvez assigner les kits de batterie qu’à la partie Main (et non aux parties Split et Dual).
Remarque: Un kit (592) propose des effets sonores (SFX) qui ne servent pas à “jouer de la batterie” mais plutôt à produire divers bruitages.
Remarque: Vous pouvez sauvegarder ce réglage dans un programme utilisateur (voyez p. 102).
Effets sonores (“SFX”)
L’EXR-40 OR contient aussi des effets sonores individuels (comme
“Train, “Kitty”, “HrseGllp”, etc.) plus des sons de batterie et de percussion individuels 500~566. Ils sont affectés à la tessiture entière
de la partie pour laquelle vous les choisissez (Main, Split ou Dual).
Notez que ces sons ne fonctionnent pas comme les kits de batterie:
ici, un seul son est assigné au clavier – et peut servir à jouer une
mélodie (même si les mélodies “de train” ne produisent sans doute
que des effets tout au plus “intéressants”).
Nous vous conseillons donc de procéder comme suit:
(1) Appuyez sur le bouton
[SPLIT]
.
(2) Déterminez si vous voulez jouer l’effet sonore ou le son de
percussion de la main gauche ou de la main droite.
Pour le jouer de la main gauche, assignez un son entre “500” et
“566” à la partie Split. Pour piloter l’effet de la main droite, assignez-le à la partie Main.
(3) Changez le point de partage (page 98) de sorte que seules
quelques touches soient assignées au pilotage du son de percussion/de l’effet sonore (“C6” pour jouer l’effet de la main
droite et “C3” pour le jouer de la main gauche).
(4) Pour produire un effet convaincant, vous devrez peut-être
aussi modifier le réglage
MAIN Oct
ou
SPLT Oct
(page 99).
Si vous assignez un effet sonore/son de percussion à la partie
Split, voici les plages de clavier que vous pourriez obtenir.
89
Page 90

r
EXR-40 OR
Transpose
La fonction Transpose change la hauteur des notes et des
accords joués. Si vous devez changer de tonalité pour un chanteur ou un autre instrument, vous n’aurez aucun mal à trouver
les notes à jouer: il suffit de définir la valeur Transpose et de
jouer votre morceau comme d’habitude pour obtenir la tonalité
spécifiée.
Il existe en fait deux fonctions de transposition, une (“USRTrnsp”)
dont le réglage peut être sauvegardé dans un programme utilisateur et une autre (“GLBTrnsp”) qui s’applique à toutes les sections.
Son réglage est ajouté (ou soustrait) à la valeur “USR Transp”. Ce
réglage n’est pas sauvegardé.
Commençons par la fonction “USRTrnsp”, assignée au bouton
[TRANSPOSE]
(1) Appuyez sur le bouton [TRANSPOSE].
L’écran se présente maintenant comme ceci:
(2) Utilisez
régler l’intervalle de transposition voulu.
:
TRANSPOSE
USRTrnsp
M
[–][+]
et/ou les boutons numériques (
ORCHESTRATOR BEAT
INTRO
NO YES
=
12000 001
FULL
BAND
[0]~[9]
) pour
Plage de réglage: –12~12 demi-tons. Un “demi-ton” correspond
à l’écart entre une touche blanche et une touche noire (ou entre
deux touches blanches adjacentes, à savoir “Mi”/“Fa” et “Si”/
“Do”).
Appuyez plusieurs fois sur
[+]
ou
[–]
pour transposer le clavier
vers le haut ou vers le bas. Vous pouvez aussi définir directement l’intervalle de transposition voulu en appuyant sur le bouton numérique correspondant.
Pour transposer le clavier vers le bas, maintenez le bouton
enfoncé en appuyant sur un bouton
[0]~[9]
(cela permet de
[–]
transposer le clavier de maximum 9 demi-tons vers le bas).
Exemple: Si vous voulez entendre un “E” (Mi) chaque fois que
vous jouez un “C” (Do), choisissez “4”. Toutes les autres notes
sont décalées du même intervalle, de sorte que vous sonnez en
Mi majeur alors que vous jouez en fait en Do majeur.
Pas de transposition (Do majeur)
Transpos= 4 (Mi majeur)
La valeur correspondante et l’icône apparaissent à
TRANSPOSE
l’écran.
(3) Pour désactiver la fonction Transpose, répétez les étapes (1)
et (2) en entrant la valeur “0” (pas de transposition).
Remarque: Vous pouvez sauvegarder ce réglage dans un programme utilisateur (voyez p. 102).
Remarque: Vous disposez aussi d’une fonction permettant de
spécifier quelle(s) section(s) est/sont affectée(s) par la fonction
Transpose. Voyez “TransMod*” (p. 98).
(4) Appuyez sur un autre “grand” bouton de la section DATA
ENTRY pour quitter cette fonction.
Transposition globale (“GLB”)
Il existe une commande de transposition permettant de changer la
hauteur de toutes les sections de l’EXR-40 OR. Sa valeur s’ajoute à
l’intervalle de transposition actuel jusqu’à ce que vous la régliez de
nouveau sur “0” ou que vous mettiez l’EXR-40 OR hors tension.
(1) Appuyez sur le bouton [TRANSPOSE].
L’écran affiche alors le message “
(2) Appuyez une fois sur le bouton SELECT
USR Trnsp
[®]
pour sélectionner
”.
le paramètre suivant:
GLBTrnsp
(3) Utilisez
(4) Pour désactiver la transposition globale, répétez l’étape (3) en
(5) Appuyez sur un autre “grand” bouton de la section DATA
[–][+]
et/ou les boutons numériques (
[0]~[9]
) pour
régler l’intervalle de transposition voulu.
Plage de réglage: –6~0~5 demi-tons. Ce réglage est ajouté à (ou
soustrait de) la valeur “USRTrnsp” pour toutes les sections et
tous les programmes utilisateur.
Appuyez plusieurs fois sur
[+]
ou
[–]
pour transposer le clavier
vers le haut ou vers le bas. Vous pouvez aussi définir directement l’intervalle de transposition voulu en appuyant sur le bouton numérique correspondant.
Pour transposer le clavier vers le bas, maintenez le bouton
enfoncé en appuyant sur un bouton
[0]~[6]
(cela permet de
[–]
transposer le clavier de maximum 6 demi-tons vers le bas).
Dès que vous sélectionnez une autre valeur que “0”, l’icône
TRANSPOSE
se met à clignoter pour signaler que l’EXR-40 OR trans-
pose toutes les sections.
entrant toutefois la valeur “0” (pas de transposition).
TRANSPOSE
L’icône cesse de clignoter (et disparaît si la fonction
“USRTrnsp” n’est pas active).
Remarque: Ce réglage n’est pas sauvegardé dans un programme utilisateur et est initialisé lorsque vous mettez
l’EXR-40 OR hors tension.
ENTRY pour quitter cette fonction.
90
Page 91

EXR-40 OR
Réglages d’octave
L’EXR-40 OR vous permet de transposer les parties Keyboard
(Main, Split, Dual) 4 octaves vers le haut ou vers le bas.
Pour changer la transposition d’octave d’une partie, maintenez
enfoncé
[TONE]
(partie Main),
Dual) en appuyant sur
[SPLIT]
[–]
(vers le bas) ou
NO YES
(partie Split) ou
[+]
(vers le haut).
[DUAL]
(partie
Autres fonctions liées aux parties
clavier
Voici d’autres fonctions concernant les parties Keyboard, c.-à-d.
les parties que vous jouez. Vous pouvez les régler avec le menu
FUNCTION; certaines sont décrites ailleurs:
• Dynamique du clavier (voyez p. 92)
• Master Tune (voyez p. 97)
• Volume des parties Keyboard (voyez p. 99)
• Fonction Intelligence de la partie Split (voyez p. 98)
• Fonction Hold de la partie Split (voyez p. 98)
91
Page 92

r
EXR-40 OR
11. Fonctions de jeu et effets
Fonctions de jeu
Sensibilité au toucher (Keyboard Touch)
L’EXR-40 OR est sensible au toucher: le volume et la brillance des
notes Main, Split et Dual dépendent de la force/de la vitesse avec
lesquelles vous enfoncez les touches.
Tous les instruments acoustiques (piano, violon, flûte, batterie, etc.)
sont sensibles au toucher. Plus vous jouez fort, plus le volume et la
brillance des notes produites augmentent, recréant un effet entièrement naturel. (C’est pourquoi la fonction KEYBOARD TOUCH est
activée à la mise sous tension de l’EXR-40 OR.)
Si l’EXR-40 OR est votre tout premier instrument de musique, vous
serez peut-être un peu distrait par les variations de volume et de
timbre des notes jouées.
(1) Si l’icône n’est pas affichée, appuyez sur le bouton
[KEYBOARD¥TOUCH]
l’EXR-40 OR.
(2) Appuyez à nouveau sur ce bouton pour désactiver la fonction
KEYBOARD TOUCH une fois que vous n’en avez plus besoin.
(3) Pour définir une valeur de toucher fixe, maintenez enfoncé le
bouton
“
KbdTouch
(4) Servez-vous des boutons numériques et/ou
la valeur de toucher qui sera utilisée pour toutes les notes
que vous jouez (1~127).
“1” produit un niveau très bas (souvent inaudible), tandis que
“127” correspond au toucher maximum (produisant des notes
fortes et brillantes). Cette valeur sert seulement quand l’icône
KEY TOUCH
pour activer la sensibilité au toucher de
[KEYBOARD¥TOUCH]
” s’affiche.
KbdTouch
KEYBOARD
TOUCH
jusqu’à ce que le message
[–][+]
pour définir
KEY TOUCH
n’est pas affichée (sinon, toutes les notes ont les
valeurs de toucher correspondant à la force avec laquelle vous
enfoncez les touches).
(5) Appuyez sur un autre “grand” bouton de la section DATA
ENTRY pour quitter cette fonction.
Remarque: Certains sons bénéficient de la “commutation par
toucher”. Dans ce cas, vous pouvez alterner entre deux sons en
jouant plus ou moins fort sur le clavier. Ne désactivez donc ce
paramètre que si cela permet d’augmenter votre confort de jeu.
Remarque: Vous pouvez sauvegarder ce réglage dans un programme utilisateur (voyez p. 102).
Remarque: La fonction Keyboard Touch concerne toutes les
parties que vous pouvez jouer vous-même (les “parties Keyboard”): Main, Split et Dual.
Pitch Bend et Modulation
Le levier BENDER/MODULATION à gauche du clavier permet d’ajouter deux types d’effets aux notes des parties Keyboard. Vous pouvez
même utiliser ces effets simultanément si vous le voulez.
(1) Poussez le levier vers l’arrière de l’EXR-40 OR pour ajouter un
effet de vibrato (“tremblotement”) aux notes jouées.
MODULATION
Diminue la
hauteur
BENDER
L’axe de modulation permet aussi d’alterner entre les vitesses
lente et rapide de l’effet Rotary (si le type “Rotary” est assigné au
MFX).
(2) Poussez le levier à gauche pour diminuer temporairement la
hauteur des notes jouées. Poussez-le à droite pour augmenter
la hauteur des notes.
Augmente la
hauteur
(3) Pour chacun de ces types d’effets, vous pouvez relâcher le
levier quand vous n’avez plus besoin de l’effet.
Remarque: Si nécessaire, vous pouvez changer l’intervalle de
Pitch Bend. Voyez “PB Range° (Plage de Pitch Bend)” (p. 98).
Remarque: La modulation n’est pas disponible quand le type
“Rotary” est assigné au MFX. Dans ce cas, l’axe de modulation du
levier sert à alterner entre les vitesses lente et rapide de l’effet.
Commutateur au pied
La prise FOOTSWITCH de l’EXR-40 OR (sur le panneau arrière) permet de brancher un commutateur au pied DP-2, DP-6 ou BOSS
FS-5U. en option.
Vous pouvez utiliser ce commutateur au pied pour maintenir les
notes jouées (fonction par défaut), comme pédale douce ou pédale
tonale (sostenuto), pour changer la vitesse de l’effet Rotary (MFX) et
pour d’autres fonctions encore. Voyez “FSW° (Footswitch Assign)”
(p. 98) et “Utiliser les sorties et un commutateur au pied” (p. 114).
Pour utiliser le commutateur au pied afin de maintenir les notes
jouées, procédez comme suit:
(1) Branchez un commutateur au pied DP-2, DP-6 ou BOSS
FS-5U. à la prise FOOTSWITCH.
(2) Jouez une note de la main droite.
(3) Appuyez sur le commutateur au pied.
(4) Relâchez la touche.
Le son de la note ou des notes jouées continue après le relâchement des touches en question.
(5) Pour couper le son de la note ou des notes, relâchez le com-
mutateur au pied.
92
Page 93

EXR-40 OR
Utilisation des effets
L’EXR-40 OR contient des processeurs d’effets numériques
Reverb et Chorus. Vous pouvez activer/couper ces effets et choisir d’autres types. En outre, vous pouvez régler le niveau d’envoi
Send (la quantité de Reverb ou de Chorus) appliqué aux différentes parties Keyboard. Retenez que l’effet Chorus ne peut pas
être combiné avec le MFX (vous devez donc choisir entre Chorus
et MFX pour la partie Main).
Utiliser le processeur multi-effet (MFX)
Vous pouvez appliquer le processeur multi-effet (MFX) à la partie Main. Contrairement aux processeurs Reverb et Chorus, qui
produisent uniquement des effets liés à l’ambiance (REV) et à la
modulation (CHR), le processeur MFX génère divers effets (47),
dont certains sont des combinaisons de deux effets.
(1) Appuyez sur le bouton
(2) Utilisez FAMILY
Les paramètres Function de l’EXR-40 OR sont divisés en 9
“familles” selon une répartition logique. Pour effectuer cette
procédure, il faut choisir le groupe des effets.
(3) Utilisez SELECT
Remarque: Voyez aussi “Utiliser les boutons FAMILY, SELECT et
les boutons numériques” (p. 78).
Le message “
(4) Pour activer le MFX, choisissez un des 47 types avec les bou-
tons
Off: Le MFX est désactivé.
Enhancer: L’effet Enhancer contrôle la structure des harmo-
niques des hautes fréquences, rendant le son plus pétillant et
serré.
[–][+]
Off
.
[FUNCTION]
[√][®]
pour sélectionner “
[√][®]
pour choisir le paramètre “MFX”.
00
” indique que le MFX n’est pas actif.
(il doit s’allumer).
FUNCTION
EFFECTS
Off
”.
Overdrv1~4: L’Overdrive crée une légère distorsion semblable à celle produite par les amplis à lampes. Divers types
d’overdrive sont disponibles: Divers types d’overdrive sont
disponibles: (1) petit combo, (2) combo, (3) tour d’amplification (2 enceintes), (4) tour d’amplification (3 enceintes).
Distort1~4: Cet effet produit une distorsion plus intense
que l’effet overdrive. Les numéros correspondent à des types
de distorsion.
Phaser: Ajoute un son déphasé par rapport au son original
et produit une modulation tournante créant une impression
d’espace et de profondeur.
AutoWah: L’effet Auto Wah module un filtre pour créer des
changements cycliques du timbre.
Rotary: L’effet Rotary simule l’effet d’un haut-parleur rotatif
classique. Effet idéal pour orgue électrique. Dans ce cas, l’axe
MODULATION du levier BENDER/MODULATION sert à alterner
entre les vitesses lente et rapide de l’effet: poussez le levier
vers l’arrière de l’EXR-40 OR pour alterner entre les vitesses
des ondulations.
StFlangr: Voici un flanger stéréo produisant une résonance
métallique qui rappelle quelque peu un avion décollant ou
atterrissant.
SpFlangr: Voici “Step Flanger” avec des paliers bien audibles
au lieu d’un changement de hauteur continu.
Compress: Un compresseur atténue les crêtes de signal,
accentue les bas niveaux et aplanit le volume global.
Limiter: Un limiteur empêche le volume de dépasser un certain niveau seuil (Threshold) sans accentuer les bas niveaux.
HexaCho: Hexa Chorus se sert d’un chorus à 6 phases (six
couches de son avec chorus) pour rendre le son plus riche et
plus vaste.
Trem Cho: Tremolo Chorus est un chorus avec du trémolo
(modulation cyclique du volume).
StChorus: Chorus stéréo.
Space-D: Un chorus multiple qui ne donne pas une impres-
sion de modulation mais produit un chorus transparent (un
parfait “faiseur de stéréo”).
StDelay: Cet effet répète le signal d’entrée, créant ainsi des
échos (répétitions de signal).
Mod Dly: Cet effet ajoute de la modulation au son retardé et
produit un effet semblable à celui d’un flanger.
3Tap Dly: Le Triple Tap Delay produit trois sons retardés;
centre, gauche, droite.
4Tap Dly: Effet delay avec quatre lignes de retard.
TmCtrDly: Cet effet permet de contrôler le temps de retard
en temps réel.
Reverb: Un superbe effet de réverbération.
GteRevNr: Gate Reverb est un type spécial de réverbération
qui coupe brutalement le son réverbéré (au lieu de le faire
diminuer progressivement).
GteRevRv: Un effet Gate Reverb inversé.
GteRevS1: Le son réverbéré passe de droite à gauche.
GteRevS2: Le son réverbéré passe de gauche à droite.
2PtchShf: Un effet pitch shifter change la hauteur du signal
entrant. Cet effet à 2 voix a deux pitch shifters et permet
donc d’ajouter deux copies transposées au signal original.
FbPtchShf: Voici un effet pitch shift avec plusieurs répétitions.
OD®Chors: Overdrive et chorus branchés en série. (“En
série” signifie que le premier effet est aussi traité par le
second.)
OD®Flger: Overdrive et Flanger branchés en série.
OD®Delay: Overdrive et Delay branchés en série.
DS®Chors: Distorsion et Chorus branchés en série.
DS®Flger: Distorsion et Flanger branchés en série.
DS®Delay: Distorsion et Delay branchés en série.
EH®Chors: Enhancer et Chorus branchés en série.
EH®Flger: Enhancer et Flanger branchés en série.
EH®Delay: Voici un enhancer et un delay branchés en série.
Cho®Dly: Chorus et Delay branchés en série.
FL®Delay: Flanger et Delay branchés en série.
Cho®Flgr: Chorus et flanger branchés en série.
Cho/Dly: Chorus et delay branchés en parallèle. (“En paral-
lèle” signifie que le signal d’entrée est traité par deux effets
qui n’ont aucune interaction.)
FL/Delay: Flanger et Delay branchés en parallèle.
Cho/Flgr: Chorus et Flanger branchés en parallèle.
Remarque: Vous pouvez sauvegarder ce réglage dans un pro-
gramme utilisateur (voyez p. 102).
93
Page 94

r
EXR-40 OR
Remarque: Par défaut, le choix du type MFX est lié à la sélection de son pour la partie Main. Vous pouvez cependant désactiver ce lien. Voyez “Tone MFX°” (p. 100). Notez que cette remarque ne s’applique pas à tous les sons.
(5) Choisissez un type MFX, jouez quelques notes sur le clavier et
écoutez l’effet.
(6) Appuyez sur un autre “grand” bouton de la section DATA
ENTRY pour quitter cette fonction.
Remarque: Quand le MFX est actif, la partie Main n’est plus
traitée par l’effet Chorus. Toutefois, le MFX a aussi des algorithmes de chorus (indépendants ou combinés à d’autres effets).
Reverb
La réverbération (Reverb) est un effet qui donne l’impression
que vous jouez dans une salle de concert, une pièce ou un autre
décor acoustique réfléchissant les sons.
A la mise sous tension de l’EXR-40 OR, les trois parties Keyboard
(Main, Dual, Split) ainsi que les parties de l’arrangeur et de morceau
sont traitées par l’effet Reverb.
Si vous ne comptez pas utiliser cet effet, vous pouvez couper le processeur Reverb (il ne traite alors plus aucune des 19 parties de
l’EXR-40 OR) ou désactiver son traitement seulement pour la partie
Keyboard voulue. Vous ne pouvez pas modifier la quantité de
réverbération ajoutée aux parties de l’arrangeur ou de morceaux
préenregistrés.
●
Activer/couper l’effet Reverb
Pour couper complètement la réverbération (pour toutes les
parties de l’EXR-40 OR) ou choisir un autre type de réverbération, procédez comme suit.
(1) Appuyez sur le bouton [FUNCTION] (il doit s’allumer).
FUNCTION
(2) Utilisez FAMILY
Les paramètres Function de l’EXR-40 OR sont divisés en 9
“familles” selon une répartition logique. Pour effectuer cette
procédure, il faut choisir le groupe des effets.
(3) Utilisez SELECT
Remarque: Voyez aussi “Utiliser les boutons FAMILY, SELECT et
les boutons numériques” (p. 78).
[√][®]
pour sélectionner “
[√][®]
pour choisir le paramètre “REV”.
00
Hall 2
EFFECTS
”.
(4) Utilisez les boutons
comptez pas travailler avec le processeur Reverb. Sinon, choisissez un des huit types disponibles:
Type Explication
Room 1~3 Ces types simulent la réverbération d’une
Hall 1, 2 Ces types simulent la réverbération d’une
Plate Simulation numérique d’une plaque métalli-
Delay Effet Delay (pas de réverb). Fonctionne un peu
Pan Delay Version stéréo de l’effet précédent. Crée des
(5) Jouez quelques notes sur le clavier et écoutez l’effet.
●
Changer la quantité de réverbération appliquée
[–][+]
pour choisir “
pièce. Plus le numéro est élevé (1, 2 ou 3), plus
la pièce est “grande”.
petite (1) ou grande (2) salle de concert et
produisent un espace nettement plus vaste
que les types Room ci-dessus.
que parfois utilisée pour créer des effets de
réverbération. Bons résultats avec les sons de
percussion.
comme un écho et répète les sons.
répétitions qui alternent entre les canaux
gauche et droit.
Off
” si vous ne
aux parties clavier
Pour changer l’intensité de la réverbération (c.-à-d. la quantité
de réverbération ajoutée à une partie), procédez comme suit:
(6) Si le bouton
[√][®]
[FUNCTION]
pour choisir un des paramètres suivants.
est toujours allumé, utilisez SELECT
Rev MAIN
Intensité de réverbération de la partie Main.
Rev DUAL
Intensité de réverbération de la partie Dual.
Rev SPLIT
Intensité de réverbération de la partie Split.
(Si
[FUNCTION]
tions (1) et (2) ci-dessus.)
n’est pas allumé, effectuez d’abord les opéra-
94
Page 95

EXR-40 OR
Chr MAIN
Chr DUAL
Chr SPLIT
Intensité de Chorus de la partie Main*.
Intensité de Chorus de la partie Dual.
Intensité de Chorus de la partie Split.
(*) Bien que ce paramètre soit aussi affiché quand le MFX a un autre réglage
que “Off”, la partie Main n’est dans ce cas pas traitée par l’effet chorus.
Main
Reverb
Chorus
Reverb
Chorus
MFX
“Off”
Main
MFX
Quand le MFX est réglé sur “Off”
Quand vous avez choisi un autre type MFX
(7) Choisissez “0” avec
Keyboard sélectionnée avec l’effet Reverb. Sinon, choisissez la
valeur voulue.
Si vous avez choisi un type MFX (voyez p. 93), le paramètre
MAIN
n’affecte pas directement la partie Main mais le signal
du MFX.
Quand le MFX est réglé sur “Off”
Quand vous avez choisi un autre type MFX
“
Rev Main
du signal Main traité sortant du processeur MFX. Vous pouvez
utiliser ce réglage pour une palette d’applications intéressantes:
Distorsion (MFX) + Réverb (REV), Rotary (MFX) + Plate (REV), etc.
(8) Jouez quelques notes sur le clavier et écoutez l’effet.
N’oubliez pas d’activer la partie Split ou Dual si vous voulez
vérifier l’intensité de son effet Reverb.
Remarque: Vous pouvez sauvegarder ce réglage dans un programme utilisateur (voyez p. 102).
(9) Appuyez sur un autre “grand” bouton de la section DATA
ENTRY pour quitter cette fonction.
[–][+]
si vous ne voulez pas traiter la partie
Rev
Main Reverb
Rev MAIN
MFX
Main Reverb
MFX
= 100” désigne alors: l’intensité de réverbération
Réverb pour Main
“Off”
Rev MAIN
Réverb pour Main + MFX
=
=
Chorus
Le chorus élargit la dimension spatiale du son et produit une
impression stéréo. Vous avez le choix entre 8 types.
A la mise sous tension de l’EXR-40 OR, aucune des trois parties Keyboard (Main, Dual, Split) n’est traitée par l’effet Chorus interne.
Notez en outre que l’effet Chorus n’affecte pas la partie Main si
le MFX est réglé sur tout type autre que “Off”.
Si vous n’avez pas besoin de chorus, vous pouvez couper le processeur Chorus (il ne traite alors plus aucune des 19 parties de
l’EXR-40 OR) ou désactiver son traitement seulement pour la partie
Keyboard voulue. Vous ne pouvez pas modifier la quantité de Chorus ajoutée aux parties de l’arrangeur ou de morceaux préenregistrés.
●
Activer/couper l’effet Chorus
Pour couper complètement le chorus (pour toutes les parties de
l’EXR-40 OR) ou choisir un autre type de chorus, procédez
comme suit.
(1) Appuyez sur le bouton
(2) Utilisez FAMILY
(3) Utilisez SELECT
[FUNCTION]
[√][®]
pour sélectionner “
[√][®]
pour sélectionner le paramètre “CHR”:
(il doit s’allumer).
FUNCTION
EFFECTS
”.
●
Changer la quantité de Chorus appliquée aux parties keyboard
Pour changer l’intensité du Chorus (c.-à-d. la quantité de Chorus
ajoutée à une partie), procédez comme suit:
(6) Si le bouton
[√][®]
[FUNCTION]
(Si
tions (1) et (2) ci-dessus.)
(7) Choisissez “0” avec
Keyboard sélectionnée avec l’effet chorus. Sinon, choisissez la
valeur voulue.
Si vous avez choisi un type MFX (voyez p. 93), le paramètre
MAIN
[FUNCTION]
pour choisir un des paramètres suivants.
n’est pas allumé, effectuez d’abord les opéra-
n’a aucun effet (même s’il est affiché).
est toujours allumé, utilisez SELECT
[–][+]
si vous ne voulez pas traiter la partie
Chr
00
Chorus 3
Remarque: Voyez aussi “Utiliser les boutons FAMILY, SELECT et
les boutons numériques” (p. 78).
(4) Utilisez les boutons
comptez pas travailler avec le processeur Chorus. Sinon, choisissez un des huit types disponibles (voyez la liste ci-dessous).
Chorus 1
Chorus 2
Chorus 3
(5) Jouez quelques notes sur le clavier et écoutez l’effet.
[–][+]
pour choisir “
Chorus 4
FB Chorus
Flanger
Off
S-Delay
SDelayFb
” si vous ne
(8) Jouez quelques notes sur le clavier et écoutez l’effet.
N’oubliez pas d’activer la partie Split ou Dual si vous voulez
vérifier l’intensité de son effet Chorus.
Remarque: Vous pouvez sauvegarder ce réglage dans un programme utilisateur (voyez p. 102).
95
Page 96

r
EXR-40 OR
(9) Appuyez sur un autre “grand” bouton de la section DATA
ENTRY pour quitter cette fonction.
Fonction V-LINK
V-LINK est une fonction qui permet de relier musique et vidéo.
Si vous utilisez du matériel vidéo compatible V-LINK (c.-à-d. un
Edirol DV-7PR), vous pouvez facilement lier des effets visuels
aux effets sonores et conférer plus d’expression encore à votre
exécution.
Grâce à l’utilisation combinée de l’EXR-40 OR et d’un Edirol DV-7PR,
vous pouvez:
• Déclencher des changements d’images (clips) avec le clavier
(l’octave la plus haute) de l’EXR-40 OR. Maintenez une touche enfoncée pour allonger la transition (“fondu”). Enfoncez
brièvement une touche pour produire une transition rapide.
• Les boutons numériques [0]~[9] servent à changer de palettes
(à condition que le bouton [USER¥PROGRAM] soit allumé).
• Utiliser l’axe BENDER du levier BENDER/MODULATION pour
changer la vitesse de défilement des images ou choisir une
couleur différente.
• Utiliser les boutons LOCK pour changer d’effet (VFX1~4).
Les signaux V-Link peuvent être transmis via la prise MIDI OUT.
(1) Reliez la prise MIDI OUT de l’EXR-40 OR à la prise MIDI IN
du processeur vidéo externe (ou à une interface UM-1).
REMOTE
Edirol UM-1
MIDI OUT
Edirol DV-7PR
(2) Appuyez sur le bouton
[V-LINK]
(il s’allume en bleu).
BEAT
(3) Servez-vous de l’axe BENDER, des boutons assignés ou des
touches “V-LINK” (l’octave la plus haute) pour manipuler les
images vidéo en synchronisation avec votre musique (voyez
ci-dessous).
(4) Appuyez à nouveau sur
[V-LINK]
pour désactiver cette fonc-
tion (le bouton s’éteint).
Fonctions V-LINK pilotables par l’EXR-40 OR (et
messages MIDI correspondants)
L’EXR-40 OR propose les fonctions suivantes pour piloter du matériel vidéo compatible V-LINK.
• Clavier: Clip 1~8→ No. de programme: 00H~08H
Enfoncez les touches de l’octave la plus haute pour changer
de clip.
• Dynamique: Dissolve Time→ CC23
Le toucher appliqué aux touches de l’octave la plus haute
pilote la vitesse de transition entre les images.
• Boutons [1]~[0] (si le bouton [USER¥PROGRAM] s’allume):
Palette 1~10→ CC00 (Sélection de banque)/00H~09H
Quand le bouton [V-LINK] est allumé, vous pouvez choisir les
palettes 1~10 en appuyant sur les boutons [1]~[0]. (Les boutons numériques conservent leurs fonctions “normales”.)
• Axe BENDER du levier BENDER/MODULATION: Vitesse de
défilement→ Pitch Bend
Déplacez le levier vers la droite pour accélérer le défilement
des images ou vers la gauche pour le ralentir. En position
centrale, la vitesse de défilement est normale.
• Axe MODULATION du levier BENDER/MODULATION: Clip
color→ CC24 (Color CB), CC25 (Color CR)
Poussez le levier vers l’arrière de l’EXR-40 OR pour changer
la couleur. Chaque manipulation du levier sélectionne une
des cinq couleurs disponibles: vert, violet, bleu, rouge, couleur originale du clip.
• Boutons LOCK: VFX1~4, Aucun (ACOUSTIC= Aucun,
POP= V-FX 1, ROCK= V-FX 2, DANCE= V-F1h
• X 3, ETHNIC= V-FX 4)
Utilisez ces boutons pour changer d’effet vidéo. Cette fonction n’est pas disponible si le processeur vidéo récepteur est
déjà réglé sur “Off”.
Remarque: VFX2 n’est pas reconnu par le DV-7.
Remarque: Les messages V-LINK sont transmis sur les canaux
MIDI 13 et 14.
96
Page 97

EXR-40 OR
12. Menu Function
Le mode Function de l’EXR-40 OR contient des paramètres plus sophistiqués dont vous n’aurez sans doute pas besoin tous les jours. Ces paramètres servent à affiner la réponse de votre instrument. Nous vous
recommandons donc de vous familiariser avec leur utilisation. Vous pouvez mémoriser la plupart des réglages (“*”) dans un programme utilisateur (voyez p. 102). D’autres paramètres (“°”) sont sauvegardés en
mémoire Flash interne quand vous quittez le mode Function.
Edition de paramètres (procédure
générale)
Vous pouvez éditer les paramètres Function de l’EXR-40 OR à
l’écran. Voici la procédure générale que vous appliquerez à tous les
paramètres dont il est question ici:
(1) Appuyez sur
(2) Utilisez FAMILY
nant le paramètre voulu:
■ KB SET: KbdTouch, MsterTune, USRTrnsp, GLB Trnsp,
TransMod, PB Range, KeySplit, SpltHold, SpltInt, FSW, Port
Main, Port Dual, Mode Main, Mode Dual
■ METRONOM: Mtro TS, MetroVol, Count-In
■ OCTAVE: MAIN Oct, DUAL Oct, SPLT Oct
■ VOLUME: Main Vol, Dual Vol, SplitVol, Auto Bass,
AccDrums, AccBass, Accomp1~Accomp6, Song1~Song16
■ ARR SET: ArrChord, Arr Hold, EP Chord, Bass Inv, MI
(Melody Intelligence), InEnCHRD, Sync Stop
[FUNCTION]
.
FUNCTION
[√][®]
pour choisir le groupe Function conte-
FAMILY
■ EFFECTS: REV (Reverb), CHR (Chorus), MFX, Tone MFX, Rev
MAIN, Chr MAIN, Pan MAIN, Rev DUAL, Chr DUAL, Pan DUAL,
RevSPLIT, ChrSPLIT, PanSPLIT
■ KB SCALE: Scale C/C#/D/Eb/E/F/F#/G/Ab/A/Bb/B, Scale
Mode
■ MIDI: Local, MidiTxRx, Sync Rx, Style PC, LyricsTx,
NTARx14, PitchBnd, Modulatn, ProgChng, Velo Rx, Clock Tx,
StartStp, SongPosP
■ UTILITY: LockInit, InitFLASH, Resume
■ WriteSNG (voyez p. 106)
■ WriteSTL (voyez p. 107)
■ RemoveSNG (voyez p. 107)
■ Remove STL (voyez p. 108)
■ WriteUPG (voyez p. 107)
■ ReadUPG (voyez p. 107)
■ RemovUPG (voyez p. 108)
(3) Utilisez SELECT
ci-dessous).
Remarque: En mode FUNCTION, SELECT [√][®] ne permettent pas
de passer d’une famille à l’autre.
Le message “VALUE” et un réglage s’affichent, indiquant que
vous pouvez modifier (“éditer”) le paramètre en question.
(4) Utilisez DATA ENTRY
quement pour des valeurs) pour modifier le réglage du paramètre choisi.
[√][®]
pour choisir le paramètre à éditer (voyez
SELECT
[–][+]
ou les boutons numériques (uni-
Remarque: Voyez aussi page 78.
Remarque: Pour retrouver la valeur par défaut du paramètre
choisi, appuyez simultanément sur [+] et [–].
(5) Utilisez les boutons FAMILY
paramètre Function.
(6) Poursuivez avec l’étape (3).
(7) Appuyez sur un autre “grand” bouton de la section DATA
ENTRY pour quitter cette fonction.
[√][®]
pour sélectionner un autre
Paramètres KB SET
■
Kbd Touch*
(1~127, Réglage par défaut: 110) Ce paramètre permet de
régler la valeur de toucher fixe de l’EXR-40 OR utilisée quand
KEY TOUCH
l’icône n’est pas affichée. Voyez p. 92.
Remarque: Vous pouvez aussi choisir ce paramètre en maintenant
enfoncé [KEYBOARD¥TOUCH].
■
MstrTune° (accord global)
(427.4~452.6, Réglage par défaut: 440.0) Ce paramètre permet
de changer l’accord global de l’EXR-40 OR, ce qui peut se révéler nécessaire quand vous accompagnez un chanteur, un instrument acoustique ou quand vous jouez en accompagnant
une cassette ou un CD.
■
USRTrnsp*
(–12~12, Réglage par défaut: 0) Utilisez ce paramètre pour
transposer l’EXR-40 OR par demi-tons. Pour en savoir plus sur
la transposition, voyez p. 90. Vous pouvez aussi choisir ce paramètre en appuyant sur le bouton [TRANSPOSE].
■
GLBTrnsp
(–6~5, Réglage par défaut: 0) Utilisez ce paramètre pour transposer l’EXR-40 OR par demi-tons. Pour en savoir plus sur la
transposition, voyez (voyez p. 90). Vous pouvez aussi choisir ce
paramètre en appuyant sur [TRANSPOSE] et une fois sur SELECT
[®].
97
Page 98

r
EXR-40 OR
■
TransMod*
(Réglage par défaut: Int+Song) Ce paramètre permet de spécifier les parties affectées par le réglage de transposition:
Int: Les parties Keyboard et Arranger sont transposées. Les
notes reçues via MIDI, par contre, sont jouées sans changement.
Song: Seules les parties de morceau sont transposées. Ce
réglage n’a de sens que si vous reproduisez un fichier Standard
MIDI ou un de vos propres morceaux avec l’enregistreur de
l’EXR-40 OR.
MIDI: Seules les notes reçues via MIDI sont transposées.
Int+Sng, Int+MIDI, Sng+MIDI, All: Il s’agit de combinaisons
des réglages précédents. Int peut être utile pour transposer
uniquement les parties Keyboard, de sorte à jouer un morceau
du Recorder dans “votre” tonalité tout en sonnant dans la
tonalité du morceau.
■
PB Range° (Plage de Pitch Bend)
(0~24, Réglage par défaut: 2) Ce paramètre sert à spécifier
l’intervalle obtenu en poussant le levier BENDER/MODULATION
à fond à gauche ou à droite (effet Pitch Bend). Ce réglage
s’effectue par pas de demi-ton, avec un maximum de 24 demitons (soit 2 octaves). Le réglage par défaut est de “2”, ce qui
devrait convenir à la plupart des applications.
Remarque: Le Pitch Bend est uniquement disponible pour les parties Main, Dual et Split. Voyez aussi p. 92.
■
KeySplit* (Point de partage)
(48~84, Réglage par défaut: 60) Ce paramètre sert à régler le
point de partage du mode Arranger et de la partie Split. La note
que vous spécifiez ici est la note la plus grave que vous pouvez
jouer avec la partie Main. Le numéro fait référence à une note.
“60” correspond à la note “C4”.
Remarque: Vous pouvez aussi choisir ce paramètre en appuyant
sur le bouton [ARRANGER¥BAND] et en le maintenant enfoncé.
■
SpltHold* (fonction Hold de la partie Split)
(On/Off, Réglage par défaut: Off) La fonction SpltHold
mémorise les accords que vous jouez quand la partie Split est
active et maintient ces notes jusqu’à ce que vous jouiez un
autre accord.
■
SpltInt* (Split Chord Intelligence)
(On/Off, Réglage par défaut: Off) Quand vous activez le bouton
[SPLIT], la fonction Split Chord Intelligence de l’EXR-40 OR permet de jouer des accords majeurs d’une pression sur une seule
touche, des accords mineurs en appuyant sur deux touches et
des accords plus complexes en actionnant trois touches. Ce
système suit donc le pilotage de l’arrangeur; aussi, il serait une
bonne idée de choisir “On” dès que vous vous servez de la partie Split quand l’icône est affichée.
■
FSW° (Footswitch Assign)
ARRANGER
Sustain
(Réglage par défaut: Sustain) Après avoir branché un commutateur au pied DP-2, DP-6 ou BOSS FS-5U. en option à la prise
FOOTSWITCH du panneau arrière, vous pouvez utiliser ce paramètre pour assigner une fonction au commutateur au pied.
Sustain: Cette fonction, aussi appelée “Hold” or “Damper”, permet d’utiliser le commutateur au pied pour maintenir les notes
jouées sur le clavier, pratiquement comme sur un piano acoustique.
Sostenut: Le commutateur au pied fait office de pédale Sostenuto (autre pédale équipant les pianos à queue et numériques
et qui permet de ne maintenir que les notes jouées quand on
appuie sur la pédale).
Remarque: Cette fonction n’est disponible que pour les parties
Keyboard.
Soft: Dans ce cas, le commutateur au pied fonctionne comme
une pédale Soft (pédale pour pianos à queue et pianos numériques, qui réduit le volume).
Remarque: Cette fonction n’est disponible que pour les parties
Keyboard.
Rotary S/F: Permet de choisir la vitesse lente ou rapide de
l’effet Rotary. Cette fonction n’est disponible que si le type
“Rotary” est assigné au MFX (voyez p. 93).
UsrPrgUp: Sélectionne le programme utilisateur suivant (par
exemple, “20” si “19” est actif).
UsrPrgDw: Sélectionne le programme utilisateur précédent
(par exemple, “1” si “199” est actif).
Start/Stop: Lance et arrête la reproduction de l’arrangeur ou
de morceau. Même fonction que le bouton [START÷STOP].
Bass Inv: Active et coupe la fonction Bass Inversion (voyez
p. 86).
Punch I/O: Le commutateur au pied peut activer et arrêter
l’enregistrement Punch in/out (voyez p. 83).
■
Port Main
(Off, 1~127, Réglage par défaut: 0ff) Le portamento est un
effet qui produit un glissement de hauteur progressif entre les
notes que vous jouez. Plus la valeur est élevée, plus il faut longtemps pour que la hauteur de la nouvelle note soit atteinte.
Ce paramètre permet de régler deux paramètres simultanément pour la partie Main (il y a un autre paramètre pour la
partie Dual): le commutateur de portamento et le temps de
portamento. Quand vous choisissez une valeur comprise entre
“1” et “127”, le commutateur de portamento est automatiquement activé: “On” (127).
■
Port Dual
(Off, 1~127, Réglage par défaut: 0ff) Ce paramètre permet de
régler deux paramètres simultanément pour la partie Dual: le
commutateur de portamento et le temps de portamento. Voyez
l’explication ci-dessus.
■
Mode Main
Mode Main
(Mon/Pol, Réglage par défaut: Pol) Ce paramètre permet de
préciser si la partie Main doit être polyphonique (“Pol”) ou
monophonique (“Mon”). “Polyphonique” permet de jouer des
accords tandis que “monophonique” ne permet de jouer qu’une
seule note à la fois. Cela peut être utile pour le violon, des bois
ou d’autres sons semblables car l’instrument acoustique correspondant ne produit pas d’accords. Si vous enfoncez deux touches après avoir choisi “Mon”, seule la note jouée en dernier
lieu résonne (la simultanéité du jeu n’est jamais parfaite).
■
Mode Dual
(Mon/Pol, Réglage par défaut: Pol) Ce paramètre permet de
préciser si la partie Dual doit être polyphonique (“Pol”) ou
monophonique (“Mon”). Lisez aussi ci-dessus.
98
Page 99

Paramètres METRONOM
■
Metro TS° (métrique du métronome)
(1/4~9/4, 1/8~9/8, Réglage par défaut: 4/4) Ce paramètre sert à
régler la métrique du métronome (le nombre de temps par
mesure). Songez que ce réglage change chaque fois que vous
choisissez un style musical d’une métrique différente. Voyez
p. 72 la manière d’utiliser le métronome. Vous pouvez aussi
activer ce paramètre en maintenant enfoncé le bouton
[METRONOME].
■
Metro Vol° (volume du métronome)
(0~127, Réglage par défaut: 100) Servez-vous de ce paramètre
s’il vous semble que le son du métronome est trop fort/faible
par rapport à la musique. Le réglage par défaut convient dans
la plupart des cas.
■
Décompte
(On/Off, Réglage par défaut: Off) Ce paramètre sert à activer/
couper la fonction de décompte pour l’enregistrement normal
et Punch I/O (voyez p. 83). Quand ce paramètre est sur “On”, le
métronome décompte deux mesures (8 temps pour un morceau d’une métrique en 4/4).
Paramètres OCTAVE
■
MAIN Oct*, DUAL Oct*, SPLIT Oct* (transposition par octave)
(–4~0~4, Réglage par défaut: 0) Ces trois paramètres vous permettent de changer l’octave de la partie en question (Main,
Split ou Dual) d’un maximum de quatre octaves vers le haut ou
vers le bas. Cette fonction peut être utile pour les morceaux
Techno/Dance, quand vous voulez un son de piano qui joue
dans deux octaves différentes.
Pour ce faire, assignez deux sons de piano différents (ou un
même son) aux parties Main et Dual, activez le bouton [DUAL]
et réglez DUAL Octv sur “–1” (ou “1”).
Remarque: Si un kit de batterie est assigné à la partie Main, la
hauteur des sons de batterie/de percussion n’est pas transposée.
Les touches sont simplement assignées à d’autres sons de batterie/
de percussion (elles sont “décalées”). Exemple: si vous réglez “MAIN
Oct” sur “–1”, la touche C3 pilote la grosse caisse (au lieu de la touche C2) et les autres sons sont disponibles à gauche de la touche
C3.
Paramètres VOLUME
■
Main Vol*, Dual Vol*, SpltVol*: Volume
Main Vol
(0~127, Réglage par défaut: 127 Main/110 Dual/100 Split) Ces
trois paramètres permettent de régler respectivement le
volume des parties Main, Dual et Split. Notez que les réglages
effectués ici n’ont aucun effet si vous avez utilisé BALANCE
[ACCOMP] pour régler au maximum le volume des parties de
l’arrangeur/du morceau.
Remarque: Vous pouvez aussi régler le volume de la partie Dual en
maintenant [DUAL] enfoncé tout en appuyant sur [ACCOMP] ou
[KEYBOARD]. Cette méthode s’applique aussi à la partie Split, sauf
que dans ce cas, vous maintenez [SPLIT] enfoncé.
■
Auto Bass*: statut et volume
(OFF, 0~127, Réglage par défaut: OFF) Quand la partie Split est
active, ce paramètre permet de régler le volume de la partie
Auto Bass (qui est alors activée). Cette partie sonne des notes
de basse monophoniques en se basant sur les accords que vous
jouez. Si la fonction Bass Inversion (voyez p. 86) est coupée, la
partie Auto Bass produit les toniques (fondamentales) des
accords que vous jouez de la main gauche (avec la partie Split).
La partie Auto Bass peut aussi être ajoutée à la partie EP Chord
(voyez ci-dessous); elle obéit alors aux mêmes règles que cette
partie. Vous pouvez régler le volume et le statut d’Auto Bass
indépendamment pour “l’utilisation Split” et “l’utilisation EP
Chord”.
Dans les deux cas, choisissez off si vous n’avez pas besoin de
la partie Auto Bass.
■
AccDrums*, AccBass*, Accomp1*~Accomp6*: Volume
(0~127, Réglage par défaut: 100 AccDrums/100 AccBass/
100 Accomp1~6) Ces trois paramètres permettent de régler le
volume des trois sections d’un style musical: la partie de batterie, de basse et celles d’accompagnement (1~6). Vous pouvez
recourir à ces paramètres si le “mix” original du style musical en
question ne vous semble pas parfait.
EXR-40 OR
■
Song1~Song16: Volume
(–64~0~63) Ces paramètres de volume s’appliquent aux pistes
correspondantes du morceau actuellement reproduit. Dans la
majorité des cas, vous souhaiterez sans doute changer le
volume de la piste 4 (mélodie), 2 (basse) ou 10 (batterie). Notez
que pour les autres pistes (1, 5~9, 11~16), il est possible qu’il
vous faille plus longtemps pour localiser la piste à corriger, car
l’affectation des parties est plus ou moins libre. Retenez cependant que tous les fichiers Standard MIDI n’exploitent pas les 16
pistes disponibles (il se peut donc très bien qu’un changement
de volume de la piste 16, par exemple, ne produise aucun effet
audible).
Le réglage de ces paramètres est relatif et défini par rapport au
volume des parties du morceau: la valeur spécifiée ici est ainsi
soustraite (si elle est négative) ou ajoutée (si elle est positive)
au volume de ces parties. “127” correspond à la limite maximum (définie par la norme MIDI). Il peut arriver que vous ne
puissiez pas augmenter le volume d’une piste (car il est déjà sur
“127”). Si le volume d’une piste vous semble parfait, choisissez
“0”.
N’oubliez pas que les changements effectués ici doivent impé-
rativement être sauvegardés avec les données de morceau.
Ils ne sont pas sauvegardés dans un programme utilisateur.
Pour savoir comment sauvegarder les morceaux, voyez pages
106 et 111.
99
Page 100

r
EXR-40 OR
Paramètres ARR SET
■
ChordInt* (Arranger Chord Intelligence)
(Md1, Md2, Off, Réglage par défaut: Md1) Ce paramètre permet de choisir le système Chord Intelligence de l’EXR-40 OR: le
système Roland (“Md1”, plus adapté au contexte pédagogique,
voyez page 126) ou le système “Md2”, qui fonctionne comme
suit:
Accords majeurs Appuyez sur la touche correspondant à la fondamentale de
l’accord.
Accords mineurs Fondamentale + n’importe quelle touche noire à gauche de
la fondamentale.
Accords de
septième
Accords de
septième mineure
Dans les deux cas, il suffit donc d’enfoncer quelques touches
pour produire des accords complets. Si vous avez l’habitude de
jouer des accords complets, vous pouvez couper cette fonction.
■
ArrHold* (Arranger Hold)
(On/Off, Réglage par défaut: On) La fonction Arranger Hold
mémorise les accords joués de la main gauche et continue à
produire les notes correspondantes jusqu’à ce que vous jouiez
un autre accord.
Si vous coupez la fonction ArrHold, les parties mélodiques de
l’arrangeur (A.Bass, Accomp) s’arrêtent de jouer dès que vous
relâchez la ou les touche(s) dans la moitié gauche du clavier, ce
qui ne vous laisse plus que l’accompagnement de batterie.
Pour vous simplifier la vie, cette fonction est activée à la mise
sous tension de l’EXR-40 OR.
■
EP Chord° (cordes stéréo main gauche + basse)
(On/Off, Réglage par défaut: On) La fonction EP Chord (“Educational Purposes”) active un son de cordes stéréo et un son de
basse monophonique (à condition qu’Auto Bass soit réglé sur
“on”) quand (a) l’icône est affichée et (b) l’arrangeur est à l’arrêt. Cela vous permet de jouer des accords (et une
ligne de basse) de la main gauche en mode Arrangeur – sans
utiliser la fonction d’accompagnement de l’EXR-40 OR.
Par contre, si vous choisissez “Off”, la moitié gauche du clavier
est coupée si les conditions (a) et (b) sont remplies et si l’icône
SPLIT
n’est pas affichée.
Fondamentale + n’importe quelle touche blanche à gauche
de la fondamentale.
Fondamentale + n’importe quelle touche noire à sa gauche
+ n’importe quelle touche blanche à sa gauche.
ARRANGER
■
Bass Inv*
(On/Off) Cette fonction permet de changer la manière dont
l’arrangeur interprète les accords que vous jouez. Voyez p. 86.
■
MI* (type d’harmonie Melody Intelligence)
(Réglage par défaut: Traditnl) Ce paramètre permet d’assigner
le type d’harmonie voulu à la fonction Melody Intelligence.
Remarque: Vous pouvez aussi choisir ce paramètre en maintenant
enfoncé le bouton [MELODY¥INTELLIGENCE]. Voyez p. 85.
■
InEnCHRD* (reconnaissance d’accords pour les motifs Intro/
Ending)
(On/Off, Réglage par défaut: Off) Ce paramètre permet de
désactiver la reconnaissance d’accords pendant le jeu du motif
d’introduction ou de finale du style musical choisi en mode
PIANIST. Contrairement aux motifs “normaux” (Original, Variation), les motifs Intro et Ending contiennent généralement des
changements d’accords. Si vous choisissez “Off”, la reconnaissance d’accords est active pendant le jeu de l’introduction/
du motif de fin. Dans ce cas, il se peut que l’accompagnement
change de tonalité. Pour éviter ces changements, choisissez
“On”.
■
Sync Stop* (système utilisé pour les arrêts automatiques)
(Int/Nor, Réglage par défaut: Nor) Ce paramètre permet de
spécifier le mode de fonctionnement de SYNC STOP (voyez
p. 74). Sélectionnez “Nor” pour que l’arrangeur s’arrête dès que
vous relâchez les touches dans la zone de reconnaissance
d’accords (côté gauche du clavier en mode ARRANGER et clavier entier en mode PIANIST). Lorsque vous jouez un nouvel
accord, l’arrangeur redémarre au début du style sélectionné.
Si vous sélectionnez “Int”, activez la fonction SYNC STOP (voyez
p. 74) puis relâchez toutes les touches dans la zone de reconnaissance d’accords; l’arrangeur s’arrête au début de la mesure
suivante et toutes les notes jouées à ce moment continuent à
résonner (à condition que la fonction “ArrHold” soit activée).
Lorsque vous jouez un nouvel accord, l’arrangeur redémarre à
l’endroit où il s’était arrêté quand vous avez relâché toutes les
touches de la zone de reconnaissance d’accords.
Remarque: Vous pouvez aussi choisir ce paramètre en maintenant
le bouton [SYNC¥START/STOP] enfoncé.
Paramètres EFFECTS
■
Rev* (Type de réverbération)
(Réglage par défaut: Hall 2) Utilisez ce paramètre pour choisir
le type de réverbération le mieux adapté à vos besoins ou pour
désactiver (“Off”) le processeur Reverb. Voyez p. 94.
■
Chr* (type de chorus)
(Réglage par défaut: Chorus 3) Ce paramètre permet de spécifier le type d’effet Chorus ou de désactiver (“Off”) le processeur
Chorus. Voyez p. 95.
■
MFX* (type MFX)
(Réglage par défaut: Rotary) Ce paramètre permet de choisir le
type MFX voulu et de désactiver le processeur MFX. Voyez p. 93
pour en savoir plus sur le MFX. “Off” signifie que le MFX est
coupé.
Remarque: Vous pouvez en outre lier le choix du type MFX au
choix du son pour la partie Main.
■
Tone MFX°
(On/Off, Réglage par défaut: On) Ce paramètre permet de lier le
choix d’un type MFX au son assigné à la partie Main. Vous pouvez ainsi choisir un effet Distortion/Overdrive pour un son de
guitare rock, un effet Rotary pour un son d’orgue, etc.
■
Rev MAIN*
(0~127, Réglage par défaut: 100) Ce paramètre règle le niveau
d’envoi de réverb (Reverb Send) pour la partie Main (c.-à-d.
combien de réverb est ajoutée aux notes Main). Choisissez “0” si
vous ne voulez pas traiter la partie Main avec cet effet.
■
Chr MAIN*
(0~127, Réglage par défaut: 0) Ce paramètre règle le niveau
d’envoi de chorus (Chorus Send) pour la partie Main (c.-à-d.
combien de chorus est ajouté aux notes Main). Si vous voulez
traiter cette partie avec l’effet Chorus, veillez à choisir une
valeur autre que “0”. Ce paramètre est uniquement utilisé
quand MFX est réglé sur “Off”.
■
Pan MAIN*
(Rnd, R63~0~L63, Réglage par défaut: 0) Ce paramètre détermine le panoramique de la partie Main (sa position entre les
enceintes gauche et droite). Pour “Rnd”, la position stéréo
change de manière aléatoire à chaque note jouée. Les valeurs
100
 Loading...