

Page 1

Installation Instructions
PHOTOSWITCHr Bulletin 45LPT Optical Label Sensor
45LPT-1LEB1-P4
IMPORTANT: SAVE THESE INSTRUCTIONS FOR FUTURE USE.
Description
The 45LPT is an optical label sensor designed exclusively for
the detection of standard or opaque labels on a high speed
web. The 45LPT provides a solution for the packaging
industry. Applications include label counting, web detection,
“double sheet” detection, and mark detection on a translucent
film.
Using transmitted beam technology the 45LPT senses the
leading edge of a label sending a discrete NPN or PNP output
within 50 microseconds which is compatible with most control
circuits found in factory automation systems. Other features
include “One Touch” teachable capabilities using either the
teach button on the sensor or remotely with a pushbutton
switch. For easy installation and versatility this sensor is
equipped with a 4-pin pico connector.
The 45LPT label sensor maintains all ratings that are
necessary for all applicable industries today: IP65, CE, cULus.
Features
S “One Touch” local and remote teach capability
S 10 to 30V DC operation
S Fast 50µsec response time
S NPN/PNP output
S User interface lockout feature
S IP65 Housing
S Industrial anodized aluminum housing
S cULus listed and CE marked for all applicable directives
Specifications
Approvals UL and cUL and CE marked for all applicable
Sensing Beam Nonpulsed IR
Sensing Gap 3mm (0.12in)
Supply Voltage 10-30V DC
Current Consumption 40mA maximum
Circuitry Protection Reverse polarity, transient, overload, short circuit
Output Configuration NPN (current sinking) or PNP (current sourcing)
User Configuration Local and remote teach
Output Rating 100mA (NPN or PNP)
Response Time 50 microseconds
Adjustments Sensitivity (teach button)
Housing Material Anodized aluminum
Environmental Ratings IP65
Connections 4Ćpin DC pico (M8) connector
Operating Temperature
Leakage Current 12V Supply: 0.78mA @ 10mA load, 6.9mA @
Power-on Delay 350ms
directives
protection
Light Operate: Normally open circuits that conduct
with target present
Dark Operate: Normally closed circuits that
conduct with target absent
-20_C to +60_C (-4_F to 140_F)
100mA load
24V Supply: 0.30mA @ 10mA load, 3.0mA @
100mA load
Page 2
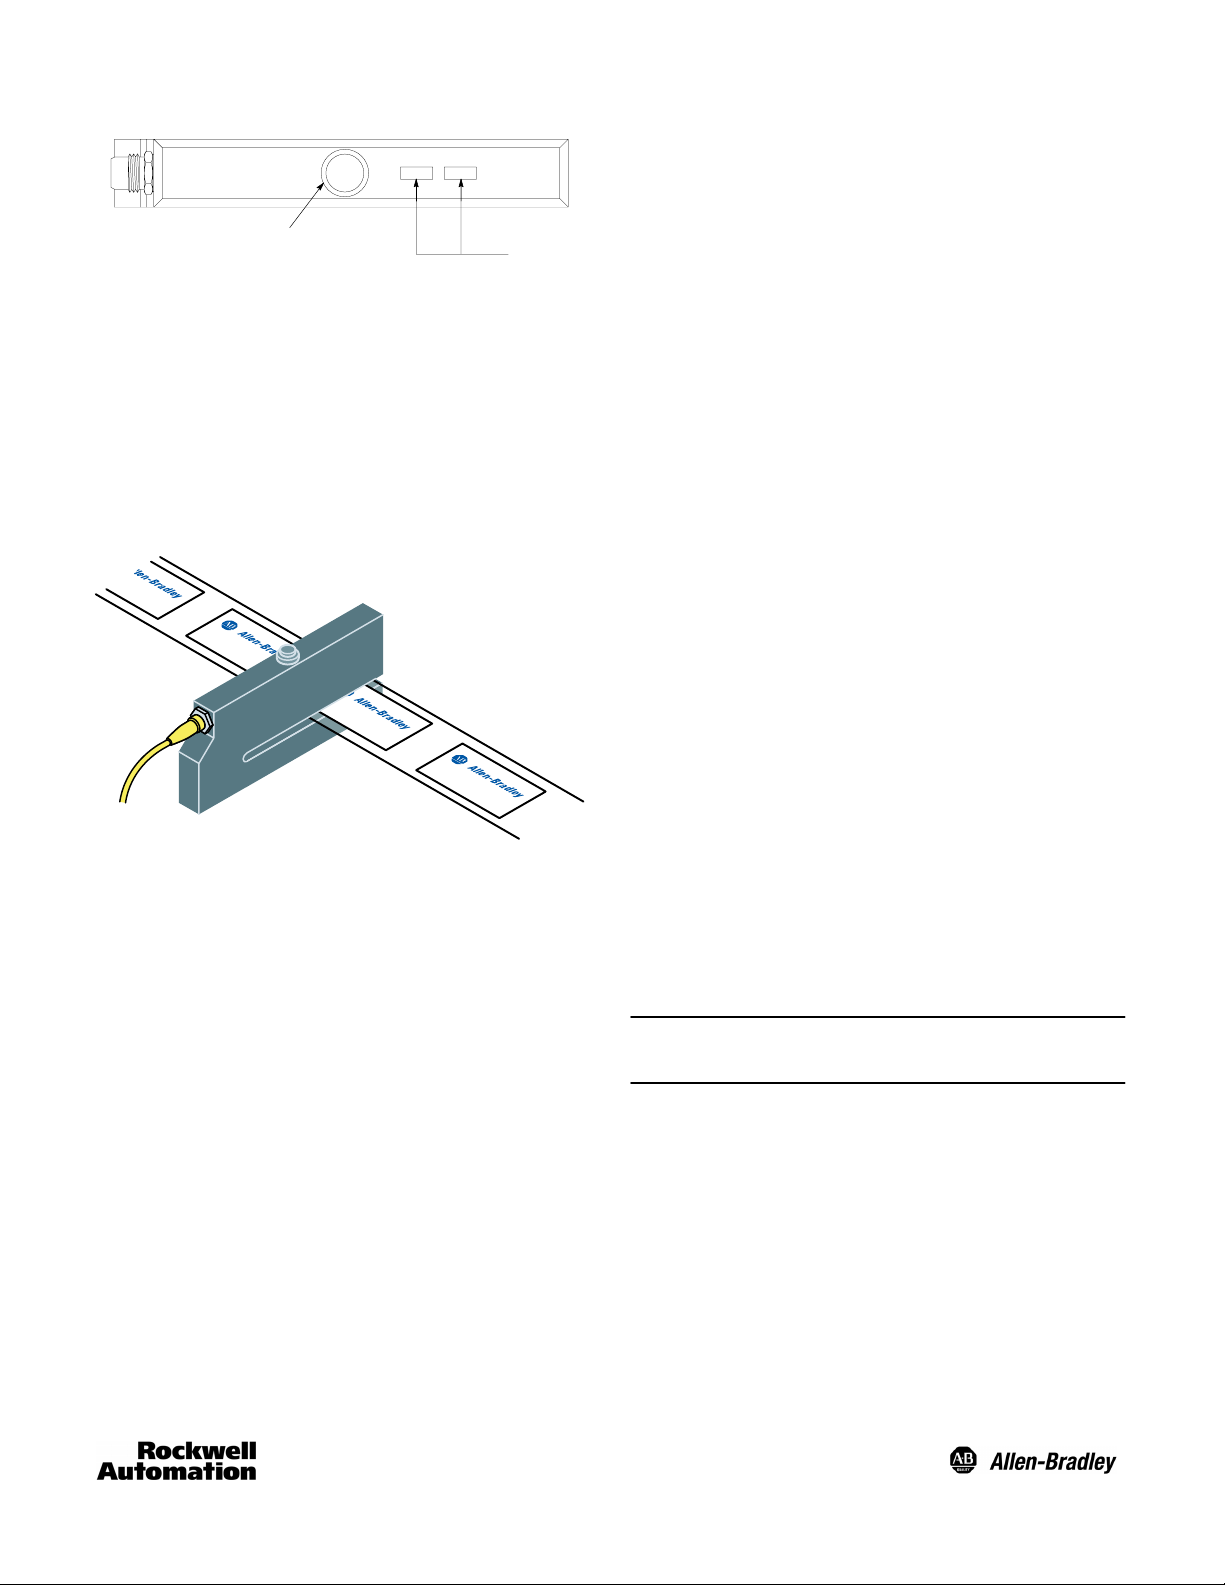
User Interface
Test your setup by ensuring the green LED on the user
interface blinks when the label is inserted and removed.
To lock out user interface hold down teach button for six
seconds until red LED blinks once.
Teach Button
LEDs
Red LED = Interface Lockout
Green LED = Power ON / Free light path
Red LED blinks = Standard label teach
Green LED blinks = Fine teach – translucent label teach
Red & Green LED blink = Short circuit mode or label too
translucent or web too opaque
Teaching Sensor and Setup
Initial setup includes mounting the sensor securely and then
providing power through a 4-pin pico cordset. The initial
factory settings have the threshold on the sensor preset so
that most opaque labels may be sensed on a translucent web.
Release button and notice that both red and green LEDs are
illuminated on the user interface.
To unlock user interface hold down teach button for six
seconds until red LED turns off.
Release button and notice that only green LED is illuminated.
For remote teach follow the instructions in the wiring section
using a momentary pushbutton switch.
Teaching Translucent Labels:
To teach the sensor insert the material to be sensed into the
fork so that it enters the beam path.
Position the material so that the translucent web is in the
beam path in the fork.
Press and release the teach button twice. The green LED on
the user interface will begin to blink.
While the green LED is blinking quickly insert and remove the
translucent label into and out of the sensors beam path until
the green LED stops blinking.
Test your setup by ensuring the green LED on the user
interface blinks when the label is inserted and removed.
To lock out user interface hold down teach button for six
seconds until red LED blinks once.
Teaching Most Opaque Labels (on translucent web):
To teach the sensor insert the material to be sensed into the
fork so that it enters the beam path.
Position the material so that the translucent web is in the
beam path in the fork.
Press and release the teach button once. The red LED on the
user interface will begin to blink.
While the red LED is blinking quickly insert and remove the
opaque label into and out of the sensors beam path until the
red LED stops blinking.
Release button and notice that both red and green LEDs are
illuminated on the user interface.
To unlock user interface hold down teach button for six
seconds until red LED turns off.
Release button and notice that only green LED is illuminated.
For remote teach follow the instructions in the wiring section
using a momentary pushbutton switch.
Important:For Label detection use Dark operate.
For Web detection use Light operate.
2
Page 3

80 (3.15)
12
(0.47)
(0.55)
(0.23)
Wiring Diagrams
NPN (Light Operate)
3
2
4
1
Teach Button
4.2 (0.16)
Dia.
14
6
23
(0.90)
1 (0.03)
5 (0.19)
15
(0.59)
Optical Axis
60 (2.36)
LEDs
22.5
(0.88)
12
(0.47)
6
(0.23)
3
(0.11)
37.5
(1.47)
PNP (Light Operate)
Blue
White
Black
Brown
Load
+
Ê
–
+
–
Brown
1
White
2
Black
4
3
Load
Blue
+
Ê
–
Pico
24
13
NPN (Dark Operate)
Brown
1
White
2
Black
4
3
Ê Remote teach = Tie White Wire to (+) positive terminal.
Ë Remote teach = Tie White Wire to (–) negative terminal.
Note: If remote teach (white wire) is not used, tie it to (–) negative terminal.
Note: In the event of power failure, the sensor remembers the last threshold taught-in.
Load
Blue
PNP (Dark Operate)
+
Ë
–
+
–
Accessories
Description Catalog Number
2m (6.5ft) pico QD Cordset 889P-F4AB-2
3
Blue
3
White
2
Black
4
1
Load
Brown
+
Ë
–
Pico
24
13
Page 4

PHOTOSWITCHR is a registered trademark of
Rockwell Automation.
4
Publication 75009–194–01(A)
January 2003
Printed in USA
 Loading...