

Rinnai rhfe-553ft Customer's Operating Information And Installation Instructions
Rinnai
RHFE - 553FT
CUSTOMER’S OPERATING
INFORMATION
E
I
I
0
INSTALLATION INSTRUCTIONS
This appliance shall be installed in accordance with:
Manufacturer’s Installation Instructions
Local Gas Fitting Regulations
Municipal Building Codes
A.G.A./ S.A.N.Z. Installation Code for Gas Burning Equipment
Any other relevant Statutory Regulation
This appliance must only be installed, serviced and removed by an
Authorised Person.
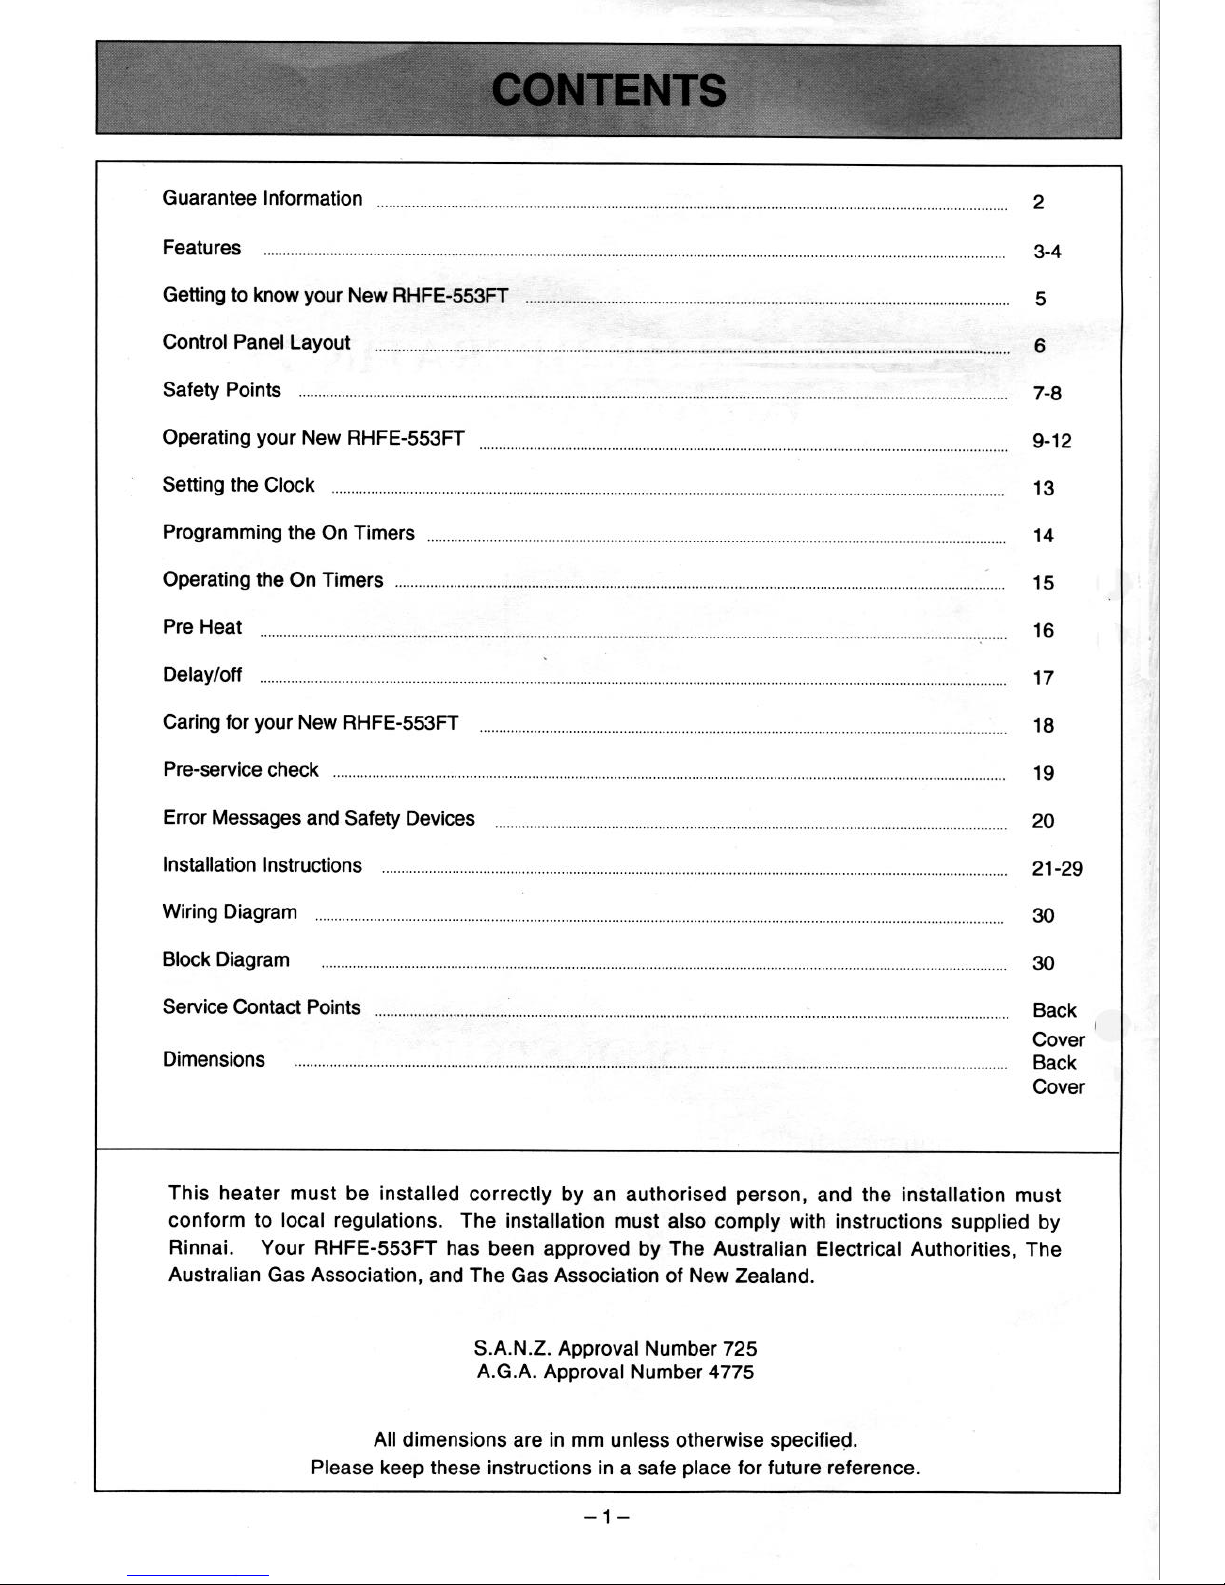
Guarantee Information
. . . . . . . . . . . . . . . . . . . . . . . . . . . . . . . .
. . . . . . . . . . . . . . . . . . . . . . . . . . . . . . . . . . . . . . . .
2
Features
. . . . . . . . . . . . . . . . . . . . . . . . . . . . . . . . . . . . . . . . . . . . . . . . . . . . . . . . . . . . . . . .
3-4
Getting
to know your New RHFE-553FT
. . . . . . . . . . . . . . . . . . . . . . . . . . . . . . . . . . . . . . . . . . . . . . . . . . . . . . . . . . . . . . . . . . . . . . . . . . . . . . . . . . . . . . . . . . . . . . . . . . . . . . . . . . . . . . . . . . . . . . . . ....
5
Control Panel Layout
. . . . . . . . . . . . . . . . . . . . . . . . . . . . . . . . . . . . . . . . . . . . . . . . . . . . . . . . . . . . . . . . . . . . . . . . . . . . . . . . . . . . . . . . . . . . . . . . . . . . . . . . . . . . . . . . . . . . . . . . . . ..,.... . ............. .. ..,.. .,,*.* .......
6
Safety
Points . . . . . . . . . . . . . . . . . . . . . . . . . . . . . . . . . . . . . . . . . . . . . . . . . . . . . . . . . . . . . . . . . . . . . . . . . . . . . . . . . . . . . . . . . . . . . . . . . . . . . . . . . . . . . . . . . . . . . . . . ..............................................................
7-8
Operating your New RHFE-553FT
. . . . . . . . . . . . . . . . . . . . . . . . . . . . . . . . . . . . . . . . . . . . . . . . . . . . . . . . . . . . . . . . . . . . . . . . . . . . . . . . . .
9-12
Setting
the Clock
. . . . . . . . . . . . . . . . . . . . . . . . . . . . . . . . . . . . . . . . . . . . . . . . . . . . . . . . . . . . . . . . . . . . . . . . . . . . . . . . . . . . . . . . . . . . . . . . . . . . . . . . . . . . . . . . . . . . . . . . ....................................................
13
Programming the On Timers
. . . . . . . . . . . . . . . . . . . . . . . . . . . . . . . . . . . . . . . . . . . . . . . . . . . . . . . . . . . . . . . . . . . . . . . . . . . . . . . . . . . . . . . . . . . . . . . . . . . . . . . . . . . . . . . . . . . . . . . . . ...........................
14
Operating
the On
Timers . . . . . . . . . . . . . . . . . . . . . . . . . . . . . . . . . . . . . . . . . . . . . . . . . . . . . . . . . . . . . . . . . . . . . . . . . . . . . . . . . . . . . . . . . . . . . . . . . . . . . . . . . . . . . . . . . . . . . . . . ................................ I....
15
Pre Heat
. . . . . . . . . . . . . . . .
16
Delay/off
. . . . . . . . . . . . . . . . . . . . . . . . . . . . . . . . . . . . . . . . . . . . . . . . . . . . . . . . . . . . . . . . . . . . . . . . : . . . . . . . . . . . . . . . . . . . . . . . . . . . . . . . . . . . . . . . . . . . . . . . . . ......................................................................
17
Caring
for your New ~HFE-~53~
. . . . . . . . . . . . . . . . . . . . . . . . . . . . . . . . . . . . . . . . . . . . . . . . . . . . . . . . . . . . . . . . . . . . . . . . . . . . . . . . . . . . . . . . . . . . . . . . . . . . . . . . . . . . . . . . . . . . . . . . ................
18
Pre-service
check
. . . . . . . . . . . . . . . . . . . . . . . . . . . . . . . . . . . . . . . . . . . . . . . . . . . . . . . . . . . . . . . . . . . . . . . . . . . . . . . . . . . . . . . . . . . . . . . . . . . . . . . . . . . . . . . . . . . . . . . . .....................................................
19
Error Mes=ws
and Safety Devices
. . . . . . . . . . . . . . . . . . . . . . . . . . . . . . . . . . . . . . . . . . . . . . . . . . . . . . . . . . . . . . . . . . . . . . . . . . . . . . . . . . . . . . . . . . . . . . . . . . . . . . . . . . . . . . . . . . . . . . . . ............
20
Installation
Instructions . . . . . . . . . . . . . . . . . . . . . . . . . . . . . . . . . . . . . . . . . . . . . . . . . . . . . . . . . . . . . . . . . . . . . . . . . . . . . . . . . . . . . . . . . . . . . . . . . . . . . . . . . . . . . . . . . . . . . . . . .........................................
21-29
Wiring Diagram
. . . . . . . . . . . . . . . . . . . . . . . . . . . . . . . . . . . . . . . . . . . . . . . . . . . . . . . . . . . . . . . . . . . . . . . . . . . . . . . . . . . . . . . . . . . . . . . . . . . . . . . . . . . . . . . . . . . . . . . . .........................................................
30
Block Diagram
. . . . . . . . . . . . . . . . . . . . . . . . . . . . . . . . . . . . . . . . . . . . . . . . . . . . . . . . . . . . . . . . . . . . . . . . . . . . . . . . . . . . . . . . . . . . . . . . . . . . . . . . . . . . . . . . . . . . . . . .......................................................
30
Service Contact Points
. . . . . . . . . . . . . . . . . . . . . . . . . . . . . . . . . . . . . . . . . . . . . . . . . . . . . . . . . . . . . . . . . . . . . . . . . . . . . . . . . . . . . . . . . . . . .
Back
Cover ’
Dimensions
. . . . . . . . . . . . . . . . . . . . . . . . . . . . . . . . . . . . . . . . . . . . . . . . . . . . . . . . . . . . . . . . . . . . . . . . . . . . . . . . . . . . . . . . . . . . . . . . . . . . . . . . . . . . . . . . . . . . . . . . ...............................................................
Back
Cover
This heater must be installed correctly by an authorised person, and the installation must
conform to local regulations.
The installation must also comply with instructions supplied by
Rinnai.
Your RHFE-553FT has been approved by The Australian Electrical Authorities, The
Australian Gas Association, and The Gas Association of New Zealand.
S.A.N.Z. Approval Number 725
A.G.A. Approval Number 4775
All dimensions are in mm unless otherwise specified.
Please keep these instructions in a safe place for future reference.
-l-
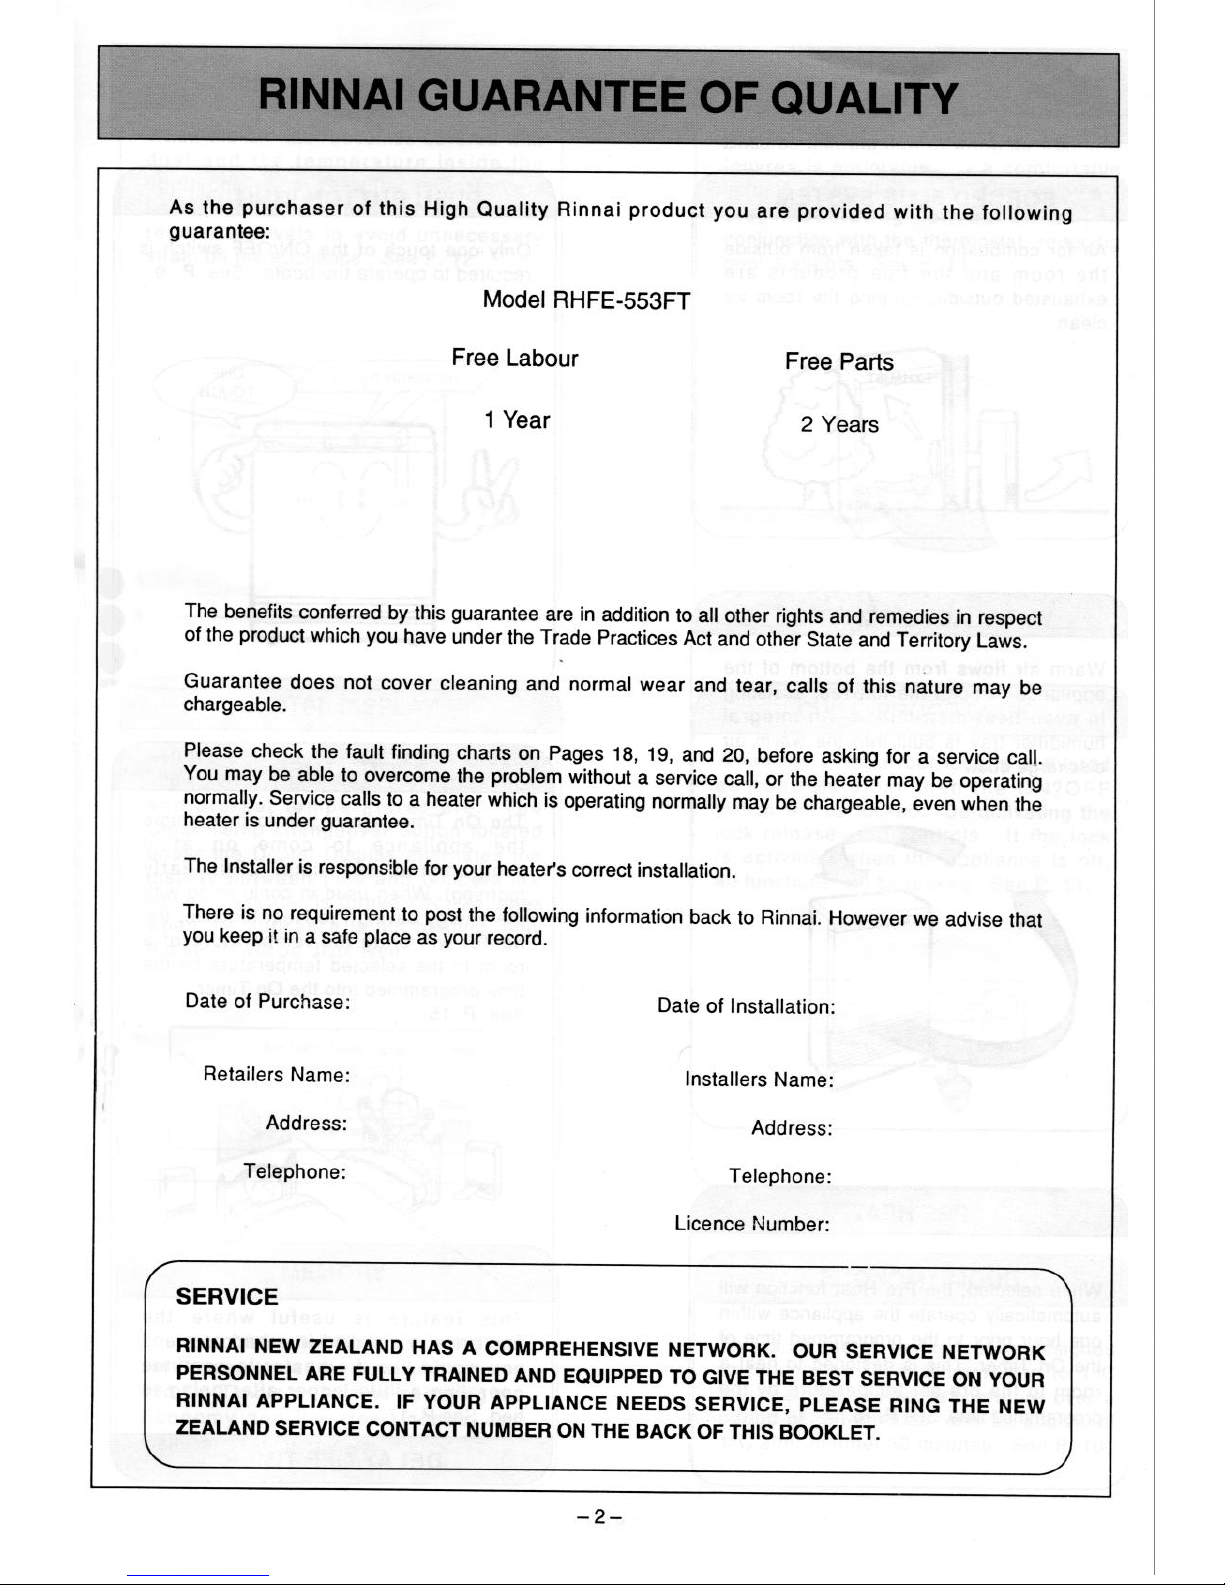
Free Labour
Free Parts
1 Year
2 Years
As the purchaser of this High Quality Rinnai product you are provided with the following
guarantee:
Model RHFE-553FT
The benefits conferred by this guarantee are in addition to all other rights and remedies in respect
of the product which you have under the Trade Practices Act and other State and Territory Laws.
Guarantee does not cover cleaning and normal wear and tear, calls of this nature may be
chargeable.
Please check the fault finding charts on Pages 18, 19, and 20, before asking for a service call.
You may be able to overcome the problem without a service call, or the heater may be operating
normally. Service calls to a heater which is operating normally may be chargeable, even when the
heater is under guarantee.
The Installer is responsible for your heater’s correct installation.
There is no requirement to post the following information back to Rinnai. However we advise that
you keep it in a safe place as your record.
Date of Purchase:
Retailers Name:
Date of Installation:
Installers Name:
Address:
Telephone:
Address:
Telephone:
Licence Number:
--
SERVICE
RINNAI NEW ZEALAND HAS A COMPREHENSIVE NETWORK. OUR SERVICE NETWORK
PERSONNEL ARE FULLY TRAINED AND EQUIPPED TO GIVE THE BEST SERVICE ON YOUR
RINNAI APPLIANCE. IF YOUR APPLIANCE NEEDS SERVICE, PLEASE RING THE NEW
ZEALAND SERVICE CONTACT NUMBER ON THE BACK OF THIS BOOKLET.
-2-
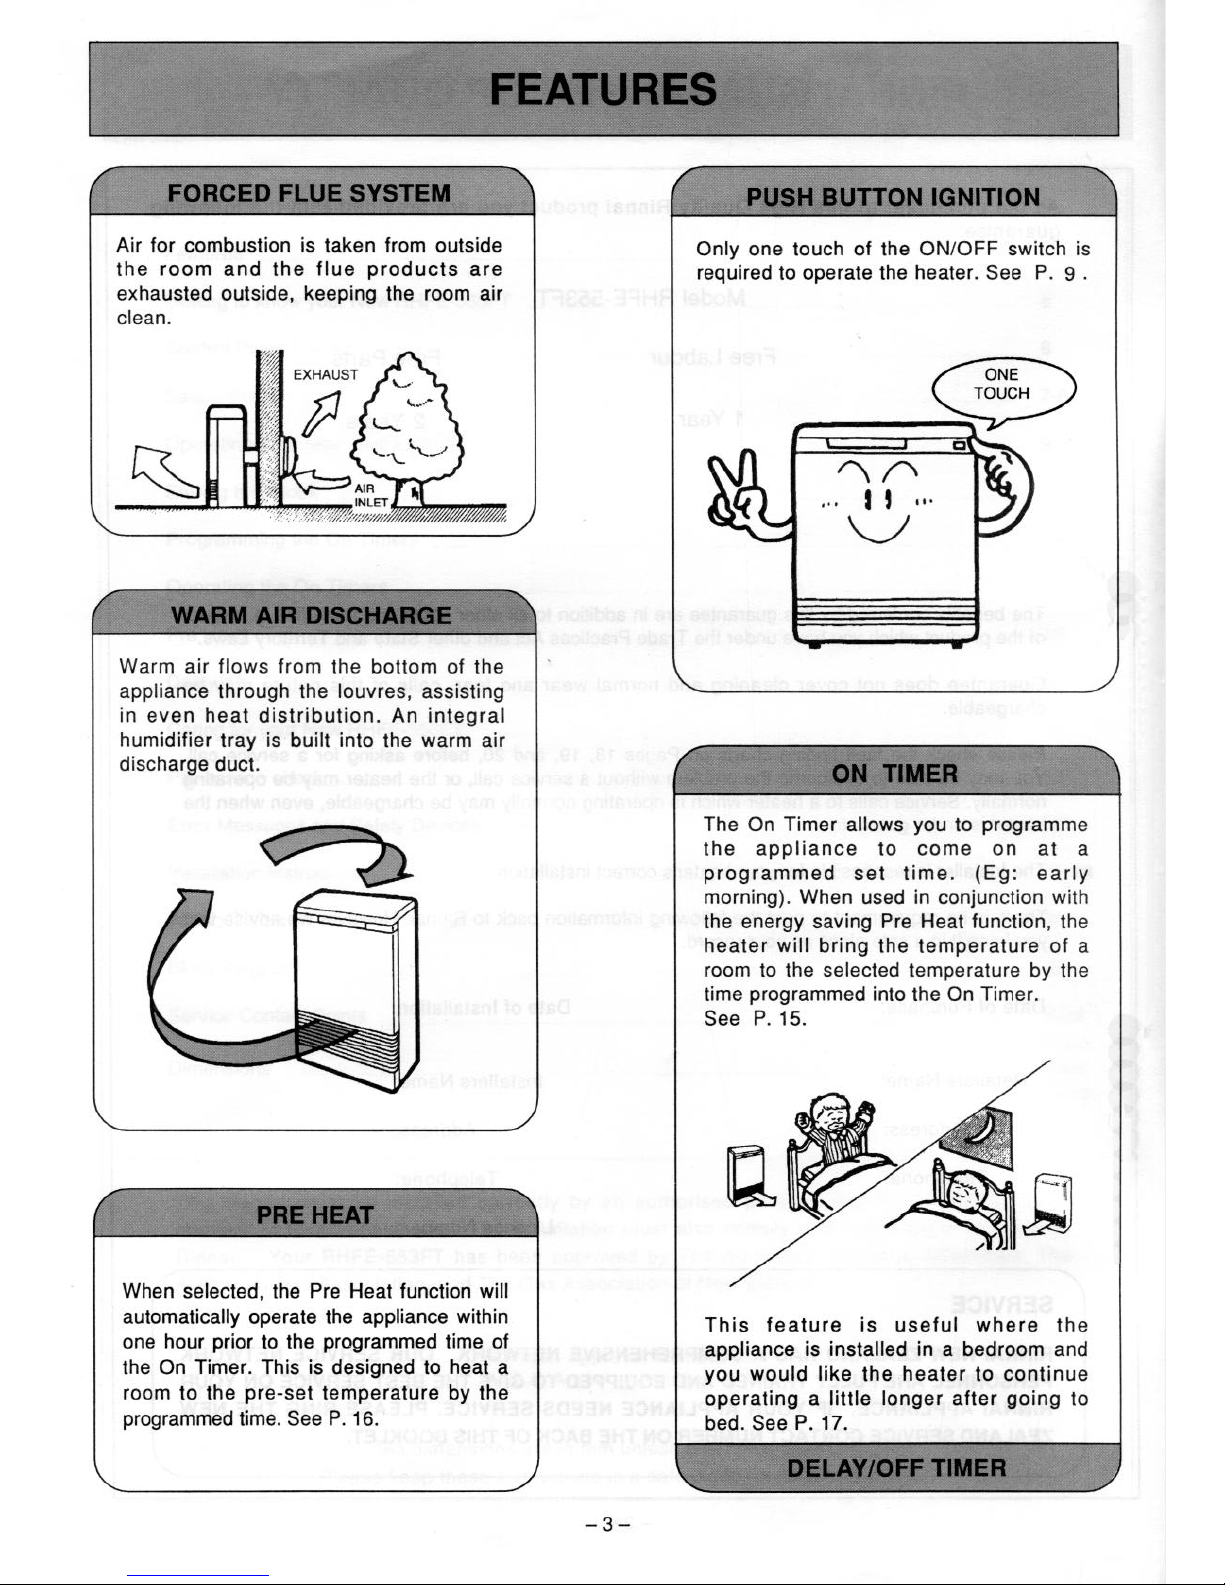
Air for combustion is taken from outside
the room and the flue products are
exhausted outside, keeping the room air
clean.
Warm air flows from the bottom of the
appliance through the louvres, assisting
in even heat distribution. An integral
humidifier tray is built into the warm air
discharge duct.
When selected, the Pre Heat function will
automatically operate the appliance within
one hour prior to the programmed time of
the On Timer. This is designed to heat a
room to the pre-set temperature by the
programmed time. See P. 16.
Only one touch of the ON/OFF switch is
required to operate the heater. See P. 9 .
The On Timer allows you to programme
the appliance to come on at a
programmed set time. (Eg: early
morning). When used in conjunction with
the energy saving Pre Heat function, the
heater will bring the temperature of a
room to the selected temperature by the
time programmed into the On Timer.
See P. 15.
This feature is useful where the
appliance is installed in a bedroom and
you would like the heater to continue
operating a little longer after going to
bed. See P. 17.
3-
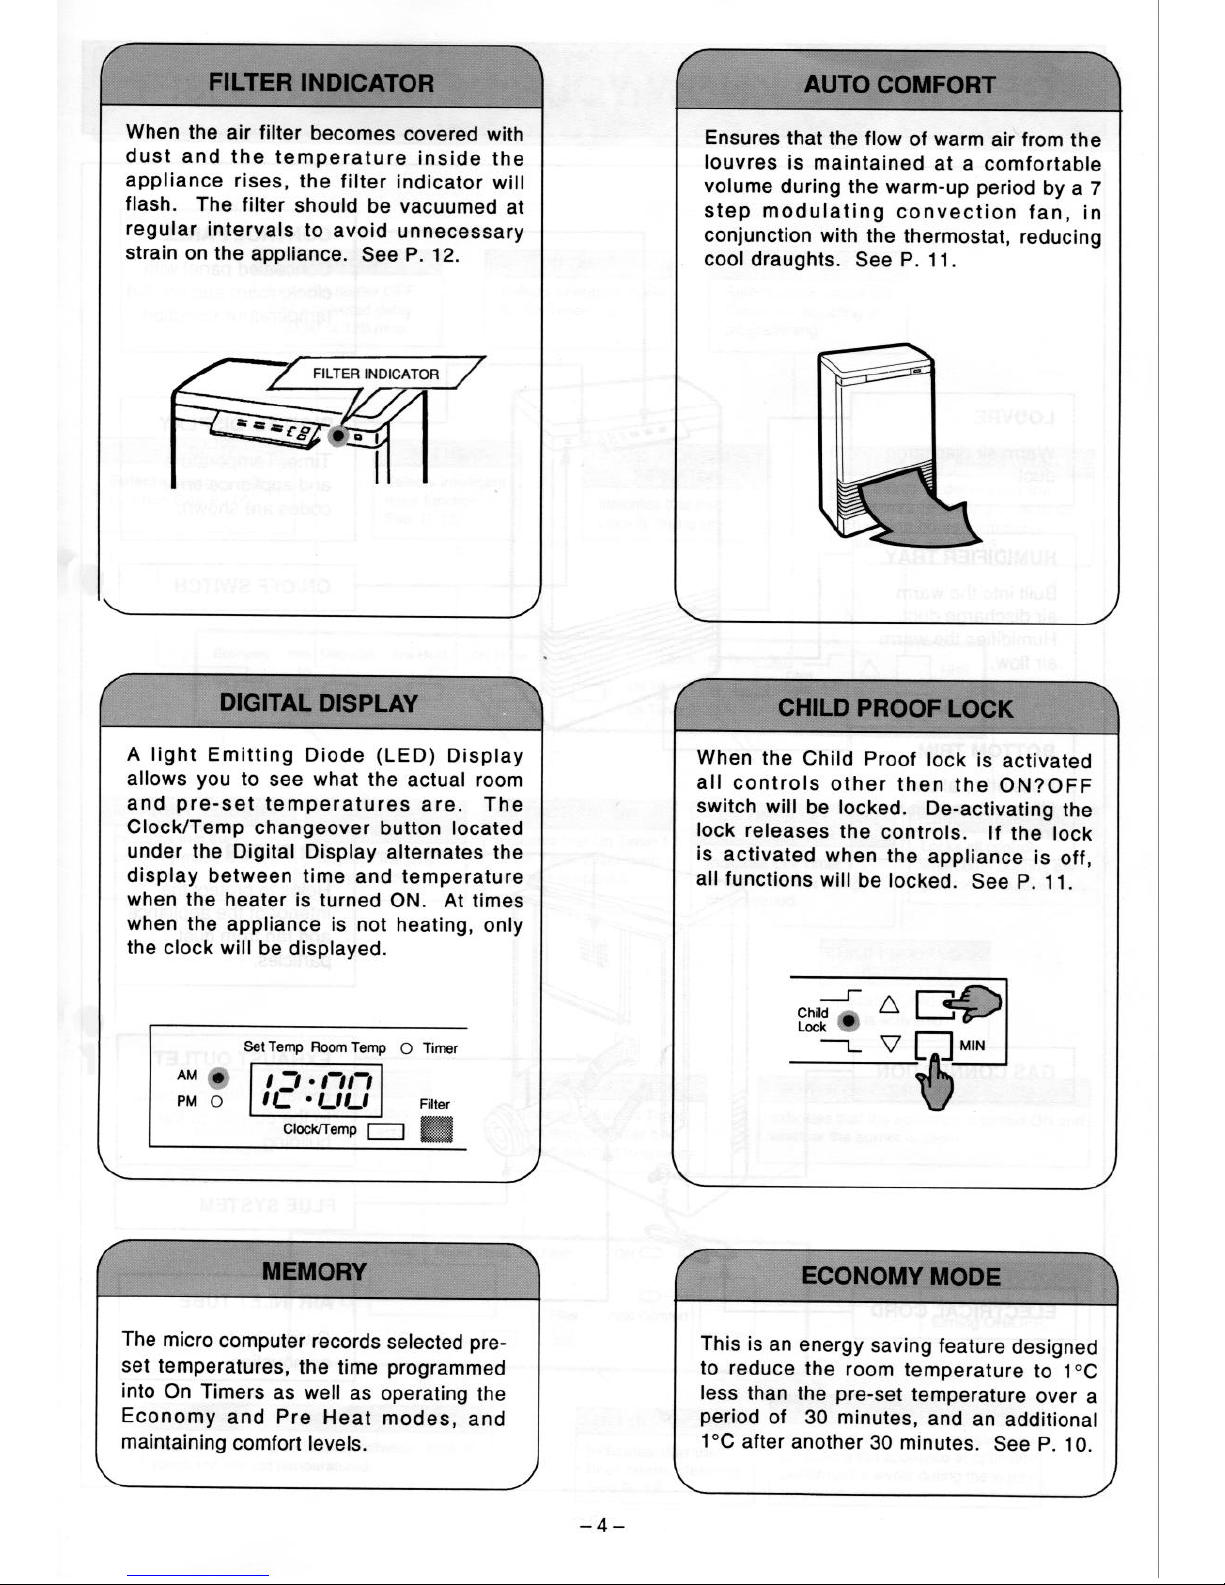
FILTER I~~l~AT~R
When the air filter becomes covered with
dust and the temperature inside the
appliance rises, the filter indicator will
flash. The filter should be vacuumed at
regular intervals to avoid unnecessary
strain on the appliance. See P. 12.
--
A light Emitting Diode (LED) Display
allows you to see what the actual room
and pre-set temperatures are. The
Clock/Temp changeover button located
under the Digital Display alternates the
display between time and temperature
when the heater is turned ON. At times
when the appliance is not heating, only
the clock will be displayed.
Set Temp Room Temp 0 Timer
Clockflemp 0
The micro computer records selected preset temperatures, the time programmed
into On Timers as well as operating the
Economy and Pre Heat modes, and
maintaining comfort levels.
Ensures that the flow of warm air from the
louvres is maintained at a comfortable
volume during the warm-up period by a 7
step modulating convection fan, in
conjunction with the thermostat, reducing
cool draughts. See P. 11.
When the Child Proof lock is activated
all controls other then the ON?OFF
switch will be locked. De-activating the
lock releases the controls. If the lock
is activated when the appliance is off,
all functions will be locked. See P. 11.
This is an energy saving feature designed
to reduce the room temperature to 1°C
less than the preset temperature over a
period of 30 minutes, and an additional
1°C after another 30 minutes. See P. 10.
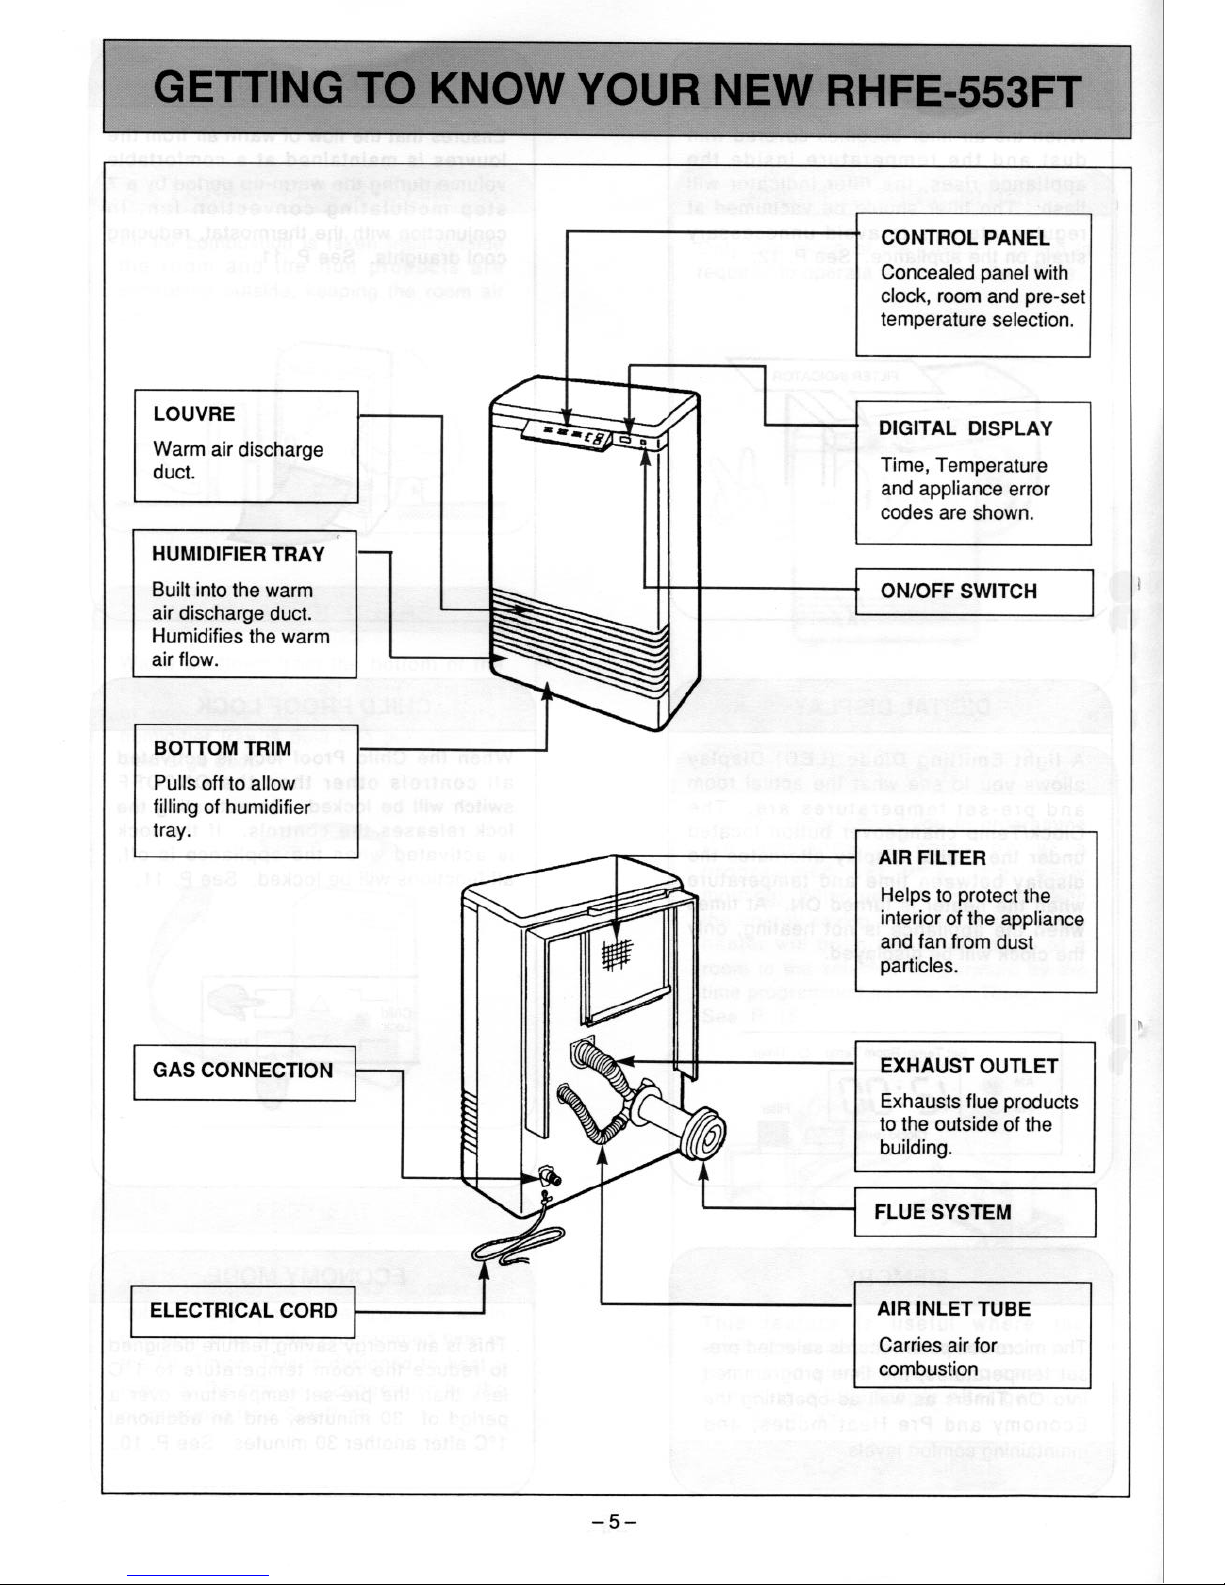
GETTING TO KNOW YOUR NEW RHFE-553FT
Built into the warm
air discharge duct.
Humidifies the warm
I
BOlTOM TRIM
Pulls off to allow
filling of humidifier
tray.
I
I
ON/OFF SWITCH
I
Helps to protect the
interior of the appliance
and fan from dust
Exhausts flue products
to the outside of the
I
AIR INLET TUBE
Carries air for
combustion
-5-
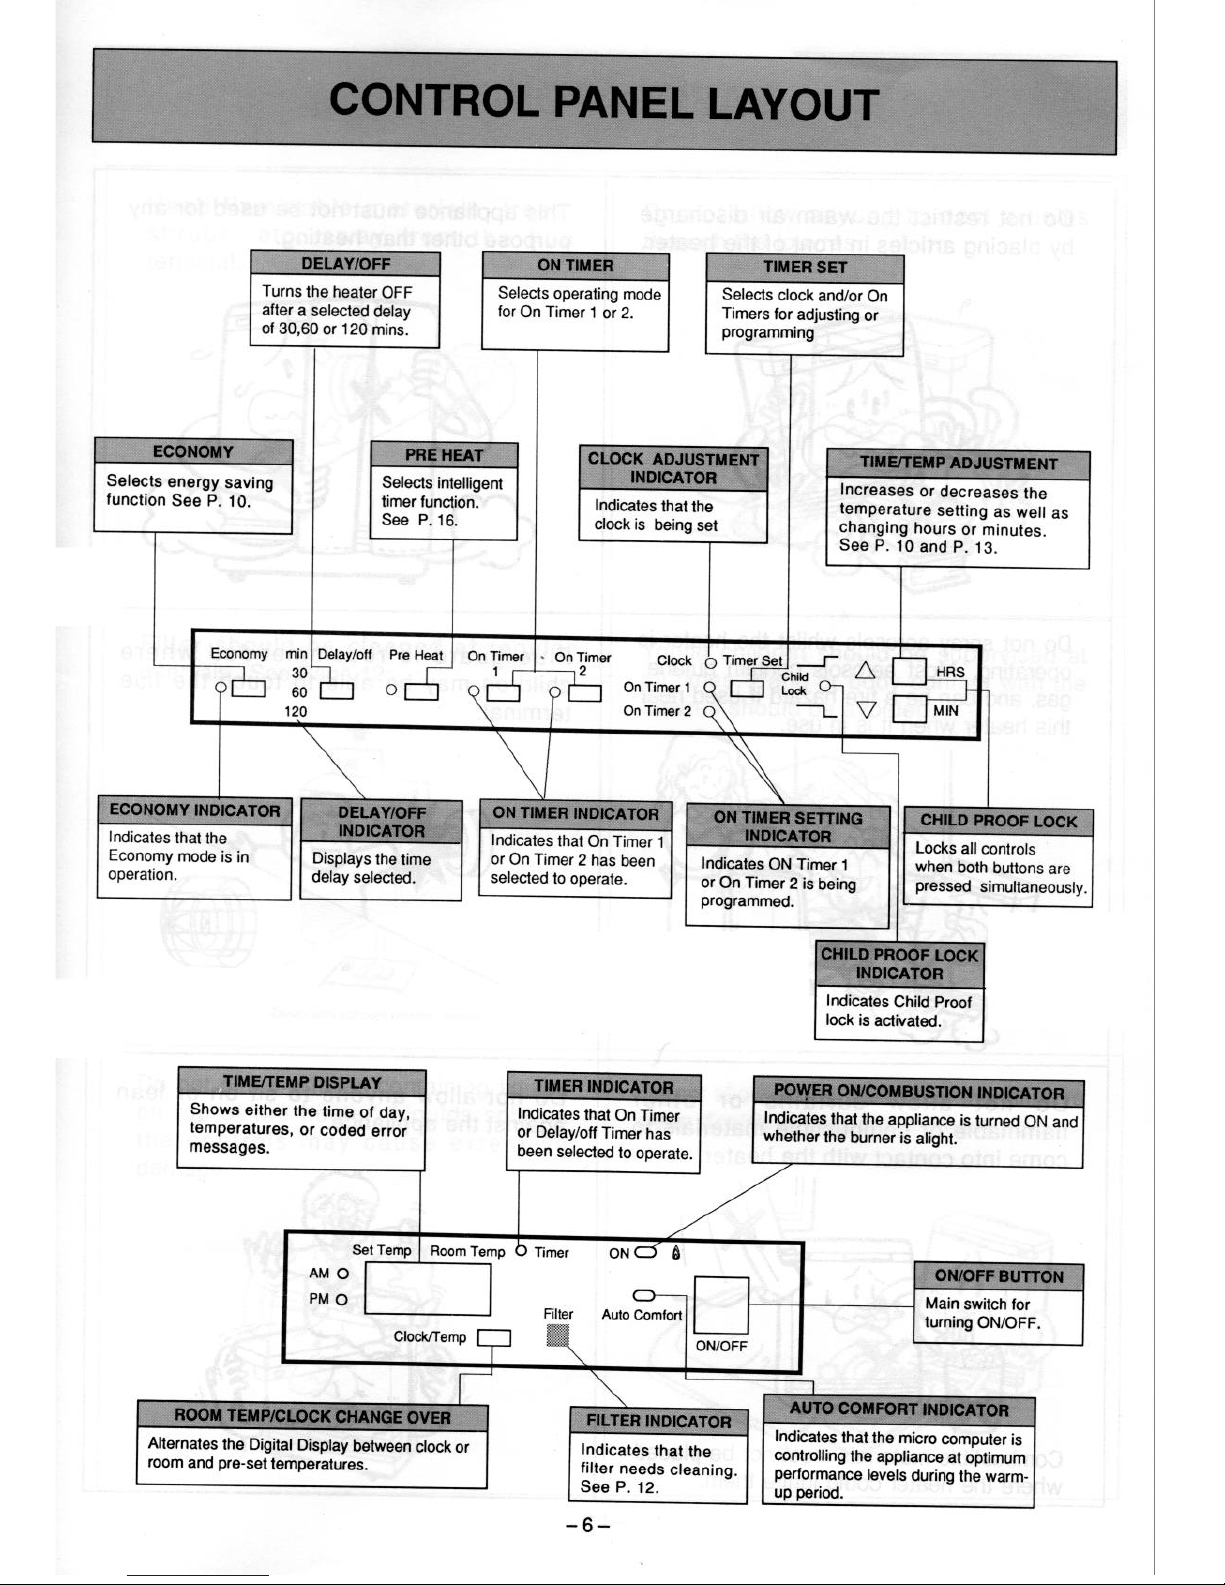
CONTROL PANEL LAYOUT
Turns the heater OFF
after a selected delav
I
of 30,60 or 120
mins
:I (
Timers for adjusting
1
I
1 programming
7-
I
Indicates that the
clock is being set
I
temperature setting as well as
changing hours or minutes.
See P. 10 and P. 13.
conomy mode
is in
Indicates ON Timer
Shows either the time of day,
temperatures, or coded error
messages.
lock is activated.
I
Indicates that the appliance is turned ON and
whether the burner is alight.
6etTemp Room Temp b Timer
ON d 4
AM 0
m.4 0
ClorWTemp
Filter
Auto Comfort
--I-
ON/OFF
e
micro computer I
e appliance at optimum
ormance levels during the warm-
-6-
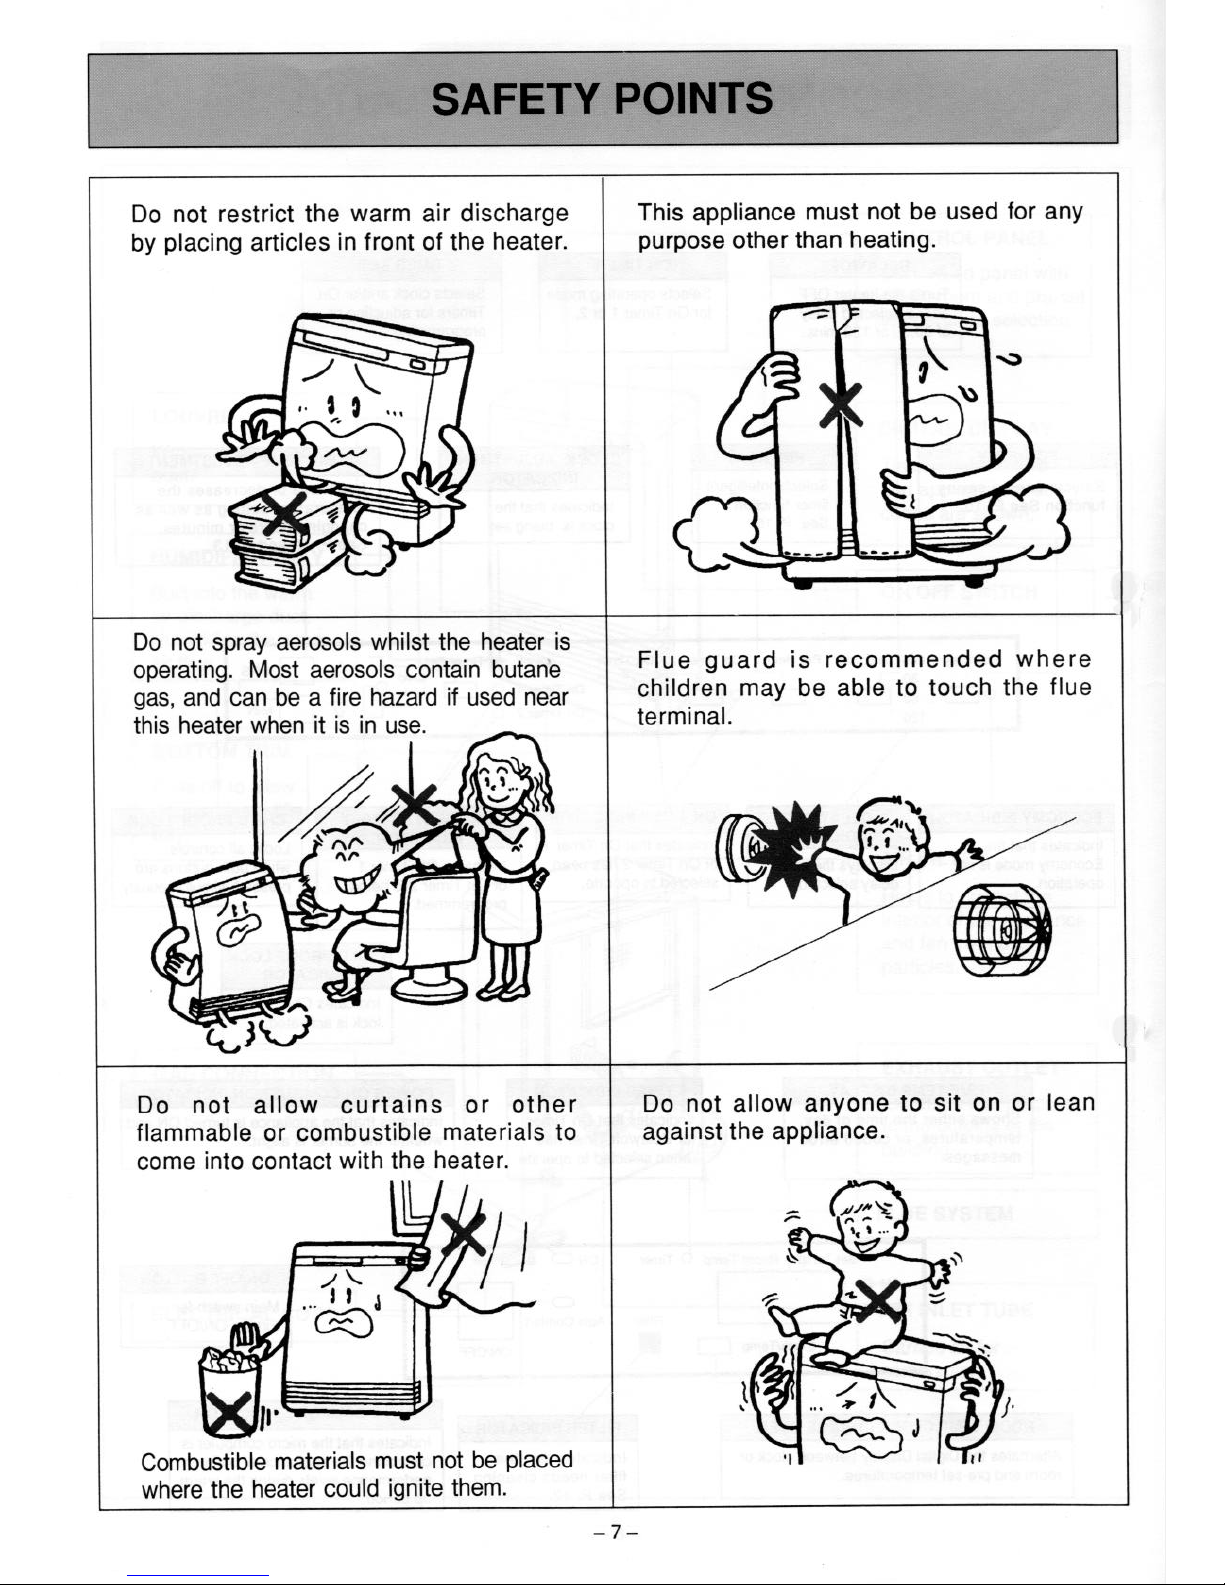
SAFETY POINTS
Do not restrict the warm air discharge
by placing articles in front of the heater.
This appliance must not be used for any
purpose other than heating.
Do not spray aerosols whilst the heater is
operating. Most aerosols contain butane
gas, and can be a fire hazard if used near
Flue guard is recommended where
children may be able to touch the flue
Do not allow curtains or other
flammable or combustible materials to
come into contact with the heater.
Do not allow anyone to sit on or lean
against the appliance.

SAFETY POINTS
Keep flammable materials, trees,
shrubs, etc, away from the flue
terminal.
Do not allow anyone to post articles
through the louvres.
Filter should be cleaned at regular
intervals. See Page 12.
4
Young children should be supervised at
all times. Hand or body contact with the
louvres should be avoided.
Do not place articles containing liquids
on top of the heater. Liquids spilt on
the controls may cause extensive
damage.
Do not allow young children or the infirm to
sleep directly in front of the heater.
-8-
OPERATING YOUR NEW RHFE-553FT
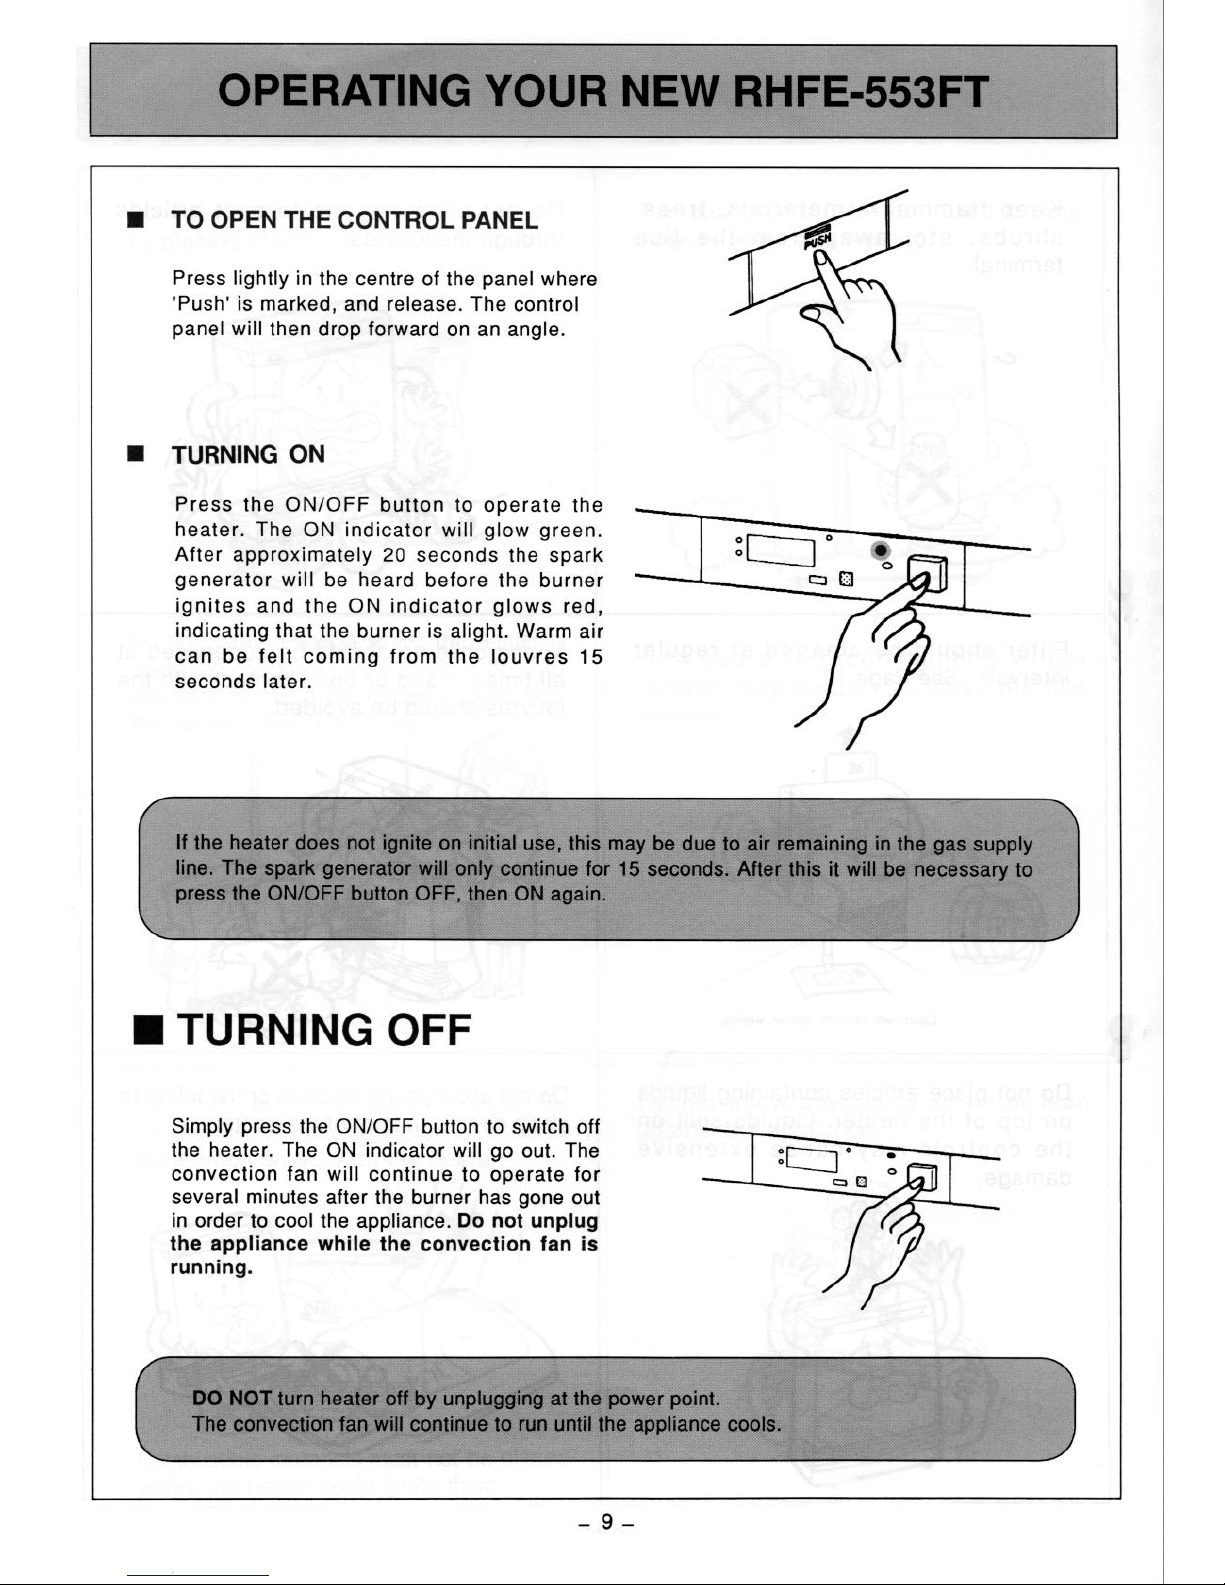
H TO OPEN THE CONTROL PANEL
Press lightly in the centre of the panel where
‘Push’ is marked, and release. The control
panel will then drop forward on an angle.
n TURNING ON
Press the ON/OFF button to operate the
heater. The ON indicator will glow green.
After approximately 20 seconds the spark
generator will be heard before the burner
ignites and the ON indicator glows red,
indicating that the burner is alight. Warm air
can be felt coming from the louvres 15
seconds later.
press the ON/OFF button UFF,then ON again.
n TURNING OFF
Simply press the ON/OFF button to switch off
the heater. The ON indicator will go out. The
convection fan will continue to operate for
several minutes after the burner has gone out
in order to cool the appliance. Do not unplug
the appliance while the convection fan is
running.
DO NOT turn heater off by ~nplu~~~n~ at thepower point.
.
The cofivection fan will contir~e to run until the appliance cosfs,
-9-
 Loading...