

Page 1
Model, Modèle, Modelo
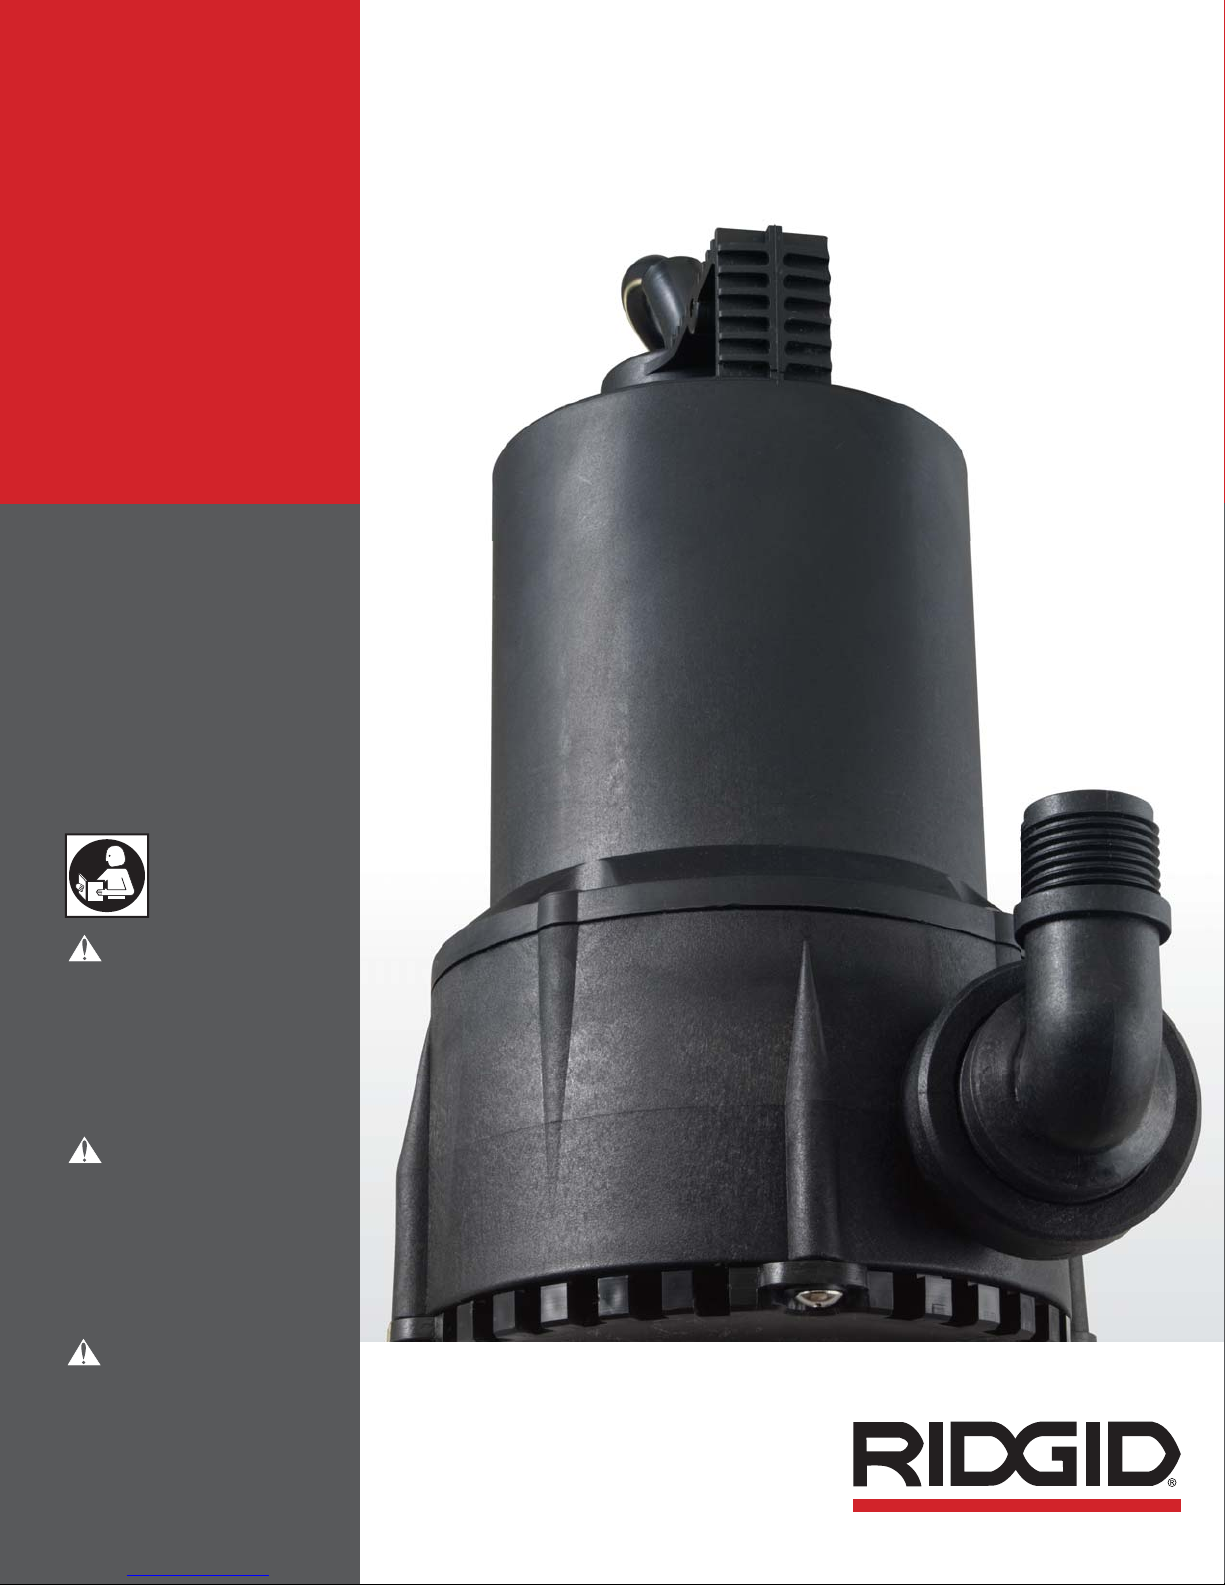
Submersible Utility Pump
TP-160
OPERATING INSTRUCTIONS
AND PARTS MANUAL
MANUEL DE PIÈCES ET
MODE D’EMPLOI
MANUAL DE INSTRUCCIONES
DE FUNCIONAMIENTO Y
PIEZAS DE REPUESTO
Pompe utilitaire submersible
Bomba sumergible de uso general
WARNING
READ UNDERSTAND AND
FOLLOW ALL INSTRUCTIONS
IN THIS MANUAL — DO NOT
DISCARD. Failure to understand
and follow the contents of this
manual may result in electrical
shock, fire and/or serious
personal injury.
!
AVER TISSEMENT!
LIRE, COMPRENDRE ET SUIVRE
TOUTES LES INSTRUCTIONS
DANS CE MANUEL — NE PAS
JETER. Ne pas comprendre et
ne pas suivre les contenus de ce
manuel peut avoir pour résultat
un choc électrique, de feux et/ou
de blessures personnelles graves.
¡
ADVERTENCIA!
LEA, ENTIENDA Y SIGA
TODAS LAS INSTRUCCIONES
DE ESTE MANUAL — NO LAS
DESECHE. El no entender
y no seguir el contenido de
este manual puede dar como
resultado un choque eléctrico,
incendios y/o lesiones graves.
Page 2

Operating Instructions and Parts Manual
Model, Modèle, Modelo – TP-160 Manuel de pièces et mode d’emploi
Manual de instrucciones de funcionamiento y piezas de repuesto
Table of Contents
Description . . . . . . . . . . . . . . . . . . . . . . . . . . . . . . . . . . . . . . . . . . . . . . . . . . . . . . . . . . . . . . . . . . . . . . . . . . . . . . . . . . . . . . . . . . . . . . . . . 1
Unpacking . . . . . . . . . . . . . . . . . . . . . . . . . . . . . . . . . . . . . . . . . . . . . . . . . . . . . . . . . . . . . . . . . . . . . . . . . . . . . . . . . . . . . . . . . . . . . . . . . 1
Safety Guidelines . . . . . . . . . . . . . . . . . . . . . . . . . . . . . . . . . . . . . . . . . . . . . . . . . . . . . . . . . . . . . . . . . . . . . . . . . . . . . . . . . . . . . . . . . . . . 1
Specifications . . . . . . . . . . . . . . . . . . . . . . . . . . . . . . . . . . . . . . . . . . . . . . . . . . . . . . . . . . . . . . . . . . . . . . . . . . . . . . . . . . . . . . . . . . . . . . . 1
Construction . . . . . . . . . . . . . . . . . . . . . . . . . . . . . . . . . . . . . . . . . . . . . . . . . . . . . . . . . . . . . . . . . . . . . . . . . . . . . . . . . . . . . . . . . . . . . . . . 1
General Safety Information . . . . . . . . . . . . . . . . . . . . . . . . . . . . . . . . . . . . . . . . . . . . . . . . . . . . . . . . . . . . . . . . . . . . . . . . . . . . . . . . . . . . 1
Performance . . . . . . . . . . . . . . . . . . . . . . . . . . . . . . . . . . . . . . . . . . . . . . . . . . . . . . . . . . . . . . . . . . . . . . . . . . . . . . . . . . . . . . . . . . . . . . . . 1
Application & Operation . . . . . . . . . . . . . . . . . . . . . . . . . . . . . . . . . . . . . . . . . . . . . . . . . . . . . . . . . . . . . . . . . . . . . . . . . . . . . . . . . . . . . . 2
Maintenance . . . . . . . . . . . . . . . . . . . . . . . . . . . . . . . . . . . . . . . . . . . . . . . . . . . . . . . . . . . . . . . . . . . . . . . . . . . . . . . . . . . . . . . . . . . . . . . . 2
Troubleshooting . . . . . . . . . . . . . . . . . . . . . . . . . . . . . . . . . . . . . . . . . . . . . . . . . . . . . . . . . . . . . . . . . . . . . . . . . . . . . . . . . . . . . . . . . . . . . 3
Recording Form for Pump Serial Number . . . . . . . . . . . . . . . . . . . . . . . . . . . . . . . . . . . . . . . . . . . . . . . . . . . . . . . . . . . . . . . . . . . . . . . . 4
Contact Information . . . . . . . . . . . . . . . . . . . . . . . . . . . . . . . . . . . . . . . . . . . . . . . . . . . . . . . . . . . . . . . . . . . . . . . . . . . . . . . . . . . . . . . . . 4
Exploded View . . . . . . . . . . . . . . . . . . . . . . . . . . . . . . . . . . . . . . . . . . . . . . . . . . . . . . . . . . . . . . . . . . . . . . . . . . . . . . . . . . . . . . . . . . . . . . 4
Replacement Part List . . . . . . . . . . . . . . . . . . . . . . . . . . . . . . . . . . . . . . . . . . . . . . . . . . . . . . . . . . . . . . . . . . . . . . . . . . . . . . . . . . . . . . . . 4
Warranty . . . . . . . . . . . . . . . . . . . . . . . . . . . . . . . . . . . . . . . . . . . . . . . . . . . . . . . . . . . . . . . . . . . . . . . . . . . . . . . . . . . . . . . . . . Back Cover
Table des matières
Description . . . . . . . . . . . . . . . . . . . . . . . . . . . . . . . . . . . . . . . . . . . . . . . . . . . . . . . . . . . . . . . . . . . . . . . . . . . . . . . . . . . . . . . . . . . . . . . . . 5
Déballage. . . . . . . . . . . . . . . . . . . . . . . . . . . . . . . . . . . . . . . . . . . . . . . . . . . . . . . . . . . . . . . . . . . . . . . . . . . . . . . . . . . . . . . . . . . . . . . . . . . 5
Directives de sécurité . . . . . . . . . . . . . . . . . . . . . . . . . . . . . . . . . . . . . . . . . . . . . . . . . . . . . . . . . . . . . . . . . . . . . . . . . . . . . . . . . . . . . . . . 5
Spécifications . . . . . . . . . . . . . . . . . . . . . . . . . . . . . . . . . . . . . . . . . . . . . . . . . . . . . . . . . . . . . . . . . . . . . . . . . . . . . . . . . . . . . . . . . . . . . . . 5
Construction . . . . . . . . . . . . . . . . . . . . . . . . . . . . . . . . . . . . . . . . . . . . . . . . . . . . . . . . . . . . . . . . . . . . . . . . . . . . . . . . . . . . . . . . . . . . . . . . 5
Information générale sur la sécurité . . . . . . . . . . . . . . . . . . . . . . . . . . . . . . . . . . . . . . . . . . . . . . . . . . . . . . . . . . . . . . . . . . . . . . . . . . 5-6
Performance . . . . . . . . . . . . . . . . . . . . . . . . . . . . . . . . . . . . . . . . . . . . . . . . . . . . . . . . . . . . . . . . . . . . . . . . . . . . . . . . . . . . . . . . . . . . . . . . 5
Application et fonctionnement . . . . . . . . . . . . . . . . . . . . . . . . . . . . . . . . . . . . . . . . . . . . . . . . . . . . . . . . . . . . . . . . . . . . . . . . . . . . . . . . . 6
Maintenance . . . . . . . . . . . . . . . . . . . . . . . . . . . . . . . . . . . . . . . . . . . . . . . . . . . . . . . . . . . . . . . . . . . . . . . . . . . . . . . . . . . . . . . . . . . . . . 6-7
Tableau de dépannage . . . . . . . . . . . . . . . . . . . . . . . . . . . . . . . . . . . . . . . . . . . . . . . . . . . . . . . . . . . . . . . . . . . . . . . . . . . . . . . . . . . . . . . 7
Formulaire d’enregistrement du numéro de série de la pompe
Coordonnées . . . . . . . . . . . . . . . . . . . . . . . . . . . . . . . . . . . . . . . . . . . . . . . . . . . . . . . . . . . . . . . . . . . . . . . . . . . . . . . . . . . . . . . . . . . . . . . 8
Vue éclatée . . . . . . . . . . . . . . . . . . . . . . . . . . . . . . . . . . . . . . . . . . . . . . . . . . . . . . . . . . . . . . . . . . . . . . . . . . . . . . . . . . . . . . . . . . . . . . . . . 8
Pièces de rechange . . . . . . . . . . . . . . . . . . . . . . . . . . . . . . . . . . . . . . . . . . . . . . . . . . . . . . . . . . . . . . . . . . . . . . . . . . . . . . . . . . . . . . . . . . 8
Garantie . . . . . . . . . . . . . . . . . . . . . . . . . . . . . . . . . . . . . . . . . . . . . . . . . . . . . . . . . . . . . . . . . . . . . . . . . . . . . . . . . . . .
. . . . . . . . . . . . . . . . . . . . . . . . . . . . . . . . . . . . . . . . . . . . . . . . . . . . . . . 8
Couverture arrière
Índice
Descripción . . . . . . . . . . . . . . . . . . . . . . . . . . . . . . . . . . . . . . . . . . . . . . . . . . . . . . . . . . . . . . . . . . . . . . . . . . . . . . . . . . . . . . . . . . . . . . . . 9
Desempaque . . . . . . . . . . . . . . . . . . . . . . . . . . . . . . . . . . . . . . . . . . . . . . . . . . . . . . . . . . . . . . . . . . . . . . . . . . . . . . . . . . . . . . . . . . . . . . . . 9
Pautas de seguridad. . . . . . . . . . . . . . . . . . . . . . . . . . . . . . . . . . . . . . . . . . . . . . . . . . . . . . . . . . . . . . . . . . . . . . . . . . . . . . . . . . . . . . . . . . 9
Especificaciones. . . . . . . . . . . . . . . . . . . . . . . . . . . . . . . . . . . . . . . . . . . . . . . . . . . . . . . . . . . . . . . . . . . . . . . . . . . . . . . . . . . . . . . . . . . . . 9
Construcción. . . . . . . . . . . . . . . . . . . . . . . . . . . . . . . . . . . . . . . . . . . . . . . . . . . . . . . . . . . . . . . . . . . . . . . . . . . . . . . . . . . . . . . . . . . . . . . . 9
Información general de seguridad . . . . . . . . . . . . . . . . . . . . . . . . . . . . . . . . . . . . . . . . . . . . . . . . . . . . . . . . . . . . . . . . . . . . . . . . . . . 9-10
Rendimiento . . . . . . . . . . . . . . . . . . . . . . . . . . . . . . . . . . . . . . . . . . . . . . . . . . . . . . . . . . . . . . . . . . . . . . . . . . . . . . . . . . . . . . . . . . . . . . . . 9
Aplicación y funcionamiento . . . . . . . . . . . . . . . . . . . . . . . . . . . . . . . . . . . . . . . . . . . . . . . . . . . . . . . . . . . . . . . . . . . . . . . . . . . . . . . . . . 10
Mantenimiento . . . . . . . . . . . . . . . . . . . . . . . . . . . . . . . . . . . . . . . . . . . . . . . . . . . . . . . . . . . . . . . . . . . . . . . . . . . . . . . . . . . . . . . . . . 10-11
Tabla de diagnóstico y resolución de problemas . . . . . . . . . . . . . . . . . . . . . . . . . . . . . . . . . . . . . . . . . . . . . . . . . . . . . . . . . . . . . . . . . 11
Formulario de registro para el número de serie de la bomba . . . . . . . . . . . . . . . . . . . . . . . . . . . . . . . . . . . . . . . . . . . . . . . . . . . . . . . 12
Información de contacto . . . . . . . . . . . . . . . . . . . . . . . . . . . . . . . . . . . . . . . . . . . . . . . . . . . . . . . . . . . . . . . . . . . . . . . . . . . . . . . . . . . . . 12
Diagrama esquemático . . . . . . . . . . . . . . . . . . . . . . . . . . . . . . . . . . . . . . . . . . . . . . . . . . . . . . . . . . . . . . . . . . . . . . . . . . . . . . . . . . . . . . 12
Piezas de repuesto . . . . . . . . . . . . . . . . . . . . . . . . . . . . . . . . . . . . . . . . . . . . . . . . . . . . . . . . . . . . . . . . . . . . . . . . . . . . . . . . . . . . . . . . . 12
Garantia . . . . . . . . . . . . . . . . . . . . . . . . . . . . . . . . . . . . . . . . . . . . . . . . . . . . . . . . . . . . . . . . . . . . . . . . . . . . . . . . . . . . . . .
ii
Ridge Tool Company
Contraportada
Page 3
Model TP-160 – Operating Instructions and Parts Manual
Please read and save these instructions. This manual contains important Safety Warnings and Operating Instructions. You will need to refer to it
before attempting any application or maintenance. Always keep this manual with the unit so that it will be easily accessible. Failure to read and
follow these warnings and instructions could result in property damage, serious injury, or death.
DESCRIPTION
This portable, submersible utility pump is designed for use in water. The
units are equipped with a 9 ft. 3-prong grounding type power cord. The
provided discharge adapter can be used for convenient attachment to a
garden hose.
UNPACKING
Inspect this unit before it is used. Occasionally, products are damaged
during shipment. If the pump or components are damaged, contact
customer service at 1-877-9RIDGID.
READ & FOLLOW ALL INSTRUCTIONS
SAVE THESE INSTRUCTIONS — DO NOT DISCARD
SAFETY GUIDELINES
This manual contains information that is very important to know
and understand. This information is provided for SAFETY and
to PREVENT EQUIPMENT PROBLEMS. To help recognize this
information, observe the following symbols.
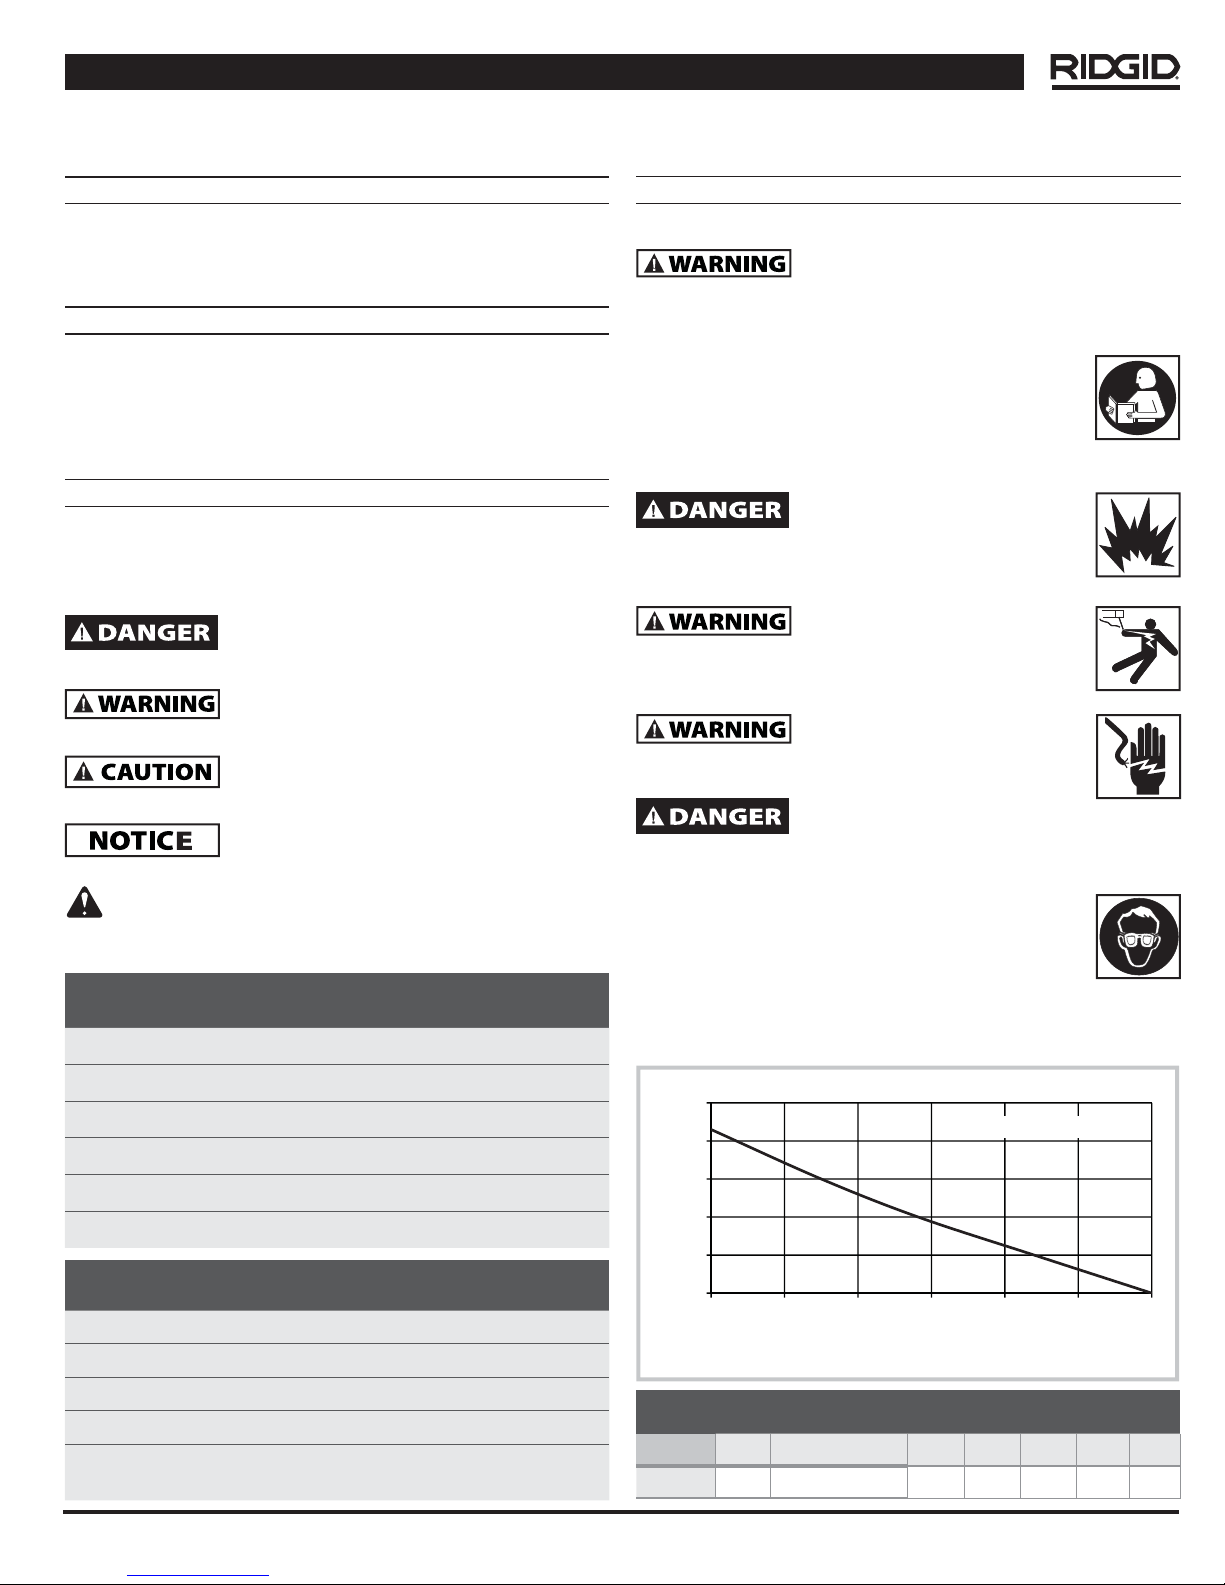
Danger indicates an imminently hazardous
death or serious injury.
Warning indicates a potentially hazardous
death or serious injury.
Caution indicates a potentially hazardous
minor or moderate injury.
Notice indicates important information, that if
This is the safety alert symbol. It is used to alert you to potential
bodily injury hazards. Obey all safety messages that follow this
symbol to avoid possible injury or death.
situation which, if NOT avoided, WILL result in
situation which, if NOT avoided, COULD result in
situation which, if NOT avoided, MAY result in
NOT followed, MAY cause damage to equipment.
NOTE: Information that requires special attention.
SPECIFICATIONS
POWER SUPPLY REQUIREMENTS
120 V, 60 Hz
GENERAL SAFETY INFORMATION
CALIFORNIA PROPOSITION 65
This product or its power cord may contain
of California to cause cancer and birth defects or other reproductive
harm. Wash hands after handling.
GENERAL SAFETY
• Read the manual(s) included with this product carefully.
Be thoroughly familiar with the controls and the proper
use of the equipment. Follow all instructions.
• Only persons well acquainted with these rules of safe
operation should be allowed to use the unit.
Keep away from children!
Risk of fi re, explosion and/or death!
fl ammable/combustible liquids, vapors or dusts. Do NOT
pump liquids that are NOT clear. Failure to follow these
instructions will result in bodily injury or death.
Risk of electric shock! This pump
swimming pool or marine areas. Never place pump in pools
while people are in the water. Failure to follow COULD result
in death or serious injury.
Risk of electric shock! Do NOT handle
standing in water or on a damp surface. Failure to follow
COULD result in death or serious injury.
will provide protection against line to ground faults only. The ground fault
receptacle does NOT limit the magnitude of fault current and will NOT
prevent an electrical shock.
1. Wear safety glasses at all times when working with
pumps.
2. The unit MUST be plugged into a GFCI. For
installation by a qualified electrician only.
3. Do not use the power cord or discharge hose to carry or handle
the pump. Damage to the power cord or discharge hose may
occur. Use the handle supplied on the pump.
chemicals, including lead, known to the State
Pump is NOT rated for use with
has not been tested for use in
pump with wet hands or when
Electric shock hazard! For installation
by a qualifi ed electrician only. GFCI receptacles
MOTOR
HORSEPOWER / AMP RATINGS
LIQUID TEMPERATURE RANGE
CIRCUIT REQUIREMENTS
DIMENSIONS
Single Phase
1/6 HP / 2.5 A
40° F to 104° F
15 A (minimum)
10-3/4 in. high x 6-3/4 in. base
CONSTRUCTION
MOTOR HOUSING Thermoplastic
VOLUTE Thermoplastic
IMPELLER Thermoplastic
SHAFT Stainless Steel
DISCHARGE
1-1/4 in. NPT
(garden hose adapter included)
25
20
15
10
5
DISCHARGE (FEET)
0
PERFORMANCE
Model HP Discharge Head 0 ft 5 ft 10 ft 15 ft 20 ft
TP-160
Ridge Tool Company
Model TP-160
0 500 1000 1500 2000 2500 3000
GALLONS PER HOUR
1/6 Gal / Hr 3000 2200 1410 750 120
322103-005 5/11
Page 4
Model TP-160 – Operating Instructions and Parts Manual
APPLICATION AND OPERATION
Always disconnect
attempting to install, service, relocate, or
perform any maintenance. If the power
source is out of sight, lock and tag in open
(off) position to prevent unexpected power
application. Failure to do so could result in fatal electrical shock!
Electric shock hazard. Use
(UL)-listed extension cord with # 16 gauge or larger wire
that is labeled for outdoor use. Use polarized grounding
type plugs only. Polarized plugs have one blade slightly
wider than the other and can only be inserted one way into the outlet.
Do NOT handle plug connector near water. Failure to follow these
instructions will result in serious injury or death.
This unit is NOT designed for use as a
This unit is NOT designed for use in septic tanks or
underground vaults to pump raw sewage or effl uents.
NEVER use in hazardous or explosive locations.
1. This pump has been designed with 1-1/4 in. NPT discharge
size. Connect pipe or fitting to the discharge threads, or connect
the supplied garden hose elbow fitting to the pump. Thread the
female end of the garden hose to the male discharge on the
pump.
2. To reduce leakage between the pump and the hose, place a
hose washer (not included) on the garden hose before installing
to the pump.
3. For best pump performance, unwind the hose before starting the
pump. This will help remove any kinks or binds in the hose and
allow the unit to pump with less restriction.
4. Set the pump on a hard, flat surface in the water. Do not set the
pump directly on mud or sand surfaces. This will cause the inlet
screen to clog.
Do not handle pump with wet
on a damp surface when the unit is operating or fails to
operate. ALWAYS disconnect pump power cord from
power source before handling.
5. Plug the power cord into a grounded 120-volt GFCI power
outlet. The pump will start operating as soon as the power cord
is plugged into the power outlet.
6. The pump will remove water down to 3/8 in. above the hard
surface the pump was placed on.
7.
The pump should be turned off once the water level reaches the
3/8 in. mark.
pump without water WILL damage the shaft seal and cause pump
failure.
electric supply before
only Underwriters Laboratories
sump pump or in sump applications.
hands or when standing in water or
Do NOT allow pump to run dry. The shaft
seal depends on water for lubrication. Operating
MAINTENANCE
ALWAYS disconnect electric
supply before attempting to install,
service, relocate, or perform any maintenance. Failure to
do so COULD result in fatal electrical shock.
Minimal service is required for this pump. The motor
housing of the pump is completely sealed and requires no service. If
pump should fail to operate, perform the following troubleshooting
guidelines:
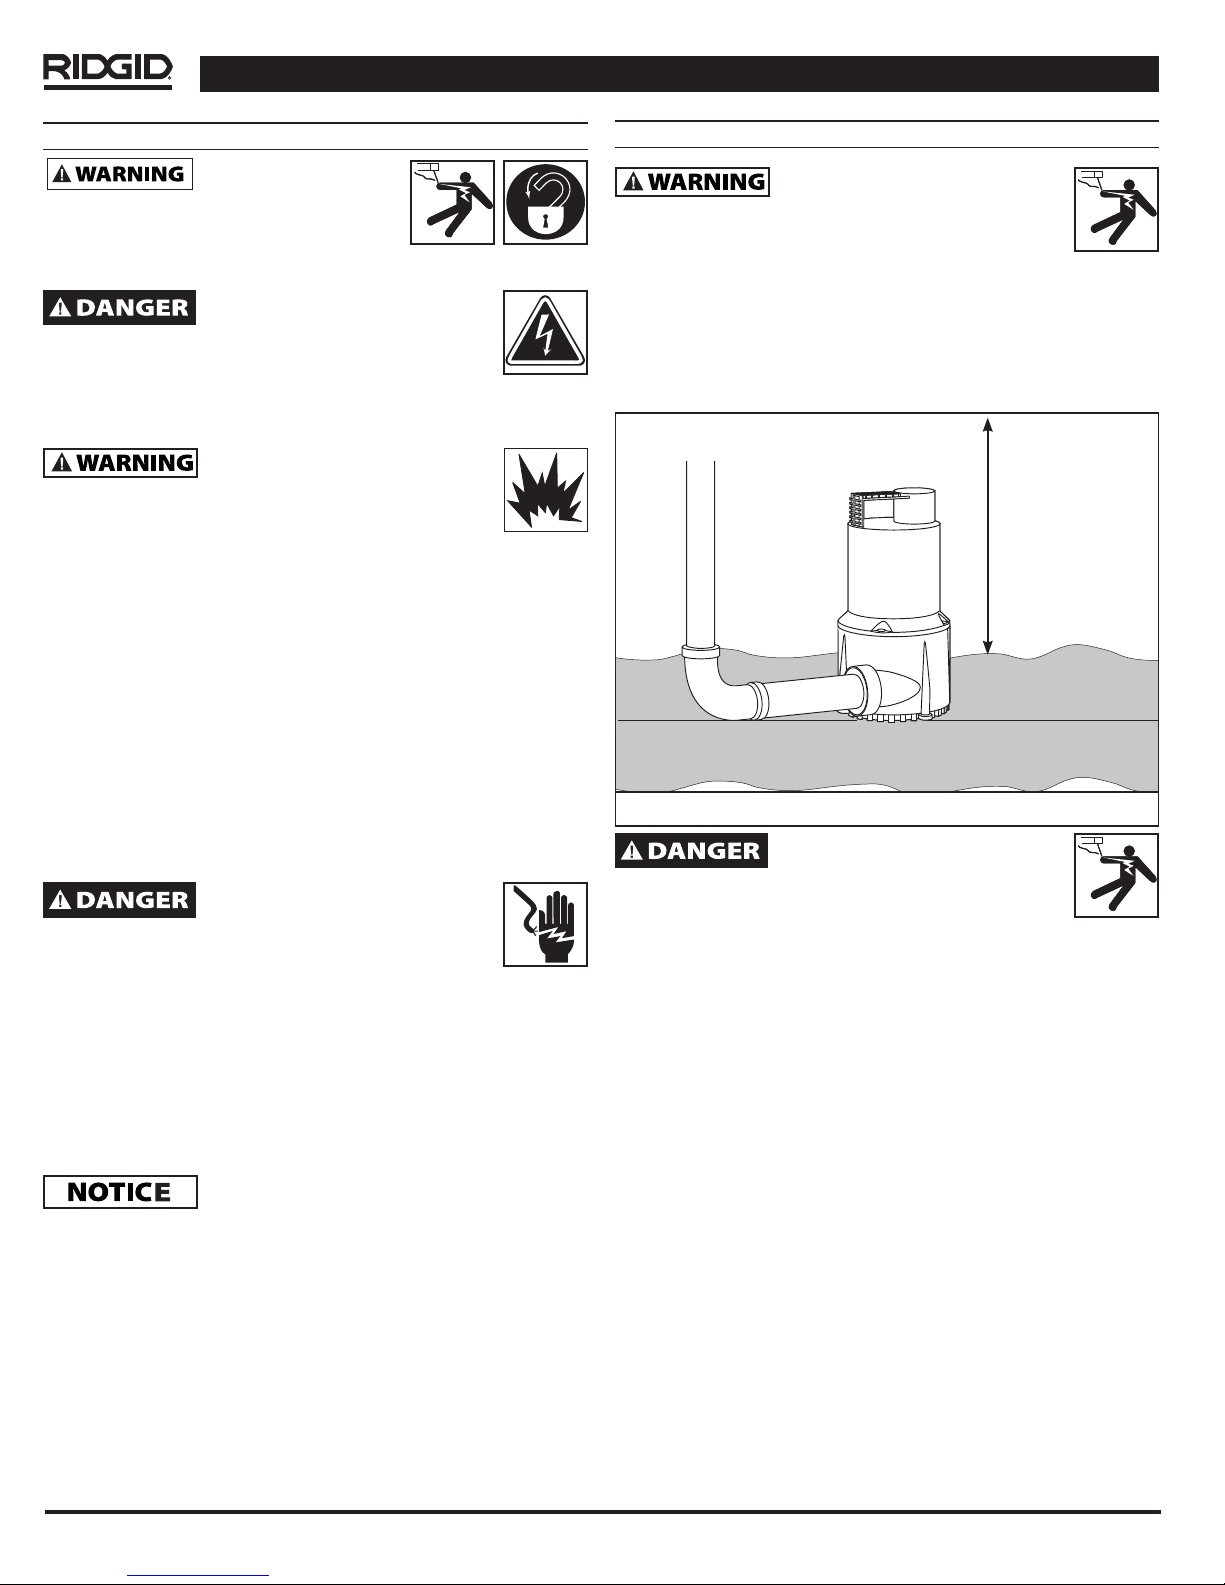
1. Verify pumping height does NOT exceed 20 feet
(See Figure 1). If pumping height is greater than 20 feet, this
pump will NOT operate.
20 FT MAXIMUM
WATER LEVEL
Figure 1 - Water Level
Do NOT disassemble or alter this
product in any way. Failure to follow
these instructions will result in serious injury or death.
2. To verify pump is operating correctly:
a. Disconnect pump from power source.
b. Connect hose adapter and discharge hose to pump.
c. Immerse pump in a bucket or tub of water.
d. Place the other end of the discharge hose outside the
bucket, so the water will pump out.
e. Plug power cord into a grounded 120 volt GFCI power outlet.
If pump operates correctly, proceed to step #3. If pump does
NOT operate, unplug power cord and proceed to step #4 in
this section.
3. To verify discharge hose is free from a blockage:
a. Connect hose to another water source such as a faucet.
If water flows through hose, proceed to step 4. If water is
restricted, verify discharge hose is unwound. Remove all
kinks, bends, or obstructions in hose.
4. Periodic cleaning is required to maintain performance of the
pump. Follow the cleaning steps listed below:
a. Unplug the power cord.
b. Remove the 4 screws in the bottom of the base.
c. Remove the base and inlet plate.
d. Remove the debris and make sure the impeller turns freely.
e. Reinstall inlet plate, base, and screws.
2
Ridge Tool Company
Page 5

TROUBLESHOOTING
Model TP-160 – Operating Instructions and Parts Manual
Troubleshooting Chart
Symptom Possible Cause(s) Corrective Action
Pump will not start
or run
Pump operates but
delivers little or no
water
1. Tripped home electrical breaker
2. GFCI tripped
3. Low line voltage
4. Defective motor
5. Impeller obstructed
6. Inlet screen clogged
1. Impeller obstructed
2. Obstructed piping
3. Discharge height exceeds capability
1. Reset breaker
2. Check for damaged wiring or moisture
3. If voltage is under 108 volts, check wiring size
4. Replace pump
5. Remove base and impeller plate, check for debris; clean
6. Clean inlet screen
1. Remove base and impeller plate, check for debris; clean
2. Check for kinks, reposition hose or check for debris
3. Reposition pump to reduce discharge height
NOTES
Ridge Tool Company
3
Page 6

Model TP-160 – Operating Instructions and Parts Manual
TP-160 — Submersible Utility Pump
Serial No.
If you have any questions regarding the service or repair of
this pump, call or write to:
RIDGID Water Systems
Attn: Customer Service Department
101 Production Drive
Harrison, Ohio 45030
csridgid@waynewatersystems.com
Ref. No. Description
1 Adapter Kit
Record Serial Number From Product Decal Below
For name and address of your nearest Independent
Authorized Service Center, contact the Ridge Tool Company
at http://www.RIDGID.com
For Customer Service, call 1-877-9RIDGID.
TP-160
Cat. No.
40143
40908
Quantity
1
4
1
Ridge Tool Company
Page 7

Modèle TP-160 – Manuel de pièces et mode d’emploi
Veuillez lire et conserver ces instructions. Ce manuel contient des instructions d’utilisation et des avertissements de sécurité importants. Il faudra s’y
reporter avant toute application ou tout entretien. Toujours conserver ce manuel avec l’appareil pour qu’il soit facilement accessible. Ne pas lire et suivre
ces avertissements et ces instructions pourrait mener à des dommages à la propriété, à de graves blessures, ou à la mort.
DESCRIPTION
Cette pompe utilitaire, submersible et portable est conçue pour une
utilisation dans l'eau. Les appareils sont dotés d'un cordon
d'alimentation mis à la terre de 2,74 m (9 pieds)
à 3 broches. L'adaptateur de décharge fourni peut être utilisé
comme accessoire pratique pour un tuyau d'arrosage.
DÉBALLAGE
Inspecter cet appareil avant de l'utiliser. À l'occasion, les produits sont
endommagés durant l'expédition. Si la pompe ou les composants sont
endommagés,
contactez la service au client au 1-877-9RIDGID
.
LIRE ET SUIVRE TOUTES LES INSTRUCTIONS
CONSERVER CES INSTRUCTIONS - NE PAS LES JETER
DIRECTIVES DE SÉCURITÉ
Ce manuel contient de l'information très importante à connaître
et à comprendre. Cette information est fournie pour LA SÉCURITÉ
et pour PRÉVENIR LES PROBLÈMES D’ÉQUIPEMENT. Pour aider à
reconnaître cette information, consulter les symboles suivants.
Danger indique une situation dangereuse imminente
elle n’est pas évitée.
Avertissement indique une situation potentiellement
d’entraîner des lésions corporelles graves ou
même la mort.
Attention indique une situation potentiellement
risquer d’entraîner des lésions corporelles mineures
ou modérées.
Notice indique de l’information importante qui
PAS respectée.
qui MÈNERA à la mort ou à des blessures graves si
dangereuse qui, si elle N’EST PAS évitée, RISQUE
dangereuse qui, si elle N’EST PAS évitée, POURRAIT
POURRAIT endommager l’équipement si elle N’EST
SPÉCIFICATIONS
Ceci est le symbole d’alerte de sécurité. Il est utilisé pour vous aviser des
dangers possibles de blessures personnelles. Respectez tous les messages
de sécurité qui suivent ce symbole pour éviter toutes blessures possibles ou la mort.
REMARQUE : Information qui exige une attention spéciale.
INFORMATION GÉNÉRALE SUR LA SÉCURITÉ
PROPOSITION 65 DE LA CALIFORNIE
de Californie, causent le cancer et des anomalies congénitales ou autres
problèmes de reproduction. Se laver les mains après toute manipulation.
GÉNÉRALITÉS SUR LA SÉCURITÉ
• Lire attentivement tous le manuel(s) inclus avec ce produit.
Bien se familiariser avec les commandes et la bonne
utilisation de l’équipement. Suivez toutes les instructions.
• Seules les personnes familières avec ces règles
d'utilisation sans danger devraient utiliser l'appareil.
Tenir hors de portée des enfants!
utilisation avec des liquides, vapeurs ou poussières infl ammables/
combustibles. NE PAS pomper des fl uides NON limpides. Le nonrespect de ces instructions entraînera des blessures corporelles ou
pertes de vies.
Risque de décharge électrique!
une utilisation dans une piscine ou dans des secteurs marins.
Ne jamais placer la pompe dans les piscines lorsqu'il y a
des personnes dans l'eau.
POURRAIT entraîner des pertes de vies ou des blessures graves.
ou debout dans l’eau ou sur une surface humide. Ne pas suivre ces
instructions POURRAIT mener à la mort ou à de graves blessures.
Ce produit ou son cordon peut contenir des produits
chimiques, dont le plomb, qui de l'avis de l'État
Risque d’incendie, d’explosion et/ou de
mort! Cette pompe NE convient PAS à une
Cette pompe n’a pas été testée pour
Le non-respect des instructions
Risque de décharge électrique! NE PAS
manipuler la pompe avec les mains humides
EXIGENCES D’ALIMENTATION
DE COURANT
MOTEUR
HORSEPOWER/
VALEURS EN AMPÈRES
GAMME DE TEMPÉRATURE
DU LIQUIDE
EXIGENCES DE CIRCUIT
DIMENSIONS
CONSTRUCTION
BOITIER DU MOTEUR
VOLUTE
IMPULSEUR
ARBRE
DÉCHARGE
120 V, 60 Hz
Monophasé
1/6 HP / 2.5 A
4,4 à 40 °C (40° à 104 °F)
15 A (minimum)
27,3 cm de haut x 17,1 cm
de base (10 3/4 x 6-3/4 po)
Thermoplastique
Thermoplastique
Thermoplastique
Acier inoxydable
3,8 cm (1-1/2 po) NPT
(adaptateur pour tuyau
d’arrosage inclus)
7
6
5
4
3
2
1
DÉCHARGE (METRES)
0
0 2000 4000 6000 8000 10000 12000
Modele TP-160
LITRES PAR HEURE
PERFORMANCE
Modéle CH
Tête de décharge
TP-160 1/6 L / Hr 11.300 7.200 5.400 3.700 0
0 m 1,5 m 3 m 4,5 m 6 m
Ridge Tool Company
5
Page 8

Modèle TP-160 – Manuel de pièces et mode d’emploi
INFORMATION GÉNÉRALE SUR LA SÉCURITÉ (SUITE)
à disjoncteur différentiel (GFCI) ne préviennent que la fuite de courant
à la terre. Cette prise NE limite PAS la grandeur du courant en fuite et
N’empêchera PAS une décharge électrique.
1. Porter des lunettes de sécurité en tout temps en
travaillant avec les pompes.
2.
L’appareil DOIT être branché à une prise à disjoncteur
différentiel (GFCI). À faire installer par un électricien
qualifié seulement.
3. Ne pas utiliser le cordon d'alimentation ou le boyau de
décharge pour transporter ou manipuler la pompe. Cela pourrait
endommager le cordon d'alimentation ou le boyau
de décharge. Utiliser la poignée fournie sur la pompe.
Danger de décharge
par un électricien qualifi é seulement. Les prises
électrique ! À faire installer
APPLICATION ET FONCTIONNEMENT
de réparer, de déplacer ou de faire tout entretien. Si
la source de courant est loin de la vue, verrouiller et
repérer en position ouverte (arrêt) pour éviter toute
application de courant imprévue. Ne pas suivre ces instructions pourrait mener
à une décharge électrique mortelle!
mortelle.
homologuées par Underwriters Laboratories (UL), calibre
16 ou un fi l de taille plus grande conçus pour les usages
extérieurs. Utiliser seulement des fi ches de masse
polarisées. Les fi ches polarisées ont une lame légèrement plus large
que l’autre et ne peuvent être insérées que d’une seule manière dans
la prise. NE PAS manipuler le connecteur près de l’eau. Ne pas suivre
cet avertissement peut mener à de graves blessures ou à la mort.
. Cette unité N’EST PAS conçue pour
puisard ou dans les applications de puisard.
N’EST PAS conçu pour être utilisé dans les fosses
septiques ou les enceintes souterraines pour pomper les
effl uents ou les eaux usées. NE JAMAIS utiliser dans des endroits
dangereux ou explosifs.
1.
Cette pompe a été conçue avec une taille de décharge de 3 cm (1-1/4
po) NPT. Mettre le tuyau ou les accessoires en contact avec le filet.
Introduire l’extrémité femelle du tuyau
du coude de la pompe.
2.
Pour réduire la fuite entre la pompe et le tuyau, placer une rondelle
à tuyau (non inclus) sur le tuyau d’arrosage avant l’installation de
la pompe.
3. Pour obtenir la meilleure performance de la pompe, dérouler le
tuyau avant de démarrer la pompe. Ceci aidera à retirer tous les
entortillements ou les coudes du tuyau et laissera l’appareil pomper
avec moins de restriction.
4.
Placer la pompe sur une surface dure, à plat dans l’eau. Ne pas
placer la pompe directement sur les surfaces de boue ou de
sable. Ceci bloquera le grillage d’admission.
Ne pas manipuler la pompe avec les
ou sur une surface humide lorsque l'appareil fonctionne
ou ne fonctionne pas. TOUJOURS débrancher le cordon
d'alimentation de la pompe de la source de courant avant toute
manipulation.
5.
Brancher le cordon d’alimentation dans une prise de courant
à disjoncteur de fuite à la terre de 120 volts. La pompe
commencera à fonctionner dès que le cordon d’alimentation
sera branché dans la prise de courant.
Toujours couper le courant
avant d’essayer d’installer,
Danger de décharge électrique.
Utiliser exclusivement des rallonges
l’utilisation comme une pompe de
Cet appareil
d’arrosage dans l’extrémité mâle
mains humides ou debout dans l'eau
6.
La pompe retirera l’eau jusqu’â 9,5 mm (3/8 po) au-dessus de la
surface dure où la pompe est placée.
7.
La pompe doit être éteinte dés que le niveau de l’eau a atteint
les 9,5 mm (3/8 po).
NE PAS laisser la pompe fonctionner
à sec. La garniture d’étanchéité de l’arbre
compte sur l’eau pour sa lubrification. Faire fonctionner la
pompe à sec ENDOMMAGERA la garniture d’étanchéité de
l’arbre et mettra la pompe en panne.
MAINTENANCE
TOUJOURS couper le courant avant
de déplacer ou de faire tout entretien. Ne pas suivre ces
instructions POURRAIT mener à un choc électrique mortel.
Cette pompe exige très peu d’entretien. Le boîtier du
moteur de la pompe est entièrement scellée et n’exige aucun
entretien. Si la pompe cesse de fonctionner, suivre les directives de
dépannage suivantes:
Figure 1 - Niveau de l’eau
1. Vérifier que la hauteur de pompage NE dépasse PAS 6,1 m (20
pi) (voir la Figure 1). Si la hauteur de pompage dépasse 6,1 m
(20 pi), cette pompe NE fonctionnera PAS.
NE PAS démonter ou modifi er ce
ce soit. Ne pas suivre cet avertissement peut mener à de
graves blessures ou à la mort.
2. Pour vérifier si la pompe fonctionne correctement.
a. Débrancher la pompe de la source d'alimentation.
b. Brancher l’adaptateur de tuyau et le tuyau de décharge à la
pompe.
c. Plonger la pompe dans un seau ou dans un contenant d’eau.
d. Placer l’autre extrémité du tuyau de décharge à l’extérieur du
seau pour que l’eau pompe vers l’extérieur.
d’essayer d’installer, de réparer,
6 M (20 PI)
MAXIMUM
NIVEAU DE L’EAU
produit de quelque manière que
6
Ridge Tool Company
Page 9

MAINTENANCE (SUITE)
Modèle TP-160 – Manuel de pièces et mode d’emploi
e.
Brancher le cordon d’alimentation dans une prise de courant
à disjoncteur de fuite à la terre de 120 volts. Si la pompe
fonctionne correctement, passer à l’étape 3. Si la pompe NE
fonctionne PAS, débrancher le cordon d’alimentation et passer à
l’étape 4 dans cette section.
3. Pour vérifier si le tuyau de décharge est libre de tout blocage:
a. Raccorder le tuyau à une autre source d’eau telle qu’un
robinet. Si l’eau coule à travers le tuyau, passer à l’étape 4. Si
l’eau ne coule pas librement, vérifier si le tuyau de décharge
est déroulé. Retirer tous les tortillements, les coudes ou les
obstructions dans le tuyau.
Tableau de dépannage
4. Il faut nettoyer périodiquement la pompe pour maintenir sa
performance. Suivre les étapes de nettoyage indiquées plus bas:
a. Débrancher le cordon électrique.
b. Retirer les 4 vis se trouvant au bas de la base.
c. Retirer la base et la plaque d’entrée.
d. Retirer les débris et s’assurer que l’impulseur tourne
librement.
e. Réinstaller la plaque d’entrée, replacer la base et les vis.
Symptôme Cause(s) possible(s) Mesures corrective
La pompe ne
démarre pas ou
ne fonctionne pas
1. Fusible résidentiel grillé
2. Disjoncteur de fuite à la terre déclenché
3. Basse tension de ligne
4. Moteur défectueux
5. Impulseur obstrué
6. Tamis d'entrée bloqué
1. Si grillé, remplacer en utilisant la bonne taille de fusible ou
réinitialiser le disjoncteur
2. Vérifier tout signe de fil endommagé ou d'humidité
3. Si la tension est inférieure à 108 volts, vérifier la taille du câblage
4. Remplacer la pompe
5. Retirer la base et la plaque de l'impulseur, vérifier s'il y a des
débris; nettoyer
6. Nettoyer le tamis d'entrée
La pompe
fonctionne,
mais donne peu
ou aucune eau
1. Impulseur obstrué
2. Tuyauterie obstruée
3. Hauteur de décharge dépasse la capacité
NOTES
1. Retirer la base et la plaque de l'impulseur, vérifier s'il y a des débris;
nettoyer
2. Vérifier s'il y a des tortillements, replacer le tuyau, vérifier s'il y a des
débris
3. Replacer la pompe pour réduire la hauteur de décharge
Ridge Tool Company
7
Page 10

Modèle TP-160 – Manuel de pièces et mode d’emploi
TP-160 — Pompe utilitaire submersible
No. de série
Si vous avez des questions au sujet du service ou des
réparations de cet pompe, appelez ou écrivez à:
RIDGID Water Systems
Attn: Customer Service Department
101 Production Drive
Harrison, Ohio 45030
csridgid@waynewatersystems.com
N° de réf. Description
1 Trousse d’adaptateur
Enregistrez le numéro de série de la décalcomanie du produit ci-après
Pour le nom et l’adresse de votre centre de service autorisé
indépendant le plus près, contactez la Ridge Tool Company
au http://www.RIDGID.com
Pour le service au client, appeler le 1-877-9RIDGID.
TP-160
N° de cat.
40143
40908
Quantité
1
8
1
Ridge Tool Company
Page 11

Modelo TP-160 – Manual de instrucciones de funcionamiento y piezas de repuesto
Sírvase leer y guardar estas instrucciones. Este manual contiene Advertencias de seguridad e Instrucciones de funcionamiento. Deberá consultar el mismo antes
de realizar cualquier aplicación o mantenimiento. Siempre mantenga este manual con la unidad de forma de acceder al mismo fácilmente. No leer ni respetar estas
advertencias e instrucciones podría dar como resultado daño a la propiedad, lesiones graves, o la muerte.
DESCRIPCIÓN
Esta bomba portátil sumergible de uso general está diseñada
para uso en agua. Las unidades están equipadas con un cable
de corriente de 2,74 m (9 pies) con enchufe de tres clavijas con
conexión a tierra. El adaptador de descarga proporcionado puede
ser usado para conectarse fácilmente a una manguera de jardín.
DESEMPAQUE
Inspeccione esta unidad antes de usarla. Ocasionalmente, los productos
se dañan durante el envío. Si la bomba o los componentes están
dañados,
comuníquese con servicio al cliente en 1-877-9RIDGID
.
LEA Y SIGA TODAS LAS INSTRUCCIONES
GUARDE ESTAS INSTRUCCIONES — NO LAS DESECHE
PAUTAS DE SEGURIDAD
Este manual contiene información que es muy importante conocer y
comprender. Esta información es proporcionada por SEGURIDAD y
para EVITAR PROBLEMAS CON EL EQUIPO. Para ayudar a reconocer
esta información, observe los siguientes símbolos.
Peligro indica una situación inminentemente
resultado la muerte o una lesión grave.
Advertencia indica una situación
PODRÍA resultar en la muerte o una lesión grave.
Precaución indica una situación potencialmente
en una lesión leve o moderada.
peligrosa, la cual, si NO se evita, TENDRÁ como
potencialmente peligrosa, la cual, si NO se evita,
peligrosa la cual, si NO se evita, PUEDE resultar
ESPECIFICACIONES
REQUISTITOS DE SUMINISTRO DE ENERGÍA 120 V, 60 Hz
MOTOR
Monofásico
Aviso indica información importante, que si no
Éste es el símbolo de alerta de seguridad. Se utiliza para alertarle sobre
los posibles peligros de lesiones corporales. Obedezca todos los mensajes
de seguridad que siguen a este símbolo para evitar posibles lesiones o la muerte.
se respeta, puede causar daño al equipo.
NOTA: Información que requiere atención especial.
INFORMACIÓN GENERAL DE SEGURIDAD
PROPOSICIÓN 65 DE CALIFORNIA
por el Estado de California como causante de cáncer y defectos de nacimiento
u otros daños reproductivos. Lávese las manos luego de manipularlo.
SEGURIDAD GENERAL
• Lea atentamente todos el manual(es) incluidos con
este producto. Familiarícese bien con los controles y el
uso correcto del equipo. Siga todas las instrucciones.
• Sólo se les debe permitir usar esta unidad a aquellas
personas bien familiarizadas con estas reglas de
manejo seguro.
utilizada con polvos, vapores o líquidos infl amables/combustibles.
NO bombee líquidos que NO estén libres de impurezas. No seguir
estas instrucciones ocasionará lesiones corporales o la muerte.
¡Riesgo de choque eléctrico! Esta
piscinas o en áreas marinas. No coloque nunca la bomba en
una piscina cuando haya personas en el agua. No seguir las
instrucciones PODRÍA ocasionar la muerte o lesiones graves.
se encuentre apoyada en agua o sobre una superfi cie húmeda. No
seguir las instrucciones PODRÍA ocasionar la muerte o lesiones
graves.
Este producto o su cable de corriente pueden
contener químicos, incluido plomo, que son conocidos
Mantener alejado de los niños
¡Riesgo de incendio, explosión y/o muetre!
La bomba NO tiene la capacidad para ser
bomba no ha sido probada para uso en
¡Riesgo de choque eléctrico! NO manipule
la
bomba con las manos mojadas ni cuando
!
CLASIFICACIONES DE CABALLOS DE
FUERZA/ AMPERIOS
RANGO DE TEMP. DEL LÍQUIDO
REQUISITOS DEL CIRCUITO 15 A (minimum)
DIMENSIONES
27,3 cm (10-3/4 pulg.) de alto x
17,1 cm (6-3/4) pulg. de base
CONSTRUCCIÓN
CUBIERTA DEL MOTOR
VOLUTE
IMPULSOR
EJE
DESCARGA
Termoplástico
Termoplástico
Termoplástico
Acero inoxidable
3,8 cm (1-1/2 pulg.) NPT
(adaptador para manguera
de jardín incluido)
1/6 HP / 2.5 A
4,4°C a 40°C
(40° F a 104° F)
Ridge Tool Company
7
6
5
4
3
2
1
DESCARGA (METROS)
0
0 2000 4000 6000 8000 10000 12000
Modelo TP-160
LITROS POR HORA
RENDIMIENTO
Modelo HP
TP-160
1/6 L / Hr
Cabeza de
descarga
0 m
1,5 m 3 m 4,5 m 6 m
11.300 7.200 5.400 3.700 0
9
Page 12

Modelo TP-160 – Manual de instrucciones de funcionamiento y piezas de repuesto
INFORMACIÓN GENERAL DE SEGURIDAD
(CONTINUACIÓN)
capacitado. Los tomacorrientes GFCI (Ground Fault Circuit Interrupter) brindarán
protección contra las fallas de la línea a la conexión a tierra solamente. El tomacorriente
de falla de conexión a tierra NO limita la magnitud de la falla de corriente y NO impide
un choque eléctrico.
1. Use gafas de seguridad en todo momento
al trabajar con bombas.
2. La unidad DEBE estar conectada a GFCI. La instalación
debe realizarla solamente un electricista capacitado.
3. No use el cable de corriente ni la manguera de descarga para
llevar o manipular la bomba. Esto puede provocar daños en el
cable de corriente o en la manguera de descarga. Use el mango
que se proporciona en la bomba.
¡Riesgo de choque eléctrico! La instalación
debe realizarla realizarla solamente un electricista
APLICACIÓN Y FUNCIONAMIENTO
antes de intentar instalar, efectuar un servicio,
reubicar o realizar cualquier tipo de mantenimiento.
Si la fuente de energía está fuera de la vista, tránquela
y etiquétela en la posición abierta (off) para evitar
que se aplique corriente en forma inesperada. Si no lo hace, puede provocar un
choque eléctrico mortal.
Peligro de choque eléctrico. Use sólo
por Underwriters Laboratories (UL) con alambre calibre
16 o mayor, etiquetado para uso en exteriores. Use sólo
enchufes polarizados de conexión a tierra. Los enchufes
polarizados tienen una clavija ligeramente más ancha que la otra
y pueden enchufarse de una sola manera en el tomacorriente. NO
maneje el conector de enchufe cerca del agua. El no seguir estas
instrucciones dará como resultado lesiones graves o la muerte.
Siempre desconecte
la fuente de electricidad
cables de extensión homologados
5. Enchufe el cable en un tomacorriente con conexión a tierra GFCI, de
120 voltios. La bomba comenzará a funcionar en cuanto enchufe el
cable de corriente en el tomacorriente.
6. La bomba sacará agua hasta 9,5 mm (3/8 pulg.) de la superficie
dura sobre la que se colocó la bomba.
7. Una vez que el nivel del agua alcance la marca de 9,5 mm (3/8
pulg.), es necesario apagar la bomba.
NO permita que la bomba funcione
sin líquido. El sello del eje, para su lubricación,
depende del agua. Si hace funcionar la bomba sin agua DAÑARÁ el
sello del eje y provocará el fallo de la bomba.
MANTENIMIENTO
SIEMPRE desconecte la fuente de
electricidad antes de intentar instalar,
efectuar un servicio, reubicar o realizar cualquier tipo de
mantenimiento. El no hacer así PUEDE provocar un choque
eléctrico mortal.
Esta bomba requiere un servicio mínimo. La caja del motor de la
bomba está completamente sellada y no requiere servicio. Si la
bomba no funciona, siga estas pautas de diagnóstico y resolución
de problemas:
1. Verifique que la altura de bombeo NO supere los 6,1 m (20 pies)
(vea la Figura 1). Si la altura de bombeo es mayor a 6,1 m (20 pies),
esta bomba NO funcionará.
NO desarme o altere este producto de
ninguna manera. No seguir estas
instrucciones ocasionará lesiones graves o la muerte.
2. Para verificar que la bomba está funcionando
correctamente:
a. Desconecte la bombade la fuente de energía.
b. Conecte el adaptador de la manguera y la manguera de
descarga a la bomba.
Esta unidad NO está diseñada para uso
bomba de sumidero o en aplicaciones
de sumiderocomo. Esta unidad NO está diseñada para uso
en tanques sépticos ni sótanos subterráneos, para bombear
aguas residuales o efl uentes. No la utilice NUNCA en
ubicaciones peligrosas u explosivas.
1. Esta bomba fue diseñada con un tamaño de descarga de 3 cm
(1-1/4 pulg.) NPT. Conecte el tubo o el accesorio de conexión a
la salida de descarga roscada o conecte a la bomba la conexión
acodada de la manguera de jardín que se proporciona. Enrosque
el extremo hembra de la manguera de jardín a la salida macho de
la bomba.
2. Para reducir las pérdidas entre la bomba y la manguera, antes de
instalar la bomba coloque una arandela para mangueras (no se
incluye) en la manguera de jardín.
3. Para un mejor rendimiento de la bomba, desenrolle la manguera
antes de encender la bomba. Esto ayudará a eliminar cualquier
pliegue o codo en la manguera y permitirá que la unidad bombee
con menos resistencia.
4. Coloque la bomba sobre una superficie dura y plana en el agua.
No coloque la bomba directamente sobre una superficie lodosa o
arenosa. Esto obstruirá el filtro de entrada.
No manipule la bomba con las manos
mojadas o si está parado en una
superfi cie húmeda o con agua cuando la unidad esté en
funcionamiento o tenga fallas de funcionamiento. Antes de
manipular, desconecte SIEMPRE el cable de la bomba de la
fuente de energía.
MÁX. 6 M (20 PIES)
NIVEL DE AGUA
Figura 1 – Nivel de agua
c. Sumerja la bomba en un cubo o tina con agua.
d. Coloque el otro extremo de la manguera de salida fuera del
cubo, de forma que el agua se bombee hacia afuera.
e. Enchufe el cable de corriente en un tomacorriente con
conexión a tierra GFCI, de 120 voltios. Si la bomba funciona
correctamente, prosiga al punto 3. Si la bomba NO funciona
correctamente, desenchufe el cordón eléctrico
y siga al punto 4 de esta sección.
10
Ridge Tool Company
Page 13

Modelo TP-160 – Manual de instrucciones de funcionamiento y piezas de repuesto
MANTENIMIENTO (CONTINUACIÓN)
3. Para verificar que la manguera de descarga no tenga obstrucciones:
a. Conecte la manguera a otra fuente de agua, como un grifo.
Si el agua fluye a través de la manguera, prosiga con el paso
4. Si el agua no fluye, verifique que la manguera de descarga
esté desenrollada. Elimine todos los pliegues, dobleces u
obstrucciones de la manguera.
4. Para mantener el buen funcionamiento, la bomba requiere una
limpieza periódica de la misma. Siga los pasos de limpieza que
se detallan a continuación:
a. Desenchufe el cable de corriente.
b. Retire los 4 tornillos al fondo de la base.
c. Quite la base y la placa de entrada.
d. Elimine los desechos y asegúrese de que el impulsor gire
libremente.
e. Vuelva a colocar la placa, la base y los tornillos
Tabla de diagnóstico y
resolución de problemas
Síntoma Causa(s) posible(s) Acciones a tomar
La bomba no
enciende o no
funciona
La bomba funciona
pero sale muy
poca agua o nada
1. Fusible eléctrico de la casa
quemado
2. El GFCI se disparó
3. Bajo voltaje
4. Motor defectuoso
5. Impulsor obstruido
6. Rejilla de entrada obstruida
1. Impulsor obstruido
2. Tubería obstruida
3. La altura de descarga excede
la capacidad
1. Si está quemado, cámbielo por un fusible del tamaño correcto o
reajuste el disyuntor
2. Verifique que no existan cables dañados ni humedad
3. Si el voltaje está por debajo de 108 voltios, verifique el tamaño del cable
4. Reemplace la bomba
5. Quite la base y la placa del impulsor, verifique que no tengan residuos;
limpie
6. Limpie la rejilla de entrada
1. Quite la base y la placa del impulsor, verifique que no tengan residuos;
limpie
2. Verifique que no tenga pliegues, cambie de lugar la manguera, verifique
que no tenga residuos
3. Cambie de lugar la bomba para reducir la altura de descarga
NOTAS
Ridge Tool Company
11
Page 14

Modelo TP-160 – Manual de instrucciones de funcionamiento y piezas de repuesto
TP-160 — Bomba sumergible de uso general
No. de serie
Si usted tiene alguna pregunta respecto al servicio o reparación de esta bomba, llame o escriba a:
RIDGID Water Systems
Attn: Customer Service Department
101 Production Drive
Harrison, Ohio 45030
csridgid@waynewatersystems.com
N.º de Ref. Descripción
1 Juego de adaptador
Anote el número de serie indicado abajo en la calcomanía del producto
Si desea conocer el nombre y la dirección del Centro
Autorizado de Servicio independiente más cercano a su
domicilio, comuníquese con Ridge Tool Company llamando al
visite nuestra página de Internet en: http://www.RIDGID.com
Para servicio al cliente, llame al 1-877-9RIDGID.
TP-160
No. de cat.
40143
40908
Cantidad
1
12
1
Ridge Tool Company
Page 15

Operating Instructions and Parts Manual
Model, Modèle, Modelo – TP-160 Manuel de pièces et mode d’emploi
Manual de instrucciones de funcionamiento y piezas de repuesto
NOTES / NOTAS
Ridge Tool Company
13
Page 16

Operating Instructions and Parts Manual
Model, Modèle, Modelo – TP-160 Manuel de pièces et mode d’emploi
Manual de instrucciones de funcionamiento y piezas de repuesto
RIDGID Water Pump Limited Three Year Warranty
This product is manufactured by WAYNE Water Systems. The trademark is licensed from Ridge Tool Company. All warranty communications should be directed to RIDGID customer service at 1-877-9RIDGID.
What is Covered under the Limited Three Year Warranty
RIDGID water pumps are warranted to be free of material and workmanship defects for the three-year period from the date of purchase. This warranty is specific to this water pump and for the original owner and may not be transferred.
Warranties from other RIDGID products may vary.
How to Obtain Service
To obtain service for this RIDGID water pump you must return it, freight prepaid, to a service center authorized to repair RIDGID water pumps. You may obtain the location of the service center nearest you by calling (toll free) 1-877-9RIDGID or by
logging on to the RIDGID website at www.RIDGID.com. When requesting warranty service, you must present the proof of purchase documentation, which includes the date of purchase. During the term of this Limited Warranty the authorized service
center will repair any faulty workmanship and either repair or replace any defective part, at WAYNE Water Systems option at no charge to the original owner.
What is Not Covered
This warranty does not cover normal wear and tear or any malfunction, failure, or defect resulting from accident, misuse, abuse, neglect, alteration, improper installation or maintenance, modification, repair by other than a service center authorized
to repair RIDGID brand water pumps or failure to operate in accordance with RIDGID water pump written instructions. WAYNE WATER SYSTEMS MAKES NO OTHER EXPRESS WARRANTIES, REPRESENTATIONS, OR PROMISES AS TO THE
QUALITY OR PERFORMANCE OF ITS WATER PUMPS OTHER THAN THOSE SPECIFICALLY STATED IN THIS LIMITED WARRANTY. RIDGE TOOL COMPANY MAKES NO WARRANTIES OR REPRESENTATIONS, EXPRESS OR IMPLIED,
INCLUDING AS NOTED BELOW.
Additional Limitations
TO THE EXTENT PERMITTED BY APPLICABLE LAW, ALL IMPLIED WARRANTIES, INCLUDING WARRANTIES OF MERCHANTABILITY OR FITNESS FOR A PARTICULAR PURPOSE, ARE DISCLAIMED. ANY IMPLIED WARRANTIES,
INCLUDING WARRANTIES OF MERCHANTABILITY OR FITNESS FOR A PARTICULAR PURPOSE, THAT CANNOT BE DISCLAIMED UNDER STATE LAW ARE LIMITED TO THREE YEARS FROM THE DATE OF PURCHASE. WAYNE Water
Systems is not responsible for direct, indirect, incidental, special or consequential damages. Some states do not allow limitations on how long an implied warranty lasts and/or do not allow the exclusion or limitation of incidental or consequential
damages, so the above limitations may not apply to you. This warranty gives you specific legal rights, and you may also have other rights, which vary, from state to state, province to province, or country to country.
Questions or Comments
Call 1-877-9RIDGID
www.RIDGID.com
Please have your model and serial number on hand when calling.
Garantie limitée de trois ans de pompe à eau RIDGID
Ce produit est fabriqué par WAYNE Water Systems. La marque de commerce est sous licence de la société Ridge Tool. Toutes les communications sous la garantie doivent être acheminées au service à la clientèle RIDGID au 1-877-9RIDGID.
Ce qui est couvert sous la garantie limitée de trois ans
Les pompes à eau RIDGID sont garanties libres de défauts de matériaux et de fabrications pour la période de trois ans à partir de la date d’achat. Cette garantie est offerte pour cette pompe à eau et à l’acheteur original et ne peut pas être transférée.
Les garanties d’autres produits RIDGID peuvent varier.
Comment obtenir le service
Pour obtenir le service pour cette pompe à eau, vous devez le retourner, frais de transport prépayés, à un centre de service autorisé pour effectuer les réparations de pompes à eau RIDGID. Vous pouvez obtenir l’information sur le centre de service le
plus près de vous en appelant le (numéro sans frais) 1-877-9RIDGID ou en visitant le site Web de RIDGID à www.RIDGID.com. Pour toute demande de service sous garantie, vous devez présenter la documentation de preuve d’achat qui inclut la date
d’achat. Pendant la durée de la garantie limitée, le centre de service autorisé réparera tout problème de main d’œuvre et réparera ou remplacera toute pièce défectueuse, à la discrétion de WAYNE Water Systems sans frais pour le propriétaire original.
Ce qui n’est pas couvert
Cette garantie ne couvre pas l’usure normale ou toute défaillance, mauvais fonctionnement ou défaut suite à un accident, une mauvaise utilisation, un abus, de la négligence, des altérations, une installation ou une maintenance inappropriée, des
modifications ou des réparations par tout autre qu’un centre de service autorisé à réparer les pompes à eau de marque RIDGID ou ne pas utiliser conformément aux instructions écrites de la pompe à eau RIDGID. WAYNE WATER SYSTEMS
N’OFFRE AUCUNE GARANTIE EXPRESSE, DÉCLARATION OU PROMESSE QUANT À LA QUALITÉ OU LA PERFORMANCE DE SES POMPES À EAU AUTRES QUE CELLES INDIQUÉES SPÉCIFIQUEMENT DANS CETTE GARANTIE
LIMITÉE. LA SOCIÉTÉ RIDGE TOOL N’OFFRE AUCUNE GARANTIE OU DÉCLARATION, EXPRESSE OU IMPLICITE Y COMPRIS CE QUI EST INDIQUÉ PLUS BAS.
Limites supplémentaires
DANS LA MESURE PERMISE PAR LA LOI APPLICABLE, TOUTES LES GARANTIES IMPLICITES, Y COMPRIS LES GARANTIES DE COMMERCIALITÉ ET D’ADAPTATION À UN USAGE PARTICULIER, SONT RÉFUTÉES. TOUTES LES
GARANTIES IMPLICITES, Y COMPRIS LES GARANTIES DE COMMERCIALITÉ OU D’ADAPTATION À UN USAGE PARTICULIER, QUI NE PEUVENT PAS ÊTRE
LA DATE D’ACHAT. WAYNE Water Systems n’est pas responsable des dommages directs, indirects, accidentels, spéciaux ou consécutifs. Certains états ou certaines provinces n’autorisent pas de limitations de durée pour les garanties implicites,
ni l’exclusion ni la limitation des dommages fortuits ou indirects. Les limitations précédentes peuvent donc ne pas s’appliquer. Cette garantie vous donne des droits précis et vous pouvez aussi avoir d’autres droits qui peuvent varier d’un état à l’autre,
d’une province à l’autre ou d’un pays à l’autre.
Questions ou commentaires
Appeler le 1-877-9RIDGID
www.RIDGID.com
En appelant, veuillez avoir à portée de la main votre numéro de modèle et votre numéro de série.
RÉFUTÉES SOUS LA LOI DE L’ÉTAT SONT LIMITÉES À TROIS ANS À PARTIR DE
Garantía limitada por tres años de la bomba de agua RIDGID
Este producto es fabricado por WAYNE Water Systems. La marca comercial está registrada con licencia de Ridge Tool Company. Todas las comunicaciones referentes a la garantía deben dirigirse al servicio de atención al cliente de RIDGID al
1-877-9RIDGID.
Qué está cubierto bajo la garantía limitada de tres años
Se garantiza que las bombas de agua RIDGID están libres de defectos materiales y de mano de obra durante un período de tres años a partir de la fecha de compra. Esta garantía es específica para esta bomba de agua y para el comprador original y
no puede ser transferida. Las garantías de otros productos RIDGID pueden variar.
Cómo obtener servicio
Para obtener servicio para esta bomba de agua RIDGID debe enviarlo, con el flete pagado, a un centro de servicio autorizado para la reparación de bombas de agua RIDGID. Puede obtener la ubicación del centro de servicio más próximo llamando
por el número de llamada gratuita 1-877-9RIDGID o conectándose al sitio web de RIDGID en www.RIDGID.com. Cuando solicite un servicio cubierto por la garantía, debe presentar documentación de prueba de compra, que incluya la fecha de
compra. Durante el período de esta Garantía limitada el centro de servicio autorizado reparará cualquier defecto de mano de obra y reparará o reemplazará cualquier pieza defectuosa, según lo decida WAYNE Water Systems sin cargo para el
propietario original.
Qué no se cubre
Esta garantía no cubre el uso y desgaste normales ni ningún funcionamiento defectuoso, falla o defecto que surja como resultado del uso incorrecto por accidente, abuso, negligencia, alteración, instalación o mantenimiento inadecuados,
modificación, reparación por una persona que no esté autorizada por el centro de servicio para reparar bombas de agua de la marca RIDGID o la incapacidad de funcionar de acuerdo con las instrucciones escritas de la bomba de agua RIDGID.
WAYNE WATER SYSTEMS NO PROPORCIONA NINGUNA GARANTÍA, REPRESENTACIÓN NI PROMESA EXPRESA SOBRE LA CALIDAD O EL FUNCIONAMIENTO DE SUS BOMBAS DE AGUA EXCEPTO POR AQUELLAS QUE
SE MENCIONAN ESPECÍFICAMENTE EN ESTA GARANTÍA LIMITADA. RIDGE TOOL COMPANY NO PROPORCIONA NINGUNA GARANTÍA NI REPRESENTACIÓN, EXPRESA O IMPLÍCITA, INCLUYENDO LAS QUE SE DETALLAN A
CONTINUACIÓN.
Limitaciones adicionales
HASTA DONDE ESTÉ PERMITIDO POR LAS LEYES QUE SE APLICAN, SE NIEGA TODA RESPONSABILIDAD POR GARANTÍAS IMPLÍCITAS, INCLUYENDO LAS GARANTÍAS DE COMERCIABILIDAD O IDONEIDAD PARA USOS
ESPECÍFICOS. LAS RESPONSABILIDADES DE CUALQUIER GARANTÍA IMPLÍCITA, INCLUYENDO LAS GARANTÍAS DE COMERCIABILIDAD O IDONEIDAD PARA USOS ESPECÍFICOS, QUE NO PUEDAN SER DENEGADAS DE ACUERDO
A LAS LEYES ESTATALES ESTARÁN LIMITADAS A TRES AÑOS A PARTIR DE LA FECHA DE COMPRA. WAYNE Water Systems no es responsable por daños directos, indirectos, incidentales, especiales o consecuentes. Algunos estados no
permiten limitaciones sobre la duración de las garantías implícitas y/o no permiten la exclusión ni la limitación de daños incidentales o consecuentes, por lo tanto es posible que las limitaciones anteriores no se apliquen en su caso. Esta garantía le
proporciona derechos legales específicos, y también puede tener otros derechos que varían de un estado a otro o de una provincia a otra o de un país a otro.
Preguntas o comentarios
Llame al 1-877-9RIDGID
www.RIDGID.com
Recuerde tener a mano el número de modelo y el número de serie cuando llame.
© 2011,
WAYNE/Scott Fetzer Company.
Ridge Tool Subsidiary Emerson Electric Co.
322103-005 5/11
 Loading...