

Page 1

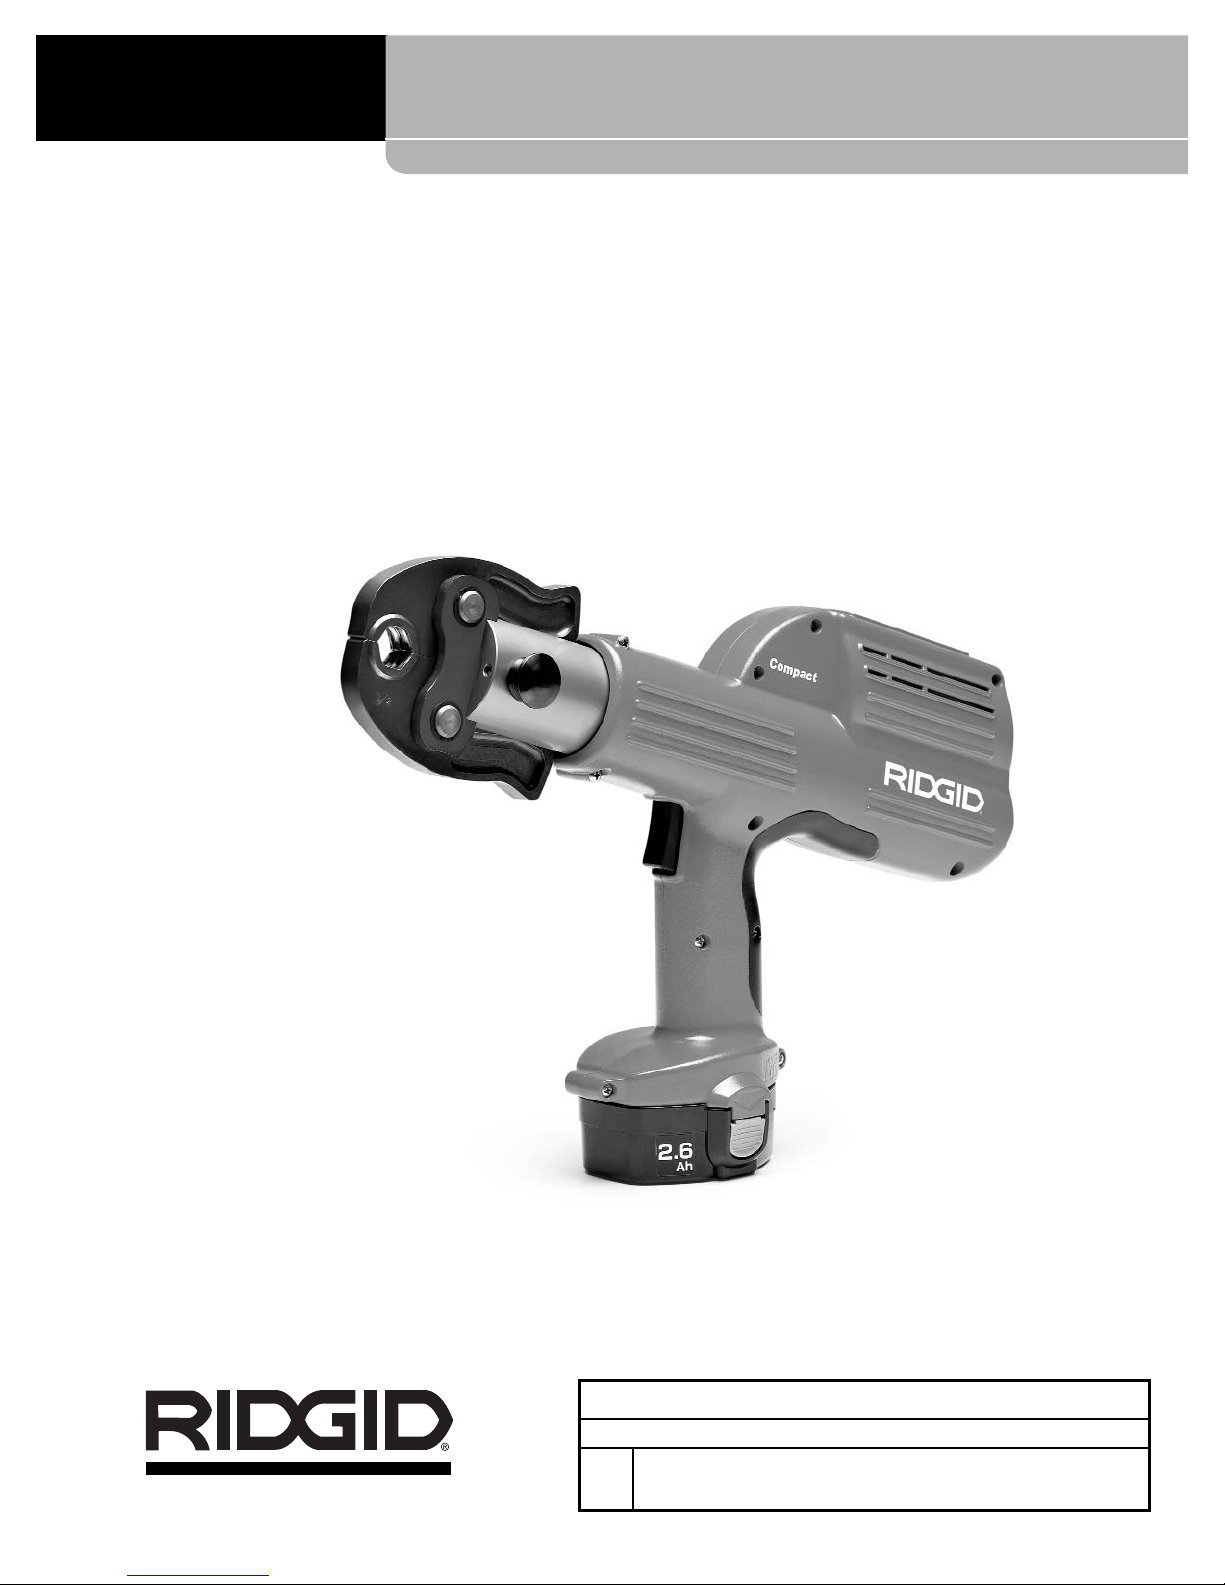
Pressing Tool
• Français – 13
• Castellano – pág. 27
WARNING!
Read this Operator’s Manual
carefully before using this
tool. Failure to understand
and follow the contents of
this manual may result in
electrical shock, fire and/or
serious personal injury.
Compact 100-B Manual
Page 2

Ridge Tool Companyii
Compact 100-B Pressing Tool
Table of Contents
Recording Form for Machine Serial Number..............................................................................................................1
General Safety Information
Work Area Safety........................................................................................................................................................2
Electrical Safety ..........................................................................................................................................................2
Personal Safety ..........................................................................................................................................................2
Tool Use and Care......................................................................................................................................................2
Service ........................................................................................................................................................................3
Specific Safety Information
Pressing Tool Safety ..................................................................................................................................................3
Battery Safety ............................................................................................................................................................3
Description and Specifications
Description ..................................................................................................................................................................3
Specifications..............................................................................................................................................................4
Inspecting the Pressing Tool and Jaw Sets
Compact 100-B Battery Charger ................................................................................................................................4
Attaching Pressing Jaws ............................................................................................................................................4
Tool and Work Area Set-Up
Battery Charging Procedure ......................................................................................................................................5
Important Charging Notes ..........................................................................................................................................6
Battery Disposal..........................................................................................................................................................6
Nickel-Cadmium Batteries ..........................................................................................................................................6
Nickel-Metal Hydride Batteries....................................................................................................................................6
Operating Instructions
Preparing The Joint ....................................................................................................................................................7
Pressing A Fitting With Typical Scissor Jaw Set ........................................................................................................7
Inspecting The Pressed Connection ..........................................................................................................................8
Maintenance Instructions
Daily Cleaning and Lubrication ..................................................................................................................................8
Jaws............................................................................................................................................................................8
Required Maintenance at RIDGID Authorized Service Center ..................................................................................8
Accessories ..................................................................................................................................................................9
Storage ..........................................................................................................................................................................9
Service and Repair........................................................................................................................................................9
Troubleshooting..........................................................................................................................................................10
Compact 100-B Diagnostic Codes ............................................................................................................................11
Lifetime Warranty ........................................................................................................................................Back Cover
Page 3
Compact 100-B Pressing Tool
Record Serial Number below and retain product serial number which is located on nameplate.
Serial
No.
Pressing Tool
Compact 100-B
Page 4
Ridge Tool Company2
Compact 100-B Pressing Tool
General Safety Information
WARNING! Read and understand all instructions. Failure
to follow all instructions listed below may
result in electric shock, fire, and/or serious
personal injury.
SAVE THESE INSTRUCTIONS!
Work Area Safety
• Keep your work area clean and well lit. Cluttered
benches and dark areas invite accidents.
• Do not operate tools in explosive atmospheres,
such as in the presence of flammable liquids,
gases, or dust. Power tools create sparks which
may ignite the dust or fumes.
• Keep by-standers, children, and visitors away
while operating a tool. Distractions can cause you to
lose control.
Electrical Safety
• Double Insulated tools are equipped with a polarized plug (one blade is wider than the other). This
plug will fit in a polarized outlet only one way. If the
plug does not fit fully in the outlet, reverse the
plug. If it still does not fit, contact a qualified electrician to install a polarized outlet. Do not change
the plug in any way. Double Insulation eliminates
the need for the three wire grounded power cord and
grounded power supply system.
• Avoid body contact with grounded surfaces such
as pipes, radiators, ranges and refrigerators. There
is an increased risk of electrical shock if your body is
grounded.
• Do not expose power tools to rain or wet condi-
tions. Water entering a tool will increase the risk of
electrical shock.
• Do not abuse cord. Never use the cord to carry the
tools or pull the plug from an outlet. Keep cord
away from heat, oil, sharp edges or moving parts.
Replace damaged cords immediately. Damaged
cords increase the risk of electrical shock.
• When operating a tool outside, use an outdoor
extension cord marked “W-A” or “W”. These cords
are rated for outdoor use and reduce the risk of electrical shock.
• Use proper extension cords.
(See Chart)
Insufficient
conductor size will cause excessive voltage drop, loss
of power and overheating.
Personal Safety
• Stay alert, watch what you are doing and use
common sense when operating a power tool. Do
not use tool while tired or under the influence of
drugs, alcohol, or medications. A moment of inat-
tention while operating power tools may result in serious personal injury.
• Dress properly. Do not wear loose clothing or
jewelry. Contain long hair. Keep your hair, clothing,
and gloves away from moving parts. Loose clothes,
jewelry, or long hair can be caught in moving parts.
• Avoid accidental starting. Carrying tools with your
finger on the switch invites accidents.
• Do not overreach. Keep proper footing and bal-
ance at all times. Proper footing and balance enables
better control of the tool in unexpected situations.
• Use safety equipment. Always wear eye protec-
tion. Dust mask, non-skid safety shoes, hard hat, or
hearing protection must be used for appropriate conditions.
Tool Use and Care
• Do not force tool. Use the correct tool for your
application. The correct tool will do the job better
and safer at the rate for which it is designed.
• Do not use tool if switch does not turn it ON or
OFF. Any tool that cannot be controlled with the
switch is dangerous and must be repaired.
• Remove battery before making any adjustments,
changing accessories or storing the tool. Such
preventive safety measures reduce the risk of starting
the tool accidentally.
• Store idle tools out of the reach of children and
other untrained persons. Tools are dangerous in
the hands of untrained users.
• Check for misalignment or binding of moving
parts, breakage of parts, and any other condition
that may affect the tool’s operation. If damaged,
have the tool serviced before using. Many acci-
dents are caused by poorly maintained tools.
Minimum Wire Gauge for Extension Cord
Nameplate
Amps
Total Length (in feet)
0 – 25 26 – 50 51 – 100
0 – 6 18 AWG 16 AWG 16 AWG
6 – 10 18 AWG 16 AWG 14 AWG
10 – 12 16 AWG 16 AWG 14 AWG
12 – 16 14 AWG 12 AWG
NOT RECOMMENDED
Page 5

Ridge Tool Company 3
• Use only accessories that are recommended by
the manufacturer for your model. Accessories that
may be suitable for one tool may become hazardous
when used on another tool.
• Keep handles dry and clean; free from oil and
grease. Allows for better control of the tool.
Service
• Tool service must be performed only by qualified
repair personnel. Service or maintenance performed
by unqualified repair personnel could result in injury.
• When servicing a tool, use only identical replace-
ment parts. Follow instructions in the Maintenance
Section of this manual. Use of unauthorized parts or
failure to follow Maintenance Instructions may create a
risk of electrical shock or injury.
Specific Safety Information
WARNING
Read this operator’s manual, the Jaw Set operator’s
manual and the fitting manufacturer’s installation
instructions carefully before using the RIDGID
Compact 100-B Pressing Tool. Failure to understand and follow the contents of these manuals
and instructions may result in extensive property
damage, severe personal injury, or death.
Call the Ridge Tool Company, Technical Service Department at (800) 519-3456 if you have any questions.
Pressing Tool Safety
• Only use the Compact 100-B Pressing Tool with
RIDGID Compact jaws. Other uses or modifying the
Compact 100-B Pressing Tool for other applications
may damage the pressing tool, damage the jaws
and/or cause personal injury.
• Keep your fingers and hands away from jaws dur-
ing pressing cycle. Your fingers or hands can be
crushed, fractured or amputated if they become caught
between the jaws or between these components and
any other object.
• Never attempt to repair a damaged jaw set. A jaw
that has been welded, ground, drilled or modified in
any manner can shatter during pressing resulting in
serious injury. Discard the entire damaged jaw set.
Replace with a new jaw set. Never replace individual
components except for damaged jaw return springs.
Please call Ridge Tool Company, Technical Services
for availability.
Compact 100-B Pressing Tool
• Never use tool with a switch or motor housing
that is damaged. Using a tool with a cracked motor
housing or broken switch can result in electric shock
and severe injury.
Selection of appropriate materials and joining
methods is the responsibility of the system designer
and/or installer. Before any installation is attempted, careful evaluation of the specific service environment, including chemical environment and service temperature, should
be completed. Consult Press Fitting System manufacturer
for selection information.
Battery Charger Safety
• Charge only Makita®Ni-MH and Ni-Cd rechargeable
batteries in the Makita®battery charger. Other types
of batteries may burst causing personal injury and
damage.
• Do not probe battery charger with conductive ob-
jects. Shorting of battery terminals may cause sparks,
burns or electrical shock.
• Do not insert battery with cracked case into charg-
er. Do not operate charger if it has been dropped or
damaged in any way. Damaged charger increases
the risk of electrical shock.
• Do not burn batteries for any reason. Batteries
explode in fire.
• Charge battery cartridge in temperatures above
50°F (10°C) and below +104°F (40°C). Store tool
and battery pack in locations where temperatures
will not exceed +120°F (49°C). Proper care will prevent
serious damage to batteries. Improper care of batteries
may result in battery leakage, electrical shock or burns.
• Do not attempt to use a step-up transformer, an
engine generator or DC power receptacle. May
cause damage to charger resulting in electrical shock,
fire or burns.
• Do not allow anything to cover the charger while in
use. May result in fire.
• Unplug the charger when not in use. Reduces risk
of injury to children and untrained persons.
• Always cover the battery terminals with the battery
cover when the battery cartridge is not used.
Reduces risk of electrical shock.
• Do not charge battery pack in damp or wet envi-
ronment. Do not expose to rain or snow. Increases
the risk of electrical shock.
CAUTION
Page 6
NOTE! The Compact 100-B Pressing Tool and Compact
Jaw Sets are protected under various U.S. and
international patents and patent applications.
NOTE! RIDGID jaw sets are offered in two “series”
• Standard Series
• Compact Series
These jaw sets are not interchangeable. That is,
only compact series jaw sets will work with the
Compact 100-B Pressing Tool. Similarly, only
standard series jaw sets will work with standard
series tools. Please refer to the standard series
tools' (320-E, CT-400) operator's manuals for
further information on these tools and jaws.
Inspecting The Compact
Pressing Tool and Jaw Sets
WARNING
To prevent serious injury, inspect the Compact
100-B Pressing Tool, battery charger and Compact
Jaw Sets. Never use the Compact 100-B Jaw Set
with damaged or missing parts. The following
inspection procedures should be performed on a
daily basis:
1. Make sure the Compact 100-B Pressing Tool battery
is removed.
2. Inspect the tool housing and switch for damage.
Check for damage such as cracks in the tool housing
and exposed wires.
3. Inspect the jaw sets. If dirty, clean jaw sets. Refer to
Maintenance Section for cleaning instructions. Failure
to properly maintain jaws can result in an improper
connection that can lead to extensive property damage. If any cracks are found, discard the damaged
assemblies and obtain replacement.
Always discard the entire assembly. Never
replace individual components except for jaw return
springs. Failure to replace the entire assembly may result
in component failure and serious injury.
4. Clean any oil, grease or dirt from the tool handles.
This reduces the risk of the tool slipping from your grip.
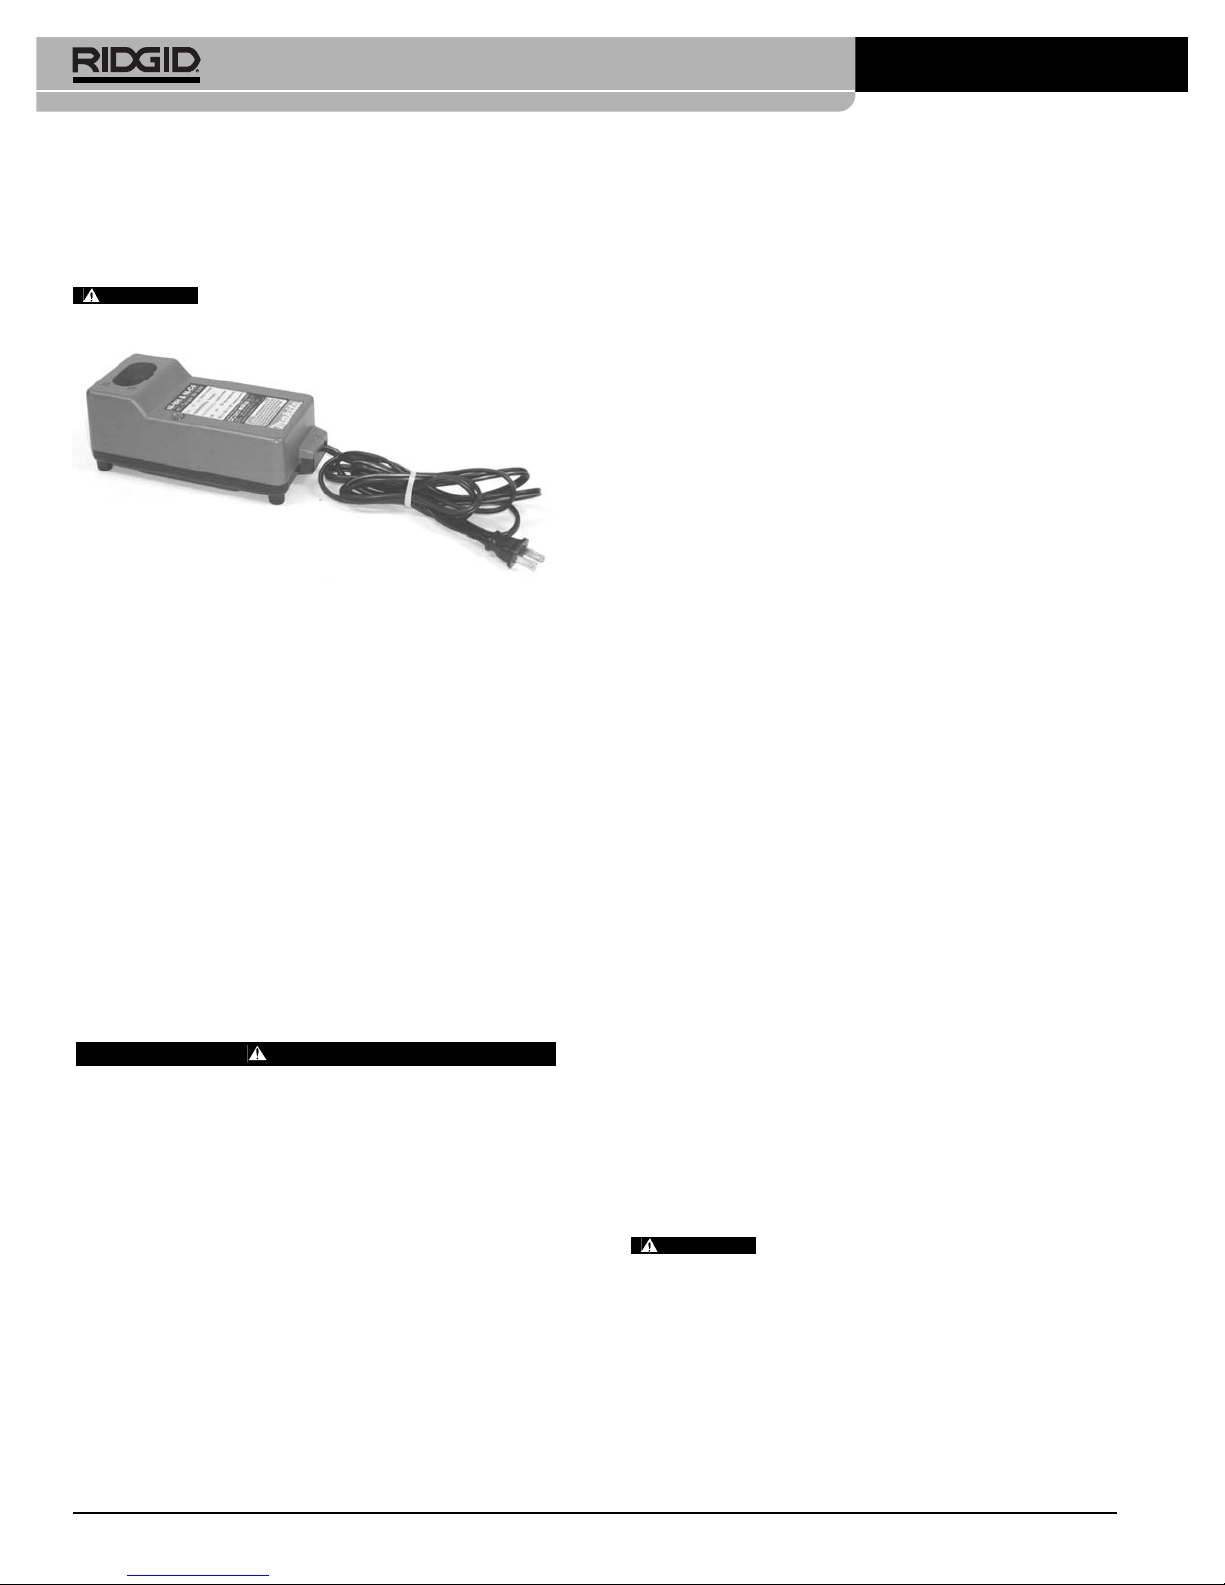
Compact 100-B Battery Charger
Inspect the power cord and plug for damage. If the cord or
plug is damaged, do not use the charger until the cord is
Description, Specifications and
Standard Equipment
Description
The Compact 100-B Pressing Tool, when used with appropriate jaw sets, is designed to mechanically press fittings
onto tubing to create a water-tight and permanent seal.
When the switch on the Compact 100-B is depressed, an
internal electric motor powers a hydraulic pump which
forces fluid into the cylinder of the tool, forcing the ram forward and applying thousands of pounds of pressing force
onto specially designed fittings.
The entire cycle duration is approximately seven (7) seconds. Once the cycle begins to deform a fitting, it will automatically continue until completion, even if the trigger
switch is released. LED displays on the top of the tool indicate problems such as improper temperature, open jaw
mounting pin or maintenance required.
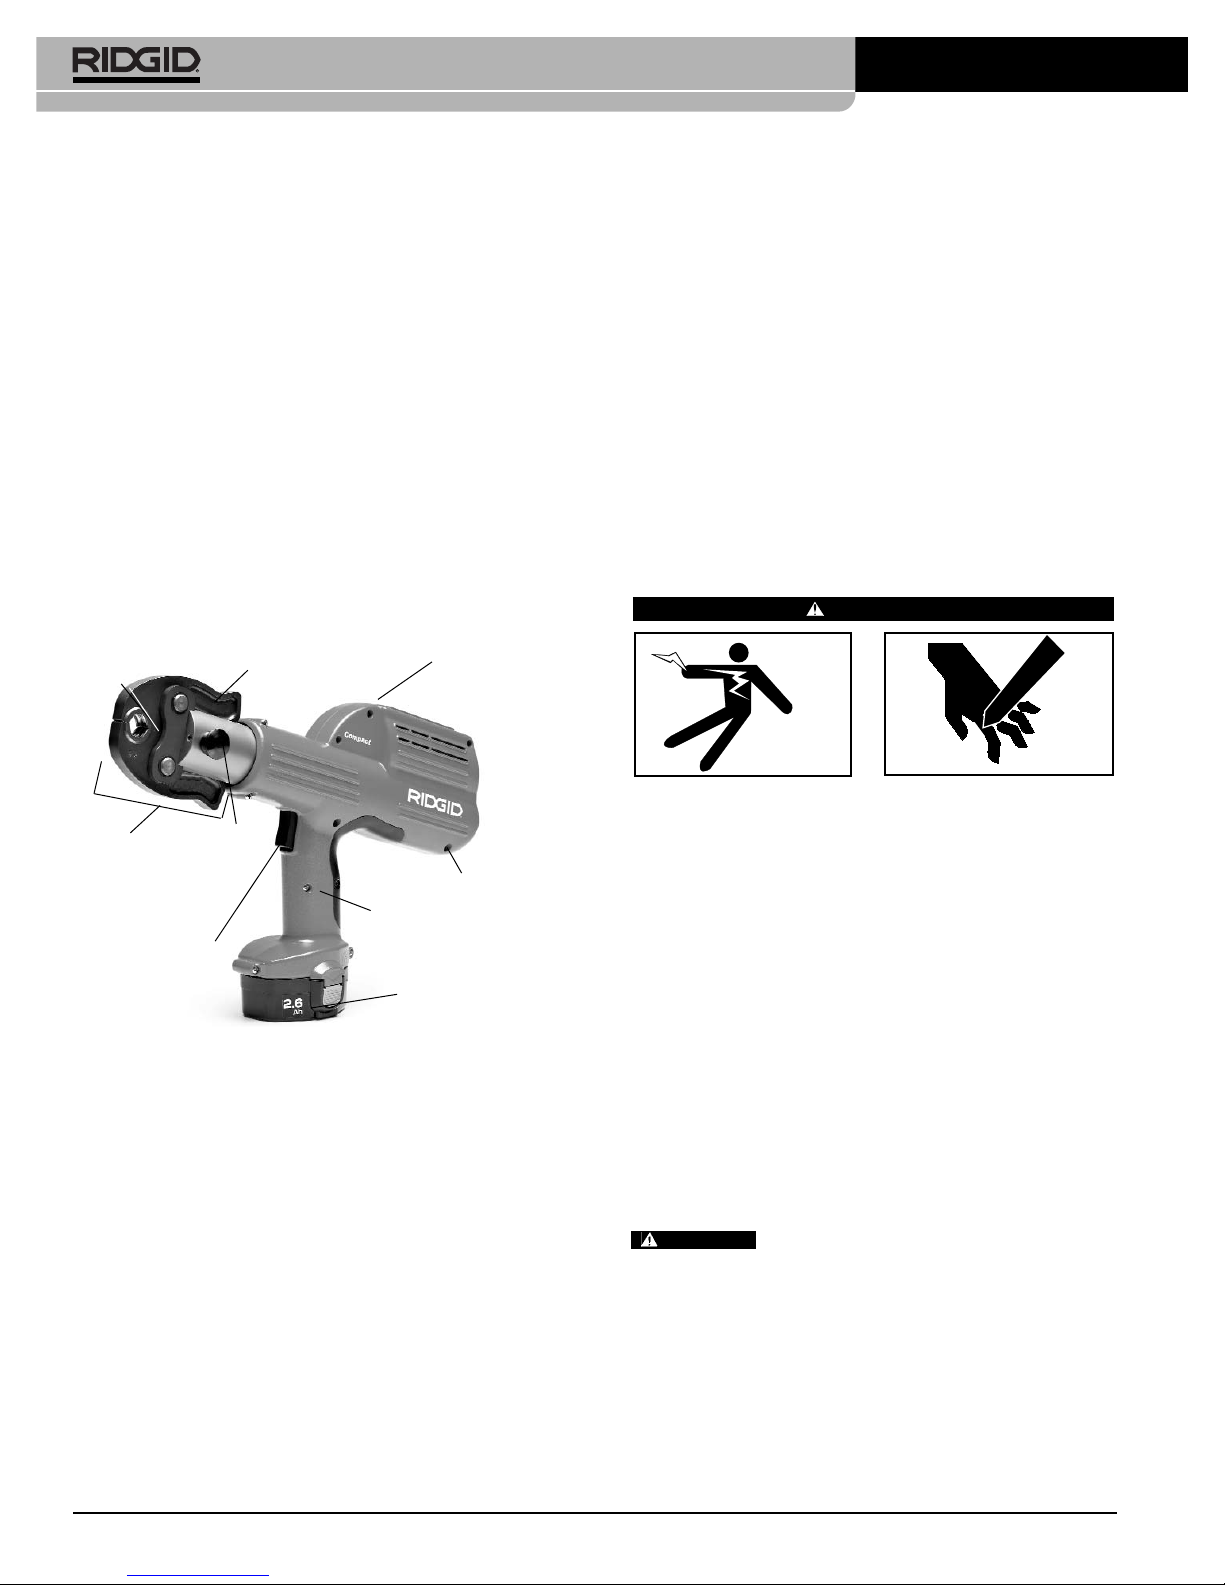
Figure 1 – Compact 100-B Pressing Tool and Compact
Series Jaw Set
Specifications
Compact 100-B Pressing Tool:
Motor
Voltage ...................14.4 VDC
Amperage ...............25.6Amp
Power .....................325 Watts
Weight ........................7.5 lbs. (3.4 Kg) with Battery
5.7 lbs. (2.6 Kg) without Battery
Ram Force.....................5,400 Lbs. (24kN)
Operating Temperature
Range...............................32° F to 122° F (0° C to 50° C)
Ridge Tool Company4
Compact 100-B Pressing Tool
LED Display
Panel (Top)
Compact
Scissor Style
Jaw Set
Compact Jaw Arm
Jaw
Mounting
Pin
Battery
Tool Housing
Switch
Handle
Jaw
Sideplate
WARNING
Page 7
drilled or modified in any manner can shatter during
pressing, resulting in sharp flying objects, severe injury or
death. Discard and replace damaged jaw sets.
5. Slide the jaw set into the pressing tool
(Figure 3)
.
6. Push the jaw set mounting pin until it clicks.
NOTE! The Compact 100-B will not work unless the pin
is fully engaged.
Tool and Work Area Set-Up
WARNING
To prevent serious injury, proper set-up of the
pressing tool and work area is required. The
following procedures should be followed:
1. Check work area for:
• Adequate lighting
• Flammable liquids, vapors or dust that may ignite.
Battery Charging Procedure:
WARNING
Before using the battery charger, read all the battery and charger instructions.
1. Locate the charger so the cord and charger will not be
stepped on, tripped over or be subjected to damage. Do not expose charger to wet environment such
as rain or snow.
2. Charge battery cartridge in temperatures above 50°F
(10°C) and below 104°F (40°C). Store tool and battery
cartridge in location where temperatures do not
exceed 120°F (49°C).
3. Plug the battery charger into the proper A/C voltage
source. The charging light will flash in green color
(Figure 4)
.
To avoid electric shock and electrical fires,
never use an extension cord that is damaged or does not
meet the following requirements:
• The cord has pins on line plug that are similar in size
and shape to those of the plug on the charger.
• The cord is rated as “W” or “W-A” if being used
outdoors.
replaced. Inspect charger for damage. Do not use charger if it has received a sharp blow, been dropped or otherwise damaged.
Attaching Pressing Jaws
Only use RIDGID Jaw Sets. Use with the
RIDGID jaw set intended for the specific fitting system and
tubing material you are installing. Use of other jaw sets will
result in an improper seal that could result in extensive
property damage.
1. Make sure the battery is removed.
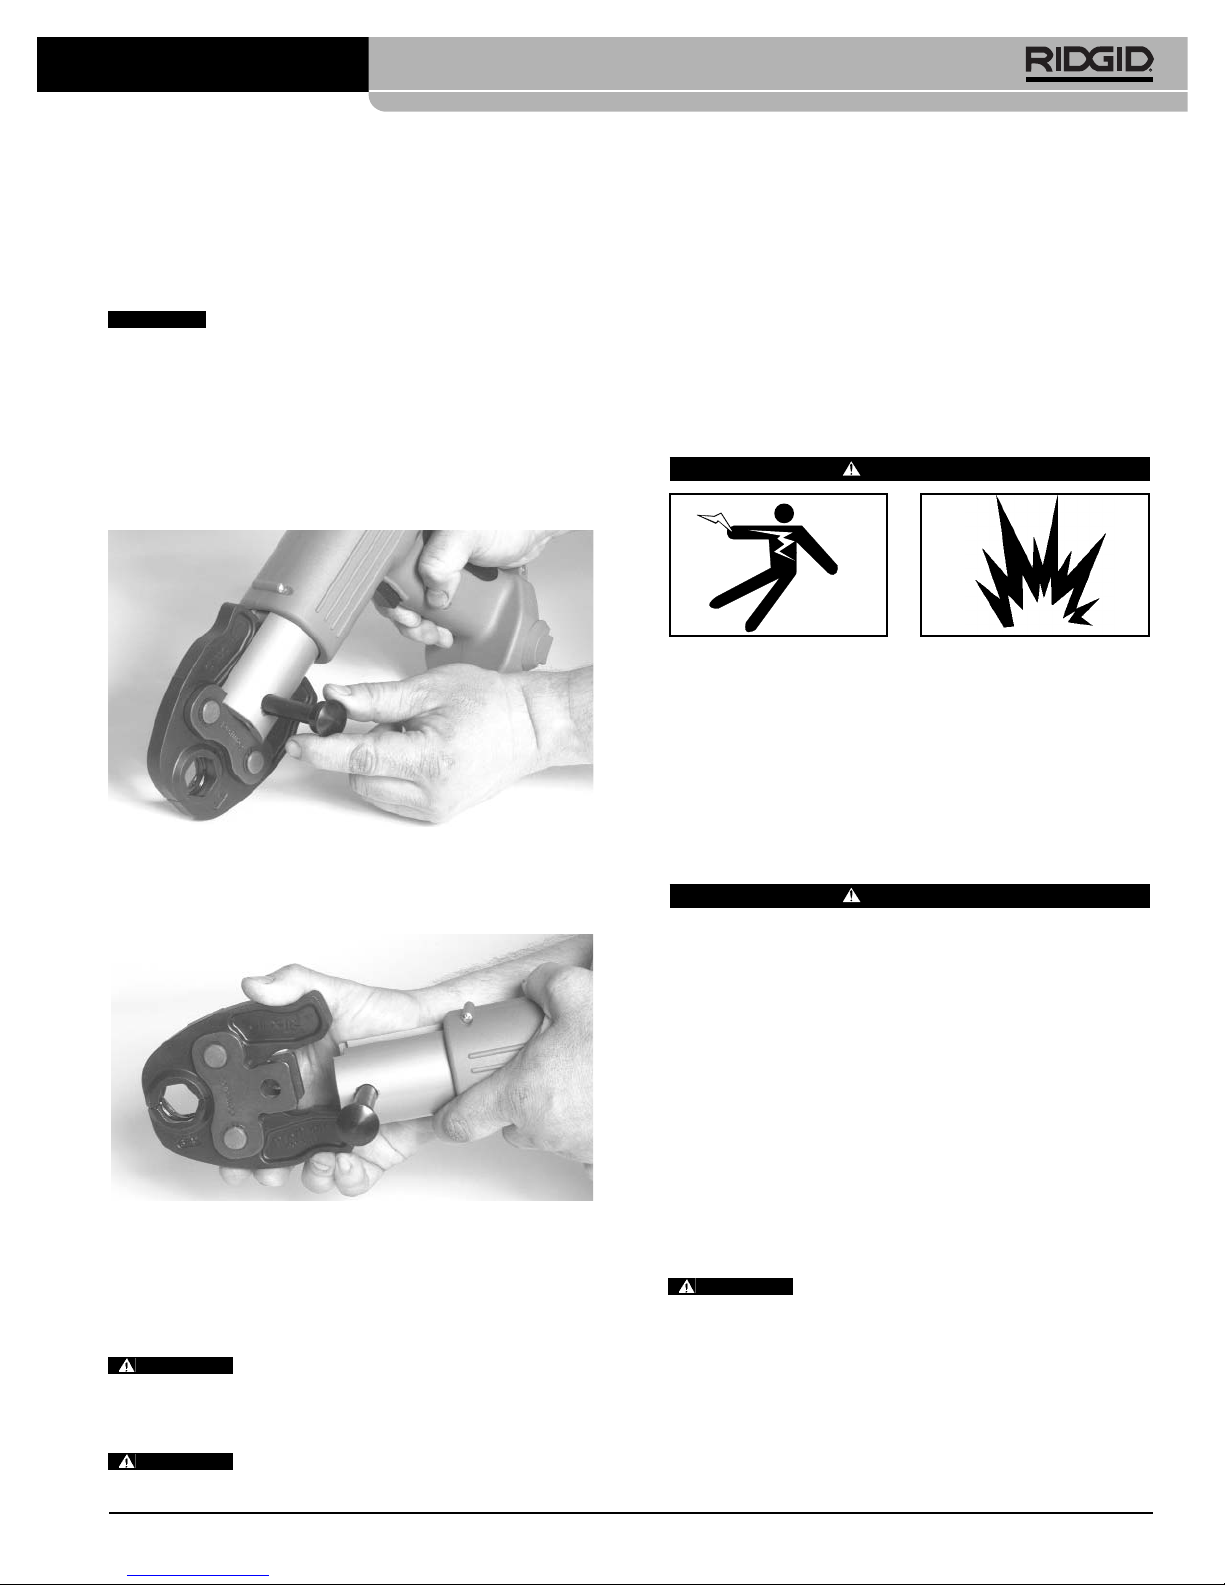
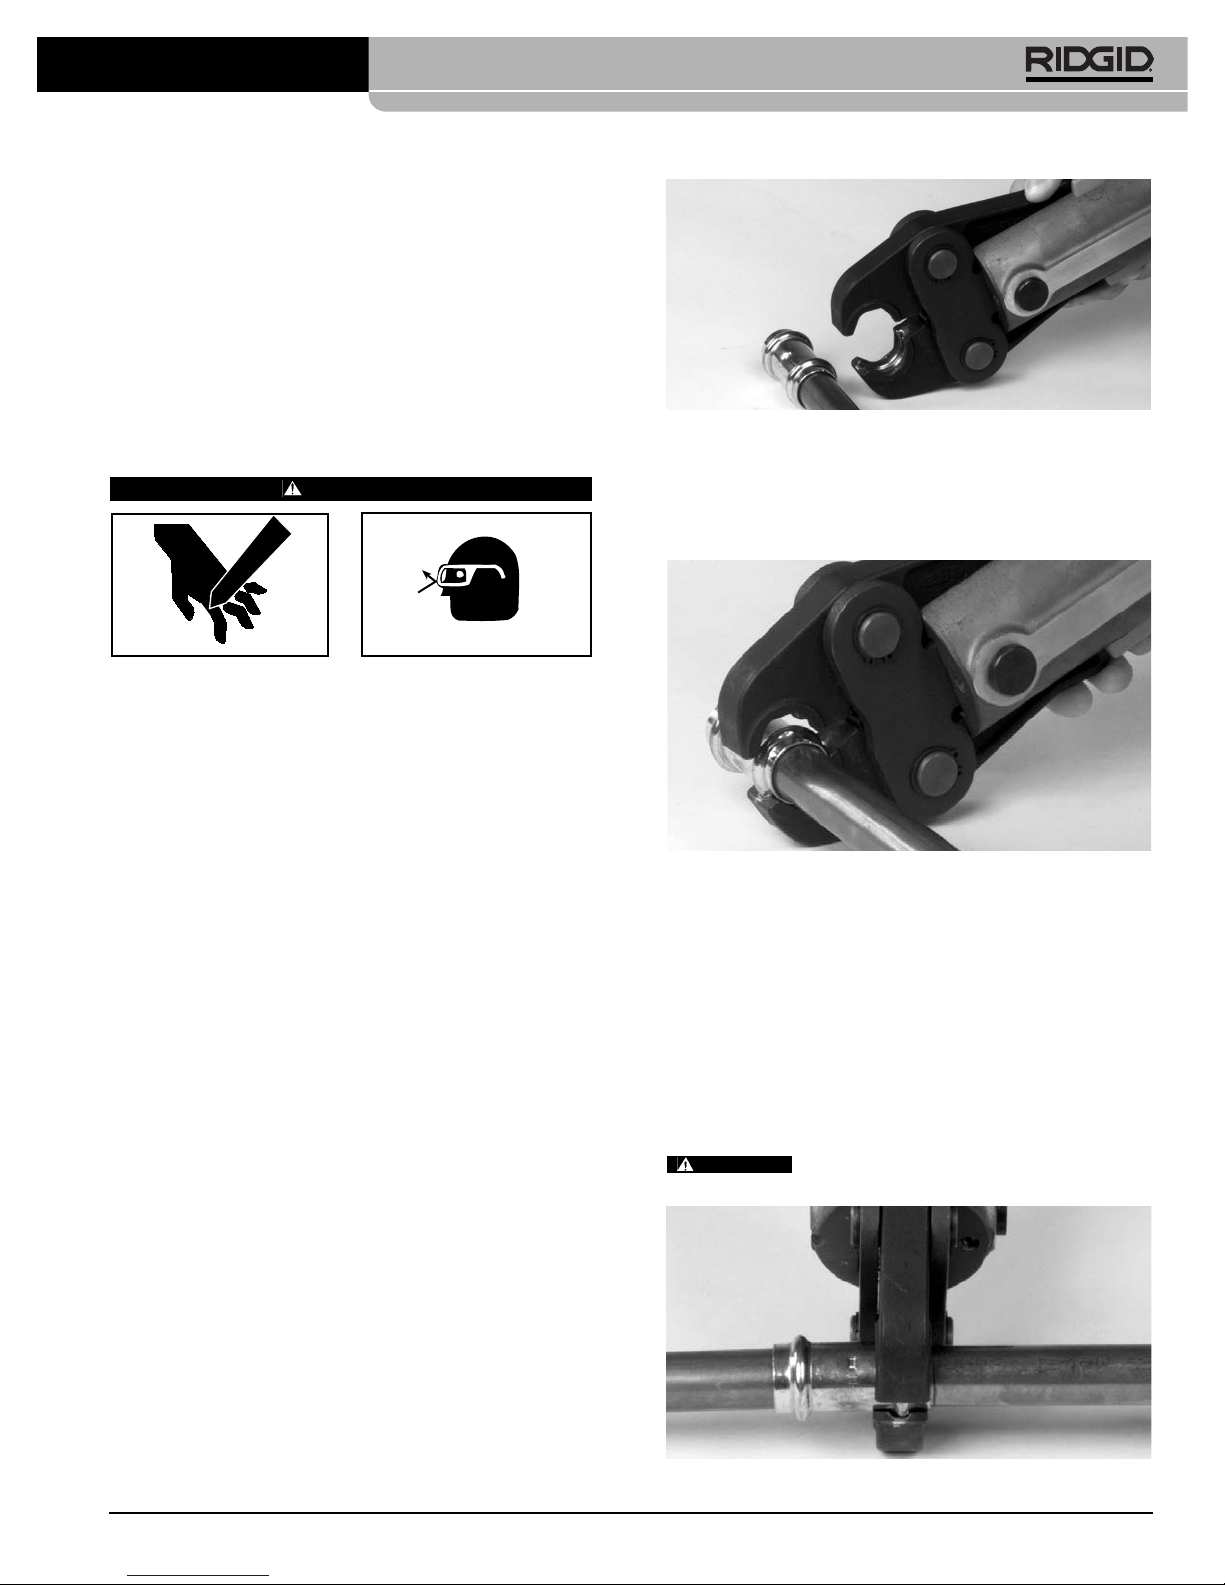
2. Pull the jaw set mounting pin to its most open position
(Figure 2).
Figure 2 – Pulling The Jaw Set Mounting Pin Out
3. If pressing tool contains a jaw set, slide it out of the
pressing tool.
Figure 3 – Sliding Jaw Set Into Compact 100-B
4. Select the jaw set that corresponds to the tubing
size and fitting system. Inspect the jaw set. If dirty,
clean jaw sets. Refer to Maintenance section of Jaw
Set Operator’s Manual for cleaning instructions.
Failure to clean jaws can result in an improper connection that can lead to extensive property
damage. If any cracks are found, discard the damaged jaw
set and obtain replacement.
A jaw that has been welded, grounded,
Ridge Tool Company 5
Compact 100-B Pressing Tool
WARNING
WARNING
WARNING
CAUTION
Page 8
• The cord has sufficient wire thickness (16 AWG
below 100′). If the wire thickness is too small, the
cord may overheat, melting the cord’s insulation or
causing nearby objects to ignite.
Do not attempt to use a step-up trans-
former, an engine generator or DC power receptacle.
Figure 4 – Battery Charger
NOTE! New batteries are not charged and must be
charged before use.
4. Insert the battery cartridge so that the plus and minus
terminals on the battery cartridge are on the same
sides as their respective markings on the battery
charger. Insert the cartridge fully into the port so that
it rests on the charger port floor.
5. When the battery cartridge is inserted, the charging
light color will change from green to red and charging
will begin. The charging light will remain lit steadily
during charging. When charging is completed, the
charging light color will change from red to green.
NOTE! Charging time will be approximately 11/4hours
for 2.6 AH Ni-MH standard equipment battery or
one hour for 2.0 AH NiCd optional battery.
WARNING
Charge only Makita®batteries. Other types of batteries may burst causing personal injury.
6. After charging, unplug the charger from the power
source. Always cover the battery terminals with the
battery cover when the battery cartridge is not being
used.
Important Charging Notes
1. When you charge a new battery cartridge or a battery
cartridge which has not been used for a long period of
time, it may not accept a full charge. This is a normal
condition and does not indicate a problem. You can
recharge the battery cartridge fully after discharging
it completely and recharging a couple of times.
2. If you charge a battery cartridge from a just-operated
tool or a battery cartridge which has been left in a
location exposed to direct sunlight or heat for a long
time, the charging light may flash in red color. If this
occurs, wait for a while. Charging will begin after the
battery cartridge cools. The battery cartridge will cool
faster if you remove the battery cartridge from the battery charger.
3. If the charging light flashes alternately in green and
red color, a problem exists and charging is not possible. The terminals on the charger or battery cartridge
are clogged with dust or the battery cartridge is worn
out or damaged.
4. Batteries should be removed from the Compact 100B Pressing Tool when the tool is being stored, especially when stored for lengthy periods of time. The tool
electronics represent a very slight drain on the battery
when the battery is installed. Leaving a battery plugged
in the tool for long periods of time may result in overdischarging a battery and can cause permanent battery damage.
NOTE! Battery performance is severely reduced
when batteries are stored below 32°F (0°C).
For optimal tool performance and battery life
per charge in cold climates, take care to keep
batteries as warm as possible. When battery
temperatures are kept above 32°F (0°C), the
number of press cycles is dramatically improved, especially on larger diameter fittings.
Other suggestions for improving battery performance:
• Use the tool to make pressed connections as
soon as possible after transferring the battery
from a warm storage environment to a freezing
or subfreezing operating environment. Planning
ahead in this manner will significantly improve
the number of connections achieved before
battery requires recharging.
• Be sure to fully discharge the battery before
recharging.
• Follow proper recharging procedures as spelled
out on pages 5-6 of this manual.
Battery Disposal
Do not attempt to disassemble the battery or remove any component projecting from the
battery terminals. Fire or injury may result. Prior to dis-
posal, protect exposed terminals with heavy insulating tape
to prevent shorting.
Nickel-Cadmium Batteries
If equipped with nickel-cadmium battery, the battery must
be collected, recycled or disposed of in an environmentally
sound manner.
Ridge Tool Company6
Compact 100-B Pressing Tool
WARNING
WARNING
Page 9
Ridge Tool Company 7
Figure 5 – Opening The Scissor-Style Jaw Set
6. Place open jaws around the fitting. Make sure the
contour of the jaw set is properly aligned with the contour of the fitting as specified in Fitting Systems operator's manual
(Figure 6).
Figure 6 – Placing Scissor-Style Jaw Set Around Fitting
7. Make sure the tool is square to the tubing and depress
the switch
(Figure 7)
. The pressing cycle takes about
seven (7) seconds. Once a press cycle begins and the
rollers contact the jaw arms, the tool will lock-on and
automatically complete the press cycle. Releasing
the trigger will not stop the tool once the pressing
process has begun. This assures consistent, repeatable press joint integrity. Releasing the trigger before
the pressing process begins will cause the rollers to
automatically retract to the starting position.
To avoid pinch point injuries, keep fingers
away from jaws.
Figure 7 – Compact 100-B Tool Square To Tubing
Please call 1-800-8-BATTERY for information on Ni-Cd battery recycling and disposal bans/restrictions in your area.
Nickel-Metal Hydride Batteries
If equipped with a nickel-metal hydride battery, the battery
can be disposed of in a municipal solid waste stream.
Contact your local government for disposal or recycling
practices in your area.
Operating Instructions
WARNING
The Compact 100-B is designed for use only with
RIDGID Compact Jaw Sets. Use the RIDGID
Compact Jaw intended for the specific fitting system and tubing material you are installing.
Keep fingers and hands away from jaws during
pressing cycle. Always wear eye protection to protect your eyes from dirt and other foreign objects.
Preparing the Joint
1. See appropriate Fitting Systems operator's manual for
proper joint preparations, prior to pressing.
Pressing A Fitting With Typical Scissor
Jaw Set
1. Make sure the Compact 100-B Pressing Tool has the
correct jaw set installed.
2. Insert fully charged battery into the base of the handle.
3. Depress ON/OFF button on display panel one time to
turn tool ON. All three light emitting diodes (LED’s) will
blink once. Then, the green LED should be solid illuminated indicating the tool is ready to press.
NOTE! Tool will automatically turn off if left unused for ten
(10) minutes. To restart tool, it is necessary to
once again depress the ON/OFF button on the
top display panel.
4. Make sure the tubing is inserted to the proper depth
in fitting, as specified in Fitting Systems operator's
manual.
5. Squeeze jaw arms to open the jaw set
(Figure 5).
Compact 100-B Pressing Tool
WARNING
Page 10
NOTE! If yellow LED service indicator blinks, the tool
should be sent to a RIDGID Authorized Service
Center for required maintenance. The tool will not
run if it is not maintained within 2,000 cycles
after the first blinking yellow LED.
8. Press jaw arms to open the jaw set.
9. Remove the Compact 100-B Tool from tube.
Avoid sharp edges that may have formed on
the fitting during the pressing operation.
Inspecting The Pressed Connection
CAUTION
The Compact 100-B Pressing Tool will turn off automatically if the battery is too low to successfully
complete a pressed connection. This will be indicated by five blinks of red and green LED’s. After
the blinking red and green LED’s, the tool will automatically shut off. A fully charged battery should be
inserted in the tool and the pressed connection
should be repeated as indicated above. To retract
the rollers and remove the tool from the fitting if
battery dies or tool malfunctions during pressed
connection, it is necessary to press the pressure release black button on the right hand side of the tool.
1. Inspect the pressed fitting. Look for the following:
• misaligned tubes
• not fully inserted tubes, double check depth marks
• incorrect jaw alignment with the fitting
• any other issues per the fitting manufacturer.
If one or more of these problems are found then a
new section of tubing and a new fitting will have to be
prepared, inserted and pressed.
2. Test system in accordance with normal practice and
local codes.
Maintenance Instructions
WARNING
Make sure battery is removed from tool before performing maintenance or making any adjustment.
Compact 100-B Pressing Tools
Daily Cleaning and Lubrication
1. Wipe the tool with a clean dry cloth.
2. Inspect the jaw mounting pin and lubricate the pin with
silicone lubricant as needed.
Jaws
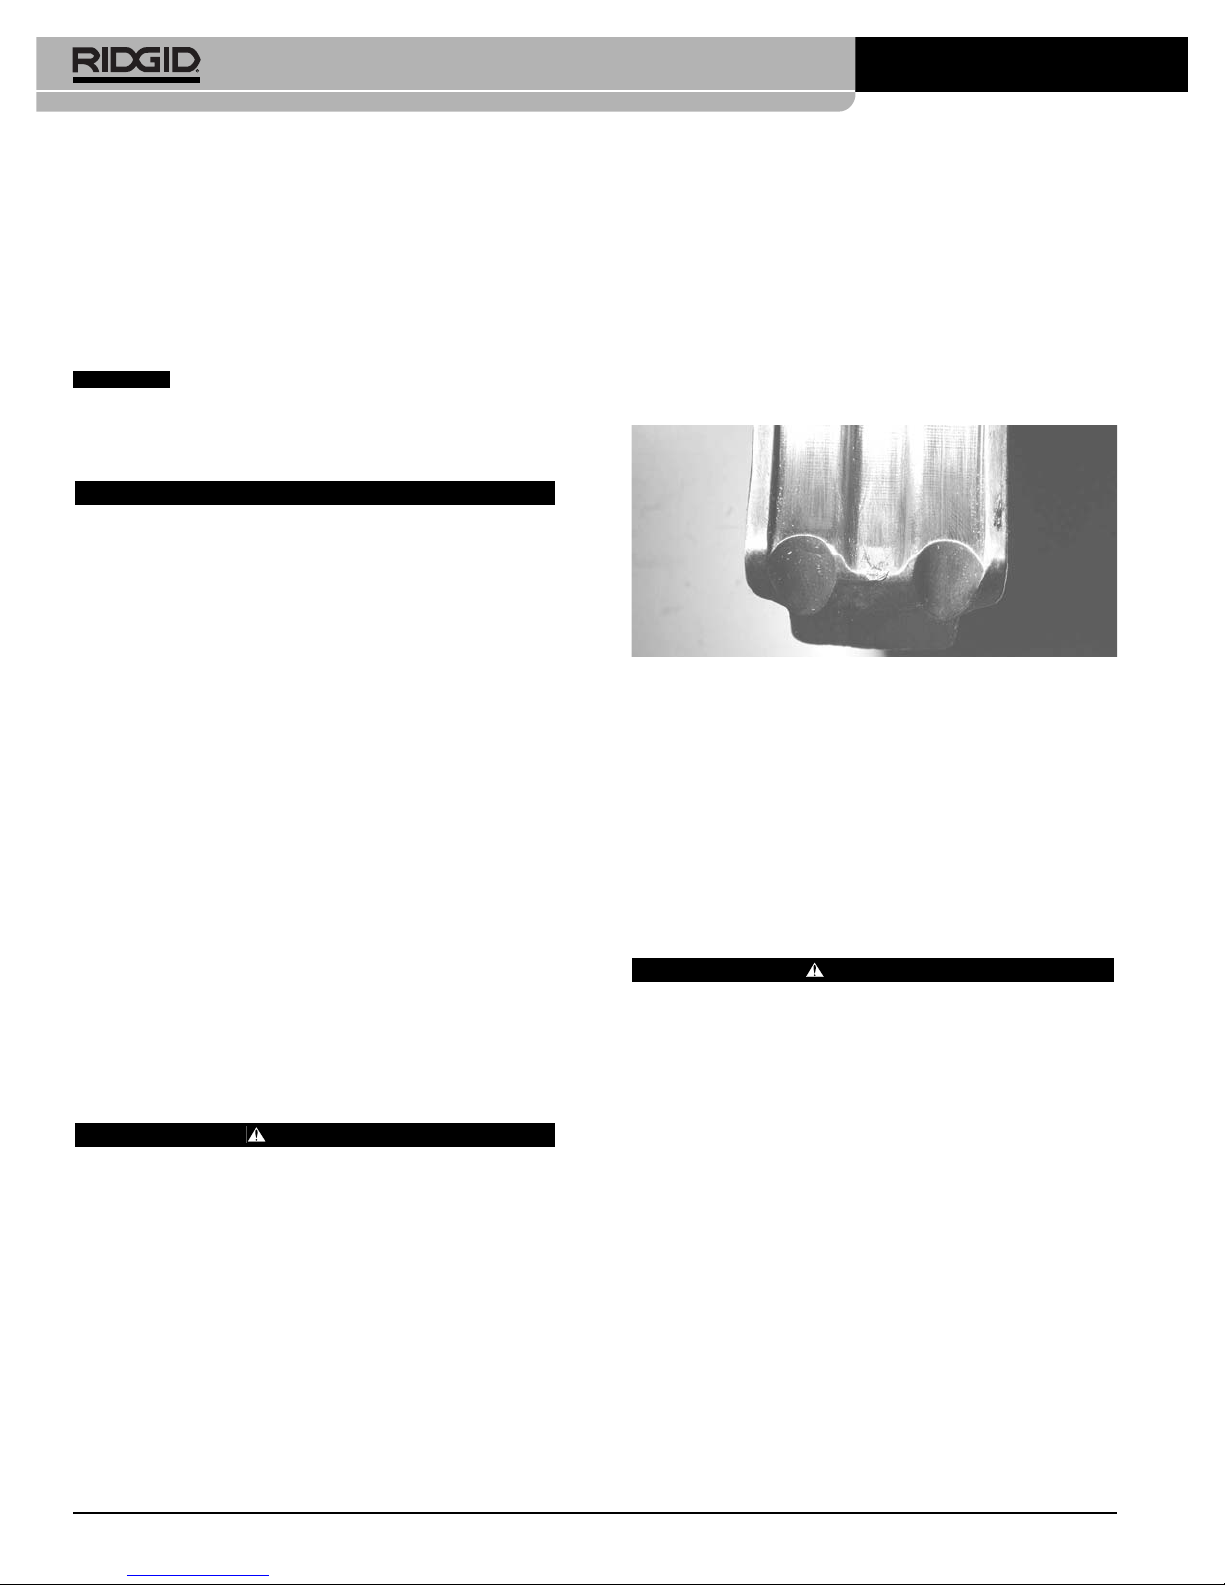
1. Inspect the jaws inside diameter daily. If rusty, dirty or
if there is evidence of copper or bronze fitting material building up on the jaw or ring inside diameter,
(build-up is most likely to occur near the tips of scissor
style jaws as shown in
Figure 8
) clean with fine grade
ScotchBrite®(ScotchBrite®is a registered trademark of
3M Company) metal polishing pads (or equivalent),
steel wool or a steel bristle wire brush. Emery cloth,
sandpaper or other similar abrasive materials
should not be used since they may damage critical press jaw dimensions.
Figure 8 – Copper Material Build-Up Requiring Jaw
Cleaning
2. Pivot pins on jaws should be cleaned and lubricated
at least once a year with a general purpose “wheel
bearing” type grease. A light coating on the pins and
bores is sufficient.
3. Jaws and sideplates should be visually inspected
daily for obvious cracks or other signs of wear or
damage. If cracks are visible in any parts, they should
be discarded and replaced.
WARNING
A jaw component that has been welded, ground,
drilled or modified in any manner can shatter during
pressing, resulting in sharp flying objects, severe
injury or death. Discard and replace damaged jaws,
press rings or ring actuators.
4. Check return springs in press jaws with each use.
Jaws should open and close freely with only moderate finger effort required.
Required Maintenance at RIDGID
Authorized Service Center
After 20,000 cycles, the tool will show a blinking yellow
LED on the display panel as long as the tool is turned on
to indicate that it is time for maintenance and recalibration.
The tool will not run if it is not maintained within 2,000
more cycles after the yellow blinking LED begins. The display panel will show a solid yellow LED. This mandatory
maintenance is necessary to assure that the tool remains
in good working condition and provides consistent press
joints.
Ridge Tool Company8
Compact 100-B Pressing Tool
CAUTION
Page 11
Other suggestions for improving battery performance:
• Use the tool to make pressed connections as
soon as possible after transferring the battery
from a warm storage environment to a freezing
or subfreezing operating environment. Planning
ahead in this manner will significantly improve
the number of connections achieved before
battery requires recharging.
• Be sure to fully discharge the battery before
recharging.
• Follow proper recharging procedures as spelled
out on pages 5-6 of this manual.
Service and Repair
Service and repair on this Compact 100-B
Pressing Tool must be performed by a RIDGID Authorized
Service Center. The tool fasteners have been marked to
indicate if service has been performed by unauthorized
individuals. Improper service or repair may lead to extensive property damage, serious injury or death.
For any repairs or maintenance, contact the Ridge Tool
Company, Technical Service Department at (800) 5193456 or www.ridgid.com for nearest authorized service
outlet.
If you have any questions regarding the service or repair
of this machine, call or write to:
Ridge Tool Company
Technical Service Department
400 Clark Street
Elyria, Ohio 44035-6001
Tel: (800) 519-3456
E-mail: TechServices@ridgid.com
For name and address of your nearest Independent
Authorized Service Center, contact the Ridge Tool Company at (800) 519-3456 or http://www.ridgid.com
Accessories
Only the following products have been designed to
function with the Compact 100-B Pressing Tool. Other
accessories suitable for use with other tools may
become hazardous and/or produce bad presses when
used with the Compact 100-B. Use only accessories
listed below.
Fittings:
Refer to Fitting Systems Operator’s Manual for a list of
available fittings for specific fitting systems.
Storage
Place the tool and jaws in carrying case. 100-B should be
stored above 32°F (0°C) and below 122°F (50°C). The tool
temperature sensor will not allow the tool to turn on if oil
temperature is not within this temperature range. This
will be indicated by a red blinking LED on the display
panel.
Store the carrying case in a dry, secured,
locked area that is out of reach of children and people
unfamiliar with the Compact 100-B Pressing Tool. The tool
is dangerous in the hands of untrained users.
NOTE! Battery performance is severely reduced
when batteries are stored below 32°F (0°C).
For optimal tool performance and battery life
per charge in cold climates, take care to keep
batteries as warm as possible. When battery
temperatures are kept above 32°F (0°C), the
number of press cycles is dramatically improved, especially on larger diameter fittings.
Ridge Tool Company 9
Compact 100-B Pressing Tool
Catalog
No. Description
12683 14.4V Battery Pack (Original Equipment
Replacement Battery 2.6 Ah Ni-MH)
83407 14.4V Battery Pack (Optional 2.0 Ah Ni-Cd
Battery)
83417 115V Charger
84112 230V Charger
16818 Carrying Case (Plastic)
— RIDGID Compact Series Jaw Sets
Compact 100-B Press Tool Accessories
WARNING
WARNING
Page 12
Ridge Tool Company10
Compact 100-B Pressing Tool
SYMPTOM POSSIBLE REASONS SOLUTION
Tool will not turn ON
when ON/OFF button on
display panel is pressed.
Tool turns OFF either
when trigger is depressed or in the middle
of a press cycle. Red
LED alarm blinks 5 times
then the tool shuts off
automatically.
Yellow LED blinks
repeatedly as long as
tool is turned ON and
tool functions properly.
Yellow LED glows continuously and tool will
not begin press cycle
when trigger switch is
depressed.
Red LED blinks repeatedly and tool will not begin
press cycle when trigger
switch is depressed.
Red LED and yellow LED
both glow continuously
when tool is turned ON.
Troubleshooting
Battery is completely discharged or battery has
failed.
Battery not properly inserted into handle of tool.
Battery is too low.
Battery is too cold.
Scheduled maintenance/recalibration is required
after 20,000 presses.
Scheduled maintenance/recalibration is mandatory after 22,000 presses. Tool is “locked” and
will not function until tool is serviced.
Jaw mounting pin not fully closed.
Temperature out of range.
Tool malfunction detected.
Insert fully charged battery/recharge dead battery.
Check to assure battery is fully inserted.
Insert fully charged battery/recharge dead battery.
Warm battery to range of 32°F (0°C) to 122°F
(50°C).
NOTE! Fitting must be repressed if tool stops
in the middle of a press cycle. Failure
to do so may result in a leaking fitting.
Contact Ridge Tool Company, Technical Service
Department at (800) 519-3456 for nearest
Authorized Service outlet.
Contact Ridge Tool Company, Technical Service
Department at (800) 519-3456 for nearest
Authorized Service outlet.
Insert jaw mounting pin to the fully closed position.
Bring tool and battery to the range of 32°F (0°C) to
122°F (50°C).
Remove and reinsert fully charged battery. If LED’s
continue to glow, contact Ridge Tool Company,
Technical Service Department at (800) 519-3456 for
nearest Authorized Service outlet.
Page 13
Ridge Tool Company 11
Compact 100-B Pressing Tool
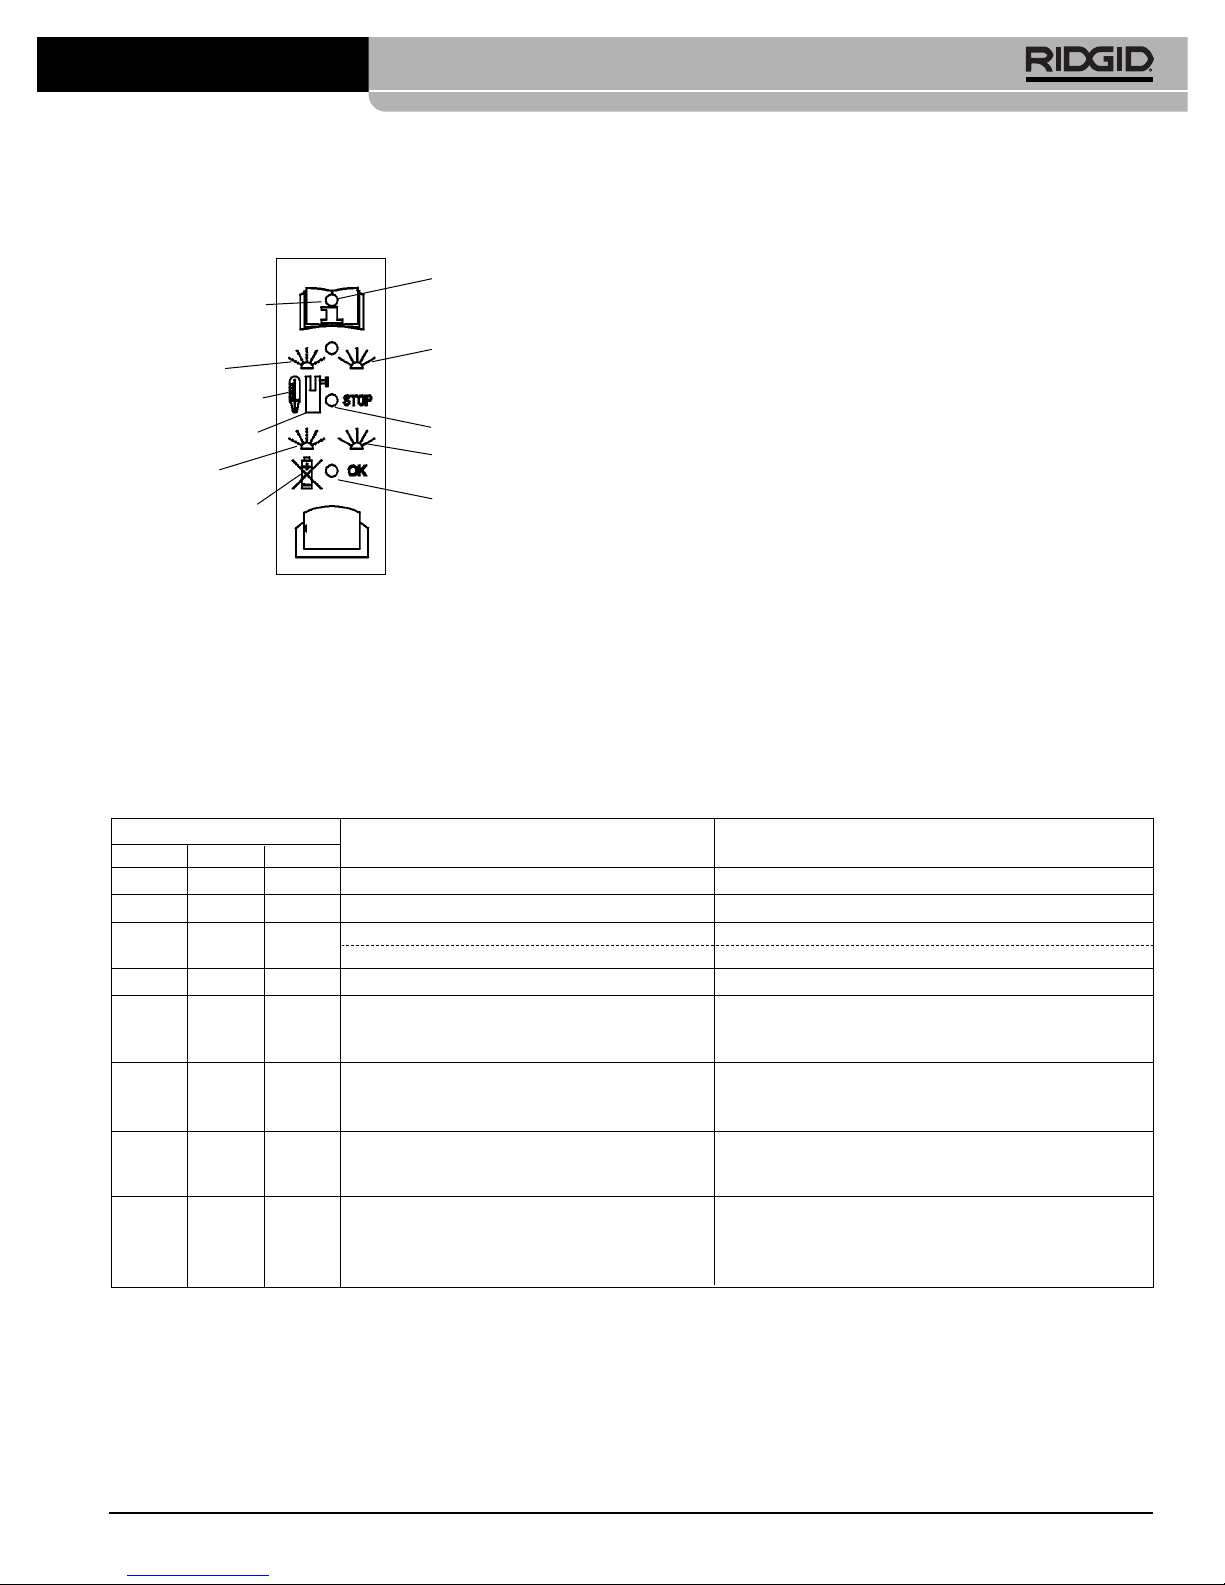
Compact 100-B Diagnostic Codes
SERVICE
YELLOW
SERVICE
MAINTENANCE
REQUIRED
SOLID LIGHT
BLINKING
LIGHT
TEMPERATURE
RED
JAW PIN OPEN
LOW BATTERY
GREEN
LED DISPLAY
GREEN RED YELLOW MEANING ACTION
Blink 1x Blink 1x Blink 1x Power-up light check. —
Solid Operate mode. Tool is ready to press.
Solid Blinking Jaw pin open. Check jaw mounting pin to assure fully inserted.
Temperature out of range. Bring tool battery to range >32°F or <122°F
Blink 5x Blink 5x Low Battery. Replace or recharge battery. NOTE! Repeat Press.
Solid Blinking Maintenance due (>20,000 presses). Contact Ridge Tool Company, Technical Service
Department at (800) 519-3456 for nearest Authorized
Service outlet.
Solid Solid Maintenance required (>22,000 presses). Contact Ridge Tool Company, Technical Service
Department at (800) 519-3456 for nearest Authorized
Service outlet.
Solid Solid Tool locked due to malfunctions. Remove and replace battery. If still locked, contact Ridge
Tool Company, Technical Service Department at (800)
519-3456 for nearest Authorized Service outlet.
Blink Blink Tool overheated/excessive current draw due to Allow tool to cool for 20 seconds. If condition occurs
20 Sec 20 Sec. tool malfunction. repeatedly, contact Ridge Tool Company, Technical Service
Department at (800) 519-3456 for nearest Authorized
Service outlet.
SOLID LIGHT
BLINKING
LIGHT
ON/OFF
Page 14

Ridge Tool Company12
Compact 100-B Pressing Tool
Page 15

Sertisseuse Compact 100-B
Inscrivez ci-dessous le numéro de série indiqué sur la plaque signalétique de l’appareil
N° de
série
Sertisseuse
Sertisseuse Compact 100-B
Page 16

Ridge Tool Company14
Table des matières
Fiche d’enregistrement du numéro de série de l’appareil ......................................................................................13
Consignes générales de sécurité
Sécurité du chantier ..................................................................................................................................................15
Sécurité électrique ....................................................................................................................................................15
Sécurité individuelle ..................................................................................................................................................15
Utilisation et entretien de l’appareil ..........................................................................................................................16
Service après-vente ..................................................................................................................................................16
Consignes de sécurité particulières
Sécurité de la sertisseuse ........................................................................................................................................16
Sécurité des piles......................................................................................................................................................17
Description, spécifications et équipements de base
Description ................................................................................................................................................................17
Spécifications............................................................................................................................................................17
Inspection de la sertisseuse et des mâchoires de sertissage
Chargeur de piles de la Compact 100-B ..................................................................................................................18
Montage des mâchoires de sertissage ....................................................................................................................18
Préparation de l’appareil et du chantier
Rechargement des piles ..........................................................................................................................................19
Observations importantes visant le rechargement....................................................................................................19
Recyclage des piles ..................................................................................................................................................20
Piles nickel-cadmium ................................................................................................................................................20
Piles à hydrure métallique de nickel ........................................................................................................................20
Mode d’emploi
Préparation des raccords..........................................................................................................................................20
Sertissage des raccords avec mâchoires à ciseaux traditionnelles..........................................................................20
Inspection des raccords sertis ..................................................................................................................................21
Entretien
Nettoyage/lubrification quotidien ..............................................................................................................................22
Mâchoires ................................................................................................................................................................22
Révisions obligatoires chez un centre de service RIDGID ......................................................................................22
Accessoires ................................................................................................................................................................22
Stockage ......................................................................................................................................................................23
Service après-vente et réparations............................................................................................................................23
Dépannage ..................................................................................................................................................................24
Codes de diagnostic de la Compact 100-B ..............................................................................................................25
Garantie à vie ..........................................................................................................................................Page de garde
Sertisseuse Compact 100-B
Page 17

Ridge Tool Company 15
Sertisseuse Compact 100-B
Consignes générales de sécurité
MISE EN GARDE ! Familiarisez-vous complètement avec
l’ensemble des instructions. Le nonrespect de ces consignes augmenterait
les risques de choc électrique, d’incendie et/ou de graves blessures corporelles.
CONSERVEZ CES INSTRUCTIONS !
Sécurité du chantier
• Maintenez le chantier propre et bien éclairé. Les
établis encombrés et le manque d’éclairage sont à
l’origine de nombreux accidents.
• N’utilisez pas d’appareils électriques en présence
de combustibles tels que les liquides, gaz ou poussières inflammables. Les appareils électriques pro-
duisent des étincelles capables d’enflammer les
poussières et les émanations combustibles.
• Eloignez les curieux, les enfants et les visiteurs lors
de l’utilisation d’un appareil électrique. Les distractions éventuelles peuvent vous faire perdre le contrôle de l’appareil.
Sécurité électrique
• Les appareils à double isolement sont équipés de
fiches polarisées (une barrette plus large que l’autre). Cette fiche ne peut entrer dans une prise polarisée que dans un seul sens. Si la fiche ne s’introduit
pas complètement dans la prise, inversez la fiche.
Si elle refuse toujours de s’introduire, demandez à
un électricien qualifié d'installer une fiche polarisée.
Ne tentez pas de modifier la fiche. Le double isole-
ment élimine le besoin d’un cordon d’alimentation à
trois fils et d’une source d’alimentation avec mise à la
terre.
• Evitez tout contact avec les masses telles que
tuyaux, radiateurs, cuisinières ou réfrigérateurs.
Les risques de choc électrique augmentent lorsque
votre corps est en contact avec une masse.
• N’exposez pas les appareils électriques à la pluie
ou aux intempéries. Toute pénétration d’eau à l’intérieur d’un appareil électrique augmente les risques de
choc électrique.
• Ne maltraitez pas le cordon d’alimentation de
l’appareil. Ne jamais porter l’appareil par son cordon, ni tirer sur celui-ci pour débrancher l’appareil.
Gardez le cordon à l’abri des sources de chaleur,
de l’huile, des angles tranchants et des pièces
mobiles. Remplacez immédiatement tout cordon
endommagé. Les cordons endommagés augmentent
les risques de choc électrique.
• Lors de l’utilisation de l’appareil à l’extérieur,
utilisez une rallonge électrique portant la désignation “W-A” ou “W”. Ce type de rallonge est prévu
pour être utilisé à l’extérieur et réduit les risques de
choc électrique.
• Utilisez la section de rallonge appropriée
(voir
tableau)
. Une section de conducteurs insuffisante
provoquerait une perte de tension excessive, d’où un
manque de puissance.
Sécurité individuelle
• Soyez attentif, concentrez-vous sur ce que vous
faites et faites preuve de bon sens lorsque vous
utilisez un appareil électrique. N’utilisez pas ce
type d’appareil lorsque vous êtes fatigués ou
lorsque vous prenez des médicaments, de l’alcool
ou des produits pharmaceutiques. Un instant d’inat-
tention peut entraîner de graves blessures lorsque
l’on utilise un appareil électrique.
• Habillez-vous de manière appropriée. Ne portez
pas de vêtements amples ou de bijoux. Attachez
les cheveux longs. Gardez vos cheveux, vos vêtements et vos gants à l’écart du mécanisme. Les
vêtements amples, les bijoux et les cheveux longs
peuvent être entraînés dans le mécanisme.
• Evitez les risques de démarrage accidentel. Porter
l’appareil avec un doigt sur son l’interrupteur est une
invitation aux accidents.
• Ne vous mettez pas en porte-à-faux. Maintenez
une bonne assise et un bon équilibre à tous moments. Une bonne assise et un bon équilibre vous
permettent de mieux contrôler l’appareil en cas
d’imprévu.
• Utilisez les équipements de sécurité appropriés.
Portez systématiquement des lunettes de sécurité.
Un masque à poussière, des chaussures de sécurité,
le casque et/ou une protection auditive doivent être
portés selon les conditions d’utilisation.
Section minimale des fils conducteurs des rallonges
Ampères indiqués
sur la plaque Longueur totale (en pieds)
signalétique
0 à 25 26 à 50 51 à 100
0 à 6 18 AWG 16 AWG 16 AWG
6 à 10 18 AWG 16 AWG 14 AWG
10 à 12 16 AWG 16 AWG 14 AWG
12 à 16 14 AWG 12 AWG
Déconseillé
Page 18

Ridge Tool Company16
Sertisseuse Compact 100-B
Utilisation et entretien de l’appareil
• Ne forcez pas l’appareil. Utilisez les outils adaptés
au travail prévu. L’outil approprié assurera un meilleur
travail et une meilleure sécurité s’il est utilisé au régime
prévu.
• N’utilisez pas d’appareil dont l’interrupteur ne per-
met pas de le mettre en marche ou de l’arrêter.
Tout appareil qui ne peut pas être contrôlé par son
interrupteur est dangereux et doit être réparé.
• Enlevez la pile avant tout réglage, changement
d’accessoires ou stockage de l’appareil. De telles
précautions réduisent les risque de démarrage accidentel.
• Rangez les appareils non utilisés hors de la portée
des enfants et des personnes non initiées. Ces
appareils sont dangereux entre les mains de personnes non initiées.
• Examinez la machine pour signes de mauvais
alignement ou de grippage du mécanisme ou
autres conditions qui pourraient entraver le bon
fonctionnement de l’appareil. Le cas échéant, faire
réparer l’appareil avant de vous en servir. De nom-
breux accidents sont le résultat d’un appareil mal
entretenu.
• Utilisez uniquement les accessoires recommandés
par le fabricant pour votre appareil particulier.
Des accessoires prévus pour un certain type d’appareil
peuvent être dangereux lorsqu’ils sont montés sur un
autre.
• Gardez les poignées de la machine propres, sèch-
es et dépourvues d’huile ou de graisse. Cela vous
permettra de mieux contrôler l’appareil.
Service après-vente
• Toutes réparations de l’appareil doivent être confiées à un réparateur qualifié. La réparation ou l’en-
tretien de l’appareil par du personnel non qualifié peut
entraîner des blessures.
• Lors de la réparation de l’appareil, n’utilisez que
des pièces de rechange identiques à celles d’origine. Suivez les instructions de la section “Entretien”
du mode d’emploi. L’utilisation de pièces de rechange
non homologuées et le non-respect des consignes
d’entretien peut créer un risque de choc électrique ou
de blessure corporelle.
Consignes de
sécurité particulières
MISE EN GARDE !
Lisez soigneusement ce mode d’emploi, ainsi que
le manuel d’utilisation des mâchoires et celui du
fabricant des raccords avant d’utiliser la sertisseuse Compact 100-B. Le non-respect du contenu
de ces publications augmenterait les risques de
dégâts matériels importants et de blessures corporelles graves, voire mortelles.
Veuillez adresser toutes questions éventuelles aux services techniques de la Ridge Tool Company en composant le (800) 519-3456.
Sécurité de la sertisseuse
• N’utilisez la sertisseuse Compact 100-B qu’avec
des mâchoires de type RIDGID Compact. Toute
autre utilisation ou la modification de la sertisseuse
100-B afin de l’adapter à d’autres applications risque
d’endommager la sertisseuse, endommager les
mâchoires et/ou entraîner des blessures corporelles.
• Eloignez vos doigts et vos mains des mâchoires
durant le cycle de sertissage. Vos doigts risqueraient
d’être écrasés, fracturés ou amputés s’ils devaient se
prendre entre les mâchoires ou entre ceux-ci et tout
autre objet.
• Ne jamais tenter de réparer des mâchoires endom-
magées. Les mâchoires qui ont été soudées, meulées,
percées ou modifier d’une manière quelconque risquent d’éclater en cours de sertissage et provoquer de
graves blessures. Même si une seule mâchoire est
endommagée, mettez la paire de mâchoires au rebut.
Remplacez-les avec une nouvelle paire de mâchoires.
Ne jamais remplacer les éléments individuellement, à
l’exception d’un ressort de rappel de mâchoire endommagé. Veuillez consulter les services techniques de la
Ridge Tool Company pour les questions de disponibilité.
• Ne jamais utiliser l’appareil si son interrupteur ou
carter de moteur est endommagé. L’utilisation d’un
appareil électrique avec carter de moteur fissuré ou
interrupteur endommagé risque de provoquer des
chocs électriques et entraîner de graves blessures
corporelles.
La sélection des matériaux et des
méthodes de raccordement appropriés est la responsabilité du bureau d’études et/ou de l’installateur. Avant
toute tentative d’installation, il convient d’effectuer une
étude approfondie du milieu d’utilisation spécifique, y
compris du milieu chimique et des températures d’utili-
AVERTISSEMENT
Page 19

Ridge Tool Company 17
Sertisseuse Compact 100-B
Description, spécifications et
équipements de base
Description
Equipée des mâchoires appropriées, la sertisseuse
Compact 100-B assure à la fois le sertissage étanche et
permanent des raccords de tuyau. Un moteur électrique
interne, commandé par l’interrupteur de la Compact 100B, active une pompe hydraulique qui envoi le liquide
sous pression dans le cylindre de l’appareil, poussant ainsi
son piston sous une pression de plusieurs milliers de
livres pour sertir des raccords spécialement étudiés.
Le cycle de sertissage prend environ sept (7) secondes.
Une fois le sertissage entamé, il ira jusqu’au bout, même
après avoir lâché la gâchette. Les affichages DEL situées
en tête de l’appareil signaleront des problèmes éventuels,
tels que mauvaise température, ouverture de broche de
mâchoire ou besoin d’entretien.
Figure 1 – Sertisseuse Compact 100-B équipée de
mâchoires Compact
Spécifications
Sertisseuse Compact 100-B :
Moteur
Tension
d’alimentation .........14,4 V(cc)
Ampères .................25,6 A
Intensité ..................325 Watts
Poids ..........................3,4 kg (7,5 livres) avec pile,
2,6 kg (5,7 livres) sans pile
Force du piston..............24 kN (5.400 livres)
Température opérationnelle
Plage................................0°C à + 50 °C (32°F à 122°F)
sation. Consulter le fabricant du système de raccords
utilisé afin de déterminer la sélection appropriée.
Sécurité du chargeur de piles
• N’utilisez le chargeur Makita®que pour le recharge-
ment des piles rechargeables Makita®au Ni-MH ou
Ni-Cd. D’autres marques de piles risqueraient d’éclater
et provoquer des blessures corporelles et des dégâts
matériels.
• Ne sondez pas le chargeur à l’aide d’objets con-
ducteurs. Tout court-circuit des bornes de pile peut
provoquer des étincelles et des brûlures ou chocs
électriques.
• Ne pas introduire de pile fêlée dans le chargeur. Ne
pas utilisé le chargeur s’il est tombé ou s’il a été
endommagé d’une manière quelconque. Les outils
endommagés augmentent les risques de choc électrique.
• Les piles ne doivent en aucun cas être incinérées.
Les piles explosent lors de leur incinération.
• Chargez les piles à des températures supérieures
à 10°C (50°F) et inférieures à 40°C (104°F). Rangez
l’outil et les piles dans un endroit où la température ne risque pas de dépasser 49°C (120°F). Un
entretien approprié empêchera la détérioration sérieuse
des piles. Un manque d’entretien des piles risque de
provoquer leur fuite, ainsi que des chocs ou brûlures
électriques.
• Ne tentez pas d’utiliser un transformateur d’allu-
mage, un groupe électrogène ou une prise à courant continu. Cela pourrait endommager le chargeur et
provoquer des chocs, incendies ou brûlures électriques.
• Ne laissez rien recouvrir le chargeur lorsqu’il est
en service. Un incendie pourrait en résulter.
• Débranchez le chargeur lorsqu’il n’est pas en ser-
vice. Cela réduira les risques de blessure des enfants
et des personnes non initiées.
• Mettez systématiquement le cache sur les bornes
du bloc-piles lorsque celui-ci ne sert pas. Cela
réduira les risques de choc électrique.
• Ne chargez pas les piles dans un milieu humide ou
mouillé. N’exposez pas le chargeur aux intempéries. Cela augmenterait les risques de choc élec-
trique.
Affichage
DEL (haut)
Mâchoires à
ciseaux
Compact
Bras de mâchoire
Compact
Broche de
fixation
des
mâchoires
Pile
Bâti de
l’appareil
Gâchette
Poignée
Etrier de
mâchoire
Page 20

Ridge Tool Company18
Sertisseuse Compact 100-B
Chargeur de piles Compact 100-B
Examinez le cordon d’alimentation et sa fiche pour signes
de détérioration. Si le cordon ou sa fiche est endommagé, ne pas utiliser le chargeur avant de les avoir remplacés. Examinez le chargeur pour signes d’anomalie. Ne
pas utiliser le chargeur s’il a reçu un choc important, s’il est
tombé ou s’il a été endommagé d’une autre manière.
Montage des mâchoires de sertissage
Utilisez exclusivement des mâchoires
RIDGID. Utilisez les mâchoires RIDGID prévues pour le
système de raccordement et les matériaux utilisés. L’utilisation d’autres types de mâchoires produirait une mauvaise étanchéité qui pourrait entraîner d’importants dégâts
matériels.
1. Enlevez la pile.
2. Tirez la broche de fixation des mâchoires au maximum
(Figure 2)
.
Figure 2 – Retrait de la broche de fixation des mâchoires
3. Si des mâchoires sont déjà installées dans la sertisseuse, retirez-les.
Figure 3 – Insertion des mâchoires dans la Compact 100-B
4. Sélectionnez les mâchoires qui correspondent à la
section des tuyaux et au type de raccords utilisés.
Examinez les mâchoires. Nettoyez-les si elles sont
encrassées. Reportez-vous à la section Entretien
pour les consignes de nettoyage.
NOTA ! La sertisseuse Compact 100-B et les mâchoires
Compact correspondantes sont protégés par
plusieurs brevets et demandes de brevets
américains et internationaux.
NOTA ! RIDGID propose deux types de mâchoires :
• Série Standard
• Série Compact
Celles-ci ne sont pas interchangeables. C’est à
dire que seules les mâchoires de la série Compact peuvent être utilisées avec la sertisseuse
Compact 100-B. De même, seules les mâchoires
de la série Standard peuvent fonctionner avec les
appareils standards. Consultez le manuel de l’un
des appareils standard (320-E ou CT-400) pour
de plus amples renseignements concernant ces
appareils et les mâchoires correspondantes.
Inspection de la sertisseuse et
des mâchoires Compact
MISE EN GARDE !
Afin d’éviter les blessures graves, inspectez la sertisseuse Compact 100-B, le chargeur de piles et
les mâchoires Compact. Ne jamais utiliser de
mâchoires Compact 100-B endommagées. Effectuez
l’inspection suivante au quotidien :
1. Enlevez la pile de la sertisseuse Compact 100-B.
2. Examinez le bâti et la gâchette de l’appareil pour
signes d’anomalies telles qu’un bâti fissuré ou des fils
exposés.
3. Examinez les mâchoires. Nettoyez les mâchoires
encrassées. Reportez-vous à la section Entretien
pour les consignes de nettoyage. Les mâchoires
encrassées peuvent produire un raccord de mauvaise qualité et entraîner d’importants dégâts
matériels. Remplacez systématiquement tout jeu de
mâchoires fissuré.
Remplacez le jeu de mâchoires en
entier. Ne jamais remplacer ses composants individuels,
à l’exception des ressorts de rappel. Un remplacement
partiel risquerait d’entraîner la défaillance des composants et de graves blessures.
4. Eliminez toutes traces d’huile, de graisse ou de
crasse des poignées de l’appareil. Cela évitera que
l’appareil s’échappe en cours d’utilisation.
MISE EN GARDE
AVERTISSEMENT
Page 21

Ridge Tool Company 19
Sertisseuse Compact 100-B
Des mâchoires encrassées peuvent
produire un raccord de mauvaise qualité qui risque de
provoquer des dégâts matériels importants. En cas de fissuration, remplacez systématiquement le jeu de mâchoires endommagé.
Toute mâchoire soudée, meulée,
percée ou modifié d’une manière quelconque risque
d’éclater en cours de sertissage et projeter des débris
capables de provoquer de graves blessures, potentiellement mortelles. Remplacez systématiquement tout jeu de
mâchoires endommagé.
5. Enfilez les mâchoires dans la sertisseuse
(Figure 3)
.
6. Enfoncez la broche de fixation des mâchoires jusqu’à
ce qu’elle soit complètement engagée.
NOTA ! La Compact 100-B ne fonctionnera que lorsque
la broche est entièrement engagée.
Préparation de l’appareil et du
chantier
MISE EN GARDE !
La bonne préparation de la sertisseuse et du chantier est nécessaire à la sécurité d’utilisation de
l’appareil. La préparation suivante est de rigueur :
1. Assurez-vous que le local :
• Offre suffisamment d’éclairage
• N’abrite pas de liquides, de vapeurs ou de pous-
sières inflammables.
Rechargement des piles :
MISE EN GARDE !
Lisez l’ensemble des instructions accompagnant la
pile et le chargeur avant d’utiliser le chargeur de
pile.
1. Positionnez le chargeur de manière à éviter qu’on le
piétine, qu’on trébuche sur le cordon d’alimentation ou
qu’il soit endommagé d’une manière quelconque.
N’exposez pas le chargeur aux intempéries.
2. Chargez les piles à des températures supérieures à
10°C (50°F) et inférieures à 40°C (104°F). Stockez
l’outil et la pile dans un endroit où la température
ne risque pas de dépasser 49°C (120°F).
3. Branchez le chargeur sur une source d’alimentation
à courant alternatif appropriée. Le témoin de charge
clignotera en vert
(Figure 4)
.
Afin d’éviter les chocs et incendies
électriques, ne jamais utiliser de rallonge électrique endommagée ou qui ne répond pas aux critères suivants :
• La fiche et la prise de la rallonge doivent être de
taille et de forme similaires à celles de la fiche du
chargeur.
• La rallonge est homologuée « W » ou « W-A »
lors des travaux à l’extérieur.
• Les fils conducteurs de la rallonge ont une section
nominale suffisante (16 AWG pour une longueur
inférieure à 100 pieds). Une section de fil insuffisante
créera un risque de surchauffe de la rallonge, la
fonte éventuelle de son isolation ou l’incendie des
objets à proximité.
Ne tentez pas d’utiliser un transformateur d’allumage, un groupe électrogène ou une prise à
courant continu.
Figure 4 – Chargeur de piles
NOTA ! Les piles neuves sont livrées non chargées et
doivent être chargées avant leur utilisation.
4. Introduisez la pile dans le chargeur avec ses bornes
positive et négative face aux bornes correspondantes
du chargeur. Introduisez la pile à fond dans l’orifice de
manière à ce qu’elle repose sur son socle.
5. Lorsqu’une pile est introduite, le témoin du chargeur
passera du vert au rouge pour indiquer la mise en
charge. Le témoin de charge restera allumé tout au
long de la période de charge. Lorsque le chargement
est terminé, le témoin passera du rouge au vert.
NOTA ! La durée de charge devrait être de l'ordre d'une
heure UN quart pour les piles de base type
2.6 Ah Ni-MH, voire d’une heure pour les piles
optionnelles type 2.0 Ah NiCd.
MISE EN GARDE !
Ne chargez que les piles Makita®. D’autres types de
pile risque d’éclater et de provoquer des blessures
corporelles.
MISE EN GARDE
MISE EN GARDE
MISE EN GARDE
MISE EN GARDE
Page 22

Ridge Tool Company20
Sertisseuse Compact 100-B
• Respectez la procédure de rechargement
décrite aux pages 19-20 du manuel.
Recyclage des piles
Ne tentez pas de démonter la pile
ou de retirer une partie quelconque de ses bornes.
Cela pourrait provoquer un incendie ou un accident.
Avant de recycler les piles protégez les bornes exposées
avec une bande adhésive lourde et isolante afin d’éviter
les courts-circuits.
Piles au nickel-cadmium
Toute pile au nickel-cadmium doit être recyclée selon
des méthodes écologiquement responsables.
Veuillez composer le 1-800-8-BATTERY pour les méthodes de recyclage préconisées pour les piles Ni-Cd dans
votre région.
Piles à hydrure métallique de nickel
Les piles à hydrure métallique de nickel peuvent être
mises au rebut avec les déchets solides municipaux.
Consultez les autorités locales pour les méthodes de
recyclage utilisées dans votre région.
Mode d’emploi
MISE EN GARDE !
La Compact 100-B ne peut utiliser que des mâchoires
RIDGID Compact. Utilisez le type de mâchoire RIDGID
Compact spécifiquement prévu pour le système de
raccordement et les matériaux envisagés.
Eloignez vos doigts et vos mains des mâchoires
durant le cycle de sertissage. Portez systématiquement des lunettes de sécurité afin de protéger vos yeux contre la projection de débris.
Préparation des raccords
1. Consultez le mode d’emploi du système de raccordement utilisé pour les consignes de préparation
préalable des raccords avant de les sertir.
Sertissage des raccords à l’aide de
mâchoires à ciseaux typiques
1. Assurez-vous que la sertisseuse Compact 100-B est
équipée des mâchoires appropriées.
6. En fin de charge, débranchez le chargeur du secteur
d’alimentation. Si la pile ne doit pas servir, recouvrez
systématiquement ses bornes avec le couvercle
prévu.
Conseils importants visant le chargement
1. Les piles neuves ou qui n’ont pas servi depuis longtemps risquent de ne pas accepter une charge complète. Cela est normal et n’est pas indicatif d’un
problème. Vous pouvez recharger la pile complètement après l’avoir déchargé et rechargé à quelques
reprises.
2. Lorsqu’une pile qui vient de servir ou qui a été exposée au soleil ou à la chaleur pendant un certain
temps est mise en charge, le témoin rouge risque de
clignoter. Le cas échéant, attendez quelque temps. Le
chargement commencera dès que la pile aura suffisamment refroidie. La pile refroidira plus rapidement
si elle est hors du chargeur.
3. Si le témoin de charge clignote alternativement entre
le vert et le rouge, c’est signe d’anomalie et que le
chargement est impossible, car les bornes du chargeur ou de la pile sont encrassées de poussière ou la
pile est morte ou endommagée.
4. Les piles doivent être retirées de la sertisseuse
Compact 100-B lors de son stockage, surtout lors de
périodes de stockage prolongées. Les composants
électroniques de l’appareil tirent très légèrement sur
la pile lorsque celle-ci est installée. Une pile installée
dans l’appareil pour une période prolongée risque de
se décharger au point d’être irrémédiablement endommagée.
NOTA ! Les performances des piles souffrent con-
sidérablement lorsqu’elles sont stockées à
une température inférieure à 0° C (32° F).
Pour assurer un maximum de performances
et de longévité de charge dans les climats
froids, gardez les piles aussi chaudes que
possible. Lorsque les piles sont maintenues
à une température supérieure à 0° C (32° F), le
nombre de cycles de sertissage s’accroît
dramatiquement, surtout sur les raccords de
gros diamètre.
Conseils supplémentaires visant l’amélioration
des performances des piles :
• Utilisez la sertisseuse dès que possible lorsque
vous sortez la pile d’un endroit chaud vers le
gel. Les préparatifs de ce genre amélioreront
considérablement le nombre de raccords effectués avant d’avoir à recharger la pile.
• Tâchez de décharger la pile complètement
avant de la recharger.
MISE EN GARDE
Page 23

Ridge Tool Company 21
Sertisseuse Compact 100-B
2. Installez une pile complètement chargée dans l’embase de la poignée.
3. Appuyez sur la touche ON/OFF (marche/arrêt) de
l’affichage une fois pour mettre l’appareil en marche.
Les trois diodes électroluminescentes (DEL) devraient, ensemble, clignoter une fois. Ensuite, la DEL
verte devrait rester allumée pour indiquer que l’appareil est prêt à sertir.
NOTA ! L’appareil s’éteindra automatiquement s’il n’est
pas utilisé au bout de dix (10) minutes. Pour le
remettre en marche, il sera nécessaire d’appuyer à nouveau sur la touche ON/OFF (marche/arrêt) de l’affichage.
4. Assurez-vous que le tuyau est engagé dans le raccord jusqu’à la profondeur indiquée dans le manuel du
système de raccordement utilisé.
5. Comprimez les bras de la mâchoire pour l’ouvrir
(Fi-
gure 5)
.
Figure 5 – Ouverture des mâchoires à ciseaux
6. Positionnez les mâchoires sur le raccord. Vérifiez le
bon alignement des mâchoires sur le pourtour du
raccord, comme indiqué dans le manuel du système
de raccordement
(Figure 6)
.
Figure 6 – Positionnement des mâchoires à ciseaux sur
le raccord
7. Tenez l’outil bien d’équerre par rapport au tuyau,
puis appuyez sur la gâchette
(Figure 7)
. Le cycle de
sertissage dure sept (7) secondes environ. Une fois
le cycle de sertissage lancé et que les rouleaux
entrent en contact avec les bras de mâchoire, l’appareil se verrouillera et complétera le cycle de sertissage automatiquement. Le fait de lâcher la gâchette
n’arrêtera pas l’appareil une fois le processus de sertissage lancé. Cela assure un maximum de régularité,
d’uniformité et de fiabilité des raccords sertis. Le fait de
lâcher la gâchette avant le début du cycle de sertissage ramènera automatiquement les rouleaux à leur
position de départ.
Eloignez vos doigts des mâchoires
afin d’éviter de vous faire pincer.
Figure 7 – Compact 100-B d’équerre avec le tuyau
NOTA ! Lorsque le témoin DEL jaune se met à clignoter,
c’est signe que l’appareil a besoin de révision et
qu’il doit être confié à un centre de service
RIDGID agréé. L’appareil cessera de fonctionner
s’il n’est pas révisé dans les 2.000 cycles suivant
le premier clignotement du témoin DEL jaune.
8. Comprimez les bras de mâchoire pour ouvrir les
mâchoires.
9. Retirez la sertisseuse Compact 100-B du tuyau.
Evitez de toucher les bavures tranchantes qui peuvent se former sur le raccord durant son
sertissage.
Inspection des raccords sertis
AVERTISSEMENT
La sertisseuse Compact 100-B s’arrêtera automatiquement dès que sa pile devient trop faible pour
achever le sertissage correctement. Cela sera
indiqué par cinq clignotements des DEL rouge et
verte. L’appareil s’arrêtera automatiquement au
bout des cinq clignotements rouges et verts. Il convient alors de remplacer la pile par une pile à pleine
charge, puis de recommencer le sertissage comme
indiqué plus haut. Pour ramener les rouleaux et
retirer l’appareil du raccord en cas de pile déchargée ou d’anomalie en cours de sertissage, il
sera nécessaire de d’appuyer sur le bouton de
détente noir qui se trouve du côté droit de l’appareil.
MISE EN GARDE
AVERTISSEMENT
Page 24

Ridge Tool Company22
Sertisseuse Compact 100-B
2. Les axes de pivotement des mâchoires doivent être
nettoyés au moins une fois par an, puis lubrifiés à
l’aide d’une graisse à roulements universelle. Il suffit
d’appliquer une légère couche aux axes et aux logements.
3. Les mâchoires et les plaques latérales doivent faire
l’objet d’un examen visuel quotidien en vue de détecter les fissures visibles et autres signes d’usure ou
de détérioration. En présence de fissurations visibles quelconques, il sera nécessaire de remplacer les
mâchoires.
MISE EN GARDE !
Les mâchoires soudées, meulées, percées ou modifiées d’une manière quelconque risquent d’éclater
en cours de sertissage et projeter des débris tranchants capables de provoquer des blessures graves,
voire mortelles. Remplacez systématiquement les
mâchoires, bagues de sertissage et bras d’entraînement endommagés.
4. Examinez les ressorts de rappel des mâchoires lors
de chaque utilisation. Les mâchoires devraient s’ouvrir
et se fermer sans encombre sous une pression des
doigts minimale.
Révisions obligatoires chez un centre
de service RIDGID autorisé.
Au bout de 20.000 cycles, le témoin DEL jaune de
l’affichage se mettra à clignoter dès la mise en marche de
l’appareil pour signaler qu’il est temps de le réviser et de
le rajuster. L’appareil cessera de fonctionner s’il n’est
pas révisé au bout de 20.000 cycles suivant le premier
clignotement du témoin DEL jaune. Dès lors, le témoin
DEL jaune restera allumé en permanence. Cette révision
obligatoire assure le bon état de marche de l’appareil et la
production de sertissages uniformes.
Accessoires
Seuls les produits suivants sont adaptés à la sertisseuse Compact 100-B. Toute tentative d’adaptation de
mâchoires ou d’accessoires prévus pour d’autres
types d’appareil peut s’avérer dangereuse et/ou produire des sertissages de mauvaise qualité. Utilisez
exclusivement les accessoires indiqués ci-dessous
1. Examinez le raccord serti pour l’une ou plusieurs des
anomalies suivantes :
• Mauvais alignement des tuyaux
• Tuyaux mal engagés ; vérifiez les repères d’en-
gagement
• Mauvais alignement des mâchoires par rapport au
raccord
• Tout autre risque d’anomalie souligné par le fabri-
cant des raccords
Le cas échéant, il sera nécessaire de remplacer la
section de tuyau et d’y sertir un nouveau raccord.
2. Testez le réseau selon les règles de l’art et la réglementation locale.
Entretien
MISE EN GARDE !
N’oubliez pas d’enlever la pile de l’appareil avant
toute intervention.
Sertisseuse Compact 100-B
Nettoyage et lubrification quotidiens
1. Essuyez l’appareil avec un chiffon sec et propre.
2. Examinez l’axe des mâchoires et, au besoin, lubrifiezle avec un lubrifiant à la silicone.
Mâchoires
1. Examinez les surfaces d’attaque des mâchoires quotidiennement. Si elles sont rouillées, encrassées ou
recouvertes de dépôts de cuivre ou de bronze (ces
dépôts s’accumulent le plus souvent à l’extrémité des
mâchoires à ciseaux comme indiqué à la
Figure 8
),
nettoyez-les avec des tampons de polissage à grain
fin, tels que les tampons ScotchBrite®(ScotchBrite®est
une marque déposée de la société 3M), de la paille de
fer ou avec une brosse métallique. N’utilisez pas
de toile d’émeri, de papier verre ou des matériaux
abrasifs semblables car ils risquent de compromettre l’intégrité dimensionnelle des mâchoires.
Figure 8 – Dépôts de cuivre nécessitant le nettoyage
des mâchoires
Page 25

Raccords :
Consultez le manuel du système de raccords utilisé pour
une liste des raccords disponibles.
Stockage
Stockez l’appareil et ses mâchoires dans la mallette de
transport. La Compact 100-B doit être stockée à plus de
0° C (32° F) et moins de 50° C (122° F). Le capteur de
température de l’appareil l’empêchera de fonctionner s’il
est hors de cette plage de température. Cela sera indiqué
par le clignotement d’un témoin DEL rouge sur l’affichage.
Rangez la mallette de transport dans
un endroit sec et fermé sous clé, à l’abri des enfants et de
tout individu qui n’est pas rompu au fonctionnement de la
sertisseuse Compact 100-B. Cet appareil peut être dangereux entre les mains d’un novice.
NOTA ! Les performances des piles souffrent con-
sidérablement lorsqu’elles sont stockées à
une température inférieure à 0° C (32° F).
Pour assurer un maximum de performances
et de longévité de charge dans les climats
froids, gardez les piles aussi chaudes que
possible. Lorsque les piles sont maintenues
à une température supérieure à 0° C (32° F),
le nombre de cycles de sertissage s’accroît
dramatiquement, surtout sur les raccords
de gros diamètre.
Conseils supplémentaires visant l’amélioration
des performances des piles :
• Utilisez la sertisseuse dès que possible lorsque
vous sortez la pile d’un endroit chaud vers le
gel. Les préparatifs de ce genre amélioreront
considérablement le nombre de raccords effectués avant d’avoir à recharger la pile.
• Tâchez de décharger la pile complètement
avant de la recharger.
• Respectez la procédure de rechargement
décrite aux pages 19-20 du manuel.
Ridge Tool Company 23
Sertisseuse Compact 100-B
Réf.
Catalogue Description
12683 Bloc-piles 14,4V (pile de rechange d’origine
de 2,6 Ah Ni-MH)
83407 Bloc-piles 14,4V (pile optionnelle de 2,0 Ah
Ni-Cd)
83417 Chargeur 115V
84112 Chargeur 230V
16818 Mallette de transport en matière plastique
— Mâchoires RIDGID série Compact
Accessoires pour sertisseuse Compact 100-B
Révisions et réparations
Toute révision ou réparation de la
sertisseuse Compact 100-B doit être assurée par un
réparateur RIDGID agréé. La quincaillerie de l’appareil a
été marqué afin de déceler toute intervention non autorisée.
D’importants dégâts matériels, ainsi que des blessures
graves et potentiellement mortelles, peuvent découler de
telles interventions.
Veuillez consulter les services techniques de la Ridge Tool
Company en composant le (800) 519-3456 ou son site
www.ridgid.com pour obtenir les coordonnées du centre
de service le plus proche.
Veuillez adresser toutes questions concernant la révision
ou la réparation de cette machine aux coordonnées
suivantes :
Ridge Tool Company
Technical Service Department
400 Clark Street
Elyria, Ohio 44035-6001
Tél. : 800) 519-3456
E-mail: TechServices@ridgid.com
Vous pouvez obtenir les coordonnées du réparateur
indépendant agréé le plus proche en consultant la Ridge
Tool Company au (800) 519-3456 ou en visitant le site
http://www.ridgid.com
MISE EN GARDE
MISE EN GARDE
Page 26

Ridge Tool Company24
Sertisseuse Compact 100-B
SYMPTOME CAUSE POTENTIELLE
SOLUTION
L’appareil ne se met pas
en marche lorsqu’on
appui sur la touche
ON/OFF de l’affichage.
L’appareil s’arrête
lorsque l’on appui sur
sa gâchette ou en milieu
du cycle de sertissage.
Le témoin DEL rouge
clignote 5 fois, puis
l’appareil s’arrête
automatiquement.
Le témoin DEL jaune
clignote constamment
tandis que la machine
est en marche et qu’elle
fonctionne normalement.
Le témoin DEL jaune
reste allumé et l’appareil
ne fonctionne pas
lorsque l’on appui sur la
gâchette.
Le témoin DEL rouge clignote et l’appareil ne fonctionne pas lorsque l’on
appui sur la gâchette.
Les témoins DEL rouge
et jaune restent allumés
en permanence lorsque
l’appareil est en marche.
Dépannage
La pile est soit complètement déchargée ou
endommagée.
La pile est mal installée dans la poignée de
l’appareil.
La pile est déchargée.
La pile est trop froide.
La révision et le recalibrage de la machine sont
obligatoires au-delà de 20.000 sertissages.
La révision et le recalibrage de la machine sont
obligatoires au-delà de 22.000 sertissages. L’appareil est bloqué et ne fonctionnera plus tant qu’il n’a
pas été révisé.
L’axe des mâchoires est mal engagée.
La température est hors limite.
Anomalie opérationnelle.
Installez une pile rechargée ou rechargez la pile
existante.
Vérifiez l’installation appropriée de la pile.
Installez une pile rechargée ou rechargez la pile
existante.
Réchauffez la pile pour que sa température se
situe dans la plage des 0°C (32°F) à 50°C (122°F).
NOTA ! Il sera nécessaire de sertir le raccord
à nouveau si l’appareil s’arrête en
cours de sertissage. Sinon, le raccord
risque de fuir.
Contactez les services techniques de la Ridge Tool
Company en composant le (800) 519-3456 pour le
centre de service agréé le plus proche.
Contactez les services techniques de la Ridge Tool
Company en composant le (800) 519-3456 pour
obtenir les coordonnées du centre de service agréé
le plus proche.
Enfoncez l’axe des mâchoires complètement.
Amenez l’appareil et la pile dans la plage des 0°C
(32°F) à 50°C (122°F).
Retirez et réinstallez la pile chargée. Si les DEL
restent allumées, consultez les services techniques
de la Ridge Tool Company en composant le (800)
519-3456 pour obtenir les coordonnées du centre de
service agréé le plus proche.
Page 27

Ridge Tool Company 25
Sertisseuse Compact 100-B
Codes de diagnostique du Compact 100-B
SERVICE
Jaune
Besoin de
révision
Témoin allumé
Témoin
clignotant
Température
Rouge
Axe de mâchoire
non engagé
Pile déchargée
Vert
TEMOINS DEL
VERT ROUGE JAUNE DESIGNATION REMEDE
Clignote 1x Clignote 1x Clignote 1x Témoin de mise en marche. —
Continu Mode opérationnel. L’appareil est prêt à sertir.
Continu Clignotant Axe de mâchoires désengagé. Vérifiez l’engagement complet de l’axe.
Température hors plage. Amenez la pile de l’appareil dans la plage des 0° C (32° F)
à 50° C (122° F)
Clignote 5x Clignote 5x Pile déchargée. Remplacez ou rechargez la pile. NOTA ! Recommencez le
sertissage.
Continu Clignotant Besoin de révision (> 20.000 sertissages). Consultez les services techniques de la Ridge Tool
Company au (800) 519-3456 pour obtenir les coordonnées
du centre de service agréé le plus proche.
Continu Continu Révision obligatoire (> 22.000 sertissages). Consultez les services techniques de la Ridge Tool
Company au (800) 519-3456 pour obtenir les coordonnées
du centre de service agréé le plus proche.
Continu Continu Appareil bloqué par une anomalie Retirez et réinstallez la pile. S’il reste bloqué, consultez les
opérationnelle. services techniques de la Ridge Tool Company au (800)
519-3456 pour obtenir les coordonnées du centre de service agréé le plus proche.
Clignote Clignote Surchauffe ou consommation de courant Laissez refroidir pendant 20 seconds. Si le problème a lieu
pendant pendant. excessive dues à une anomalie opérationnelle. à plusieurs reprises, consultez les services techniques de
20 s. 20 s. la Ridge Tool Company au (800) 519-3456 pour obtenir es
coordonnées du centre de service agréé le plus proche.
Témoin allumé
Témoin
clignotant
ON/OFF
Page 28

Ridge Tool Company26
Sertisseuse Compact 100-B
Page 29

Selladora
Compacta No. 100-B
Selladora compacta No. 100-B
A continuación apunte y retenga el Número de Serie del aparato que se encuentra en su
placa de características.
No. de
serie
Page 30

Índice
Ficha para apuntar el Número de Serie del aparato ................................................................................................27
Información general de seguridad
Seguridad en la zona de trabajo ..............................................................................................................................29
Seguridad eléctrica ..................................................................................................................................................29
Seguridad personal ..................................................................................................................................................29
Uso y cuidado del aparato ........................................................................................................................................29
Servicio ....................................................................................................................................................................30
Información específica de seguridad
Seguridad de la Selladora ........................................................................................................................................30
Seguridad del cargador de pilas ..............................................................................................................................30
Descripción, especificaciones y equipo estándar
Descripción ..............................................................................................................................................................31
Especificaciones ......................................................................................................................................................31
Revisión de la Selladora y de los juegos de mordazas
Cargador de pilas de la Selladora Compacta 100-B ................................................................................................32
Montaje de las mordazas selladoras ........................................................................................................................32
Preparación del aparato y de la zona de trabajo
Procedimiento para cargar la pila ............................................................................................................................33
Datos importantes sobre la carga de pilas................................................................................................................34
Eliminación de las pilas ............................................................................................................................................34
Pilas de níquel-cadmio..............................................................................................................................................34
Pilas de níquel-metal hídrido ....................................................................................................................................34
Instrucciones para el funcionamiento
Preparación de la junta ............................................................................................................................................34
Selladura de un acoplamiento con un juego de mordazas tradicional tipo tijeras ....................................................35
Inspección de la junta sellada ..................................................................................................................................35
Instrucciones para el mantenimiento
Limpieza y lubricación diarias ..................................................................................................................................36
Mordazas ..................................................................................................................................................................36
Mantenimiento obligatorio en un Servicentro Autorizado RIDGID............................................................................36
Accesorios ..................................................................................................................................................................37
Almacenaje ..................................................................................................................................................................37
Servicio y reparaciones..............................................................................................................................................37
Detección de averías ..................................................................................................................................................38
Códigos de diagnóstico de la Compacta 100-B ......................................................................................................39
Garantía vitalicia..................................................................................................................................carátula posterior
Ridge Tool Company28
Selladora compacta No. 100-B
Page 31

Ridge Tool Company 29
Selladora compacta No. 100-B
Información general de seguridad
¡
ADVERTENCIA! Lea y comprenda todas las instrucciones.
Pueden ocurrir golpes eléctricos, incendios y/u otras lesiones personales graves
si no se siguen todas las instrucciones
detalladas a continuación.
¡
GUARDE ESTAS INSTRUCCIONES!
Seguridad en la zona de trabajo
• Mantenga su área de trabajo limpia y bien alumbrada. Los bancos de trabajo desordenados y las
zonas oscuras invitan a que se produzcan accidentes.
• No haga funcionar aparatos motorizados en pre-
sencia de combustibles tales como líquidos, gases
o polvos inflamables. Los aparatos eléctricos generan
chispas que pueden inflamar el polvo o las emanaciones combustibles.
• Al hacer funcionar una máquina, mantenga aparta-
dos a los curiosos, niños y visitantes. Las distracciones pueden hacerle perder el control del aparato.
Seguridad eléctrica
• Los aparatos con doble aislamiento vienen provistos de un enchufe polarizado: una de sus clavijas es más ancha que la otra. Este enchufe puede
introducirse en un tomacorriente polarizado de
una sola manera. Si el enchufe no entra completamente en el tomacorriente, inviértalo. Si todavía
no cabe, recurra a un electricista calificado para
que instale un tomacorriente polarizado. No modifique el enchufe de manera alguna. El doble ais-
lamiento elimina la necesidad de contar con un
cordón de suministro de tres alambres y conexión a
tierra, y de un suministro conectado a tierra.
• Evite el contacto con artefactos conectados a tierra
tales como cañerías, radiadores, estufas o cocinas y refrigeradores. Aumenta el riesgo de que se pro-
duzca un choque eléctrico cuando su cuerpo ofrece
conducción a tierra.
• No exponga los aparatos motorizados a la lluvia o
a condiciones mojadas. Cuando agua penetra en un
aparato a motor, aumenta el riesgo de que se produzca
un golpe eléctrico.
• No maltrate el cordón eléctrico del aparato. Nunca
transporte el aparato tomándolo de su cordón
eléctrico ni jale del cordón para desenchufarlo del
tomacorriente. Mantenga el cordón lejos del calor,
aceite, bordes cortantes o piezas movibles. Recambie un cordón dañado inmediatamente. Un
cordón en mal estado aumenta el riesgo de que se produzca un choque eléctrico.
• Al hacer funcionar un aparato motorizado a la
intemperie, emplee un cordón de extensión fabricado para uso exterior y rotulado “W-A” o “W”.
Estos cordones han sido diseñados para su empleo al
aire libre y reducen el riesgo de que se produzca un
choque eléctrico.
• Use cordones de extensión apropiados
(vea la
tabla).
Una dimensión insuficiente del conductor
causará una caída excesiva del voltaje, pérdida de
potencia y recalentamiento.
Seguridad personal
• Manténgase alerta, preste atención a lo que está
haciendo y use sentido común cuando trabaje
con un aparato motorizado. No lo use si está
cansado o se encuentra bajo la influencia de drogas, alcohol o medicamentos. Sólo un breve des-
cuido mientras hace funcionar un aparato a motor
puede resultar en lesiones personales graves.
• Vístase adecuadamente. No lleve ropa suelta ni
joyas. Contenga el cabello largo. Mantenga cabello, ropa y guantes apartados de las piezas en
movimiento. La ropa suelta, las joyas o el pelo largo
pueden engancharse en la piezas móviles.
• Evite la puesta en marcha no intencional del apara-
to. Jamás transporte un aparato con el dedo sobre su
interruptor. Así ocurren accidentes.
• No trate de alcanzar algo extendiendo su cuerpo.
Mantenga sus pies firmes en tierra y un buen
equilibrio en todo momento. Al mantener el equilibrio
y los pies firmes, tendrá mejor control sobre el aparato en situaciones inesperadas.
• Use equipo de seguridad. Siempre lleve protección
para los ojos. Cuando las condiciones lo requieran,
debe usar mascarilla para el polvo, calzado de seguridad antideslizante, casco duro o protección para los
oídos.
Uso y cuidado del aparato
• No fuerce el aparato. Use el aparato correcto para
el trabajo que realizará. El aparato adecuado hará el
Dimensión mínima de alambre para cordones de extensión
Amperios en
la placa de Longitud total (en pies)
características
0-25 26-50 51-100
0-6 18 AWG 16 AWG 16 AWG
6-10 18 AWG 16 AWG 14 AWG
10-12 16 AWG 16 AWG 14 AWG
12-16 14 AWG 12 AWG
NO SE RECOMIENDA
Page 32

Ridge Tool Company30
Selladora compacta No. 100-B
trabajo mejor y de manera más segura, a la velocidad
para la cual fue diseñado.
• Si el interruptor del aparato no lo enciende o no lo
apaga, no use el aparato. Cualquier herramienta
motorizada que no pueda ser controlada mediante
su interruptor es peligrosa y debe ser reparada.
• Antes de efectuar trabajos de regulación, de cam-
biar accesorios o de almacenar el aparato, extráigale la pila. Este tipo de seguridad preventiva reduce
el riesgo de poner el aparato en marcha involuntariamente.
• Almacene los aparatos que no estén en uso fuera
del alcance de los niños y de otras personas sin
entrenamiento. Las herramientas son peligrosas en
las manos de usuarios no capacitados.
• Verifique que las piezas movibles del aparato no
estén desalineadas o agarrotadas, si hay piezas
quebradas o si existe cualquiera otra condición
que pueda afectar el buen funcionamiento del
aparato. En caso de estar dañado, antes de usar el
aparato, hágalo componer. Numerosos accidentes
son causados por aparatos que no han recibido un
mantenimiento adecuado.
• Solamente use accesorios recomendados por el
fabricante para su modelo. Los accesorios que son
adecuados para un aparato pueden ser peligrosos
al usárselos en otra herramienta.
• Mantenga los mangos limpios y secos, libres de
aceite y grasa. Esto permite un mejor control del
aparato.
Servicio
• El servicio al aparato sólo debe ser efectuado por
personal de reparaciones calificado. El servicio o
mantenimiento practicado por personal no calificado
puede ocasionar lesiones.
• Cuando efectúe servicio en un aparato debe usar
únicamente repuestos o piezas de recambio idénticas. Siga las instrucciones en la sección de
Mantenimiento de este manual. El uso de piezas no
autorizadas o el no seguir las instrucciones para el
mantenimiento, pueden crear el riesgo de que se produzcan un choque eléctrico o lesiones.
Información específica
de seguridad
ADVERTENCIA
Lea detenidamente este Manual del Operario, el
manual del juego de mordazas y las instrucciones
de instalación del fabricante de los acoplamientos, antes de usar la Selladora Compacta 100-B
de RIDGID. Pueden ocurrir daños materiales de
envergadura, lesiones personales graves, y hasta
muertes, si no se comprenden y siguen las instrucciones de este manual.
Si tiene alguna duda, llame al Servicio Técnico de Ridge
Tool Company al teléfono (800) 519-3456.
Seguridad de la Selladora
• Use la Selladora Compacta 100-B únicamente con
mordazas compactas RIDGID. Usarla para otros
fines o modificar la Compacta 100-B para que efectúe
otros trabajos podría hacerle daño a la selladora, averiar las mordazas y/o causar lesiones personales.
• Mantenga sus dedos y manos apartados de las
mordazas durante el ciclo de sellado. Sus dedos o
manos pueden ser aplastados, fracturados o amputados si quedan atrapados entre las mordazas o entre
éstas y cualquier otro objeto.
• Nunca intente reparar un juego de mordazas ave-
riado. Una mordaza que ha sido soldada, afilada,
perforada o modificada de cualquier forma puede
hacerse trizas durante una selladura y causar lesiones
graves. Deseche todo el conjunto de mordazas dañado. Cámbielo por un nuevo juego de mordazas. Nunca
reemplace sus componentes en forma individual,
salvo un resorte de retorno dañado. Consulte al
Departamento Técnico de Ridge Tool Company para
obtener repuestos.
• Nunca use el aparato con el interruptor o el alo-
jamiento del motor dañado. El uso de un aparato
con el alojamiento del motor agrietado o un interruptor
averiado puede causar choques eléctricos y lesiones
de gravedad.
La selección de los materiales y de los métodos de junta o sellado apropiados es responsabilidad del
diseñador y/o instalador del sistema. Antes de comenzar
una instalación se requiere efectuar una exhaustiva
evaluación de las condiciones ambientales imperantes,
incluyendo las químicas y las temperaturas de funcionamiento. Consulte con el fabricante del sistema de
acoplamientos para efectuar la selección.
Seguridad del cargador de pilas
• Cargue únicamente pilas recargables Makita®de
Ni-MH y Ni-Cd en el cargador de pilas Makita®.
Otros tipos de pilas pueden reventar y causar daños y
lesiones personales.
• No pruebe el cargador de pilas con objetos con-
ductores de electricidad. Un cortocircuito de los
CUIDADO
Page 33

Ridge Tool Company 31
Selladora compacta No. 100-B
El ciclo completo dura aproximadamente siete (7) segundos. Una vez iniciado el ciclo de deformación del acoplamiento, el ciclo sigue su curso automáticamente hasta
finalizar, aunque se suelte el interruptor de gatillo. Los visualizadores DEL en la parte superior del aparato advierten problemas tales como temperatura inapropiada,
pasador para el montaje de las mordazas abierto o mantenimiento necesario.
Figura 1 – Selladora Compacta 100-B y juego de
mordazas serie compacta
Especificaciones
Selladora Compacta 100-B:
Motor
Voltage ...................14,4V c.c.
Amperaje ................25,6 amps.
Potencia..................325 vatios
Peso...........................7,5 libras (3,4 Kg.) con pila
5,7 libras (2,6 Kg.) sin pila
Presión del ariete ..........5400 libras (24kN)
Temperaturas de
funcionamiento ...............entre los 32° y 122° F (0° y
50° C)
¡
NOTA! La Selladora Compacta 100-B y los juegos de
mordazas serie compacta se encuentran bajo la
protección de diversas patentes y patentes en
trámite tanto en los Estados Unidos de América
como internacionalmente.
¡
NOTA! Hay disponibles juegos de mordazas RIDGID
de dos "series":
• Serie estándar
• Serie compacta
bornes de la pila puede producir chispas, quemaduras
y choques eléctricos.
• No introduzca en el cargador una pila que tiene su
envoltura agrietada. No use el cargador si se ha
golpeado o dañado en lo más mínimo. Un car-
gador averiado aumenta el riesgo de choques eléctricos.
• Por ningún motivo queme una pila. Las pilas ex-
plotan cuando se ponen al fuego.
• Siempre cargue la cápsula de pilas a una tempe-
ratura ambiente superior a 50° F (10° C) e inferior a
104° F (40° C). Almacene la herramienta y la cápsula de pilas en un lugar donde la temperatura
no excederá los 120º F (49° C). El cuidado adecuado
de las pilas evitará que sufran un daño irreparable. El
trato indebido a las pilas puede causar fugas, choques
eléctricos o quemaduras.
• No intente emplear un transformador elevador,
un generador motorizado o un tomacorriente con
corriente continua. Pueden dañar el cargador y
provocar choques eléctricos, incendios o quemaduras.
• Nada debe cubrir al cargador mientras esté en
uso. Puede producirse un incendio.
• Desenchufe el cargador cuando no esté en uso.
Así se evita causar lesiones a un niño o a personas
inexpertas.
• Cuando la pila no esté en uso, siempre mantenga
los bornes de la pila cubiertos con su tapa. Así se
evitan los choques eléctricos.
• No ponga a cargar la cápsula de la pila en ambien-
tes húmedos o mojados. No la deje expuesta a la
lluvia o la nieve. Aumentan los riesgos de un choque
eléctrico.
Descripción, especificaciones
y equipo estándar
Descripción
La Selladora Compacta 100-B -en conjunción con las
mordazas apropiadas- engarza mecánicamente un acoplamiento o fitting sobre un tubo, creando entre ellos
una junta o sello hermético y definitivo. Al oprimirse el
interruptor de la Compacta 100-B, un motor eléctrico
interno propulsa una bomba hidráulica, la que inyecta
líquido hacia el interior del cilindro del aparato. A su vez,
esta acción impele al ariete o martillo hidráulico hacia
delante, para aplicar una fuerza selladora de miles de
libras sobre acoplamientos especialmente diseñados.
Visualizador
DEL (arriba)
Mordazas
modelo
compacta
tipo tijeras
Brazo de la mordaza
modelo compacta
Pasador
para el
montaje
de las
mordazas
Pila
Alojamiento
del aparato
Interruptor
Mango
Placa lateral
de la mordaza
Page 34

Ridge Tool Company32
Selladora compacta No. 100-B
el cordón. Revise el cargador mismo. No use el cargador
si ha recibido un golpe fuerte, se ha caído o dañado.
Montaje de las mordazas selladoras
Emplee exclusivamente juegos de mordazas
RIDGID. Emplee el juego de mordaza RIDGID expresamente indicado para el tipo de acoplamiento que usará y
el material de la tubería que instalará. El empleo de
otros tipos de mordazas producirá sellados defectuosos
que podrían causar vastos daños en un inmueble o
propiedad.
1. Asegure que la pila ha sido extraída del aparato.
2. Retraiga el pasador para el montaje de las mordazas
(Figura 2).
Figura 2 – Retracción del pasador para el montaje de
las mordazas
3. Si la Selladora tiene colocado un juego de mordazas, extráigalo.
Figura 3 – Introducción de un juego de mordazas en la
Compacta 100-B
4. Seleccione el juego de mordazas que corresponda al
diámetro de la tubería y al sistema de acoplamientos
que se instalará. Revise las mordazas. Si están
sucias, límpielas. Consulte las instrucciones de
limpieza en la sección de Mantenimiento.
Si no se limpian las mordazas, las
juntas pueden quedar mal hechas y, por consiguiente,
Estas mordazas no son intercambiables. Es
decir, la Selladora Compacta No.100-B sólo funciona con mordazas de la serie compacta. Asimismo, sólo las mordazas estándar funcionarán
con Selladoras serie estándar. Consulte los manuales de estas selladoras estándar (320-E, CT-
400) para obtener mayor información acerca de
estas selladoras y sus mordazas.
Revisión de la Selladora y de
los juegos de mordazas
ADVERTENCIA
Para evitar lesiones graves, revise la Selladora
Compacta 100-B, el cargador de la pila, los juegos
de mordazas compactas. Nunca use un juego de
mordazas 100-B con piezas dañadas o faltantes.
Las siguientes revisiones deben realizarse diariamente:
1. Asegure que a la Selladora Compacta 100-B se le ha
extraído la pila.
2. Revise el alojamiento de la Selladora y su interruptor
por si están dañados. Observe si hay grietas en el
alojamiento del motor o alambres expuestos.
3. Revise las mordazas. Si están sucias, límpielas. Para
saber como limpiarlas, consulte la sección de Mantenimiento en este manual. Si no se limpian las mordazas, las conexiones pueden quedar mal hechas y,
por consiguiente, ocasionar daños materiales de gran
envergadura. Si detecta cualquier grieta, deseche la
pieza dañada y cámbiela por una en buen estado.
Siempre deseche la totalidad del ensamble dañado. Jamás recambie un componente individual del conjunto, con excepción de los resortes de
retorno de las mordazas. Si no se recambia el ensamble
completo, pueden ocurrir daños y lesiones graves.
4. Limpie cualquier aceite, grasa o mugre de los mangos
del aparato. Así se evita que el aparato se escape de
sus manos.
Cargador de pilas de la Selladora
Compacta 100-B
Revise el cordón de suministro y el enchufe del cargador
de pilas por si tienen algún daño. Si detecta cualquier
defecto, no use el cargador hasta que se le haya cambiado
ADVERTENCIA
CUIDADO
ADVERTENCIA
Page 35

Ridge Tool Company 33
Selladora compacta No. 100-B
ocasionar daños materiales de gran envergadura. Si
detecta cualquier grieta en las mordazas, deseche el
juego dañado y reemplácelo.
Una mordaza que ha sido soldada,
afilada, perforada o modificada de cualquier forma puede
hacerse trizas durante una operación de sellado y disparar
objetos cortantes por los aires, los que pueden causar
lesiones o heridas graves y hasta la muerte. Deseche y
reemplace los conjuntos de mordazas dañados.
5. Introduzca el juego de mordazas en la Selladora
(Figure 3)
.
6. Empuje el pasador para el montaje de las mordazas
hasta que haga clic.
¡
NOTA! La Compacta 100-B no funcionará si el pasador
no está enganchado a fondo.
Preparación del aparato y de la
zona de trabajo
ADVERTENCIA
Para prevenir lesiones graves, es necesario preparar el aparato y la zona de trabajo adecuadamente.
Deben seguirse los siguientes procedimientos:
1. Revise que la zona de trabajo:
• esté bien iluminada,
• no tenga líquidos, gases o polvo inflamables que
puedan provocar un incendio.
Procedimiento para cargar la pila
ADVERTENCIA
Antes de usar el cargador de pilas, lea todas las
instrucciones sobre la pila y el cargador.
1. Coloque el cargador y su cordón donde nadie pueda
pisarlos, dañarlos o tropezarse con ellos. No exponga el cargador a la lluvia o la nieve.
2. Cargue la cápsula de pilas a temperaturas ambientes por sobre los 50° F (10° C) y por debajo de los
104° F (40° C). Almacene el cargador y la cápsula de
pilas en un lugar donde la temperatura no sobrepase
los 120° F (49° C).
3. Enchufe el cargador en un tomacorriente de corriente
alterna. La luz del indicador de carga destellará en
verde
(Figura 4)
.
Para evitar un choque eléctrico e incendios eléctricos, jamás use un cordón de extensión
dañado o que no cumpla con los siguientes requisitos:
• tener un enchufe cuyas clavijas tienen igual forma
y tamaño como las del enchufe del cargador.
• tener una clasificación "W" ó "W-A" si se lo va a
usar al aire libre.
• tener un grosor de alambre suficiente (16 AWG
cuando tiene menos de 100 pies). Si el grosor
del alambre es inferior al necesario, el cordón
puede recalentarse, derretir el aislante del cordón
o inflamar objetos cercanos.
No intente enchufar el cargador a un transformador elevador, grupo electrógeno, o suministro de
corriente continua.
Figura 4 – Cargador de pilas
¡
NOTA! Las pilas nuevas no vienen cargadas y deben
cargarse antes de usarlas.
4. Introduzca la cápsula de pilas de tal manera que
los bornes negativo y positivo en la cápsula coincidan
con las marcas respectivas en el cargador. Asiente la
cápsula hasta el fondo de su cuna en el cargador.
5. Al insertarse la cápsula de pilas en el cargador, el
indicador luminoso cambiará de color verde a rojo y
comenzará la carga. Mientras se carga la cápsula, la
luz del indicador permanecerá encendida, sin destellar. Cuando la cápsula se haya terminado de cargar,
la luz cambiará de rojo a verde.
¡
NOTA! La pila estándar 2,6 Ah Ni-MH del equipo tardará
aproximadamente una hora y cuarto (1
1
/4) en
cargarse. La pila opcional 2,0 Ah NiCd demorará
una hora en cargarse.
ADVERTENCIA
Sólo cargue pilas Makita®en el cargador. Otras pilas podrían reventarse y causar lesiones personales.
6. Finalizada la carga, desenchufe el cargador de la
ADVERTENCIA
ADVERTENCIA
CUIDADO
Page 36

Ridge Tool Company34
Selladora compacta No. 100-B
• Siga las instrucciones para recargar la pila
correctamente; las encuentra en las páginas
33 y 34 de este Manual.
Eliminación de las pilas
No intente desarmar una pila o
sacarle algún componente que sobresale de sus
bornes. Puede causar un incendio o lesiones. Antes de
desecharla, cubra los bornes con cinta aislante para
impedir que hagan cortocircuito.
Pilas de níquel-cadmio
Las pilas de níquel-cadmio deben juntarse, reciclarse o
eliminarse en forma responsable para proteger el medioambiente.
Por favor llame al fono 1-800-BATTERY para obtener información acerca del reciclaje y de las restricciones o prohibiciones de eliminación de pilas de Ni-Cd en su zona.
Pilas de níquel-metal hídrido
Si el aparato dispone de pilas de níquel-metal hídrido,
pueden eliminarse en la recolección municipal de desechos sólidos.
Consulte al gobierno de su localidad para interiorizarse de
las prácticas de eliminación o reciclaje de pilas.
Instrucciones para
el funcionamiento
ADVERTENCIA
La Selladora Compacta 100-B está diseñada para
usarse únicamente con juegos de mordazas compactas RIDGID. Use las mordazas compactas
RIDGID fabricadas específicamente para el sistema
de acoplamiento y tipo de tubería que va a instalar.
Mantenga sus dedos y manos apartados de las
mordazas durante el ciclo de sellado. Siempre lleve
protección para los ojos para proteger sus ojos de
mugre y otros cuerpos extraños.
Preparación de la junta
1. Antes de proceder a efectuar una selladura, lea el
manual correspondiente al sistema de acoplamientos
en uso para conocer la forma correcta en que se
prepara la junta o unión.
fuente de suministro. Siempre que la pila no esté
en uso, cubra los bornes de la pila con su cubierta.
Datos importantes sobre la carga de
pilas
1. Es posible que una nueva cápsula de pilas o una cápsula que no se ha usado por un largo período de
tiempo no se cargue por completo la primera vez.
Esto es normal y no es indicativo de un problema. Podrá cargar la pila por completo una vez que se haya
descargado por completo y recargado un par de
veces.
2. Si se pone a cargar una cápsula de pila que recién fue
extraída de un aparato que estuvo en funcionamiento, o una cápsula que fue dejada expuesta –por largo
tiempo- a la luz directa del sol o al calor, es posible
que la luz del cargador destelle en color rojo. Si esto
ocurre, espere un rato. La cápsula de pilas comenzará
a cargarse una vez que se haya enfriado. La cápsula se enfriará más rápidamente si la saca del cargador.
3. Si la luz del cargador destella alternadamente en
verde y en rojo, existe un problema y no es posible
cargar la pila. Los bornes en el cargador o en la
cápsula de la pila podrían estar sucios o la cápsula
está dañada o desgastada.
4. Cuando la Selladora Compacta 100-B se vaya a
guardar, especialmente si se la almacenará por largo
tiempo, debe extraérsele la pila. Una pila que queda
puesta e inactiva en la Selladora por mucho tiempo
puede descargarse más allá de lo recomendable y
quedar inutilizable.
¡
NOTA! El rendimiento de las pilas disminuye con-
siderablemente cuando se las almacena a
menos de 0°C (32°F). Para un rendimiento
óptimo y una larga vida útil de las pilas en climas fríos, manténgalas en lo posible a temperaturas templadas. Cuando las pilas se
mantienen regularmente a más de 0°C (32°F),
el número de ciclos de sellado que logran
efectuar entre cada carga mejora considerablemente, especialmente si se está trabajando con acoplamientos de mayor diámetro.
Otros consejos para mejorar el rendimiento de
las pilas:
• Use la Selladora lo antes posible después de
trasladarla de un lugar templado a otro bajo
cero. Así podrá trabajar con ella durante más
tiempo antes que deba recargar la pila.
• Permita que la pila se agote por completo antes
de recargarla.
ADVERTENCIA
Page 37

Ridge Tool Company 35
Selladora compacta No. 100-B
Selladura de un acoplamiento con un
juego de mordazas tradicional tipo
tijeras
1. Asegure que la Selladora Compacta 100-B tiene
instaladas las mordazas correctas.
2. Introduzca la pila completamente cargada en la base
del mango.
3. Oprima el botón ON/OFF en el visualizador una sola
vez para encender la Selladora. Los tres diodos
emisores de luz (DEL) pestañearán una vez. Luego,
el DEL verde debe permanecer encendido, indicando que el aparato está listo para sellar.
¡
NOTA! El aparato se apaga automáticamente si per-
manece inactivo por más de diez (10) minutos.
Es necesario volver a oprimir el botón de ON/OFF en el visualizador para reencender la Selladora.
4. Asegure que el tubo se haya introducido hasta la profundidad debida en el acoplamiento, según lo especifique el manual del sistema de acoplamientos que se
está instalando.
5. Apriete los brazos de las mordazas para abrirlas
(Figura 5).
Figura 5 – Apertura de las mordazas tipo tijeras
Figura 6 – Posición de las mordazas alrededor del
acoplamiento
6. Coloque las mordazas abiertas alrededor del acoplamiento. Si está utilizando un sistema, asegure
que los cantos interiores de las mordazas estén alineados debidamente con el contorno del acoplamiento
(Figura 6)
, según las especificaciones en el manual
del sistema de acoplamientos que se va a instalar.
7. Asegure que el aparato esté en ángulo recto con
respecto al tubo y oprima el interruptor
(Figura 7)
. El
ciclo de sellado o cierre hermético demora alrededor
de siete (7) segundos. Una vez que comienza el
ciclo de una selladura y los rodillos hacen contacto
con los brazos de la mordaza, el aparato queda
enclavado y automáticamente completa el ciclo de
sellado. Aunque usted suelte el gatillo, el aparato
no se detendrá una vez que el proceso sellador ha
comenzado. Esto asegura un rendimiento consistente y reiterado del aparato. Sin embargo, si se
suelta el gatillo antes de que haya comenzado el
proceso de la selladura, los rodillos se retraerán
automáticamente a su posición inicial.
Para evitar que sus dedos sufran pellizcos o queden atrapados, manténgalos apartados de las
mordazas.
Figura 7 – Selladora Compacta 100-B en ángulo recto
con relación al tubo
¡
NOTA! Si el indicador DEL amarillo parpadea, el apara-
to debe enviarse a un Servicentro Autorizado
RIDGID para que se le efectúe el mantenimiento
necesario. El aparato no funcionará si no se le
hace mantenimiento antes de que transcurran 2
mil ciclos después del primer parpadeo del DEL
amarillo.
8. Apriete los brazos de las mordazas para abrirlas.
9. Desmonte la Selladora Compacta 100-B del tubo.
Durante una selladura pueden formarse bordes cortantes en el acoplamiento. Tenga cuidado con
sus dedos.
Inspección de la junta sellada
CUIDADO
La Selladora Compacta 100-B se apagará automáticamente si la pila no tiene suficiente carga para
ADVERTENCIA
CUIDADO
Page 38

Ridge Tool Company36
Selladora compacta No. 100-B
equivalente, lana de acero o escobilla metálica. No
use papel de lija, lima de esmeril ni materiales
abrasivos similares para limpiarlos porque harán
variar las dimensiones de las mordazas.
Figura 8 – La acumulación de cobre en las mordazas
requiere limpieza
2. Limpie y lubrique los pasadores de pivote en las
mordazas por lo menos una vez al año con grasa
para rodamientos de uso general. Basta una pequeña
capa en los pasadores y alrededor de los cilindros.
3. Las mordazas y las placas laterales deben revisarse
a diario para detectar grietas u otras señales visibles de desgaste o daño. Si se ven grietas o rajaduras
en alguna pieza, deséchela y reemplácela.
ADVERTENCIA
Cualquier componente de las mordazas que haya
sido soldado, afilado, perforado o modificado de
alguna forma puede hacerse trizas durante una
selladura y lanzar objetos por los aires. Esto puede
causar lesiones graves y hasta la muerte. Deseche
y reemplace mordazas, aros selladores o accionadores de aros si están dañados.
4. Revise los resortes de retorno en las mordazas cada
vez que las use. Las mordazas deben abrirse y cerrarse libremente con la presión normal de los dedos.
Mantenimiento obligatorio en un
Servicentro Autorizado RIDGID
Transcurridos 20.000 ciclos, el aparato mostrará –toda vez
que esté encendido- un DEL amarillo parpadeante en el
visualizador. Esto es indicativo de que se debe efectuar
el mantenimiento y calibración del aparato. La Selladora
dejará de funcionar pasados dos mil ciclos desde el
comienzo del parpadeo del DEL amarillo. Desde este
instante el DEL amarillo permanecerá constantemente
encendido. El mantenimiento obligatorio es indispensable
para asegurar el buen funcionamiento de la Selladora y
juntas selladas de óptima calidad
completar un sellado exitosamente. En este caso, los
DEL rojo y verde parpadearán cinco veces indicando
insuficiente carga. A continuación de estas señales
luminosas, la Selladora se apagará por su cuenta.
Debe colocársele una pila completamente cargada y
repetir la operación de sellado como se indicó anteriormente. Si la pila llegara a agotarse o falla la
Selladora durante un ciclo de sellado, usted podrá
retraer los rodillos y desmontar la Selladora del
acoplamiento presionando el botón negro de desenganche ubicado en el lado derecho del aparato.
1. Revise el acoplamiento o fitting que recién se selló.
Verifique que no haya:
• tubos desalineados;
• tubos que no se han metido hasta la profundidad
debida. Revise las marcas de profundidad;
• una mala alineación entre las mordazas y el aco-
plamiento; y
• cualquier otro asunto indicado por el fabricante del
acoplamiento.
Si se detecta alguno o varios de estos problemas, se
hace necesario preparar, introducir y sellar un nuevo
acoplamiento a otra nueva sección de tubo.
2. El sistema instalado debe someterse a prueba, de
acuerdo a las prácticas habituales y a los códigos
locales en vigencia.
Instrucciones para
el mantenimiento
ADVERTENCIA
Asegure que la pila esté fuera del aparato antes de
efectuarle mantenimiento o ajustes.
Selladora Compacta 100-B
Limpieza y lubricación diarias
1. Limpie el aparato con un paño limpio y seco.
2. Revise el pasador para el montaje de las mordazas y
lubríquelo con lubricante de silicona, cuando sea
necesario.
Mordazas
1. Inspeccione a diario el diámetro interior de las mordazas. Si tienen óxido, mugre o rastros de bronce o
cobre provenientes de acoplamientos o aros de sellado (lo más probable es que el cobre se acumule
cerca de la punta de las mordazas tipo tijeras, como
se muestra en la
Figura 8
). Límpielos con una almohadilla limpiametales fina de ScotchBrite®(ScotchBrite®es marca registrada de la compañía 3M) o una
Page 39

Accesorios
Sólo los siguientes productos han sido fabricados
para funcionar con la Selladora Compacta 100-B.
Otros accesorios, hechos para ser usados con otros
aparatos, resultan peligrosos y/o producen selladuras
defectuosas cuando se usan con la Compacta 100-B.
Emplee únicamente los accesorios listados a continuación:
Acoplamientos:
Consulte el manual del sistema de acoplamientos correspondiente para conocer cuales acoplamientos se encuentran disponibles para cada sistema específico.
Almacenaje
Coloque el aparato y las mordazas en el maletín de
transporte. La Compacta 100-B debe almacenarse a
temperaturas superiores a 32° F (0° C) e inferiores a
122° F (50° C). El sensor térmico de la Selladora no
permitirá que se encienda si la temperatura del aceite en
su interior no está comprendida dentro de dicha gama. En
el visualizador parpadeará el DEL rojo.
Almacene el maletín de transporte
en un lugar seco, seguro y bajo llave, para que quede
fuera del alcance de los niños y personas no capacitadas para trabajar con la Selladora Compacta 100-B. El
aparato es peligroso en manos de usuarios inexpertos.
¡
NOTA! El rendimiento de las pilas disminuye con-
siderablemente cuando se las almacena a
menos de 0°C (32°F). Para un rendimiento
óptimo y una larga vida útil de las pilas en climas fríos, manténgalas en lo posible a temperaturas templadas. Cuando las pilas se
mantienen regularmente a más de 0°C (32°F),
el número de ciclos de sellado que logran
efectuar entre cada carga mejora considerablemente, especialmente si se está trabajando con acoplamientos de mayor diámetro.
Ridge Tool Company 37
Selladora compacta No. 100-B
No. en el
catálogo Descripción
12683 Cápsula de pilas de 14,4V (Pila de recambio original
2,6 Ah Ni-MH)
83407 Cápsula de pilas de 14,4V (Pila opcional de 2,0 Ah
Ni-Cd
83417 Cargador de pila 115V
84112 Cargador de pila 230V
16818 Maletín plástico
— Juegos de mordazas Serie Compacta de RIDGID
Accesorios para la Selladora compacta 100-B
Otros consejos para mejorar el rendimiento de
las pilas:
• Use la Selladora lo antes posible después de
trasladarla de un lugar templado a otro bajo
cero. Así podrá trabajar con ella durante más
tiempo antes que deba recargar la pila.
• Permita que la pila se agote por completo
antes de recargarla.
• Siga las instrucciones para recargar la pila
correctamente; las encuentra en las páginas
33 y 34 de este manual.
Servicio y reparaciones
El servicio o reparación de la Selladora Compacta 100-B debe ser efectuado por un Servicentro Autorizado RIDGID. Los cierres del aparato han
sido marcados para indicar si personal no autorizado la ha
abierto. El mantenimiento o reparaciones indebidos pueden resultar en daños materiales de envergadura, lesiones
graves y hasta la muerte.
Para cualquier reparación o mantenimiento del aparato,
contacte al Departamento de Servicio Técnico de Ridge
Tool Company al (800) 519-3456 o visite nuestro sitio
http://www.ridgid.com para obtener una lista de nombres
y direcciones de los Servicentros Independientes Autorizados RIDGID más cercanos.
Si tiene cualquier pregunta sobre el servicio o reparación
de este aparato, llame o escriba a:
Ridge Tool Company
Technical Service Department
400 Clark Street
Elyria, Ohio 44035-6001
Tel: (800) 519-3456
E-mail: TechServices@ridgid.com
Para cualquier reparación o mantenimiento del aparato,
contacte al Departamento de Servicio Técnico de Ridge
Tool Company al (800) 519-3456 o visite nuestro sitio
http://www.ridgid.com
ADVERTENCIA
ADVERTENCIA
Page 40

Ridge Tool Company38
Selladora compacta No. 100-B
PROBLEMA POSIBLES CAUSAS
SOLUCIÓN
La Selladora no se
enciende cuando se le
oprime el botón de
ON/OFF en el visualizador.
La Selladora se apaga ya
sea cuando se le aprieta
el gatillo o en medio de
un ciclo de sellado. DEL
rojo parpadea 5 veces y
el aparato se apaga
automáticamente.
DEL amarillo parpadea
reiteradamente aunque el
aparato está encendido y
funciona debidamente.
DEL amarillo parpadea
reiteradamente y,
estando el gatillo
oprimido, el aparato no
comienza a efectuar el
ciclo de la selladura.
DEL rojo parpadea continuamente y, estando el
gatillo oprimido, el aparato no comienza a efectuar
el ciclo de la selladura.
DEL rojo y DEL amarillo
brillan continuamente
cuando el aparato está
en ON (encendido).
Detección de averías
La pila está completamente descargada o averiada.
La pila no está bien insertada en el mango del
aparato.
La pila tiene poca carga.
La pila está demasiado fría.
Después de 20 mil selladuras el aparato necesita
mantenimiento y calibración.
Después de 22 mil selladuras es obligatorio hacerle mantenimiento y calibración al aparato. La
Selladora se "bloqueó" y no funcionará hasta que se
le haga mantenimiento.
El pasador para el montaje del juego de mordazas no ha enganchado correctamente.
La temperatura ambiente es superior o inferior a las
requeridas para el funcionamiento.
Se ha detectado una falla en la Selladora 100-B
Introduzca una pila completamente cargada o
cargue la pila descargada.
Asegure que la pila esté bien insertada en el mango
del aparato.
Introduzca una pila completamente cargada o
cargue la pila descargada.
Permita que la batería esté a una temperatura
entre cero y 50 grados Celsius (32 a 122°F).
¡
NOTA! El acoplamiento debe volver a sellarse
si la Selladora deja de funcionar en medio de un ciclo de sellado. De lo contrario, la junta sellada puede tener fugas.
Contacte al Departamento Técnico de Ridge Tool
Company al (800) 519-3456 para obtener el nombre
del Servicio Autorizado más cercano.
Contacte al Departamento Técnico de Ridge Tool
Company al (800) 519-3456 para obtener el nombre
del Servicio Autorizado más cercano.
Empuje el pasador del montaje de las mordazas
hasta que quede bien enganchado.
Permita que tanto la Selladora como la pila se
encuentren a una temperatura entre los 0°C (32°F)
y los 50°C (122°F).
Extraiga y vuelva a colocar la pila completamente
cargada. Si los DEL permanecen encendidos, contacte al Departamento Técnico de Ridge Tool
Company al (800) 519-3456 para obtener el nombre
del Servicio Autorizado más cercano.
Page 41

Ridge Tool Company 39
Selladora compacta No. 100-B
Códigos de diagnóstico de la Compacta 100-B
MANTENIMIENTO
AMARILLO
REQUIERE
MANTENIMIENTO
LUZ CONTINUA
LUZ
PARPADEANTE
TEMPERATURA
ROJO
PASADOR DE
LAS MORDAZAS
ABIERTO
PILA CON POCA
CARGA
VERDE
VISUALIZADOR DE LOS DEL
VERDE ROJO AMARILLO SIGNIFICA ACCIÓN
Parpadea 1 vez Parpadea 1 vez Parpadea 1 vez Indica que el aparato está encendido. —
Continuo Modalidad de funcionamiento. Aparato listo para comenzar una selladura.
Continuo Parpadeante Pasador de las mordazas abierto Revise que el pasador para el montaje de las mordazas esté bien
insertado
Temperatura de funcionamiento inadecuada. Tenga la pila de la Selladora entre >32°F y 122°F.
Parpadea 5 veces Parpadea 5 veces Pila con poca carga. Cambie o cargue la pila. ¡NOTA! Vuelva a sellar.
Continuo Parpadeante Toca hacerle mantenimiento Contacte al Departamento Técnico de Ridge Tool Company al
(+ de 20 mil selladuras efectuadas) (800) 519-3456 para obtener el nombre del Servicio Autorizado
más cercano.
Continuo Continuo Mantenimiento obligatorio Contacte al Departamento Técnico de Ridge Tool Company al
(+ de 22 mil selladuras efectuadas) (800) 519-3456 para obtener el nombre del Servicio Autorizado
más cercano.
Continuo Continuo Aparato se bloqueó debido a alguna falla. Extraiga y recambie la pila. Si la Selladora sigue bloqueada, contacte
al Departamento Técnico de Ridge Tool Company al (800) 519-3456
para obtener el nombre del Servicio Autorizado más cercano.
Parpadea Parpadea Aparato se ha recalentado o consume Permita que la pila se enfríe por 20 segundos. Si esto ocurre
20 segs. 20 segs. demasiada energía debido a una falla. reiteradamente, contacte al Departamento Técnico de Ridge Tool
Company al (800) 519-3456 para obtener el nombre del Servicio
Autorizado más cercano.
LUZ CONTINUA
LUZ
PARPADEANTE
ON/OFF
ON/OFF
(encendida/apagada)
Page 42

Ridge Tool Company40
Selladora compacta No. 100-B
Page 43

EMERSON. CONSIDER IT SOLVED.
™
Against Material Defects
& Workmanship
FULL LIFETIME
WARRANTY
Tools For The Professional
TM
Ridge Tool Company
400 Clark Street
Elyria, Ohio 44035-6001
What is covered
RIDGID®tools are warranted to be free of defects in workmanship and material.
How long coverage lasts
This warranty lasts for the lifetime of the RIDGID
®
tool. Warranty coverage ends when the product
becomes unusable for reasons other than defects in workmanship or material.
How you can get service
To obtain the benefit of this warranty, deliver via prepaid transportation the complete product to
RIDGE TOOL COMPANY, Elyria, Ohio, or any authorized RIDGID
®
INDEPENDENT SERVICE CENTER.
Pipe wrenches and other hand tools should be returned to the place of purchase.
What we will do to correct problems
Warranted products will be repaired or replaced, at RIDGE TOOL’S option, and returned at no charge;
or, if after three attempts to repair or replace during the warranty period the product is still
defective, you can elect to receive a full refund of your purchase price.
What is not covered
Failures due to misuse, abuse or normal wear and tear are not covered by this warranty. RIDGE
TOOL shall not be responsible for any incidental or consequential damages.
How local law relates to the warranty
Some states do not allow the exclusion or limitation of incidental or consequential damages, so the
above limitation or exclusion may not apply to you. This warranty gives you specific rights, and you
may also have other rights, which vary, from state to state, province to province, or country to country.
No other express warranty applies
This FULL LIFETIME WARRANTY is the sole and exclusive warranty for RIDGID
®
products. No
employee, agent, dealer, or other person is authorized to alter this warranty or make any other warranty on behalf of the RIDGE TOOL COMPANY.
Qué cubre
Las herramientas RIDGID están garantizadas contra defectos de la mano de obra y de los
materiales empleados en su fabricación.
Duración de la cobertura
Esta garantía cubre a la herramienta RIDGID durante toda su vida útil. La cobertura de la garantía caduca cuando el producto se torna inservible por razones distintas a las de defectos en la mano de obra
o en los materiales.
Cómo obtener servicio
Para obtener los beneficios de esta garantía, envíe mediante porte pagado, la totalidad del producto
a RIDGE TOOL COMPANY, en Elyria, Ohio, o a cualquier Servicentro Independiente RIDGID. Las llaves
para tubos y demás herramientas de mano deben devolverse a la tienda donde se adquirieron.
Lo que hacemos para corregir el problema
El producto bajo garantía será reparado o reemplazado por otro, a discreción de RIDGE TOOL, y
devuelto sin costo; o, si aún resulta defectuoso después de haber sido reparado o sustituido tres
veces durante el período de su garantía, Ud. puede optar por recibir un reembolso por el valor total
de su compra.
Lo que no está cubierto
Esta garantía no cubre fallas debido al mal uso, abuso o desgaste normal. RIDGE TOOL no se hace
responsable de daño incidental o consiguiente alguno.
Relación entre la garantía y las leyes locales
Algunos estados de los EE.UU. no permiten la exclusión o restricción referente a daños incidentales
o consiguientes. Por lo tanto, puede que la limitación o restricción mencionada anteriormente no rija
para Ud. Esta garantía le otorga derechos específicos, y puede que, además, Ud tenga otros derechos, los cuales varían de estado a estado, provincia a provincia o país a país.
No rige ninguna otra garantía expresa
Esta GARANTIA VITALICIA es la única y exclusiva garantía para los productos RIDGID. Ningún
empleado, agente, distribuidor u otra persona está autorizado para modificar esta garantía u ofrecer cualquier otra garantía en nombre de RIDGE TOOL COMPANY.
Ce qui est couvert
Les outils RIDGE
®
sont garantis contre tous vices de matériaux et de main d’oeuvre.
Durée de couverture
Cette garantie est applicable durant la vie entière de l’outil RIDGE
®
. La couverture cesse dès lors que le
produit devient inutilisable pour raisons autres que des vices de matériaux ou de main d’oeuvre.
Pour invoquer la garantie
Pour toutes réparations au titre de la garantie, il convient d’expédier le produit complet en port payé
à la RIDGE TOOL COMPANY, Elyria, Ohio, ou bien le remettre à un réparateur RIDGID
®
agréé. Les clés
à pipe et autres outils à main doivent être ramenés au lieu d’achat.
Ce que nous ferons pour résoudre le problème
Les produits sous garantie seront à la discrétion de RIDGE TOOL, soit réparés ou remplacés, puis réexpédiés gratuitement ; ou si, après trois tentatives de réparation ou de remplacement durant la période
de validité de la garantie le produit s’avère toujours défectueux, vous aurez l’option de demander le remboursement intégral de son prix d’achat.
Ce qui n’est pas couvert
Les défaillances dues au mauvais emploi, à l’abus ou à l’usure normale ne sont pas couvertes par cette
garantie. RIDGE TOOL ne sera tenue responsable d’aucuns dommages directs ou indirects.
L’influence de la législation locale sur la garantie
Puisque certaines législations locales interdisent l’exclusion des dommages directs ou indirects, il se
peut que la limitation ou exclusion ci-dessus ne vous soit pas applicable. Cette garantie vous donne des
droits spécifiques qui peuvent être éventuellement complétés par d’autres droits prévus par votre législation locale.
Il n’existe aucune autre garantie expresse
Cette GARANTIE PERPETUELLE INTEGRALE est la seule et unique garantie couvrant les produits
RIDGID
®
. Aucun employé, agent, distributeur ou tiers n’est autorisé à modifier cette garantie ou à offrir
une garantie supplémentaire au nom de la RIDGE TOOL COMPANY.
Printed in U.S.A. 3/06 085-005-029.10
REV. A
 Loading...