

Ricoh Nashuatec 3322S, Rex-Rotary 8522S, Gestetner 2622S Operating Instructions Manual
INTRODUCTION
This manual contains detailed instructions on the operation and maintenance of this copier. To get maximum versatility from this copier, all
operators should carefully read and follow the instructions in this manual.
Please keep this manual in a handy place near the machine.
Please read the next section before using this copier. It contains important
information related to USER SAFETY and PREVENTING EQUIPMENT
PROBLEMS.
SAFETY INFORMATION
When using your copier, the following safety precautions should always be followed.
Safety During Operation
In this manual, the following important symbols are used:
R
nx
In addition, all safety messages are identified by the words "WARNING"
and "CAUTION". These words mean the following:
WARNING:
R
R
CAUTION:
R
WARNINGS:
Since some parts of the copier are supplied with high electrical voltage, touch only the parts specified in this manual.
This symbol is intended to alert the user to the presence of important operating and maintenance (servicing) instructions in the
literature accompanying the machine.
This symbol is attached to some components to alert the user not
to touch them, because they may be very hot.
Important information to alert you to a situation that
might cause serious injury and damage to your property
if instructions are not followed.
Important infor mation that tel ls how to prev ent dama ge to eq uipment, or how to avoid a si tuation that might cause minor injury.
i

Do not modify or replace any parts other than the ones specified in
this manual.
Do not incinerate toner or toner containers. Toner dust might ignite
when exposed to open flames.
Do not store toner where it will be exposed to heat.
Do not eat or swallow toner, and keep it out of reach of children.
The fusing section can be very hot. Be careful when handling it.
R
CAUTIONS:
While copying, do not turn off the main switch.
While copying, do not open the front cover.
While copying, do not lift the platen cover, or the optional document feeder.
While copying, do not unplug the power cord.
Do not lay anything weighing more than 10 kg, 22 lb on the exposure glass.
Do not place tools or other hard objects on the exposure glass .
Keep corrosive liquids, such as acid, off the machine.
Do not allow paper clips, staples, or other small metallic objects to fall inside
the machine.
General Safety Information
Always turn the copier off when you have finished copying for the day, but
❐
leave it plugg ed in.
When the copier will not be used for a long period, disconnect the power cord.
❐
If the copier must b e transported by vehicl e, please contact your serv ice repre-
❐
sentative.
When the main switch is in the Stand-by position, the optional anticondensation
❐
heater is on. I n case o f emerg ency, unplug t he machi ne’s p ower cor d.
To disconnect t he power s ource, the main plug mu st be pu lled.
❐
ii

WHERE IS IT
& WHAT IS IT
WHERE IS IT & WHAT IS IT
1
COPIER EXTERIOR AND INTERIOR
COPIER EXTERIOR AND INTERIOR
3
2
1
10
12
11
13
4
5
6
7
8
9
14
15
2

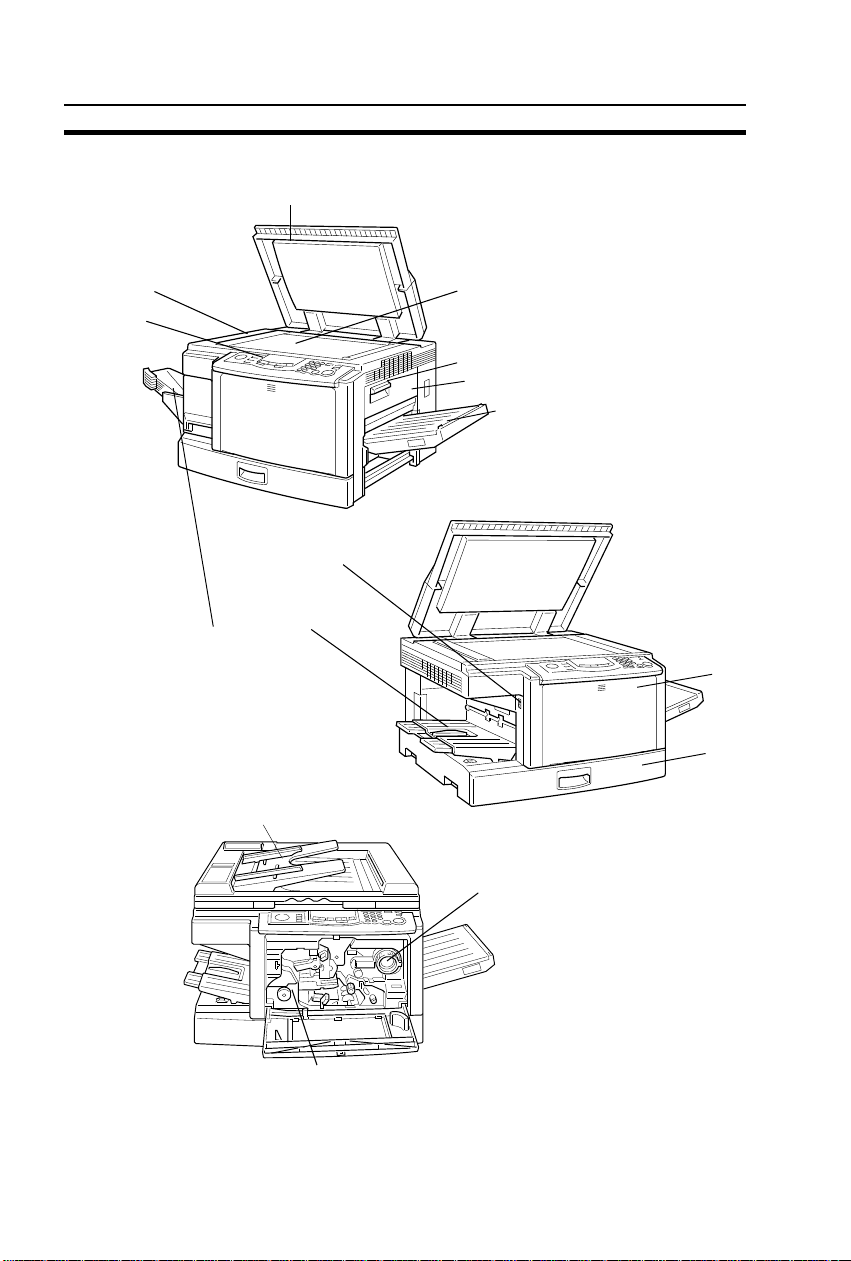
COPIER EXTERIOR AND INTERIOR
1. Operation panel
2. Left scale
3. Platen cover
4. Exposure glass
5. Bypass feed table
6. Key counter holder
7. Cassette
8. Front cover
9. Paper Tray
10. Main switch
11. Copy tray
12. 10-bin sorter (Option)
13. Document feeder
(Option)
14. Toner Cartridge
Operator controls and indicators are located here.
Use to align originals on the exposure glass.
Lower this cover over originals for copying.
Position originals here face down for copying.
Use to copy onto paper of unusual size or
weight, or color paper.
Insert the optional key counter here.
This cassette can hold 250 sheets of copy paper.
Open to access the inside of the copier.
This tray can hold 250 sheets of copy paper.
Switches the copier between on and stand-by
conditions. ("stand-by" means that the anticondensation heater is on.)
Completed copies are delivered here.
Completed copies are sorted or stacked here.
Insert a stack of originals here. The originals are
individually fed onto and removed from the exposure glass.
Replace the toner cartridge when the f
indicator is lit or blinking.
Toner
Add
WHERE IS IT & WHAT IS IT
15. Fusing Unit
Fuses the copy image to the paper. When accessing the inside of the copier, use caution.
This unit may be very hot.
3
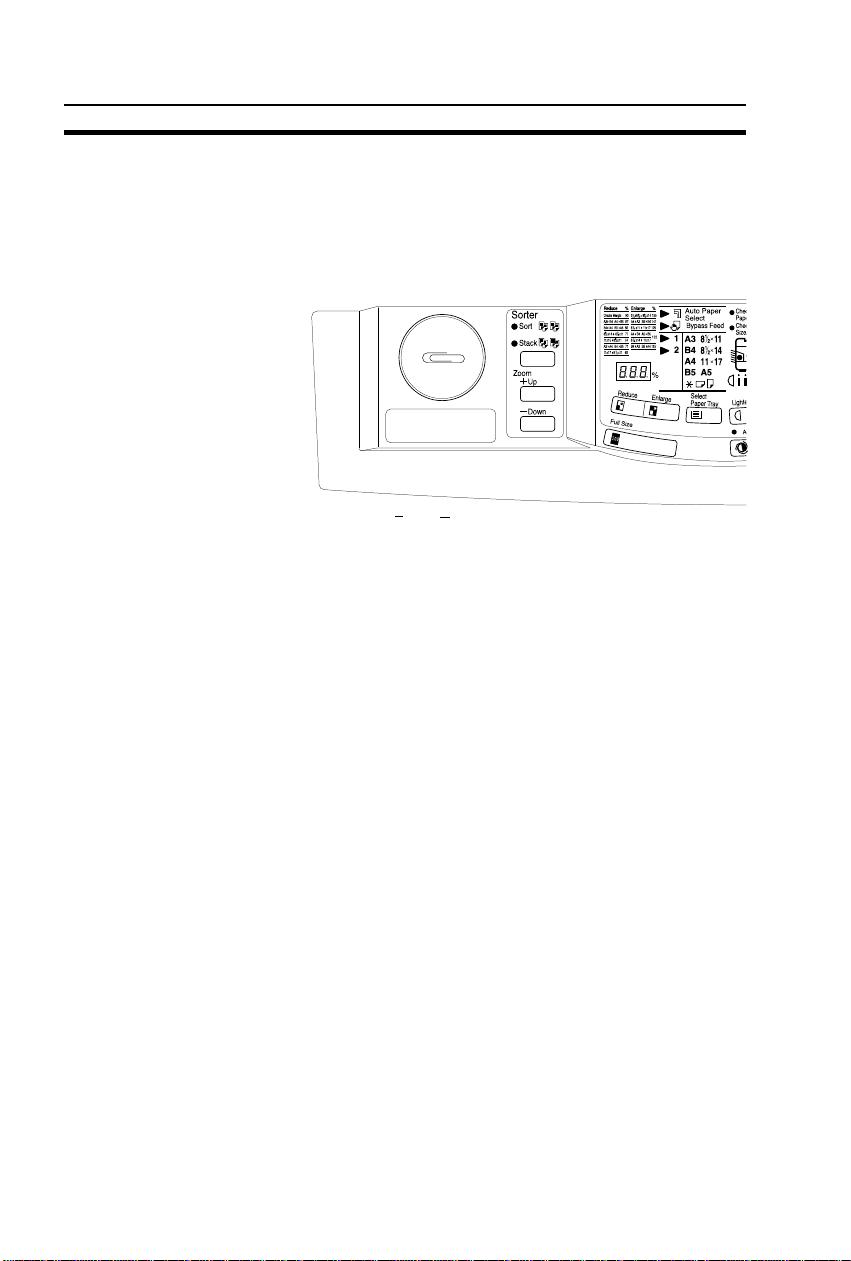
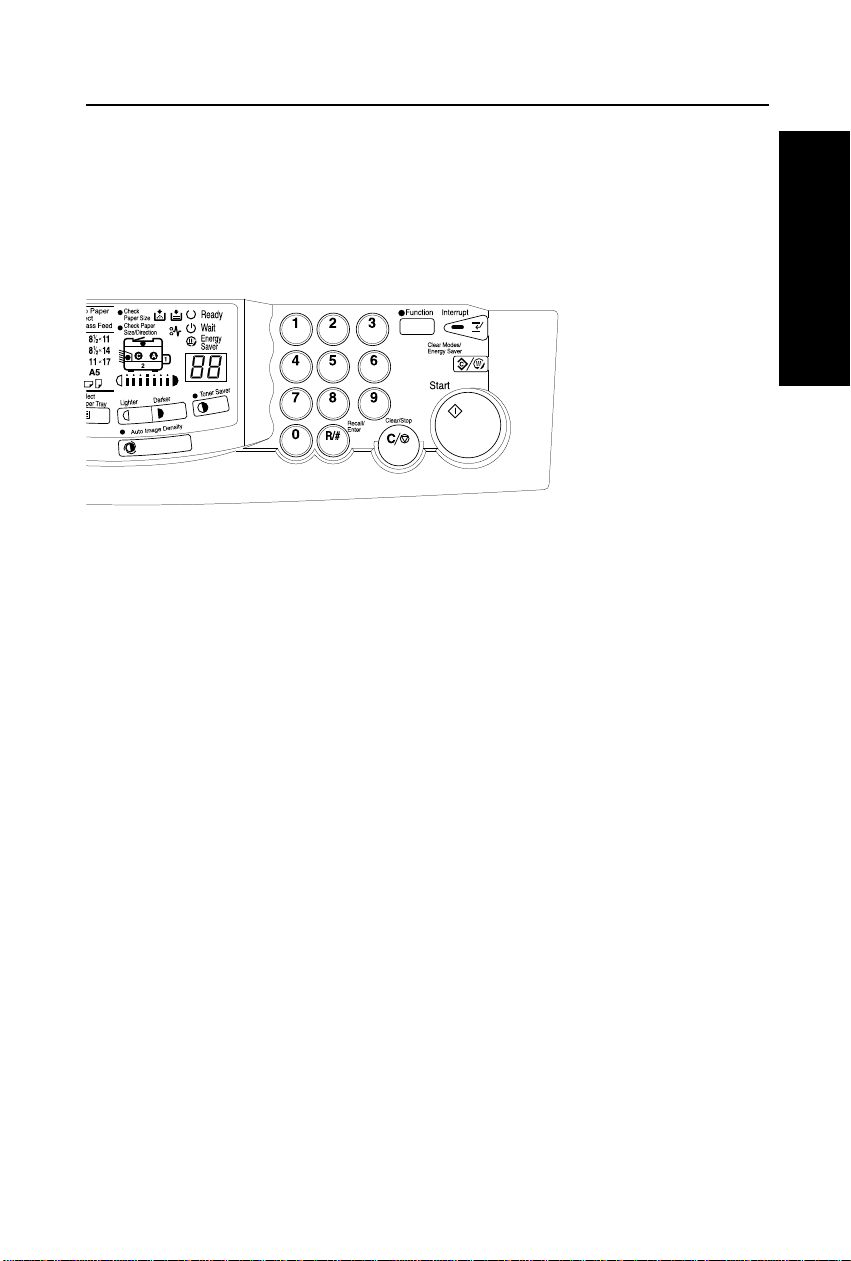
OPERATION PANEL
Keys
OPERATION PANEL
13
12
16
15
14
11
1. Function key
Press in combination with the
Number keys to make onesided copies from various
originals and to erase parts of
the copy image. ☛
38 ~ 42, 43 ~ 44.
2. Interrupt key
33 ~ 35.
See pages
☛ See pages
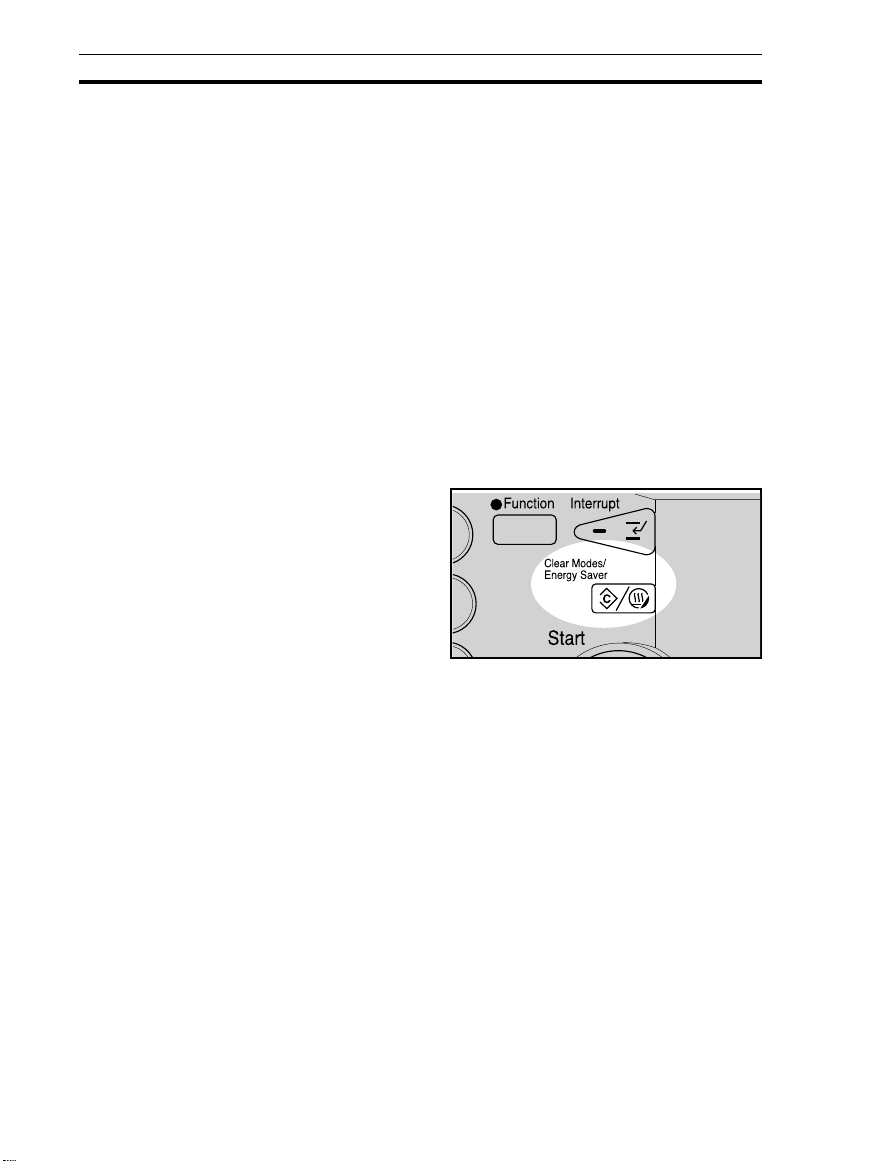
3. Clear Modes/Energy Saver
key
Press to clear the copier of previously entered settings. Press
this key for more than 1 second
to enter/exit the Energy Saver
☛
mode.
4
See pages 17 an d 24.
4. Start key
Press to start copying.
Use to set the Auto Start.
See page 37.
☛
5. Clear/Stop key
Press to cancel the copy number entered. While copying,
press to stop copying. This
key is also used to clear data.
6. Recall/Enter key
Use to enter data.
7. Number keys
Use to enter the desired number of copies. They are also
used to enter data.
OPERATION PANEL
1
10
7
8
9
6
8. Toner Saver key
☛
See pages 25 and 30.
9. Lighter an d Darker k eys
☛
See page 30.
10. Auto Image Density key
☛
See page 30.
11. Select Paper Tray key
☛
See page 28.
2
3
4
5
WHERE IS IT & WHAT IS IT
14. Zoom Up key
Enlarges in 1% steps.
☛
See page 37.
15. Zoom Down key
Reduces in 1% steps.
See page 37.
☛
16. Sorter key (option)
☛
See pages 48 ~ 51.
12. Reduce and Enlarge keys
☛
See page 36.
13. Full Size key
See page 28.
☛
5
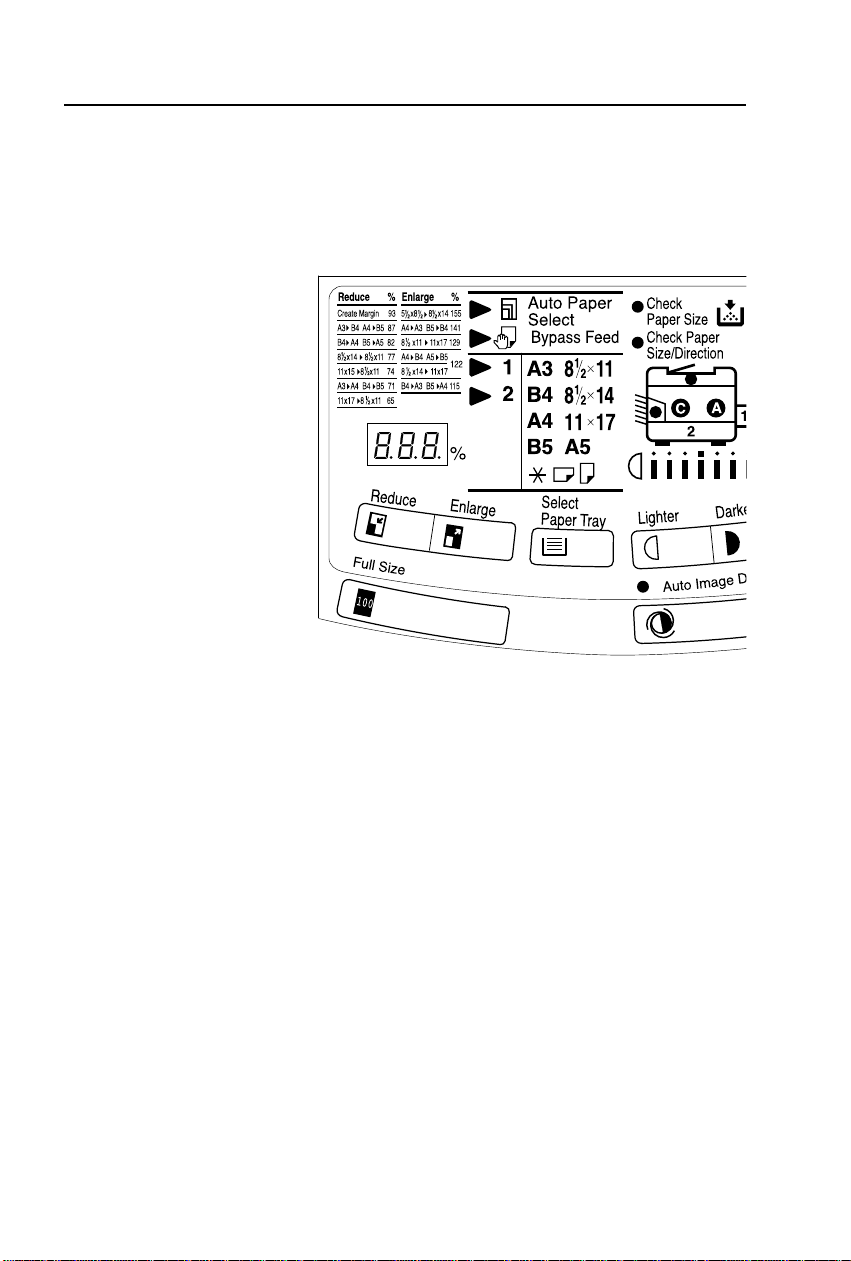
OPERATION PANEL
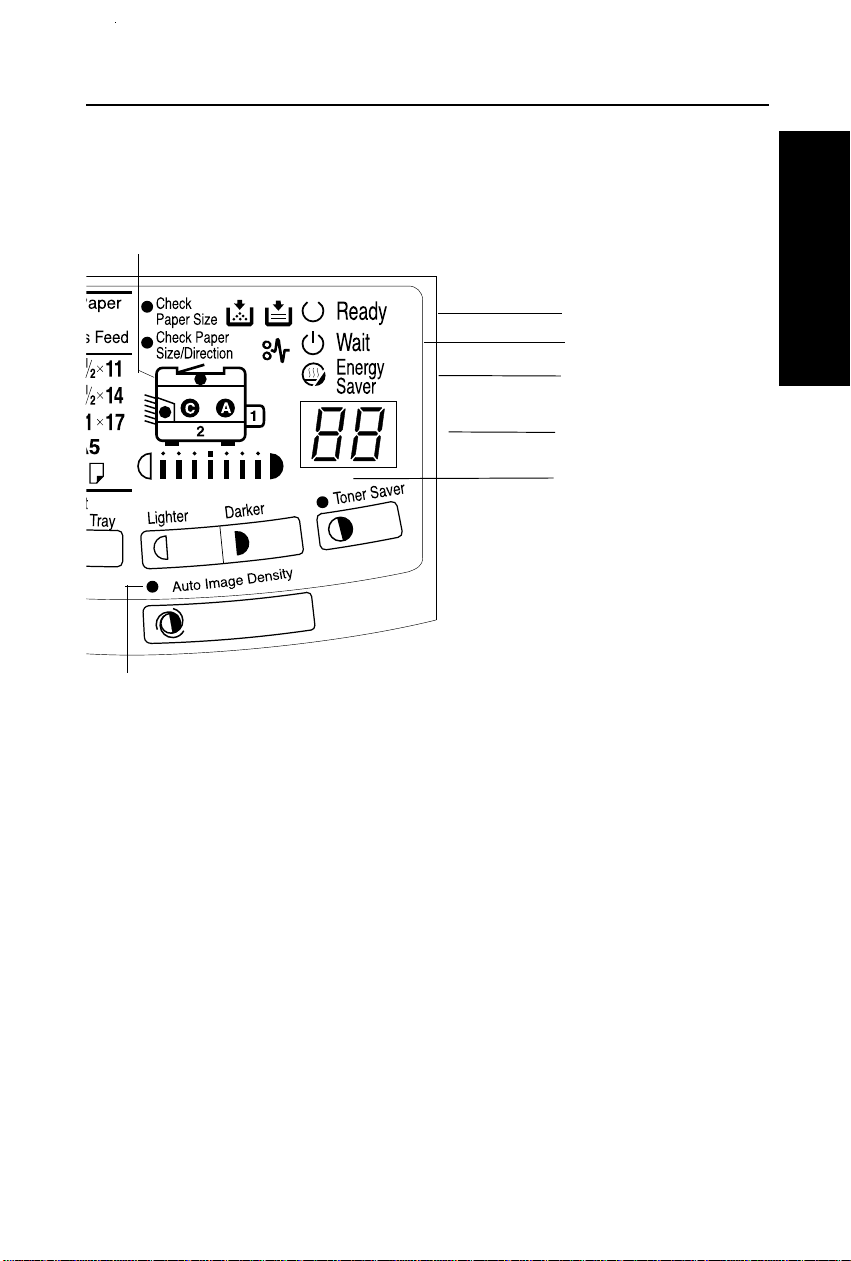
Indicators
9
8
1. Ready indicator
☛
See page 16.
2. Wait indicator
☛
See page 16.
3. Energy Saver indicator
☛
See pages 17 and 24.
4. Copy Counter
Indicates the number of copies.
Data display.
5. Toner Saver indicator
☛
See pages 25 and 30.
10
11
12
13
14
6. Manual Image Density indicator
☛
See page 30.
7. Auto Image density indicator
☛
See page 30.
8. Three Digit indicator
Data display.
9. Paper Size indicators
Show the selected feed station,
copy paper size, and direction.
6
15
16
17 18
OPERATION PANEL
1
2
3
4
5
WHERE IS IT & WHAT IS IT
7
6
10. Reduce and Enlarge indicators
☛
See page 36.
11. Auto Paper Select indicator
(option)
☛
See pages 45 ~ 47.
12. Bypass Feed indicator
☛
See page 32.
13. Check Paper Size indicator
☛
See page 57.
14. Check Paper Size/Direction
indicator
☛
See page 57.
15. Misfeed Location display
☛
See pages 64 ~ 66.
16. Add Toner indicator
☛
See page 63.
17. Load Paper indicator
☛
See pages 59 ~ 62.
18. Check Paper Path indicator
☛
See pages 64 ~ 66.
7

WHAT YOU CAN DO
WITH THIS COPIER
THIS COPIER
WHAT YOU CAN DO WIT H
9

FUNCTIONS
FUNCTIONS
Auto image density
☛ See page 30.
Manual image density
☛ See page 30.
Copying from the bypass feed table
☛ See page 31.
Temporarily stopping one job to copy something else
☛ See page 33.
10
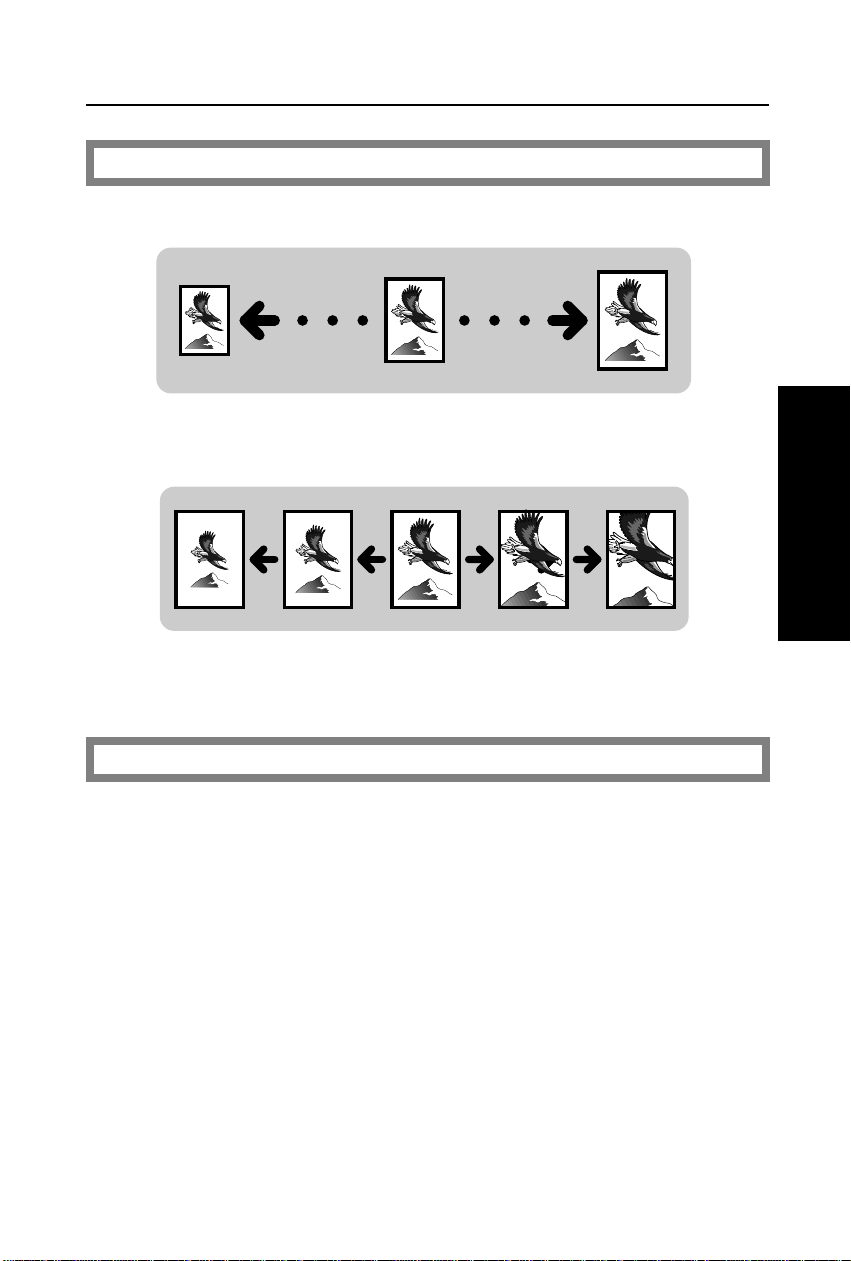
Reducing and enlarging
Reducing and enlarging using preset ratios
FUNCTIONS
☛ See page 36.
Reducing and enlarging with the Zoom Up (+) and Zoom Down (-) keys
☛ See page 37.
Entering copy job settings during the warm-up period
☛ See page 37.
THIS COPIER
WHAT YOU CAN DO WIT H
11
FUNCTIONS
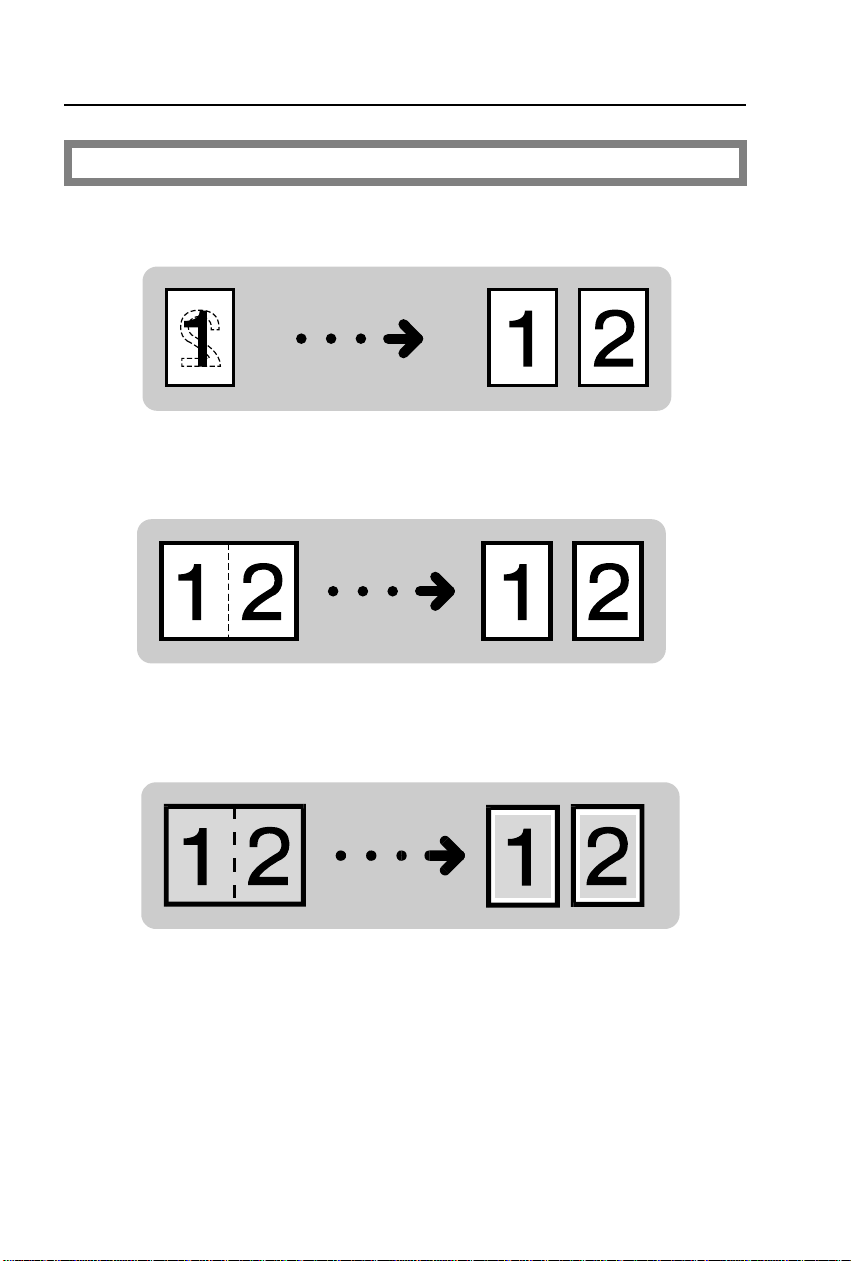
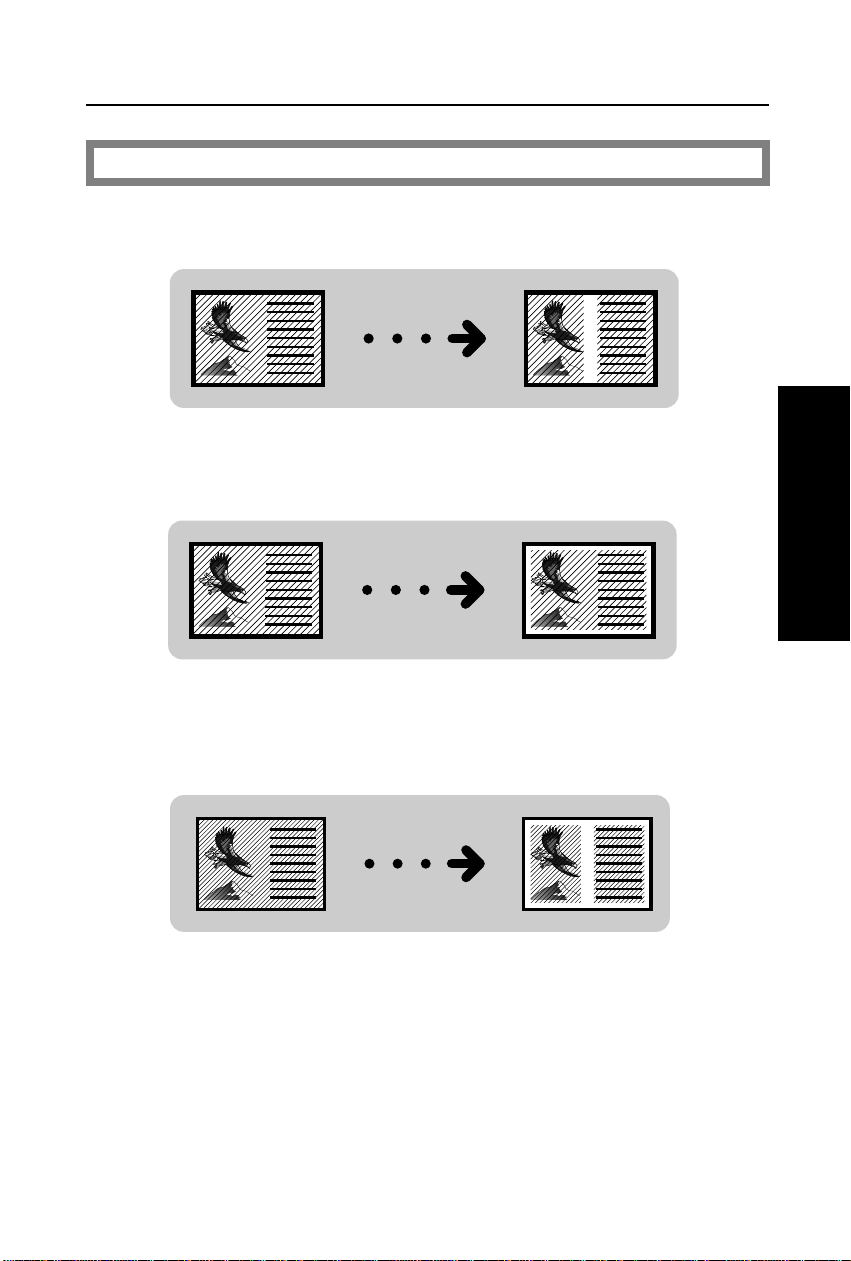
Making one-sided copies from various originals
From 1 two-sided original to 2 one-sided copies
From 2 facing pages to 2 one-sided copies
From 2 facing pages to 2 one-sided copies and erasing the surrounding
area of the original image
☛ See page 38.
☛ See page 39.
12
☛ See page 41.
Erasing parts of copy image
Erasing the center margin of the original image
FUNCTIONS
☛ See page 43.
Erasing the surrounding area of the original image
Erasing the center margin and surrounding area of the original image
☛ See page 43.
☛ See page 43.
THIS COPIER
WHAT YOU CAN DO WIT H
13
FUNCTIONS
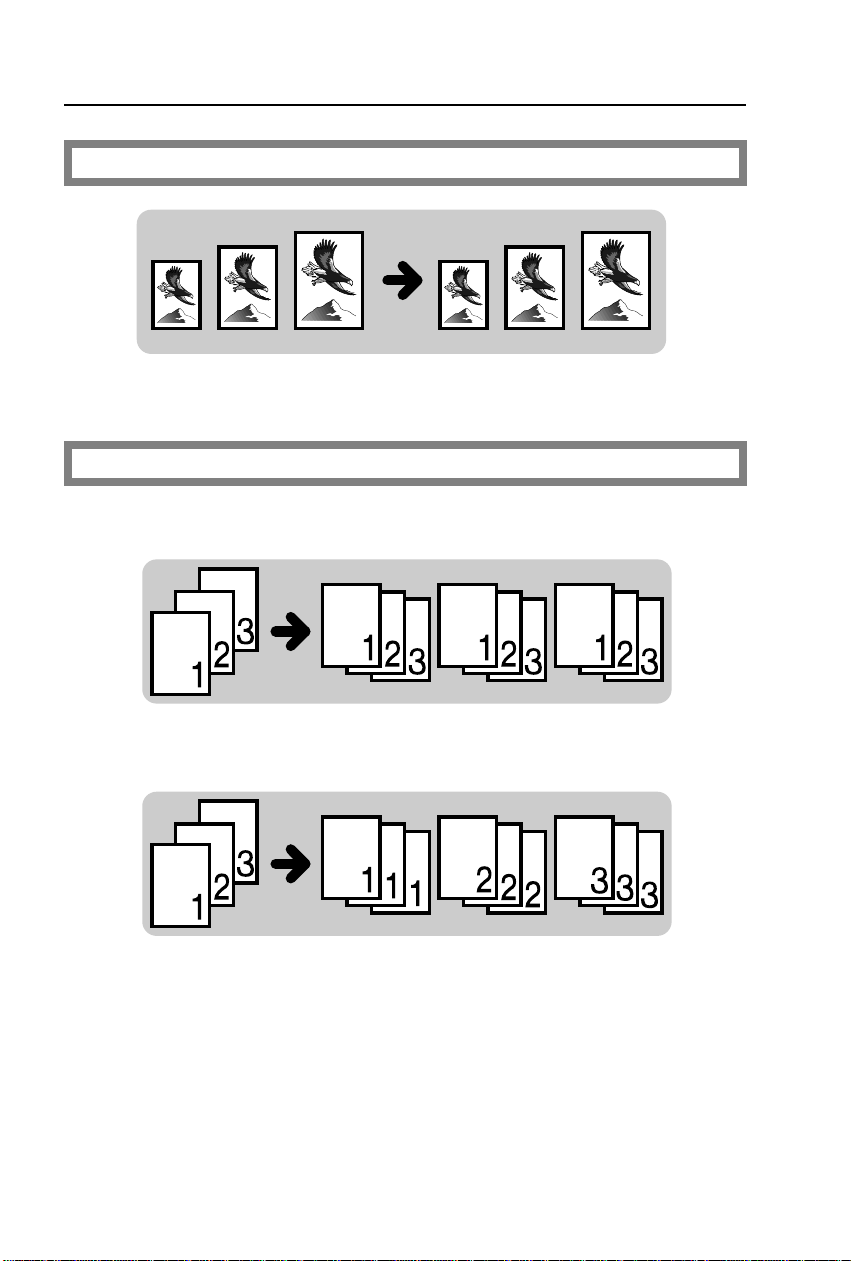
Having the copier choose the paper size (Option)
Finishing (Option)
Sorting into sets (123,123,123)
☛ See page 45.
Stacking together all copies of a page (111, 222, 333)
14
☛ See page 48.
☛ See page 50.

BASICS
15
BASICS
STARTING THE COPIER
STARTING THE COPIER
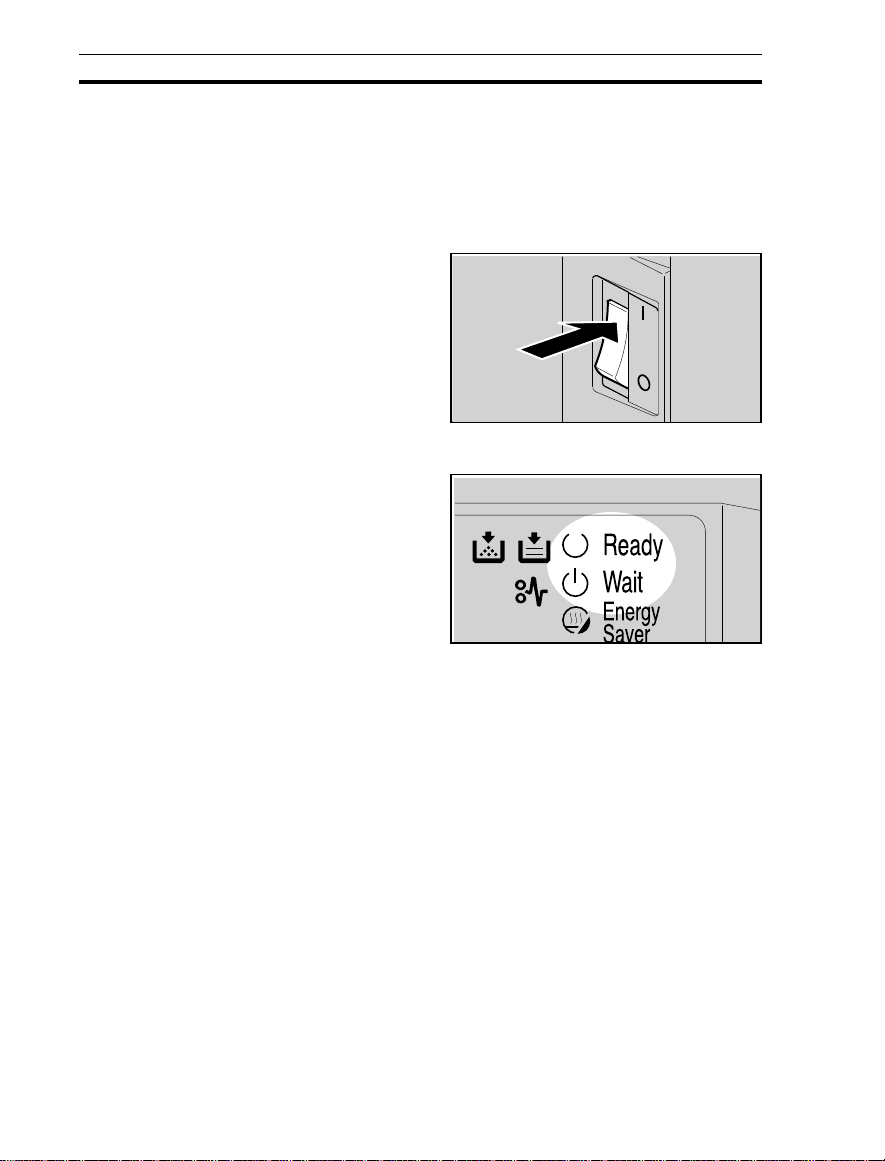
When The Main Switch Is In The Stand-by Position
Turn on the main switch.
1
On
Stand by
Wait for the copier to warm-up.
2
During the warm-up period (less
than 1 minute), the
cator is on.
After warm-up, the v Ready indi-
3
cator lights.
u Wait indi-
16
STARTING THE COPIER
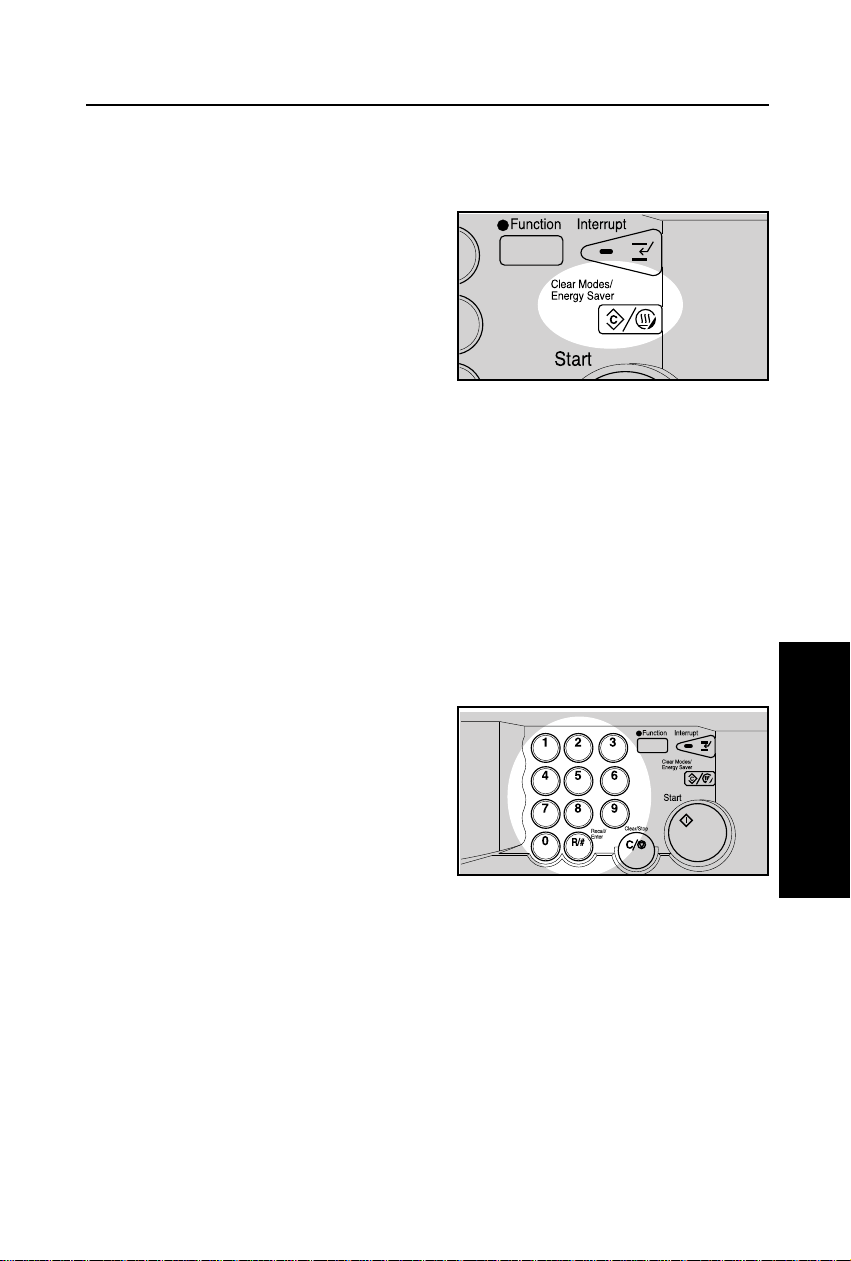
When The r Energy Saver Indicator Is On
The copier is in the Energy Saver
mode.
Press the Clear Modes/Energy
Saver key to return to the ready
condition.
For details about the Energy Saver,
❐
see page 24.
☛
The following actions will also return the copier to the ready condition:
❐
Opening or clos ing the option al document fe eder.
•
Setting origi nals in the op tional doc ument feeder .
•
Opening or clos ing the bypass feed table.
•
Setting copy paper in the bypass feed table.
•
Pressing any ke y except the
•
Start
key.
When The Copier Is Set For User Codes
When U2 is indicated in the copy
counter, the copier is set for user
codes.
Input your user code (4 digits)
using the Number keys. Then
press the Recall/Enter key.
To prevent others from making cop-
❐
ies using your user code, press the
Clear/Stop
ergy Saver
copying.
Regarding user codes,
❐
84.
To set your copier for user codes,
❐
contact your service representative.
☛
and
key simultaneously after
See page 88.
Clear Modes/En-
see page
☛
BASICS
17

ORIGINALS
ORIGINALS
Recommended Originals
❐ Regarding ori ginals that the optiona l document feeder can ha ndle, ☛ see page
105.
Non-recommended Originals For The Optional
Document Feeder
R
Caution:
The following types of originals are not recommended for use with the
document feeder. Place them directly on the exposure glass.
❐ Originals thicker than 128 g/m
❐ Originals thicker than 105 g/m
❐ Originals thinner than 41 g/m
❐ Originals larger th an A3, 11" x 17"
❐ Originals smaller than B6 ; , 51/2" x 81/2" ;
❐ Paper with a ny kin d of coa ting (s uch as carbon ) on th e back
❐ Folded, curled , creased, or da maged origina ls
❐ Mailing labels, or perforated originals
❐ Bound, stapled, or cl ipped origi nals
❐ OHP transparencies
❐ Translucent pape r
❐ Pasted origin als
❐ Damp original s
❐ Sticky orig inals
❐ Wavy originals
❐ Originals that are not made from paper
❐ Originals written in pencil on both sides, or two-si ded carbon or iginals
❐ Thermal fax pape r
2
, 34 lb
2
, 28 lb when using two-si ded origina ls
2
, 11 lb.
18
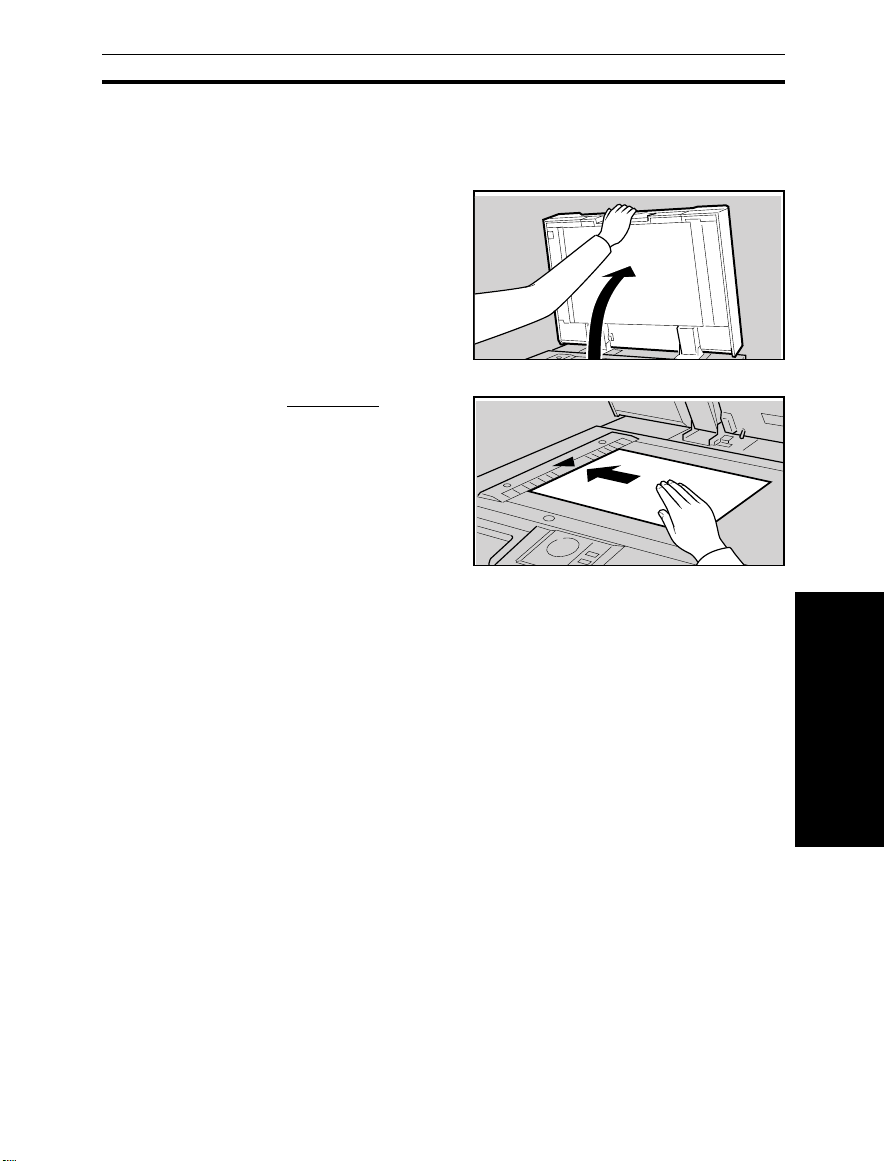
SETTING ORIGINALS ON THE EXPOSURE
.
Lift the platen cover or the op-
1
tional document feeder.
❐ When lifting the platen cover, hold it
in the center.
.
Set the original
2
exposure glass. The original
should be centered according to
the size marks on the left scale.
face down
on the
SETTING ORIGINALS ON THE EXPOSURE GLASS
GLASS
.
Lower the platen cover or the op-
3
tional document feeder.
BASICS
19
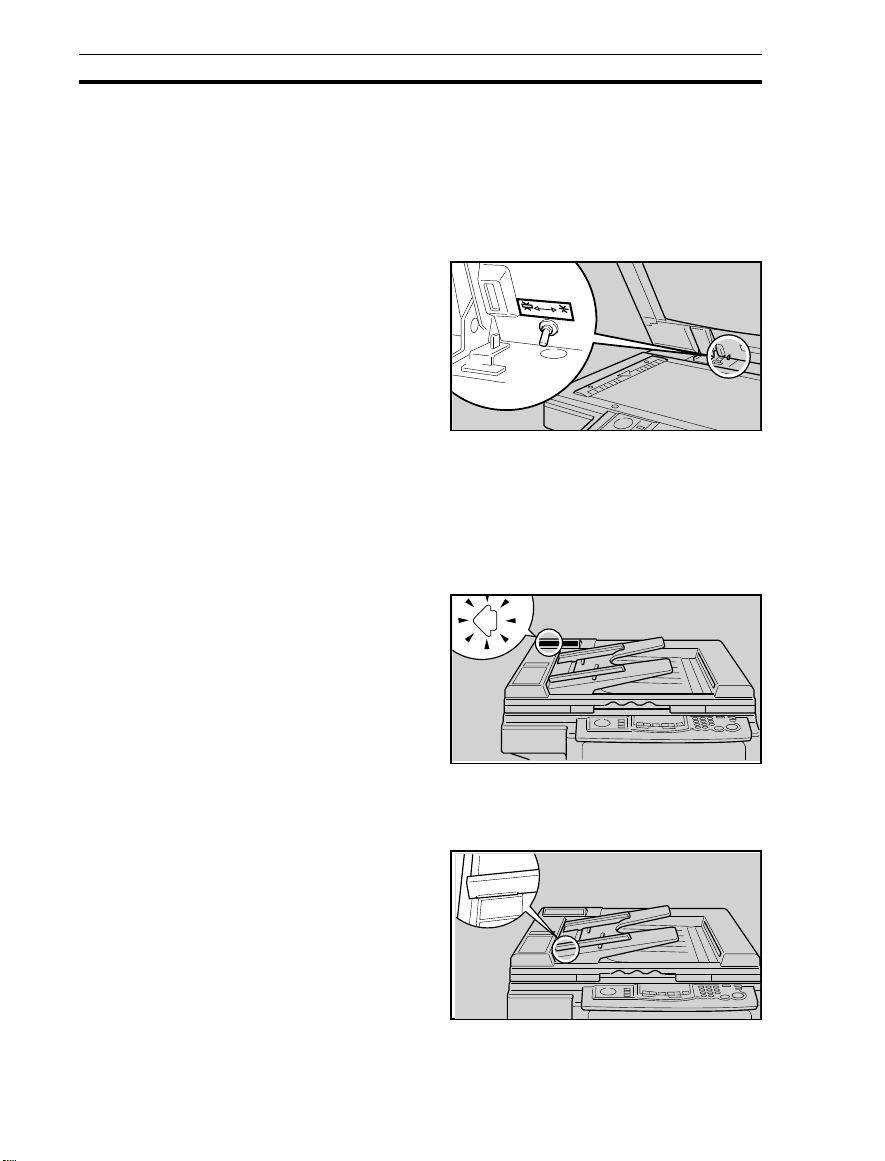
SETTING A STACK OF ORIGINALS IN THE OPTIONAL DOCU MENT FEEDER
SETTING A STACK OF ORIGINALS IN THE
OPTIONAL DOCUMENT FEEDER
You can insert a stack of originals (one-sided or two-sided) of the same size
into the document feeder. These originals are individually fed onto and
removed from the exposure glass.
❐ If the originals are heavier than 52
g/m2, 14 lb, set the Original Select
switch of the docume nt feeder to the
Thick Original p osition.
❐ If you want to set originals of different sizes at the same time, use the user
tools. ☛ See page 81.
.
Correct any curl, fold, or crease
1
in the originals before setting.
.
Confirm that the Insert Original
2
indicator is lit before setting the
originals.
.
Confirm that no previous originals
3
remain on the exposure glass.
.
Adjust the guides to the original
4
size.
20
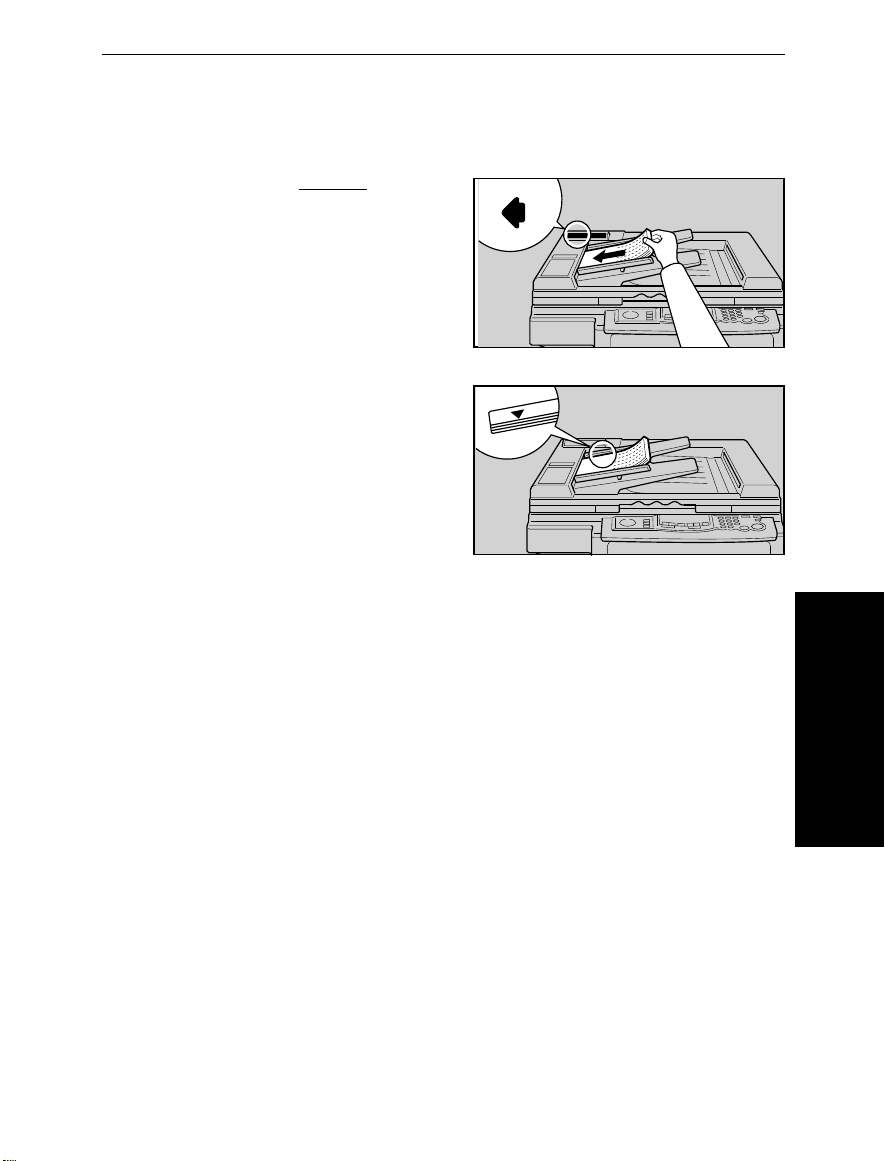
SETTING A STACK OF ORIGINALS IN THE OPTIONAL DOCU MENT FEEDER
.
Set the originals
5
document feeder until the Insert
Original indicator goes off.
❐ The last page should be on the bot-
tom.
❐ The guides mus t touch both sides of
the originals.
❐ Do not stack originals above the limit
mark.
face up
into the
21
BASICS
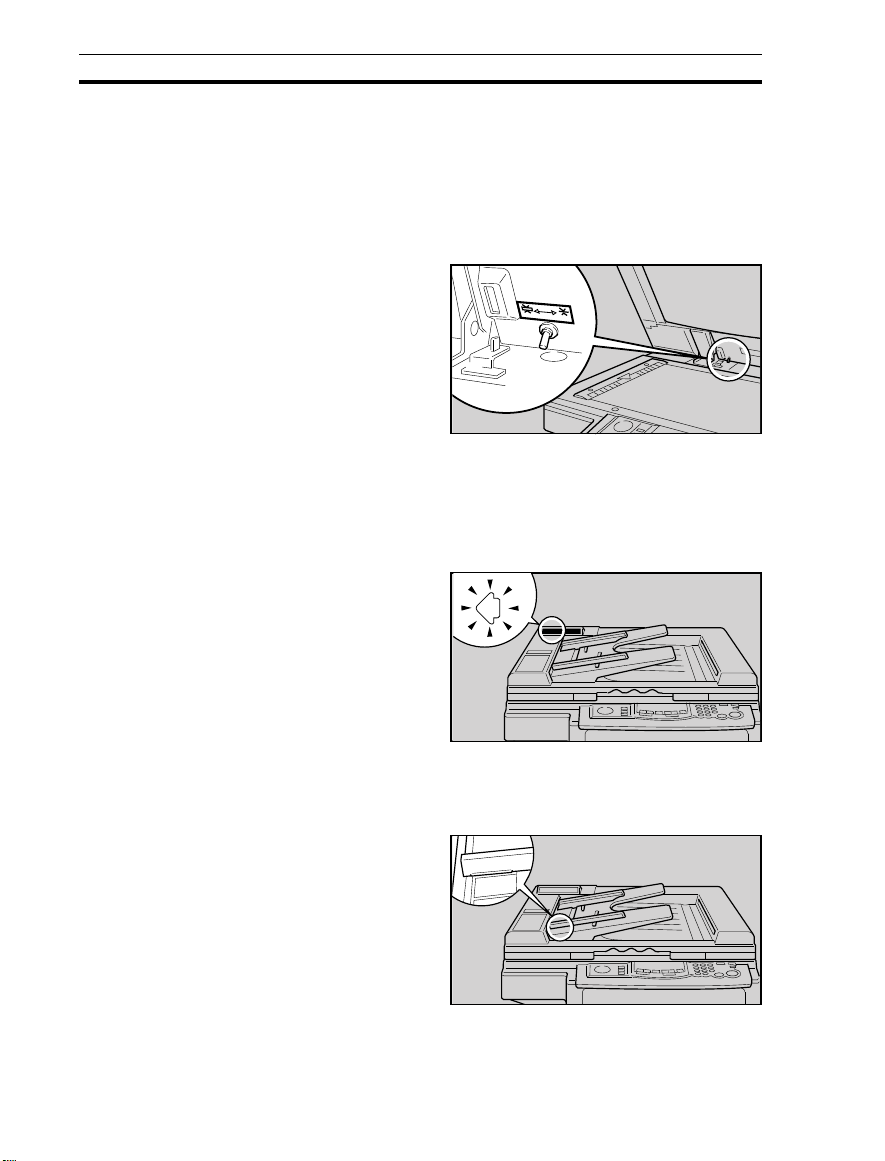
SETTING ONE ORIGINAL AT A TIME IN THE OPTIONAL DOCUMENT FEEDER
SETTING ONE ORIGINAL AT A TIME IN THE
OPTIONAL DOCUMENT FEEDER
You can insert one original at a time into the document feeder. The original
is automatically fed onto and removed from the exposure glass.
❐ If the originals are heavier than 52
g/m2, 14 lb, set the Original Select
switch of the docume nt feeder to the
Thick Original p osition.
.
Correct any curl, fold, or crease
1
in the originals before setting.
.
Confirm that the Insert Original
2
indicator is lit before setting the
originals.
.
Confirm that no previous originals
3
remain on the exposure glass.
.
Adjust the guides to the original
4
size.
22

SETTING ONE ORIGINAL AT A TIME IN THE OPTIONAL DOCUMENT FEEDER
.
Set the original
5
document feeder until the Insert
Original indicator goes off.
❐ If you are co pying a st ack of o riginals
one sheet at a time and you want to
keep them in order, start w ith the last
page of the originals.
❐ The original guides must touch both
sides of the original.
Press the Start key.
face up
into the
6
.
While the Auto Feed indicator is
7
lit after an original is fed, set the
next original. The original is automatically fed and copied.
❐ If you have set more than two origi-
nals, the Auto Feed indicator is not
lit after th e last original is fe d. In this
case, press the Start key again after
setting an original.
23
BASICS
SAVING ENERGY
SAVING ENERGY
With the Energy Saver, the copier is reset and uses less electricity.
❐ To have the Ene rgy Saver automatically activated when the copier is auto re-
set, set the user tools. ☛ See page 82.
❐ Your service r epresentative c an select one of four lev els for the saving rat io.(☛
See page 83.) The high er the saving ratio, the mo re time the co pier will ne ed to
return to the ready condition.
❐ The following acti ons will cancel the Energy Sav er mode:
• Opening or closing the optional document feeder.
• Setting originals in the optional document feeder.
• Opening or closing the bypass feed table.
• Setting copy pape r in the bypass feed table.
• Pressing any key except the Start key.
Press the Clear Modes/Energy
1
Saver key more than one second
to enter the Energy Saver condition.
❐ All indicators except the r Energy
Saver indicator turn o ff.
24
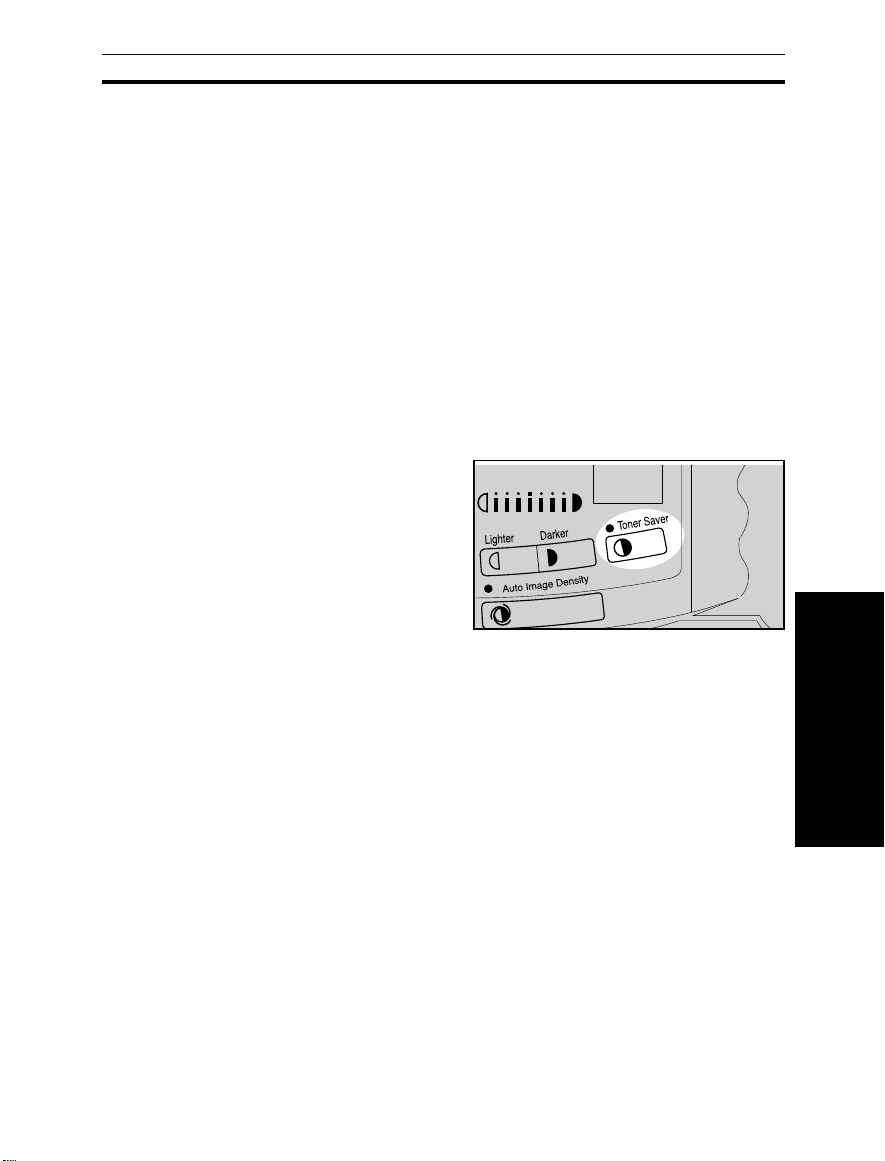
SAVING TONER
SAVING TONER
With the Toner Saver, the toner cartridge lasts longer. However, the copy
image density will be lower.
❐ Depending on images on a original, toner saving ratio might be changed.
❐ If the copy im age dens ity wit h this f unction is too l ow, can cel it.
❐ The auto and manual image density modes cannot be selected with this func-
tion.
❐ To set the Toner Saver function as default, set the user tools. ☛ See page
77.
❐ Your service representative can select one of three toner saving ratio. ☛ See
page 87.
Press the Toner Saver key.
1
❐ If you want to cancel this function,
press the Toner Saver key again,
the Lighter and Darker keys, or the
Auto Image Densit y key.
Make your copies.
2
BASICS
25

COPYING
27
COPYING
BASIC OPERATION
BASIC OPERATION
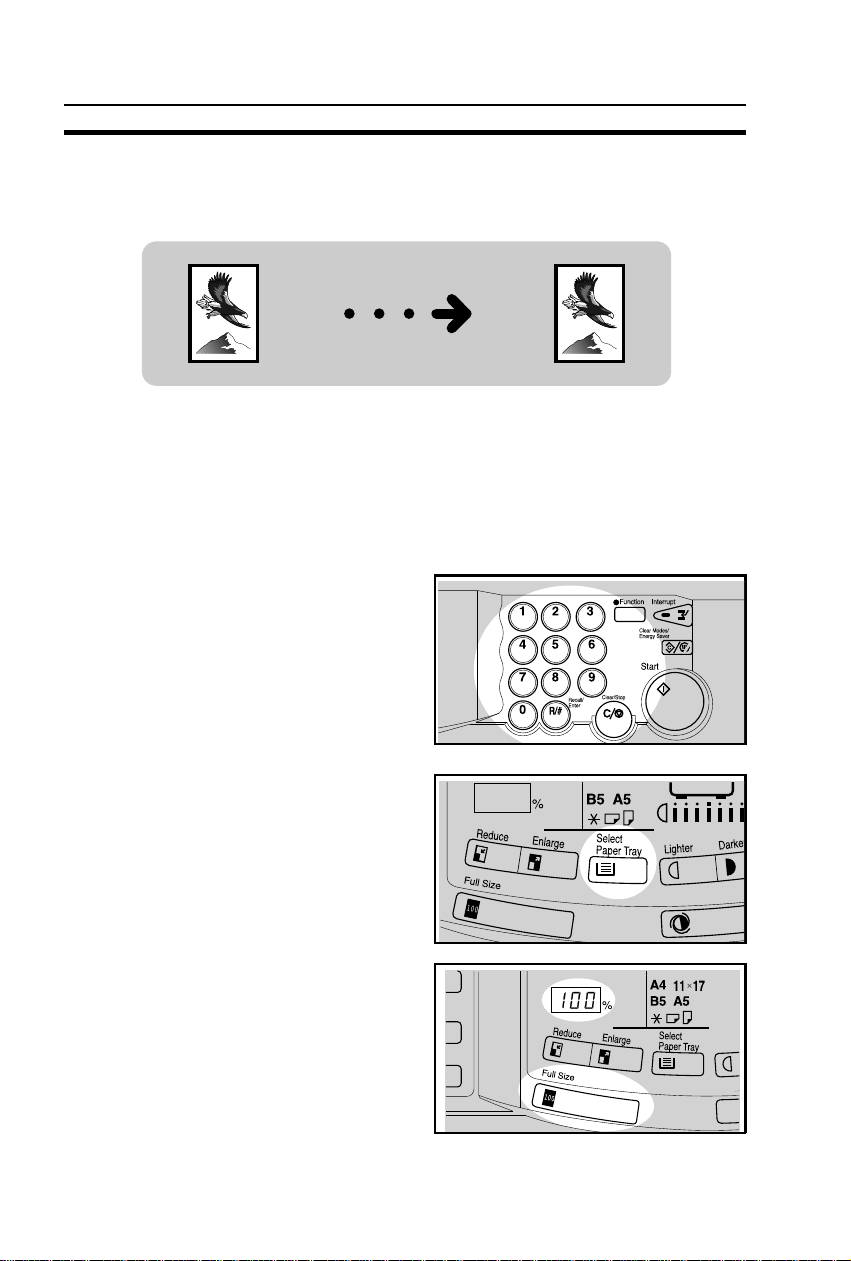
One-to-one Copying
You can make copies that are the same size as your originals.
Set your original on the exposure
1
glass or in the optional document
feeder.
22.
Enter the number of copies re-
2
quired using the Number keys.
❐
To change the number entered,
press the
the new number.
☛
See page 19, 20, or
Clear/Stop
key, then enter
Select the copy paper using the
3
Select Paper Tray key.
❐
When you set the original in the optional docum ent feeder, you can use
the Auto Paper Select function.
See page 45.
Make sure that the magnification
4
ratio is set to 100%. If not, press
the Full Size key.
28
☛
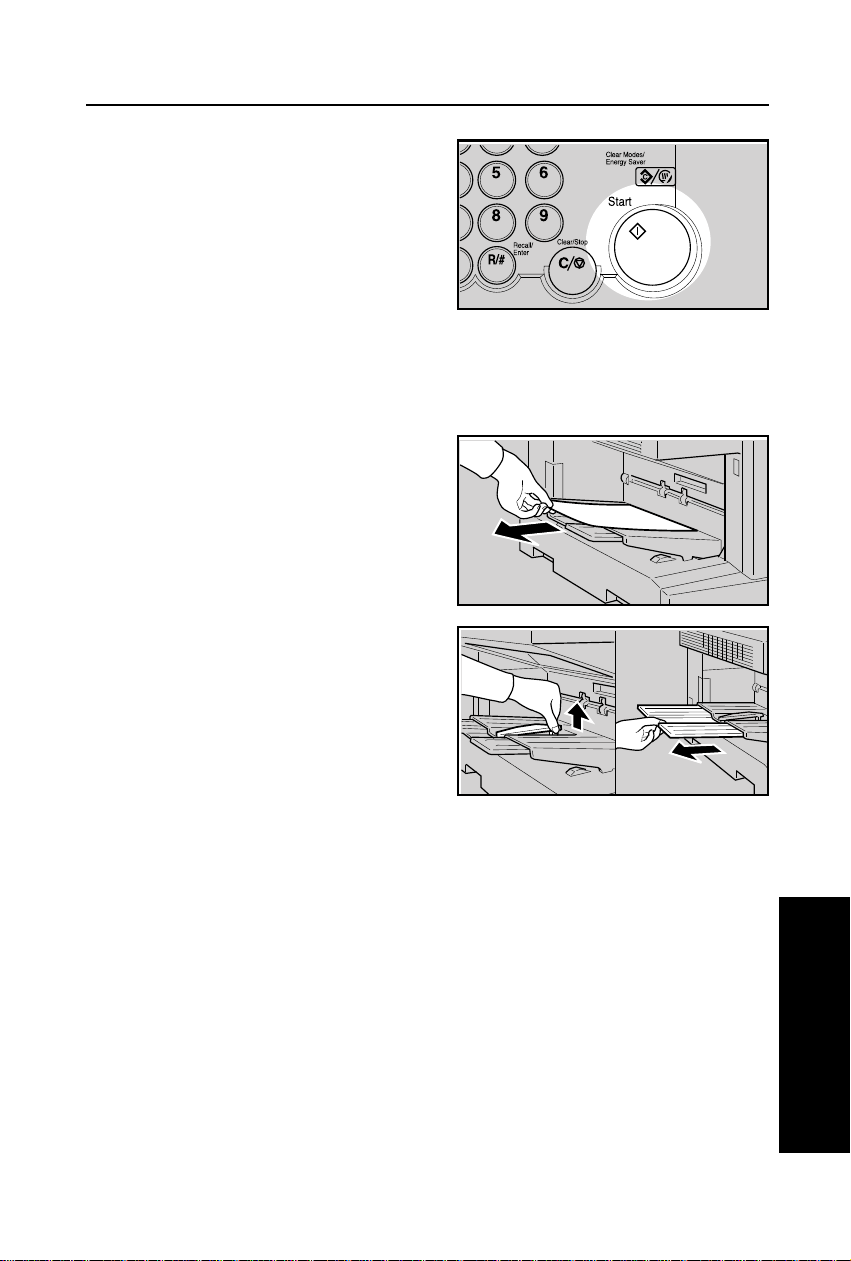
Press the Start key.
5
❐
To confirm th e number of copie s that
you entered, press the
key.
❐
To stop the copie r during a multicop y
run, press th e
❐
Press the
ing, or press the
again to clear the entered copy number.
Clear/Stop
key to resume copy-
Start
Remove the copies from the copy
6
tray.
❐
The copy tray holds approxima tely 250
sheets (B4, 8
100 sheets (A3, 11" x 17").
❐
If you make B4, 8
size copies, raise the center rib and
extend the copy tray to stack them
properly.
" x 14" and smaller ) or
1/2
Recall/Enter
key.
Clear/Stop
" x 14" or larger
1/2
BASIC OPERATION
key
29
COPYING
BASIC OPERATION
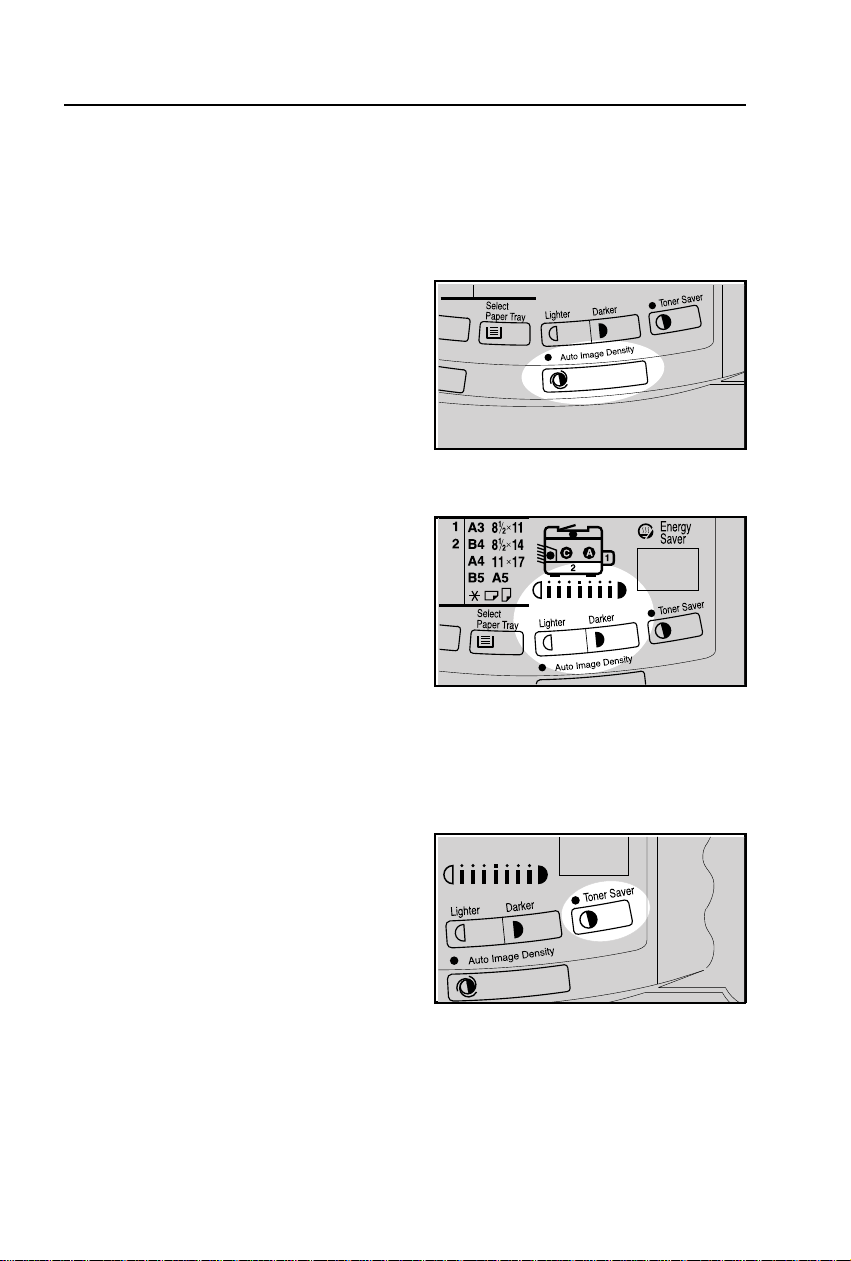
Adjusting Copy Image Density
To match the type of originals, adjust the image density.
Auto image density
If the Auto Image Density indicator is lit, the copier automatically controls the image density.
If the indicator is not lit, press the
Auto Image Density key.
Manual image density
If you require darker or lighter
copies, adjust the image density
yourself.
Press the Lighter (left) key to
lower the image density. Press
the Darker (right) key to increase
the image density.
Toner Saver mode
Using this mode, the copy density
will be lighter and the toner cartridge will last longer.
Press the Toner Saver key before making copies.
❐
The auto and manual image density
modes cannot be selected simultaneously with the Toner Saver mode and
vice versa.
❐
Regarding the Toner Saver function,
☛
see page 25.
30
 Loading...