

Page 1
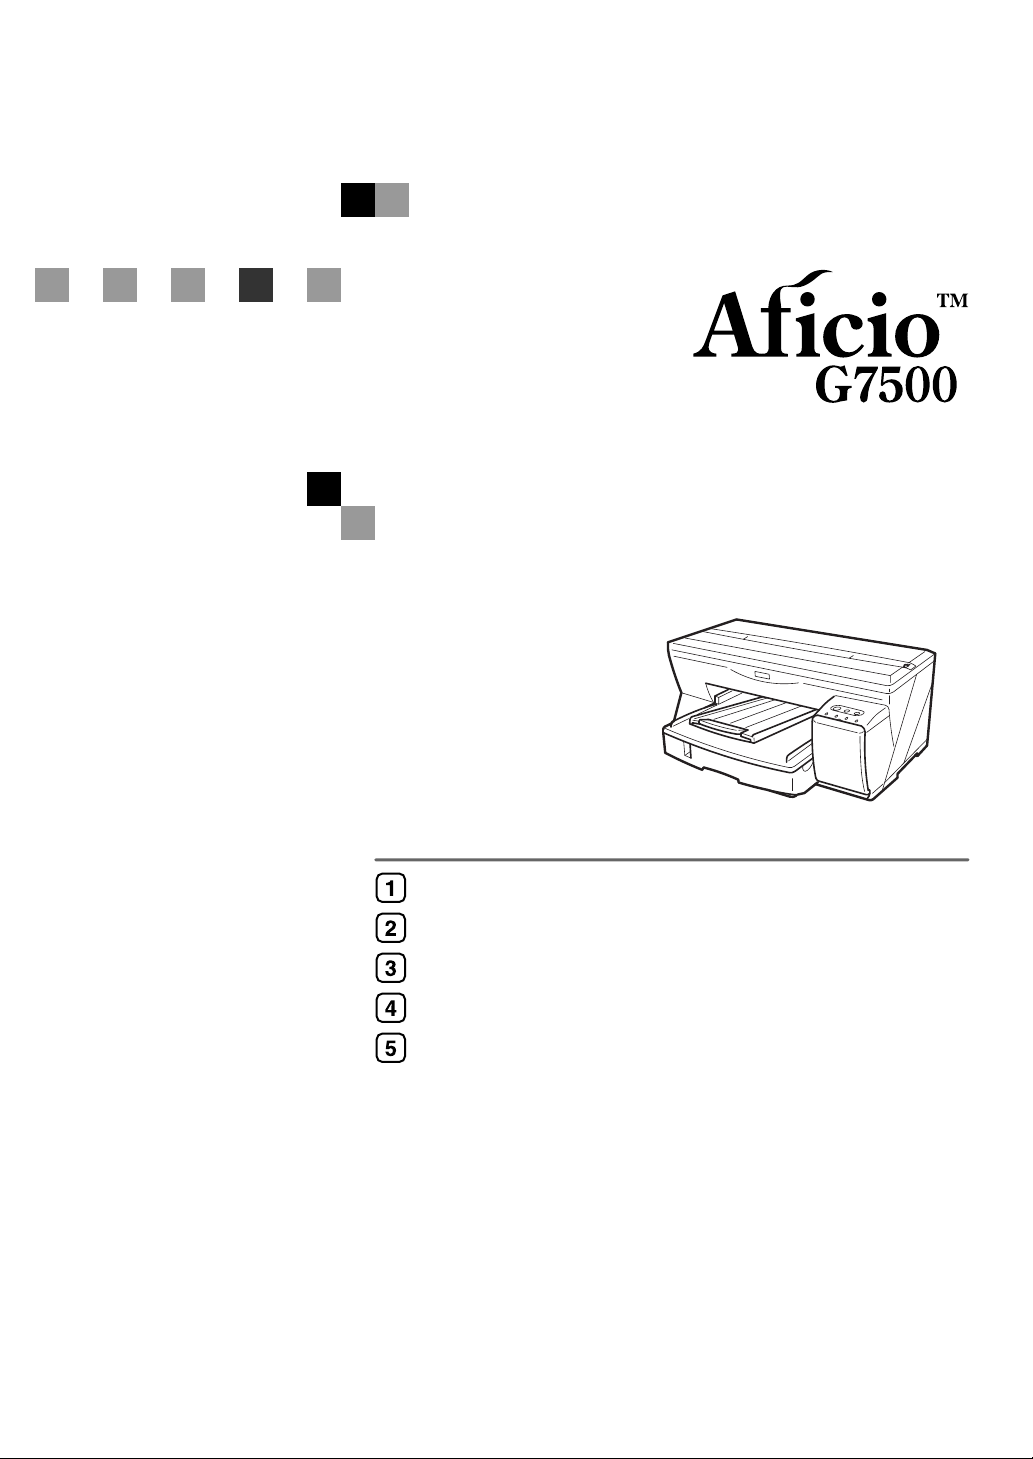
Setup Handbook
Guide to Components
Installing the Paper Feed Unit (option)
Using the Printer Driver
Using User Guide
Troubleshooting
Read this manual carefully before you use this machine and keep it handy for future reference. For safe and correct use, be sure to read the Safety Information
before using the machine.
Page 2

Introduction
This manual contains detailed instructions and notes on the operation and use of this machine. For your safety and
benefit, read this manual carefully before using the machine. Keep this manual in a handy place for quick reference.
Do not copy or print any item for which reproduction is prohibited by law.
Copying or printing the following items is generally prohibited by local law:
bank notes, revenue stamps, bonds, stock certificates, bank drafts, checks, passports, driver's licenses.
The preceding list is meant as a guide only and is not inclusive. We assume no responsibility for its completeness or
accuracy. If you have any questions concerning the legality of copying or printing certain items, consult with your legal
advisor.
Power Source
220-240V, 50/60Hz, 0.5A or more
Voltage must not fluctuate more than 10%.
Please be sure to connect the power cable to a power source as above.
Confirm that the wall outlet is near the machine and freely accessible, so that in event of an emergency, it can be un-
plugged easily.
Important
Contents of this manual are subject to change without prior notice. In no event will the company be liable for direct,
indirect, special, incidental, or consequential damages as a result of handling or operating the machine.
Two kinds of size notation are employed in this manual. With this machine refer to the metric version.
For good print quality, the supplier recommends that you use genuine print cartridges from the supplier.
Ricoh shall not be responsible for any damage or expense that might result from the use of parts other than genuine
Ricoh parts with your Ricoh office products.
Trademarks
Adobe and Acrobat are either registered trademarks or trademarks of Adobe Systems Incorporated in the United
States and/or other countries.
Pentium is a registered trademark of Intel Corporation.
Netscape is a registered trademark of Netscape Communication Corporation in the U.S. and/or other countries.
Macromedia and Flash are either registered trademarks or trademarks of Macromedia, Inc. in the U.S. and/or other
countries.
Microsoft, Windows, Windows NT are either registered trademarks or trademarks of Microsoft Corporation in the
U.S. and/or other countries.
Other product names used herein are for identification purposes only and might be trademarks of their respective com-
panies. We disclaim any and all rights to those marks.
• The product name of Windows® 95 is Microsoft® Windows® 95.
®
• The product name of Windows
• The product name of Windows
• The product names of Windows
®
Microsoft
Microsoft
Microsoft
Windows® 2000 Professional
®
Windows® 2000 Server
®
Windows® 2000 Advanced Server
• The product names of Windows
®
Microsoft
Microsoft
Windows® XP Home Edition
®
Windows® XP Professional
• The product names of Windows Server
®
Microsoft
Microsoft
Microsoft
Windows ServerTM 2003 Standard Edition
®
Windows ServerTM 2003 Enterprise Edition
®
Windows ServerTM 2003 Web Edition
• The product names of Windows NT
Microsoft
Microsoft
®
Windows NT® Workstation 4.0
®
Windows NT® Server 4.0
98 is Microsoft® Windows® 98.
®
Me is Microsoft® Windows® Millennium Edition (Windows Me).
®
2000 are as follows:
®
XP are as follows:
TM
2003 are as follows:
®
4.0 are as follows:
Some illustrations in this manual might be slightly different from the machine.
Certain options might not be available in some countries. For details, please contact your local dealer.
Page 3

TABLE OF CONTENTS
How to Read This Manual . . . . . . . . . . . . . . . . . . . . . . . . . . . . . . . . . . . . . . . . . . . . . . . . . . . . . . . . 2
Symbols . . . . . . . . . . . . . . . . . . . . . . . . . . . . . . . . . . . . . . . . . . . . . . . . . . . . . . . . . . . . . . . . . . . . . . . . 2
Keys
. . . . . . . . . . . . . . . . . . . . . . . . . . . . . . . . . . . . . . . . . . . . . . . . . . . . . . . . . . . . . . . . . . . . . . . . . . 2
Safety Information . . . . . . . . . . . . . . . . . . . . . . . . . . . . . . . . . . . . . . . . . . . . . . . . . . . . . . . . . . . . . . 3
Safety During Operation . . . . . . . . . . . . . . . . . . . . . . . . . . . . . . . . . . . . . . . . . . . . . . . . . . . . . . . . . . . . . . 3
Warning
. . . . . . . . . . . . . . . . . . . . . . . . . . . . . . . . . . . . . . . . . . . . . . . . . . . . . . . . . . . . . . . . . . . . . . . 4
. . . . . . . . . . . . . . . . . . . . . . . . . . . . . . . . . . . . . . . . . . . . . . . . . . . . . . . . . . . . . . . . . . . . . . . . 5
Caution
User's Notes
Manuals for This Printer . . . . . . . . . . . . . . . . . . . . . . . . . . . . . . . . . . . . . . . . . . . . . . . . . . . . . . . . . . 9
1. Guide to Components
Printer Body . . . . . . . . . . . . . . . . . . . . . . . . . . . . . . . . . . . . . . . . . . . . . . . . . . . . . . . . . . . . . . . . . . 11
Printer Rear . . . . . . . . . . . . . . . . . . . . . . . . . . . . . . . . . . . . . . . . . . . . . . . . . . . . . . . . . . . . . . . . . . 12
Control Panel . . . . . . . . . . . . . . . . . . . . . . . . . . . . . . . . . . . . . . . . . . . . . . . . . . . . . . . . . . . . . . . . . 13
Option . . . . . . . . . . . . . . . . . . . . . . . . . . . . . . . . . . . . . . . . . . . . . . . . . . . . . . . . . . . . . . . . . . . . . . 15
Paper Feed Unit Type 7500 . . . . . . . . . . . . . . . . . . . . . . . . . . . . . . . . . . . . . . . . . . . . . . . . . . . . . . . . . . . . 15
2. Installing the Paper Feed Unit (option)
Paper Feed Unit Type 7500 . . . . . . . . . . . . . . . . . . . . . . . . . . . . . . . . . . . . . . . . . . . . . . . . . . . . . . 17
. . . . . . . . . . . . . . . . . . . . . . . . . . . . . . . . . . . . . . . . . . . . . . . . . . . . . . . . . . . . . . . . . . . . . 7
3. Using the Printer Driver
Installing the Printer Driver (USB) . . . . . . . . . . . . . . . . . . . . . . . . . . . . . . . . . . . . . . . . . . . . . . . . . . 19
Test Print . . . . . . . . . . . . . . . . . . . . . . . . . . . . . . . . . . . . . . . . . . . . . . . . . . . . . . . . . . . . . . . . . . . . . 24
4. Using User Guide
Installing User Guide . . . . . . . . . . . . . . . . . . . . . . . . . . . . . . . . . . . . . . . . . . . . . . . . . . . . . . . . . . . 27
How to Use User Guide . . . . . . . . . . . . . . . . . . . . . . . . . . . . . . . . . . . . . . . . . . . . . . . . . . . . . . . . . 30
Opening User Guide . . . . . . . . . . . . . . . . . . . . . . . . . . . . . . . . . . . . . . . . . . . . . . . . . . . . . . . . . . . . . . . . 31
5. Troubleshooting
Software Cannot Be Installed . . . . . . . . . . . . . . . . . . . . . . . . . . . . . . . . . . . . . . . . . . . . . . . . . . . . . 35
Checking Your Computer Environment . . . . . . . . . . . . . . . . . . . . . . . . . . . . . . . . . . . . . . . . . . . . . . . . . . . . . 35
Confirming Installation
Restoring USB
Printer Driver Cannot Be Installed
USB Connection is not Automatically Detected
If Test Print Fails . . . . . . . . . . . . . . . . . . . . . . . . . . . . . . . . . . . . . . . . . . . . . . . . . . . . . . . . . . . . . . . 38
Uninstalling . . . . . . . . . . . . . . . . . . . . . . . . . . . . . . . . . . . . . . . . . . . . . . . . . . . . . . . . . . . . . . . . . . 39
Uninstalling the Printer Driver . . . . . . . . . . . . . . . . . . . . . . . . . . . . . . . . . . . . . . . . . . . . . . . . . . . . . . . . . . . 39
Deleting Devices
Uninstalling User Guide
. . . . . . . . . . . . . . . . . . . . . . . . . . . . . . . . . . . . . . . . . . . . . . . . . . . . . . . . . . . . . . . 36
. . . . . . . . . . . . . . . . . . . . . . . . . . . . . . . . . . . . . . . . . . . . . . . . . . . . . . . . . . . . . . . . . . . . 36
. . . . . . . . . . . . . . . . . . . . . . . . . . . . . . . . . . . . . . . . . . . . . . . . . . . . . . . . 36
. . . . . . . . . . . . . . . . . . . . . . . . . . . . . . . . . . . . . . . . . . . . . . . . 37
. . . . . . . . . . . . . . . . . . . . . . . . . . . . . . . . . . . . . . . . . . . . . . . . . . . . . . . . . . . . . . . . . . 41
. . . . . . . . . . . . . . . . . . . . . . . . . . . . . . . . . . . . . . . . . . . . . . . . . . . . . . . . . . . . . . 42
INDEX . . . . . . . . . . . . . . . . . . . . . . . . . . . . . . . . . . . . . . . . . . . . . . . . . . . . . . . . . . . . . . . . . . . . 44
1
Page 4
How to Read This Manual
Symbols
The following set of symbols is used in this manual.
This symbol indicates a potentially hazardous situation that might result in death or serious injury
when you misuse the machine without following the instructions under this symbol. Be sure to read
the instructions, all of which are described in the Safety Information section.
This symbol indicates a potentially hazardous situation that might result in minor or moderate injury
or property damage that does not involve personal injury when you misuse the machine without following the instructions under this symbol. Be sure to read the instructions, all of which are described
in the Safety Information section.
* The statements above are notes for your safety.
If this instruction is not followed, paper might be misfed, originals might be damaged, or data might
be lost. Be sure to read this.
This symbol indicates information or preparations required prior to operating.
This symbol indicates precautions for operation, or actions to take after abnormal operation.
This symbol indicates numerical limits, functions that cannot be used together, or conditions in which
a particular function cannot be used.
This symbol indicates a reference.
Keys
[
]
Keys on the computer's keyboard.
[
]
Keys and buttons that appear on the computer's display.
2
Page 5

Safety Information
When using this machine, the following safety precautions should always be followed.
Safety During Operation
In this manual, the following important symbols are used:
Indicates a potentially hazardous situation which, if instructions are not followed, could result in
death or serious injury.
Indicates a potentially hazardous situation which, if instructions are not followed, may result in
minor or moderate injury or damage to property.
3
Page 6

Warning
z
The supplied power cord is for use with this equipment only. Do not use
with other appliances. Doing so may result in fire, electric shock, or
injury.
z
Only connect the machine to the power source described on the inside
front cover of this manual.
z
Avoid multi-wiring.
z
Do not damage, break or make any modifications to the power cord. Do
not place heavy objects on it. Do not pull it hard nor bend it more than
necessary. These actions could cause an electric shock or fire.
z
Do not plug or unplug the power cord with your hands wet. Otherwise,
an electric shock might occur.
z
Connect the power cord directly into a wall outlet and never use an
extension cord.
z
To avoid hazardous electric shock, do not remove any covers or screws
other than those specified in this manual. When the machine needs to be
checked, adjusted, or repaired, contact your service representative.
z
Do not take apart or attempt any modifications to this machine. There is
a risk of fire, electric shock, explosion or loss of sight.
z
If by any chance this machine falls over or a breakage occurs (e.g. the
cover), turn off the main switch, unplug the power cable and contact
your service representative. If you continue to use the machine in this
state it could result in fire or electric shock.
z
If metal, liquid or foreign matter falls into the machine, turn off the operation and main power switches, and unplug the main power cord. Contact your service representative. Do not keep using the machine with a
fault or defect.
z
Do not put any metal objects or containers holding water (e.g. vases,
flowerpots, glasses) on the machine. If the contents fall inside the
machine, a fire or electric shock could occur.
z
Keep the machine away from flammable liquids, gases, and aerosols. A
fire or an electric shock might occur.
z
Disposal can take place at our authorized dealer.
4
Page 7

Caution
z
Keep the machine away from humidity and dust. Otherwise a fire or an
electric shock might occur.
z
Do not place the machine on an unstable or tilted surface. If it topples
over, an injury might occur.
z
If you use the machine in a confined space, make sure there is a continuous air turnover.
z
Unplug the power cord from the wall outlet before you move the
machine. While moving the machine, you should take care that the
power cord will not be damaged under the machine.
z
When the machine will not be used for a long time, unplug the power
code.
z
When you disconnect the power plug from the wall outlet, always pull
the plug (not the cable).
z
Our products are engineered to meet high standards of quality and functionality, and we recommend that you use only the expendable supplies
available at an autohrized dealer.
z
Deliver to waste product collection areas. Do not dispose of via domestic
refuse collection.
z
The machine weighs approximately 14.2 kg (31.3 lb.).
z
When moving the machine, hold the machine by the bottom below the
two indentations. Lift the machine slowly in order to avoid straining your
body. Lifting the machine without sufficient strength or assistance or handling it roughly and dropping it could cause an injury.
5
Page 8
z
Do not eat or swallow ink.
z
If ink is ingested, induce vomiting by drinking a strong saline solution.
Consult a doctor immediately.
z
If your skin comes into contact with ink, wash the affected area thoroughly with soap and water.
z
If ink comes into contact with your eyes, rinse immediately in running
water. For other symptoms, consult a doctor.
z
Avoid getting ink on your clothes or skin when removing a paper jam or
replacing ink. If your skin comes into contact with ink, wash the affected
area thoroughly with soap and water.
z
If ink gets on your clothing, wash with cold water. Hot water will set the
ink into the fabric and may make removing the stain impossible.
z
Keep the ink or ink container out of reach of children.
z
Be careful not to get ink on your clothes when replacing an ink container. Ink stains on clothes are hard to remove.
z
Rating voltage of the connector for option: Max. DC 37 V.
z
When you use this machine for a long time in a confined space without good ventilation, you
may detect an odd smell. To keep the workplace comfortable, we recommend that you keep it
well ventilated.
6
Page 9

User's Notes
z
High temperatures inside the printer can cause a breakdown. Do not lean anything against the
vent or block it in any way.
z
Warm air from the vent is normal and not a cause for concern.
z
Do not leave the top cover open. Doing so could cause an injury.
z
During printing, do not move the printer or open its covers.
z
During printing, do not pull out a paper tray (tray 1 or tray 2). Printing will stop and the paper will
jam.
z
Do not touch the feed belt.
z
Take care not to let paper clips and other foreign objects fall inside the printer.
z
During printing, do not turn off the power or unplug the power cord from the wall outlet.
z
During printing, do not subject the printer to external shock such as that caused by tapping paper
on it.
z
When not using the printer, turn off the power.
z
Do not place more than 5 kg (11.1 lb.) on the printer. (The outer surface of the printer can tolerate
up to 20 kg (44.1 lb.).)
z
The operational life of this printer is estimated to be 5 years based on less than 2500 (A4) prints
per month and 8 hours of normal daily usage. Exceeding these totals may reduce the operational
lifespan of the printer. The operational lifespan is also affected by the environment in which the
printer is operated.
z
"Secondary Counter" displays the number of pages printed. Sheets of A4 or smaller are counted
as one page. Sheets larger than A4 are counted as multiple pages, according to their size ratio
relative to A4.
Use "Secondary Counter" to estimate the number of pages that can be printed within the printer's
remaining operational life.
The printer's operational life is calculated based on the number of pages that it can print on plain
A4 paper in [Standard (speed priority)] mode.
z
This printer is designed to have an operational life of 5 years / 150,000 pages.
z
Depending on your settings, the internal unit may fill up sooner than normal.
An "Internal unit nearly full" message appears shortly before the internal unit is full. Contact your
service representative as soon as possible for a replacement internal unit (charge incurred).
z
The printing yields of print cartridges are as follows: (The yields of the print cartridges packaged
with the printer are lower than the yields described below.)
z
Black: approximately 3200 A4/Letter sheets (5% chart)
z
Cyan: approximately 2500 A4/Letter sheets (5% chart)
z
Magenta: approximately 2500 A4/Letter sheets (5% chart)
z
Yellow: approximately 2500 A4/Letter sheets (5% chart)
Printing yields vary depending on page content, paper type, paper size, and environmental conditions. Also, cartridges may need to be changed before the yields above have been reached
due to deterioration over time. To maintain print quality, cartridges should be opened before their
expiration date and used within six months of being opened.
7
Page 10

z
Color ink may be used even if you print all-black text or if you specify black and white printing. It
may also be used for print head cleaning and refreshing, which are done to maintain printer performance.
z
Print cartridges and supplies comply with the manufacturer's safety specifications. To ensure
safety and reliability, use genuine print cartridges and supplies.
z
If you print a large number of pages in a day, for instance, hundreds of pages, the nozzles of the
print-heads may be clogged the next day. If this happens, clean the print-heads.
z
This printer performs regular automatic maintenance, after and during printing, to ensure consistent print quality. Maintenance is also performed when printing begins after a period of disuse.
8
Page 11

Manuals for This Printer
This printer is provided with two manuals.
Quick Installation Guide
This manual describes procedures from unpacking the printer to loading paper. If you have purchased options, see P.17 "Installing the Paper Feed Unit (option)".
Setup Handbook (this manual) (PDF file - CD-ROM)
Topics such as printer installation, connecting to a computer, and basic print operations are
explained.
User Guide (CD-ROM)
This is included on the provided "Drivers & Manual" CD-ROM. Topics such as advanced features,
troubleshooting when printing does not start or is not performed as expected, dealing with paper
jams, and information about paper are explained. We recommend that you install this manual on
computers for your convenience.
z
Depending on the operating system and version used, actual procedures may differ from the procedures explained in these manuals.
9
Page 12

10
Page 13

1. Guide to Components
Printer Body
1 Top cover
Keep this cover closed during printing. If you cannot locate paper jams, or jammed paper can-
not be removed easily, you can check the condition of paper from the top of the printer.
2 Envelope selector
For envelopes, set the lever to the rear position ; for everything else, set the lever to the for-
ward position .
3 Print cartridge (yellow)
1
AGK001S
4 Print cartridge (magenta)
5 Print cartridge (cyan)
6 Print cartridge (black)
7 Right front cover
Keep this cover closed during printing. Open to install or replace print cartridges.
8 Tray 1
Load paper here.
9 Output tray extension
Pull out when using paper larger than A4/Letter to keep the printed paper from falling.
10 Output tray
Prints are delivered to this tray.
When using paper larger than A4/Letter, pull out the output tray extension.
11
Page 14
1
1. Guide to Components
Printer Rear
AGK002S
1 USB slot
Connect the USB cable from the computer here.
2 Duplex unit cover button
Push to open the duplex unit cover.
3 Bypass tray
Insert paper by hand here.
Insert thick paper and label paper.
4 Duplex unit locks
Use to lock or unlock the duplex unit when attaching or detaching it.
5 Duplex unit cover
Open to remove paper jammed inside the duplex unit.
6 Vent
Air is vented here to prevent the inside of the printer from getting too warm. Do not lean any-
thing against the vent or block it in any way. If the inside of the printer gets too warm, a break-
down could occur.
7 Guide board
Open to remove paper jammed inside the printer.
8 Paper feed wheel
Use to wind out paper jammed around the guide board.
9 Power cord
Plug the power cord into a wall outlet.
10 Bypass tray guides
Slide the left and right guides in to match the size of paper being used in the bypass tray.
11 Duplex unit
Turns the paper over when performing duplex printing.
12
Page 15
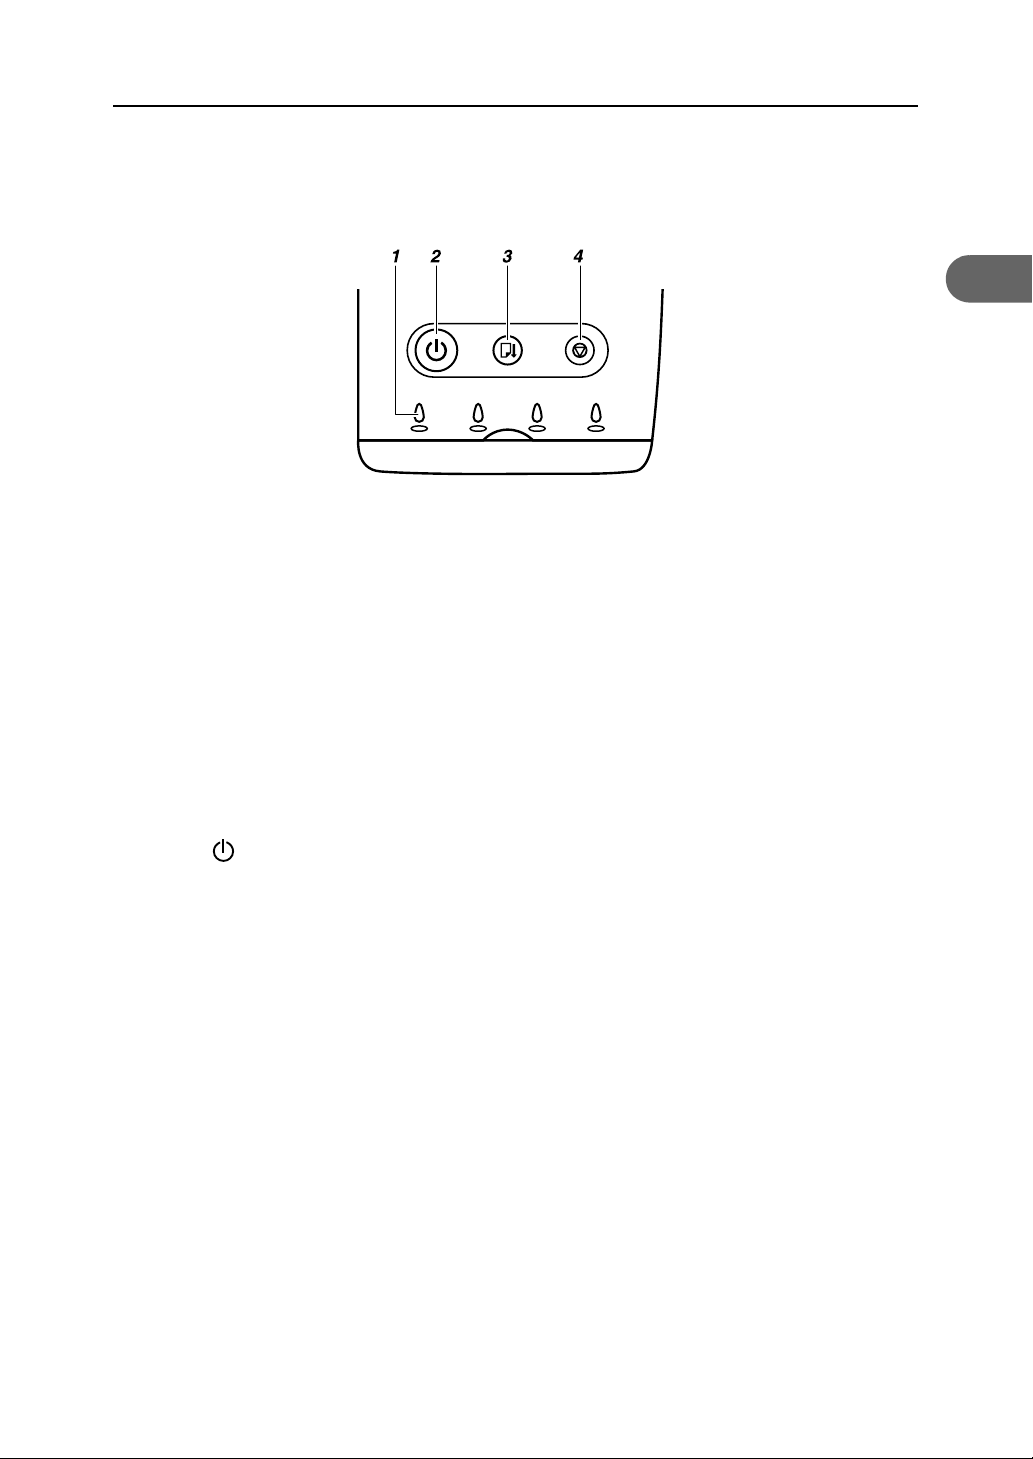
Control Panel
1 Cartridge replacement indicators
z
The indicators correspond to the position of the print cartridges. From left to right, the cartridge replacement indicators display the status of the black (K), cyan (C), magenta (M),
and yellow (Y) print cartridges.
2 [Power] key
z
Press to turn the power on and off.
z
When turning the power on, press the key for one second until it lights.
z
After the power is turned on, the [Power] key will blink until the printer is ready for printing.
At this point, the key will stop blinking and stay lit.
z
The [Power] key will also blink when the printer is processing data.
z
When the power is turned off, the key will blink slowly until the printer has completely shut
down at which point the key will be dark.
z
means "standby".
Control Panel
1
AGK101S
3 [Resume] key
z
Press to resume printing after dealing with an error.
z
This key lights or blinks when paper runs out or a paper jam or error occurs.
13
Page 16

1
1. Guide to Components
4 [Cancel] key
z
Press to cancel printing.
z
When the power is off, if you hold the [Cancel], [Resume], and [Power] keys down
together for more than three seconds, all four cartridge replacement indicators light.
When you release the keys, the machine produces a sample print. On the sample print,
you can check “Secondary Counter”.
z
When the power is off, if you hold the [Resume] and [Power] keys down together for more
than three seconds, all four cartridge replacement indicators light. When you release the
keys, the machine ejects a blank sheet.
z
If you hold this key down for over three seconds, the [Power] key starts blinking, and then
the machine cleans all four print-heads.
z
When the power is off, if the [Cancel] key is held down and the [Power] key is pressed
and held down for over three seconds, the cartridge replacement indicators will light
once and the nozzle blockage check test pattern will be printed.
z
For details about a continuously lit or blinking indicator, see “Error Indicator Summary”, User
Guide.
14
Page 17

Option
Paper Feed Unit Type 7500
1 Tray 2
Load plain paper here.
Option
1
AGK071S
2 Tray 2 rear cover
Open to remove paper jammed in tray 2.
3 Tray cover
This is attached to tray 2.
Take this cover off when loading paper.
15
Page 18

1
1. Guide to Components
16
Page 19

2. Installing the Paper Feed Unit (option)
z
The machine weighs approximately 14.2 kg (31.3 lb.).
z
When moving the machine, hold it using the hand recesses at the bottom
center of each side, and then lift it slowly and carefully. Lifting the
machine carelessly or dropping it may cause injury.
Paper Feed Unit Type 7500
Follow the procedure below to install Paper Feed Unit Type 7500.
1 Check that the power cord of the printer is not plugged in.
2 Take the paper feed unit out of its box.
2
3 Position the paper feed unit close to the printer.
4 Remove the orange tape from tray 2.
5 Remove the paper from the roller at the rear of tray 2 by pulling the attached orange tape.
6 Place the cover on tray 2.
AGK069S
17
Page 20

2
2. Installing the Paper Feed Unit (option)
7 Align the connecting parts of the printer and paper feed unit, and then place the printer on top of
the paper feed unit.
To position the printer, lift carefully with both hands using the indented sections on the sides' lower
centers.
AGK070S
z
Align the paper feed unit and printer using their left-side corners.
z
When the printer is placed on top of the paper feed unit, installation is complete.
z
Do not tilt the machine.
z
Be careful not to trap your fingers.
18
Page 21

3. Using the Printer Driver
Installing the Printer Driver (USB)
Follow the procedure below to install the printer driver only.
If you installed the printer driver when performing Quick Install for USB, there is no need to install it
again here.
z
To install the printer driver under Windows 2000/XP or Windows Server 2003, you must log
on as a user with administrator rights.
z
Do not turn on the power at this point.
3
AGK006S
z
The following explanation uses Windows 2000 as an example. Procedures under other operating systems may differ.
z
Screens vary according to the operating environment.
z
This section explains the procedure for USB connection. For details about network connection,
see “Setting Up a Client Computer”,
User Guide
.
19
Page 22

3
3. Using the Printer Driver
1 Start Windows, and insert the provided "Drivers & Manual" CD-ROM into the CD-ROM drive.
z
Quit all other applications currently running.
z
When you start Windows, the Add New Hardware Wizard may appear. If this happens, click
[Cancel]. Check again that the power is off, and then proceed to step 2.
z
After inserting the CD-ROM, the [Drivers & Manual] dialog box appears. If it does not, doubleclick the CD-ROM drive icon under [My Computer] or [Explorer], and then double-click
[SETUP.EXE].
z
If the [Drivers & Manual] screen does not appear even when you double-click the [SETUP.EXE]
icon, or if an error occurs during installation, access the CD-ROM drive from [My Computer] or
[Explorer], double-click the [RDISETUP.EXE] icon, and then install the printer driver by following
the instructions that appear on the screen.
2 Select a language for the interface, and then click [OK].
The following languages are available:
Deutsch (German), English (English), Espanol (Spanish), Francais (French), Italiano (Italian), Nederlands (Dutch) The default interface language is English.
3 Click [Printer Driver].
20
Page 23

Installing the Printer Driver (USB)
4 Read the license agreement, click [I accept the agreement.], and then click [Next >].
5 Select the computer-printer connection type, and then install the driver.
z
You cannot select [Connected with USB cable] under Windows 95 or Windows NT 4.0.
z
If the message "Digital Signature Not Found" or the [Found New Hardware Wizard] or [Hardware Installation] dialog box appears, see "Notes on the Installation",
Quick Installation Guide
1 Click [Connected with USB cable], and then click [Next >].
3
.
21
Page 24

3
3. Using the Printer Driver
2 Check again that the power of the printer is off, and then click [Next >].
Check that the dialog box below appears.
3 Make sure that the computer and printer are properly connected, and then press the [Power]
key.
AGK008S
Installation starts.
Proceed to step 6.
22
Page 25

Installing the Printer Driver (USB)
6 Select whether or not to open the Printer Status monitor automatically, and then click [Next >].
7 Check the installation result, and then click [Finish].
3
z
If the message prompting you to restart the computer appears, restart the computer.
z
Confirm the printer driver is correctly installed by checking that the [Power] key of the printer is lit
and performing a test print. See P.24 "Test Print".
z
For details about installing User Guide only, see P.27 "Installing User Guide".
23
Page 26

3
3. Using the Printer Driver
Test Print
Follow the procedure below to print a test print page.
z
The following explanation uses Windows 2000 as an example. Procedures under other operating systems may differ.
z
Screens vary according to the operating environment.
1 Check that A4/Letter size paper is loaded in tray 1.
z
For details about loading paper, see "Loading Paper",
2 On the [Start] menu, point to [Settings], and then click [Printers].
Quick Installation Guide
.
3 Click the icon of the printer, and then click [Properties] on the [File] menu.
z
If the confirmation message about printer configuration appears, click [OK]. In the [Accessories]
dialog box, select the option installed.
24
Page 27

4 Click the [General] tab, and then click [Print Test Page].
The test print page is printed.
5 Check that the test print page was printed correctly.
z
If the test print page was printed incorrectly, see P.38 "If Test Print Fails".
Test Print
3
25
Page 28

3
3. Using the Printer Driver
26
Page 29

4. Using User Guide
Installing User Guide
Follow the procedure below to install User Guide only.
If you installed the software when performing [Quick Install for USB], there is no need to install it
again here.
z
The following explanation uses Windows 2000 as an example. Procedures under other operating systems may differ.
z
Screens vary according to the operating environment.
1 Start Windows, and insert the provided "Drivers & Manual" CD-ROM into the CD-ROM drive.
4
z
Quit all other applications currently running.
z
After inserting the CD-ROM, the [Drivers & Manual] dialog box appears. If it does not, doubleclick the CD-ROM drive icon under [My Computer] or [Explorer], and then double-click
[SETUP.EXE].
2 Select a language for the interface, and then click [OK].
The following languages are available:
Deutsch (German), English (English), Espanol (Spanish), Francais (French), Italiano (Italian), Nederlands (Dutch)
The default interface language is English.
27
Page 30

4
4. Using User Guide
3 Click [User Guide].
4 Read the license agreement, click [I accept the terms of the license agreement], and then click [Next >].
5 Confirm the location in which you want to install User Guide, and then click [Next >].
z
To change the installation location, click [Change...].
28
Page 31

Installing User Guide
6 Confirm the program folder in which you want to install User Guide, and then click [Next >].
7 Click [Install].
4
Installation starts.
8 When installation is complete, click [Finish].
z
When installation is complete, User Guide icon appears on your desktop.
z
To use the printer, the printer driver must be installed. See P.19 "Installing the Printer Driver (USB)".
29
Page 32

4
4. Using User Guide
How to Use User Guide
User Guide (on the provided CD-ROM) includes detailed information about this printer and a troubleshooting guide.
Use one of the browsers below to display User Guide.
z
Microsoft Internet Explorer Version 4.01 SP2 or later
z
Netscape 6.2 or later
z
To view the video files of User Guide, Macromedia Flash Player 5 plug-in is required.
When using screen reader software or when you cannot install Macromedia Flash Player plu-
gins
When using screen reader software to listen to User Guide or when video files cannot be displayed because Flash plug-ins cannot be installed, click [For screen reader] to display User
Guide version optimized for screen reader software.
Use the button in the upper right window to change the screen.
When using a non-recommended browser
When using Internet Explorer 3.02 or Netscape Navigator 4.05 or later versions, a simplified
User Guide is displayed.
z
If the simplified User Guide does not automatically appear, in the "Drivers & Manual" CDROM's [unv] folder, open index.htm.
30
Page 33

How to Use User Guide
Opening User Guide
Opening from the icon
1 Double-click the [User Guide] icon on your desktop.
The browser opens, and then User Guide appears.
Opening from the [Start] menu
1 On the [Start] menu, point to [Programs] (Windows XP: [All Programs]), point to [Product Name],
and then click [Product Name User Guide].
4
The browser opens, and then User Guide appears.
z
Depending on the settings made during installation, menu folder names may differ.
Opening from the printer driver
1 In the printer properties dialog box, click [User Guide] on the [Setup] tab.
The browser opens, and then User Guide appears.
31
Page 34

4
4. Using User Guide
Opening from the CD-ROM
1 Start Windows, and insert the provided "Drivers & Manual" CD-ROM into the CD-ROM drive.
z
After inserting the CD-ROM, the [Drivers & Manual] dialog box appears. If it does not, doubleclick the CD-ROM drive icon under [My Computer] or [Explorer], and then double-click
[SETUP.EXE].
2 Select a language for the interface, and then click [OK].
The following languages are available:
Deutsch (German), English (English), Espanol (Spanish), Francais (French), Italiano (Italian), Nederlands (Dutch) The default interface language is English.
3 Click [Browse User Guide].
The browser opens, and then User Guide appears.
32
Page 35

Opening from Printer Status error messages
1 The Printer Status monitor displays an error message if a problem occurs.
2 Click [User Guide].
The browser opens, and then User Guide appears.
How to Use User Guide
4
Open User Guide from here if a problem occurs while using the printer.
33
Page 36

4
4. Using User Guide
34
Page 37

5. Troubleshooting
Software Cannot Be Installed
Checking Your Computer Environment
The CD-ROM may not be inserted properly. Check that the "Drivers & Manual
" CD-ROM is inserted properly. Check also that it is
not damaged and the CD-ROM drive is working
properly.
The power cord or USB cable may not be properly
connected.
The operating system is incompatible. Check that the computer's operating system is fully
There is insufficient hard disk space.
USB connection is not possible. You cannot connect via USB if your computer has no
Other applications are not closed. When installing software, quit all other applications.
The printer is turned on before installation. If the printer is connected to the computer and it is
Windows 95 or Windows NT 4.0 is running.
Check that the power cord and USB cable are properly connected and not damaged.
compatible with this printer. See "Before Installation",
Quick Installation Guide
USB interface. Under Windows 95 or Windows NT
4.0, connect via a network.
Installation may be disrupted if other applications
are open. Also, quit any anti-virus applications that
are running.
turned on before printer driver installation is performed, Windows may automatically set up the USB
connection. Since this connection may not work normally, delete it, and then install the printer driver. See
P.36 "Restoring USB".
z
Windows 95 and NT 4.0 do not support USB
connection with the printer. Connect the printer via
a network in this case.
z
[Quick Install for USB] is unavailable. See P.19
"Installing the Printer Driver (USB)".
z
Configure the printer as a shared network printer.
See P.19 "Installing the Printer Driver (USB)".
z
For details about network printer settings, see
Guide
. For details about opening User Guide, see
P.30 "How to Use User Guide".
.
5
User
35
Page 38

5. Troubleshooting
Confirming Installation
Checking icons When the printer driver is properly installed, the icon
of the printer appears in the [Printers] folder.
When installation of User Guide is complete, User
Guide icon appears on your desktop.
If the icons do not appear, the software is not properly installed. In this case, you must repeat the installation procedure. See "Quick Install for USB",
Installation Guide
Checking ports In the printer properties dialog box, check that USB
connection or network printer is selected as a port.
To check the connection, perform a test print. If the
test print is not printed, see P.38 "If Test Print Fails".
.
Quick
5
Restoring USB
Windows made USB settings automatically. Open Windows' Device Manager, and then, under
[Universal Serial Bus controllers], remove any conflicting devices. Conflicting devices have a yellow [!]
or [?] icon by them. Take care not to accidentally
remove required devices. For details, see P.41 "Deleting Devices".
Printer Driver Cannot Be Installed
The printer driver installer does not start.
An error occurs during installation.
If the [Drivers & Manual] screen does not appear
even when you double-click the [SETUP.EXE] icon, or
if an error occurs during installation, access the CDROM drive from [My Computer] or [Explorer]. Double-click the [RDISETUP.EXE] icon, and then install the
printer driver by following the instructions that
appear on the screen.
An error occurs if the path to the location of the
stored data is too long. To install a printer driver
downloaded from a Website or copied from a CDROM, save the printer driver directly on the hard
disk, and then install it.
On the [Start] menu, point to [Settings], and then
click [Printers]. In the [Printers] window, install the
printer driver.
z
For details, see Windows Help.
36
Page 39

USB Connection is not Automatically Detected
If the USB connection is not automatically detected, do the following:
1 Run [Quick Install for USB].
When [Quick Install for USB] is complete, go to Step 3.
2 Delete the printer driver.
3 Delete the device.
4 Run [Quick Install for USB] again.
z
For details about [Quick Install for USB], see “Quick Install for USB”,
z
For details about deleting the device, see P.41 "Deleting Devices".
z
For details about deleting the printer driver, see P.39 "Uninstalling the Printer Driver".
If these steps do not solve the problem, contact your sales or service representative.
Software Cannot Be Installed
Quick Installation Guide
.
5
37
Page 40

5. Troubleshooting
If Test Print Fails
5
The power cord or USB cable is not properly connected.
The port connection is not properly set. 1) On the [Start] menu, point to [Settings], and
The Printer Status monitor displays an error message. See
Ink feed is incomplete. Ink begins automatically feeding into the print-heads
Check that the power cord and USB cable are properly connected.
then click [Printers].
2) Click the icon of the printer, and then click
[Properties] on the [File] menu.
3) Click the [Details] tab (Windows 2000/XP,
Windows Server 2003, Windows NT 4.0: the
[Ports] tab) , and then check the printer port.
z
Select USB or network printer in the list
when the selected port connection is something other than USB or network printer.
z
To connect via USB when USB does not
appear in the list, you must re-install the
printer driver. See P.39 "Uninstalling".
User Guide
tus error messages".
when the power of the printer is first turned on or
when a cartridge is replaced.
Wait until ink feed is complete at which point the
[Power] key stops blinking and remains lit.
. See P.33 "Opening from Printer Sta-
If you cannot solve the problem, contact sales or service representative.
38
Page 41

Uninstalling
If software was installed incorrectly or incompletely, uninstall and then reinstall it.
z
Before uninstalling software or deleting devices, turn off any other printers connected to your
computer via USB, or disconnect the USB cable to the printers.
z
The following explanation uses Windows 98 as an example. Procedures under other operating
systems may differ.
z
Screens vary according to the operating environment.
Uninstalling the Printer Driver
Uninstalling
To update the printer driver, uninstall the old printer driver before installing the new one.
z
The following explanation uses Windows 98 as an example. Procedures under other operating systems may differ.
z
The Printer Status monitor installed with the current printer driver is uninstalled when the current
printer driver is uninstalled.
z
Registered custom settings are also deleted. To continue using registered custom settings, save
them as custom settings files before uninstalling.
1 Press the printer's [Power] key to turn the printer off.
5
AGK008S
2 On the [Start] menu, point to [Settings], and then click [Printers].
3 Click the icon of the printer, and then click Delete on the File menu.
A confirmation message appears.
39
Page 42

5
5. Troubleshooting
4 Click [Yes].
The printer driver is uninstalled.
5 Double-click [My computer].
6 On the [View] menu, click [Folder Options...].
7 Click the [View] tab.
8 In the [Advanced Settings:] box, click [Do not show hidden files], and then deselect the [Display the
full path in title bar] check box.
9 Click [OK].
10 On the [Start] menu, point to [Find], and then click [Files or Folders...].
11 Click the [Name & Location] tab, and then enter “RCD4E19X.inf” in the [Named:] field.
12 In the [Look in:] box, select the hard disk on which Windows is installed, and then click [Find Now].
13 Right-click the file displayed as the search result, and then click [Delete...].
The INF file is uninstalled.
40
Page 43

14 After uninstalling the printer driver, restart Windows.
z
When using Windows 2000/XP, enter “RCD4E12K.inf” as the INF file name.
z
When using Windows NT 4.0, enter “RCD4E1NT.inf” as the INF file name.
z
For details about storing registered custom settings, see “Saving a Registered Custom Setting in a
File”,
User Guide
z
For details about updating the printer driver, contact your sales or service representative.
.
Deleting Devices
If Windows automatically establishes a USB connection because of an unauthorized device, you
can delete the device and any others like it. Be sure not to delete necessary devices. If USB connection is established normally, you do not need to perform this procedure.
z
The following explanation uses Windows 98 as an example. Procedures under other operating systems may differ.
Uninstalling
5
1 Press the printer's [Power] key to turn the printer on.
AGK008S
2 On the [Start] menu, point to [Settings], and then click [Control Panel].
3 Double-click [System].
4 Click the [Device Manager] tab.
41
Page 44

5. Troubleshooting
5 Click [CIJ USB Printing Support] or [Product name].
5
6 Click [Remove].
A confirmation message appears.
7 Click [OK].
8 Click [Close].
Uninstalling User Guide
If User Guide is installed incorrectly or incompletely, uninstall and then reinstall it.
1 Press the printer's [Power] key to turn the printer off.
AGK008S
2 Open My Computer, and then open Control Panel.
42
Page 45

3 Double-click [Add/Remove Programs].
4 Select the installed [Product name User Guide], and then click [Add/Remove...].
Uninstalling
5
5 Follow the instructions that appear.
z
To reinstall the software, restart Windows.
z
For details about reinstalling the software, see P.19 "Installing the Printer Driver (USB)".
43
Page 46

INDEX
B
Bypass tray . . . . . . . . . . . . . . . . . . . . . . . . . . . . 12
Bypass tray guides . . . . . . . . . . . . . . . . . . . . . . 12
C
Cancel key . . . . . . . . . . . . . . . . . . . . . . . . . . . . . 14
Cartridge replacement indicators . . . . . . . . . 13
Control panel . . . . . . . . . . . . . . . . . . . . . . . . . . 13
D
Deleting Devices . . . . . . . . . . . . . . . . . . . . . . . . 41
Duplex unit . . . . . . . . . . . . . . . . . . . . . . . . . . . . . 12
Duplex unit cover . . . . . . . . . . . . . . . . . . . . . . . 12
Duplex unit cover button . . . . . . . . . . . . . . . . . 12
Duplex unit locks . . . . . . . . . . . . . . . . . . . . . . . 12
E
Envelope selector . . . . . . . . . . . . . . . . . . . . . . . 11
G
Guide board . . . . . . . . . . . . . . . . . . . . . . . . . . . 12
Guide to components . . . . . . . . . . . . . . . . . . . 11
H
How to Use User Guide . . . . . . . . . . . . . . . . . 30
I
P
Paper Feed Unit Type 7500 . . . . . . . . . . 15, 17
Paper feed wheel . . . . . . . . . . . . . . . . . . . . . . . . 12
Power cord . . . . . . . . . . . . . . . . . . . . . . . . . . . . . 12
Power key . . . . . . . . . . . . . . . . . . . . . . . . . . . . . . 13
Print cartridge
(black) . . . . . . . . . . . . . . . . . . . . . . . . . . . . . . . 11
(cyan) . . . . . . . . . . . . . . . . . . . . . . . . . . . . . . . . 11
(magenta) . . . . . . . . . . . . . . . . . . . . . . . . . . . . . 11
(yellow) . . . . . . . . . . . . . . . . . . . . . . . . . . . . . . 11
Printer body . . . . . . . . . . . . . . . . . . . . . . . . . . . . . 11
Printer Driver Cannot Be Installed . . . . . . . . . . 36
Printer rear . . . . . . . . . . . . . . . . . . . . . . . . . . . . . . 12
R
Restoring USB . . . . . . . . . . . . . . . . . . . . . . . . . . . 36
Resume key . . . . . . . . . . . . . . . . . . . . . . . . . . . . . 13
Right front cover . . . . . . . . . . . . . . . . . . . . . . . . . 11
T
Test print . . . . . . . . . . . . . . . . . . . . . . . . . . . . . . . . 24
Top cover . . . . . . . . . . . . . . . . . . . . . . . . . . . . . . 11
Tray 2 . . . . . . . . . . . . . . . . . . . . . . . . . . . . . . . . . . 15
Tray 2 rear cover . . . . . . . . . . . . . . . . . . . . . . . . 15
Tray cover . . . . . . . . . . . . . . . . . . . . . . . . . . . . . . 15
Troubleshooting . . . . . . . . . . . . . . . . . . . . . . . . . 35
U
If test print fails . . . . . . . . . . . . . . . . . . . . . . . . . 38
Installing
Checking your computer environment . . . . . . . . 35
Confirming installation . . . . . . . . . . . . . . . . . . . 36
Software cannot be installed . . . . . . . . . . . . . . . 35
Installing the Paper Feed Unit (option) . . . . . 17
Installing the printer driver (USB) . . . . . . . . . 19
O
Option . . . . . . . . . . . . . . . . . . . . . . . . . . . . . . . . 15
Output tray . . . . . . . . . . . . . . . . . . . . . . . . . . . . 11
Output tray extension . . . . . . . . . . . . . . . . . . . 11
44
Uninstalling . . . . . . . . . . . . . . . . . . . . . . . . . . . . . 39
Uninstalling The Printer Driver . . . . . . . . . . . . . 39
USB Connection is not Automatically Detected
USB slot . . . . . . . . . . . . . . . . . . . . . . . . . . . . . . . . 12
User Guide
Installing . . . . . . . . . . . . . . . . . . . . . . . . . . . . . . 27
Opening from Printer Status error messages . . . . . 33
Opening from the CD-ROM . . . . . . . . . . . . . . . . 32
Opening from the icon . . . . . . . . . . . . . . . . . . . . 31
Opening from the printer driver . . . . . . . . . . . . . . 31
Opening from the Start menu . . . . . . . . . . . . . . . 31
Uninstalling . . . . . . . . . . . . . . . . . . . . . . . . . . . . 42
Using the Printer Driver . . . . . . . . . . . . . . . . . . . 19
Using User Guide . . . . . . . . . . . . . . . . . . . . . . . 27
. . . 37
Page 47

V
Vent . . . . . . . . . . . . . . . . . . . . . . . . . . . . . . . . . . . 12
45
Page 48

46 GB GB J006-6618
Page 49

Declaration of Conformity
“The Product complies with the requirements of the EMC Directive 89/336/EEC and its amending directives and the
Low Voltage Directive 73/23/EEC and its amending directives.”
In accordance with IEC 60417, this machine uses the following symbols for the main power switch:
means STAND BY.
Copyright © 2005 Ricoh Co., Ltd.
Page 50

Setup Handbook
Overseas Affiliates
The Netherlands
RICOH EUROPE B.V.
Nieuw Kronenburg
Prof. W.H. Keesomlaan 1
1183 DJ Amstelveen
Phone: +31-(0)20-5474111
United Kingdom
RICOH UK LTD.
Ricoh House,
1 Plane Tree Crescent, Feltham,
Middlesex, TW13 7HG
Phone: +44-(0)20-8261-4000
Germany
RICOH DEUTSCHLAND GmbH
Wilhelm-Fay-Strasse 51,
D-65936 Frankfurt am Main
Phone: +49-(0)69-710425-0
France
RICOH FRANCE S.A.
383, Avenue du Général de Gaulle
BP 307-92143 Clamart Cedex
Phone: +33-(0)-821-01-74-26
Spain
RICOH ESPAÑA S.A.
Avda. Litoral Mar, 12-14,
Blue Building, Marina Village,
08005 Barcelona
Phone: +34-(0)93-295-7600
Italy
RICOH ITALIA SpA
Via della Metallurgia 12,
37139 Verona
Phone: +39-045-8181500
Singapore
RICOH ASIA PACIFIC PTE.LTD.
260 Orchard Road,
#15-01/02 The Heeren,
Singapore 238855
Phone: +65-6830-5888
Model number: Aficio G7500
GB GB
J006-6618
 Loading...