

Page 1
RICOH Technical B ulletin PAGE: 1/1
Model: BANTAM Date: 15-Apr-97
No: 1
Subject: PM Parts Yield Prepared by: M. Ishihara
From: QAC 1st Field Information Dept. Checked by: T. Inoue
Classification:
Troubleshooting
Mechanical
Paper path
Other ( )
Part information
Electrical
Transmit/receive
Action required
Service manual revision
Retrofit information
The yields of the Document Feeder (A662) PM parts have been reviewed.
Please correct your PM table as follows.
OLD
EM 24 K 48 K Notes
DOCUMENT FEEDER (A662) (for originals)
Transport Belt C R R Belt cleaner
Friction Belt C R R Belt cleaner
Pick-up Roller C C C Soft cloth dampened with water
Feed Roller C C C Soft cloth dampened with water
↓↓
NEW
EM 80 K 160 K Notes
DOCUMENT FEEDER (A662) (for originals)
Transport Belt C R R Clean with belt cleaner at copier
PM.
Friction Belt C R R Clean with belt cleaner at copier
PM.
Pick-up Roller C C C Soft cloth dampened with water
Feed Roller C C C Soft cloth dampened with water
Page 2
RICOH Technical Bulletin PAGE: 1/2
Model: BANTAM Series Date: 31-May-97
No: 2
Subject: Service Manual Revision Prepared by: M.Ishihara
From: QAC 1st Field Information Dept.
Classification:
Troubleshooting
Mechanical
Paper path
Other ( )
Part information
Electrical
Transmit/receive
Action required
Service manual revision
Retrofit information
Please correct your Service Manual as follows.
1. Page 2
Copy Tray Capacity:
1 sheet (OPC) →→ 1 sheet (OHP)
2. Page 2
Noise Emission:
Sound power level should be corrected as follows:
OLD
Copy cycle Less than 64 dB Less than 62 dB
Stand by Less than 55 dB Less than 40 dB
NEW
Copy cycle Less than 64 dB
Stand by
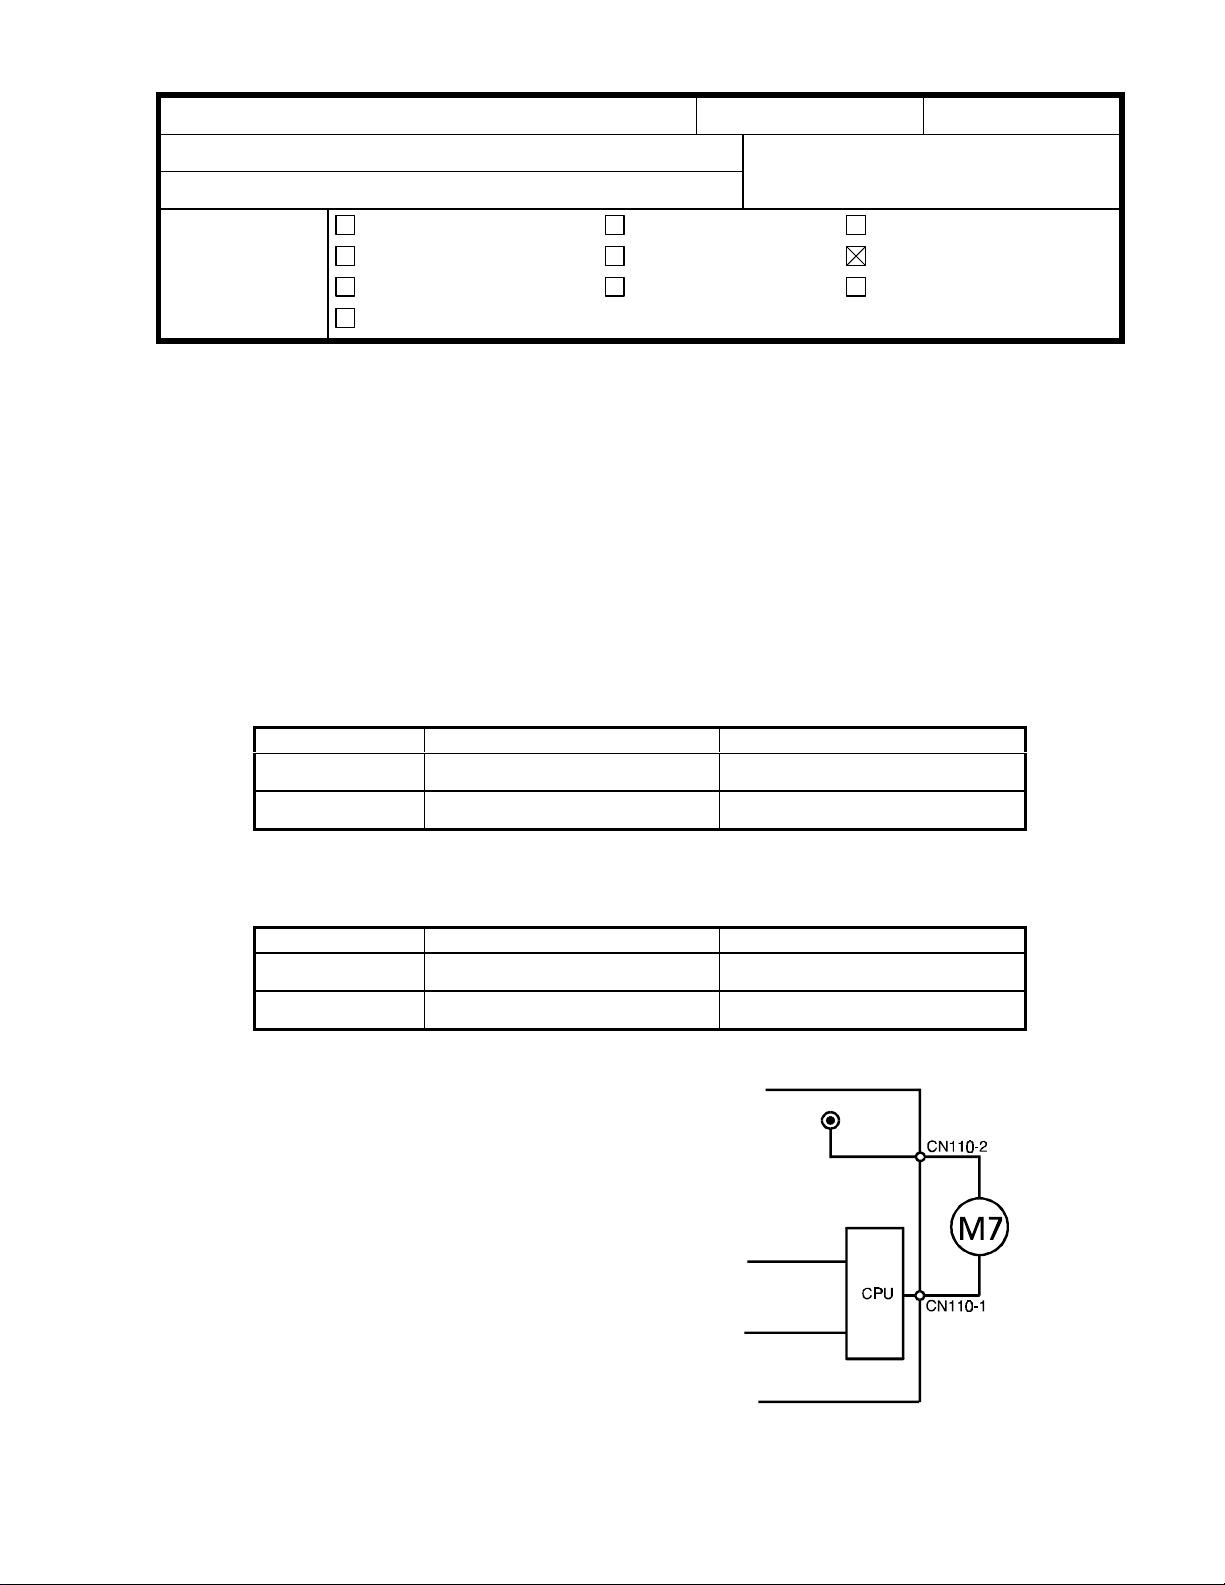
3. Page 17
Illustration correction:
The electrical component on the right side
of the circuit should be corrected as
follows:
MSC1 →→ M7
(For Bantam, toner supply is performed by
the Toner Supply Motor .)
Copier Only Copier with document feeder
↓↓
Copier Only Copier with document feeder
Less than 68 dB
Less than 40 dB
Less than 40 dB
Page 3
RICOH Technical Bulletin PAGE: 2/2
Model: BANTAM Series Date: 31-May-97
4. Page 36
CLEAR ALL MEMORY PROCEDURE:
Step number 5 should be eliminated.
The drum does not need to be replaced, since the Bantam does
not do the “Drum Wear Correction”.
5. Page 43
SP96 (Toner End Force Cancel):
This SP mode has been newly added from the Bantam series.
∗ ” should be added.
6. Page 44
NOTE 1: 1):
The following SP mode numbers are also applied for this note.
Please correct as follows: (The corrected items are shown in bold letters.)
SP mode numbers: 5, 6, 7, 52, 55, 56, 59, and 65
No: 2
7. Page 44
NOTE 1: 1):
The illustration of the “Auto Image Density” key is described as the “Darker” key.
Please correct the illustration.
→→
8. Page 46
- How to check sensor / switch inputs for the A203 copier - step 1:
The illustration of the “Auto Image Density” key is described as the “Darker” key.
Please correct the illustration.
→→
9. Page 52
Toner Supply Motor Replacement:
The NOTE should be eliminated. The motor can be reinstalled at both positions.
10. Page A662-1
Copying Speed:
15 copies/minute →→ 13 copies/minute
Page 4
T
Model:
BANTAM Series
echnical
ulletin
B
Date:
15-Jul-97
No:
PAGE: 1/2
3
Subject:
From:
Classification:
Please correct your Service Manual as follows.
1. Page 45
NOTE4:
The wrong key is shown.
Please correct the illustrations.
Service Manual Revision
QAC 1st Field Information Dept.
Troubleshooting
Mechanical
Paper path
Other ( )
Part information
Electrical
Transmit/receive
→*
Prepared by:
Action required
Service manual revision
Retrofit information
M. Ishihara
2. Page 57
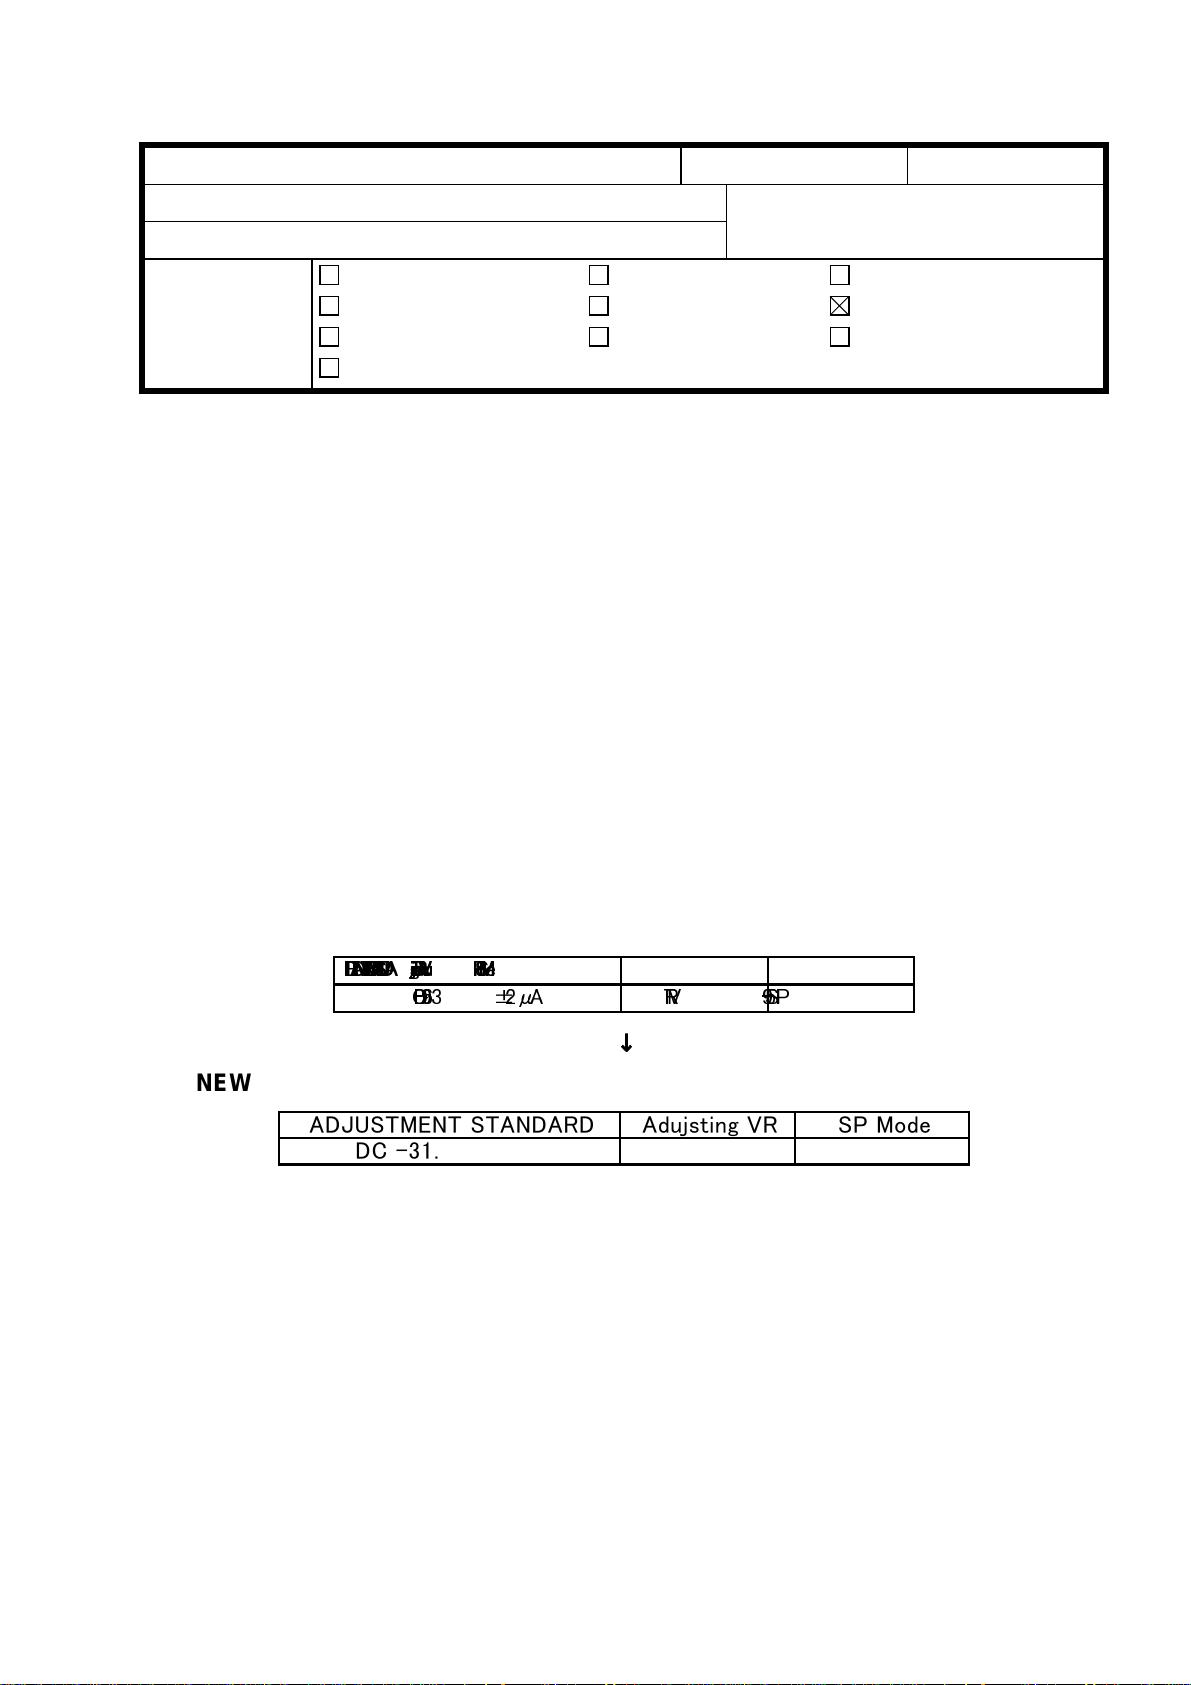
TRANSFER CORONA CURRENT ADJUSTMENT (SP9-5)
ADJUSTMENT STANDARD should be corrected as follows:
OLD
¾ÁÇÒÐÑÊÂËÑÐѾËÁ¾ÏÁ ¾áòçðñæëäÓÏ ÐÍÊìáâ
ÁÀª¶°«³ p¯¾ ÓÏÑ ÐͶª²
↓
NEW
¾БЗТРСКВЛСРС¾ЛБ¾ПБ ¾бт зрсжл дУП РНКмбв
ÁÀª°®«p«²¾ ÓÏÑ ÐͶª²
Note: The new ADJUSTMENT STANDARD is the same as for the Robin series.
Page 5

T
Model:
3. Page 58
SEPARATION CORONA CURRENT ADJUSTMENT (SP9-6)
ADJUSTMENT STANDARD should be corrected as follows:
NEW
Note: The new ADJUSTMENT STANDARD is the same as for the Robin series.
BANTAM Series
OLD
¾БЗТРСКВЛСР С¾ЛБ ¾ПБ ¾бт зрсжл дУ П ÐÍÊìáâ
À®±²«³p²«¾ ÓÏÁ ÐͶª³
¾БЗТРСКВЛСР С¾ЛБ ¾ПБ ¾бт зрсжл дУ П ÐÍÊìáâ
À±¶p®«¾ ÓÏÁ ÐͶª³
echnical
↓
B
ulletin
Date:
15-Jul-97
No:
PAGE: 2/2
3
Page 6

RICOH Technical Bulletin PAGE: 1/1
Model: Bantam Date: 31-Aug-97
Subject: False E54 Prepared by: M.Mimura
From: QAC 1st Field Information Dept.
Classification:
Troubleshooting
Mechanical
Paper path
Other ( )
Part information
Electrical
Transmit/receive
Action required
Service manual revision
Retrofit information
No: 4
SYMPTOM
False E54 – Fusing Error
1. At power-up
E54 is indicated after the warm-up, usually seconds after the fusing lamp has turned off at
185°C. This occurs only in the machines set up to use the fusing phase control mode.
2. Other Possible Occurrences
E54 may be also indicated in any mode – warm-up, stand-by, and copying. This occurs
regardless of the fusing control mode.
CAUSE
Software bug
SOLUTION
1. Install the E version ROM.(A2025108E for Bantam and A2035108E for Bantam R)
2. If the ROM is not immediately available, select the ON/OFF control mode because
case #2 listed hardly ever occurs.
Note: Do not select the phase control mode unless needed.
Factory Cut-ins
TBA (Scheduled to start early September in ’97)
Page 7

T
Model:
Bantam
echnical
B
ulletin
Date:
15-Oct-97
No:
PAGE: 1/2
5
Subject:
From:
Classification:
To meet the Energy Star specifications, the following modification has been applied to the
production machines.
Energy Star
QAC Field Information Dept.
Troubleshooting
Mechanical
Paper path
Other ( )
Part information
Electrical
Transmit/receive
Prepared by:
Action required
Service manual revision
Retrofit information
M.Ishihara
SP Mode 14
∗ Setting No.5 has been added.
Mode No. Function Settings
Auto Reset
Time Setting
(Energy Star)
14
Selects the auto shut off time.
The copier main switch is shut off automatically
after the selected auto shut off time, if SP77 and
UP10 are at “0”.
0:30 min. (Factory
Setting)
1 : 15 min.
2 : 60 min.
3 : 90 min.
4 : 120 min
∗ 5 : 240 min
User Program Mode
The following UP has been added.
U-Code Function Settings
Auto Shut Off
On/Off
10
Note: Factory settings of SP77 and UP10 for the USA version are 0:Yes.
For the other area versions, it is 1:No.
Selects the “Auto Shut Off” mode. 0 : Yes (Factory
Setting)
1 : No
ROM Suffix Numbers for this modification
Part Number Model Area
A2025108D Bantam Worldwide
A2035108D Bantam R Worldwide
Page 8

T
Model:
Bantam
echnical
Cut-in Machine Serial Numbers
- Bantam -
B
ulletin
Date:
15-Oct-97
No:
PAGE: 2/2
5
A202 - 10 : AJ77870001
-15 : 7A97870001
-17 : A7407872048
-76 : A7407872519
-22 : AJ87870001
-26 : AJ87870001
-27 : A7407870001
-29 : A7407872589
-39 : A7407881466
- Bantam R A203 -10 : AM87870001
-15 : 8A17870001
-17 : A7417871166
-76 : A7417871026
-22 : AM97870001
-26 : 3M18770001
-27 : A7417870001
-29 : A7417872555
-39 : A7417880940
-50 : AM47880001
∼
∼
∼
∼
∼
∼
∼
∼
∼
∼
∼
∼
∼
∼
∼
∼
∼
∼
∼
Page 9

T
echnical
RTB Correction
Reissue date:
Cut-in serial numbers have been added.
Model:
Bantam
31-Oct-97
B
ulletin
Date:
31-Aug-97
No:
PAGE: 1/2
4
Subject:
From:
Classification:
False E54
QAC 1st Field Information Dept.
Troubleshooting
Mechanical
Paper path
Other ( )
Part information
Electrical
Transmit/receive
Prepared by:
Action required
Service manual revision
Retrofit information
M.Mimura
SYMPTOM
False E54 – Fusing Error
1. At power-up
E54 is indicated after the warm-up, usually seconds after the fusing lamp has turned off at
185°C. This occurs only in the machines set to use the fusing phase control mode.
2. Other Possible Occurrences
E54 may be also indicated in any mode – warm-up, stand-by, and copying. This occurs
regardless of the fusing control mode.
CAUSE
Software bug
SOLUTION
1. Install the E version ROM.(A2025108E for Bantam and A2035108E for Bantam R)
2. If the ROM is not immediately available, select the ON/OFF control mode because
case #2 listed hardly ever occurs.
Note: Do not select the phase control mode unless needed.
Page 10

T
Model:
Bantam
echnical
Cut – in Machine Serial Numbers
-Bantam-
A202 – 10 : AJ778890066
–15 : 7A97900001
–17 : A7407900066
–19 : A740790xxxx
–22 : AJ87890001
–26 : 3M08970001
–27 : A7407890001
–28 : A740790xxxx
–39 : A7407890643
–76 : A740790xxxx
-Bantam R-
B
ulletin
Date:
31-Aug-97
No:
PAGE: 2/2
4
A203 – 10 : AM87900001
–15 : 8A17900001
–17 : A7417900734
–19 : A741790xxxx
–22 : AM97890237
–26 : 3M19070001
–27 : A7417900001
–28 : A7417890803
–29 : A7417902134
–39 : A7417902019
–50 : AM47900001
–76 : A7417901779
Page 11

T
Model:
Bantam
echnical
B
ulletin
Date:
31-Dec-97
No:
PAGE: 1/1
6
Subject:
From:
Classification:
Updated ROM Information - Bantam R only
QAC Field Information Dept.
Troubleshooting
Mechanical
Paper path
Other ( )
Part information
Electrical
Transmit/receive
Prepared by:
Action required
Service manual revision
Retrofit information
M.Ishihara
SYMPTOM
When an 11” x 17” original is copied to 8.5” x 11” or 8.5” x 14” (reduction), approximately
10 mm of the original trailing edge will be blank.
CAUSE
Software bug in original scanning and erase timing.
SOLUTION
The bug has been fixed. Install the F version ROM
Note: The problem does not appear for A3 originals.
Factory Cut-in Machine Serial Numbers:
A203-10: AM87910644∼
-15: 8A17910001∼
-17: A7417910563∼
-19: No Production
-22: AM97910385∼
-26: 3M19170001∼
-27: A7417910001∼
-28: No Production
-29: A7417911854∼
-39: A7417911728∼
-50: AM47920001∼
-76: A7417911588∼
Page 12

T
Model:
Bantam Series
echnical
B
ulletin
Date:
15-Apr-98
No:
PAGE: 1/3
7
Subject:
From:
Manual Correction
QAC Field Information Dept.
Classification:
Troubleshooting
Mechanical
Paper path
Other ( )
Part information
Electrical
Transmit/receive
Prepared by:
Action required
Service manual revision
Retrofit information
K. Miura
Please correct your service manual as follows:
The 2nd description described in service call No.14 should be an item for service call code
No.54. Also, we have added a flow chart for SC No.54.
1. Page 48
Service Call Code
OLD
Frequency Detection Error
∗
14
The detected frequency is not within 45 ∼ 65 Hz.
•
The fusing lamp stays on for longer than 38 seconds
•
while the main motor is off.
NEW
14
∗
2. Page 49
OLD
54
∗
New
54
∗
Frequency Detection Error
The detected frequency is within 45 ∼ 65 Hz.
Fusing Error
The temperature detected by the thermistor does not
rise more than 20°C within 12 seconds when the fusing
lamp is turned on continuously in the main motor off
condition.
Fusing Error
The temperature detected by the thermistor does not
•
rise more than 20 °C within 12 seconds when the
fusing lamp is turned on continuously while the main
motor is off.
The fusing lamp stays on for longer than 38 seconds
•
while the main motor is off.
Page 13

T
Model:
-Possible Causes-
• Thermistor open
• Defective main board
• Defective ac drive board
• Fusing lamp open
• Thermoswitch open
• Defective ac harness
-Action-
Bantam Series
Is the thermistor open?
No Yes
Replace the thermistor.
echnical
B
ulletin
Date:
15-Apr-98
No:
PAGE: 2/3
7
Clear the service call condition.
Does the fusing lamp turn on?
No Yes
Replace the main board.
Is the fusing lamp open?
No
Is the thermoswitch open?
No Yes
Is the ac harness defective?
No
Yes
Replace the fusing lamp.
Replace the thermoswitch.
Yes
Replace the ac harness.
Page 14

T
Model:
Bantam Series
No
Check the voltage at CN114-6 on the main board.
echnical
B
ulletin
Date:
15-Apr-98
No:
PAGE: 3/3
7
0 volts
Check the voltage at CN 114-4 on the main board.
0 volts
Check the voltage at CN114-8 on the main board.
Replace the ac drive board.
24 volts
Replace the main board.
24 volts
Replace the main board.
0 volts24 volts
Replace the main board.
Page 15

T
Model:
Bantam Series
echnical
B
ulletin
Date:
15-Jun-98
No:
PAGE: 1/2
8
Subject:
From:
Classification:
Page 41
SP57 (Drum Rotation Time)
Since there is no drum wear correction, this SP mode is not effective even though it can be
accessed. Please change the description as follows:
OLD
57
Service Manual Correction
QAC Field Information Dept.
Troubleshooting
Mechanical
Paper path
Other ( )
Drum Rotation
Time
Displays the total time that the drum has rotated.
“Minutes” is displayed first. Press and hold the
key to display “Hours”.
Part information
Electrical
Transmit/receive
Prepared by:
Action required
Service manual revision
Retrofit information
&
K. Miura
↓
NEW
57 Drum Rotation
Time
Page 42
SP66 (Drum Initial Setting):
It is not necessary to use SP66 when installing a new drum because there is no Vr
correction or drum wear correction for this model. Please change the description as
follows:
OLD
Drum Initial
Setting
66
Not used
Used to condition the new drum.
Initial setting must be done when a new drum is
installed.
The Drum Rotation Time (SP57) and the OPC
counter (SP69) are cleared.
↓
NEW
66 Drum Initia l
Setting
Not used
Page 16

T
Model:
SP 69 (OPC Counter):
Since there is no Vr correction for this model, this SP mode is not effective even though it
can be accessed. Please change the description as follows:
OLD
Bantam Series
echnical
ulletin
B
Date:
15-Jun-98
No:
PAGE: 2/2
8
OPC Counter
69
NEW
69OPC Counter Not used
Shows the total number of copies made with the
drum installed in the machine.
Refer to NOTE 4.
↓
 Loading...