

Page 1
Installation Procedure
INSTALLING YOUR COPIER
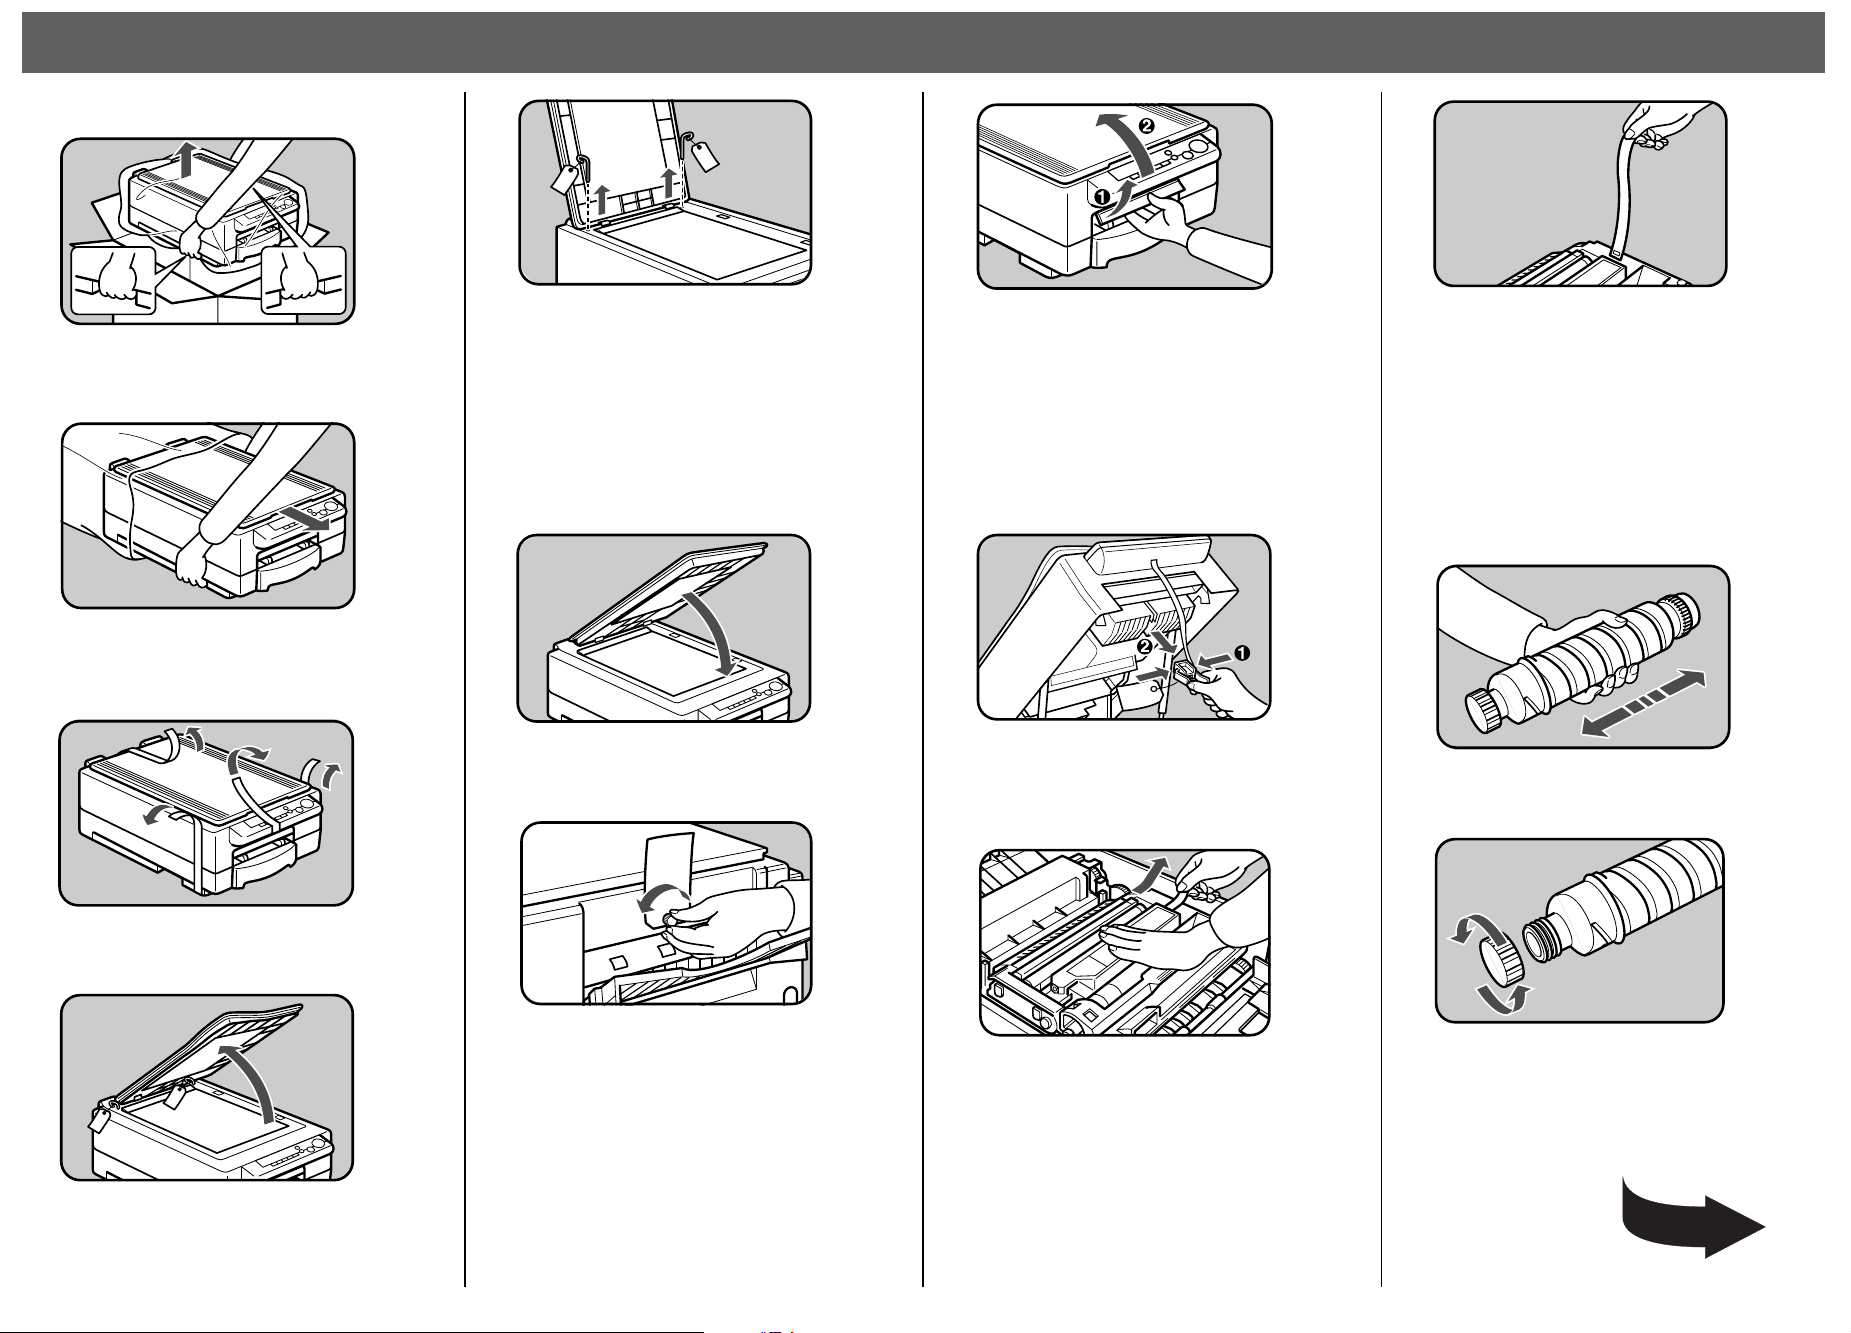
1
Take out the copier holding the copier as
shown.
2
Open the clear wrapper. Grip the copier as
shown opposite and take it out carefully. Put
it where you will be using it.
5
Take off the tape fixing the metal rods and
remove the two metal rods from the both
sides of the exposure glass.
Keep the two metal rods in the big cardboard box
❐
to prepare for moving the copier.
Do not turn on the main switch until two metal rods
❐
have been removed. Otherwise, the copy image
may be distorted.
6
8
Open the top unit and remove two pieces of
cardboard.
To stop the top unit from springing up, keep one
❐
hand on it while o pening it.
Note: When you inst all your copier , be careful not
to touch the blue material (OPC) in the imaging unit.
Note: Do not expose the imaging unit (especially
the blue material) to light.
9
B
Remove the tape completely from the inside
of the imaging unit.
Pull out the tape in the direction of the arrow on
❐
the tape. After removing it, you will find the end
mark at the end of the tape.
If you do not remove the tape completely, U2 is
❐
displayed on the copy counter.
.................................... .................. .................. .................. ..
SETTING THE TONER BOTTLE
1
3
Remove all the tapes fixing the platen cover,
paper cassette, copy tray and power cord.
4
Open the platen cover. Remove the tapes
fixing the caps covering the hinge slots and
the paper on the exposure glass.
Close the p laten c over.
7
Take off the tape covering the screw and
remove the screw and green tag as shown.
Keep the screw to prepare for moving the copier.
❐
Remove the green bracket and tape from the
inside of the top unit.
Keep the green tool to prepare for moving the cop-
❐
ier.
A
Pull out the tape inside the imaging unit as
shown.
Hold down the u nit with one hand to a void turning
❐
it over.
Shake the toner bottle well at least 5 to 6
times.
2
Remove the black cap from the toner bottle
carefully so you don’t spill toner.
Do not remove the inner cap of the toner bottle.
❐
Page 2
3
6
2
5
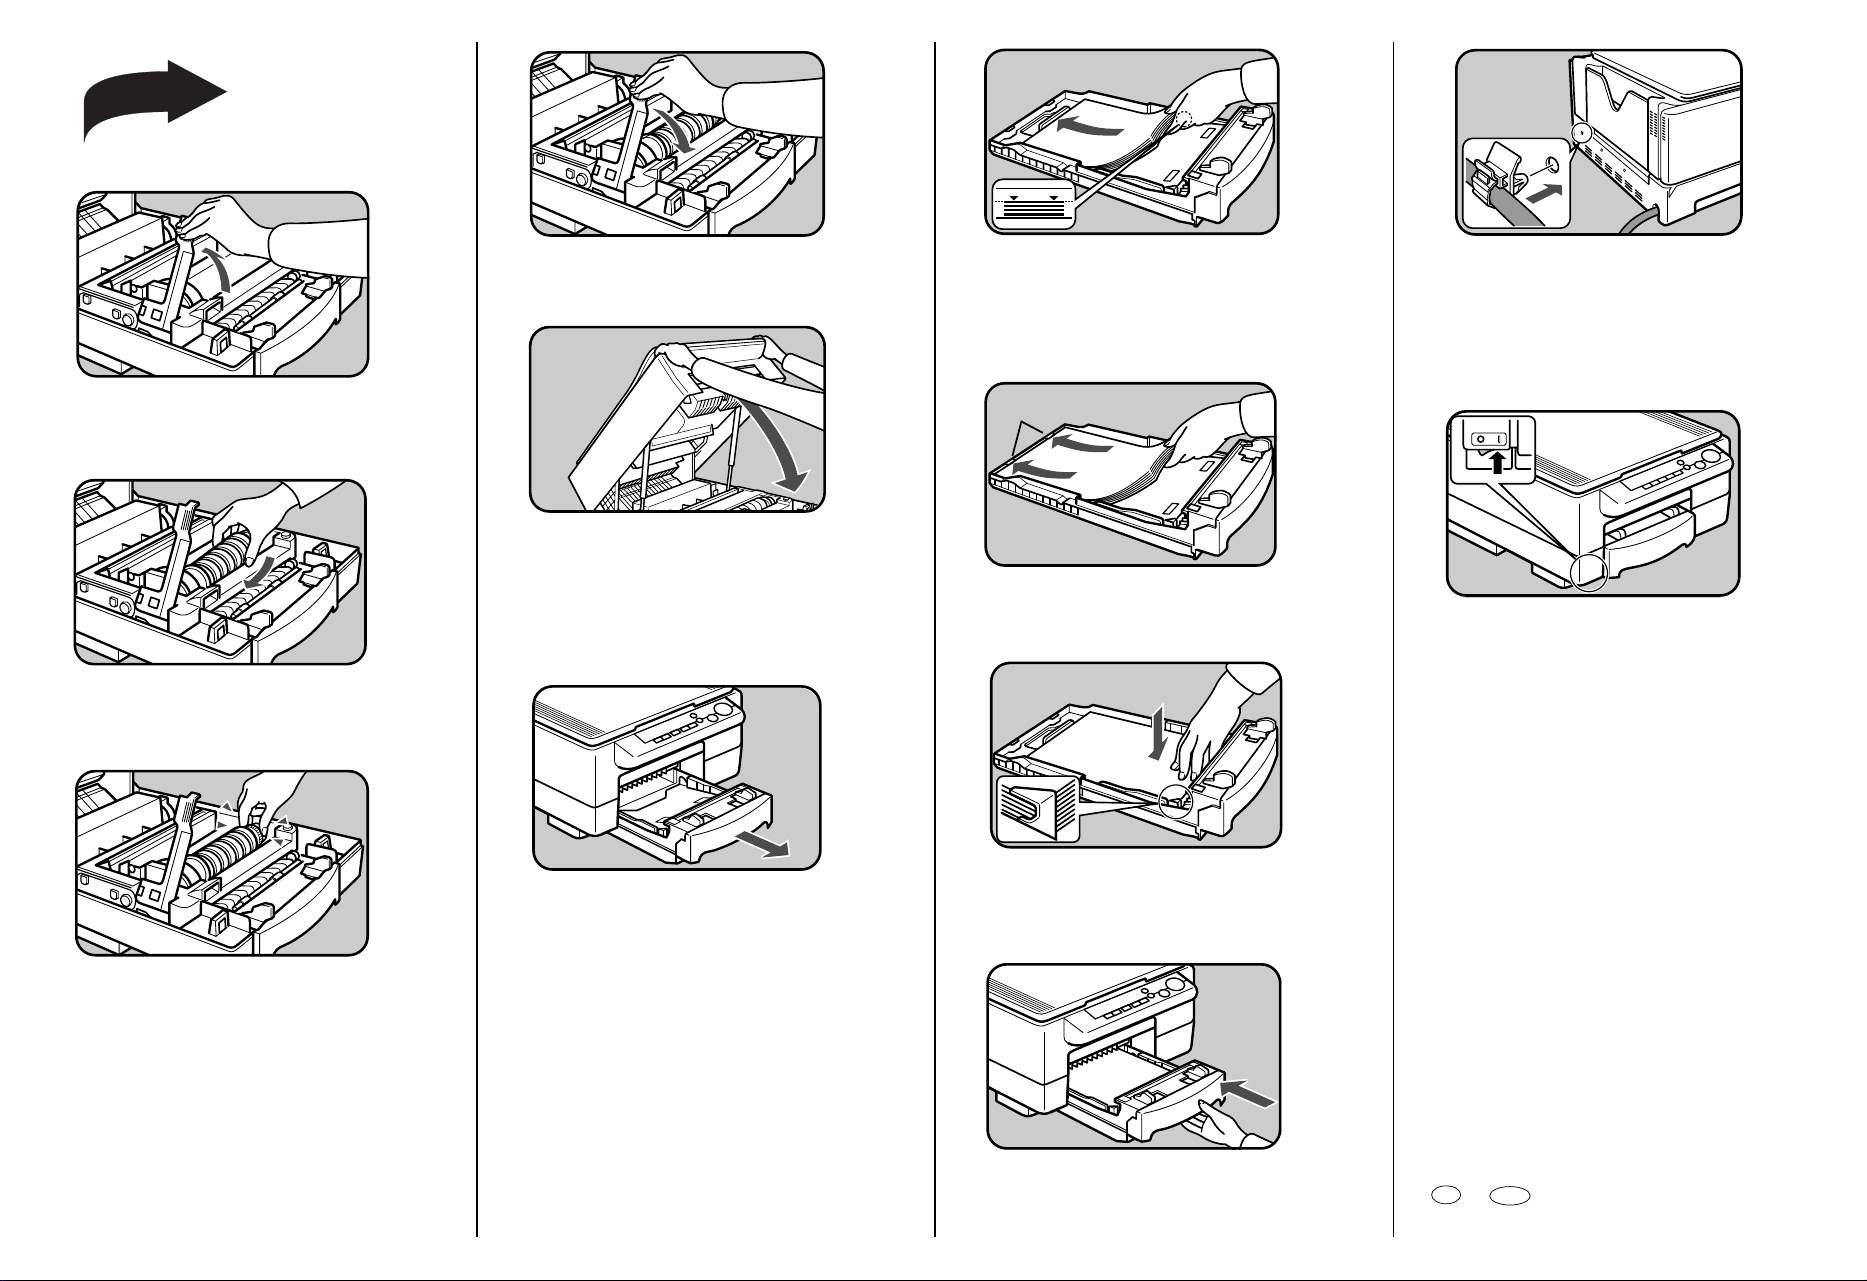
Open the lever in the direction of the arrow.
4
Put the cap side of the toner bottle under the
lever.
5
Close the le ver.
Do not open the lever until the f indicator comes
❐
on.
7
Close the top unit with both hands.
.................................... .................. ........................ ..............
LOADING PAPER
1
Lift up slightly and pull out the paper cassette.
Load paper in the paper cassette.
Make sure not to stack paper above the limit mark
❐
of the side guid e.
Maximum capacity:
❐
250 sheets (8
100 sheets (8
guides
When you use 8
❐
trailing edges of the pap er are un der the guides.
" x 11"/5
1/2
" x 14"/8
1/2
1/2
" x 8
1/2
" x 13")
"/A4/A5)
1/2
1/2
" x 14" paper, make sure that the
3
Push the paper down until the leading corners of the paper are under the corner
guides. Then, let go.
Put the cord clamp in the hole that is opposite side of the entrance of the cord.
Paste the sticker where you can read it eas-
6
ily.
7
Insert the plug firmly into the outlet and turn
on the main switch.
Wait for the cop ier to w arm up.
❐
After the indicator on the Start key turns green,
❐
make a few trial copies.
Make sure you have removed the two metal rods
❐
before turning on the m ain switch .
Insert the operator’s manual in the manual
+-----------------
8
pocket behind the copy tray. Keep the manual here for refe renc e.
Push the other side of the toner bottle in
until it locks in position.
Before pulling out the paper cassette, make sure
❐
that all the tapes fixing the cassette are removed.
4
Push the cassette in horizontally.
Printed in China
EE GB UE USA A2718670
 Loading...