

Page 1
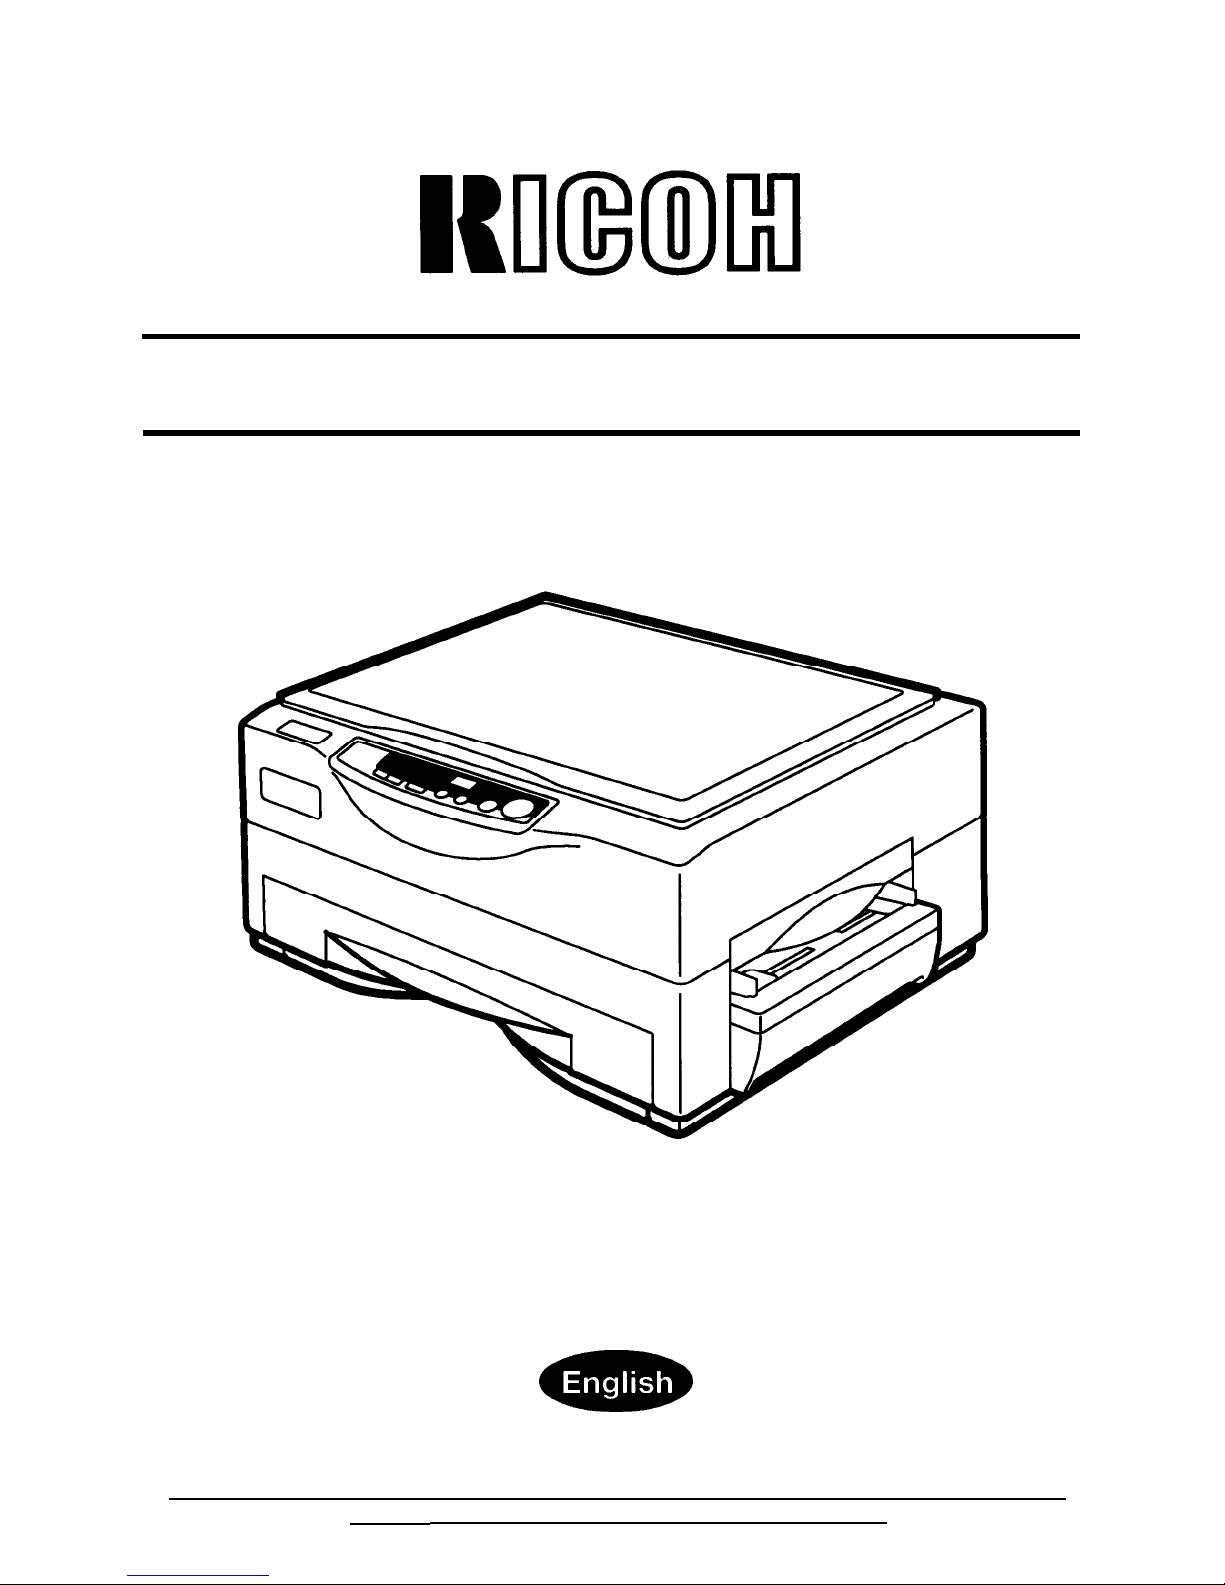
RICOH
FT1008/1208
OPERATOR’S MANUAL
Read this manual carefully before you use this product and keep it handy for future reference.
For safety. please follow the instructions in this manual.
Page 2
Notes: Model names for the machines do not appear in the following pages. Check
the type of your machine before reading this manual.
(For details, see pages 8-9.)
Type 1
RICOH
FT1008
Type
2
RICOH
FT1208
Certain types may not be available in some countries. For details, contact your
local dealer.
For good copy quality, Ricoh recommends that you use genuine Ricoh toner.
Ricoh
shall not be responsible for any damage or expense that may result from the use
of parts and supplies other than genuine Ricoh parts in your Ricoh
office
product.
Note: Some illustrations may be slightly different from your machine.
Power Source: 220-240
V,
50/60
Hz, 6 A
Please make sure to connect the power cord to a power source as above. For details
about power connection, see page 20.
2
0
Copyright 1998, RICOH CO., LTD.
Page 3
This manual contains detailed instructions for the operation and
maintenance of this copier. To ensure maximum versatility from this
copier, all operators should carefully read and follow the instructions in
this manual. Please keep this manual in a handy place near the copier.
Before using this copier, please read the following cautions section. It
contains important information related to user safety and the prevention
of equipment problems.
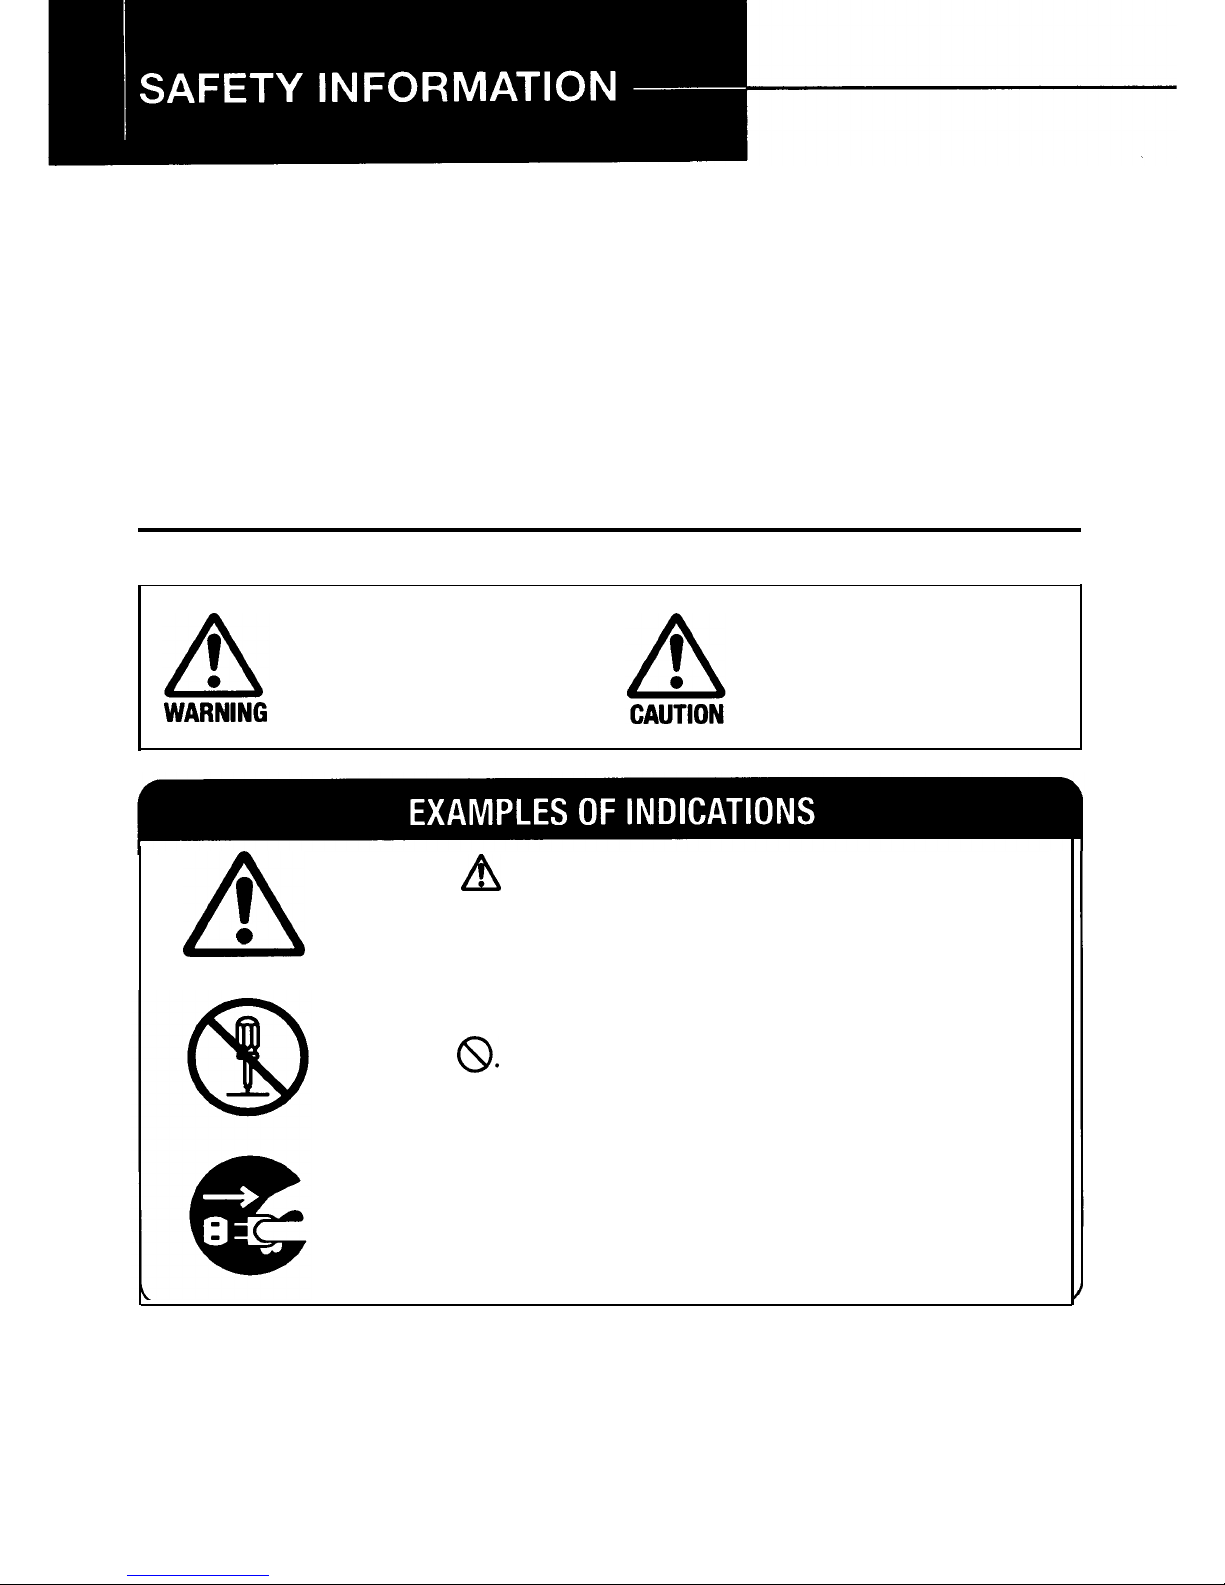
ESSENTIAL SYMBOLS
The following essential symbols are used in this manual:
Ignoring this warning
could cause serious
injury or even death.
Ignoring this caution
could cause injury or
damage to property.
A
v
Symbol A means a situation that requires you to take
care.
0
DO NOT carry out the operation represented by the
symbol
@.
This example means “Do not take apart”.
Symbol
l
means you MUST perform this operation.
This example means “You must remove the wall plug”.
Page 4
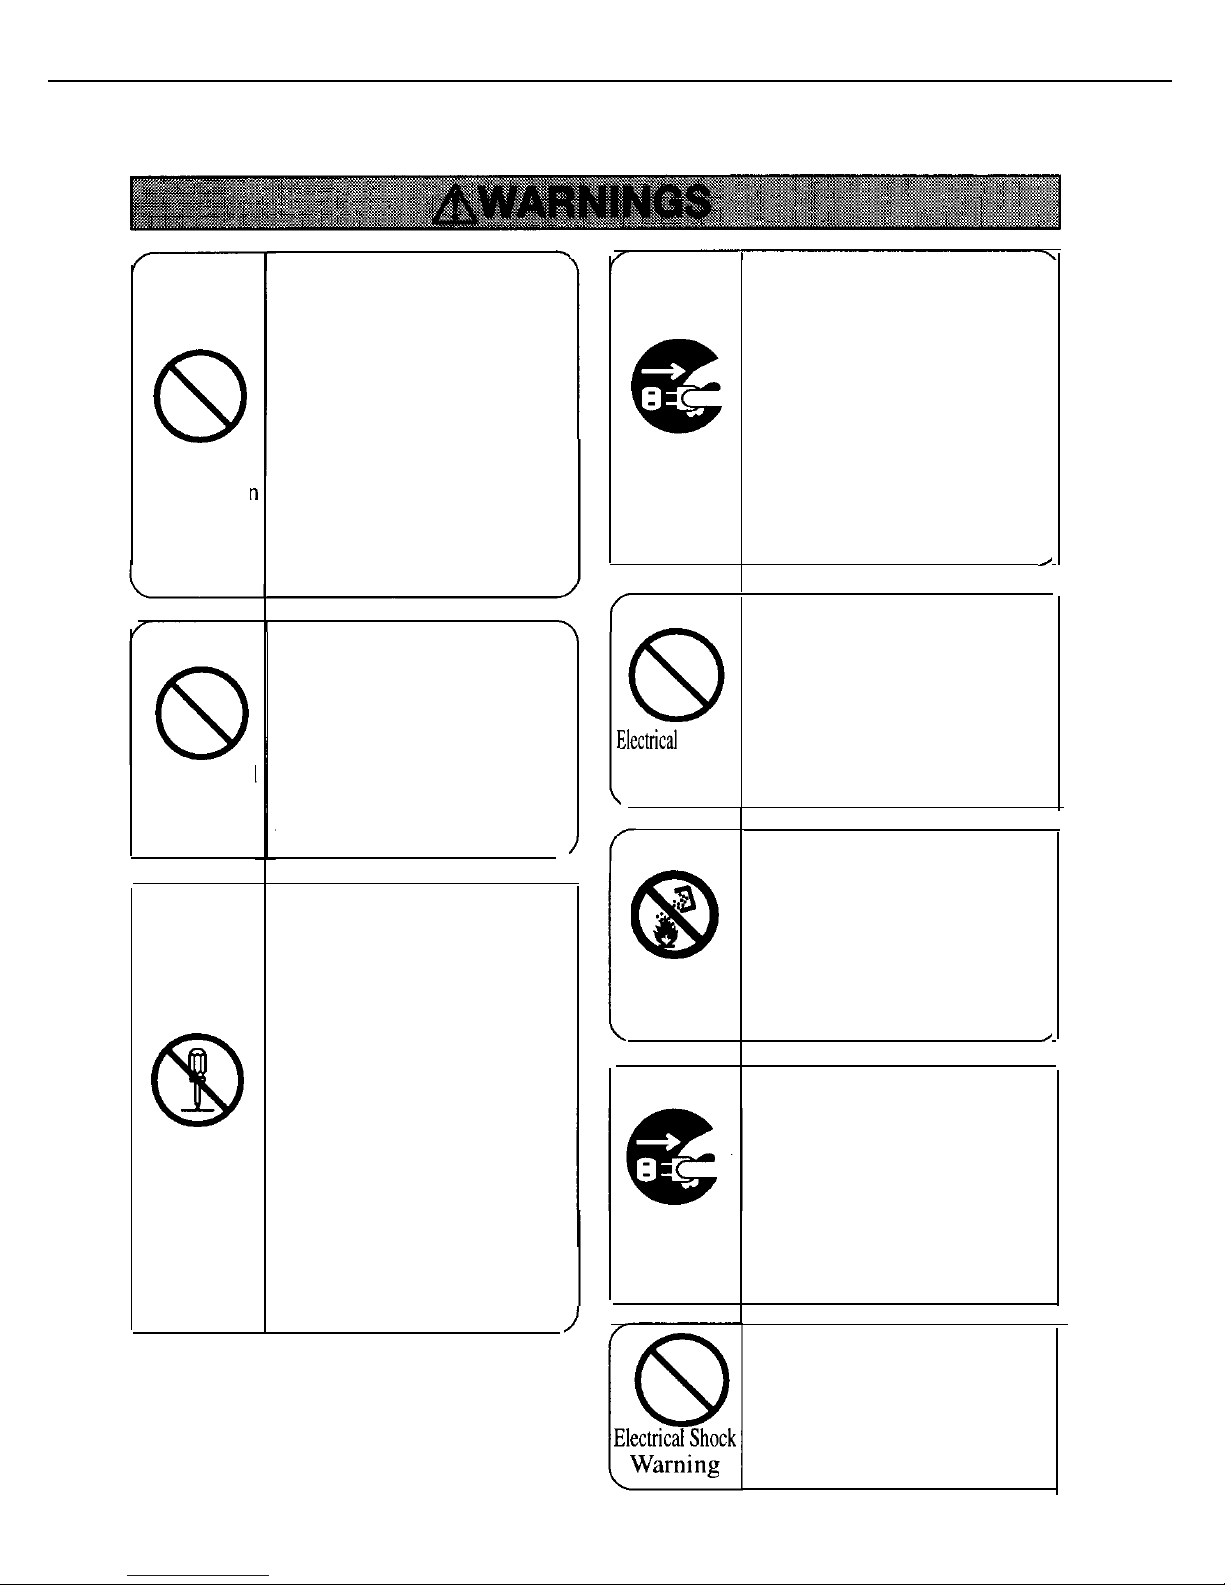
8
Power
Connection
Warning
Power Cord
Warning
@
Modification
Warning
.
Only connect the copier to
the power source described
on the inside front cover of
this manual. Avoid multiwiring as it could cause an
electrical shock or fire.
Avoid using an extension
cord. Make sure the wall
outlet is near the copier and
freely accessible so that in
event of an emergency it
can be unplugged easily.
Do not damage, break or
make any modifications to
the power cord. Do not
place heavy objects on it,
pull it hard or bend it more
than necessary. These
actions could cause an
electric shock or fire
Do not remove any covers
or screws other than those
specified in this manual.
Some parts of the copier
are charged with high
voltage and could give you
an electric shock. When the
copier needs to be checked,
adjusted or repaired,
contact your service
representative.
Do not take apart or
attempt any modifications
to this copier. There is a
risk of fire, electric shock,
explosion or loss of sight.
Damage
Warning
If the copier looks damaged
or breaks down, smoke is
coming out, there is a
strange smell or anything
looks unusual, immediately
turn off the main switch
then unplug the power cord
from the wall. Do not
continue using the copier in
this condition. Contact your
service representative.
/
Do not incinerate used toner
or toner containers. Toner
dust might ignite when
exposed to an open flame.
Toner
Dispose of the used toner
Warning
containers according to
local regulations.
/
Do not put any containers
holding metal objects or
water (e.g. vases, flowerpots, glasses) on the copier.
3ectrical
Shock
If the contents fall inside
Warning
the copier a fire or electric
shock could occur.
.
,
Foreign
Object
Warning
If anv metal, liauid or
foreign
matter falls into the
copier, turn off the main
switch and unplug the main
power cord. Contact your
service representative. Do
not continue using the
copier with a fault or defect.
Do not plug or unplug the
power cord with wet hands
or an electric shock might
occur.
Page 5
e
Unplug
Caution
Unplug
Caution
8
Copier
Location
Caution
When you move the copier,
unplug the power cord from
the wall outlet to avoid fire
or electric shock.
When you pull out the plug
from the socket, grip the
plug to avoid damaging the
cord and causing fire or
electric shock.
Keep the copier away from
humidity and dust. A fire or
an electric shock might
occur.
Do not place the copier on
an unstable or tilted surface.
If it topples over it could
cause injury.
e
Unplug
Caution
8
Copier
Location
Caution
Clearing
Misfeed
Caution
n
1
l
Parts
Caution
When the copier will not be
used for a long time, unplug
the power cord.
.
If you use this copier in a
confined space, make sure
there is a continuous air
turnover.
When removing misfed
paper, do not touch the
fusing section
-
it could be
very hot.
This copier has been tested
for safety using this
supplier’s parts and
consumables. We recommend you only use these
specified supplies.
5
Page 6
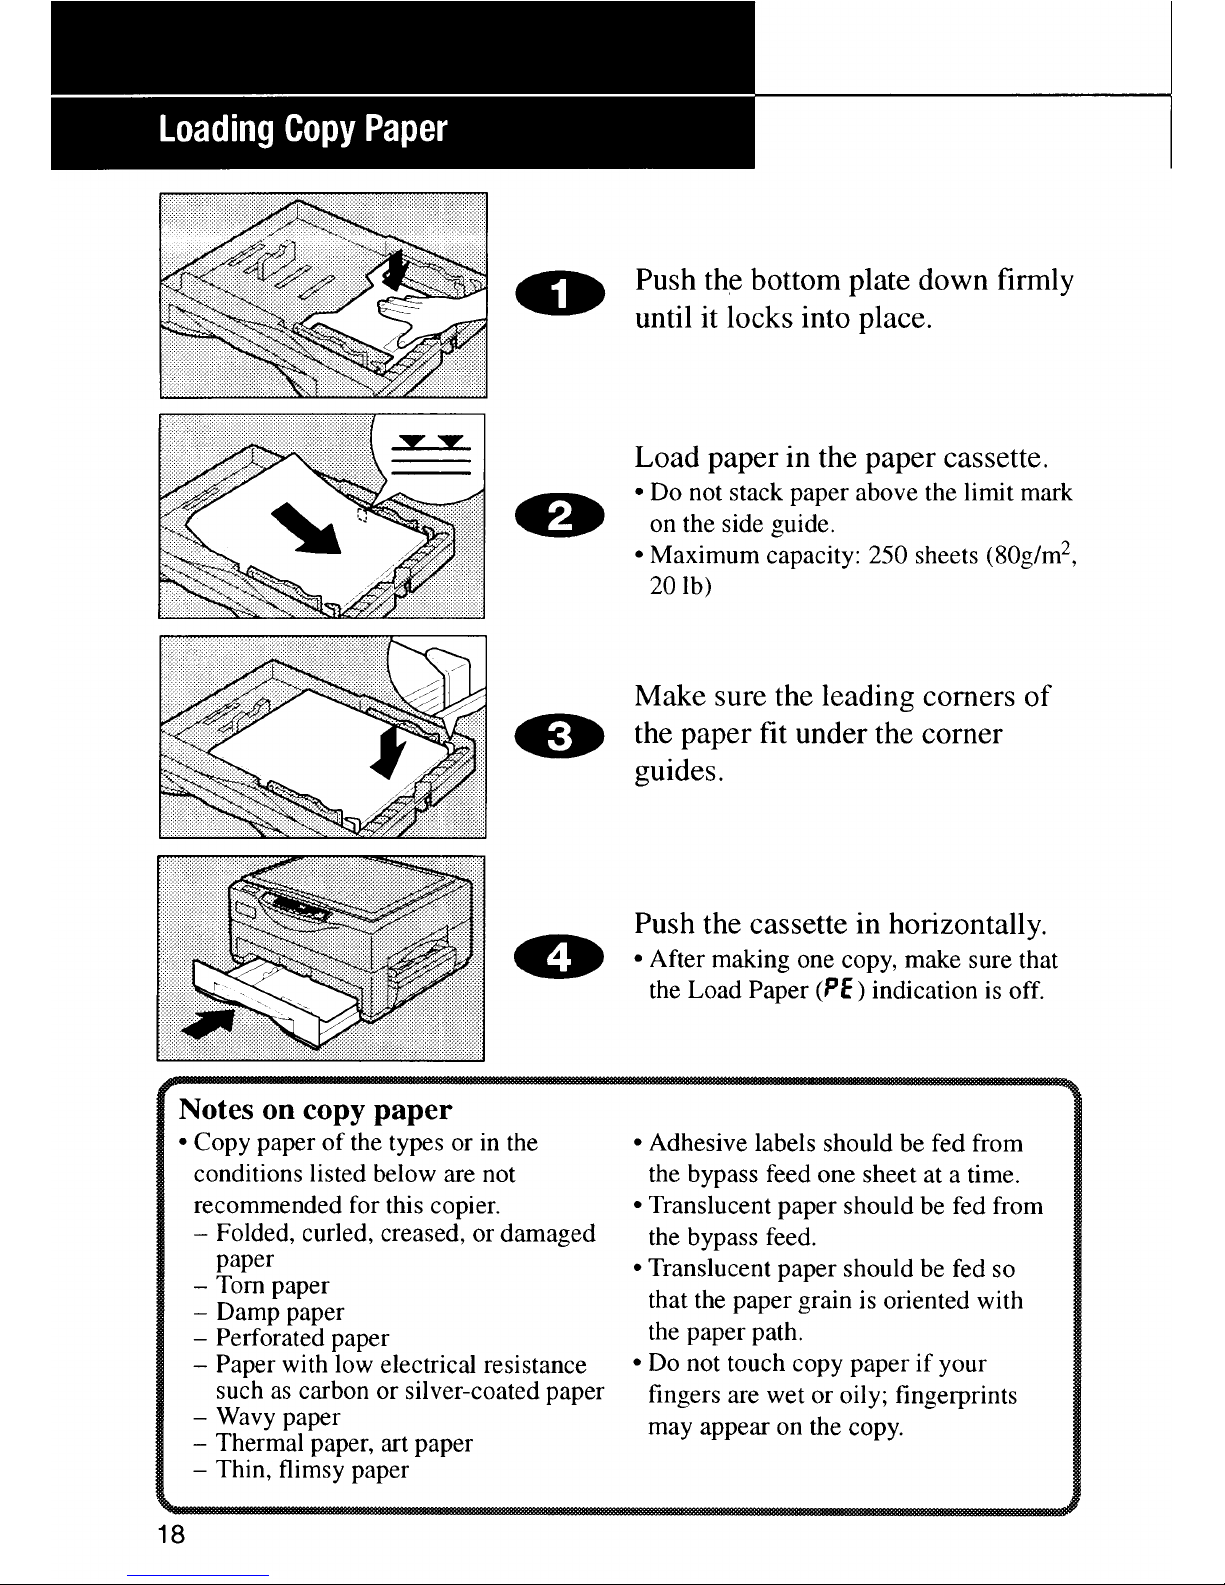
*Press this marked
1. Main Switch
For turning copier on/off.
2.
Exposure Glass
Position originals face down.
3. Copy Tray
Finished copies are delivered
here.
4.
Operation Panel
Panel type 1 or 2 depends on
copier model. (See pages 8-9.)
5. Paper Cassette
Holds up to 250 sheets of paper.
6.
Platen Cover
7.
Top Unit
Open to access inside of copier.
8.
Bypass Feed Guides
Assist alignment of copy paper
in the bypass feed. (See page
26.)
9.
Bypass Feed
Use to copy to transparencies,
adhesive labels and translucent
paper. (See pages 26-27.)
* Make sure to press down on this
position when closing the top
unit.
6
Page 7

1.
Charge Corona Wire
If white streaks appear on
copies, or image density appears uneven, clean this wire.
(See page 45.)
2.
Toner Cassette
When
l&l
lights up or blinks,
replace the toner cassette. (See
page 42.)
3. Fusing Unit
Fuses the copy image to the
paper.
B
:
This unit may be very
hot. When accessing the inside
of the copier, use caution.
4. Image Density Recalibration
Switch
When you want to adjust the
image density after using the
copier for a long time, adjust
this switch. (See page 34.)
5.
Transfer Corona Wire
If white streaks appear on
copies, or image density appears uneven, clean this wire.
(See page 45.)
6.
Guide Plates
If the reverse side of copies
appears dirty, clean the guide
plates. (See page 47.)
7
Page 8
Qpe1&2
1.Photo Mode Indicator
4.Copy Counter
2.Auto Image Density
5.Start Indicator
Indicator
6.Start
Toner Indicator
Key
0
Clear/Stop Key
Indicators
Path Indicator
8.Image Density
Adjustment Key
1. Photo Mode Indicator: Lights
up when photo mode is selected
with image density indicator.
(See page 28.)
2. Auto Image Density Indica-
tor: Lights up to show copier is
in automatic image density
mode. (See page 28.)
3. &I
Replenish Toner Indicator:
Replenish toner when this indicator lights up. (See page 42.)
4.
Copy Counter: Indicates the
number of copies.
Shows reduction/enlargement
size in % in zooming mode
(Type 2 panel only);
PE
display
tells you to replenish paper, and
displays other data.
5. Start Indicator: Lights green
when copier is ready to make
copies.
8
6. Start Key: Press to start copy-
ing.
7. Manual Image Density Indi-
cators: Lights up when image
density is adjusted manually.
(See page 28.)
8. Image Density Adjustment
Key: Used to adjust image
density. (See page 28.)
9. &
Check Paper Path Indica-
tor: Lights up to indicate paper
jam. To clear paper misfeeds,
see page 60.
10.
+ and - keys: Used to increase
or reduce the desired number of
copies. Or type 2 only, for
reduction or enlargement in 1%
increments. (See page 30.)
11.
Clear/Stop Key: Press to reset
the counter to 1. During copying, press to stop copying.
Page 9
12.Reproduction
Ratio Indicators
@
@
@
@
@@
@
Reproduction Ratio Indica-
tors: Shows the preset repro-
duction ratio selected. (See page
29.)
@
Preset Reduce/Enlarge Key:
Press to reduce/enlarge copies
in preset ratios. (See page 29.)
14.Zoom Indicator: Lights to
indicate the copier is in zoom
mode. (See page 30.)
@
Zoom Key: Press before using
+ or - key to zoom up/down
copies in 1% increments. (See
page 30.)
% appears when the
zoom indicator is lit
and the copy counter
is showing reduction/
enlargement size as a
percentage in zooming mode.
Page 10
SAFETY INFORMATION
. . . . . . . . . . . . . . . . . . . . . . . . . . . . . . . . . . . . . . . . . . . . . . . . . . . .
3-5
NAME/FUNCTION OF PARTS
. . . . . . . . . . . . . . . . . . . . . . . . . . . . . . . . . . . . . . . . . . .
6-9
Exterior
. . . . . . . . . . . . . . . . . . . . . . . . . . . . . . . . . . . . . . . . . . . . . . . . . . . . . . . . . . . . . . . . . . . . . . . . . . . . . . . .
6
Interior
. . . . . . . . . . . . . . . . . . . . . . . . . . . . . . . . . . . . . . . . . . . . . . . . . . . . . . . . . . . . . . . . . . . . . . . . . . . . . . . . .
7
Operation Panel
. . . . . . . . . . . . . . . . . . . . . . . . . . . . . . . . . . . . . . . . . . . . . . . . . . . . . . . . . . . . . . . . .
8-9
CONTENTS
. . . . . . . . . . . . . . . . . . . . . . . . . . . . . . . . . . . . . . . . . . . . . . . . . . . . . . . . . . . . . . . . . . . .
IO-11
INSTALLATION
. . . . . . . . . . . . . . . . . . . . . . . . . . . . . . . . . . . . . . . . . . . . . . . . . . . . . . . . . . . . . . .
Checking the Package Contents
. . . . . . . . . . . . . . . . . . . . . . . . . . . . . . . . . . . . . . . . . . . .
14
Unpacking
. . . . . . . . . . . . . . . . . . . . . . . . . . . . . . . . . . . . . . . . . . . . . . . . . . . . . . . . . . . . . . . . . . . . . . . . . .
14
Installing Copier
.,...............................................,................
15
Loading Toner Cassette
. . . . . . . . . . . . . . . . . . . . . . . . . . . . . . . . . . . . . . . . . . . . . . . . . . . . . . . .
16
Setting or Changing Paper Size
. . . . . . . . . . . . . . . . . . . . . . . . . . . . . . . . . . . . . . . . . . . . .
17
Loading Copy Paper
. . . . . . . . . . . . . . . . . . . . . . . . . . . . . . . . . . . . . . . . . . . . . . . . . . . . . . . . . . . . .
18
Notes on copy paper
. . . . . . . . . . . . . . . . . . . . . . . . . . . . . . . . . . . . . . . . . . . . . . . . . . . . . . . .
18
Attaching Copy Tray
. . . . . . . . . . . . . . . . . . . . . . . . . . . . . . . . . . . . . . . . . . . . . . . . . . . . . . . . . . . .
19
TURNING COPIER ON
. . . . . . . . . . . . . . . . . . . . . . . . . . . . . . . . . . . . . . . . . . . . . . . . . .
20-21
Auto-off mode
-
for automatically saving power..
. . . . . . . . . . . . . .21
NOTES ON INSTALLATION LOCATION
. . . . . . . . . . . . . . . . . . . . . . . . . . . .
22
PLACEMENT OF ORIGINALS
. . . . . . . . . . . . . . . . . . . . . . . . . . . . . . . . . . . . . . . . . . . .
24
Alignment of Originals
. . . . . . . . . . . . . . . . . . . . . . . . . . . . . . . . . . . . . . . . . . . . . . . . . . . .
24
FULL-SIZE COPYING
. . . . . . . . . . . . . . . . . . . . . . . . . . . . . . . . . . . . . . . . . . . . . . . . . . . . . . . . .
25
Auto Start
-
Setting Copy Orders During Warm-Up
. . . . . . . . . .25
BYPASS FEED COPYING
. . . . . . . . . . . . . . . . . . . . . . . . . . . . . . . . . . . . . . . . . . . . . .
26-27
Original and Copy Directions
. . . . . . . . . . . . . . . . . . . . . . . . . . . . . . . . . . . . . . . . . . . . . . . .
27
ADJUSTING COPY DENSITY
. . . . . . . . . . . . . . . . . . . . . . . . . . . . . . . . . . . . . . . . . . . . .
28
Auto image density
. . . . . . . . . . . . . . . . . . . . . . . . . . . . . . . . . . . . . . . . . . . . . . . . . . . . . . . . . .
28
Manual image density
. . . . . . . . . . . . . . . . . . . . . . . . . . . . . . . . . . . . . . . . . . . . . . . . . . . . . .
28
REDUCING/ENLARGING
. . . . . . . . . . . . . . . . . . . . . . . . . . . . . . . . . . . . . . . . . . . . . .
29-30
Reducing/Enlarging Using Preset Ratios
. . . . . . . . . . . . . . . . . . . . . . . . . . . . . . . .
29
Zooming in 1% Increments
. . . . . . . . . . . . . . . . . . . . . . . . . . . . . . . . . . . . . . . . . . . . . . . . . . .
30
MAKING TWO-SIDED COPIES
. . . . . . . . . . . . . . . . . . . . . . . . . . . . . . . . . . . . . . . . . .
31
MAKING BOOK COPIES
. . . . . . . . . . . . . . . . . . . . . . . . . . . . . . . . . . . . . . . . . . . . . . . . . . . .
32
10
Page 11

...................................
USER TOOLS
.................................................................35-40
List of User Tools
.................................................................
35
Making Adjustment with User Tools
.................................
36-37
User Tool Menu
..............................................................
37-40
REPLACING THE TONER CASSETTE
........................
.42-43
Copy Yield
.........................................................................
43
MAINTAINING COPIER
.................................................
44-47
Daily Maintenance
...............................................................
44
Corona Wires
.................................................................
45-46
Guide Plates
.......................................................................
47
NOTES
............................................................................
48-49
General Operation
...............................................................
48
Replenishing Toner
..............................................................
49
Removing Misfed Paper
.......................................................
49
STORAGE
............................................................................
50
Paper
.................................................................................
50
Toner Cassette
....................................................................
50
REPACKING
...................................................................
51-53
TROUBLESHOOTING
....................................................
56-57
CLEARING
MISFEEDS
..................................................
58-60
When PE appears on the copy counter
...............................
59
When & stays on
............................................................
60
I
SPECIFICATIONS
. . . . . . . . . . . . . . . . . . . . . . . . . . . . . . . . . . . . . . . . . . . . . . . . . . . . . . . . . .
62-63
1
INDEX
. . . . . . . . . . . . . . . . . . . . . . . . . . . . . . . . . . . . . . . . . . . . . . . . . . . . . . . . . . . . . . . . . . . . . . . . . . . . .
64-65
11
Page 12

INSTALLATION
................................
14-19
Checking the Package Contents
.............
14
Unpacking
...........................................
14
Installing Copier
...................................15
Loading Toner Cassette
.........................
16
Setting or Changing Paper Size
..............
17
Loading Copy Paper
..............................
18
Notes on copy paper
......................
18
Attaching Copy Tray
.............................
19
TURNING
COPIER ON
...................
20-21
Auto-off mode -for automatically
saving power
.................................
21
NOTES ON INSTALLATION
LOCATION
.......................................
22
13
Page 13
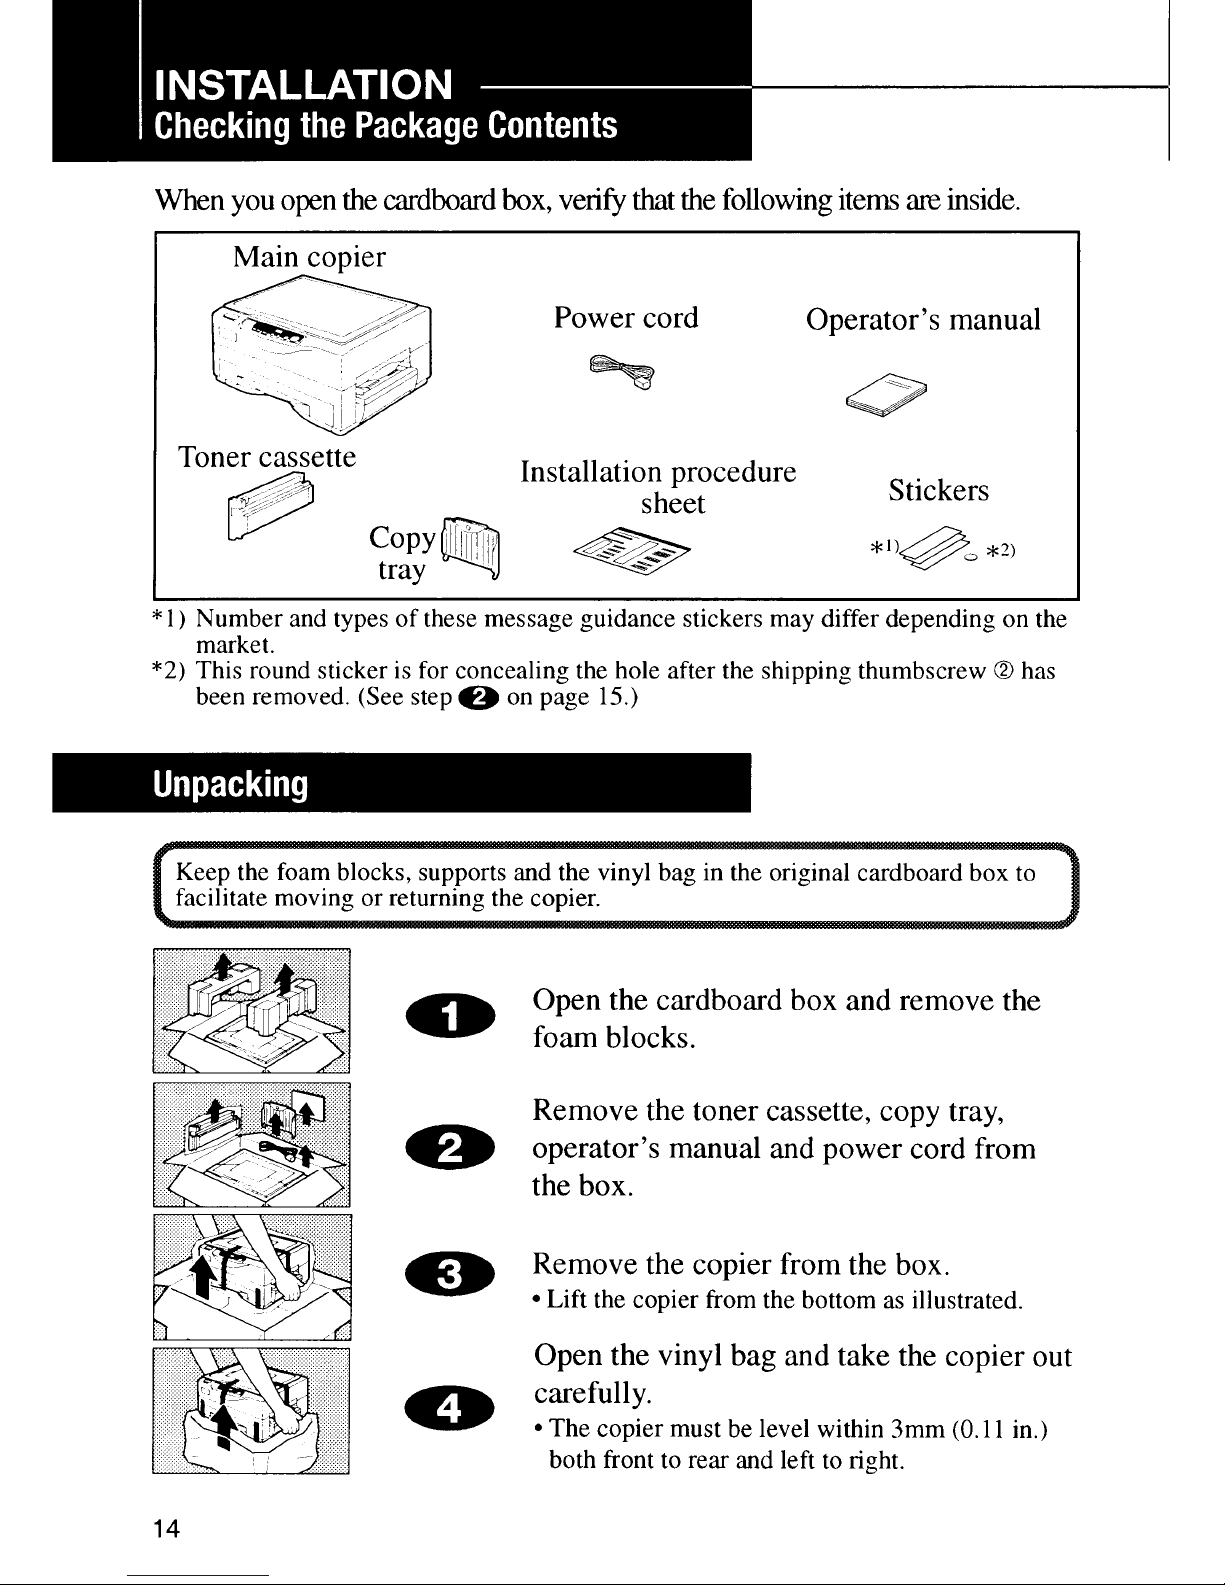
Page 14
. Be careful not to touch the OPC (Organic Photo Conductor, blue material) inside
the copier.
l
Do not expose the OPC to light.
0
Remove all tapes.
Remove shipping thumbscrew 0, then
open
the platen cover. (No thumbscrew
0
*
m
for type i model)
Next, remove shipping thumbscrew 0, and
attach the sticker to conceal the hole of
shipping thumbscrew
0.
The removed shipping thumbscrews should
be kept as shown in step
a
for future
shipping.
m:
Do not turn on the main switch until
the two shipping thumbscrews have been
removed, otherwise the copier may be damaged.
Store the two shipping thumbscrews as
-
shown. (Only short thumbscrew with type
1 model)
m:
Make sure to keep the shipping thumb-
screws; they must be attached prior to shipping.
aa
Remove the paper in the unit.
Close the ton unit bv pressing down firmly
a
on the marked
position.
Attention: Make sure to press the marked position.
15
Page 15
Remove the toner cassette from the
vinyl bag.
l Keep the vinyl bag for repacking.
Rock the toner cassette back and
forth five or six times.
Set the toner cassette on a flat
surface and remove the two tapes
inside the unit completely as
shown.
l Hold the toner cassette firmly with one
hand to prevent it from turning over.
l Yellow marks appear at the end of the
tapes. Make sure to remove the tapes
completely from the toner cassette.
m:
If these tapes are not removed,
the toner cassette may be damaged, and
unable to make a copy.
Open the top unit.
Confirm that the A mark
0
of the
toner cassette is pointing upward.
Align guides on both sides of the toner
cassette with the left (with
l mark)
and right (with
c
mark) guides @ of
the toner cassette holder, then insert
the toner cassette into the copier as
shown until it clicks into place.
l Do not insert the toner cassette into the
copier until the tapes are completely
removed.
Close the top unit by pressing
down firmly on the marked position.
Attention: Make sure to press the marked
position.
16
Page 16
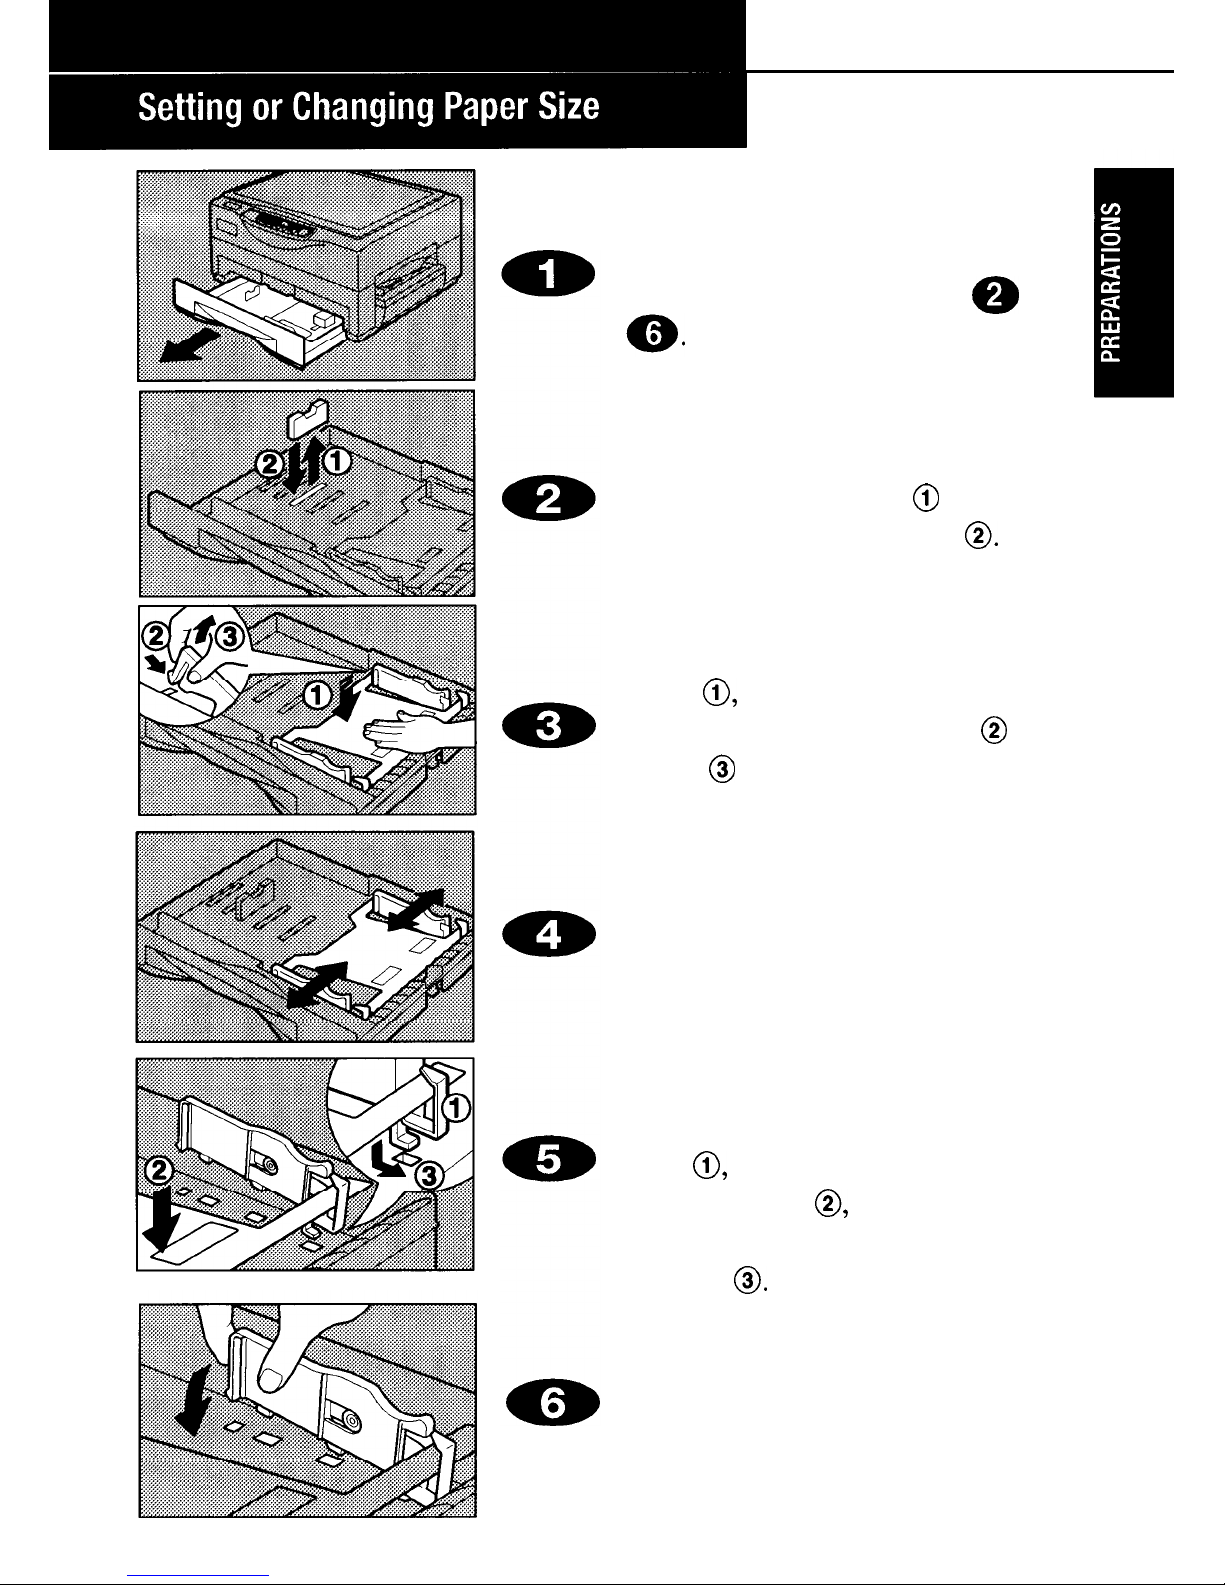
Pull the paper cassette out.
Check the set paper size.
If preset paper size is the setting you
want to use, disregard steps @ to
If you need to change the paper size,
continue to the following steps.
Adjusting the paper length
Remove the end plate @ and set it
to your desired paper size
0.
Adjusting the paper width
Push the bottom plate halfway
down
0,
and carefully remove the
two side guides by pushing @ and
lifting @ the end of the side guides
as illustrated.
Move the two side guides to your
desired paper size, while pushing
the bottom plate halfway down.
To set the side guides, confirm that
the metal hook of the side guide is
above the protrusion of the bottom
plate
0,
push the bottom plate
halfway down 0, and insert the
bottom hook of the side guide into
the hole
0.
Then slowly insert the hook on the
other end into the hole until it
clicks into place.
17
Page 17
Page 18
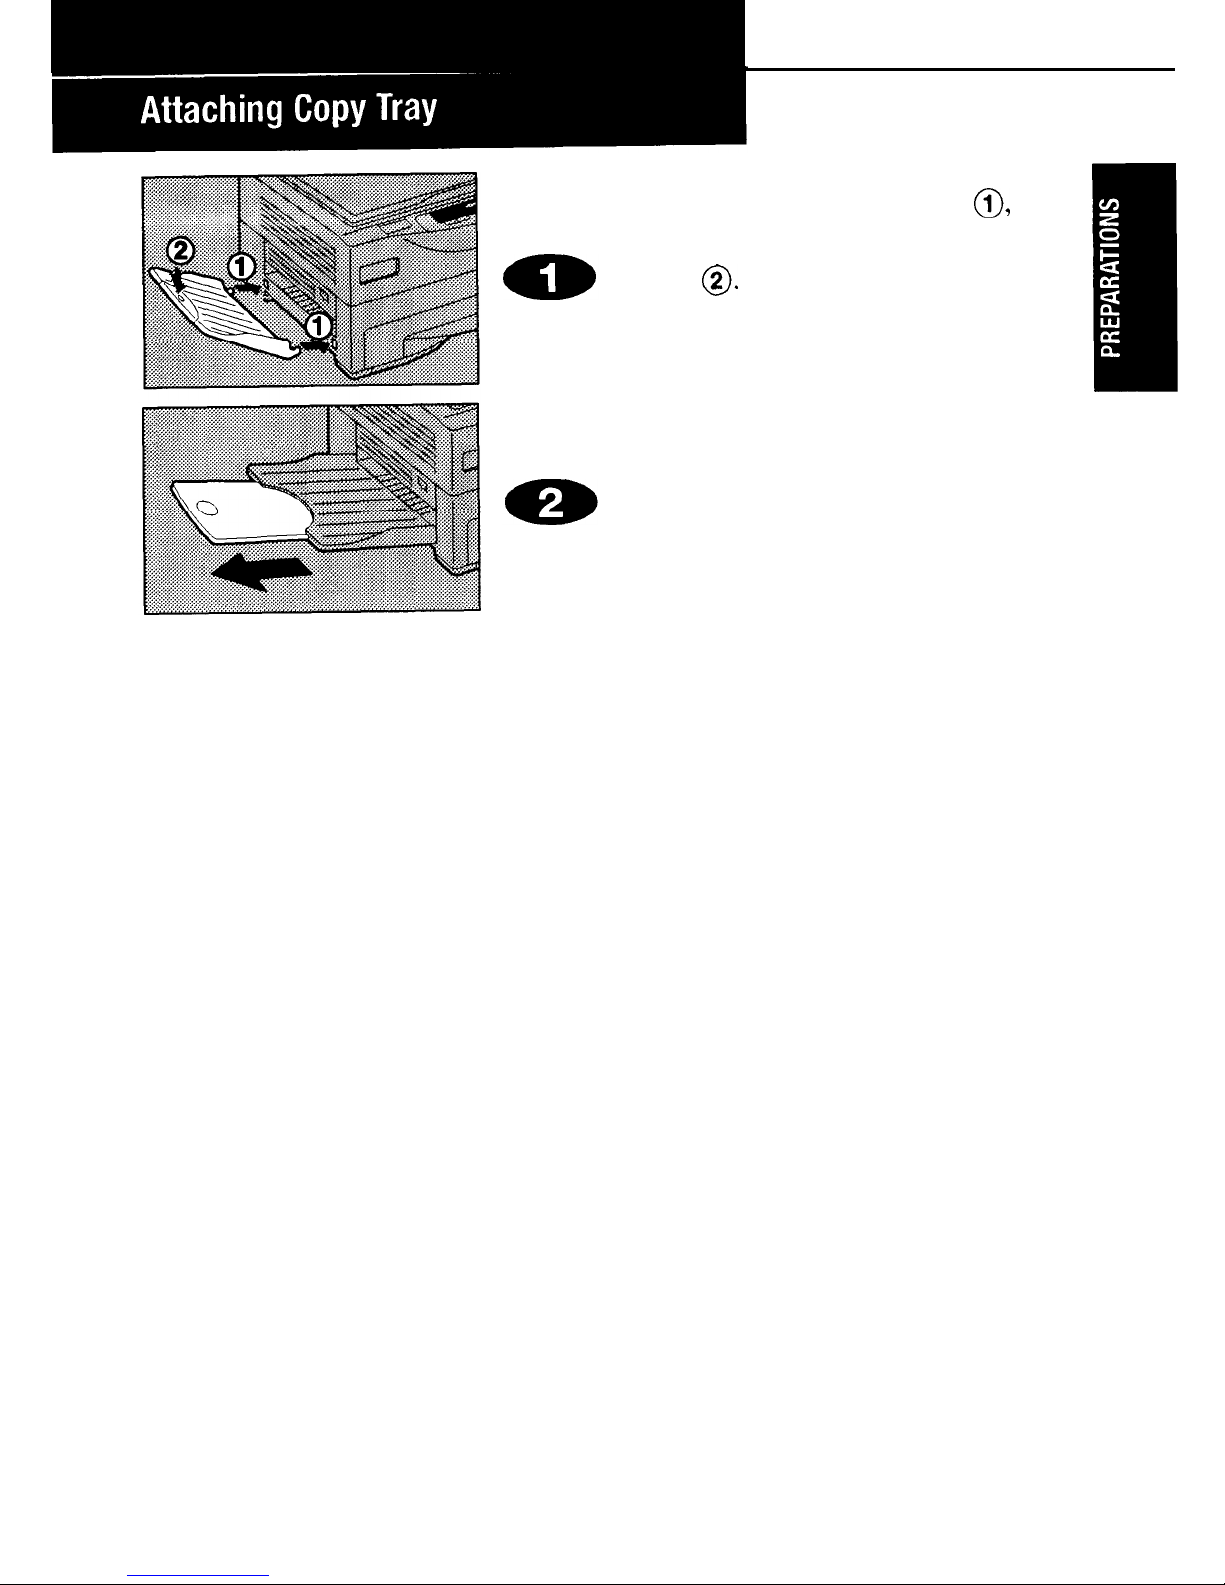
Attach copy tray as shown
0,
then depress it slightly to fix it in
place
0.
l
Confirm that the copy tray is securely in
place.
When you
copy
onto long-size
paper,
extend-the
copy tray as
shown.
19
Page 19
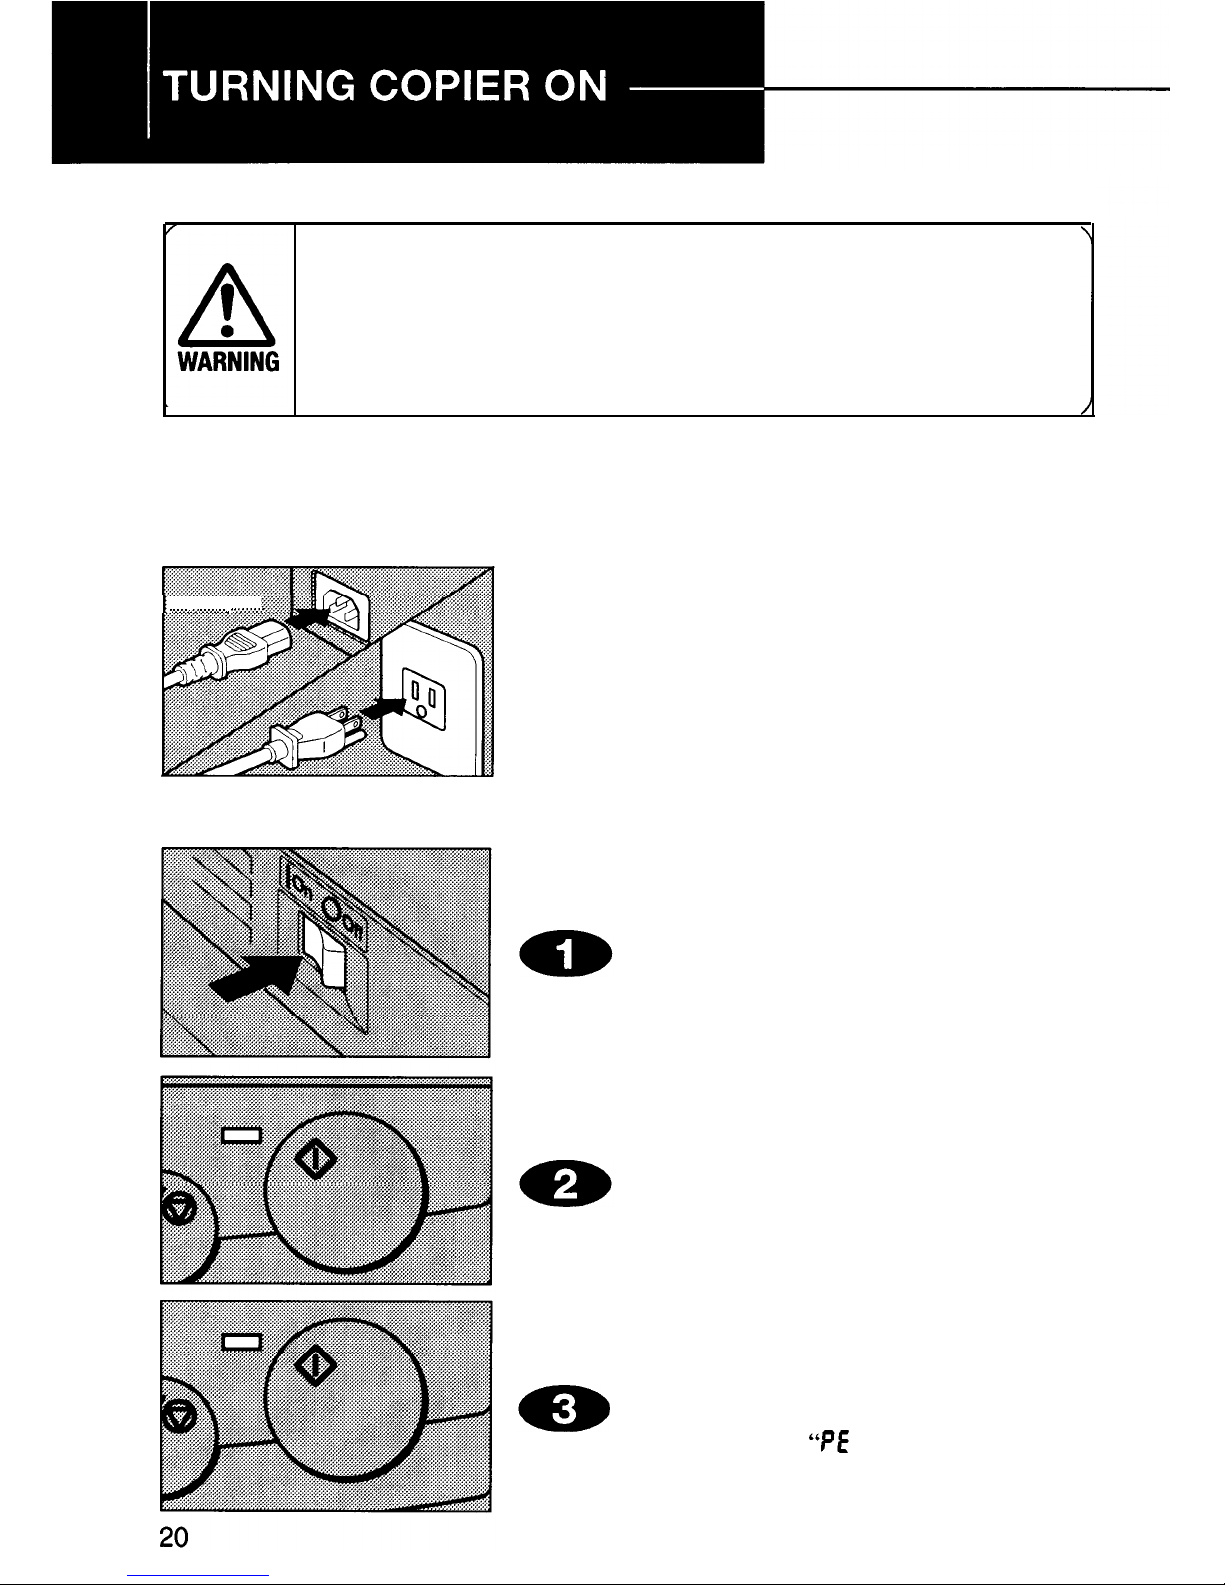
Power Connection
Only connect the copier to the power source described on the inside
front cover of this manual. Avoid multi-wiring as it could cause an
electric shock or fire.
Avoid using an extension cord. Make sure the wall outlet is near the
copier and freely accessible so it can be unplugged easily in the event of
an emergency.
l
Make sure the plug is firmly inserted in the outlet.
l
Voltage must not fluctuate more than 10%.
l
Do not set anything on the power cord.
l
Always turn the copier off when you have finished copying for the day.
.........................
..........................
.........................
..........................
.........................
..........................
.........................
. .. .. .. .. .. .. .
...
. .. .. .. .. .. .. .
. . . ..
..........
..i
Firmly insert the plug into the
copier and outlet.
Turning
Copier On
Turn the main switch on.
Wait
for the
copier to warm up.
During warm-up, the
Start
indica-
tor lights red.
When the
Start
indicator turns
green, the copier is ready to make
copies.
l
If Load Paper
“PE ”
indication is on
when starting, load paper.
Page 20
Auto-off mode
-
for automatically saving power
To conserve energy, this copier automatically shifts to the “Auto-off mode” 30
minutes after you make a copy. In Auto-off mode, power consumption is reduced
from less than 91W (standby) to less than 5W. To re-activate the copier, press any
key.
l
The copier does not enter Auto-off mode when:
-
the
Start
indicator is red.
-
You are accessing the user tools.
l
Initial Auto-off duration is 30 minutes. To change this duration with the user
tools, follow the steps on page 38.
l
When the copier is in Auto-off mode, the Start indicator (green) blinks.
21
Page 21

Environmental conditions greatly affect the performance of a copier. Be
sure to choose your installation location carefully.
Optimum Setting Conditions
Temperature: 10 - 35°C (50 -
95°F)
Humidity: 15 - 80% RH
Place upon a strong, stable, level
base with a flat, even surface. Do
not place on a surface that has
holes, ruts, cavities or is uneven
in any way.
The copier must be level within
3mm (0.11 in.) both front to rear
and left to right.
To avoid a possible ozone
buildup, be sure to locate this
copier in a large well ventilated
room with an air turnover of
more than 3 times/hr/person.
Locations to Avoid
Locations exposed to direct
sunlight or strong light (more
than 2,000 lux).
Locations directly exposed to
cool air from an air conditioner
or heated air from a heater.
(Sudden temperature changes
may cause condensation within
the copier.)
Places where the copier might be
subjected to frequent strong
vibration.
Dusty areas.
Areas exposed to corrosive
gases.
Places higher than
2,000m
(6,500
ft.) above sea level.
Copier Location
Place the copier near the wall outlet, providing minimum clearance as
shown.
More than 20cm (7.9 in.)
More than
10cm
(3.9 in.)
+
l
More than 11 cm
More than 30cm (11.8 in.)
22
Page 22

PLACEMENT OF ORIGINALS
.............
24
Alignment of Originals
.....................
24
FULL-SIZE COPYING
..........................
25
Auto Start
-
Setting Copy Orders
During Warm-Up
.............................
25
BYPASS FEED COPYING
...............
26-27
Original and Copy Directions
.................
27
ADJUSTING COPY DENSITY..
............
28
Auto image density
...........................
28
Manual image density
.......................
28
REDUCING/ENLARGING
...............
29-30
Reducing/Enlarging Using Preset
Ratios
. 29
Zooming in 1% Increments
....................
30
MAKING TWO-SIDED COPIES
...........
31
MAKINGBOOK COPIES..
...................
32
23
Page 23

Lift the platen cover.
Set the original face down on the
exposure glass. Align the center of
your original with the arrow mark
on the scale.
Lower the platen cover.
l When copying from a book, the thick-
ness of the book should be no more than
20mm (0.78 in.).
Alignment of Originals
Align the original with the scale
on
the left side of the exposure
glass.
l When the original is a standard size
such as 8
‘/z
or A4, align it to the
indexes on the scale.
l When your original is not a standard
size, align the center of the original to
the arrow mark at the center of the
scale.
24
Page 24

To make copies the same size as your originals.
Lift the platen cover and place the
0
original face down on the exposure
glass. Align the center of your
original with the arrow mark on the
scale. Lower the platen cover.
If your copier includes an enlargement/ reduction feature (Type 2
panel only), make sure the magnification ratio is set to Full Size. If
not, press the
Reduce/Enlarge
key until Full Size indicator is lit.
Enter your desired number of copies
using the + key (to increase copy number) or
-
key (to reduce copy number).
l
Up to 50 copies can be entered.
l
To reset the number to 1, press the
Clear/
Stop
key.
l
When copy counter is 1, pressing the
-
key changes the counter to 50. Likewise,
0
++
+o
when the-counter is
50,
pressing the + key
1,z
3
48,49,50
changes the counter to 1.
, . . . . . . . . . . . . . . . . . . . .
eb
Press the
Start
key.
l
To stop the machine during a multi-copy
run, press the
Clear/Stop
key.
l
To resume copying, press the
Start
key.
l
To clear the copy counter, press the
Clear/Stop
key.
Auto Start
-
Setting Copy Orders During Warm-Up
If you press the
Start
key during warm-up, the
Start
indicator will
blink
in red and
green.
The
copier will start copying when warm-up is
completed.
l
To cancel Auto Start, press the
Clear/Stop
key.
Page 25

To copy onto paper different from the type in the paper cassette, use the
bypass feed.
l
One sheet should be inserted into the bypass feed at a time.
l
Bypass feed copying should also be used for transparencies, adhesive
labels, translucent paper or postcards.
Place the original face down on the
0
exposure glass and lower the
platen cover.
l
Align the center of the original to the
arrow mark.
Q
Adjust the bypass feed guides to
the proper width.
Gently insert the copy paper into
w
the bypass feed.
l
Never insert more than one copy paper
at a time.
aD
Copy starts automatically.
When making multiple copies using the bypass feed, gently insert the
next copy paper into the bypass feed until the paper is fed automatically.
l
Do not set the next paper before th e
Start
indicator turns green. A misfeed may
occur.
26
Page 26

copies are as follows.
Transparencies
Letterhead
Set the originals and transparencies as
shown.
l
Remove copies delivered to the copy tray one by
one.
Set the originals and letterhead as shown.
Two-sided copies
Set the originals and copy paper for copying
the reverse side as shown.
l
Do not use paper that has been printed on using
other copiers or printers.
l
For instructions on making two-sided copies, see
page 31.
27
Page 27

Page 28

Page 29

Page 30

Place the original for the front side
of the copy on the exposure glass
and lower the platen cover.
l
Align the center of the original to the
arrow mark on the scale.
Press the
Start
key to make the
first copy.
Place the original for the reverse
side of the copy on the exposure
glass and lower the platen cover.
Adjust the bypass feed guides to
the proper width.
Insert the copy paper into the
bypass feed blank side facing
upward.
l
If the paper is curled, straighten it before
insertion. (See page 48.)
Copy directions are as indicated.
31
Page 31

Page 32

RECALIBRATING COPY DENSITY . . . . . 34
USER TOOLS
. . . . . . . . . . . . . . . . . . . . . . . . . . . . . . . . . .
35-40
List of User Tools
. . . . . . . . . . . . . . . . . . . . . . . . . . . . . . . . . .
35
Making Adjustment with User Tools . . 36-37
User Tool Menu
. . . . . . . . . . . . . . . . . . . . . . . . . . . . . . .
37-40
33
Page 33

When copies have become unclear or dirty after using the copier for a
long time, adjust copy density using the image density recalibration
switch.
Slide the image density
recalibration switch to 1 to make
the image clearer.
If the copies are still unclear or
dirty, slide the image density
recalibration switch to 2.
Close the top unit by pressing
GD
down firmly on the marked position.
Attention: Make sure to press the marked
position.
34
Page 34

The value or mode of the following items can be
corresponding User Tool.
adjusted with the
User Tool
number
1
2
3
4
5
6
7
8
Adjustable item See page
Auto image density level
37
Darker-side manual image density level
38
Lighter-side manual image density level
38
Photo mode level
38
Auto-off duration
38
Auto reset duration
39
Counter up/down
39
Total copy number
39-40
35
Page 35

Page 36

Adjusting values/modes
When the desired user tool number
is lit on the copy counter and the
Photo Mode indicator is blinking,
enter the required setting using the
+ and
-
keys.
l
For the settings, refer to pages 37-40.
Press the
Image Density
adjust-
ment key.
The setting will be stored in
memory.
l
The setting number and the Photo Mode
indicator blink. Now, you can access
another user tool number by pressing the
+ and - keys.
To exit user tools, turn the main
switch off and then back on again.
1. Auto image density level
User mode
If the image density in the auto image density mode is too dark or too
light, adjust it using this function.
1
Default: Normal (Number: 0)
Setting Normal Light Lighter Lightest Dark Darker Darkest
Number 0
1
3 5
2
4
6
l
If your desired image density could not be obtained with the adjustment in “User
mode
l”,
adjust it by sliding the image density recalibration switch to the right.
(Refer to page 34.)
37
Page 37

2. Darker-side manual image density level
User mode 2
Thedensity
represented bythe right indicator can be made darker.
Default: Normal (Number:
0)
Setting
Normal Dark Darker
Number 0
1
2
3. Lighter-side manual image density level User mode 3
The density represented by the left indicator can be made lighter.
Default: Normal (Number: 0)
Setting Normal Light Lighter
Number 0
1
2
4. Photo mode level
User mode 4
If the image density in the photo mode is too dark, adjust it using this
function.
Default: Normal (Number: 3)
Setting Lightest Lighter Light
Normal Dark Darker
Number
0
1
2
3
4
5
5. Auto-off duration
User mode 5
To conserve energy, this copier automatically shifts to the Auto-off mode
30 minutes after the last copying job has been completed. This time can
be adjusted using this function.
Default: 30 minutes (Number: 2)
Setting
5
minutes 10minutes30minutes60
minutes90minutes
120
minutes
Number
0
1
2
3
4
5
Page 38

6. Auto reset duration
User mode 6
As a default setting, the copier will reset itself 1 minute after the final
copy is made or after the last time any key is pressed. If a 1 minute reset
time is not appropriate, you can change this time.
Default: 1 minute (Number: 0)
Setting
1 minute 3 minutes
Number 0
1
Off
2
7. Counter up/down
User mode 7
The copy counter can be set to show the number of copies made (count
up) or the number of copies remaining to be made (count down).
Default: Up (Number: 0)
Setting Up
Down
Number 0
1
8. Total copy counter
You can check the total number of copies made.
How to check the total copy counter:
User
mode
8
Access user tool number “8”. You
will find the first two digits of the
total copy quantity (configured in
six digits) are displayed on the
copy counter.
l Example: When 12345 copies are made,
“8 1” is displayed on the copy counter.
l For the first two digits, the left image
density indicator is lit.
39
Page 39

Press the
Start
key. You will find
the second two digits of the total
copy quantity are displayed on the
copy counter.
l
Example: When 12345 copies are made,
“23” is displayed on the copy counter.
l
For the second two digits, the center
image density indicator is lit.
Press the
Start
key again. You will
find the last two digits of the total
copy quantity are displayed on the
copy counter.
l
Example: When 12345 copies are made,
9s”
is displayed on the copy counter.
l
For the last two digits, the right image
density indicator is lit.
l
When you want to see the
first
two digits
again, press the
Start
key once. When
you want to see the second two digits,
press the
Start
key twice.
l
To access another user tool number,
press the
Image Density
adjustment
key.
l
To exit the user tools, turn the main
switch off and then back on again.
40
Page 40

REPLACING THE TONER
CASSETTE
. . . . . . . . . . . . . . . . . . . . . . . . . . . . . . . . . .
42-43
Copy Yield
.,...................................
43
MAINTAINING THE COPIER . . . . . . . . . . 44-47
Daily Maintenance
. . . . . . . . . . . . . . . . . . . ............
44
Corona Wires
. . . . . . . . . . . . . . . . . . . . . . . . . . . . . . . . . .
45-46
Guide Plates
. . . . . . . . . . . . . ..........................
47
NOTES
. . . . . . . . . . . . . . . . . . . . . . . . . . . . . . . . . . . . . . . . . . . . .
48-49
General Operation
. . . . . . . . . . . . . . . . . . . . . . . . . . . . . . . .
48
Replenishing Toner
. . . . . . . . . . . . . . . . . . . . . . . . . . . . . . .
49
Removing Misfed Paper . . . . . . . . . . . . . . . . . . . . . . . .
49
STORAGE
. . . . . . . . . . . . . . . . . . . . . . . . . . . . . . . . . . . . . . . . . . . . .
50
Paper
..................................................
50
Toner Cassette
. . . . . . . . . . . . . . . . . . . . . . . . . . . . . . . . . . . . .
50
REPACKING
. . . . . . . . . . . . . . . . . . . . . . . . . . . . . . . . . . . .
51-53
Page 41

When
I.&
blinks on the operation panel, it is time to replace the toner
cassette (copying is still possible). When I& is continuously displayed,
copies cannot be made until the cassette is replaced.
l When you install the new toner cassette, be careful not to touch
the OPC (blue material). Copy image and copy quality could be
affected.
l After a new toner cassette is installed, the density of the first few
copies may be slightly lighter.
Open the top unit.
Remove the used toner cassette
carefully.
l Be careful not to stain your hands with
the toner. If toner is present, clean up
with a cold damp cloth.
Open the new toner cassette
cardboard box.
Remove the toner cassette from the
vinyl bag.
l Keep the vinyl bag for repacking.
Page 42

Page 43

Platen Cover
Copy Tray
Bypass Feed
44
Page 44

Page 45

Remove the tool from the transfer
m
0
corona wire and store it as shown.
l
Keep this tool inside the copier.
Close the top unit by pressing
down firmly on the marked
posi-
@B
tion.
Attension: Make sure to press the marked
position.
46
Page 46

Open the top unit, clean the transfer and transport guide plates with
a damp cloth, and wipe them with
a dry cloth.
l
If you do not clean the guide plates, the
leading and trailing edges of the reverse
side of copies become dirty.
Close the top unit by pressing
down firmly on the marked position.
Attension: Make sure to press the marked
position.
47
Page 47

l
l
l
l
When using transparencies, set one sheet at a time into the bypass feed and
open the copy tray. Remove copies delivered to the copy tray one by one.
When you use translucent paper in low-temperature and low-humidity
conditions, it may be misfed. Set the paper aside with paper curl face down
until paper is flat with surface. Set one sheet at a time into the bypass feed.
Then, deliver the paper to the copy tray.
Under the following conditions, you might get light copies:
-
When you make 150 or more copies continuously.
-
When you make solid full image copies.
-
When you make copies while the Replenish Toner
I_&
indicator is blinking.
Copies may be curled after coming out of the
copier. If necessary, uncurl the paper within
5mm (0.2 in.) of its edges, as shown, before
inserting it in the bypass feed to make a
two-
sided copy.
l
l
Keep the used toner cassette horizontal. If you tilt the unit, toner may spill.
Do not store the toner cassette in high-temperature and high-humidity conditions.
l
If you make copies continuously under high temperatures, the copier may
stop to prevent overheating. The Start indicator will turn red and
“ti :”
is
displayed on the copy counter. In this case, let the copier cool down, and wait
until the Start indicator turns green.
l
When you replace the toner cassette and close
the top unit, press down firmly on the marked
position.
While copying, do not turn off the main switch.
While copying, do not open the top unit.
While copying, do not lift the platen cover.
While copying, do not unplug the power cord.
Do not lay anything weighing more than
10kg
(22 lb) on the exposure glass.
Do not place tools or other hard objects on the exposure glass.
Do not allow paper clips, staples, or other small metallic objects to fall inside
the copier.
l
Always turn the copier off when you have finished copying for the day.
48
Page 48

Replenish toner when replenish toner &I indicator is blinking.
When
&.I
is continuously lit, copies can no longer be made.
Before installing a new toner cassette, rock it back and forth, at least
five or six times.
When removing the tapes inside the cassette, make sure to remove the
tapes completely.
Do not insert the toner into the copier until the tapes are completely
removed.
Do not eat or swallow toner, and keep it out of reach of children.
Replace the toner cassette with the new one, turn the main switch on,
and let the copier warm up.
In several seconds, it is ready to make copies in the initial status mode.
l Do not leave any tom scraps of paper inside the copier.
l After clearing misfeeds, make sure that all units are returned to their
original positions and all covers are closed.
l Do not touch the copy image when removing misfed paper
-
toner
may stain your hands.
49
Page 49

Paper should always be stored properly. Improperly stored paper might
result in poor image reproduction, creased copies, or paper misfeeds.
Generally, avoid paper curling and absorption of moisture.
Avoid storing paper in humid areas. In high-temperature and
highhumidity, or low-temperature and low-humidity conditions, store paper
in a vinyl bag.
Do not store paper where it will be exposed to heat.
Store on a flat surface.
Use older stock first.
Do not lay heavy objects on paper.
Keep open reams of paper in the package, and store as you would
unopened paper.
l
Store horizontally in a cool, dark place.
l
Never store toner cassette where it will be exposed to heat.
l
Do not lay heavy objects on the toner cassette.
l
Keep the toner cassette out of children’s reach.
50
Page 50

Page 51

52
Put the toner cassette in a vinyl
bag.
m :
To prevent the toner from
spilling out, make sure you seal the vinyl
bag firmly.
Remove the two shipping thumbscrews from inside the copier.
(Only short thumbscrew with type
1 model.)
Close the top unit by pressing
down firmly on the marked position.
Attention: Make sure to press the marked
position.
Remove the sticker and insert the
two shipping thumbscrews into the
holes, then tighten them as shown.
(Only short thumbscrew with type
1 model.)
l
Make sure to insert the shipping
thumbscrews to prevent damage while
moving the copier.
Remove copy tray as shown.
First, gently lift it up
0,
then pull
it out
0.
Put the copier in the vinyl bag.
Page 52

-
Put the copier in the cardboard
-
box.
l
Lift the copier from the bottom as
illustrated.
-
Insert the toner cassette, copy tray,
operator’s manual and power cord
into the box.
aB
A
Firmly put the foam blocks on the
copier.
am
Seal the box firmly using tape.
53
Page 53

TROUBLESHOOTING
........................
56-57
CLEARING
MISFEEDS
......................
58-60
When Pz appears on the copy counter
..
.59
When & stays on
...................................
60
55
Page 54

Condition
Cause
Remedy
See
Page
Power cord is not properly
Plug it in firmly.
-
plugged into the outlet.
Nothing happens
Check that the both ends of
when the switch is
the top unit are securely
turned on.
Top unit is not completely
closed. If not, close the top
15
closed.
unit firmly by pressing the
marked position.
PE
is displayed on
the copy counter.
Paper cassette is empty.
Load paper.
18
L&I
is
blinking.
Toner has nearly run out
Replace toner cassette.
42
L&l
stays
on.
Toner has run out.
Replace toner cassette.
42
&
stays on.
A misfeed has occurred.
Clear misfed paper.
59
The copier has
entered Auto-off
mode (30 minutes
The copier has shifted to the
Press any key to
re-activate
after a copy was
Auto-off function.
the copier.
21
made or a key was
pressed).
Copies have white
streaks.
Corona wires are dirty.
Clean the corona wires.
45
Copy image
density is uneven.
t’
i
is
displayed on
Wait for a while until the
the copy counter.
The copier is overheated.
copier cools down and
t’
I
is
48
no longer displayed.
ATTENTION: If the error code (E
..)
appears, turn off the main switch,
then turn it on. If the error code disappears, the copier
will function. If the error code appears again, turn off the
main switch and immediately call your service personnel.
56
Page 55

Condition
Cause
Paper does not meet
specification.
Remedy
S
pZ;e
Set
proper
paper. Paper
size and
weight
must
comply with the
standards
62
set for this copier.
Misfeeds occur
frequently.
Copies appear dirty.
Folded, wrinkled, damp,
or curled paper is in the
Load paper correctly.
18
cassette.
Paper is positioned
Position the end plate and
improperly.
the side guides properly.
17
A piece of misfed paper
Clear paper path
or another foreign object
completely of paper and
is in the copier.
other material.
58
The original has a gray
or colored background.
Adjust the image
density.
28
The
image density is
too dark.
The platen cover or
Clean platen cover
exposure glass is dirty.
and exposure glass.
44
The reverse side of an
The
image density is
original image is copied.
too dark.
The original has a low Adjust the image
contrast image.
density.
28
Copies are too light.
The
image density is
too light.
Damp or rough grain Use dry paper without
paper is used.
rough grain.
18
The same copy area is
dirty
whenever making
The platen cover or Clean platen cover
copies.
exposure glass is dirty
and exposure glass.
44
.
Copies are blank or
parts of the image are
not copied.
The original is not set
correctly.
Set originals correctly.
24
An improper paper size
is selected.
17
57
Page 56

When there is a paper misfeed, the Check Paper Path (& ) indicator or
Load Paper
(PE
) indication on the copy counter will light.
A
1
When removing misfed paper, do not touch the fusing unit
0
because it could be very hot.
CAUTION
Do not leave any torn scraps of paper inside the copier.
After removing the misfed paper, make sure that all units are returned
to their original positions and the top unit is closed.
When a paper misfeed occurs, the copier keeps track of the selected
copy modes and how many copies have been completed. It is not
necessary to reset the copy modes or the copy quantity after removing
misfed paper.
Repeat the procedures described in this section until the Check Paper
Path
*
indicator goes out. (The indicators do not function unless the
top unit is closed.)
Do not touch the copy image when removing misfed paper
-
toner
may stain your hands.
58
Page 57

When
PE
appears on the copy counter:
Pull out the paper cassette and
0
check if paper remains in the
cassette.
l
If the paper cassette has run out of paper,
load paper. See page 18.
Remove the misfed paper com-
w
pletely.
l
Make sure that there are no scraps of
paper inside the copier.
If paper remains in the paper cassette and there is no misfed paper,
follow the steps below.
1) Make sure that the end plate and side plates are positioned properly to match the paper size you are using.
2) If
PE
is still displayed, change the paper type.
If the PE indication does not go out, call for a service representative. See the back cover of this manual for the telephone number.
59
Page 58

When & is lit:
Remove the misfed paper com-
w
pletely.
l
If it is difficult to remove the misfed
paper, gently take it out through the
copy tray area.
Close the top unit by pressing
m
down firmly on the marked
posi-
tion.
l
Make sure that the Check Paper Path
&
indicator is turned off.
60
Page 59

SPECIFICATIONS
...........................
62-63
61
Page 60

Configuration
Copy Process
Originals
Maximum Original Size
Copy Paper Size
Bypass Feed Paper Size
Copy Paper Weight
Desktop
Dry electrostatic transfer system
Sheet/Book
A4, 8
l/2
x
14 in.
A5 to A4, 5
l/2
x 8 l/2
to 8
l/2
x
14 in.
A6 to A4, 5
l/2
x 8 l/2
to 8
l/2
x
14 in.
Paper tray feed: 60 -
90g/m2,
16 - 24 lb
Bypass feed: 60
- 180g/m2,
16 - 48 lb
Reproduction Ratios
(Type 2
only)
Zoom (Type 2 only)
From 70% to 141% in 1% increments
Copying Speed
8 copies/minute
Warm-Up Time
First Copy Time
Copy Number Input
(A4 lengthwise or 8
l/2
x
11 in. lengthwise)
Less than 15 seconds
(at 23°C or 73°F)
Less than 10 seconds
(A4 lengthwise or 8
l/2
x
11 in. lengthwise)
+/-
key, 1 to 50
Manual Image
Density Selection
Automatic Reset
(count up or count down)
4 steps including halftone
1 minute standard setting; can also be set to
3 minutes or no auto reset.
[Metric version
1
Inch version
1
Enlargement
Full size
141%
122%
141%
100%
100%
Reduction
82%
93%
71%
78%
70%
62
Page 61

Paper Capacity
Toner Replenishment
Copy Tray Capacity
Power Source
Paper cassette:
250 sheets
(80g/m2,
20 lb)
Bypass feed entrance: 1 sheet (
180g/m2,
48 lb)
Toner cassette exchange (140g/unit)
50 sheets
See the inside of the front cover of this
manual
Power
Consumption
IM
aximum
I
1,300W
I
Copy cycle condition 1 450W
Warm-up condition
790W
Standbv condition 91W
Auto-off condition
1 5W
Less than
55dB
Standby condition less than 40dB
Copy cycle condition less than 62dB
Noise Emission
Sound pressure level
(Measured according to
IS0 7779 at operator
position.)
Noise Emission
Sound power level
(Measured according to
IS0 7779)
Dimensions
Weight
Copier with toner cassette:
Less than
16.5kg,
36.4 lb
Specifications are subject to change without notice.
63
Page 62

Page 63

Page 64

In accordance with IS0 Standard 700 1, this machine uses the following symbols
for the main switch:
I
means POWER ON.
0
means POWER OFF.
.
1
I
CC
Declaration of Conformity
“The Product complies with the requirements of the
EMC Directive 89/336/EEC
and the
Low Voltage Directive 73/23/EEC”.
67
Page 65

SUPPLIES MODEL NAMES
The
correct
model name of supplies for
our machine as listed below.
f
oner cassette Type 1215
n
Overseas Affiliates
U.S.A.
RICOH CORPORATION
5
Dedrick Place
West Caldwell, New Jersey 07006
Phone: +1-973-882-2000
The Netherlands
RICOH EUROPE B.V.
Groenelaan 3, 1186 AA, Amstelveen
Phone:
+31-(0)20-5474111
United Kingdom
RICOH UK LTD.
Ricoh
House, 1 Plane Tree Crescent,
Feltham,
Middlesex,
TW1
3 7HG
Phone: +44-(0)181-261-4000
Germany
RICOH DEUTSCHLAND GmbH
Mergenthaler
Allee
38-40, 65760
Eschborn
Phone: +49-(0)6196-9060
Spain
RICOH
ESPANA
S.A.
Av. Litral Mar, 12-14, 08005 Barcelona
Phone: +34-(0)93-295-7600
Italy
RICOH
ITALIA
SpA
Viale, Della Metallurgia 12,
Zona
Basson
37139 Verona
Phone: +39-(0)45-8181500
Hong Kong
RICOH HONG KONG LTD.
23/F., China Overseas Building, 139,
Hennessy Road, Wan Chai, Hong Kong
Phone: +852-2862-2888
Singapore
RICOH ASIA PACIFIC PTE. LTD.
260 Orchard Road,
#15-01/02
The Heeren, Singapore 238855
Phone: +65-830-5888
France
RICOH FRANCE S.A.
383, Avenue du General de Gaulle-
BP 307-92143 Clamart Cedex
Phone: +33-(0)1-40-94-38-38
RICOH COMPANY, LTD.
15-5,
1
-chome,
Minami-Aoyama,
Minato-ku, Tokyo, Japan
Phone:
+81(3)3479-3111
Printed in The Netherlands
EE@rnm~
 Loading...