

Ricoh FAX880 OPERATING INSTRUCTIONS I20 US

OPERATOR’S MANUAL
RICOH MV74
Please read all of these instructions and keep this manual by your machine.

OPTIONAL EQUIPMENT
MEMORY (FEATURE EXPANDER TYPE 100 2M, FEATURE EXPANDER
TYPE 100 4M)
Either a 2 - Mbyte Fax memory card or 4 - Mbyte Fax memory card can be
added.
PC-FAX EXPANDER TYPE 120
This allows use of this machine as a scanner and a PC FAX modem.
Trademark Notice:
Canon and BJ are registered trademarks and Bubble Jet is a trademark of
Canon Inc.
Other brand and product names may be trademarks or registered
trademarks of their respective companies.

USA
FCC Requirements
1. This equipment complies with Part 68 of the FCC rules. On the cover of this equipmen t is a la be l tha t con ta ins, amo ng
other information, the FCC regist ra tio n nu mb er and ring er equ ivale nce num ber (REN) for this eq uip me nt . If req ue ste d,
this information must be provided to the tele ph on e com pa ny.
2. This equipment uses the following USOC ja ck: RJ11C
3. The REN is used to determine the quantity of device s which ma y be conne cte d to the te lep ho ne line . Excessive REN’s
on the telephone line may result in the de vices not ringing in response to an incoming call. In most, but no t all ar ea s, th e
sum of the REN’s should not exceed five (5.0). Con ta ct th e telep ho ne comp any to de te rmine the maximum REN for the
calling area.
4. If this equipment causes ha rm to the te lep ho ne networ k, th e te lep ho ne compan y will notif y you in ad van ce th at
temporary discontinuance of service may be requir ed . If adva nce not ice is not practica l, th e te lep ho ne compan y will
notify the customer as soon as possible. Also, you will be advise d of you r righ t t o f ile a com pla int with th e FCC if you
believe it is necessary.
5. The telephone company ma y make chan ges in its facilities, equipment, operations, or proced ures t ha t cou ld affect the
operation of the equipmen t. If th is hap pe ns, the telephone company will provide advance notice in order for you to ma ke
necessary modifications in order to main ta in un int er ru pt ed service .
6. In the event of op eration problems (document jam, copy jam, com mu nica tion error indication), refer to the solvin g
problems section in this manual.
7. If you cannot correct the problem, plea se con tact th e RICO H CORP. CUSTOMER SUPPORT DEPT. at 1-800-FAST FIX
for repair and warranty informa tio n. If it is causing harm to the telephone network, th e telephone company may request
you to disconnect the equipment from the ne two rk un til th e prob lem is resolve d.
8. This equipment cann ot be use d on telephone company-provided coin service. Conn ect ion to Pa rt y Lin e Ser vice is
subject to state tariffs.
WHEN PROGRAMMING EMERGENCY NUMBERS AND/OR MAKING TEST CALLS
TO EMERGENCY NUMBERS:
1. Remai n on the lin e and bri efly exp lain to th e dispat cher th e reaso n for the
call before hang ing up.
2. Perf orm suc h acti vities in the of f-peak ho urs, s uch as ea rly mor ning ho urs or
late even ings .
CANADA
The Industry Canad a lab el ide nt ifie s cert ifie d eq uip me nt . Th is cert ifica tio n me an s tha t t he equipment meets certain
telecommunications network protective, operationa l, an d safety requirements. The departmen t d oe s no t gu ar an te e the equipment
will operate to the user’s satisfact ion . Bef or e inst allin g this equ ipm en t, user s shou ld ensur e th at it is permissible to be conn ect ed
to the facilities of the local telecommunications company. The equipment must also be installed using an acceptable method of
connection. The cust om er should be awar e th at compliance with the above conditions may not pre ven t d eg ra da tio n of service in
some situations.
Repairs to certified eq uip me nt shou ld be made by an aut ho rize d Can ad ian main te na nce facilit y designated by the supplier . An y
repairs or alterat ion s mad e by th e use r to this equipment, or equipment malfunctions, ma y give th e te leco mm un icat ion s comp an y
cause to request the user to disconnect the equipment. Users should ensure for their own protection that the electrical ground
connections of the power utilit y, telephone lines, and internal me ta llic wate r pip e syste m, if pre sen t, are conn ect ed to geth er. This
precaution may be part icula rly important in rural areas.
Cautio n: Users should not attempt to make such connect ion s the mse lves, but shou ld con ta ct the appropriate electric inspection
authority, or electrician, as appropriate.
The standard connecting arrangement code for this equipment is CA11A.
The Load Number (LN) assig ne d to each terminal device denotes the percen ta ge of th e total load to be connected to a telephone
loop which is used by the device to pr eve nt over loa din g. The termination of a loop may consist of any combinatio n of device s
subject only to the requ irement that the sum of the load number s of all th e de vices do es no t exceed 100.

SUPPLIES
Caution: Ricoh shall not be responsible for any damage or expense that
may result from the use of parts other than genuine Ricoh parts in your
Ricoh office product.
INK CARTRIDGE
❐ Ink Cartridge Type 120 Black is recommended for the best monochrome
performance.
❐ Ink Cartridge Type 125 Color is recommended for the best colour
performance.
❐ Ink Refill Type 125 Black is recommended as a replacement when Ink
Refill Type 125 Color runs out of black ink.
❐ Ink Refill Type 125 Color is recommended as a replacement when Ink
Refill Type 125 Color runs out of Color ink.
U.S. Government Market ing : Rico h Co rp orat ion , 3 60 1 Eise nhowe r A ve nu e, Suit e 4 00, Ale xan dr ia, VA 22304.(70 3)31 7- 3290
Headquarters: Ricoh Corp oration, 5 Dedrick Place, West Caldwell, NJ 07006. 201-88 2- 20 00
Ricoh Company., Ltd. 15-5, Minami-Aoyama 1-ch om e, Minatoku, Tokyo 107, Japan
Part No. H5058710 Printed in Japan
US

Table of Content s
INTRODUCTION......................................................................................... 1
WHAT DOES A FAX MACHINE DO?.........................................2
WHAT DOES THE PRINTER DO?..............................................2
SOME OF THE THINGS THAT THIS MACHINE CAN DO ........ 3
HOW TO USE THIS MANUAL.....................................................4
GENERAL PRECAUTIONS ................................... ......................5
GUIDE TO COMPONENTS ......................................................................... 9
OPERATION PANEL .................................................................10
FRONT VIEW ...............................................................................12
BASIC FAX OPERATION............................................................................13
SENDING IMMEDIATELY VS. SCANNING QUICKLY...............14
SENDING IMMEDIATELY
SCANNING QUICKLY (Memory Transmission) .................................17
IF YOU MAKE A MISTAKE .......................................... ..............19
POSSIBLE PROBLEMS...............................................................19
SENDING A PAGE WITH VERY FINE DETAIL .......................... 20
OTHER FEATURES FOR TRANSMISSION ...............................23
CHANGING TRANSMISSION MODE ..........................................27
REDIALING ................................................................................... 28
CHOOSING THE RECEIVING MODES & HOW TO RECEIVE..30
RECEIVING FAX MESSAGES WHEN
THERE IS A PROBLEM ................ ..............................................35
MAKING TELEPHONE CALLS ................................... ................37
ERASING & PRINTING STORED MESSAGES..........................40
COPYING......................................................................................42
(Immediate Transmission) ............ .... .... ....16
OTHER FAX FEATURES...............................................................................4 3
PROGRAMMING KEYSTROKES...................... ..........................44
SENDING CONFIDENTIAL MESSAGES....................................47

RECEIVING CONFIDENTIAL MESSAGES................................ 49
LOCKING INCOMING MESSAGES ........................................... 52
FORWARDING MESSAGES.......................................................56
MULTI-COPY SETTING .............................................................. 62
REVERSE ORDER PRINTING ...................................................65
PROTECTION AGAINST WRONG CONNECTIONS .................66
REJECTING MESSAGES FROM CERTAIN SENDERS............68
PROGRAMMING SPECIAL SENDERS .................... .................73
WILD CARDS...............................................................................76
TONAL SIGNALS......................................................................... 77
(Error Correction Mode) AND PAGE RETRANSMISSION ..... 78
ECM
BATCH TRANSMISSION.............................................................79
CALLING TO REQUEST A MESSAGE (POLLING).................. 81
COUNTERS........................... ....................................................... 88
(Remote Diagnostic System) ...................................................... 89
RDS
AI SHORT PROTOCOL............................................................... 90
USING THE PRINTER ..................................................................................91
SETTING UP THE PRINTER....................................................... 92
USING THE PRINTER................................................................98
PRINTING THE SELF TESTS..................................................... 101
USING THE PRINTER WITH YOUR SOFTWARE..................... 105
USING THE OPERATION PANEL.............................................. 125
CUSTOMIZING THE PRINTER ...................................................128
CHANGING AN EMULATION SWITCH SETTING .....................135
REPORTS .....................................................................................................137
AUTOMATICALLY PRINTED REPORTS................................... 138
REPORTS YOU CAN PRINT OUT YOURSELF......................... 143

MAINTAINING YOUR MACHINE ..............................................................145
ADDING PAPER........................................................................... 146
REPLACING THE INK CARTRIDGE................................... ........147
CLEANING THE MACHINE.........................................................150
SOLVING PROBLEMS ................................................................................153
SDOCUMENT JAMS.............................. ......................................154
COPY JAMS ................................................................................. 1 55
COMMUNICATION PROBLEMS .................................................158
OPERATING DIFFICULTIES .......................................................1 58
DISPLAYED ERROR MESSAGES .............................................. 1 62
ERROR CODES............................................................................1 64
TECHNICAL REFERENCE ............................................................................167
ENTERING TELEPHONE NUMBERS.........................................168
STORING NAMES AND LABELS...............................................168
USER SWITCHES ............................ ............................................169
EMULATION SWITCHES FOR THE PRINTER .......................... 176
DOING TWO THINGS AT ONCE
LIMITS ON THE USE OF STORED TELEPHONE NUMBERS . 181
DOCUMENT SPECIFICATIONS .................................................182
FAX SPECIFICATIONS ................................................................ 184
PRINTER SPECIFICATIONS.......................................................185
(Dual Access) .......... ................ ..180
APPENDIX A INSTALLING THE MACHINE & INITIAL SETTINGS ...............187
LOCATION .................................................................................... 188
INSTALLATION............................................................................189
SOME ITEMS MUST BE PROGRAMMED FIRST ......................1 97
STORING OFTEN USED NUMBERS ..........................................210
OTHER ITEMS TO PROGRAM AT YOUR LEISURE................. 221

APPENDIX B PRINTING IN COLOR........................................................... 223
INTRODUCTION........................ ................................................... 224
SELECTING THE PRINT MEDIA................................................ 224
UNDERSTANDING YOUR APPLICATION’S CAPABILITIES ... 225
COLOR AND PRINTING SPEEDS..............................................227
GLOSSARY........................... .......................................................226
FUNCTION LIST

WARNING: This equipment has been tested and found to comply with
the limits for a Class B digital device, pursuant to Part 15 of the FCC
Rules. These limits are designed to provide reasonable protection
against harmful interference in a residential installation. This equipment
generates, uses and can radiate radio frequency energy and, if not
installed and used in accordance with the instructions, may cause
harmful interference to radio communications. However, there is no
guarantee that interference will not occur in a particular installation. If this
equipment does cause harmful interference to radio or television
reception, which can be determined by turning the equipment off and on,
the user is encouraged to try to correct the interference by one or more
of the following measures:
- Reorient or relocate the receiving antenna.
- Increase the separation between the equipment and receiver.
- Connect the equipment into an outlet on a circuit different from that to
which the receiver is connected.
- Consult the dealer or an experienced radio/TV technician for help.
Changes or modifications not expressly approved by the party
responsible for compliance could void the user’s authority to operate the
equipment.
Properly shielded and grounded cables and connectors must be used for
connection to host computer in order to meet FCC emission limits.
Energy Saving Information
This product was designed to reduce the environmental impact associated
with this fax equipment. This is accomplished by means of energy saving
features such as Low Power (Energy Saver) modes and Night Timer.
Please see applicable sections of operating manual for details.
As an Energy Star Partner, we have determined that this fax
model meets Energy Star guidelines for energy efficiency.

Notice about the Telephone Consumer Protection Act (Valid in the USA
only)
Attention Please!
The Telephone Consumer Protection Act of 1991 among other things
makes it unlawful for any person to send any message via a telephone
fax machine unless such message clearly contains in a margin at the top
or bottom of each transmitted page or on the first page of the
transmission, the date and time it is sent and an identification of the
business or other entity, or other individual sending the message and
the telephone number of the sending machine or such business, other
entity, or individual. This information is transmitted with your document
by the TTI (Transmit Terminal Identification) feature.
In order for you to meet the requirement, your machine must be
programmed by following the instructions in the accompanying Operation
Manual. In particular, please refer to the "General Precations" and/or
"Some Items Must be Programmed First" sections. Also refer to the TTI
(Transmit Terminal Identification) programming procedure to enter the
business identification and telephone number of the terminal or business.
Do not forget to set the date and time.
Thank you.

IMPORTANT SAFETY INSTRUCTIONS
1. Read all of these instructions.
2. Save these instructions for later use.
3. Follow all warnings and instructions mark ed on the product.
4. Unplug this product from the wall the outlet before cleaning. Do not use liquid cleaners or
aerosol cleaners. Use a damp cloth for cleaning.
5. Do not use this product near water.
6. Do not place this product on an unstable cart, stand or table. The product may fall ,
causing serious damage to the product or injuring the user.
7. Slots and openings in the cabinet and the back or bottom are provided for ventil ati on; to
ensure reliable operation of the product and to protect it from overheating, thes e openings
must not be blocked or covered. The openings should never be block ed by plac ing t h e
product on a bed, sofa,rug or other similar surface. This product should not be placed i n a
built-in installation unless proper ventilation is provided.
8. This product should be operated from the type of power source indicated on the marking
label. If you are not sure of the type of power available, consult an authorised sales person
or your local power company.
9. This product is equipped with a 3-wire grounding type plug, a plug having a third
(grounding) pin. This plug will only fit into a grounding-type power outlet. This is a safety
feature. If you are unable to insert the plug into the outlet, contact your electric ian to
replace your obsolete outlet. Do not defeat the purpose of the ground grounding type plug.
(This does not apply in countries in which the 2-wire, non-grounded type plug is used,)
10. Do not allow anything to rest on the power cord. Do not locate this product where persons
will walk on the cord.
1 1. If an extension cord is used with this product, make sure that the total of ampere ratings
of the products plugged into the extension cord does not exceed the extens ion c or d
ampere rating. Also, make sure that the total of all products plugged into the wall outl et
does not exceed 15 amperes.
12. Never push objects of any kind into this product through cabinet slots as they may touc h
dangerous voltage points or short out parts that could result in a risk of fire or electri c
shock. Never spill liquid of any kind on the product.
13. Do not attempt to service this product yoursel f, as opening or removing c overs may
expose you to dangerous voltage points or other risks. Refer all servicing to qualif ied
service personnel.
14. Unplug this product from the wall outlet and refer servicing to qualified serv ice pers onnel
under the following conditions:
A. When the power cord or plug is damaged or frayed.
B. If liquid has been spilled into the product.
C. If the product has been exposed to rain or water.
D. If the product does not operate normally when the operating
instructions are followed. Adjust only those controls that are covered
by the operating instructions since improper adjustment of other
controls may result in damage and will often required extensive work
by a qualified technician to restore the product to normal operation.
E. If the product has been dropped or cabinet has been damaged.
F. If the product exhibits a distinct change in performance, indicating a
need for service.

INTRODUCTION
Thank you for purchasing this product. This compact machine is ideal for
small businesses and home office users. It is very easy to operate. Also, you
can get printouts from your computer just by entering printer mode. If you
install the optional color cartridge, you can get printouts in color. You will
soon become accustomed to its features and will be able to enjoy years of
service from it.
Your machine is equipped with a wide range of labor-saving and cost saving
features. Please keep this manual near the machine at all times.
INTRODUCTION
1

WHAT DOES A FAX MACHINE DO?
A fax machine scans your document and converts it into a series of black
and white dots (the number of dots there are across and down the page
depends on the resolution that you selected
section of this manual for details). This series of dots is transformed into an
electrical signal and sent out over the telephone line to the destination fax
machine.
The receiving fax machine reconstructs your document from the incoming
signal, and prints it.
If you are worried about whether the message arrived at the destination, you
can check a report called the TCR (Transaction Confirmation Report). When
you print this report, you can see the result of the most recent fax
communications made by your machine.
You can use your fax machine to send and receive many types of
documents, even photographs.
-refer to the specifications
WHAT DOES THE PRINTER DO?
When you are in printer mode, you will be able to use the machine as a
desktop printer for your personal computer. To ensure that the printer can be
used with a wide range of application programs, emulation modes for
different printer types have been provided.
2
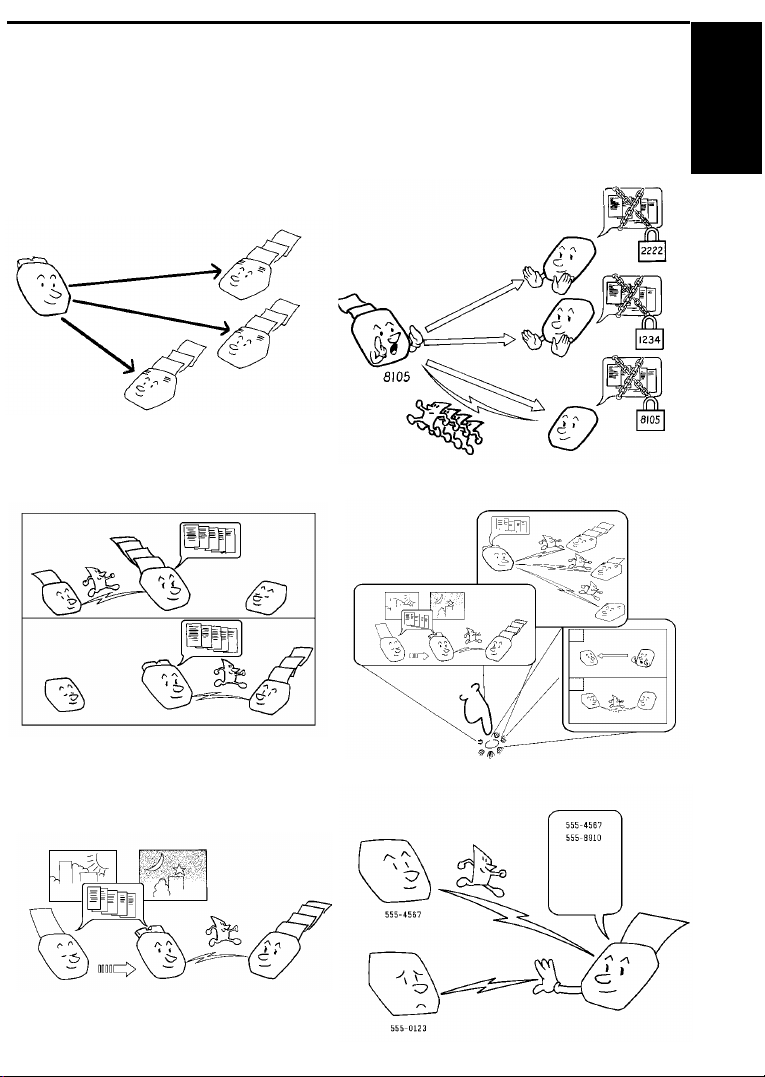
SOME OF THE THINGS THAT THIS MACHINE
Polling Reception
See page 44
CAN DO
This machine has many features. Here is a sample of what it can do.
Sending a Fax to More Than One Location
See page 18
Forwarding
INTRODUCTION
See page 85
Programing Keystrokes
See page 56
Sending a Fax Later
See page 23
Authorized Reception
See page 70
3

HOW TO USE THIS MANUAL
This manual contains instructions on how to operate and take care of your
machine. Please keep it near the machine at all times.
Note that the external appearance of the machine in some illustrations may
differ slightly from the actual machine.
The manual consists of the following sections.
❐ How to Use This Manual - This is the section that you are now reading.
It contains an overview of the manual.
❐ General Precautions - This section lists precautions that you should
keep in mind when operating the machine. Read this section before you
begin to use your machine.
❐ Guide to Components - This contains a diagram that shows where the
main components of your machine are situated. It also describes the
functions of the various buttons and indicators that are on your
machine’s operation panel.
❐ Basic Fax Operation - This section describes the features and settings
that would normally be used on a daily basis.
❐ Other Fax Features - This section explains how to take advantage of
the special features of your fax machine.
❐ Using The Printer - This section explains how to use the machine as a
printer and take advantage of the printer features.
❐ Reports - This section explains the reports that the machine generates:
When there are error codes or paper jams refer to this section (many
routine problems do not need to be solved by an experienced
technician).
❐ Maintaining Your Machine - This section shows you what to do when
consumable supplies run out.
❐ Solving Problems - For example when your machine cannot
communicate or there is a paper jam.
❐ Technical Reference - Inputting characters, setting up the user
switches, specifications and other technical information.
❐ Appendix A - The best place to install your machine is described here.
Please also refer to it when you plan to move the machine to another
location. It also explains the things you have to do before you can send
your fax message, and lists important features that will make faxing
more convenient.
❐ Appendix B -Printing in color.
4
GENERAL PRECAUTIONS
WARNING : Do not attempt any maintenance or troubleshooting other
than that mentioned in this manual.
Pay attention to the following :
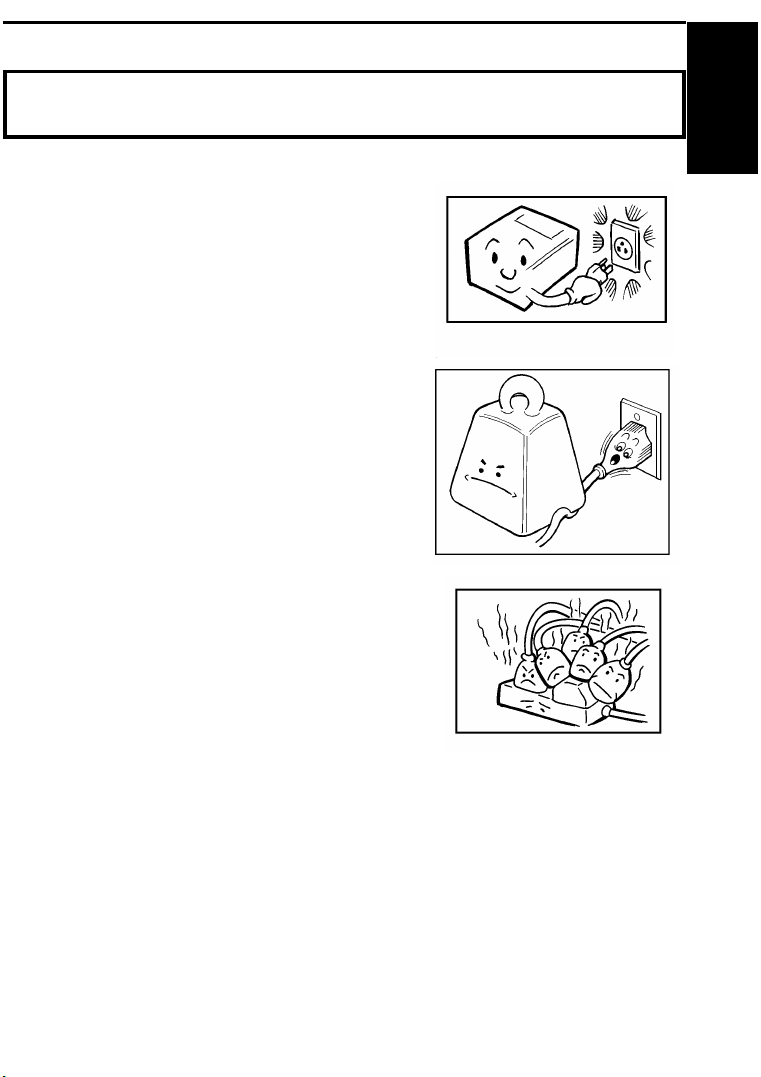
Power Supply
1. Power requirements:
115Vac, 60 Hz.
2. Insert the power plug securely into the
wall socket.
3. Make sure that the wall outlet is near
the machine and readily accessible.
4. Do not connect other equipment to the
same socket.
5. Do not step on or set anything on the
power cord.
6. Do not connect other equipment to the
same extension cord.
7. Be sure that the power cord is not in a
position where it could trip someone.
INTRODUCTION
Grounding
Ground the machine and the lightning protection circuit in accordance with
the regulations. Do not ground to gas or water pipes, or to a telephone
ground plug. Proper grounding is to the ground terminal of the power outlet.
Be sure that the ground terminal of the power outlet is properly grounded.
The lightning protection circuit for the machine requires the machine to be
properly grounded. If proper grounding is provided, about 90% of lightning
damage can be prevented. For safety, be sure to connect the machine to a
three-prong grounded outlet.
5
GENERAL PRECAUTIONS
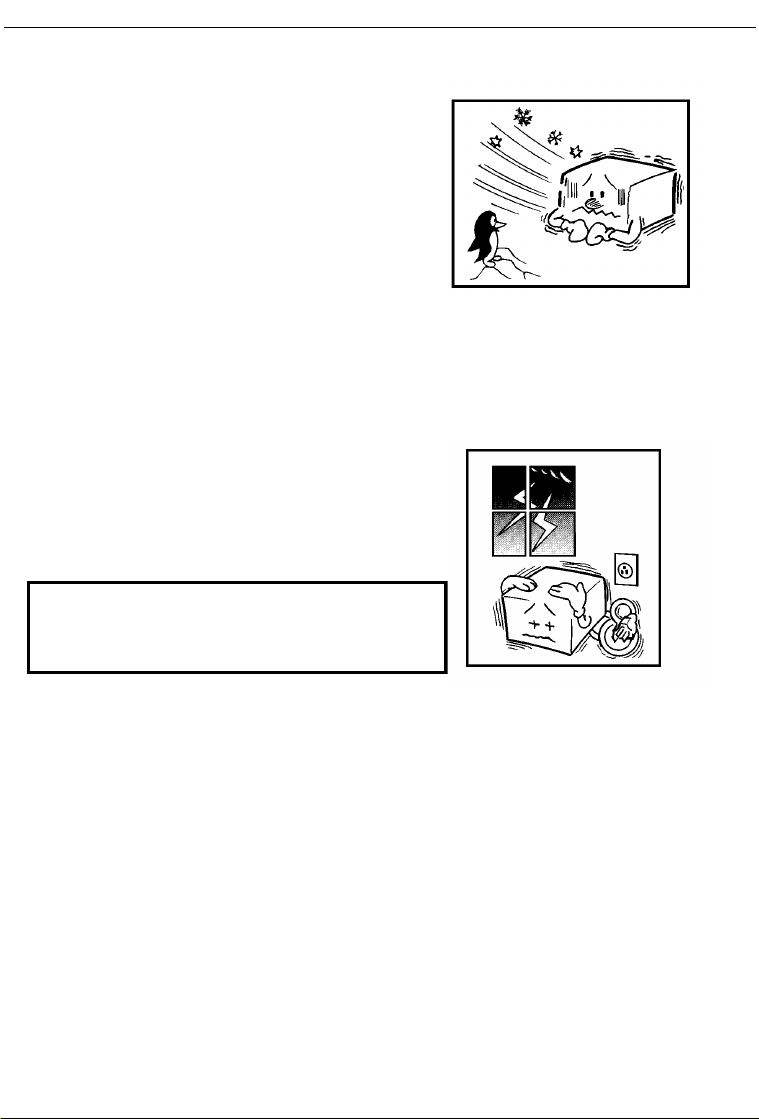
COLD WEATHER POWER-UP
Avoid raising the room temperature abruptly
when it is below 57°F , or condensation may
form inside the machine.
1. Raise the room temperature to 68°F at
less than 18°F per hour.
2. Wait for 30 to 60 minutes.
3. Turn the power on.
Do not use the machine near a humidifier.
THUNDERSTORMS
With proper grounding, about 90% of lightning
damage can be prevented. However, if
possible, during severe electric storms
disconnect the power cord and telephone line
cord.
NOTE: All fax messages stored in the
memory are erased if the power is switched
off for more than one hour.
PAPER PRECAUTIONS
The following list of precautions tells you how to store and handle your
printer paper.
Unused paper
❐ Store in a dry, cool, dark place.
❐ Do not store under uneven pressure.
❐ Only use fresh unmarked paper.
Copies
❐ Store in a dry, cool, dark place.
❐ Do not use adhesives or writing materials containing alcohol or other
organic solvents.
❐ Avoid contact with films or adhesive tapes containing plasticisers.
6

GENERAL PRECAUTIONS
❐ Avoid contact with diazo photosensitive paper.
❐ When a copy gets wet, dry it by wiping it gently with a soft cloth or tissue.
❐ Do not scratch or rub it with hard materials.
❐ Do not copy with a mercury lamp diazo copier.
❐ Make a photocopy if the information is to be kept for a long time.
❐ Do not store copies in vinyl file folders.
INK CARTRIDGES
❐ Ink Cartridge Type 120 Black is recommended for the best black
performance. For color printing, Ink Cartridge Type 125 Color is
recommended.
❐ Store in a cool, dark place.
❐ Keep out of reach of children. The ink in the cartridge c ontains isopropyl
alcohol 67-63-0.
❐ Never store where it may be exposed to heat.
❐ Do not unpack a cartridge until you need to use it.
❐ Do not touch the print head : This is a precis ion
component.
❐ Do not lay heavy objects on the ink cartridge.
INTRODUCTION
❐ Do not remove the ink cartridge from the printer
unless you have to; ink inside the cartridge will dry
out and the cartridge will not disperse ink.
❐ For best results, change the cartridge at least once a
year.
❐ Do not attempt to refill ink cartridges. Printouts with
refilled cartridges may be of poor quality.
❐ Do not disassemble ink cartridges. Ink may be spilled on your hands or
clothes.
❐ Do not subject cartridges to shock or vibration; ink may spill out of the
cartridge.
❐ Do not touch the aluminum plate on the cartridge.
❐ Do not replace the protective seal and head cap.
❐ If you unwrap a cartridge and do not install it, store it in the ink car tridge
container.
7

GENERAL PRECAUTIONS
OPERATING PRECAUTIONS
❐ Do not unplug the power cord while the machine is operating.
❐ Do not overload the paper feed unit.
❐ Keep corrosive liquids, such as acid, off the machine.
❐ Do not touch copy paper if your fingers are wet or oily; fingerprints may
appear on the copy.
❐ Do not let paper clips, staples or other small metal objects fall into the
machine.
❐ Do not place beverages on or near the machine, they may spill on or
into it.
❐ While the machine is in operation, do not unplug the power cord.
❐ If you open the front cover, the machine does not stop printing at once.
Do not touch the inside of the machine while it is working.
❐ Make sure the ink cartridge is in its home position.
❐ After the cover has been open, the machine will automatically perform
print head cleaning.
GENERAL
❐ Since some parts of the machine are supplied with high voltage, make
sure that you do not attempt any repairs or attempt to access any parts
of the machine except those described in this manual.
❐ Do not modify or replace parts other than those mentioned in this
manual.
❐ After unplugging the power cord, always wait for more than three
seconds before plugging it back in.
❐ A lithium battery has been used in this machine to provide the maximum
storage life for your programmed data (such as Quick Dial keys and
Speed Dial codes). Your data will be saved for 5 years if you keep the
machine’s power on all the time.
❐ Do not place the machine in direct sunlight.
❐ Avoid prolonged or repeated contact with skin.
❐ Cleanse skin thoroughly after contact, before breaks and meals, and at
the end of the work period.
❐ Ink is readily removed from skin by waterless hand cleaners followed by
washing with soap and water.
❐ Be careful not to get any ink on your clothing.
8

GUIDE TO COMPONENTS
GUIDE TO
COMPONENTS
9

OPERATION PANEL
1
2
4
3
GHI JKL
PRS TUV
OPER
ABC
DEF
MNO
WXY
5
Receive File Indicator Lights when an incoming message was
received into the memory.
Check Display Indicator Lights or blinks when there is a problem
with the machine; look at the display to
determine the nature of the problem.
Function Key Press to use one of the numbered
functions.
Yes Key (m) Use to answer questions on the display.
1
No Key (i) Use to answer questions on the display.
Replace Cartridge( j ) Use to replace cartridges.
Arrow Keys When the arrow keys (j and k keys) are
shown on the display, use these keys to
access the options, items, or functions
shown by the arrow. Also use them to
move the cursor when programming or
editing a displayed item.
10

OPERATION PA NEL
Auto Select Mode Key
and Indicator
Detail Indicator Lights when you are in Detail mode.
Fine Indicator Lights when you are in Fine mode.
Halftone Key/ Halftone
2
Indicator
Memory Key Press this if you wish to transmit a fax
On line Key/ On Line
Indicator
Speed Dial Key Press this to dial using Speed Dials.
Pause/Redial Key Press this if you need to insert a pause
3
On Hook Dial Key Press this to dial without picking up the
Clear Key Use this to delete a single character on the
Quick Dial Keys Each of these can be programmed with a
4
Ten Keypad Use this as a telephone keypad, or to enter
Stop Key Press this to stop the machine and return it
5
Start / Copy Key Press this to start fax communications or
Press this key to use Auto Receive Mode.
The indicator lights when you are in this
mode.
Press this to use Halftone Mode, the
indicator lights when you are in the this
mode.
message using the memory features.
Press this to switch the printer On line or
Off line. While this indicator is blinking you
can not print.
when dialing. Also, press this to redial the
last dialed number.
handset.
display during programming.
telephone number.
Speed Dial codes.
to standby mode.
copy a document in the feeder.
GUIDE TO
COMPONENTS
11
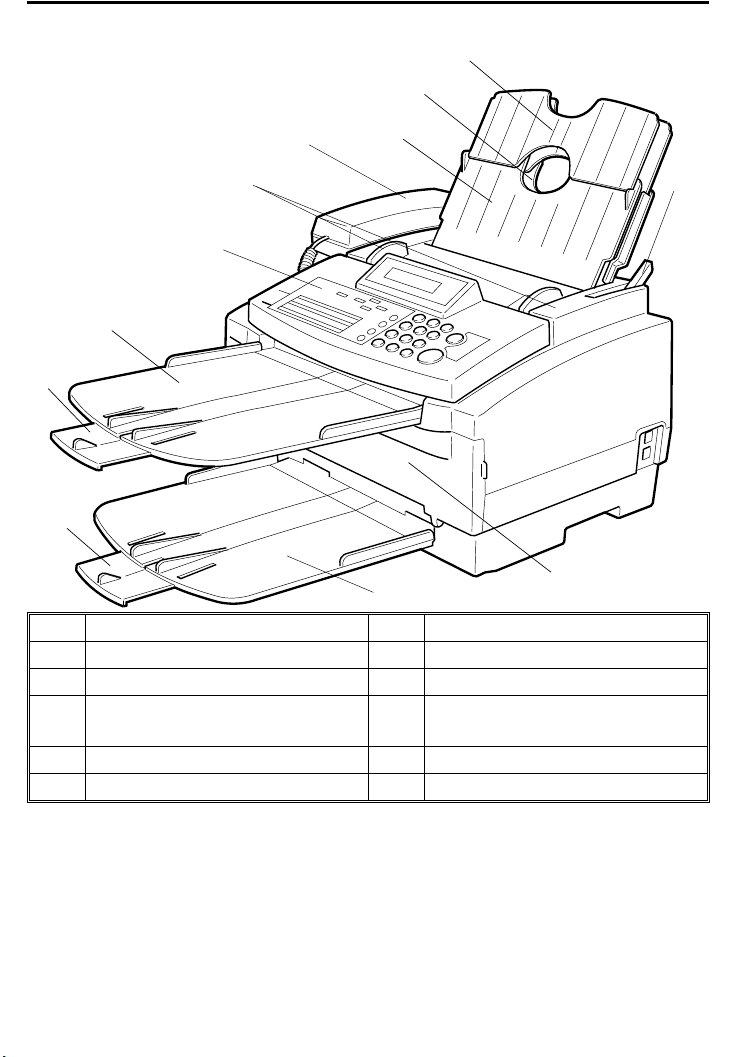
FRONT VIEW
1
2
3
5
6
7
8
9
10
1 Paper Feed Lever 7 Operation Panel
2 Document Table Extention 8 Document Tray
3 Paper Feed 9 Document Tray Extension
4 Document Table (Paper Feed
Cover )
5 Handset 11 Copy Tray
6 Document Guides 12 Front Cover
4
11
10 Copy Tray Extension
12
12
BASIC FAX OPERATION
indicates a hint (for example a page number where related information
can be found)
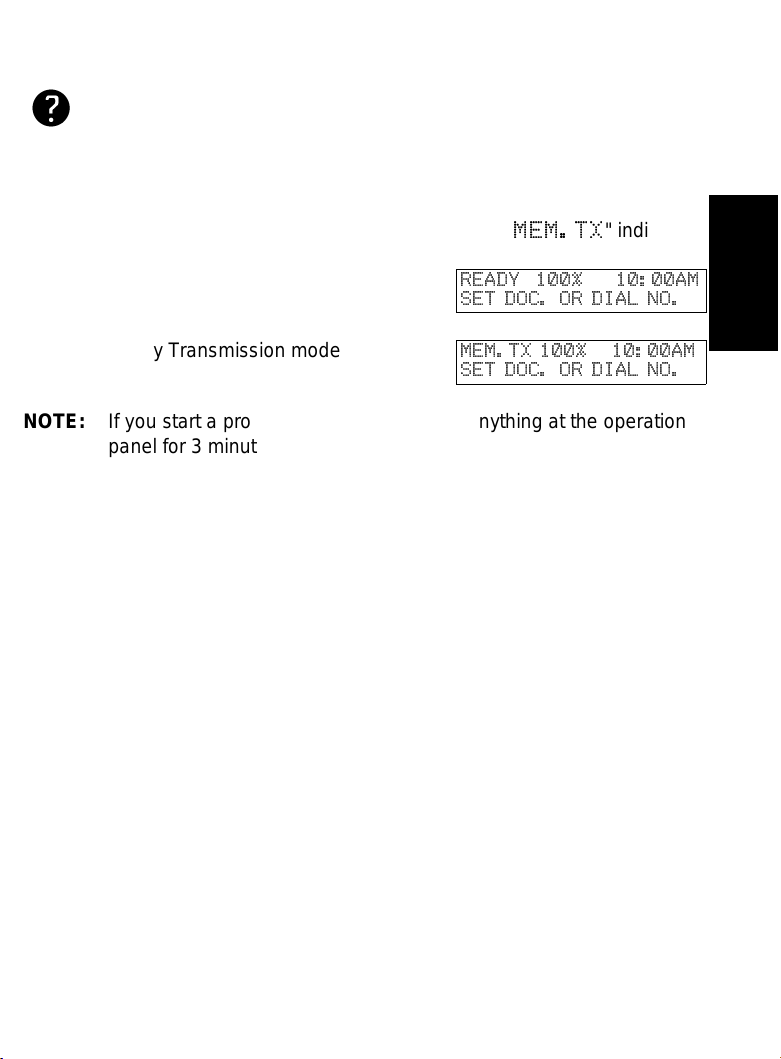
Most procedures start from standby mode as shown below. The percentage
number shows how much memory space is remaining. "
that the machine is in Memory Transmission mode.
❐ Immediate Transmission mode
❐ Memory Transmission mode
NOTE: If you start a procedure and do not enter anything at the operation
panel for 3 minutes, the machine returns to standby mode.
MEM.TX
READY 100% 10:00AM
SET DOC. OR DIAL NO.
MEM.TX 100% 10:00AM
SET DOC. OR DIAL NO.
" indicates
BASIC FAX
OPERATION
13
SENDING IMMEDIATELY VS. SCANNING
There are two ways to send a fax message:
❐ Memory Tr ansmission
❐ Immediate Transmission
Sending Immediately (Immediate Transmission)
QUICKLY
This is known as Immediate Transmission. It is useful when:
❐ You wish to send a message immediately.
❐ You quickly wish to check whether you have successfully connected with
the other party.
❐ Your machine’s memory is becoming full.
The machine dials immediately after you press the Start key (or at a
specified later time, if you used a time delay feature like Send Later). The
message is scanned and transmitted page by page without being stored in
memory.
14
SENDING IMMEDIA TELY VS. SCANNING QUICKLY
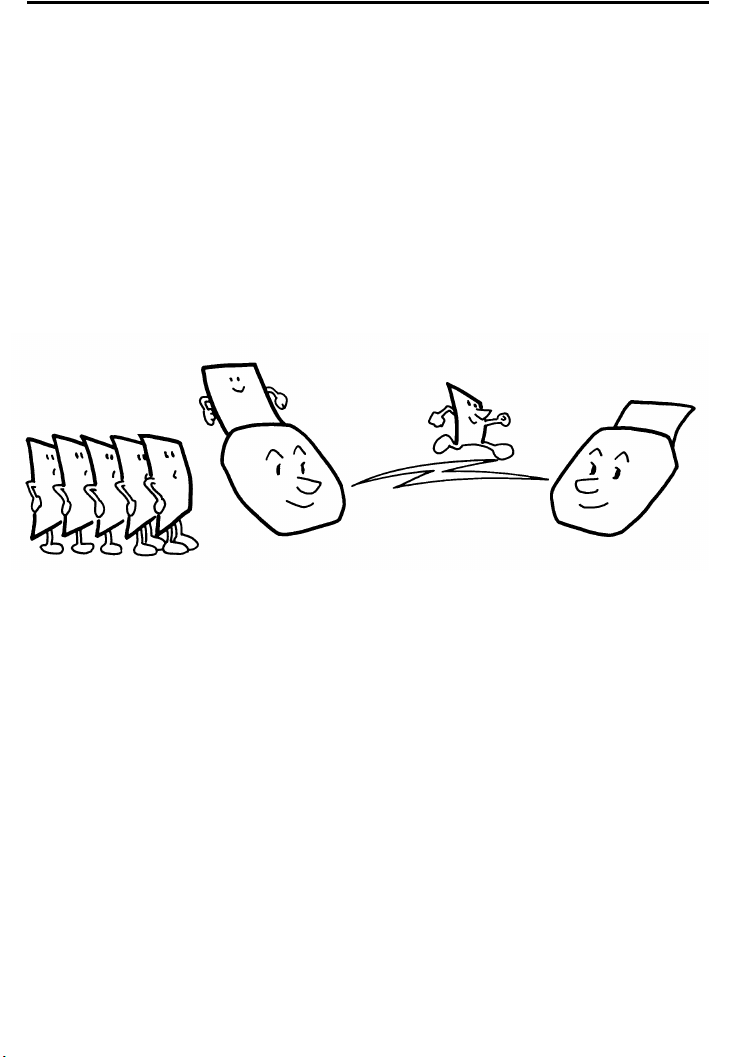
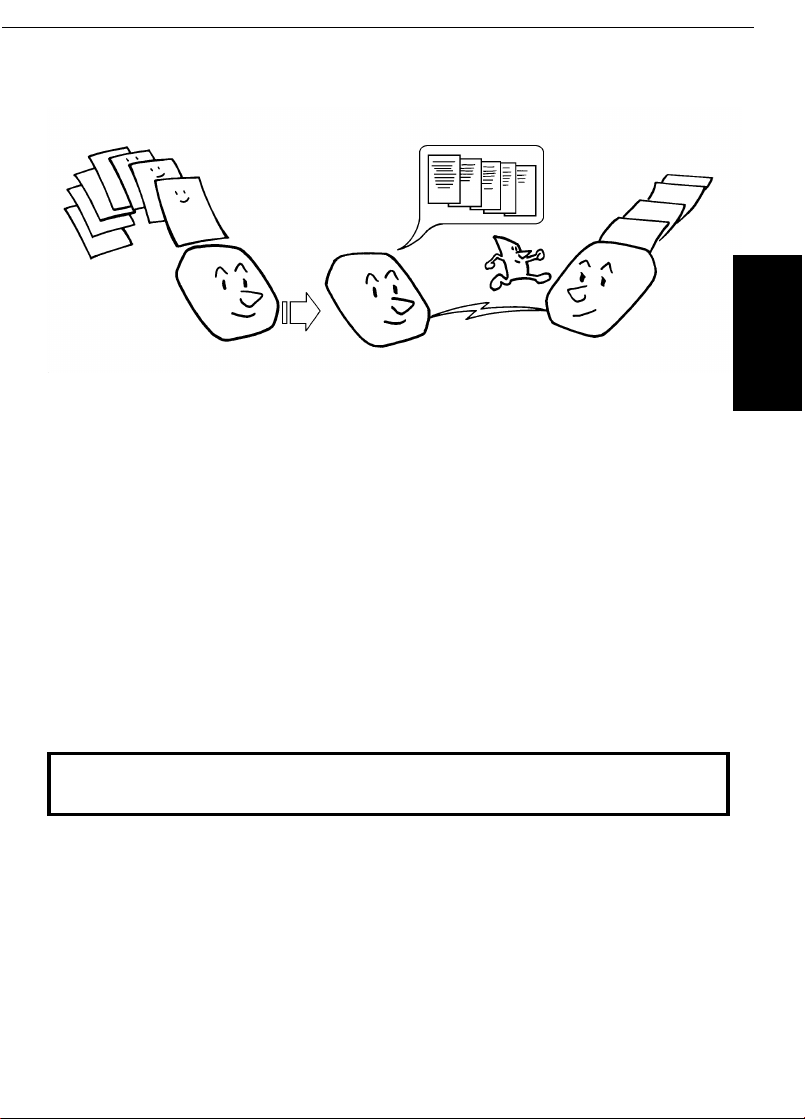
Scanning Quickly (Memory Transmission)
This is called Memory Transmission. It is advantageous because:
❐ Fax messages can be scanned much more quickly (you can take your
document away from the fax machine without waiting for the
transmission to be completed).
❐ While your fax message is being sent, another user can operate the
machine (people will not have to wait by the fax machine a long time).
❐ You can send the same message to more than one place with the same
operation.
After you press the Start key, the machine doesn’t dial until all the pages of
your fax message have been stored in the memory.
BASIC FAX
OPERATION
The default mode of this machine is Immediate Transmission, so the
procedures described in this manual will be based on the assumption that
you are using Immediate Transmission.
Cross-references
Send Later:see page 23.
15

SENDING IMMEDIATELY (Immediate
leading edge
T ransmission)
With this procedure you may only specify one destination. The advantages
and disadvantages of Immediate Transmission and Memory Transmission
are discussed on pages 14 and 15.
Make sure that the machine is in
1
standby mode.
If the display does not look like above,
2
then press the Memory Key.
Follow both steps in any order:
3
❐ You can dial in any of these ways
(only one destination):
a) Ten Keypad b) Quick Dial c) Speed Dial d) Handset
❐ Carefully place your fax message
face down into the document feeder.
The machine will take it in.
NOTE:
READY 100% 10:00AM
SET DOC. OR DIAL NO.
TRANSMIT Y/START
3104719266
TRANSMIT OPTION
DIAL FAX NUMBER
❐ Take your hand away from the feeder before
the documents start feeding. Do not touch or
hold the documents while they are feeding.
❐ The sheets must be stacked face down in the
feeder. So they are fed properly, align the leading edges in a slight wedge shape so the bottom document is inserted deepest.
Good
❐ The pages must be face down in the feeder
with the first page at the bottom of the stack.
❐ Feed the pages in so that the top edge goes
in first.
❐ Do not feed in more than 15 pages.
❐ Do not use unsuitable types of originals (see
page 182).
leading edge
Bad
❐ Adjust the document guides to fit the width of
the pages.
❐ Do not use pages of different sizes.
Selecting Contrast : See page 20.
Options for sending a message: See page 23.
16
llllllll
k
SCANNING QUICKLY (Memory Transmission)
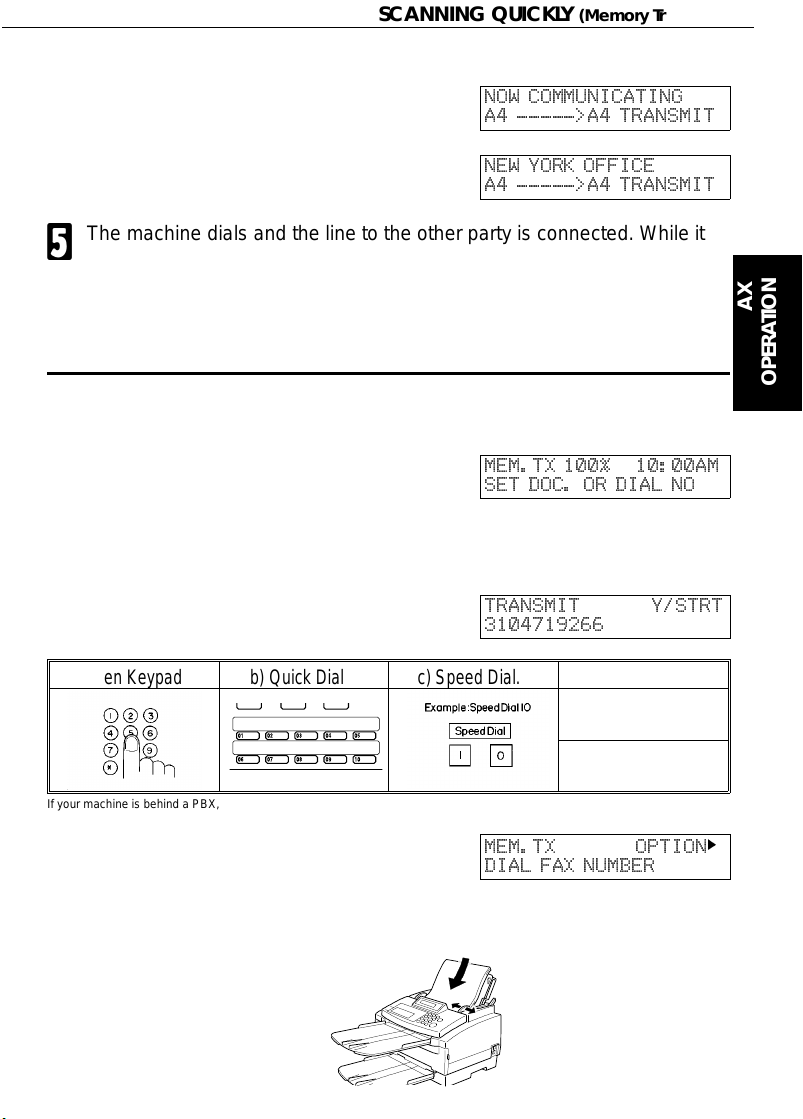
Press the Start key.
4
The machine dials and the line to the other party is connected. While it is
5
dialing, the number that you dialed is displayed (or if you used Quick
Dial or Speed Dial, the Quick Dial or Speed Dial Label stored for that
number is displayed). After transmission the machine will return to
standby mode.
NOW COMMUNICATING
A4 ----->A4 TRANSMIT
NEW YORK OFFICE
A4 ----->A4 TRANSMIT
SCANNING QUICKLY (Memory Transmission)
Make sure that the machine is in
1
standby mode. If the display does not
look as right, then press the Memory
key.
Follow both steps in any order.
2
❐ Dial in one of the following ways:
a) Ten Keypad b) Quick Dial c) Speed Dial. d) Other
If your machine is behind a PBX, dial th e acce ss code , then a pau se, then th e te lep ho ne numbe r. For international numbers,
press the Pause key after entering the country code.
❐ Carefully place your fax message
face down into the document feeder.
The machine will take it in.
NOTE: If you do not set the document carefully you can reset the ma-
chine to its default. Check after that the display still looks as
above.
MEM.TX 100% 10:00AM
SET DOC. OR DIAL NO
TRANSMIT Y/STRT
3104719266
Several destinations :
GROUP DIAL
Just one location
HANDSET
MEM.TX OPTION
DIAL FAX NUMBER
:
BASIC FAX
OPERATION
k
17
SCANNING QUICKLY (Memory Transmission)
Press the Yes key.
3
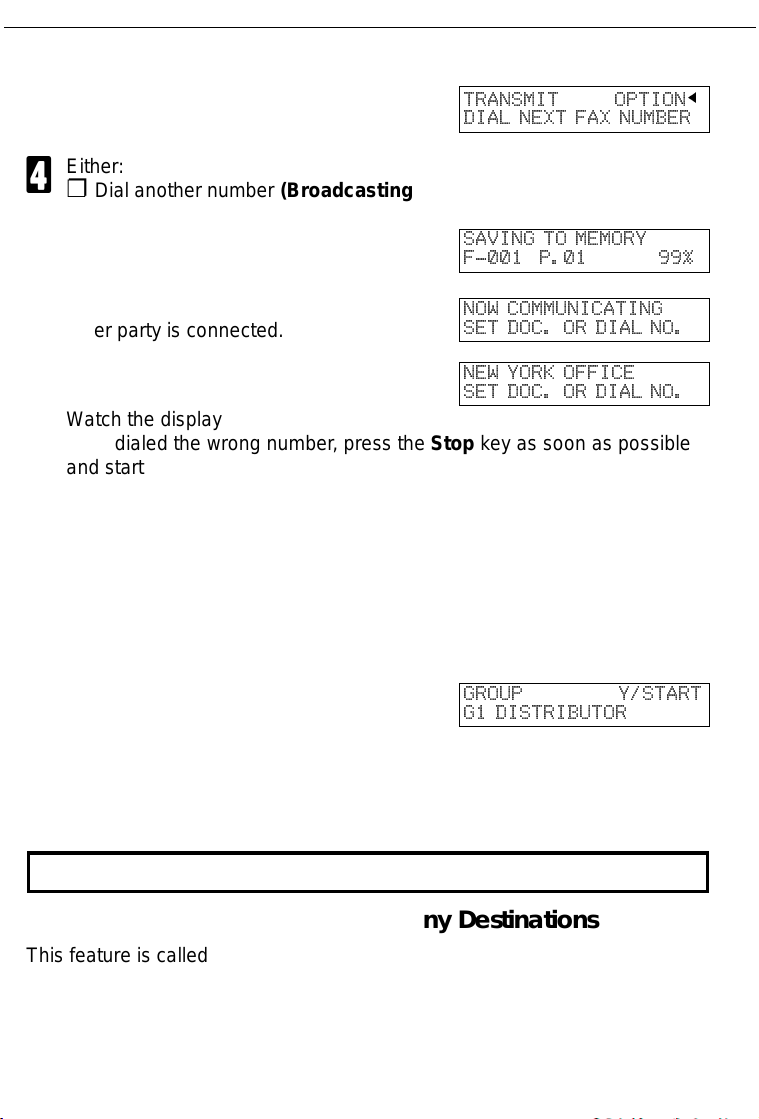
Either:
4
❐ Dial another number (Broadcasting).
See the next section : Go to step 2.
❐ Press the Start key.The machine will
scan the document and dial.
The machine dials, and the line to the
5
other party is connected.
Watch the display. The identification of the other party will appear. If you
have dialed the wrong number, press the Stop key as soon as possible
and start over again.
After sending the message, the ma-
6
chine hangs up automatically.
TRANSMIT OPTION
DIAL NEXT FAX NUMBER
SAVING TO MEMORY
F-001 P.01 99%
NOW COMMUNICATING
SET DOC. OR DIAL NO.
NEW YORK OFFICE
SET DOC. OR DIAL NO.
Transmission Using the Group Key
Either:
1
❐ Place a document into the feeder.
GROUP Y/START
G1 DISTRIBUTOR
❐ Press the Quick Dial 10 (Group
Key). Then enter the group number.
j
Press the Start key.
2
Programming the Group Key see page 218
Sending the Same Message to Many Destinations
This feature is called Broadcasting. When you are in Memory Transmission
mode, you can send the same message to many destinations (maximum 30
destinations). After dialing the number of the first destination (steps 2 & 3
above), dial another number. Repeat this procedure until you have dialed all
the numbers, then press the Start key.
18

IF YOU MAKE A MISTAKE
If you make a mistake when inputting a name or number, either :
❐ Press the No key to erase the entire name or number and start again.
❐ Press the Clear key to erase the last letter or digit that you entered.
If you enter the wrong function number,
❐ Press the Function key to return to standby mode and start again.
If you dial the wrong number:
❐ Press the No key to erase the number, then enter it again.
❐ If scanning has already begun, press the Stop key.
❐ If you have already programmed the number into the machine by
pressing the Yes key, remove the document from the feeder and start
again.
POSSIBLE PROBLEMS
You want to take out the document:
Open the operation panel and take it out.
CAUTION: Do not pull out the document without opening the scanner or
you will damage the machine.
BASIC FAX
OPERATION
You want to send more than 15 pages:
While the last page is being fed in, place more pages (up to 15) in the feeder.
You make a mistake while dialing:
If you have already pressed the Start key, press the Stop key immediately.
If you haven’t pressed the Start key yet, either:
❐ Press the No key: The entire number is deleted. Enter a new number.
❐ Press the Clear key: Only the last digit is deleted.
If you find a mistake after scanning and the document has been stored
as a memory file (Memory Transmission):
Use Function 21 to clear the memory file. (see page 40) and start again.
The Check Display indicator is blinking:
An error has been detected. Follow the instructions on the display. For more
information about error displays see page 160.
19
 Loading...