

Page 1
OPERATOR’S MANUAL
RICOH FAX4000L
A Dual Access, Laser printing
facsimile that scans pages in four
and a half secondhand transmits in
six seconds
Immllo
Page 2
WARNING –
device, pursuant to Part 15 of the FCC Rules. These limits are designed to provide reasonable protection
against harmful interference when the equipment is operated in a commercial environment. This equipment generates, uses, and can radiate radio frequency energy and, if not installed and used in accordance
with the instruction manual, may cause harmful interference to radio communications. Operation of this
equipment in a residential area is likely to cause harmful interference in which case the user will be
required to correct the interference at his own expense.
“CAUTION-Use of Control or Adjustments or Performance of Procedures Other Than Those specified
herein May Result in Hazardous Radiation Exposure.”
This equipment has been tested and found to comply with the limits for a Class A digital
Class A
This Digital Apparatus does not exceed the Class A Iimitsfor Radio Frequency noise from Digital
Apparatus set out in the Radio Interference Regulations of the Canadian Department of
Communications.
Le present appareil numerique n’emet pas de bruits radioelectriques depassant Ies Iimites
applicables auxappareils numeriquesde laclasse Aprescritesdans Ie Reglement surle brouil Iage radioelectrique edicte par Ie ministere des Communications du Canada.
WHEN PROGRAMMING EMERGENCY NUMBERS
AND/OR MAKING TEST CALLS TO EMERGENCY
NUMBERS:
1. Remain on the line and briefly explain to the dispatcher the reason for the
call before hanging up.
2. Perform such activities in the off-peak hours, such as early morning hours
or late evenings.
Page 3
HOW TO USE THIS MANUAL
GENERAL PRECAUTIONS “
contains information you
1
should read before you start to z to set up the machine, get to
install the machine.
D
INSTALLATION tells you
everything you need to know
know it, and move it to a new
location.
GENERAL PRECAUTIONS
1. PRECAUTIONS
1-1
Power and Grounding . ... .. ... . .. .. ... . .. .. . .. . .. .. . .. . .. .. . .. . .. .. . .. . .. .. . .. . .. . .. .. .
1-2
Cold Weather Power-up . .. . .. ... . . . .. . .. . . . .. ... . . . .. . .. . . . .. . .. ... .. . .. . .. .. . .. . .. . .. .
1-3
Thunderstorms .. .. ... . . . .. ... .. . .. . .. . .. .. . .. ... .. . .. ... .. . .. ... .. . .. ... . . . .. . .. . .. ... .
1-4
1
Copy Paper ... .. . .. .. . .. ... .. . .. ... .. . .. . .. .. . .. ... .. . .. . .. .. . .. . .. ... .. . .. ... .. . .. ... ..
1-5
Toner . . .. .. ... . . . .. ... .. . .. . .. .. . .. . .. ... .. . . . ... .. . . . ... .. . .. ... .. . .. ... .. . .. . .. .. . .. . ..
1-6
Master Kit . .. ... .. . .. ... .. . .. ... .. . .. ... .. . .. . .. . . . .. . .. ... .. . . . ... .. . .. ... .. . .. ... .. . .. .
1-7
Cleaning Kit .. .. . .. .. . ... .. .. . ... .. .. . ... .. ... ... .. ... ... .. ... .. . .. ... .. . .. ... . .. .. . .. . ..
1-8
Operating Precautions . .. . .. . .. . . . .. . .. . . . ... .. . . . ... .. . . . ... .. . .. .. . .. . .. ... .. . .. . .. ..
1-9
General . .. ... ... .. ... .. . .. .. . .. . .. ... .. . .. ... .. . .. . . . .. . .. . . . ... .. . .. ... .. . .. ... . . . .. ... .
ROUTINE OPERATION
explains how to operate the
machine. Section 1-2 will be
especially useful if you want to
3
send a fax message as soon
as you have installed the
machine.
8
9
9
9
10
10
10
10
10
INSTALLATION
1.
INSTALLATION
1-1 Location . . .. ... .. . .. ... .. ... .. . .. ... ... .. ... .. . .. ... .. . .. . .. .. . .. . . . ... .. . . . ... .. . .. . .. ..
1-2 Connecting the Telephone Sets, Line, and Power Cord . . .. . .. .. . .. . .. . .. .. . .. . .. ... .
COMPONENTGUIDE
2.
2-1 External View . .. ... .. . . . ... .. . . . ... .. . .. ... .. . .. ... .. . .. .. . .. . .. ... .. . .. . .. ... .. . .. . .. ..
2-2 Operation Panel ... .. . . . ... .. . .. ... .. . .. ... .. . .. ... .. . .. . .. ... .. . .. ... .. . .. ... .. . .. ... ..
3.
GETTING STARTED
3-1 Basic Rules for Programming .. ... .. . .. ... .. . .. ... .. . .. . .. .. . .. . .. ... .. . .. ... .. . .. . .. ..
3-2 Program mingthe Date and Time . . .. .. . ... .. .. . .. . .. .. . .. . .. ... .. . .. ... .. . .. ... ... .. . .
3-3 Program mingthe Telephone Line Type . . .. ... .. . .. ... .. . .. ... .. . .. ... .. . .. . .. . .. ... ..
3-4 Programming the RTl, TTl, and CSl . ... . .. .. . .. . .. .. . .. . .. .. . .. . .. ... .. . .. . .. . .. .. . .. . .
3-5 Programming the Polling lD Code . .. ... .. . .. ... .. . .. ... .. . .. . .. . . . .. . .. . .. ... .. . .. ... .
3-6 Programming your Fax Terminal’s Telephone Number . . . . ... .. . . . ... .. . . . ... .. . .. ...
3-7 Programming the Confidential Password . .. . .. .. . .. ... ... .. . .. ... .. . .. . .. .. . .. . .. ... ..
TRANSPORTING THE MACHINE ... .. . .. ... .. . .. ... .. . .. ... .. . .. ... .. . .. . .. . .. .. . .. . .. ... . .. .
4.
12
13
14
15
17
18
19
20
23
24
25
26
2
Page 4
RICOH FAX4000L
ADVANCED FEATURES
explains the wide range of
4
features your machine has.
PROGRAMMiNG AND
PRINTING REPORTS explalns
how to program the machine
5
and print reports, and explalns
the reports that the machine
automatically prints.
ROUTINE OPERA TION
1. SENDING A FAX MESSAGE
Recommended Types of Document ... .. ... .. . .. .. . . . .. . .. . . . .. .. . .. ... .. ... .. ... .. . . . 28
1-1
1-2
Quick Look Transmission Procedure . .. .. . .. ... . . . .. .. . . . ... .. .. . .. .. . .. . . . .. ... .. . .. . 30
1-3
Selecting Contrast and Resolution . . .. .. ... .. . .. .. . .. .. . .. ... .. ... .. . .. .. . .. .. . .. .. . .. 34
1-4
Page Counting Methods . ... . . . .. . . . .. ... .. ... .. . .. .. . . . .. . .. .. . .. .. . .. . .. .. ... .. . .. .. . . 35
1-5
Department Code Entry . .. ... .. .. . .. .. . .. .. . .. ... .. . .. .. . . . ... .. ... .. .. . .. . . . .. ... .. . .. 36
Making Overseas Calls . ... .. . .. .. . .. .. . .. .. . .. ... .. . . . .. . . . ... .. .. ... .. . .. .. . .. ... .. . .. 37
1-6
Redialing .. .. .. . .. . .. .. ... .. . .. . . . .. .. . .. . .. .. . .. .. . .. .. . .. .. ... . . . .. . . . .. . .. .. . .. .. . .. .. 38
1-7
1-8
Send Later . . . .. ... . . . .. . . . .. ... .. ... .. . .. .. . . . .. . .. . .. .. .. . .. . .. .. ... .. ... .. . .. .. . .. . .. . 39
1-9
Using Speed Dial and Quick Dial for Faxing .. ... .. . .. .. . .. ... .. ... .. .. . .. . . . .. . . . .. . . 40
1-1o
3
Group Dialing .. ... .. . .. .. . . . ... .. ... .. .. . .. . . . .. ... .. . .. .. . .. .. . .. .. . .. ... .. . . . .. . . . .. .. 41
Dual Access . .. . .. .. . .. . . . .. ... . . . .. .. . .. ... .. ... .. ... .. . . . .. . .. ... .. .. . .. .. . .. .. . .. ... .. 41
1-11
LOOKING AFTER THE
MACHINE explains how to
replace consumable supplies
6
and how to make sure that
your machine gives top quality
performance.
SOLVING PROBLEMS might
help you if you are having
7
trouble with your machine.
REFERENCE MATERIAL
contains specifications and
8
explanations of fax
terminology.
2. RECEIVING FAX MESSAGES
2-1 Selecting the Reception Mode . . . . .. . . . ... .. .. ... .. . .. .. . .. .. . .. . .. .. .. . .. . .. .. ... .. . .. 42
2-2 Routine Reception . . .. .. ... .. . .. .. . .. .. . .. ... .. .. . .. . .. .. . . . .. . .. . . . .. .. . .. ... .. ... .. . . . 42
2-3 Substitute Reception (Receive File) .. .. . .. .. . .. .. . .. . .. .. .. . .. . .. .. . . . .. . .. . . . .. .. . .. . 43
2-4 Confidential Reception .. ... .. . .. .. . .. .. . .. . . . .. .. . .. ... .. ... .. ... .. . .. .. . .. ... .. .. . .. . . 44
3. USING THE UNIT FOR TELEPHONE CALLS
3-1 Making a Telephone Call . .. . .. .. . .. .. . .. .. . .. .. . .. ... .. . .. .. .. . .. . .. .. ... .. . .. .. . .. .. . . 45
3-2 Answering the Telephone . . .. ... . . . .. .. . .. ... .. ... .. .. . .. . . . .. ... .. . .. .. . .. .. . .. .. . .. .. 46
3-3 Phoning and Faxing onthe Same Call . .. . .. .. .. . .. ... .. . .. .. . . . ... .. .. . .. .. . .. . . . .. .. . 46
3
Page 5
ADVANCED FEATURES
1.
TRANSMllTING
1-1
Keystroke Programs . .. . .. . .. ... .. . .. ... .. . .. .. . .. . .. .. . .. . .. .. . .. . .. .. . .. . .. . . . .. . .. . . . .
1-2
Memory Transmission .. .. . .. ... .. . .. ... . . . .. ... .. . .. .. . .. . .. . . . .. . .. . . . ... .. . . . ... .. . . . .
1-3
Broadcasting . ... .. . .. .. . .. ... .. . .. . .. .. . .. ... .. . .. . .. .. ... . .. .. . .. . .. .. . .. . .. .. . .. . .. .. . .
1-4
Confidential Transmission .. .. . .. ... .. . .. ... .. ... ... .. ... ... .. ... . .. .. ... .. . .. . .. . .. .. . ..
1-5
Transfer Request . . . . ... .. . .. .. . .. . .. .. . .. . .. .. . .. ... .. . .. ... .. . .. . .. .. ... . .. .. ... . .. ... .
1-6
Polling Transmission . . .. . .. .. . .. . .. ... .. . .. .. . .. . .. .. . .. . .. .. . .. ... . . . .. . .. . . . .. ... . . . .. .
1-7
Turnaround Polling . . .. . .. . . . .. ... . . . ... .. . . . .. . .. . . . .. . .. . .. .. . .. . .. .. . .. ... .. . .. ... .. . ..
1-8
Alternative Destination . . .. .. . .. . .. .. . .. . .. .. . .. . .. .. . .. ... . . . .. ... . . . .. . .. .. . .. . .. ... .. . .
1-9
Protection Against Bad Connections . ... .. . .. ... .. . .. . .. .. . .. .. . ... .. .. . ... .. ... ... .. ... .
1-1o
Closed Network . . .. .. . .. . .. .. . .. . .. .. . .. . .. .. . .. ... .. . .. . .. .. . .. . .. .. ... . .. .. . .. . .. .. . .. .
1-11
Stamp . .. . . . .. . .. . . . .. ... . . . .. . .. .. . .. . .. . .. .. . .. ... .. . .. ... .. . .. ... .. ... ... .. ... . .. .. ... .
1-12
GI Mode . . . . .. . .. . . . ... .. . . . .. . .. . . . ... .. . .. .. . .. ... .. . .. . .. .. . .. ... .. . .. ... .. . .. . .. .. . ..
1-13
Sending Abnormally Thick or Large Sheets . . .. . .. . . . ... .. . . . .. . .. . . . .. . .. . .. .. . .. . .. .. . .
1-14
Batch Transmission . .. . .. .. . .. ... .. . .. ... . . . .. ... . . . .. ... .. . .. ... .. . .. ... ... .. ... ... .. ...
1-15
A3[ll.7’’] — width Transmission .. .. ... . .. .. ... .. . .. . .. .. . .. . . . ... .. . . . ... .. . . . ... .. . .. ..
RECEIVING
2.
2-1 Polling Reception . .. .. . ... .. ... .. . .. ... ... .. ... .. . .. ... .. . .. .. . .. . .. . . . .. . .. . . . ... .. . . . ..
2-2 Closed Network for Reception . . .. .. . .. . .. .. . .. ... .. . .. ... .. . .. ... . . . .. ... .. . .. ... .. . .. . .
2-3 Authorized Reception . .. .. . .. . .. ... .. . .. ... .. ... ... .. ... ... .. ... ... .. ... . .. .. ... . .. .. ... .
2-4 Notification . ... . .. .. ... .. . .. ... .. . .. . .. .. . .. . . . ... .. . . . ... .. . .. ... .. . .. ... .. . .. ... .. . .. . ..
2-5 Forwarding . ... .. . .. .. . .. . .. .. . .. ... .. . .. ... .. . .. . .. .. ... . .. .. ... . .. .. . .. . .. .. . .. . .. .. . .. .
3.
OTHERS
Transfer Broadcasting . . .. .. . .. . .. ... .. . .. .. . .. . .. . . . .. . .. . . . ... .. . . . ... .. . .. ... .. . .. ... .
3-1
3-2 Speaker . .. ... . . . .. . .. .. . .. . . . ... .. . .. ... .. . . . ... .. . .. ... . . . .. ... .. . .. . .. . . . .. . .. . . . .. . .. .
3-3 Short Preamble . .. .. . .. ... .. . .. ... .. . .. ... .. . .. ... .. . .. . .. .. . .. . .. ... .. . .. ... .. . .. .. . .. . .
3-4 Using Your Machine as a Copier . ... .. . .. ... .. . .. .. . .. . .. .. . .. . .. .. . .. . .. . . . .. . .. . . . ... ..
3-5 Error Correction Mode (ECM) .. . . . .. . .. . .. .. . .. ... .. . .. ... .. . .. ... .. . .. ... .. . .. . .. .. . .. . .
3-6 User Function Keys . ... .. .. . .. . .. ... .. . .. ... .. . .. .. . .. . .. .. . .. . .. .. . .. . .. .. . .. . .. . . . .. . ..
3-7 Reverse Order Stacking . . ... .. . .. ... .. . .. .. . .. ... .. . .. ... .. . .. ... .. ... ... .. ... . .. .. . .. . .
3-8 Chain Dialing .. .. . .. . .. .. . .. ... . . . .. . .. . . . .. ... . . . .. . .. .. . .. .. . ... .. .. . ... .. ... ... .. ... ...
1.
3-9 Optional Equipment . . .. .. . .. . .. .. . .. . .. .. . .. ... .. . .. ... .. . .. ... .. . .. . .. .. . .. . .. ... .. . .. . .
48
50
52
53
54
57
58
59
60
60
60
60
61
62
62
62
64
65
67
69
71
71
71
72
72
73
74
74
75
Page 6
PROGRAMMING AND PRINTING REPORTS
PROGRAMMING
1.
1-1 Checking the Counters . . . .. ... .. . .. .. . .. ... .. .. . .. ... .. . . . .. . .. ... .. .. . .. . .. .. . .. . .. ..
1-2 Switching Page Count On/Off . .. .. . .. .. . .. .. . .. .. . .. . .. .. . . . .. . .. .. ... .. . .. . .. .. . .. . . .
1-3 Switching Department Code On/Off .. . .. .. . .. .. . .. ... .. ... .. . .. .. . . . .. . . . ... .. . . . ... .
1-4 Switching the Transmission Report On/Off . .. . .. .. . .. ... .. . .. .. . . . .. ... .. . .. . .. .. . ..
1-5 Programming Quick Dial and Speed Dial . .. . .. .. . .. . .. .. ... . . . .. .. . .. .. . .. . .. .. . .. . ..
1-6 Programming Groups . . .. .. . .. . .. .. ... .. . .. .. . .. .. . .. . .. .. . . . .. . .. .. .. . .. . .. . .. .. . .. . . .
1-7 Clearing a Polling File . .. ... .. . .. . . . .. .. . .. . .. .. . .. ... .. .. . .. ... .. . . . .. . .. . . . .. . . . ... ..
1-8 Switching TTI On/Off . .. ... .. . .. .. . .. .. . .. . . . .. ... .. . .. .. ... .. . .. .. . .. ... .. . . . ... .. ...
1-9 Clearing a Memory File . .. . .. . .. . . . .. .. . .. ... .. ... .. . .. .. . . . .. . .. .. . .. ... .. . .. .. . .. ... .
1-10 Printing the Contents of a Memory File .. .. .. . .. . . . .. . . . .. ... .. . .. .. . .. ... .. . .. .. . .. ..
2.
AUTOMATICALLY PRINTED REPORTS
5
2-1 TCR (Transaction Confirmation Report) ...................................................................................
2-2 Error Report ..................................................................................................................................
2-3 Transmission Report ...................................................................................................................
2-4 Transfer Result Report ................................................................................................................
2-5 New Polling File Report ..............................................................................................................
2-6 New File Report
2-7 Memory Transmission Report ....................................................................................................
2-8 Power Failure Report ..................................................................................................................
3.
USER-INITIATED REPORTS
3-1 TCR . . . .. .. .. .. . .. .. . .. . .. .. .. .. ... .. .. . .. . . . .. .. . .. .. .. .. . .. .. .. .. . . . .. . .. ... .. .. .. .. ..
3-2 Telephone Lists . .. . .. .. . . . .. . .. .. . . .. . .. .. . .. .. .. .. .. . .. ... .. . .. .. . .. .. . . .. . . . .. ... .. ..
3-3 Polling File List . .. .. . . .. .. . .. . .. .. . .. .. . .. ... .. ... .. . . . .. . .. ... .. . . . .. . .. .. . .. .. .. .. .. .
3-4 Program List .. .. .. ... .. .. . .. .. .. .. . . . .. .. .. . . . .. .. . .. . .. .. . .. ... .. .. . . .. . .. .. .. .. .. . .. .
3-5 SAF File List . .. ... .. . .. .. . .. .. . .. . . . .. . . . .. . .. .. . .. .. . .. ... .. . .. .. . . . .. . . . ... .. .. . .. . . .
3-6 Authorized Reception List . .. . .. .. . .. ... .. . . . .. . .. .. .. .. .. . .. ... .. ... .. .. .. .. . . . .. ... ..
...........................................................................................................................
76
76
77
77
78
85
87
87
88
88
89
90
90
91
91
92
92
92
93
93
94
94
94
95
LOOKINGAFTER THEMACHINE
1.
REPLACING PAPER .. ... .. . .. .. . .. .. .. . . . .. .. . .. . .. .. .. .. . . . .. . .. .. . .. ... .. .. .. .. .. .. .. . . . ..
REPLACING TONER .. ... .. . .. . . . ... .. .. . . .. .. . .. . .. .. . .. . .. .. . .. .. . .. .. . .. . .. . . . .. .. . .. .. .. .
2.
REFILLING THE STAMP .. . .. .. . .. .. .. .. . .. .. . .. .. .. .. . .. ... .. .. . .. .. .. .. . ... .. ... .. .. .. . .. ..
3.
6
REPLACING THE MASTER UNIT . . . . .. . . . .. . .. ... .. .. . .. . .. .. . .. ... .. .. . .. . .. . .. .. .. . .. .. . ..
4.
REPLACING THE CLEANING UNIT . .. ... .. .. .. .. . .. .. . .. . .. .. .. .. .. . .. ... . .. .. . . . .. .. . .. .
5.
6.
USER MAINTENANCE PROCEDURE . . . . ... .. .. . . .. .. . ... .. .. . .. ... .. . .. . .. . . . .. .. .. .. .. .
SOLVINGPROBL EMS
1.
DOCUMENT JAM . . . .. . . . ... .. .. .. .. . .. .. . . . .. . .. . .. .. .. . . ... .. .. . .. .. . .. .. . . .. .. .. .. . . .. . ..
2.
COPY JAM . .. . . .. . . . .. . .. ... .. .. .. .. . .. .. . . . ... .. .. . . .. . .. ... .. .. . .. . .. .. .. . . .. .. .. .. . .. ... ...
LINE PROBLEM . . . .. .. . .. .. .. .. . .. . .. .. . . . .. . .. . .. .. .. . . .. . .. .. . .. ... .. . .. .. .. . . .. . . . .. . .. . ..
3.
4.
OPERATING DIFFICULTIES . . .. .. . . .. . . . .. . .. .. .. .. .. .. ... .. .. . .. . .. .. . .. ... .. . .. .. .. . .. ... .
5.
ERROR CODES . .. .. . . ... .. ... .. .. .. .. . .. ... .. . .. .. . .. .. . .. .. . .. .. . .. . . .. .. . .. . .. .. .. .. . . . .. .
REFERENCEMA TERIAL
1.SPECIFICATION’4S . .. .. .... .. ... .... .. .... ... .... .. .. ... ... ... .. .. .. .... .. .. ... .... ... .. ...
8
2. GLOSSARY .. .. .. .... .. .. .. .. .. .. .... ... ... ... .... .. .. .. . ... ... ..... .. .... .. ... .... ... .... .
96
97
99
100
102
105
112
113
118
118
120
122
123
5
Page 7

1
OTHERS
~l. OFFICIAL NOTICES TO USERS . . . .. .. .. . .. . .. ... .. . . .. . .. . .. .. . .. .. .. . .. . .. .. ... .. .. . . .. . .. 126
~9
2. HANDSET USER’S MANUAL . .. . .. . .. ... . .. .. . .. . .. .. . .. . .. .. . .. . .. .. . .. . .. .. .. . . .. . .. . .. .. . 128
I INDEX
10
[
Page 8

MEMO
Page 9
GENERAL PRECAUTIONS
WARNING
I
Do not attempt any maintenance or troubleshooting other than that mentioned in this manual.
This machine contains a laser beam generator and direct exposure to laser beams can cause
permanent eye damage.
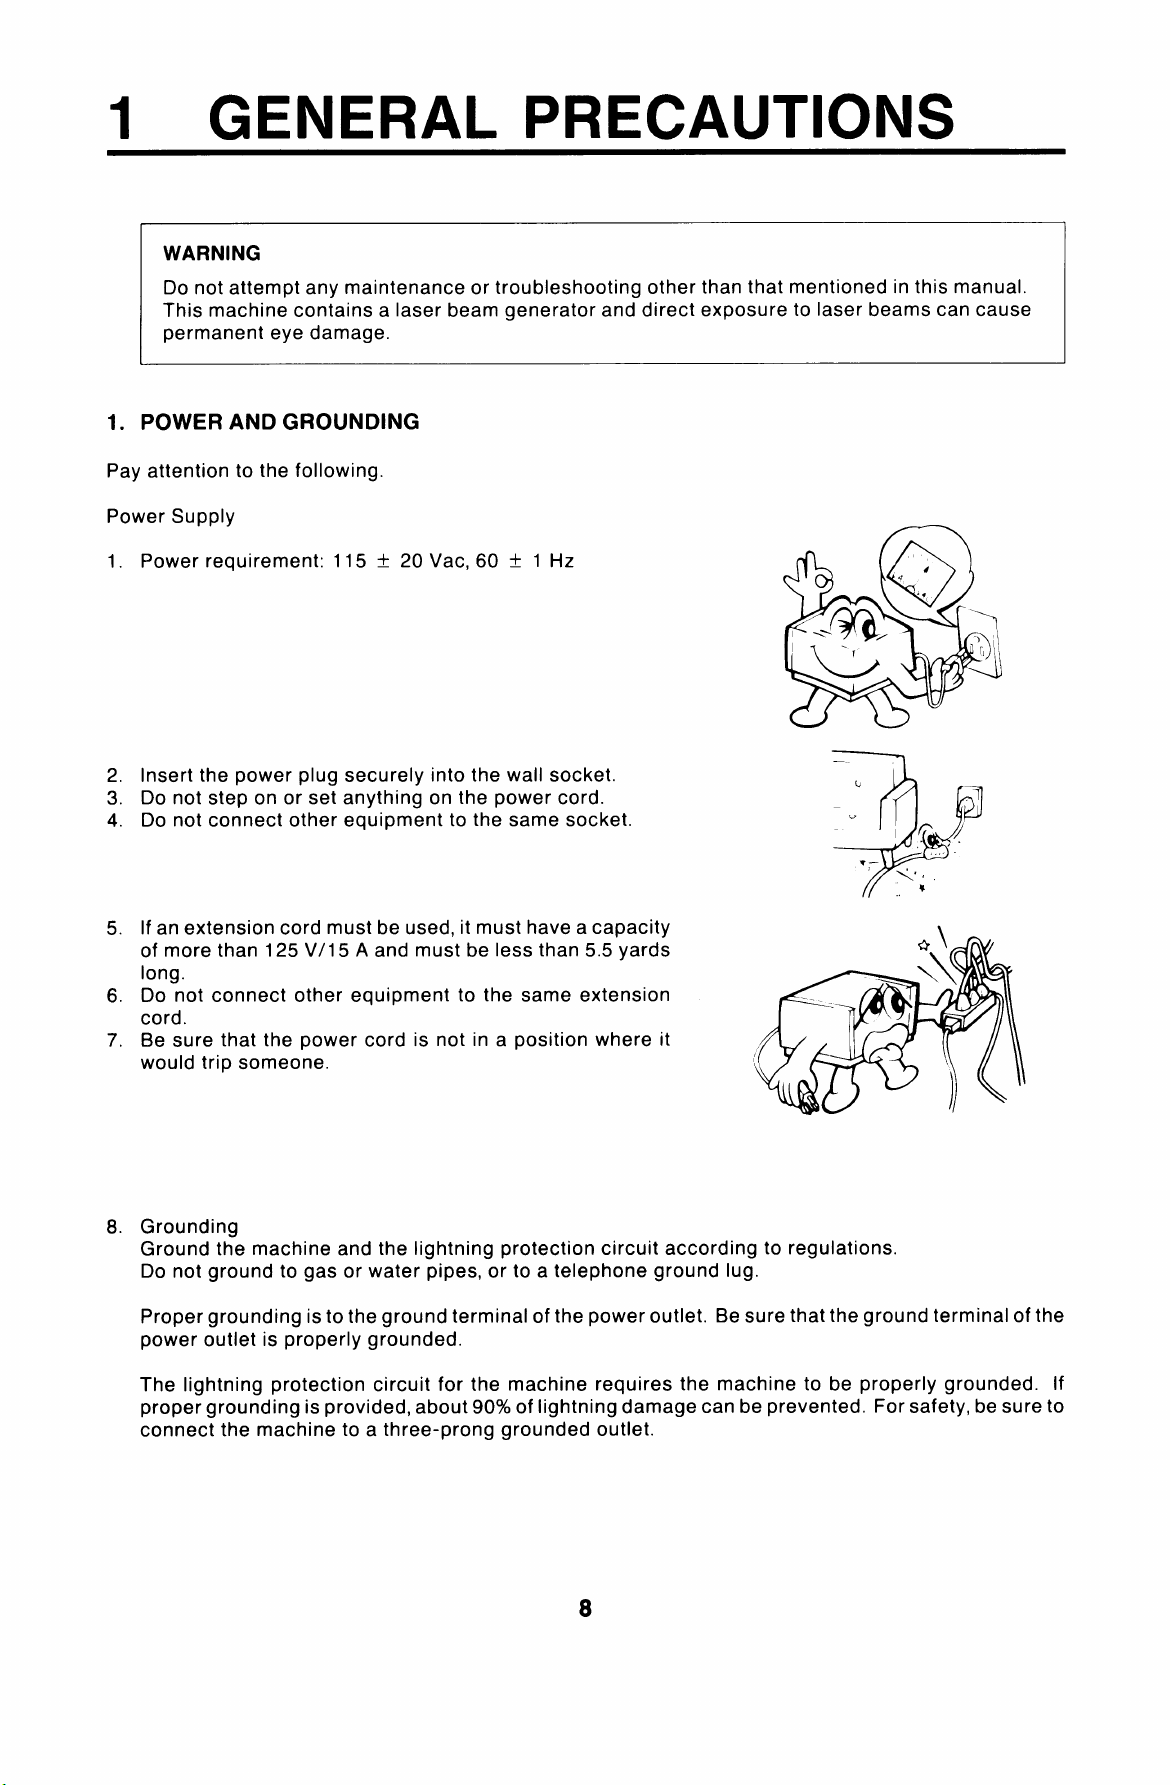
POWER AND GROUNDING
1.
Pay attention to the following.
Power Supply
1. Power requirement: 115 t 20 Vat, 60 f 1 Hz
2. Insert the power plug securely into the wall socket.
3. Do not step on or set anything on the power cord.
4. Do not connect other equipment to the same socket.
5. If an extension cord must be used, it must have a capacity
of more than 125 V/15 A and must be less than 5.5 yards
long.
6. Do not connect other equipment to the same extension
cord.
7. Be sure that the power cord is not in a position where it
would trip someone.
8. Grounding
Ground the machine and the lightning protection circuit according to regulations.
Do not ground to gas or water pipes, or to a telephone ground lug.
Proper grounding is to the ground terminal of the power outlet. Be sure that the ground terminal of the
power outlet is properly grounded.
The lightning protection circuit for the machine requires the machine to be properly grounded. If
proper grounding is provided, about 90% of lightning damage can be prevented. For safety, be sure to
connect the machine to a three-prong grounded outlet.
Page 10
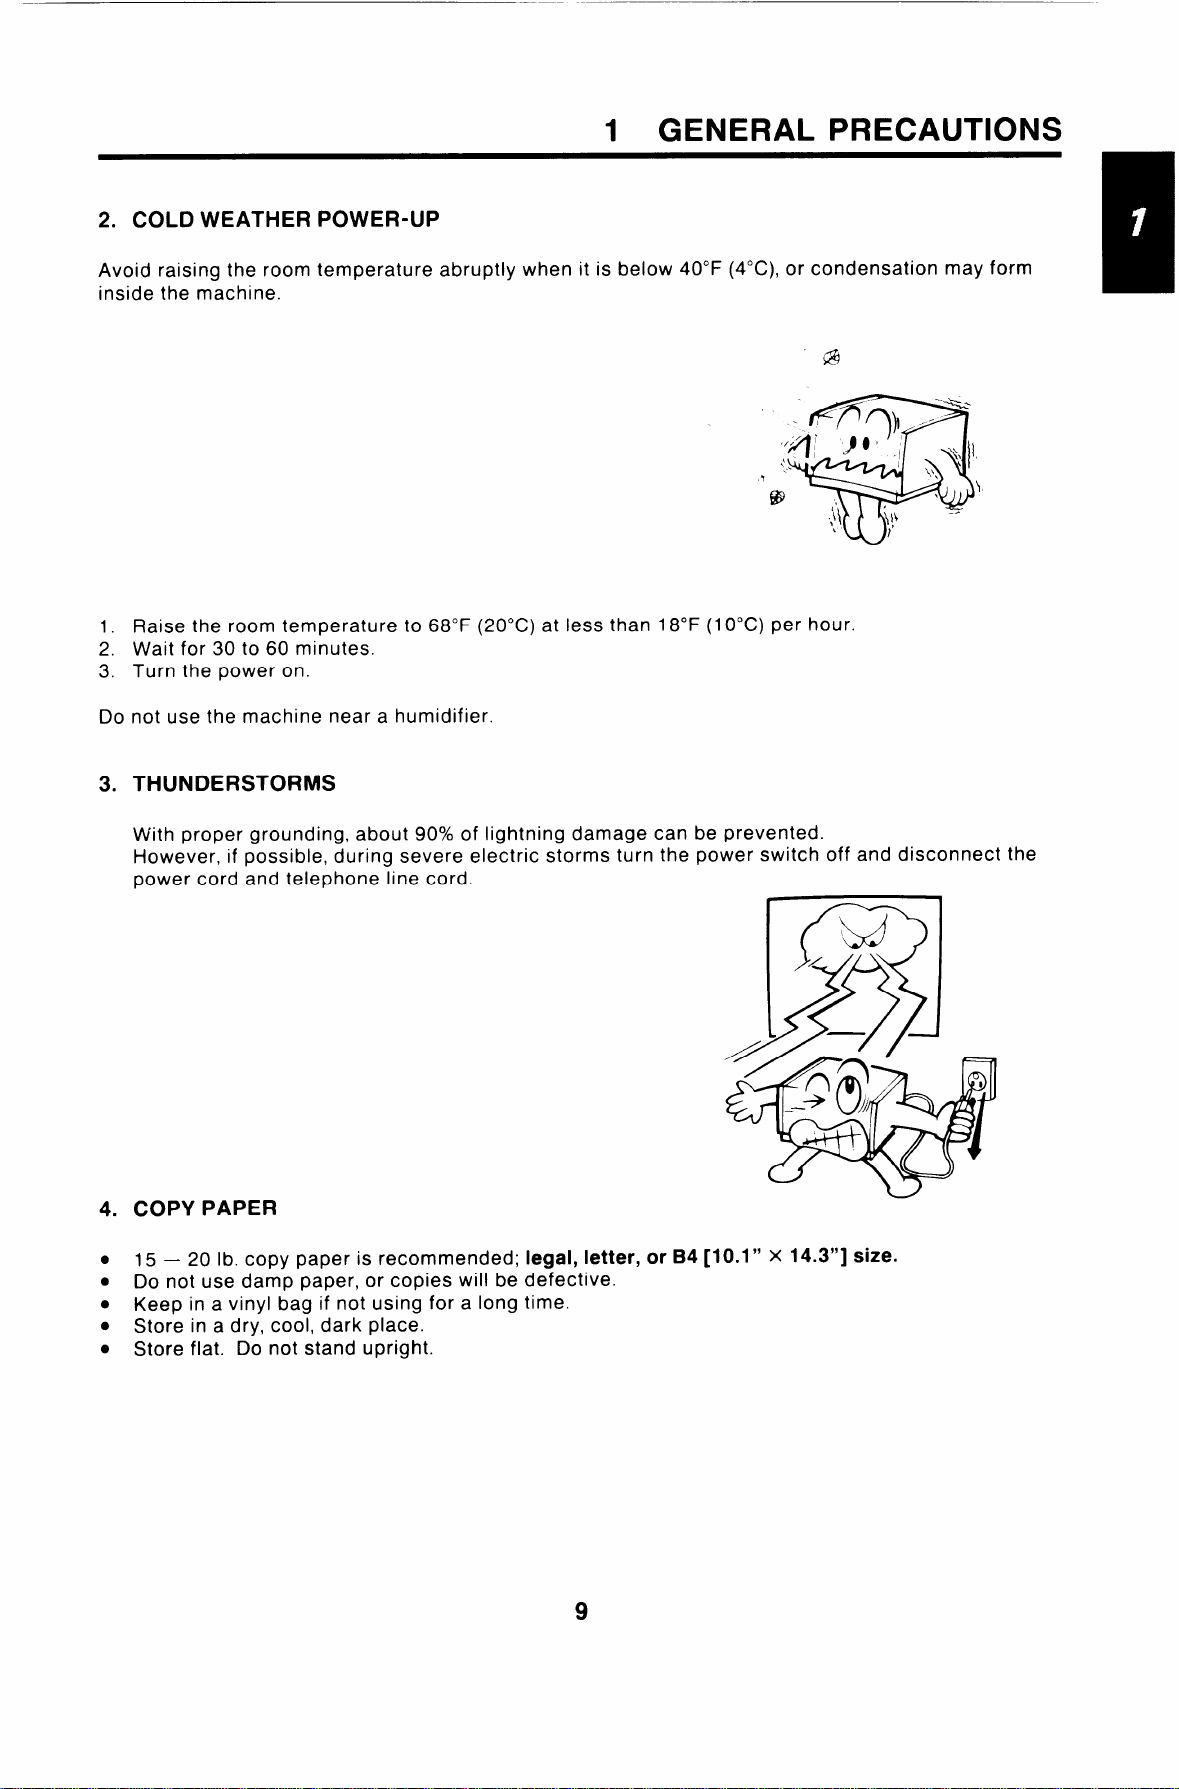
2. COLD WEATHER POWER-UP
1 GENERAL PRECAUTIONS
Avoid raising the room temperature abruptly when it is below 40°F (4”C), or condensation may form
inside the machine.
‘@
1. Raise the room temperature to 68°F (20”C) at less than 18°F (10”C) per hour.
2. Wait for 30 to 60 minutes.
3. Turn the power on.
Do not use the machine near a humidifier.
THUNDERSTORMS
3.
With proper grounding, about 90% of lightning damage can be prevented.
However, if possible, during severe electric storms turn the power switch off and disconnect the
power cord and telephone line cord.
I
COPY PAPER
4.
● 15 – 20 lb. copy paper is recommended; legal, letter, or B4 [10.1” X 14.3”] size.
● Do not use damp paper, or copies will be defective.
● Keep in a vinyl bag if not using for a long time.
● Store in a dry, cool, dark place.
● Store flat. Do not stand upright.
9
Page 11
1 GENERAL PRECAUTIONS
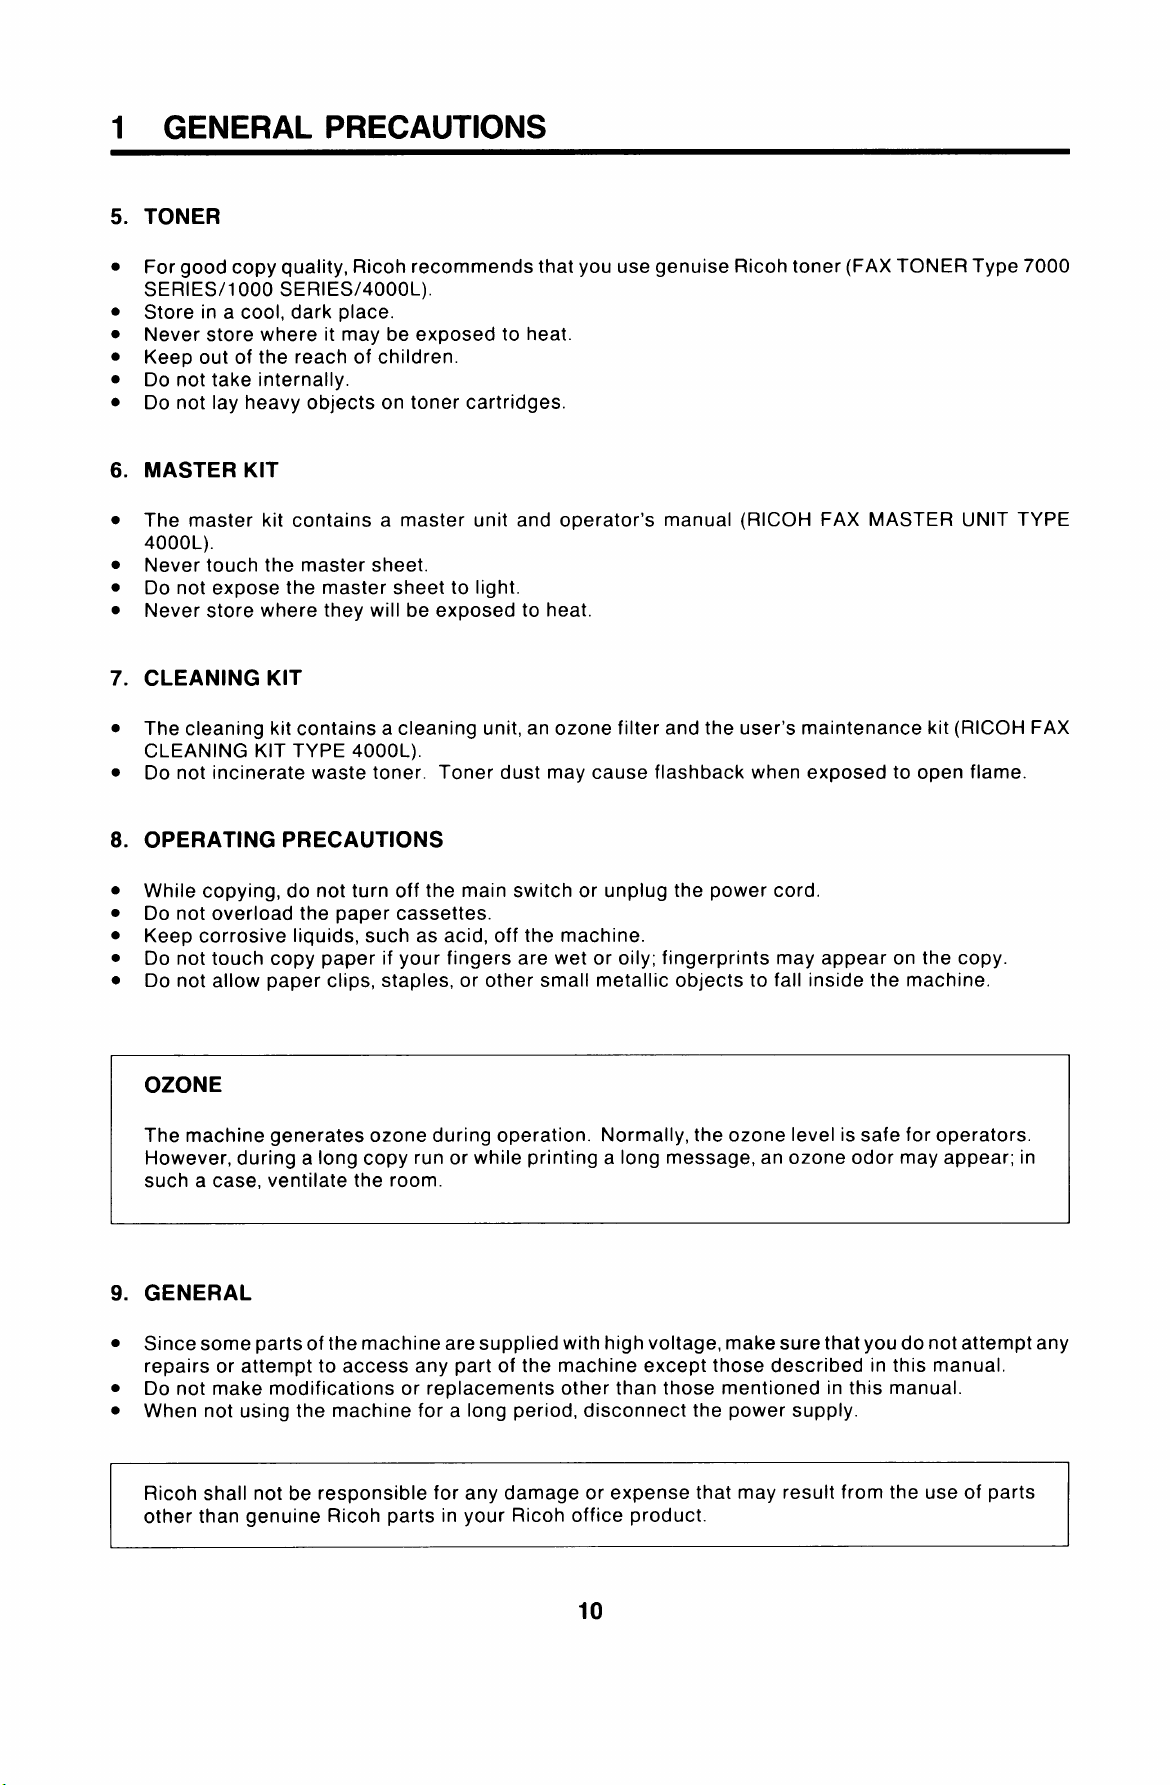
TONER
5.
●
For good copy quality, Ricoh recommends that you use genuise Ricoh toner (FAX TONER Type 7000
SERIES/1000 SERIES/4000 L).
●
Store in a cool, dark place.
●
Never store where it may be exposed to heat.
●
Keep out of the reach of children.
●
Do not take internally.
●
Do not lay heavy objects on toner cartridges.
MASTER KIT
6.
●
The master kit contains a master unit and operator’s manual (RICOH FAX MASTER UNIT TYPE
4000 L).
●
Never touch the master sheet.
●
Do not expose the master sheet to light.
●
Never store where they will be exposed to heat.
7.
CLEANING KIT
●
The cleaning kit contains a cleaning unit, an ozone filter and the user’s maintenance kit (RICOH FAX
CLEANING KIT TYPE 4000 L).
● Do not incinerate waste toner. Toner dust may cause flashback when exposed to open flame.
8. OPERATING PRECAUTIONS
● While copying, do not turn off the main switch or unplug the power cord.
● Do not overload the paper cassettes.
● Keep corrosive liquids, such as acid, off the machine.
● Do not touch copy paper if your fingers are wet or oily; fingerprints may appear on the copy.
● Do not allow paper clips, staples, or other small metallic objects to fall inside the machine.
OZONE
The machine generates ozone during operation. Normally, the ozone level is safe for operators.
However, during a long copy run or while printing a long message, an ozone odor may appear; in
such a case, ventilate the room.
9. GENERAL
● Since some parts of the machine are supplied with high voltage, make sure that you do not attempt any
repairs or attempt to access any part of the machine except those described in this manual.
● Do not make modifications or replacements other than those mentioned in this manual.
● When not using the machine for a long period, disconnect the power supply.
Ricoh shall not be responsible for any damage or expense that may result from the use of parts
other than genuine Ricoh parts in your Ricoh office product.
10
Page 12

11
Page 13

2 INSTALLATION
1. INSTALLATION
1.1 Location
Now, you have to choose a suitable location for the machine. For the best possible performance,
install your machine in a place which satisfies the following conditions.
●
Not exposed to direct sunlight
●
Well ventilated (air turnover at least three times per hour)
●
Level
●
Not subject to vibration
●
Away from other electronic equipment, to avoid interference.
●
Away from areas containing corrosive gas
●
Dust-free
●
Condensation-free
●
Temperature 63 to 82°F
●
Humidity 40 to 70% RH (do not install near a humidifier)
●
Away from heaters and air conditioners, to avoid sudden changes of temperature
●
Within 5 yards of a three-pin grounded power outlet (1 15 +- 20 Volts, 60 +1 Hz)
●
With the following clearance -
6“
rlliik
Ml
tjJ
--d
I
I
1
1
Important Points about Power Connection
● The supply from the wall outlet must not fluctuate by more than 20V either side of 115V ac.
. The power cord should not be laid in a place where it might trip somebody.
● Do not lay anything on the power cord.
. If you have to use an extension cord, make sure that it is capable of carrying 125V/1 5A,
and that your facsimile terminal is the only piece of equipment connected to that cord.
. The facsimile terminal must be grounded with a three-pin grounded power outlet.
L-1
——
—
—
.— —
F-==EFa
ll–——
.— _
u
[
I
,R!aJ
Front
v
1
*
12
Page 14
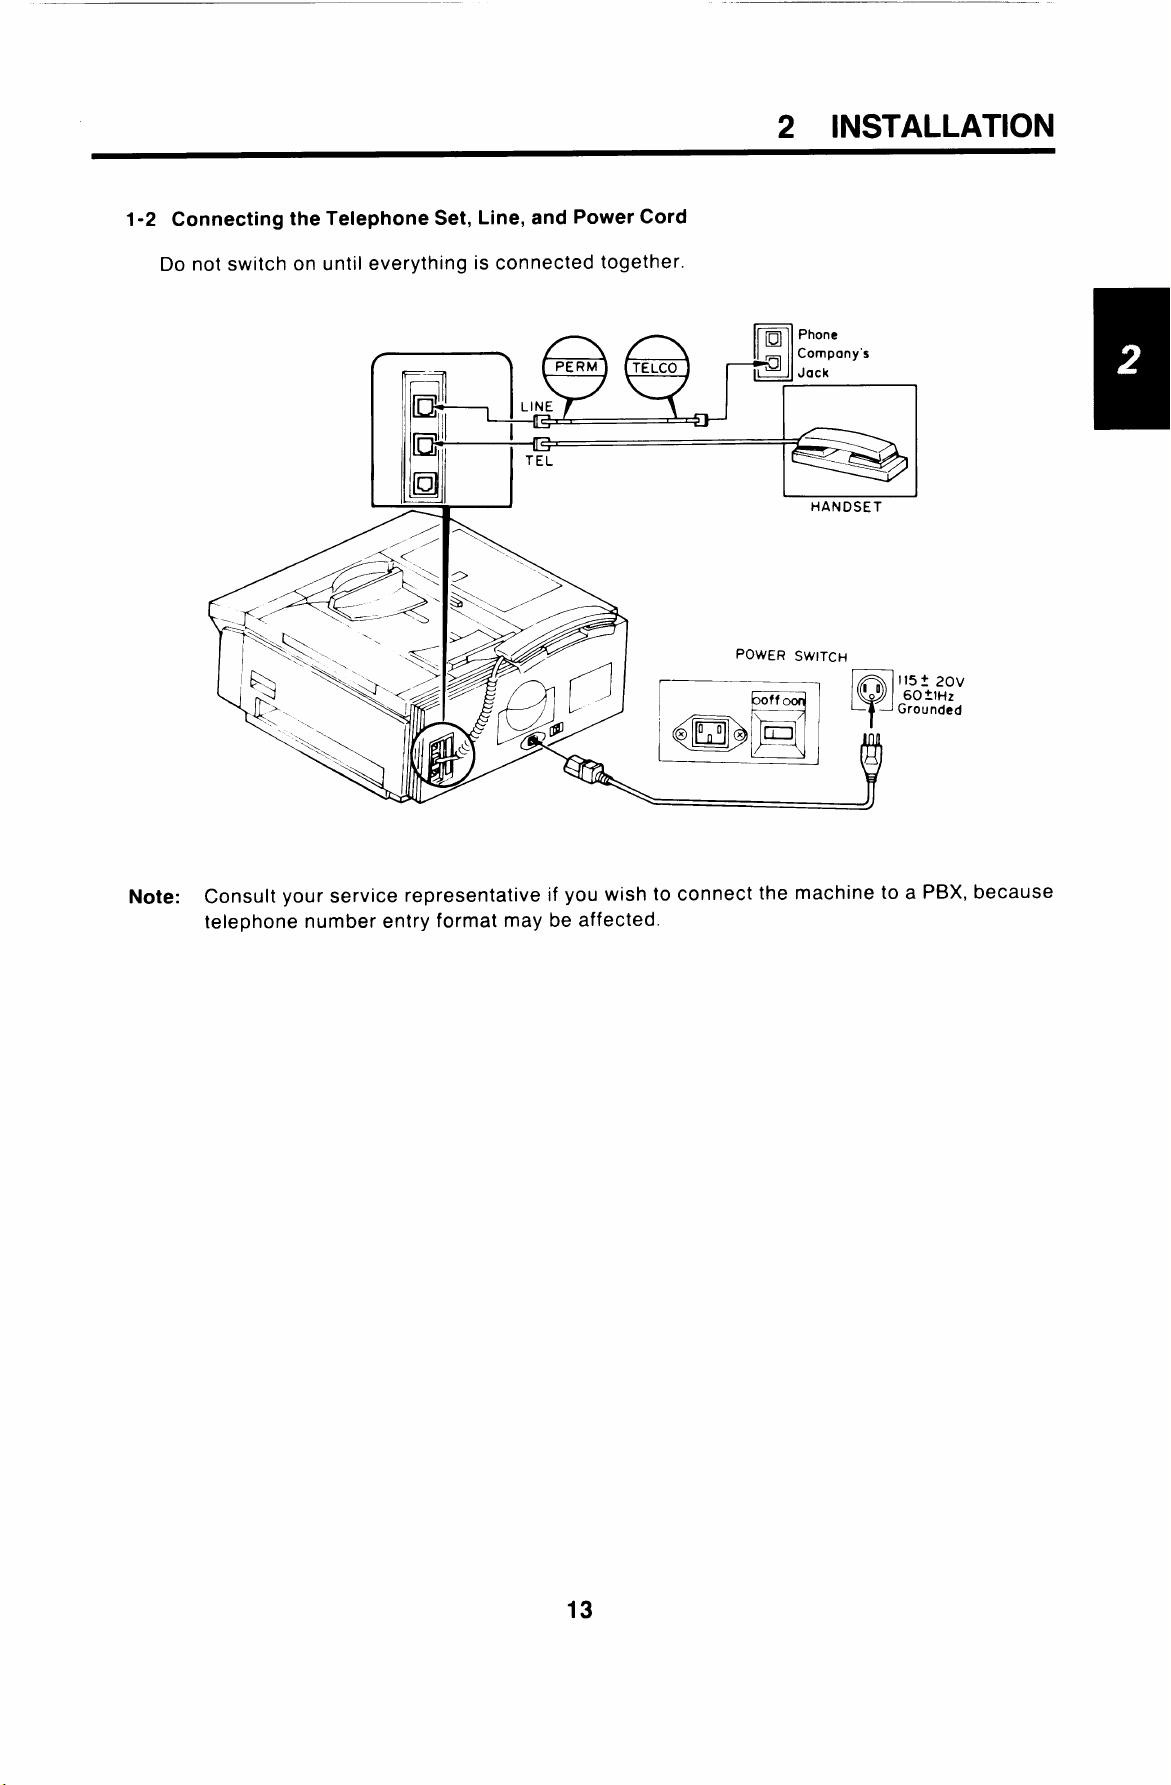
1-2 Connecting the Telephone Setj Line, and Power Cord
Do not switch on until everything is connected together.
I
d
u
Jj
I
TEL
-J
“\.
\
7 ,.
-.
2 INSTALLATION
Phone
Company”s
Jack
HANDSET
\ \:
/?
Note: Consult your service representative if you wish to connect the machine to a PBX, because
telephone number entry format may be affected.
POWER SWITCH
I
boffood I
, ~ l15t20v
o
60tlHz
—
y
Grounded
Page 15
2 INSTALLATION
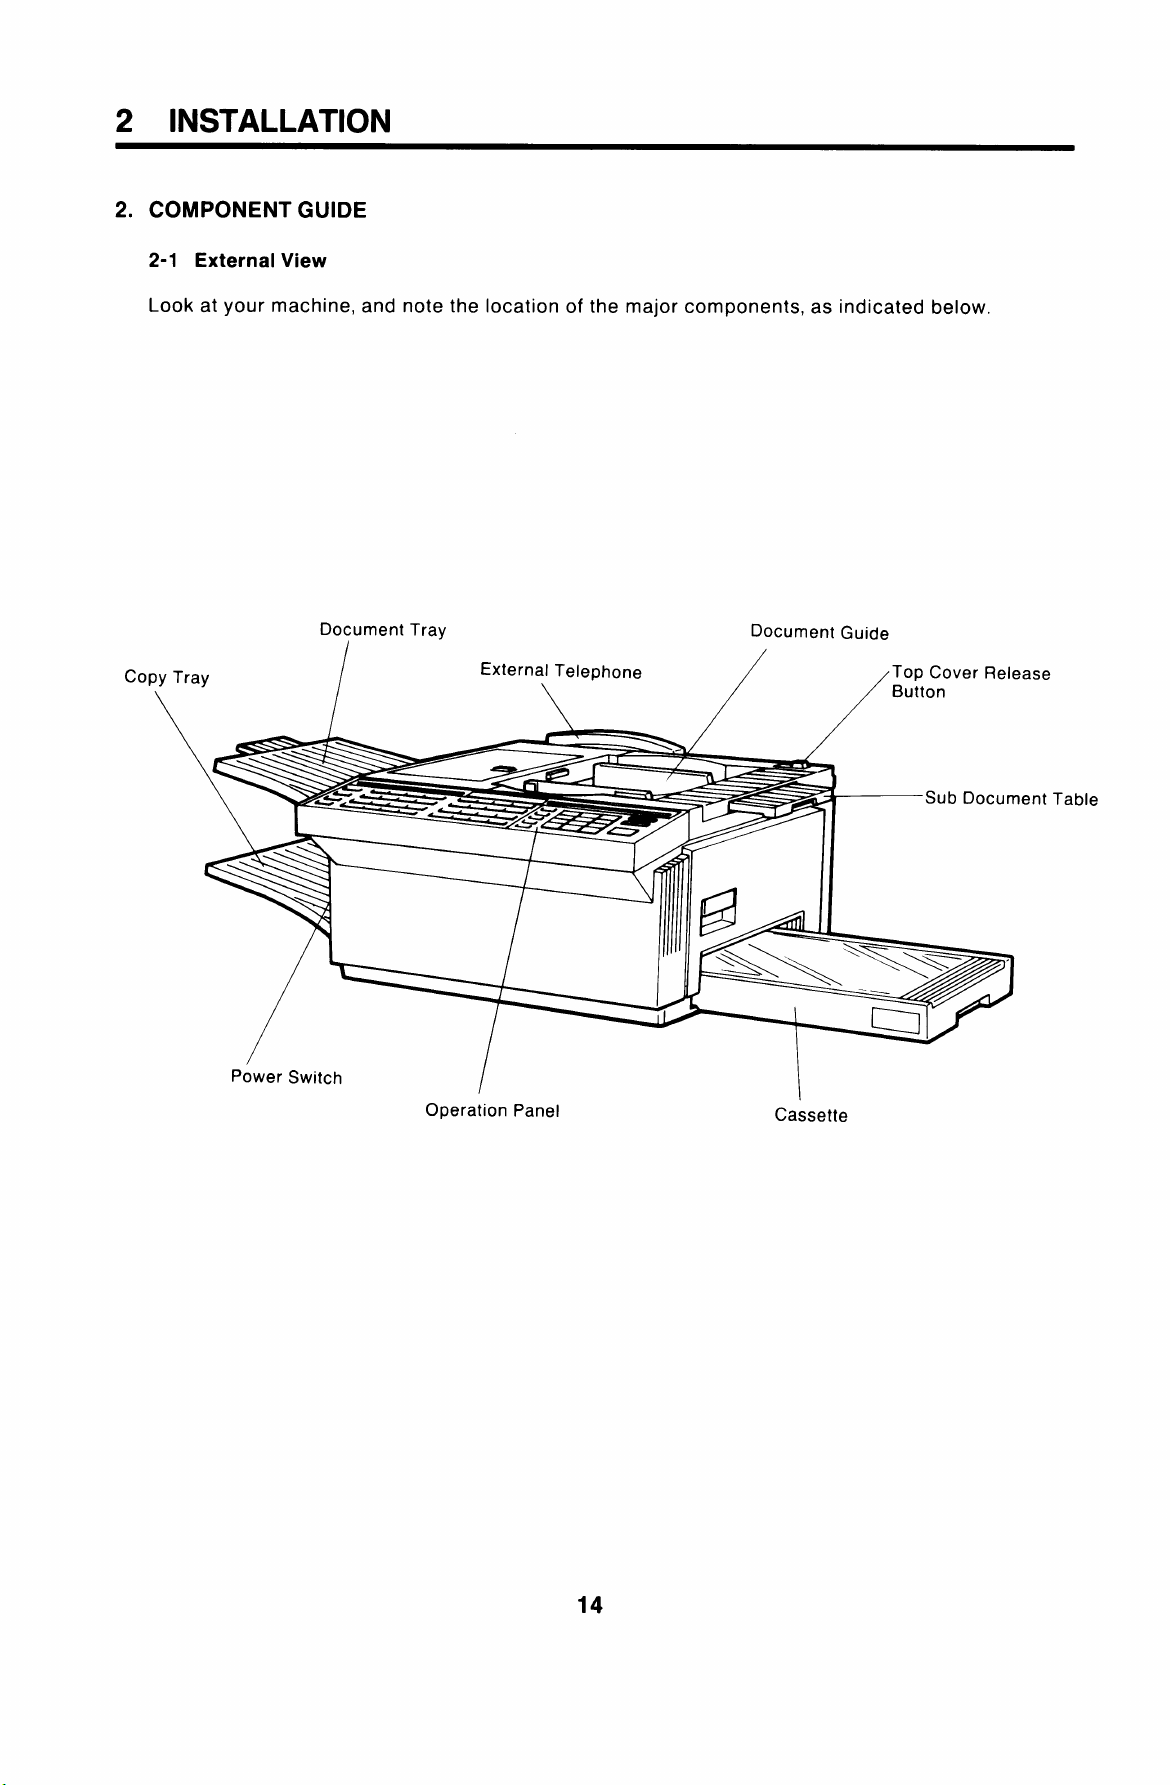
2. COMPONENT GUIDE
2-1 External View
Look at your machine, and note the location of the major componen
Document Tray
co
s, as indicated below,
Document Guide
ase
ent
Table
power Switch
/
Operation Panel
I
Cassette
14
Page 16
—
2 INSTALLATION
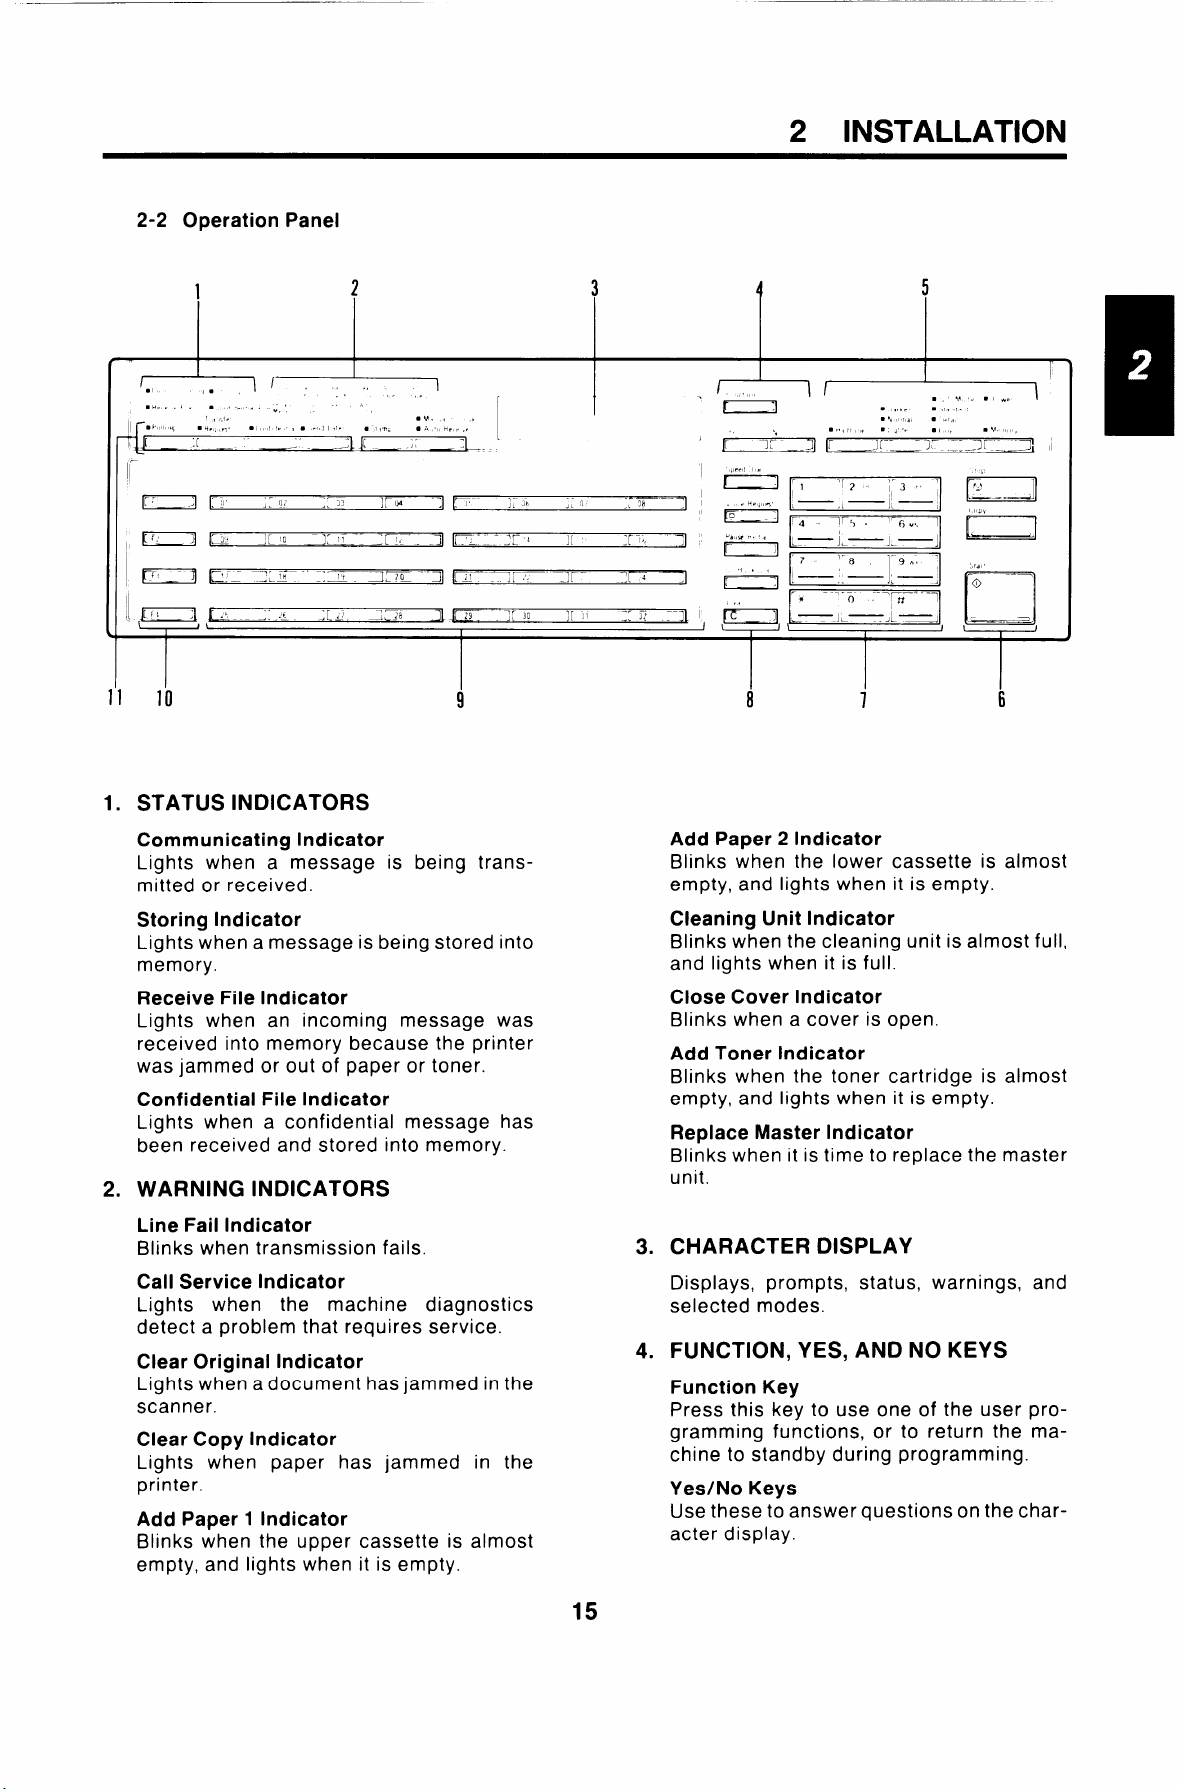
2-2 Operation Panel
10
1. STATUS INDICATORS
Communicating Indicator
Lights when a message is being transmitted or received.
Storing Indicator
Lights when a message
memory.
Receive File Indicator
Lights when an incoming message was
received into memory because the printer
was jammed or out of paper or toner.
Confidential File Indicator
Lights when a confidential message has
been received and stored into memory.
WARNING INDICATORS
2.
Line Fail Indicator
Blinks when transmission fails.
Call Service Indicator
Lights when the machine diagnos<
detect a problem that requires service.
Clear Original Indicator
Lights when a document has jammed in
scanner.
Clear Copy Indicator
Lights when paper has jammed in the
printer.
Add Paper 1 Indicator
Blinks when the upper cassette is almost
empty, and lights when it is empty.
s being stored into
9
Add Paper 2 Indicator
Blinks when the lower cassette is almost
empty, and lights when it is empty.
Cleaning Unit Indicator
Blinks when the cleaning unit is almost full,
and lights when it is full.
Close Cover Indicator
Blinks when a cover is open.
Add Toner Indicator
Blinks when the toner cartridge is almost
empty, and lights when it is empty.
Replace Master Indicator
Blinks when it is time to replace the master
unit.
8
7
6
3. CHARACTER DISPLAY
Displays, prompts, status, warnings, and
ics
he
selected modes.
FUNCTION, YES, AND NO KEYS
4.
Function Key
Press this key to use one of the user programming functions, or to return the machine to standby during programming.
Yes/No Keys
Use these to answer questionson the character display.
15
Page 17
2 INSTALLATION
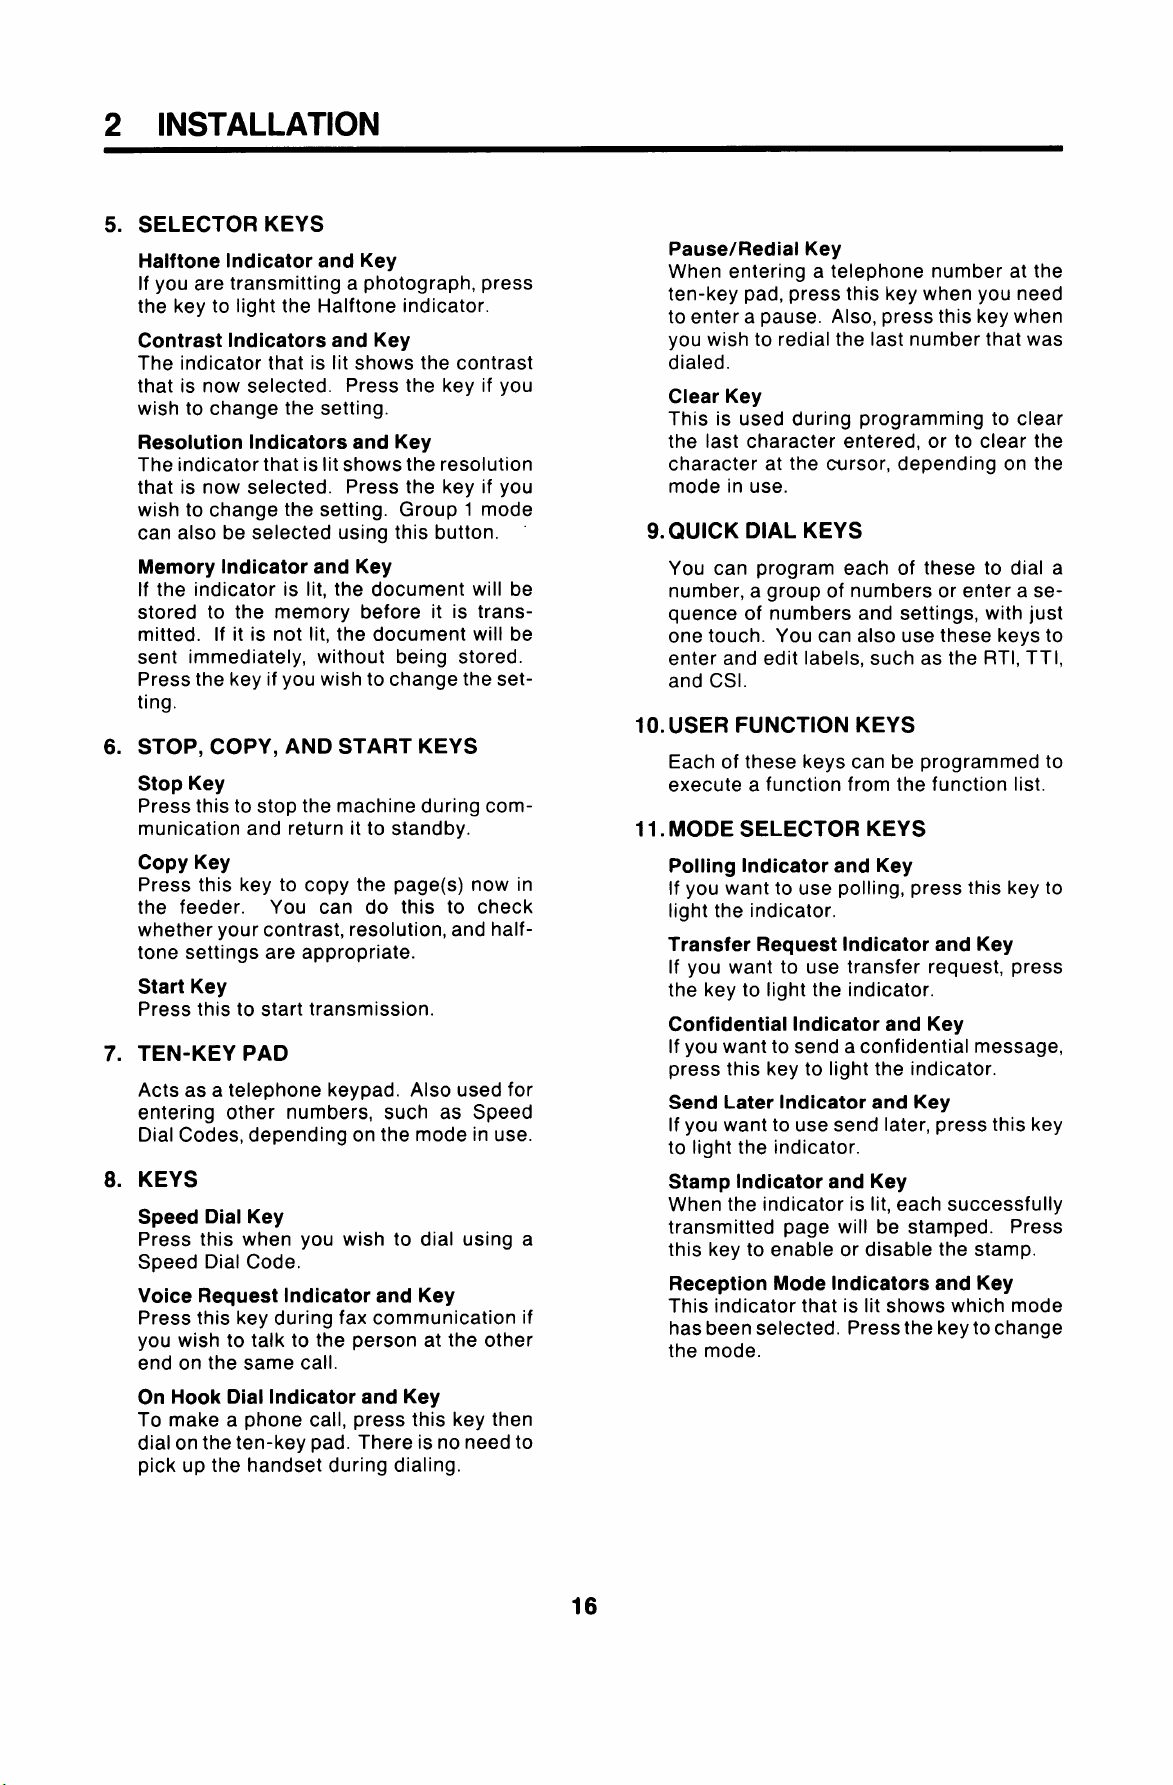
5.
SELECTOR KEYS
Halftone Indicator and Key
If you are transmitting a photograph, press
the key to light the Halftone indicator.
Contrast Indicators and Key
The indicator that is lit shows the contrast
that is now selected. Press the key if you
wish to change the setting.
Resolution Indicators and Key
The indicator that is lit shows the resolution
that is now selected. Press the key if you
wish to change the setting. Group 1 mode
can also be selected using this button.
Pause/Redial Key
When entering a telephone number at the
ten-key pad, press this key when you need
to entera pause. Also, press this key when
you wish to redial the last number that was
dialed.
Clear Key
This is used during programming to clear
the last character entered, or to clear the
character at the cursor, depending on the
mode in use.
9. QUICK DIAL KEYS
Memory Indicator and Key
If the indicator is lit, the document will be
stored to the memory before it is transmitted. If it is not lit, the document will be
sent immediately, without being stored.
Press the key if you wish to change the setting.
STOP, COPY, AND START KEYS
6.
Stop Key
Press this to stop the machine during com-
munication and return it to standby.
Copy Key
Press this key to copy the page(s) now in
the feeder.
whether your contrast, resolution, and halftone settings are appropriate.
Start Key
Press this to start transmission.
TEN-KEY PAD
7.
Acts as a telephone keypad. Also used for
entering other numbers, such as Speed
Dial Codes, depending on the mode in use.
KEYS
8.
Speed Dial Key
Press this when you wish to dial using a
Speed Dial Code.
Voice Request Indicator and Key
Press this key during fax communication if
you wish to talk to the person at the other
end on the same call.
You can do this to check
You can program each of these to dial a
number, a group of numbers or enter a sequence of numbers and settings, with just
one touch. You can also use these keys to
enter and edit labels, such as the RTI, TTI,
and CSI.
10. USER FUNCTION KEYS
Each of these keys can be programmed to
execute a function from the function list.
11. MODE SELECTOR KEYS
Polling Indicator and Key
If you want to use polling, press this key to
light the indicator.
Transfer Request Indicator and Key
If you want to use transfer request, press
the key to light the indicator.
Confidential Indicator and Key
If you want to send a confidential message,
press this key to light the indicator.
Send Later Indicator and Key
If you want to use send later, press this key
to light the indicator.
Stamp Indicator and Key
When the indicator is lit, each successfully
transmitted page will be stamped. Press
this key to enable or disable the stamp.
Reception Mode Indicators and Key
This indicator that is lit shows which mode
has been selected. Press the key to change
the mode.
On Hook Dial Indicator and Key
To make a phone call, press this key then
dial on the ten-key pad. There is no need to
pick up the handset during dialing.
16
Page 18
2 INSTALLATION
3. GETTING STARTED
3-1 Basic Rules for Programming
Before you start to send faxes, there are a few items that you should program. These are:
●
Telephone line type – Function 81
●
Date and time — Function 50
●
RTI, TTI, and CSI –
●
Your fax terminal’s telephone number – Function 80
●
ID Code – Function 62
●
Confidential password – Function 89
However, if you are in a big hurry to send your first fax, just set the telephone line type (page 19),
then send the message (page 30). After that, come back to program the other items in this section, because they are important.
Notes Concerning Programming
. Before starting, make sure the machine is in standby mode; READY must be
shown on the top line of the display.
● If you enter the wrong function number, press Function . The machine will re-
turn to standby.
. When the machine asks you a question, you have 40 seconds to reply. If you do
not reply, the machine will return to standby and you will have to repeat the entire
procedure.
. Whenever you want to return to standby, press Function
. All programmed items remain in the memory, even if you switch the power off.
Functions 63, 64, and 65
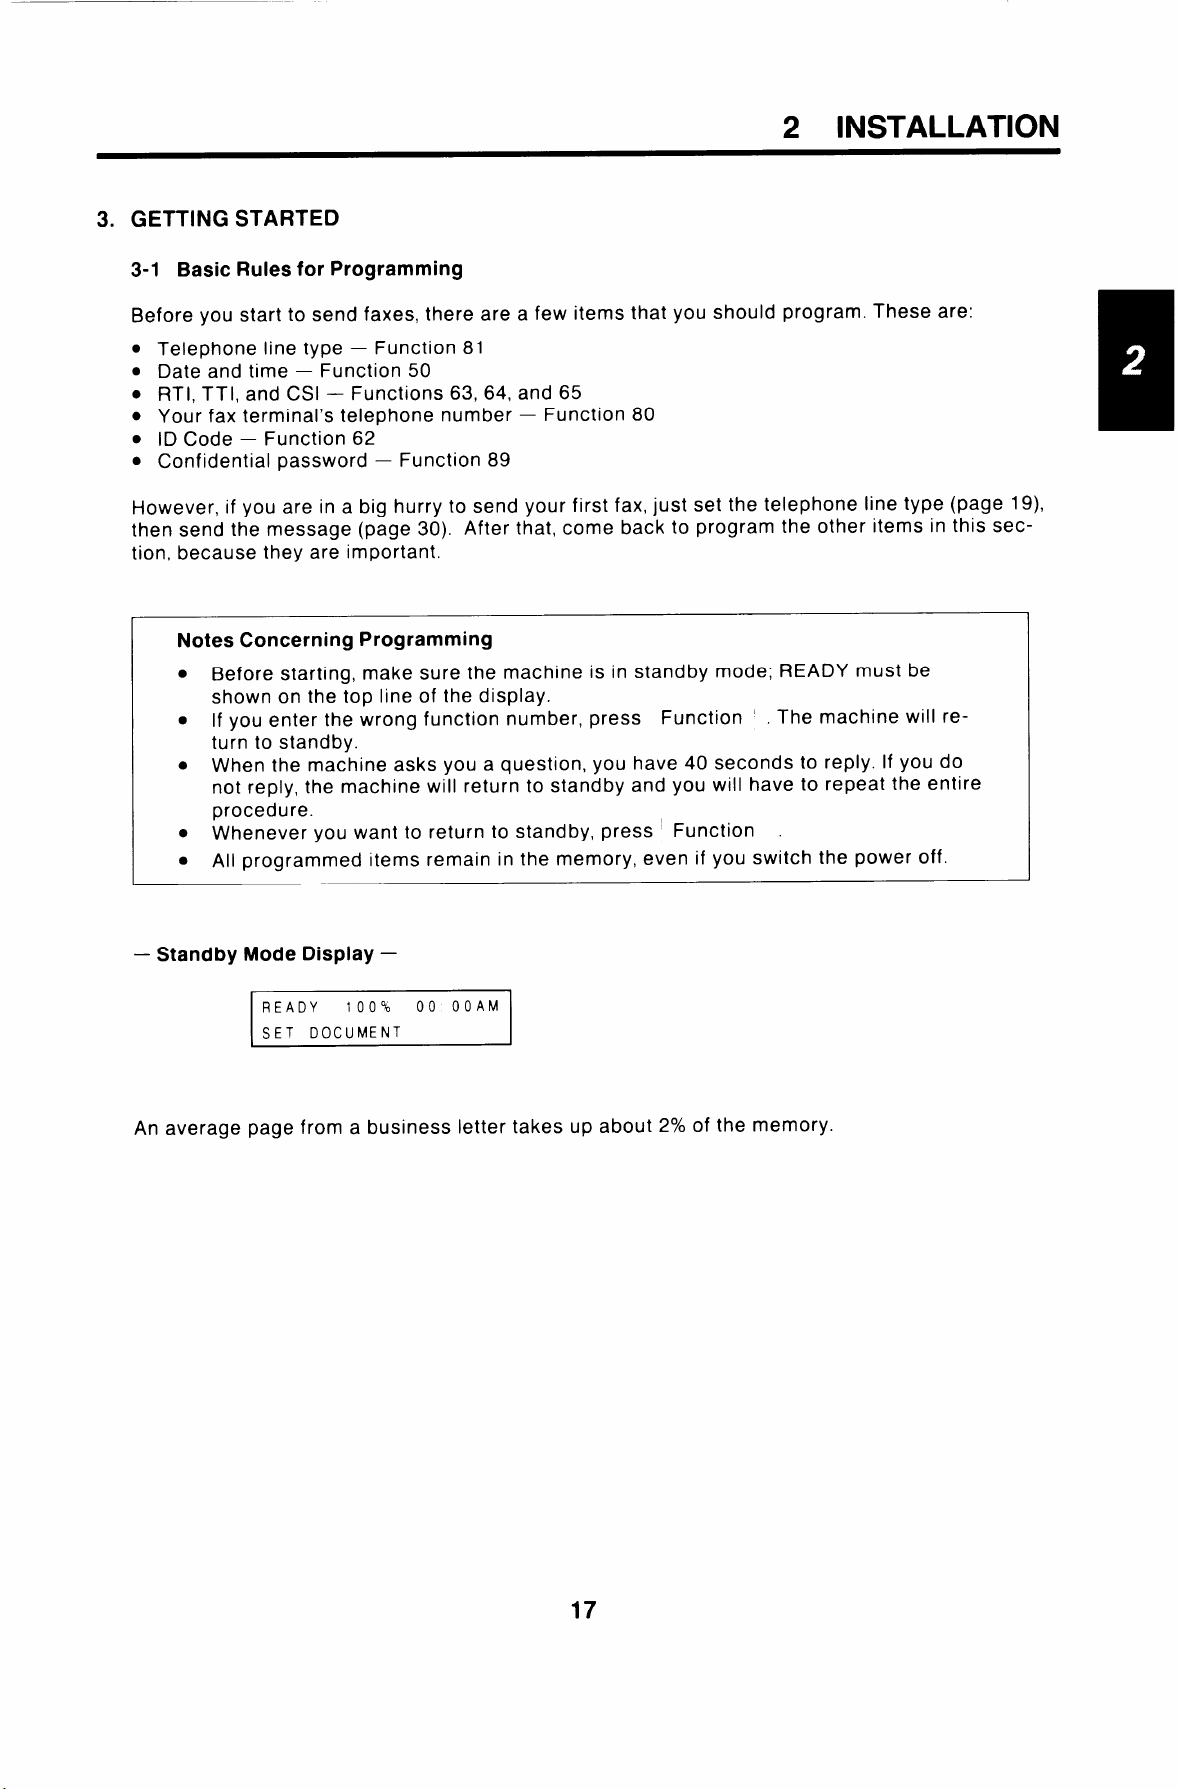
– Standby Mode Display –
100%
An average
READY
SET DOCUMENT
page from a business letter takes up about 2% of the memory.
00 00AM
17
Page 19
2 INSTALLATION
3-2 Programming the Date and Time
You should program the correct date and time, because the date and time in your machine’s clock is
normally printed on reports and on your pages when they are printed out at the other end. Also, if you
use Send Later, the machine will send your fax when this clock reaches the time that you designated
for Send Later.
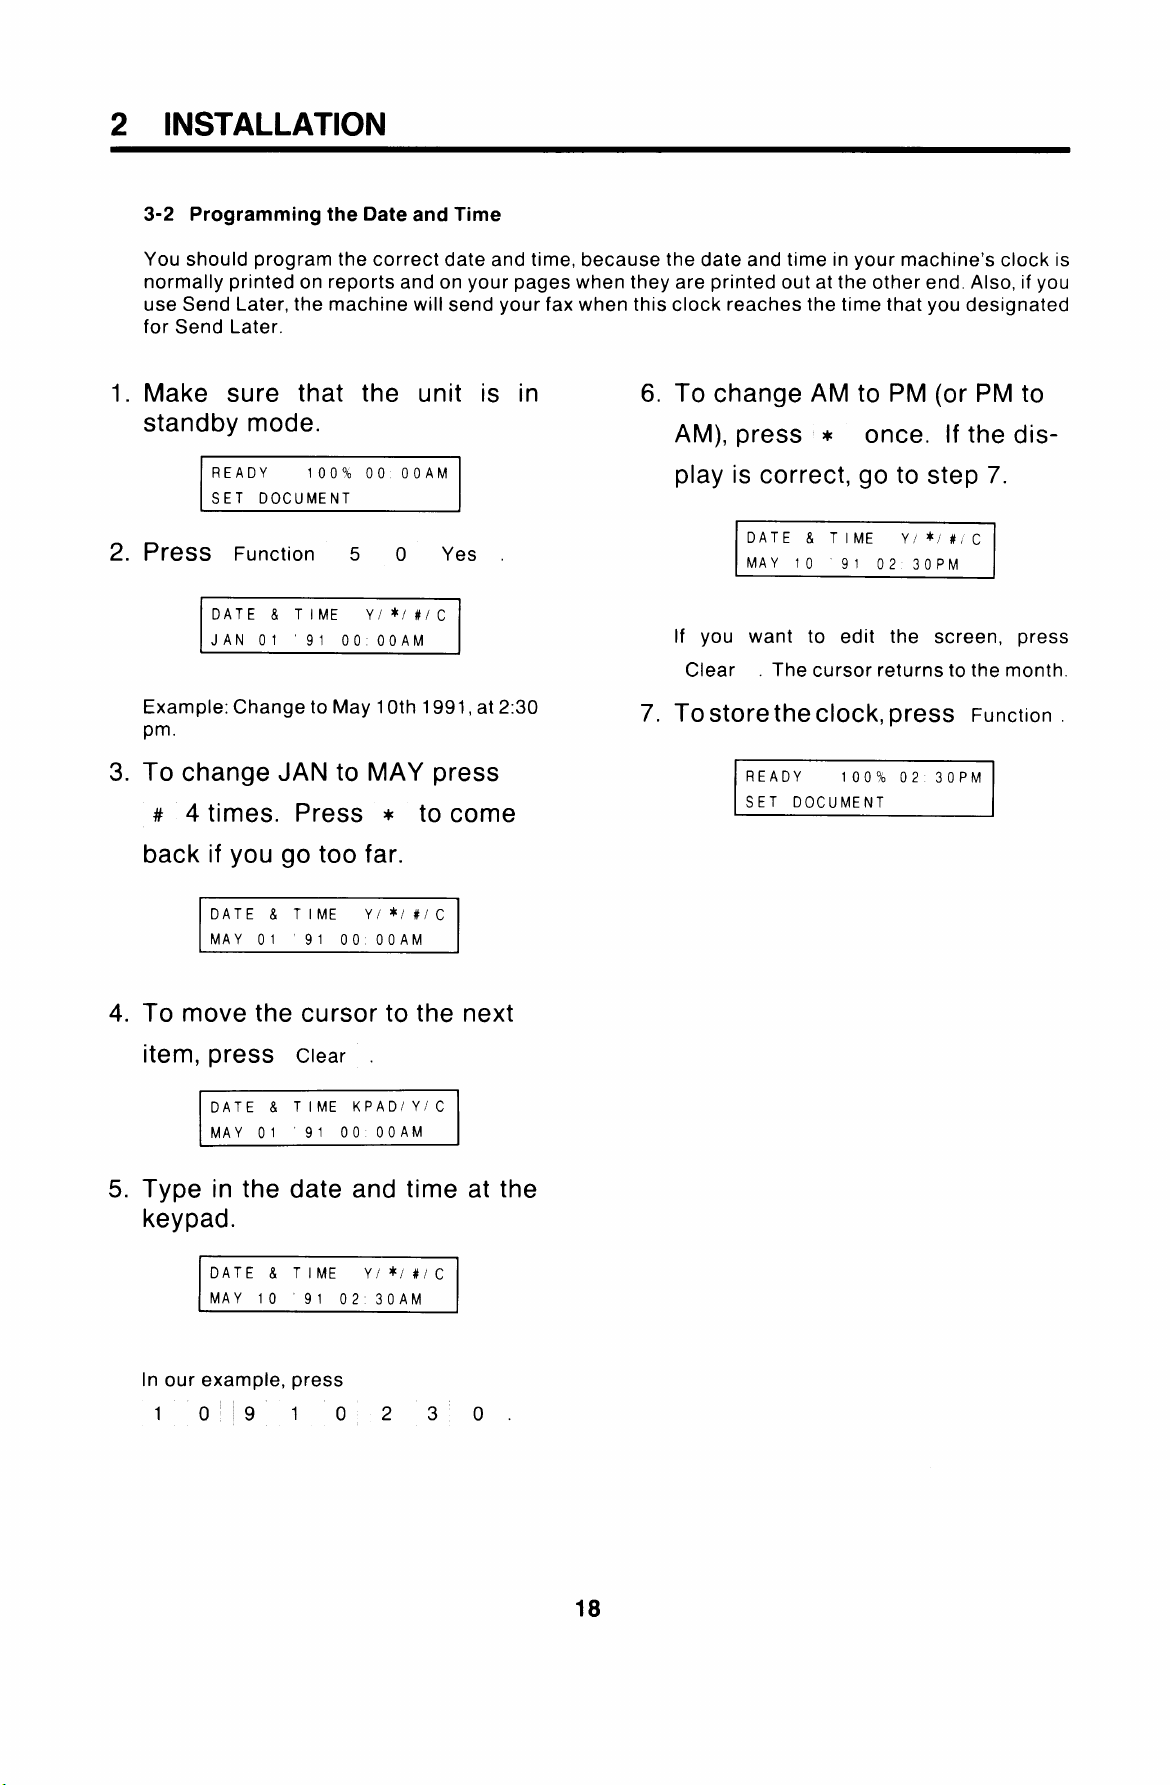
1.
Make sure that the unit is in 6.
standby mode.
To change AM to PM (or PM to
AM), press *
once. If the dis-
READY 100’% 00 00AM
SET DOCUMENT
2.
PreSS Function 5 0 Yes
DATE & TIME
JAN 01 ’91 00 00AM
Example: Change to May 10th 1991, at 2:30
pm.
3.
To change JAN to MAY press
y/*/#/C
# 4 times. Press * to come
back if you go too far.
DATE & TIME
MAY 01
4.
To move the cursor to the next
y/*/#/C
91 00 00AM
play is correct, go to step 7.
DATE & TIME
MAY 10
If you want to edit the screen, press
Clear .
7.
Tostorethe clock, press Function
The cursor returns to the month.
READY 10004 02 30PM
SET DOCUMENT
y/*/#, c
91 02 30PM
I
item, press
DATE & TIME KPAD/YIC
MAY 01 ’91 00 00AM
Type in the date and time at the
5.
Clear .
keypad.
DATE & TIME
MAY 10 91 02 30AM
In our example, press
10910230.
y/* J#/c
18
Page 20
2 INSTALLATION
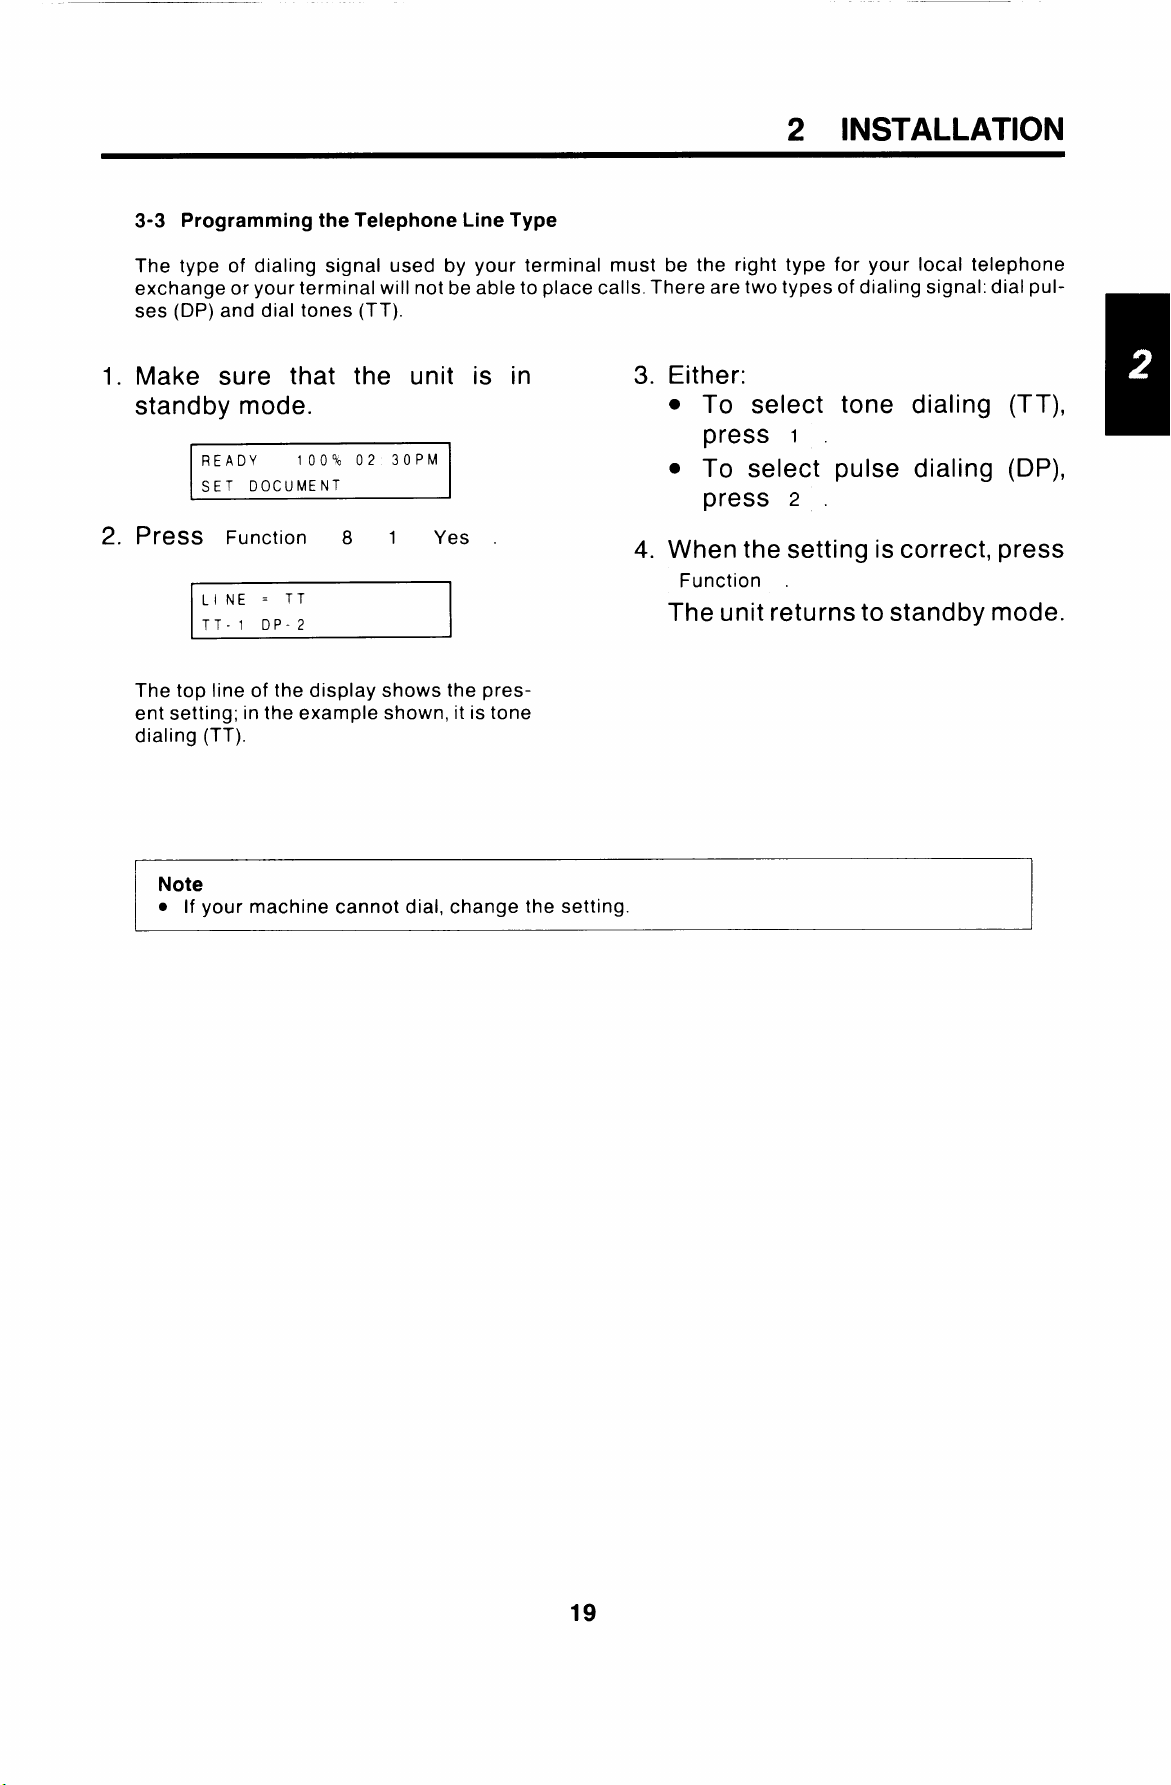
3-3 Programming the Telephone Line Type
The type of dialing signal used by your terminal must be the right type for your local telephone
exchange or your terminal will not be able to place calls. There are two types of dialing signal: dial pulses (DP) and dial tones (TT).
1. Make sure that the unit is in
standby mode.
READY
SET DOCUMENT
z. PK?SS Function 8 1
LINE = TT
TT-1 DP-2
The top line of the display shows the pres-
ent setting; in the example shown, it is tone
dialing (TT).
Note
. If your machine cannot dial, change the setting.
100% 02 30PM
Yes .
3. Either:
● To select tone dialing (TT),
press
● To select pulse dialing (DP),
press
4.
When the setting is correct, press
Function .
I .
2 .
The unit returns to standby mode.
19
Page 21
2 INSTALLATION
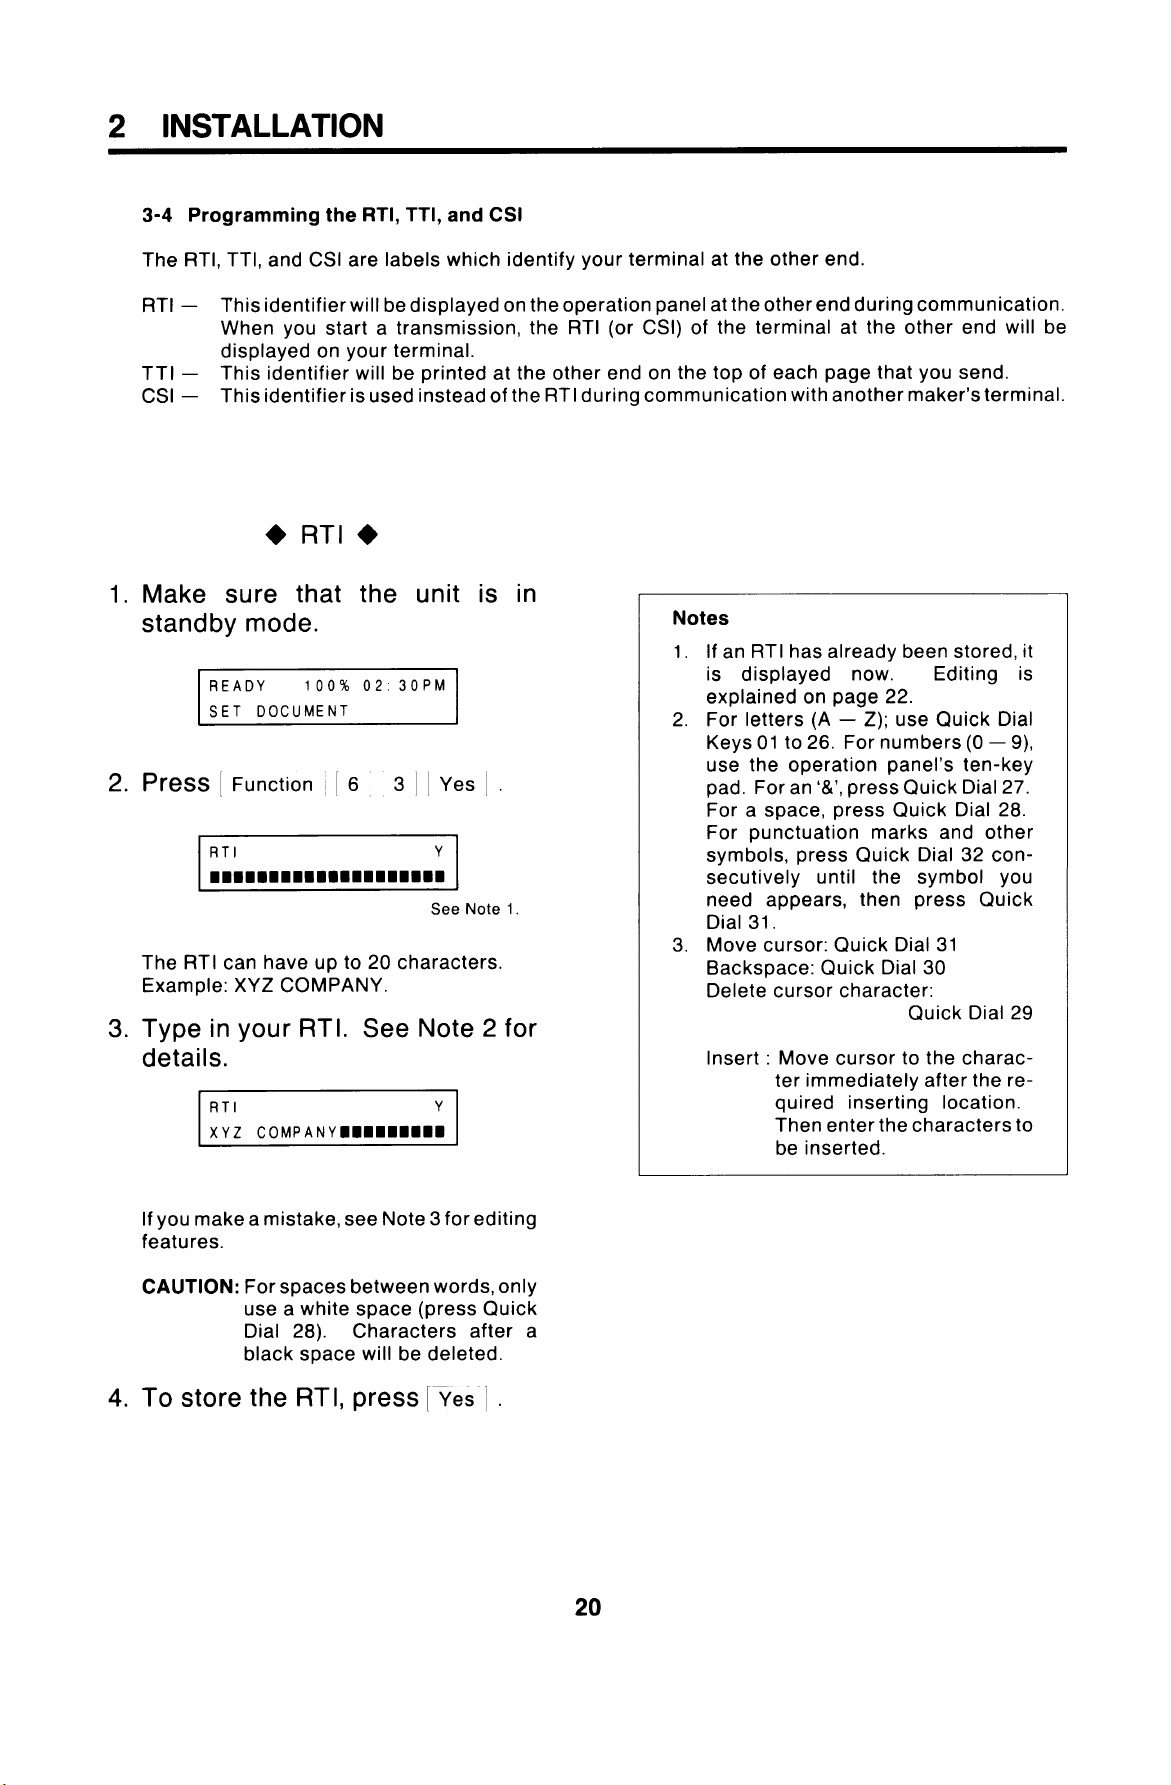
3-4 Programming the RTI, TTI, and CSI
The RTI, TTI, and CSI are labels which identify your terminal at the other end.
RTI — This identifier will be displayed on the operation panel at the other end during communication.
When you start a transmission, the RTI (or CSI) of the terminal at the other end will be
displayed on your terminal.
TTI — This identifier will be printed at the other end on the top of each page that you send.
CSI – This identifier is used instead of the RTI during communication with another maker’sterminal.
+ RTI +
Make sure that the unit is in
1.
standby mode.
READY
SET DOCUMENT
2.
PIESS I Function I 6 3 I I Yes I .
The RTI can have up to 20 characters.
Example: XYZ COMPANY.
3.
Type in your RTI. See Note 2 for
100% 02.30PM
See Note 1.
details.
Notes
1. If an RTI has already been stored, it
is displayed now. Editing is
explained on page 22.
2. For letters (A – Z); use Quick Dial
Keys 01 to 26. For numbers (O – 9),
use the operation panel’s ten-key
pad. For an ‘&’, press Quick Dial 27.
For a space, press Quick Dial 28.
For punctuation marks and other
symbols, press Quick Dial 32 consecutively until the symbol you
need appears, then press Quick
Dial 31.
3. Move cursor: Quick Dial 31
Backspace: Quick Dial 30
Delete cursor character:
Quick Dial 29
Insert : Move cursor to the charac-
ter immediately after the required inserting location.
Then enter the characters to
be inserted.
If you make a mistake, see Note 3forediting
features.
CAUTION: For spaces between words, only
use a white space (press Quick
Dial 28). Characters after a
black space will be deleted.
4. To store the RTI, press [ Yes I .
20
Page 22
+ TTI +
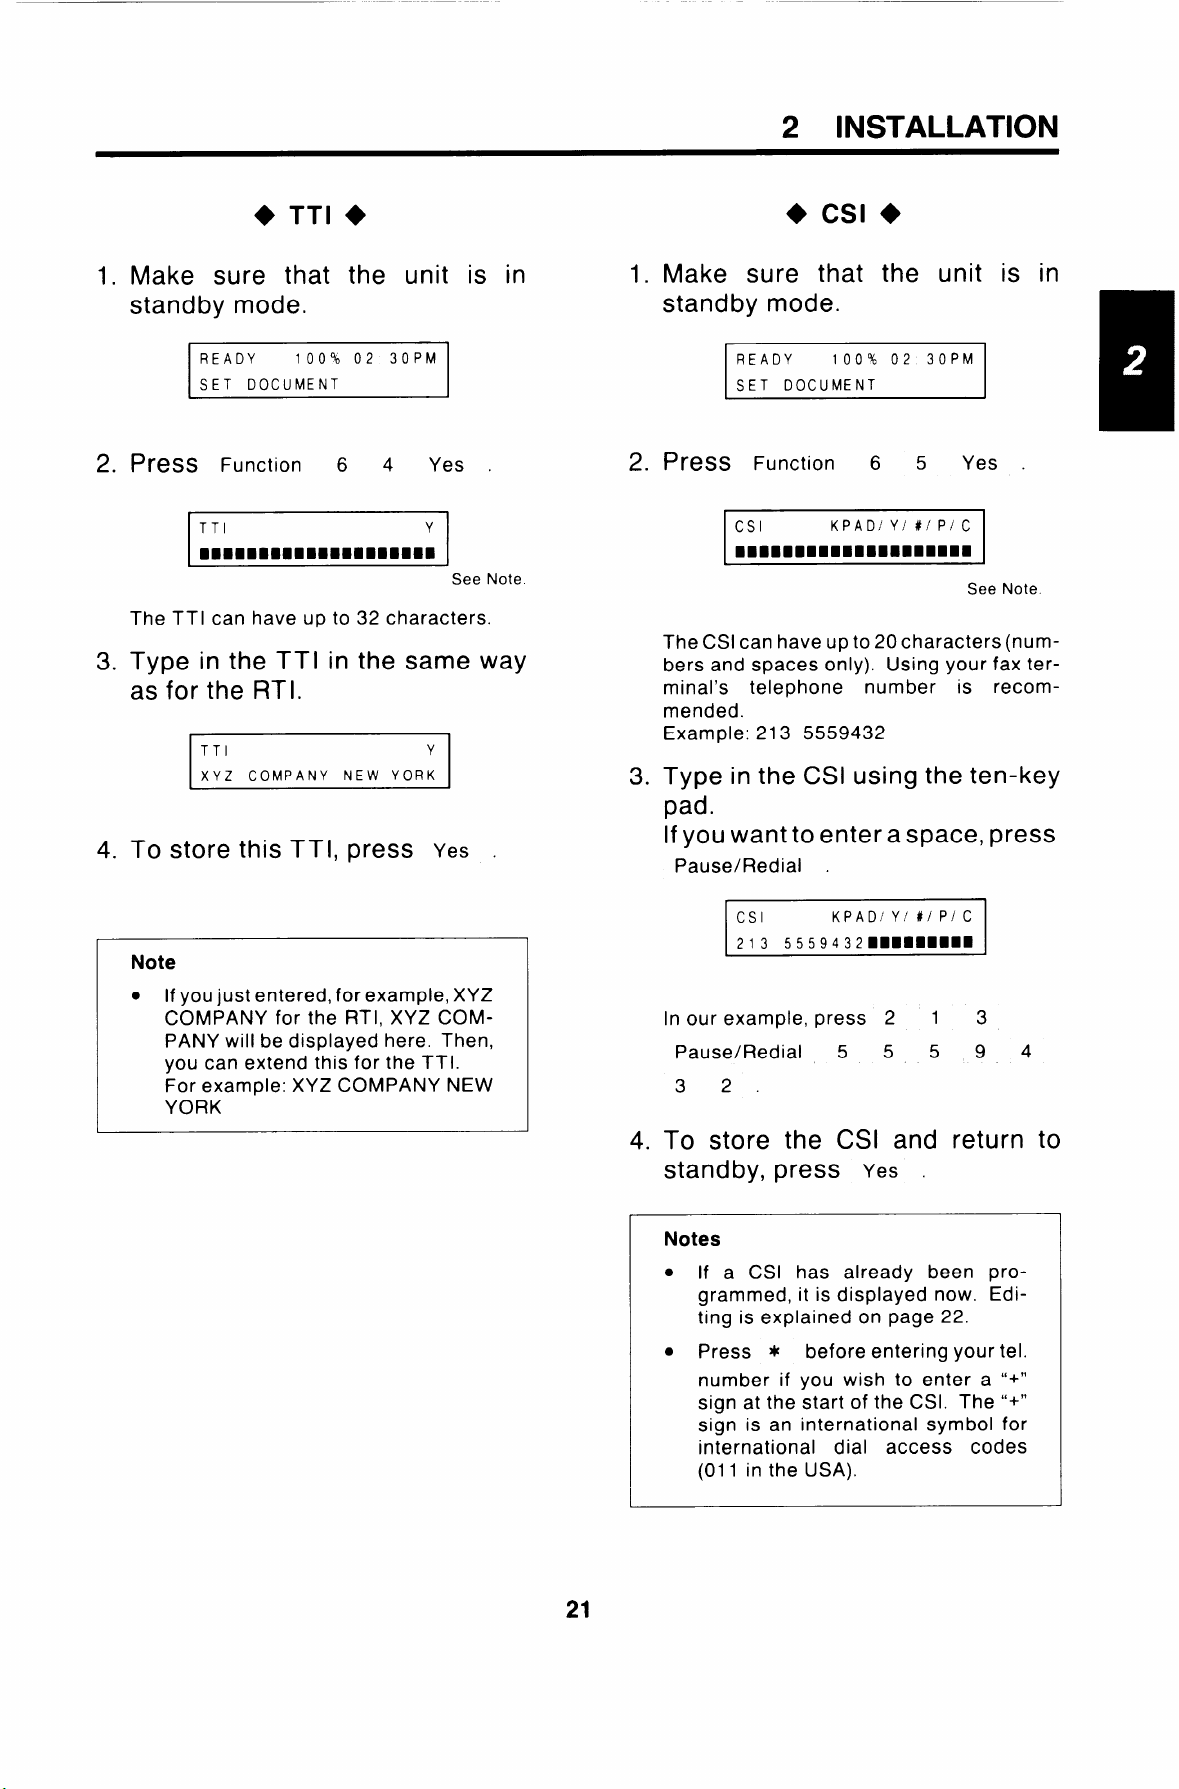
1.
Make sure that the unit is in 1.
standby mode.
2 INSTALLATION
Make sure that the unit is in
standby mode.
READY 100% 02 30PM
SET DOCUMENT
2.
PreSS Function 6 4 Yes .
The TTI can have up to 32 characters.
Type in the TTI in the same way
3.
as for the RTI.
TTI Y
XYZ COMPANY NEW YORK
To store this TTI, press
4.
Yes .
See Note.
READY 100’% 02 30PM
SET DOCUMENT
PreSS Function 6 5 Yes .
2.
See Note
The CSl can have upto20characters (numhers and spaces only). Using your fax terminal’s telephone number is recommended.
Example: 213 5559432
Type in the CSI using the ten-key
3.
pad.
If you want to enter a space, press
Pause/Redial .
Note
● lfyoujustentered, forexample, XYZ
COMPANY for the RTI, XYZ COMPANY will be displayed here. Then,
you can extend this for the TTI.
For example: XYZ COMPANY NEW
YORK
n our example, press 2 1 3
Pause/Redial 5 5 5 9 4
32.
4.
To store the CSI and return to
standby, press
Notes
. If a CSI has already been pro-
grammed, it is displayed now. Editing is explained on page 22.
. Press * before entering your tel.
number if you wish to enter a “+”
sign at the start of the CSI. The “+”
sign is an international symbol for
international dial access codes
(01 1 in the USA).
Yes .
I
21
Page 23
2 INSTALLATION
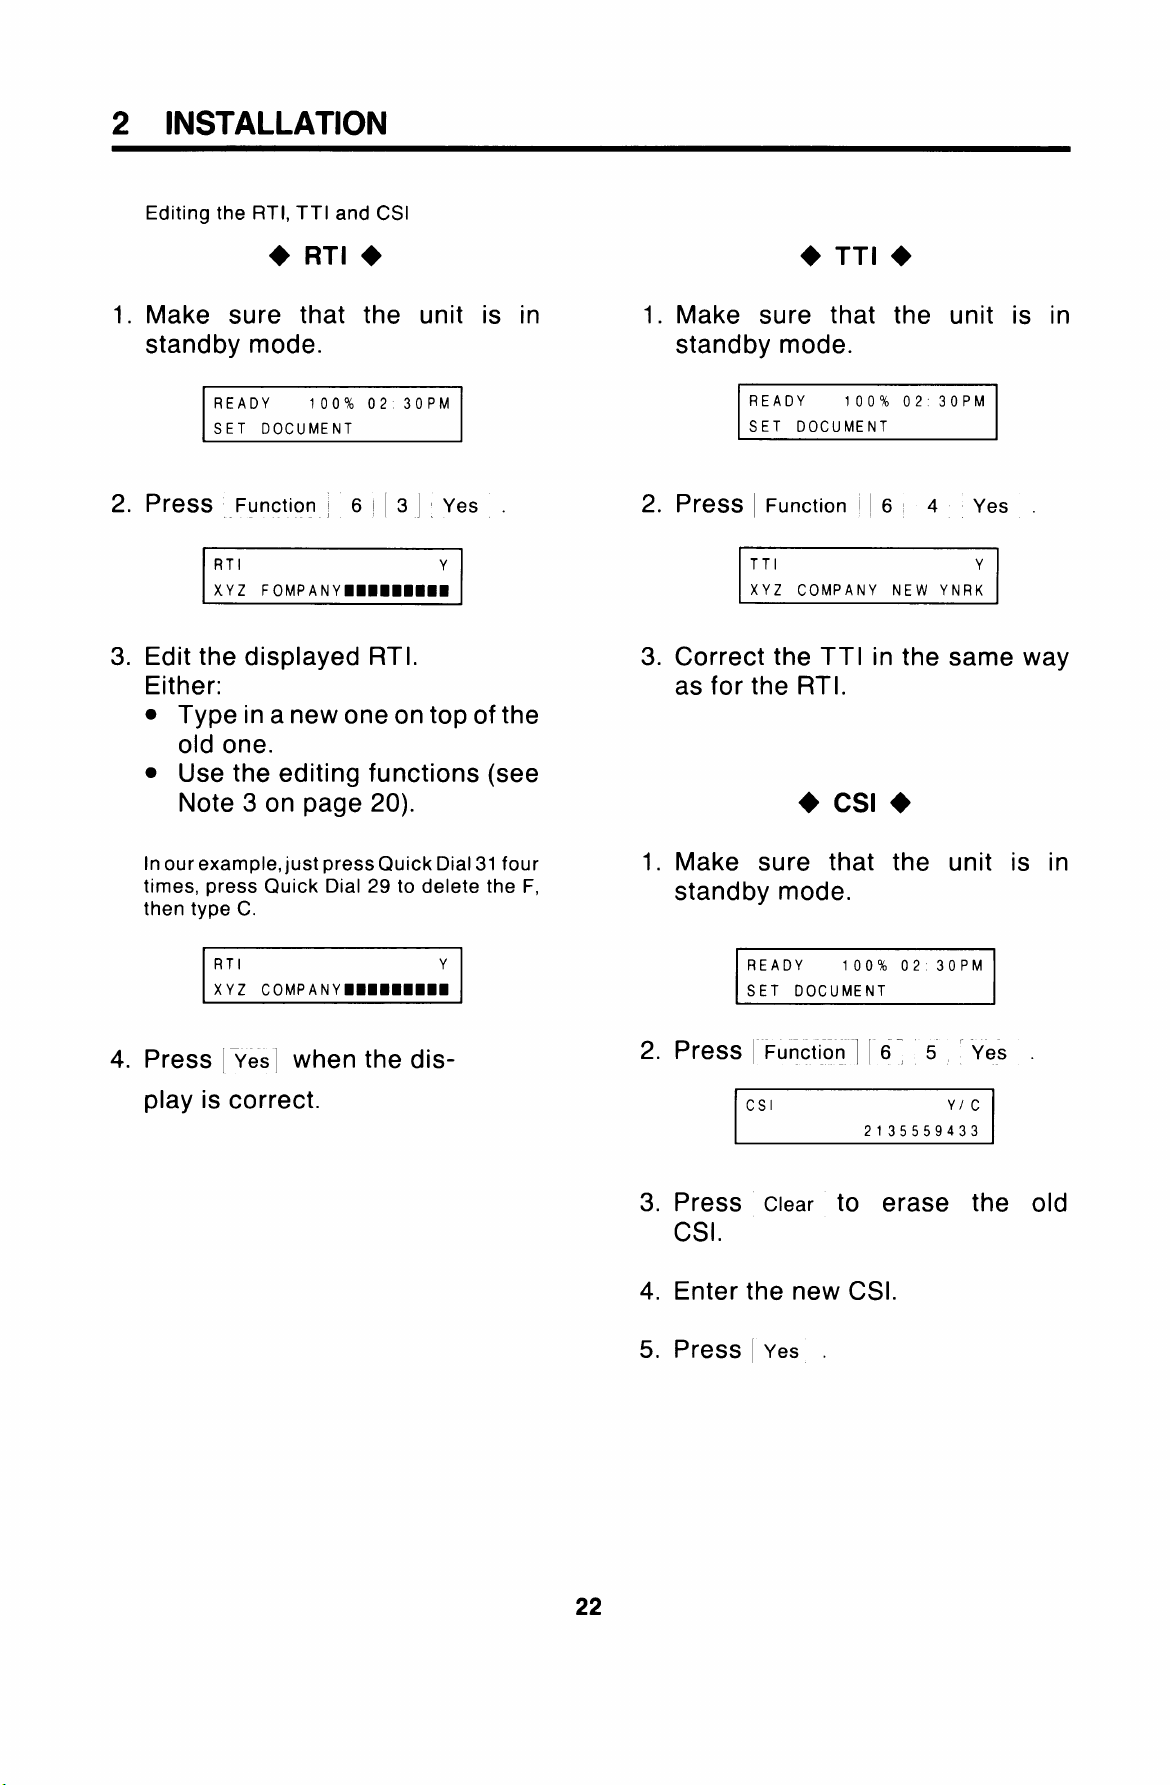
Editing the RTI, TTI and CSI
● RTI +
1. Make sure that the unit is in
standby mode.
READY 100% 02 30PM
SET DOCUMENT
3. Edit the displayed RTI.
Either:
● Type in a new one on top of the
old one.
. Use the editing functions (see
Note 3 on page 20).
In ourexample, just press Quick Dial 31 four
times, press Quick Dial 29 to delete the F,
then type C.
1. Make sure that the unit is in
standby mode.
READY 100% 02 30PM
SET DOCUMENT
TTI
XYZ COMPANY NEW YNRK
Y
3. Correct the TTI in the same way
as for the RTI.
+ Csl +
1. Make sure that the unit is in
standby mode.
4. Press [ yes] when the display is correct.
READY 100% 02 30PM
SET DOCUMENT
Csl
2135559433
Y/c
3. Press Clear to erase the old
Csl.
4. Enter the new CSI.
5. Press ~
Yes .
22
Page 24
2 INSTALLATION
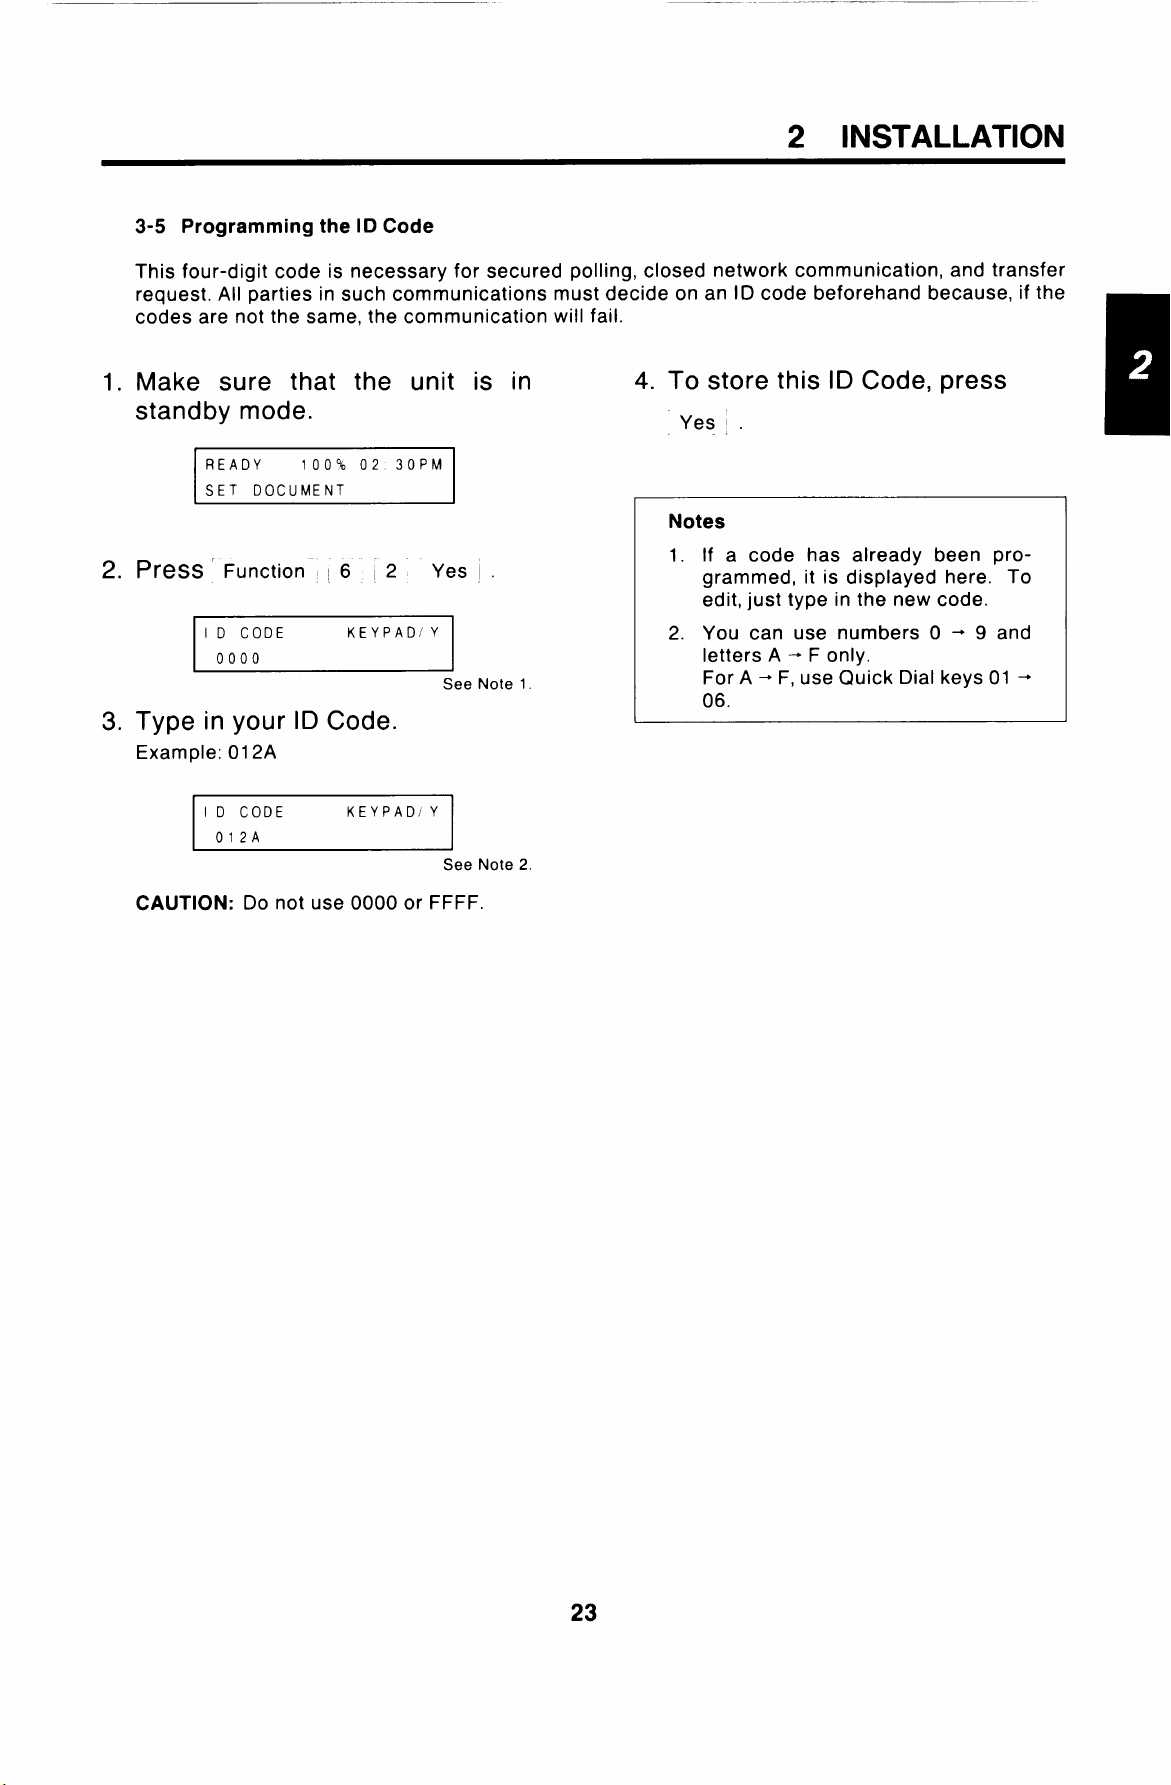
3-5 Programming thel DCode
This four-digit code is necessary for secured polling, closed network communication, and transfer
request. All parties in such communications must decide on an ID code beforehand because, if the
codes are not the same, the communication will fail.
1.
Make sure that the unit is in
standby mode.
READY 100% 02 30PM
SET DOCUMENT
2.
PU3SS r Function ~6 ~2 Yes ~.
I D CODE KEYPAD/Y
0000
See Note 1.
Type in your ID Code.
3.
Example: 012A
I D CODE KEY PADIY
012A
See Note 2
CAUTION: Do not use 0000 or FFFF.
4. To store this ID Code, press
Yes .
Notes
1. If a code has already been programmed, it is displayed here. To
edit, just type in the new code.
2. You can use numbers O + 9 and
letters A +
For A + F, use Quick Dial keys 01 +
06.
F only.
23
Page 25
2 INSTALLATION
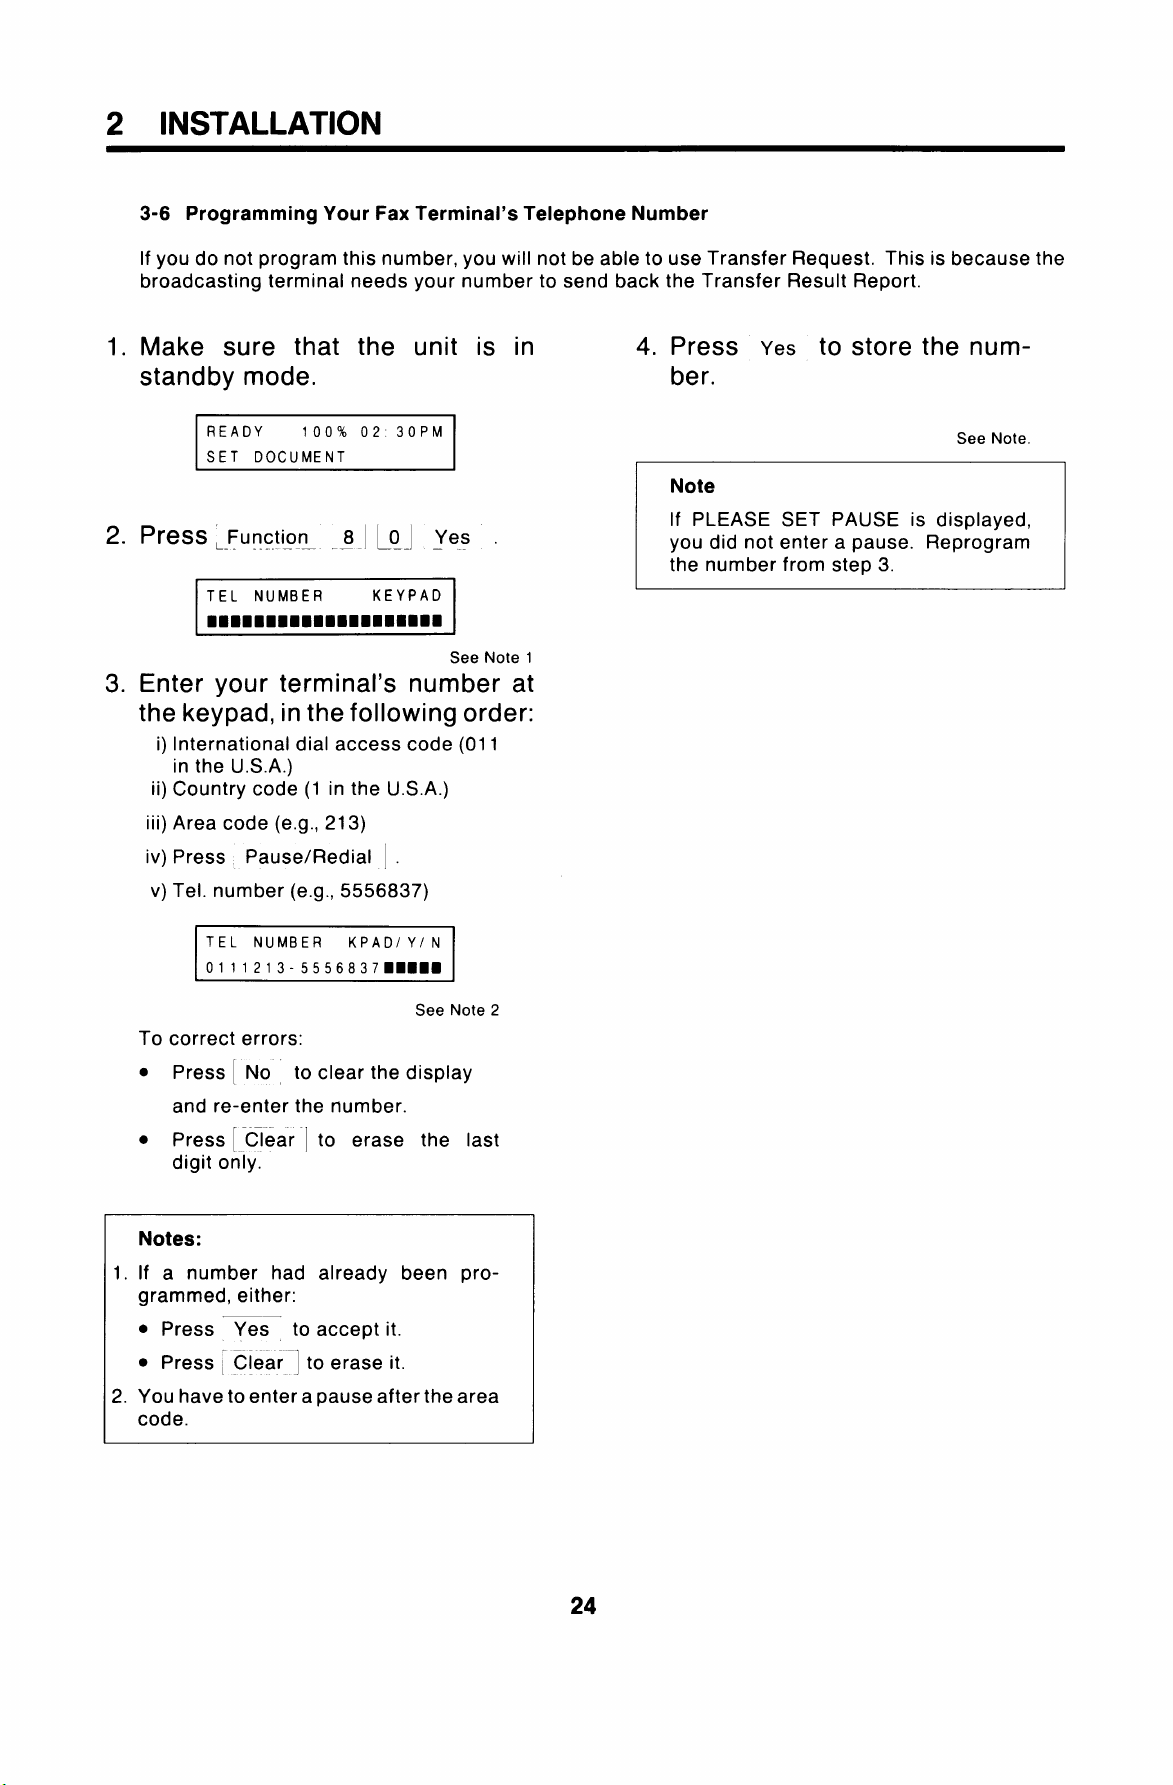
3-6 Programming Your Fax Terminal’s Telephone Number
If you do not program this number, you will not be able to use Transfer Request. This is because the
broadcasting terminal needs your number to send back the Transfer Result Report.
Make sure that the unit is in
1.
standby mode.
READY
SET DOCUMENT
z. Pl@SS ,_Function 8 j LO I Yes .
100% 02 30PM
.—.
See Note 1
3. Enter your terminal’s number at
the keypad, in the following order:
i) International dial access code (01 1
in the U.S.A.)
ii) Country code (1 in the U.S.A.)
iii) Area code (e.g., 213)
iv) Press Pause/Redial .
v) Tel. number (e.g., 5556837)
4. Press
Yes to store the num-
her.
Note
If PLEASE SET PAUSE is displayed,
you did not enter a pause. Reprogram
the number from step 3.
See Note.
~
See Note2
To correct errors:
. Press : No , to clear the display
and re-enter the number.
● Press [ Clear I to erase the last
digit only.
Notes:
1. If a number had already been pro-
grammed, either:
● Press Yes to accept it.
● Press ; Clear ] to erase it.
—.
2. You have to entera pause after the area
code.
Page 26
2 INSTALLATION
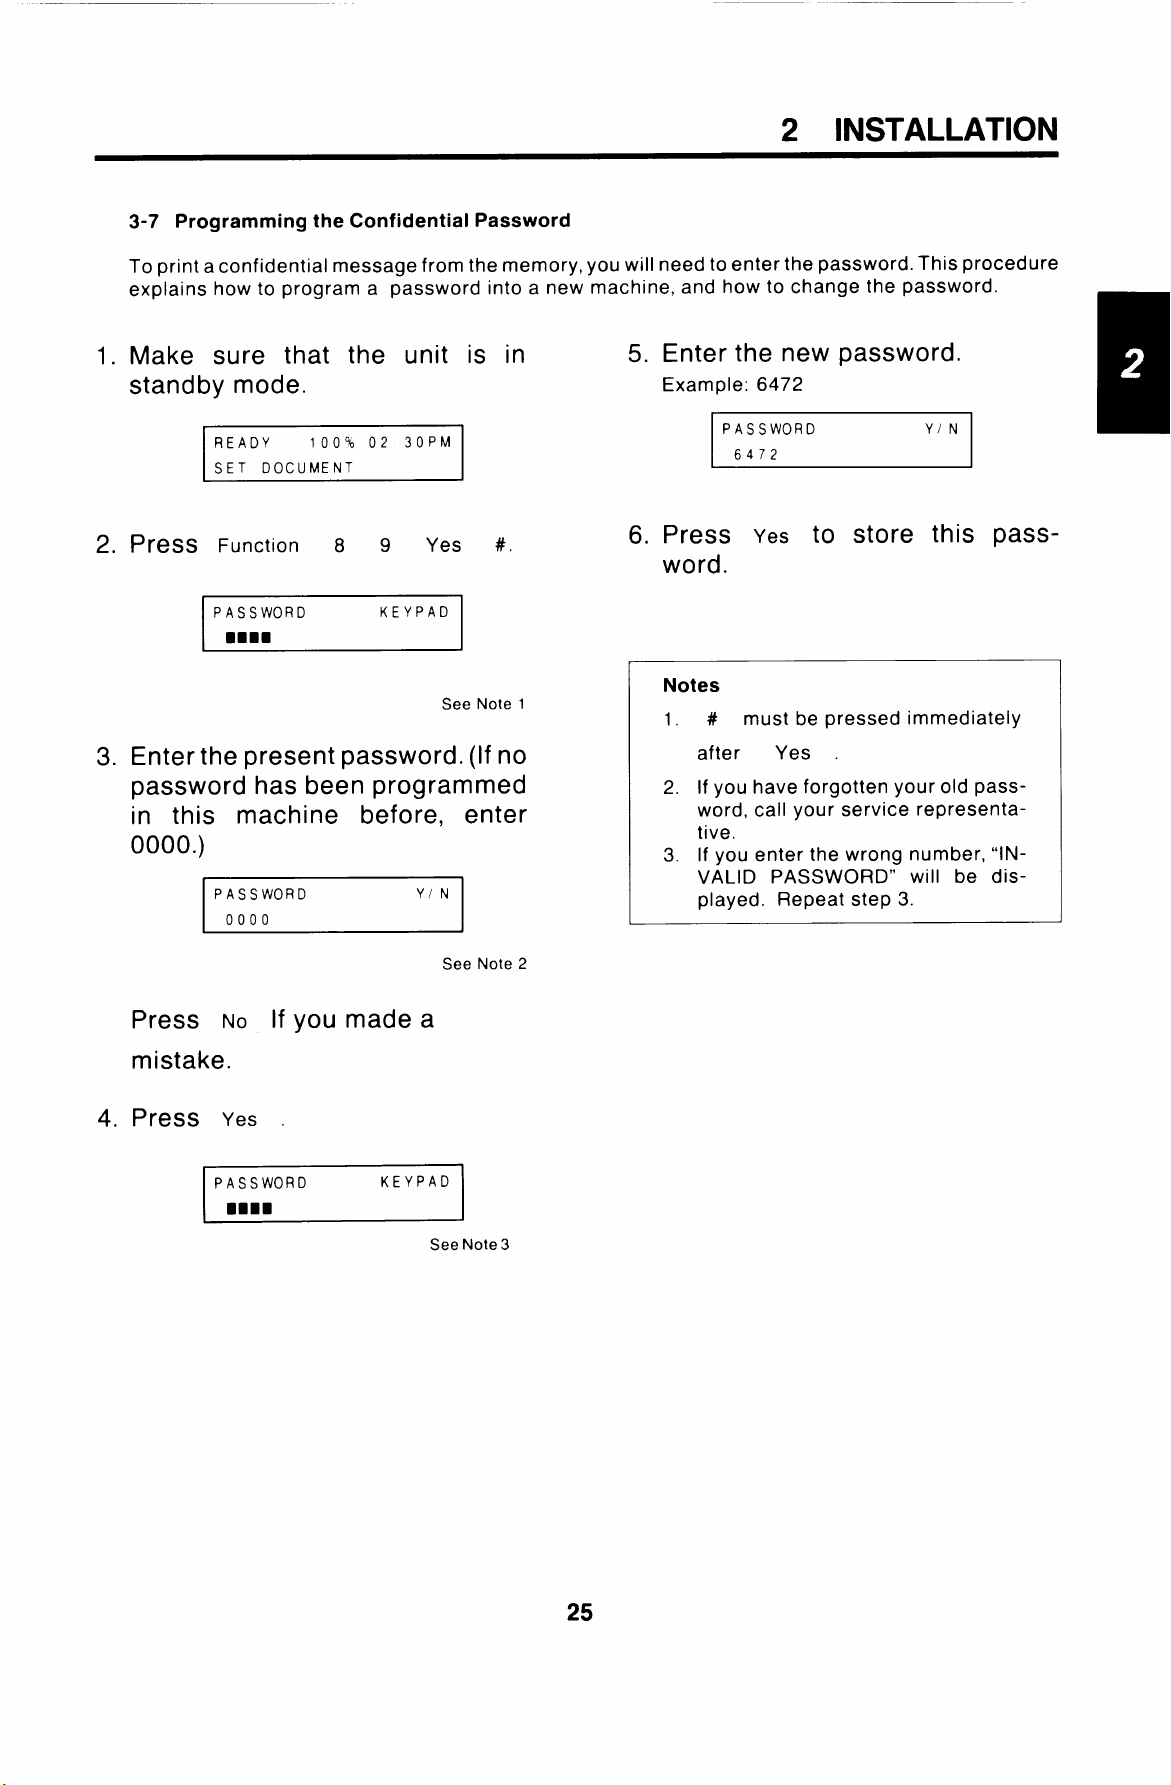
3-7 Programming the Confidential Password
To print a confidential message from the memory, you will need to enter the password. This procedure
explains how to program a password into a new machine, and how to change the password.
1.
Make sure that the unit is in
standby mode.
READY
SET DOCUMENT
PreSS Function 8 9 Yes
2.
PASSWORD
Enter the present password. (If no
3.
100% 02 30PM
KEYPAD
password has been programmed
in this machine before, enter
0000.)
PASSWORD
0000
YIN
#.
I
See Note 1
5. Enter the new password.
Example: 6472
PASSWORD YIN
I 6472
I
I
6. Press Yes to store this password.
Notes
1.
# must be pressed immediately
after
2. If you have forgotten your old pass-
word, call your service representative.
3. If you enter the wrong number, “lN-
VALID PASSWORD” will be displayed. Repeat step 3.
Yes .
Press NO If you made a
mistake.
4.
Press
Yes .
PASSWORD
mmnn
KEYPAD
Note 2
See
SeeNote3
Page 27

2 INSTALLATION
4. TRANSPORTING THE MACHINE
If you have to move the machine to a new location, please do the following.
●
Take out the cassette.
●
Take out the master unit and cleaning unit.
Caution :
●
Remove the document tray.
●
Remove the copy tray.
●
Tape up the scanner cover.
●
Secure the ac power cord.
●
Don’t leave the telephone line cord behind.
1. Do not touch the master belt surface and avoid exposing it to light.
2. Do not tip the cleaning unit upside down or used toner may come out.
Page 28

MEMO
27
Page 29

3 ROUTINE OPERATION
1. SENDING A FAX MESSAGE
1-1 Recommended Types of Document
Before you send your document, make sure that it meets the following requirements.
CAUTION: Documents that do not meet these requirements can cause your machine to jam or may
cause some components of the machine to become damaged or dirty.
1. Size
Paper Thickness: 2 to 8 roils
(20 lb paper)
Maximum
Minimum
Length: Up to 47 ins can be fed manually.
(This limit can be reset to 45 ft or328 ft
by a service technician.)
r
47”
T
4.1”
~L
L
—5.8”-4 k-l17”-
2. Small Type Sizes
Small faint characters may not be transmitted clearly.
3. Photocopies that were made with a copier that uses silicone oil may cause a misfeed. If a
misfeed occurs, use the same document again five or ten minutes later.
4. Document misfeed may occur if a thermal paper original is used.
If the document is too short, enlarge it with a
copier.
If the document is too long, divide it into two or
more sheets.
Note:
Documents longer than 16 inches must
be guided carefully by hand, or a mis-
feed or skew may occur.
5. Do not use different sizes of documents together.
Page 30
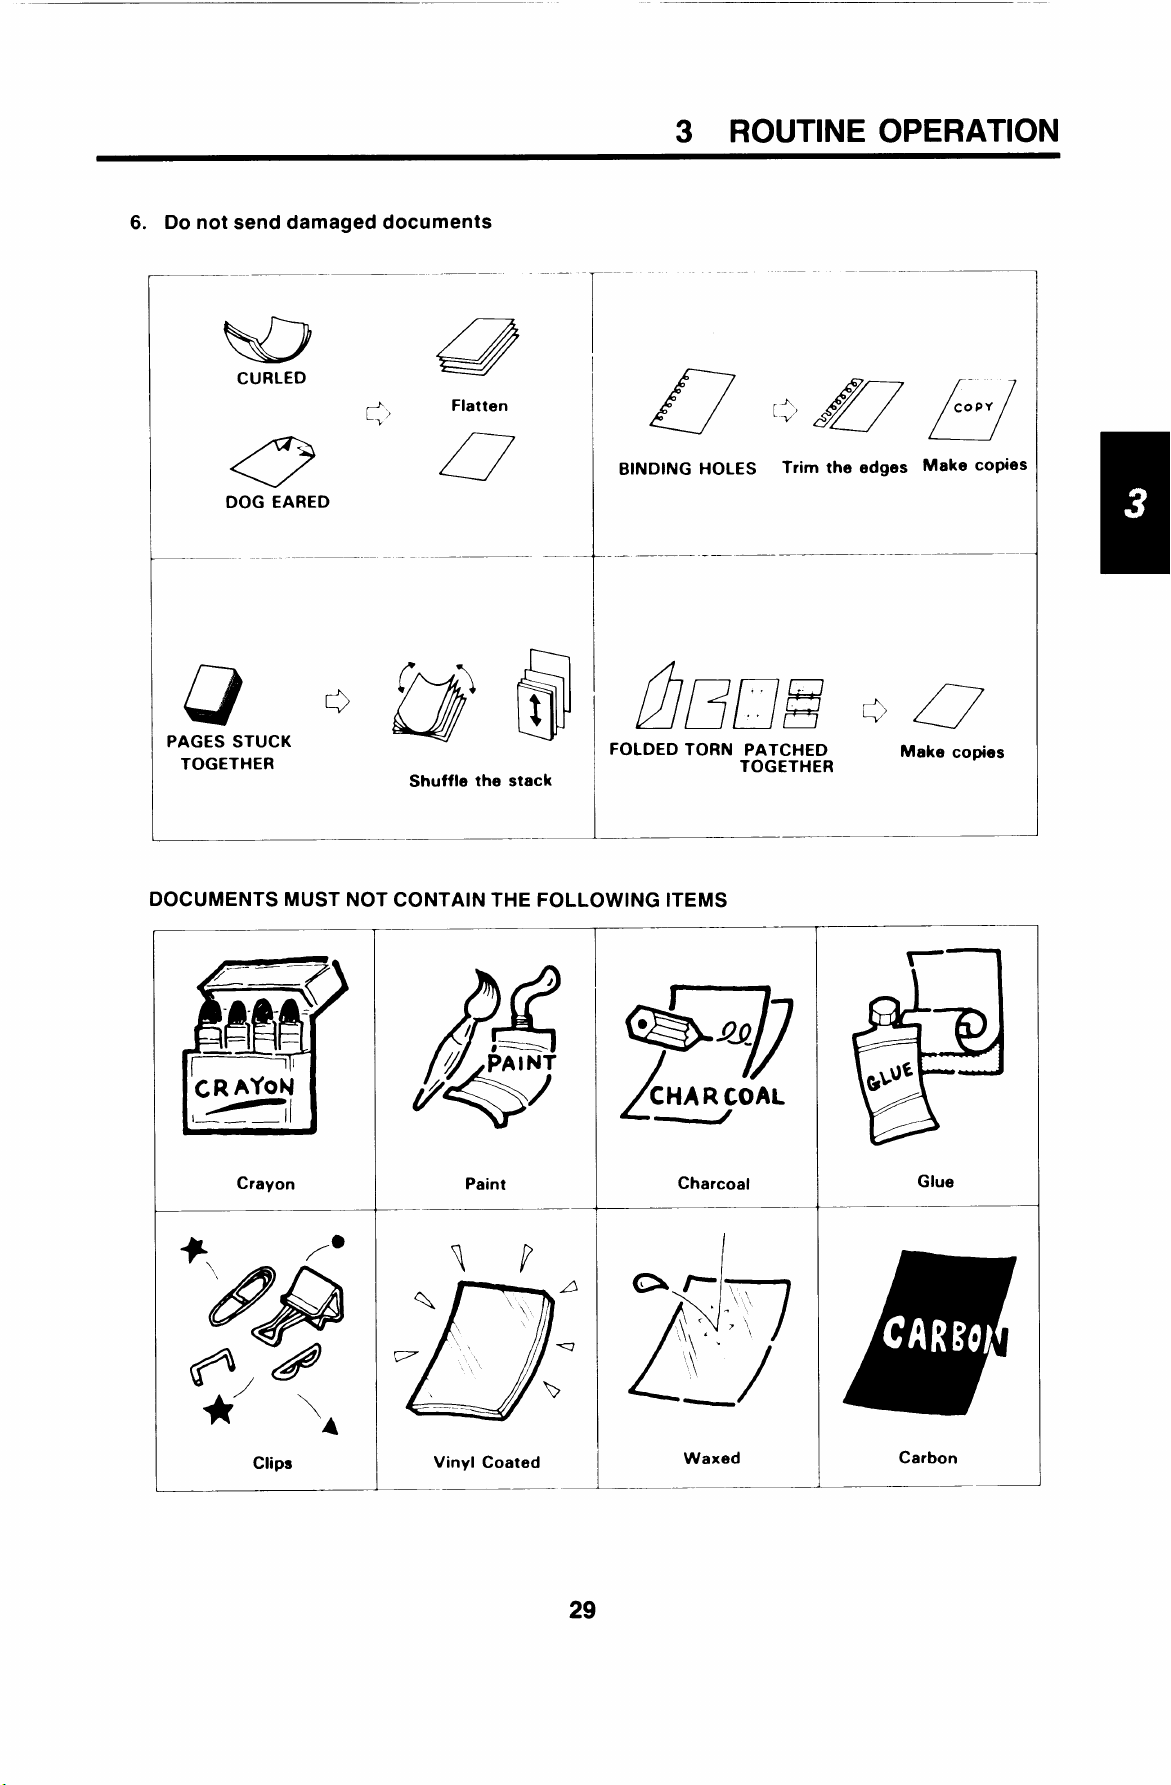
6. Do—not send damaged documents
ND’
3 ROUTINE OPERATION
Flatten
0
DOG EARED
—
.D(jj
PAGES STUCK
TOGETHER
DOCUMENTS MUST NOT CONTAIN THE FOLLOWING ITEMS
.—— — —
Y
Shuffle the stack
_——
BINDING HOLES
—
——
mm?~)
FOLDED TORN PATCHED
Trim the edges
TOGETHER
COPY
L_l
Make copies
0
Make copies
‘CRAYON
~,1
I
—.—
Crayon
—
Paint
Vinyl Coated
●
&—j)
CHAR COAL
L
P&
Charcoal
I
Waxed
Glue
Carbon
Page 31

3 ROUTINE OPERATION
1-2 Quick Look Transmission Procedure
Make sure that the unit is in standby mode.
1.
2.
Carefully place the documents
into the feeder face down along
the guide.
Note : Not more than 50 pages (20 lb. paper).
● Contrast selection Page 34.
● Resolution selection
Page 34.
~
SHUFFLE
Note : Align the leading edges of the docu-
ments as shown in the diagram.
ALIGN
EDGES
INSERT FACE DOWN ‘ ‘ ‘
O–10mm
‘%=
Document Position
v
/
m
m
Feed Leading Edge
Caution : Do not place the documents in the feeder forcefully.
30
Page 32

3. Press NO
3 ROUTINE OPERATION
● Page counting
Page 35.
4. Press NO .
5. Dial using the ten-key pad.
6. Press
Start .
. Department code
● Overseas Call
. Speed Dial Page 40.
. Quick Dial
. Send Later Page 38.
. Phoning and Faxing
on the Same Call Page 46.
. Turnaround Polling
. Alternative Destination Page 59.
CAUTION: Watch the display. The identifica-
tion of the other party (RTI) will be displayed. If
you have been connected to the wrong place,
press Stop immediately.
Page 36.
Page 37.
Page 40.
Page 58.
31
Page 33

3 ROUTINE OPERATION
Possible Problems
You want to take out the document
Press the scanner release button, open the scanner, and take out the document.
CAUTION: Do not pull outthedocument without opening thescanner, or you will damage the machine.
You want to send more than 50 pages
While the 50th page is being fed in during transmission place the following pages (up to 50) in the
feeder.
You made a mistake while dialing
●
If you already pressed ~Start , press Stop immediately.
●
If you haven’t pressed Start
a) Press No .
b) Press Clear ~.
The entire number is deleted. Enter a new number.
Only the last digit is deleted.
The Clear Original lamp has lit up
Take out the document (see the top of this page). Then redial the destination.
Hint: To redial, press ~Pause/Redial
yet, either;
I
then ~Start .
The Line Fail lamp has lit up
If the Communicating lamp is not lit, press
If the Communicating lamp is lit, wait until
stop ~.
goes out, then press Stop .
The buzzer is ringing
The other party wants to talk to you.
Pick up the handset, press Stop , and speak.
After speaking:
. If you have no more pages, hang up.
● If you have more pages, do the following.
1. Place them in the feeder.
2. Ask the other end to press Start . Do not hang up yet.
3. When you hear a high-pitched tone, press Start .
4. Hang up.
You want to send a message but there is a document in the feeder on Redial Standby or Send Later
Store the document that is in the feeder into the memory. See page 39.
32
Page 34

Notes Concerning Transmission
1.
Display
REDIAL STANDBY
If the line is busy or contact is impossible, the number is automatically redialed up to 2 times at
intervals of 5 minutes. (Contact your service representative to change these redial parameters if
necessary. ) “REDIAL STANDBY” is displayed dur-
ing the intervals. To cancel redialing, open the
scanner cover and remove the document from the
feeder.
If communication is still impossible after all redial
attempts, the unit will ask you for another number.
.
3 ROUTINE OPERATION
READY 100% 02 30PM
RED IAL STANDBY
Note: You can redial immediately by pressing
Pause/Redial if required.
TRANSMISSION STANDBY
If a message is coming in at the same time as you
press Start , “TRANSMISSION STANDBY” is
displayed below the sender’s RTI. Your documents
will be automatically transmitted immediately after
the end of reception.
“A4 A A4 TRANSMIT” or “B4 + B4 TRANSMIT” indicates that the document is being transmitted without
reduction.
If the paper in the receiving terminal is not wide enough for the
machine will automatically reduce the data so that it will fit.
If your terminal is reducing data, thetypeof reduction used is shown inthecharacter display during
transmission. For example, “B4 +
10.1” width to 8.5” width.
Error Report
2.
If transmission fails, an Error Report will be printed. Keep this; it may help the service technician.
A4 TRANSMIT” means that the original is being reduced from
document you are sending, your
SAN JOSE BRANCH
TRANSMISSION STANDBY
The machine you dialed may not have RT1/CSl capability or it may not be programmed into the
3.
machine. In this case the telephone number or quick-dial label will appear on the top line of the
Character Display, unless the external telephone was used for dialing.
33
Page 35

3 ROUTINE OPERATION
1-3 Selecting Contrast and Resolution
+ Contrast ●
Press this key to change the contrast.
. Darken
● Normal
● Lighten
Normal — suitable for most purposes
Darken – for documents with faint characters (e.g., written in pencil)
Lighten — for documents with dark or patchy background
+ Resolution +
Press this key to change the resolution.
. G1 Mode
. Standard
● Detail
● Fine
Standard – most typewritten documents
Detail — documents with small print or fine details
Fine — for high quality image reproduction
Note: Transmission takes longer with Detail and even longer with Fine resolution.
If your document contains a photograph, use halftone mode. Press the key below the Halftone indica-
tor to light the indicator.
Note: Halftone mode transmission is much slower than normal transmission.
If you are not sure whether your settings are suitable:
1. Press ~Copy .
2. Check the copy quality, and adjust the settings if necessary.
Page 36

1-4 Page Counting Methods
Quick Look Transmission Procedure, Page 30.
3 ROUTINE OPERATION
When
. If you press No and goon to dial, page numbers will be printed out at the other end as p.1, p.2,
● If you clothe following procedure, page numbers will be printed out as pi/3, p2/3, p3/3(batch num-
READY
PAGES 00
p.3 and so on (simple page numbering).
bering) in the top right-hand corner of each page.
Ex: Your document has 3 pages.
1. Press 3 .
Press NO if you make a mistake.
100°b 02 30PM
KEY PAD)N
is displayed, you can select one of two types of page numbering.
3. If you are asked for a department
code, see the next page of this
manual.
100°~ 02 30PM
Y, N
4. Dial the number.
5. Press Start .
2. Press
READY
PAGES 03
Yes
1
Note
I
If you do not like the PAGES: 00 KEYPAD/N prompt, you can switch it off. See page 76.
Simple page numbering will always be used.
I
Page 37

3 ROUTINE OPERATION
1-5 Department Code Entry
Quick Look Transmission Procedure~Page 30.
r
L—.—
When ‘EADY
DEPT CO DE OOOO KPAD/N
This code is useful for tracking machine usage, as it is printed on many of the
your Send Later transmission failed overnight, your office staff would be able
much quicker if your department code was used.
To enter the code, do the following.
100% 02,30PM
is
you may enter a four-digit
1. Enter your code.
1
3. Dial.
Example: 0001
Press ~ .
4. Press
(-Start 1.
Press ~- if you make a mistake.
READY
DEPT CO DE OOO1
100% 02 30PM
YIN
department code.
reports. For example, if
to inform you about this
2. Press Wesl .
Note
If you do not like the DEPT CODE 0000 KPAD/N prompt, you can switch it off. See page
77. If you switch it off, you cannot use department codes.
Page 38

—
3 ROUTINE OPERATION
1-6 Making Overseas Calls
There are two ways: direct dialing, and operator-assisted dialing.
● Direct Dialing ●
1. When the machine asks you to
dial, press o
2. Enter the country code of the
other party.
3. Press
Pause/Redial OnCe.
4. Enter the area code and tele-
phone number of the other party.
5. Press
Start
I I
+ Operator-assisted Dialing +
1. When the machine asks you to
dial, press On Hook o
2. Tell the operator:
● You wish to make an overseas call.
● The country, city, and phone number of
the called party.
. You are making a data call (to avoid
communication errors, the operator will
not stay on the line).
3. When you hear a high-pitched
tone from the speaker,
press
PROBLEM
Instead of a tone, somebody may
answer the line. In that case:
1. After talking, ask that person to
2. Then, when you hear the high
Start
press Start at their end.
pitched tone, press Start .
Notes
1. Direct dialing may not be available in your area.
2. The information on this page is based on using AT & T as the long distance carrier. Call your
long distance carrier for the dialing codes that they use.
37
Page 39

3 ROUTINE OPERATION
1-7 Redialing
When the other end is busy, your terminal will automatically redial the other end up to twice, at five
minute intervals, (or up to 4 times if you are transmitting from memory).
However, if you wish, you can redial immediately using the following procedure.
1. Keep the handset on hook.
2. Press Pause/Redial I then Start ~.
Note: If there is a message in the feeder waiting for redialing and you need to use the feeder, store
the message in the memory. See page 39.
1-8 Send Later
1. Not using memory
Using Send Later, you can delay transmission to take advantage of off-peak line charges.
Note: You can only specify a time that is less than 24 hours ahead.
Quick Look Transmission Procedure, Page 30.
When
READY
SET DOCUMENT
100% 0230PM
is displayed:
Place the documents in the feeder. Select the contrast and resolution. Enter the page count (see page
35 – or press No. Enter the department code (see page 36) or press No.
When
PreSS “ Send Later I
1.
READY
L..–—
READY
TIME 02 30PM
100% 02 30PM
QUICK /S PEE D/ KPAD
1’
100% 02 30PM
KPAD/Y
is displayed:
4. Press ~Yes ~.
READY 100% 02 30PM
MEMORY TRANS7
5. Press NO
,
YIN
dial, then press
Start I .
Enter the time at the keypad.
2.
Ex: 11:30 pm
READY 100% 02 30PM
( 11, 30PM) TX STANDBY
Press: : 1: 1 ‘31~o:.
The document will be sent at 11:30 pm.
3.
If the AM/PM setting is correct,
press
~& 1. Go to step 4.
-—
To change AM to PM, press ~# ~ .
Do not remove the document from the
feeder, unless you wish to cancel Send
Later.
Notes
/
1.2.You cannot use the external tele-
phone or On Hook Dial to dial for
Send Later.
~
Dial, Quick Dial, or a full telephone
number.
You can use Speed
If there is a Send Later message in
the feeder and you need to use the
feeder, you can store the message
in the memory for sending later thus
freeing your document feeder and
keeping the Send Later operation
intact. See page 39 for details.
See Note
38
Page 40

3 ROUTINE OPERATION
2. Using the memory
Using the memory allows the feeder to remain free for other operations.
The first part of the procedure is the same as for not using memory, up to and including step 4.
Then
READY
MEMORY TRANS~
100% 02 30PM
Y/’N
I
5.
Press Yes .
8. If you wish to send the message to
more than one address, dial an-
READY
*/ QUICK /Sp EED/Kp AD
Dial. Use Speed Dial, Quick Dial,
6.
Group Dial, or a full telephone
number.
7.
Press
For more information about the memory, see page 50.
3. Converting a Send Later message in the feeder into a Send Later message from memory
This procedure also works for messages waiting in the feeder for redialing. It frees the document
feeder for other work by storing the message in the memory, so it is only available if there is space in
the memory.
Yes .
100°rt 02 30PM
other number (step 6).
Otherwise, press
● Quick Dial, page 40.
● Speed Dial, page 40.
. Group Dial, page 41.
I
Start .
I
If either
is in the feeder, do the following.
PreSS Memory .
1.
Note :
~ or~l aredisplayedandamessage
READY
MEMORY TRANS~START /’N
If MEMORY TRANSMIT N/A is displayed, the message in the feeder is
not for Send Later or redialing. It
may be set up for somebody to poll.
This cannot be stored into memory.
If you remove the document, you will
have tore-program the polling operation (see Polling Transmission
page 57).
100?u 02 30PM
2. Press Start (or press NO to
cancel the operation).
The document will be stored in the memory
and transmitted at the correct time.
Note : Alternative Destination, if pro-
grammed for this message, will be
cancelled.
39
Page 41

3 ROUTINE OPERATION
1-9 Using Speed Dial and Quick Dial for Faxing
The Quick Dial Key or Speed Dial Code that you select must have been programmed in advance.
I
Programming Quick Dial and Speed Dial, Page 78.
● Speed Dial +
Example: Use Speed Dial 23. Example: Use Quick’Dial 07.
1. Place the document in the feeder.
2. Press “
● Page Count, page 35.
. Department Code, page 36. . Department Code, page 36.
Press
3.
NO I twice.
:Speed Dial l1213’. 3.
2135557362
SPEED# 23 START
1. Place the document in the feeder.
2. Press , No] twice.
● Page Count, page 35.
Press ~07 ] .
● Quick Dial
—
READY 100% 02 30PM
QUICK /S PEE D/ KPAD
2135558642
QUICK# 07 START
If you make a mistake, pressl No ] .
Repeat step 3.
4.
Press [ Start I .
If you make a mistake, press ~No ) .
Repeat step 3.
4.
Press I Start .
40
Page 42

3 ROUTINE OPERATION
1-10 Group Dialing
If you are making a transfer request, polling reception, or broadcast from memory, you can dial more
than one address.
If you often communicate regularly in one of these ways with a certain group of addresses, you can
enter them with just two keystrokes if you have programmed them into a group.
Programming Groups, Page 85.
When the machine asks you to dial, do the following.
READY
*/ Qulc K/sp EED/Kp AD
100% 02 30PM
1. Press *
READY
**-
100% 02 30PM
KEYPAD
2. Enter the group number at the
ten-key pad.
Example: Group 1.
Press 1 .
DISTRIBUTORS
**1
If you Iabelled the group when you programmed it, the label is shown on the top
line of the display.
YIN
3. Press
entered the wrong group number).
Yes (or press NO if you
4. Enter some more addresses, or
press
CAUTION: If you enter * O , the
machine will dial all numbersin all groups 1
through 9.
Start .
1-11 Dual Access
If the machine is transmitting a message from memory, or receiving, you can send a fax message without having to wait by the machine. Just place your document inthefeeder, select the required features
(such as Send Later, Memory Transmission, Confidential), dial, and press Start .
Your document will be sent immediately after the machine has finished the job now in progress.
This feature is known as dual access.
.——
41
Page 43

3 ROUTINE OPERATION
RECEIVING FAX MESSAGES
2.
2-1 Selecting the Reception Mode
There are two reception modes.
1. Auto Receive
You do not need to be by the machine when a fax message comes in.
2. Manual Receive
You must be by the machine when a fax message comes in.
To change the reception mode, press the key below the Auto and Manual Receive indicators.
Hint
If you wish to receive phone calls with your machine, use Manual Receive.
2-2 Routine Reception
1. Auto Receive
Incoming messages are received automatically. You do not need to be by the machine, if the power
switch is kept on.
2. Manual Receive
Your terminal cannot automatically receive an incoming call. You must be near the machine and
you must do the following to receive the message.
What to do when the phone rings.
Pick up the handset.
1.
You will hear a short tone every
few seconds.
Remove any documents from the
2.
feeder.
Press I
3.
4,
Hang up.
Possible Problem
You are making a copy when a fax message comes in.
● Remove all documents from the feeder.
Start .
If you hear a voice in step 1.
1.
Talk to the other party.
2.
If the other party wishes to send
you a fax message, remove any
documents from the feeder.
Press I
3.
4.
Hang up.
Start .
● Press _St_Op] .
Otherwise. vour machine miaht transmit the documents
42
in the feeder to the caller.
Page 44

3 ROUTINE OPERATION
2-3 Substitute Reception (Receive File)
When Receive File is lit, a message was received but stored in the memory because the printer was
jammed or out of paper.
Troubleshooting, Page 112.
Check the operation panel to find out where the problem is.
Caution:
Do not switch the power off, or the memory will be erased.
The message will be printed automatically after you clear the jam or add paper ortoner(see pages 96,
97 and 113).
If the paper you added is not wide enough to print the message, the message will stay inthe memory. (If
you wish, in such cases, the message can be printed, but thedatawill be reduced to fit onthe page. Ask
a service technician if you wish this feature to be switched on.)
Maximum number of pages that can be received
I
● Standard memory — About 73 letter-size pages at standard resolution
● With optional memory (1 Mbyte) — About 146
(2 Mbytes) – About 219
. Hard disk — About 1200
I
I
I
Page 45

3 ROUTINE OPERATION
2-4 Confidential Reception
When the Confidential File indicator is lit, a confidential message has been received and stored in the
memory. To print this message, you must enter the correct password.
1. PreSSl Function 117i 611 Yesl.
~
2. Enter your password that you
programmed previously (Function 89).
PASSWORD COPY/N
Notes
1. If you enter the wrong password, “INVALID PASSWORD” is displayed and the machine will
return to standby.
2. The sender may have over-ridden your password.
Check with the sender. (Print the TCR, if necessary, to find out who the sender is.)
3. If you have forgotten the password, either:
● call service
I
3. Press ‘ COPy~
The message is printed, then the machine
returns to standby.
1“
● Contact the senders and ask them to over-ride your password.
They can only do this if they are using certain types of fax terminal.
Don’t forget to find out what password they will use for the transmission.
Page 46

3. USING THE UNIT FOR TELEPHONE CALLS
3-1 Making a Telephone Call
There are two ways.
3 ROUTINE OPERATION
. Using On Hook
. Using the handset — Just like a regular telephone set.
USING ON HOOK DIALING
Make sure that the unit is in
1.
– You do not use the handset. Dial on the fax terminal keypad.
standby mode.
READY 100% 02 30PM
SET DOCUMENT
Press
2.
On Hook .
Do not pick up the handset.
Dial using the fax terminal’s
3.
keypad, Either:
.
Quick Dial
. Speed Dial
. Full telephone number
DO NOT PRESS Start (unless
you are dialing a fax machine and
do not wish to speak to the other
end).
4.
Listen to your terminal’s built-in
speaker. When the other party
answers, pick up the handset.
USING THE HANDSET
1. Make sure that the unit is in
standby mode.
2. Pick up the handset.
3. Dial.
DO NOT PRESS Start (unless
you are dialing a fax machine and
do not wish to speak to the other
end).
Note : You can dial on the fax machine’s
keypad using Quick Dial, Speed
Dial, or full numbers if you wish.
4. Use the handset as you would use
a regular telephone.
5. Hang up at the end of the conver-
sation.
Replace the handset at the end of
5.
the conversation.
Speaker Volume Adjustment
Page 71
45
Page 47

3 ROUTINE OPERATION
3-2 Answering the Telephone
If the telephone rings just once:
A fax is coming in. Do not pick up the handset.
If the telephone rings continuously
Pick up the handset.
1.
2. Speak
Note: If you hear a high-pitched tone, a fax
is coming in. Press Start , .
up.
POSSIBLE PROBLEM
If nothing happens after you press [-Start 1,
3-3 Phoning and Faxing on the Same Call
If you want to talk before sending the fax.
1. Dial the other
handset or [On
Page 45. )
(
Important:
party using the
Hook 1.
If you are using a Quick Dial
key, place the documents in
the feeder.
Then hang
3. If the caller wants to send you a
fax, press
Then hang up.
power may be switched off on your machine.
Note: If you hear a high-pitched tone in-
stead of a voice, press I Start
ately.
If you still want to talk with the other end,
press Voice Request
municating indicator lights up. Go to step 3
of the next procedure.
Start after speaking.
after the Com-
I
immedi-
2. Speak to the other party, then
place your document in the
feeder and ask them to press
Start at their end.
46
.—
Press ~Start
3.
when you hear a
high-pitched tone.
Replace the handset.
4.
Note: Do not replace the handset if you
want to speak with the other party after fax-
ing. After faxing, your machine will emit a
tone.
At that time, press ~Stop , and speak.
Page 48

If you want to talk after sending a fax
3 ROUTINE OPERATION
1.
Start the transmission.
Transmission Procedure,
2.
After the Communicating indica-
Page 30.
tor lights, press Voice Request
When your machine’s buzzer
3.
emits a tone:
i) Pick up the handset.
ii) Press Stop .
iii) Speak.
See Note 1
Notes:
I
1. If your buzzer does not emit a tone, the other party did not come to the phone.
2. This procedure only works if the other end has the Voice Request function.
4. If you want to send more
pages to the other party:
i) Place the pages in the feeder.
ii) Ask the other party to press
Start .
iii) When you hear a high-pitched
tone, press Start .
If you want to talk after receiving a fax
While the Communicating indica-
1.
tor
is lit, preSS Voice Request .
When your machine’s buzzer
2.
emits a tone:
i) Pick up the handset.
ii) Press Stop
iii) Speak.
See Note 1
I Notes:
I
1. If your buzzer does not emit a tone, the other party did not come to the phone. The line will
disconnect automatically.
2. This procedure only works if the other end has the Voice Request function.
3. After speaking, hang up.
Note: If the other party wants to send
more pages, press Start before
you hang up.
47
Page 49

4 ADVANCED FEATURES
1. TRANSMITTING
1-1 Keystroke Programs
If you regularly transmit to, or poll, a particular destination or set of destinations using the same fea-
tures, you can save repetitive keypad operation by storing the settings and destinations in a Quick Dial
key.
Before you store a program, refer to the Telephone List to determine which Quick Dial keys are free.
The keystroke programs are stored in Quick Dial Keys, so the no. of programmed Quick Dial Keys plus
the no. of programs cannot exceed 32.
– Storing a Program –
1)
Place a document into the feeder (unless you are programming for polling reception).
2)
Select all required features (e.g., Confidential), and remote terminal numbers as normal.
Note: Contrast, resolution, page count and department code cannot be stored.
instead of pressing the Start key, press the Quick Dial key that you wish to store the program in.
3)
Then press Yes. Do not press a key that already has a telephone number or program stored in it.
The programmed procedure will now begin. If you do not wish to use the procedure now, press
4)
Stop immediately.
— Labelling the Program —
For your reference you can give the program a label, such as “CALL HEAD OFFICE”. First, store the
program as explained above. Then do ~he following.
.
Press ~= ~6] ~ ~Yes j .
1.
=4
2. Press the key that you want to
label.
Example: 101-”
!—–———
FAX # 01
USED AS PROGRAM KEY
Y/N/C
Press ~1 again.
Type in the label on the keypad.
5.
—
QUICK# 01
■n,mmmsmnmnmnmmmnnan
Y
Use the typing and editing features as explained on page
QUICK# 01
CALL HEAD OF FI CE~I~~
Y
3. Press
QUICK# 01
PROGRAM LABEL?
I
YIN
20.
48
Page 50

4 ADVANCED FEATURES
6. Press Yes to store the label,
7. You can now program a number
into this key for telephoning only.
See “Programming Quick Dial
~
and Speed Dial” for more infor-
mation.
Or press
standby
– Using a Program –
a) Transmission Program
1) Place the documents into the feeder.
2) Select the required contrast and resolution.
3) Enter the page count and your department code, if required.
4) Press the key into which the desired program has been stored.
b) Polling Reception Program
1) Press the key into which the desired program has been stored.
When you press a key, the label that you gave the program is now displayed.
sure that you have the right program.
Function to return to
mode.
Check the label to make
Note: If TOO MANY STATIONS is displayed, either delete a polling or memory file (Function 66 or 67)
or try the program again later.
— Erasing a Program –
1. PreSS Function 6 0
Yes .
3. To erase the program, press
Clear .
2. Press~the key that contains the
program you want to erase.
Example: Press 01 .
FAX # 01 IS Y/Nlc
USED AS PROGRAM KEY
If you pressed the wrong key, press No.
4. To erase another program, press
No .
Go to step 2.
If you have finished, press
Function .
Page 51

4 ADVANCED FEATURES
– Editing –
Programs cannot reedited. Tomodify aprogram, youmust enter thecomplete newprogram. lf you
wish to store the modified program in the same Quick Dial key as the old one, you must erase the old
program first using Function 60 as shown on the previous page.
However, the label can be edited. Use Function 60 as explained in “Labelling the Program” (page 48).
1-2 Memory Transmission
You can send afaxto up to
for up to 400 locations overall.
Before vou decide to use the memorv, check the MemorV
Space Display in the top right of the character display. If this
reads OYO,there is no room. To determine whether there is
room for your document, bear in mind that an average page of
a business letter takes up about
If you need to make some room for a high-priority document, refer to “Clearing Memory Files” (page
88). Also note that Send Later can be used if you wish to send Iaterto one destination only and you do
not wish to erase a memory file.
Note: In memory mode, pages are automatically batch-numbered at the receiver’s terminal even if
batch-numbering has been disabled (Function 53).
The procedure for transmission is on the next page. This procedure is only for immediate transmission. Send Later transmission from memory is explained on page 39.
Locations immediately or later. Also, you can store up to
Remaining Memory Indicator
I
~
2% of the memory space.
50
Page 52

4 ADVANCED FEATURES
1.
Make sure the unit is in standby
mode.
2.
PreSS Memory .
The Memory indicator will light.
3.
Place the original in the feeder.
Select the contrast and resolu-
tion.
READY 100°~ 02 30PM
DEPT CO DE OOOO KPADN
4.
Press NO
Department Code, page 36.
I
L
r 1
READY 100% 02 30PM
*/ OUICK/SPEED/K PAD
6. Press Yes
READY 100% 02.30PM
*/ QISIKp ADj START
Note: If TOO MANY STATIONS is dis-
played, you can’t store the number
you just entered.
You will have to store the rest of your
numbers later in a seperate operation or redo the whole operation
later.
7. Either
● Dial another number.
Go to step 5.
●
Press Start .
I
1
The message will bestowed, amemoryreport will be printed, and the message will
be sent immediately.
See the notes on the next page.
5. Dial using either a Quick Dial key,
a Speed Dial Code, a full number
at the built-in keypad, or a Group.
Do not use the handset.
I
Quick Dial, page 40.
Speed Dial, page 40.
Groups, page 41.
I
51
Page 53

4 ADVANCED FEATURES
Cautions:
1. Donotswitch thepower of f,oryour message will beerased from memory.
2. While the terminal is scanning the document, do not leave the machine.
MEMORY OVER
If
CLEAR FILE?
Y/N
completely because the memory was full.
● Press I Yes
to clear this file.
. Press ~No to send the pages which were scanned completely before “Memory
over” appeared. Pages that were only partly scanned will not be sent.
. If you don’t press either key within 5 minutes, this file will be cleared.
If you press Stop during scanning, pages already scanned will be cleared.
Redialing
In memory mode, a terminal can be redialed up to 4 times (at intervals of 5,5, 10, and 5 minutes). After
each failed redial attempt, the Line Fail indicator flashes and the machine asks you to press Stop.
After all redialing attempts fail, an Error Report is printed and the message is erased from memory.
To cancel redialing, erase the document from memory with Function 67.
appeared onthedisplay, your document was not stored
Page Retransmission
If ECM is enabled (Function 83), any parts of a page that were not sent correctly will be resent
automatically. However, if ECM is not enabled, the complete page will be resent; the maximum number
of retransmission attempts is 2 but this can be increased to 3 by service.
Address Limitations
Note that the total number of addresses stored in the machine for polling reception and memory
transmission, when added together, cannot exceed 400.
No more than 79 of these can be full telephone numbers. The rest have to be Quick or Speed Dial.
Voice Request, Turnaround Polling
These are impossible in memory mode.
1-3 Broadcasting
You can send a message to up to 200 locations, either immediately or at a programmed later time.
The procedure is the same as for Memory Transmission. See page 51 (immediate) or page 39 (Send
Later).
Page 54

4 ADVANCED FEATURES
1-4 Confidential Transmission
If the other end has memory and the confidential reception feature, you can use confidential transmission. The other end can only print the message after they enter their terminal’s programmed pass-
word (see Function 89, page 25).
For extra security, you can specify the password for the message. This personal password will
override the password that theotherterminal user has previously stored intheir machine, which would
normally be used for printing confidential messages. Co-ordinate with the receiver operator before
using this
terminal.
Notes:.
Make sure the unit is in standby mode.
eature. This feature only works if the receiver is using a recent Ricoh memory facsimile
Confidential transmission can not take place if the receiving terminal has no memory, or if
the receiver’s memory is full.
●
Only one address can be designated, but alternative destination can be used (page 59).
●
Confidential transmission cannot be made from memory.
Press Confidential (the indicator will light).
1.
Select the contrast and resolution. Press
Page Counting, page 35.
Department Code, page 36.
2.
READY
CONFIDENTIAL ID? Y/N
Either:
If you do not wish to specify a password
for extra security, press No . Go to
step 5.
Or:
For extra security, press Yes . Go to
step 3.
~
100% 02 30PM
Place the document in the feeder.
NO twice,
4.
Press Yes to confirm this password. The other end must use this
to print the message.
READY 100% 02 30PM
QUICK /S PEE D/ KPAD
5.
Dial the number.
Use a Quick Dial key, Speed Dial
Code, or full number at the built-in
keypad.
3. Type in the password you want to
use for this message.
Example: 7 3 6 2
READY 100% 02 30PM
ID 7362 YiN
Press No if you made a mistake.
53
Press Start .
6.
Note:
CONFIDENTIAL N/A
This indicates that the remote terminal
cannot receive confidential messages
(e.g., full memory, no memory, incom-
patible). The number will be redialed
after five minutes.
Page 55

4 ADVANCED FEATURES
1-5 Transfer Request
This feature will cause a document to be transmitted to up to 30 destinations via a broadcasting
station.
I P’71
e
p&!wl
1
The message is stored in the memory of the broadcasting transmitter and transmitted to each desig-
nated receiver sequentially.
After the end of broadcasting, a Transfer Result Report is sent from the broadcasting station to the
requesting station.
This feature can save your organization line charges if your broadcaster and end receivers are in the
same area, which is a long way from you.
Notes:.
The ID codes of the requesting and the broadcasting stations must be identical. This code
must be agreed upon and stored using Function 62 before using this feature.
●
Your fax telephone number must also have been programmed, using Function 80, before
using this feature.
●
Only a machine with the transfer broadcasting function can be used as a broadcasting
station. Your FAX4000L can act as a broadcasting station.
●
If the broadcasting station is a FAX4000L, FAX95 or FAX105 (FAX105 must have optional
memory installed), it must be within the same country as your terminal.
●
The international dial code and country code must be added to any international numbers.
However, if the broadcaster and end receivers are all in the same country, this is not required.
J
54
Page 56

1.
Make sure the unit is in standby
mode.
6. Press Yes (or press NO if you
made a mistake).
2.
Press T
cater wil
If PROGRAM OWN TEL # appears, do
Function 80 now. See page 24.
3.
Place the document in the feeder.
ansfer Request The indi -
Iight.
Select the contrast and resolution.
READY 100C, 02 30PM
PAGES 00
4.
Press hJo twice.
KEYPAD N
~
~
READY
# * QUICK SPEED KPAD
100CO 02 30PM
7. Enter an end receiver number.
Note: If the broadcaster is a FAX4000L,
FAX95 or FAX105 (FAX105 must
have optional memory installed), you
must use the dialing method given in
Note 2 on the next page.
Use a Quick Dial key, Speed Dial
Code, Group, or full number at the
built-in keypad. See Note 1.
I
Quick Dial, page 40.
Speed Dial, page 40.
Groups, page 41.
See Note 2 for an extra dialing method,
using Quick Dial, Speed Dial, and Groups
stored in the broadcaster.
1
(SAF means Store And Forward)
5.
Enter the number of the broad-
caster.
Use a Quick Dial key, Speed Dial
Code, or full number at the builtin keypad.
Example: Quick 01
SAN FRANCISCO
QUICK# 01
YN
8. Press
made
Yes (or press hlo if you
a mistake).
READY ‘OOO. 02 30PM
# * QIS’KPAD’ START
9. Either:
Enter another end receiver number.
Go to step 7. Do not enter more than 30
end receivers.
Or:
Press Start
55
Page 57

4 ADVANCED FEATURES
Notes:
1. Full numbers must bedialed as follows, iftheyare international numbers.
i) International dial access code
ii) Country code
iii) Telephone number
2. If you have an up-to-date copy of the broadcasting station’s Telephone List, you can use
their Quick Dial, Speed Dial, and Groups to enter end receiver numbers.
For a Quick Dial Code: e.g., Quick Dial 01.
Note: Do not press your Quick Dial key i 01 , .
For a Speed Dial Code: e.g., Speed Dial 00.
Press ~# ~] ~j ~0- ~_Yes j .
For a Group: e.g., Group 1.
Press ~ ~j El ~0~ ~ 1 ‘ Yes .
3. TRANSFER REQUEST N/A
If this is displayed, the designated broadcaster cannot transfer your message (its memory may be full, or it may not have the transfer function).
The broadcaster will be rediaied after 5 minutes.
.--.
———.
————
———.
Type in ~~] ~~] at the keypad.
56
Page 58

4 ADVANCED FEATURES
1-6 Polling Transmission
This feature allows you to leave a document in the feeder fora remote terminal to pick up (polling can-
not be done from memory). Reception can take place as normal after you have set up a polling transmission.
Note: Polling transmission can be either free or secured.
Free polling –
Secured polling –
ID codes will not be checked. Any terminal can poll yours.
ID codes will be checked. If a machine with a different ID code tries to poll
your terminal, it will not succeed.
For extra security, you can specify an ID code for this message. The other
end will have to enter this code to pick up the message, instead of their
programmed ID code.
ID code, page 23.
Make sure that the unit is in
1.
standby mode.
READY
SET DOCUMENT
Press polling NO . The Polling
2.
100’% 02 30PM
indicator should be lit.
Place a document in the feeder.
3.
Select contrast and resolution.
READY
PAGES 00
100% 02 30PM
KEYPAD/N
4. Press NO twice.
Page counting, page 35.
Department Code, page 36.
READY
PERSONAL I D? YIN
100’% 02 30PM
6. Type in the ID code that you wish
to use for this message.
Example: 7 3 6 2 .
READY 100% 02 30PM
ID 7362
Press No if you make a mistake.
7. Press Yes to confirm this
YIN
D.
The other end must use this code
to pick up the message. Go to
step 9.
8.
Either:
● press Yes
. Press No to select free polling.
READY
CHECK I D CODE?
100% 02 30PM
YIN
to select secure polling.
5.
Either:
If you do not wish to specify an ID code
for extra security, press No .
Go to step 8.
Or:
For extra security, press Yes .
Go to step 6.
READY
I D ¤~~~ KEYPAD
100% 02 30PM
9. Your terminal is now in polling
standby. When your terminal is
polled, it will scan and transmit
the document.
To cancel polling standby, open
the scanner and remove the
document.
57
Page 59

4 ADVANCED FEATURES
1-7 Turnaround Polling
During routine transmission, if you select this feature, your terminal will automatically poll the terminal
that you are sending to and ask it to send you any documents that it has ready for you to pick up.
You will have topaylinecharges for both thetransmissionand reception of thepolleddocument. However, the overall line charges are less than for the two calls that would otherwise be needed for this
operation.
1.
Perform the normal transmission
operation:
a) Insert the document(s).
b) Select the appropriate resolution and
contrast.
c) Dial the other party.
d) Press Start .
4. After transmission is complete,
the machine goes into the polling
reception
mode.
5. The machine emits a tone when
2.
When the Communication lamp
lights on the operation panel,
press
Polling .
201-555-1212
A4-->A4 TRANSMIT
reception of the document is
complete.
READY
SET DOCUMENT
100°~ 02 30PM
As transmission takes place, the
3.
RTI or CSI of the other party
appears in the display.
201-555-1212
SET DOCUMENT
58
Page 60

4 ADVANCED FEATURES
1-8 Alternative Destination
During the keypad entry procedure for basic transmission, you can designate two destinations. If the
first choice of destination cannot be reached, the machine will send the message to the alternative location. If the first destination is reached, the alternative will be disregarded. This is useful if the person
you are sending to has two fax machines.
1. Place the document in the feeder.
2. Select the contrast, resolution,
page count, and department
Do not use the handset.
code.
3. Dial.
4, Press Yes .
5. Dial the alternative destination.
6. Press start .
Note: If the first destination is busy, your unit will wait for one minute before dialing the alternative lo-
cation. If the alternative is also busy, your unit will redial the first location about four minutes
later.
Both numbers will be redialed until one of them answers, or until the limit expires (2 redials per
destination).
This feature is not available for polling, transfer request, or transmission from memory.
Page 61

4 ADVANCED FEATURES
1-9 Protection Against Bad Connections
For this function to work:
1) The CSI of the called terminal must be the same as its telephone number.
2) The function must have been enabled in advance by a service technician.
Your machine compares the last eight digits of the dialed number with the last eight digits of the received CSI. If they do not match, the message will not be sent. Spaces and pauses are disregarded.
Note: . This function removes the possibility of the telephone network connecting you to the wrong
location. However, if you dial the wrong number, the message will not be stopped. So you
should still check the RTl or CSlthat is displayed onthe Character Display and press Stop if
the wrong one is displayed.
. This function cannot be used if Closed Network (see below) is switched on.
1-10 Closed Network
This function must be switched on by a service technician, and you must program the ID code (page 23).
Your machine will not send the message if the other end’s ID code does not match yours.
1-11 Stamp
The stamp allows you to check whether all pages of your document were received correctly at the remote
terminal. Pages received correctly will have a pink circle at the bottom, if the stamp is switched on.
In memory mode, the stamp does not operate. However, after an adjustment by a service representative,
it will operate if the document was scanned and stored successfully.
The stamp is not used in copy mode.
The stamp is on when the Stamp indicator is lit. Press the key below that indicator to switch the stamp on/
off.
1-12 G1 Mode
This unit is compatible with Group 1 (N. American six-minute) terminals.
If you want to make a G1 mode transmission, do the following.
1.
Press the resolution key unit the
GI Mode indicator lights.
2.
Place the document in the feeder.
Dial.
3.
4. Press I Start ] .
Note that the following features cannot be
used with
●
Confidential Transmission
●
Transfer Request
●
Polling
●
Voice Request
●
Protection against bad connections
Detail and fine resolution
ECM
RTI, TTI, and CSI
Closed Network
Short preamble
G1 Mode.
60
Page 62

1-13 Sending Abnormally Thick or Large Sheets
Using the manual feed feature, you can ex-
tend the maximum document width to A2
[23.4”] width, and the maximum document
thickness to 0.4 mm [16 roils]. Manual feed
should also be used for thinner pages than
normal.
4 ADVANCED FEATURES
A2 .S~ze
pjyiynmj
If you wish tosendan original that is thicker
than the recommended maximum thickness, you can send it as follows.
1. Push the manual feed button
while placing the document in the
feeder.
Notes: 1.Push the document in until docu-
ment feed starts.
2. Place only one sheet in the
feeder.
2. Dial the destination address, then
press Yes
3. Press
If you have more than one original, place it in
the feeder immediately after the trailing edge
of the previous sheet has been fed in.
Start
You can also transmit an original that is wider
than the document guide; fold it in half and
use the manual feed lever, as follows:
Be sure to use Memory transmission (the
Memory indicator must be lit).
1.
Fold the original in half.
Push the manual feed button while
2.
placing the folded document in the
feeder.
Note: Push thedocument
feed starts.
Dial,
3.
Start
After the original has been fed
4.
press Yes , and press
in until document
through, place it in the feeder
again, the other side facing down.
Note that two calls are needed to send a very wide original.
(see page 62 for more on Batch Transmission).
1. Store the second half of the message using Memory Transmission and Send Later (use Speed Dial
or Quick Dial or this procedure will not work).
2. Store the first half of the message using Memory Transmission, but not using Send Later.
The machine will send the first half, then the second half, without disconnecting the line.
To use just one call, use Batch Transmission
61
Page 63

4 ADVANCED FEATURES
1-14 Batch Transmission
With batch transmission, if your machine sends a message from memory to a certain location, and if
there are any other messages stored in the memory for that location, they will be sent on the same call.
This will cut your telephone charges.
If you wish to disable this function, please contact your service representative.
Notes:
1. No more than 5 messages can be sent in one batch.
2. Batch transmission is only possible if the other end was dialed as a Quick Dial key
or Speed Dial Code.
1-15 A3 [1 1.7”] — width Transmission
If the machine at theotherend has A3 [1 1.7”] width printer paper, and if you send a document between
10.1” and 11.7” wide, your machine will send the message without reducing its width.
This feature means that the message will be reproduced clearly at the other end. Some fax machines
cannot send wide fax messages in this way.
2.
RECEIVING
2-1 Polling Reception
This feature allows you to call a fax machine and instruct it to send you whatever documents it hason
polling standby for you to pick up.
Polling can be done immediately or at a programmed later time.
Polling transmission, page 57.
Notes: 1.
There must be a message ready for polling transmission at the other end.
The other end’s ID code must be the same as your programmed ID code (Function 62), un-
2.
less:
●
The other end specifies free polling – ID codes will not be checked.
●
You enter a “Personal ID” fsee steD 7) — this will override your stored ID code for this
transmission only; you should enter the ID code of the machine that you want to poll.
Co-ordinate the ID codes used by the fax machines in your polling network.
You can poll up to 100 locations consecutively in one operation.
3.
You can program up to 8 operations.
4.
The total number of polled locations over all programmed polling operations cannot ex-
5.
ceed 400.
The total number of locations programmed for polling reception and memory transmission,
6.
when combined, cannot exceed 400.
Normal reception can still take place even if you have programmed a Poll Later operation.
7.
Page 64

1. Make sure thatyour machine isin
standt y mode.
READY
SET DOCUMENT
100% 02 30PM
4 ADVANCED FEATURES
If you do not wish to use a
6.
personal ID, press
Go to step 9.
If you will use
a personal ID,
NO .
2. Press Polling
Yes .The Polling
indicator should be lit.
READY
DEPT CO DE OOOO KPAD/N
100% 02 30PM
3. Press fNO .
I
Dept Code, page 36
READY 100% 02 30PM
POLL LATER?
y//N
4, If you want to poll immediately,
press
NO Go to step 6.
If you want to poll later, press
Yes
Yes .
READY 100% 02 30PM
●Hmm
I D
KEYPAD
n the personal ID for
s
7.
press
Type
operation.
Example: 1 3 6 2 .
I
Press No if you make a mistake.
Do not use 0000 or FFFF.
READY
ID 1362
100°6 02 30PM
Y/N
8. Press Yes to confirm this ID.
READY
*/ QuICK/Sp EED/Kp AD
100% 02 30PM
READY
TIME 02 30PM
100% 02 30PM
KPAD/Y
5. Enter the time at the keypad.
Example: 11:30 pm
i) Type 1 1 3 0 .
ii) Press #
iii) Press
Or re-enter the time if you made a
mistake.
to change AM to PM.
READY 100”% 02 30PM
TIME 11 30PM
Yes when the time is correct.
#l YIN
9. Dial using Quick Dial, Speed Dial,
a full number at the keypad, or a
Group.
Do not use the handset
Quick Dial, page 40.
Speed Dial, page 40.
Groups, page 41.
Page 65

4 ADVANCED FEATURES
10. Press ‘Yes .
READY
*/ Q/s/ KpAD/s T/+RT
100% 02 30PM
11. Either:
●
Dial another number. Go to step 9
●
Press Start ! .
If polling is time designated, a polling file
list will be printed and the unit will return
Note: If TOO MANY STATIONS is dis-
to standby.
played, you can’t store the number
you just entered. You will have to
store the rest of your numbers later.
If polling is immediate, the terminal will
begin to dial.
If the polled location is busy, your terminal will redial up to two times at intervals
of five minutes.
Notes: 1. To cancel a preprogrammed time-designated polling reception operation, use Function 66
(see “Clearing Polling Files”).
2. POLL FILE CREATED
If this is displayed, a message was coming in at the designated polling time or when you
pressed ~Start . Polling will begin immediately after the end of reception.
CAUTION: Send later polling files are erased automatically after polling unless there is a line
problem.
2-2 Closed Network for Reception
In a closed network, communication can only take place between terminals which have the same ID
code (see page 23).
A closed network for reception will prevent unauthorized people, such as senders of junk fax mail, from
communicating with your terminal and using up your paper supply. This function is normally disabled.
Call your service representative if you are interested in this feature.
Note : This feature is not reliable for communication with terminals produced by another manufac-
turer. Authorized reception is a more reliable feature (see page 65).
64
Page 66

4 ADVANCED FEATURES
2-3 Authorized Reception
If youareconcerned about junk fax mail using up your paper supply, you can use authorized reception.
This feature allows you to specify up to 30 terminals from which you will accept fax messages; all
others will be shut out.
The following functions control authorized reception:
● Function 57 — Authorized Reception On/Off
● Function 78 — Authorized Reception List Output
● Function 85 — programming Authorized Reception
– Programming Authorized Reception –
You can specify up to 30 fax machines from which you will accept fax messages. For each terminal,
you must know the programmed RTI (if it is a fax terminal made by Ricoh) or CSI (if it is another manufacturer’s model). If that fax terminal subsequently changes its RTlor CSl, you will have toprogram the
new one.
Hint : You can get the other party’s RTI or CSI from the TCR (see page 89).
r
1. PreSS Function
Note: If a name or
displayed on
press Yes
the display is
85
telephone number is
the bottom line,
consecutively until
as shown below.
Yes
2, Enter the RTI or CSI of the fax
minal that you wish to have
cess to yours.
ter-
ac-
3. Press Yes .
Note : If CANNOT PROGRAM is displayed,
30 terminals have already been
stored.
4. Either
. Program another identifier; go to step 2.
● Press Function .
READY
SET DOCUMENT
100’% 02 30PM
65
Page 67

ADVANCED FEATURES
– Removing a Terminal from Authorized Reception —
1. Pr(3SS Function 8 5
CSI RTI
XYZ NEW YORK
Yes . 3.
Y’c
2. Press Yes consecutively until
the RTI or CSI of the terminal that
you wish to erase is displayed.
CS1/’RTl
XYZ CHICAGO
– Switching Authorized Reception On/Off –
Y/c
Press clear to erase the
RT1/CSl.
The next programmed RTI or CSI is displayed.
~
4. Either:
● Continue erasing – go to step 2.
● Press Function .
READY 100°6 02 30PM
SET DOCUMENT
If you wish to receive from terminals that are not included in authorized reception, you will have to
switch authorized reception off.
I. PIQSS Function 5 7
The top line of the display shows the cur-
rent setting.
Yes .
2. Press ‘ I to switch authorized
reception on.
Press ‘ 2 to switch it off.
E!EYzl
Press Function
if the setting
is correct.
READY 100% 02 30PM
SET DOCUMENT
– Printing the Authorized Reception List –
Use Function 78 (see page 95).
Page 68

4 ADVANCED FEATURES
2-4 Notification
If your desk isnot near the fax machine, you can’t tell when a fax message has come in. However, if you
switch notification on, the fax machine will send to your desk, or any location you wish, notification
when a message has come in (provided that you have programmed the telephone number in advance
using Function 87). This notification will be in the form of a beeping sound heard when you pickup your
desk’s telephone or fax machine handset.
Function 87 must be programmed before Notification can be switched on
– Switching Notification On/Off –
Press Function 5 9
1.
Yes .
2. To switch notification on, press
1.
NOTIFICATION OFF
ON-1 OF F-2
To switch it off, press 2 .
If the setting is correct, press
The top line of the display shows the current setting.
– Programming the Notify Terminal Telephone Number –
The notify terminal can either be:
. A fax machine or telephone on the same PBX as this machine
● A fax machine or telephone on an outside line, but not connected to a PBX at that location
Note: If a fax machine is used for the notify terminal, it must have a handset or external telephone.
Function .
67
Page 69

4 ADVANCED FEATURES
Program as follows
3. Press Yes to store the number.
Note
If a number is already displayed,
either:
●TO keep the number as it is, press
I‘Yes I .
.To erase the number, press
2. Type in the telephone number at
the built-in ten-key pad.
Example:
2135558641
NOT I FY TEL# KPAD/ Y/N
21355586419~IB_~~B9S
REPEAT
4 TIMES
KEYPAD
4. The display shows how many
times the beeper will sound.
Either:
. To keep this value, press ~Yes 1
● To change the value e.g., to 5, press
5~thenL Yes.
The value can be from 1 to 9.
I
To correct a mistake:
. Press Clear to go
● press ~NO
to clear
back a space.
the whole number.
Note for PBX users:
If your machine is behind a PBX,
include the access code and a
pause before the number, if the notify terminal is on an outside line.
Example: Access Code = 9
Press ~9
Pause/Redial I ,
then enter the number.
Page 70

4 ADVANCED FEATURES
2-5 Forwarding
Ifyou switch forwarding on,yourmachine will send incoming faxmessageson toanother faxterminal
(program the forwarding terminal number with Function 86 before doing the following procedure).
Notes: 1.
– Switching Forwarding On/off –
1. Press
The top line of the display shows the cur-
rent setting.
Confidential receptions or messages received for transfer broadcasting are not sent to
the forwarding terminal.
2.
Messages can only be forwarded one at a time; batch forwarding is impossible.
3.
Your TTI is not printed out on top of the pages by the forwarding terminal.
Your machine will print the message before forwarding it (PRINT FORWARD FILE will be
4.
displayed on your machine’s display panel).
Function 5 8
Yes .
2. To switch forwarding on,
press 1 .
To switch it off, press
If the setting is correct, press
Function .
2 .
Page 71

4 ADVANCED FEATURES
– Programming the Forwarding Terminal Telephone Number –
The forwarding terminal can either be:
● A fax machine on the same PBX as this machine.
● A fax machine on an outside line, but not connected to a PBX at that location,
Program as follows:
1. PreSS , Function ~81 6
Note
If a number is already displayed,
either:
● To keep the number as it is,
● To erase the number, press
Clear .
IYesl.
2. Type in the telephone number at the
built-in ten-key pad.
Example: 2135553761
FOR WARD I NG# KPAD/ Y/N
2135553761,~~~~I~S,B
To correct a mistake:
. Press Clear to go back a space.
. Press No I to clear the whole number.
Note for PBX users
If your machine is behind a PBX, in-
clude the access code and a pause
before the number, if the forwarding
terminal is on an outside line.
Example: Access Code = 9
Press ~9 Pause/Redial I , then
70
enter the number.
3. Press ~Yes Ito store the number.
Page 72

4 ADVANCED FEATURES
3.
OTHERS
3-1 Transfer Broadcasting
Transfer broadcasting allows your machine to be a broadcasting station in a transfer request operation (see page 54), if your ID code is the same as that of the requesting and receiving terminals.
This is an automatic procedure — any terminal that hasthe same lDcodeas you can use your machine
as a broadcaster. You do not have to be by your machine during the operation.
3-2 Speaker
The speaker can be used to Iistento the telephone Iineduring transmission, reception oron-hookdial-
ina. The sDeaker is cut off shortlv after the start of communication.
The speaker volume can be controlled with Function 55.
If thespeaker has been enabled, you will beableto hear the Iinecondition during communication. If the
line is busy, you can press Stop and begin another operation.
When the unit is in standby mode,
1.
pr13SS Function 5 5 Yes .
ON HOOK MONITOR Y’ */#
MIN >>
2.
Adjust the volume of the on-hook
MAX
dial monitor while listening to the
speaker.
. Raise volume: press # .
. Lower volume: press * .
When correct, press Yes .
TRANS MONITOR
>>>
MIN
Note: If all “>” signs disappear, the speaker volume is zero.
y/*/#
MAX
Repeat step 2 for the trans-
3.
mission monitor.
RECV MONITOR
MIN > MAX
Repeat step 3 for the recep-
4.
y/*/#
tion monitor.
Press Yes to return to
standby.
3-3 Short Preamble
Short preamble slightly reduces communication charges between Ricoh terminals.
tact your service representative if you are interested in this feature.
Con-
Page 73

4 ADVANCED FEATURES
3-4 Using Your Machine as a Copier
To make a single copy of a document, place the sheets in the feeder face down and press Copy .
To make more than one copy of a document, use Function 77.
How many copies do you need ?
1. Make sure the machine is in
standby mode.
READY
SET DOCUMENT
z. PreSS I Function I I 7 7 I ~Yes .
MULTI COPY
SET DOCUMENT
100% 02 30PM
4.
Example: 12 copies
Press 1 2 I .
COPY/N
12 SETS
Press 1No 1 if you made a mistake. You
can make up to 99 copies.
Press 1COPY~ .
5.
3. Place the sheets in the feeder
face down.
● Shuffle the stack
● Align the edges
. Not more than 50 pages
KEY PA DI COPY
01 SETS
3-5 ECM (Error Correction Mode)
ECM (Error Correction Mode) is a recently developed signaling system which greatly reduces the
possibility of data being lost as a result of bad telephone lines. You should switch on ECM if you
frequently communicate over poor telephone lines. Using ECM, telephone charges are not affected,
and may even be reduced, unless you encounter a bad line. In this case, the extra signaling involved
will increase line charges but data will be transmitted much more reliably.
When transmitting from the memory, pages that are not sent correctly will be resent automatically,
even if ECM is disabled. However, ECM is a more efficient way of resending damaged data, as only the
damaged parts of the data will be resent. Also, the maximum possible number of retransmission
attempts is much higher.
The sheets are all scanned and stored.
Then the copies are printed.
Then the documents are cleared from
memory.
After receiving using ECM, if DATA IN ECM MEMORY is displayed, your printer is jammed or out of
paper or toner. Do not switch off the machine or the data will be lost. The data will be printed after you
clear the problem (see page 96, 97 or 113).
Continued on the next page
Page 74

To switch ECM on or off:
4 ADVANCED FEATURES
1. PreSS Function 8 3
ECM ON
ON-1 OF F-2
Yes .
2. To switch ECM on, press I .
To switch it off, press 2 .
If the setting is correct, press
Function .
The top line of the display shows the cur-
rent status.
3-6 User Function Keys
This machine has four user function keys, F1 to F4, located at the left of the operation panel. You can
program each of the keys to access a function from the function list on the back of this manual.
If you useoneof the functions inthe list quite often, program it asauserfunction key. This will save you
a few moments every time you use that function.
For example, if you often do Function 51 (Communicated Page Counter) do the following.
Press Yes .
1. Press
Function 5 1
3.
k
m
MODE NO 51
TOTAL # TX/RX
Y/N
Press Function to return to
4.
standby.
Then when you wish to see the communi-
2. Press
Example : F4 .
Note: Each user function key has already been programmed as follows.
a user function key.
MODE NO 51
PROGRAM FUN CT IO N~Y/N
If you wish to change these settings, you can.
. F1 — Printing the TCR (Function 70)
. F2 – Multicopying (Function 77)
. F3 — Programming Quick Dial and Speed Dial (Function 60)
. F4 — Not Programmed
cated page counter, just
press F4 .
Page 75

4 ADVANCED FEATURES
3-7 Reverse Order Stacking
Normally the machine prints the pages of received
messages in the order they came in.
However if you wish, the machine can output the message from the last page first to make it easier to distribute
the received messages.
This feature is also available for multicopy mode and for
printing confidential messages.
Contact your service
ested in this feature.
3-8 Chain Dialing
You can program parts of telephone numbers, such as area codes and country codes, using the Quick
Dial Keys and Auto Dial Codes. Then, youcanenter a combination of Quick Dial Keys, Auto Dial Codes,
and digits to dial a telephone number.
Example :
Assume that the following Quick Dial and Auto Dial have already been programmed.
. Quick Dial 01 = 01181 (Overseas to Japan)
. Quick Dial 02 = 3
. Auto Dial 10 = 555
Then, you can dial 01181-3-5557631 as follows.
representative if you are inter-
(Tokyo)
&/
O
)f
Normally
l-’
// /
Reverse Order Stacktng
-—
When the machine asks you to dial :
Press 101!, ~021,1Auto Dial~, ~1’~Ol,then~7 ~6~~3 1
Notes:
1. This feature canalsobeused when dialing with the handset and inon-hookdial mode.
2. The Redial Key cannot be used with this feature.
3. This feature cannot be used in keystroke programs or memory transmission.
Page 76

4 ADVANCED FEATURES
3-9 Optional Equipment
RS-232C Interface
1.
This is a digital interface that will allow you to connect the fax to a MacintoshTM personal computer
for use as a back-up printer.
2.
Optional Memory Board
The machine can be upgraded with an extra 1 Mbyte (73 letter-size pages of the CCITT#l Slerexe
Ietter test chart) of memory or an extra2 Mbytes (146 letter-size pages)of memory. The maximum
amount of memory permissible using memory boards is 3 Mbytes, or 219 pages.
Hard Disk
3.
The machine can be upgraded with a 20-Mbyte hard disk (1,200 letter-size [8 1/2”
the CCITT # 1 Slerexe letter test chart). If a hard disk is added, optional memory boards cannot be
used, and the basic 1 Mbyte of memory inside your machine will be disabled. So the maximum
amount of memory is 1,200 pages.
Paper Feed Unit
4.
This cassette allows you to add an extra 500 sheets of copy paper.
See page 116 for a diagram of this unit.
If you are interested in any of these, please call your local Ricoh sales representative.
x 1 1”] pages of
75
Page 77

5 PROGRAMMING AND PRINTING REPORTS
1. PROGRAMMING
1-1 Checking the Counters
There are four counters.
Tx :
Rx :
Scan :
Print :
number of pages the machine has transmitted
number of pages the machine has received
number of pages scanned (includes copy mode)
number of pages printed (includes copy mode)
– Function 51
– Function 51
– Function 52
– Function 52
1.
L.———— 1 1 ––. - .1 1
–,
2. Press [Function: when you have
finished. ‘-’-
TX 017654
RX 016351
1-2 Switching Page Count On/Off
This function allows you to instruct your terminal to batch-number multipage documents as they are
printed out at the other end (e.g., p 1/3, p 2/3, p 3/3).
If you disable this function, the “PAGES :00 KPAD/N” prompt will not appear when you are making a
transmission, and pages will be given simple page numbers (e.g., PI, p2, p3).
Page 35 for more information
1. Press
lFunction 151131’Yesl
I L ..1 L—J ——. — J
r—
Note: If you wish to see the scan and print
counters, use Function 52.
The top
status.
PAGE COUNT ON
ON-1 OF F-2
line of the display gives the current
76
2. To switch batch numbering off,
press [
21.
To switch it on, press [1 ] .
Press [
setting is correct.
Function ] if the displayed
Page 78

5 PROGRAMMING AND PRINTING REPORTS
1-3 Switching Department Code On/Off
To track machine use, you can allocate a four-digit department code to each user. If you switch
Function 54 on, the machine will ask the user for a department code before each transmission or
polling, and the department codes used for each communication will be listed on the TCR (see
page 89).
If you switch off Function 54, “DEPTCODE :0000
or making a transmission.
press Function 5 4
1.
Yes
~
The top line of the display gives the current status.
1-4 Switching the Transmission Report On/Off
The transmission report is disabled at the factory.
Use this function to enable this report.
I
Page 90 for more on this report
KPAD/N” will not appear when you are polling
2. To switch off department code,
press 2
To switch on department code,
press 1 .
When the displayed setting is
COrlPCt, Pt’eSS Function
I
1. Press Function 5 6
TRANS REPORT ON
ON-1 OF F-2
This top line of the display shows the current setting.
Yes .
I
2. To switch the report on, press
1.
To switch it off, press 2 .
When the setting is correct,
preSS Function
77
Page 79

5 PROGRAMMING AND PRINTING REPORTS
1-5 Programming Quick Dial and Speed Dial
Using Quick Dial and Speed Dial, you can dial a facsimile or telephone on your terminal’s keypad by
pressing only one key (for Quick Dial) or two keys (for Speed Dial). However, you have to program the
Quick Dial key or Speed Dial Code in advance.
When you have programmed a key or code, you can use it as often as you like without reprogramming it.
Quick Dial keys –
There are 32 Quick Dial keys (01 to 32).
Each key can be programmed with either:
● Two numbers, one for a fax terminal and one for a telephone (see pages 30, 40 and 45 for how to use
Quick Dial keys for faxing and for phoning).
The telephone number can be the same as the fax number (for example, the fax may share a line with a
telephone). Or they can be completely unrelated.
When using a Quick Dial key, if a document is present in the feeder, the machine will dial the fax number
stored in the Quick Dial key. If no document is present, the machine will dial the telephone number.
● A keystroke program (see page 48) and a number (telephone only).
Speed Dial Codes —
There are 100 Speed Dial Codes (00 to 99). Each can be programmed with one
number. It can be a phone or a fax number.
Page 80

5 PROGRAMMING AND PRINTING REPORTS
● Quick Dial Key ●
1. PreSS Function 6 0
QUICK# I
I
Yes .
SPEED
2. Press the key that you want to
program.
Example : Press 01 .
Press No if you pressed the wrong
key. Repeat step 2.
Notes:
1. If USED AS PROGRAM KEY is
displayed, this key already
contains a keystroke program.
Either:
. Erase the program — preSS
Clear . Go to step 3.
. Choose another key — Press
No Go to step 2.
● Store a non-fax telephone
number — Press Yes
No Go to step 6.
2. If FAX # 01 Y/N/C and a fax
number is displayed, this key
is already programmed.
Either:
. Go on to program the tele-
phone number and label –
Press Yes .
● Delete the number — press
Clear . Go to step 3.
. Choose another key — Press
No Go to step 2.
Go to step 6.
, then
Enter the number at the built-in
3.
ten-key pad. This must be a fax
number.
Note: If you do not want to store a fax
number, press No and go to
step 6.
Example:
To correct a mistake:
– Press Clear to go back one space.
— Press No to clear the whole number.
Note for PBX users:
If your machine is behind a PBX, you will
need to include the access code and a
pause before the number, if the number is
en an outside line.
Example: Access Code is 9
Then enter the number.
2135558632
Press 9 Pause/Redial
Notes:
1. For international numbers, you
must place a pause after the
country code. Use the Pause/
Redial key.
2. If you are going to use the number as a broadcaster or end receiver in a Transfer Request
operation at any time, you may
have to enter the international
dialing code, then a pause, then
the country and area codes, then
a pause, then the number. See
the bottom of page 54 for more
information.
79
Page 81

5 PROGRAMMING AND PRINTING REPORTS
9.
4.
To store the number, press
Yes , .
FAX # 01
SET TEL# FOR TALK?
5.
Either:
. If you wish to program a telephone
number, press Yes . Go to step 6.
● Press NO .
Enter the number at the ten-key
6.
Go to step 8.
pad, as in step 3.
This must be a telephone num-
ber, and not a fax number.
Note: If you do not wish to store a tele-
phone number, press No and go
to step 8.
Example: 2135559368
YIN
Type in the label. See Note 1
below for details.
Example: HEAD OFFICE
If you made a mistake, see Note 2 below
for editing features.
Notes:
1. For letters (A-Z); use Quick Dial
Keys 01 to 26. For numbers (O-
9), use the operation panel’s
ten-key pad. For an ‘&’, press
Quick Dial 27.
press Quick Dial 28. For punc-
tuation marks and other sym-
bols, press Quick Dial 32, con-
secutively until the symbol you
need appears, then press Quick
Dial 31.
2. Move cursor: Quick Dial 31
Backspace: Quick Dial 30
Delete cursor character:
For a space,
Quick Dial 29
Insert : See ‘RTI’ (page 20).
To store the number, press
7.
10.
Yes .
QUICK# 01
PROGRAM LA BEL7
8.
If you do not wish to label the
Quick Dial key, press
YIN
NO . Go
to step 11.
If you
press
After programming a Quick Dial Key, attach a blank Quick Dial Label from the accessories above the
appropriate key on the keypad and write the name of the destination on this label.
wish to enter a label,
Yes .
To store the label, press
Yes .
QUICK# 01
PROGRAMMED
Either:
11.
●
To program another key or code, go to
step 2.
●
If you have finished programming,
press Function
Print a Telephone List (Function 71)
and keep it near the machine.
Y
80
Page 82

5 PROGRAMMING AND PRINTING REPORTS
● Speed Dial Code +
1.
PreSS Function 6 0 Yes
lQUICK# H SPEED I
2.
Press Speed Dial
SPEED# ¤~
3.
Enter the code that you want to
KPAD N
program.
Example : Press O 0 .
Press No if you entered the wrong
code. Go to step 2.
[
Notes:
I
If SPEED # 00 Y/N/C and a
number is displayed, this code is
already programmed.
Either:
Erase the number – press
Clear Go to step 4.
Choose another code — press
No . Go to step 3.
Note for PBX users:
If your machine is behind a PBX, you will
need to include the access code and a
pause before the number, if the number
is on an outside line.
Example: Access Code is 9 .
Press 9 Pause/Redial .
Then enter the number.
r
Notes:
1. For international numbers, you
must place a pause after the
country code. Use the Pause/
Redial key.
2. If you are going to use the number as a broadcaster or end receiver in a Transfer Request
operation at any time, you may
have to enter the international
dialing code, then a pause, then
the country and area codes, then
a pause, then the number. See
the bottom of page 54 for more
information.
To store the number, press
5.
Yes .
SPEED# 00
PROGRAM LABEL?
Y, N
Type in the number at the key-
4.
pad.
Example: 2135557362
To correct a mistake:
– Press Clear to go back one space.
— Press No to clear the whole number.
Program a label. See steps 8, 9,
6.
and 10 on the previous page.
Either:
7.
● To program another code or key, go back
to step 2.
● Press Function if you have finished
programming.
Print a Telephone List (Function 71) and
keep it near the machine.
Page 83

5 PROGRAMMING AND PRINTING REPORTS
Editing a Quick Dial Key or Speed Dial Code
If you want to change or delete any of the numbers that you programmed previously, do the fol-
lowing.
● Quick Dial Key +
PreSS Function 6 0
1.
CIUICK# I
Press the key that you want to
2.
SPEED
program.
Example : Press 01 .
Y/N/C
2135558632
Press No
key. Repeat step 2.
Note:
If USED AS PROGRAM KEY appears,
either:
● Erase the program — Press
Clear .
telephone number and label are
also cleared from this key.
. Choose another key — Press
No . Go to step 2.
. Store or edit a non-fax telephone
number — Press 1Yes .
Go to step 6.
3.
Either:
● Press Yes
FAX # 01
if you pressed the wrong
Go to step 4. Note that any
if you want to keep the fax
number. Go to step 6.
. clear tt-le
number — press , Clear .
Yes .
4. Enter the new fax number at the
built-in ten-key pad. Observe the
rules given in step 3 on page 79.
Example: 2015557468
FAX # 01
2015557468~U19DI,~~9
Notes:
1. To correct a mistake:
— Press Clear to go back one space.
— Press No to clear the whole number.
2. If you do not want to program a new fax
number into the key:
— Press No .
– Go to step 7.
KPADI YIN
5. To store the number, press
Yes .
The telephone number stored in this key is
now displayed.
FAX # 01
SET TEL# FOR TALK?
Y/N
6. Either:
. If you wish to program a telephone num-
her, press , Yes
. Press NO .
~
82
Page 84

5 PROGRAMMING AND PRINTING REPORTS
7. Enter the new telephone number
at the ten-key pad, as in step 4. It
must not be a fax number.
Example: 2015556487
TEL # 01
1
KPAD/ Y/N
1
8. Tostorethe number, press Yes .
QUICK# 01
PROGRAM LABEL?
YfN
9. Either:
. If you do not wish to reprogram the label.
press No . Go to step 11.
● press Yes .
10. Type in a new one. Press Yes to
store it.
OUICK# 01
I
PROGRAMMED
Y
I
11. Either:
●
Edit or program another number. Go to step 2.
●
If you have finished, press Function .
Print a Telephone List (Function 71) and
keep it near the machine.
83
Page 85

5 PROGRAMMING AND PRINTING REPORTS
+ Speed Dial Code +
To
PreSS ‘ Function , 6 ] [ O Jes ~ .
1.
.——
5.
store the number, press Iyes
QUICK# 9
Enter the code that you want to
2.
SPEED
edit.
Example : Press j Speed Dial i ~O I O I .
Press [ No I if you entered the wrong
code. Repeat step 2.
Press r clear to erase the num-
3.
ber.
YIN
6.
SPEED# 00
PROGRAM LABEL?
Either:
Reprogram the label – press I Yes ] .
Keep the label the same — press No
and go to step 8.
See steps 8, 9, and 10 of Quick
Dial Code programming (page
80) for details on how to edit the
label.
Either:
8.
—
To reprogram another key or code,
go back to step 2.
—
If you have finished programming,
press 1 Function
,. Print a Telephone
Enter the new number at the built-
4.
in keypad.
Observe the rules given in step 3
on page 79.
Example: 2015557468
Notes:
1. To correct a mistake:
— Press Clear to go back one space.
— Press No i to clear the whole number.
2. If you do not want to program a new number into the code:
— Press ~No .
– Go to step 6.
List (Function 71) and keep it near the
machine.
84
Page 86

5 PROGRAMMING AND PRINTING REPORTS
1-6 Programming Groups
You can designate more than one destination for broadcasting using the memory, polling reception or
transfer request. If you regularly broadcast, poll or transfer to the same group of destinations (for
example, your branch offices), it may be convenient for you to be able to designate all these destina-
tions with only a few keystrokes. This can be done with preprogrammed groups.
You can program up to 9 groups. Each group may contain as many destinations as you want.
However, a group with more than 30 stations cannot be used for transfer request, a group with more
than 100stationscannot be used for polling reception, and a group with more than 142stationscannot
be used for memory transmission.
Only ten full telephone numbers can be stored in groups.
The following procedure applies both to programming new groups, or modifying existing ones.
1, PreSS Function 6 I
GROUP NO H 1-9
Yes .
2. Enter the group number that you
want to program or edit.
Example: Group 1, press 1
GROUP NO 1
PROGRAM LABEL?
YN
3. Either:
.
If YOU do not want to program a
label, press No . Go to step 6.
● If you want to program or modify the label,
press Yes .
4. Type in the label, or edit the displayed one.
The method is the
same as for the RTI, TTI, and
Quick Dial key labels.
Example: DISTRIBUTORS
5. Press Yes to store the label.
GROUP NO 1
OUl CK/SPEED/KPAD
Page 87

5 PROGRAMMING AND PRINTING REPORTS
6. Enter a number that you wish to
store in or erase from the group.
Either:
●
Quick Dial Key (fax no. only): e.g.,
press ~01 I .
●
Speed Dial Code: e.g., press
!SPeed Dial ‘!0’ 0.
●
Full number: Type it at the built-in
ten-key pad.
Follow the rules in step 3 on page 79.
Example: I Speed Dial ~O 0 I .
GROUP NO 1
I
SPEED# 00
Press NO] if you entered the
wrong number. Repeat step 6.
Y/NIC
7. Either:
●
Store this number: press Yes .
●
Remove this number from the group:
press Clear .
See Note 2.
8. Either:
. Continue programming: go to step 6.
. If you have finished, press Function .
Print a Telephone List (Function 71) and
keep it near the machine.
Notes:
1. One of the following messages will be briefly displayed.
PROGRAMMED – the number has been stored into the group.
# NOT PROGRAMMED – no telephone number has been allocated to this key or code.
LONGHAND #’S FULL – you tried to program a full telephone number into the group
but there are already ten telephone numbers used in groups.
Either delete an unwanted telephone number from all the
groups, or program the new number as a Speed Dial Code or
Quick Dial Key (Function 60) before storing it in a group.
2. One of the following messages will be briefly displayed.
CLEARED –
NOT IN GROUP –
this number has now been taken out of this group.
the number that you wanted to clear was not in the group.
86
Page 88

5 PROGRAMMING AND PRINTING REPORTS
1-7 Clearing a Polling File
To cancel a preset poll-later reception program, first study the Polling File List (Function 72)and determine the file number of the program that you want to cancel. Then carry out the following procedure.
1. PreSS Function 6 6 Yes
~
2. Type in the file number to be
erased.
Example: File No. 1, type 1 .
FILE NO 1
CLEAR FILE?
Notes:
Press No if you typed the wrong number.
ylN
3. Press Yes .
An updated Polling File List is
printed and the machine returns
to standby.
Note:
If NO FILE EXISTS is displayed, you
instructed the machine to delete a file that
does not exist. Try again from step 2.
1-8 Switching TTI On/Off
If you disable TTI, your TTI and date, time, and page number will not be printed at the top of pages
received at the other end. You may wish to disable TTI if you want the other end to receive an exact
unmarked replica of the original.
1. Press Function 8 2 Yes .
2. To switch TTI off, press 2 .
To switch TTI on, press 1 .
TTI ON
ON-1 OF F-2
I
I
Press Function , if the displayed
setting is correct.
The top line of the display shows the
current setting.
87
Page 89

5 PROGRAMMING AND PRINTING REPORTS
1-9 Clearing a Memory File
To make room in the memory for a document that you want to store, or for a confidential message you
may be expecting, you may erase some lower-priority documents using the following procedure.
Before erasing a file, you might wish toviewthe contents of that file to check whether you really want to
erase it. To do this, use Function 75 (see section 1-10 at the bottom this page).
1.
PtWSS Function 16 7 I Yes . 3,
r
FILE NO
I
Type in the file number to be
2.
Inm
KEYPAD
1
I
I
erased. Refer to the latest SAF
File List if you need to know the
correct file number.
Example: File No. 1, type O 0 1 .
FILE NO 001 Y/N
CLEAR FILE7
Pressi No if you typed the wrong number.
1-10 Printing the Contents of a Memory File
Press Yes .
An updated SAF File List is
printed and the machine returns
to standby.
Notes:
●
If NO FILE EXISTS is displayed, you
instructed the machine to delete a file
that does not exist. Try again from step 2.
●
You cannot erase a confidential file. If
you try, the machine will go back to step 2
automatically.
If you want to see the text of a document that you stored in a particular memory file, do the following.
1.
PreSS ~Function 7 5 Yes
FILE NO ■nm
KEYPAD
3. Press copy .
The contents of the file will be
printed.
Notes:
2.
Type in the number of the file that
you want to see. Refer to the latest
SAF File List if you need to know the
correct file number.
Example: File No. 1, press ~O 0 1 .
FILE NO 001
Press’ Nolif youenteredthewrong number.
COPY/N
1.2.If NO FILE EXISTS is displayed, you
asked the machine to print a file that
does not exist. Go to step 2.
You cannot print a confidential file using
Function 75. The machine will go back to
step 2. Also, you cannot print a message
that was sent to your machine for transfer broadcasting.
Page 90

5 PROGRAMMING AND PRINTING REPORTS
2. AUTOMATICALLY PRINTED REPORTS
2-1 TCR (Transaction Confirmation Report)
This report gives details on each communication made by your terminal. It is automatically output
every 35 communications. Automat icTCR output can be enabled or disabled by a service technician.
TCR
**********
Your machine’s ID is here : RTI, TTI, CSI, SELF NO. (MAR 01’9108:30 AM)
***** ***** ***** ***** ***** ***** ***********************************************~
*
*
*
*
* DATE
*
*
*
*
~ MAROI
*
*
*
*
*
*
*
*
*
*
*
*
*
*
*
*
*
*
*
*
*
*
*
*
***** ***** ***** ***** ***** ***** ************************************************
START
TIME
08 30AM
REMOTE TERMINAL MODE
IDENTIFICATION
RICOH CORP
G3EF > RMC 00’15” OK
See See
below
TX 000005 RX 000006
T
TIME
RESULTS
t
below
TOTAL DEPT FILE
PAGES CODE NO
01 0001 F-001
t
See
below
*
*
*
*
*
*
:
*
*
*
*
*
I
*
*
*
*
*
*
*
*
*
*
*
*
1
*
*
*
*
*
*
Receive
Mode:
Results: OK:
File No.: P:
Footnote: TX:
R:
Transmit
T:
s:
Standard Resolution
Detail Resolution
D:
Fine Resolution
F:
c:
Confidential
ECM
E:
Memory
M:
>:
Reduction
Transfer
$:
Batch Transmission
#:
Successful Communication
Error occurred
E:
ID Codes did not match
c:
K:
No fax connection
Polling File number
F:
Memory File number
Total number of transmitted pages
RX:
Total number of received pages
These symbols apply to all reports.
89
Page 91

5 PROGRAMMING AND PRINTING REPORTS
2-2 Error Report
When a problem occurs during transmission or reception, this report is automatically printed.
Check the report and retransmit those pages that were not sent. For pages not received, contact the
remote location and request a retransmission.
Keep these reports as they may be useful for a service technician.
Error report output can be enabled or disabled by a service technician.
The following report means that the machine sent four pages but there were errors during the first two
pages.
ERROR REPORT
***************
Your machine’s ID is here : RTI, TTI, CSI, SELF NO. (MAR 01’9108:30 AM)
***** ***** ***** ***** ***** *****
*
*
*
; DATE START
*
*
*
~ MAR 01
*
*
*
*
*
*
I ERROR MESSAGE
*
*
*
*
*
*
*
*
*
*
*
*
***** ***** ***** ***** ***** ***** ************************************************
TIME IDENTIFICATION
0830AM
PAGE(S) NOT TRANSMITTED
ERROR CODE(S)
REMOTE TERMINAL
RICOH CORP.
***********************************************$
MODE
G3EST
TIME RESULTS TOTAL DEPT FILE x
00’40” E
P-ol ,P-02,
0-07,0-07
PAGES CODE NO.
04 1234
2-3 Transmission Report
If Function 56isswitched on, the transmission report will be printed when a transmission is successful.
The format of the report is similar to that of the error report, except for the error message.
*
*
*
*
*
*
*
$
*
*
*
*
*
*
*
*
*
*
*
*
$
*
*
*
*
Page 92

5 PROGRAMMING AND PRINTING REPORTS
2-4 Transfer Result Report
After the end of atransfer transmission, the broadcasting station sends you this report. The report lists
the telephone numbers of the broadcasting station and the end receivers, and indicates whether each
transmission was successful or not. Retransmit pages that were not transmitted, either directly or
through another transfer.
The format of the report will vary according to the type of machine that is being used as a broadcaster.
If your machine is the broadcasting terminal, it will print the report if it cannot send it to the transfer
requesting terminal (e.g., due to a busy line). The report asks you to send the report manually, and the
telephone number is given. See below for an example.
TRANSFER STATION REPORT (MAR 01 ’91 08:30 AM)
***** *********************************
TRANSFER FAX XYZ COMPANY
2165559833 Broadcasting machine (your machine)
TIME REQUESTED 103OAM
REMOTE TERMINAL
IDENTIFICATION PAGES TRANSMITTED
QUICK DIAL 01
SPEED DIAL 00 01 E
## UNABLE TO TRANSMIT THIS REPORT TO TRANSFER REQUESTOR
PLEASE RESEND TO FAX NO 213-5556381
Transfer Requesting Terminal
.
TOTAL
02 OK
RESULTS PAGES NOT
P ol--
2-5 New Polling File Report
This report isprinted automatically after you program themachine for polling reception. It gives the file
number, time of polling, and destinations (including any Group numbers you used).
The polling reception report can be output after polling has finished. This option can be enabled ordis-
abled by your service representative.
Polling reception reports output after a polling operation may have’’E’’followed byacode in the Result
coulumn and a message printed at the bottom. This code and message indicate that a problem oc-
curred. The codes are explained below.
Code
1
Message
I
Hang up or Line Fail The remote terminal hung up or had no
Explanation
message on polling standby, or there was a
line problem.
2
3
Busy The remote terminal was busy.
No Answer
The remote terminal did not answer.
4 No Facsimile Connection The remote machine was not a facsimile
terminal
91
Page 93

5 PROGRAMMING AND PRINTING REPORTS
POLLING RECEPTION REPORT
************************
Your machine’s ID is here : RTI, TTI, CSI, SELF NO. (MAR 01’9108:30 AM)
*****************************************************************************$
*
*
*
; FILE
~ NO. CODE
*
*
*1
*
*
*
*
*
*
*
~ REASON FOR ERROR
* 1) HANG UPORLINEFAIL
*
~ 2) BUSY
* 3) NO ANSWER
; 4) NO FACSIMILE CONNECTION
*
*
*
+
******************************************************************************
FILE TYPE DEPT. RESULTS GROUP
POLL LATER 08:30AM
1234
E, 1)2)3)4)5)
1
1) 1
REMAINING CALL CAPACITY 192
REMOTE TERMINAL I
IDENTIFICATION
QUICK DIAL 01
RICOHCORP,
*
*
*
*
*
*
*
*
*
*
*
*
*
*
*
*
*
*
*
*
*
*
*
*
*
*
2-6 NewFileReport
This report is printed immediately after you store a documentin memory. It gives the file number,
time offending, and destinations (including any Group numbers you used).
2-7 Memory Transmission Report
If Function 56 is on, this report is automatically printed after every memory transmission, whether it
was successful or not.
For your reference, a sample of the stored message can be printed below the report if the transmission
failed. If you wish to enable this feature, call your service representative.
If the transmission failed, an error message may also be printed. The messages are the same as those
for the New Polling File Report (see item 2-5 on the previous page).
Note:
Occasionally, a fractional number will appear in the Pages column. For example, 1/2 means
that two pages were stored but only one could be sent.
2-8 Power Failure Report
If the power fails or is switched off, all documents stored in the memory (including forwarding files,
transfer files, confidential and substitute receptions, and any ECM received data) will be erased.
When power is restored, a power failure report is printed, informing you of the files that were lost.
Notes:
. Check the File Type column. If there are any files given as FORWARDING, TRANSFER,
CONFIDENTIAL RX, SUBSTITUTE RX, or ECM FILE, a received fax message was erased
(substitute reception is explained in the “Receiving Fax Messages” section). To find out
who sent these files so that you can ask them to resend, look in the Remote Terminal
Identification column.
● For an explanation of the Pages column, see item 2-7 above (Memory Transmission Re-
port).
. If there is an E in the Result column, the communication failed but the message was still
stored. The code after the E has the same meaning as for the Polling File Report (see item
2-5 on the previous page).
92
Page 94

5 PROGRAMMING AND PRINTING REPORTS
3.
USER-INITIATED REPORTS
3-1 TCR
You may print the TCR at any time, using Function 70.
1.
PreSS Function 7 0 Yes .
MODE NO 70
FOR TCR PRESS
I
Press Function if you entered
Note:
the wrong number.
3-2 Telephone Lists
These lists contains all information concerning preprogrammed Quick Dial keys, Speed Dial codes,
groups, and full telephone numbers used in groups. You should print these lists whenever you change
your directory of preprogrammed telephone numbers. The Quick Dial and Speed Dial lists also show
what groups each programmed telephone number is contained in.
1.
PreSS Function 7 1
MODE NO 71
TELEPHONE LIST?
COPY/N
Yes .
YIN
2. Press COPY
4. If you want to see the Quick Dial
List, press Yes .
Otherwise, press
I NO ‘ .
Note: Press Function
the wrong number.
Press Yes .
2.
ALL LISTS? COPY/N
3.
Either:
if you entered
. Ifyou wantalllists, press Copy . Goto
step 8.
● If you only want one or two of the lists,
press No .
SELECT LISTS Y/N
QUICK DIAL LIST?
EE5Erl
Repeat step 4 for the Speed Dial
5.
List.
SELECT LISTS
GROUP DIAL LIST?
Repeat step 4 for the Group List.
6.
PRESS COPY
Press COPY~.
7.
The reports you selected are
8.
Y/N
COPY
printed out, then the machine
returns to standbv.
.—
.
93
Page 95

5 PROGRAMMING AND PRINTING REPORTS
3-3 Polling File List
You may print information on a selected program or on all polling reception programs still in memory
with Function 72.
1.
PreSS I Function 7 2 Yes .
ALL FILES? coPY/ N
To list information on all polling files, go to
step 4.
2.
Press
FILE NO , KEYPAD
I
I
3. Enter the number of the file that
4. Press ~COPY .
3-4 Program List
To list information on your keystroke programs, do the following.
1.
PreSS I Function j I 71 r 3, ~Copy_ .
3-5 SAF File List
..—
you wish to see.
Example: File 3
Press ~3 .
If you made a mistake, press No .
You may print information on any one document stored in the memory, or on all stored documents.
For an explanation of the Pages column, see “Memory Transmission Report” on page 92.
1,
Press
I-Function , I 71 ~4 ‘ ~Fei–” .
r
Enter the number of the file that
3.
you wish to see.
PzEzEl
If the number is less than 100,
for example “27”, type “027”.
To list information on all memory files (ex-
cept confidential ones), go to step 4.
2,
Press r NOj .
!—.
FILE NO. ¤E~
KEYPAD
Example: File 3
Press ~O-~~0]’3 .
FILE NO 003
If you made a mistake, press No .
4.
Press COPY .
Note:
Information on confidential files, or
messages sent from another terminal for
your machine to broadcast (transfer
broadcast files) will not be printed.
COPYI N
94
Page 96

5 PROGRAMMING AND PRINTING REPORTS
3-6 Authorized Reception List
To print a list of fax terminals selected for authorized reception, do the following.
1. PreSS Function 7 8
AU THC)RIZED REC LIST
copy
AUTHORIZED RECEPTION LIST
***** *************************
Your machine’s ID is here : RTI, TTI, CSI, SELF NO. (MAR 10’9109:00 AM)
*
*
*
*
*
*
* 01 RICOH CO LTD 11 21
f 02
* 03
* 04
*
* 05
*
* 06 RICOH FAX DESIGN 16 26
: 07
* 08 CHICAGO OFFICE 18 28
~ 09 19
~ 10
*
*
*
***** ***** ***** ***** ***** ***** ***********************************************:
REMOTE TERMINAL REMOTE TERMINAL
IDENTIFICATION
RICOH TOKYO 12 22
RICOH USA 13 23
2465551371 14 24
RICOH EUROPE
RICOH AOYAMA
IDENTIFICATION IDENTIFICATION ~
15 25
17
20
REMOTE TERMINAL ~
27.
29:
30
*
*
*
*
*
*
*
*
*
*
*
*
*
I
*
*
*
*
*
Page 97

6 LOOKING AFTER THE MACHINE
1. REPLACING PAPER
When the Add Paper 1 indicator islit, theuppercassette is empty. When the Add Paper 2indicator islit,
the optional lower cassette is empty.
To refill a cassette:
1. Take out the cassette.
(Raise the end slightly, then slide it out
gently.)
I
t
2. Open the lid.
3. Bend the new stack of paper a few times.
4. Load paper into the cassette.
Note : . True up the edges of the stack.
. If you want to use a different size of
paper, call service to have the cassette and sensors adjusted.
. Do not fill up past the load limit
marker ( ~ ).
5. Close the lid and replace the cassette.
-
96
Page 98

6 LOOKING AFTER THE MACHINE
2. REPLACING TONER
When the Add Toner indicator starts to blink, thetoner cartridge is almost empty. Youwill be able
to make 100 more copies before you have to change the cartridge.
When the Add Toner indicator remains lit, it is
time to install a new toner cartridge.
1. Take out the cassette.
2. Open the right cover
(Pull up the lever on the cover).
3. Swing down the toner cartridge by pulling
it down from the top. Then remove the cartridge from the development unit.
4. Take a new cartridge and shake it,
Do not remove the seal yet.
97
Page 99

6 LOOKING AFTER THE MACHINE
Fit the pegs on the sides of the cartridge
5.
into the slots in the sides of the development unit.
Rotate the cartridge up until it snaps into ~
6.
position
7. Fit the handle onto the pin on the bottom
left of the cartridge.
Note: There are two possible types of
handle, as shown in the diagram.
mII
w
%
8. Turn the handle clockwise to remove the
seal until you see the yellow band on the
seal.
Then, remove the handle.
9. Close the cover and replace the paper
cassette.
Turn until you see the ye~band.
.
.,
,.
‘, L
<l
., ,.
.1!
~
11’,
IL “
L
“/
._
‘, .
,.
,,
-, ,
,@
‘?
l-’p
—
98
I
Page 100

3. REFILLING THE STAMP
6 LOOKING AFTER THE MACHINE
When the stamp mark becomes
1. Remove the document tray.
2. Open the scanner cover.
pale, refill the stamper as described below.
3.
Add no more than 2 drops of ink to the
center of the stamp.
Let the ink soak in.
Caution : Don’t drink the ink.
4.
Close the
ment tray
cover and put back the docu -
 Loading...