

Ricoh FAX2700L Operator’s Manual mv106omu
RICOH
MV106 FACSIMILE REFERENCE
Read the safety instructions on page i to iv
Operator’s Manual
Optional equipment
Read this Manual first.

Telephone Handset (HANDSET TYPE 100)
This permits voice communication (over the PSTN).
PAPER FEED UNIT TYPE 70
A paper feed unit can be added to the base machine.
FAX EXPANSION CARD TYPE 10
A 1-Mbyte memory card can be added.
FAX EXPANSION CARD TYPE 20
A 2-Mbyte memory card can be added.
ENERGY SAVING INFO RMATI ON
As an Energy Star Partner, we have determined that this fax
model meets Ener gy St ar gu i de li ne s f or en er g y efficiency.
This product was designed to reduce the environmental impact
associated with fax equipm e nt . Th i s i s acco m pli sh ed by
means of energy saving feat ure s such as Lo w Powe r
(saving energy) mode and N igh t Timer. Please see
applicable sections of operating manual for details.
WARNING: This equipment has been tested and found to
comply with the limits for a Class B digital device, pursuant to
Part 15 of the FCC Rules. Th ese limits are de signed to provide
reasonabl e prote ction a gainst harmful i nterference in a
residential i nstallation. This equipment generates, uses and
can radiate r adio f requency energy and, if not installed and
used in accordance with the instructions, may cause harmful
interferen ce to rad io co mmuni cations. However, there is no
guarantee that interference will not occur in a particular
installat ion . I f t his e qu i pm ent do es c au se ha rm fu l in te rfer en c e
to radio or television reception, which can be determined by
turning the e qu ipm en t off and on, the use r is e nco uraged to try
to correct the interference by one or more of the following
measures:
- Reorient or relocate the receiving antenna.
- Increase the separation between the equipment and receiver.
- Connect the equip ment i nto an outlet on a circuit different
from that to which the receiver is connected.
- Consult the dealer or an experienced radio/TV technician for
help.
Changes or modifications not expressly approved by the party
responsible for compliance could void the user’s authority to
operate the equip me nt .
Properly s hi elded and gro unde d c ables an d co nnect ors mus t
be used for connection to host computer in order to meet FCC
emission limits.
Caution
Use of control or adjustments or performance of procedures
other than those specified herein may result in hazardous
radiation exposu re
In accordance with ISO 7001, this machine uses the following
symbols for the main switch:
s means POWER ON
t means POWER OFF
Operator Safety
This equipment is considered a CDRH Class 1 laser device,
safe for office/EDP use. The m achine contai ns a 5-milliwatt,
770 to 810 nanome te r wa vele ng th , A lG aA s la ser di o de . Dir ect
(or indirect reflected) eye contact with the laser beam may
cause serious eye damage. Safety precautions and interlock
mechanisms have been designed to prevent any possible
laser beam ex posure to the operator.
WARNING
This symbo l is intended to alert the user to the presence of
important operating and maintenance (servicing) instructions
in the literature accompanying the machine.
Notice about t he Telephone Consumer Protection Act
(Valid in USA only).
The Telephone Consumer Protection Act of 1991 among other
things makes it unlawful for any person to send any message
via a telephone fax machine unless such message clearly
contains i n a marg in at the top or bottom of each tr ansmit ted
page or on the f irst pa ge of the t ransm ission, the date and ti me
it is sent and an id en tif i cat ion o f th e business or other enti t y, or
other individual sending the message and the telephone
number of the sending machine or such business, other entity
or individual. This information is transmitted with your
document by the T TI (Transmit Terminal Identificat ion ) fe atur e.
In order for you to meet the requirement, your machine must
be programmed by following the instructions in the
accompanying Opera ti o n Ma nu al. In particular, pl ea se re fe r to
the chapter of Insta llation. Also refer to the TTI (Transmit
Terminal Identification(programming procedure to enter the
business identification and telephone number of the terminal
or business. Do not forget to set the date and time.
Thank you.

SAFETY
Important Safety Instructions
All safety messages in the main text of this manual are labeled WARNING or
CAUTION. These mean the following:
WARNING:
CAUTION:
In addition to the warnings and cautions included in the text of this manual,
please read and observe the following safety instructions.
1 Read all of these instructions.
2 Save these instructions for later use.
3 Follow all warnings and cautions marked on the product.
4 Unplug this product from the wall outlet before cleaning. Do not use
liquid cleaners or aerosol cleaners. Use a damp cloth for cleaning.
5. Do not use this product near water.
6. Do not place this product on an unstable cart, stand, or table. The product
may fall, causing serio us dama ge to the pr oduc t or inju ring th e user.
7. Slots and openings in the cabinet and the back or bottom are provided
for ventilation; to ensure reliable operation of the product and to protect
it from overheating, these openings must not be blocked or covered.
The openings should never be blocked by placing the product on a bed,
sofa, rug, or other similar surface. This product should not be placed in a
built-in installation unless proper ventilation is provided.
8. This product should be operated from the type of power source
indicated on the marking label. If you are not sure of the type of power
available, consult an authorized sales person or your local power
company.
9. This product is equipped with a 3-wire grounding type plug, a plug having a
third (groundi ng) pi n. Th is plug will on ly fi t into a g rou ndin g-type powe r
outlet. Thi s i s a sa fety fe at ur e . If yo u ar e u na bl e to i nse r t th e pl u g i nt o t he
outlet, conta ct you r e le ctrician to replace yo ur ob sol et e ou tl et . Do n ot d ef ea t
the purpose of t he gr ou nd ing typ e pl ug . (T hi s d oes not a pp ly in co untr i es in
which the 2-wire, non-grounded type of plug is used.)
Important information to alert you to a situation that might cause serious injury
and damage to your property if instructions are not followed properly.
Important information that tells how to prevent damage to your equipment or how to
avoid a situation that might cause minor injury.
i

SAFETY When to Call Your Service Representative
10. Do not allow anything to rest on the power cord. Do not locate this
product where persons will walk on the cord.
11. If an extension cord is used with this product, make sure that the total of
the ampere ratings on the products plugged into the extension cord
does not exceed the extension cord ampere rating. Also, make sure that
the total of all products plugged into the wall outlet does not exceed 15
amperes.
12. Never push objects of any kind into this product through cabinet slots as
they may touch dangerous voltage points or short out parts that could
result in a risk of fire or electric shock. Never spill liquid of any kind on
the product.
13. Do not attempt to service this product yourself, as opening or removing
covers may expose you to dangerous voltage points or other risks.
Refer all servicing to qualified service personnel.
When to Call Your Service Representative
WARNING:
Do not attempt any maintenance or troubleshooting other than that mentioned in
this manual. This machine contains a laser beam generator and direct exposure
to laser beams can cause permanent eye damage.
Unplug this product from the wall outlet and refer servicing to qualified service
personnel under the following conditions:
A. When the power cord or plug is damaged or frayed.
B. If liquid has been spilled into the product.
C. If the product has been exposed to rain or water.
D. If the product does not operate normally when the operating instructions
are followed. Adjust only those controls that are covered by the
operating instructions since improper adjustment of other controls may
result in damage and will often require extensive work by a qualified
technician to restore the product to normal operation.
E. If the product has been dropped or the cabinet has been damaged.
F. If the product exhibits a distinct change in performance, indicating a
need for service.
ii

Power and Grounding SAFETY
Power and Grounding
Power Supply
1. Power requirements: 115 V, 60 Hz
2. Insert the power plug securely into the wall socket.
3. Make sure that the wall outlet is near the machine and readily
accessible.
4. Do not connect other equipment to the same socket.
5. Do not step on or set anything on the power cord.
6. Do not connect other equipment to the same extension cord.
7. Be sure that the power cord is not in a position where it would trip
someone.
8. The wall outlet must be easily accessible.
Grounding
Ground the mac hine and the l ightning protection circuit in accordance with
regulations. Do not ground to gas or water pipes, or to a telephone ground
plug. Proper grounding is to the ground terminal of the power outlet. Be sure
that the ground terminal of the power outlet is properly grounded.
The lightning p rotection cir cuit for the ma chine requires the machine to be
properly grou nded. If prop er grounding i s provided, about 90% of lightning
damage can be prevented. For safety, be sure to connect the machine to a
three-prong grounded outlet.
Cold Weather Power-up
Avoid raising the room temperature abruptly when it is below 57°F, o r
condensation may form inside the machine.
1. Raise the room temperature to 68°F at less than 18°F per hour.
2. Wait for 30 to 60 minutes.
3. Turn the power on.
4. Do not use the machine near a humidifier.
iii
SAFETY Thunderstorms
Thunderstorms
With proper grounding, about 90% of lightning damage can be prevented.
However, if possible, du ring severe electric stor ms turn the power switch off
and disconnect the power cord and telephone line cord.
GENERAL
1. Since some parts of the machine are supplied with high voltage, make
sure that you do not attempt any repairs or attempt to access any part of
the machine except those described in this manual.
2. Do not make modifications or replacements other than those mentioned
in this manual.
3. When not using the machine for a long period, disconnect the power
cord.
Ozone
The machine generates ozone during operation. Normally, the ozone level is
safe for operators. However, during a long copy run or while printing a long
message, ozone odor may appear; in such a case, ventilate the room.
Symbols & Conventions Used In This Manual
Documents:
Prints:
Procedures:
This is a step in a procedure.
1
iv
A document is anything you put on the feed table of your machine whether
you are faxing it or copying it.
A print is anything that comes out of the machine: a fax message you received or a copy you made.
Procedures are described step by step. Perform them in order. When you
see an LCD display, it always shows what comes
it accompanies. Other illustrations accompanying steps help you find the
right key or handle, or show you how to perform the step.
THIS CORRESPONDS TO
THE LCD DISPLAY.
after performing the step

Table of Contents
SAFETY........................................................................................................i
Important Safety Instructions............................................................................i
When to Call Your Service Representative.......................................................ii
Power and Grounding ......................................................................................iii
Cold Weather Power-up....................................................................................iii
Thunderstorms..................................................................................................iv
Symbols & Conventions Used In This Manual.................................................iv
Machine Layout........................................................................................1
Operation panel ................................................................................................1
Part Names.......................................................................................................2
FAXING.......................................................................................................3
Recommended Types of Document ................................................................4
Memory Transmission and Immediate Transmission ..................................6
Receiving Calls & Fax Messages(Faxes/Phone Calls) ................................11
Printing Received Messages that Have been Stored
(Substitute Reception)......................................................................................14
Faxing a Page With Very Fine Detail................................................................15
Optional Features for Transmission .............................................................16
Redialing ........................................................................................................19
Storing & Editing Fax Numbers (Functions 31 & 32)........................................21
Storing & Editing a Group of Fax Numbers (Function 33)................................23
Erasing Groups.................................................................................................25
Programming the Group Key ...................................................................25
Programming the Dial Option Key....................................................................26
Chain Dialing ..............................................................................................27
Erasing a Stored Message Before It Is Sent
(Functions 21 & 22)...........................................................................................28
Printing a Stored Message (Function 51).........................................................29
Polling Reception (Function 11) .....................................................................30
Talking Before Sending a Fax(On Hook Dial) ...............................................31
Sending a Fax using the Handset ...................................................................31
OTHER FEATURES.........................................................................................32
Verifying Communications, Errors, Counters, etc. ..........................................32
Rejecting Messages From Certain Senders .................................................37
Saving Energy .................................................................................................42
Printing the Sender’s Identification .................................................................46
Tonal Signals ..................................................................................................46
MAINTAINING YOUR MACHINE................................................................48
Loading Paper in the Main Paper Tray ...........................................................48
Replacing Toner Cassette ................................................................................49
Replacing the Photoconductor..........................................................................51
v

Daily Maintenance .............................................................................................53
Troubleshooting........................................................................................ 54
If an Indicator Lights Up on the Operation Panel ............................................54
Other Possible Problems................................................................................. ..54
Clearing Document Jams..................................................................................55
Clearing Copy Jams ..........................................................................................56
If Messages You Receive Don’t Fit on Your Paper............................................57
Communication problems..................................................................................57
RDS (Remote Diagnostic System)..................... .. .. .................... .. .................... .58
Operational Difficulties.......................................................................................59
Displayed Error Messages ..... .. .................... .................... .. .................... .......63
Error Codes .......................................................................................................64
Calling the Service Stati on. .. .. .. .. .. .................... .................... .. .................... .......65
TECHNICAL REFERENCE ............................................................................ 66
Access Code for Functions 61 to 94.................................................................66
User Parameters (function 63) ..........................................................................66
Adjusting the Volume of Various Features ........................................................71
Selecting the Displ ay ’s Language........ .................. .. .................. .. .. .................. .72
Counters (Function 94, see page 37. )..............................................................72
Entering Characters ..........................................................................................73
Document & Paper Specifications.....................................................................74
Capabilities ........................................................................................................75
Specifications.....................................................................................................76
INSTALLATION............................................................................................ 78
Machine Environment........................................................................................78
Installing the Photoconductor and Toner Cassette .....................................80
Installing the Main Paper Tray ....................................................................81
Attaching the Document Tray ...................................................................81
Installing the Aut o Do cu me nt Table .. .. .. .. .. .................... .. .................... .........82
Installing the Copy Tray ..............................................................................82
Installing the Optional Paper Feed Unit ....................................................83
Setting the Paper Size ..................................................................................84
Setting the Paper...............................................................................................85
Installing the Optio na l Me mo ry Card.......................................... .. .................... .85
Connecting the Machine....................................................................................86
Connecting to the Phone Lines .........................................................................86
Connecting the Power .....................................................................................88
Initial Setting s & Adjust ment s..................... .... .... .... .. .... .... .... .... .... .... .... .... .... .... .89
INDEX & GLOSSARY.................................................................................. 95
Mini-Glossary.....................................................................................................97
Certification Label.................................................................................... 98
vi
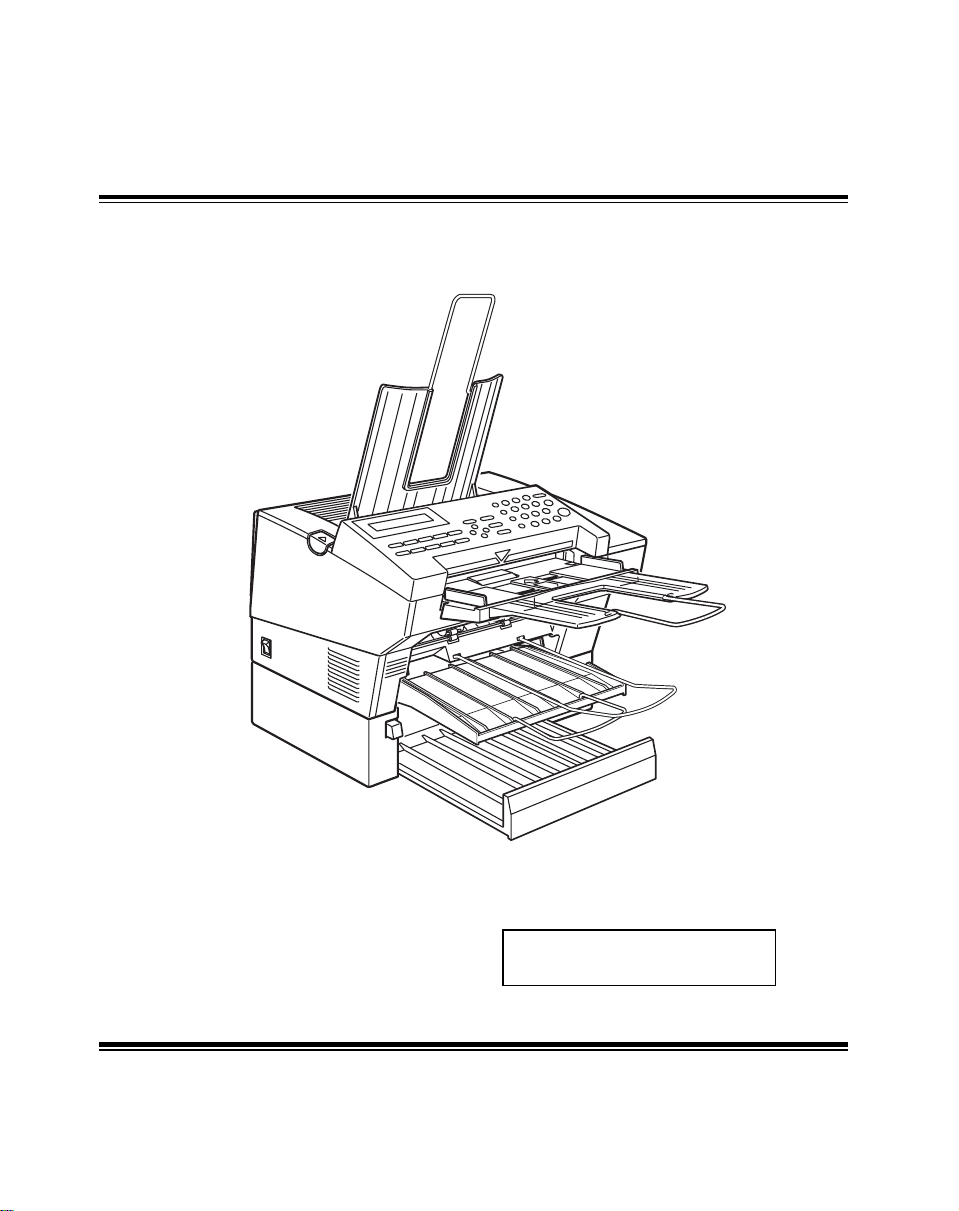
Operation panel
Machine Layout
1- The Receive Files indicator lights when a fax
message is stored in memory (see page 14).
2- The Check Display indicator lights to tell you to
read the display.
3- Press the Auto Select key to use Auto Receive
Mode. The indicator lights when you are in this
mode.
4- The resolution/Halftone is indicated by these three
indicators and can be changed by the
resolution/Halftone button.
5- When the Memory indicator is on, then memory
transmission is in effect, if it is off, immediate
transmission is in effect. Switch between the two
with the Memory button.
6- There are ten Quick Dial keys. Use them to store
individual numbers (see page 21) or groups (see
page 23 ). Use the keys to enter characters (see
page 73). Use Quick Dial 09 as a dial option key .
Use Quick Dial 10 as a Group key (see page 25).
7- The Liquid Crystal Display guides you through tasks
and informs you of the state of the machine.
Messages appear here. The LCD consists of two
20-character lines.
8- Use the arrow buttons to navigate through functions,
to accept or reject settings, or to set function options.
9- Press the Function key and enter a two digit code
to access functions 11 to 51. (For functions 61 to 94,
enter 6, the access code on page 66 and the
function number.)
10- Press the Speed Dial key and enter a two digit code
(between 00 & 49) to dial or store individual
numbers (see page 21).
11- The Pause/Redial key inserts a pause when you
are dialing or storing a fax number. Or, press the key
to redial the last number dialed. (The redial feature
doesn’t work once you’ve started dialing a new
number.)
12- Press the On Hook Dial key to dial a phone call
from the keypad without having to lift the phone or
handset off the hook (phone or handset option
needed).
13- Press the Clear key to erase the last character or
digit entered, or use the left and right arrow keys to
move the cursor and then press Clear to erase
whatever is at the cursor.
14- Press the Stop key to stop a transmission or a
document scanning, to stop a reception or to stop a
long copy run. The machine will finish printing out
the sheet being printed and then stop.
15- Press the Start key to start all tasks.
16- Use the numeric keypad (sometimes called the 10
keys) to dial fax numbers, to enter the numbers of
copies, etc.
1
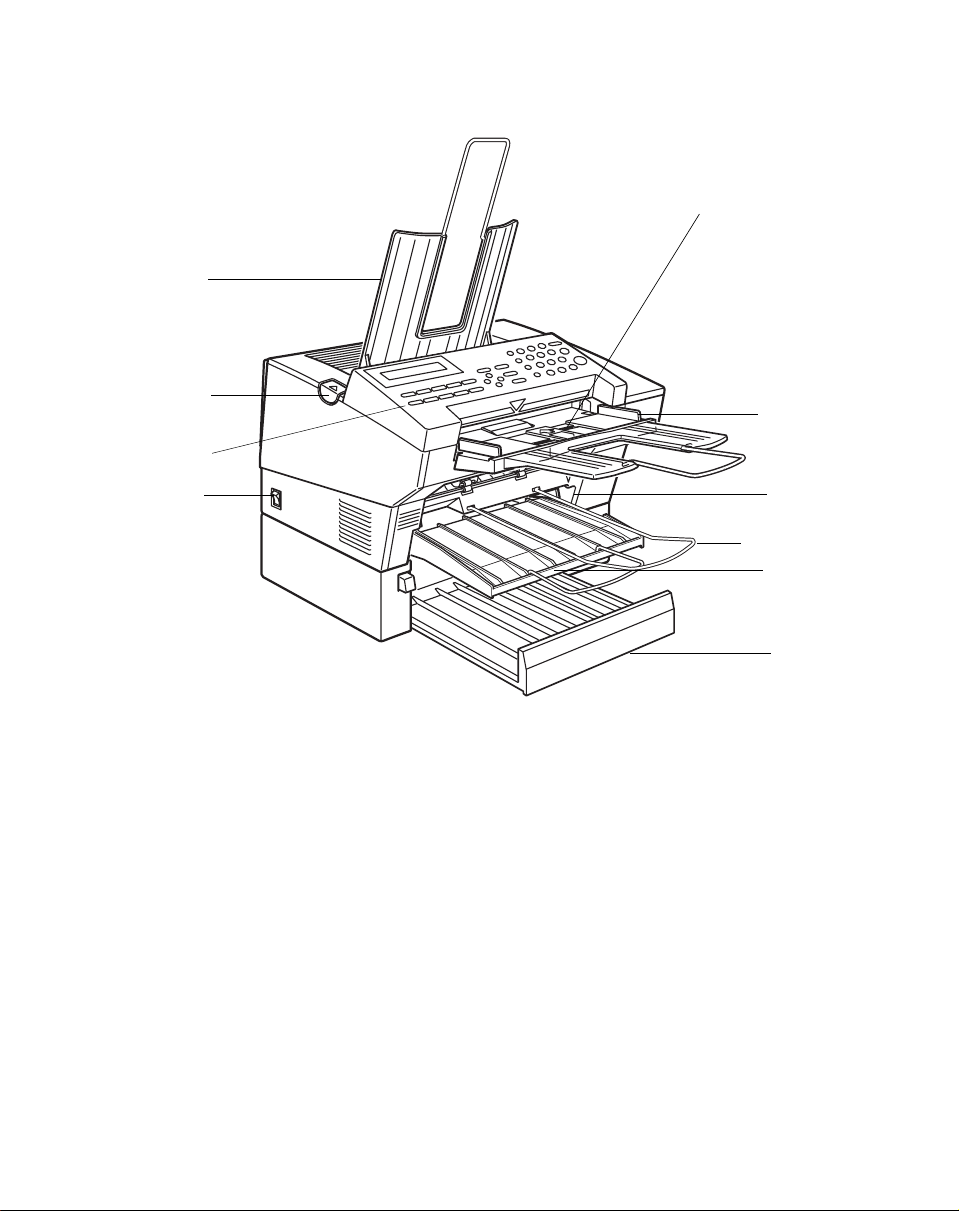
Part Names
4
5
3
2
1
1- The main switch turns your machine on and off.
2- 10 Quick Dial keys store telephone numbers.
3 The cover release button
4- Incoming faxes and copies are sent to the copy
tray.
5- The automatic document feeder (ADF) holds up
to 30 sheets which are fed one at a time. Place your
original documents here.
6- Match the document guide to the size of your
original documents.
7- Scanned documents are stacked on the Document
Tray.
8- The main paper tray holds copy paper.
6
9
7
8
10
9- When loading paper, match the paper guide to the
paper size.
10- The optional paper feed unit holds more paper.
2

FAXING
If you have not yet installed your fax machine, do so now. See Installation, on
page 78.
This section covers what you’ll most often need to do:
Recommended Types of Document ................................................................ 4
Memory T ran sm is si on an d Im me di ate Transmission.................................... .. .6
Receiving Calls & Fax Messages(Faxes/Phone Calls) .................................... 11
Printing a Message Received & Stored
(Substitute Reception) ...................................................................................... 14
Faxing a Page With Very Fine Detail ................................................................ 15
Optional Feature for Transmission.................................................................... 16
Redialing ........................................................................................................... 19
Storing & Editing Fax Numbers (Functions 31 & 32)........................................ 21
Storing & Editing a Group of Fax Numbers (Function 33)................................23
Chain Dialing....... .............................................................................................. 27
Erasing a Stored Message Before It Is Sent
(Functions 21 & 22)........................................................................................... 28
Printing a Stored Message (Function 51) ......................................................... 29
Polling Reception (Function 11)........................................................................ 30
Talking Before Sending a Fax(On Hook Dial)................................................... 31
Sending a Fax using the Handset .............. ...................................................... 31
A Few Hints...
Press Clear to erase the last letter or digit that you entered.
Press No to erase the entire name or number and start again.
To enter characters and labels, turn to page 73.
3
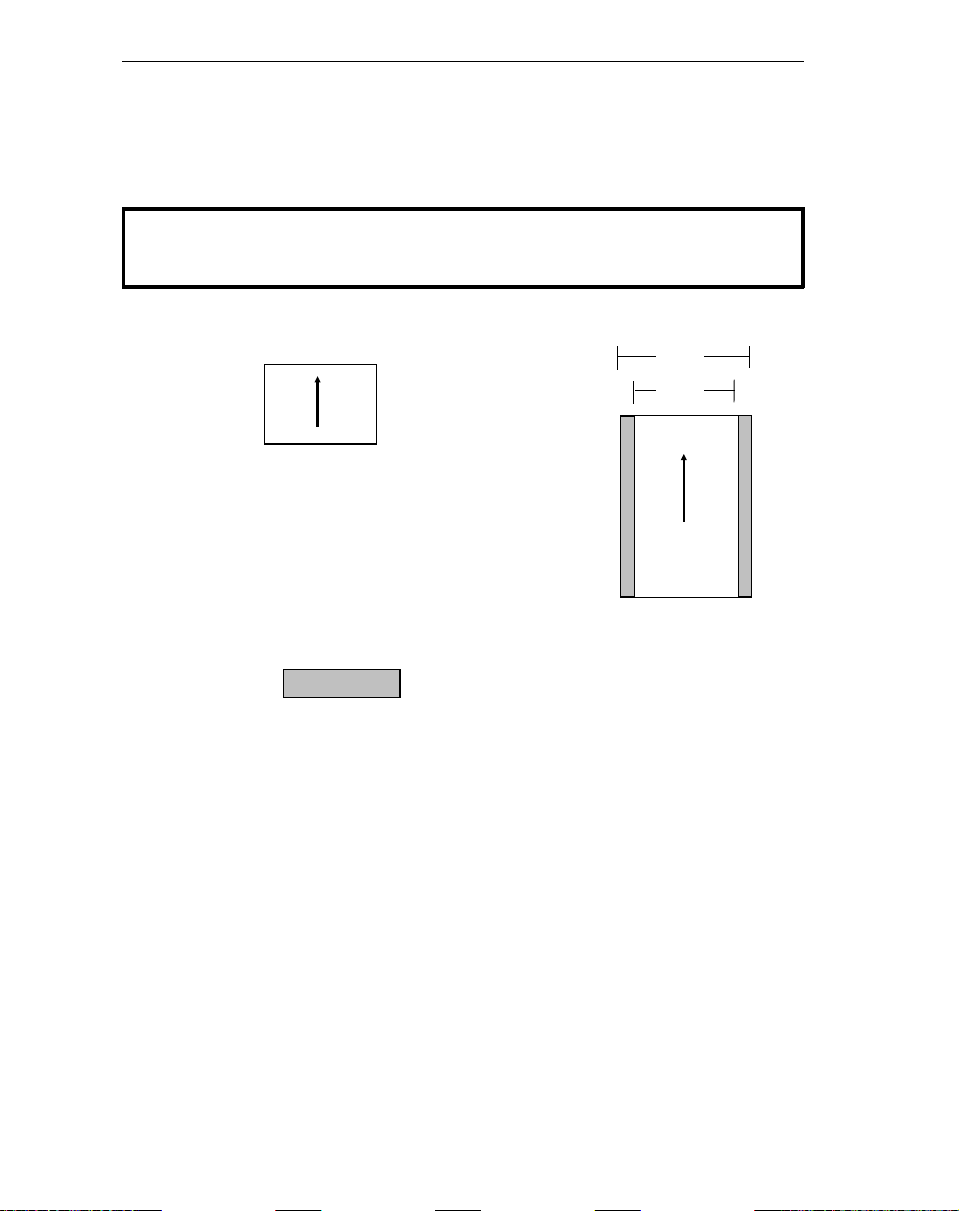
FAXING Recommended Types of Document
Recommended Types of Document
Before you send your document, make sure that it meets the following
requirements.
CAUTION: Documents that do not meet these requirements can cause your
machine to jam or may cause some components of the machine to become
damaged or dirty.
Minimum size
5.8"
4.1"
Scanning direction
Maximum size
8.5"
8.2"
23.6"
Scanning direction
*The part shaded will not be scanned, because it is outside the
maximum scanning width range.
Correct Size for the Auto Document Feeder
Thickness: 2 to 8 mils (20 lb paper)
Length and Width: See the above diagram.
If the page is too short, put it inside a document carrier or enlarge it with a
copier.
If the page is too long, divide it into two or more sheets.
Clearly Written
Small faint characters may not be transmitted clearly.
Uniform Page Size
Do not use different sizes of document in the same transmission.
4
Recommended Types of Document F AXING
Page Condition
Do not place damaged pages in the automatic document feeder.
If your pages are curled or dog eared, flatten them.
❐
If your pages are stu ck tog ether, shuffle the stack.
❐
If your pages are fol ded, torn, or patched together, make copies.
❐
If your pages have binding hiles, trim the edges or make copies.
❐
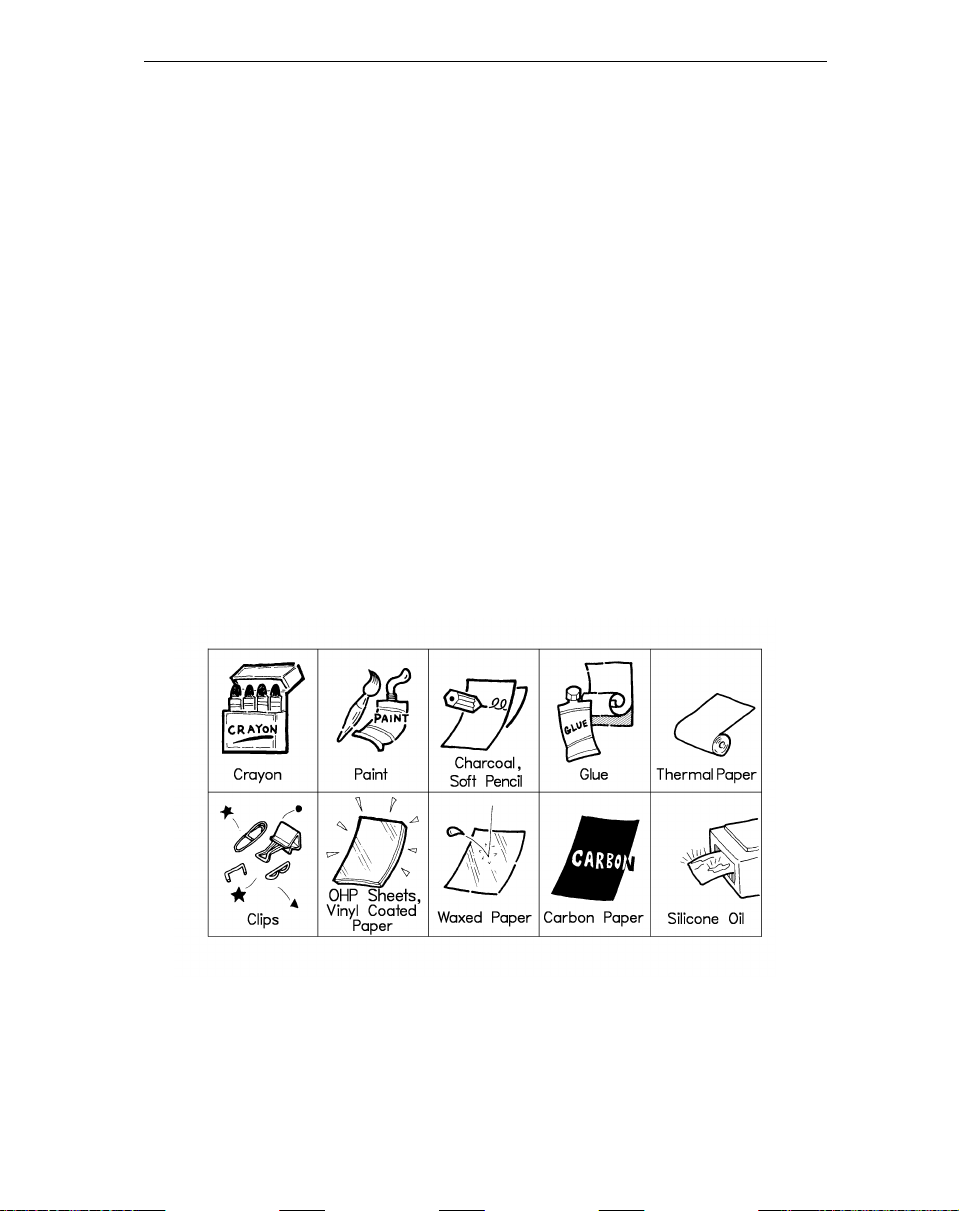
Originals that contain the f ollowing mate rials should no t be placed in the
document feeder.
Note:
Copies made with a copier that uses silicone oil may cause a misfeed. T o avoid this, do
not scan such copies until five or ten minutes after copying.
5

FAXING Memory Trans mission and Immediate Transmission
Memory Transmission and Immediate Transmission
There are two ways to send a fax message.
Immediate Transmission
❐
Memory T ran smis si on
❐
Immediate Transmission
Immediate Transmission is convenient when:
You wish to send a message immediately
❐
You wish to quickly check whether you have suc ce ss fu lly connected with the
❐
other party’s fax machine.
Your machine’s memory is getting full
❐
The machine dials immediately after you press Start (or at the specified later
time, if you used a time- delay feature like Send Later). The message is
scanned and transmitted page by page without being stored in memory.
Memory Transmission
Memory Transmission is convenient because:
Fax messages can be scanned much more quickly (you can take your
❐
document away fro m th e fa x ma ch in e w it ho ut waiting too long).
While your fax message is being sent, another user can operate the machine
❐
(people will not have to wait by the fax machine too long).
You can send the same message to more than one place with the same
❐
operation.
After you press Start, the machine doesn’t dial until all the pages of your fax
message have been stored in the memory.
(Memory indicator not lit)
(Memory indicator lit)
6
Memory Trans mission and Immediate Transmission FAXING
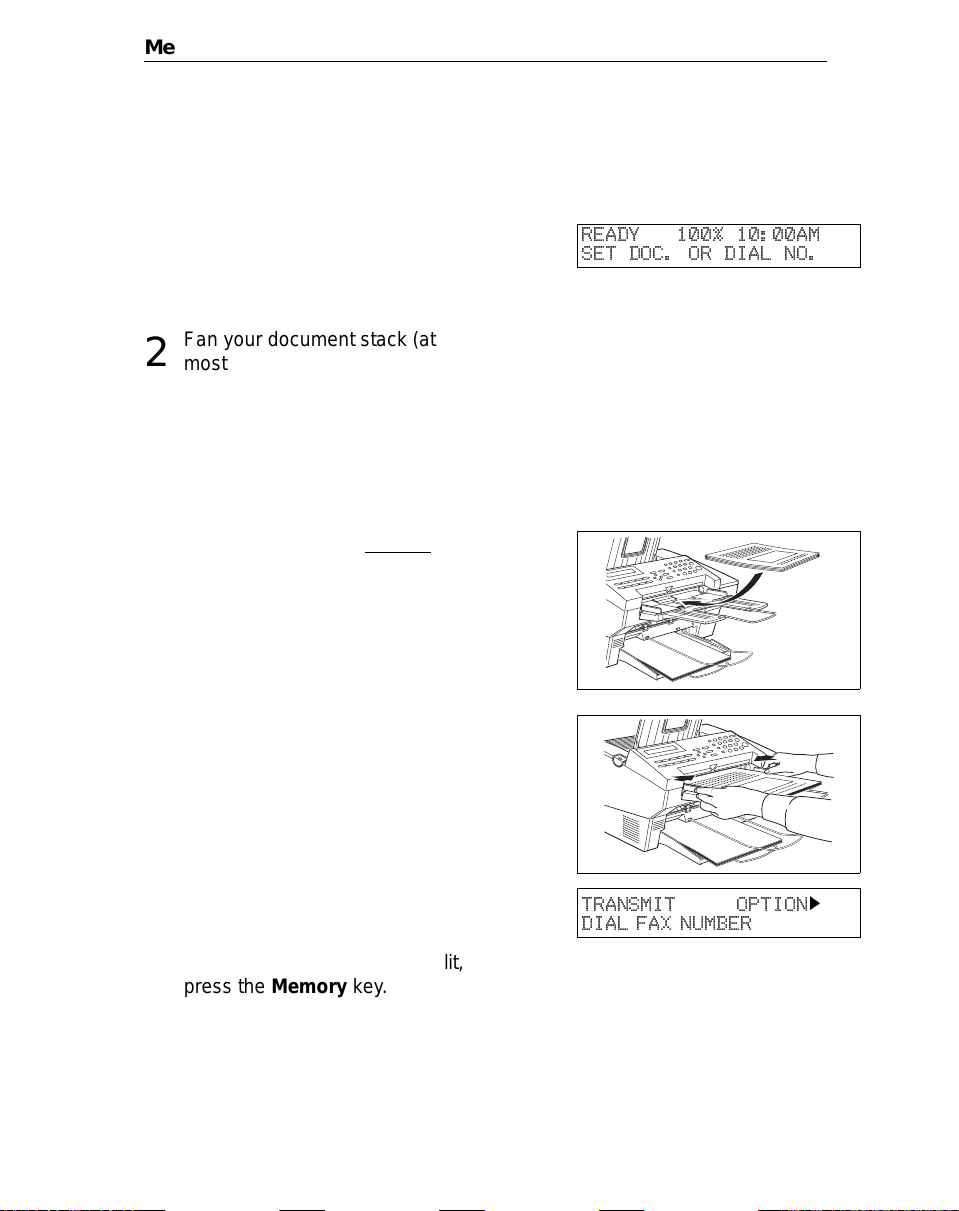
Memory Transmission
Caution:
Make sure that the machine is in
1
standby mode for faxing. The display should look like this:
Fan your document stack (at
2
most 30 pages: 20lb) to make
sure all pages are loose, then
square it.
All pages in your document must
be one-sided and be of the same
size.
Insert the document face up in
3
the feeder and adjust the guides
to fit the width of the document.
Note: You can dial before you set
the document. Place the document after you dial the number
and go to step 7.
If your document gets stuck while it is being processed, press the Stop key, and
turn to page 55 for instructions on how to safely remove the original.
READY 100% 10:00AM
SET DOC. OR DIAL NO.
The display will look like this:
4
If the memory indicator is not lit,
5
press the Memory key.
TRANSMIT OPTION
DIAL FAX NUMBER
k
7

FAXING Memory Trans mission and Immediate Transmission
Dial the number in one of the fol-
6
lowing ways.
a) Ten Key Pad b) Quick Dial c) Speed Dial d) Group
06 07
If you install the handset, you can sent the message manually. Pick up
the handset and dial.
If you want to erase a digit of the phone number, press the Clear key.
If you want to erase the entire number, press the No key.
*: In this example Group Dial is programmed in Quick Dial 08.
**: In this e xample Quick D ial key 10 is p rogrammed as the Group key, and
Group dial number 1 is programmed.
Programming Quick Dial: see page 21.
Programming Speed Dial: see page 21.
Programming Group Dial: see page 23.
Programming Group key: see page 25.
Note: The ma ximum destinations you can dial using the ten key pad is 49.
However, this limitation is also subject to memory capacity.
If you enter the wrong number,
press No or Clear and enter
again.
Press Clear to delete one digit.
Press No to delete the whole
number.
TRANSMIT Y/START
5551234©©©©©©©©©©©©©
Example:
Method 1 *
Quick Dial key 08.
Method 2 **
Quick Dial key 10
and 1 on the ten
key pad.
Press Yes to enter another num-
7
ber.
If you have only one destination,
press Start.
Repeat steps 6 and 7 until all destinations are entered.
8
8
TRANSMIT DIAL/START
DIAL NEXT FAX NUMBER
Memory Trans mission and Immediate Transmission FAXING
The machine stores your message and dials the first number (or, if you
selected Send Later, it will return to standby mode and the fax message
will be sent at the time that you selected). Send later: see page 16 .
Press the Start key and wait. The
9
machine will dial the destination’s
5551234
SET DOC. OR DIAL NO.
number.
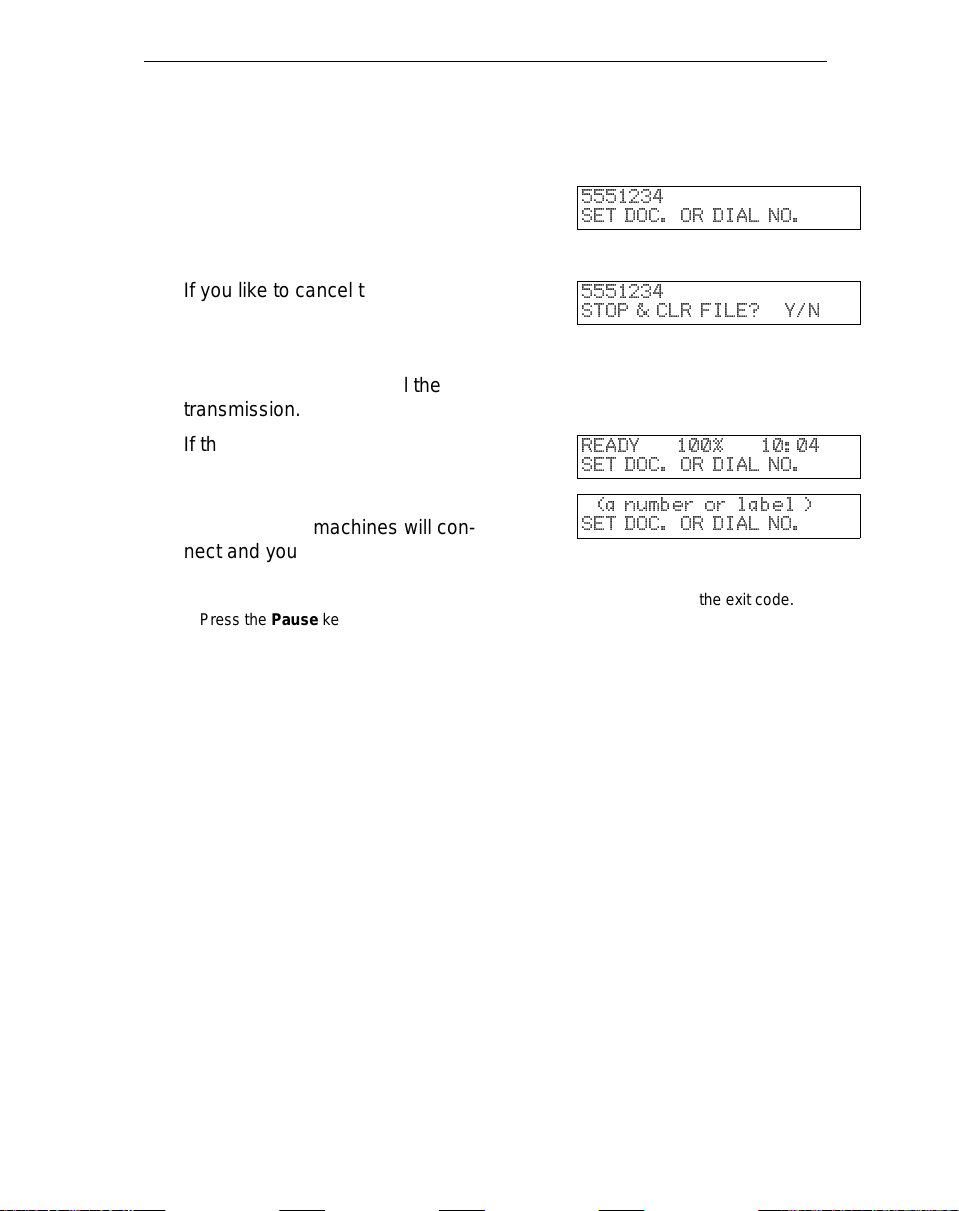
If you like to cancel the transmis-
sion, press the Stop key during
5551234
STOP & CLR FILE? Y/N
communication.
Then press Yes to cancel the
transmission.
If the other party’s line is busy,
your machine will dial again.
If the other party’s fax machine
answers, both machines will con-
READY 100% 10:04
SET DOC. OR DIAL NO.
(a number or label )
SET DOC. OR DIAL NO.
nect and yours will send the message.
Tip:
If your line goes through a local switchboard (a PBX) remember to dial the exit code.
Press the
press the
key immediately after the code. If the number includes a country code,
Pause
key after the country code, then dial the rest of the number.
Pause
9
FAXING Memory Trans mission and Immediate Transmission
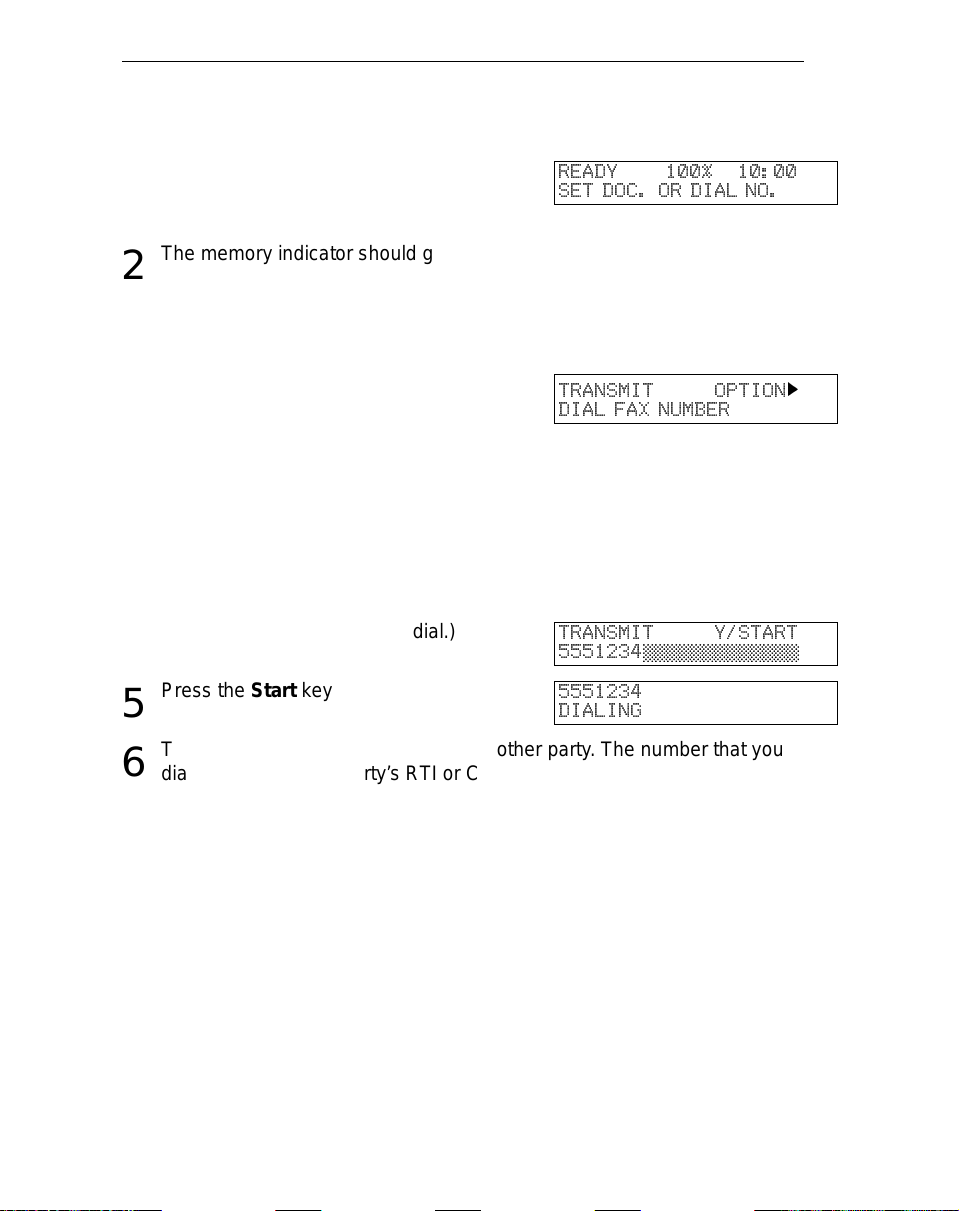
Immediate Transmission
Make sure that the machine is in
1
standby mode. The display
should look like this:
The memory indicator should go
2
out. If the memory indicator is lit,
press the Memory key.
Place the entire document face
3
up into the feeder. (No more than
30 pages.)
How to set document see page 7.
Note: You can dial before you set
the document. Place the document after you dial the number
and go to step 6.
Dial. (See page 8 for how to dial.)
4
Press the Start key
5
The machine dials and connect to the other party . The number that you
6
dialed and the other party’s RTI or CSI is displayed.
(RTI, CSI: see page 90.)
READY 100% 10:00
SET DOC. OR DIAL NO.
TRANSMIT OPTION
DIAL FAX NUMBER
TRANSMIT Y/START
5551234©©©©©©©©©©©©©
5551234
DIALING
k
10

Receiving Calls & Fax Messages(Faxes/Phone Calls) FAXING
Receiving Calls & Fax Messages(Faxes/Phone Calls)
Overview
The machine can treat incoming fax messages and telephone calls in three
ways.
Auto mode (Auto Select Lit)
❐
Use this mode if your line is shared by a fax machine and telephone.
When a call comes in , the machine will ring a number of times to give you the
chance to pick up th e ha nd se t. If you do not pick up and the call is a fax
message, the mac hi ne will go into fax mode and start receiv in g. Y ou ca n c hoose
the number of times the machine rings before taking the call by altering the Auto
Ring time (see page 13). Also use this mode if you have a telephone answering
machine connec te d (se e pa ge 13).
Fax mode (Auto Select Lit)
❐
Use this mode if you have a dedicated fax line.
The machine assu me s all calls are fax messages. I t will ring once to alert you to
an incoming call and then start receiving.
Manual Receive Mode (Auto Select Not Lit)
❐
Use this mode if your line is shared by a fax machine and a telephone but you
wish to answer all call s yourself and decide whethe r the y are fax mes sa ge s or
telephone calls. You must manually hit the Start key to receive a fax.
The machine will ring continuously until you answer the call, s o you have to be
near the machine at all tim es .
11
FAXING Receiving Calls & Fax Messages(Faxes/Phone Calls)
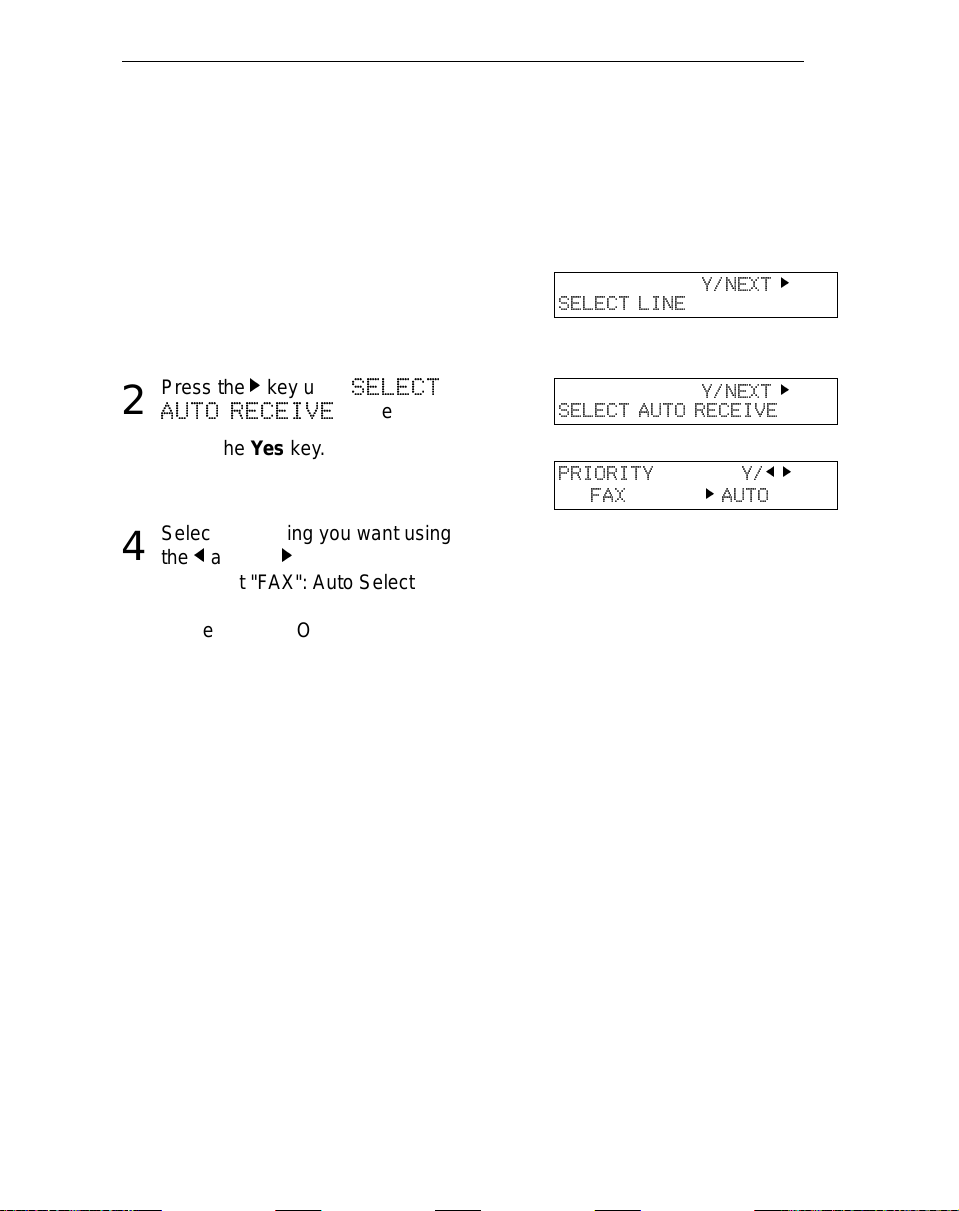
Auto Mode or Fax Mode (Auto Select Lit)
When the Au to Select indi cator is lit, th e machine is in one of the automatic
reception modes ( Auto mode or Fax mode). Which mode is active depends on
how you set up your machine. Decide which mode you will use most often and
program it with the following procedure. Then press the Auto Select button
whenever you wish to switch to and from this mode.
Press the Function key and 6, 2,
1
2, 2, 2, 6, 2 using the ten key
pad, then press the Yes key.
Press the k key until "
2
AUTO RECEIVE
Press the Yes key.
SELECT
" appears.
3
Select the setting you want using
4
and the k keys.
the
j
SELECT LINE
SELECT AUTO RECEIVE
PRIORITY Y/
FAX
Y/NEXT
Y/NEXT
k
AUTO
k
k
jk
❐ Select "FAX": Auto Select indicator
shows you are in Fax mode.
❐ Select "AUTO": Auto Select indicator
shows you are in Auto Receive mode.
Press the Function key.
5
Manual Receive Mode (Auto Select Not Lit)
This mode is active when the Auto Selec t indicator is NOT lit. Press the Auto
Select key to switch to and from this mode. You have to answer the call
yourself and decide whether it is a fax or a telephone call. The procedure for
answering a call is as follows:
Pick up the handset.
1
Listen to the other end.
2
If you hear a voice, con tinue your conversation as you woul d normally .
❐
If you hear a fax tone , rem ov e an y do cuments from the feeder, press the
❐
Start key then replace the handset. The machine will start receiving.
12
Receiving Calls & Fax Messages(Faxes/Phone Calls) FAXING
Setting the Auto Ring Time
In Auto mode, the machine rings a number of times to give you the chance to
pick up the handset before taking the call automatically. You can alter the
number of rings by changing the Auto Ring Time.
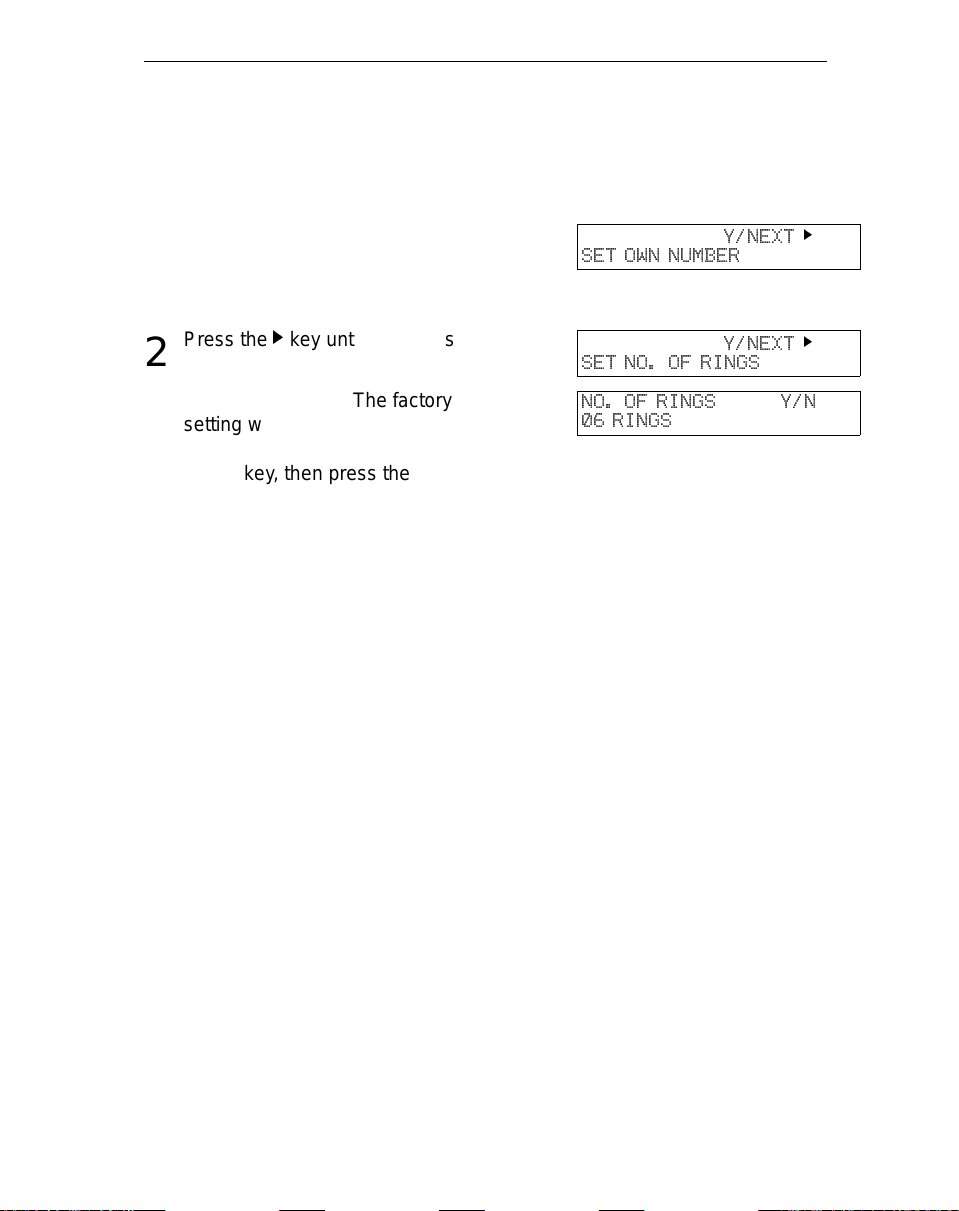
Press the Function key and 6, 2,
1
2, 2, 2, 6, 1 using the ten key
pad, then press the Yes key.
Press the k key until the opposite
2
display appears.
Press the Yes key. The factory
3
setting will be displayed, either:
SET OWN NUMBER
SET NO. OF RINGS
NO. OF RINGS Y/N
06 RINGS
Y/NEXT
Y/NEXT
k
k
❐ Change the number of rings, press the
No key, then press the new number using the ten key pad.
Example 03. Press 0, 3 using the ten
key pad.
❐ Keep these settings, go to step 4.
Press the Yes key, then the
4
Function key.
When you connect Telephone Answering Machine
When you are in Auto Mode, you can connect the Telephone Answering
Machine.
Plug the answering machine into the TEL jack on your fax machine.
❐
Auto mode ensures t ha t yo ur an sw e ring machine has the chance to res po nd to
❐
incoming telephone calls. If the call happens to be a fax message, the message
will be given to the fax machine automatically.
When you conn ec t t he telephone answering machine, the Auto Ring Time must
❐
be set to one ring more than the number of rings that your answering machine
waits before it takes the call. To check this number, have a friend call and do not
answer the phone, count the number of rings that you hear before the an swering
machine takes th e call.
13
FAXING Printing Received Messages that Have been Stored
(Substitute Reception)
Printing Received Messages that Have been Stored (Substitute Reception)
If the Receive File indicator is lit, a message was stored in memory using
substitute reception. This could be because the machine ran out of paper or
toner, or because the night timer has turned off the print engine.
Night Timer:
Hold any key to print messages received while the Night Timer (page 43) has
turned the heater off. Otherwise, check if any of the following indicators are lit,
and follow instructions.
When ADD PAPER appears in the display, your fax machine is out of
paper. Add paper: see page 48.
When ADD TONER appears in the display, your fax machine is out of
toner. Change the toner cassette: page 49.
Or There might be a paper jam (see
page 56) or an open cover.
-Message appears here-
SETDOC.ORDIALNO.
As soon as the machine is back in working condition, messages stored in
memory will be printed. The Receive File indicator will turn off and the
messages will be erased from memory.
If a message comes in while you are copying, the fax machine will store the
message in memory and the Receive File indicator will light. The message will
be printed as soon as copying is done.
To turn substitu te reception off or back on, set bit 0 of user parameter
switch 05. See page 68.
14

Faxing a Page With Very Fine Detail FAXING
Faxing a Page With Very Fine Detail
So that text , diagrams and images stand out clearly in your document, the
machine automa tically detec ts the image de nsity (contrast) and makes a
compensation.
However, if you need to send a document which requires optimum clarity,
select the resolution setting appropriate to your needs.
You can select different settings for each page of your message. Simply
change the settings for page 2 while page 1 is being scanned.
Resolution & Shading
The resolution button gives you control over doc ument quality. The indicators
above the button show the current setting. Choose a setting that matches your
document.
Standard:
Detail:
Fine:
Halftone
: Use this for optimum quality if your document contains
Important:
Standard quality. Use for most printed or typewritten documents. This is selected when the other resolution indicators are not lit.
High quality. Use for documents with small print or fine details.
Very high quality. Use this for high quality reproduction.
photographs/diagrams with complex shading patterns or gray
tones. If you choose this setting, resolution will automatically be
Detail.
Faxing at a higher resolution requires more time. Frequent use of high resolution
could cause an increase in your phone bill, especially for long distance transmissions.
15
FAXING Optional Features for Trans mission
Optional Features for Transmission
Send Later
Using this feature, yo u can delay transmission of your fax mes sage until a
specified ti me. This allows you to take adv antage of off-p eak telephone l ine
charges without having to be by the machine at the time.
CAUTION:
Proceed as for a usual fax message but don’t press Start.
If your machine’s memory is full, you will have to send the message from the
document feeder. This means that anybody removing your document would automatically cancel the operation.
1
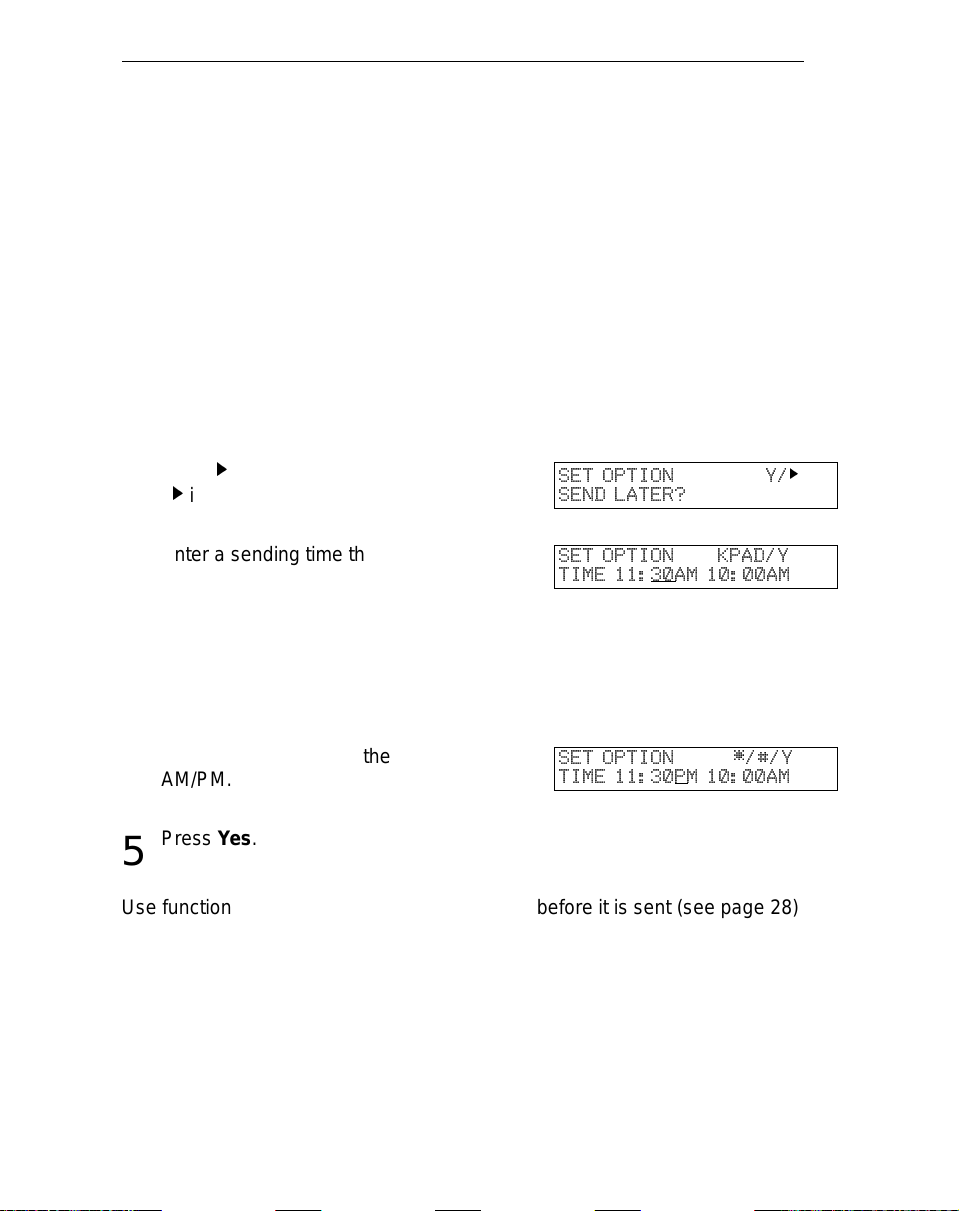
Press k once and press Yes.
2
( k is also the Option key).
Enter a sending time that falls
3
within the following 24 hours.
For example: To send at 11:30
pm, press 1, 1, 3, and 0 from the
key pad. If you enter the wrong
time, press No and enter again.
Press * or # to change the
4
AM/PM.
Press Yes.
SET OPTION Y/
SEND LATER?
SET OPTION KPAD/Y
TIME 11:
SET OPTION */#/Y
TIME 11:30
5
k
30AM 10:00AM
PM 10:00AM
Use function 21 to erase a stored fax message before it is sent (see page 28).
16
Optional Features for Transmission FAXING
Page Count (Immediate Transmission only)
When your fax message is p rinted at the other end, page numbers will b e
printed on the top of each page. Using the Page Count feature, you can select
the format in which the page numbers are printed.
If you use Page Count:
Page numbers will be printed in batch-number ing format (for example, p1/3,
p2/3, and p3/3 for a three-page message). This makes it easy for the other
party to see how many pages you sent, and if any are missing. However, you
have to input the number of pages at the keypad before sending.
If you do not use Page Count:
Page numbers will be printed only as a sequenc e (for example, p1, p2, p3).
This makes it difficult for the other party to tell at a glance whether any pages
are missing (f or example, du e to a double feed in your machine’s document
feeder).
If you do not select Immediate Transmission, Page Count is automatically switched on,
Note:
and the pages are counted automatically.
If the numbering with page count appears strange, check that the page count value
matches the number of pages in your document.
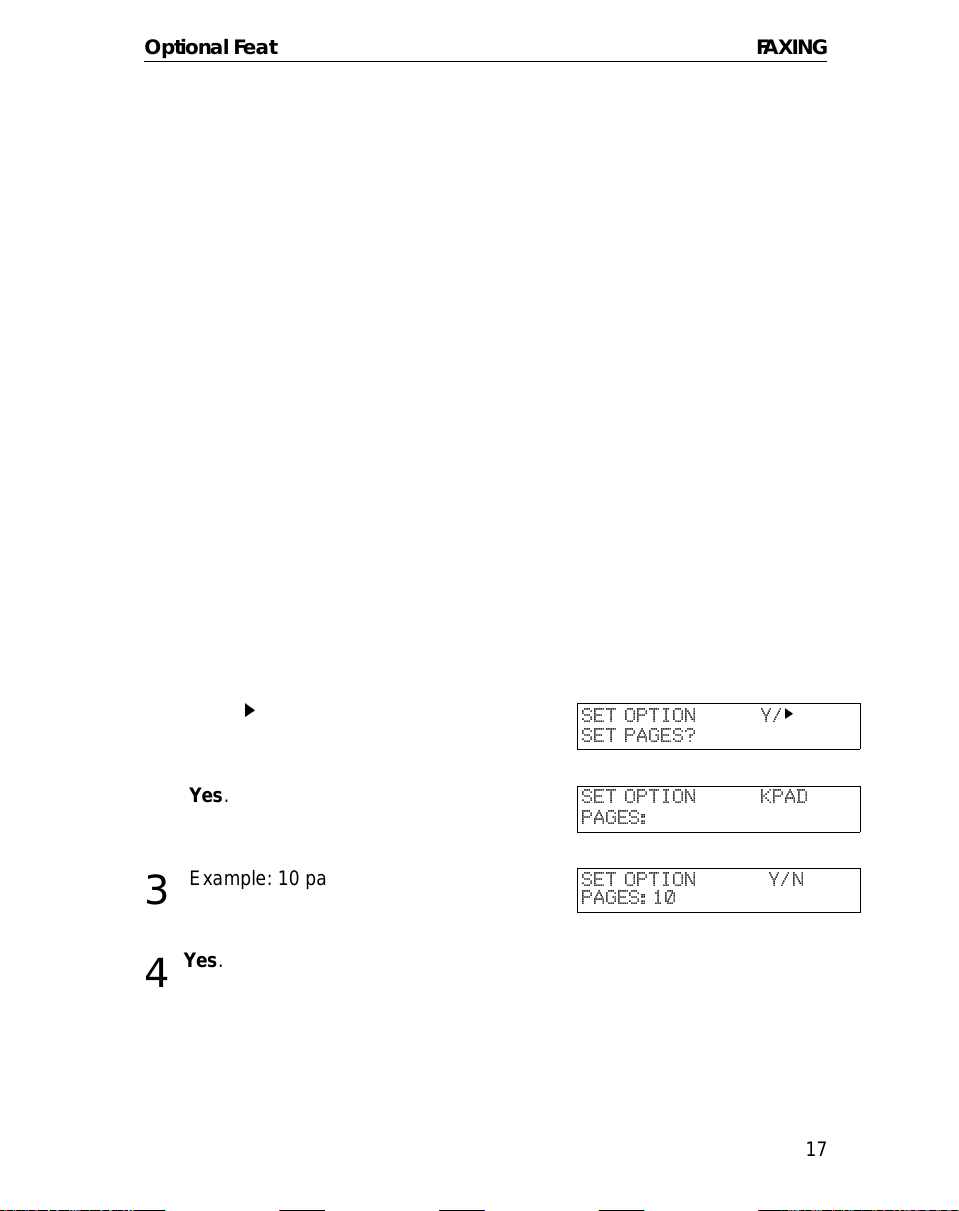
Press k until the right display ap-
1
pears.
Yes.
2
Example: 10 pages
3
1 0
Yes.
4
SET OPTION Y/
SET PAGES?
SET OPTION KPAD
PAGES:
SET OPTION Y/N
PAGES:10
k
17
FAXING Optional Features for Trans mission
TTI
Normally, the TTI programmed in your machine is printed at the top of each of
the pages you transmit when they are received at the other end. The top of the
image will be ov erprinted if there is no margin at the top of the transmitted
page.
In some cases, you may wish the other party to receive an unmarked copy of
your original. In this case, you can switch TTI off.
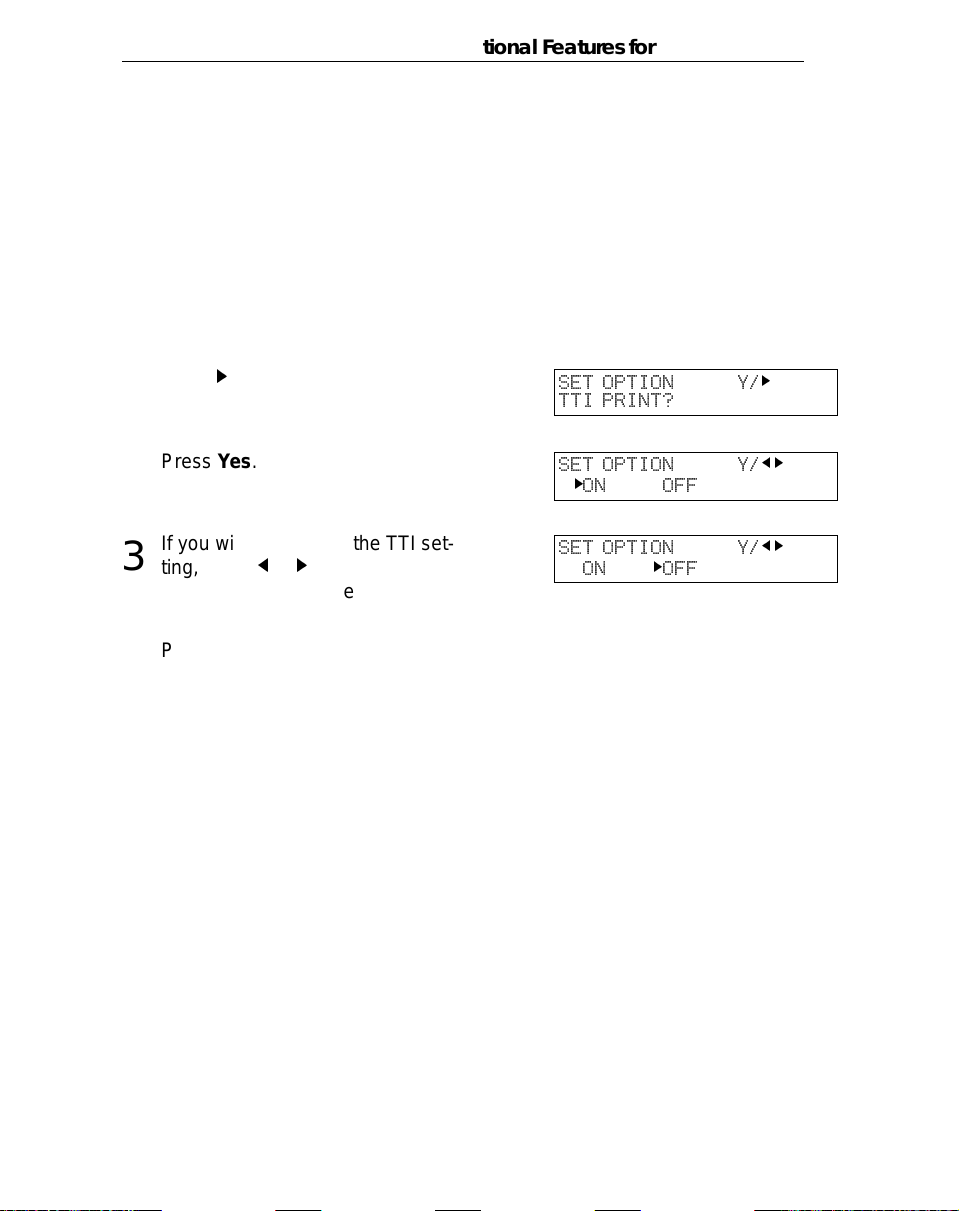
Press k until the right display ap-
1
pears.
Press Yes.
2
If you wish to change the TTI set-
3
ting, press j or k until the displayed setting is correct.
Press Yes when you have fin-
4
ished.
SET OPTION Y/
TTI PRINT?
SET OPTION Y/
k
ON OFF
SET OPTION Y/
ON
k
OFF
k
jk
jk
18
Redialing FAXING
Redialing
If a message wa s not transmitt ed successfull y, that doe s not mean that you
have to enter t he telephone n umber again. In many cases , the machine will
redial the destination automatically . Or, with the Redial key , you can redial with
just a few keystrokes.
Automatic Redialing
The machine will automatically redial the other party if any of the following
conditions occurred.
❐ The other party was busy
❐ There was no reply from the other party
❐ The message was rejected by the machine at the other end because of
excessive errors (in this case, redialing will only take place if Memory
Transmission was used)
Redialing is done 4 times at 5 minute intervals (for a memory transmission) or
twice at 5 minute intervals (for an immediate transmission).
The number of redials and the redial interval may be adjusted by a service
technician.
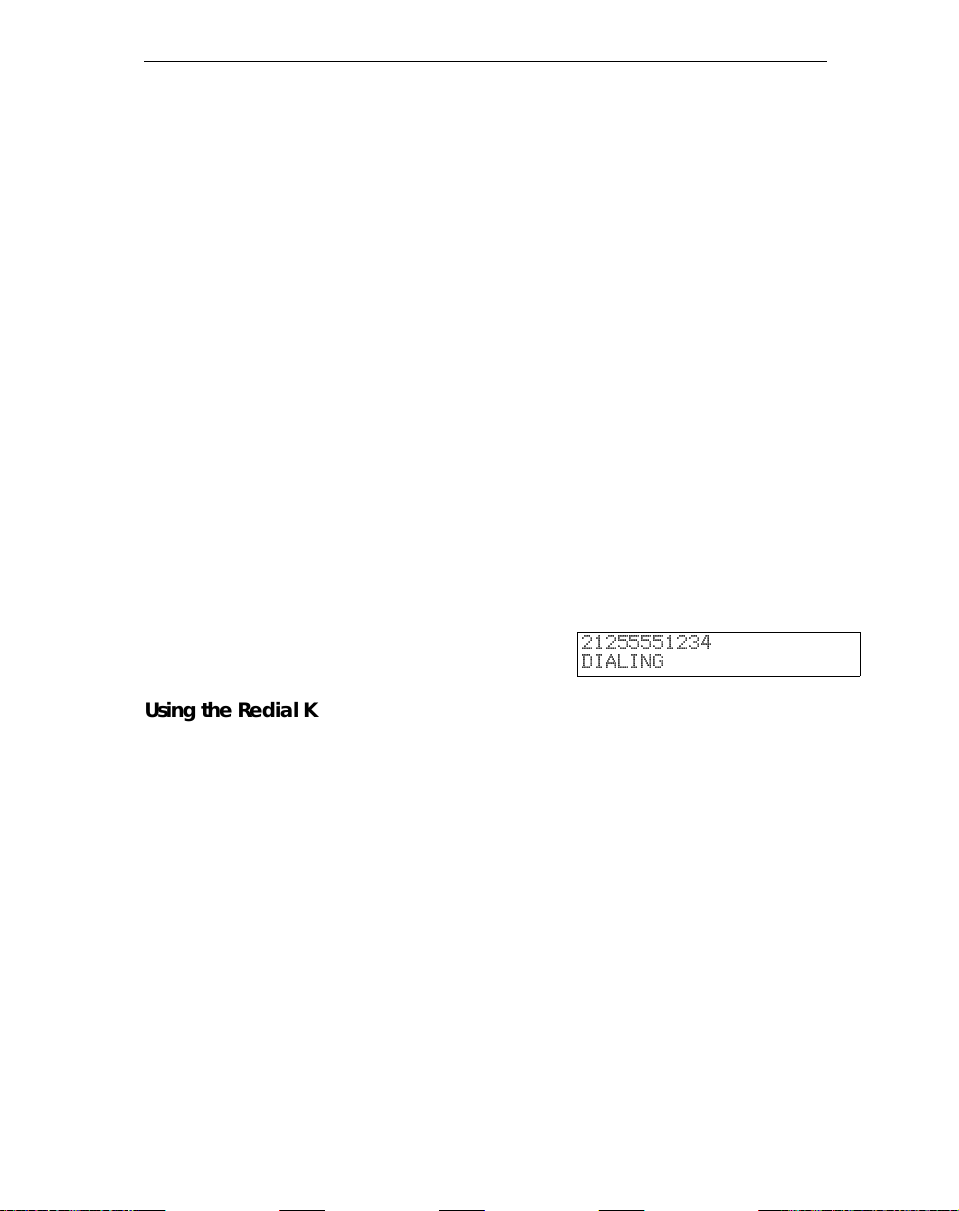
During redialing, the number being dialed is displayed as shown on the below.
21255551234
DIALING
Using the Redial Key
The machine remembers the last telephone number that you input. If you have
to redial this number, just press the Redial key, then press the Start key.
This feature has the following uses.
If the machine is waiting to redial the other party, you do not have to wait for the
redialing interval to expire.
If you wish to send another message to the s ame address that you just sent
last time, you don’t have to dial the full number again.
Place the message in the feeder, then press the Redial key, then press the
Start key.
19
FAXING Redialing
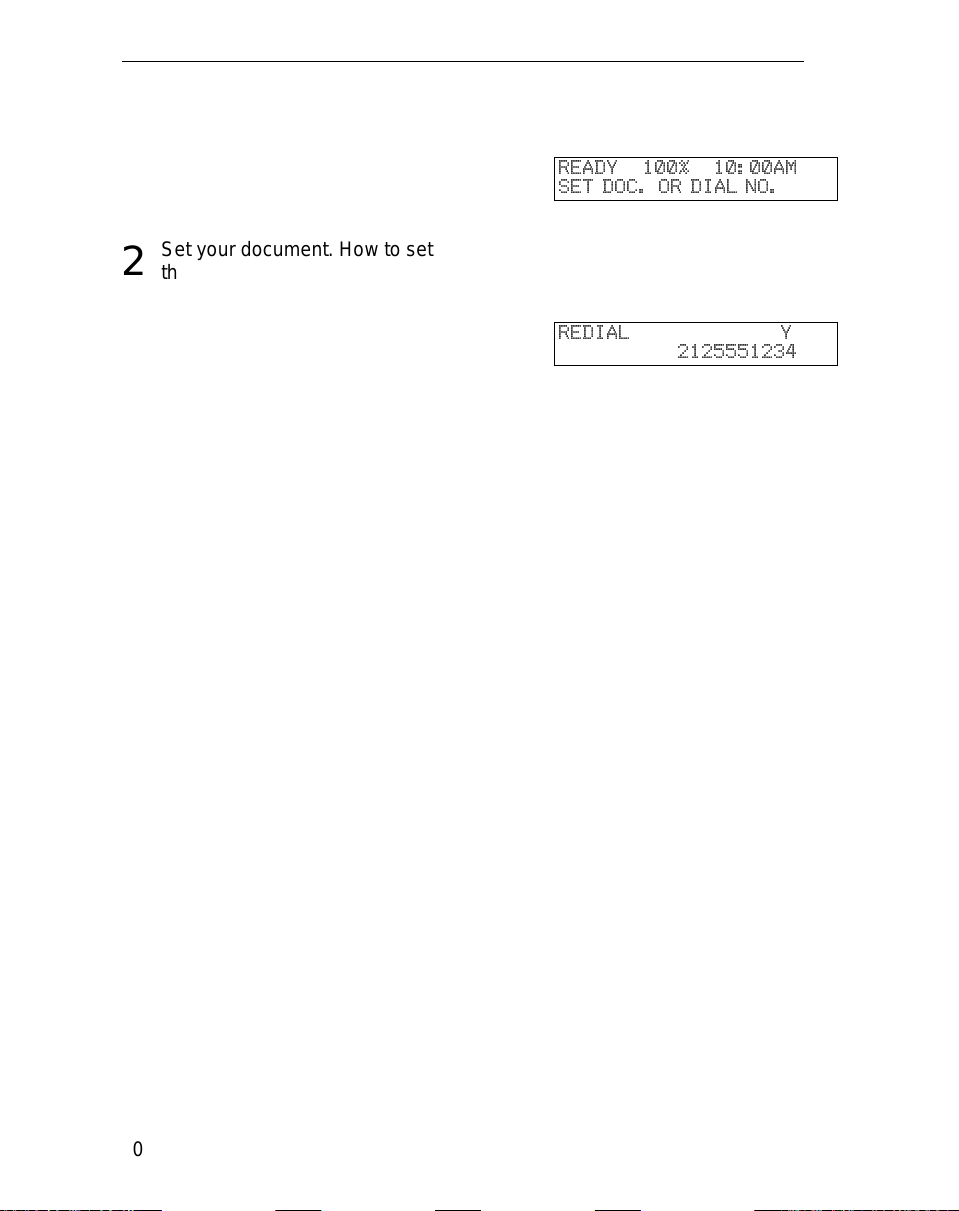
To send a fax using Redial, do the following:
Make sure that the machine is in
1
standby mode for faxing. The display should look like this:
Set your document. How to set
2
the document, see page 7.
Press Redial.
3
Press Start.
4
READY 100% 10:00AM
SET DOC. OR DIAL NO.
REDIAL Y
2125551234
20

Storing & Editing Fax Numbers (Functions 31 & 32) FAXING
Storing & Editing Fax Numbers (Functions 31 & 32)
Numbers that you often use can be stored in memory. A stored number will
remain in memory even if the power is cut.
You can store numbers in three ways.
Quick Dials
The number is assigned to its own key. To dial that number, just press the key.
You can store up to 10 numbers in this way.
Speed Dials
The number is given a two digit code. To dial the number, press the Speed Dial
key and enter the code. There are 50 Speed Dial codes available numbered 00
to 49.
Groups
If you regularly broadcast messages to the same set of destinations, you can
combine these numbers into a group. Then just select the group and eac h
number will be dialled in sequence automatically. You can program up to 3
groups with 30 numbers each.
Storing, Editing and Erasing Quick Dials/ Speed Dials
These steps des cribe how to store or edit telephone number in Quick Dial
keys or Speed Dial codes. You can get a printout of numbers st ored. In this
example we will store a new number in Speed Dial 01.
Choose Quick Dial or Speed Dial
1
programming mode.
❐ Quick Dial: Function 31 Yes
❐ Speed Dial: Function 3 2 Yes
Select the Quick Dial key or
2
Speed Dial code you want either:
© QUICK/
PRINT LISTj/SEARCH
© QUICK/
PRINT LISTj/SEARCH
jk
k
jk
k
❐ Quick Dial: Press the Quick Dial key
21
 Loading...